Category: cooking from scratch

  • Easy Mexican Green Rice

    Easy Mexican Green Rice

    Mexican green rice (arroz verde) is long-grain rice cooked in a blended sauce of cilantro, jalapeño, garlic, onion, lime and broth until fluffy and fragrant. Blend the sauce, simmer covered for 20 minutes, then rest 10 minutes before fluffing. Ready in about 40 minutes.

    Jump to Recipe

    This post may contain affiliate links. As an Amazon Associate I earn from qualifying purchases.

    You have heard of Mexican red rice, but have you ever heard of Mexican green rice? Probably not! This is a recipe I put together after gathering inspiration from the ingredients and flavours I came across at a local mercado. I took the same idea behind traditional Mexican red rice, but instead of tomatoes I went with fresh herbs, garlic, lime and a little jalapeño.

    The cilantro turns the rice that bright green colour, the lime keeps it fresh, and the jalapeño brings just enough warmth to keep every bite interesting.

    In our family we love this Mexican green rice alongside just about anything: meat, chicken, seafood, even a vegetarian plate. One of our absolute favourite combinations is serving it with Mexican fire-roasted chicken. Honestly, though, there are so many other delicious ways to eat it.

    The best part? It is super easy. You blend the green sauce, cook the rice in it, and let everything steam until fluffy. A simple side that makes an ordinary dinner feel a little more special!

    Fluffy Mexican green rice (arroz verde) filling a stainless steel skillet on a wooden table.

    Want a week of dinners planned for you? Get my free dinners

    Why we love this Mexican green rice

    There is something fun about taking a familiar dish and giving it a completely new twist. We all know Mexican red rice. This green version brings something different to the table.

    Instead of tomatoes for colour and flavour, this recipe uses fresh cilantro, jalapeño, garlic, onion and lime. Everything gets blended into a green sauce that the rice soaks up as it cooks. You get herby rice with a little citrus, and it tastes as good as it looks.

    I also love how simple the cooking is. Just like red rice, you cook the grains in a flavourful liquid instead of plain water. Here that liquid is our homemade green sauce, so all those fresh ingredients go straight into the rice.

    And can we talk about the colour? It looks so good next to golden roasted chicken, grilled meat or a pile of roasted vegetables!

    Sometimes we want a simple side next to our protein. Other times we build a whole meal around a few different flavours and textures. This rice works for both.

    Ingredients you’ll need

    You only need a handful of simple ingredients. Most of the flavour comes from blending fresh herbs and aromatics into the green sauce.

    • Garlic, onion and jalapeño: the base of the sauce. Seed the jalapeño for a milder pot, or leave the seeds in if you like a little extra heat!
    • Fresh cilantro: a whole bunch, with a few leaves saved for garnish. This is what turns the rice green.
    • Lime juice: juice of 1 small lime for that citrusy kick.
    • Low-sodium chicken broth: 2 cups. Water also works.
    • Ground cumin, salt and black pepper.
    • White basmati or jasmine rice: 1 cup. I like these because they stay fluffy with the green sauce. Stick to one type and follow the method so the grains do not go mushy.

    Want it spicier? Leave the jalapeño seeds in. Serving kids or anyone sensitive to spice? Take the seeds and membranes out for a milder flavour.

    Recommended tools

    How to make easy Mexican green rice

    Step 1: Blend the green sauce. Add the garlic, onion, jalapeño, cilantro, lime juice, chicken broth, cumin, salt and black pepper to a high-powered blender or food processor. Blend until completely smooth. It should look bright green and smell wonderfully fresh.

    This green sauce is the heart of the recipe, so blend it well before you move on.

    Step 2: Toast the rice, then add the green sauce. Do not rinse the rice. Place a medium pot over medium heat. Add the dry rice and toast, stirring, until the grains look lightly browned. Then pour in the green sauce, stir gently so the grains sit evenly in the liquid, and bring it to a simmer.

    White rice simmering in a bright green cilantro sauce in a stainless steel pan on the stove.

    Step 3: Cover and cook. Once it is simmering, reduce the heat to low and immediately cover with a tight-fitting lid. Cook for 20 minutes without lifting the lid. Keeping it covered lets the rice absorb the liquid and cook evenly.

    Close-up of Mexican green rice bubbling in green herb sauce on the stovetop.

    Step 4: Let the rice steam. After 20 minutes, take the pot off the heat, but keep the lid on. Do not open it just yet! Let it rest and steam for another 10 minutes. That resting time finishes the grains and gives you that fluffy texture.

    Step 5: Fluff and serve. Remove the lid and gently fluff the rice with a fork. Garnish with extra cilantro leaves or a few jalapeño slices if you like a little kick. Serve warm.

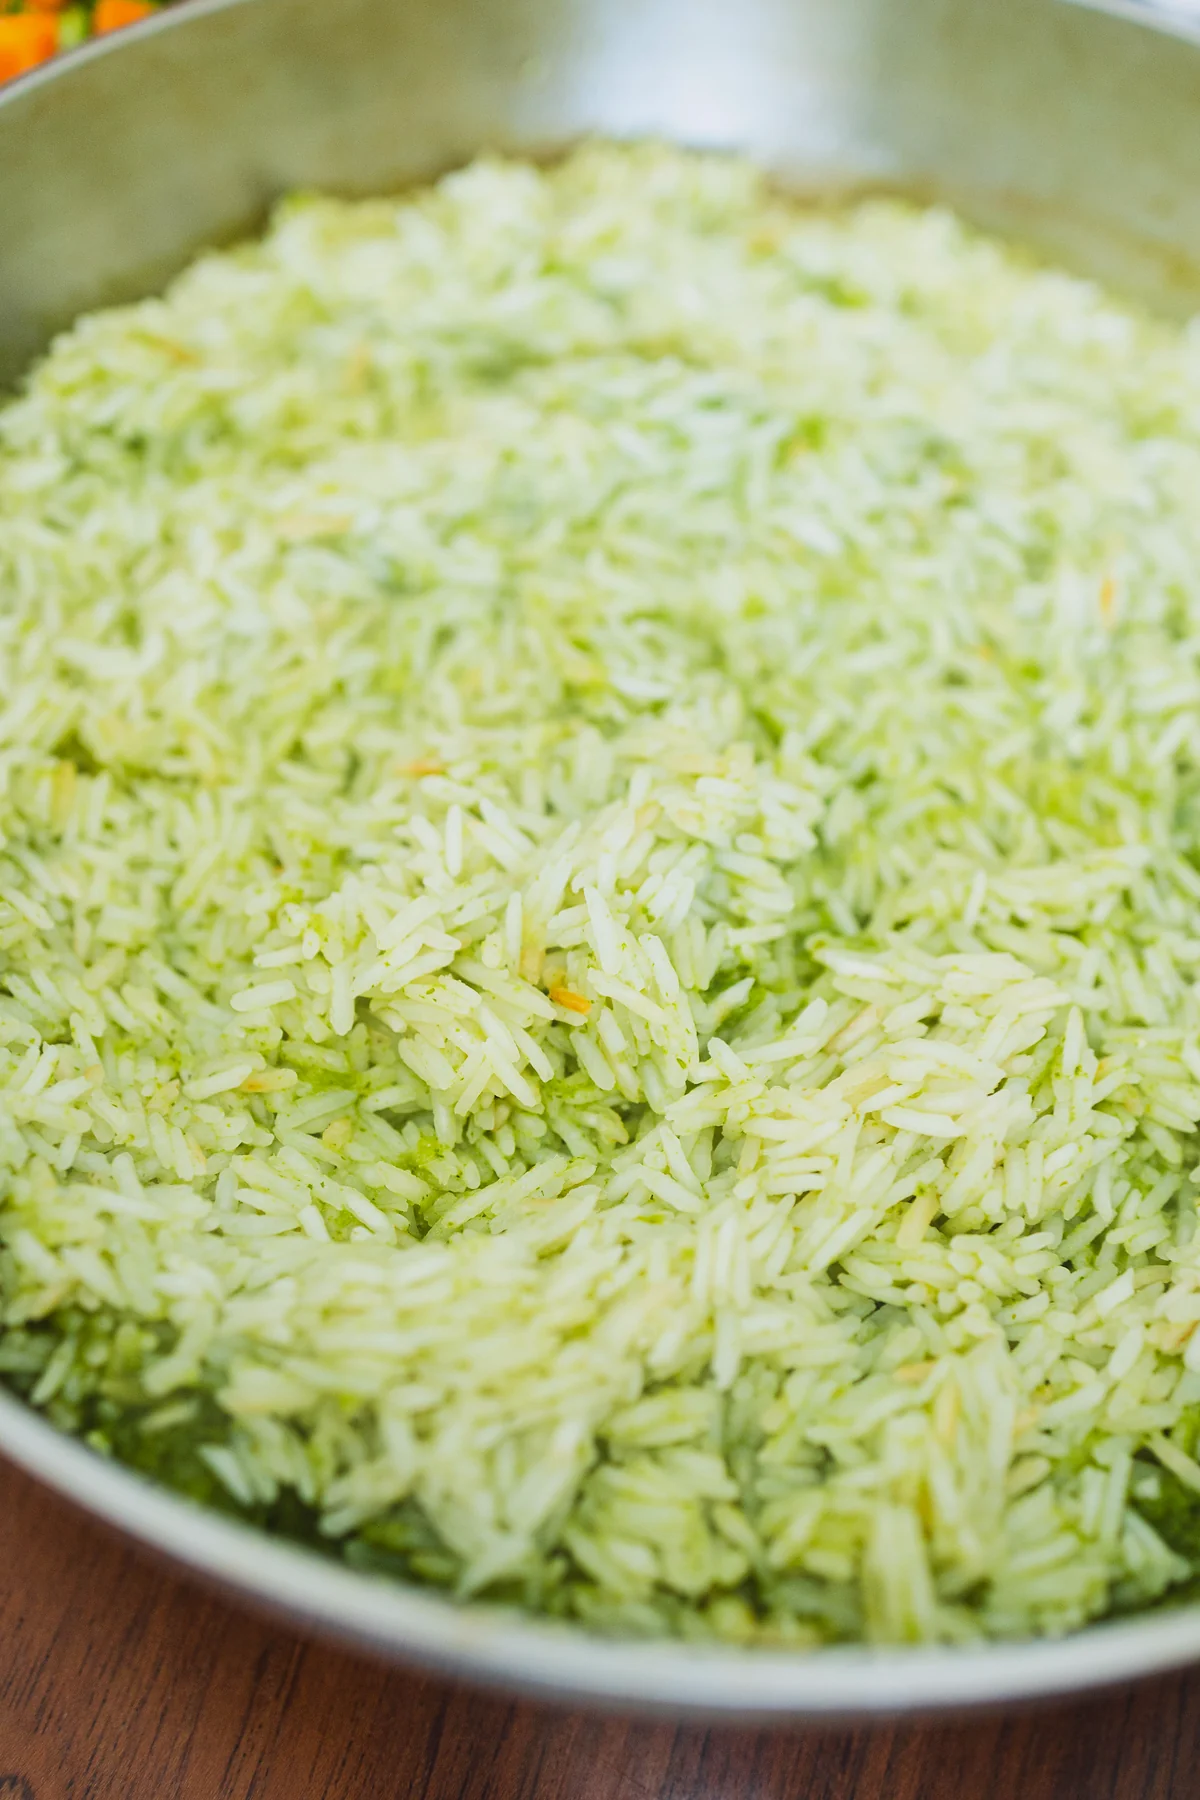
    Close-up of fluffy long-grain Mexican green rice showing herb flecks.

    And that’s it! TA-DA, you got yourself a pot of fluffy Mexican green rice.

    Tips and common mistakes

    • Do not rinse the rice. Use it dry straight from the bag or canister.
    • Toast until lightly browned. Dry-toast the rice in the pot over medium heat before you add the green sauce — that light colour on the grains is what you want.
    • Do not lift the lid during the 20 minutes. Steam is doing the work. Peeking lets it out.
    • Use a tight-fitting lid. If yours is loose, the liquid evaporates too fast and the rice stays underdone.
    • Rest the full 10 minutes. I know it is hard to wait. That rest is what keeps the grains fluffy instead of wet.
    • Stick to basmati or jasmine. Mixing rice types or swapping in a short-grain rice changes the liquid ratio and can turn mushy.
    • Taste the sauce before it hits the pot. Salt levels vary by broth brand. Adjust before you pour.

    How to store homemade Mexican green rice

    A skillet of Mexican green rice on a wooden table next to a garden salad and broccoli.

    One of the best things about making rice at home is having leftovers ready for another meal. Cooked rice does need careful storage.

    • Refrigerator: transfer leftovers into shallow containers and refrigerate within 2 hours (sooner is better for rice; aim for within 1 hour). Keep at 40°F (4°C) or below. As a cautious food-safety guideline for cooked rice, use it within 24 hours.
    • Freezer: divide into individual portions and freeze promptly in airtight containers. For best texture, use within 1 to 2 months.
    • Reheating: reheat until steaming hot throughout, ideally 165°F (74°C). Add a small splash of water or broth, and avoid reheating the same portion more than once.
    • A helpful tip: never leave cooked rice sitting at room temperature for several hours. Rice can contain spores of Bacillus cereus, which can survive cooking and produce toxins if the rice is stored improperly.

    FAQ

    What is Mexican green rice (arroz verde)?

    It is rice cooked in a blended green sauce, usually cilantro with onion, garlic and green chile, instead of the tomato base used for Mexican red rice. This version uses cilantro, jalapeño, garlic, onion, lime and broth.

    Does this green rice use spinach?

    This recipe’s colour comes from cilantro (and jalapeño), not spinach.

    Is Mexican green rice spicy?

    It depends on the jalapeño. Seeded, it stays mild with a little warmth. Leave the seeds in for more heat, or take them out when you are cooking for kids or anyone sensitive to spice.

    Can I use water instead of broth?

    Yes. Broth adds more flavour; water still works.

    How do I keep the rice fluffy, not mushy?

    Do not rinse the rice. Toast the dry grains until lightly browned, then add the green sauce. Use one type of long-grain rice (basmati or jasmine — both work), keep the lid on for the full 20 minutes, then rest 10 minutes before fluffing with a fork.

    How long do leftovers keep?

    Refrigerate promptly and, as a cautious guideline for cooked rice, use within 24 hours. Freeze portions for 1 to 2 months. Always reheat until steaming hot.

    More recipes you’ll love

    Of course, you do not need a special main dish. This rice is just as good next to grilled vegetables, sautéed mushrooms or whatever protein you already have going.

    That is what makes this Mexican green rice so special to us. Familiar ingredients, a straightforward method, and a pot of something colourful and full of flavour.

    So the next time you are planning dinner, skip the usual rice for a change and give this green version a try. You might just discover a new family favourite!

    Get my free dinners

    Mexican green rice in a skillet.

    Easy Mexican Green Rice

    White rice simmered in a blended cilantro, jalapeño, garlic, onion, lime and broth sauce, a fresh green take on Mexican rice (arroz verde).
    Prep Time 10 minutes
    Cook Time 20 minutes
    Rest 10 minutes
    Total Time 40 minutes
    Servings: 4 servings
    Course: Side Dish
    Cuisine: Mexican

    Ingredients
      

    • 3 cloves garlic
    • ½ white or yellow onion roughly chopped
    • 1 jalapeño seeded (leave seeds for more heat)
    • 1 bunch fresh cilantro reserve a few leaves for garnish
    • 1 small lime juiced
    • 2 cups low-sodium chicken broth or water
    • ½ tsp ground cumin
    • ½ tsp salt
    • freshly ground black pepper to taste
    • 1 cup white basmati or jasmine rice

    Equipment

    • High-speed blender or food processor any comparable blender works
    • Medium pot with a tight-fitting lid
    • Measuring cups and spoons
    • Fork for fluffing

    Method
     

    1. Add the garlic, onion, jalapeño, cilantro, lime juice, chicken broth, cumin, salt and black pepper to a high-powered blender or food processor. Blend until completely smooth and vibrant green.
    2. Do not rinse the rice. Place a medium pot over medium heat. Add the dry rice and toast, stirring, until the grains look lightly browned. Pour in the green sauce, stir gently, and bring to a simmer.
    3. Reduce heat to low, immediately cover with a tight-fitting lid, and cook for 20 minutes without lifting the lid.
    4. Remove from heat and keep covered. Let the rice rest and steam for 10 minutes.
    5. Fluff with a fork. Garnish with cilantro or jalapeño slices. Serve warm.
      Fluffy Mexican green rice (arroz verde) filling a stainless steel skillet on a wooden table.

    Notes

    For milder rice, remove jalapeño seeds and membranes. For more heat, leave them in. Water can replace broth. Store leftovers promptly in the fridge and reheat until steaming hot (see post storage section).
  • Homemade Beef Jerky

    Homemade Beef Jerky

    Homemade beef jerky is thin strips of beef marinated in soy sauce, Worcestershire sauce, liquid smoke and spices, heated to 160°F for safety, then dried at 135°F in an air fryer, oven or dehydrator until firm but still bendy. Plan on an overnight marinade and about 8 hours of drying.

    Jump to Recipe

    This post may contain affiliate links. As an Amazon Associate I earn from qualifying purchases.

    There is something so satisfying about having a homemade snack ready whenever hunger strikes. In our house, this homemade beef jerky has become a family favourite. It’s savoury, a little smoky, and so good that my son loves it enough to learn the recipe himself!

    We started making jerky because we were looking for snacks to take on our trips. Store-bought beef jerky is expensive, but it was always what we ended up buying at the convenience store instead of chips, packaged cookies or instant ramen. So we started making our own!

    Now it’s our snack for trips and for that rush between school and afternoon classes, when there’s no time to sit down and eat. The kids grab it, and honestly, so do the grown-ups.

    Living in Mexico, I find that convenience stores are filled with packaged snacks and sweets. There is nothing wrong with a treat, but a jar of homemade jerky is a snack we’d rather pack than chips.

    Let me show you how we make it!

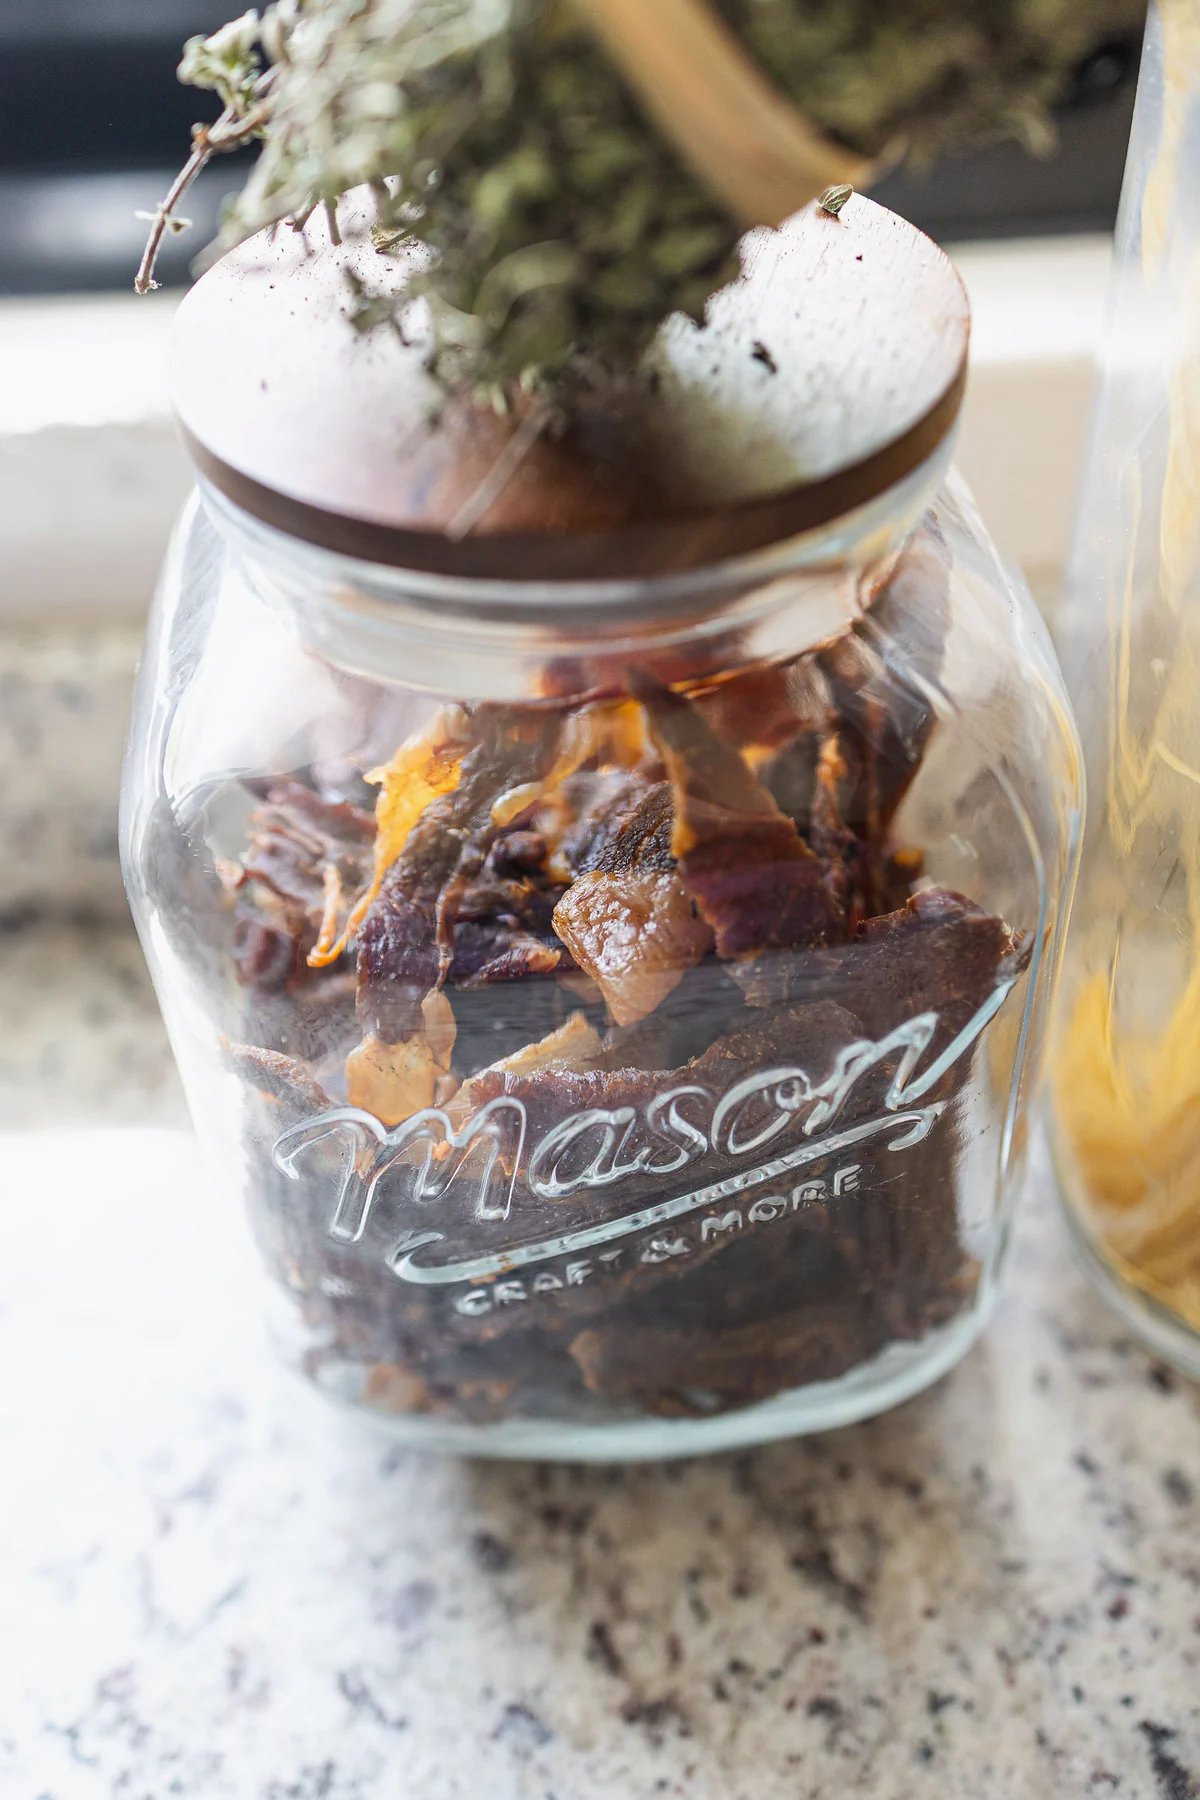
    Homemade beef jerky in a glass Mason jar with a wooden lid on a granite kitchen counter.

    Want a week of dinners planned for you? Get my free dinners

    Why we love this beef jerky recipe

    The first reason is simple: it tastes amazing! Soy sauce, Worcestershire sauce, liquid smoke, garlic, onion and paprika make a savoury, smoky jerky that is hard to stop eating.

    My son is one of its biggest fans. He loves these beef jerky sticks so much that he learned the recipe just so he would know how to make them. As a mom, I love seeing my kids get excited about food we make at home!

    I also love how convenient it is. We keep a jar on the kitchen counter for those moments when the kids or my husband walk by looking for something to eat. Instead of cookies or candy being the easiest thing to grab, there’s homemade jerky. Keep the main batch airtight in the fridge, though (more on storage below).

    Of course, jerky is still a salty snack, so we enjoy it as one snack among many. But having another option our whole family genuinely enjoys? That is a win in my book.

    Ingredients you’ll need

    You only need five things to think about: beef, soy sauce, Worcestershire sauce, liquid smoke and seasonings.

    • Beef round steak: a lean cut, which matters because fat goes rancid. Top round or eye of round both work well. I buy my sliced beef from Wild Fork. It comes frozen and cut thin, which makes prep so much easier. If your beef isn’t sliced, freeze it for 1 to 2 hours until firm, then slice it about 1/4 inch (5 mm) thick. Slice against the grain for a more tender chew, or with the grain if you like it chewier.
    • Soy sauce: regular soy sauce. Low-sodium soy sauce works too if you want it a little less salty.
    • Worcestershire sauce and liquid smoke: these two give it the smoky, “store-bought jerky” flavour.
    • Brown sugar: balances the salt.
    • Meat tenderizer: use unseasoned meat tenderizer. Most brands already contain salt, so don’t add extra.
    • Garlic powder, onion powder, sweet paprika, black pepper, salt.

    Substitutions: no liquid smoke? Use smoked paprika instead of regular paprika for a gentler smoky note. Gluten-free: use tamari and a gluten-free Worcestershire sauce.

    Recommended tools for homemade jerky

    Equipment

    • Air fryer with a dehydrate function (that’s what I use), or an oven that can hold 135°F, or a food dehydrator with an adjustable thermostat
    • Instant-read meat thermometer
    • Large bowl or zip-top bag for marinating
    • Sheet pan with a wire rack (for the 160°F pre-heat step)
    • Long, sharp slicing knife and cutting board (if slicing your own beef)
    • Clean airtight jars or zip-top bags

    How to make homemade beef jerky

    Step 1: Make the marinade. In a large bowl, stir together the soy sauce, Worcestershire sauce, liquid smoke, brown sugar, salt, black pepper, meat tenderizer, garlic powder, onion powder and paprika until well combined.

    Step 2: Marinate the beef. Add the thin beef strips and toss so every piece is coated. Cover and refrigerate overnight, at least 6 and up to 24 hours. Always marinate in the fridge, never on the counter, and throw out the marinade afterwards.

    Step 3: Drain. Take the beef out of the marinade and let the excess drip off. Pat the strips lightly with paper towels so they dry faster.

    Step 4: Heat to 160°F first. This is the food safety step. The USDA recommends heating beef to 160°F (71°C) before dehydrating, because drying alone may never get the meat hot enough to kill bacteria. Lay the strips in a single layer on a wire rack set over a sheet pan and roast at 325°F (163°C) until an instant-read thermometer in the thickest strip reads 160°F. Thin strips usually take 10 to 15 minutes, but go by the thermometer, not the clock. You can also steam them.

    Strips of homemade beef jerky on a wire cooling rack over a granite counter.

    Step 5: Dry at 135°F for about 8 hours. Once the strips have reached 160°F, arrange them in a single layer with space between pieces so air can move. I use my air fryer’s dehydrate function at 135°F (57°C) for about 8 hours. No air fryer? Use the oven at 135°F for about 8 hours, with the strips on a wire rack over a sheet pan. Check with an oven thermometer that your oven really holds 135°F, because many ovens don’t go that low; if yours doesn’t, use an air fryer or a dehydrator instead. A food dehydrator set to 135°F works the same way. The USDA says to keep the drying temperature steady between 130 and 140°F. Thinner strips can be ready sooner, so start checking around 6 hours.

    Step 6: Check the texture. Done jerky is dry and firm but still bends and cracks without snapping in half. No wet or soft spots in the middle. Let it cool completely before storing.

    Homemade beef jerky strips sticking out of a glass Mason jar.

    And that’s it! TA-DA, you got yourself a batch of homemade beef jerky for the next snack attack.

    Tips and common mistakes

    • Don’t skip the 160°F step. Marinating doesn’t make raw meat safe, and 135°F drying is too low to do the job alone.
    • Keep the slices even. Thick and thin strips on the same tray dry at different speeds. Pull the thin ones early.
    • Trim visible fat. Fat doesn’t dry and makes jerky go off sooner.
    • Give it room. Overlapping strips stay wet where they touch.
    • Use a thermometer, not a guess. Thin strips heat fast, so check early.

    Amazing snacks for the family

    Close-up of homemade beef jerky through the glass of a Mason jar.

    One of my favourite things about this recipe is how easily it fits into our everyday routine. Some days the kids are home looking for something to eat between activities. Other days we are rushing from one place to another, and I know we will need something in the car.

    That’s when these beef jerky sticks really shine. I pack a few sticks and a bottle of water, and it’s a simple snack for the kids while we’re out. Having something ready in my bag saves me from stopping at a convenience store every time someone gets hungry.

    My son especially loves this snack, and it’s an easy one to pack alongside fruit or crackers. Since jerky is dried and salty, I make sure the kids drink plenty of water with it, especially when they’re active or outside.

    I’m not saying we never buy packaged snacks. Real life is busy. But I love knowing I have another option ready at home or packed for the road.

    How to store homemade beef jerky

    A jar of homemade beef jerky topped with a bundle of thyme on a sunny windowsill.

    In our house it’s gone in two weeks, so the jar on the counter never sits around for long! Honestly, I would have guessed a good airtight jar keeps it about a month, but the National Center for Home Food Preservation says properly dried jerky keeps two weeks at room temperature in a sealed container, so two weeks is our counter limit. Keep the rest airtight in the fridge; the USDA says home-dried jerky can be stored 1 to 2 months. For longer, freeze it in small portions; Cornell Cooperative Extension says up to 1 year in the freezer for best quality. If you ever see moisture or mould in the jar, or it smells off, throw it out.

    • Before storing: let it cool completely and blot off any oil, then pack it in a clean, dry, airtight jar or bag.
    • On the go: pack a portion in a clean, sealed container and keep it cool. Don’t leave jerky in a hot car.

    FAQ

    Do you have to cook beef jerky before dehydrating it? Yes, for safety. The USDA recommends steaming or roasting the strips to 160°F before drying, because a dehydrator or low oven may not heat the meat enough to kill bacteria like E. coli and Salmonella.

    What is the best cut of beef for jerky? Lean cuts like round steak (top or bottom round) or eye of round work best because there is less fat to go rancid. We use thinly sliced round steak.

    How long does homemade beef jerky last? Up to 2 weeks at room temperature in a sealed container (National Center for Home Food Preservation). In the fridge, it keeps 1 to 2 months (the USDA says home-dried jerky can be stored 1 to 2 months). Freeze it for longer storage.

    How do I know when beef jerky is done? It should be dry and firm but still bend and crack without breaking in two, with no moist spots inside.

    Can I make beef jerky in an air fryer? Yes. If your air fryer has a dehydrate function, heat the strips to 160°F first, then dehydrate at 135°F for about 8 hours. That’s how we make ours.

    Can I make beef jerky in the oven? Yes, if your oven can hold a steady 135°F. Heat the strips to 160°F first, then dry them on a wire rack at 135°F for about 8 hours. Check the temperature with an oven thermometer.

    How long should I marinate beef jerky? At least 6 hours and up to 24 hours, always in the fridge.

    More recipes you’ll love

    If there is one thing I have learned as a busy mom, it’s that the snacks we keep within easy reach make everyday life a little easier. This jerky is something we can make ahead, keep ready for hungry family members, and pack when we know we’ll be out for hours.

    So make a batch, store it safely, and see how fast your family goes through it. Just be warned: once everyone finds out where you keep the jerky, that jar may need refilling sooner than you think!

    Happy snacking!

    Get my free dinners

    Homemade beef jerky in a glass jar.

    Homemade Beef Jerky

    Thin strips of beef round marinated in soy sauce, Worcestershire, liquid smoke and spices, heated to 160°F for safety, then dried at 135°F in the air fryer or oven until firm but bendable.
    Prep Time 20 minutes
    Cook Time 8 hours 15 minutes
    Marinate 12 hours
    Total Time 20 hours 35 minutes
    Servings: 10 servings (about 1 oz each)
    Course: Snack
    Cuisine: American

    Ingredients
      

    For the beef
    • 1.2 kg beef round steak top round or eye of round, sliced about 1/4 inch (5 mm) thick (about 2.6 lb)
    For the marinade
    • ¼ cup soy sauce regular or low-sodium
    • 2 tbsp Worcestershire sauce
    • 1 ½ tbsp liquid smoke
    • 2 tbsp brown sugar
    • 2 tsp salt
    • 1 tsp ground black pepper
    • 1 tsp meat tenderizer unseasoned
    • 1 tsp garlic powder
    • 1 tsp onion powder
    • 1 tsp sweet paprika

    Equipment

    • Air fryer with a dehydrate function or an oven that holds 135°F, or a food dehydrator
    • Instant-read meat thermometer
    • Slicing knife if slicing your own beef
    • Wire rack and sheet pan
    • Airtight jars or zip-top bags

    Method
     

    1. In a large bowl, stir together the soy sauce, Worcestershire sauce, liquid smoke, brown sugar, salt, pepper, meat tenderizer, garlic powder, onion powder and paprika.
    2. Add the beef strips and toss to coat every piece. Cover and refrigerate overnight (6 to 24 hours). Discard the marinade afterwards.
    3. Drain the strips and pat them lightly dry with paper towels.
    4. Lay the strips in a single layer on a wire rack over a sheet pan and roast at 325°F (163°C) until the thickest strip reads 160°F (71°C) on an instant-read thermometer, usually 10 to 15 minutes. Go by the thermometer, not the clock.
      Strips of homemade beef jerky on a wire cooling rack over a granite counter.
    5. Arrange the strips in a single layer with space between pieces. Dry at 135°F (57°C) for about 8 hours using the air fryer’s dehydrate function, an oven that holds 135°F, or a dehydrator, until dry and firm but still bendable. Start checking around 6 hours.
    6. Cool completely. Store in an airtight container in the fridge, or freeze for longer storage.
      Homemade beef jerky strips sticking out of a glass Mason jar.

    Notes

    I use my air fryer’s dehydrate function at 135°F. No air fryer? Use the oven at 135°F for about 8 hours, but check with an oven thermometer that it really holds 135°F. A food dehydrator at 135°F works too (USDA: keep drying between 130 and 140°F). The USDA recommends heating beef to 160°F before drying. Thin, even slices dry evenly; pull thinner strips early. Storage: up to 2 weeks at room temperature in a sealed container (NCHFP). Keep the rest airtight in the fridge; the USDA says home-dried jerky can be stored 1 to 2 months. Freeze it for longer storage.
    Yield: about 300 g (10 to 11 oz) of jerky from 1.2 kg raw beef.
  • Homemade Pesto Gnocchi

    Homemade Pesto Gnocchi

    Making gnocchi and pesto from scratch isn’t just cooking — it’s a meal the whole family gathers around. This homemade pesto gnocchi comes together in about 30 minutes, uses simple pantry ingredients, and delivers restaurant-quality flavor at a fraction of the cost. Pillowy potato gnocchi tossed in a vibrant walnut-basil pesto: pure comfort food that feels special every single time.

    This post may contain affiliate links. If you purchase through these links, I may earn a small commission at no extra cost to you. Thank you for supporting Love & Harvest!

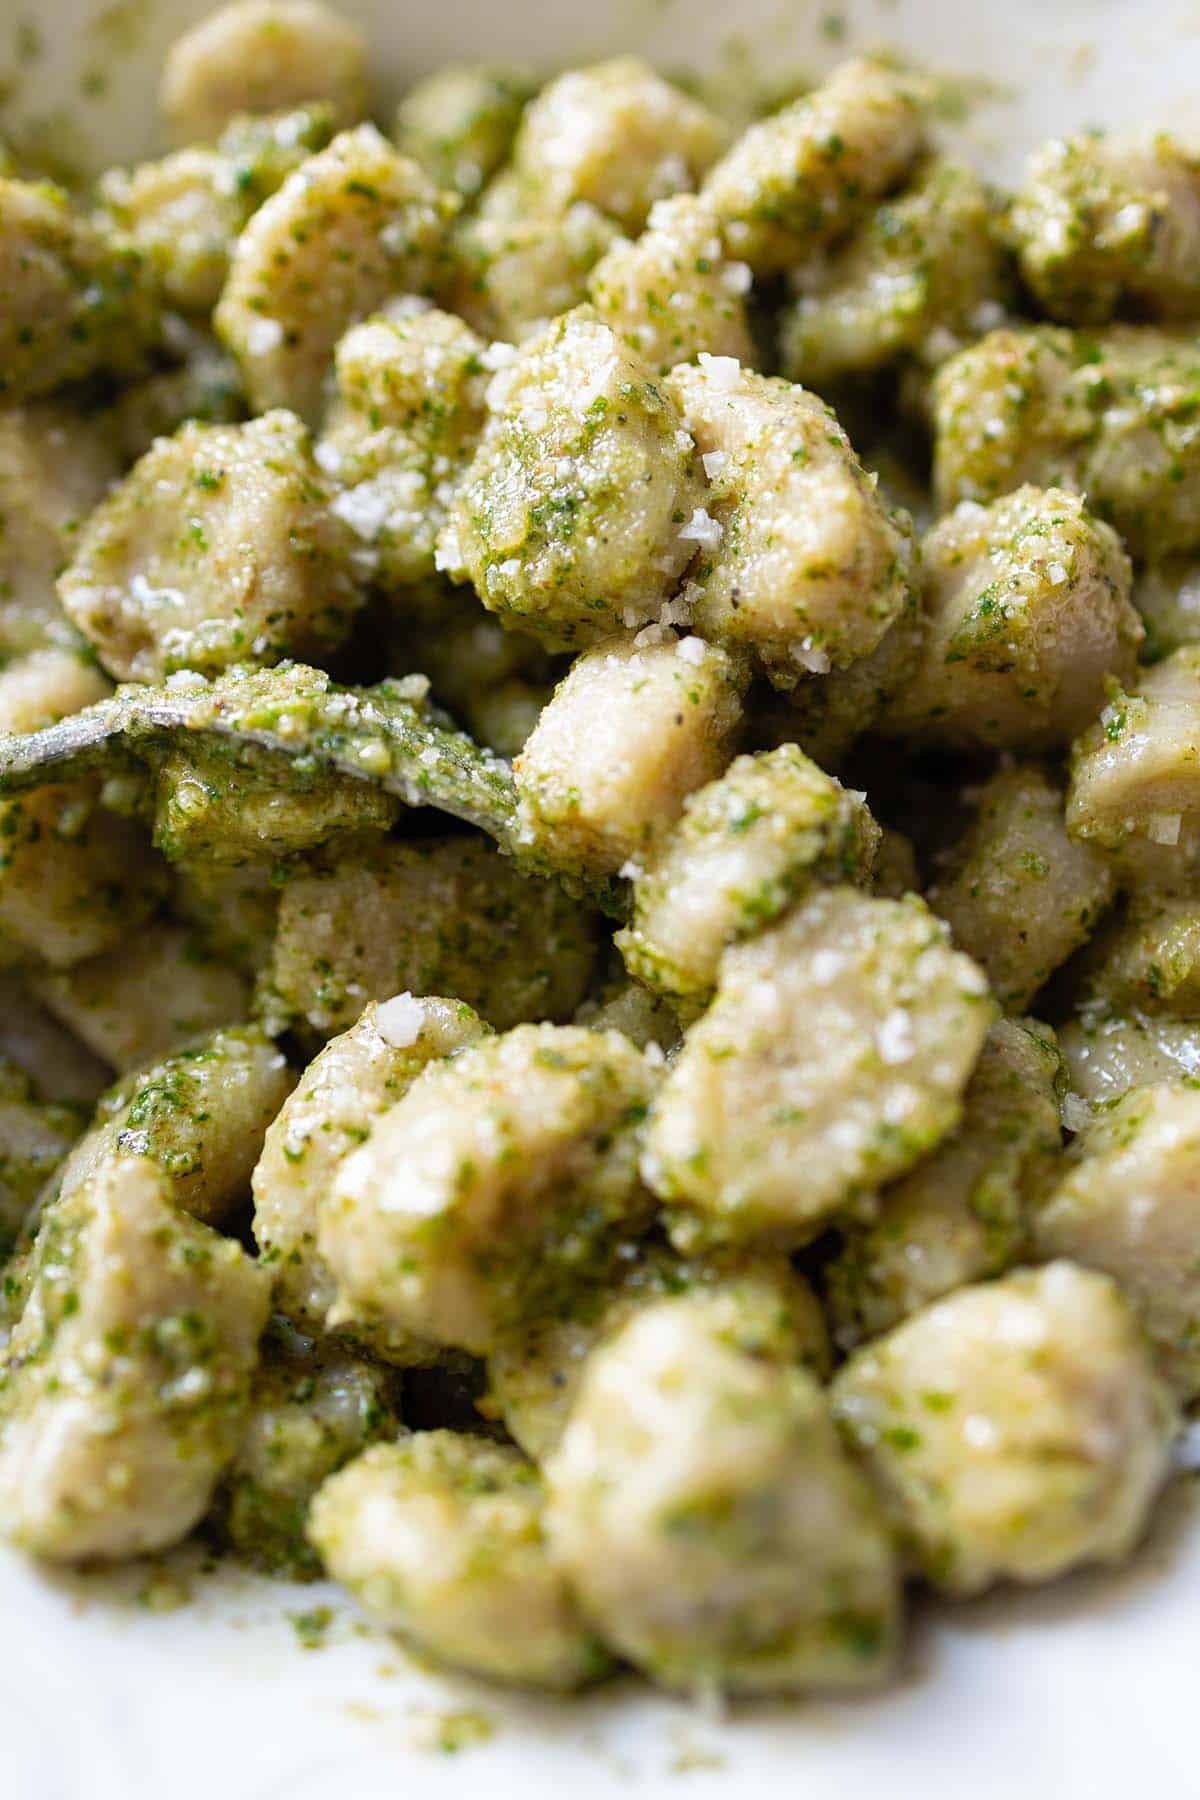
    Homemade gnocchi tossed in green pesto on a white plate

    Easy Pesto Gnocchi Recipe

    What might sound like a labor-intensive dinner is, in fact, a 30-minute miracle. Gnocchi dough is made with just a few simple ingredients — cooked potatoes, flour, egg — and requires nothing more than your hands to shape into perfect pillowy bites. The pesto is a quick blend of fresh herbs, nuts, and olive oil, ready in minutes.

    Even better? You can make both the gnocchi and the pesto ahead of time. Pack them up and take them on a picnic, or bring them to a family gathering — you’ll wow your guests with the taste and simplicity.

    Delicious and Simple

    Homemade gnocchi gives you total control over the ingredients. And the pesto? Loaded with fresh basil, parsley, walnuts and olive oil. No heavy creams or hidden fillers — just fresh, bright flavor.

    For families who love comfort food but want it homemade, this dish is gold. You can swap in spinach or kale for part of the basil, or use walnuts or sunflower seeds instead of pine nuts — making it allergy-friendly and affordable. A speedy, rewarding, from-scratch recipe your family will love.

    Why We Love This Recipe

    There’s something magical about cooking from scratch — especially when it takes place on a floured countertop, with your hands in the dough, your kids watching, and a warm kitchen filled with fresh basil and garlic aromas. This homemade pesto gnocchi recipe isn’t just a meal — it’s a moment.

    It’s fast (yes, really), affordable, and so satisfying to make. You don’t need a pasta machine or fancy tools — just a fork, a counter, and the will to try. Once you make homemade gnocchi, you’ll wonder why you ever bought the store-bought version.

    Key Ingredients

    Ingredients

    Russet Potatoes

    • The base of the gnocchi — light, starchy, and perfect for creating that soft, pillowy texture. Boiled and mashed while warm, they hold the dough together with minimal flour. Always use russet (not waxy) potatoes for the lightest result. A food processor can help make the pesto smooth and effortless.

    Fresh Basil

    • The star of the pesto. Fragrant, peppery, and vibrant green — it gives the sauce its unmistakable Italian soul. Use loosely packed leaves and avoid any stems that are thick and bitter. Fresh basil cannot be substituted with dried for pesto.

    Walnuts

    • Traditional pesto uses pine nuts, but walnuts are an affordable and equally delicious substitute. They add creaminess and a hint of sweetness. Lightly toast them for a few minutes in a dry pan to deepen the flavour before blending.

    Egg Yolk

    • Just one egg yolk adds richness to the gnocchi dough and binds it gently without making it heavy. The key is not to over-knead the dough once the egg is added — overworking it activates the gluten in the flour and makes gnocchi tough.

    Extra Virgin Olive Oil

    • Silky and flavourful, olive oil brings the pesto together and is the key to its glossy, smooth texture. Choose a good-quality extra virgin olive oil for the best taste — it’s one of only a few ingredients, so quality shows. A KitchenAid immersion blender is also a great tool if you prefer to blend right in the jar.

    Parmesan Cheese

    • Adds a salty, nutty depth to the pesto. Use freshly grated parmesan rather than pre-packaged grated cheese — the texture and flavour are noticeably better. Leave it out for a dairy-free version; the pesto is still delicious.

    Family Favourite

    Whether you’re cooking with your kids or for them, this is a recipe that brings everyone together. Let the little ones help roll and shape the gnocchi (expect floury giggles). The pesto is kid-approved too — smooth, creamy, and a vibrant green that makes dinner feel special.

    Serve it warm, or pack it into a jar for a cold pasta salad-style lunch at the park. It keeps well, tastes even better the next day, and never fails to bring out the “Wow, you made this?!” from friends and family.

    Homemade pesto gnocchi tossed in walnut-basil pesto

    If you love pasta night, our Easy Camping Shrimp Pasta is another quick crowd-pleaser, or try our Fluffy Naan Bread to serve alongside this gnocchi as a complete Italian-inspired spread. For a protein-packed main to serve with the pesto, our Lemongrass Chicken Drumsticks pair beautifully.

    Frequently Asked Questions

    Can I make gnocchi ahead of time?

    Yes! You can make gnocchi dough up to a day ahead and store it covered in the refrigerator. Alternatively, shape the gnocchi, dust with flour, spread on a baking sheet, and freeze until solid — then transfer to a zip-lock bag. Cook from frozen, adding 1–2 minutes to the boiling time. The pesto keeps refrigerated for up to 5 days with a thin layer of olive oil on top.

    Why is my gnocchi dense or rubbery?

    The most common culprit is too much flour or over-kneading the dough. Add flour sparingly — just enough so the dough isn’t sticky. Mix gently and stop as soon as the dough comes together. The other common issue is using waxy potatoes like Yukon Gold; stick to starchy russet potatoes for the lightest result.

    Can I use store-bought pesto?

    Absolutely, and it will still be delicious. However, the homemade walnut-basil pesto takes only 5 minutes and tastes significantly fresher. If you’re short on time, jarred pesto works in a pinch — just add a squeeze of lemon juice and a little extra parmesan to brighten it up.

    How do I know when gnocchi is cooked?

    Gnocchi is done when it floats to the surface of the boiling water, which takes about 2–3 minutes. Once they float, give them another 30 seconds then scoop them out with a slotted spoon rather than draining — this prevents them from getting waterlogged and keeps them light.

    Can I pan-fry the gnocchi after boiling?

    Yes, and it’s highly recommended for extra texture! After boiling and draining, heat a knob of butter or a splash of olive oil in a pan over medium-high heat. Add the gnocchi in a single layer and let them crisp up for 2–3 minutes per side without moving them. Toss with pesto just before serving. The crispy edges with the creamy pesto is an upgrade worth trying.

    Homemade Pesto Gnocchi

    Homemade gnocchi gives you total control over the ingredients. And the pesto? Loaded with fresh basil, parsley, walnuts and olive oil. No heavy creams or hidden fillers—just fresh, bright flavor.
    Prep Time 20 minutes
    Cook Time 10 minutes
    Total Time 30 minutes
    Servings: 4 people
    Course: Main Course
    Cuisine: Italian
    Calories: 520

    Ingredients
      

    Gnocchi
    • 2 medium russet potatoes (about 500g)
    • 1 egg yolk
    • 1 cup all-purpose flour (plus more for dusting)
    • pinch sea salt
    Pesto
    • 1½ cup fresh basil leaves loosely packed
    • ½ cup parsley leaves loosely packed
    • ¼ cup chopped walnuts or other preferred nuts
    • 1 garlic clove
    • ½ tsp sugar
    • 1 tsp balsamic vinegar
    • ½ cup extra virgin olive oil
    • ½ freshly squeezed lemon juice
    • ¼ cup freshly grated parmesan cheese
    • sea salt
    • black pepper

    Method
     

    Gnocchi
    1. Boil the potatoes whole, with skins on, until fork-tender (about 20 minutes).
    2. Let cool slightly, then peel and mash while still warm.
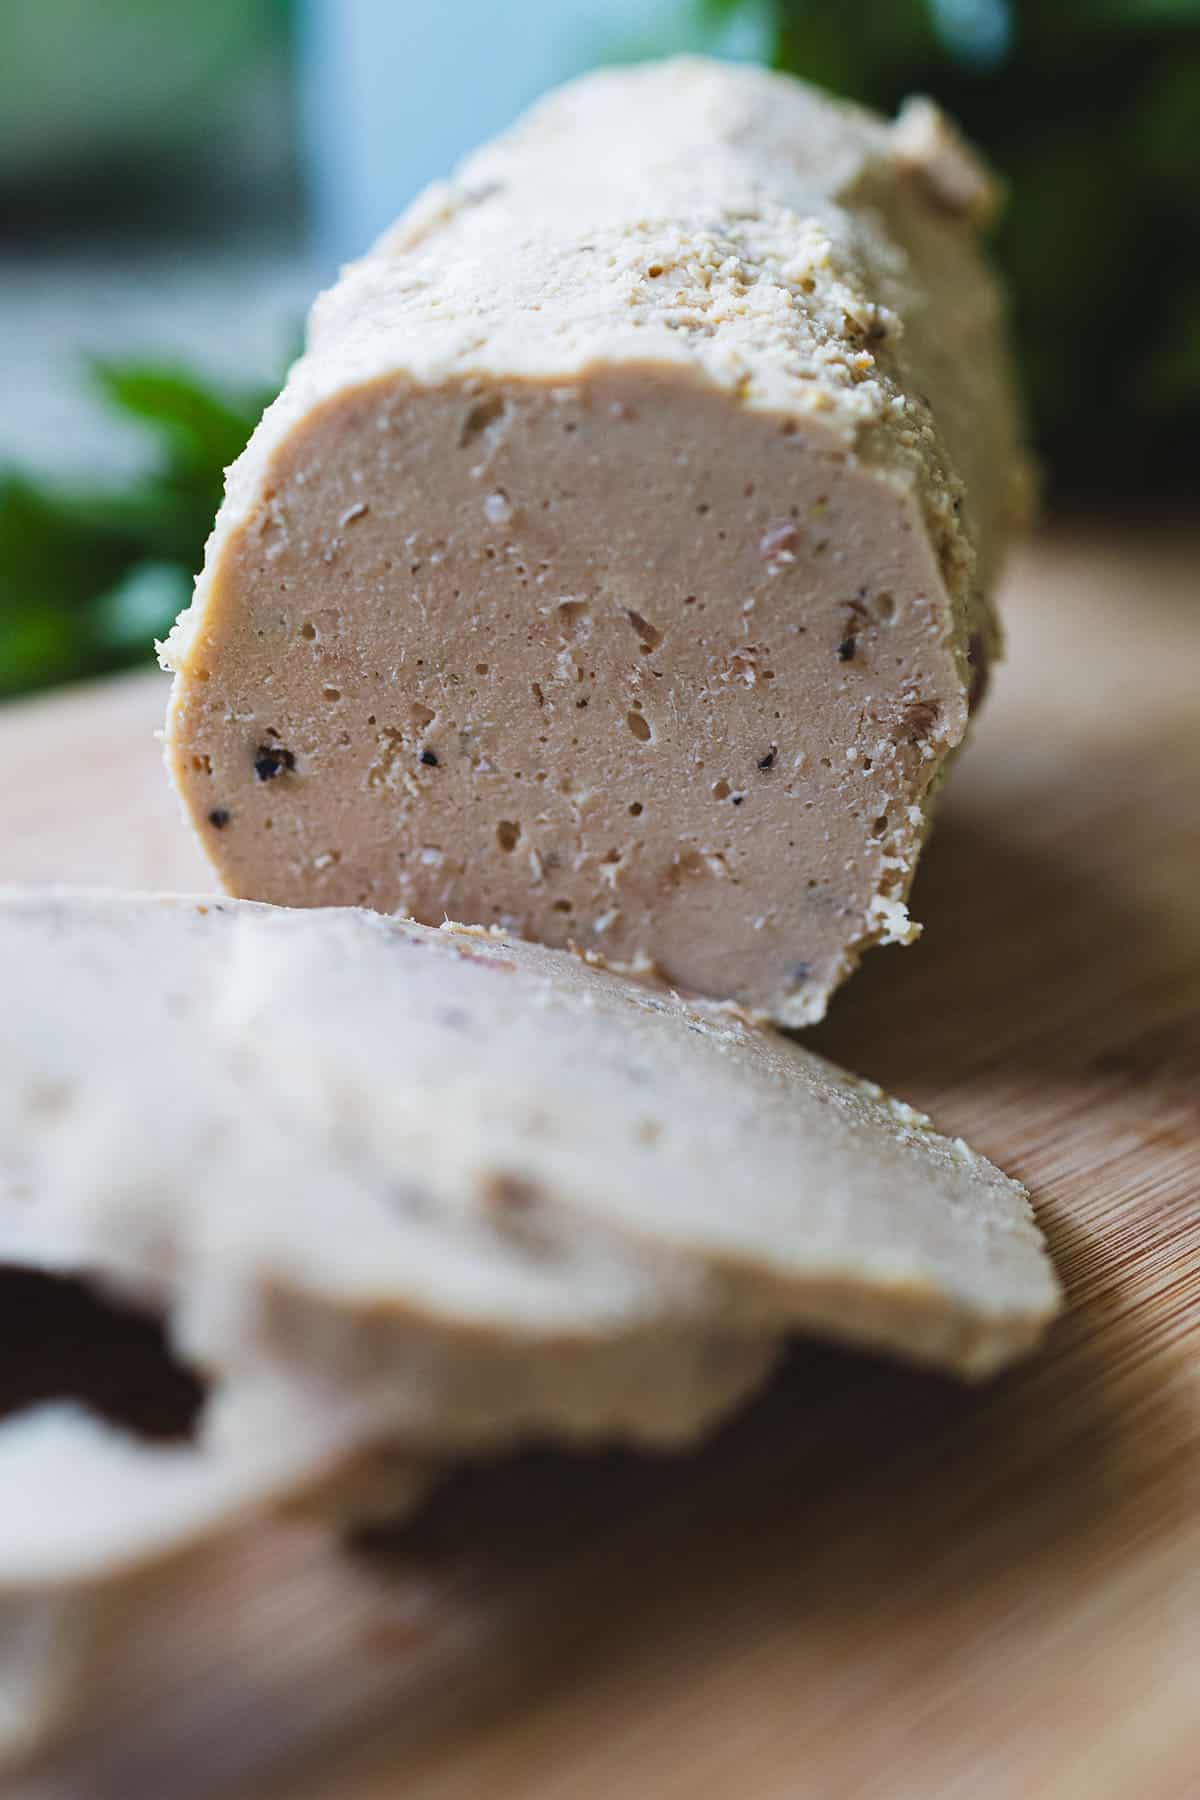
    3. Add the egg yolk, salt, and flour. Gently knead on a floured surface until just combined—don’t overwork it.
    4. Divide dough into 4 pieces. Roll each into a rope about ½-inch thick. Cut into 1-inch pieces and press lightly with a fork for texture (optional).
    5. Bring a large pot of salted water to a boil. Drop in gnocchi; once they float (about 2–3 minutes), they’re ready.
    Pesto
    1. Blend all the ingredients together in a food processor (except olive oil). I usually use the pulse button to get a chunkier texture, but you can run it continuously for a smoother texture.
    2. Slowly drizzle in olive oil while blending until smooth. Season with salt and pepper.
    3. Toss and Serve: Drain the gnocchi and toss with the pesto while still warm. Garnish with more cheese or fresh herbs.

  • Easy Plum Jam

    Easy Plum Jam

    This easy plum jam, made with seasonal Mexican ciruela roja, is a fun and rewarding way to turn fresh fruit into something delicious—with plenty of hands-on help from the kids.

    This post may contain affiliate links. If you purchase through these links, I may earn a small commission at no extra cost to you. Thank you for supporting Love & Harvest!

    Open jar of homemade red plum jam with a spoon

    Jamming at Home

    There’s something magical about making jam at home—especially when your little ones are part of the process. In our kitchen, it’s a full family affair.

    The kids love squishing the fruit, stirring the bubbling pot (maybe a bit too enthusiastically), and watching simple ingredients transform into something sweet and spreadable. Sure, the stove might get a little sticky, and the counters might sparkle with sugar syrup splatters, but I wouldn’t trade it for anything.

    Cooking from scratch teaches my kids a deep appreciation for where food comes from—and that many things we buy at the supermarket can be made right at home, often tasting even better.

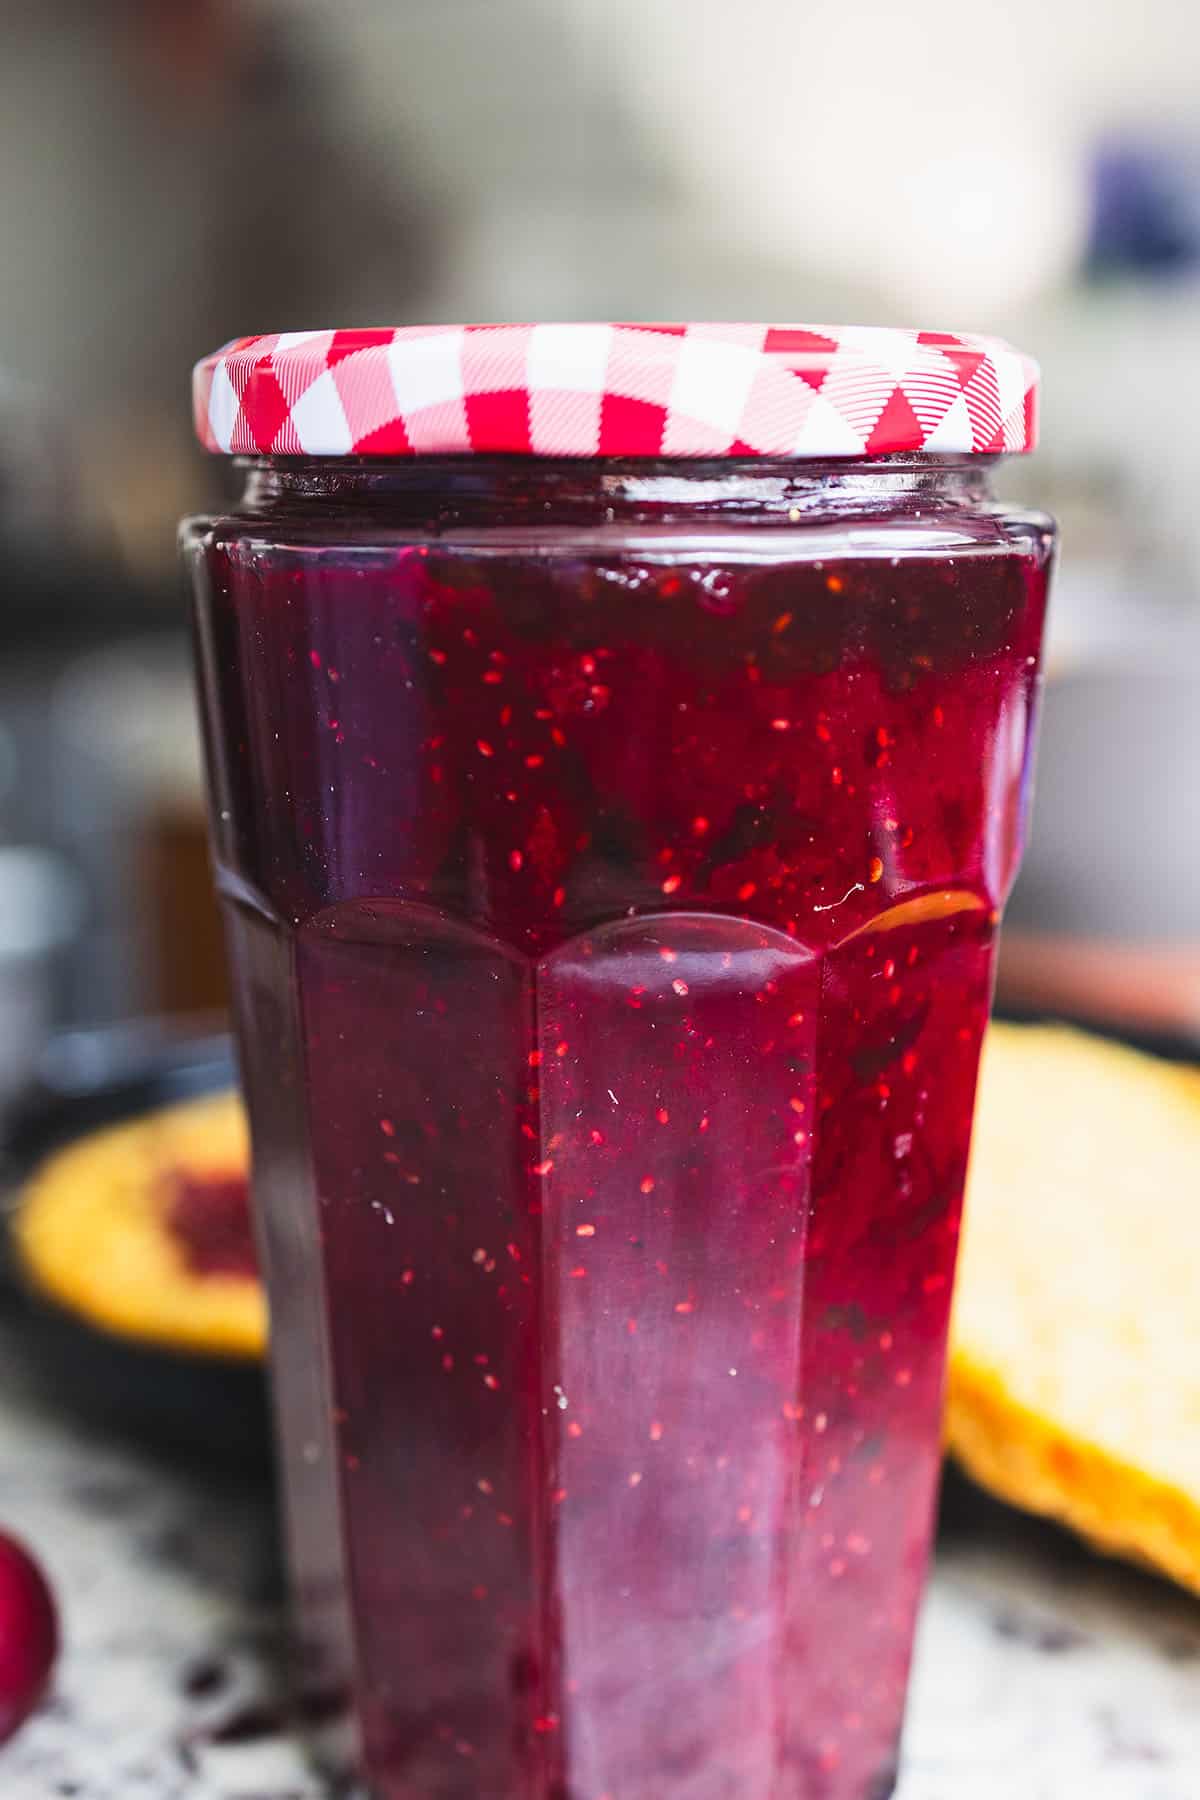
    Tall jar of homemade plum jam with a gingham lid

    Main Ingredients

    This jam is all about simplicity. Here’s all you need:

    Ingredients

    Fresh Red Plums (Ciruela Roja)

    • The star of the show — pitted and chopped. Their natural sweetness and acidity make them ideal for jam-making without needing excessive sugar.

    Granulated Sugar

    • Brings out the fruit’s natural sweetness and helps the jam set and preserve. The ratio matters — too little and it won’t set; too much and it overpowers the fruit.

    Fresh Lemon Juice

    • Brightens the flavour, activates the pectin for a better set, and helps with preservation. Always use fresh — bottled just isn’t the same.

    Fruit Pectin or Gelatine

    • The setting agent that gives your jam that perfect spreadable consistency without endless boiling. We love using a canning funnel and jelly jars to bottle this up cleanly.

    What Is Ciruela Roja?

    Ciruela roja is the Mexican red plum—small, vibrant, and sweet-tart with a deep red skin and juicy flesh. It’s a seasonal fruit that shows up in abundance at local markets during summer, and its natural balance of sweetness and acidity makes it perfect for jam-making. When in season, we grab them by the kilo to preserve their flavor in jars we can enjoy year-round.

    Jar of plum jam next to fresh red plums and basil

    Great Substitutes for Ciruela Roja

    If you can’t find ciruela roja, don’t worry—this jam recipe works beautifully with other types of plums, especially:

    • Black plums – dark, juicy, and rich in flavour

    • Santa Rosa plums – sweet-tart with a fragrant aroma

    • Yellow plums (Mirabelle) – slightly milder, but still great for jam

    • Apricots or peaches – for a softer, sweeter twist

    Spoonful of plum jam over a creamy dessert with a golden crust

    The Magic Tool: Potato Masher

    You don’t need fancy equipment to make great jam. One of our favorite tools? The humble potato masher. The kids love using it to break down the cooked plums into a chunky, rustic texture. It’s safe, satisfying, and lets them feel like real little chefs. No blender needed—just old-school mashing fun.

    Why We Love This Easy Plum Jam Recipe

    • It’s seasonal – We use Mexican ciruela roja when it’s in full swing, usually around summer. When plums are everywhere in the local markets, we grab kilos and turn them into jam jars we enjoy all year.

    • It’s fast – No long hours of boiling needed. This is a quick jam recipe you can make in under an hour.

    • It’s kid-approved – From making to eating, kids are all in.

    • It’s a pantry hero – It keeps well in the fridge and makes a perfect little homemade gift.

    Other Ways of Using Jam

    Sure, plum jam and peanut butter on homemade sourdough is a classic. But don’t stop there! We love layering it between cakes, spooning it into cupcake centers, or swirling it into yogurt for a fruity breakfast. Try glazing roasted meats with it, folding it into thumbprint cookies, or even mixing a spoonful into your vinaigrette for a sweet-savory salad twist. It also pairs beautifully alongside our vanilla bean ice cream for a fruity sundae, or drizzled over our super moist cherry loaf.

    A hand spreading plum jam over golden cornbread in a slow cooker

    Frequently Asked Questions

    Can I make this jam without pectin?

    Yes! Plums are naturally high in pectin, especially when slightly underripe. You can cook the jam a bit longer—about 25–30 minutes total—and it will thicken on its own. Just do the cold plate test to check consistency.

    How long does homemade plum jam last?

    Stored in a clean, sealed jar in the refrigerator, this jam will keep for up to 3 weeks. For longer storage, pour into sterilized jars while hot and freeze for up to 6 months.

    Can I use frozen plums?

    Absolutely. Thaw them first and drain any excess liquid before cooking. Frozen plums work great and often have excellent flavor since they’re picked at peak ripeness.

    My jam didn’t set — what went wrong?

    The most common cause is either not enough pectin or not cooking long enough. You can rescue it by returning to the heat, adding a little more lemon juice, and boiling for another 5–10 minutes. The cold plate wrinkle test is your best friend here.

    What can I do with leftover jam besides spreading on toast?

    So many things! Use it as a cake filling, swirl into yogurt, glaze roasted meats, fill thumbprint cookies, or spoon over vanilla ice cream. Even a spoonful in your salad dressing adds a lovely sweet-tart depth. Also try it alongside our cherry syrup recipe for a fruit preserve duo.

    Tall jar of homemade plum jam with a gingham lid

    Easy Plum Jam Recipe

    An easy plum jam recipe made with just four ingredients—fresh plums, sugar, lemon juice, and pectin or gelatine. A pantry hero that celebrates this delicious seasonal fruit.
    Prep Time 15 minutes
    Cook Time 20 minutes
    Total Time 35 minutes
    Servings: 1 large jar (1L)
    Course: Condiment
    Calories: 55

    Ingredients
      

    • 1 kg (2.2 lbs) fresh plums (ciruela roja or any ripe plums), pitted and chopped
    • 500 g (2 ½ cups) granulated sugar
    • 2 tbsp fresh lemon juice
    • 1 package (about 7 g or 1 tbsp) fruit pectin or 1 tbsp unflavored powdered gelatine

    Equipment

    • potato masher

    Method
     

    1. Wash, pit, and chop the plums. You can leave the skin on—it adds beautiful color and texture.
    2. Place the plums in a large saucepan over medium heat. Add lemon juice and stir occasionally. Cook for about 10–15 minutes until the fruit softens and begins to break down.
    3. Use a potato masher to mash the plums into your desired consistency—chunky or smooth.
    4. Stir in the sugar and bring the mixture to a gentle boil. Once boiling, sprinkle in the pectin or gelatine and stir well to dissolve completely.
    5. Continue to cook for another 10–15 minutes, stirring frequently, until the jam thickens slightly. To test the consistency, place a spoonful on a chilled plate—if it wrinkles when pushed, it's ready.
    6. Remove from heat and let cool for 5–10 minutes. Pour into clean jars and allow to cool fully before sealing. Store in the fridge for up to 3 weeks or freeze for longer storage.

  • Easy Hummus Recipe

    Easy Hummus Recipe

    Creamy, flavourful, and ready in 10 minutes — this homemade hummus beats anything from the grocery store. Made with chickpeas, tahini, lemon, garlic, and finished with a drizzle of olive oil and a sprinkle of sumac.

    This post may contain affiliate links. If you purchase through these links, I may earn a small commission at no extra cost to you. Thank you for supporting Love & Harvest!

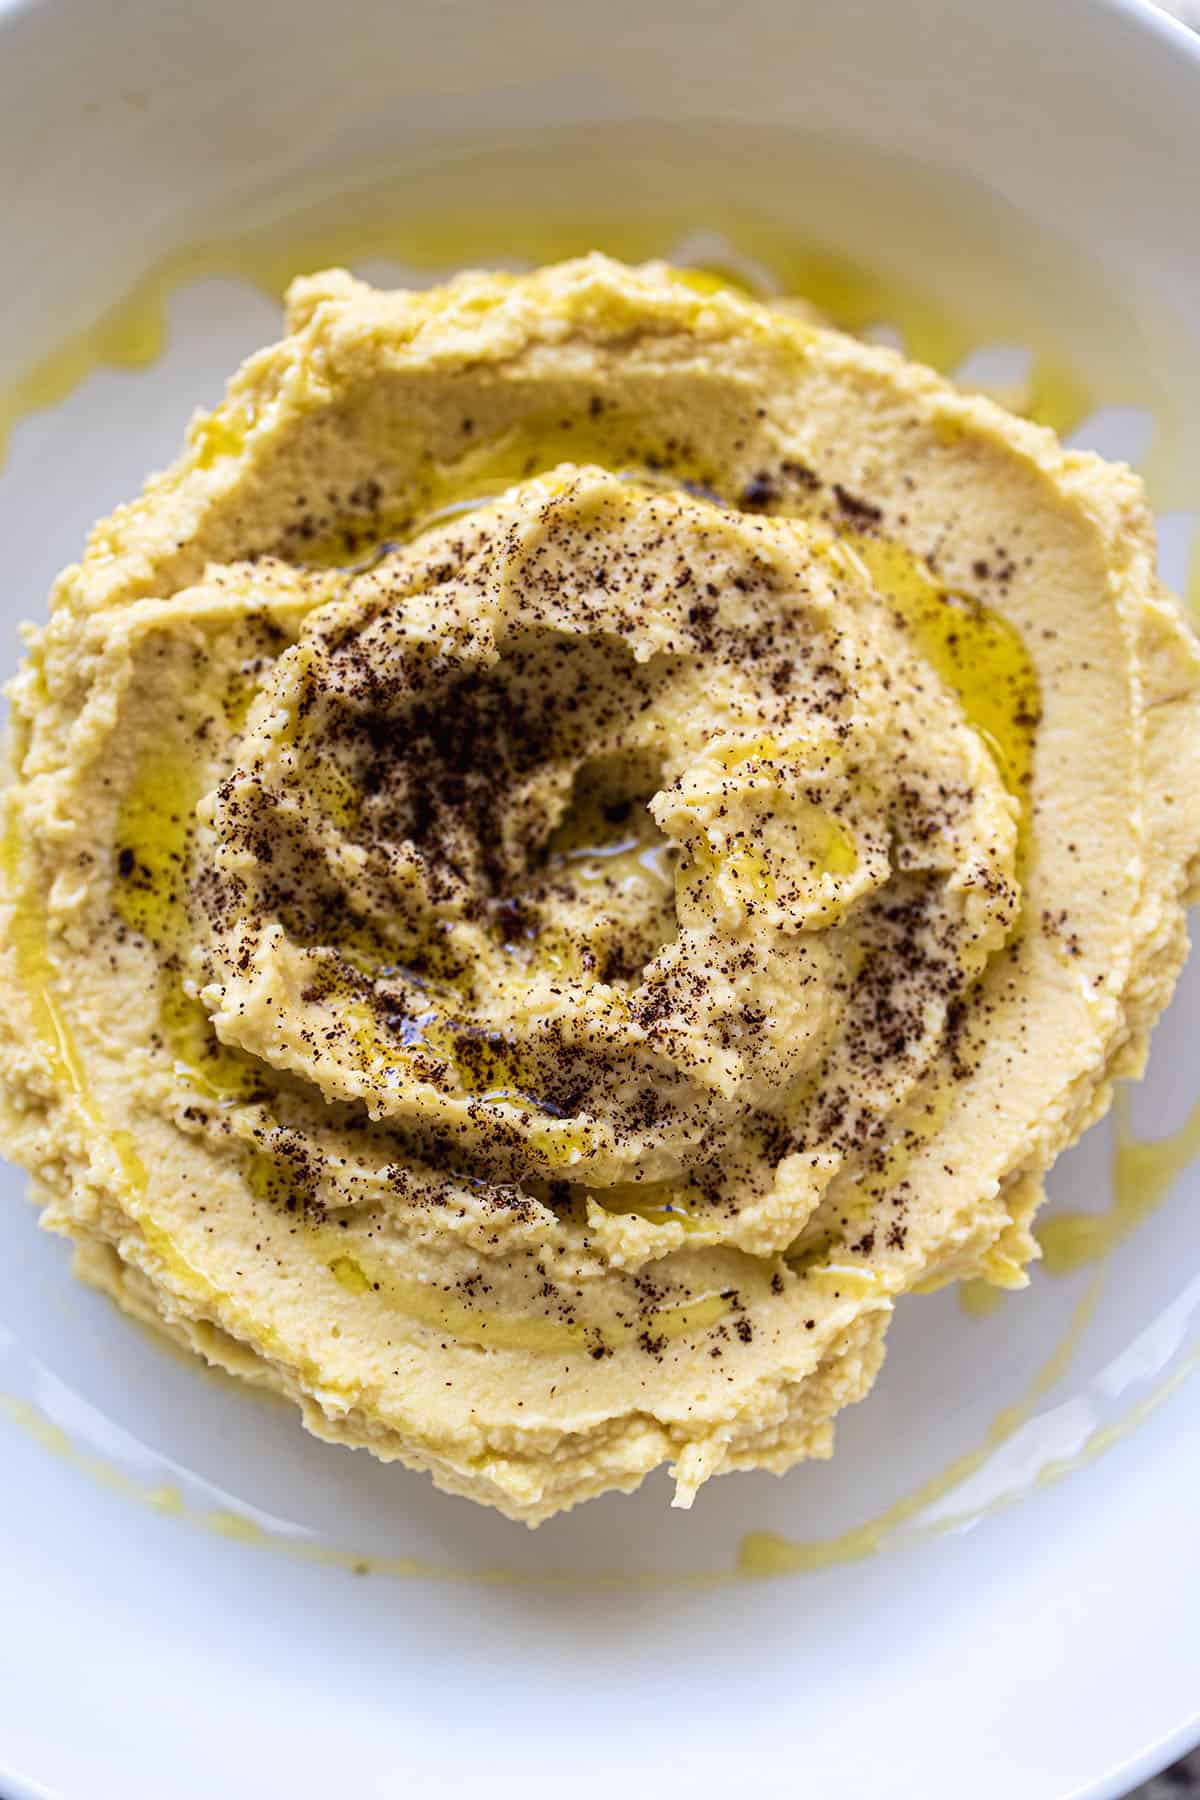
    Homemade hummus swirled on a white plate with olive oil and ground sumac

    Why You Should Try This Recipe

    Hummus is a versatile, satisfying snack that’s perfect for dipping veggies, spreading on sandwiches, or serving alongside your favourite meals. Making it at home not only saves money but also lets you control the flavour and texture. Whether you soak chickpeas overnight for fresh-from-scratch flavour or use canned chickpeas for convenience, this recipe will become your go-to dip in no time.

    Creamy homemade hummus with a pool of olive oil and ground spice on top

    Why Garnish the Hummus with Sumac?

    Sprinkling sumac on top of hummus adds a burst of tangy, citrus-like flavour that complements the creamy richness beautifully. It enhances the visual appeal with its deep red colour and provides a bright, zesty finish that balances the dish. Sumac is also a traditional Middle Eastern spice, giving your hummus an authentic touch.

    Ingredients

    Chickpeas

    • The heart of the recipe — they provide the creamy, starchy base and nutty flavour. For the smoothest hummus, use canned chickpeas (rinsed well) or cook dried chickpeas from scratch. If using canned, reserve the aquafaba (chickpea water) to thin the hummus to your preferred consistency. Find quality tahini paste while you’re at it — it’s equally essential.

    Tahini

    • Ground sesame seed paste — the ingredient that separates great hummus from good hummus. Use a runny, well-stirred tahini made from hulled sesame seeds. It adds richness, nuttiness, and binds everything into a silky paste. Don’t substitute with peanut butter — the flavour profile is completely different.

    Fresh Lemon Juice

    • Always fresh, never bottled. Lemon juice provides the bright acidity that lifts all the other flavours and prevents the hummus from tasting flat or heavy. Start with half a lemon and adjust — the right amount makes the whole dip come alive.

    Extra Virgin Olive Oil

    • Drizzled on top and blended in for silkiness. Use a good quality extra virgin olive oil — its fruity, peppery finish is a key part of the final flavour. Don’t use light or regular olive oil; the flavour difference matters here.

    Garlic

    • Raw garlic adds a sharp, savoury kick that’s traditional in hummus. For a milder result, roast a whole head of garlic in the oven first — roasted garlic gives a sweet, mellow depth without any bite. Start with one clove raw; you can always add more to taste.

    Sumac

    • A dried, ground berry from the Middle East with a tart, citrus flavour. It’s the classic finishing spice for hummus — adds colour and a pop of brightness that elevates the whole presentation. Find it in Middle Eastern grocery stores or here on Amazon.

    Hummus swirled in a bowl and topped with olive oil and ground sumac

    Our Favourite Side Dishes

    We love pairing this hummus with fresh veggies like carrots, cucumbers, and bell pepper slices. Pita bread or crackers are also fantastic options. For a heartier snack, try it with grilled chicken or falafel. For homemade bread to serve alongside, our Fluffy Naan Bread is perfect — warm and soft, ideal for scooping.

    Love Mediterranean flavours? Try our Chicken Shawarma Wrap with Caesar Salad where this hummus makes an excellent spread, or our Best Garlic Mashed Potatoes for another crowd-pleasing dip alternative at the table.

    A good food processor is the most important tool for smooth hummus — blend for at least 3 minutes for a truly silky texture.

    How to Make It Easier and Faster

    • Soak the Chickpeas: If making from scratch, soak dried chickpeas overnight and cook them until soft. More time-intensive but yields the creamiest texture.
    • Use Canned Chickpeas: For a quicker option, grab a can of chickpeas. Just rinse them well before blending.
    • Peel the Chickpeas (Optional): For extra-smooth hummus, peel the skins off the chickpeas. While not necessary, it’s worth it if you want a velvety texture.

    Making hummus at home is an easy way to elevate any meal or snack. Whether you’re prepping for a family gathering, a quick lunch, or a cozy night in, this recipe will always deliver. Give it a try — you won’t regret it!

    Sammi Chow — Love and Harvest

    Frequently Asked Questions

    Can I use dried chickpeas instead of canned?

    Yes, and the results are even creamier. Soak 1 cup of dried chickpeas overnight in plenty of cold water. Drain, then simmer for 1–2 hours until very soft (they should crush easily between your fingers). Cool before blending. Dried chickpeas make about 2.5 cups cooked — the equivalent of one large can.

    Why is my hummus grainy and not smooth?

    Two reasons: not blending long enough, and not using enough tahini or liquid. Blend for a minimum of 3 minutes, scraping down the sides. Add aquafaba (chickpea water), ice water, or more lemon juice one tablespoon at a time until you reach the silky consistency you want. Warm chickpeas also blend smoother than cold ones.

    How long does homemade hummus keep?

    Store in an airtight container in the refrigerator for up to 5 days. Drizzle a thin layer of olive oil on top before sealing to keep it fresh and prevent it from drying out. Give it a stir before serving as it may thicken slightly in the fridge.

    Can I freeze hummus?

    Yes. Freeze in individual portions in airtight containers for up to 3 months. Thaw overnight in the refrigerator and stir well before serving. The texture may be slightly different after freezing — add a drizzle of olive oil and a squeeze of lemon to refresh it.

    What is sumac and can I substitute it?

    Sumac is a dried ground berry with a tangy, citrus-like flavour. If you can’t find it, a small pinch of lemon zest on top provides a similar brightness. Smoked paprika is another common topping that adds colour and a warm, smoky note instead of the citrus tang.

    What’s in hummus?

    It’s mostly chickpeas and tahini, blended with fresh lemon juice, extra virgin olive oil, garlic, salt and a splash of aquafaba, with a pinch of sumac on top.

  • How to Make Flakey Pie Crust

    How to Make Flakey Pie Crust

    This post may contain affiliate links. If you purchase through these links, I may earn a small commission at no extra cost to you. Thank you for supporting Love & Harvest!

    After years of failed pie crusts, I finally cracked the code. This all-butter flakey pie crust recipe comes together in a food processor in minutes and delivers that shatteringly crisp, melt-in-your-mouth texture every single time — whether you’re making a classic apple pie or a savory pot pie.

    Slice of fruit pie with a flaky golden crust on a white plate

    Why This Recipe Works

    I’ve made a gazillion bad pie crusts over the years. From sticky disasters to crumbly messes that fell apart before they hit the pie plate, I’ve lived through every pie failure imaginable. Now I have the recipe, the tips, and the confidence to share it with you.

    Rolled pie dough draped over a fluted tart pan

    I started making pie at a young age to impress my dad, who loves desserts — especially pies. We used to visit a pie shop in West Vancouver, and as prices climbed year after year, I decided to challenge myself: make him the same (or better) pie at home. Little did I know, perfecting that crust was harder than I expected without the right tips!

    A hand holding a plate with a slice of salmon pot pie

    Ingredient Deep-Dive

    Ingredients

    All-Purpose Flour

    • Why it matters: Provides structure without too much gluten. Measure by weight (150g) for consistent results — cup measurements vary too much.

    Cold Unsalted Butter

    • Why it matters: All-butter crusts deliver unbeatable flavor. The cold butter creates steam pockets in the oven, producing those beautiful flaky layers. Cut into ½-inch cubes and freeze for 15 minutes before using.

    Ice Water + Apple Cider Vinegar

    • Why it matters: The vinegar inhibits gluten development, keeping the crust tender. Always use ice-cold water — warm water melts the butter before it hits the oven, destroying flakiness.

    Fine Sea Salt

    • Why it matters: Enhances all the buttery flavors. Use fine sea salt so it distributes evenly without leaving salty pockets.

    What is Parbaking?

    Parbaking refers to partially baking a bottom crust before filling it and continuing to bake. It is also known as blind baking. It is typically used with single-crusted pies to ensure the crust bakes fully. Pie shells can be parbaked up to 24 hours in advance because they refresh during their second trip to the oven.

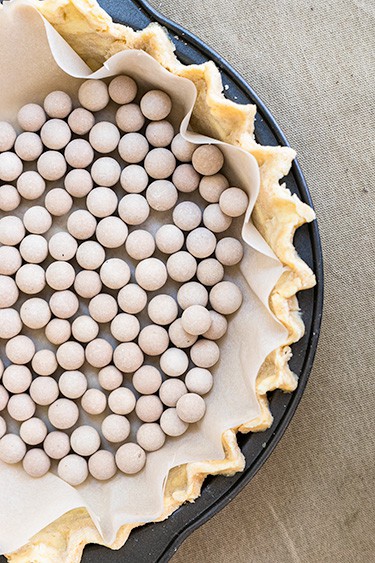
    To parbake: shape the pie crust into the pie plate. Place parchment paper on top of the crust and put weights on it. I like to use a Pyrex pie dish and ceramic weights to hold the shape. If you don’t have ceramic pearls, dry beans work perfectly — just use them within a week after parbaking.

    Pie crust lined with parchment and filled with ceramic pie weights for parbaking

    Remember to lift the opposite edges of the parchment paper to remove all the ceramic pearls. The dough is buttery and slippery underneath — dumping instead of lifting will send pearls everywhere.

    Pieces of pie dough in a baking pan next to dried beans used as pie weights

    Butter or Lard?

    The right choice is to go all in with butter. The flavor is unbeatable. However, for a more economical option, half butter and half lard also works beautifully — you still get that hint of butter with an extremely flakey, crispy texture.

    Vinegar or Vodka?

    Both vinegar and vodka prevent gluten from developing in the dough — gluten is the enemy of flakiness. For a single-crust recipe, add 1 teaspoon of white or apple cider vinegar to the ice water. Alternatively, add 1 tablespoon of vodka. I always go with apple cider vinegar — it adds a slight tang that works beautifully in both sweet and savory pies.

    Mixing the Dough with a Food Processor

    Using the Cuisinart Food Processor is the quickest method for cutting butter and mixing dough. Start by cutting the butter into 1-inch pieces. Toss the butter in the flour and salt to coat, then add everything to the food processor. Pulse in 3-second bursts until the butter pieces are walnut-half sized. Slowly add your ice water, no more than 10–15 short pulses total. Visible pea-sized butter chunks in the dough are a good sign — that promises a super flakey crust.

    Crumbly pie dough with pea-sized butter pieces after pulsing in a food processor

    Troubleshooting Common Errors

    Pie Error: Dough is Too Wet or Too Dry

    Too Wet: Sticky dough means too much water. Dust generously with flour when rolling out. Over-wet dough bakes up tough and hard.

    Too Dry: Flatten the dough to half an inch, dip your hands in ice water, and flick drops of water onto the surface. Fold (don’t knead) a few times until incorporated. Chill for 30 minutes before using.

    Pie Error: Edges of the Rolled-Out Dough Break

    This happens to everyone. Patch tears with a scrap piece of dough. Brush away excess flour from the patch area, dip your finger in cold water, and press the scrap onto the problem spot.

    Pie Error: Dough Breaks Before Landing on Pie Plate

    Once rolled out to the right size for your pie dish, drape the dough over your rolling pin to transfer it. Hanging it on the pin is far easier to move and much less likely to break.

    Fool-Proof Professional Tips

    Pro Tip #1: Bake at 425°F

    Flakey doughs love high temperatures. When cold fat hits the oven heat, the moisture evaporates creating pockets of steam. Those steam pockets push up the dough, creating lightness and flakiness. If your crust isn’t crisp enough, your oven likely isn’t hot enough.

    Pro Tip #2: Chill the Dough

    Chilling is the most important step. Cold dough is easier to work with, holds its shape better, and bakes up flakier. Chill at three key moments: after the dough comes together, before crimping, and before baking.

    Square block of pie dough ready to chill in the fridge

    Pro Tip #3: Use the Freezer

    Give your assembled pie a 15–30 minute freeze before it goes into the oven. This ensures the crust is ice-cold when it hits that blast of heat, giving you maximum flakiness.

    Pro Tip #4: Use Minimal Flour When Rolling

    Too much flour dries out the dough. Roll it out on parchment paper instead — no sticking to the counter and you use far less flour. Peel the parchment off once you have your ideal shape.

    Pro Tip #5: Use a Kitchen Scale

    Accuracy matters for pie crust. Use a kitchen scale to measure ingredients by weight rather than cups. Cup measurements vary depending on how flour is packed — weight is always precise.

    Frequently Asked Questions

    Can I make this pie crust without a food processor?

    Yes. Cut the cold butter into the flour mixture using a pastry cutter or two forks until you reach pea-sized pieces. Work quickly so the butter stays cold. A food processor is faster, but hand-mixing works perfectly.

    How far in advance can I make the dough?

    The dough disk can be refrigerated tightly wrapped for up to 3 days, or frozen (wrapped in plastic then foil) for up to 3 months. Thaw overnight in the fridge before rolling.

    Why is my pie crust shrinking in the oven?

    Shrinkage happens when the dough hasn’t rested and chilled enough, or when it was stretched rather than laid gently into the pie plate. Always chill before baking and let the dough settle into the pan without pulling it.

    Can I use salted butter instead of unsalted?

    Yes, but omit the added salt in the recipe. Unsalted is preferred because it gives you control over the saltiness and typically has less water content.

    How do I get a golden brown top crust?

    Brush the top crust with an egg wash (1 egg + 1 tablespoon water) or a milk wash just before baking. This gives a beautiful golden color and slight shine.

    Can I use this crust for savory pies?

    Absolutely. This is a neutral, all-butter crust that works for both sweet pies (apple, cherry, pumpkin) and savory pies (pot pie, quiche). For savory applications, you can add a pinch of herbs to the dough.

    Crimped, unbaked flaky pie crust in a dark pie pan

    Super Flakey Crust

    Make the best flakey crust. Pie shop recipe that guarantees you the best tasting buttery pie crust you can make! Makes one 9-inch / 23cm crust.
    Prep Time 15 minutes
    Cook Time 30 minutes
    Total Time 45 minutes
    Course: Dessert
    Cuisine: American
    Calories: 195

    Ingredients
      

    • 150 g all-purpose flour (1¼ cups)
    • 1 g fine sea salt (¼ tsp)
    • 113 g cold unsalted butter cut into ½ inch (8 tbsp)
    • 60 g ice water + 2 tsp apple cider vinegar (¼ cup)

    Equipment

    • food processor

    Method
     

    1. Add the flour and sea salt into the food processor. Pulse it 5 times so it is well incorporated.
    2. Add the cold cubed butter. Close the lid. While you pulse the machine, add the ice vinegar water on top. Never let the machine run. Always fast pulses.
    3. Once the dough starts to come together and pull away from the sides. Stop and roll it into a flat disk together. Wrap it up with plastic wraps and put it in the fridge for at least 30 minutes to overnight.
      If there are still some flours at the bottom it is okay, just pat the flour onto the dough. Do not knead the dough.
      If you see little pea size of butter in the dough, that promises you the crust is going to be super flakey.
    4. This dough is best baked at 425°F (220°C).
      You can partake, blind-bake, or fill and bake as directed in the recipe of your choice.

    Notes

    Make Ahead and Store
    This tightly wrapped disk of dough can be refrigerated for up to 3 days. Wrapped in plastic wrap and then in aluminum foil, the dough can be frozen for up to 3 months. Thaw overnight in the fridge before using. 

    Love this recipe? Try our Best Spiced Pumpkin Pie with Flakey Crust for the perfect filling to go with it, or explore our Instant Pot Black Garlic for a unique savory pie flavor addition. For more baking essentials, check out our Preserved Salty Lemons — a pantry staple that pairs beautifully with fruit pies.

  • 4 Ingredients Chicken Sandwich Deli

    4 Ingredients Chicken Sandwich Deli

    Store-bought deli meat adds up fast, and the ingredient list is often longer than you’d expect. This 4-ingredient homemade chicken deli sandwich meat needs very little hands-on prep and delivers juicy, tender slices that hold up in any sandwich, wrap, or grain bowl.

    Thin slices of homemade chicken deli meat on a wooden board

    This post may contain affiliate links. If you purchase through these links, I may earn a small commission at no extra cost to you. Thank you for supporting Love & Harvest!

    Making this for lunches? My free PDF has seven easy family dinners to go with it. Send me the free dinners

    Why This Recipe is Perfect for Families

    This homemade chicken deli recipe is an excellent option for families for several reasons:

    1. Know What’s in It: Unlike a lot of store-bought deli meat, this recipe gives you full control over every ingredient, including the salt. It’s just chicken breast, smoked salt, Montreal steak spice and cornstarch.
    2. Budget-Friendly: Making your own chicken deli costs a fraction of packaged options and scales easily. Batch-cook and freeze portions for future use.
    3. Customizable: Adjust spices to suit picky eaters — milder for kids, bolder for adults. One recipe, infinite variations.
    4. Great for Meal Prep: Make ahead and use in lunches, quick dinners, and snack plates all week long.

    Ingredient Deep-Dive

    Ingredients

    Chicken Breast

    • Why it matters: Chicken breast gives a lean, firm texture that slices cleanly — essential for deli-style cuts. I sometimes add a small amount of chicken gizzard for extra texture and to honor the whole animal (a Chinese cooking philosophy I grew up with). Optional, but worth trying.

    Smoked Salt

    • Why it matters: Smoked salt adds depth and mimics the flavor of traditionally smoked deli meats without a smoker. There are many varieties — hickory, birch, applewood — all delicious. Try them all and find your favorite.

    Montreal Steak Spice

    • Why it matters: Montreal steak spice is a bold blend of garlic, black pepper, coriander, and dill that gives the chicken rich, savory depth. I buy mine at Costco, but it’s readily available on Amazon or at any grocery store.

    Cornstarch

    • Why it matters: Cornstarch creates a firm, sliceable texture. Without it, the chicken mixture stays too soft to cut into clean deli-style slices. It also locks in moisture so each slice stays juicy.

    Homemade chicken deli roll sliced on a wooden cutting board

    How to Make Your Own Chicken Deli Meat

    The links below are Amazon affiliate links. If you buy through them, I may earn a small commission at no extra cost to you.

    Recommended tools

    Any comparable pie weights or food processor work, and any clean, heatproof glass jar or container does the job.

    Step 1: Prepare the Chicken. Trim any excess fat from the chicken breasts. In a small bowl, combine smoked salt, Montreal steak spice, and cornstarch. Mix the dry ingredients.

    Step 2: Food Processor. Add the chicken to a food processor with the dry ingredients. Blend until a thick, uniform mixture forms with no visible chunks of meat.

    Step 3: Cook and Slice. I line a glass or steel container with a BPA-free plastic bag so the deli meat slips out more easily after cooking. If you do the same, use a bag that is rated for cooking in simmering water (such as a sous vide bag), and skip rigid plastic containers. The container diameter should match the lid opening so the meat can be easily removed. Fill the bag-lined container with the meat mixture, pressing to remove air bubbles. Add ceramic pie weights on top to prevent the meat from expanding unevenly. Set it in a pot of water at a gentle simmer and cook for 40 minutes (the recipe card below has the full setup). Then check the center with an instant-read thermometer, keeping the probe off the container walls. It should read 165°F (74°C), the USDA minimum for poultry. If it doesn’t, keep simmering for 10 more minutes and check again. Let it cool on the counter, get it into the refrigerator within 2 hours of cooking (USDA guideline; 1 hour if your kitchen is above 90°F), and chill at least 2 to 3 hours or overnight. Slice and enjoy!

    Homemade chicken deli meat roll with a few thin slices cut

    Customize Your Deli Chicken

    While smoked salt and Montreal steak spice provide a great base, don’t be afraid to experiment. Try a garlic and herb rub, paprika for a smokier kick, or a honey-mustard variation for a slightly sweet profile.

    Food Ideas with Homemade Chicken Deli

    • Classic Chicken Sandwich: Layer on whole grain bread with lettuce, tomato, and mayo or mustard.
    • Chicken Wraps: Roll in a wrap with hummus, fresh spinach, and avocado.
    • Protein-Packed Salads: Top any salad with thin slices for an easy protein boost.
    • Chicken and Cheese Panini: Grill between sourdough slices with your favorite cheese.
    • Snack Plate: Pair with crackers, cheese, and veggies.
    • Noodle Soup: Slice thinly over a hot bowl of soup for a satisfying weeknight meal.

    Sliced homemade chicken deli meat on a board with fresh celery and parsley

    Frequently Asked Questions

    Can I use chicken thighs instead of chicken breast?

    Chicken thighs work but produce a softer, fattier result that’s harder to slice cleanly. Breast is strongly recommended for that classic deli texture. If you prefer thighs for flavor, use a 50/50 blend.

    Why cook it in water instead of an oven?

    The water bath cooks the chicken gently and evenly without drying it out. It also allows the cornstarch to set properly, creating that firm, sliceable texture. Oven cooking tends to dry out the exterior before the inside is cooked through.

    How long does homemade chicken deli last in the fridge?

    Up to 4–5 days tightly wrapped in the refrigerator. For longer storage, slice and freeze in portions for up to 2 months.

    What if I don’t have a food processor?

    You can mince the chicken very finely by hand or use a blender (in short pulses). The texture won’t be as uniform, but it will still work. The food processor produces the smoothest, most consistent result.

    Can I add vegetables or herbs to the mixture?

    Yes. Finely minced herbs like parsley, dill, or chives fold in beautifully. Avoid chunky vegetables as they’ll prevent the meat from slicing cleanly.

    Is this gluten-free?

    Yes — chicken, smoked salt, Montreal steak spice, and cornstarch are all naturally gluten-free. Always check your spice blend label to ensure no wheat is added as a filler.

    Creamy homemade chicken liver mousse on wooden board with natural light.

    4 Ingredients Chicken Deli

    This homemade chicken deli recipe is all about simplicity and bold flavour. The chicken breast, seasoned with smoked salt and Montreal steak spice, delivers a rich, savoury aroma with a hint of smokiness, perfectly balanced by the robust blend of spices.
    Prep Time 10 minutes
    Cook Time 40 minutes
    Chill Time (minimum) 2 hours
    Total Time 2 hours 50 minutes
    Calories: 175

    Ingredients
      

    • 2 large chicken breast
    • 1 tsp smoked salt
    • 2 tsp Montreal Steak Spice
    • 1 tbsp cornstarch

    Equipment

    • 1 glass jar

    Method
     

    1. Blend the Ingredients:
      Place the cubed chicken breasts, cornstarch, smoked salt, and Montreal steak spice in a food processor. Pulse the mixture until it forms a smooth, thick paste. Make sure all the ingredients are well-combined.
    2. Prepare the Jar:
      If you like, line a clean, heatproof glass jar (like a wide-mouth Mason jar) with a food bag rated for cooking in simmering water, such as a sous vide bag, so the chicken slips out more easily later. Transfer the blended chicken mixture into the jar (or the bag-lined jar). Pack the mixture tightly, pressing it down to remove any air pockets. Leave about 2 inches of space at the top of the jar.
    3. Add the Weight:
      To ensure the chicken stays compact while cooking, place something heavy on top of the chicken mixture inside the jar. You can use ceramic pie weights, or a small, heatproof glass jar filled with water that fits inside the opening. This will help keep the mixture pressed down during cooking.
    4. Cook the Chicken:
      Screw the lid on loosely, or cover the jar with foil if using a lid is not an option. Place the jar in a pot with enough water to reach about halfway up the sides of the jar. Bring the water to a gentle simmer over low heat, making sure it does not boil vigorously. Keep the fire at the lowest setting to maintain a low simmer. Cook for 40 minutes, occasionally checking that the water remains at a gentle simmer. When the time is up, check the center with an instant-read thermometer, keeping the probe off the jar: it should reach 165°F (74°C), the USDA minimum for poultry. If it hasn’t, keep simmering for 10 more minutes and check again.
    5. Cool, Chill, and Slice:
      Carefully remove the jar from the pot and let it cool on the counter, and get it into the refrigerator within 2 hours of cooking (USDA guideline; 1 hour if your kitchen is above 90°F). Place the jar in the refrigerator for at least 2-3 hours (or overnight) to allow the chicken to firm up completely. Once chilled, remove the weighted object and ease the chicken loaf out of the jar. If you used a bag, leave the loaf in the bag until it is out, then peel the bag away and discard it. Slice thinly for deli-style chicken slices.

    Notes

    Serving Suggestions:

    • Perfect for sandwiches and wraps.
    • Adds protein to salads or snack plates with cheese and crackers.

    Storage:

    Store the chicken deli slices in an airtight container in the refrigerator for up to 4 days.
    This pressing method gives the chicken a compact texture, making it easier to slice thinly. The seasoning infuses throughout the meat during the gentle cooking, resulting in a flavorful, homemade deli-style chicken that rivals store-bought options.

    Pair this chicken deli with our Mexican Pickled Red Onions for a flavor-packed sandwich topping, or slice it over our Easy Mexican Salsa Verde for a bold protein plate. Looking for more chicken inspiration? Try our Chicken Milanesa.

    Need dinners for the rest of the week? Get my free PDF with seven easy family dinners. Get the free dinners

  • Instant Pot Black Garlic

    Instant Pot Black Garlic

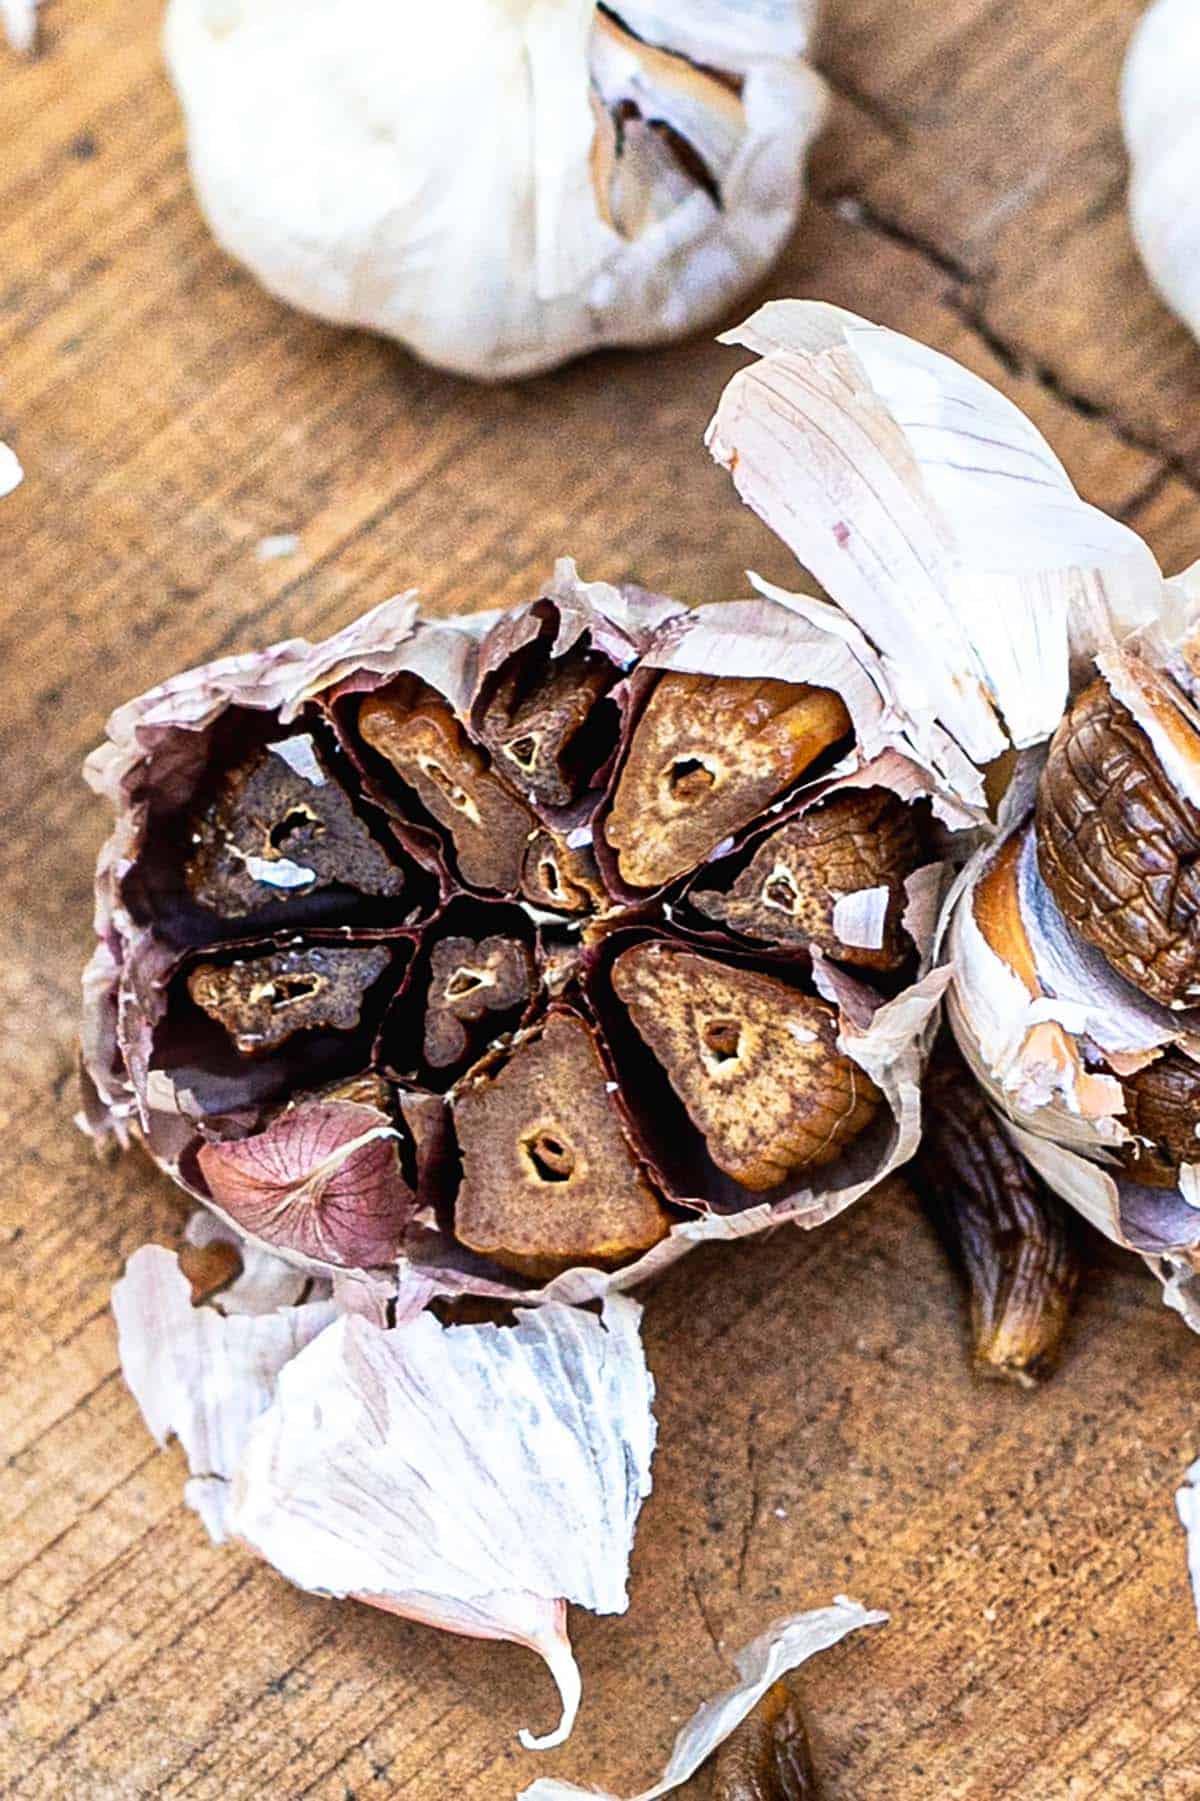
    Black garlic is one of those rare ingredients that genuinely transforms dishes. Sweet, earthy, slightly tangy, with none of raw garlic’s sharpness — and you can make it at home using just your Instant Pot and three weeks of patience.

    Halved heads of homemade black garlic among whole garlic bulbs

    This post may contain affiliate links. If you purchase through these links, I may earn a small commission at no extra cost to you. Thank you for supporting Love & Harvest!

    Why Black Garlic?

    Black garlic is simply fermented garlic aged over time at controlled temperature and humidity, resulting in a deep black color and a complex, almost balsamic flavor profile.

    Head of black garlic cut open to show the dark, soft cloves

    Ingredient Deep-Dive

    Ingredients

    Whole Garlic Bulbs

    • Why it matters: Use medium-sized whole bulbs — they ferment more evenly than very large bulbs. Remove only the loose outer papery layers but keep most of the skin intact. The skin protects the cloves, regulates moisture, and ensures even fermentation. I typically use 7 bulbs per batch.

    Aluminum Foil

    • Why it matters: Wrapping each bulb individually in foil traps moisture and creates a consistent microenvironment for fermentation. Without the foil, the outer layers dry out unevenly and the cloves can harden rather than turn soft and sticky.

    Instant Pot (Yogurt Setting)

    • Why it matters: The Instant Pot’s Yogurt function on its lowest setting maintains the precise low temperature (around 140°F / 60°C) needed for the Maillard reaction that transforms garlic into black garlic. This eliminates the need for specialized black garlic fermenters. Any brand with a yogurt or keep-warm function works.

    Making Black Garlic with an Instant Pot: Step by Step

    1. Prepare the Garlic: Remove loose outer papery layers from the garlic bulbs, keeping the inner skin intact to protect the cloves.
    2. Wrap the Garlic: Individually wrap each bulb in aluminum foil. This traps moisture and ensures even fermentation.
    3. Set Up the Instant Pot: Place a trivet or steamer rack inside the Instant Pot to prevent the garlic from touching the bottom where it could burn.
    4. Cook on Yogurt Setting: Place the wrapped garlic on the trivet. Set the Instant Pot to “Yogurt” on the lowest setting. Leave for about 3 weeks. Do not use the pressure lid — use a glass lid or cover loosely with foil. Keep the valve open so moisture can escape.
    5. Place Outside: Fair warning — the aroma is overwhelming. For the first 2 weeks especially, the garlic smell intensifies daily. Place the Instant Pot outside in a covered spot protected from sun and rain. Include the power cord. This is not optional if you want to keep peace in your home.
    6. Check and Store: After 3 weeks, unwrap and check. Cloves should be jet black, soft, and sticky. If they need more time, rewrap and check again every few days. Let cool completely, then store in an airtight container in the refrigerator.

    A single peeled black garlic clove on a wooden board

    Enhancing Your Meals with Black Garlic

    1. Black Garlic Butter: Mash cloves into softened butter. Spread on toast, top steaks, or melt over roasted vegetables.
    2. Black Garlic Aioli: Blend into mayo for a creamy, umami-rich dipping sauce perfect for fries, burgers, or sandwiches.
    3. Salad Dressings: Mince into vinaigrettes or creamy dressings for added depth.
    4. Pasta Sauce: Stir into tomato sauce, Alfredo, or pesto for complex sweetness.
    5. Soups and Stews: Toss whole cloves into soups or broths — they dissolve and impart rich, savory flavor.
    6. Roasted Meats and Vegetables: Rub directly onto proteins or vegetables before roasting.

    Vegetarian Caesar dressing recipe: dressing mixed with grated cheese in a bowl

    Try our Vegetarian Caesar Salad dressing. Grating a clove of black garlic in is a game changer!

    Black garlic bulbs with their papery skins on a dark stone surface

    Peeled black garlic clove next to a whole garlic bulb on a wooden board

    Frequently Asked Questions

    What does black garlic taste like?

    Black garlic has a complex, sweet-savory flavor with notes of balsamic vinegar, molasses, and tamarind. None of the sharp, pungent bite of raw garlic. The texture is soft and slightly sticky — almost like a dried fig. It is genuinely unlike any other ingredient.

    Why does it take 3 weeks?

    The transformation happens through the Maillard reaction, the same browning chemistry that gives roasted coffee and seared steak their complex flavors. At the low temperature maintained by the Yogurt setting, this reaction happens slowly over weeks rather than minutes. You cannot rush it without compromising flavor and texture.

    Is the smell really that bad?

    Yes. Week 1 is manageable. By week 2, it is intense enough to permeate your home if kept indoors. Place it outside in a sheltered, covered spot. The finished product is completely odor-neutral when refrigerated.

    How long does homemade black garlic keep?

    Stored in an airtight container in the refrigerator, it keeps for 2–3 months. You can also freeze individual cloves on a baking sheet, then transfer to a freezer bag for up to 6 months.

    Can I use a rice cooker or slow cooker instead of an Instant Pot?

    Yes, if it has a keep-warm or low-heat function that maintains approximately 140°F (60°C). A rice cooker’s keep-warm setting works well. The key is consistent low temperature over 3 weeks — too hot and the garlic will burn; too cool and the Maillard reaction won’t occur.

    Can I make black garlic with individual cloves instead of whole bulbs?

    Technically yes, but whole bulbs are strongly recommended. The outer skin regulates moisture retention during the long process. Individual cloves tend to dry out and harden rather than becoming that soft, sticky consistency.

    Instant Pot Black Garlic

    This sweet, earthy, and slightly tangy delicacy transforms ordinary dishes into gourmet creations. The best part? You can make it easily at home using an Instant Pot.
    Prep Time 10 minutes
    Cook Time 30 minutes
    Gentle Aging 21 days
    Total Time 21 days 40 minutes
    Servings: 1 large jar
    Course: Condiment
    Cuisine: Asian
    Calories: 30

    Ingredients
      

    • 7 medium sized garlic bulbs

    Equipment

    • Instant Pot or any other similar devices
    • Aluminum foil

    Method
     

    1. Prepare the Garlic: Start by removing any loose outer layers of the garlic bulbs, but keep the skin intact to protect the cloves.
    2. Wrap the Garlic: Individually wrap each bulb of garlic in aluminum foil. This helps to keep the moisture in and ensures even fermentation.
    3. Set Up the Instant Pot: Place a trivet or steamer rack inside the Instant Pot. This will prevent the garlic from directly touching the bottom of the pot, where it could burn.
    4. Cook on the Yogurt Setting: Place the wrapped garlic bulbs on the trivet inside the Instant Pot. Set the Instant Pot to the "Yogurt" function on the lowest setting. Make sure the valve is on so the whole time it can expel moisture from the pot.
      You’ll need to leave the garlic in the Instant Pot for about 3 weeks.
    5. Check and Store: After 3 weeks, unseal the garlic and check its colour and texture. The cloves should be jet black, soft, and sticky. Let them cool completely before storing them in an airtight container in the refrigerator.

    Love fermented and preserved flavors? Try our Preserved Salty Lemons — another pantry staple that transforms everything it touches. For more garlic-forward recipes, our One Pot Lemon Garlic Chicken is the perfect showcase. And for a bold garlic side dish, our Best Garlic Mashed Potatoes uses a full head of roasted garlic.

  • Classic Simple Cheeseburgers

    Classic Simple Cheeseburgers

    If you’ve ever stood at a grill wondering why your homemade burger never quite matches the one at that legendary local joint, the answer isn’t a secret sauce or special equipment — it’s technique. These Classic Simple Cheeseburgers use a smash-and-sear method on a flat-top, a blend of chuck roast and flank steak for the perfect fat ratio, homemade special sauce, and bread-and-butter pickles that will absolutely ruin you for store-bought. Simple done right is the best kind of cooking there is.

    This post may contain affiliate links. If you purchase through these links, I may earn a small commission at no extra cost to you. Thank you for supporting Love & Harvest!

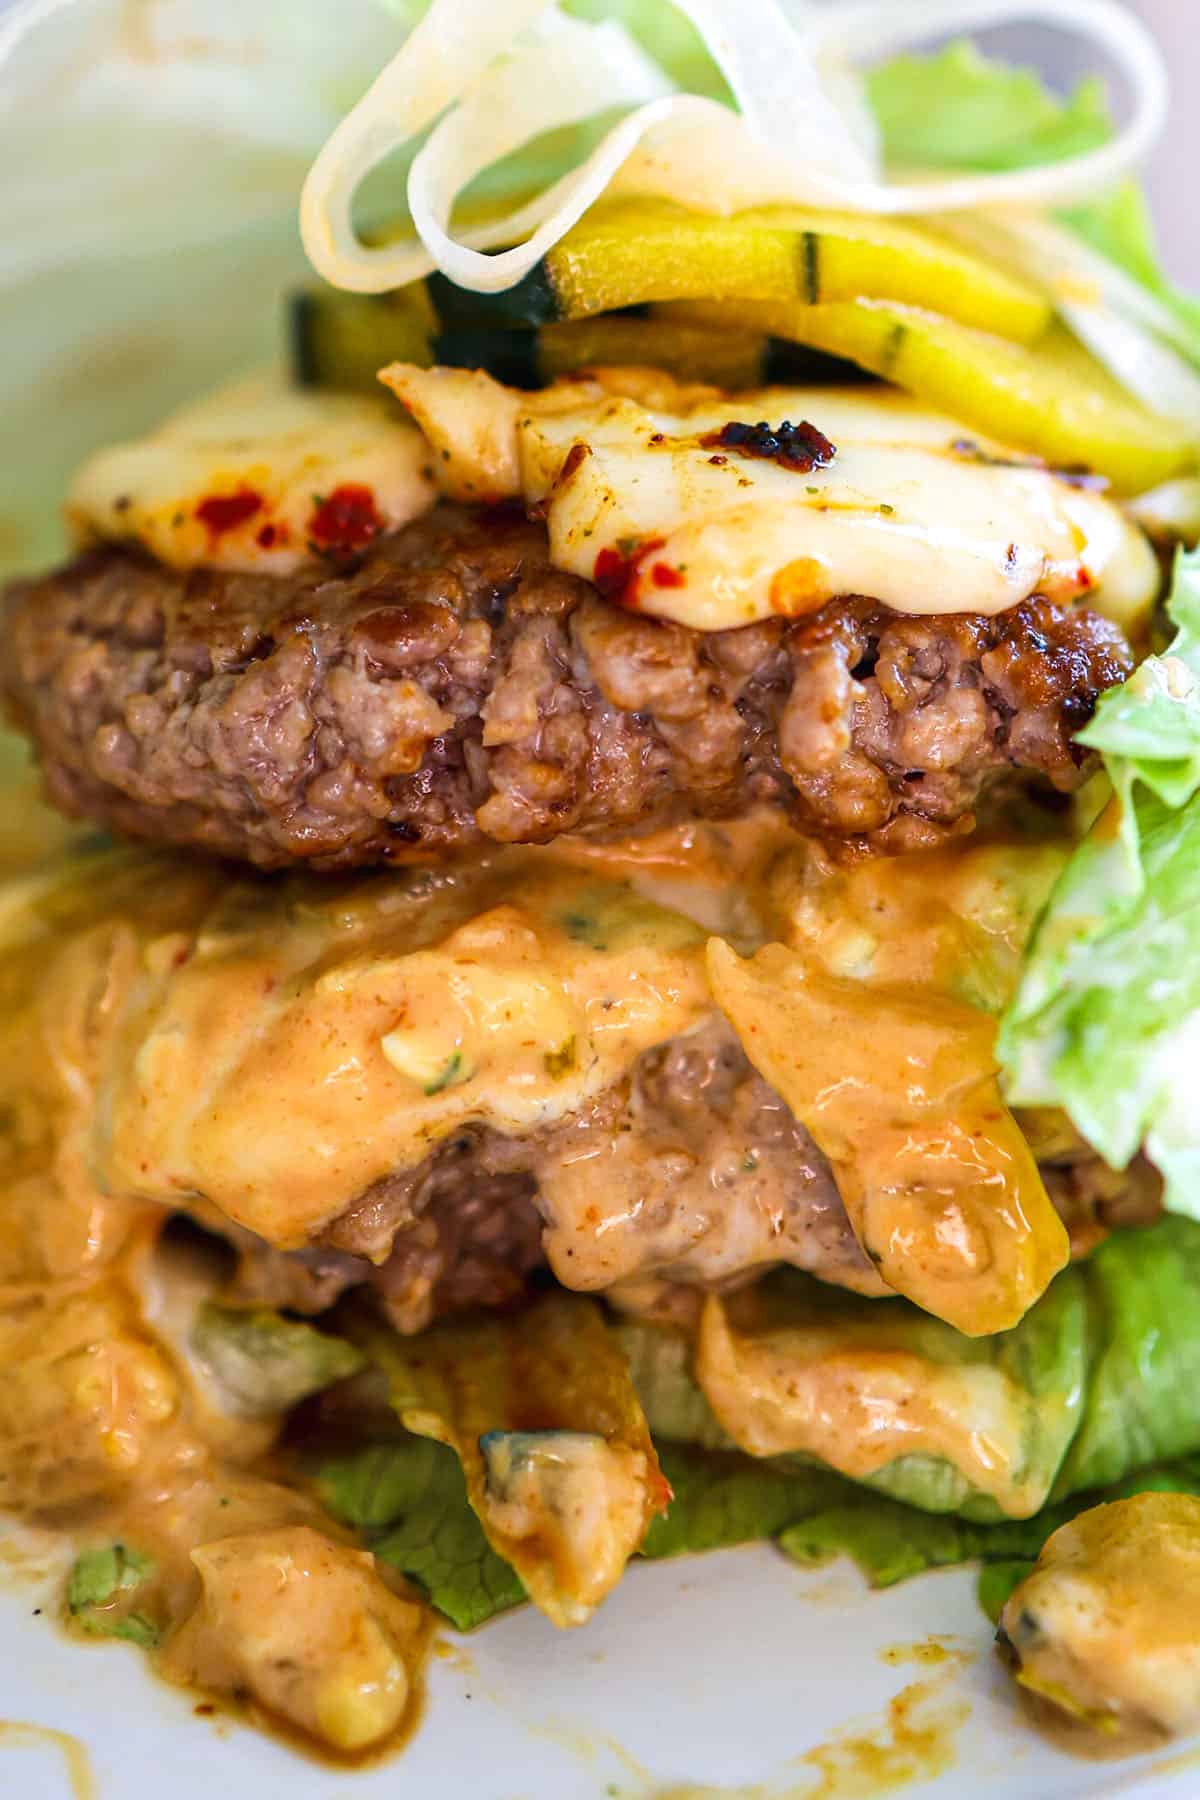
    Double cheeseburger with grilled onions and pickles on a toasted bun

    This recipe uses a mix of boneless chuck roast and flank steak for the patties — the perfect mixture of fat and flavour. Accompanied by homemade special sauce and homemade bread and butter pickles.

    Why This Recipe Works

    Most homemade burgers fail for one of three reasons: wrong beef, wrong heat, or wrong technique. This recipe fixes all three. The smash method maximizes the Maillard reaction (that deep, caramelized crust), the beef blend delivers just the right fat content, and the special sauce brings tangy complexity without overpowering the meat. It’s the kind of burger that makes you wonder why you ever ordered delivery.

    Tall double cheeseburger stacked with lettuce, tomato and pickles

    Ingredients Deep Dive

    Ingredients

    Chuck Roast & Flank Steak (Beef Blend)

    • Why it matters: Chuck brings rich beefy flavour and enough fat to stay juicy. Flank adds a firmer texture and a slightly more intense meaty note. Together they hit around 20–25% fat — the sweet spot. Too lean and you get a dry hockey puck; too fatty and the patty shrinks to nothing on the griddle.

    Special Sauce

    • Why it matters: Mayo, mustard, ketchup, lemon juice, lemon zest, pickled jalapeños, and hot sauce. Each element plays a role — mayo brings creaminess, mustard cuts through the fat, ketchup adds sweetness, the citrus brightens everything, and the jalapeños deliver a quiet heat that keeps things interesting without being obvious.

    Bread and Butter Pickles

    • Why it matters: Sweet-tangy pickles create contrast against the rich beef and creamy sauce. The crunch is structural — it gives every bite a textural surprise. Try our homemade bread and butter pickles — they are genuinely in a different league from store-bought.

    Cast Iron Flat-Top or Skillet

    • Why it matters: You need a flat, very hot surface to smash properly. A good Lodge 12″ Cast Iron Skillet holds heat better than almost anything else and develops a natural non-stick surface over time. It’s the single best investment for burger cooking at home.

    Burger Press

    • Why it matters: While a spatula works, a burger press gives you consistent thin patties with even surface contact every time. This means a more uniform crust and better cheese melt.

    A hand holding a juicy cheeseburger cut to show the patty

    The Smash Method

    Roll the meat into a ball and season the outside heavily with salt and pepper. Place it on a screaming-hot flat-top and smash it hard with a spatula or burger press. Then: leave it alone. The proteins grip the griddle surface, and moving it prematurely tears the crust. Let the fat render and caramelize for 1½–2 minutes per side. After flipping, add the onions to the griddle to soften alongside the patty, and lay the cheese on top until just melted.

    Smash burger patties with melted cheese and onions on a bun

    The Special Sauce

    Mayo + mustard + ketchup + pickles + lemon zest + lemon juice + pickled jalapeños + hot sauce. See the full recipe card below for exact ratios. Spread it generously on both sides of the bun. Don’t be shy — the sauce is doing real work here.

    Bread and Butter Pickles

    Try our BEST bread-and-butter pickles — once you taste homemade, there’s no going back. They’re sweet, tangy, snappy, and take the burger to a completely different level.

    Bread and butter pickles recipe: pickle slices in brine in a white bowl

    Gluten-Free Option

    Swap the bun for crisp iceberg lettuce leaves. This is more than just a substitution — it’s legitimately great. The cool crunch of the lettuce complements the hot, juicy patty in a way the bun never quite does. Many burger chains offer this now. Once you try it, you’ll understand why.

    Lettuce-wrapped cheeseburger with special sauce and onions

    Want to use a reliable instant-read meat thermometer to check doneness? 160°F for well-done, 145°F for medium. No guessing required.

    Bunless double cheeseburger in lettuce with pickles and sauce

    Classic cheeseburger with melted cheese, onions and special sauce

    More Recipes You’ll Love

    Frequently Asked Questions

    Can I use ground beef from the store instead of grinding my own?

    Yes. Look for 80/20 ground chuck — it has the right fat percentage for a juicy smash burger. Avoid extra-lean ground beef; it will dry out on the high heat required for the smash method.

    Do I need a flat-top grill or will a skillet work?

    A heavy cast-iron skillet works very well. The key is getting it very hot before the patty goes down. Avoid non-stick pans — they can’t handle the heat required and the coating may degrade at high temperatures.

    Why do you smash the burger? Doesn’t that squeeze out the juices?

    This is one of the most common burger myths. Smashing immediately after placing the ball on the griddle maximizes the surface area in contact with the hot metal — creating a much larger Maillard crust. The juices are locked in by that sear, not lost. The key is to smash once, immediately, and not press repeatedly.

    What cheese works best?

    American cheese melts the most smoothly and is the traditional choice. Oaxaca string cheese (as used in this recipe) pulls beautifully and adds a mild, creamy flavour. Cheddar is excellent for sharper flavour. Avoid hard aged cheeses — they don’t melt properly on a hot patty.

    Can I make the special sauce ahead of time?

    Yes — and it actually improves after a few hours in the fridge as the flavours meld. It keeps covered in the refrigerator for up to 5 days. Make a double batch; you’ll find yourself putting it on everything.

    How do I prevent the burger from falling apart?

    Don’t overwork the meat when forming the ball — handle it as little as possible. Season the outside, not mixed in. And use beef with enough fat content. Lean beef needs binders to hold together; the right fat percentage does the binding naturally.

    A hand holding a juicy cheeseburger cut to show the patty

    Classic Cheeseburgers

    There's something undeniably satisfying about a classic cheeseburger. It's the kind of meal that feels like home, yet offers endless opportunities for customization. I want to celebrate the beauty of simplicity—a cheeseburger that’s built on the basics but elevated by attention to detail and the right ingredients.
    Prep Time 15 minutes
    Cook Time 25 minutes
    Total Time 40 minutes
    Servings: 5 cheeseburgers
    Course: Main Course
    Cuisine: American
    Calories: 680

    Ingredients
      

    Special Sauce
    • ¾ cup mayonnaise
    • ½ cup yellow mustard
    • 2½ tbsp ketchup
    • ¼ cup bread and butter pickles drained and cut into small dices
    • 2 tbsp picled jalapeños drained and cut into small dices
    • 1½ tsp grated lemon zest
    • 1 tbsp fresh lemon juice
    • 1 tbsp Valentina Mexican hot sauce
    • 1½ tsp Red Hot Buffalo Hot Sauce
    • salt and pepper
    Cheeseburgers
    • 1½ pound boneless chuck roast
    • 8 oz flank steak
    • 3 tbsp unsalted butter room temperature
    • 5 hamburger buns split
    • ½ cup shaved white onion
    • 10 slices American Cheese
    • ½ cup homemade bread and butter pickles see notes above

    Equipment

    • meat grinder

    Method
     

    Special Sauce
    1. Combine all the ingredients for the sauce in a large container and stir to blend well. Cover and refrigerate. (this can be stored in the fridge for up to 5 days).
    Cheeseburgers
    1. Place the meat in the fridge. Make sure it is cold so when you grind the meat it passes through more successful – warmer meat tends to get the meat grinder all clogged up. Grind the chuck and flank steak through the large die of the meat grinder into a bowl.
    2. Mix gently to combine. Grind half the mixture through the small die. Mix the two halves together. Set aside.
    3. Heat a griddle on the stove on high heat.
    4. Roll the meat into a ball weighing roughly ½ pound each. Generously salt and pepper the balls around it.
    5. Place the the meat ball on the hot griddle, and using a spatula smash the meatball flat on the griddle. Now leave it alone and do not touch it. Let it cook for 1½-2 minutes. Flip the burger and add the cheese on top. Casually saute the onions on the griddle as well until soft.
      Depending on the fat content of the meat you buy, you might not need to add any extra fat. But if it feels a bit dry, you can add some beef fat or butter.
    6. Lightly toast the buns and smear some of the special sauce on both sides. Place 5 pickles on the bottom half of each bun. Add the burgers and top them with iceberg lettuce before placing the top half of the bun on.

  • Fresh Beet Pasta

    Fresh Beet Pasta

    Fresh beet pasta is one of those recipes that makes you feel like a genuinely good cook the first time you make it. The color is extraordinary — a deep, jewel-toned magenta that comes entirely from beet juice, with no artificial dye or trickery involved. And it’s not just visual: the beets lend a subtle sweetness and a tender bite to the pasta that transforms an ordinary dough into something memorable. Using a pasta maker, the whole process takes about 3 minutes of actual machine time. The hardest part is deciding what sauce to pair it with.

    This post may contain affiliate links. If you purchase through these links, I may earn a small commission at no extra cost to you. Thank you for supporting Love & Harvest!

    Fresh beet pasta strands drying on a wooden rack

    This recipe uses beet juice and a pasta maker machine to produce fresh beet pasta in about 3 minutes of active machine time.

    Why Make Fresh Beet Pasta?

    Store-bought beet pasta exists, but it doesn’t compare. Fresh pasta made with actual beet juice has a vibrant color that stays vivid even after cooking, a delicate texture that dried pasta can’t replicate, and a flavor dimension — subtle earthiness and sweetness — that makes the dish taste genuinely handmade. Once you’ve made it fresh, dried will feel like a compromise.

    Bright pink beet pasta hanging to dry on a pasta rack

    Equipment: The Pasta Maker

    This recipe was developed using the Philips Pasta Maker Machine. You add the ingredients, it mixes and extrudes the pasta automatically. There’s no manual kneading or rolling — it does everything. For anyone who has wanted to make fresh pasta but found the hand-rolling process too involved, this machine is a genuine game-changer.

    If you don’t have a pasta machine, you can still make this recipe by hand: knead the dough for 8–10 minutes, rest it for 30 minutes, then roll and cut with a rolling pin. It takes longer, but the result is the same excellent pasta.

    A pasta drying rack is very useful here — it lets you hang the extruded strands while the rest of the batch processes, preventing them from sticking together before you’re ready to cook.

    Beet pasta strands hanging in a wooden pasta drying cabinet

    Ingredients Deep Dive

    Ingredients

    Beets (Fresh-Juiced)

    • Why it matters: Fresh beet juice is what gives the pasta its signature magenta color and subtle earthy sweetness. Use a juicer if you have one. No juicer? Blend the beets on high and strain through a fine-mesh sieve or cheesecloth. Don’t use pre-packaged beet juice — the color is usually duller and it may contain added sugar or preservatives that affect the pasta dough.

    High-Protein Flour

    • Why it matters: High-protein (bread) flour creates more gluten structure, giving the pasta that satisfying al dente bite. All-purpose flour works but produces a softer, more delicate result. For pasta that holds up to a heavy sauce and retains its texture after cooking, protein content matters. A kitchen food scale ensures precise flour-to-liquid ratios — pasta dough is less forgiving than most recipes when measurements are off.

    Eggs

    • Why it matters: Eggs bind the flour and beet juice together, add richness, and contribute to the pasta’s golden-amber undertone that mixes beautifully with the beet’s red. Room temperature eggs incorporate more smoothly into the dough. Use large eggs.

    Salt

    • Why it matters: Salt in the dough (as opposed to just the cooking water) seasons the pasta from within. A small pinch — about 1/2 teaspoon — is enough to make the difference between pasta that tastes like something and pasta that just tastes like flour.

    Fresh beet pasta drying inside an open wooden cabinet

    The Magic of Beet Juice in Pasta

    Beet juice gets its color from betalain pigments — water-soluble compounds that are relatively heat-stable compared to anthocyanins (the pigment in red cabbage, which turns blue when cooked). The pasta holds most of its color through cooking, especially if you cook it al dente and don’t leave it sitting in water. The acidity in sauces like sour cream actually helps preserve the color.

    Exploring Other Vegetable Pastas

    Once you’re comfortable with beet pasta, the same technique works beautifully with other vegetables. Spinach pasta is a classic — vibrant green with a fresh, grassy flavour. Carrot pasta has a gentle sweetness and a warm orange hue. Butternut squash pasta is golden and rich. Each vegetable brings its own colour and subtle flavour note, making fresh pasta infinitely variable.

    Pink beet pasta in a creamy spinach and sour cream sauce

    This beet pasta is the star ingredient in our Spinach Sour Cream Pasta — a 20-minute weeknight recipe that pairs this pasta with a tangy, garlicky cream sauce. Highly recommended as a first way to use this dough.

    More Recipes to Try

    Frequently Asked Questions

    Can I make beet pasta without a pasta machine?

    Yes. Combine the ingredients and knead by hand for 8–10 minutes until smooth and elastic. Wrap in plastic wrap and rest at room temperature for 30 minutes. Then roll out with a rolling pin to about 1–2mm thickness and cut into your desired shape with a knife or pasta cutter. The dough is slightly stiffer than plain pasta dough because of the beet juice — give it extra kneading time if it feels tight.

    How do I prevent the pasta from sticking together after extrusion?

    Dust extruded strands lightly with flour as soon as they come out of the machine. Use a pasta drying rack or hang them over a clean broom handle placed between two chairs. If cooking immediately, drop them straight into boiling salted water within a few minutes of extrusion.

    How long does fresh beet pasta take to cook?

    Fresh pasta cooks significantly faster than dried — usually 2–4 minutes in heavily salted boiling water. Start testing at 2 minutes. It’s done when it floats to the surface and has a tender but slightly firm bite. Do not walk away from the pot.

    Can I store fresh beet pasta?

    Yes. Dust with flour, nest into small portions, and refrigerate in an airtight container for up to 2 days. For longer storage, let the pasta dry completely on a rack (1–2 hours) and then store in a sealed container at room temperature for up to a week, or freeze for up to 3 months.

    Will the color bleed into the sauce?

    Yes — and this is a feature, not a bug. When you toss beet pasta in a cream-based sauce, the sauce picks up the beautiful magenta and turns an extraordinary pink color. In tomato-based sauces the color is less visible but still adds depth. Expect any light-colored sauce or cheese to be tinted after contact.

    Can I use beet powder instead of fresh beet juice?

    Yes — beet powder is a convenient alternative. Start with 2 tablespoons per 100g flour and adjust as needed. The color won’t be quite as vivid as fresh juice, but the flavour difference is minimal. Dissolve the powder in the liquid component before adding to the flour.

    Bright pink beet pasta hanging to dry on a pasta rack

    Fresh Beet Pasta

    The beets lend their earthy sweetness, transforming ordinary pasta into a feast for the senses. Each bite is a tender embrace of tradition and innovation, a whisper of the earth’s gifts wrapped in the elegance of handmade pasta. 
    Prep Time 5 minutes
    Cook Time 7 minutes
    Total Time 12 minutes
    Servings: 6 people
    Course: Main Course
    Cuisine: Italian
    Calories: 240

    Ingredients
      

    • 250 g semolina flour
    • 250 g all-purpose flour
    • 1 beet juice
    • 2 large eggs
    • sea salt

    Equipment

    • Philips Pasta Maker Machine

    Method
     

    1. Attach the desired pasta shaping disc to the Philips pasta maker. I usually like using the normal spaghetti disk.
    2. Turn on the pasta maker and choose the program for fresh pasta.
    3. Gradually add the flour mixture into the pasta maker's chamber.
    4. Combine the beet juice and egg together until it is well blended together.
    5. Slowly pour in the beet and egg mixture into the pasta maker as it kneads the dough.
    6. Allow the machine to knead the dough for the programmed time.
    7. Once the kneading is complete, the machine will start extruding the pasta.
    8. Cut the pasta to your desired length as it comes out of the machine.
    Cooking the Beet Pasta:
    1. Bring a large pot of salted water to a boil
    2. Add the fresh beet pasta to the boiling water and cook for 2-4 minutes, or until al dente.
    3. Drain the pasta and serve immediately with your favourite sauce.

  • Vegetarian Caesar Salad Dressing

    Vegetarian Caesar Salad Dressing

    Most people assume Caesar salad dressing requires anchovies. They’re right about the umami — but wrong about the source. This vegetarian Caesar swaps anchovies for Chinese fermented bean curd (fu ru), and the result is a dressing with all the depth, savoriness, and creaminess of the classic, without any fish. If you’ve ever served this and watched someone ask “wait, what makes this so good?” without being able to place it, you’ll understand immediately why this substitution works so well.

    This post may contain affiliate links. If you purchase through these links, I may earn a small commission at no extra cost to you. Thank you for supporting Love & Harvest!

    Romaine Caesar salad with a small jug of vegetarian dressing and lemon

    Why This Recipe Works

    Caesar dressing relies on five flavour pillars: fat (mayonnaise), acid (lemon juice), heat (Dijon mustard), umami (anchovy), and sharpness (Parmesan and garlic). Remove the anchovy and you lose the umami backbone — the dressing becomes flat and one-dimensional. Fermented bean curd provides the same umami punch with a creamy texture that blends seamlessly. It’s not a compromise; it’s a genuine upgrade that makes the dressing vegetarian-friendly without sacrificing depth.

    Bowl of creamy vegetarian Caesar dressing next to romaine and lemon

    Ingredients Deep Dive

    Ingredients

    Mayonnaise

    • Why it matters: The fat base that gives Caesar dressing its body and helps it coat the lettuce. Full-fat mayonnaise is strongly recommended — low-fat versions are too watery and the dressing won’t cling. Avocado mayo is an acceptable substitute if you want a lighter profile. A quality mayo makes a real difference in the final flavour; this is not the place to use a bargain brand.

    Chinese Fermented Bean Curd (Fu Ru)

    • Why it matters: This is the key ingredient. Fermented bean curd is tofu that has been cured in a brine of rice wine, salt, and spices for months. The fermentation process breaks down the protein into free amino acids — the same process that creates umami in aged cheese and fish sauce. It has a creamy, spreadable texture that blends directly into the dressing without any grinding or special preparation. One cube is enough to replace all the anchovy. Find it at any Asian grocery store or order online — a jar lasts for months refrigerated.

    Lemon Juice

    • Why it matters: Acid is essential for balancing the fat and richness of the mayo and cheese. Fresh lemon juice is notably better than bottled — the bright, clean citrus note cuts through the creaminess. Squeeze it yourself, every time. A good food processor makes quick work of emulsifying all ingredients into a perfectly smooth dressing.

    Garlic

    • Why it matters: Caesar dressing needs garlic. The method matters: grating or microplaning the garlic (rather than chopping it) creates a paste that incorporates smoothly into the dressing without sharp, uncooked garlic chunks. One clove is the standard; add a second if you love garlic.

    Parmesan Cheese

    • Why it matters: Adds a second layer of umami richness, a slightly grainy texture that thickens the dressing, and a nutty, salty depth that amplifies everything else. A block of real Parmigiano-Reggiano grated fresh with a Parmesan grater is significantly better than pre-shredded. The pre-shredded versions contain anti-caking agents that prevent them from melting into the dressing smoothly.

    Dijon Mustard

    • Why it matters: Mustard is an emulsifier that helps the oil and acid stay combined rather than separating. It also adds a sharp, slightly spicy note that cuts through the richness. Don’t skip it; don’t substitute yellow mustard — the flavor profile is completely different.

    An immersion blender is ideal for this dressing — it emulsifies everything in 30 seconds directly in a jar, with almost no cleanup required.

    Jar of fermented bean curd beside romaine and a cup of dressing

    The Flavor Profile

    The fermented bean curd provides deep umami richness that pairs perfectly with the tangy lemon juice, sharp Dijon mustard, and nutty Parmesan. The dressing clings beautifully to crisp romaine lettuce, ensuring every bite is fully coated. It’s creamy without being heavy, complex without being difficult to make.

    Creamy vegetarian Caesar dressing in a mixing bowl with lemon

    Vegetarian Caesar dressing mixed with grated cheese in a bowl

    Chopped romaine lettuce tossed in Caesar dressing

    More Salad & Light Meal Recipes

    Frequently Asked Questions

    Where can I find Chinese fermented bean curd?

    Any Asian grocery store carries it — look for the white variety (as opposed to red, which is made with red yeast rice and has a stronger colour and flavour). Online ordering via Amazon is also reliable. A single jar contains enough bean curd for dozens of batches of dressing and keeps in the fridge for several months once opened.

    What does fermented bean curd taste like on its own?

    Strong, pungent, salty, and creamy — similar in intensity to a very strong blue cheese or fish sauce. Don’t taste it on its own and expect to enjoy it raw; it’s a condiment designed to be used in small amounts where it adds depth without dominating. One cube in a full batch of Caesar dressing mellows dramatically.

    Can I make this dressing vegan?

    Almost. Swap the mayonnaise for a vegan mayo (aquafaba-based varieties work well) and omit or replace the Parmesan with nutritional yeast (2–3 tablespoons) for a similar umami note. The fermented bean curd is already vegan. The result won’t be identical, but it’s a genuinely good vegan Caesar.

    How long does homemade Caesar dressing keep?

    Up to 5 days in an airtight container in the refrigerator. Stir or shake before each use — natural separation occurs. Do not freeze; the emulsion breaks and the texture becomes grainy upon thawing.

    Can I use this dressing for grilled chicken Caesar wraps or sandwiches?

    Yes — it works beautifully as a sandwich spread, a dip for grilled chicken, and a marinade for chicken shawarma wraps. The fermented bean curd’s umami quality makes it a versatile condiment beyond just salad.

    Why does my dressing taste too sharp or sour?

    This usually means too much lemon juice relative to mayo and Parmesan. Add more mayonnaise (1 tablespoon at a time) and grated Parmesan to bring the balance back. The ratio of fat to acid is the key to a dressing that tastes rich rather than harsh.

    Caesar salad in a white bowl with a jug of creamy dressing and a lemon half

    Vegetarian Caesar Salad Dressing

    A classical Caesar Salad dressing, but with a twist by swapping out the anchovy for Chinese fermented bean curd. This vegetarian dressing is packed with umami flavour and creamy texture dressing that just glides onto the romaine lettuce.
    Prep Time 10 minutes
    Cook Time 5 minutes
    Total Time 15 minutes
    Servings: 1 large bowl
    Course: Condiment
    Calories: 115

    Ingredients
      

    • 1-2 fermented bean curd
    • 2 garlic cloves
    • ½ cup mayonnaise
    • 2 tbsp olive oil
    • 1 tsp sea salt
    • ¼ tsp black pepper
    • 1 tsp Dijon mustard
    • 2 tbsp lemon juice
    • 2 dash Worcestershire sauce
    • ¼ cup parmesan cheese grated

    Equipment

    • food processor

    Method
     

    1. In the food processor, add all the ingredients except the parmesan cheese. Process the mixture until smooth and no lump. Transwer to a large bowl.
    2. Add the grated Parmesan cheese, salt, and pepper to the mixture. Stir until well combined.
    3. Refrigerate the dressing for at least 30 minutes before serving to allow the flavors to meld together.
    4. Toss with fresh Romaine lettuce, croutons, and additional grated Parmesan cheese for a classic Caesar salad.

  • The BEST Bread and Butter Pickled Cucumbers

    The BEST Bread and Butter Pickled Cucumbers

    These are the best-tasting pickles you’ll ever have on your burgers, hot dogs, or eaten straight from the jar. After trying them, you won’t go back to store-bought pickles ever again.

    Bowl of homemade bread and butter pickle slices in brine

    This post may contain affiliate links. If you purchase through these links, I may earn a small commission at no extra cost to you. Thank you for supporting Love & Harvest!

    This post is a recipe for the best bread and butter pickled cucumbers — a simple recipe with cucumbers, turmeric, coriander seeds, bay leaf, apple cider vinegar, sugar, and more.

    These are truly the BEST Bread and Butter Pickled Cucumbers. This recipe, a breeze to prepare, offers simplicity and delight. The most challenging part? A bit of waiting — but I assure you, the patience is richly rewarded.

    These pickles are perfect companions to any dish and stand unrivalled in flavour. Once you savour this recipe, no other will ever compare. It will carve a cherished place in your heart.

    Why You Only Need This Pickle Recipe

    With each batch, I find myself drawn back to its simplicity and perfection. This recipe consistently delivers on taste and quality — it has become my go-to, my tried-and-true, my culinary comfort zone. And the bonus? The leftover brine becomes the secret ingredient for the crispiest chicken wings you have ever made.

    Bread and butter pickled cucumber slices in a white bowl with chopsticks

    Don’t Throw Away the Brine!

    Do you have some pickle brine left after finishing the jar? Learn how to make our Crispy Pickle Brine Chicken Wings — the brine marinates the chicken overnight, infusing it with a unique tangy flavour and keeping it incredibly moist and tender.

    How to Get a Crunchy Texture

    To enhance crispiness, slice the cucumbers into a bowl and add a dash of sea salt. Include the sliced onions, then cover the mixture with crushed ice and press it down with a plate to keep the cucumbers submerged as the ice melts. Cover and refrigerate overnight. This process draws out excess moisture and guarantees an optimal crunchiness that elevates the pickles to perfection.

    Ingredients

    Ingredients

    Cucumbers

    • Why it matters: Kirby cucumbers or Persian cucumbers are ideal — they have thinner skin, fewer seeds, and stay crunchier in the jar than regular cucumbers. I peel half the skin off in alternating strips so the finished pickle looks beautiful in the jar. A mandoline slicer produces perfectly even slices for consistent pickling.

    Turmeric

    • Why it matters: Turmeric is what makes these pickles truly distinctive. It adds a warm, slightly peppery depth that no one can quite identify — they just know the pickles taste exceptional. It also gives the brine that gorgeous golden hue that makes these pickles stand out on any table.

    Apple Cider Vinegar

    • Why it matters: Apple cider vinegar adds a rounder, more complex tang compared to plain white vinegar. It also brings subtle fruity notes that complement the sweetness of the bread and butter style. I increase the vinegar-to-water ratio slightly for a more pronounced pickle flavour.

    Spices

    • Why it matters: The brine includes celery powder, coriander seeds, bay leaf, and clove. None of them is overpowering individually, but together they create a layered, aromatic brine that tastes like something your grandmother spent hours perfecting.

    Mason Jars

    • Why it matters: Use wide-mouth mason jars with a canning funnel for easy filling. Wide-mouth jars make it far easier to pack in the cucumbers tightly and retrieve the pickles without a mess.

    Frequently Asked Questions

    How long do homemade bread and butter pickles last?

    Stored in a sealed jar in the refrigerator, these pickles keep beautifully for up to 3 months. The flavour actually improves after the first 48 hours as the cucumbers absorb the brine. For the absolute best taste, wait at least 24 hours before opening the jar.

    Do I need to process these jars in a water bath?

    For refrigerator pickles (the method in this recipe), no water bath canning is needed. These are quick pickles intended to be stored in the fridge and consumed within 3 months. If you want shelf-stable pickles that can be stored in the pantry for up to 1 year, you will need to process the sealed jars in a boiling water bath for 10 minutes. Follow a tested canning recipe for safety.

    Why do my pickles turn soft instead of staying crunchy?

    The most common culprits are: not soaking in salt and ice overnight, using regular slicing cucumbers instead of Kirby or Persian varieties, or packing them too loosely. The ice-and-salt method is key — it firms the flesh and draws out the moisture that would otherwise make the pickles go limp. Do not skip this step.

    Can I use white vinegar instead of apple cider vinegar?

    Yes, but the flavour will be sharper and less complex. Apple cider vinegar adds a natural sweetness and depth that works particularly well with the bread and butter style. If you use white vinegar, consider reducing the amount slightly to avoid an overly acidic brine.

    What is the difference between bread and butter pickles and dill pickles?

    Bread and butter pickles use a sweet-tangy brine with sugar and warm spices like turmeric, coriander, and celery seed. Dill pickles use a sharp vinegar brine with fresh or dried dill and garlic, with little to no sugar. Bread and butter pickles are sweeter, milder, and more aromatic. They are the classic choice for burgers and sandwiches.

    Can I pickle other vegetables with this brine?

    Absolutely. This brine works wonderfully with thinly sliced red onions, banana peppers, cauliflower florets, and green beans. Adjust the brining time based on the vegetable — denser vegetables like cauliflower benefit from a slightly longer soak of 48–72 hours.

    Chopsticks lifting bread and butter pickle slices from a bowl of brine

    The BEST Bread and Butter Pickled Cucumbers

    Prep Time 20 minutes
    Total Time 20 minutes
    Servings: 8
    Course: Condiment
    Cuisine: American
    Calories: 120

    Ingredients
      

    • 1 kg Kirby Cucumbers or 2 pounds
    • 2 cups small diced sweet white onions
    • ¼ cup kosher salt
    • ½ kg crushed ice or 1 pound
    • 2 cups sugar
    • 1 tbsp yellow mustard seeds
    • 1 tsp celery seeds
    • 2 cups apple cider vinegar
    • 1 fresh bay leaf torn into pieces
    • 3 whole cloves
    • ½ jalapeno sliced paper thin with seeds

    Method
     

    1. Slice cucumbers into ⅛ inch thick slices. To draw out the liquid for extra crunch: layer the cucumber slice with onions, salt and ice in a glass or stainless steel container and weight with a plate large enough to cover the cucumbers and keep them submerged when the ice melts.
      Cover and refrigerate overnight.
    2. Next day, sterilize three 1L canning jars, along with their rings nd lids, and put them on a clean dish towel or wire rack.
    3. Drain the cucumbers and onions, put them in a large non reactive pot, and add the sugar, mustard seeds, turmeric, celery seeds, vinegar, bay leaf, cloves, and jalapeño. Bring to a simmer over high heat, stirring to completely dissolve the sugar. About 5 minutes. Skim off any foam that has formed at the top.
    4. Divide the batch in three parts for the jars. Ladle the hot vinegar liquid over the cucumbers leaving a ¼ inch headspace. White the rims and threads clean, put the lids and rings on the jars, and tighten the rings. Cool the jars to room temperature.
    5. Refrigerate the jars and let the pickle cure for at least 1 week before eating. Unopened, the pickles will keep for up to 2 months in the fridge.

    Once you have a jar of these pickles, the natural next step is our Crispy Pickle Brine Chicken Wings — where the leftover brine does the heavy lifting. For more fermented and preserved favourites, explore our Traditional Kimchi and Mexican Pickled Red Onion.