Category: cooking from scratch

  • Vanilla Bean Ice Cream

    Vanilla Bean Ice Cream

    There is a reason homemade vanilla bean ice cream tastes nothing like the store-bought version. Those tiny black specks of real vanilla seeds, the richness of a custard base made with fresh egg yolks and heavy cream — this is the real thing. And with an ice cream machine doing most of the work, you only need about 20 minutes of hands-on time before it churns itself into something extraordinary.

    This post may contain affiliate links. If you purchase through these links, I may earn a small commission at no extra cost to you. Thank you for supporting Love & Harvest!

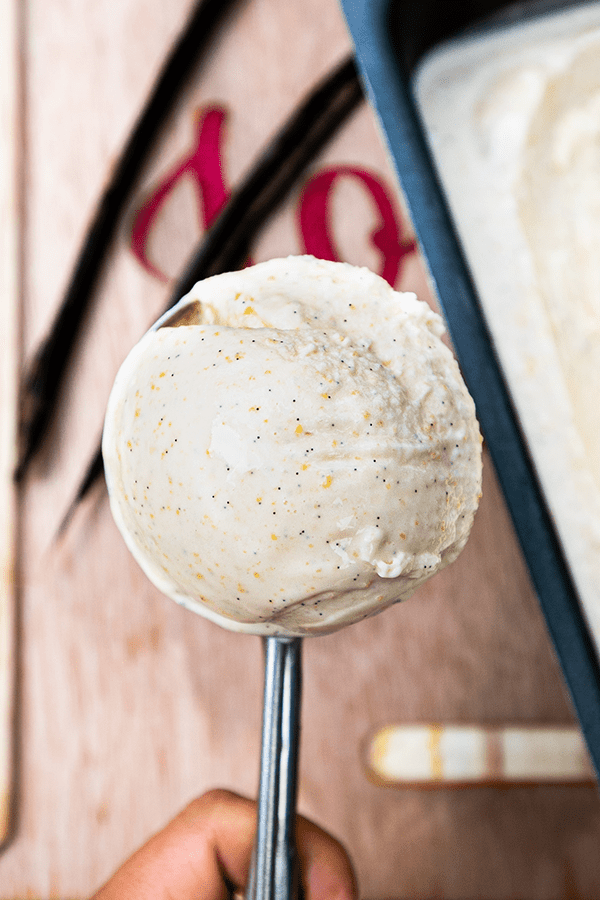
    A hand holding a scoop of vanilla bean ice cream above the container

    It is almost impossible to believe that with just a few key ingredients, you can make such a delicious dessert. The machine I use to churn my ice cream is the Cuisinart Ice Cream Maker. I have been using this for years and it has never failed me. It is the best ice cream machine for home use and the results are consistently perfect.

    If you are looking to make a simple gourmet ice cream at home, this is the recipe for you. All you need is sugar, whole milk, heavy cream, a vanilla bean, and egg yolks.

    Ice cream scoop resting in a loaf pan of vanilla bean ice cream

    We love serving this ice cream with Cinnamon Rolls with Rompope Frosting or Triple Chocolate Fudgy Brownies.

    If vanilla ice cream feels too basic and you want something packed with flavour and texture, try our Salted Caramel Pecan Ice Cream. It is honestly to die for. Or go lighter with our Easy Blueberry Ice Cream.

    Scooping vanilla bean ice cream from a dark loaf pan

    Ingredients

    Key Ingredients

    Vanilla Bean

    • Why it matters: Just one Grade B vanilla bean is enough to bring this ice cream to life. Use the back of a knife to scrape out all the seeds. If you do not have vanilla beans, substitute with 1 tablespoon of pure vanilla extract or vanilla bean paste. The paste is a great middle ground — affordable and loaded with real vanilla seeds.

    Heavy Cream

    • Why it matters: Heavy cream (also called whipping cream) is a must for homemade ice cream. The high fat content creates the smooth, velvety texture that makes this dessert feel luxurious. Do not substitute with light cream or milk — the texture will suffer. You can froth it before adding for extra airiness using a milk frother.

    Egg Yolks

    • Why they matter: Using egg yolks in the ice cream mixture creates a richer and fuller custard base. This is literally the ingredient that takes you from average ice cream to gourmet-level flavour. The yolks must be cooked to 165°F to eliminate bacteria — never skip this step.

    Whole Milk

    • Why it matters: Whole milk contributes to texture and flavour. I recommend full-fat whole milk only. Low-fat or lactose-free milk does not create the same airy ice crystals during churning.

    Foods to Pair with Vanilla Ice Cream

    • Pie (pecan, apple, strawberry, rhubarb, chocolate)
    • Cake (chocolate cake, fruit cake, pound cake)
    • Sundaes (with strawberry, chocolate syrup, candies, nuts)
    • Loaves (banana, chocolate chip, pecan, blueberry, cherry)
    • Tarts (apple, blackberry, peach, guava, Nutella)
    • Cookies (ginger, chocolate chip, macadamia)

    Professional Vanilla Ice Cream Tips

    Pro Tip #1 – Completely Freeze Your Ice Cream Bucket

    There is nothing more frustrating than churning your ice cream only to realize the bucket is not cold enough to freeze it properly. Freeze the bowl overnight — at least 12 hours. This guarantees a successful result every time.

    Pro Tip #2 – Cook the Vanilla Ice Cream Mixture

    We have egg yolks in the recipe and that requires cooking. This step kills any bacteria in the egg. The target temperature is 165°F. Do not let it come to a boil — boiling will scramble the eggs and ruin the custard.

    Pro Tip #3 – A Good Coat on the Back of the Spoon Is Your Signal

    To know if your custard is cooked thoroughly, dip a spoon into the liquid. If it gives a thick, uniform coat that does not run, it is ready. Remove from heat immediately and let it cool to room temperature before chilling.

    Vanilla custard coating the back of a spoon over a bowl, with vanilla pods

    Pro Tip #4 – Cover the Mixture with Plastic Wrap

    When you finish cooking the custard, cool it before placing it in the ice cream bucket. Press a piece of plastic film directly onto the surface of the mixture while it cools. This prevents a skin from forming on top.

    Store your finished ice cream in a dedicated ice cream container for best texture preservation.

    Loaf pan of vanilla bean ice cream with one scoop on top

    Frequently Asked Questions

    Do I need an ice cream machine for this recipe?

    Yes, this recipe is designed for an ice cream machine. The machine churns air into the custard as it freezes, creating the smooth, creamy texture you expect from gourmet ice cream. No-churn methods lack the same texture and flavour depth.

    Can I use vanilla extract instead of a vanilla bean?

    Yes. Substitute the vanilla bean with 1 tablespoon of pure vanilla extract or vanilla bean paste. The paste is the best alternative because it still contains real vanilla seeds and delivers a very similar flavour.

    Why does my ice cream turn icy instead of creamy?

    The most common reasons are: the ice cream bucket was not frozen long enough (freeze at least 12 hours), the custard was not chilled thoroughly before churning, or too much milk and not enough cream was used. Always follow the ratios in this recipe.

    How long does homemade vanilla ice cream last?

    Stored in an airtight container in the freezer, it keeps well for up to 2 weeks. After that, ice crystals start to form and the texture degrades. Press plastic wrap directly on the surface of the ice cream before sealing to minimize crystal formation.

    Why do I need to cook the custard to 165 degrees?

    Raw egg yolks can carry bacteria. Cooking the custard to 165°F eliminates that risk while also thickening the base, which is what gives this ice cream its silky, gourmet texture.

    Can I make this without egg yolks?

    You can, but the result will be less rich and less creamy. Egg yolks are the secret to that gourmet French-style ice cream texture. If you want an egg-free version, increase the heavy cream slightly and add a tablespoon of cornstarch as a thickener.

    Close-up of a scoop of vanilla bean ice cream flecked with vanilla seeds

    Vanilla Bean Ice Cream

    Fresh vanilla bean ice cream is extremely delicious and tastes nothing like your average store-bought artificial flavoured ice cream. With its smooth and velvet-like texture, you can make this with 20 minutes hands-off time! Print Recipe Pin RecipePrep Time:10 minsCook Time:20 minsCourse: DessertKeyword: ice cream, vanilla, vanilla beanServings: 6 people

    Equipment

    • ice cream machine

    Ingredients

    • 4 large egg yolks
    • ¾ cup granulated sugar
    • 1 vanilla bean
    • 1½ cups whole milk
    • 1½ cups heavy cream
    • ½ tsp sea salt

    Instructions

    • In a large non-stick saucepan, heat the pan over medium low heat. Add egg yolks and sugar, and whisk until a light yellow color.
    • In another sauce pan, combine the vanilla bean, whole milk, heavy cream and salt. Combine well. When you see the sides of the sauce pan start to simmer, turn off the heat immediately.
    • Slowly add the milk to egg and sugar mixture, stirring constantly.
    • When the temperature reaches 165°F, remove from heat. Do not let it come to boil.
    • Pour the custard base into a container to reach room temperature. Then add a plastic film on top of the mixture and put it in the fridge for 2 hours or overnight.
    • When the custard base is ready, pour it into your ice cream maker and process according to your ice cream maker's instructions.
  • Salted Caramel Pecan Ice Cream

    Salted Caramel Pecan Ice Cream

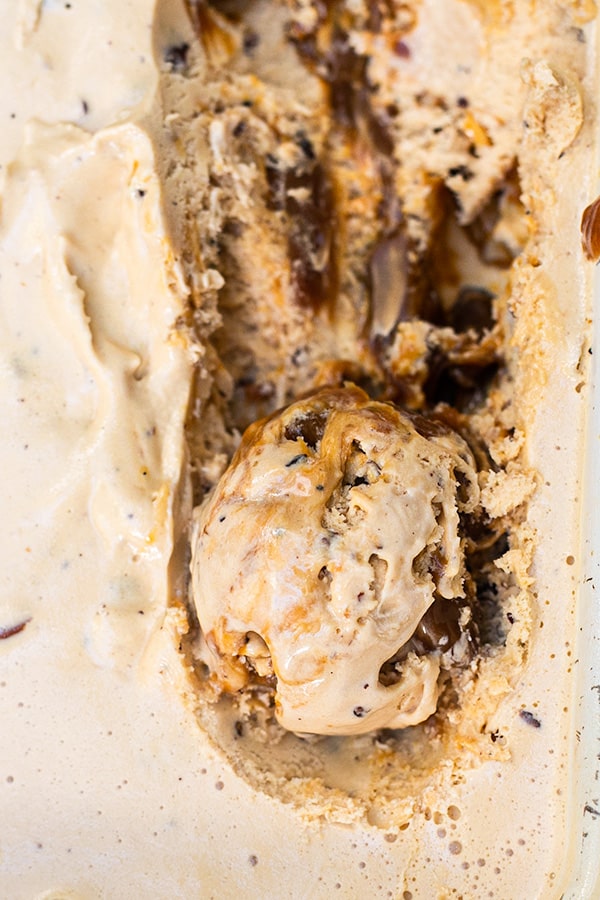
    This is not basic ice cream. Salted caramel pecan ice cream is layered with rich, buttery homemade caramel, toasted pecan nuts with a deep roasted flavour, and a silky custard base that tastes absolutely nothing like anything you can buy at a grocery store. It is fall in a scoop — and it consistently steals the show after Thanksgiving dinner.

    This post may contain affiliate links. If you purchase through these links, I may earn a small commission at no extra cost to you. Thank you for supporting Love & Harvest!

    Tub of salted caramel pecan ice cream with a serving spoon

    If you have an ice cream machine, I have the best recipe for you. Nowadays, ice cream parlours charge a lot for real gourmet ice cream, but it is genuinely easy to make at home. Fun fact: did you know Dairy Queen soft serve is 70% air? This recipe is the opposite of that — dense, flavourful, and made with real ingredients you can actually read on the label.

    Try our Vanilla Bean Ice Cream for a classic base, or go bold with our Easy Chocolate Fudge Ice Cream.

    Scoop of salted caramel pecan ice cream on a blue plate

    Why Try This Salted Caramel Pecan Ice Cream

    The taste is unbelievably delicious and packed with textures. The pecan is lightly toasted so you get a darker, richer flavour. Here are a few more reasons to make it:

    • Cheaper — Making gourmet ice cream at home costs a fraction of an ice cream parlour. You are in full control of the ingredients and the quality.
    • It is fun — Watching your ice cream churn is genuinely satisfying. Swirling the caramel into the ice cream with the toasted pecans looks like a masterpiece coming together.
    • Delicious recipe — There are a few more steps compared to simpler recipes, but the result is complex, textured, and tastes like real effort went into it.
    • The perfect fall ice cream — Salted caramel pecan screams fall. This is the dessert to serve after Thanksgiving dinner.

    Ice cream base churning in an ice cream machine

    Why Use an Ice Cream Machine?

    The ice cream machine freezes your base slowly, making small ice crystals that give you a smoother, tastier texture. Many store-bought ice creams are packed with preservatives and air. Making your own means you control exactly what goes in.

    Ingredients

    Key Ingredients

    Heavy Cream

    • Why it matters: Full-fat heavy cream is essential for the rich, luscious texture of this ice cream. For a dairy-free version, swap with coconut cream — it works remarkably well. You can also pick up a Cuisinart Ice Cream Maker if you do not yet have one.

    Pecan Halves

    • Why they matter: The pecan is the textural hero of this recipe. Toast them in a dry pan until fragrant and slightly darkened — the caramelized, roasted flavour is irreplaceable. Buy the best quality pecan halves you can find. Fresh, plump pecans make a noticeable difference.

    Sea Salt Flakes

    • Why they matter: The salt in salted caramel is not just flavour — it is the contrast that makes every bite more interesting. Use quality Maldon sea salt flakes for the best result. The flaky texture dissolves differently than table salt and delivers a cleaner, brighter hit of salt in the caramel.

    Egg Yolks

    • Why they matter: Four egg yolks transform the ice cream sauce into a proper custard. This is what gives the base its ultra-smooth, silky texture. Save the egg whites for meringue or breakfast.

    Wooden bowl of toasted pecans and mixed nuts

    Professional Tips

    Pro Tip #1 – Use an Ice Cream Machine

    This recipe will not work in a high-speed blender. The churning process is what creates the smooth texture. If you love frozen treats, the Cuisinart Ice Cream Maker is a great investment that pays for itself quickly.

    Pro Tip #2 – Get Everything Ready Before You Start

    This recipe has three components — caramel sauce, ice cream custard, and toasted pecans. Read the full recipe first and prepare everything in order so you are not scrambling between steps.

    Pro Tip #3 – Freeze in a Clear Container

    Store the finished ice cream in a clear container with a lid so you can easily identify it in the freezer. A dedicated ice cream container also helps maintain the right texture by limiting air exposure.

    Container of salted caramel pecan ice cream with a scoop taken out

    Frequently Asked Questions

    Do I need an ice cream machine for this recipe?

    Yes. The churning process is essential for the smooth, gourmet texture of this ice cream. A blender-based no-churn version will not produce the same result. See our guide to the best ice cream makers if you need a recommendation.

    Can I make this ice cream dairy-free?

    Yes. Swap the heavy cream with full-fat coconut cream and the whole milk with your preferred nut milk — cashew or oat milk work best. The texture will be slightly different but still very good.

    How do I know when the caramel is ready?

    The sugar will melt and turn a deep amber colour. Once all the sugar is dissolved and the liquid is amber, add the butter immediately. The caramel is done when the butter is fully incorporated and the sauce is smooth and glossy.

    Why is my caramel grainy?

    Grainy caramel usually means the sugar crystallized during cooking. Avoid stirring the sugar once it starts melting — just swirl the pan gently instead. Also make sure no sugar crystals on the sides of the pan fall back into the caramel.

    How long does this ice cream last in the freezer?

    Up to 2 weeks when stored in an airtight container. Press plastic wrap directly onto the surface of the ice cream before sealing to prevent ice crystal formation.

    Can I skip the pecan extract?

    Yes. The real toasted pecans carry most of the flavour. The extract adds extra depth but the ice cream is still excellent without it. Pure vanilla extract alone works perfectly.

    Close-up of salted caramel pecan ice cream with caramel swirls

    Salted Caramel Pecan Ice Cream

    Delicious gooey full flavoured pecan ice cream! Rich nutty-flavoured ice cream swirled together with some salted caramel and roasted pecan nuts. Print Recipe Pin RecipePrep Time:30 minsCook Time:25 minsCourse: DessertKeyword: pecan ice cream, salted caramel

    Equipment

    • ice cream machine

    Ingredients

    Salted Caramel

    • ¾ cup cane sugar
    • 5 tbsp butter room temperature
    • ½ cup heavy cream
    • 1 tsp vanilla
    • 1½ tsp sea salt

    Ice Cream Sauce

    • 1½ cup heavy cream
    • 1½ cup whole milk
    • ½ cup sugar
    • ½ tsp sea salt
    • 1 tsp vanilla
    • 1 tsp pecan extract
    • 4 egg yolks

    Pecan

    • ¼ cup chopped pecan

    Instructions

    Caramel Sauce

    • In a medium sauce pan, add the sugar to the pan on medium high heat. Move the sugar around the sauce pan and eventually the sugar will start to melt. Using a metal whisk, move the liquid around for 3 minutes until the sugar is dissolved.
    • Cut the butter into small pieces and add it to the sugary liquid. Whisk the butter and sugar liquid together until fully incorporated. Then add the cream and vanilla. Whisk until the mixture comes together.
    • Divide the caramel into two equal heat-proof bowls. Divide the salt and place it on top of the caramel. Set to the side to cool.

    Ice Cream Sauce

    • In a large sauce pan, heat the heavy cream, milk and sugar on medium heat. Once the liquid starts to boil, whisk in the salt, vanilla, and pecan extract. Take off the heat.
    • In a separate bowl, separate the egg yolk and egg white.
    • While whisking the hot milk liquid, slowly add the egg yolk and vigorously whisk the egg yolk into the warm liquid. Keep whisking until the egg yolk is completely incorporated into the liquid. Put the pan back on the heat on low heat and simmer for 3 minutes.
    • Add one of the bowls of caramel into the liquid and keep whisking it. Simmer for another 3 minutes.
    • Take the liquid off the heat, and scrape it to a heat proof bowl. Let the liquid cool completely to room temperature and place it in the fridge for 5 hours or overnight.

    Pecan

    • In a sauce pan on medium high heat, toast the pecans until brown and fragrant. Set aside to cool.

    Salted Caramel Pecan Ice Cream

    • Plug in the ice cream machine and insert the freeze bowl into the machine.
    • Have all three ready: caramel sauce, ice cream sauce, and toasted pecans.
    • Turn on the machine and first add the ice cream liquid into the freezer bowl. Then add the toasted pecans. The machine will churn the liquid into ice cream in 25-30 minutes.
    • Meanwhile, take your ice cream vessel out. Put ⅓ of the caramel at the bottom of the vessel.
    • Once the ice cream is done, scoop ⅓ of the ice cream into the vessel along with the caramel. Alternate between the caramel and ice cream until finished. Place the ice cream into the freezer for 3 hours before serving.
  • Best Thanksgiving Turkey with Bacon Strips

    Best Thanksgiving Turkey with Bacon Strips

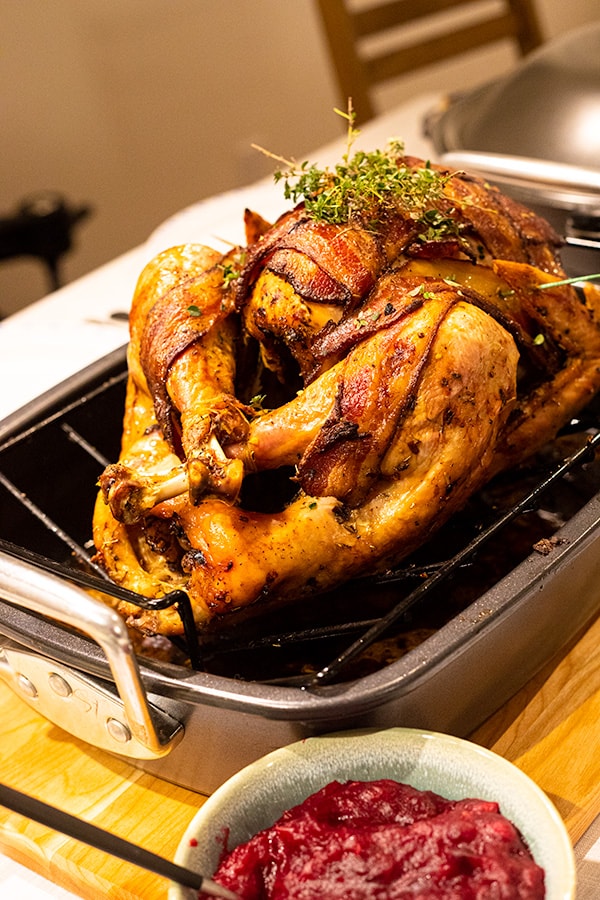
    Every Thanksgiving table deserves one truly legendary turkey — one that is impossibly juicy, wrapped in crispy woven bacon, and finished with a rich dripping gravy that has everyone scraping the pan. This is that recipe, and it has been the same one for over 10 years.

    This post may contain affiliate links. If you purchase through these links, I may earn a small commission at no extra cost to you. Thank you for supporting Love & Harvest!

    best thanksgiving turkey with bacon recipe

    This post is all about the best Thanksgiving turkey with bacon strips recipe. Turkey is moist and juicy from woven bacon along with a delicious gravy on the side.

    Thanksgiving turkeys have a reputation for being dry and flavourless. That reputation exists because most recipes miss a few critical steps. This recipe does not miss them. The result: the moistest turkey you have ever served — with crispy bacon on top and a gravy made from every last drop of those incredible drippings.

    My Chinese side of the family used to dread turkey. After trying this recipe, they now look forward to Thanksgiving every year. That is the best endorsement I can give.

    Why Try This Recipe?

    • Proven for 10 years — made this every Thanksgiving and Christmas, always comes out perfect
    • Woven bacon technique — locks in moisture, crisps evenly, and makes the presentation stunning
    • 90% hands-off cooking — long oven time, but you are mostly just basting every 30 minutes
    • Built-in gravy recipe — the drippings become the most flavourful gravy you have tasted
    • Works for any size turkey — use the sizing table below to scale cooking time

    The Best Turkey Gravy

    The gravy is made entirely from the turkey marinade and the drippings left in the pan. It is made in the 30 minutes the turkey rests before carving — no wasted time. The neck of the turkey (tucked inside the cavity when you buy it) goes into a pot with water and turkey juice to build the stock. Then you brown flour, whisk in the liquid, and reduce to a velvety, umami-packed gravy. This is the kind of gravy people pour on everything on the plate.

    Use the Turkey Carcass to Make Another Meal

    After the feast, boil down the carcass with the remaining marinade to extract every drop of flavour. Use the resulting turkey stock for:

    • Congee — add rice, ginger, and green onion for a warming bowl
    • Turkey noodle soup — exactly like chicken noodle soup, but richer
    • Chinese noodle soup — boil vegetables and noodles in the stock, top with chilli oil
    • Turkey chilli bean stew — turkey stock, red beans, tomato paste, and your favourite spices

    unique turkey recipes

    Ingredients

    Turkey (7kg / ~15 lbs)

    Use a fully defrosted turkey — never cook from frozen. A 7kg bird serves about 15 people generously. See the sizing table below if you are cooking for a different group size.

    • Why it matters: Defrosting completely is non-negotiable. Partially frozen meat cooks unevenly and risks undercooking near the bone.

    Smoked Bacon Strips

    One full package of smoked bacon strips is woven across the breast and legs. Smoked bacon adds a depth of flavour that regular bacon cannot match.

    • Why it matters: Bacon acts as a self-basting fat layer for the driest parts of the bird (breast and legs). The weave keeps the bacon in place as it shrinks during cooking.

    Seasonings (rosemary, thyme, oregano, basil, paprika, kosher salt)

    These six aromatics form the backbone of the marinade. They are combined with hot oil poured over finely chopped onion and garlic to create a fragrant, oil-based rub.

    • Why they matter: Hot oil “blooms” the dried herbs and drives the flavour deeper into the meat when rubbed into the fork-poked holes.

    Meat Thermometer

    A reliable instant-read meat thermometer is non-negotiable. Turkey is done at 170°F in the thickest part of the thigh.

    • Why it matters: Guessing doneness is how turkeys end up either raw or bone dry. A thermometer removes all uncertainty.

    Large Roasting Pan

    You need a large roasting pan that fits the turkey with room for the drippings to pool — those drippings become your gravy.

    • Why it matters: A too-small pan causes drippings to burn instead of collect. The collected juices are the entire foundation of the gravy.

    How Much Turkey per Person

    A general rule: 1 pound (0.45kg) per regular eater, 1.5 pounds (0.65kg) per heavy eater.

    Weight in kg

    Weight in lbs

    Time at 325°F

    Serves

    1.9 – 2.7 kg

    4 – 6 lbs

    2 – 2.5 hours

    4 people

    3.6 – 5.4 kg

    8 – 12 lbs

    2.5 – 3 hours

    8 people

    5.4 – 8.2 kg

    12 – 18 lbs

    3 – 4 hours

    12 people

    7.3 – 11 kg

    16 – 24 lbs

    4 – 6 hours

    16 people

    11 – 13 kg

    25 – 28 lbs

    5 – 7 hours

    25 people

    Defrosting the Turkey

    If buying frozen, start defrosting 2–3 days ahead. Defrost overnight on the counter in a deep dish (there will be drips), then finish in the fridge. Never rush this step — a partially frozen turkey will cook unevenly no matter how good the recipe is.

    Know the Anatomy of the Turkey

    Turkey has dark meat (legs — more active muscle, needs more oxygen) and white meat (breast — less active, drier). The breast is the part most likely to dry out, which is exactly why the bacon weave focuses heaviest coverage there. Knowing this anatomy means you baste smarter — more attention to the breast every 30 minutes.

    Woven Bacon Strips

    The weave is not just for aesthetics. When bacon strips shrink and curl during cooking, a flat-laid arrangement slides and bunches. The weave holds everything in position, providing consistent coverage across the entire breast and legs throughout the full cook time. Toothpicks at each end secure the perimeter — just count them going in so you remove every single one before serving.

    how to cook a turkey in the oven to be moist

    Seasoning

    The marinade is onion, garlic, rosemary, thyme, oregano, basil, paprika, and kosher salt — all finely chopped and combined, then hit with hot canola oil poured over the top. The hot oil extracts the full flavour from the aromatics on contact. Rub this all over the bird and into the fork-poked holes. Marinate overnight in the fridge for the deepest flavour.

    Fool-Proof Professional Tips

    Pro Tip 1: Use toothpicks to attach the bacon

    Secure the ends of the woven bacon strips with toothpicks. Do not push them too deep — you need to remove every one before serving. Count them as you go in, so you can confirm they are all out when the turkey rests.

    Pro Tip 2: Poke holes along the leg and breast

    Use a fork to vigorously poke deep holes across the legs and breast with even spacing. Do this only when the turkey is completely defrosted. The holes let the marinade penetrate deeply rather than sitting on the surface.

    Pro Tip 3: Weave the bacon strips

    Not just for looks — weaving keeps bacon in position as it shrinks and ensures even fat coverage across every inch of the breast. Flat-laid strips slide. Woven strips stay put.

    Pro Tip 4: Baste every 30 minutes

    Every 30–45 minutes, open the oven, slide the rack out slightly (not all the way), and baste the turkey with the drippings from the bottom of the pan. Focus on the breast and legs. Replace the foil and continue cooking.

    Pro Tip 5: Rest 30 minutes before carving

    Cutting a hot turkey leaks all the moisture out immediately. Resting 30 minutes lets the juices redistribute throughout the meat. This is what separates a good turkey from a great one.

    turkey recipes for dinner

    More Holiday Main Recipes

    Looking for more showstopper mains? Try the Thanksgiving Roasted Lemon Garlic Chicken as a smaller-crowd alternative, and the Succulent Sunday Pot Roast for a hearty weekend centrepiece.

    Frequently Asked Questions

    How do I know when the turkey is done?

    Insert a meat thermometer into the thickest part of the thigh, avoiding the bone. The turkey is done when it reads 170°F. If any part of the thigh reads below that, return to the oven and check every 15 minutes.

    Why does my turkey always come out dry?

    Usually because it was either over-cooked, not basted frequently enough, or the bacon was not covering the breast. Follow the 30-minute basting intervals, keep the foil on for most of the cook time, and only remove it for the final hour to crisp the bacon.

    Can I skip marinating overnight?

    You can marinate for a minimum of 6 hours, but overnight gives significantly deeper flavour. If you are short on time, at least poke holes and rub the marinade generously into every part of the bird, including inside the cavity.

    How long do I need to defrost the turkey?

    Plan for 2–3 full days. Start on the counter overnight, then move to the fridge for the remaining time. A 7kg turkey needs at least 48 hours in the fridge to fully defrost after the initial counter thaw.

    Can I make the gravy ahead of time?

    The gravy relies on the turkey drippings which are only available after cooking, so it cannot be made fully ahead. However, you can simmer the turkey neck in water 30 minutes before the turkey finishes to have the stock ready, then combine with drippings when the bird comes out.

    How should I store leftover turkey?

    Store leftover turkey in an airtight container in the fridge for up to 4 days. Slice the meat off the carcass before storing — it stays more moist than storing it on the bone. The carcass should be used for stock within 2 days.

    Best Thanksgiving Turkey With Bacon

    Best Thanksgiving Turkey with Woven Bacon Strips

    It's a meal that promises huge flavours and a happy full belly. The perfect Thanksgiving turkey recipe that promises the juiciest meat, crispy bacon, and umami gravy. The turkey is flavourful and luscious! Print Recipe Pin RecipePrep Time:30 minsCook Time:4 hrsCourse: Main CourseCuisine: AmericanKeyword: thanksgiving turkey, turkey baconServings: 15 people

    Equipment

    • food processor
    • turkey baster
    • large roasting pan

    Ingredients

    • 7 kg defrosted turkey
    • 1 cup canola oil
    • 1 tsp dried rosemary
    • 1 tsp dried thyme
    • 1 tsp dried oregano
    • 1 tsp dried basil
    • 2 tsp smoked paprika
    • 2 tbsp kosher salt
    • 1 whole garlic
    • 1 large white onion
    • 1 package smoked bacon strips

    Gravy

    • neck of the turkey
    • 2 cups water
    • 2 tbsp flour
    • salt and pepper to your taste

    Instructions

    Turkey Preparation

    • Wash the defrosted turkey and dry with paper towel.
    • Using a fork, poke holes along all parts of the turkey legs and breasts. Space them out evenly and not so close together or the skin might break. Use 1 tbsp of kosher salt and rub all over the turkey. Set aside.

    Marinate Preparation

    • Use a frying pan and add the canola oil. Heat until it smokes.
    • In the meantime, combine all the spice together: rosemary, thyme, oregano, basil, paprika and salt.
    • In a food processor, chop finely the whole bulb of garlic and onion. Combine well with the spices. Put in a heat proof glass bowl.
    • Pour the hot oil on top of the bowl of spices, and stir well to combine everything.
    • To marinate the turkey, wear gloves first. Place the turkey in a dish that is deep and that will also fit inside your fridge. Take a handful of the marinate and start to rub the turkey all over it. Be vigorous and rub hard. Rub the cavity of the turkey as well. If you have extra marinate, put it on top of the turkey and inside the cavity.
    • Plastic wrap the turkey and place it in the fridge. Marinate at least 6 hours or overnight.

    Cooking the Turkey

    • Preheat oven to 325°F. Place rack in the middle of the oven, and take out the other racks.
    • Take the turkey out, move the turkey to the large roasting pan, and discard the plastic wraps.
    • Start to weave the bacon strips on top of the turkey. Make sure it overlaps the legs and breasts.
    • For each end of the bacon strips, secure it on to the turkey by poking it with toothpicks. Count the number of toothpicks used, so when you take it out, you have removed them all.
    • Lay a sheet of tinfoil on top of the turkey securely.
    • Place the turkey inside and set the timer for 3.5 hours (15-20 minutes per pound).

    30-Minute Interval Basting

    • Open the oven door and remove the tin foil, move the rack out slightly and baste the turkey with the juice at the bottom of the pan. Give it a good baste across the legs and breast. Replace the tinfoil and close the oven door.

    Final Stages of Cooking

    • Use a meat thermometer and insert it to the thigh of the turkey. Turkey is done when it reads 170°F in the thickest part of the thigh.
    • For the last one hour of your cooking time, remove the tin foil and let bacon get crispy.
    • When it is time to remove the turkey, allow it to sit outside for 30 minutes before carving.

    Turkey Gravy

    • Once the turkey is moved from the large roasting pan, take the juice out of the pan. Defat the oil from the juice.
    • Take the neck of the turkey and put it in a pot along with 2 cups of water. Boil on medium low heat for 20 minutes along with the juice of the cooked turkey. Discard the neck.
    • In a large cooking pan, fry the flour until brown and fragrant, about 2 minutes. Whisk continuously as you pour the juice into the pan. Keep whisking until the gravy is well blended with no flour lumps. Cook for 5-10 minutes on low.
    • OPTIONAL: Blend the gravy for a smooth puree consistency.
    • Season with salt and pepper to taste.
  • BEST Pumpkin Ravioli With Sage Butter

    BEST Pumpkin Ravioli With Sage Butter

    If you have ever wanted to make restaurant-quality pasta at home, this is the recipe. Pumpkin and spinach ravioli wrapped in chewy homemade dough, finished with sage butter sauce and toasted pecans — the flavour is so layered and the texture so luxurious that guests will genuinely think you ordered from an Italian restaurant. The cost is a fraction, and the satisfaction of making it yourself is something no delivery can touch.

    This post may contain affiliate links. If you purchase through these links, I may earn a small commission at no extra cost to you. Thank you for supporting Love & Harvest!

    Pumpkin ravioli

    Why You Will Love This Pumpkin Ravioli

    Pumpkin and spinach are two ingredients that pair beautifully together — kind of like wine and cheese. The taste is autumnal and exquisite in texture. Pureed pumpkin and spinach folded with panela cheese and cream cheese give the filling a velvet consistency. Lightly seasoned with nutmeg is the secret that brings hints of warmth and nuttiness. A mature dish that can be enjoyed by the whole family.

    If you love this pasta, try our homemade pesto gnocchi next — it uses a similar approach of hand-crafted pasta with bold sauce. For a vegetable-forward pasta, our fresh beet pasta is another showstopper worth trying.

    Ingredients Deep-Dive

    Pumpkin

    The pumpkin used in this recipe is the green Mexican variety — sweeter than the orange variety commonly seen in North America. If you have a variety or canned version you prefer, use what you have. The key is that the pumpkin is fully roasted and pureed to a smooth, thick consistency before going into the filling.

    • Why it matters: Wet pumpkin filling will tear the ravioli during sealing and boiling. Roast the pumpkin first and let it cool completely so excess moisture evaporates.

    Panela Cheese

    Panela is a fresh, smooth Mexican cheese made from pasteurized cow’s milk — low in calories and mild in flavour. It works perfectly here because it blends smoothly into the filling without overpowering the pumpkin. If panela is hard to find, substitute with white cheddar or feta.

    • Why it matters: The cheese adds a creamy, slightly salty counterpoint to the sweet pumpkin. Without it, the filling tastes flat.

    Cream Cheese

    Combined with the panela, cream cheese is responsible for that oozy, luxurious quality when you cut the ravioli in half. It also helps bind the filling so it holds its shape inside the pasta.

    • Why it matters: Cream cheese is what makes this filling feel restaurant-quality rather than homemade.

    Spinach

    Pumpkin and spinach are natural partners. Spinach adds colour, texture, and a mild earthiness that balances the sweetness of the pumpkin. Chop it finely so it distributes evenly through every bite.

    • Why it matters: Without spinach, the filling is visually monotone and misses the textural contrast that makes every bite interesting.

    Sage

    Fried sage in butter is one of the best-kept secrets in fall and winter cooking. When sage leaves hit hot butter, they crisp up and release an intense herbal, almost floral aroma. The flavour transforms completely from raw — it becomes deep, nutty, and satisfying.

    • Why it matters: Sage butter is what elevates this from good pasta to extraordinary pasta. A few leaves of fresh sage make a restaurant-quality sauce in minutes.

    Pecans

    Toasted pecans in butter have a magical, warm, autumnal smell that signals fall is here. They add a satisfying crunch to the sauce and amplify the nuttiness of the sage butter. When pecans are mixed into this beautiful butter mixture, everything about the sauce makes perfect sense.

    • Why it matters: Texture contrast is essential in pasta dishes. The crispy pecan against the soft, chewy ravioli is what makes each forkful memorable.

    Pasta Maker

    A pasta maker attachment makes producing consistent, thin pasta sheets effortless. A ravioli cutter stamp ensures perfectly shaped, evenly sealed ravioli every time. A simple rolling pin works too if you prefer to roll by hand.

    • Why it matters: Consistent dough thickness means every ravioli cooks in the same time. Uneven sheets produce some ravioli that are raw and others that are overcooked.

    what goes with pumpkin ravioli

    Making the Ravioli Dough

    The Philips Pasta Maker makes producing consistent ravioli sheets effortless. I attach the lasagna disc, weigh all the ingredients, put the dry ingredients in the hopper, whisk the liquids separately, and let the machine run. Within 3 minutes it extrudes a perfect pasta sheet. The first 6 inches tend to be uneven — cut those off and put them back in the hopper. Then measure alternating sheets of 12 inches (bottom) and 12.5 inches (top) and keep them covered with a towel so they do not dry out.

    savory pumpkin ravioli

    The Secret to the Sage Butter Sauce

    This sauce is simple but its combination of butter, crispy sage, toasted pecans, apple cider vinegar, and heavy cream is genuinely gourmet. The secret: once the thick sauce is ready, pour it over hot ravioli and add a splash of starchy pasta water. The hot pasta water emulsifies with the thick sauce into a silky, creamy coating. This is the same technique used in fine dining kitchens.

    pumpkin ravioli jamie oliver

    This Recipe Is Vegetarian — But It Does Not Have to Stop There

    This pumpkin ravioli recipe is vegetarian as written. If you want to add protein, some delicious options are: seared tuna, grilled steak, poached chicken, or grilled sausages. The richness of the sage butter sauce stands up well to bold proteins.

    pumpkin ravioli with sage butter

    Frequently Asked Questions

    Can I make the ravioli dough without a pasta machine?

    Yes. Roll the dough by hand with a rolling pin to about 1–2mm thickness. A pasta machine produces more consistent results, but hand-rolled dough works perfectly well. The key is getting the sheet thin enough so the dough cooks through in 4 minutes.

    Why does my ravioli fall apart in the water?

    The two most common causes: the filling was too wet, or the edges were not sealed firmly enough. Make sure the pumpkin puree is dry before mixing the filling, and always brush the edges with egg wash before pressing the top sheet down. Press firmly around each pocket of filling.

    Can I freeze homemade ravioli?

    Yes. Lay the uncooked ravioli flat on a parchment-lined baking sheet and freeze until solid, then transfer to a zip-lock bag. Cook directly from frozen in boiling salted water for 6–7 minutes instead of 4.

    What can I substitute for sage?

    Thyme or rosemary can replace sage if needed. The flavour will be different — thyme is more subtle, rosemary is more assertive — but both work with browned butter and pecans.

    Can I make the filling ahead of time?

    Yes. The pumpkin spinach filling can be made 1 day ahead and stored covered in the fridge. This actually helps the flavours meld. Bring it to room temperature before filling the ravioli.

    What pasta shapes can I use this filling for?

    This filling works in any enclosed pasta shape — tortellini, cappelletti, or large stuffed pasta shells baked with extra sage butter sauce on top are all fantastic variations.

    Pumpkin ravioli in sage cream sauce with sausage on a blue plate

    Pumpkin Ravioli with Sage Butter

    Pumpkin ravioli wrapped in a chewy dough drizzled with sage butter is a culinary experience. Rich in flavour and texture, it is like eating in an up-scale restaurant, minus the cost. Print Recipe Pin RecipePrep Time:35 minsCook Time:15 minsServings: 6 people

    Ingredients

    Ravioli Dough

    • 550 g all purpose flour
    • 4 g sea salt
    • 170 g 2 eggs + milk
    • 37 g water

    Pumpkin Spinach Filling

    • 1.5 cups pumpkin puree
    • 2 garlic clove grated
    • ¼ tsp ground cinnamon
    • ½ tsp ground nutmeg
    • ½ cup panela cheese or cheddar cheese
    • 4 oz cream cheese
    • ¼ cup chopped spinach
    • 2 tsp sea salt
    • pepper to taste

    Sage Butter Sauce

    • ½ cup butter
    • 2 garlic clove grated
    • 20 sage leaves
    • ¼ cup chopped pecans
    • 3 tbsp apple cider vinegar
    • ½ cup heavy cream
    • ½ tsp ground nutmeg
    • 1 tsp sea salt
    • ½ tsp ground black pepper

    Instructions

    Ravioli Dough Using Philips Pasta Machine

    • Attach the lasagna disc to the machine and tightly screw it on.
    • Weigh all the ingredients. Add the flour and salt into the pasta machine’s hopper.
    • In a separate bowl, whisk together all the liquids: eggs, milk, and water until fully combined.
    • Turn the machine on and set it for 3 minutes. Put the lid on and let it run.
    • Slowly and gradually add the liquid into the reservoir at the top of the lid.
    • When the machine finishes mixing, it will begin extruding pasta. The first 6 inches will be uneven — cut them off and place back into the hopper.
    • Measure and cut alternating sheets of 12 inches (bottom) and 12.5 inches (top). Cover sheets with a towel so they do not dry out.
    • Place the bottom sheet on a table. Scoop half a tablespoon of filling onto the sheet with 1-inch gaps. Brush beaten egg around each filling mound.
    • Carefully place the top sheet over the filling, leaving space at the top. Press firmly around each filling pocket to seal.
    • Cut the ravioli with a knife or ravioli cutter. Place on a dry baking sheet and repeat until the dough and filling are used up.
    • Fill a large deep pot with water and bring to a boil. Add 2 tsp of salt. Stir the pot 5 times in the same direction until a vortex forms. Slowly add ravioli in batches of about 10 — do not overcrowd. Stir gently to prevent sticking.
    • Cook for 4 minutes, or until the ravioli floats. Drain and set aside. Reserve a splash of pasta water.
    • Meanwhile, make the sauce: melt together butter, garlic, pecans, and sage in a large skillet over medium heat. Cook, stirring occasionally, until the butter browns and the sage is crisp, 4–5 minutes. Remove the sage leaves and set aside.
    • Reduce heat to low. Add the apple cider vinegar, cream, nutmeg, salt, and pepper. Simmer 1 minute. Add the ravioli and a splash of pasta water, gently tossing to combine. Remove from heat.
    • Serve ravioli topped with crispy sage leaves.
  • Best Homemade Fried Chicken with Ranch Sauce

    Best Homemade Fried Chicken with Ranch Sauce

    This post may contain affiliate links. If you purchase through these links, I may earn a small commission at no extra cost to you. Thank you for supporting Love & Harvest!

    There’s a moment when you bite into a piece of perfectly fried chicken — that ear-splitting crunch, the steam that hits your face, and then the juice that runs — where you realize not all fried chicken is created equal. This recipe was gifted to me by a stranger on a Facebook group who had spent years in restaurant kitchens. He asked nothing in return. I’m passing it on to you the same way.

    Pile of crispy homemade fried chicken on a plate outdoors

    Why This Is the Best Homemade Fried Chicken

    Fried chicken is a social affair. It’s gathering food — the kind that fills a table with noise and happiness. What makes this recipe stand out is a two-part process: a citrus brine overnight and a double-fry method that locks in moisture while building a shattering crust. The result is chicken that’s deeply flavoured all the way to the bone, never dry, never greasy.

    Thank you, Ethan Chavoya, wherever you are.

    Golden fried chicken drumsticks and thighs with a crunchy crust

    Ingredients Deep-Dive

    Ingredients

    The Citrus Brine

    The brine is the heart of this recipe. Lemon juice breaks down the muscle fibres, salt draws moisture in rather than out (counterintuitively), and ginger adds a subtle warmth that doesn’t read as “ginger” in the finished chicken — it just tastes more alive. Sugar balances acidity and encourages browning during frying. Give the chicken a full 12 hours in the brine. Overnight is not optional here — it’s what separates good from unforgettable.

    The Dredge Liquid: Hot Sauce + Buttermilk

    The secret is a sour-base hot sauce mixed into the buttermilk. It tenderises further and leaves a faint tang in the finished crust. In Mexico, Valentina works perfectly. Elsewhere, Frank’s Red Hot Buffalo Sauce is the benchmark. Can’t find buttermilk? Mix 1 cup whole milk with 1 tbsp white vinegar, wait 5 minutes — done.

    The Breading Blend

    The combination of flour, breadcrumbs, and cornmeal creates three different textures in the crust: the flour gives it body, the breadcrumbs add a coarse chew, and the cornmeal produces those irresistible sharp ridges that stay crispy long after the chicken comes out of the oil. The spice blend — paprika, cayenne, garlic and onion powder, poultry seasoning — seasons the crust, not just the meat.

    The Oil and Temperature

    Use a neutral oil with a high smoke point: canola is ideal. The first fry at 275°F sets the crust and partially cooks the meat without burning. A second fry finishes the job and produces the deep amber colour. A deep-fry thermometer is your best tool here — guessing oil temperature is how you get pale, greasy chicken. For air frying, see the section below.

    The Ranch Sauce

    Sour cream base instead of mayonnaise keeps it tangy and light. Fresh chives and parsley are non-negotiable — dried herbs flatten the flavour. A touch of dried dill and white vinegar ties everything together. This ranch keeps for a week in the fridge and will be raided for carrots, celery, and anything else within reach.

    How to Make the Best Fried Chicken (Step-by-Step with Photos)

    Step 1 — Brine the Chicken

    In a large bowl, combine the chicken pieces with all the dry brine ingredients. Add the lemon juice and zest. Toss until everything is evenly coated. Transfer to a sealed bag or covered bowl and refrigerate for 12 hours minimum.

    Step photos: chicken pieces tossed with the brine ingredients in a bowl
    Step photos: chicken pieces lightly coated in buttermilk brine

    Step 2 — Air Dry and Dredge

    The next day, place the chicken on a wire rack over a baking sheet and return to the fridge — uncovered — for 2 hours. This surface drying is critical; wet chicken in hot oil spatters dangerously and produces a soggy crust. While it dries, whisk together the buttermilk, eggs, and hot sauce in one bowl. Combine all the breading ingredients in a second bowl.

    One piece at a time: dip in the wet mixture, then press firmly into the breading on all sides. Place back on the rack. Let the coated pieces rest in the fridge for 1 hour so the breading fully adheres.

    Step photos: hands dredging buttermilk chicken in seasoned flour on all sides

    Step 3 — First Fry (275°F)

    Heat the oil in a large wok or heavy pot to 275°F. Fry 3 pieces at a time — never crowd the pan. Lower each piece in slowly, holding the end for 3 seconds before releasing. Fry for 12–15 minutes until cooked through, then transfer to a paper-towel-lined rack. Repeat with remaining pieces.

    Step photo: tossing a floured chicken piece to shake off excess breading

    Step 4 — Second Fry (375°F) for Extra Crunch

    Raise the oil to 375°F. Fry each piece a second time for 3–5 minutes until deeply golden. The second fry is what produces the signature crunch. Transfer to fresh paper towels. Do not cover — steam will soften the crust.

    Breaded chicken pieces resting on a wire rack before frying
    Tray of flour-coated chicken pieces on a rack next to the dredging bowls

    Air Fryer Method

    Preheat to 400°F for 5 minutes. Cook drumsticks and thighs for 10 minutes, flip, then cook for another 10 minutes. Check doneness with a knife poke at the thickest point — juice should run clear. Internal temperature must reach 165°F. An air-fried version won’t match the deep-fried crunch, but it’s a solid weeknight alternative.

    What to Serve with Fried Chicken

    This chicken pairs beautifully with bright, acidic sides that cut through the richness. Try it alongside our Beet and Avocado Sashimi Appetizer for a party spread, or keep it classic with coleslaw and cornbread. The ranch sauce doubles as a vegetable dip — our kids have it with carrots and celery weekly.

    For a complete feast, the Easy Fall-Off-the-Bone Ribs make an incredible companion for big gatherings. Both can be prepped ahead and served together.

    Frequently Asked Questions

    Can I use chicken wings instead of drumsticks and thighs?

    Yes. Wings work well and make a great appetizer-sized serving. Note that wings cook significantly faster than thighs — reduce the first fry time to around 8 minutes and check doneness before the second fry.

    What if I can’t find buttermilk?

    Make it yourself in 5 minutes: combine 1 cup of whole milk with 1 tablespoon of white vinegar, stir, and let stand for 5 minutes. You’ll see the milk thicken slightly — that’s your buttermilk ready to use.

    How far ahead can I prep this recipe?

    The brine step can be done 24 hours in advance. The fully dredged, uncooked chicken can sit on the rack in the fridge for up to 2 hours before frying. The first fry can be done several hours ahead; just do the second fry right before serving for maximum crunch.

    Can I bake this instead of frying?

    You can, though the crust won’t achieve the same crunch. Bake on a wire rack at 425°F for 35–40 minutes, flipping halfway. Spray lightly with oil before baking to help the breading brown.

    How do I keep the chicken warm for a party?

    After the second fry, place on a wire rack set over a baking sheet in a 200°F oven. This keeps the chicken warm for up to 45 minutes without softening the crust. Do not cover or wrap — trapped steam is the enemy of crispy.

    Is there a Lodge cast iron skillet option?

    Absolutely. A Lodge 12″ cast iron skillet is excellent for shallow-frying this chicken with less oil. Use about 2 inches of oil and maintain temperature carefully — cast iron holds heat well but responds slowly to adjustments.

    best fried chicken love and harvest

    BEST Homemade Fried Chicken with Ranch Sauce

    Incredibley crispy golden brown fried chicken with super juicy flesh inside. The BEST homemade fried chicken you'll taste all made with fresh herbs and spices. A gorgeous bright and fresh brine that will tenderize your chicken for that super moist and juicy texture. All matched with an amazing ranch sauce that will get your guests dipping and crunching away. There is no better way of serving chicken than this. Print Recipe Pin RecipePrep Time:15 minsCook Time:30 minsCourse: Main CourseCuisine: AmericanKeyword: chicken, fried chickenServings: 5 people

    Ingredients

    Chicken Brine

    • 2 kg chicken legs and chicken wings mix
    • 1 TBSP salt
    • 1 TSP pepper
    • 1 spring fresh rosemary chopped
    • ½ TSP fresh thyme chopped
    • 1 TSP fresh ginger grated
    • 1 lemon juice
    • 1 lemon zest
    • 2 TSP sugar
    • 1 TSP chili flakes

    Dredge Liquid

    • 2 eggs
    • 1 cup buttermilk
    • 2 TBSP hot sauce

    Fried Chicken Breading

    • 2 cups flour
    • ½ cup bread crumbs
    • 3 TBSP cornmeal
    • 2 TBSP salt
    • 2 TSP pepper
    • 1 TBSP paprika
    • 2 TSP garlic powder salt
    • 2 TSP onion powder
    • 1 TSP poultry seasoning
    • 1 TSP cayenne powder

    Deep Fry

    • 4 cups canola oil

    Ranch Sauce

    • 1 ½ cups sour cream
    • 5 tsp white vinegar / lemon juice
    • 2 TBSP fresh chives chopped
    • ½ TSP fresh parsley chopped
    • 1 TSP dried dill
    • 1 TSP garlic powder
    • 1 TSP onion powder
    • 2 TSP salt
    • ½ TSP pepper

    Instructions

    Chicken Brine

    • In a large bowl, clean and rinse the chicken. Pat try. Cut the legs into two pieces separating the drumstick and thigh. Add the salt, pepper, rosemary, thyme, ginger, lemon juice, lemon zest, sugar, and chili flakes with the chicken. Toss and rub the chicken with the marinate. Put everything in a plastic bag and marinate overnight (12 hours).

    To Prepare Fried Chicken

    • Next day, take out a baking rack with a fitted baking sheet underneath. Take the bag of chicken out the fridge and give it a light toss to flick out access liquid. Put all the chicken pieces in the rack to air dry in the fridge.
    • Prepare the dredge liquid by combining the egg, buttermilk and hot sauce together with a whisk in a large bowl.
    • In a separate bowl (preferably a smaller bowl with tall wall – like a small pot) put the breading ingredients together. Combine well the flour, bread crumbs, cornmeal, salt, pepper, paprika, garlic salt powder, onion powder, poultry seasoning, and cayenne powder together.
    • Take the chicken out the fridge. Dip each chicken pieces separately in the liquid first. make sure all surface is covered with the liquid, and quickly drop the chicken piece in the breading bowl. Rub and put pressure to make sure all surface area is covered with the breading flour. if you see a gap, add some flour and rub it in. Give it a few taps for access flour, and place it back on the drying rack. Repeat until all the chicken pieces are dredge and breaded. Let them rest in the fridge for 1 hour before deep frying.

    To Make Fried Chicken

    • Heat your vessel to deep fry. I have a wok and I enjoy deep frying everything there. Add 4 cups of fresh canola oil. Preheat oil to 275F.
    • Depending how big the deep fryer you have, add enough chicken pieces where it has room to swim around and not be over crowded. I recommend 3 pieces at the same time.
    • Carefully dip half the chicken in the oil and hold on to the end for 3 seconds, and let it all go in the deep fryer. This is the reason we need the chicken as dry as possible. If there's liquid on the chicken, the oil will explode and burn your hand. Repeat until you have three pieces in the deep fryer. Fry for 12-15 minutes.
    • In a drying rack, add some paper towels. When the chicken is done cooking, take them out and place them on top of the paper towel. Make sure you're not over crowding the chickens. For them to maintain crispy, it needs air circulation to completely dry and not have any moisture. Serve

    Ranch Sauce

    • Whisk together the sour cream, white vinegar / lemon juice, fresh chives, and fresh parsley. Add the spices. Pour into a jar and chill in the refrigerator until ready to serve. This dressing will keep nicely in the refrigerator for up to a week. Enjoy!
  • Easy Ribs Recipe with Homemade BBQ Sauce

    Easy Ribs Recipe with Homemade BBQ Sauce

    This post may contain affiliate links. If you purchase through these links, I may earn a small commission at no extra cost to you. Thank you for supporting Love & Harvest!

    The biggest mistake people make with ribs at home is trying to grill them raw. That’s how you end up with a chewy, undercooked rack that nobody’s proud of. This recipe flips the script: slow-bake the ribs in the oven first until they’re impossibly tender, then finish them over charcoal for that caramelised, smoky crust. The result is fall-off-the-bone ribs that look like a grill master pulled them off — even if you’ve never grilled before.

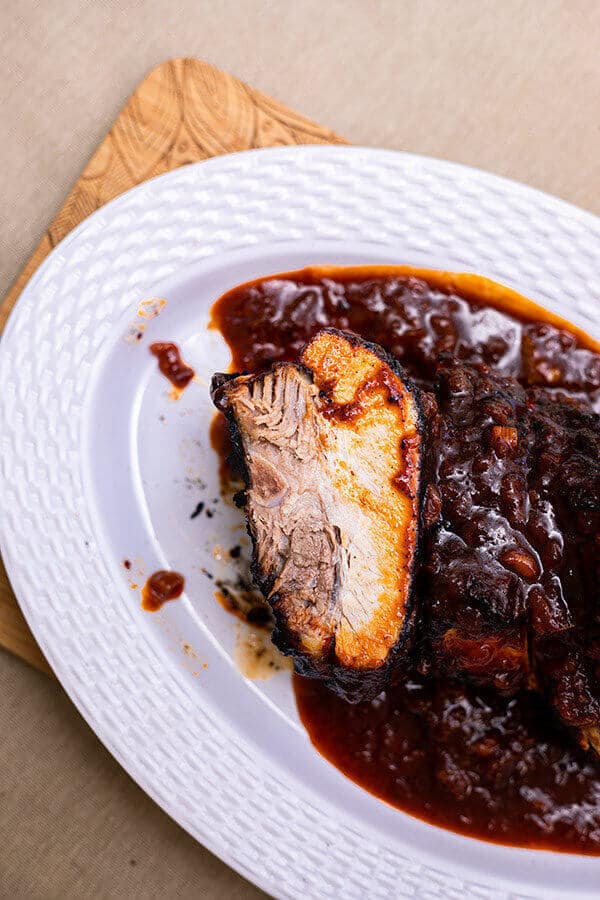
    Glazed BBQ ribs on a white platter with homemade sauce

    Why This Ribs Recipe Works

    Reason 1: Bake Ahead, Grill with Confidence

    My husband loves this recipe because it removes all the pressure from grilling. The ribs are already fully cooked before they touch the grill — there’s no stress about raw meat, no thermometers required for doneness. All the grill needs to do is add caramelisation and char. He can focus on the performance and let the oven do the real work.

    bbq ribs recipe grill

    Reason 2: The Flavour Is Extraordinary

    The dry rub and homemade BBQ sauce use pantry staples, but together they produce something that tastes restaurant-calibre. The sugar in the rub caramelises on the grill. The liquid smoke, tamarind vodka, and molasses in the sauce create layers of smoky, tangy, deep flavour that store-bought BBQ sauce simply cannot mimic.

    Reason 3: Truly Hands-Off

    95% of the cooking time requires nothing from you. The ribs bake in foil for 2.5 hours, and then you grill them for 7–10 minutes. It’s dummy-proof. Once those ribs finish the slow bake, they will taste good no matter what happens on the grill. A great recipe for beginners and pros alike.

    Rack of ribs searing on a charcoal grill

    Ingredients Deep-Dive

    Ingredients

    The Dry Rub

    The rub is where the ribs’ flavour foundation is built. Kosher salt draws moisture to the surface and seasons the meat deeply. Brown sugar creates the caramelised crust on the grill and balances the savoury spices. Smoked paprika adds colour and a subtle smokiness even before the grill. Cumin adds an earthy warmth that makes the flavour complex without being identifiable as a single spice. Grind the rub fresh if you can — the difference is notable.

    Liquid Smoke

    This is what gives indoor or charcoal-light BBQ that authentic smoked-meat flavour. The concentrate I use is all-natural hickory liquid smoke — a few drops go a long way. I also use it on my Cured Salmon Gravlax recipe. Hickory and mesquite combined gives a complex, campfire-style depth that no dry spice can replicate.

    Molasses and Brown Sugar

    Together these two are the backbone of the BBQ sauce. They don’t make it sweet in a candy way — they create the deep, jammy thickness that makes a great BBQ sauce cling to the ribs. The molasses also adds a slight bitterness that balances the honey and vinegar.

    Smirnoff Spicy Tamarind Vodka

    This is the ingredient that sets this BBQ sauce apart from everything else. In Mexico it’s easy to find; elsewhere, substitute with dark rum. The tamarind adds a fruity tartness and the spice builds quietly in the background. It’s the unexpected ingredient that makes people ask “what is in this sauce?”

    Smoker Chips

    If you’re using charcoal, add wood chips to the coals. Apple or hickory smoker chips added to the coals give the ribs a real smoke character that liquid smoke alone can’t fully replicate. Soak the chips in water for 30 minutes before adding so they smoulder rather than burn.

    pork ribs recipe

    Charcoal, Propane, or Smoker?

    All three work. For the grilling step we just need high heat to caramelise the exterior — the ribs are already fully cooked. Personally, I prefer charcoal with a handful of wood for the smoke it generates. But if all you have is a propane grill set to high, these ribs will still be outstanding.

    Small blue kettle charcoal grill on a stone patio

    What to Serve with the Ribs

    Here are my favourite sides with these fall-off-the-bone ribs:

    • Tortillas — a favourite around here in Mexico. A warm tortilla is perfect for wrapping the meat with the BBQ sauce.
    • Potatoes — mashed, baked, or potato salad. All work beautifully as a starchy companion.
    • Salads — greens help cut through the richness. Try our Cold Beet and Avocado Sashimi — it’s elegant and goes perfectly with BBQ.
    • Bread — the best way to soak up extra sauce. Our Best Fried Chicken also makes an incredible pairing for a full feast.

    bbq pork ribs recipe

    Frequently Asked Questions

    Can I make these ribs ahead of time?

    Yes — and in fact they’re better that way. Bake the ribs up to 3 days ahead. The flavour develops more fully and the cold, firm ribs hold together better on the grill. Refrigerate wrapped in foil and grill straight from the fridge, adding a few extra minutes for the heat to penetrate.

    What if I burnt the ribs on the grill?

    Honestly? The burnt edges taste great. Because of the sugar in the rub, the meat chars quickly — and that slightly burnt, caramelised exterior with the homemade BBQ sauce is absolutely delicious. Don’t panic if parts get darker than expected.

    Can I make these for camping?

    These are arguably the perfect camping food. Bake them at home, transport them wrapped in foil. At the campsite, all you need is a grill and 10 minutes. They’re fast, impressive, and make you look like you cooked all day.

    How spicy is the BBQ sauce?

    Mildly spicy. The red chili pepper and tamarind vodka add a background warmth, not heat. If you want more kick, double the chili pepper or add a few drops of hot sauce to the finished sauce. Kids in our house eat this without complaint.

    Can I use spareribs instead of baby back ribs?

    Yes. Spareribs are larger and take longer to bake — allow 3.5 hours instead of 2.5 hours. Everything else in the recipe stays the same. Baby back ribs are leaner and more tender; spareribs have more fat and flavour.

    What’s the best way to reheat leftovers?

    Wrap leftover ribs in foil and reheat in a 300°F oven for 20–25 minutes. Unwrap for the last 5 minutes to re-crisp the exterior. Avoid microwaving — it makes the crust soggy and toughens the meat.

    Sliced BBQ ribs covered in homemade sauce on a white platter

    Easy Fall-Off-The-Bone Ribs with Homemade BBQ Sauce

    Easy and delicious slow-baked ribs in the oven for that juicy tender interior, and grilled over charcoal for that crispy caramalized exterior. Super addicting and adored by many! Print Recipe Pin RecipePrep Time:10 minsCook Time:3 hrsCourse: Main CourseCuisine: AmericanKeyword: BBQ, BBQ Sauce, Grill, Grilled Ribs, oven-baked ribs, Ribs, Ribs RecipeServings: 8 people

    Equipment

    • charcoal grill

    Ingredients

    Ribs Dry Rub

    • 2½ tbsp kosher salt
    • 1 tbsp garlic powder
    • 1 tbsp onion powder
    • 1 tbsp ground cumin
    • 3 tbsp brown sugar
    • 1 tbsp smoked paprika
    • ½ tsp Mexican spice
    • ½ tsp ground black pepper
    • 4 kg baby back pork ribs roughly about 8 racks

    BBQ Sauce

    • 2¼ tbsp vegetable oil
    • ½ white onion finely chopped
    • 1½ cup water
    • ½ cup tomato paste
    • ½ cup white vinegar
    • ⅓ cup brown sugar
    • 2½ tbsp honey
    • 2 tbsp worcestershire sauce
    • 2 tsp salt
    • ¼ tsp black pepper
    • 1¼ tsp liquid smoke flavouring
    • 2 tsp Smirnoff Tamarind Vodka
    • 3 garlic clove grated
    • ¼ tsp smoked paprika
    • 1 tbsp dark molasses
    • ½ tsp red Chili pepper
    • rib juice reserved

    Instructions

    Ribs Marinate

    • Preheat oven to 300°F.
    • Combine salt, garlic powder, onion powder, cumin, brown sugar, smoked paprika, mexican spice, and black pepper in a small bowl.
    • Place each rack of ribs on a double layer of foil; sprinkle rub all over ribs. Wrap racks individually and divide between 2 baking sheets.Bake ribs until very tender but not falling apart, about 2.5 hours for baby backs and 3.5 hours for spareribs.

    Best BBQ Sauce

    • Heat oil in a medium saucepan over medium heat. Cook and stir the onions in oil for 5 minutes. Stir in water, tomato paste, vinegar, brown sugar, honey, and Worcestershire sauce.
    • Season with 2 teaspoons salt, 1/4 teaspoon black pepper, liquid smoke, tamarind liquor / rum, garlic, smoked paprika, dark molasses, rib juice, and 1/2 tablespoon ground chile pepper. Bring mixture to a boil, then reduce heat. Simmer for 45 minutes, uncovered, or until sauce thickens. Remove from heat, and set sauce aside.
    • Carefully unwrap ribs; pour any juices from foil into a 4-cup heatproof measuring cup; reserve juices. Let ribs cool completely. Cover and chill juices. Rewrap ribs in foil and chill. Build a medium-hot fire in a charcoal grill, or heat a gas grill to high. If youre using charcoal, add some wood chips so there's a slight smoke to smoke the ribs to give it more flavour.
    • Add bbq sauce.
    • ***DO AHEAD: Ribs can be baked up to 3 days ahead (the flavor will be more developed, and the cold ribs will hold together better on the grill as they heat through).***

    Grilling

    • Grill ribs, basting with barbecue sauce mixture and turning frequently, until lacquered and charred in places and heated through, 7-10 minutes. Transfer to a cutting board; cut between ribs to separate. Transfer to a platter and serve with additional barbecue sauce.

    Notes

    ***DO AHEAD: Ribs can be baked up to 3 days ahead (the flavour will be more developed, and the cold ribs will hold together better on the grill as they heat through).***

  • How To Make Gourmet Homemade Sausages: Chorizo & Apple Sage

    How To Make Gourmet Homemade Sausages: Chorizo & Apple Sage

    This post may contain affiliate links. If you purchase through these links, I may earn a small commission at no extra cost to you. Thank you for supporting Love & Harvest!

    Once you make sausages from scratch, it’s very hard to go back to the grocery store kind. Not because it’s faster or cheaper — it isn’t — but because the taste of fresh, nitrate-free sausage made with real herbs and your own choice of spices is in a different league entirely. This guide walks you through two gourmet recipes: a vibrant, chilli-red Classic Chorizo and a sweet, aromatic Apple Sage Maple Syrup breakfast sausage. Both are easier than you think.

    homemade sausages

    Why Make Your Own Sausages?

    Commercial sausages contain nitrates — preservatives that help give them their pink colour and extended shelf life. At low levels they’re considered safe, but they’re still there. When you make sausages at home, you control every ingredient: the quality of the pork, the salt type, the herbs. You know exactly what’s inside. The taste reflects that.

    This is also a surprisingly fun family project. Kids love the stuffing process, and the moment the first batch hits a hot cast iron skillet, the smell alone makes everyone appear in the kitchen.

    homemade sausage seasoning

    Ingredients Deep-Dive

    Ingredients

    The Meat Ratio: Pork + Pork Fat

    The standard ratio is 80% lean ground pork to 20% back fat. The fat is not optional — it’s what gives the sausage its juicy, succulent texture and prevents it from drying out during cooking. Ask your butcher to grind both the lean and fat together twice through the machine. Two passes through a fine grinder creates the smooth, emulsified texture that commercial sausages achieve with machinery. If you want to invest in your own machine, a KitchenAid meat grinder attachment is excellent for home use.

    Classic Chorizo: Ancho and Guajillo Chillies

    These two dried Mexican chillies are the soul of the chorizo. Ancho is the dried version of a poblano — it’s fruity, mild, and adds deep colour. Guajillo is slightly more tannic with a berry-like flavour. Neither is hot. Together, they produce the brick-red colour and complex flavour that makes Mexican chorizo unmistakable. Combined with white vinegar (which tenderises the meat and brightens the flavour), Mexican oregano, and a pinch of clove and cinnamon, this is a chorizo that tastes authentic and homemade in the best possible way.

    Apple Sage Maple Syrup: Sweetness with Depth

    This sausage is an homage to the breakfast sausages I grew up eating in Vancouver — sweet, fat-rich, and deeply comforting. Grated apple adds natural sweetness and moisture. Fresh sage provides an herbal backbone. Maple syrup creates the sticky-sweet glaze when the sausages hit a hot pan. A splash of sweet red wine rounds everything out. These are remarkable on their own, but also extraordinary crumbled into pasta or egg dishes.

    The Casing

    Natural hog casings are available at most butchers and specialty meat shops. They give the sausages that classic snap when you bite in, and they hold up beautifully on a cast iron skillet. Submerge them in lukewarm water and rinse the insides by running water through the tubes before use. If you can’t source natural casings locally, sausage stuffers and casing kits are available online.

    Salt Choice Matters

    Skip curing salt (sodium nitrate) — it’s unnecessary for fresh sausages you’ll cook within a few days. Use high-quality sea salt. We use Sal Faro Verde from Colima, Mexico — a western state famous for its natural sea salt. The mineral content affects flavour in a noticeable way. Good sea salt is an investment that pays off in every dish you make.

    gourmet sausage recipes

    Tools You Need

    This recipe is designed to require minimal equipment. All you need:

    • A butcher who will grind your pork and fat (twice)
    • A large funnel (wider mouth is easier)
    • Natural hog casings (from your butcher or online)
    • A toothpick for air bubbles

    That’s it. No sausage stuffer machine required, though you’re welcome to upgrade. The funnel method is slower but completely achievable for home batches. If you cook sausages often, a dedicated vertical sausage stuffer will save you significant time on larger batches.

    unique homemade sausage recipes

    How to Stuff the Sausages

    Tie one end of the casing tightly. Feed the casing onto the funnel accordion-style, leaving about 4 inches hanging off the end. Fill the funnel with meat and use your thumb to push it through. Work slowly — you want firm, evenly filled sausages without air pockets. Poke any air bubbles with a toothpick as they appear.

    Don’t overstuff. Leave room in the casing for expansion during cooking. An overstuffed sausage will split open on the heat. A split sausage still tastes good, but it reveals all the filling and loses its shape. When all the casing is filled, twist into links at 5-inch intervals, alternating the direction of each twist.

    The 12-Hour Fridge Rest

    After stuffing, lay the sausage links uncovered on a rack over a baking sheet and refrigerate for at least 12 hours. This step is essential for two reasons: it lets the meat absorb the seasoning fully, and it dries the outer casing slightly so it doesn’t burst from excess moisture during cooking.

    Serving Suggestions

    The Chorizo is spectacular in scrambled eggs, crumbled over fresh homemade pasta, or simply pan-fried and served with crusty bread. The Apple Sage sausages are outstanding as a breakfast plate alongside eggs and toast, or paired with a bright salad like our Beet and Avocado Sashimi for a brunch board.

    Frequently Asked Questions

    How long do homemade sausages keep?

    Fresh sausage links keep in the refrigerator for up to 2 days after the drying stage. For longer storage, freeze them for up to 3 months. Freeze individually or separated by parchment paper so they don’t stick together. Thaw overnight in the refrigerator before cooking — never on the counter.

    Do I need a sausage machine?

    No. A large funnel and your hands are sufficient for home batches. The process is slower than a dedicated stuffer, but entirely achievable. If you plan to make sausages regularly, a vertical sausage stuffer is a worthwhile upgrade — they fill casings much faster and with more even pressure.

    What if the casing breaks during stuffing?

    It happens to everyone, especially on the first batch. If the casing tears, stop, tie off what you have, and start a new section. A casing tear doesn’t affect the taste — the sausage just won’t hold its shape as neatly. Those broken ones become the cook’s snack.

    Can I skip the casings and make sausage patties instead?

    Absolutely. Shape the seasoned meat into patties and cook directly in a cast iron skillet over medium heat. You lose the snap of the casing but the flavour is identical. This is also a great way to test your seasoning before investing in casing materials.

    Can I freeze the sausage meat before stuffing?

    Yes. Season the meat, mix thoroughly, then freeze in portions before the stuffing step. Thaw overnight in the fridge, then stuff and proceed with the drying step. This is helpful if you want to prep the meat one weekend and stuff the following weekend.

    What’s a good sausage flavour variation to try next?

    Some excellent combinations to experiment with: rosemary with cayenne and sea salt; habanero with garlic and onion powder; blueberry with ginger, nutmeg, and maple syrup; cheddar cheese cubed into the pork with paprika; or a Cajun blend of cumin, cayenne, and paprika. The template is always the same — 1kg pork, 200g fat, 2 tbsp sea salt — and everything else is creative freedom.

    homemade fresh chorizo

    Gourmet Fresh Sausages: Classic Chorizo & Apple Sage

    Learn how to make fresh gourmet Sausages right at home. Two simple recipes, Classic Chorizo and Apple Sage Maple Syrup sausages. You'll fall in love with these two popular choices that is bursting with flavour and colour. Print Recipe Pin RecipePrep Time:30 minsCook Time:12 mins

    Equipment

    • funnel

    Ingredients

    Classic Chorizo

    • 1 kg ground pork grounded twice in the machine of your butcher
    • 200 g pork back fat, grounded
    • 5 tbsp white vinegar
    • 1 ancho chili
    • 2 guajillo chili
    • 1.5 tsp paprika
    • 1 tsp vegetable oil
    • 2 tbsp sea salt
    • ½ tsp ground cumin
    • ¼ tsp ground black pepper
    • 1 tbsp mexican oregano
    • a pinch of clove
    • ¼ tsp cinnamon
    • 1 garlic, grated
    • 6 feet small hog casings

    Apple Sage Maple Syrup Breakfast Sausages

    • 1 kg ground pork grounded twice in the machine of your butcher
    • 200 g ground pork back fat
    • 2 tbsp sea salt
    • 2 tsp ground fresh black peppers
    • 3 tbsp brown sugar
    • 2 small apple, peeled and grated
    • 2 garlic clove, grated
    • 10 fresh sage leaf, chopped
    • ½ cup maple syrup
    • ¼ cup sweet red wine
    • 6 feet small hog casings

    Instructions

    Classic Chorizo

    • Combine all ingredients in a large bowl. Wear gloves in this process and mix, push, knead and squeeze the mixture until well blended.
    • Wrap well and chill overnight or around 8 hours before using.
    • To taste for seasoning, make a small patty of the sausage mixture and cook it in a small skillet over medium-low heat. Taste and adjust the seasoning to your liking. If not shaping the sausages immediately, refrigerate until you’re ready to proceed.
    • To make sausage links, put the casings in a medium bowl and set it in the sink. Rinse the casings under cool running water: Hold one end of each piece of casing open under the tap and flush it out by gently running cool water through it. (Once you fill part of the casing, use your hands to push the water through to other end.) Fill the bowl with fresh, cool water and let the casings soak for 10 minutes.
    • Take out your large funnel. Splash cool water onto the end to moisten it. Open an end of one piece of casing and pull it over the end of the tube. Push the rest of the casing onto the tube accordion-style, leaving 3 or 4 inches hanging off the end.
    • Fill the funnel with the sausage mixture and feed it through with your thumb or fingers just until it reaches the end of the tub. Tie the end of the attached casing into a knot, and slide it up over the tube until the knot hits the tip of the tube.
    • Continue to feed the meat mixture through the tube to fill the casing, pressing your thumb and forefinger against the tip of the tube to control the rate and tightness of the filling. Go slowly, don’t overstuff (but do stuff firmly), and watch for air holes. When there are only 3 to 4 inches of empty casing left, stop the feed, slip the casing off the tube and tie it in a knot about 1/2 inch from the end of the sausage filling—this extra space will fill in as you make links
    • Use a skewer or toothpick to prick any air holes that have formed during stuffing. Repeat with the remaining casings and sausage mixture.
    • To make links, lay one sausage at a time on a clean work surface, with the front end of the sausage (the end where you began filling) in front of you and the rest of the sausage lying to the right. Measure 5 inches from left to right and pinch the casing at that spot between your thumb and forefinger. Twist the unlinked portion away from you at least 4 or 5 turns to bind off the link on the left. Measure another 5 inches and pinch and twist away from you to form another link. Repeat until you reach the end of the casing, always twisting in the same direction. Prick any remaining air holes.
    • Lay the links, uncovered, on a rack set over a rimmed baking sheet. Dry in the refrigerator for 12 hours to allow the flavors to meld and to give the casings a good bite when cooked. Drying will also reduce the amount of moisture in the meat, too much of which can steam and lead to bursting.
    • To cook the sausage links, heat the oil in a large, preferably cast-iron, skillet over medium heat. Cook, turning as needed, until browned and cooked through, about 12 minutes.

    Apple Sage Maple Syrup Sausages

    • In a small bowl, mix the salt, pepper, garlic, and sage. Add the seasonings and the wine to the ground meat and mix briefly but thoroughly with your hands. Don’t overmix, or the fat could begin to melt.
    • To taste for seasoning, make a small patty of the sausage mixture and cook it in a small skillet over medium-low heat. Taste and adjust the seasoning to your liking. If not shaping the sausages immediately, refrigerate until you’re ready to proceed.
    • To make sausage links, put the casings in a medium bowl and set it in the sink. Rinse the casings under cool running water: Hold one end of each piece of casing open under the tap and flush it out by gently running cool water through it. (Once you fill part of the casing, use your hands to push the water through to other end.) Fill the bowl with fresh, cool water and let the casings soak for 10 minutes.
    • Take out your large funnel. Splash cool water onto the end to moisten it. Open an end of one piece of casing and pull it over the end of the tube. Push the rest of the casing onto the tube accordion-style, leaving 3 or 4 inches hanging off the end.
    • Fill the funnel with the sausage mixture and feed it through with your thumb or fingers just until it reaches the end of the tub. Tie the end of the attached casing into a knot, and slide it up over the tube until the knot hits the tip of the tube.
    • Continue to feed the meat mixture through the tube to fill the casing, pressing your thumb and forefinger against the tip of the tube to control the rate and tightness of the filling. Go slowly, don’t overstuff (but do stuff firmly), and watch for air holes. When there are only 3 to 4 inches of empty casing left, stop the feed, slip the casing off the tube and tie it in a knot about 1/2 inch from the end of the sausage filling—this extra space will fill in as you make links
    • Use a skewer or toothpick to prick any air holes that have formed during stuffing. Repeat with the remaining casings and sausage mixture.
    • To make links, lay one sausage at a time on a clean work surface, with the front end of the sausage (the end where you began filling) in front of you and the rest of the sausage lying to the right. Measure 5 inches from left to right and pinch the casing at that spot between your thumb and forefinger. Twist the unlinked portion away from you at least 4 or 5 turns to bind off the link on the left. Measure another 5 inches and pinch and twist away from you to form another link. Repeat until you reach the end of the casing, always twisting in the same direction. Prick any remaining air holes.
    • Lay the links, uncovered, on a rack set over a rimmed baking sheet. Dry in the refrigerator for 12 hours to allow the flavors to meld and to give the casings a good bite when cooked. Drying will also reduce the amount of moisture in the meat, too much of which can steam and lead to bursting.
    • To cook the sausage links, heat the oil in a large, preferably cast-iron, skillet over medium heat. Cook, turning as needed, until browned and cooked through, about 12 minutes.
  • Fresh Beet Pasta & Lemon Garlic Alfredo

    Fresh Beet Pasta & Lemon Garlic Alfredo

    This post may contain affiliate links. If you purchase through these links, I may earn a small commission at no extra cost to you. Thank you for supporting Love & Harvest!

    The first time you serve this pasta, people will think you spent hours in the kitchen. You didn’t. The colour comes from beet juice, the creaminess from a simple lemon garlic alfredo, and the pasta itself takes about 3 minutes in a machine. What you get on the plate looks stunning, tastes extraordinary, and is 100% vegetarian. It’s become one of our family’s most requested meals — including by the kids, who love calling it “pink pasta.”

    beet pasta

    Why You’ll Love This Beet Pasta

    • Stunning colour — The beet turns the pasta a vivid magenta. Once it meets the cream sauce it shifts to a deep rose-pink. It’s genuinely beautiful on a plate.
    • Unbeatable fresh pasta flavour — There is no comparison between homemade fresh pasta and store-bought dried. The texture is silky, the bite is tender, and the beet adds a subtle earthiness that’s unlike anything else.
    • Fun family project — Kids love feeding the pasta machine and watching the pink noodles come out. It turns cooking into a small event.
    • Ready in 3 minutes — With the Philips Pasta Maker, the dough kneading and extrusion is automated. You handle the prep and cooking; the machine does the labour.

    beet pasta with lemon garlic Alfredo

    Ingredients Deep-Dive

    Ingredients

    Beet — The Star Ingredient

    Beets are available year-round in most markets in red, purple, yellow, and white varieties — sometimes even striped. For this pasta, use red or purple for the most dramatic colour.

    The earthy, slightly sweet flavour of beet is the reason this pasta needs a bright sauce. The lemon tang in the alfredo brings out the beet’s natural depth and creates a balance that makes the dish feel complete rather than just colourful.

    Flour — All-Purpose or Bread Flour?

    All-purpose flour is the standard choice for homemade pasta — it produces a soft, pliable dough with good stretch. If you want a chewier pasta with more bite, substitute 50% of the all-purpose with bread flour. Bread flour has higher protein content which creates more gluten structure — the pasta cooks firmer and has more resistance when you bite through it. Both versions are excellent; it’s a texture preference.

    The Pasta Machine

    This recipe is built around the Philips Pasta and Noodle Maker. It kneads the dough, extrudes it through a disk, and produces fresh pasta in under 3 minutes. You can change the disk to produce spaghetti, penne, fettuccine, and other shapes. It’s one of the most-used machines in our kitchen. If you want the upgraded version with a built-in scale and more disk options, the Philips Avance Automatic Pasta Maker Plus is worth the investment if you make pasta regularly.

    Cream Cheese — The Alfredo Secret

    The alfredo sauce uses cream cheese instead of heavy cream. This produces a sauce that’s thicker, tangier, and more stable — it doesn’t break or turn greasy when reheated the way cream-based alfredo does. Philadelphia Cream Cheese is the standard choice; its consistent quality makes the sauce reliable every time. The cream cheese melts into the hot milk and butter without needing to be at room temperature.

    Lemon — Juice and Zest

    Both the juice and the zest go into the sauce. The juice provides the acid that cuts through the fat and makes the cream cheese sauce taste bright rather than heavy. The zest adds fragrance — a floral lemon note that elevates the dish without being harsh. Meyer lemons are slightly sweeter; Eureka lemons are more traditional. Either works. Always strain out seeds when squeezing — biting into a lemon seed is memorably unpleasant.

    Parmesan Cheese

    Use a block of real Parmigiano-Reggiano and grate it yourself. The pre-grated powdered version has added anti-caking agents that prevent it from melting properly — it clumps in the sauce rather than incorporating smoothly. A fresh block has a nutty, crystalline richness that makes the difference between a good alfredo and a great one.

    beet pasta recipe

    Pro Tips

    Pro Tip 1: Blend the Beet, Don’t Juice It

    You have two options for adding beet to the pasta dough: juice the beet (concentrated, vibrant colour) or blend the cooked beet into a smooth puree (retains all the fibre). Juicing produces a slightly more electric colour; blending keeps the whole beet in the pasta without any texture difference in the finished noodles. I prefer blending: you use the whole beet and lose nothing in the process. Blend on high until completely smooth with no chunks before adding to the pasta machine.

    Pro Tip 2: The 216g Liquid Measurement

    The Philips Pasta Maker requires a specific liquid-to-flour ratio for optimal results. For this recipe: place a container on a scale, zero it, add 2 eggs, then fill with beet puree until the total reaches exactly 216g. This precision ensures the dough is the right consistency every time — not too dry to extrude, not too wet to hold its shape.

    Pro Tip 3: Add Protein to Make It Hearty

    This is a naturally vegetarian dish. Grilled chicken, sautéed shrimp, or seared beef strips all work beautifully alongside the pasta and sauce. Make a slightly larger batch of the alfredo sauce if you’re adding protein so you have enough to coat everything generously.

    What to Serve Alongside

    For a complete dinner table, this beet pasta pairs magnificently with our Beet and Avocado Sashimi Appetizer — both dishes feature beet and create a visually stunning spread. A crisp green salad or garlic bread rounds out the meal. For a meat option to accompany, our Best Homemade Fried Chicken provides a satisfying contrast to the pasta’s creaminess.

    beetroot pasta

    Frequently Asked Questions

    Do I need a pasta machine for this recipe?

    The Philips Pasta Maker automates the kneading and extrusion and makes the process fast and consistent. That said, you can make beet pasta by hand: mix the flour and beet-egg liquid into a dough, knead for 8–10 minutes until smooth, rest for 30 minutes, then roll thin with a rolling pin and cut into strips. It takes more time and arm strength, but the result is the same.

    Can I make this pasta without eggs (vegan)?

    Yes. Replace the eggs with additional beet puree. You’ll need to adjust the liquid amount slightly — start with the same 216g total and add a tablespoon more puree if the dough seems too dry. The pasta will be slightly less rich but still colourful and delicious. The alfredo sauce can be made vegan with plant-based cream cheese and milk.

    Can I make the pasta ahead of time?

    Fresh beet pasta is best cooked the day it’s made. If you need to make it ahead, lay the extruded pasta flat (not overlapping) on a floured baking sheet, dust lightly with flour, and refrigerate for up to 24 hours. Alternatively, allow the pasta to dry at room temperature for 2 hours, then store loosely in an airtight container for up to 2 days.

    Why does my beet pasta turn pink instead of deep red?

    This is normal. The alkaline proteins in the egg and the heat from boiling water both affect the beet’s pigment. Once you add the cream sauce, the pasta turns a beautiful rose-pink. If you want a deeper colour, use more beet puree and less egg, or use only the beet without egg (vegan version).

    Can I use beet powder instead of fresh beet?

    Yes. Beet powder is a convenient alternative — add 2–3 tablespoons to the flour before mixing. You’ll still get colour and a mild beet flavour, though it’s slightly less vibrant than fresh beet puree. The nutritional profile is also slightly different since processing removes some of the whole beet’s fibre.

    What pasta shapes work best with this sauce?

    Spaghetti and fettuccine are the most visually striking — the long strands show off the colour best. Penne and rigatoni also work well because the alfredo sauce clings inside the tubes. Avoid very thin pasta shapes like angel hair — the sauce is too thick and they tend to clump.

    Pink beet pasta tossed in lemon garlic Alfredo with a lemon half

    Fresh Beet Pasta and Lemon Garlic Alfredo Sauce

    Delicious homemade beet pasta with a lemon garlic alfredo sauce. It's tangy, garlicky, and oh so creamy! Print Recipe Pin RecipePrep Time:20 mins35 minsCourse: Main CourseCuisine: American, MediterraneanKeyword: alfredo, beet, fresh, fresh pasta, garlic, homemade pasta, lemon, pasta, phillips pasta and noodle machineServings: 6 people

    Equipment

    • high speed blender
    • Philips Pasta and Noodle Maker

    Ingredients

    Beet Pasta

    • 1 medium size beet root
    • 2 eggs
    • 550 g all purpose flour
    • 7 g salt

    Lemon Garlic Alfredo Sauce

    • ½ cup butter
    • 3 garlic clove grated
    • 1½ cup whole milk
    • 1 8oz cream cheese
    • 2 tsp sea salt
    • ½ lemon juice
    • lemon zest
    • ¼ cup parmesan cheese grated
    • black pepper

    Instructions

    Beet Pasta

    • Peel the skin off the beet and cut it in half. fill a small pot with water and put the beets in. cover it with a lid and cook it for 10 minutes. Let it cool, but reserve the water.
    • Place the beet within a high-speed blender with ½ cup of its reserved water. Blend on high until it is a smooth smoothie. set aside.
    • On a measuring scale, put a medium size container, and turn it on. Make sure it says 0g. Add 2 eggs to the container and fill the container up with beet juice until it reaches 216g. Set aside.

    Philips Pasta machine

    • take out the Philips pasta and noodle maker. Make sure you have the spaghetti disk attached to the ends. Open the lid, and put in the flour and salt. Close the lid.
    • Turn the machine on and press ‘Start.’ Slowly pour in the beet and egg liquid.
    • Let the machine knead the dough for 3 minutes. It will beep once it is ready to extrude the pasta.
    • Cut the pasta when it is about 20-25cm long.
    • Lay the fresh pasta on a baking sheet, and don’t overlap the pasta on top with more.

    Cooking the Beet Pasta

    • Using a large pot, fill it ¾ full and add 3 tsp of salt (roughly 4L of water). Wait for it to boil.
    • Once the water is rapidly boiling, slowly add the fresh pasta to the water. Immediately stir it with chopsticks or something soft that won’t break the pasta apart. Cook for 2 minutes.
    • Add the cooked pasta to a bowl of water. Move the noodles in the water around. Rinse and repeat at least once. strain the noodles and place them in a large bowl. Again don’t place more noodles on top of the weight will have the noodles stick together.

    Lemon Garlic Alfredo Sauce

    • In a medium-size pot, turn heat to medium-high and place butter inside until melted. Add the garlic and cook for 2 minutes or until soft. Add the milk and cream cheese. Turn the heat to low. Add sea salt.
    • Add the fresh beet pasta to the sauce and give it a few good stirs. Add the lemon juice and parmesan cheese. Softly toss the noodle until the cheese is melted and the alfredo sauce is well coated with the pasta.
    • Garnish pepper on top. Serve immediately.
  • Super Tasty Mexican Slow Cooker Pulled Pork

    Super Tasty Mexican Slow Cooker Pulled Pork

    This Mexican Slow Cooker Pulled Pork is the definition of a set-it-and-forget-it meal that still manages to blow everyone away. Smoky guajillo and ancho peppers, red wine, apple, and cumin slow-cook together with a pork shoulder for 5 hours until the meat falls apart and drinks up every drop of that incredible sauce. It is one of our most-made dinner recipes — at least twice a month on the rotation.

    This post may contain affiliate links. If you purchase through these links, I may earn a small commission at no extra cost to you. Thank you for supporting Love & Harvest!

    slow cooker pulled pork

    This post is all about slow cooker Mexican pulled pork.

    Ingredients for This Mexican Slow Cooker Pulled Pork Recipe

    Ingredients

    Pork Shoulder

    The cut we are looking for in this recipe is the pork shoulder. The shoulder has enough meat and fat mixed in together — it is not the tough part of the pork and using the slow cook method, the meal always comes out juicy, tender, and incredibly delicious.

    • Why it matters: Fat content in the shoulder bastes the meat from the inside as it slow-cooks, creating that signature pull-apart texture you cannot get from leaner cuts like loin.

    Guajillo Peppers

    The Guajillo dried peppers are not spicy when the seeds are removed. They give the sauce a nice thick texture and a distinct citrus-smoke flavour.

    • Why it matters: Guajillos are the backbone of many Mexican red sauces. Their fruity, slightly tannic flavour is what makes this sauce taste authentically Mexican rather than generic chili pork.

    Ancho Peppers

    Ancho peppers give the sauce its deep red color. They are not spicy and don’t have a sharp taste — they are dried poblanos with a mild, chocolatey undertone.

    • Why it matters: Anchors are responsible for the sauce’s gorgeous color and the earthy depth that rounds out the guajillo’s brightness. Together they are a classic Mexican pairing.

    Cumin

    Always a great partner with pork. Use powder form, not seeds — it marinates into the meat more evenly and the flavour is more evenly distributed throughout the roast.

    • Why it matters: Cumin is the warm spice foundation of the rub. Without it the pork tastes flat. Don’t be shy with it — this recipe leans into the cumin intentionally.

    Red Wine

    A great way to tenderize the pork — it penetrates into the meat and adds a fall-and-winter depth of flavour. A Malbec or any full-bodied red wine works perfectly here.

    • Why it matters: The alcohol in the wine breaks down muscle fibers during the long cook, resulting in a more tender final product. It also adds complexity to the sauce that water or stock alone cannot achieve.

    Apple

    Three apples, peeled and shredded. Adding apples is a great way to include fibre and natural sweetness that offsets the wine’s acidity and tartness.

    • Why it matters: The natural sugars in the apple caramelize during cooking and help balance the smokiness of the peppers. The apple also adds another layer of tenderization — the malic acid breaks down protein similarly to how a citrus marinade works.

    Slow Cooker

    I use an Crock-Pot Slow Cooker or the slow cook setting on my Instant Pot 7-in-1. Both work perfectly. The slow cook method is what makes this recipe so hands-off — 90% of the time you’re just waiting for the cooker to do its magic.

    • Why it matters: Slow cooking at low temperature for a long time breaks down the tough collagen in the pork shoulder into gelatin, which gives the sauce its body and the meat its silky, fall-apart texture.

    How to Serve Pulled Pork

    There are many ways to serve this slow cooker pulled pork:

    • Bread — any bread works. Make a pulled pork burger, a torta, or sliders with small buns.
    • Burrito — wrap in a large flour tortilla.
    • Taco — serve on top of a corn tortilla for a pulled pork taco.
    • Mash potato — serve with mashed potato and veggies, drizzled with the sauce.
    • Poutine — deep fry fries, add pulled pork, black beans, cheese, and sour cream.
    • Appetizer — bake thin baguette slices and serve the pulled pork with pickled onions.

    For more Mexican-inspired recipes, try our Green Pozole (Pozole Verde) or our Easy Mexican Salsa Verde — both pair beautifully with this pulled pork.

    easy slow cooker pulled pork

    Mexican pulled pork being shredded with forks in a dark sauce

    Mexican Slow Cooker Pulled Pork

    Easy tender and delicious pork with a Mexican sauce soaked and slow-cooked in an Instant Pot. I love serving this with tortilla, rice, or over mashed potatoes.
    Print Recipe
    Pin Recipe
    Prep Time:10 minsCook Time:5 hrsServings: 6 people

    Equipment

    • Instant Pot or Slow Cooker

    Ingredients

    Pork Marinate

    • 1 kg pork shoulder whole
    • 3 tsp sea salt
    • 1 tbsp paprika
    • 1 tbsp cumin powder
    • 1 tsp black pepper
    • 3 tbsp canola oil

    Mexican Peppers

    • 2 guajillo peppers
    • 3 ancho peppers

    Liquid

    • 1 cup red wine
    • 3 apples peeled and shredded
    • 1 white onion shredded
    • 1 cup orange juice
    • 2 tbsp vinegar
    • 3 bay leaf
    • salt to taste

    Instructions

    • Rinse and pat dry the pork shoulder with a paper towel.
    • Mix the spices and salt together for the pork marinade. Rub the spice all over the meat. Let it sit for 15–30 minutes.
    • Soak the Mexican peppers in hot boiling water. Place a plate or something heavy on top to keep the peppers fully submerged for 10 minutes.
    • Break the top off the peppers and scrape the inside clean. Add all the peppers to a blender with 1/2 cup of water. Blend until smooth.
    • Heat a pan with oil on medium-high heat. Place the pork shoulder in the pan and brown all sides.
    • Set your slow cooker or Instant Pot to the slow cook setting on high for 5 hours. Place the browned pork shoulder inside and add all the liquids and Mexican pepper puree on top.
    • Close the lid and open the valve (if using Instant Pot).
    • After 5 hours, open the lid and use two forks to shred the meat apart. This allows the sides to soak up all the juices. Add salt to taste.

    Frequently Asked Questions

    Can I make this pulled pork without a slow cooker?

    Yes. You can braise it in a Dutch oven in the oven at 300°F (150°C) for 4–5 hours with the lid on. The result is essentially the same — low heat for a long time is what does the work, regardless of the vessel. A Lodge Dutch Oven works beautifully for this.

    What cut of pork is best for pulled pork?

    Pork shoulder (also called pork butt or Boston butt) is the best cut for pulled pork. It has the right fat-to-meat ratio so the meat stays moist during the long cook. Avoid pork loin — it is too lean and will dry out.

    How spicy is this Mexican pulled pork?

    Not spicy at all, as long as you remove the seeds from the guajillo and ancho peppers before blending. Both peppers are mild when deseeded. The sauce is smoky, earthy, and slightly sweet from the apple and orange juice — not hot.

    Can I use an Instant Pot instead of a Crock-Pot?

    Yes. Use the slow cook function on your Instant Pot, set to high for 5 hours with the lid closed and the valve open. Alternatively, use the pressure cook function for 60–75 minutes on high pressure followed by a natural release — the texture will be slightly different but equally tender.

    How do I store and reheat leftover pulled pork?

    Store pulled pork in an airtight container with its juices in the refrigerator for up to 4 days, or freeze for up to 3 months. Reheat gently in a pan on low heat with a splash of water or orange juice to revive the sauce. Avoid microwaving on high as it can dry the meat out.

    What do I do if the sauce is too thin after cooking?

    Remove the pork from the slow cooker after shredding and pour the remaining liquid into a saucepan. Simmer on medium-high heat for 10–15 minutes until the sauce reduces and thickens. Pour it back over the shredded pork before serving.

  • Homemade Chinese Food Classic: Hainanese Chicken

    Homemade Chinese Food Classic: Hainanese Chicken

    Hainanese Chicken is one of those dishes that sounds deceptively simple — poached chicken, ginger scallion sauce, rice cooked in the broth — but the result is a deeply comforting bowl that makes you understand immediately why it has been a beloved dish across generations of Cantonese and Southeast Asian families. This is authentic homemade Chinese food at its most honest: few ingredients, careful technique, profound flavour.

    This post may contain affiliate links. If you purchase through these links, I may earn a small commission at no extra cost to you. Thank you for supporting Love & Harvest!

    Hainanese chicken on a platter with a spoon drizzling sauce, next to fresh herbs

    Chicken is always served during Chinese New Year because it is the symbol of unity and family. Usually, steamed or poached chicken with head and feet is served during our traditional dinner to further emphasize the concept of union and rebirth. Although Hainanese Chicken is from the Hainan province in China, it is said to have been popularized in Singapore by Hainanese immigrants, and it is still well-loved among Cantonese families everywhere.

    This post is all about a delicious Homemade Chinese Food Classic: Hainanese Chicken.

    Why You’ll Love This Recipe

    • Easy — it is a slow-poached chicken in a stock pot, lightly seasoned. Mostly hands-off once it is in the pot.
    • Poached, not fried — the chicken cooks gently in water.
    • Delicious — ginger and chicken go hand in hand, and it is a soul-soothing taste. Try it once and you will understand the obsession.
    • Authentic Cantonese dish — if you want a popular homemade Cantonese recipe, this is the one. All Cantonese moms know it.

    Hainanese Chicken Rice

    The same broth used to cook the chicken is also used to make the rice. When it finishes cooking, you open the lid to a luscious and glossy pot of rice that is infused with the chicken’s essence. In restaurants, they often add a lot of oil and chicken fat to make it extra tasty. For a less oily version, skim the soup of its fat by removing the skin and defatting the top layer of oil. If flavour is your priority, pour on all that glory and work a little harder the next day.

    easy chinese food recipes

    Cooking Methods

    There are two known ways of making Hainanese Chicken. First, the chicken and rice are steamed together. Second, the chicken is poached in water, and the rice is cooked separately using the chicken broth. We use the second method — a little more work, but the result is better presentation and more control over each component.

    top 12 easy chinese recipes

    Ingredients Deep-Dive

    Ingredients

    Free-Range Chicken

    The most important ingredient. Try to find a fresh, free-range chicken — it has a far better flavour and texture compared to caged varieties.

    • Why it matters: Free-range chickens have more developed muscles from movement, which means more flavour in the meat and a better-tasting broth. The difference is noticeable in a delicate dish like this where the chicken is the only star.

    Ginger

    Ginger goes into the poaching liquid, the scallion sauce, and the rice. Use fresh ginger — not powder.

    • Why it matters: Ginger neutralizes the gamey notes in chicken and infuses every component with a clean, warming flavour. It is the defining aromatic of this dish. A ginger grater makes it easy to get fine, fibrous shreds perfect for the sauce.

    Sesame Oil

    Used in the chicken marinade — just 1 teaspoon brushed over the bird before and after cooking.

    • Why it matters: Sesame oil adds a toasted, nutty aroma that is unmistakably Chinese. Use it as a finishing touch — it is not a cooking oil and should never be added to high heat.

    Chinese Cooking Wine

    Shaoxing rice wine is used in the marinade. Two great options: Qian Hu Chinese Shaohsing Rice Cooking Wine and Premium Shaoxing Rice Cooking Wine.

    • Why it matters: Shaoxing wine removes any residual odour from raw chicken and adds a subtle complexity to the marinade that cannot be replicated with any substitute.

    Whole chicken poaching in a pot of broth with onion pieces

    Pro Tips for Perfect Hainanese Chicken

    Pro Tip 1 — Choice of Chicken and Exfoliation

    Before cooking, exfoliate your chicken with large sea salt or kosher salt — rub it all over the skin for a good 10 minutes, including under the wings and inside the cavity. Initially the skin is wrinkly, but after 10 minutes of salt rubbing it should appear smooth and glowing. Wear gloves to protect your hands.

    Pro Tip 2 — Cooking Temperature

    It is important to bring the water to a full boil before dipping the chicken in. This causes the skin to contract immediately, helping it adhere to the flesh. Once the chicken is in, reduce to a very low simmer — a hard boil will make the skin tough. A low, steady simmer produces juicy, bouncy flesh.

    secret chinese restaurant recipes

    Pro Tip 3 — Ice Bath

    The ice bath is essential for bouncy chicken meat. When the hot chicken meets instant cold water, the meat contracts immediately so all the juices stay inside. Do not skip this step. Fill a large bowl with 2L water and 1L of ice, and transfer the chicken immediately when it comes out of the pot.

    Pro Tip 4 — Chopping the Chicken

    In Cantonese whole chicken dishes, we always chop through the bones. Two factors matter: knife sharpness and commitment. Sharpen your knife well and use a heavy butcher’s knife. When you raise the knife, do not hesitate — a clean, decisive hit goes through the bone cleanly. A tentative hit shatters the bone into small pieces. Practice makes perfect.

    top 20 chinese dishes

    If you enjoy this recipe, try our Steam Preserved Vegetables with Pork for another classic Cantonese comfort dish.

    Chopped Hainanese poached chicken on a platter with rice and greens

    Hainanese Chicken with Ginger Scallion

    Authentic warm and cozy Hainanese Chicken recipe with ginger scallion sauce. A great family meal to share. Whether you’re preparing for Chinese New Year or a regular family dinner, this traditional Chinese meal will leave everyone full and happy!
    Print Recipe
    Pin Recipe
    Prep Time:1 hrCook Time:60 minTotal Time:2 hrsServings: 6 people

    Ingredients

    Poached Chicken

    • 1.3 kg free range and hormone free chicken
    • 4 Litre water until water slightly covers the chicken in the pot
    • 1.5 tbsp kosher salt or salt rock
    • 2 scallion
    • 7 slices of ginger
    • 2 garlic clove smashed

    Chicken Marinade

    • 1 tsp sesame oil
    • 1 tsp light soy sauce
    • 1 tsp Chinese rice cooking wine

    Ginger Scallion Sauce

    • 4 tbsp ginger grated
    • 2 scallion washed and chopped
    • ¼ cup canola oil
    • 1 tsp sea salt

    Hainanese Rice

    • 2 tbsp canola oil or 2 tbsp chicken rendered fat
    • 2 cm ginger grated
    • 1 garlic clove grated
    • 1 tsp sea salt
    • 2 cups jasmine rice
    • 2 cups chicken broth from the poaching liquid

    Garnish

    • 1 cucumber sliced thinly

    Instructions

    Cleaning the Chicken

    • Take the whole chicken and give it a good wash. Pat dry with a paper towel.
    • Exfoliation: wearing gloves, take 1 tsp of kosher salt and rub the chicken evenly — including under the wings and inside the cavity. Rub for a good 10 minutes. The skin should go from wrinkly to smooth and glowing.
    • Chicken marinade: combine soy sauce, sesame oil, and Chinese cooking wine. Using a pastry brush, brush the chicken with the marinade and let it sit.

    Cooking the Chicken

    • Bring a large stock pot with 4L of water to a boil. Add scallion, ginger, and garlic. Grabbing the chicken by the neck, dip it into the boiling water and pull it back out. Repeat 4 times. On the 4th time, place the whole chicken (breast submerged first) into the pot with the lid on. Reduce to a very low simmer for 35 minutes. After 35 minutes, turn off the heat and let the chicken rest in the broth for an additional 15 minutes.
    • Fill a large bowl with 2L of water and 1L of ice. Once the chicken is done, immediately transfer it to the ice bath.
    • Leave the chicken in the ice bath until the meat is firm and cool, about 10 minutes. Remove and drain excess liquid.

    Ginger Scallion Sauce

    • In a deep heatproof bowl, place the grated ginger, chopped scallion, and salt. Mix well.
    • In a pan, heat the canola oil until it just starts to smoke. Turn off the heat and carefully pour it over the ginger and scallion. Hold the bowl over a sink as it will splatter. Mix well.

    Hainanese Rice

    • In a pan or pot with a lid, heat up the chicken fat or oil. Add ginger and garlic. Cook, stirring, until fragrant. Stir in the rice and fry gently until glossy. Add chicken stock, place the lid on, and cook on low for 17 minutes. Let rest for 10 minutes before serving.

    Serving

    • Using a sturdy knife, chop the chicken into bite-size pieces, chopping through the bones. Lay all pieces on a large plate.
    • Brush the chicken marinade over the chicken pieces again.
    • Fluff up the rice and serve with thinly sliced cucumbers and the ginger scallion sauce on the side.

    Frequently Asked Questions

    What is Hainanese Chicken?

    Hainanese Chicken is a dish of poached whole chicken served with rice cooked in the poaching broth, ginger scallion sauce, and often cucumber slices. While it originates from the Hainan province in China, it was popularized in Singapore by Hainanese immigrants and is deeply beloved across Cantonese and Southeast Asian communities.

    Why do you dip the chicken in and out of boiling water four times?

    This technique, called “dipping,” causes the skin to contract four times in rapid succession. It seals the skin tightly to the flesh so it does not slip off during the long poach. It also helps the skin develop a beautiful, tight texture. Do not skip this step.

    Can I use chicken pieces instead of a whole chicken?

    You can, but the result will not be the same. A whole chicken produces a richer, more complex broth that makes the rice shine. If you do use pieces, choose bone-in skin-on thighs — they are closest to the whole chicken in terms of flavour output.

    What is the correct temperature to poach the chicken?

    You want a very low simmer — just barely bubbling. In temperature terms, around 160–180°F (71–82°C). A hard boil will make the skin tough and the meat dry. A gentle simmer keeps the flesh juicy and the skin supple.

    What can I substitute for Shaoxing cooking wine?

    Dry sherry is the most common substitute and works well. Mirin can also work but it is sweeter, so use half the amount. If you cannot find any of these, simply omit the cooking wine from the marinade — the dish will still be delicious.

    How do I store and reheat Hainanese Chicken?

    Store the chicken and rice separately in the refrigerator. Keep the remaining broth and use it to reheat the rice by adding a splash when reheating in a pan. The chicken is best eaten cold or at room temperature the next day — many Cantonese prefer it this way. Reheat gently to avoid toughening the skin.

  • Green Nopales Corn Tortillas

    Green Nopales Corn Tortillas

    If you have ever wanted to make authentic Mexican tortillas at home, this green tortilla recipe with nopales is your new go-to. Vibrant in color and made with just a handful of real ingredients, these tortillas are not only impressive to look at — they taste far better than anything store-bought.

    This post may contain affiliate links. If you purchase through these links, I may earn a small commission at no extra cost to you. Thank you for supporting Love & Harvest!

    Green nopales corn tortillas stacked on a wooden table

    What Are Nopales?

    Nopales are edible cactus paddles from the prickly pear cactus — one of the most iconic ingredients in Mexican cuisine. The texture is thick, slightly slimy, and meaty, with a mild acidic flavor similar to okra and asparagus. They appear in Mexican grocery stores, restaurants, and home kitchens throughout the country. For vegetarians in Mexico, nopales are a common filling alongside beans and legumes. Pair these tortillas with the Homemade Pico de Gallo or use them for Salsa Verde quesadillas.

    Fresh nopal cactus paddles with dried corn cobs on a wooden board

    Ingredients Deep-Dive

    Masa Harina (Corn Flour)

    • Why it matters: Masa is the foundation of tortilla dough. It is made from nixtamalized corn — treated with an alkaline solution. Do not substitute all-purpose flour here; it will not produce the right texture or flavor. The brand I use is White Maseca Corn Flour — widely available and reliably consistent.

    Nopales

    • Why it matters: Blended with water and spinach, nopales create the green liquid that replaces the plain water in traditional tortilla dough. They add a vivid green color, and a mild earthy flavor that does not overpower the corn. Fresh nopales give the best result.

    Spinach

    • Why it matters: Spinach deepens the green color without changing the taste. A small amount goes a long way visually.

    Bag of masa harina corn flour for making tortillas

    Pro Tip 1: Blend the Nopales and Spinach First

    Using a high-speed blender, blend the nopales and spinach with water until completely smooth — no chunks or flecks of green. This smooth green liquid replaces plain water in the masa dough, infusing every tortilla with color.

    Bright green nopales and spinach purée poured into a bowl of masa harina
    Green nopales and spinach tortilla dough in a steel bowl

    Pro Tip 2: Use a Tortilla Press

    The tortilladora is the tortilla press used in every traditional Mexican kitchen. It works only with corn dough — flour dough requires a rolling pin. A cast iron tortilla press is ideal: heavy, durable, and easy to use. The key technique is placing a plastic sheet or wax paper on both sides of the dough ball before pressing — without it, the raw tortilla will stick and tear.

    Pressed green tortilla on a blue plastic sheet in a tortilla press
    Small ball of green tortilla dough on the open tortilla press

    Pro Tip 3: Cooking Time

    Corn tortillas cook very fast. On medium-high heat, cook each side for about 1 minute. You will know it is ready when the surface develops light brown spots and the vivid green deepens to a richer hue. To speed things up, use a large flat pan or a cast iron comal where you can cook 2 to 3 tortillas simultaneously.

    A hand holding a raw green nopales tortilla

    Pro Tip 4: Storage

    Store cooked tortillas in the fridge for up to three days, wrapped in a plastic bag or sealed container. They also freeze very well — just separate each tortilla with a small piece of plastic wrap before freezing so they do not stick together. Tortillas dry out quickly when exposed to air, so keep them covered at all times.

    Green nopales corn tortillas in a cloth-lined basket
    Stack of cooked green nopales tortillas on a wooden board

    What to Make with Your Nopales Tortillas

    Once you have a stack of green tortillas, the possibilities are wide open. Make quesadillas with gouda or oaxaca cheese. Fry them in oil for homemade tortilla chips. Use them for chilaquiles — the beloved Mexican breakfast of fried tortillas simmered in salsa and topped with cheese and crema. Or simply serve them as a side with any Mexican dish and watch them disappear.

    Hands pulling apart a green tortilla quesadilla with melted cheese
    Folded green nopales tortillas on a white plate with nopal paddles and corn

    Frequently Asked Questions

    What is the difference between masa harina and regular corn flour?

    Masa harina is made from corn that has been treated through a process called nixtamalization — soaking dried corn in an alkaline lime solution. This process gives masa its distinct flavor and pliable texture. Regular corn flour or cornmeal is not nixtamalized and will not produce tortillas with the same taste or texture. Use masa harina specifically.

    Can I use store-bought nopales in a jar?

    Fresh nopales give the best color and flavor, but jarred or canned nopales work in a pinch. Rinse them well to remove the brine before blending. The color of the tortillas may be slightly less vibrant, but the flavor is preserved.

    Why does my masa dough dry out so fast?

    Masa dough loses moisture quickly when exposed to air. Keep the dough covered with a damp towel at all times while you are working with it. This is why the recipe instructs you to keep the unused dough covered as you press and cook each tortilla individually.

    Can I make these tortillas gluten-free?

    Yes — masa harina made from 100% corn is naturally gluten-free. Just verify the packaging to ensure it was not processed in a facility that also handles wheat if you have celiac disease or a serious gluten sensitivity.

    How thick should I press the tortillas?

    For tacos and quesadillas, press the tortilla fairly thin — about 2 to 3mm. For wraps or thicker applications like tlayudas, press slightly thicker. A good tortilla should be thin enough to fold without cracking but thick enough to hold fillings without tearing.

    Can I freeze the raw dough?

    Yes. Form the dough into small balls, place them on a baking sheet, and freeze until solid. Transfer to a freezer bag and store for up to 2 months. To use, thaw at room temperature for 20 to 30 minutes, then press and cook as normal.

    Stack of green nopales corn tortillas on a wooden table

    Nopales Tortilla

    Prep Time 15 minutes
    Cook Time 20 minutes
    Total Time 35 minutes
    Course: Bread
    Cuisine: Mexican
    Calories: 120

    Ingredients
      

    green water
    • 1 nopales
    • ¼ cup spinach
    • 3 cups water
    Masa Dough
    • 3 cups masa corn flour
    • 1 tsp sea salt

    Equipment

    • high speed blender

    Method
     

    Green Water
    1. In a high speed blender, add the nopale, spinach, and water. Blend until very smooth and see no clumps or chunks of greens. About 1 minute.
    Masa Dough
    1. In a large mixing bowl, add the flour and salt. Mix well. Make a dwell in the middle and add the green water. Use your hands and start to mix and incorporate the dough until you see no white but all green around. Put a wet towel on top while you get the stove ready. The masa dough dries out very quickly, so keeping it moist is important.
    2. Heat the grill or large pan on medium high heat.
    3. Meanwhile take your tortilla presser. Lay two piece of plastic or wax paper inside.
    4. Roll a small round dough about 1" in diameter and press it between the two plastic sheets. Press hard on the tortilla presser. I like to use my body weight and give it one hard press.
      Release and peel one sheet of plastic off the dough. gently lift the tortilla and place it on your hand. Lift off the other side of the tortilla from the plastic.
      Gently and carefully place the raw tortilla on the grill and cook 1 minute on each side or until it is slighly brown. Repeat
    5. After each tortilla has finished cooking, place the tortilla in between two towels to keep it moist and warm. I recommend to also place it in a container with the towel and tortilla to keep it warm and fresh.
  • AMAZING Canadian Smoked Bacon Ham

    AMAZING Canadian Smoked Bacon Ham

    The moment this Canadian Smoked Bacon Ham comes out of the smoker, the entire house fills with that deep, rich, wood-smoke aroma that makes everyone gravitate to the kitchen. It is a project with a proud payoff — tender, beautifully pink, intensely flavourful meat that costs a fraction of the store-bought version and tastes better in every way.

    This post may contain affiliate links. If you purchase through these links, I may earn a small commission at no extra cost to you. Thank you for supporting Love & Harvest!

    This recipe is easy and hands-off. If you can boil water and turn on an oven, you are fully capable of making this. And once you do, you will never buy Canadian Smoked Bacon Ham again — but you will definitely keep buying pork loins to make your own.

    A patriotic remembrance of the vast and beautiful land of Canada. A polite recipe to recollect fond memories there, and a surrender to the experience where the past and present live beautifully together.

    Important safety note: Curing meats using sodium nitrite is very different from any other recipe. It is essential to read and thoroughly understand the process before attempting to cure meat. Please follow the measurements exactly.

    My Inspiration

    I miss walking into Superstore in North Vancouver. The deli section next to the meat counter at the back of the store always smelled like smoked meat. Buying ham in Canada was one of those memorable moments filled with fondness, like Mexican people buying tacos on crowded streets in Mexico.

    My first love is smoked salmon — still the best-tasting food in the whole world, in my opinion. That love for cold-smoked salmon is what eventually led me toward this love affair with smoked bacon ham.

    Ingredients

    Pink Curing Salt (Prague Powder #1)

    • Why it is essential and NOT optional: Pink Curing Salt is 94% table salt and 6% sodium nitrite. It preserves the meat, prevents dangerous bacterial growth (including botulism), and keeps the ham its beautiful pink colour. Without it, the meat would turn an unappetising grey. Do not confuse it with Pink Himalayan Salt — they are completely different products. Store it clearly labelled and out of reach of children.

    Smoker Wood Chips

    Pork Loin (or Pork Butt / Pork Leg)

    • Why pork loin for Canadian bacon: Canadian bacon is always made from pork loin — it is lean, boneless, and cuts cleanly into thick discs after curing. It is fundamentally different from American bacon, which uses fatty pork belly. Pork loin is leaner and produces a firmer, more ham-like result. If your cut is more flat than round, simply tie it with butcher’s twine before smoking.

    The Brine

    • Why a wet brine: The brine — brown sugar, sea salt, bay leaves, garlic powder, water, and curing salt — penetrates deep into the meat during the 24-hour refrigeration period. Sugar balances the salt and adds a subtle sweetness. Always brine in a non-reactive container (no metal — not even a metal spoon). The meat will float, so weigh it down with a ceramic dish.

    Instant-Read Meat Thermometer

    Why You Will Love This Recipe

    The full Canadian experience is here. Easy to follow, ingredients are not hard to find. If smoking sounds too intimidating, I have included oven baking instructions — both methods produce delicious results.

    The uses for this Canadian smoked bacon ham are endless: a sandwich with ham and cheddar, pasta with ham and cream sauce, cured ham with pineapples on toothpicks, or the perfect Eggs Benedict. Canadian bacon is also leaner than American bacon, since it’s made from pork loin, not belly.

    Pro Tips

    How Much Smoke Is Enough?

    My rule of thumb: if you can smell the smoke, the meat is absorbing it. Poor ventilation causes creosote — a thick, bitter, oily coat that forms when smoke sits on meat too long. Ensure the smoke can escape the chamber. Do not pile on wood or fuel. A gentle, consistent wisp of smoke is all you need.

    How Do You Know When It Is Done?

    Use a meat thermometer. When the internal temperature in the deepest part of the centre reaches 150°F (65°C), it is done. Do not go by time alone — cooking and smoking times vary with the size and shape of the meat.

    Meat Storage

    Refrigerate for up to two weeks or freeze for longer. Vacuum-sealed portions keep even longer still and slice perfectly from frozen.

    Once you have made this, it pairs beautifully with our Easy Camping Shrimp Pasta for a smoky, satisfying meal. You can also check out our Easy Ribs Recipe with Homemade BBQ Sauce for more smoked and cured meat inspiration.

    Frequently Asked Questions

    Is pink curing salt the same as pink Himalayan salt?

    No — they are completely different products. Pink Himalayan salt is a mineral salt from Pakistan used for cooking and seasoning. Pink Curing Salt (Prague Powder #1) is 94% table salt and 6% sodium nitrite, specifically formulated for curing meat. Using Himalayan salt in place of curing salt will not preserve the meat and could result in unsafe, grey-coloured ham.

    Can I make this without a smoker?

    Yes. Baking the cured ham in the oven produces equally delicious results, minus the smoke flavour. Preheat to 350°F, wrap the ham in foil, bake for 20 minutes, then remove the foil, increase temperature to 425°F, and roast for 12–15 more minutes until golden and the internal temperature reads 150°F.

    How long should I brine the ham?

    Brine for at least 24 hours in the refrigerator. You can extend the time by up to 20% for a saltier result with better nitrite penetration. Do not go shorter than 24 hours — the curing salt needs adequate time to work through the meat safely.

    What wood chips work best for smoking ham?

    Apple, cherry, and maple wood chips are classic choices for pork. They produce a sweet, mild smoke that complements the ham without overwhelming it. Hickory gives a stronger, more assertive smoke flavour if you prefer something bolder. Avoid resinous woods like pine — they produce bitter, acrid smoke.

    Why does my ham need to rest before slicing?

    Cutting into hot smoked or baked meat causes the juices to run out immediately, drying the meat. Resting allows the juices to redistribute evenly. Let the ham cool on the counter uncovered until the internal temperature drops to around 100°F before slicing into discs and searing.

    homemade Canadian smoked ham

    Amazing Canadian Smoked Back Bacon Ham

    Prep Time 10 minutes
    Cook Time 2 hours 30 minutes
    Total Time 2 hours 40 minutes
    Servings: 8 servings
    Cuisine: Canadian
    Calories: 210

    Ingredients
      

    • 1.3 kg pork leg / pork butt
    • ¾ cup brown sugar
    • ¾ cup sea salt
    • 3 bay leaf
    • 1 tbsp garlic powder
    • 4 litre water
    • 1 tbsp Prague Powder #1

    Equipment

    • meat thermometer
    • grill / smoker

    Method
     

    1. In a non reactive pot, put all the ingredients inside (except the meat). Bring it to a boil until the sugar and salt has melted. Let it cool and transfer to the curing container.
    2. Clean and rinse the meat thoroughly. Pat dry with paper towel.
    3. When the brine is at room temperature submerge the meat into the water and place a dish on top or anything heavy to hold the meat under the brine. Refrigerate for 1 day. ***You can add 20% longer time if you want to. The meat will be saltier and absorb more nitrite if safety is a concern***
    4. After the cure, rinse the ham with clean water to wash off access salt. Dump the brine water out, and bring fresh water back to the bowl. Fully submerge the ham in clean water for 30 minutes to let de-salt the ham. Pat dry.
    5. Now the ham needs to be smoked or baked. Below are your options.
    To Smoke
    1. Smoke the ham at 325°F for 2.5 hours until the internal temperature is 150°F in the deepest part of the center.
    2. Serve. Unfortunately, you can’t cut into your Canadian Bacon just yet, if you do, it will dry it out and won’t be as fantastic as it should be!  Its very important to let it rest on the counter uncovered until the internal temperature gets down to 100 degrees. Afterwards you can slice into discs and sear it on the grill or in a medium hot frying pan with a little bit of oil.

    To Bake
    1. preheat oven to 350°F.
    2. Take ham out of the brine, and rinse the meat with water to take the access salt out of the ham. Pat dry.
    3. ***OPTIONAL*** To add more flavour to the baked ham, you can roll your ham in some freshly grind peppers, chili powder, garlic powder, and onion powder.
    4. Wrap ham with aluminum foil and place on baking sheet. Bake for 20 minutes.
    5. Remove from the oven, remove the foil and increase oven temperature to 425°F. Return pan to the oven and roast for 12-15 minutes or until roast is golden brown. Check internal temperature with a meat thermometer that it has reached 150°F in the deepest part of the center.
    6. Let rest for 10 minutes before slicing and serving.
    7. Serve. Unfortunately, you can’t cut into your Canadian Bacon just yet, if you do, it will dry it out and won’t be as fantastic as it should be!  Its very important to let it rest on the counter uncovered until the internal temperature gets down to 100 degrees. Afterwards you can slice into discs and sear it on the grill or in a medium hot frying pan with a little bit of oil.

    Notes

    CURING TIME: The cure time depends on the thickness of your meat. You can go longer by as much as 20%, but do not go less.
    AMOUNT OF SALT: The recipe uses Morton Coarse Kosher Salt. If you use table salt, use about 3/4 as much by volume, or better, weigh it (the same weight works). I don’t recommend table salt in the brine.