Category: cooking from scratch

  • Fluffy Naan Bread

    Fluffy Naan Bread

    I still remember the first time I pulled a piece of freshly made naan off a cast iron pan — that slightly charred, impossibly soft bread that fills the kitchen with the most intoxicating yeasty aroma. This recipe has become a weekly staple in our home, and once you taste it warm with a brush of garlic butter, you’ll understand why. It’s also the exact naan we use for our chicken shawarma wraps — and that combination is nothing short of legendary.

    This post may contain affiliate links. If you purchase through these links, I may earn a small commission at no extra cost to you. Thank you for supporting Love & Harvest!

    Fluffy homemade naan bread fresh off the pan

    Fluffy, chewy naan bread made with instant yeast, honey, yogurt, and whole milk — topped with garlic butter. Soft on the inside, lightly charred on the outside. Ready in under 2 hours.

    Culinary Versatility

    One of the most remarkable aspects of naan bread is how many ways you can use it. While it shines as a side dish alongside curries and tandoori meats, it is also one of the best canvases for creativity in the kitchen.

    Some of our favorite ways to use naan:

    • Naan pizza — Top with tomato sauce, cheese, and your favorite protein. Bake until bubbly.
    • Naan chips — Slice into strips, brush with olive oil, season with herbs, bake until crispy.
    • Curry scoop — Use naan as a spoon to pick up rich, saucy curries. Better than rice on some days.
    • Chicken shawarma wraps — Fill with grilled shawarma chicken, romaine, and Caesar dressing. Our favorite meal, once a week, without fail.

    Chicken shawarma wrap recipe: a naan wrap with chicken and lettuce cut in half

    Ingredients

    Key Ingredients

    Instant Yeast

    Instant yeast does not require proofing or activation before adding it to the dough. This saves time and simplifies the process significantly compared to active dry yeast. You get consistent, reliable rise every time.

    • Why it matters: Instant yeast is forgiving and fast — ideal for breads where you want a predictable, fluffy result without babysitting a starter.

    Honey

    A small amount of honey balances the slight tanginess of the yogurt and milk, giving the naan a subtle sweetness. If you don’t have honey on hand, 1 teaspoon of regular sugar works perfectly as a substitute.

    • Why it matters: Without something to balance the savory, the bread tastes flat. Honey also feeds the yeast for a better rise.

    Whole Milk

    Whole milk is what gives naan its characteristic chewy, soft texture. The fat content in whole milk cannot be replicated by low-fat or skim milk — the texture will suffer. Do not substitute here.

    • Why it matters: Fat = tenderness. Low-fat milk produces a tougher, drier crumb. This is a non-negotiable ingredient for authentic naan.

    Plain Yogurt

    Yogurt is the other key ingredient for softness. Its protein content keeps the bread tender as it cooks on the griddle. It also adds a very subtle tang that gives naan its distinct flavor.

    • Why it matters: Without yogurt, naan becomes dense and hard. Yogurt is what separates this bread from a simple flatbread.

    All-Purpose Flour

    All-purpose flour provides the right gluten structure for naan — strong enough to hold shape, but tender enough to stay soft. Whole wheat flour can be substituted if you prefer a slightly heartier, nuttier bread.

    • Why it matters: Flour protein level directly determines the chew. All-purpose strikes the ideal balance for naan’s pillowy texture.

    Stack of fluffy homemade naan with charred spots

    Torn piece of naan showing its soft, airy inside

    This naan pairs perfectly with our chicken shawarma wrap. It’s also a great companion to homemade hummus for a simple, crowd-pleasing appetizer. For a full bread-baking session, try our sourdough bread recipe next.

    Frequently Asked Questions

    Can I make naan bread without a cast iron pan?

    Yes. Any heavy-bottomed pan or griddle on high heat will work. Cast iron gives the best char and heat retention, but a stainless steel or nonstick pan can produce good results. A Lodge cast iron skillet is our recommendation for consistent results.

    Can I freeze naan bread?

    Yes. Let the naan cool completely, then stack with parchment between each piece, place in a zip-lock bag, and freeze for up to 2 months. Reheat in a dry pan for 30–60 seconds per side.

    Why is my naan turning out dense instead of fluffy?

    The most common causes are: yeast that is too old or dead, dough that was not allowed to rise long enough, or flour that was overmeasured. Make sure your yeast is fresh, your kitchen is warm (68–75°F), and you measure flour by spooning it into the cup rather than scooping.

    Can I make garlic butter naan?

    Absolutely — it’s our favorite version. Melt 2 tablespoons of butter with 2 cloves of minced garlic and a pinch of fresh parsley. Brush liberally over the naan immediately after it comes off the pan.

    How long does the dough need to rest?

    The dough should rest for 60–90 minutes or until it has roughly doubled in size. A warm environment speeds this up. Do not rush the rise — it is what creates the fluffy, bubbly interior.

    Can I use active dry yeast instead of instant yeast?

    Yes. Proof the active dry yeast first by dissolving it in warm milk with a pinch of sugar for 10 minutes until foamy, then proceed with the recipe. The rest time may be slightly longer.

    Fluffy Naan Bread

    An amazing naan recipe that is soft and moist. It is made with a griddle on the stovetop with butter garlic. Its slightly charred exterior and soft, chewy interior create a delightful contrast that leaves taste buds craving for more!
    Prep Time 1 hour 30 minutes
    Cook Time 20 minutes
    Total Time 1 hour 50 minutes
    Servings: 20 naam breads
    Course: Bread
    Cuisine: Indian
    Calories: 160

    Ingredients
      

    Naam Bread
    • ¼ cup warm water
    • 1 tbsp honey
    • ¾ tsp instant yeast
    • ¾ cup warm whole milk
    • 1 cup plain yogurt
    • 4 cups all-purpose flour
    • 1½ tsp baking powder
    • 1 tsp baking soda
    • ¼ tsp sea salt
    Butter Garlic
    • 8 tbsp butter melted
    • 2-4 garlic clove grated
    • ¾ cup chopped mix fresh herbs (cilantro, oregano, thyme, rosemary, chive, parsley, dill)
    • ¼ tsp sea salt

    Equipment

    • stand mixer

    Method
     

    1. In a large heat proof bowl, mix together the warm water, honey, and instant yeast. Let it sit for 5-10 minutes until the liquid is slightly frothy on the surface.
    2. In the stand mixer with the dough hook attachment, combine warm whole milk, plain yogurt, flour, baking powder, baking soda, and salt. While the machine is mixing on medium speed, add the bowl of instant yeast liquid. knead together for 3 minutes.
    3. Once the dough comes together (it will look sticky), cover with a plastic wrap and let it sit for 1 hour or until it double in size.
    4. Meanwhile, make the garlic butter. Melt the butter in the microwave for about 20-30 seconds. Stir in the mix of fresh herbs and salt. Set it on the side.
    5. Preheat the griddle over medium-high heat. Deflate the dough and knead it briefly. Pinch off a golf ball-sized piece of dough and roll it out into a thin round using a rolling pin. Lightly spread garlic butter over the dough. Carefully place the dough on the griddle, buttered side down. Spread more garlic butter over the top while the first side cooks, about 2 minutes. Flip and cook for another 2 minutes. Repeat with the remaining dough.
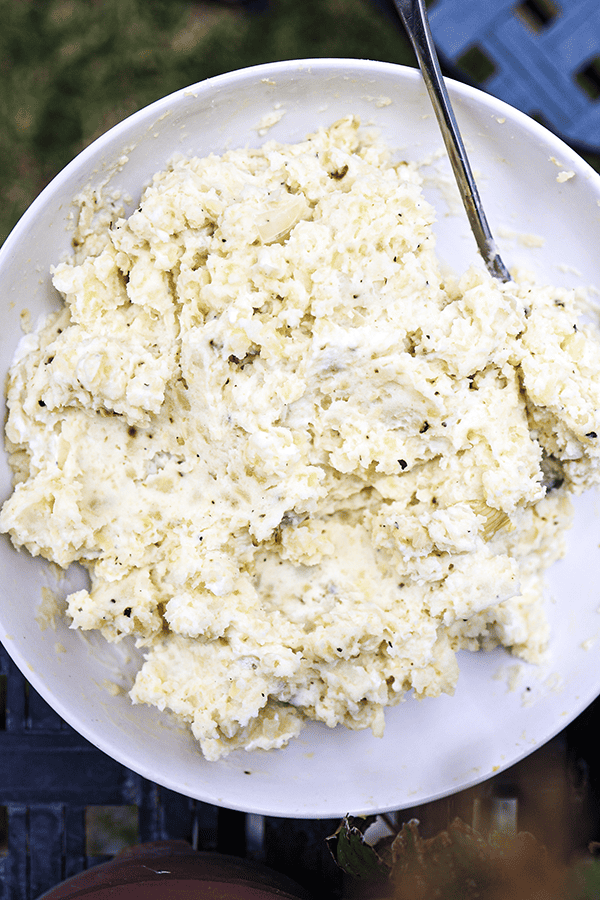
  • Best Garlic Mashed Potatoes

    Best Garlic Mashed Potatoes

    Some recipes just stay with you. I’ve been making this garlic mashed potatoes since high school, and it has never once left leftovers on the table — not at family dinners, not at parties, not at potlucks. It’s creamy, fluffy, and loaded with savory garlic flavor, and it comes together in under 40 minutes. The secret is in five simple tips that most people skip: the right potato, the right timing on the garlic, room-temperature butter, proper mashing technique, and a touch of patience. Once you nail this, every roast, chicken, or grilled salmon on your table gets an instant upgrade.

    This post may contain affiliate links. If you purchase through these links, I may earn a small commission at no extra cost to you. Thank you for supporting Love & Harvest!

    Best garlic mashed potatoes creamy and fluffy

    Why Make This Best Garlic Mashed Potatoes Recipe

    Garlic mashed potatoes are one of the most versatile side dishes in any kitchen. They pair beautifully with roast beef, grilled chicken, salmon, ribs — essentially anything that benefits from a rich, savory accompaniment.

    Bowl of creamy garlic mashed potatoes with a serving spoon

    We Have Loved This Recipe for Years and You Will Too

    This is the dish I reach for when there’s nothing in the fridge. It’s customizable, fast, and everyone who tries it asks for the recipe. Whether you’re cooking for a weeknight dinner or a dinner party, garlic mashed potatoes are a guaranteed hit.

    Creamy mashed potatoes with garlic butter close-up

    Ingredients

    Key Ingredients

    Russet Potatoes

    Russet potatoes are the gold standard for mashed potatoes. They have a low moisture content and high starch level that results in a light, fluffy mash rather than a dense or gluey one. Yukon Gold is a good second option for a slightly creamier, butterier result.

    • Why it matters: Waxy potatoes (like red or fingerling) hold too much water and produce a dense, gummy mash. Russets are the correct choice for this texture.

    Garlic

    Fresh garlic sauteed in butter is the backbone of this recipe. The key is timing — garlic must be added to heated butter and cooked for only 1–2 minutes until fragrant. A good stainless steel garlic press makes mincing fast and consistent.

    • Why it matters: Burned garlic turns bitter and unpleasant. Under-cooked garlic stays sharp and raw-tasting. Exactly 1–2 minutes in warm butter is the sweet spot.

    Butter

    Use unsalted butter at room temperature. Cold butter does not incorporate smoothly into the mash and can cause a lumpy, streaky texture. Room-temperature butter blends in effortlessly and creates a silkier finish.

    • Why it matters: Temperature of your fat directly determines the smoothness of your final mash. This is one of the most common mistakes home cooks make.

    Heavy Cream or Whole Milk

    Heavy cream delivers the richest, most luxurious mash. Whole milk produces a lighter result. Both must be warmed before adding — cold dairy seizes the starch in the potato and creates a gummy texture. A potato ricer gives you a smoother result than a standard masher.

    • Why it matters: Cold cream = lumps. Warm cream = velvet. This single step separates average mashed potatoes from extraordinary ones.

    Professional Tips

    Pro Tip 1: Use Russet Potatoes

    Russet potatoes have a buttery texture and less moisture than waxy varieties, which means a creamier, lighter mash. For more on choosing the right potato, see Bon Appetit’s guide to the best potatoes for mashing.

    Pro Tip 2: Do Not Overcook the Potatoes

    Overcooked potatoes become waterlogged and mushy, which ruins the texture. Check frequently and remove from heat the moment a fork slides in with minimal resistance. Do not wait for the potato to fall apart.

    Pro Tip 3: Use Room Temperature Ingredients

    Cold butter and cold cream cause the mash to seize and turn lumpy. Pull your butter out of the fridge 30 minutes before cooking and warm your cream in a small saucepan before adding it to the potatoes.

    Pro Tip 4: Add Garlic at the Right Time

    Add garlic to butter only after the butter is heated. Saute for 1–2 minutes until fragrant, then immediately incorporate into the mash. Do not let the garlic sit in the pan unattended — it burns in seconds.

    Pro Tip 5: Mash the Potatoes Properly

    Use a potato ricer for the smoothest result, or a hand masher for a slightly chunkier texture. Never use an electric mixer or food processor — over-processing breaks down the starch structure and creates a sticky, gluey paste.

    This mashed potato recipe pairs perfectly with lemongrass chicken drumsticks or a crispy pan-seared salmon. For another classic comfort dish, try our 30-minute Thai basil chicken — it is equally fast and deeply satisfying.

    Frequently Asked Questions

    What potatoes are best for mashed potatoes?

    Russet potatoes are the top choice for their low moisture content and fluffy texture when mashed. Yukon Gold is a close second for a creamier, buttery result. Avoid waxy potatoes like red potatoes or fingerlings — they produce a dense, gummy mash.

    Can I make garlic mashed potatoes ahead of time?

    Yes. Make them up to 2 days ahead and store covered in the refrigerator. Reheat gently on the stovetop with a splash of warm cream or milk to restore the creamy consistency. Do not reheat in a microwave without adding moisture — they will dry out.

    Why are my mashed potatoes gummy or glue-like?

    The most common cause is over-mashing or using a food processor. This activates too much starch in the potato and creates a sticky paste. Use a ricer or hand masher and stop as soon as the potatoes are smooth.

    Can I use garlic powder instead of fresh garlic?

    You can in a pinch, but fresh sauteed garlic produces a noticeably richer, more aromatic flavor. Garlic powder tends to taste flat in comparison. Use 1/2 teaspoon of garlic powder as a substitute if needed.

    How do I keep mashed potatoes warm for a dinner party?

    Transfer the finished mashed potatoes to a heatproof bowl set over a pot of barely simmering water (double-boiler method). Cover with a lid or foil and they will hold for up to 2 hours with occasional stirring.

    Can I freeze mashed potatoes?

    Yes. Spread them in a single layer on a baking sheet to flash freeze, then transfer to airtight bags. They keep for up to 1 month. Reheat from frozen in a covered saucepan with added butter and cream, stirring frequently.

    Garlic mashed potatoes in a white bowl on a striped cloth with flowers

    Best Garlic Mashed Potatoes

    The best garlic mashed potato dish that is creamy, fluffy, and bursting with savoury garlic flavour.
    Prep Time 15 minutes
    Cook Time 20 minutes
    Servings: 6 people
    Course: Side Dish
    Cuisine: American
    Calories: 260

    Ingredients
      

    • 1½ kg russets potato cut into large chunks
    • 1 litre water
    • 5 tbsp butter room temperature
    • 5 garlic clove grated
    • 1 white onion finely diced
    • 2 tsp dried basil
    • ½ cup sour cream
    • salt
    • black pepper

    Method
     

    1. Run the potatoes in the water and give it a good scrub. Cut the potatoes into large wedges. (For a large potato I usually cut it into 5 wedges). Give it another good rinse to wash away all the starch. Place them into a large pot and make sure it is covered by water (roughly about 1L of water). Place lid on top, and heat the pot on the stove on high.
    2. Once the pot is boiling, move the lid slightly open so the water doesn't boil over. Boil the potatoes on medium-high for 20 minutes. You know the potatoes are done if you can easily poke thru the potato wedges with a fork.
    3. Meanwhile, in a frying pan heat it in high heat. Place 5 tbsp of butter inside. Sauce the onion until soft and slightly translucent. Add the garlic and sauté it until it's aromatic. Stir in the dried basil. Turn the heat off and set it aside.
    4. Discard the water, and let the potatoes cool until it is warm or when your hands can touch it without burning.
    5. Peel the skin of the potato with your hands and place them in a large mixing bowl. Place another 2 tbsp of butter inside the warm peeled potatoes. Using a hand potato masher or a potato rice, mash the potatoes until smooth and no large chunks are visible.
    6. Fold in the butter garlic. You don't want to deflate the fluffiness.
    7. Stir in the sour cream until well combined. Add salt and pepper to your liking.
  • Traditional Kimchi

    Traditional Kimchi

    This is the traditional kimchi recipe I have been making for years — the one I use to produce batches from 1 pound all the way up to 5 kilograms for family, friends, and neighbors here in Puebla, Mexico. It is basic, approachable, and genuinely delicious every single time.

    This post may contain affiliate links. If you purchase through these links, I may earn a small commission at no extra cost to you. Thank you for supporting Love & Harvest!

    Jump to Recipe

    Bowl of freshly mixed traditional kimchi with red chili paste

    This post is about a traditional kimchi recipe — one I have used for many years to make for family and friends from 1 lb to 5 kg. It is a beloved recipe I keep coming back to.

    I adore my kimchi, and it holds a special place in the fridge. While some, like my husband, find the aroma off-putting, the rest of us relish the flavor and delight in the crunch of the Napa as it absorbs the marinade.

    The recipe I am about to share is not an heirloom passed down to me — I am Chinese, not Korean — but that does not hinder my deep appreciation for this Korean culinary treasure. Much like dedicated Korean homemakers, I prepare massive batches of kimchi, enjoy it on its own, incorporate it into fried rice, add it to soups, and share it generously with everyone around me.

    Hands holding a glass jar packed with homemade kimchi

    In the vast landscape of kimchi recipes, this one stands out for three reasons:

    1. Authenticity First: This recipe honors the time-honored techniques and authentic ingredients that define traditional kimchi. From the spice blend to the layering of flavors, it captures the true essence of the original.

    2. Perfect Balance of Flavors: The marriage of heat, tanginess, and umami is carefully calibrated. Nothing overpowers — everything harmonizes.

    3. Clear Instructions for Any Level: I give this recipe to local Mexicans here in Puebla and they absolutely love it. If someone with zero kimchi background can nail it, so can you.

    Two glass jars of fermenting traditional kimchi

    Ingredients

    Napa Cabbage

    The non-negotiable base of any kimchi. Always choose the freshest Napa cabbage available — no brown spots, leaves that are crisp and slightly green and yellow at the tips.

    • Why it matters: Fresh cabbage retains the crunch that makes kimchi satisfying. Wilted cabbage produces a mushy result no amount of seasoning can fix.

    Pear

    Pear contributes natural sweetness, aids fermentation by feeding beneficial bacteria, and enhances the overall flavor depth of the paste.

    • Why it matters: The enzymes in pear help tenderize the cabbage and balance the heat of the gochugaru, producing a rounder, less aggressive spice.

    Apple

    Blended into the porridge, apple enhances flavor and improves the consistency of the paste — it makes it smoother and more spreadable.

    • Why it matters: Apple adds a subtle sweetness and body to the paste that pear alone does not quite achieve.

    Radish

    The more vegetables the better. I grow my own radish, which is why you see a variety of colors in my bowl. Any radish works. Traditionally Korean kimchi uses large white Korean radish (mu). I often use Red Meat or Purple Daikon varieties.

    • Why it matters: Radish adds crunch, slight bitterness, and a peppery note that contrasts beautifully with the savory paste.

    Carrots

    Carrots add crunch and a gentle sweetness to the kimchi. I like to add them generously, but adjust to your preference.

    • Why it matters: They balance the heat and provide a visually appealing color contrast in the jar.

    Sea Salt

    I highly recommend natural sea salt over table salt. Table salt contains anti-caking additives that can interfere with fermentation and produce an off taste. If you are investing this much effort, use better salt.

    • Why it matters: Salt draws moisture out of the cabbage through osmosis. That extracted liquid is what creates the brine. Without the right salt, fermentation is compromised.

    Gochugaru (Korean Red Pepper Flakes)

    The defining ingredient. Gochugaru is a Korean red pepper powder with a coarse texture that contributes both heat and a distinctive fruity, smoky flavor unique to kimchi. Regular chili powder or cayenne are not substitutes.

    • Why it matters: No other chili produces the same color, heat profile, or flavor. Gochugaru is what makes kimchi taste like kimchi.

    Fish Sauce

    Fish sauce elevates the kimchi’s umami depth dramatically. Brand matters — not every bottle smells or tastes the same. I use Three Crabs fish sauce. My mom always said “buy the three crabs!” — and she was right.

    • Why it matters: Fish sauce provides the savory backbone that keeps the kimchi’s flavor complex and addictive even as it ferments over weeks.

    Fish Paste

    Traditional Korean kimchi uses dried anchovies soaked and blended in. My shortcut is LEE KUM KEE Fish Paste — it delivers that same rich depth in far less time.

    • Why it matters: Fish paste adds layers of umami that you cannot achieve with fish sauce alone. It is the flavor insurance policy in this recipe.

    Julienned scallions, radish, carrot and chives in a green bowl for kimchi

    Professional Tips for Perfect Kimchi

    These five tips will elevate your kimchi from good to extraordinary.

    Pro Tip #1: Be Generous with the Salt

    Use coarse or natural sea salt rather than fine table salt. Coarse salt adheres better to the cabbage, drawing out moisture more effectively and ensuring a controlled salting process. I recommend this Natural Sea Salt.

    Pro Tip #2: Press Down on the Cabbage

    When pressing salted Napa, apply even pressure to ensure uniform salting. Use your hands or a flat kitchen tool to press gently but firmly. I normally flip a large glass dish and weight it down with a jar of water or canned food.

    Pro Tip #3: Get the Porridge Right

    • Ensure the porridge has a smooth, lump-free consistency. Use a whisk or sieve to achieve a velvety texture — this helps the seasoning distribute evenly throughout every leaf of cabbage.

    • Most importantly: allow the porridge to cool completely before adding it to the kimchi mixture. Hot porridge wilts the vegetables and destroys the crunch you are working hard to preserve.

    Pot of red chili paste made with rice porridge for kimchi

    Pro Tip #4: Wear Gloves

    Essential — not optional. Gochugaru stains everything and the garlic-fish paste combination will linger on your fingertips for the rest of the day regardless of how much soap you use. Use disposable nitrile gloves.

    A gloved hand mixing vegetables with chili paste in a green bowl

    Pro Tip #5: Store in Glass Containers

    Glass containers have clear advantages. The red marinade will permanently stain plastic containers. Glass also does not absorb BPA or other plasticizers — even BPA-free plastics can leach over time. A dedicated kimchi container is a good option for storage. It keeps fermentation controlled and makes a huge difference in shelf life and flavor consistency.

    Hands holding a large glass jar filled with kimchi

    Frequently Asked Questions

    How long does kimchi last in the fridge?

    Fresh kimchi (just made, minimal fermentation) lasts 2–3 weeks in the refrigerator. Moderately fermented kimchi — after a few weeks — keeps for another 2–3 months. Fully fermented kimchi can last 6 months or more. Fermentation itself acts as a natural preservative. Always use clean utensils when serving to avoid introducing contaminants.

    Does kimchi need to ferment before eating?

    No. You can eat kimchi immediately after making it — fresh kimchi has a bright, lightly spicy, crunchy quality that many people love. As it ferments it becomes tangier, softer, and more complex. Both stages are delicious; they are just different experiences.

    Can I make kimchi without fish sauce to keep it vegan?

    Yes. Substitute the fish sauce with soy sauce or coconut aminos, and omit the fish paste. Add a bit more gochugaru and garlic to compensate for the lost depth. The kimchi will taste slightly less complex but is still excellent and fully vegan.

    Why is my kimchi too salty?

    Insufficient rinsing after the salting step is the most common cause. After the 2-hour salt press, rinse the cabbage thoroughly under cold running water at least 2–3 times and taste a small piece before proceeding. It should taste pleasantly salty — not aggressively so.

    Can I use regular cabbage instead of Napa?

    Traditional kimchi requires Napa cabbage — its wide, tender leaves hold the paste and allow proper fermentation. Regular green cabbage is too tough and does not ferment the same way. Napa cabbage is widely available in most Asian grocery stores and increasingly in mainstream supermarkets.

    How do I know if my kimchi has gone bad?

    Trust your senses. Signs of spoilage include unusually foul odors beyond the typical fermented smell, slimy texture, unusual discoloration like gray or black patches, or visible mold. Properly fermented kimchi has a tangy, slightly funky smell but should never smell putrid. When in doubt, discard it.

    Love fermented and preserved foods? Also try our steam preserved vegetables with Zha Choy and pork, our homemade sashimi guide, and our vegetarian mango soy ceviche.

    Bowl of freshly mixed traditional kimchi with red chili paste

    Traditional Kimchi

    Our traditional kimchi recipe is basic, easy, and super delicious. From 1lb to 10lbs, we make it all the time for family and friends. We have all the details on how to make it, and some professional tips to get you started almost guaranteeing a delicious results!
    Prep Time 45 minutes
    Total Time 2 hours 45 minutes
    Servings: 20 servings
    Course: Side Dish
    Cuisine: Korean
    Calories: 45

    Ingredients
      

    Salting Cabbage
    • 2.7 kg napa cabbage
    • ½ cup natural sea salt
    Porridge
    • 2 cups water
    • 2 tbsp sweet rice flour
    • 2 tbsp sugar
    Vegetables
    • 2 cups radish matchsticks
    • 1 cup carrots matchsticks
    • 7-8 green onion chopped into quarters
    • 3 pears core taken out and thinly sliced
    Seasoning
    • 12 cloves garlic
    • 2 tsp ginger grated
    • 1 white onion, medium minced
    • ½ cup fish sauce
    • 3 tbsp shrimp paste
    • 1 apple peeled and core taken out
    • 1¼ cups hot pepper flakes

    Equipment

    • 3-4 non-reactive large metal or plastic bowls
    • gloves
    • glass jars

    Method
     

    1. Split the cabbages in half and give it a good rinse especially close the bottom of the cabbage and the out layers.
    2. Put the cabbage in a large container/basin and rub salt all over the between the leafs. Arrange all the cabbage in a large basic and place a large plate on top. The plate needs to cover the whole basin. Add some cans or jugs of water on top. Let that sit for 2 hours. Remember to flip occasionally – every 30 minutes.
    3. While the cabbage is salting, make the porridge.
      Combine the water and flour and cook on medium heat for 10 minutes. Stir frequently with a balloon whisk. Slowly add the sugar and cook for 1 minute. Remove from the heat and let it sit on the counter until it is cool completely. Pour the porridge in a blender and add all the seasoning ingredients. The texture should be similar to a thin paste.
    4. After wash all the salt out of the cabbage. Split the cabbage half again and cut the core out. Let the cabbage sit in the strainer. You can test the cabbage if it's ready by tearing a piece to eat. the texture should be crunchy and salty at the same time.
    5. In another bowl, combine all the vegetables together. While wearing gloves, pour the spicy marinate into vegetables and mix well. Set aside.
    6. In a large basin that you used to salt the cabbage, spread the kimchi paste on each cabbage leaf. Open up the leafs between the cabbage and generously spread the marinate. Make sure each leaf is coated and even distribution.
    7. Once all the leaves are coated with the marinate, you can start to individually jar the kimchi separately. Pack the kimchi intoa clean, airtight container. Press hard and seal it. This can be eaten right after it is marinated.

    Notes

    SHELF LIFE
    The shelf life of kimchi in the fridge can vary based on factors such as the level of fermentation, storage conditions, and personal preferences for taste. Generally, kimchi can last for different durations depending on its stage of fermentation:
    1. Fresh Kimchi: If you’ve just made the kimchi and it hasn’t undergone significant fermentation, it can last for about 2-3 weeks in the refrigerator. During this period, the flavors are still mild, and the texture remains relatively crisp.
    2. Moderately Fermented Kimchi: As kimchi ferments further, it develops a stronger flavor and the texture may become softer. At this stage, which usually occurs after a few weeks in the fridge, it can last for an additional 2-3 months. The taste will continue to evolve during this time.
    3. Well-Fermented Kimchi: Fully fermented kimchi, with a tangy and complex flavor, can last for several months, sometimes even up to 6 months or more. While the texture may continue to soften, the fermentation process acts as a natural preservative, allowing the kimchi to maintain its quality for an extended period.
    It’s important to store kimchi properly to maximize its shelf life. Keep it in an airtight container to prevent exposure to air, which can lead to faster deterioration. Additionally, use clean utensils when serving kimchi to avoid introducing contaminants.
    Always trust your senses. If you notice any signs of spoilage, such as off odors, unusual colors, or a slimy texture, it’s best to discard the kimchi. While kimchi is known for its long shelf life, individual preferences for taste and texture play a significant role in determining when it is most enjoyable.
  • Sourdough English Muffins

    Sourdough English Muffins

    There is something deeply satisfying about pulling a batch of homemade sourdough English muffins off a cast iron skillet — golden, nook-filled discs that toast up perfectly every single time. This recipe uses your active sourdough starter to deliver a subtle tang and incredible texture you simply cannot get from a store-bought bag.

    This post may contain affiliate links. If you purchase through these links, I may earn a small commission at no extra cost to you. Thank you for supporting Love & Harvest!

    Sourdough English muffin sandwiches with egg, cheese and avocado

    Why Try This Recipe?

    Beyond the convenience of store-bought options, crafting these delectable delights at home adds artisanal flair to your mornings. Here is why this recipe is worth your time.

    • Flavorful Complexity: Sourdough fermentation imparts a unique, subtle tang that transforms each bite into something special.
    • Control Over Ingredients: Choose organic flour, local honey, and wholesome components — no mystery additives.
    • No Preservatives or Additives: Unlike commercially available muffins, homemade versions are clean and natural.

    And above all, sharing these muffins with people who can taste your dedication and love of food is the real reward.

    Golden sourdough English muffins cooling on a wire rack

    What You’ll Need

    Ingredients

    Sourdough Starter

    If you already have an active sourdough starter, you are all set. If not, or if you are not sure what one is, check out the full guide here: How to Make Sourdough Starter.

    • Why it matters: The starter is the leavening agent and the source of that signature tangy flavor — no commercial yeast needed.

    Flour

    Standard all-purpose flour works perfectly here. For a cleaner, more flavorful result, weigh your flour with a kitchen scale rather than scooping by volume.

    • Why it matters: Measuring by weight ensures consistent dough hydration and a reliable rise every time.

    Milk

    Full fat whole milk gives the muffins a fluffier, richer texture. Low-fat alternatives work but will produce a slightly less tender crumb.

    • Why it matters: The fat in whole milk tenderizes the dough and contributes to a soft, pillowy interior.

    Honey

    Honey serves a dual purpose — it adds a balanced sweetness and feeds the beneficial bacteria in the sourdough starter, helping the dough rise optimally.

    • Why it matters: Unlike refined sugar, honey also adds moisture and depth of flavor to the finished muffin.

    Cornmeal

    Cornmeal dusted on the pan and the baking sheet creates a classic, slightly crunchy coating on the outside of every muffin — the hallmark of a proper English muffin.

    • Why it matters: It prevents sticking and delivers that iconic texture contrast between the crisp exterior and pillowy interior.

    Equipment

    Electric Stand Mixer

    A KitchenAid stand mixer with a dough hook makes kneading effortless and consistent. These machines last for decades — well worth the investment.

    Cast Iron Skillet

    Cast iron distributes heat evenly and retains it well, which is critical for getting that golden crust without scorching. I love my Lodge 5-quart Dutch oven and cast iron skillets for all bread work — pre-seasoned, affordable, and virtually indestructible.

    English muffin breakfast sandwich stacked on top of whole muffins

    This is a flexible recipe — mix the dough in the morning and cook your muffins by evening, or ferment overnight for an even deeper flavor. Either way, you end up with a batch of beautifully nook-filled muffins ready for toasting. Pair them with the full sourdough bread guide or try them alongside rosemary beer bread for a full bread-baking weekend.

    Stack of sourdough English muffins topped with an egg, cheese and avocado sandwich

    Frequently Asked Questions

    Can I make sourdough English muffins without a stand mixer?

    Yes. You can knead the dough by hand for about 8–10 minutes until it becomes smooth and elastic. It takes more effort but works perfectly well.

    How long does the dough need to ferment?

    After adding all the flour, the dough needs 4–6 hours at room temperature until it doubles in size. For a more developed flavor, you can refrigerate the dough after the first fermentation and cook the muffins the next morning.

    What if my sourdough starter is not active enough?

    Feed your starter 8–12 hours before you begin the recipe. It should be bubbly, have roughly doubled in size, and pass the float test — a small spoonful dropped in water should float.

    Can I freeze sourdough English muffins?

    Absolutely. Let them cool completely, then freeze in a zip-lock bag for up to 3 months. Thaw at room temperature or toast directly from frozen.

    Why do English muffins have nooks and crannies?

    The nooks come from the open crumb structure created by fermentation and the way the muffins are cooked on a griddle rather than baked in an oven. Never slice them with a knife — always use a fork to split them so you preserve those pockets.

    Can I use discard sourdough starter instead of active starter?

    For best results use an active, fed starter. Discard will work but the rise will be slower and the muffins may be denser. Allow extra fermentation time if using discard.

    Golden sourdough English muffins cooling on a wire rack

    Sourdough English Muffins

    Easy sourdough English muffins cooked on a griddle! Ferment the dough in the morning and enjoy fresh English muffins in the evening. They are crunchy on the outside and super soft and moist on the inside.
    Prep Time 8 hours
    Cook Time 15 minutes
    Total Time 8 hours 15 minutes
    Servings: 12
    Course: Breakfast
    Calories: 195

    Ingredients
      

    • 1 cup active sourdough starter
    • ¾ cup warm water
    • 1 cup warm whole milk
    • 5 cups flour split 2 cups first then 3 cups
    • ¼ cup honey
    • 1 tbsp extra virgin olive oil
    • 1 tsp sea salt
    • cornmeal

    Equipment

    • electric stand mixer
    • round steel pastry cutter
    • Rolling Pin
    • cast iron skillet

    Method
     

    1. Ensure your sourdough starter is active and bubbly. If it has been in the refrigerator, take it out a day before and feed it with equal parts flour and water until it becomes vigorous.
    2. In the electric stand mixer with the dough hook attached, combine the active sourdough starter, warm water, and warm milk until it is well combined. Wait 5 minutes.
    3. Now add TWO CUPS of all-purpose flour, and mix until a sticky dough comes together. Cover and leave for 30 minutes. Mix the ingredients until they come together into a sticky dough.
    4. Now add in the remaining 3 cups of all-purpose flour and honey. Knead the dough for about 5 minutes and a smooth elastic dough forms. Drizzle the olive oil on top and cover the top with plastic. Rest for 4-6 hours until it double in size.
    5. Once the dough has risen, gently deflate it and turn it out onto a floured surface. Roll the dough to about 1/2 inch thickness. Using a round cutter or a glass, cut out individual muffins. Place them on a baking sheet dusted with cornmeal to prevent sticking.
    6. Cover the muffins with a kitchen towel and let them rise for another 1-2 hours. They should puff up but not necessarily double in size.
    7. Preheat a large skillet over medium-low heat. Sprinkle some cornmeal on the hot surface. Carefully transfer the muffins onto the skillet and cook for 6-8 minutes on each side or until they are golden brown and cooked through.
    8. Once cooked, transfer the English muffins to a wire rack to cool. They can be split with a fork or a serrated knife.

    Notes

    COOKING THE NEXT MORNING:
    You can absolutely prepare the dough in the evening and refrigerate it overnight for baking the next morning. This overnight method allows for a longer, slower fermentation, enhancing the flavor and texture of the sourdough English muffins. The adjusted timeline is after the first fermentation, deflate the dough and put it in a container (with space for it to rise), and place it in the fridge. In the morning, take the dough out of the refrigerator. It should have risen overnight. Gently deflate it and roll it out to about 1/2 inch thickness on a floured surface. Cut out individual muffins and place them on a cornmeal-dusted baking sheet. Cover the muffins with a kitchen towel and let it rise at room temperature for 1-2 hours or until they puff up but not necessarily double in size. Now follow the same cooking instructions. 
  • How to Make Sushi Roe

    How to Make Sushi Roe

    The day our eldest son asked to go fishing for his birthday, we said yes without hesitation — and we came home with fresh trout loaded with roe sacs. What followed was an afternoon of discovery: rinsing, separating, brining, and tasting. The result was vibrant, jewel-like fish roe that he piled on top of his sushi and popped inside his mouth with pure joy. This guide shows you exactly how to replicate that experience at home.

    This post may contain affiliate links. If you purchase through these links, I may earn a small commission at no extra cost to you. Thank you for supporting Love & Harvest!

    Sushi rolls topped with bright orange homemade salmon roe

    What Is Sushi Roe?

    Sushi roe refers to the tiny, flavorful eggs of various fish species used as a topping or garnish in sushi. These glistening orbs add both visual appeal and a burst of flavor that elevates any sushi creation.

    What Does Sushi Roe Taste Like?

    The flavor varies by fish type. Here are the most common varieties:

    1. Tobiko (Flying Fish Roe): Small, crunchy, vibrant colors. Mild and sweet with a hint of salt.
    2. Ikura (Salmon Roe): Larger, richer pop. Savory with subtle sweetness.
    3. Masago (Capelin Roe): Smaller, milder than tobiko. Slightly sweet, valued for texture.
    4. Trout Roe: Larger than most. Mild, buttery, slightly briny. Smooth texture with a satisfying pop.

    Close-up of glossy orange fish roe still in its membrane

    What’s in Fish Roe

    1. Omega-3 Fatty Acids: Fish roe has the omega-3 fats EPA and DHA.
    2. Protein: Fish roe is mostly protein and fat.
    3. Vitamins and Minerals: Contains B12, vitamin D, iodine, selenium, and phosphorus.
    4. Astaxanthin: The pigment that gives salmon roe its orange colour.

    Sushi pieces topped with orange roe on a dark plate

    Fish Roe vs. Caviar: What Is the Difference?

    Fish roe is a broad term covering the eggs of any fish species. Caviar specifically refers to the processed, salted eggs of sturgeon — particularly beluga, osetra, and sevruga. True caviar is rarer, more expensive, and more regulated than other types of roe. Trout, salmon, and flying fish roe are more accessible and just as delicious for everyday sushi use.

    Ingredients

    Key Ingredients

    Fresh Trout with Roe Sacs

    The key is sourcing the freshest fish possible. Ask your fishmonger specifically for trout with intact roe sacs, or catch your own. The roe must be fresh — not frozen and thawed — for the best flavor and texture.

    • Why it matters: Fresh roe has clean flavor and firm eggs that hold their shape during brining. Older or improperly handled roe will be mushy and off-tasting.

    Sea Salt Brine

    A simple brine of 1/4 cup sea salt per quart of water is all you need to preserve and season the roe. The salt draws out excess moisture, firms up the eggs, and adds the characteristic savory depth that makes sushi roe so addictive.

    • Why it matters: The brine concentration and soak time directly control the saltiness of the final product — start with 30 minutes and adjust to your taste.

    Gunkan-style sushi topped with large orange roe

    Equipment You Will Need

    • Cookie sheet cooling rack — acts as a sieve to separate eggs from the membrane
    • Colander or fine mesh strainer
    • Bowl for collecting the eggs
    • Cheesecloth (optional, for removing excess moisture)

    Once you have your homemade roe ready, use it on homemade sashimi or alongside traditional kimchi for a Japanese-inspired spread at home.

    A child in a sun hat holding up a freshly caught trout by a lake

    Frequently Asked Questions

    How long does homemade fish roe last in the refrigerator?

    Freshly made fish roe is best consumed within 3–4 days when stored in a clean, airtight container in the refrigerator. The brine helps preserve it but it is still a fresh product — do not push it past a week.

    Can I use salmon roe instead of trout?

    Absolutely. Salmon roe (ikura) is one of the most popular types for home preparation. The process is identical — harvest, rinse, separate from membrane over a rack, brine, strain, and serve. Salmon roe will be larger with a richer, more pronounced pop.

    How salty should the brine be?

    The standard ratio is 1/4 cup of sea salt per quart of water. For a less salty result, soak for only 20–30 minutes and taste frequently. For a more preserved, saltier roe closer to commercial ikura, extend the brine to 2–4 hours.

    Can I freeze homemade fish roe?

    Yes, but the texture will change after thawing — the eggs become slightly softer. Freeze in small portions in airtight containers for up to 1 month. Thaw slowly in the refrigerator overnight.

    Why use a cooling rack to separate the eggs?

    The cooling rack acts as a natural sieve. When you place the intact roe sac on the rack and gently work it, the individual eggs drop through the openings while the membrane stays on top — a clean, efficient way to separate them without crushing the delicate eggs.

    What can I do with homemade sushi roe besides sushi?

    Fish roe is excellent on crackers with cream cheese, as a garnish for deviled eggs, stirred into pasta dishes, or served on a simple bed of steamed rice with soy sauce. Once you have a batch ready, the possibilities are wide open.

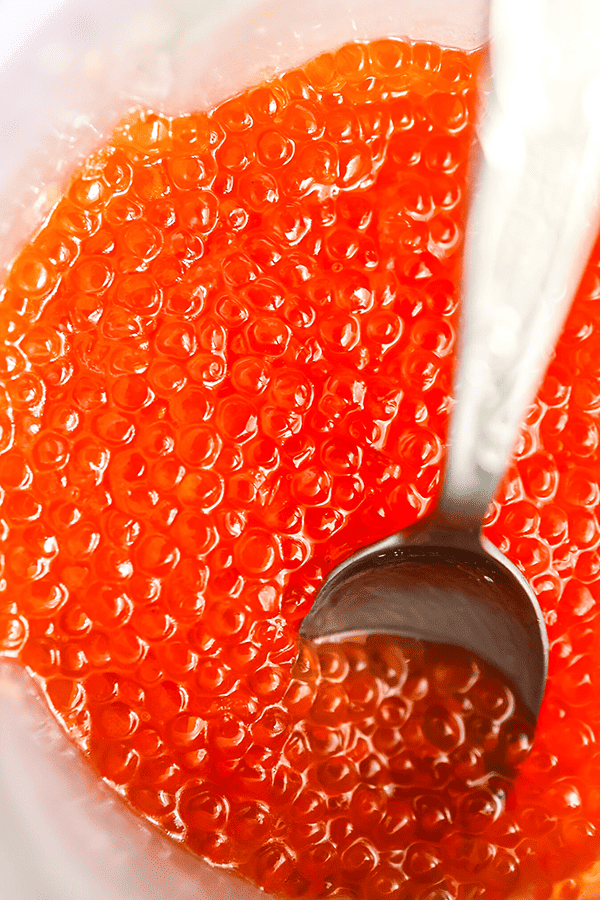
    Bowl of cured orange fish roe with a spoon

    How to Make Sushi Roe

    An effortlessly and simple recipe using trout eggs, resulting in a truly satisfying culinary experience bursting with flavour and colour.
    Prep Time 30 minutes
    Brining 30 minutes
    Total Time 1 hour
    Course: Condiment
    Cuisine: Japanese
    Calories: 60

    Ingredients
      

    • 2 fresh trout with roe sacks
    • ¼ cup sea salt
    • 1 quart water
    • liquid smoke optional
    • smoking gun optional

    Equipment

    • cookie sheet cooling rack
    • Colander or fine mesh strainer
    • bowl
    • cheesecloth

    Method
     

    1. Obtain fresh fish with roe. Common fish with edible roe include trout, salmon, or any other fish known for its roe.Carefully remove the roe sacs from the fish. You can do this by gently cutting along the belly and extracting the roe.
    2. Place the roe sacs in a bowl of cold water. Gently rinse the roe to remove any blood or membrane.
    3. Position the cookie sheet cooling rack over a bowl or tray. The purpose of the rack is to allow the eggs to fall through while keeping the membrane on top.Using a knife or your fingers, carefully cut or gently pull apart the membrane that encases the roe sac. Be gentle to avoid damaging the eggs.
    4. Place the roe sac, along with its membrane, onto the cooling rack. The eggs will start to fall through the spaces in the rack, separating from the membrane.
    5. Let the roe sac sit on the cooling rack for a few minutes, allowing gravity to help the eggs drop through the openings. You may gently tap or shake the membrane to encourage the process.
    6. As the eggs fall through the rack, collect them in the bowl or tray placed underneath. The cooling rack acts as a sieve, separating the eggs from the membrane.
    7. Prepare a brine solution by dissolving salt in water. A common ratio is¼ cup of salt per quart of water. Immerse the cleaned roe in the brine solution. The salt helps preserve the roe and adds flavour. Allow the roe to soak in the brine for at least 30 minutes to several hours, depending on your preference for saltiness.
    8. After brining, strain the roe to remove excess liquid. You can use a colander or a fine mesh strainer.Optionally, if you want a more refined texture, place the strained roe on a layer of cheesecloth and gently wrap it to remove excess moisture.
    9. Storage: Place the processed roe in a clean, airtight container. Store the roe in the refrigerator. Freshly made fish roe is best when consumed within a few days
      Serve: Once processed, the fish roe can be served as a topping for sushi, salads, or other dishes.
  • How to Make Sourdough Bread

    How to Make Sourdough Bread

    Once you bake your first real sourdough loaf — crackling crust, open crumb, deep tang — you will never look at store-bought bread the same way. This guide breaks down the entire process simply and clearly: how to build a starter from scratch, how to shape and ferment the dough, and how to bake a loaf that rivals what you would find in a serious bakery. Our family makes sourdough at least once a week, and this is the exact recipe we use.

    This post may contain affiliate links. If you purchase through these links, I may earn a small commission at no extra cost to you. Thank you for supporting Love & Harvest!

    Sourdough loaf broken in half next to a linen bread bag

    Why Sourdough?

    Sourdough bread is all about flavor and that chewy, tangy crumb.

    Two round loaves of whole grain sourdough bread on a cloth

    Step 1: Build Your Sourdough Starter

    Your starter is the heart of this recipe. If you want a deeper guide, see the full post: How to Make Sourdough Starter. Here is the quick version.

    How to Make Sourdough Starter

    Ingredients: Whole wheat or all-purpose flour, filtered or dechlorinated water

    Day 1: Mix 1/2 cup flour with 1/2 cup water. Cover loosely and leave at room temperature for 24 hours.

    Day 2: Discard half. Add 1/2 cup flour and 1/2 cup water. Mix. Cover and rest 24 hours.

    Days 3–7: Repeat daily — discard half, add 1/2 cup flour, 1/2 cup water. Watch for bubbles and rising.

    Day 7 (or when active): The starter should be bubbly, smell tangy, and have roughly doubled in size. It is ready to bake with.

    A lively starter is what makes sourdough rise without commercial yeast. It is also endlessly useful — cinnamon rolls, pizza dough, croissants, and much more all benefit from a well-maintained starter.

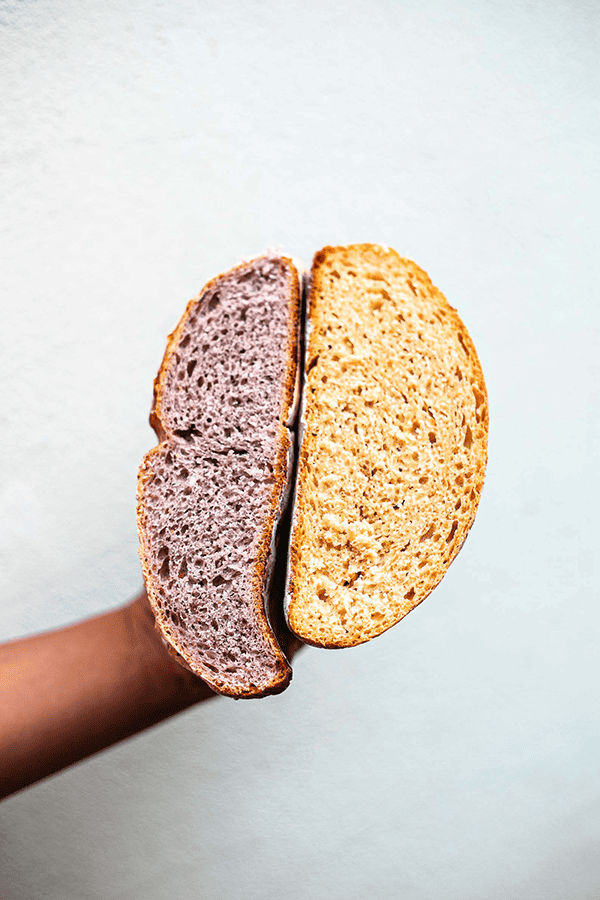
    A hand holding two halves of sourdough bread showing the crumb

    Ingredients

    Key Ingredients

    Flour

    All-purpose or bread flour both work. For the best flavor, we recommend organic flour. Use a digital kitchen scale to weigh your flour — precision is one of the biggest contributors to consistent results in sourdough baking.

    • Why it matters: Exact flour weight ensures correct hydration, which directly affects the crumb structure and crust.

    Active Sourdough Starter

    Your starter must be fed and active before you begin. Feed it 8–12 hours before mixing the dough. It should be bubbly and at or near its peak rise.

    • Why it matters: An under-active starter results in a dense, gummy loaf that will not rise properly. Timing the starter correctly is the single most important variable in this recipe.

    Sea Salt

    Salt is added after the autolyse rest, not at the start. It controls fermentation rate, strengthens gluten, and adds essential mineral complexity to the crumb.

    • Why it matters: Adding salt too early inhibits the starter. Timing it after the initial rest gives the dough structure without slowing the initial hydration phase.

    Two crusty round sourdough loaves on parchment paper

    6 Steps to Make Sourdough Bread

    1. Mix the Dough

    Combine active sourdough starter and lukewarm water in a large bowl. Gradually add flour, stirring to form a shaggy dough. Rest 30 minutes. This autolyse step improves gluten development before any kneading.

    2. Add Salt and Knead

    Sprinkle salt over the rested dough and knead for about 5 minutes until smoother. No need to overwork it — just incorporate the salt fully.

    3. Bulk Fermentation

    Cover with a damp cloth and rest at room temperature for 4–6 hours. Perform a series of gentle stretch-and-fold sets every 30 minutes during the first 2 hours. This builds strength and structure without aggressive kneading.

    4. Shape and Refrigerate Overnight

    Turn the dough onto a lightly floured surface. Stretch all sides outward and fold them to the center to build tension, then shape into a smooth round ball. Place in a bowl lined with a floured cloth, seam-side up. A banneton proofing basket is ideal here for maintaining shape and developing the classic spiral pattern. Refrigerate for 12–24 hours — the cold slow fermentation deepens flavor significantly.

    5. Bake in a Dutch Oven

    Preheat your oven to 450°F (230°C) with a Lodge 5-quart Dutch oven inside. Once preheated, carefully transfer the cold dough to the hot Dutch oven. Score the top with a bread lame. Cover and bake 20 minutes. Remove the lid and bake another 20 minutes until the crust is deep golden brown.

    6. Cool Before Slicing

    This step is non-negotiable. Let the bread cool on a wire rack for at least 1 hour before slicing. Cutting too early releases steam and collapses the crumb structure — patience here protects all the work you put in.

    Half a loaf of sourdough bread resting in a clay pot

    Other Sourdough Variations to Try

    • Honey Cranberry sourdough bread
    • Chocolate Coffee sourdough bread
    • 4 Seeds — sunflower, flaxseed, sesame, and pumpkin seed
    • Rye flour sourdough bread
    • Purple yam sourdough bread

    Once you have sourdough mastered, try branching out to homemade focaccia bread or sourdough English muffins — both use the same starter and build naturally from these same skills.

    Tray of sourdough cinnamon rolls topped with rainbow sprinkles
    Table of assorted sourdough breads, buns and cookies
    Dark sourdough loaf cut open to show the crumb

    Frequently Asked Questions

    Why does sourdough take so long to make?

    The long fermentation time — 4–6 hours bulk fermentation plus 12–24 hours of cold proofing — is what creates the flavor and texture that make sourdough worth the effort. The wild yeast and bacteria need time to do their work. You can compress the timeline, but the flavor and texture will be less developed.

    What flour is best for sourdough bread?

    Bread flour or high-quality unbleached all-purpose flour produce excellent results. Bread flour has a higher protein content which supports stronger gluten development. For extra nutrition and complexity, you can replace up to 20% of the flour with whole wheat or rye flour.

    Why is my sourdough not rising?

    The most common causes are: starter that is not active enough (feed it and wait for peak activity), dough that is too cold (ferment in a warmer spot — 75–78°F is ideal), or insufficient gluten development (perform more stretch-and-fold sets during bulk fermentation).

    Do I need a Dutch oven to bake sourdough?

    A Dutch oven is strongly recommended. It traps steam in the first phase of baking, which allows the loaf to expand fully before the crust sets. Without it you can use a baking stone with a steam pan underneath, but results will be less consistent.

    How do I know when sourdough bread is done baking?

    A well-baked sourdough loaf has a deep golden-brown crust, sounds hollow when tapped on the bottom, and reads 200–210°F (93–99°C) internally. Visual cues and the tap test are usually sufficient once you have made it a few times.

    Can I freeze sourdough bread?

    Yes. Let it cool completely, slice it, and freeze in a tightly sealed bag for up to 3 months. Toast directly from frozen or thaw at room temperature. Pre-slicing before freezing makes it much more convenient to use.

    A hand holding two halves of sourdough bread showing the crumb

    How to Make Sourdough Bread

    We have assembled an easy-to-follow guide on how to make a glorious loaf of tasty sourdough bread at the comfort of your own home. 
    Prep Time 12 hours
    Cook Time 40 minutes
    Total Time 12 hours 40 minutes
    Course: Bread
    Calories: 170

    Ingredients
      

    • 475 g all-purpose flour or bread flour
    • 300 g filtered water
    • 30 g active sourdough starter
    • 1 tsp sea salt

    Equipment

    • kitchen scale
    • large non-reactive bowl
    • large kitchen clothe
    • parchment paper
    • sharp blade

    Method
     

    NIGHT BEFORE
    1. 9PM: Take your sourdough starter from the fridge right before you sleep, and place it on your counter overnight.
    DOUGH DAY
    1. 10 AM: Open your sourdough starter and put half of it into a clean jar. Add ¼ cup of water, stir the mixture until well combined. Slowly incorporate ½ cup of flour, stirring until everything is well combined, and no traces of flour remain in the mixture. Cover with a lid and let it sit until it has doubled in size.
      *I like to place an elastic band where the starter is initially. When it has doubled in size, I will know because it has surpassed the elastic band on the jar.*
      *also remember to feed the other half of the sourdough starter with the same measurements. Once it has doubled in size, place the lid back on, and place it back in the fridge for next time use*
    2. 12PM: While you wait for the sourdough start to doubled in size, in a large bowl mix together the flour and water together. Roughly combine the dough until a shaggy dough develops. Cover it with a kitchen towel or plastic wrap and wait for 30 minutes.
    3. 12:30PM: Remove the towel or plastic wrap and add in the 30g sourdough starter that has doubled in size. Mix well until it is well combined. Leave it for 1 hour and cover.
    4. 1:30PM: Stretch and fold the dough, cover and let it rest at room temperature for 1 hour.
    5. 2:30 PM: Stretch and fold the dough, cover and let it rest at room temperature for 30 minutes.
    6. 3:30 PM: Stretch and fold the dough, cover and let it rest at room temperature for 30 minutes.
    7. 4:00 PM: Perform a fourth set of stretches and folds. In the bowl where you plan to proof your bread, cover it with a large kitchen towel and dust it with flour. Stretch the dough and pinch a portion to form a stretched-out ball. Place the dough with the pinched part facing up. Allow the ends of the bowl to cover the dough and let it rest in the fridge overnight.
    BAKING DAY
    1. 6AM: Take the dough out of the fridge, place your dutch oven with the lid on top into the oven and preheat at 450°F (232°C) for 30 minutes.
    2. Open the kitchen towel and gently place a parchment paper on top of the dough. Carefully flip the bowl over, and remove the bowl and kitchen towel. Using a sharp blade, make a deep score (also known as a cut) in the middle of the bread.
    3. Using oven gloves, carefully remove the Dutch oven and lift the lid. Holding onto the ends of the parchment paper, gently place the bread inside the Dutch oven and replace the lid. Bake the bread for 35 minutes.
    4. Uncover the pot and bake for another 25 minutes.
    5. Place the bread on a cooling rack. Slice when the bread is completely cooled.
  • How to Make Sourdough Starter

    How to Make Sourdough Starter

    You only need two ingredients and seven days to build a living, bubbling sourdough starter from scratch — and once you have it, you have a leavening agent that can last for decades. This guide walks you through every day of the process, explains why each step matters, and gives you the troubleshooting knowledge to revive your starter no matter what life throws at it.

    This post may contain affiliate links. If you purchase through these links, I may earn a small commission at no extra cost to you. Thank you for supporting Love & Harvest!

    how to make sourdough starter

    What Is a Sourdough Starter?

    A sourdough starter is a mixture of flour and water that captures and cultivates wild yeast and lactic acid bacteria from your environment. This naturally fermented mixture serves as the leavening agent in sourdough bread, giving it the distinct tangy flavor, open crumb, and chewy crust that commercial yeast simply cannot replicate. The starter is kept alive by regular feedings of fresh flour and water, allowing the microbial community to thrive indefinitely.

    Why Make Your Own Sourdough Starter?

    There are real, practical reasons to build your own starter rather than buying commercial yeast:

    • No commercial yeast needed ever again — once established, your starter replaces packaged yeast for all bread, pancakes, waffles, and more.
    • Better flavor and texture — the lactic acid bacteria produce organic acids that create sourdough’s signature tang and help preserve the bread naturally.
    • Endless versatility — use the same starter (or its discard) for sourdough English muffins, focaccia, pizza crust, pancakes, and waffles.
    • Self-sufficient and zero-waste — discard can be turned into crackers, crepes, and flatbreads instead of being thrown away.

    active sourdough starter bubbles

    Ingredients for a Sourdough Starter

    Ingredients

    Flour

    • Why it matters: Whole-wheat or rye flour on Day 1 gives the starter a head start — the bran contains more wild yeast and bacteria than white flour. Once active, you can switch to all-purpose for daily maintenance. For the best results, use a kitchen scale (ASIN B079D9B82W) to weigh rather than measure by volume — precision matters more than it does in regular baking.

    Water

    • Why it matters: Chlorine and chloramine in tap water can inhibit or kill the wild yeast you are trying to culture. Use filtered water, or let tap water sit uncovered overnight to let the chlorine dissipate. Room-temperature water (around 70–75°F / 21–24°C) works best — cold water slows fermentation and hot water above 100°F can kill beneficial bacteria.

    sourdough starter day by day progress

    What Other Baked Goods Can You Make with a Sourdough Starter?

    Once your starter is active, you can use it — or its discard — in a wide range of recipes. Here are some favorites:

    • Sourdough Bread — the classic. Use our guide at how-to-make-sourdough-bread.
    • Sourdough English Muffins — perfect nooks and crannies. See our sourdough English muffins recipe.
    • Focaccia — crispy outside, airy inside. Try our easy homemade focaccia bread.
    • Pancakes and waffles — tangy, fluffy, and easy to make with discard.
    • Pizza crust, crackers, biscuits, cinnamon rolls — once you have a starter, the list is almost endless.

    How to Make Your Own Sourdough Starter

    With just two ingredients and patience, you can have an active starter within 5–7 days.

    How to Maintain a Sourdough Starter

    Once established, keeping your starter healthy is straightforward. Here is the routine:

    Equipment:

    Feeding ratios: A common starting ratio is 1:1:1 (starter : flour : water by weight). As your starter matures and you want to control its rise timing, you can move to 1:2:2 or 1:5:5 for a slower rise.

    Frequency: At room temperature, feed every 12–24 hours. If you bake infrequently, store in the refrigerator and feed once a week.

    Signs of a Healthy Starter

    • Bubbles throughout the jar, not just on top.
    • Doubles in size within 4–8 hours of feeding.
    • Pleasant, slightly tangy or yeasty aroma (like beer or yogurt).
    • Passes the float test: a small spoonful dropped in water floats when ready to bake.

    sourdough starter ready to bake

    Frequently Asked Questions

    What if I do not bake frequently?

    Store your starter in the refrigerator. Feed it once before refrigerating, then pull it out and feed it at least once a week to keep it alive. When you are ready to bake, take it out 24 hours in advance, let it come to room temperature, and feed it at least once before using it in your recipe.

    There is a grey or dark liquid on top of my starter — is it ruined?

    No. That liquid is called “hooch,” a byproduct of fermentation that forms when the starter is hungry. Simply pour it off (or stir it back in for a more sour flavor) and feed the starter as normal. However, if your starter turns pink or orange, that signals contamination — discard it and start fresh.

    What should my starter smell like?

    A healthy starter smells pleasantly tangy, like yogurt or mild vinegar. A very sharp acetone smell means it needs more frequent feeding. If it smells rotten or putrid (not just sour), check for contamination — pink or fuzzy growth is a sign to start over.

    My starter is not bubbling — is it still alive?

    Check whether it rises (not just bubbles) in the hours after feeding. Activity varies with room temperature — colder rooms slow everything down. Try moving it somewhere warmer (top of the refrigerator, inside the oven with just the light on). If you have not fed it in weeks, it will take 2–3 days of daily feedings to bounce back.

    Can I freeze my sourdough starter?

    Yes. Freeze a portion as a backup by spreading a thin layer on parchment paper, letting it dry completely, then storing the flakes in a sealed bag. To revive, rehydrate the flakes in water, add flour, and feed daily until active again — usually 3–5 days.

    Why is my starter not rising after 7 days?

    The most common culprits are: chlorinated tap water, a room that is too cold (below 65°F / 18°C), too-infrequent feedings, or using flour that lacks enough wild yeast. Try switching to whole-wheat flour for the next few feedings, use filtered water, and move to a warmer spot. If you live in a region where wild yeast is sparse, a small amount of commercial dried sourdough starter can jumpstart the culture.

    sourdough starter in jar

    How to Make Sourdough Starter

    We have assembled an easy-to-follow guide on how to make a glorious loaf of tasty sourdough bread at the comfort of your own home.
    Print Recipe
    Pin Recipe
    Prep Time:5 minutes
    7 days

    Equipment

    • glass jar

    Ingredients

    • ½ cup whole-wheat flour
    • non-chlorinated water
    • all-purpose flour for maintaining the starter

    Instructions

    • Day 1: combine ½ cup of whole-wheat flour and ¼ cup water in the jar. Stir thoroughly and cover with a towel and rubber band. Let it sit for 24 hours at room temperature. Keep it in an area that is somewhat warm. Very cool rooms tend to slow the action of a starter.
    • Day 2: The first feeding after 24 hours. Add ½ cup of all-purpose flour and ¼ cup of water. Give it a good stir, and wait for 24 hours.
    • Day 3: After 24 hours, check for bubbles. Bubbles are a sign something is going right. Discard half of the starter, add ½ cup of all-purpose flour and ¼ cup of water, and stir thoroughly. Let it sit for 24 hours.
    • Day 4: Again discard half of the starter, and feed with ½ cup of all-purpose flour and ¼ cup of water, stirring thoroughly. Let it sit for 24 hours.
    • Day 5 onward: Continue this routine until the starter is consistently bubbling and doubling in size within 8 hours of each feeding. At this point, you can store the starter in the refrigerator and feed it about once a week. When you plan to use the starter, pull it out of the refrigerator 24 hours in advance to feed it and allow it to warm up and grow.

    Notes

    If you have repeatedly attempted sourdough starters with dismal results, it could be that the wild yeast strains in your area are not well suited to sourdough. You can easily overcome this by purchasing a dried commercial starter. Cared for properly, your starter should last for many years. If you have other ferments or cultures in your kitchen, keep your starter at least several feet away from them to prevent cross-contamination.

  • Homemade Vanilla Extract

    Homemade Vanilla Extract

    Two ingredients. Six months of patience. The result is a vanilla extract so rich and aromatic it will transform everything you bake. Here is exactly how to make your own homemade vanilla extract and why it is worth every minute of the wait.

    This post may contain affiliate links. If you purchase through these links, I may earn a small commission at no extra cost to you. Thank you for supporting Love & Harvest!

    homemade vanilla extract in glass bottle

    Why Make Your Own Vanilla Extract?

    • Quality Control: When you make your own vanilla extract, you have control over the quality of ingredients used. You can choose high-quality vanilla beans and the type of alcohol you prefer, ensuring a superior product compared to some commercial options.
    • Customization: Homemade vanilla extract allows you to customize the flavour to your liking. You can experiment with different types of vanilla beans, such as Madagascar, Tahitian, or Mexican, to create unique and nuanced flavors.
    • Cost-Effective: In the long run, making your own vanilla extract can be more cost-effective than purchasing small bottles from the store, especially if you bake or cook frequently.
    • No Artificial Additives: Homemade vanilla extract is free from artificial additives, colours, and preservatives that may be present in some commercial extracts.
    • Sustainability: By making your own extract, you can choose sustainable and ethically sourced vanilla beans, contributing to better environmental and ethical practices.
    • Gift Ideas: Homemade vanilla extract makes a thoughtful and personalized gift for friends and family who enjoy cooking or baking.
    • Freshness: Homemade extract often has a fresher and more robust flavour compared to store-bought options, as you can control how long it extracts.

    fresh vanilla bean split open

    Fresh vanilla bean.

    vanilla beans from Cuetzalan Mexico

    Living in Mexico comes with many perks — like buying fresh vanilla beans! We buy all our vanilla beans in a small Pueblo Magico called Cuetzalan. It is a beautiful colonial town, 3 hours from Puebla and 5 hours from Mexico City.

    market in Cuetzalan Mexico

    Ingredients

    Key Ingredients

    Vanilla Beans

    You will need whole vanilla beans. The number depends on the quantity of extract you want to make and your flavour preference. Typically, use 3 to 6 vanilla beans per 8 ounces (240 ml) of vodka.

    • Why they matter: The quality and origin of your vanilla beans determines the complexity and depth of your extract. Mexican vanilla beans are prized for their bold, creamy, and slightly spicy character.

    These Grade B Vanilla Beans are ideal for extract making because their lower moisture content means more concentrated vanillin. If you can source Mexican vanilla beans locally, always choose them first.

    Vodka

    Choose a high-quality, unflavored, and clear vodka with a neutral flavour profile. The alcohol content should be at least 35-40% (70-80 proof).

    • Why it matters: Alcohol is the solvent that extracts and preserves all of the flavour compounds from the vanilla beans. The better the vodka, the cleaner and more pure your extract will taste.

    The quality of your vanilla beans and vodka will significantly impact the final flavour. Better ingredients always mean better results.

    Dark Glass Bottle

    Use a clean glass container with a tight-sealing lid. Dark glass protects the extract from light exposure, which can degrade its quality over time.

    • Why it matters: Light is the enemy of vanilla extract. An amber or cobalt glass bottle keeps your extract at peak quality for years.

    These small dark glass bottles are perfect for gifting and storing your homemade extract.

    vanilla extract ingredients laid out

    Equipment

    Making homemade vanilla extract is a straightforward process, and you do not need many specialized tools.

    1. A Clean Glass Bottle or Jar: Use a glass container with a tight-sealing lid. The size should match the amount of extract you plan to make.
    2. Knife or Scissors: To split the vanilla beans open and expose the seeds.
    3. Cutting Board: To safely cut the vanilla beans.

    Optional but helpful:

    1. Funnel: Makes it easier to pour vodka into the bottle without spills.
    2. Labels: Keep track of the preparation date and bean variety used.

    vanilla extract in amber bottle

    Why Use Alcohol Instead of Water?

    Alcohol, typically vodka, is used to make vanilla extract instead of water for several important reasons:

    1. Extraction of Flavour Compounds: Vanilla beans contain a wide range of flavour compounds, including vanillin. Alcohol is an excellent solvent for these compounds, allowing them to dissolve and infuse into the liquid. Water is not as effective at extracting these compounds.
    2. Preservation: Alcohol acts as a preservative, inhibiting the growth of microorganisms that can spoil the extract.
    3. Longer Shelf Life: Vanilla extract made with alcohol often lasts several years. Water-based extracts are more susceptible to spoilage.
    4. Flavour and Aroma: Alcohol carries and intensifies the vanilla scent, resulting in a more aromatic and flavourful extract.
    5. Versatility: Alcohol-based extracts are more versatile in the kitchen. The alcohol evaporates during cooking, leaving behind concentrated vanilla flavour.

    For those who prefer non-alcoholic options, you can make alcohol-free vanilla extract using food-grade glycerin, though the flavour and shelf life may differ.

    finished vanilla extract in dark bottle

    Recipes That Showcase Vanilla Extract

    Explore these recipes that perfectly showcase the flavour of your homemade vanilla extract.

    Birthday Rainbow Sugar Cookies — beautifully designed rainbow sugar cookies for any special occasion. Both the dough and the icing need vanilla extract and this is the perfect time to use your homemade batch.

    rainbow sugar cookies

    Oatmeal Chai Breakfast Cookies — cinnamon, cardamom, ginger, and cloves in a hearty oatmeal cookie. Vanilla extract ties all those spices together beautifully.

    Frequently Asked Questions

    How long does homemade vanilla extract take?

    A minimum of 6 months for full flavour development. The longer it sits, the richer and more complex it becomes. Many bakers keep a bottle going indefinitely, topping it off with fresh vodka as they use it.

    What is the best vanilla bean variety for extract?

    Madagascar vanilla beans are the most popular choice for their classic sweet, creamy flavour. Tahitian beans are floral and fruity. Mexican vanilla beans are bold and slightly spicy — my personal favourite. All three make excellent extract; it comes down to personal preference.

    Can I use rum or bourbon instead of vodka?

    Yes. Rum produces a slightly sweet extract. Bourbon adds a woody, caramel note that pairs beautifully with warm-spiced baked goods. Vodka remains the standard because its neutral flavour lets the vanilla shine through unaltered.

    How many vanilla beans do I need per bottle?

    The FDA standard for vanilla extract requires a minimum of 13.35 ounces of vanilla beans per gallon of 35% alcohol. For a home 8 oz (240 ml) bottle, use 5-6 beans for a strong extract.

    How do I know when the extract is ready?

    After 2-3 months the liquid will have turned a deep amber-brown colour. At 6 months you will have a full-bodied extract. Taste it — it should be rich, smooth, and distinctly vanilla with no harsh alcohol edge.

    Can I reuse the vanilla beans?

    Yes. As long as the beans are still fragrant and the extract is flavourful, keep topping off the bottle with fresh vodka. Some bakers have running bottles they have maintained for years.

    Homemade Vanilla Extract

    Homemade vanilla extract is a simple and rewarding project. Here is a recipe for making your own vanilla extract using vanilla beans and vodka.
    Print Recipe
    Prep Time:5 minutes

    Equipment

    • A clean glass bottle or jar with a tight-sealing lid
    • A sharp knife
    • A cutting board

    Ingredients

    • 6-8 vanilla beans (Grade B or Grade A beans work well)
    • 1 cup high-quality vodka (at least 35-40% alcohol by volume)

    Instructions

    • Lay your vanilla beans flat on a cutting board. Use a sharp knife to make a lengthwise slit down the middle of each bean, leaving about 1/2 inch at each end uncut. This will expose the tiny vanilla seeds inside.
    • Place the split vanilla beans in the glass bottle or jar. You may need to cut the beans into smaller pieces to fit them in the container if necessary.
    • Pour the vodka over the vanilla beans in the bottle, making sure the beans are completely submerged. Leave some space at the top to allow for shaking.
    • Seal the bottle tightly with the lid. Give the bottle a good shake to mix the vodka and vanilla beans. Store the bottle in a cool, dark place, such as a pantry or cupboard.
    • Let the vanilla extract sit for at least 6 months to allow the flavours to develop. Shake the bottle gently every week or so to agitate the mixture.
    • After 6 months, your homemade vanilla extract will be ready to use. You can top off the bottle with more vodka to keep the supply going indefinitely.

    Notes

    Over time, the vanilla extract will become richer and more aromatic. Homemade vanilla extract makes a thoughtful gift for friends and family who enjoy baking. Consider making extra batches to share.

  • Matcha Green Tea Popsicles

    Matcha Green Tea Popsicles

    Imagine biting into an ice-cold, creamy popsicle that cools you down from the inside out. That is exactly what these Matcha Green Tea Popsicles deliver — a tropical blend of coconut milk and ceremonial matcha that is as creamy as it is refreshing. One batch and you will want a stash in your freezer all summer.

    This post may contain affiliate links. If you purchase through these links, I may earn a small commission at no extra cost to you. Thank you for supporting Love & Harvest!

    A hand holding a matcha green tea popsicle over ice

    Quench your summer cravings with the refreshing delight of Matcha popsicles. These vibrant treats satisfy your sweet tooth with that earthy matcha flavor.

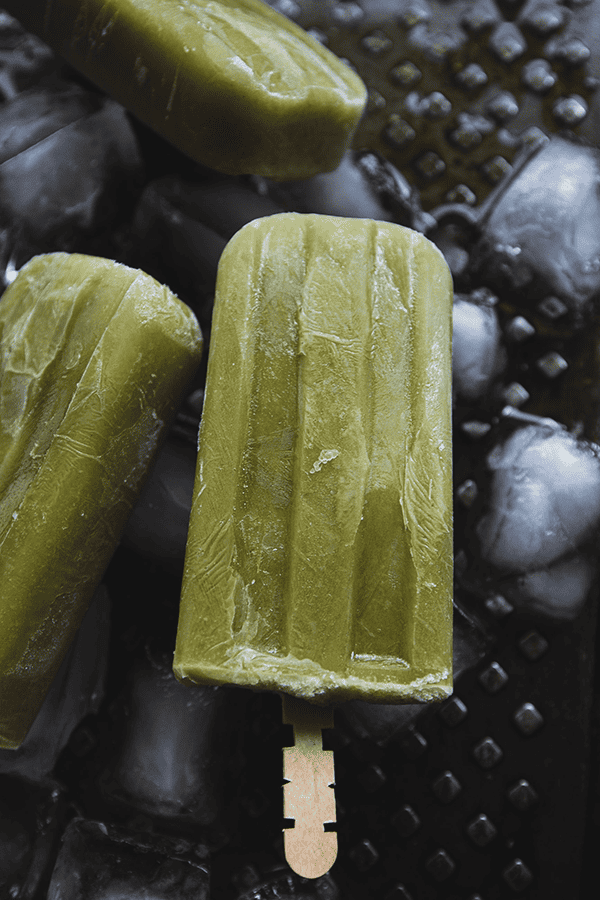
    Matcha green tea popsicles resting on ice cubes

    What is Matcha Green Tea?

    Matcha green tea is a type of powdered green tea that has been a traditional part of Japanese culture for centuries. It is made from the leaves of the Camellia sinensis plant, the same plant used to produce other types of green tea. However, what sets matcha apart is the way it is grown, harvested, and processed.

    The cultivation of matcha involves shading the tea plants for several weeks before harvest, which boosts the chlorophyll content and gives the leaves a vibrant green color. After harvest, the stems and veins are removed, and the leaves are ground into a fine powder using traditional granite stone mills.

    Why Use Xanthan Gum in Matcha Popsicles?

    Xanthan gum is a common ingredient used in the production of matcha popsicles and other frozen desserts. Here are a few reasons why xanthan gum is often included:

    1. Texture and Mouthfeel: Xanthan gum acts as a thickening and stabilizing agent, giving the popsicle mixture a smooth and creamy texture. It helps prevent ice crystals from forming, resulting in a more enjoyable mouthfeel and preventing the popsicles from becoming too icy.
    2. Emulsification: Xanthan gum can help emulsify and bind the ingredients together, ensuring that the matcha and other components in the popsicle mixture are evenly distributed. This contributes to a consistent flavour throughout the popsicle.
    3. Suspension of Ingredients: Matcha powder can sometimes settle at the bottom of the popsicle mixture due to its weight. Xanthan gum helps suspend the matcha particles and other ingredients evenly throughout the mixture, preventing separation and ensuring a consistent distribution of flavour.
    4. Enhanced Stability: Xanthan gum improves the stability of the popsicle mixture, preventing ingredient separation and reducing the chances of the mixture separating or becoming watery during the freezing process.
    5. Reduced Melting: Xanthan gum can help slow down the melting rate of popsicles, allowing them to maintain their shape and texture for a longer period, particularly in warmer temperatures.

    What I Love About Homemade Matcha Popsicles

    • Control the sugar content in each lick
    • Great way to use seasonal summer fruits
    • Easy recipe for kids to follow and tons of fun!
    • A great way of making homemade frozen treats
    • An infinite avenue for creativity

    Ingredients

    You only need 5 ingredients to make these matcha green tea popsicles. Simple, clean, and packed with flavour.

    Coconut Milk

    Full-fat coconut milk is the backbone of this recipe.

    • Why it matters: The high fat content creates that creamy, ice-cream-like texture without any dairy. It also carries the matcha flavour beautifully and prevents an icy, hard bite.

    Matcha Powder

    Use ceremonial-grade matcha powder for the best results.

    • Why it matters: Ceremonial grade matcha is brighter green and less bitter. Culinary grade works but produces a slightly more bitter flavour.

    Plant-Based Milk

    Almond milk, oat milk, or any plant-based milk you prefer.

    • Why it matters: This thins the coconut milk to a pourable consistency and adds volume without adding heaviness. Use unsweetened almond milk so the honey is the only sweetener.

    Honey

    Raw varietal honey or ¼ cup sugar work equally well.

    • Why it matters: Sweetness is essential in frozen desserts because cold temperatures dull flavor perception. Honey adds complexity that plain sugar cannot match.

    How To Make Matcha Popsicles

    In a high speed blender add coconut milk, almond milk, xanthan gum, matcha powder, and honey. Blend on high until the mixture comes together smoothly. Leave it on high for about 30–40 seconds until the top of the liquid gets frothy. The froth at the top of the popsicle mold gives it a beautiful look once frozen.

    Fingers lifting a frothy-topped matcha popsicle from a bed of ice

    What Do You Need to Make Homemade Popsicles?

    Firstly, you will need a popsicle mold. The one I like is silicone because you can stretch and pull to get the popsicles out. It is easier to store in cabinets too. Another thing I like about silicone molds is that I can use wooden sticks.

    I mean, come on, who hates it when a plastic stick goes missing, and you’re running through the kitchen looking for it? I despise playing hide-and-seek with the reusable sticks because I end up looking like a crazy lady searching for them.

    If you have kids and want a smaller size, you can buy a 6-cavity silicone mold — it makes about 3.3oz per popsicle, perfect for children!

    If you have a preferred mould, use it. In essence, they are all the same, so long as you have a popsicle at the end of the day.

    Two matcha green tea popsicles on dark ice cubes

    Create A Memorable Family Moment!

    This matcha popsicle recipe is so simple and delicious that asking the kids to join in can create a fantastic summer memory for them.

    When the kids see me laying out the limes on the kitchen counter with a big bowl beside it, they always know it’s popsicle-making time! Engaging kids in the process of making popsicles can be a wonderfully enjoyable and educational experience. They can learn about flavours, textures, measuring, and the science of freezing — all while having a great time.

    If you love frozen treats, you might also enjoy our Matcha Avocado Popsicles or the fun and fruity Loco Mango Popsicles. And for something completely different, try our Mixed Berry Smoothie with Pomegranate and Nopal, another family favourite.

    Frequently Asked Questions

    Can I use culinary grade matcha instead of ceremonial grade?

    Yes, you can. Culinary grade matcha is less expensive and works well in recipes. However, ceremonial grade produces a more vibrant green colour and a less bitter flavour. If you are sensitive to bitterness, stick with ceremonial grade.

    Can I make these popsicles without xanthan gum?

    Yes, but the texture will be icier. Xanthan gum is what prevents large ice crystals from forming, giving these popsicles their smooth, creamy bite. If you skip it, the popsicles will still be delicious — just slightly less creamy.

    How long do matcha popsicles last in the freezer?

    Stored in an airtight container or individually wrapped in plastic wrap, these matcha popsicles keep well for up to 2 months in the freezer. After that, they may develop freezer burn.

    Can I use a different sweetener?

    Absolutely. Maple syrup, agave nectar, or even coconut sugar all work well. Just note that liquid sweeteners blend more easily than granulated sugars. If using coconut sugar, blend an extra 10 seconds to fully dissolve.

    What popsicle mold size do I need?

    This recipe makes about 10 standard-size popsicles (roughly 3 oz each). If you are using a smaller mold — like a children’s size — you will get more pieces. Just adjust freeze time accordingly; smaller molds may be ready in 4 hours.

    Can I add fruit to this matcha popsicle recipe?

    Yes! Sliced mango, kiwi, or blueberries can be placed inside the mold before pouring the matcha mixture for a beautiful and flavourful twist. Make sure the fruit pieces are small enough to fit without blocking the popsicle stick.

    A hand holding a matcha green tea popsicle over ice

    Matcha Green Tea Popsicles

    After indulging in a hearty BBQ meal, these matcha green tea popsicles make a refreshing, light finish. They provide a refreshing and light option to balance out the richness of the barbecue flavours. The creamy texture, combined with the subtle tropical breeze of coconut milk, creates a harmonious blend that will transport your taste buds to a serene paradise.
    Prep Time 10 minutes
    Freeze Time 6 hours
    Total Time 6 hours 10 minutes
    Servings: 10 people
    Course: Dessert
    Calories: 90

    Ingredients
      

    • 1 15oz can coconut milk
    • 1 cup almond milk or any other vegan milk
    • 1 tsp xanthan gum
    • 1 tbsp matcha green tea powder
    • 3 tbsp honey or ¼ cup sugar

    Equipment

    • silicon popsicle mould

    Method
     

    1. In a high-speed blender, add coconut milk, almond milk, xanthin gum, matcha powder, and honey. Blend on high until the mixture comes together smoothly.
    2. Pour the mixture to fill each popsicle mould. Place lid over moulds, then insert popsicle sticks.
    3. Place it in the freezer for 6 hours or overnight.
    4. When it is ready, leave the popsicles out for 30 minutes so it is easier to squeeze them out.
  • Cherry Syrup Recipe

    Cherry Syrup Recipe

    The first time you make your own cherry syrup from scratch, you will never go back to the store-bought version. With just three ingredients — fresh cherries, sugar, and a splash of almond extract — this recipe captures real cherry flavour at its peak. Drizzle it over oatmeal, swirl it into yogurt, or spoon it generously onto a freshly baked Chewy Honey Maple Glazed Cookie. Summer in a jar.

    This post may contain affiliate links. If you purchase through these links, I may earn a small commission at no extra cost to you. Thank you for supporting Love & Harvest!

    Jar of cherry syrup with whole cherries and a spoon, seen from above

    Why Try This Recipe

    Avoid the disappointing taste and artificial flavour of store-bought cherry syrup, which often lacks true cherry essence and may even make you question the authenticity of the cherries used. Instead, try this recipe that guarantees the preservation of seasonal freshness, allowing you to savour the genuine flavours of cherries all year round.

    With only 3 simple ingredients, you can make yourself a large jar of cherry syrup that is tasty on almost everything! You only need cherries, sugar, and almond extract.

    Glass jar of homemade cherry syrup with an orange lid

    Flavour

    Indulge in the naturally sweet and refreshing flavor of these cherries. With each bite, you’ll experience a delightful crunch, complemented by the elevated taste of almond extract. This wholesome and delicious cherry syrup will make you proud of your culinary skills, as it offers versatility in the kitchen.

    Close-up of dark cherries soaking in thick cherry syrup

    How Do You Use Cherry Syrup?

    The versatility of this cherry syrup is truly remarkable! It can be used in countless ways to enhance various dishes. Personally, I enjoy drizzling it over my oatmeal, as the vibrant color blends beautifully, creating a visually appealing hue. It also serves as a key ingredient in a Lightly Sweet Black Forest Cake, adding a delightful cherry flavour.

    Additionally, I love incorporating it into my cookies or spreading it on freshly baked sourdough bread. Its incredible taste makes it suitable for adding to almost any dish or recipe imaginable!

    Here are some pairings that work beautifully with this cherry syrup: Moist Cherry Loaf, Salted Caramel Pecan Ice Cream, Chewy Honey Maple Glazed Cookies, and Lightly Sweet Black Forest Cake.

    Black Forest cake layered with cream and cherries in cherry syrup

    Ingredients

    Three ingredients are all you need. The magic is in the quality of each one.

    Fresh Cherries

    Use ripe, seasonal fresh cherries for the best results.

    • Why it matters: Fresh cherries have a naturally concentrated flavour and vibrant colour that frozen cherries cannot replicate. Look for dark, firm Bing cherries or Rainier cherries at peak season for the sweetest syrup.

    Sugar

    Plain granulated sugar is all you need here. No need for fancy maple syrup — though that works as a fun variation too.

    • Why it matters: Sugar draws out the natural juices from the cherries through osmosis, forming the syrupy base. The ratio of sugar to cherries controls the final consistency — more sugar gives you a thicker, more jam-like syrup.

    Almond Extract

    Just half a teaspoon of almond extract transforms this from a simple cherry sauce into something extraordinary.

    • Why it matters: Cherry and almond are a classic flavor pairing — botanically related, they complement each other naturally. The almond extract adds a warm, fragrant undertone that deepens the perceived cherry flavour without tasting artificial.

    Professional Tips

    Pro Tip #1: Use a Potato Masher

    To extract the maximum juice and achieve a concentrated level of thickness and flavour, use a potato masher to release the essence of the cherries. This process effectively breaks down the flesh, making it more suitable for various applications. The potato masher also leaves behind satisfying chunks of cherries, showcasing the use of wholesome, large cherries in the recipe.

    Pro Tip #2: Use Almond Extract

    Almond extract is often used when cooking with cherries because it complements and enhances the natural flavor of cherries. The subtle almond undertones in the extract pair exceptionally well with the sweet and tart notes of the cherries, creating a harmonious and well-balanced taste. The combination of cherry and almond flavors can elevate the overall taste profile of dishes, adding depth and complexity to desserts, baked goods, and other cherry-based recipes.

    Pro Tip #3: Use a Clean Spoon to Scoop It Out

    Using a clean spoon to scoop out cherry syrup is crucial for preserving its quality and freshness. When you use a clean spoon, you minimize the risk of introducing bacteria or contaminants that could potentially spoil the syrup. Additionally, a clean spoon helps maintain the intended flavor profile by preventing off-flavors or odors from dirty utensils. Store in clean wide-mouth mason jars for easy scooping.

    Spoon scooping whole cherries out of a jar of cherry syrup

    How Long Can You Keep Homemade Cherry Syrup?

    Always store it in the fridge. With good hygiene, you can keep this up to 3 months in the fridge!

    Love homemade syrups and preserves? Try our Easy Blueberry Ice Cream next — it uses a similar fruit-cooking technique for maximum flavour.

    Frequently Asked Questions

    Can I use frozen cherries for this recipe?

    Yes, frozen cherries work well, especially outside of cherry season. Thaw them fully before cooking and drain any excess liquid so you are not diluting the syrup. Fresh cherries will always give you a brighter, more vibrant result.

    How do I know when the cherry syrup is done?

    The syrup is ready when it coats the back of a spoon and holds a clear line when you run your finger through it. It will thicken more as it cools, so do not worry if it looks thin while still on the stove.

    Can I reduce the sugar in this recipe?

    Yes, though reducing sugar will result in a thinner, less shelf-stable syrup. If you reduce the sugar by half, plan to use the syrup within 2-3 weeks rather than 3 months. You can also try honey instead.

    What can I use this cherry syrup for?

    The list is nearly endless: drizzle it over oatmeal, pancakes, or waffles; swirl it into yogurt or ice cream; mix it into lemonade or sparkling water for a quick cherry soda; spread it on toast or sourdough bread; use it as a cake filling; or fold it into whipped cream for a quick cherry Chantilly.

    Can I can this cherry syrup for long-term storage?

    This recipe is not tested for water-bath canning, so we recommend refrigerator storage only. If you want to preserve it longer, freeze it in ice cube trays for up to 6 months. Pop out a cube whenever you need a single serving.

    Can I make this without almond extract?

    Absolutely. Vanilla extract is a great substitute and gives a warmer, softer flavour profile. You can also try a tiny splash of kirsch (cherry brandy) for an adult-friendly version that intensifies the cherry character beautifully.

    Jar of cherry syrup with whole cherries and a spoon, seen from above

    Cherry Syrup Recipe

    An easy versatile cherry syrup recipe! You can use it on your cakes, breakfast, toast, breads, and so much more! The taste is so much better than your store-bought cherry syrup!
    Prep Time 10 minutes
    Cook Time 15 minutes
    Course: Condiment
    Cuisine: American
    Calories: 65

    Ingredients
      

    • 2 cups cherry pitted
    • ½ cup sugar
    • ½ tsp almond extract
    • pinch of salt

    Equipment

    • potato masher

    Method
     

    1. Wash the cherries and take out the pit. Split it in half with a knife. Toss the cherries with the sugar and set aside.
    2. Use a medium size pot and set it on the stove on medium high heat. Pour the sugar coated cherries in the pot. Once it starts to boil, turn the heat to medium and give it a good stir. Cook for 10 minutes.
    3. The juice from the cherries will start to bubble out. Take a potato mash and mash as much as you can. If you like it more chunky then mash it less. Cook for another 5 minutes.
    4. Turn the heat off and put the almond extract in with some salt. Give it a good stir. Take the pot off the heat and let it cool to room temperature.
    5. Place the cherry syrup in a clean glass container (I like to use old jam jars that are cleaned and sanitized with hot boiling water). Cherry syrup can keep in the fridge for 3 months if stored properly.
  • Easy Mexican Salsa Verde

    Easy Mexican Salsa Verde

    If you have ever tasted a truly fresh salsa verde made with raw tomatillos, you already know nothing from a jar comes close. This easy Mexican salsa verde recipe comes together in under 10 minutes with zero cooking required — just drop everything in a blender, pulse, and you have a bright, tangy green sauce that makes tacos, eggs, and grilled meats come alive.

    This post may contain affiliate links. If you purchase through these links, I may earn a small commission at no extra cost to you. Thank you for supporting Love & Harvest!

    Bowl of tomatillo salsa verde with a spoon surrounded by fresh tomatillos

    Mexican cuisine is known for its vibrant flavours and rich history. One of the most popular condiments used in Mexican cuisine is salsa verde. 

    In this blog post, we’ll dive into the history and ingredients of salsa verde, as well as some delicious ways to use it in your cooking.

    What You Need to Know about Salsa Verde

    Salsa verde, which translates to “green sauce,” has been a staple of Mexican cuisine for centuries. The sauce is made from a combination of tomatillos, chilies, garlic, cilantro, and vinegar, giving it a tangy, slightly spicy flavor.

    When dining in Mexico, you will find that all restaurants offer both red and green salsa. However, each establishment prepares their own version of these salsas, resulting in a unique flavor profile for each one. Some may be rawer, thicker, spicier, or even tangier than others.

    Although there are numerous versions of salsa verde, with each person believing their recipe is the best, the real standout ingredient is the tomatillo. Tomatillos are small, green fruits that originate from Mexico, and they are responsible for giving the sauce its distinctive vibrant green hue.

    Fresh tomatillos, garlic, green chiles and cilantro on a wooden board

    How It Is Made

    Making salsa verde is easy and can be done in just a few minutes. Some people like to roast or boil the tomatillos, but I love it raw! I will be sharing the easy raw salsa verde version.

    Start by removing the husks from the tomatillos and rinsing them under cold water. Next, add the tomatillos, garlic, cilantro, and chili peppers in a blender. Blend on high for 30 seconds until smooth, and ta-da, you’re done! Salt the salsa and vinegar to your liking.

    I use a Vitamix, but any high-speed blender works. I use it to make everything from sauces to soup!

    Green and purple tomatillos, some still in their husks, in a steel bowl

    What You Can Use Salsa Verde For

    One of the great things about salsa verde is its versatility. It can be used as a dip for chips, a topping for tacos, or a marinade for meat. Here are a few of our favourite ways to use salsa verde in the kitchen:

    1. Tacos: Salsa verde is a perfect topping for tacos, adding a tangy, slightly spicy flavour to your favourite protein. Try it on steak, chicken, or even fish tacos for a burst of flavour.
    2. Enchiladas: Instead of using traditional red enchilada sauce, try using salsa verde. It pairs perfectly with shredded chicken and cheese and gives the dish a bright flavour.
    3. Grilled meats: Use salsa verde as a marinade for grilled meats like chicken or pork. The acid in the tomatillos will help tenderize the meat while adding a delicious flavour.
    4. Eggs: Salsa verde is a great addition to breakfast dishes like scrambled eggs or omelets. It pairs well with cheese and adds a bit of zing to your morning meal.

    Love Mexican salsas? Try our fresh and easy Pico de Gallo or the smoky, addictive Salsa Macha from Veracruz.

    Salsa verde on a platter of grilled steak, sausages, chicken and stuffed peppers

    What’s in Salsa Verde

    In addition to its delicious flavour, salsa verde is made with simple, fresh ingredients. Tomatillos give it its bright, tangy flavour.

    So the next time you’re looking to add a bit of flavour to your meal, consider reaching for a jar of salsa verde.

    Why You Should Make Salsa Verde

    In conclusion, salsa verde is a staple condiment in Mexican cuisine that’s easy to make and adds a burst of flavour to any dish. With just a few simple ingredients, you can make a batch of salsa verde to keep on hand for all your cooking needs.

    Whether you’re using it as a dip for chips, a topping for tacos, or a marinade for meat, salsa verde is sure to add a delicious zing to your meal. Give it a try and taste the flavour of Mexico in your own kitchen.

    Bowl of bright salsa verde beside grilled steak and roasted peppers

    Ingredients

    Key Ingredients

    Tomatillos

    • Why they matter: The backbone of every authentic salsa verde. Raw tomatillos deliver a bright, tangy, slightly citrusy flavour that no substitution can replicate. Look for firm ones with their papery husks still intact. You can find canned tomatillos as a convenient alternative when fresh are unavailable.

    Jalapeños

    • Why they matter: Fresh jalapeños bring clean, grassy heat. Remove the seeds and ribs for mild heat, leave them in for full fire. For a smokier profile, you can substitute a serrano or use a roasted Hatch green chile.

    Cilantro

    • Why they matter: Fresh cilantro is non-negotiable. Two full bunches give you that herbaceous depth that makes this salsa taste unmistakably Mexican. Do not use dried cilantro — it will not work.

    Professional Tips for Salsa Verde

    Pro Tip #1 – Raw Tomatillos Taste Best

    There are many versions of salsa verde out there. Some people roast or toast the tomatillos before throwing them in the blender. And there are some that will boil the tomatillos until it turns a slight yellow. For me, I like it raw! Raw gives out a vibrant green colour and I find the taste to be more to my liking. If you have plans to cook it, don’t overcook the tomatillos or it will give out a slight bitterness to it.

    A hand holding a single fresh tomatillo with its husk

    Pro Tip #2 – Acid Is Your Friend

    This recipe calls for white vinegar, but you can substitute for any acid! Some other substitutes that will work are apple cider vinegar or fresh lime juice.

    Pro Tip #3 – Storage

    This fresh salsa can be stored for days! Because we add vinegar to the salsa, it can be kept fresh for a long time. This salsa verde can last for around 5 to 7 days when stored properly in the refrigerator.

    Frequently Asked Questions

    What is salsa verde made of?

    Authentic Mexican salsa verde is made from raw tomatillos, fresh jalapeños, garlic, cilantro, white vinegar, and salt. No cooking required for this version.

    Can I make salsa verde without a blender?

    Yes. A food processor or even a molcajete (traditional stone mortar) works well. The molcajete gives a slightly chunkier, more rustic texture that many people prefer.

    How long does homemade salsa verde last?

    Stored in an airtight container in the refrigerator, it stays fresh for 5 to 7 days. The vinegar acts as a natural preservative. You can also freeze it for up to 3 months.

    Is salsa verde spicy?

    It depends on your jalapeños. Remove the seeds and membranes for a mild, tangy salsa. Leave them in for a spicier kick. You can also substitute with serrano peppers for more heat.

    What is the difference between salsa verde and salsa roja?

    Salsa verde uses tomatillos and green chiles for a bright, tangy flavour. Salsa roja uses ripe red tomatoes and dried red chiles for a deeper, earthier taste. Both are staples on every Mexican table.

    Can I use canned tomatillos instead of fresh?

    Yes, canned tomatillos work well when fresh ones are hard to find. Drain them first before blending. The flavour will be slightly milder than fresh, but still delicious.

    Salsa verde in a white bowl surrounded by tomatillos and green chiles

    Authentic Mexican Salsa Verde

    Say hello to your new favourite condiment! This easy Mexican salsa verde recipe is fresh and flavourful – it will brighten up any food! Print Recipe Pin RecipePrep Time:10 minutes Course: condimentCuisine: MexicanKeyword: no-cook, salsa verdeServings: 8 people

    Equipment

    • blender

    Ingredients

    • 1 kg tomatillos husked and rinsed
    • 2 cilantro bunches
    • 1 garlic clove
    • 2-3 jalapeños seeded (leave the seeds if you want it spicier)
    • 1 tsp white vinegar
    • salt

    Instructions

    • In a blender or food processor, combine the tomatillos, cilantro, garlic, jalapeño pepper, vinegar, and salt.
    • Pulse until smooth.
    • Taste and adjust seasoning as needed. Serve immediately or store in the refrigerator for up to a week.
  • Chili Mango Sorbet

    Chili Mango Sorbet

    Ever been to a Mexican beach and watched someone devour a mango on a stick covered in Tajín? That combination of sweet, tangy, and spicy is exactly what this chili mango sorbet delivers — except you make it at home in your blender and freeze it for 2 to 3 hours. It is vegan, gluten-free, and completely dairy-free, which means everyone at the table gets a scoop.

    This post may contain affiliate links. If you purchase through these links, I may earn a small commission at no extra cost to you. Thank you for supporting Love & Harvest!

    Chili mango sorbet in a loaf pan topped with shredded coconut and chili powder

    The Flavour

    One of the things that makes chili mango sorbet so special is the combination of sweet and spicy flavours. The sweetness of the mango is perfectly balanced by the heat of the chili powder, creating a flavour experience that is both satisfying and refreshing.

    The coconut cream and maple syrup add a natural sweetness that complements the mango. While the lime juice provides a tangy citrus flavour that rounds out the overall taste.

    Loaf pan of mango sorbet with coconut, next to fresh mangoes

    Vegan Gluten-Free Dessert

    Another great thing about chili mango sorbet is that it is vegan and gluten-free. Mangoes contain vitamins A and C and some fiber. And maple syrup is a natural sweetener that adds depth of flavour beyond simple sweetness.

    How to Serve Chili Mango Sorbet

    When it comes to serving chili mango sorbet, there are many different ways to enjoy it. You could serve it:

    • on its own as a refreshing summer treat
    • pair it with fresh fruit or chopped nuts for added texture and flavour
    • serve it alongside a spicy dish to help balance out the heat

    Looking for more frozen treats? Try our Fresh Mango Sorbet or the tropical Matcha Avocado Popsicles.

    A hand sprinkling chili-lime seasoning over mango sorbet

    Ingredients

    Key Ingredients

    Frozen Mangoes

    • Why they matter: Mangoes are the star of the show. They contain vitamins A and C and some fiber. Frozen mango is required for this recipe — it gives you that cold, creamy sorbet texture without needing an ice cream machine. Cut them into small chunks before freezing for the best results.

    Coconut Cream

    • Why they matter: We are eliminating dairy for this recipe, and full-fat coconut cream gives the same luscious, creamy texture as dairy — but much tastier. Do not substitute with light coconut milk or the sorbet will be icy and thin.

    Tajín Clásico Chili Seasoning

    • Why they matter: In Mexico we love to sprinkle Tajín on mango, and this sorbet is the frozen version of that. Tajín delivers chili, lime, and salt in one hit. You can find it at most grocery stores or pair it with an ice cream maker if you want a churned version.

    Maple Syrup

    • Why they matter: To add natural sweetness with depth of flavour. It pairs beautifully with tropical fruit. Adjust the amount to your taste and the sweetness of your mangoes.

    Bottle of chili-lime seasoning held over a pan of mango sorbet

    Why Make Chili Mango Sorbet?

    • Unique dessert — If you are up for something new, different, and super tasty, this is the perfect dessert for you.
    • Take advantage of mango season — When mango is abundant, freeze it. This recipe is the perfect way to use up freezer-stored mango all year round.
    • So tasty — Ever gone to a Mexican beach and seen people sprinkling chili on a mango on a stick? This is exactly that — no travel required.

    Professional Tips

    Pro Tip #1 – Use a High-Speed Blender

    A high-speed blender will make all the difference for this recipe. The recipe asks you to blend frozen mango chunks, so a heavy-duty blender that can break down frozen ingredients is essential. A regular blender may struggle.

    Pro Tip #2 – Small Mango Chunks

    Smaller mango chunks break down more easily in the blender. If you are freezing your own mangoes, remember to cut them into small pieces before freezing.

    Pro Tip #3 – Rest for 10 Minutes Before Serving

    This sorbet will be difficult to scoop straight from the freezer. Leave it on the countertop for 10 to 15 minutes before trying to scoop. It softens to the perfect consistency.

    Frequently Asked Questions

    Do I need an ice cream machine to make this sorbet?

    No. This recipe requires only a high-speed blender. Blend, transfer to a freezer-safe container, freeze for 2 to 3 hours, and it is ready to scoop.

    Can I use fresh mango instead of frozen?

    Fresh mango will not give you the sorbet texture. You need frozen mango for the cold, creamy consistency. If you only have fresh mango, cut it into chunks and freeze it for at least 4 hours first.

    What can I substitute for Tajín?

    If you cannot find Tajín, use a mix of chili powder, a pinch of salt, and a squeeze of lime. The key is that combination of heat, salt, and citrus that Tajín delivers in one ingredient.

    Is this sorbet really vegan and gluten-free?

    Yes. Every ingredient in this recipe — frozen mango, coconut cream, lime juice, maple syrup, and Tajín Clásico — is naturally vegan and gluten-free.

    How long does chili mango sorbet keep in the freezer?

    Stored in a sealed container, this sorbet keeps well for up to 2 weeks. After that it may develop ice crystals and lose its creamy texture. Always press plastic wrap directly on the surface before sealing.

    Can I make this without coconut cream?

    Yes, but the texture will be less creamy. You can substitute with full-fat coconut milk as a lighter option, or blend in half an avocado for a creamier consistency without a strong avocado flavour.

    Chili mango sorbet with toasted coconut in a white loaf pan

    Chili Mango Sorbet

    Chili mango sorbet is a sweet and spicy treat to cool you down on a hot day! Vegan and GF. Print Recipe Pin RecipePrep Time:10 minsCook Time:25 minsCourse: DessertKeyword: chili mango sorbet, dessert, veganServings: 6 people

    Equipment

    • high speed blender

    Ingredients

    • 3 cups mango chunks frozen and cut into small pieces
    • ½ cup full fat coconut milk or cream
    • 1 lime juice
    • 2 tbsp maple syrup
    • 2 tsp dried coconut strips
    • 1-2 tsp Tajín Clásico chili seasoning salt

    Instructions

    • In a high speed blender, put all the ingredients together.
    • Blend on high for 1 minute until everything comes together smoothly with no lumps. If you find it is not coming together well, add a little bit of water to make it less thick.
    • Transfer the sorbet to a freezer-safe container (I prefer a 9×5 bread pan), cover and freeze for 2-3 hours.
    • When ready to serve, let sit at room temperature for 5-10 minutes to soften before scooping.