Category: fresh & simple recipes

  • Warm Lentil and Sweet Potato Salad

    Warm Lentil and Sweet Potato Salad

    This Warm Lentil and Sweet Potato Salad is the perfect dish to celebrate the cooler months. It’s beautiful enough to impress guests, cozy enough for a family meal, and packed with flavour. Oven-roasted sweet potatoes, hearty lentils, and a silky peanut butter-cumin dressing come together in a bowl that feels both comforting and indulgent — ready in under an hour.

    This post may contain affiliate links. If you purchase through these links, I may earn a small commission at no extra cost to you. Thank you for supporting Love & Harvest!

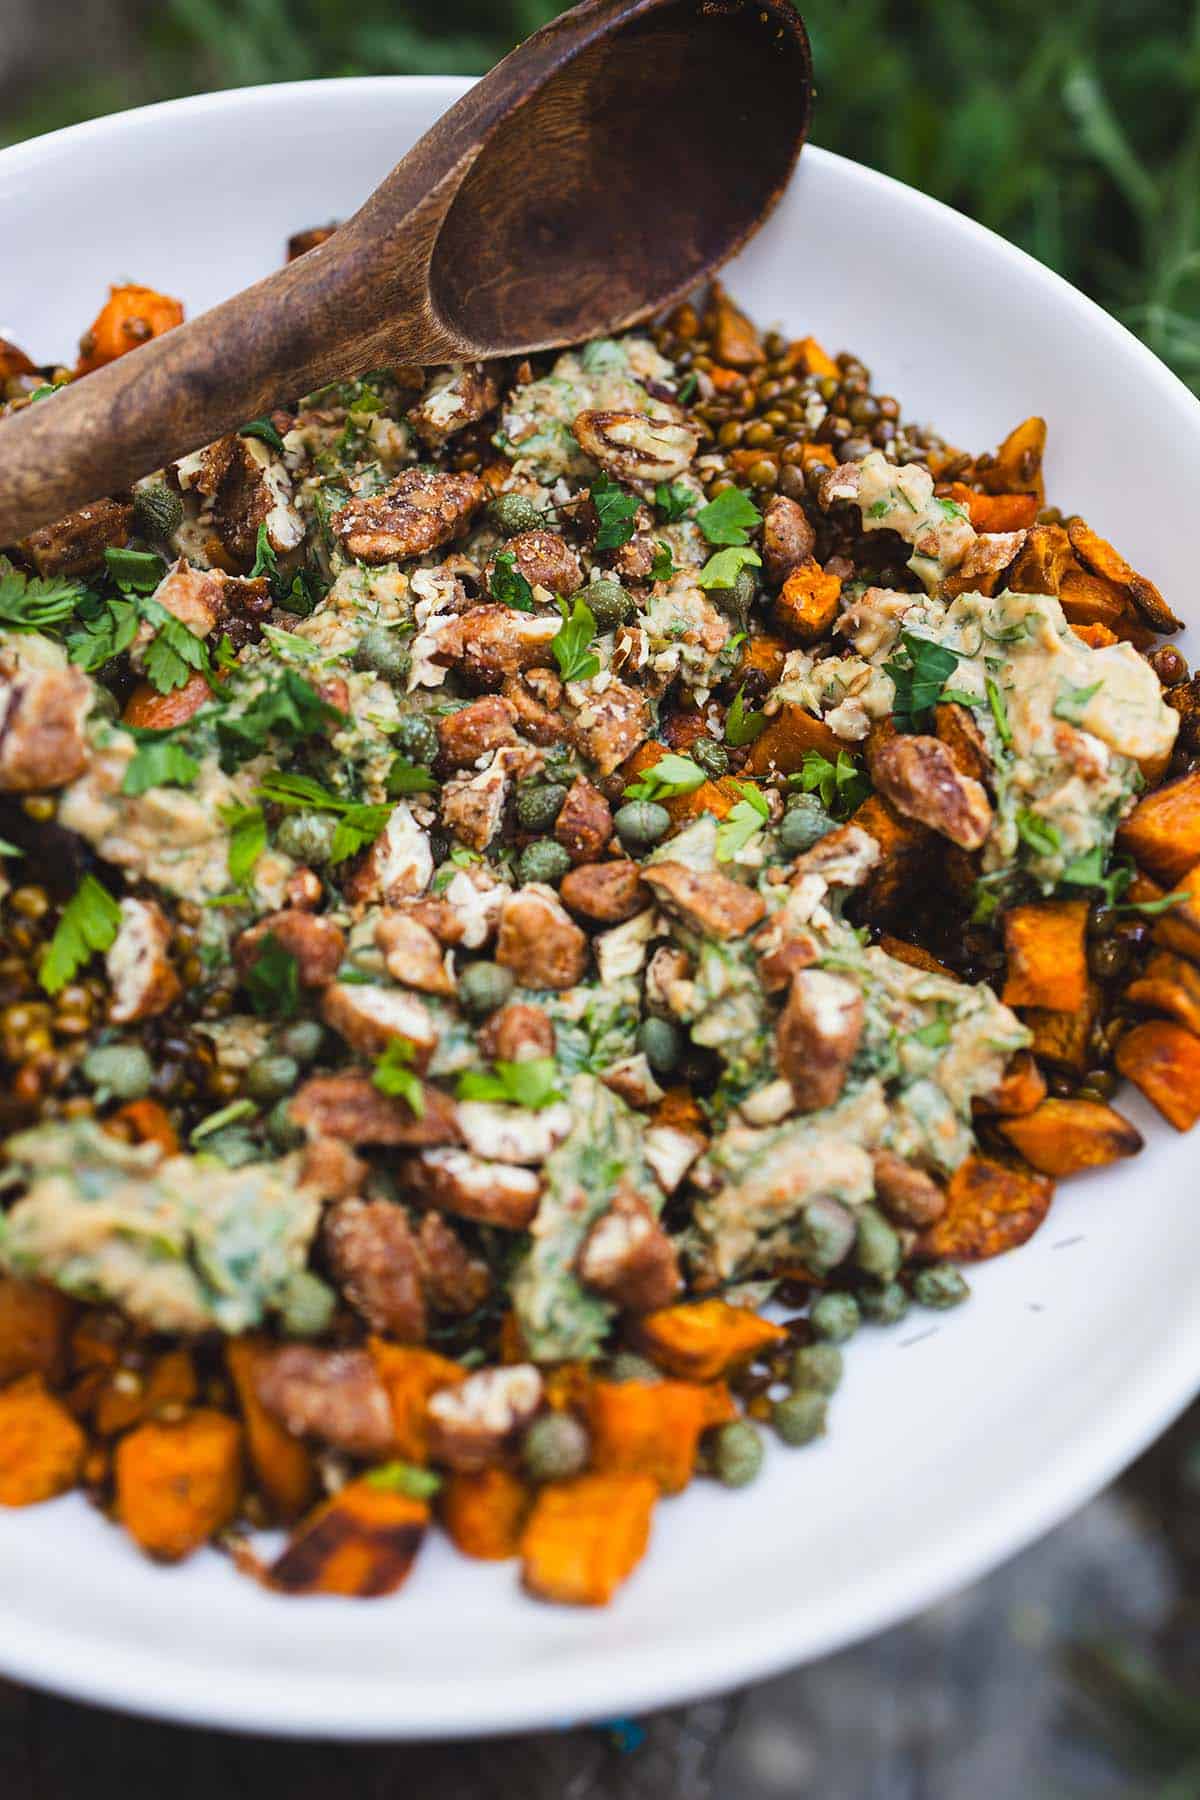
    Warm lentil and sweet potato salad in a bowl

    Why We Love This Warm Salad

    There’s something magical about warm salads, especially during the fall and winter seasons. They bridge the gap between comfort food and a big bowl of vegetables so perfectly. This salad is hearty and has just the right amount of indulgence thanks to the creamy dressing. It’s vibrant and inviting on the plate — tender roasted sweet potatoes, nutty lentils, fresh greens, and a silky dressing that clings to every bite. Whether you’re feeding family or hosting friends, it feels a little special, yet it’s so easy to put together.

    Flavour Profile

    The taste is simply beautiful. Roasted sweet potatoes bring a natural caramelised sweetness that balances the earthy depth of lentils. The peanut butter-cumin dressing is what truly makes this salad sing — nutty, savoury, slightly smoky, and warmly spiced without being overwhelming. Every forkful is a perfect combination of soft and tender textures with a hint of crunch from honey-coated almonds sprinkled on top. It’s comfort food that still feels fresh and alive.

    Lentil and sweet potato salad close-up showing texture

    Key Ingredients

    Ingredients

    Sweet Potatoes

    • Roasted until golden and slightly crispy on the edges, sweet potatoes bring natural caramelized sweetness and warmth. Cut them evenly so they roast at the same rate. Use a cast iron skillet or sheet pan lined with parchment for the best caramelization.

    Lentils

    • Earthy and hearty, lentils form the perfect base for this salad. French green lentils or black beluga lentils are ideal because they hold their shape beautifully after cooking, unlike red lentils which turn mushy. Rinse well before cooking and don’t skip the simmer time.

    Peanut Butter (or Tahini)

    • Creamy and rich, peanut butter is the secret to the dressing’s luxurious texture and depth. Chunky peanut butter adds even more character. You can swap for tahini for a more traditional Middle Eastern flavour — both work wonderfully. A KitchenAid immersion blender makes blending the dressing smooth and effortless.

    Cumin

    • Toasted cumin adds warmth and a hint of smoky spice that ties the whole dish together. Ground cumin is used both in roasting the sweet potatoes and in the dressing, building layers of flavour throughout.

    Fresh Dill & Parsley

    • Fresh herbs brighten the whole dish with clean, vibrant flavour that cuts through the richness of the dressing. Don’t substitute dried herbs here — fresh dill and parsley make a noticeable difference in both flavour and visual appeal.

    Ingredients for warm lentil sweet potato salad

    Why You Should Make This Salad

    This salad isn’t just a side dish — it’s a celebration of simple, fresh ingredients coming together in the most beautiful way. It’s hearty enough to stand alone as a meal, or it can be served alongside roasted chicken or a crusty loaf of bread for a feast. Plus, it’s naturally gluten-free and can easily be made vegan. The peanut butter and cumin dressing is a conversation starter in itself — it’s that good.

    If you love warm, salad-style recipes, you’ll also enjoy our Thai Chicken Salad if you want chicken in it, or keep it plant-based with our Easy Hummus Recipe as a side. For another warming winter dish, our Instant Pot Taiwanese Beef Noodle Soup is endlessly comforting.

    Warm lentil sweet potato salad served on a plate

    Frequently Asked Questions

    Can I make this salad ahead of time?

    Yes! This salad is great for meal prep. Roast the sweet potatoes and cook the lentils up to 3 days in advance and store them separately in the fridge. Make the dressing ahead too — it keeps for up to a week refrigerated. Assemble and toss just before serving for the best texture.

    What type of lentils work best?

    French green lentils (Puy lentils) or black beluga lentils are ideal because they hold their shape after cooking. Avoid red or orange lentils for this recipe as they become too soft and mushy. If you can only find regular green or brown lentils, those work too — just watch the cooking time carefully.

    Is this recipe vegan and gluten-free?

    It is gluten-free as written. It is vegan if you swap the honey-coated almonds for plain toasted almonds; everything else in the salad is plant-based.

    What can I serve alongside this salad?

    This warm salad works beautifully as a standalone meal or as a side dish. It pairs wonderfully with roasted chicken, pan-seared salmon, or a thick slice of sourdough bread. For a full plant-based spread, serve it with hummus and warm flatbread.

    How do I store leftovers?

    Store leftovers in an airtight container in the refrigerator for up to 3 days. The flavours actually deepen overnight, making it a fantastic next-day lunch. Reheat gently in the microwave or enjoy at room temperature. Add a splash of water to the dressing if it thickens up in the fridge.

    Lentil and roasted sweet potato salad with a green herb dressing

    Warm Lentil and Sweet Potato Salad

    Warm Lentil and Sweet Potato Salad has creamy peanut butter and earthy cumin in the dressing bring it all together with a richness and warmth.
    Prep Time 15 minutes
    Cook Time 35 minutes
    Total Time 50 minutes
    Servings: 4 people
    Course: Salad
    Calories: 340

    Ingredients
      

    Roast Sweet Potato
    • 4 medium sweet potatoes, rinsed
    • 1 cup dried mixed lentils
    • 1 tbsp olive oil or cooking oil
    • ½ tsp ground cumin
    • sea salt and pepper
    Roasted Garlic Tahini Dressing:
    • 4 garlic clove
    • ¼ cup fresh parsley, chopped
    • 2 tbsp fresh dill, chopped
    • ¼ cup chunky peanut butter or tahini
    • 1 lime, juiced
    • 1 tbsp olive oil
    • ½ tsp ground cumin
    • sea salt and pepper
    • 4-5 tbsp water
    Garnish
    • little more parsley
    • ¼ cup chopped honey coated almonds
    • 1 tbsp capers

    Method
     

    1. Preheat oven to 400°F (200°C).
    2. Wash sweet potatoes well and cut into cubes. Toss with olive oil, cumin, salt, and pepper. Spread evenly on a baking tray.
      Roast for 25–30 minutes, until tender and golden.
    3. Rinse lentils under cold water. Place in a pot with 3 cups water and a pinch of salt.
    4. Bring to a boil, then reduce heat and simmer for 20–25 minutes, until lentils are tender but not mushy. Drain and set aside.
    5. Dressing: Roast garlic cloves in the oven (wrapped in foil or in a small dish) until soft, about 15 minutes.
      In a blender or food processor, combine roasted garlic, parsley, dill, peanut butter/tahini, lime juice, olive oil, cumin, salt, and pepper.
      Add water gradually until smooth and creamy.
    6. In a large bowl, combine roasted sweet potatoes and cooked lentils. Toss with dressing until well coated.
    7. Top with fresh parsley, chopped honey-coated almonds, and a few capers. Serve warm or at room temperature as a hearty side dish or light main meal.
  • Homemade Pesto Gnocchi

    Homemade Pesto Gnocchi

    Making gnocchi and pesto from scratch isn’t just cooking — it’s a meal the whole family gathers around. This homemade pesto gnocchi comes together in about 30 minutes, uses simple pantry ingredients, and delivers restaurant-quality flavor at a fraction of the cost. Pillowy potato gnocchi tossed in a vibrant walnut-basil pesto: pure comfort food that feels special every single time.

    This post may contain affiliate links. If you purchase through these links, I may earn a small commission at no extra cost to you. Thank you for supporting Love & Harvest!

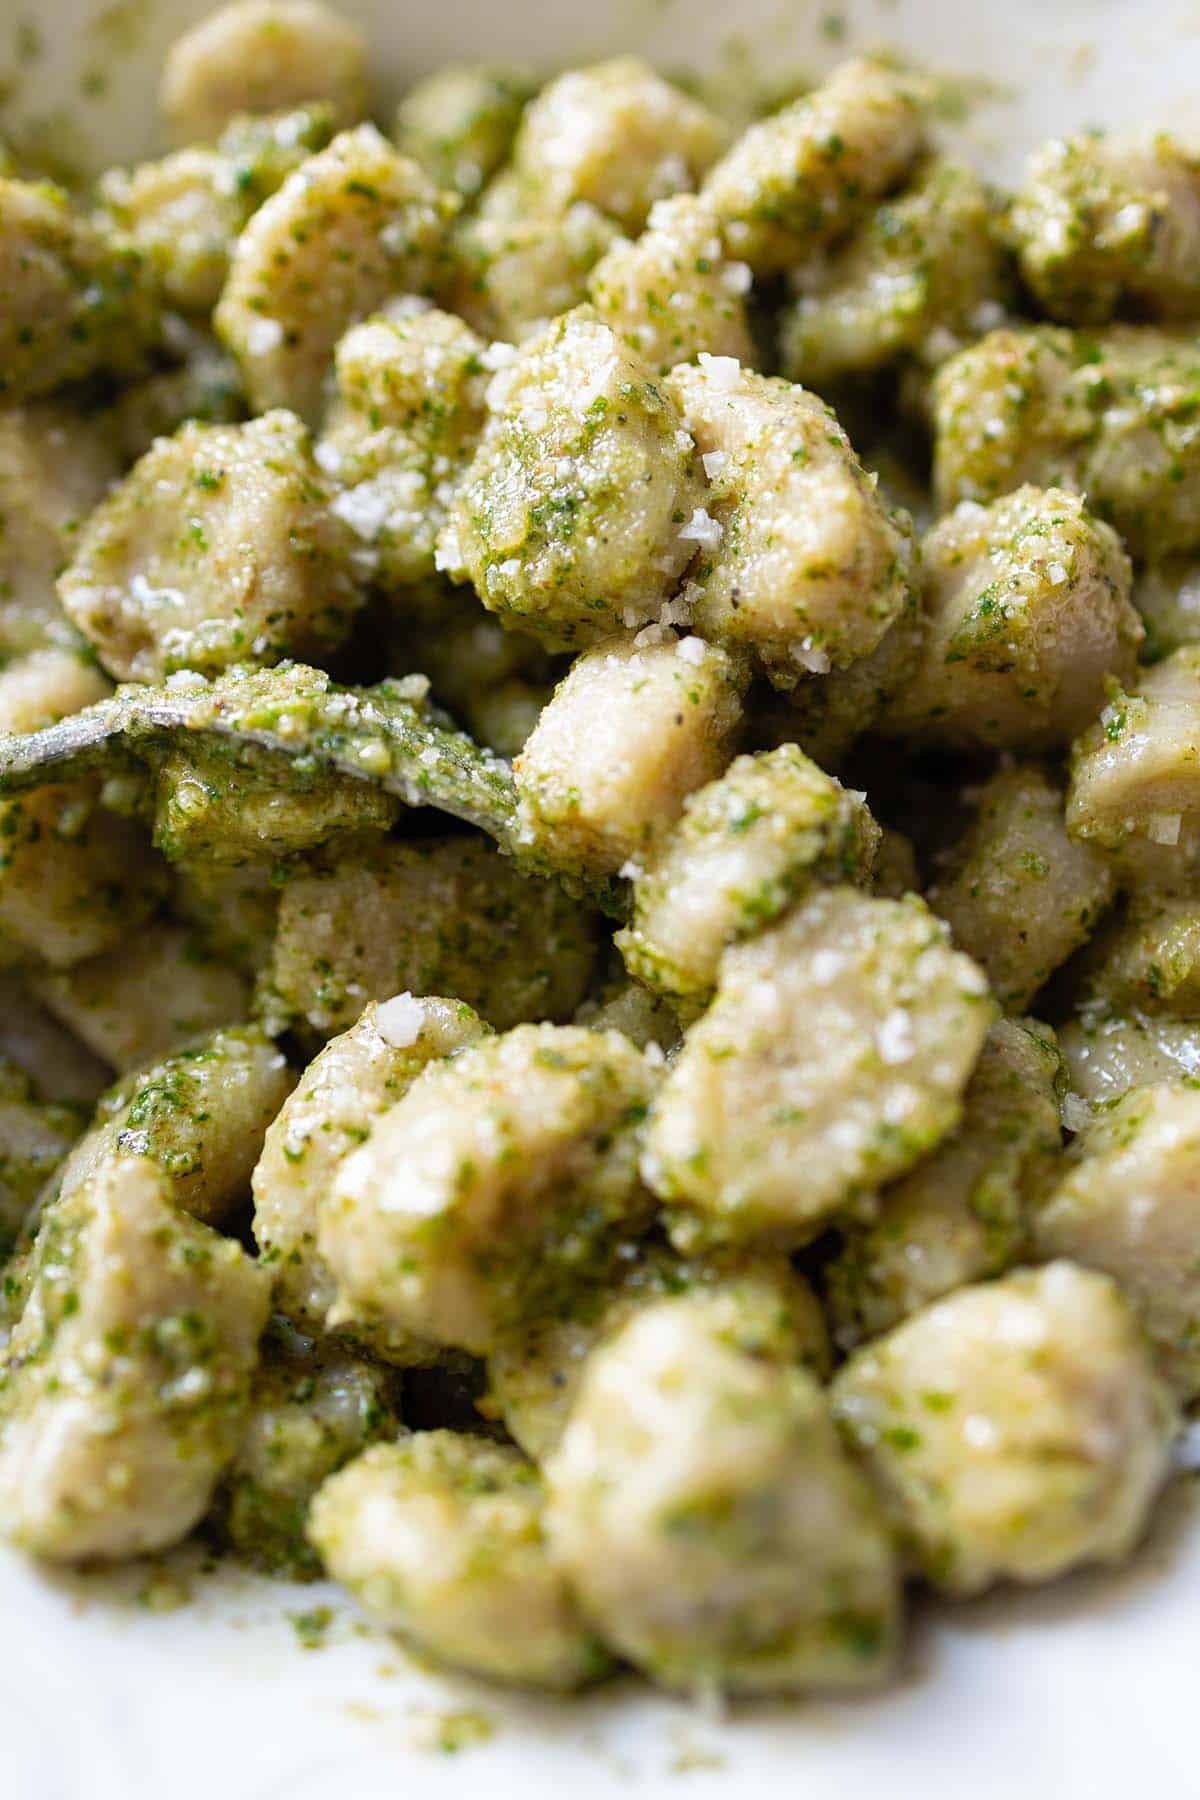
    Homemade gnocchi tossed in green pesto on a white plate

    Easy Pesto Gnocchi Recipe

    What might sound like a labor-intensive dinner is, in fact, a 30-minute miracle. Gnocchi dough is made with just a few simple ingredients — cooked potatoes, flour, egg — and requires nothing more than your hands to shape into perfect pillowy bites. The pesto is a quick blend of fresh herbs, nuts, and olive oil, ready in minutes.

    Even better? You can make both the gnocchi and the pesto ahead of time. Pack them up and take them on a picnic, or bring them to a family gathering — you’ll wow your guests with the taste and simplicity.

    Delicious and Simple

    Homemade gnocchi gives you total control over the ingredients. And the pesto? Loaded with fresh basil, parsley, walnuts and olive oil. No heavy creams or hidden fillers — just fresh, bright flavor.

    For families who love comfort food but want it homemade, this dish is gold. You can swap in spinach or kale for part of the basil, or use walnuts or sunflower seeds instead of pine nuts — making it allergy-friendly and affordable. A speedy, rewarding, from-scratch recipe your family will love.

    Why We Love This Recipe

    There’s something magical about cooking from scratch — especially when it takes place on a floured countertop, with your hands in the dough, your kids watching, and a warm kitchen filled with fresh basil and garlic aromas. This homemade pesto gnocchi recipe isn’t just a meal — it’s a moment.

    It’s fast (yes, really), affordable, and so satisfying to make. You don’t need a pasta machine or fancy tools — just a fork, a counter, and the will to try. Once you make homemade gnocchi, you’ll wonder why you ever bought the store-bought version.

    Key Ingredients

    Ingredients

    Russet Potatoes

    • The base of the gnocchi — light, starchy, and perfect for creating that soft, pillowy texture. Boiled and mashed while warm, they hold the dough together with minimal flour. Always use russet (not waxy) potatoes for the lightest result. A food processor can help make the pesto smooth and effortless.

    Fresh Basil

    • The star of the pesto. Fragrant, peppery, and vibrant green — it gives the sauce its unmistakable Italian soul. Use loosely packed leaves and avoid any stems that are thick and bitter. Fresh basil cannot be substituted with dried for pesto.

    Walnuts

    • Traditional pesto uses pine nuts, but walnuts are an affordable and equally delicious substitute. They add creaminess and a hint of sweetness. Lightly toast them for a few minutes in a dry pan to deepen the flavour before blending.

    Egg Yolk

    • Just one egg yolk adds richness to the gnocchi dough and binds it gently without making it heavy. The key is not to over-knead the dough once the egg is added — overworking it activates the gluten in the flour and makes gnocchi tough.

    Extra Virgin Olive Oil

    • Silky and flavourful, olive oil brings the pesto together and is the key to its glossy, smooth texture. Choose a good-quality extra virgin olive oil for the best taste — it’s one of only a few ingredients, so quality shows. A KitchenAid immersion blender is also a great tool if you prefer to blend right in the jar.

    Parmesan Cheese

    • Adds a salty, nutty depth to the pesto. Use freshly grated parmesan rather than pre-packaged grated cheese — the texture and flavour are noticeably better. Leave it out for a dairy-free version; the pesto is still delicious.

    Family Favourite

    Whether you’re cooking with your kids or for them, this is a recipe that brings everyone together. Let the little ones help roll and shape the gnocchi (expect floury giggles). The pesto is kid-approved too — smooth, creamy, and a vibrant green that makes dinner feel special.

    Serve it warm, or pack it into a jar for a cold pasta salad-style lunch at the park. It keeps well, tastes even better the next day, and never fails to bring out the “Wow, you made this?!” from friends and family.

    Homemade pesto gnocchi tossed in walnut-basil pesto

    If you love pasta night, our Easy Camping Shrimp Pasta is another quick crowd-pleaser, or try our Fluffy Naan Bread to serve alongside this gnocchi as a complete Italian-inspired spread. For a protein-packed main to serve with the pesto, our Lemongrass Chicken Drumsticks pair beautifully.

    Frequently Asked Questions

    Can I make gnocchi ahead of time?

    Yes! You can make gnocchi dough up to a day ahead and store it covered in the refrigerator. Alternatively, shape the gnocchi, dust with flour, spread on a baking sheet, and freeze until solid — then transfer to a zip-lock bag. Cook from frozen, adding 1–2 minutes to the boiling time. The pesto keeps refrigerated for up to 5 days with a thin layer of olive oil on top.

    Why is my gnocchi dense or rubbery?

    The most common culprit is too much flour or over-kneading the dough. Add flour sparingly — just enough so the dough isn’t sticky. Mix gently and stop as soon as the dough comes together. The other common issue is using waxy potatoes like Yukon Gold; stick to starchy russet potatoes for the lightest result.

    Can I use store-bought pesto?

    Absolutely, and it will still be delicious. However, the homemade walnut-basil pesto takes only 5 minutes and tastes significantly fresher. If you’re short on time, jarred pesto works in a pinch — just add a squeeze of lemon juice and a little extra parmesan to brighten it up.

    How do I know when gnocchi is cooked?

    Gnocchi is done when it floats to the surface of the boiling water, which takes about 2–3 minutes. Once they float, give them another 30 seconds then scoop them out with a slotted spoon rather than draining — this prevents them from getting waterlogged and keeps them light.

    Can I pan-fry the gnocchi after boiling?

    Yes, and it’s highly recommended for extra texture! After boiling and draining, heat a knob of butter or a splash of olive oil in a pan over medium-high heat. Add the gnocchi in a single layer and let them crisp up for 2–3 minutes per side without moving them. Toss with pesto just before serving. The crispy edges with the creamy pesto is an upgrade worth trying.

    Homemade Pesto Gnocchi

    Homemade gnocchi gives you total control over the ingredients. And the pesto? Loaded with fresh basil, parsley, walnuts and olive oil. No heavy creams or hidden fillers—just fresh, bright flavor.
    Prep Time 20 minutes
    Cook Time 10 minutes
    Total Time 30 minutes
    Servings: 4 people
    Course: Main Course
    Cuisine: Italian
    Calories: 520

    Ingredients
      

    Gnocchi
    • 2 medium russet potatoes (about 500g)
    • 1 egg yolk
    • 1 cup all-purpose flour (plus more for dusting)
    • pinch sea salt
    Pesto
    • 1½ cup fresh basil leaves loosely packed
    • ½ cup parsley leaves loosely packed
    • ¼ cup chopped walnuts or other preferred nuts
    • 1 garlic clove
    • ½ tsp sugar
    • 1 tsp balsamic vinegar
    • ½ cup extra virgin olive oil
    • ½ freshly squeezed lemon juice
    • ¼ cup freshly grated parmesan cheese
    • sea salt
    • black pepper

    Method
     

    Gnocchi
    1. Boil the potatoes whole, with skins on, until fork-tender (about 20 minutes).
    2. Let cool slightly, then peel and mash while still warm.
    3. Add the egg yolk, salt, and flour. Gently knead on a floured surface until just combined—don’t overwork it.
    4. Divide dough into 4 pieces. Roll each into a rope about ½-inch thick. Cut into 1-inch pieces and press lightly with a fork for texture (optional).
    5. Bring a large pot of salted water to a boil. Drop in gnocchi; once they float (about 2–3 minutes), they’re ready.
    Pesto
    1. Blend all the ingredients together in a food processor (except olive oil). I usually use the pulse button to get a chunkier texture, but you can run it continuously for a smoother texture.
    2. Slowly drizzle in olive oil while blending until smooth. Season with salt and pepper.
    3. Toss and Serve: Drain the gnocchi and toss with the pesto while still warm. Garnish with more cheese or fresh herbs.
  • Thai Chicken Salad

    Thai Chicken Salad

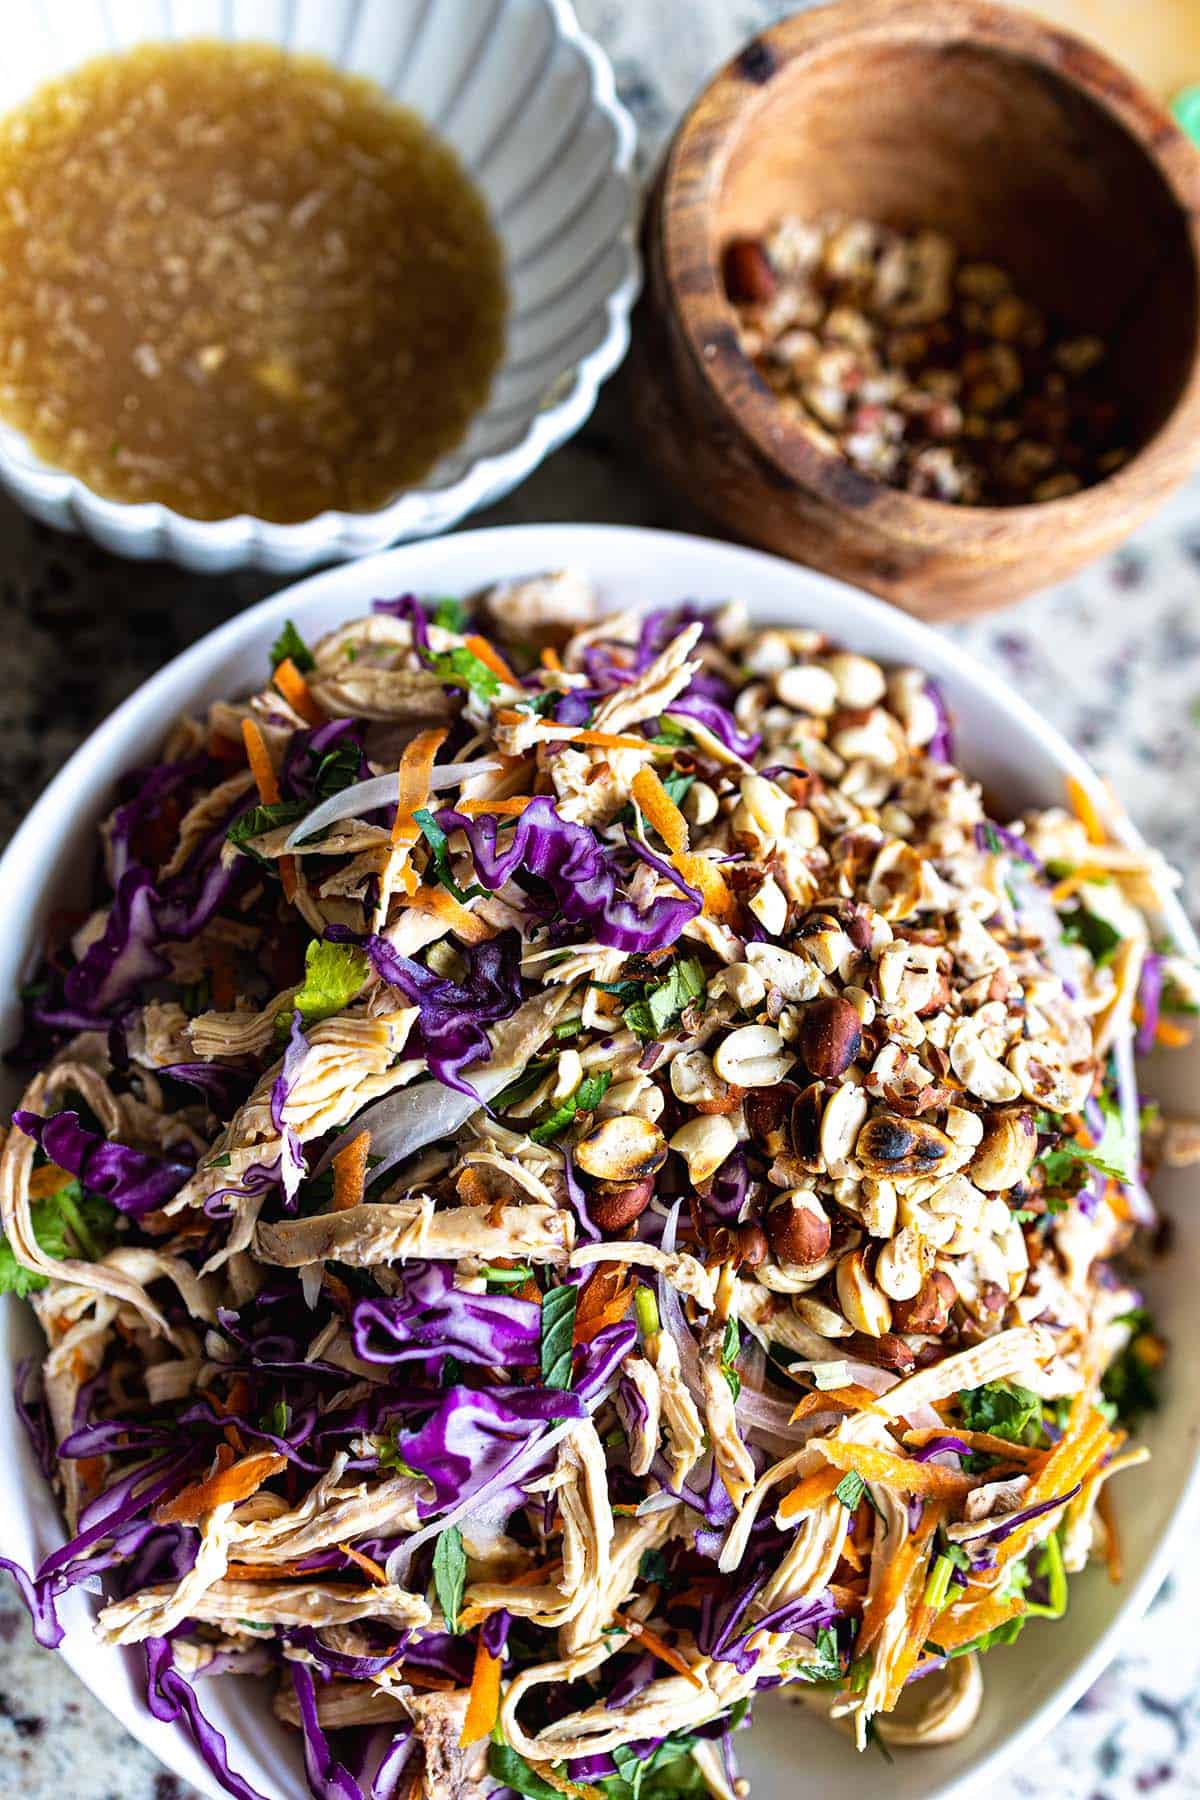
    This Thai Chicken Salad is a fresh, vibrant dish with shredded chicken, crunchy veggies, and a tangy dressing. It’s light, easy to make, and perfect for hot days when you want something fresh without turning on the stove.

    This post may contain affiliate links. If you purchase through these links, I may earn a small commission at no extra cost to you. Thank you for supporting Love & Harvest!

    Fresh shredded chicken and vibrant vegetables in a colorful salad.

    Why We Love This Recipe

    When the weather heats up and the last thing you want is to turn on the stove, this Thai Chicken Salad is the answer. It’s bright, refreshing, and loaded with crunchy vegetables, tender chicken, and a zesty, tangy dressing that pulls it all together.

    We love how quick and easy it is to throw together — especially if you use pre-cooked or leftover chicken. You get a full, satisfying meal without heating up your kitchen. It’s the kind of salad that is light but filling, and packed with flavor.

    And let’s not forget the peanuts — they add the perfect crunch and a nutty finish that makes every bite exciting.

    Thai chicken salad with purple cabbage, carrots and herbs in a white bowl

    One of Our Picnic Favourite Recipes

    This salad travels so well, which makes it a top pick for picnics, potlucks, and even lunch on the go. The veggies stay crisp, and the flavours actually get better as they sit and marinate a bit in the dressing.

    You can keep the dressing on the side until you’re ready to serve, or toss everything together right before heading out — it holds up beautifully either way.

    Why we love it as a family is that it’s dairy-free, and gluten-free if your fish sauce is labelled gluten-free, so it works for almost everyone at the table.

    Thai Chicken Salad Ingredients

    Here’s what you’ll need to make it:

    Ingredients

    Cooked Chicken

    • Shredded or sliced — grilled, poached, or rotisserie all work. Using leftover chicken makes this a genuinely no-cook meal. The chicken provides that filling protein base that turns this from a side salad into a complete meal.

    Shredded Cabbage or Lettuce

    • The crunchy, fresh base of the salad. Napa cabbage gives the most authentic Thai crunch, but any crisp variety works. Shred it thin for the best texture.

    Fresh Cilantro and Mint

    • These herbs give the salad its unmistakable Thai freshness. Don’t skip them — they’re what make this salad taste alive and aromatic. Use both generously.

    Fish Sauce

    • The secret weapon in the dressing. I use Three Crabs fish sauce — the brand I actually keep in the kitchen. A little goes a long way in building that deep umami base.

    Chopped Peanuts

    • For crunch and a nutty contrast. Toast them lightly in a dry pan for even more depth of flavor.

    The Dressing

    • A tangy blend of lime juice, a touch of honey or sugar, fish sauce or soy sauce, garlic, and a little chili for heat. Balance is key — it should be sour, salty, sweet, and just a little spicy all at once.

    Cabbage and carrot slaw with chopped peanuts and a bowl of dressing on the side

    Other Food to Pair with This Salad

    This Thai Chicken Salad is a meal on its own, but here are some delicious sides or extras to serve with it:

    • Sticky rice or jasmine rice – A great way to turn it into a heartier dinner.

    • Fresh spring rolls – Another no-cook favourite with rice paper and veggies or boiled shrimps (optional).

    • Grilled corn or skewers – If you’re firing up the BBQ, a few grilled additions pair perfectly.

    • Thai iced tea or cucumber water – Something cool and refreshing to drink alongside it.

    A Summer Meal

    Whether you’re hosting a backyard lunch, prepping meals for the week, or just trying to avoid heating up the stove, this Thai Chicken Salad checks all the boxes: easy, fresh, and seriously delicious. If you love Asian-inspired flavors, you’ll also enjoy our 30-minute Thai basil chicken or the bold flavors in our lemongrass chicken drumsticks.

    Frequently Asked Questions

    Can I make Thai Chicken Salad ahead of time?

    Yes — prepare all the components separately and store in the fridge for up to 2 days. Keep the dressing in a separate container and toss just before serving to maintain maximum crunch.

    What can I use instead of fish sauce?

    Soy sauce or tamari are great substitutes for a vegetarian version. You can also use coconut aminos for a soy-free alternative. The dressing will have a slightly different flavor but will still be delicious.

    How do I cook the chicken for this salad?

    Poaching is our favorite method — place chicken breasts in simmering salted water for 15–18 minutes, then shred with two forks. Rotisserie chicken is an even quicker shortcut. Grilled chicken also adds a lovely smoky dimension.

    Is Thai Chicken Salad gluten-free?

    It can be, when your fish sauce (and any soy sauce swap) is gluten-free. Just double-check the label — some fish sauce brands add wheat. I use Three Crabs; always verify the bottle you buy if gluten is a concern.

    Can I add noodles to this salad?

    Absolutely! Rice noodles or glass noodles cooked according to package directions and tossed with the dressing make a more substantial noodle salad. It’s essentially a Thai noodle bowl at that point — just as delicious.

    Thai chicken salad with shredded chicken, purple cabbage, carrots and chopped peanuts, with a bowl of lime dressing on the side.

    Thai Chicken Salad

    We love how quick and easy it is to throw together — especially if you use pre-cooked or leftover chicken. You get a full, satisfying meal without heating up your kitchen. It’s the kind of salad that is light but filling, and packed with flavor.
    Prep Time 20 minutes
    Cook Time 25 minutes
    Total Time 45 minutes
    Servings: 6 people
    Course: Appetizer, Salad
    Cuisine: Thai
    Calories: 280

    Ingredients
      

    Salad
    • 3 cups poached chicken breast or rotisserie chicken
    • 3 cups shredded white cabbage
    • 3 cups shredded purple cabbage
    • 1 cups shredded carrots
    • ½ cup shredded red onion
    • ¼ cup chopped mint leaves
    • 1 cup chopped cilantro
    • ½ cup roasted peanuts, chopped
    Lime and Fish Sauce Dressing (Nuoc Cham)
    • ¼ cup fresh lime juice
    • 2 tbsp fish sauce
    • 2 tbsp rice vinegar
    • 1 tbsp honey
    • 1 garlic clove
    • 1 red chili, finely minced (optional)

    Method
     

    Salad
    1. In a large bowl, combine the shredded chicken, cabbage, carrots, red onion, mint, and cilantro. Toss well to mix.
    Dressing
    1. In a small bowl, whisk together the lime juice, fish sauce, rice vinegar, honey or sugar, garlic, and chili (if using) until the sugar dissolves.
    2. When ready to serve, pour the dressing over the salad and toss well to coat everything evenly.
    3. Transfer to a serving platter or individual bowls. Top with the chopped peanuts. Serve immediately and enjoy!
  • Dairy-free Chocolate Cake

    Dairy-free Chocolate Cake

    Moist, fudgy, and completely dairy-free and egg-free. This chocolate cake is so good you’ll forget it’s vegan.

    This post may contain affiliate links. If you purchase through these links, I may earn a small commission at no extra cost to you. Thank you for supporting Love & Harvest!

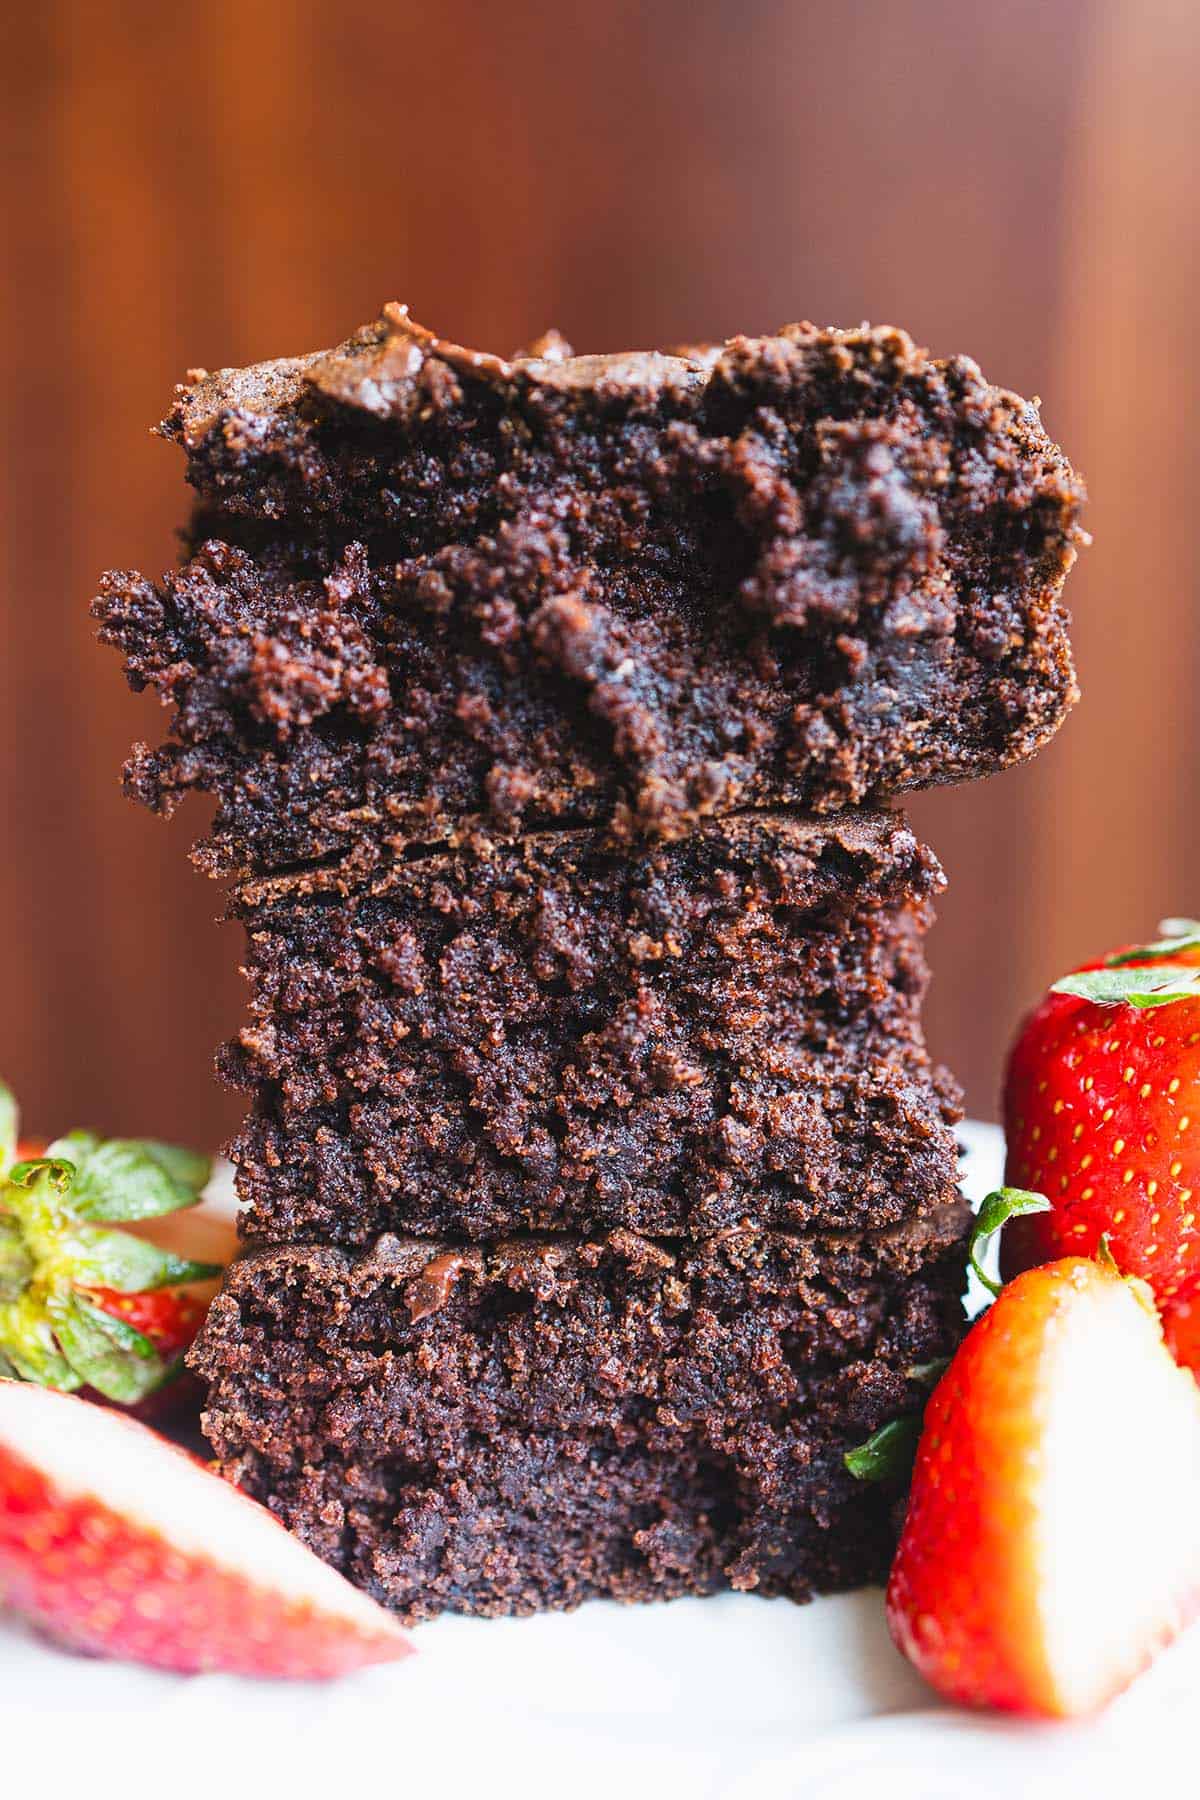
    Tall slices of dairy-free chocolate cake with fresh strawberries

    The Ultimate Dairy-Free Chocolate Cake: A Vegan Delight

    Whether you have food allergies or love experimenting with dairy-free baking, this recipe is one you’ll keep coming back to.

    Why You Will Love This Dairy-free Chocolate Cake

    • Super Moist Texture: This cake stays moist and tender, just like any classic chocolate cake.
    • No Fancy Ingredients: Uses simple pantry staples that are easy to find.
    • Allergy-Friendly: Perfect for anyone avoiding dairy, eggs, or animal products.
    • Kid-Approved: Tested and loved by even the pickiest eaters.
    • Versatile: Great for birthdays, celebrations, or an everyday treat.

    Delicious chocolate cake being eaten by a child with a fork.

    What is a Chia Egg?

    A chia egg is a fantastic plant-based substitute for traditional eggs in baking. Made from just chia seeds and water, it works as a binder to hold the cake together while keeping it moist and fluffy. It’s perfect for recipes like this one, where eggs need to be replaced without compromising texture.

    How to Make a Chia Egg

    1. Measure: Add one tablespoon of ground chia seeds to a small bowl.
    2. Add Water: Pour three tablespoons of water over the seeds.
    3. Stir: Mix well and let it sit for 5–10 minutes until it forms a gel-like consistency. Replace one chia egg for one regular egg in your baking recipes.

    Ingredients

    Cocoa Powder

    • Use unsweetened Dutch-process cocoa for the deepest chocolate flavour and darkest colour. It reacts differently than natural cocoa — deeper, smoother, less acidic. Sift it to prevent lumps. A 9-inch round cake pan gives you the ideal lift and texture for this batter.

    Chia Seeds (as egg replacer)

    • Ground chia seeds mixed with water create a gel that binds the cake exactly the way an egg would. They’re virtually tasteless in this recipe. Buy ground chia or grind whole seeds in a spice grinder for best results.

    Plant-Based Milk (Oat or Almond)

    • The recipe uses 1 cup of almond milk or oat milk. Oat milk gives a slightly richer, more neutral flavour; almond milk is lighter. Either works perfectly. Look for unsweetened versions to keep control over the sweetness level.

    Stack of dairy-free chocolate cake squares with strawberries

    Love baking without dairy? Try our Lightly Sweet Black Forest Cake for another allergy-friendly showstopper, or explore the Pumpkin Chocolate Chip Cake with Biscoff Frosting for autumn celebrations. For a simpler chocolate fix, our Pumpkin Chocolate Streusel Loaf is another family favourite.

    Use a springform pan if you want clean, professional-looking layers, or a standard 9-inch round cake pan for everyday baking.

    Frequently Asked Questions

    Can I use regular milk instead of plant-based milk?

    Yes — if dairy isn’t a concern for your household, any milk works in a 1:1 swap. The texture will be virtually identical. For a vegan or dairy-free version, stick with oat milk, almond milk, or coconut milk.

    Can I make this cake ahead of time?

    Absolutely. Bake the layers up to 2 days ahead and wrap tightly in plastic wrap at room temperature. Frost the day you plan to serve for the freshest presentation. Frosted cake keeps well in the refrigerator for up to 5 days.

    What dairy-free frosting works best?

    A simple chocolate ganache made with full-fat coconut milk and dairy-free chocolate chips is unbeatable. Whipped coconut cream with cocoa powder is also excellent. For a quick option, many store-bought frostings (like Pillsbury chocolate) are accidentally vegan — check the label.

    Can I substitute the chia egg with a flax egg?

    Yes. A flax egg (1 tbsp ground flaxseed + 3 tbsp water, rested 5 minutes) works identically. Flax gives a slightly earthier, nuttier flavour note but it’s undetectable in a chocolate cake with this much cocoa.

    Is this cake suitable for nut allergies too?

    The rest of the recipe is nut-free. Just use oat milk or rice milk instead of almond milk, and double-check that your cocoa powder and chocolate are processed in nut-free facilities if this is a concern.

    Tall slices of dairy-free chocolate cake with fresh strawberries

    Dairy-free Moist Chocolate Cake

    Decadent dark chocolate cake that’s completely dairy-free and egg-free. No dairy and no eggs. Oven and air fryer recipe.
    Prep Time 10 minutes
    Cook Time 35 minutes
    Total Time 45 minutes
    Servings: 6 people
    Course: Dessert
    Calories: 390

    Ingredients
      

    • 1¾ cups all-purpose flour
    • 1½ cups sugar
    • ¾ cup dutch-process cocoa
    • 1 tsp instant coffee powder
    • 1½ tsp baking soda
    • 1½ tsp baking powder
    • 1 tsp salt
    • ½ cup canola oil
    • 1 cup almond milk or oat milk
    • 1¾ cups hot water
    • ¼ cup prepared chia eggs see blog on how to make it
    • 2 tsp vanilla extract

    Equipment

    • air fryer optional

    Method
     

    1. oven baking: preheat oven to 350℉. Grease a 9inch square pan. Set aside.
    2. air fryer baking: preheat oven to 340℉. Grease a 9inch square pan. Set aside.
    3. In a large bowl, whisk together the flour, sugar, cocoa powder, instant coffee, baking soda, baking powder, and salt.
    4. In another bowl (or measuring jug), combine the oil, almond or oat milk, hot water, prepared chia eggs, and vanilla extract. Pour the wet mixture into the dry ingredients and whisk until smooth.
    5. Scrape the batter into the square pan and bake for 30-35 minutes, or until an inserted toothpick comes out clean. Remove from the oven and let it cool completely.
  • 30-Minute Thai Basil Chicken

    30-Minute Thai Basil Chicken

    Bold, aromatic, and on the table in 30 minutes — this Thai Basil Chicken (Pad Kra Pao) is our family’s most-cooked weeknight dinner. A handful of pantry staples, one wok, and dinner is done.

    This post may contain affiliate links. If you purchase through these links, I may earn a small commission at no extra cost to you. Thank you for supporting Love & Harvest!

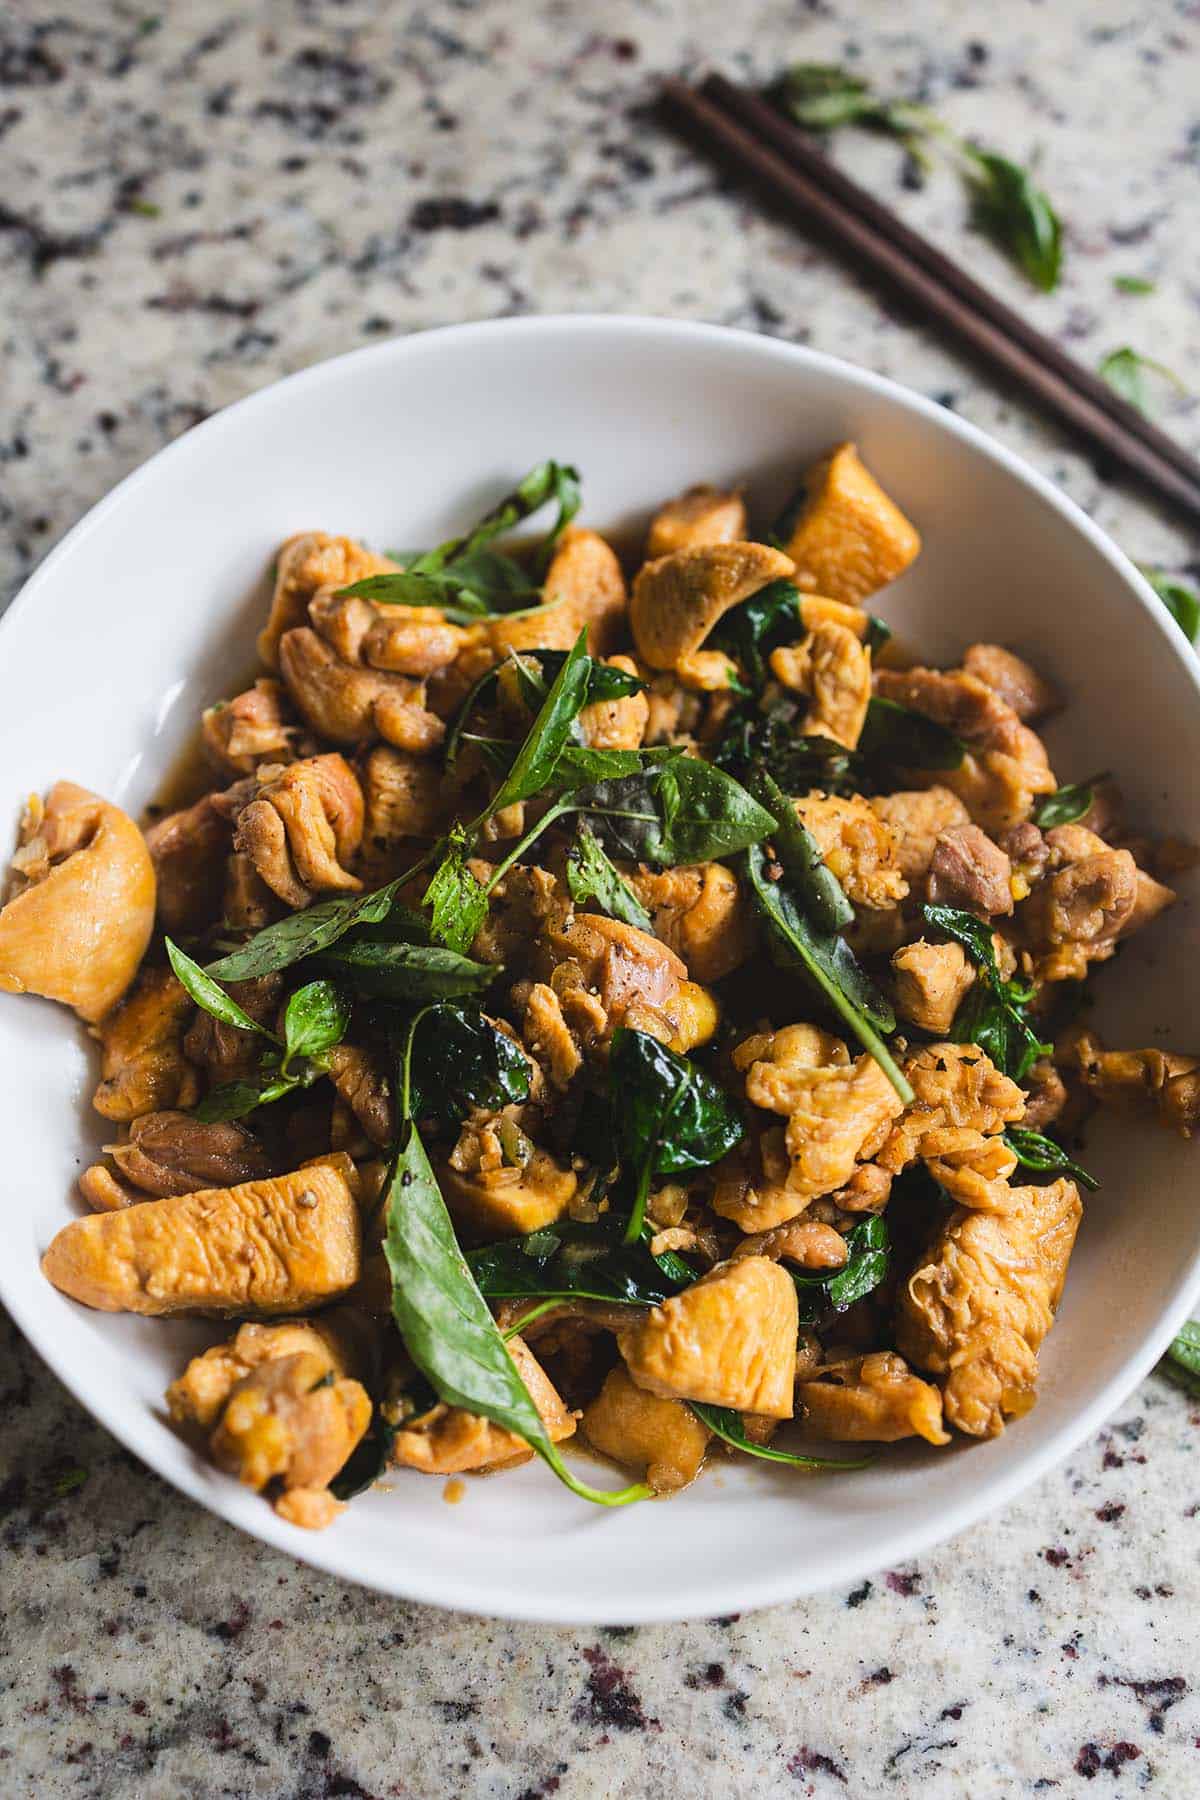
    Thai basil chicken stir-fry in a white bowl on a granite counter

    Why We Love This Easy Thai Basil Chicken

    This recipe is one of those rare gems that checks all the boxes: it’s quick, uses simple ingredients, and delivers bold, authentic flavours. In our household, it’s a staple. The kids love it because of its tangy kick from the lime juice — they always squeeze extra on top. We love it because it’s a wholesome meal that doesn’t take all evening to prepare. Any leftovers make fantastic lunchbox additions for the next day.

    Why You Should Try It

    If you’re new to Thai-inspired cooking, this dish is the perfect introduction. It’s simple enough for beginners and requires no fancy equipment — just a skillet or wok. The flavours are bold yet approachable, with a balance of sweet, salty, tangy, and aromatic notes that’ll make you feel like a pro chef. You can easily add bell peppers or green beans if you want to sneak in more vegetables.

    Close-up of Thai basil chicken with wilted basil leaves

    Ingredients

    Thai Basil

    • The star of the dish — its slightly peppery, licorice-like flavour is what separates this from any regular stir-fry. Thai basil holds up to high heat far better than Italian basil, wilting into the sauce without losing its character. Add it right at the end and toss just 30 seconds. If your family finds basil too intense, start with half a cup and adjust.

    Fish Sauce

    • The secret behind the umami depth. Fish sauce adds a savoury complexity that soy sauce alone can’t replicate — it’s funky, salty, and absolutely essential for authentic Thai flavour. Use a high-quality brand like Red Boat Fish Sauce for the cleanest flavour. Start with less and add more to taste.

    Oyster Sauce

    • Adds a sticky, slightly sweet, and deeply savoury coating to the chicken. It’s the binding element of the sauce that gives this dish its characteristic glossy finish. Use a good oyster sauce — it makes a real difference.

    Chicken Thigh vs. Breast

    • Chicken thigh stays juicier at high stir-fry heat and absorbs sauce better than breast. Either works — thigh for flavour, breast for leaner preference. Cut into uniform small pieces so everything cooks evenly in under 10 minutes.

    Garlic and Thai Chili

    • Pound them together in a mortar and pestle for the most flavourful base, or mince finely. This aromatic foundation hits the hot wok first, perfuming the oil before anything else is added. Skip the chili or reduce to one pepper for family-friendly heat levels.

    Bowl of Thai basil chicken with fresh basil leaves on the side

    Why It’s a Family Favourite

    This dish hits the sweet spot between fast and flavourful. It’s the kind of meal that comes together faster than you can decide what to order for takeout. Cooking it fills the house with an irresistible aroma that draws everyone to the table.

    Use a Carbon Steel Wok for authentic high-heat stir-frying — the carbon steel develops a natural seasoning over time and distributes heat perfectly for this style of cooking.

    Serve alongside our Instant Pot Taiwanese Beef Noodle Soup for a full Thai-inspired feast, try the Lemongrass Chicken Drumsticks for another Southeast Asian weeknight favourite, or check out our Thai Chicken Salad for a lighter meal using similar flavours.

    “This dish is proof that the simplest ingredients, cooked with love, create the most incredible flavours.”

    Sammi Chow — Love and Harvest

    Thai basil chicken in a white bowl with chopsticks

    Frequently Asked Questions

    Can I substitute regular Italian basil for Thai basil?

    You can in a pinch, but the flavour will be noticeably different. Italian basil is sweeter and more delicate; Thai basil has a peppery, anise-like quality that is central to the dish’s identity. If you can’t find Thai basil, adding a tiny pinch of anise or fennel with Italian basil gets you closer.

    What rice goes best with Thai Basil Chicken?

    Jasmine rice is the classic pairing — its fragrant, slightly sticky texture soaks up the sauce beautifully. Cook it slightly wet so the grains are soft and clingy. Brown jasmine rice also works well if you prefer a whole grain option, though the texture is slightly chewier.

    Can I make this dish vegetarian?

    Yes. Replace chicken with firm tofu (pressed and cubed) or mushrooms. Substitute fish sauce with soy sauce or coconut aminos and replace oyster sauce with a vegan mushroom oyster sauce. The cooking time is the same — just watch the tofu as it browns faster than chicken.

    How do I prevent the basil from turning black?

    Add the basil off the heat or in the final 30 seconds of cooking. High direct heat for too long will blacken and bitter the leaves. Toss quickly and serve immediately. The basil should be wilted but still vibrant green.

    Is this recipe good for meal prep?

    Absolutely. It reheats beautifully in a pan with a tiny splash of water. Pack with rice in containers — it keeps in the refrigerator for 3 days and makes excellent lunches. The basil will darken slightly upon reheating but the flavour stays great.

    Can I use frozen chicken?

    Always thaw chicken completely before stir-frying. Frozen or partially frozen chicken releases excess water in the wok, which prevents proper browning and turns the dish steamed rather than stir-fried. Thaw overnight in the refrigerator for best results.

    Thai basil chicken stir-fry in a white bowl on a granite counter

    30-Minute Meal Thai Basil Chicken

    Prep Time 10 minutes
    Cook Time 20 minutes
    Total Time 30 minutes
    Servings: 4
    Course: Main Course
    Cuisine: Thai
    Calories: 340

    Ingredients
      

    • 1 whole chicken deboned and cut into small chunks
    • 2 tbsp soy sauce
    • 1 tsp hoisin sauce
    • 2 tbsp brown sugar
    • 1 tbsp fish sauce
    • 2 tbsp cooking oil
    • 1 tsp chicken stock powder
    • ½ cup water
    • 1 cup fresh basil leaves divided (reserve some for garnish)
    • black pepper garnish
    • lime juice optional

    Method
     

    1. In a bowl, mix the chicken chunks with soy sauce, hoisin sauce, brown sugar, and fish sauce. Let it marinate for at least 15 minutes, or up to 1 hour for deeper flavor.
    2. Heat the cooking oil in a large skillet or wok over medium-high heat.
    3. Add the marinated chicken and sauté until the chicken is cooked through and starts to brown slightly, about 5–7 minutes.
    4. Sprinkle the chicken stock powder over the chicken and pour in the water. Stir well.
    5. Let the mixture simmer until the liquid reduces down to a thick sauce, about 3–5 minutes.
    6. Add most of the Thai basil leaves to the pan and stir until they wilt and become fragrant, about 1 minute.
    7. Transfer the chicken to a serving plate. Garnish with the reserved Thai basil leaves and a generous sprinkle of freshly cracked black pepper. Additionally, you can add some lime juice on top of the basil chicken.

    Notes

    Serving Suggestion

    Serve hot over steamed jasmine rice or alongside stir-fried vegetables for a complete meal.
  • Easy Hummus Recipe

    Easy Hummus Recipe

    Creamy, flavourful, and ready in 10 minutes — this homemade hummus beats anything from the grocery store. Made with chickpeas, tahini, lemon, garlic, and finished with a drizzle of olive oil and a sprinkle of sumac.

    This post may contain affiliate links. If you purchase through these links, I may earn a small commission at no extra cost to you. Thank you for supporting Love & Harvest!

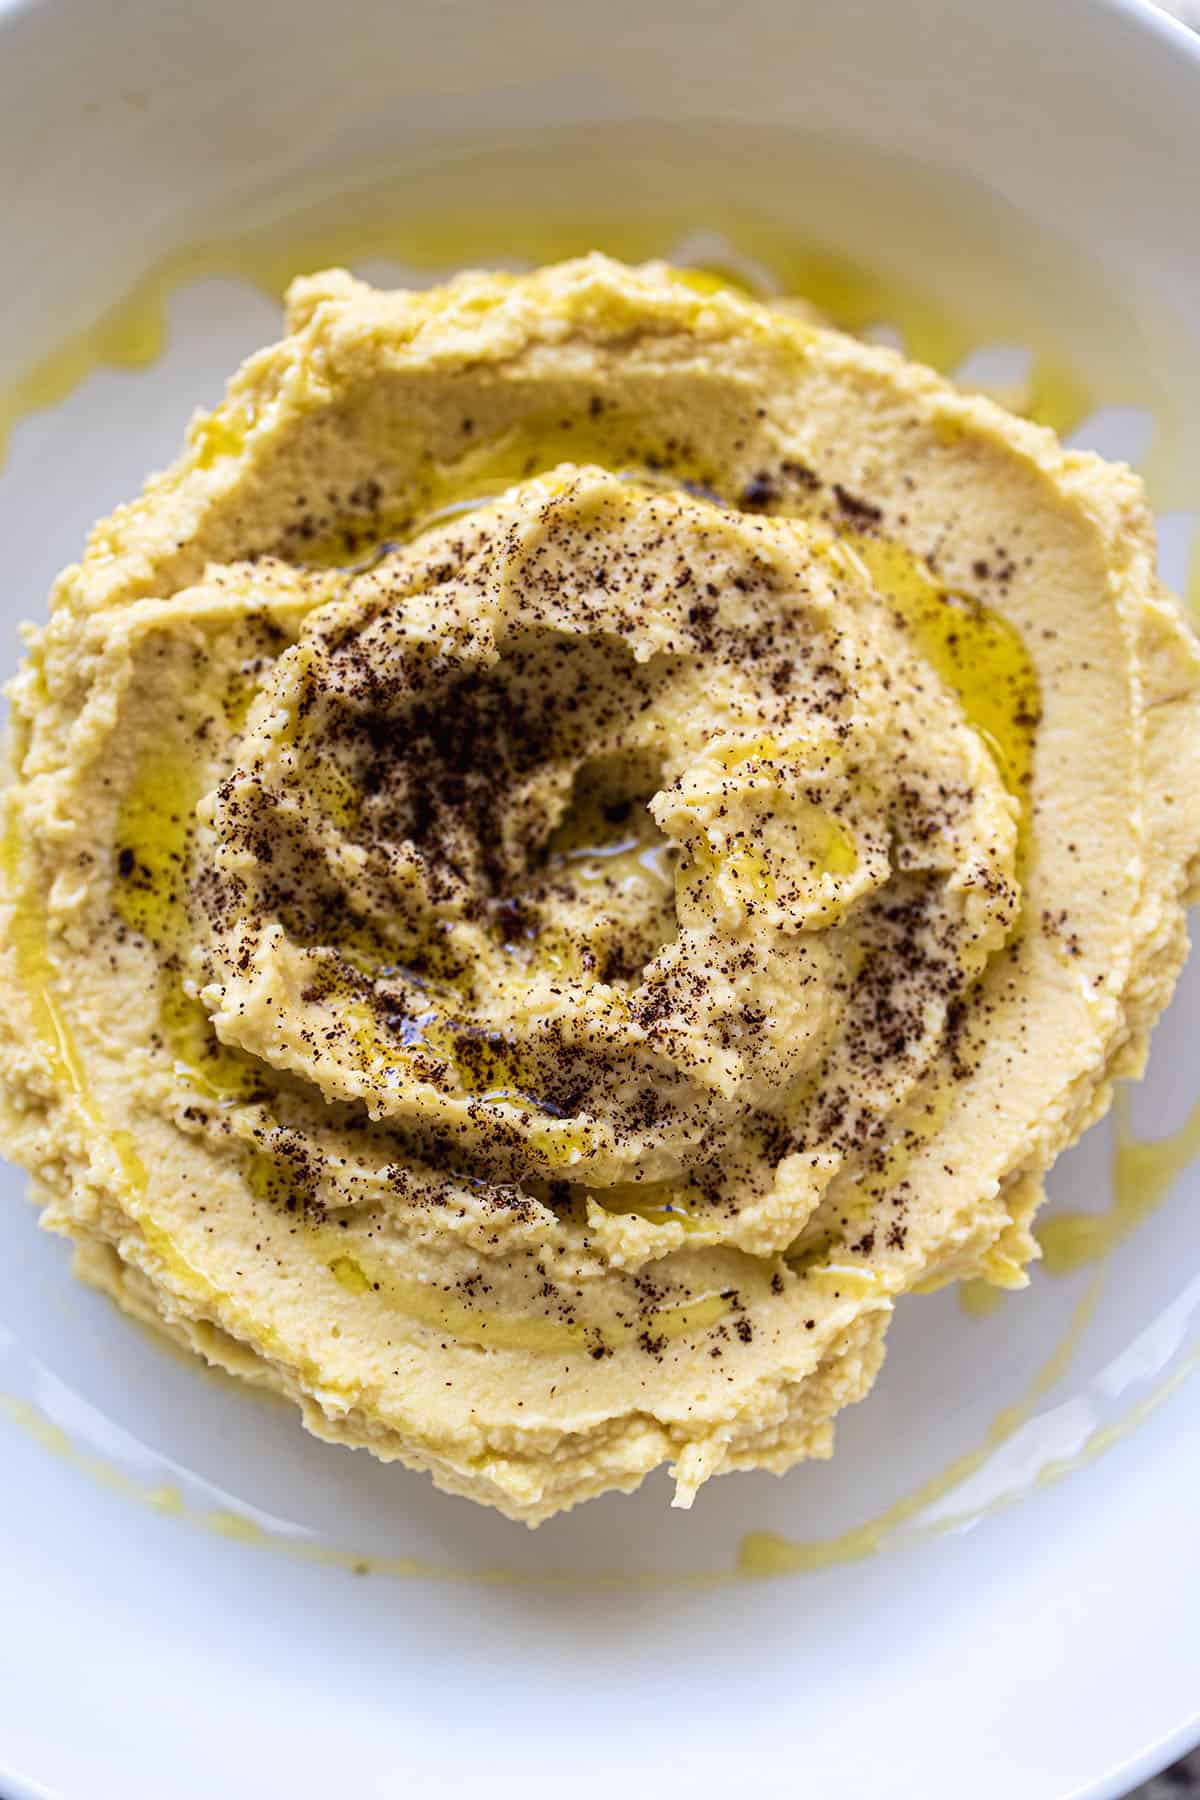
    Homemade hummus swirled on a white plate with olive oil and ground sumac

    Why You Should Try This Recipe

    Hummus is a versatile, satisfying snack that’s perfect for dipping veggies, spreading on sandwiches, or serving alongside your favourite meals. Making it at home not only saves money but also lets you control the flavour and texture. Whether you soak chickpeas overnight for fresh-from-scratch flavour or use canned chickpeas for convenience, this recipe will become your go-to dip in no time.

    Creamy homemade hummus with a pool of olive oil and ground spice on top

    Why Garnish the Hummus with Sumac?

    Sprinkling sumac on top of hummus adds a burst of tangy, citrus-like flavour that complements the creamy richness beautifully. It enhances the visual appeal with its deep red colour and provides a bright, zesty finish that balances the dish. Sumac is also a traditional Middle Eastern spice, giving your hummus an authentic touch.

    Ingredients

    Chickpeas

    • The heart of the recipe — they provide the creamy, starchy base and nutty flavour. For the smoothest hummus, use canned chickpeas (rinsed well) or cook dried chickpeas from scratch. If using canned, reserve the aquafaba (chickpea water) to thin the hummus to your preferred consistency. Find quality tahini paste while you’re at it — it’s equally essential.
    Tahini

    • Ground sesame seed paste — the ingredient that separates great hummus from good hummus. Use a runny, well-stirred tahini made from hulled sesame seeds. It adds richness, nuttiness, and binds everything into a silky paste. Don’t substitute with peanut butter — the flavour profile is completely different.

    Fresh Lemon Juice

    • Always fresh, never bottled. Lemon juice provides the bright acidity that lifts all the other flavours and prevents the hummus from tasting flat or heavy. Start with half a lemon and adjust — the right amount makes the whole dip come alive.

    Extra Virgin Olive Oil

    • Drizzled on top and blended in for silkiness. Use a good quality extra virgin olive oil — its fruity, peppery finish is a key part of the final flavour. Don’t use light or regular olive oil; the flavour difference matters here.

    Garlic

    • Raw garlic adds a sharp, savoury kick that’s traditional in hummus. For a milder result, roast a whole head of garlic in the oven first — roasted garlic gives a sweet, mellow depth without any bite. Start with one clove raw; you can always add more to taste.

    Sumac

    • A dried, ground berry from the Middle East with a tart, citrus flavour. It’s the classic finishing spice for hummus — adds colour and a pop of brightness that elevates the whole presentation. Find it in Middle Eastern grocery stores or here on Amazon.

    Hummus swirled in a bowl and topped with olive oil and ground sumac

    Our Favourite Side Dishes

    We love pairing this hummus with fresh veggies like carrots, cucumbers, and bell pepper slices. Pita bread or crackers are also fantastic options. For a heartier snack, try it with grilled chicken or falafel. For homemade bread to serve alongside, our Fluffy Naan Bread is perfect — warm and soft, ideal for scooping.

    Love Mediterranean flavours? Try our Chicken Shawarma Wrap with Caesar Salad where this hummus makes an excellent spread, or our Best Garlic Mashed Potatoes for another crowd-pleasing dip alternative at the table.

    A good food processor is the most important tool for smooth hummus — blend for at least 3 minutes for a truly silky texture.

    How to Make It Easier and Faster

    • Soak the Chickpeas: If making from scratch, soak dried chickpeas overnight and cook them until soft. More time-intensive but yields the creamiest texture.
    • Use Canned Chickpeas: For a quicker option, grab a can of chickpeas. Just rinse them well before blending.
    • Peel the Chickpeas (Optional): For extra-smooth hummus, peel the skins off the chickpeas. While not necessary, it’s worth it if you want a velvety texture.

    Making hummus at home is an easy way to elevate any meal or snack. Whether you’re prepping for a family gathering, a quick lunch, or a cozy night in, this recipe will always deliver. Give it a try — you won’t regret it!

    Sammi Chow — Love and Harvest

    Frequently Asked Questions

    Can I use dried chickpeas instead of canned?

    Yes, and the results are even creamier. Soak 1 cup of dried chickpeas overnight in plenty of cold water. Drain, then simmer for 1–2 hours until very soft (they should crush easily between your fingers). Cool before blending. Dried chickpeas make about 2.5 cups cooked — the equivalent of one large can.

    Why is my hummus grainy and not smooth?

    Two reasons: not blending long enough, and not using enough tahini or liquid. Blend for a minimum of 3 minutes, scraping down the sides. Add aquafaba (chickpea water), ice water, or more lemon juice one tablespoon at a time until you reach the silky consistency you want. Warm chickpeas also blend smoother than cold ones.

    How long does homemade hummus keep?

    Store in an airtight container in the refrigerator for up to 5 days. Drizzle a thin layer of olive oil on top before sealing to keep it fresh and prevent it from drying out. Give it a stir before serving as it may thicken slightly in the fridge.

    Can I freeze hummus?

    Yes. Freeze in individual portions in airtight containers for up to 3 months. Thaw overnight in the refrigerator and stir well before serving. The texture may be slightly different after freezing — add a drizzle of olive oil and a squeeze of lemon to refresh it.

    What is sumac and can I substitute it?

    Sumac is a dried ground berry with a tangy, citrus-like flavour. If you can’t find it, a small pinch of lemon zest on top provides a similar brightness. Smoked paprika is another common topping that adds colour and a warm, smoky note instead of the citrus tang.

    What’s in hummus?

    It’s mostly chickpeas and tahini, blended with fresh lemon juice, extra virgin olive oil, garlic, salt and a splash of aquafaba, with a pinch of sumac on top.

  • Mixed Berry Smoothie with Pomegranate and Nopal

    Mixed Berry Smoothie with Pomegranate and Nopal

    Frozen berries, creamy banana, pomegranate, a splash of cranberry juice and a little nopal powder, blended into one beautiful glass. It is naturally sweet and ready in under five minutes.

    This post may contain affiliate links. If you purchase through these links, I may earn a small commission at no extra cost to you. Thank you for supporting Love & Harvest!

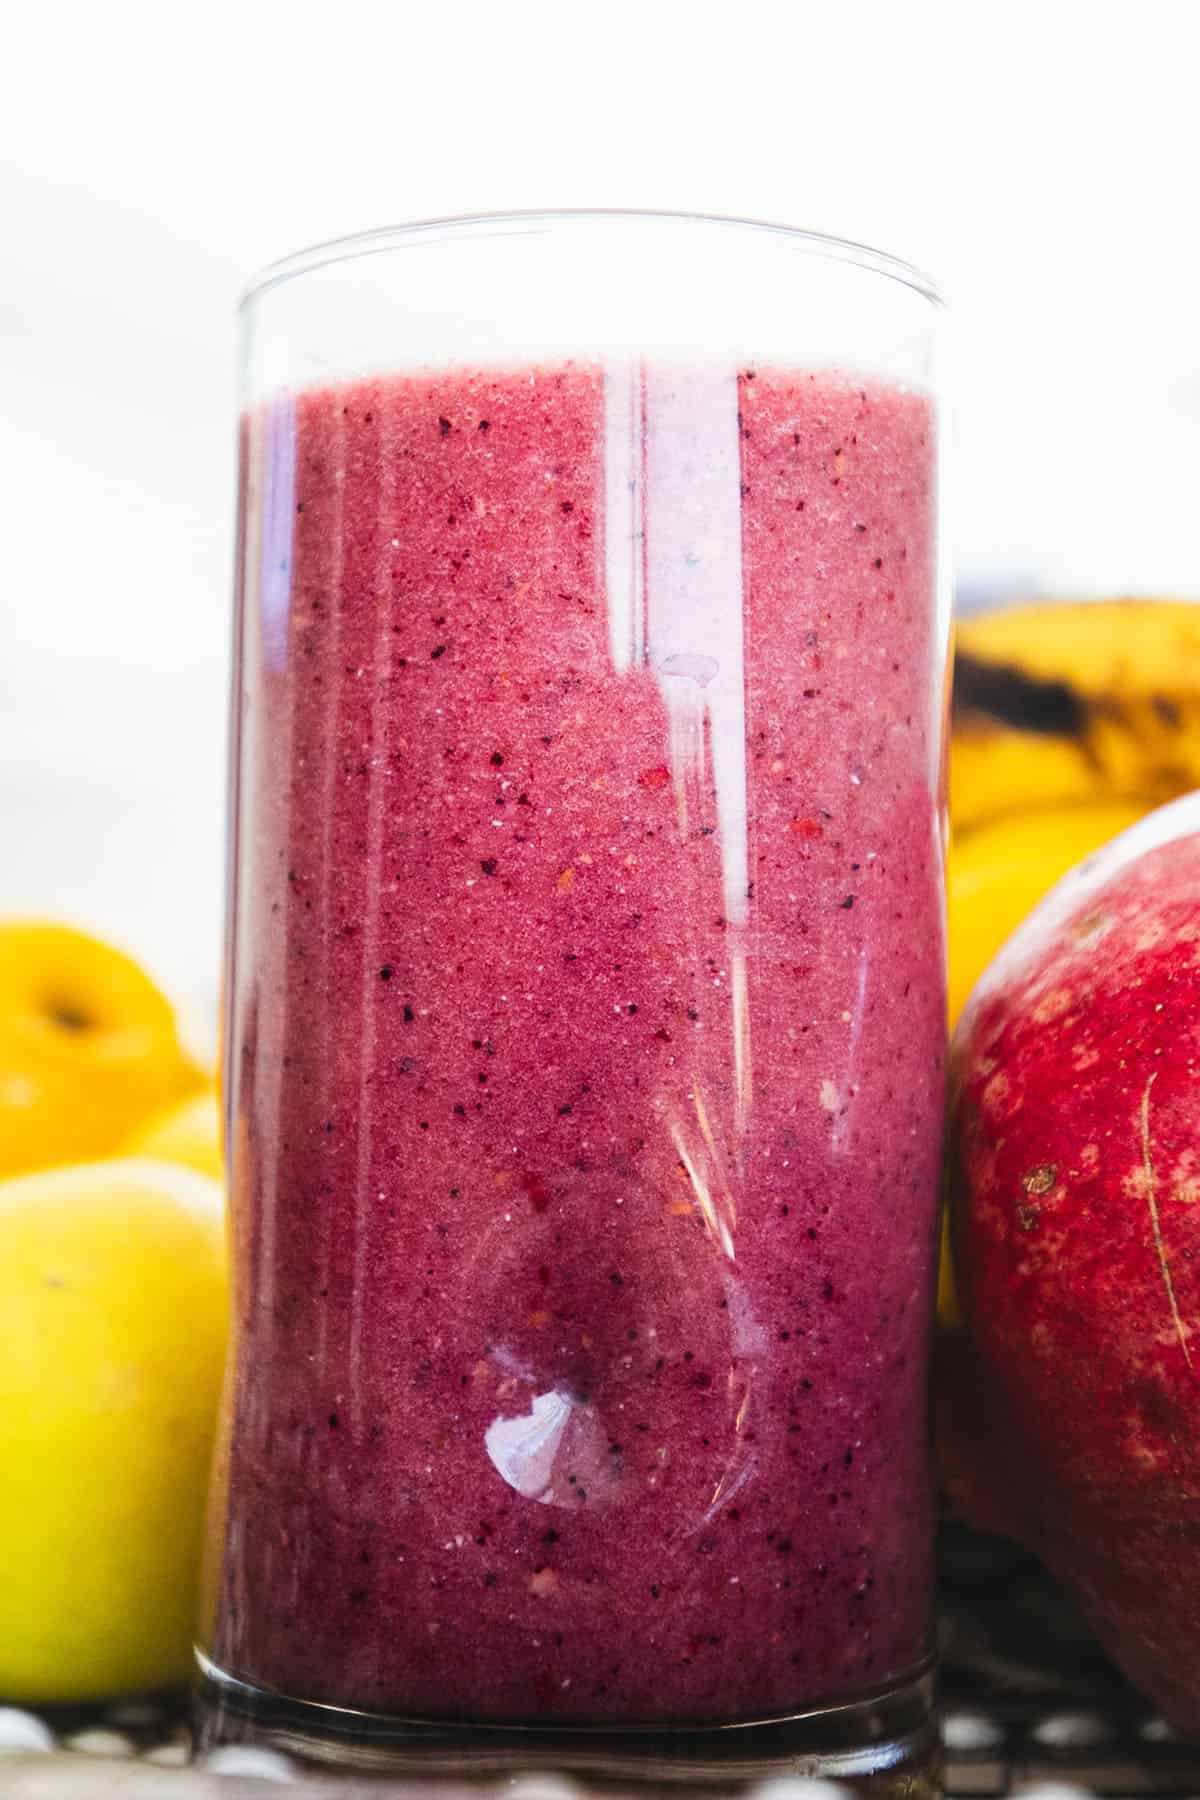
    Mixed berry smoothie in a tall glass with pomegranates, apples and lemons

    The Story Behind This Smoothie

    I first made this smoothie for my toddler. Today it is a staple in our home, for breakfast or a midday snack.

    Mixed berry smoothie in a tall glass with fresh apples in the background.

    Key Ingredients

    Ingredients

    Mixed Berries (Blueberries, Raspberries, Blackberries)

    This trio of frozen berries is the base of the smoothie. Frozen berries make it cold and thick without needing ice.

    Pomegranate

    Fresh pomegranate arils add a jewel-like burst of flavour.

    Banana

    A ripe banana gives the smoothie its creamy body and natural sweetness without any added sugar.

    Nopal Powder

    Derived from the prickly pear cactus, nopal powder is made from dried cactus pads. I use just a teaspoon, and it’s optional.

    Cranberry Juice

    A splash of unsweetened cranberry juice adds tartness.

    Pink mixed berry smoothie on a tray surrounded by fresh fruit

    Looking for more drinks and snacks? Try our Celery Juice for a fresh morning drink, or our Matcha Avocado Popsicles for a frozen treat. The Easy Blueberry Ice Cream is another berry-forward favourite the whole family loves.

    Frequently Asked Questions

    Can I use fresh berries instead of frozen?

    Yes, fresh berries work fine. Frozen berries are preferred because they make the smoothie cold and thick without needing ice. If using fresh berries, add a handful of ice cubes to achieve the right consistency.

    What can I substitute for nopal powder?

    If you cannot find nopal powder, you can simply leave it out — the smoothie is still delicious without it.

    Can kids drink this smoothie?

    I first made it for my toddler. For very young children (under 12 months), consult your paediatrician before introducing certain berry varieties.

    Can I add protein powder to this smoothie?

    Absolutely. A scoop of plant-based protein powder pairs well with the berry flavours. Vanilla or unflavoured protein powder blends in most seamlessly.

    How long can I store this smoothie?

    This smoothie is best consumed immediately after blending for the freshest flavour. If needed, you can store it covered in the refrigerator for up to 24 hours. Stir or shake well before drinking as natural separation will occur. Do not freeze the blended smoothie — the texture becomes watery when thawed.

    Can I use a regular blender instead of a high-speed blender?

    Yes. A regular blender works, though you may end up with small berry seeds in the final smoothie. For the smoothest texture, blend on high for at least 60 seconds. A high-speed blender like a Vitamix or Ninja will give you a completely silky result, but any blender will produce a delicious smoothie.

    Mixed berry smoothie in a tall glass with fresh apples in the background.

    Mixed Berry Smoothie with Pomegranate and Nopal

    Frozen berries, banana, pomegranate seeds, cranberry juice and nopal powder, blended in a high speed blender and served right away.
    Prep Time 5 minutes
    Total Time 5 minutes
    Servings: 1 person
    Course: Drinks
    Calories: 220

    Ingredients
      

    • 1 banana
    • ¾ cup frozen berries (blueberries, raspberries, blackberries)
    • ¼ cup pomergrante seeds
    • 1 cup cranberry juice or coconut water
    • 1 tsp nopal powder optional

    Equipment

    • blender

    Method
     

    1. add everything to a high speed blender, and blend well. Serve immediately.
  • Instant Pot Black Garlic

    Instant Pot Black Garlic

    Black garlic is one of those rare ingredients that genuinely transforms dishes. Sweet, earthy, slightly tangy, with none of raw garlic’s sharpness — and you can make it at home using just your Instant Pot and three weeks of patience.

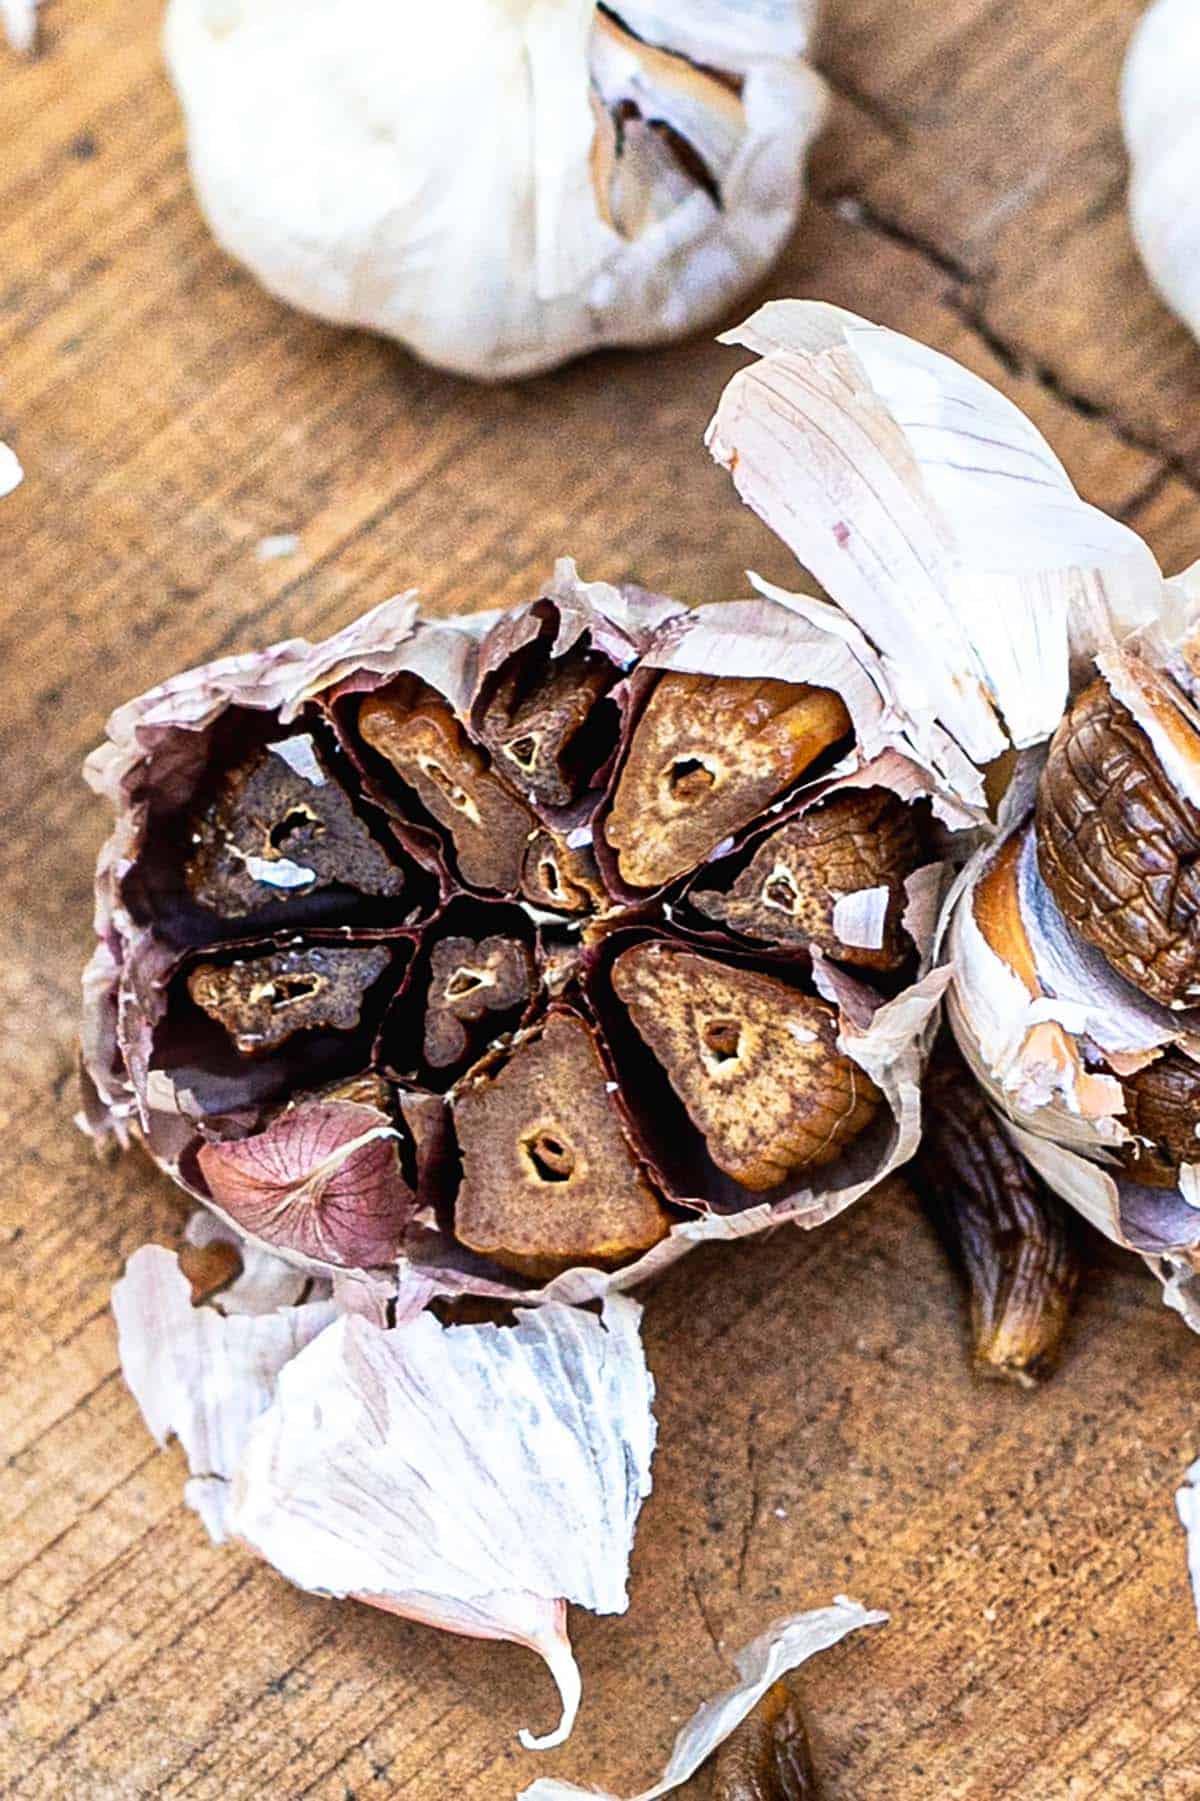
    Halved heads of homemade black garlic among whole garlic bulbs

    This post may contain affiliate links. If you purchase through these links, I may earn a small commission at no extra cost to you. Thank you for supporting Love & Harvest!

    Why Black Garlic?

    Black garlic is simply fermented garlic aged over time at controlled temperature and humidity, resulting in a deep black color and a complex, almost balsamic flavor profile.

    Head of black garlic cut open to show the dark, soft cloves

    Ingredient Deep-Dive

    Ingredients

    Whole Garlic Bulbs

    • Why it matters: Use medium-sized whole bulbs — they ferment more evenly than very large bulbs. Remove only the loose outer papery layers but keep most of the skin intact. The skin protects the cloves, regulates moisture, and ensures even fermentation. I typically use 7 bulbs per batch.

    Aluminum Foil

    • Why it matters: Wrapping each bulb individually in foil traps moisture and creates a consistent microenvironment for fermentation. Without the foil, the outer layers dry out unevenly and the cloves can harden rather than turn soft and sticky.

    Instant Pot (Yogurt Setting)

    • Why it matters: The Instant Pot’s Yogurt function on its lowest setting maintains the precise low temperature (around 140°F / 60°C) needed for the Maillard reaction that transforms garlic into black garlic. This eliminates the need for specialized black garlic fermenters. Any brand with a yogurt or keep-warm function works.

    Making Black Garlic with an Instant Pot: Step by Step

    1. Prepare the Garlic: Remove loose outer papery layers from the garlic bulbs, keeping the inner skin intact to protect the cloves.
    2. Wrap the Garlic: Individually wrap each bulb in aluminum foil. This traps moisture and ensures even fermentation.
    3. Set Up the Instant Pot: Place a trivet or steamer rack inside the Instant Pot to prevent the garlic from touching the bottom where it could burn.
    4. Cook on Yogurt Setting: Place the wrapped garlic on the trivet. Set the Instant Pot to “Yogurt” on the lowest setting. Leave for about 3 weeks. Do not use the pressure lid — use a glass lid or cover loosely with foil. Keep the valve open so moisture can escape.
    5. Place Outside: Fair warning — the aroma is overwhelming. For the first 2 weeks especially, the garlic smell intensifies daily. Place the Instant Pot outside in a covered spot protected from sun and rain. Include the power cord. This is not optional if you want to keep peace in your home.
    6. Check and Store: After 3 weeks, unwrap and check. Cloves should be jet black, soft, and sticky. If they need more time, rewrap and check again every few days. Let cool completely, then store in an airtight container in the refrigerator.

    A single peeled black garlic clove on a wooden board

    Enhancing Your Meals with Black Garlic

    1. Black Garlic Butter: Mash cloves into softened butter. Spread on toast, top steaks, or melt over roasted vegetables.
    2. Black Garlic Aioli: Blend into mayo for a creamy, umami-rich dipping sauce perfect for fries, burgers, or sandwiches.
    3. Salad Dressings: Mince into vinaigrettes or creamy dressings for added depth.
    4. Pasta Sauce: Stir into tomato sauce, Alfredo, or pesto for complex sweetness.
    5. Soups and Stews: Toss whole cloves into soups or broths — they dissolve and impart rich, savory flavor.
    6. Roasted Meats and Vegetables: Rub directly onto proteins or vegetables before roasting.

    Vegetarian Caesar dressing recipe: dressing mixed with grated cheese in a bowl

    Try our Vegetarian Caesar Salad dressing. Grating a clove of black garlic in is a game changer!

    Black garlic bulbs with their papery skins on a dark stone surface

    Peeled black garlic clove next to a whole garlic bulb on a wooden board

    Frequently Asked Questions

    What does black garlic taste like?

    Black garlic has a complex, sweet-savory flavor with notes of balsamic vinegar, molasses, and tamarind. None of the sharp, pungent bite of raw garlic. The texture is soft and slightly sticky — almost like a dried fig. It is genuinely unlike any other ingredient.

    Why does it take 3 weeks?

    The transformation happens through the Maillard reaction, the same browning chemistry that gives roasted coffee and seared steak their complex flavors. At the low temperature maintained by the Yogurt setting, this reaction happens slowly over weeks rather than minutes. You cannot rush it without compromising flavor and texture.

    Is the smell really that bad?

    Yes. Week 1 is manageable. By week 2, it is intense enough to permeate your home if kept indoors. Place it outside in a sheltered, covered spot. The finished product is completely odor-neutral when refrigerated.

    How long does homemade black garlic keep?

    Stored in an airtight container in the refrigerator, it keeps for 2–3 months. You can also freeze individual cloves on a baking sheet, then transfer to a freezer bag for up to 6 months.

    Can I use a rice cooker or slow cooker instead of an Instant Pot?

    Yes, if it has a keep-warm or low-heat function that maintains approximately 140°F (60°C). A rice cooker’s keep-warm setting works well. The key is consistent low temperature over 3 weeks — too hot and the garlic will burn; too cool and the Maillard reaction won’t occur.

    Can I make black garlic with individual cloves instead of whole bulbs?

    Technically yes, but whole bulbs are strongly recommended. The outer skin regulates moisture retention during the long process. Individual cloves tend to dry out and harden rather than becoming that soft, sticky consistency.

    Instant Pot Black Garlic

    This sweet, earthy, and slightly tangy delicacy transforms ordinary dishes into gourmet creations. The best part? You can make it easily at home using an Instant Pot.
    Prep Time 10 minutes
    Cook Time 30 minutes
    Gentle Aging 21 days
    Total Time 21 days 40 minutes
    Servings: 1 large jar
    Course: Condiment
    Cuisine: Asian
    Calories: 30

    Ingredients
      

    • 7 medium sized garlic bulbs

    Equipment

    • Instant Pot or any other similar devices
    • Aluminum foil

    Method
     

    1. Prepare the Garlic: Start by removing any loose outer layers of the garlic bulbs, but keep the skin intact to protect the cloves.
    2. Wrap the Garlic: Individually wrap each bulb of garlic in aluminum foil. This helps to keep the moisture in and ensures even fermentation.
    3. Set Up the Instant Pot: Place a trivet or steamer rack inside the Instant Pot. This will prevent the garlic from directly touching the bottom of the pot, where it could burn.
    4. Cook on the Yogurt Setting: Place the wrapped garlic bulbs on the trivet inside the Instant Pot. Set the Instant Pot to the "Yogurt" function on the lowest setting. Make sure the valve is on so the whole time it can expel moisture from the pot.
      You’ll need to leave the garlic in the Instant Pot for about 3 weeks.
    5. Check and Store: After 3 weeks, unseal the garlic and check its colour and texture. The cloves should be jet black, soft, and sticky. Let them cool completely before storing them in an airtight container in the refrigerator.

    Love fermented and preserved flavors? Try our Preserved Salty Lemons — another pantry staple that transforms everything it touches. For more garlic-forward recipes, our One Pot Lemon Garlic Chicken is the perfect showcase. And for a bold garlic side dish, our Best Garlic Mashed Potatoes uses a full head of roasted garlic.

  • Chicken Shawarma Wrap with Caesar Salad

    Chicken Shawarma Wrap with Caesar Salad

    Picture this: warm, pillowy naan bread wrapped around juicy yogurt-marinated chicken, crisp romaine Caesar salad, and a shower of freshly grated Parmesan — all held together by one gloriously messy squeeze. This Chicken Shawarma Wrap with Caesar Salad is the meal I make on repeat for road trips, school lunches, and dinner parties alike. It takes 30 minutes to assemble once the chicken has marinated overnight, and it never fails to impress.

    This post may contain affiliate links. If you purchase through these links, I may earn a small commission at no extra cost to you. Thank you for supporting Love & Harvest!

    Chicken shawarma wrap with Caesar salad on naan bread

    Succulent chicken marinated overnight in yogurt, dill, turmeric, and lime juice — wrapped up with crisp Caesar salad inside warm, fluffy naan. One squeeze and the juices spill from every corner.

    Why You Should Try This Chicken Shawarma Recipe

    1. It is totally different: Combining two classic recipes into one — shawarma and Caesar salad — is the most original twist on a weeknight wrap.
    2. Bursting with flavor: The overnight marinade of yogurt, dill, turmeric, and lime juice ensures every bite is bold and aromatic.
    3. Perfectly juicy chicken: Marinating overnight guarantees plump, tender chicken pieces that don’t dry out on the grill.
    4. Crisp Caesar salad: Crunchy romaine, tangy dressing, and salty Parmesan add a fresh, savory contrast inside the wrap.

    Chicken shawarma ingredients laid out

    My Favorite On-the-Go Meal

    I’m not exaggerating when I say this is my favorite go-to meal when I need something quick and delicious. With the chicken marinating overnight, all I have to do is grill it and toss the Caesar salad. It takes 30 minutes and works for picnics, road trips, school lunches, and camping, basically anywhere you need a satisfying meal that travels well.

    Chicken shawarma wrap ready to eat

    What Makes This Recipe Different

    1. Naan bread: Soft, fluffy homemade naan instead of standard pita adds a chewy, slightly sweet element that makes every bite better.
    2. Caesar salad inside: Most shawarma wraps use plain lettuce and tomato. We go full Caesar — romaine, tangy dressing, Parmesan — for a restaurant-quality finish.
    3. Easy to make: A few simple ingredients, overnight marinating, and 30 minutes of assembly. That’s it.

    Ingredients

    Key Ingredients

    Natural Yogurt

    Yogurt tenderizes the chicken by breaking down proteins with its acidity, resulting in a juicy texture. It also acts as a carrier for the spices, ensuring they penetrate deeply into the meat. During grilling, yogurt keeps the chicken moist and prevents it from drying out.

    • Why it matters: Without yogurt in the marinade, the chicken loses its characteristic tenderness and the flavors stay surface-level.

    Dill

    Dill adds a fresh, slightly tangy flavor that lifts the entire marinade. It complements the warm spices and contributes to the Mediterranean character of this dish. You can use a quality dried dill if fresh is not available.

    • Why it matters: Dill is what distinguishes this shawarma from generic chicken marinades. Don’t skip it.

    Turmeric

    Turmeric gives the chicken its golden color and adds a warm, earthy flavor to the marinade. A good organic turmeric powder makes a real difference in both color and taste.

    • Why it matters: That vibrant yellow color is the visual hallmark of shawarma — and it signals depth of flavor.

    Lemon Juice

    The acidity in lemon juice tenderizes the chicken further, adds brightness, and balances the warm spices in the marinade. Use freshly squeezed for the cleanest flavor.

    • Why it matters: Lemon juice prevents the marinade from becoming heavy or one-dimensional. It is the flavor activator.

    Garlic

    Garlic amplifies every other flavor in the marinade. It brings out the chicken and makes all the herbs and spices taste more pronounced. Crush it fresh for maximum potency.

    Caesar Salad Dressing

    You can use any quality store-bought Caesar dressing. The secret upgrade: stir in a squeeze of fresh lemon juice and some freshly grated Parmesan. It takes a standard dressing to another level.

    • Why it matters: The Caesar dressing is the bridge between the hot, spiced chicken and the cool, crisp lettuce. It holds the whole wrap together.

    Grilled chicken shawarma plated
    Assembling the chicken shawarma wrap

    This wrap pairs beautifully with our fluffy naan bread recipe — they were made for each other. For a lighter side, try our homemade Caesar salad dressing or the Thai chicken salad for an Asian-inspired variation on the same flavor profile.

    Frequently Asked Questions

    Can I use chicken breast instead of thighs?

    Yes, but chicken thighs are strongly recommended. They stay juicier on the grill and hold up better in the wrap. If using breast, reduce grill time by 2–3 minutes per side and watch closely to avoid drying out.

    How long should I marinate the chicken?

    Overnight is ideal — 8 to 12 hours in the refrigerator. The minimum is 4 hours. Anything less and the flavors won’t fully penetrate the meat.

    Can I make this ahead of time?

    Yes. Grill the chicken and store it separately from the Caesar salad and naan. Assemble the wraps just before serving to keep the naan from getting soggy.

    What can I substitute for naan bread?

    Pita, flatbread, or large flour tortillas all work. Naan gives the best result because of its softness and chew, but the recipe is flexible.

    Is this recipe kid-friendly?

    Very much so. Kids love the mild flavors and the handheld format. You can reduce the turmeric slightly for younger kids and pack extra Caesar dressing on the side for dipping.

    Can I cook the chicken in a pan instead of grilling?

    Absolutely. A cast iron skillet on medium-high heat gives you a great sear. Cook 4–5 minutes per side depending on thickness. A Lodge 12-inch cast iron skillet is perfect for this.

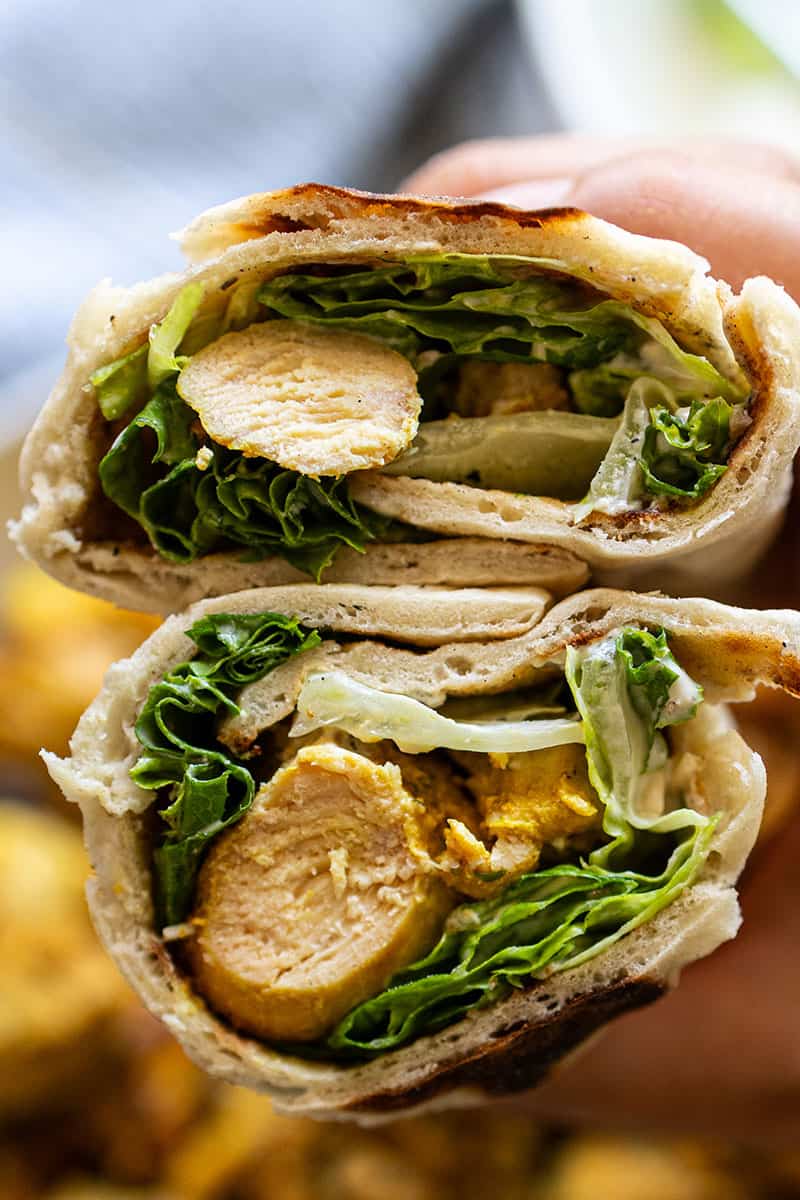
    Two halves of a chicken shawarma wrap with Caesar salad filling

    Chicken Shawarma Wrap

    Incredibly juicy, tender chunks of chicken marinated overnight with yogurt, dill, lemon juice, and turmeric, all wrapped up with Caesar salad. It's an easy meal perfect for dinner or for taking on road trips.
    Prep Time 20 minutes
    Cook Time 15 minutes
    Total Time 35 minutes
    Servings: 6 people
    Course: Main Course
    Cuisine: Indian
    Calories: 420

    Ingredients
      

    Chicken Shawarma
    • ½ kg chicken meat (can be chicken breast, chicken leg, or assorted) 1.1 pounds of chicken meat
    • 1 cup natural yogurt no sugar
    • 3 garlic cloves grated
    • 2 tsp dried dill
    • 1 tsp cumin powder
    • 1 tsp turmeric powder
    • 1 tbsp paprika
    • 1 tsp lemon juice
    • 2 tsp sea salt
    • ½ tsp black pepper
    • 6-8 large naan bread or tortilla wraps
    Caesar Salad
    • 4 cups chopped romaine lettuce
    • ¼ cup grated Parmesan cheese
    • ¼ cup Caesar salad dressing
    • 1 tbsp lemon juice
    • salt and pepper to taste

    Method
     

    1. With a clean chopping board, slice the chicken into medium size cubes. They need to be large enough to be on skewers. About 1 inch cubes.
    2. In a large bowl, combine the yogurt, grated garlic, dill, cumin, turmeric, paprika, lemon juice, salt, and pepper. Add the sliced chicken thighs and toss until well coated. Cover and refrigerate for at least 2 hours, preferably overnight.
    3. Preheat a grill or grill pan over medium-high heat. Remove the chicken from the marinade and thread onto skewers. Grill for 5-6 minutes on each side, or until the chicken is cooked through and slightly charred. Remove from the grill and place it on a plate.
    4. In a large mixing bowl, combine the chopped romaine lettuce, grated Parmesan cheese, Caesar salad dressing, lemon juice, salt, and pepper. Toss until the lettuce is evenly coated with the dressing.
    5. To assemble the wraps, warm the pita bread or tortilla wraps according to package instructions. Place a generous amount of Caesar salad on each wrap, then top with the grilled chicken shawarma slices.
    6. Roll up the wraps tightly, folding in the sides as you go. Cut in half diagonally and serve immediately.
  • Matcha Avocado Popsicles

    Matcha Avocado Popsicles

    If you are looking for a frozen treat that is stunning to look at, these matcha avocado popsicles deliver on every front. Velvety, creamy, vibrantly green, and made with just a handful of real ingredients, they’re a frozen treat worth making again and again.

    This post may contain affiliate links. If you purchase through these links, I may earn a small commission at no extra cost to you. Thank you for supporting Love & Harvest!

    Jump to Recipe

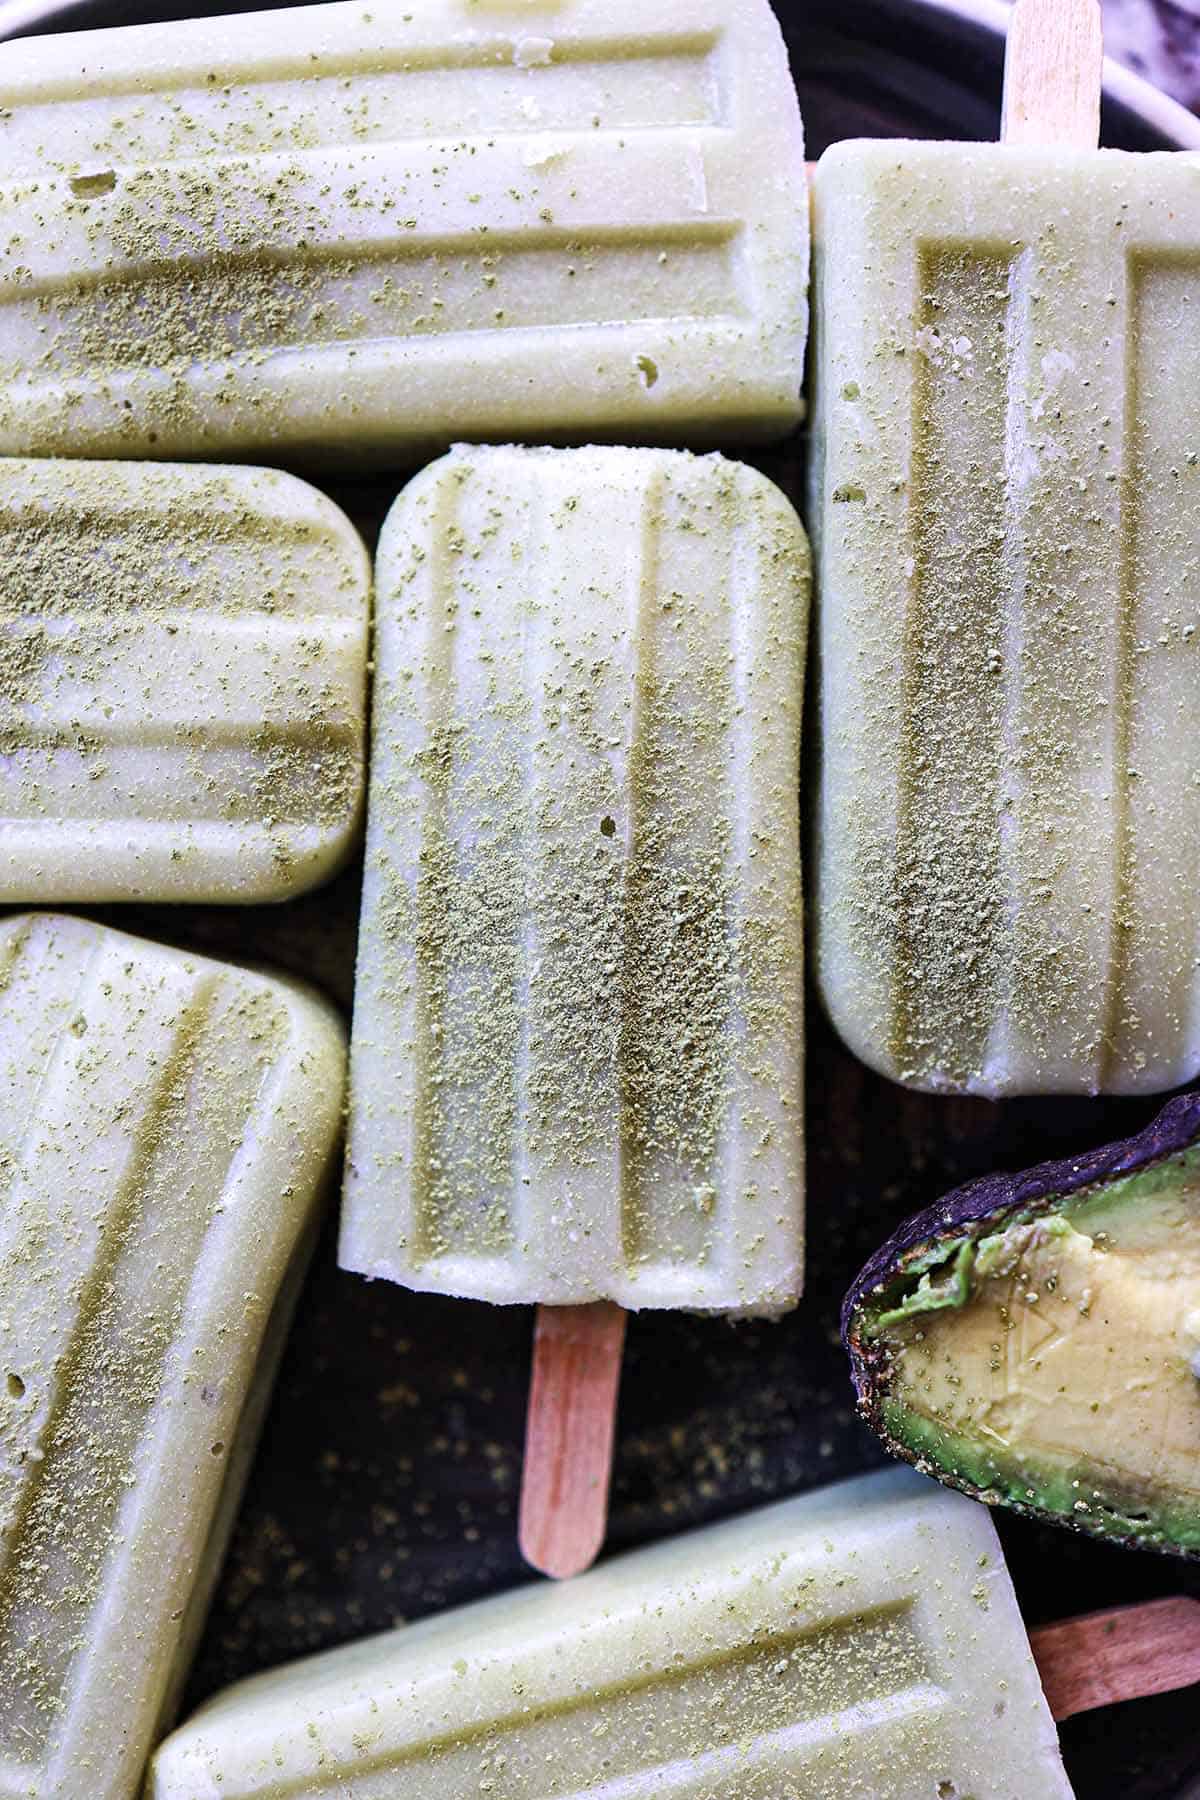
    Matcha avocado popsicles on a dark plate on a granite counter

    This post is all about a matcha avocado popsicles recipe. It has matcha powder, coconut cream, non-dairy milk, and avocado. Dairy-free and gluten-free.

    These Matcha Avocado Popsicles are your frosty summer treat. Avocado brings creamy texture, coconut cream adds richness, and matcha provides that earthy kick. Each lick is a step into a frozen paradise.

    Stack of pale green matcha avocado popsicles beside a halved avocado

    Matcha avocado popsicles piled on a tray with avocado halves

    Why Try This Recipe?

    As you savor each lick, feel the cool creaminess dance on your taste buds. These Matcha Avocado Popsicles are not just frozen treats — they are a thrilling escape from the heat and the perfect companion for summer afternoons.

    DAIRY-FREE   GLUTEN-FREE

    Matcha avocado popsicle standing in front of a stack of popsicles and an avocado

    Matcha avocado popsicles on a dark plate with halved avocados

    Ingredients

    Matcha Tea Powder

    Always opt for premium ceremonial-grade matcha. The taste is more luxurious and stronger. Ceremonial-grade matcha powder is a good option. The vibrant green color alone tells you it is the real thing.

    • Why it matters: Culinary-grade matcha can taste bitter and dull. Ceremonial-grade matcha produces a smooth, slightly sweet, earthy flavor that makes these popsicles genuinely special.

    Coconut Cream

    Full-fat coconut cream is the backbone of creaminess in this recipe. We choose a can with more cream than liquid — the cream is what gives the popsicles their rich, dense texture.

    • Why it matters: Low-fat coconut milk produces icy, watery popsicles. Full-fat coconut cream creates the smooth, almost gelato-like mouthfeel that sets these apart.

    Non-Dairy Milk

    Use your favorite non-dairy milk — almond, cashew, oat, or macadamia all work. We love almond milk for its light, neutral flavor that lets the matcha shine. Look for unsweetened varieties so you can control the sweetness yourself.

    • Why it matters: Non-dairy milk adjusts the consistency of the blend, making it pourable without diluting the creaminess of the coconut cream.

    Xanthan Gum

    A small but critical ingredient. Xanthan gum improves texture and prevents the separation of heavier ingredients (like avocado) from sinking to the bottom during freezing.

    • Why it matters: Without it, dairy-free popsicles can have an uneven, grainy texture with ingredient separation. A tiny amount keeps everything uniform from the first lick to the last.

    Avocado

    Avocado contributes silky smoothness and fats that prevent ice crystals from forming during freezing. This is the secret to a creamy popsicle without dairy.

    • Why it matters: The fat content in avocado mimics the role of cream in traditional ice cream — it gives body, smoothness, and a satisfying mouthfeel. Use fully ripe avocados only.

    A hand holding a matcha avocado popsicle in front of a large green leaf

    Frequently Asked Questions

    How do I know if my avocado is ripe enough?

    A ripe avocado yields slightly to gentle pressure when squeezed — it should feel like a ripe peach, not rock-hard and not mushy. The skin will be dark green to black. For blending into popsicles, fully ripe is essential; an underripe avocado produces a bitter, starchy flavor that no amount of matcha will mask.

    Can I skip the xanthan gum?

    You can, but the texture will be slightly icier and the mixture may separate during freezing — you may see darker avocado sinking to the bottom. If you skip it, blend thoroughly and freeze immediately. The popsicles will still taste good, just with a less uniform texture.

    What popsicle molds should I use?

    Silicone molds are the easiest to work with — just flex the mold and the popsicle releases cleanly. Standard plastic molds work well too. We use popsicle molds that hold about 3 oz each, which produces a perfect single-serve size.

    Can I use culinary-grade matcha instead of ceremonial?

    Yes, but adjust expectations. Culinary matcha is more bitter and less vibrant green. If using culinary grade, reduce the amount by 25% and add an extra teaspoon of honey or agave to compensate for the bitterness.

    How long do these popsicles keep in the freezer?

    Up to 3 weeks when stored properly. Once unmolded, wrap each popsicle individually in parchment paper and store in a sealed freezer bag to prevent freezer burn and flavor absorption from other foods.

    Are these popsicles suitable for kids?

    Matcha contains caffeine, so keep that in mind before serving these to children.

    Love frozen treats? Also check out our matcha green tea popsicles, our cucumber crush popsicles, and our loco mango popsicles for more creative frozen dessert ideas.

    Matcha avocado popsicles piled on a tray with avocado halves

    Matcha Avocado Popsicles

    These Matcha Avocado Popsicles are your frosty summer treat. Each lick is a step into a frozen paradise.
    Prep Time 10 minutes
    freeze time 4 hours
    Total Time 6 hours 10 minutes
    Servings: 10 popsicles
    Course: Dessert
    Calories: 130

    Ingredients
      

    • 1 avocado
    • 2 tsp matcha tea powder
    • 1 can full fat coconut cream
    • ¼ cup honey or agave nectar
    • ½ L almond milk or any other non-diary milk
    • ¼ tsp Xanthan gum

    Equipment

    • high speed blender

    Method
     

    1. In a blender, combine peeled and pitted avocados, matcha powder, coconut cream, honey or agave nectar, almond milk, and xanthan gum.
    2. Blend the ingredients on high speed until the mixture is smooth and well combined. Ensure there are no avocado lumps and the matcha is evenly distributed.
    3. Pour the matcha avocado mixture into popsicle molds, leaving a small space at the top for expansion during freezing
    4. Insert popsicle sticks into the molds. If your molds come with a lid, secure them to keep the sticks in place. If not, cover the molds with aluminum foil and insert the sticks through the foil.
    5. Place the popsicle molds in the freezer and let them freeze for at least 4-6 hours or until fully set.
    6. Once the popsicles are completely frozen, remove them from the molds. To release the popsicles easily, briefly run the molds under warm water or dip them in a bowl of warm water.
  • Sourdough English Muffins

    Sourdough English Muffins

    There is something deeply satisfying about pulling a batch of homemade sourdough English muffins off a cast iron skillet — golden, nook-filled discs that toast up perfectly every single time. This recipe uses your active sourdough starter to deliver a subtle tang and incredible texture you simply cannot get from a store-bought bag.

    This post may contain affiliate links. If you purchase through these links, I may earn a small commission at no extra cost to you. Thank you for supporting Love & Harvest!

    Sourdough English muffin sandwiches with egg, cheese and avocado

    Why Try This Recipe?

    Beyond the convenience of store-bought options, crafting these delectable delights at home adds artisanal flair to your mornings. Here is why this recipe is worth your time.

    • Flavorful Complexity: Sourdough fermentation imparts a unique, subtle tang that transforms each bite into something special.
    • Control Over Ingredients: Choose organic flour, local honey, and wholesome components — no mystery additives.
    • No Preservatives or Additives: Unlike commercially available muffins, homemade versions are clean and natural.

    And above all, sharing these muffins with people who can taste your dedication and love of food is the real reward.

    Golden sourdough English muffins cooling on a wire rack

    What You’ll Need

    Ingredients

    Sourdough Starter

    If you already have an active sourdough starter, you are all set. If not, or if you are not sure what one is, check out the full guide here: How to Make Sourdough Starter.

    • Why it matters: The starter is the leavening agent and the source of that signature tangy flavor — no commercial yeast needed.

    Flour

    Standard all-purpose flour works perfectly here. For a cleaner, more flavorful result, weigh your flour with a kitchen scale rather than scooping by volume.

    • Why it matters: Measuring by weight ensures consistent dough hydration and a reliable rise every time.

    Milk

    Full fat whole milk gives the muffins a fluffier, richer texture. Low-fat alternatives work but will produce a slightly less tender crumb.

    • Why it matters: The fat in whole milk tenderizes the dough and contributes to a soft, pillowy interior.

    Honey

    Honey serves a dual purpose — it adds a balanced sweetness and feeds the beneficial bacteria in the sourdough starter, helping the dough rise optimally.

    • Why it matters: Unlike refined sugar, honey also adds moisture and depth of flavor to the finished muffin.

    Cornmeal

    Cornmeal dusted on the pan and the baking sheet creates a classic, slightly crunchy coating on the outside of every muffin — the hallmark of a proper English muffin.

    • Why it matters: It prevents sticking and delivers that iconic texture contrast between the crisp exterior and pillowy interior.

    Equipment

    Electric Stand Mixer

    A KitchenAid stand mixer with a dough hook makes kneading effortless and consistent. These machines last for decades — well worth the investment.

    Cast Iron Skillet

    Cast iron distributes heat evenly and retains it well, which is critical for getting that golden crust without scorching. I love my Lodge 5-quart Dutch oven and cast iron skillets for all bread work — pre-seasoned, affordable, and virtually indestructible.

    English muffin breakfast sandwich stacked on top of whole muffins

    This is a flexible recipe — mix the dough in the morning and cook your muffins by evening, or ferment overnight for an even deeper flavor. Either way, you end up with a batch of beautifully nook-filled muffins ready for toasting. Pair them with the full sourdough bread guide or try them alongside rosemary beer bread for a full bread-baking weekend.

    Stack of sourdough English muffins topped with an egg, cheese and avocado sandwich

    Frequently Asked Questions

    Can I make sourdough English muffins without a stand mixer?

    Yes. You can knead the dough by hand for about 8–10 minutes until it becomes smooth and elastic. It takes more effort but works perfectly well.

    How long does the dough need to ferment?

    After adding all the flour, the dough needs 4–6 hours at room temperature until it doubles in size. For a more developed flavor, you can refrigerate the dough after the first fermentation and cook the muffins the next morning.

    What if my sourdough starter is not active enough?

    Feed your starter 8–12 hours before you begin the recipe. It should be bubbly, have roughly doubled in size, and pass the float test — a small spoonful dropped in water should float.

    Can I freeze sourdough English muffins?

    Absolutely. Let them cool completely, then freeze in a zip-lock bag for up to 3 months. Thaw at room temperature or toast directly from frozen.

    Why do English muffins have nooks and crannies?

    The nooks come from the open crumb structure created by fermentation and the way the muffins are cooked on a griddle rather than baked in an oven. Never slice them with a knife — always use a fork to split them so you preserve those pockets.

    Can I use discard sourdough starter instead of active starter?

    For best results use an active, fed starter. Discard will work but the rise will be slower and the muffins may be denser. Allow extra fermentation time if using discard.

    Golden sourdough English muffins cooling on a wire rack

    Sourdough English Muffins

    Easy sourdough English muffins cooked on a griddle! Ferment the dough in the morning and enjoy fresh English muffins in the evening. They are crunchy on the outside and super soft and moist on the inside.
    Prep Time 8 hours
    Cook Time 15 minutes
    Total Time 8 hours 15 minutes
    Servings: 12
    Course: Breakfast
    Calories: 195

    Ingredients
      

    • 1 cup active sourdough starter
    • ¾ cup warm water
    • 1 cup warm whole milk
    • 5 cups flour split 2 cups first then 3 cups
    • ¼ cup honey
    • 1 tbsp extra virgin olive oil
    • 1 tsp sea salt
    • cornmeal

    Equipment

    • electric stand mixer
    • round steel pastry cutter
    • Rolling Pin
    • cast iron skillet

    Method
     

    1. Ensure your sourdough starter is active and bubbly. If it has been in the refrigerator, take it out a day before and feed it with equal parts flour and water until it becomes vigorous.
    2. In the electric stand mixer with the dough hook attached, combine the active sourdough starter, warm water, and warm milk until it is well combined. Wait 5 minutes.
    3. Now add TWO CUPS of all-purpose flour, and mix until a sticky dough comes together. Cover and leave for 30 minutes. Mix the ingredients until they come together into a sticky dough.
    4. Now add in the remaining 3 cups of all-purpose flour and honey. Knead the dough for about 5 minutes and a smooth elastic dough forms. Drizzle the olive oil on top and cover the top with plastic. Rest for 4-6 hours until it double in size.
    5. Once the dough has risen, gently deflate it and turn it out onto a floured surface. Roll the dough to about 1/2 inch thickness. Using a round cutter or a glass, cut out individual muffins. Place them on a baking sheet dusted with cornmeal to prevent sticking.
    6. Cover the muffins with a kitchen towel and let them rise for another 1-2 hours. They should puff up but not necessarily double in size.
    7. Preheat a large skillet over medium-low heat. Sprinkle some cornmeal on the hot surface. Carefully transfer the muffins onto the skillet and cook for 6-8 minutes on each side or until they are golden brown and cooked through.
    8. Once cooked, transfer the English muffins to a wire rack to cool. They can be split with a fork or a serrated knife.

    Notes

    COOKING THE NEXT MORNING:
    You can absolutely prepare the dough in the evening and refrigerate it overnight for baking the next morning. This overnight method allows for a longer, slower fermentation, enhancing the flavor and texture of the sourdough English muffins. The adjusted timeline is after the first fermentation, deflate the dough and put it in a container (with space for it to rise), and place it in the fridge. In the morning, take the dough out of the refrigerator. It should have risen overnight. Gently deflate it and roll it out to about 1/2 inch thickness on a floured surface. Cut out individual muffins and place them on a cornmeal-dusted baking sheet. Cover the muffins with a kitchen towel and let it rise at room temperature for 1-2 hours or until they puff up but not necessarily double in size. Now follow the same cooking instructions. 
  • Mexican Fava Bean Salad

    Mexican Fava Bean Salad

    This Mexican fava bean salad is one of those dishes that surprises people — hearty enough to stand on its own as a meal, yet light and bright enough to serve alongside anything on the table. Fava beans, grilled cactus paddles, fresh tomatoes, cilantro, and jalapeños come together in a zesty lime dressing. It tastes like Mexico in a bowl.

    This post may contain affiliate links. If you purchase through these links, I may earn a small commission at no extra cost to you. Thank you for supporting Love & Harvest!

    Jump to Recipe

    Mexican fava bean salad with nopales, tomato and green onion in a white bowl

    What Makes This Salad Special?

    This salad stands out for its unique blend of flavors and textures. The fava beans give the salad its creamy, hearty base, the nopales add a slightly acidic green note that balances everything out, and the lime dressing pulls it all together with brightness and heat. Whether you use fresh or canned fava beans, this is a reliable, versatile, and deeply satisfying dish.

    Why Try This Salad?

    • Hearty and filling: about 8 g protein and 7 g fiber per serving, per the recipe card.
    • Offers a burst of authentic Mexican flavors that will surprise your palate.
    • An easy addition to any meal plan, dressed with just lime juice, olive oil and oregano.
    • Accessible year-round thanks to canned fava beans.

    Spoonful of fava bean and nopal salad lifted from the bowl

    Ingredients

    Key Ingredients

    Fava Beans

    You can use fresh or dried fava beans — both work beautifully. Canned fava beans are the most convenient option and require only a rinse before use.

    • Why they matter: Fava beans are the protein backbone of the salad. Their creamy, slightly earthy flavor pairs perfectly with the bright acidity of lime and the freshness of cactus.

    Cactus Paddles (Nopales)

    Nopales are a staple of Mexican cooking — slightly acidic, green, and succulent. Look for them fresh at Mexican grocery stores, or use jarred nopales as a convenient alternative.

    • Why they matter: Their mild acidity and firm texture balance the creaminess of the fava beans and keep the salad from feeling heavy.

    Tomatoes

    Use fresh, ripe tomatoes. Remove the seeds and use only the flesh to prevent the salad from becoming watery.

    • Why they matter: They add juiciness and a touch of sweetness that rounds out the acidity of the lime dressing.

    Cilantro

    Fresh cilantro is non-negotiable here. Its robust, herbal taste is one of the defining flavors of the Mexican profile in this dish.

    • Why it matters: Cilantro brings a refreshing herbaceousness that lightens every bite and adds that unmistakable Mexican identity.

    Jalapenos

    One to two jalapeños, roughly chopped, adds just the right level of heat without overpowering the other flavors. Remove the seeds for a milder kick.

    • Why they matter: Heat activates the other flavors in the salad and makes every bite more dynamic.

    Lime

    Generous lime juice forms the base of the dressing. Do not be shy — this salad needs real citrus brightness.

    • Why it matters: Lime acid brightens every ingredient, makes the beans taste fresher, and ties the dressing together.

    Mexican Oregano

    Mexican oregano has an earthy, slightly citrusy flavor that is distinct from Mediterranean oregano. It is worth seeking out for this recipe.

    • Why it matters: It adds depth and authenticity to the dressing — the flavor note that makes this taste unmistakably Mexican.

    Mexican fava bean salad with tomato and cilantro beside fresh green onions

    How to Cook Fresh Fava Beans

    Cooking fresh fava beans only takes 5–7 minutes depending on pod size. Remove the beans from their shells and boil them in salted water for 5–7 minutes. Meanwhile, prepare a bowl of ice water. Once the beans turn a vibrant moss green, transfer them to the ice bath immediately. Once cool, use your fingers to peel off the pale outer skin — the bright green inner bean is what you want.

    How to Cook Dried Fava Beans

    Dried fava beans require soaking and simmering before use.

    1. Place beans in a large bowl and cover with water. Soak overnight or for at least 8 hours.
    2. Drain, rinse, and place in a pot. Cover with fresh water at least 2 inches above the beans.
    3. Bring to a boil, then reduce to a simmer. Cook for 1 to 1.5 hours until tender, adding water as needed.

    For another hearty Mexican salad, try the original pico de gallo or the warm lentil and sweet potato salad.

    Fava bean and nopal salad on a white plate next to roast chicken and rice

    Frequently Asked Questions

    Can I use canned fava beans instead of fresh?

    Yes — canned fava beans are the easiest option. Simply drain, rinse thoroughly under cold water, and they are ready to use. The texture is slightly softer than fresh but the flavor is excellent, especially once dressed.

    What can I substitute for nopales?

    If you cannot find cactus paddles, you can substitute with blanched green beans, sliced zucchini, or cucumber for a similar crunchy, fresh element. The flavor profile will shift slightly but the salad will still be delicious.

    How long does fava bean salad keep?

    Store undressed salad in the refrigerator for up to 3 days. If already dressed, it is best consumed within 24 hours as the acid in the lime juice will continue to soften the vegetables.

    Is this salad served warm or cold?

    It is typically served at room temperature or slightly chilled. If using freshly cooked beans or nopales, allow them to cool before dressing and combining.

    Can I make the dressing ahead of time?

    Absolutely. Whisk all dressing ingredients together and store in a sealed jar in the refrigerator for up to 5 days. Give it a good shake before using.

    Mexican fava bean salad with tomato and cilantro beside fresh green onions

    Mexican Fava Bean Salad

     Try the amazing flavours of Mexico with our delicious fava bean salad! This dish features fresh cactus paddles, juicy tomatoes, and zesty onions. 
    Prep Time 30 minutes
    Cook Time 10 minutes
    Total Time 40 minutes
    Course: Salad
    Cuisine: Mexican
    Calories: 195

    Ingredients
      

    • 1 can (15pz) fava beans, drained and rinsed 2.5 cups of shelled and peeled fresh fava beans
    • 1 cup diced fresh tomatoes
    • 1 cup diced fresh cactus paddles "nopales"
    • ½ cup red onion, finely chopped
    • ¼ cup cilantro, finely chopped
    • 1-2 jalapeños, roughly chopped
    Salad Dressing
    • 2 limes, juiced
    • 1 tsp dried oregano
    • ¼ cup olive oil
    • 1 tsp sugar
    • 1 tsp salt to taste
    • black pepper to taste

    Method
     

    1. FRESH FAVA BEANS: bring a large pot of water to a boil. Remove the bean from the shell, and boil them for 5-7 minutes. 
       Once the pods have turned into a moss colour green, remove them and quickly place them in the ice bath. Now use your fingers to peel off the tough outer skin of each bean. The vibrant green inner bean is what you want to keep.
    2. CANNED FAVA BEANS: Remove the beans from the can and strain out the liquid. Give them a good rinse in water. Strain.
    3. DRESSING: Put all the ingredients together and give it a good stir with a whisk.
    4. PUTTING IT TOGETHER: Add all the fava beans tomato, cactus paddles, red onion, cilantro, and jalapeños together in a large bowl. Give it a good toss, and top it off with the dressing and give it another good toss. Serve immediately.