Category: picnic food ideas

  • Easy Picnic Tiramisu Recipe

    Easy Picnic Tiramisu Recipe

    A no-bake dessert that travels well, looks great, and tastes even better than restaurant tiramisu. This Easy Picnic Tiramisu is made right inside a Tupperware container — layer, chill, and go. The longer it sits, the better it gets, making it the ultimate make-ahead treat for picnics, barbecues, or any gathering where you want to impress without the stress.

    This post may contain affiliate links. If you purchase through these links, I may earn a small commission at no extra cost to you. Thank you for supporting Love & Harvest!

    Delicious homemade tiramisu dessert with cocoa powder topping.

    Why We Love This Recipe

    When it comes to picnics, we’re always hunting for that perfect dessert: easy to prepare, travels well, and still tastes (and looks!) delicious after a warm day in the sun. This tiramisu cake checks every single box. It’s no-bake, fuss-free, and made right inside a container with a lid — just layer, chill, and go. The longer it sits, the better it gets, which makes it picnic-perfect.

    Every time we bring this to a gathering, our close friends literally cheer when they hear we’ve packed our “famous picnic tiramisu.” Not a crumb is ever left behind.

    Flavour

    Think: creamy clouds of mascarpone, bold espresso-soaked layers, a whisper of vanilla, and a bitter cocoa finish. It’s soft, rich, comforting, and light all at once. Every bite melts on the tongue. This isn’t just a picnic dessert — it’s a little bit of luxury under the sky.

    Rich layered tiramisu dessert with coffee, mascarpone, and cocoa powder, perfect for special occasions.

    Effortless but Maximum Flavour

    No baking. No fancy tools. You don’t even need a stand mixer. We literally assemble everything in a simple tub or Tupperware — layer ladyfingers dipped in coffee, spread a fluffy mascarpone cream, repeat, and top with cocoa powder. The secret? Let it chill for at least a few hours. The result: a silky, creamy, coffee-kissed dessert that tastes like it took hours to make.

    Key Ingredients

    Ingredients

    Ladyfinger Cookies (Savoiardi)

    • The classic base of tiramisu. Savoiardi are light, dry sponge biscuits that soak up espresso without falling apart — which is exactly what you want. Dip them quickly (1–2 seconds per side), never soak them or they’ll turn mushy. Store-bought Italian ladyfingers work perfectly. A kitchen torch and a 9-inch springform pan are great for fancier presentations if you’re serving at home.

    Mascarpone Cheese

    • The soul of tiramisu. Mascarpone is a rich Italian cream cheese with a velvety, buttery texture that creates the signature creamy layer. Make sure it’s at room temperature before mixing — cold mascarpone can turn grainy when combined with cream. Don’t substitute with regular cream cheese; the flavour and texture are different.

    Espresso or Strong Coffee

    • The flavour backbone of the dish. Use freshly brewed espresso or very strong coffee, cooled to room temperature before dipping. Instant espresso powder dissolved in hot water also works well. Adding a splash of Kahlua, rum, or amaretto to the coffee is optional but adds wonderful depth for an adult crowd.

    Heavy Cream

    • Whipped to stiff peaks and folded into the mascarpone, heavy cream lightens the filling and gives it that cloud-like texture. Use cold cream straight from the fridge for the best whipping results. The ratio of cream to mascarpone is what makes this version light yet rich.

    Cocoa Powder

    • The classic finishing touch. A generous dusting of unsweetened cocoa powder on top adds a slight bitterness that perfectly balances the sweet, rich cream layers underneath. Dust right before serving (not before chilling) for the cleanest, most vibrant cocoa finish.

    Tiramisu and Picnic: A Match Made in Heaven

    You might think tiramisu is too delicate for outdoor fun — but this version is built for it. We make it ahead, and the chill time actually works in its favor. By the time everyone’s had their sandwiches and drinks, your tiramisu has turned into the creamiest, most irresistible treat. It holds up beautifully — even on warm summer evenings — and still scoops out neatly. We’ve served this on hiking trails, beaches, park benches, and patios, and it never disappoints.

    Why You Need to Try It

    My niece once told me, “Your tiramisu doesn’t even taste like the ones at restaurants — it tastes better.” I’ll never forget that. It’s one of those recipes that surprises people with how simple it is and delights them with how luxurious it tastes. Whether it’s a family picnic or a last-minute get-together, this is the dessert that brings smiles all around. Once you try it, you’ll always want to bring it along.

    Decadent tiramisu cake with layers of coffee-soaked sponge and mascarpone cheese. Perfect for dessert lovers and special occasions.

    Crumbled tiramisu dessert with cocoa powder on top, close-up shot.

    If you love no-bake desserts, our Cherry Clafoutis Pie is a crowd-pleasing French classic, and our Mexican Corn Cake with Cream Cheese is another easy, show-stopping treat. For a full Italian-inspired picnic spread, pair this tiramisu with our Homemade Pesto Gnocchi.

    Frequently Asked Questions

    Can I make this tiramisu without alcohol?

    Absolutely. The coffee liqueur (Kahlua, rum, or amaretto) is completely optional. Simply skip it and use just cooled espresso or strong coffee for dipping the ladyfingers. The tiramisu will still be deeply flavourful and delicious — and completely family-friendly.

    How long does picnic tiramisu need to chill?

    At a minimum, 4 hours in the refrigerator. Overnight is even better — the layers meld together, the ladyfingers soften to perfection, and the mascarpone cream sets beautifully. If you’re making it for a picnic, assemble the night before and transport it straight from the fridge in your cooler bag.

    How do I transport tiramisu to a picnic?

    That’s the beauty of this recipe — it’s made right in a lidded Tupperware container! Once chilled, simply seal the lid and pack it in a cooler with ice packs. It holds up well for several hours as long as it stays cold. Dust the cocoa powder on at the picnic just before serving for the freshest look.

    Can I make tiramisu without raw eggs?

    This recipe is already egg-free — no raw egg yolks in the mascarpone cream. The filling is made with whipped heavy cream folded into mascarpone and sweetened with powdered sugar, so it’s safe for everyone, including pregnant women, children, and anyone who prefers to avoid raw eggs.

    How long does homemade tiramisu keep?

    Tiramisu keeps well in the refrigerator for up to 3 days. The flavour actually improves on day 2 as the layers continue to meld. Keep it covered and chilled at all times. We don’t recommend freezing tiramisu as the cream layer can become grainy and watery when thawed.

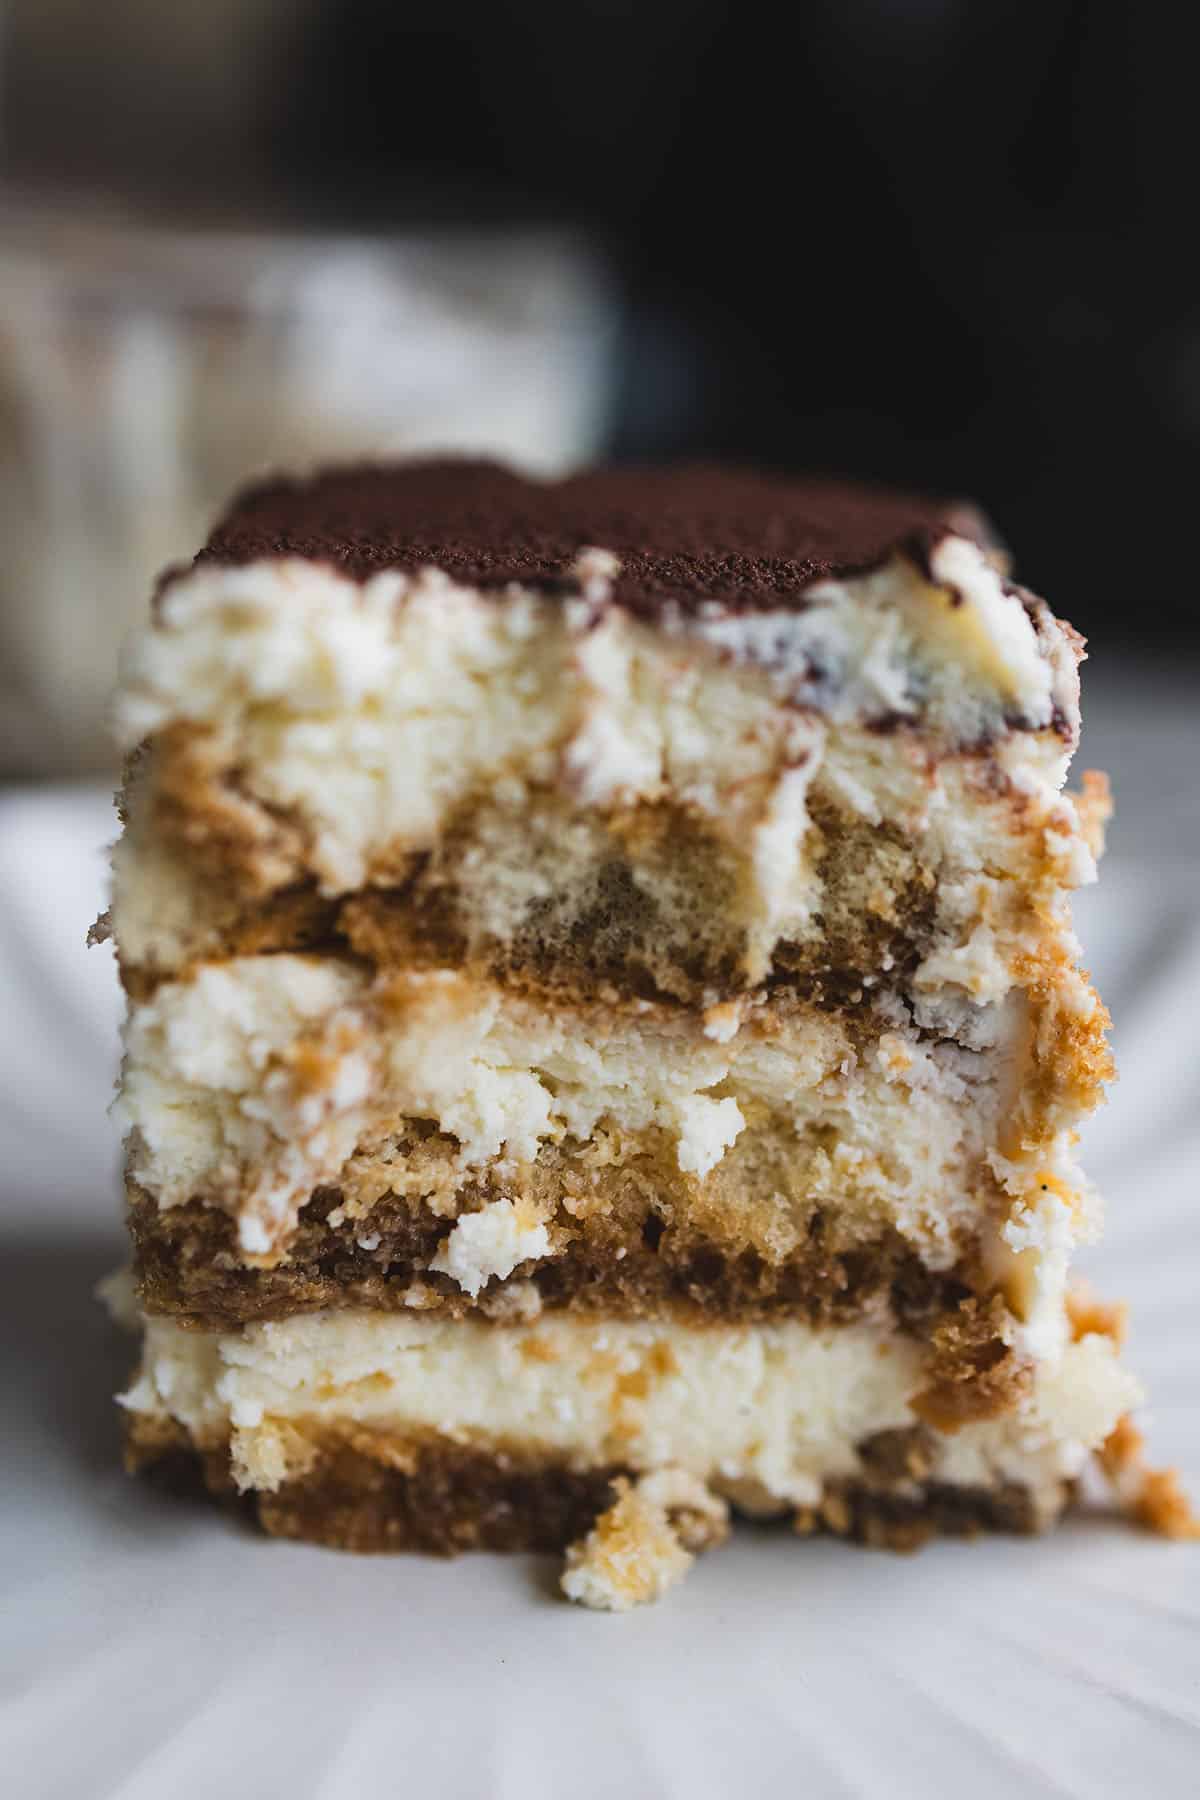
    Slice of layered picnic tiramisu dusted with cocoa powder

    Easy Tiramisu

    A dessert that delivers maximum flavour with minimal effort, all packed into a container that’s ready to travel. It’s the perfect sweet treat kissed with a touch of luxury, even in the heart of the wilderness.
    Prep Time 20 minutes
    Total Time 4 hours 20 minutes
    Servings: 6 people
    Course: Dessert
    Cuisine: Italian
    Calories: 420

    Ingredients
      

    Cream Layer
    • 1 cup heavy cream
    • 250 g mascarpone cheese (room temperature)
    • ⅓ cup granulated sugar
    • 1 tsp vanilla extract
    For the Coffee Dip
    • 1 cup strong brewed espresso or coffee (cooled)
    • 2-3 tbsp sugar optional, to sweeten the coffee
    • 2-3 tbsp coffee liqueur (e.g., Kahlua, rum, Marsala wine, or amaretto) optional
    Assembly
    • 200-250 g ladyfinger biscuits (savoiardi)
    • Unsweetened cocoa powder (for dusting)

    Equipment

    • 1 round glass container (about 8–9 inches wide and 3–4 inches deep) with a tight-fitting lid

    Method
     

    1. Whip the cold heavy cream until stiff peaks form. Set aside.
    2. In another bowl, mix mascarpone, sugar, and vanilla until smooth. Gently fold in the whipped cream until light and fluffy. Chill briefly.
    3. Mix the cooled espresso with sugar and optional liqueur in a shallow bowl. Stir to dissolve. Taste and adjust sweetness.
    Assembly
    1. Quickly dip each ladyfinger into the coffee mixture (1–2 seconds per side).
    2. Place dipped ladyfingers side by side at the base of your round glass container, trimming or breaking as needed to fit the circular shape.
    3. Spread half the mascarpone cream evenly over the first layer of ladyfingers using a spoon or spatula.
    4. Repeat with a second layer of dipped ladyfingers.
    5. Finish with the remaining cream, smoothing the top.
    Chill, Cover, and Dust
    1. Place the lid securely on the container and refrigerate for at least 4 hours (overnight for best results). The dessert will set beautifully and be easy to transport.
    2. Before serving, open the lid and dust generously with cocoa powder. Add chocolate shavings if desired. Scoop to serve, or bring the whole container to a picnic—no mess, just flavour.
  • Thai Chicken Salad

    Thai Chicken Salad

    This Thai Chicken Salad is a fresh, vibrant dish with shredded chicken, crunchy veggies, and a tangy dressing. It’s light, easy to make, and perfect for hot days when you want something fresh without turning on the stove.

    This post may contain affiliate links. If you purchase through these links, I may earn a small commission at no extra cost to you. Thank you for supporting Love & Harvest!

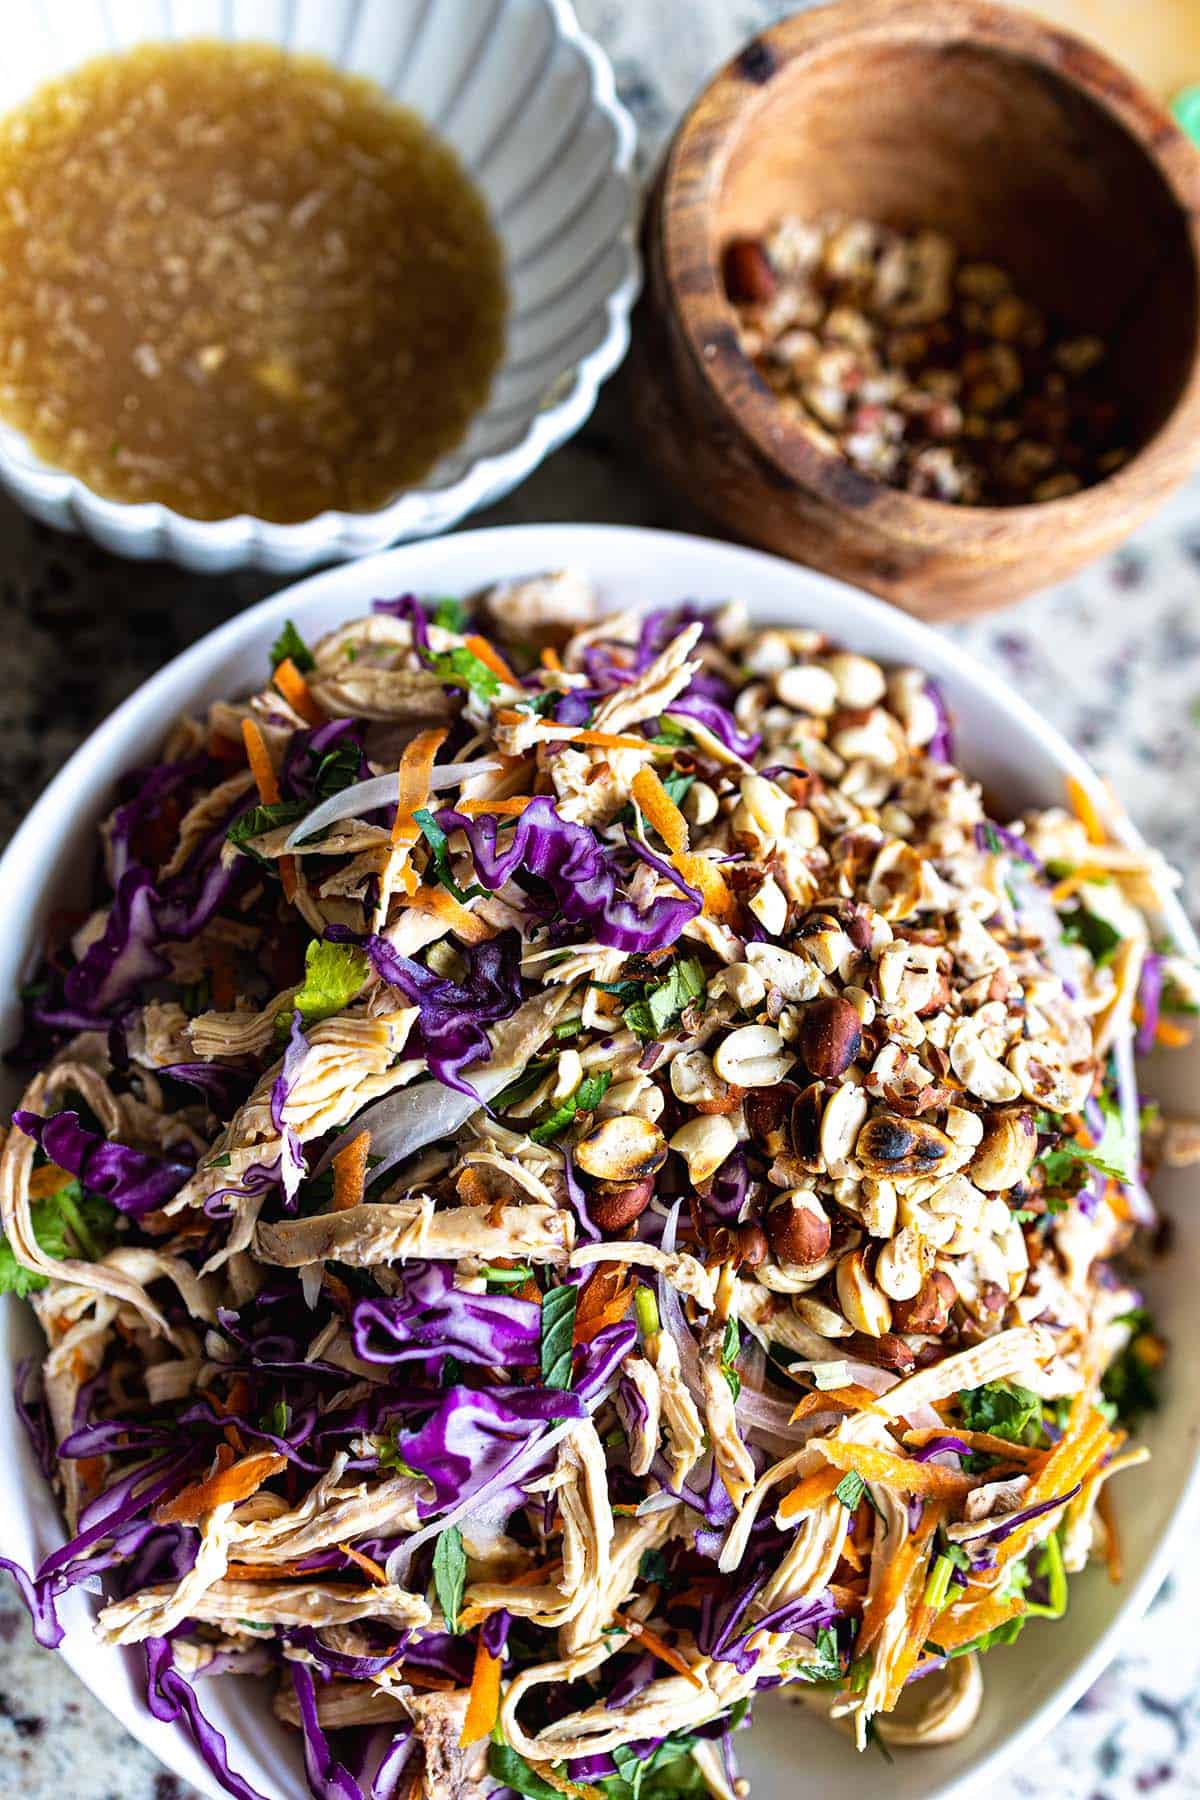
    Fresh shredded chicken and vibrant vegetables in a colorful salad.

    Why We Love This Recipe

    When the weather heats up and the last thing you want is to turn on the stove, this Thai Chicken Salad is the answer. It’s bright, refreshing, and loaded with crunchy vegetables, tender chicken, and a zesty, tangy dressing that pulls it all together.

    We love how quick and easy it is to throw together — especially if you use pre-cooked or leftover chicken. You get a full, satisfying meal without heating up your kitchen. It’s the kind of salad that is light but filling, and packed with flavor.

    And let’s not forget the peanuts — they add the perfect crunch and a nutty finish that makes every bite exciting.

    Thai chicken salad with purple cabbage, carrots and herbs in a white bowl

    One of Our Picnic Favourite Recipes

    This salad travels so well, which makes it a top pick for picnics, potlucks, and even lunch on the go. The veggies stay crisp, and the flavours actually get better as they sit and marinate a bit in the dressing.

    You can keep the dressing on the side until you’re ready to serve, or toss everything together right before heading out — it holds up beautifully either way.

    Why we love it as a family is that it’s dairy-free, and gluten-free if your fish sauce is labelled gluten-free, so it works for almost everyone at the table.

    Thai Chicken Salad Ingredients

    Here’s what you’ll need to make it:

    Ingredients

    Cooked Chicken

    • Shredded or sliced — grilled, poached, or rotisserie all work. Using leftover chicken makes this a genuinely no-cook meal. The chicken provides that filling protein base that turns this from a side salad into a complete meal.

    Shredded Cabbage or Lettuce

    • The crunchy, fresh base of the salad. Napa cabbage gives the most authentic Thai crunch, but any crisp variety works. Shred it thin for the best texture.

    Fresh Cilantro and Mint

    • These herbs give the salad its unmistakable Thai freshness. Don’t skip them — they’re what make this salad taste alive and aromatic. Use both generously.

    Fish Sauce

    • The secret weapon in the dressing. I use Three Crabs fish sauce — the brand I actually keep in the kitchen. A little goes a long way in building that deep umami base.

    Chopped Peanuts

    • For crunch and a nutty contrast. Toast them lightly in a dry pan for even more depth of flavor.

    The Dressing

    • A tangy blend of lime juice, a touch of honey or sugar, fish sauce or soy sauce, garlic, and a little chili for heat. Balance is key — it should be sour, salty, sweet, and just a little spicy all at once.

    Cabbage and carrot slaw with chopped peanuts and a bowl of dressing on the side

    Other Food to Pair with This Salad

    This Thai Chicken Salad is a meal on its own, but here are some delicious sides or extras to serve with it:

    • Sticky rice or jasmine rice – A great way to turn it into a heartier dinner.

    • Fresh spring rolls – Another no-cook favourite with rice paper and veggies or boiled shrimps (optional).

    • Grilled corn or skewers – If you’re firing up the BBQ, a few grilled additions pair perfectly.

    • Thai iced tea or cucumber water – Something cool and refreshing to drink alongside it.

    A Summer Meal

    Whether you’re hosting a backyard lunch, prepping meals for the week, or just trying to avoid heating up the stove, this Thai Chicken Salad checks all the boxes: easy, fresh, and seriously delicious. If you love Asian-inspired flavors, you’ll also enjoy our 30-minute Thai basil chicken or the bold flavors in our lemongrass chicken drumsticks.

    Frequently Asked Questions

    Can I make Thai Chicken Salad ahead of time?

    Yes — prepare all the components separately and store in the fridge for up to 2 days. Keep the dressing in a separate container and toss just before serving to maintain maximum crunch.

    What can I use instead of fish sauce?

    Soy sauce or tamari are great substitutes for a vegetarian version. You can also use coconut aminos for a soy-free alternative. The dressing will have a slightly different flavor but will still be delicious.

    How do I cook the chicken for this salad?

    Poaching is our favorite method — place chicken breasts in simmering salted water for 15–18 minutes, then shred with two forks. Rotisserie chicken is an even quicker shortcut. Grilled chicken also adds a lovely smoky dimension.

    Is Thai Chicken Salad gluten-free?

    It can be, when your fish sauce (and any soy sauce swap) is gluten-free. Just double-check the label — some fish sauce brands add wheat. I use Three Crabs; always verify the bottle you buy if gluten is a concern.

    Can I add noodles to this salad?

    Absolutely! Rice noodles or glass noodles cooked according to package directions and tossed with the dressing make a more substantial noodle salad. It’s essentially a Thai noodle bowl at that point — just as delicious.

    Thai chicken salad with shredded chicken, purple cabbage, carrots and chopped peanuts, with a bowl of lime dressing on the side.

    Thai Chicken Salad

    We love how quick and easy it is to throw together — especially if you use pre-cooked or leftover chicken. You get a full, satisfying meal without heating up your kitchen. It’s the kind of salad that is light but filling, and packed with flavor.
    Prep Time 20 minutes
    Cook Time 25 minutes
    Total Time 45 minutes
    Servings: 6 people
    Course: Appetizer, Salad
    Cuisine: Thai
    Calories: 280

    Ingredients
      

    Salad
    • 3 cups poached chicken breast or rotisserie chicken
    • 3 cups shredded white cabbage
    • 3 cups shredded purple cabbage
    • 1 cups shredded carrots
    • ½ cup shredded red onion
    • ¼ cup chopped mint leaves
    • 1 cup chopped cilantro
    • ½ cup roasted peanuts, chopped
    Lime and Fish Sauce Dressing (Nuoc Cham)
    • ¼ cup fresh lime juice
    • 2 tbsp fish sauce
    • 2 tbsp rice vinegar
    • 1 tbsp honey
    • 1 garlic clove
    • 1 red chili, finely minced (optional)

    Method
     

    Salad
    1. In a large bowl, combine the shredded chicken, cabbage, carrots, red onion, mint, and cilantro. Toss well to mix.
    Dressing
    1. In a small bowl, whisk together the lime juice, fish sauce, rice vinegar, honey or sugar, garlic, and chili (if using) until the sugar dissolves.
    2. When ready to serve, pour the dressing over the salad and toss well to coat everything evenly.
    3. Transfer to a serving platter or individual bowls. Top with the chopped peanuts. Serve immediately and enjoy!
  • Chicken Shawarma Wrap with Caesar Salad

    Chicken Shawarma Wrap with Caesar Salad

    Picture this: warm, pillowy naan bread wrapped around juicy yogurt-marinated chicken, crisp romaine Caesar salad, and a shower of freshly grated Parmesan — all held together by one gloriously messy squeeze. This Chicken Shawarma Wrap with Caesar Salad is the meal I make on repeat for road trips, school lunches, and dinner parties alike. It takes 30 minutes to assemble once the chicken has marinated overnight, and it never fails to impress.

    This post may contain affiliate links. If you purchase through these links, I may earn a small commission at no extra cost to you. Thank you for supporting Love & Harvest!

    Chicken shawarma wrap with Caesar salad on naan bread

    Succulent chicken marinated overnight in yogurt, dill, turmeric, and lime juice — wrapped up with crisp Caesar salad inside warm, fluffy naan. One squeeze and the juices spill from every corner.

    Why You Should Try This Chicken Shawarma Recipe

    1. It is totally different: Combining two classic recipes into one — shawarma and Caesar salad — is the most original twist on a weeknight wrap.
    2. Bursting with flavor: The overnight marinade of yogurt, dill, turmeric, and lime juice ensures every bite is bold and aromatic.
    3. Perfectly juicy chicken: Marinating overnight guarantees plump, tender chicken pieces that don’t dry out on the grill.
    4. Crisp Caesar salad: Crunchy romaine, tangy dressing, and salty Parmesan add a fresh, savory contrast inside the wrap.

    Chicken shawarma ingredients laid out

    My Favorite On-the-Go Meal

    I’m not exaggerating when I say this is my favorite go-to meal when I need something quick and delicious. With the chicken marinating overnight, all I have to do is grill it and toss the Caesar salad. It takes 30 minutes and works for picnics, road trips, school lunches, and camping, basically anywhere you need a satisfying meal that travels well.

    Chicken shawarma wrap ready to eat

    What Makes This Recipe Different

    1. Naan bread: Soft, fluffy homemade naan instead of standard pita adds a chewy, slightly sweet element that makes every bite better.
    2. Caesar salad inside: Most shawarma wraps use plain lettuce and tomato. We go full Caesar — romaine, tangy dressing, Parmesan — for a restaurant-quality finish.
    3. Easy to make: A few simple ingredients, overnight marinating, and 30 minutes of assembly. That’s it.

    Ingredients

    Key Ingredients

    Natural Yogurt

    Yogurt tenderizes the chicken by breaking down proteins with its acidity, resulting in a juicy texture. It also acts as a carrier for the spices, ensuring they penetrate deeply into the meat. During grilling, yogurt keeps the chicken moist and prevents it from drying out.

    • Why it matters: Without yogurt in the marinade, the chicken loses its characteristic tenderness and the flavors stay surface-level.

    Dill

    Dill adds a fresh, slightly tangy flavor that lifts the entire marinade. It complements the warm spices and contributes to the Mediterranean character of this dish. You can use a quality dried dill if fresh is not available.

    • Why it matters: Dill is what distinguishes this shawarma from generic chicken marinades. Don’t skip it.

    Turmeric

    Turmeric gives the chicken its golden color and adds a warm, earthy flavor to the marinade. A good organic turmeric powder makes a real difference in both color and taste.

    • Why it matters: That vibrant yellow color is the visual hallmark of shawarma — and it signals depth of flavor.

    Lemon Juice

    The acidity in lemon juice tenderizes the chicken further, adds brightness, and balances the warm spices in the marinade. Use freshly squeezed for the cleanest flavor.

    • Why it matters: Lemon juice prevents the marinade from becoming heavy or one-dimensional. It is the flavor activator.

    Garlic

    Garlic amplifies every other flavor in the marinade. It brings out the chicken and makes all the herbs and spices taste more pronounced. Crush it fresh for maximum potency.

    Caesar Salad Dressing

    You can use any quality store-bought Caesar dressing. The secret upgrade: stir in a squeeze of fresh lemon juice and some freshly grated Parmesan. It takes a standard dressing to another level.

    • Why it matters: The Caesar dressing is the bridge between the hot, spiced chicken and the cool, crisp lettuce. It holds the whole wrap together.

    Grilled chicken shawarma plated
    Assembling the chicken shawarma wrap

    This wrap pairs beautifully with our fluffy naan bread recipe — they were made for each other. For a lighter side, try our homemade Caesar salad dressing or the Thai chicken salad for an Asian-inspired variation on the same flavor profile.

    Frequently Asked Questions

    Can I use chicken breast instead of thighs?

    Yes, but chicken thighs are strongly recommended. They stay juicier on the grill and hold up better in the wrap. If using breast, reduce grill time by 2–3 minutes per side and watch closely to avoid drying out.

    How long should I marinate the chicken?

    Overnight is ideal — 8 to 12 hours in the refrigerator. The minimum is 4 hours. Anything less and the flavors won’t fully penetrate the meat.

    Can I make this ahead of time?

    Yes. Grill the chicken and store it separately from the Caesar salad and naan. Assemble the wraps just before serving to keep the naan from getting soggy.

    What can I substitute for naan bread?

    Pita, flatbread, or large flour tortillas all work. Naan gives the best result because of its softness and chew, but the recipe is flexible.

    Is this recipe kid-friendly?

    Very much so. Kids love the mild flavors and the handheld format. You can reduce the turmeric slightly for younger kids and pack extra Caesar dressing on the side for dipping.

    Can I cook the chicken in a pan instead of grilling?

    Absolutely. A cast iron skillet on medium-high heat gives you a great sear. Cook 4–5 minutes per side depending on thickness. A Lodge 12-inch cast iron skillet is perfect for this.

    Two halves of a chicken shawarma wrap with Caesar salad filling

    Chicken Shawarma Wrap

    Incredibly juicy, tender chunks of chicken marinated overnight with yogurt, dill, lemon juice, and turmeric, all wrapped up with Caesar salad. It's an easy meal perfect for dinner or for taking on road trips.
    Prep Time 20 minutes
    Cook Time 15 minutes
    Total Time 35 minutes
    Servings: 6 people
    Course: Main Course
    Cuisine: Indian
    Calories: 420

    Ingredients
      

    Chicken Shawarma
    • ½ kg chicken meat (can be chicken breast, chicken leg, or assorted) 1.1 pounds of chicken meat
    • 1 cup natural yogurt no sugar
    • 3 garlic cloves grated
    • 2 tsp dried dill
    • 1 tsp cumin powder
    • 1 tsp turmeric powder
    • 1 tbsp paprika
    • 1 tsp lemon juice
    • 2 tsp sea salt
    • ½ tsp black pepper
    • 6-8 large naan bread or tortilla wraps
    Caesar Salad
    • 4 cups chopped romaine lettuce
    • ¼ cup grated Parmesan cheese
    • ¼ cup Caesar salad dressing
    • 1 tbsp lemon juice
    • salt and pepper to taste

    Method
     

    1. With a clean chopping board, slice the chicken into medium size cubes. They need to be large enough to be on skewers. About 1 inch cubes.
    2. In a large bowl, combine the yogurt, grated garlic, dill, cumin, turmeric, paprika, lemon juice, salt, and pepper. Add the sliced chicken thighs and toss until well coated. Cover and refrigerate for at least 2 hours, preferably overnight.
    3. Preheat a grill or grill pan over medium-high heat. Remove the chicken from the marinade and thread onto skewers. Grill for 5-6 minutes on each side, or until the chicken is cooked through and slightly charred. Remove from the grill and place it on a plate.
    4. In a large mixing bowl, combine the chopped romaine lettuce, grated Parmesan cheese, Caesar salad dressing, lemon juice, salt, and pepper. Toss until the lettuce is evenly coated with the dressing.
    5. To assemble the wraps, warm the pita bread or tortilla wraps according to package instructions. Place a generous amount of Caesar salad on each wrap, then top with the grilled chicken shawarma slices.
    6. Roll up the wraps tightly, folding in the sides as you go. Cut in half diagonally and serve immediately.
  • Best Garlic Mashed Potatoes

    Best Garlic Mashed Potatoes

    Some recipes just stay with you. I’ve been making this garlic mashed potatoes since high school, and it has never once left leftovers on the table — not at family dinners, not at parties, not at potlucks. It’s creamy, fluffy, and loaded with savory garlic flavor, and it comes together in under 40 minutes. The secret is in five simple tips that most people skip: the right potato, the right timing on the garlic, room-temperature butter, proper mashing technique, and a touch of patience. Once you nail this, every roast, chicken, or grilled salmon on your table gets an instant upgrade.

    This post may contain affiliate links. If you purchase through these links, I may earn a small commission at no extra cost to you. Thank you for supporting Love & Harvest!

    Best garlic mashed potatoes creamy and fluffy

    Why Make This Best Garlic Mashed Potatoes Recipe

    Garlic mashed potatoes are one of the most versatile side dishes in any kitchen. They pair beautifully with roast beef, grilled chicken, salmon, ribs — essentially anything that benefits from a rich, savory accompaniment.

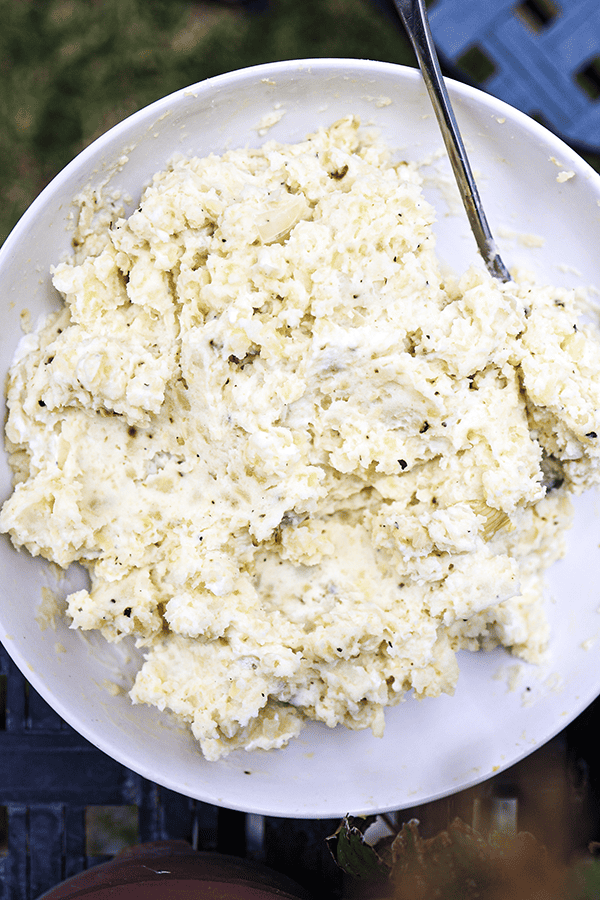
    Bowl of creamy garlic mashed potatoes with a serving spoon

    We Have Loved This Recipe for Years and You Will Too

    This is the dish I reach for when there’s nothing in the fridge. It’s customizable, fast, and everyone who tries it asks for the recipe. Whether you’re cooking for a weeknight dinner or a dinner party, garlic mashed potatoes are a guaranteed hit.

    Creamy mashed potatoes with garlic butter close-up

    Ingredients

    Key Ingredients

    Russet Potatoes

    Russet potatoes are the gold standard for mashed potatoes. They have a low moisture content and high starch level that results in a light, fluffy mash rather than a dense or gluey one. Yukon Gold is a good second option for a slightly creamier, butterier result.

    • Why it matters: Waxy potatoes (like red or fingerling) hold too much water and produce a dense, gummy mash. Russets are the correct choice for this texture.

    Garlic

    Fresh garlic sauteed in butter is the backbone of this recipe. The key is timing — garlic must be added to heated butter and cooked for only 1–2 minutes until fragrant. A good stainless steel garlic press makes mincing fast and consistent.

    • Why it matters: Burned garlic turns bitter and unpleasant. Under-cooked garlic stays sharp and raw-tasting. Exactly 1–2 minutes in warm butter is the sweet spot.

    Butter

    Use unsalted butter at room temperature. Cold butter does not incorporate smoothly into the mash and can cause a lumpy, streaky texture. Room-temperature butter blends in effortlessly and creates a silkier finish.

    • Why it matters: Temperature of your fat directly determines the smoothness of your final mash. This is one of the most common mistakes home cooks make.

    Heavy Cream or Whole Milk

    Heavy cream delivers the richest, most luxurious mash. Whole milk produces a lighter result. Both must be warmed before adding — cold dairy seizes the starch in the potato and creates a gummy texture. A potato ricer gives you a smoother result than a standard masher.

    • Why it matters: Cold cream = lumps. Warm cream = velvet. This single step separates average mashed potatoes from extraordinary ones.

    Professional Tips

    Pro Tip 1: Use Russet Potatoes

    Russet potatoes have a buttery texture and less moisture than waxy varieties, which means a creamier, lighter mash. For more on choosing the right potato, see Bon Appetit’s guide to the best potatoes for mashing.

    Pro Tip 2: Do Not Overcook the Potatoes

    Overcooked potatoes become waterlogged and mushy, which ruins the texture. Check frequently and remove from heat the moment a fork slides in with minimal resistance. Do not wait for the potato to fall apart.

    Pro Tip 3: Use Room Temperature Ingredients

    Cold butter and cold cream cause the mash to seize and turn lumpy. Pull your butter out of the fridge 30 minutes before cooking and warm your cream in a small saucepan before adding it to the potatoes.

    Pro Tip 4: Add Garlic at the Right Time

    Add garlic to butter only after the butter is heated. Saute for 1–2 minutes until fragrant, then immediately incorporate into the mash. Do not let the garlic sit in the pan unattended — it burns in seconds.

    Pro Tip 5: Mash the Potatoes Properly

    Use a potato ricer for the smoothest result, or a hand masher for a slightly chunkier texture. Never use an electric mixer or food processor — over-processing breaks down the starch structure and creates a sticky, gluey paste.

    This mashed potato recipe pairs perfectly with lemongrass chicken drumsticks or a crispy pan-seared salmon. For another classic comfort dish, try our 30-minute Thai basil chicken — it is equally fast and deeply satisfying.

    Frequently Asked Questions

    What potatoes are best for mashed potatoes?

    Russet potatoes are the top choice for their low moisture content and fluffy texture when mashed. Yukon Gold is a close second for a creamier, buttery result. Avoid waxy potatoes like red potatoes or fingerlings — they produce a dense, gummy mash.

    Can I make garlic mashed potatoes ahead of time?

    Yes. Make them up to 2 days ahead and store covered in the refrigerator. Reheat gently on the stovetop with a splash of warm cream or milk to restore the creamy consistency. Do not reheat in a microwave without adding moisture — they will dry out.

    Why are my mashed potatoes gummy or glue-like?

    The most common cause is over-mashing or using a food processor. This activates too much starch in the potato and creates a sticky paste. Use a ricer or hand masher and stop as soon as the potatoes are smooth.

    Can I use garlic powder instead of fresh garlic?

    You can in a pinch, but fresh sauteed garlic produces a noticeably richer, more aromatic flavor. Garlic powder tends to taste flat in comparison. Use 1/2 teaspoon of garlic powder as a substitute if needed.

    How do I keep mashed potatoes warm for a dinner party?

    Transfer the finished mashed potatoes to a heatproof bowl set over a pot of barely simmering water (double-boiler method). Cover with a lid or foil and they will hold for up to 2 hours with occasional stirring.

    Can I freeze mashed potatoes?

    Yes. Spread them in a single layer on a baking sheet to flash freeze, then transfer to airtight bags. They keep for up to 1 month. Reheat from frozen in a covered saucepan with added butter and cream, stirring frequently.

    Garlic mashed potatoes in a white bowl on a striped cloth with flowers

    Best Garlic Mashed Potatoes

    The best garlic mashed potato dish that is creamy, fluffy, and bursting with savoury garlic flavour.
    Prep Time 15 minutes
    Cook Time 20 minutes
    Servings: 6 people
    Course: Side Dish
    Cuisine: American
    Calories: 260

    Ingredients
      

    • 1½ kg russets potato cut into large chunks
    • 1 litre water
    • 5 tbsp butter room temperature
    • 5 garlic clove grated
    • 1 white onion finely diced
    • 2 tsp dried basil
    • ½ cup sour cream
    • salt
    • black pepper

    Method
     

    1. Run the potatoes in the water and give it a good scrub. Cut the potatoes into large wedges. (For a large potato I usually cut it into 5 wedges). Give it another good rinse to wash away all the starch. Place them into a large pot and make sure it is covered by water (roughly about 1L of water). Place lid on top, and heat the pot on the stove on high.
    2. Once the pot is boiling, move the lid slightly open so the water doesn't boil over. Boil the potatoes on medium-high for 20 minutes. You know the potatoes are done if you can easily poke thru the potato wedges with a fork.
    3. Meanwhile, in a frying pan heat it in high heat. Place 5 tbsp of butter inside. Sauce the onion until soft and slightly translucent. Add the garlic and sauté it until it's aromatic. Stir in the dried basil. Turn the heat off and set it aside.
    4. Discard the water, and let the potatoes cool until it is warm or when your hands can touch it without burning.
    5. Peel the skin of the potato with your hands and place them in a large mixing bowl. Place another 2 tbsp of butter inside the warm peeled potatoes. Using a hand potato masher or a potato rice, mash the potatoes until smooth and no large chunks are visible.
    6. Fold in the butter garlic. You don't want to deflate the fluffiness.
    7. Stir in the sour cream until well combined. Add salt and pepper to your liking.
  • BEST Pumpkin Ravioli With Sage Butter

    BEST Pumpkin Ravioli With Sage Butter

    If you have ever wanted to make restaurant-quality pasta at home, this is the recipe. Pumpkin and spinach ravioli wrapped in chewy homemade dough, finished with sage butter sauce and toasted pecans — the flavour is so layered and the texture so luxurious that guests will genuinely think you ordered from an Italian restaurant. The cost is a fraction, and the satisfaction of making it yourself is something no delivery can touch.

    This post may contain affiliate links. If you purchase through these links, I may earn a small commission at no extra cost to you. Thank you for supporting Love & Harvest!

    Pumpkin ravioli

    Why You Will Love This Pumpkin Ravioli

    Pumpkin and spinach are two ingredients that pair beautifully together — kind of like wine and cheese. The taste is autumnal and exquisite in texture. Pureed pumpkin and spinach folded with panela cheese and cream cheese give the filling a velvet consistency. Lightly seasoned with nutmeg is the secret that brings hints of warmth and nuttiness. A mature dish that can be enjoyed by the whole family.

    If you love this pasta, try our homemade pesto gnocchi next — it uses a similar approach of hand-crafted pasta with bold sauce. For a vegetable-forward pasta, our fresh beet pasta is another showstopper worth trying.

    Ingredients Deep-Dive

    Pumpkin

    The pumpkin used in this recipe is the green Mexican variety — sweeter than the orange variety commonly seen in North America. If you have a variety or canned version you prefer, use what you have. The key is that the pumpkin is fully roasted and pureed to a smooth, thick consistency before going into the filling.

    • Why it matters: Wet pumpkin filling will tear the ravioli during sealing and boiling. Roast the pumpkin first and let it cool completely so excess moisture evaporates.

    Panela Cheese

    Panela is a fresh, smooth Mexican cheese made from pasteurized cow’s milk — low in calories and mild in flavour. It works perfectly here because it blends smoothly into the filling without overpowering the pumpkin. If panela is hard to find, substitute with white cheddar or feta.

    • Why it matters: The cheese adds a creamy, slightly salty counterpoint to the sweet pumpkin. Without it, the filling tastes flat.

    Cream Cheese

    Combined with the panela, cream cheese is responsible for that oozy, luxurious quality when you cut the ravioli in half. It also helps bind the filling so it holds its shape inside the pasta.

    • Why it matters: Cream cheese is what makes this filling feel restaurant-quality rather than homemade.

    Spinach

    Pumpkin and spinach are natural partners. Spinach adds colour, texture, and a mild earthiness that balances the sweetness of the pumpkin. Chop it finely so it distributes evenly through every bite.

    • Why it matters: Without spinach, the filling is visually monotone and misses the textural contrast that makes every bite interesting.

    Sage

    Fried sage in butter is one of the best-kept secrets in fall and winter cooking. When sage leaves hit hot butter, they crisp up and release an intense herbal, almost floral aroma. The flavour transforms completely from raw — it becomes deep, nutty, and satisfying.

    • Why it matters: Sage butter is what elevates this from good pasta to extraordinary pasta. A few leaves of fresh sage make a restaurant-quality sauce in minutes.

    Pecans

    Toasted pecans in butter have a magical, warm, autumnal smell that signals fall is here. They add a satisfying crunch to the sauce and amplify the nuttiness of the sage butter. When pecans are mixed into this beautiful butter mixture, everything about the sauce makes perfect sense.

    • Why it matters: Texture contrast is essential in pasta dishes. The crispy pecan against the soft, chewy ravioli is what makes each forkful memorable.

    Pasta Maker

    A pasta maker attachment makes producing consistent, thin pasta sheets effortless. A ravioli cutter stamp ensures perfectly shaped, evenly sealed ravioli every time. A simple rolling pin works too if you prefer to roll by hand.

    • Why it matters: Consistent dough thickness means every ravioli cooks in the same time. Uneven sheets produce some ravioli that are raw and others that are overcooked.

    what goes with pumpkin ravioli

    Making the Ravioli Dough

    The Philips Pasta Maker makes producing consistent ravioli sheets effortless. I attach the lasagna disc, weigh all the ingredients, put the dry ingredients in the hopper, whisk the liquids separately, and let the machine run. Within 3 minutes it extrudes a perfect pasta sheet. The first 6 inches tend to be uneven — cut those off and put them back in the hopper. Then measure alternating sheets of 12 inches (bottom) and 12.5 inches (top) and keep them covered with a towel so they do not dry out.

    savory pumpkin ravioli

    The Secret to the Sage Butter Sauce

    This sauce is simple but its combination of butter, crispy sage, toasted pecans, apple cider vinegar, and heavy cream is genuinely gourmet. The secret: once the thick sauce is ready, pour it over hot ravioli and add a splash of starchy pasta water. The hot pasta water emulsifies with the thick sauce into a silky, creamy coating. This is the same technique used in fine dining kitchens.

    pumpkin ravioli jamie oliver

    This Recipe Is Vegetarian — But It Does Not Have to Stop There

    This pumpkin ravioli recipe is vegetarian as written. If you want to add protein, some delicious options are: seared tuna, grilled steak, poached chicken, or grilled sausages. The richness of the sage butter sauce stands up well to bold proteins.

    pumpkin ravioli with sage butter

    Frequently Asked Questions

    Can I make the ravioli dough without a pasta machine?

    Yes. Roll the dough by hand with a rolling pin to about 1–2mm thickness. A pasta machine produces more consistent results, but hand-rolled dough works perfectly well. The key is getting the sheet thin enough so the dough cooks through in 4 minutes.

    Why does my ravioli fall apart in the water?

    The two most common causes: the filling was too wet, or the edges were not sealed firmly enough. Make sure the pumpkin puree is dry before mixing the filling, and always brush the edges with egg wash before pressing the top sheet down. Press firmly around each pocket of filling.

    Can I freeze homemade ravioli?

    Yes. Lay the uncooked ravioli flat on a parchment-lined baking sheet and freeze until solid, then transfer to a zip-lock bag. Cook directly from frozen in boiling salted water for 6–7 minutes instead of 4.

    What can I substitute for sage?

    Thyme or rosemary can replace sage if needed. The flavour will be different — thyme is more subtle, rosemary is more assertive — but both work with browned butter and pecans.

    Can I make the filling ahead of time?

    Yes. The pumpkin spinach filling can be made 1 day ahead and stored covered in the fridge. This actually helps the flavours meld. Bring it to room temperature before filling the ravioli.

    What pasta shapes can I use this filling for?

    This filling works in any enclosed pasta shape — tortellini, cappelletti, or large stuffed pasta shells baked with extra sage butter sauce on top are all fantastic variations.

    Pumpkin ravioli in sage cream sauce with sausage on a blue plate

    Pumpkin Ravioli with Sage Butter

    Pumpkin ravioli wrapped in a chewy dough drizzled with sage butter is a culinary experience. Rich in flavour and texture, it is like eating in an up-scale restaurant, minus the cost. Print Recipe Pin RecipePrep Time:35 minsCook Time:15 minsServings: 6 people

    Ingredients

    Ravioli Dough

    • 550 g all purpose flour
    • 4 g sea salt
    • 170 g 2 eggs + milk
    • 37 g water

    Pumpkin Spinach Filling

    • 1.5 cups pumpkin puree
    • 2 garlic clove grated
    • ¼ tsp ground cinnamon
    • ½ tsp ground nutmeg
    • ½ cup panela cheese or cheddar cheese
    • 4 oz cream cheese
    • ¼ cup chopped spinach
    • 2 tsp sea salt
    • pepper to taste

    Sage Butter Sauce

    • ½ cup butter
    • 2 garlic clove grated
    • 20 sage leaves
    • ¼ cup chopped pecans
    • 3 tbsp apple cider vinegar
    • ½ cup heavy cream
    • ½ tsp ground nutmeg
    • 1 tsp sea salt
    • ½ tsp ground black pepper

    Instructions

    Ravioli Dough Using Philips Pasta Machine

    • Attach the lasagna disc to the machine and tightly screw it on.
    • Weigh all the ingredients. Add the flour and salt into the pasta machine’s hopper.
    • In a separate bowl, whisk together all the liquids: eggs, milk, and water until fully combined.
    • Turn the machine on and set it for 3 minutes. Put the lid on and let it run.
    • Slowly and gradually add the liquid into the reservoir at the top of the lid.
    • When the machine finishes mixing, it will begin extruding pasta. The first 6 inches will be uneven — cut them off and place back into the hopper.
    • Measure and cut alternating sheets of 12 inches (bottom) and 12.5 inches (top). Cover sheets with a towel so they do not dry out.
    • Place the bottom sheet on a table. Scoop half a tablespoon of filling onto the sheet with 1-inch gaps. Brush beaten egg around each filling mound.
    • Carefully place the top sheet over the filling, leaving space at the top. Press firmly around each filling pocket to seal.
    • Cut the ravioli with a knife or ravioli cutter. Place on a dry baking sheet and repeat until the dough and filling are used up.
    • Fill a large deep pot with water and bring to a boil. Add 2 tsp of salt. Stir the pot 5 times in the same direction until a vortex forms. Slowly add ravioli in batches of about 10 — do not overcrowd. Stir gently to prevent sticking.
    • Cook for 4 minutes, or until the ravioli floats. Drain and set aside. Reserve a splash of pasta water.
    • Meanwhile, make the sauce: melt together butter, garlic, pecans, and sage in a large skillet over medium heat. Cook, stirring occasionally, until the butter browns and the sage is crisp, 4–5 minutes. Remove the sage leaves and set aside.
    • Reduce heat to low. Add the apple cider vinegar, cream, nutmeg, salt, and pepper. Simmer 1 minute. Add the ravioli and a splash of pasta water, gently tossing to combine. Remove from heat.
    • Serve ravioli topped with crispy sage leaves.
  • Carlota de Limon – Mexican No-bake Lime Dessert

    Carlota de Limon – Mexican No-bake Lime Dessert

    This simple four-ingredient no-bake cake, known as Carlota de Limón, is one of the most beloved desserts in Mexican households — and once you taste it, you will understand why. Layers of crunchy Maria cookies soaked in condensed milk, evaporated milk, and fresh lime juice come together in the refrigerator into a zesty, creamy, irresistibly refreshing icebox cake. My mother-in-law has made this for years, and now our whole family asks for it every time.

    This post may contain affiliate links. If you purchase through these links, I may earn a small commission at no extra cost to you. Thank you for supporting Love & Harvest!

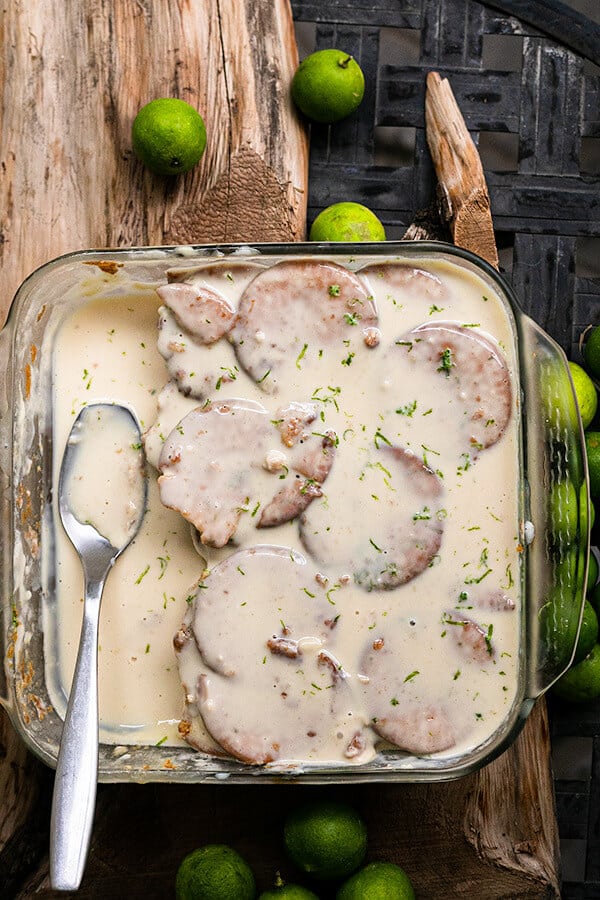
    no bake cake

    Why You Will Love This Recipe

    • Super easy recipe — no baking and no special equipment needed. Only 4 ingredients and a refrigerator.
    • Authentic Mexican flavour — a classic Mexican housewife recipe. Follow the recommended brands and you will taste the real thing.
    • No special grocery store trip — this cake uses pantry staples you likely already have at home.

    A Perfect No-Bake Dessert for Every Occasion

    Kid-Friendly

    There is no hot stove, no electrical equipment, and no complex techniques involved. Just stacking cookies and whisking ingredients. Even a young child can assemble this dessert — try it once and your kids will beg to help every time.

    Picnic-Friendly

    Carlota de Limón stays together firmly and travels well. Made in a glass baking dish, you do not need to worry about it falling apart in the car. The perfect portable dessert for any outdoor event.

    Camping-Friendly

    This is the ideal camping dessert. Bring all 4 ingredients to the campsite, assemble it there, let it sit for at least 2 hours in a cooler, and you will have an impressive cake that nobody will believe you made from scratch at a campsite.

    Potluck-Friendly

    Looking for a crowd-pleasing dessert that requires minimal effort? This is it. At the end of the party, you will be bringing home an empty container.

    no bake desserts

    Ingredients Deep-Dive

    Maria Cookies

    Just as popular as the name suggests, Maria cookies are a beloved everyday cookie across Mexico — a plain, slightly crispy biscuit with gentle hints of vanilla and ginger. Some people in Mexico recommend them when you have an upset stomach, which speaks to how mild and comforting they are. They absorb the milk mixture beautifully, becoming soft like cake on the outside while the center stays slightly crunchy.

    • Why it matters: Maria cookies are the structural base of this dessert. Their absorbency is precisely calibrated for this type of no-bake cake — they soften without falling apart. You can find them at any Latin grocery store or on Amazon.

    Condensed Milk

    This is where the sweetness of the cake comes from. Condensed milk is thick, very sweet, and acts as a natural thickener that helps bind the layers together. The most authentic brand to use in Mexico is La Lechera.

    • Why it matters: The right amount of condensed milk gives the cake its signature rich sweetness. Too much and it becomes cloyingly sweet; too little and the texture turns watery.

    Evaporated Milk

    Evaporated milk adds richness and creaminess without additional sugar. It gives the liquid mixture that fresh milk taste and a lighter, pourable consistency that soaks into the cookies evenly.

    • Why it matters: The combination of condensed milk (sweet and thick) and evaporated milk (fresh and creamy) is what creates the balanced flavour of this dessert. Using only one or the other throws off the texture.

    Fresh Lime

    Lime is where all the flavour lives. Fresh lime juice is essential — a bottled product simply does not deliver the same brightness. The acidity of fresh lime also slightly thickens the milk mixture as it sits, helping the cake set. Add lime zest on top before serving for an extra burst of citrus aroma.

    • Why it matters: This is called Carlota de Limón for a reason. The lime is the star ingredient. A lime juicer makes squeezing multiple limes effortless.

    Professional Tips for No-Fail Carlota de Limón

    Pro Tip 1: Use Fresh Lime Always

    Fresh lime juice and zest make an extraordinary difference in this dessert. All the flavour comes from lime — this is not the place to use bottled juice.

    Pro Tip 2: The Cookies Will Float at First

    When you begin assembling the cake, the cookies will float in the milk mixture. This is normal. As they soak and absorb the liquid, they will settle. Halfway through the sitting phase, gently press the cookies down with a spoon and they will stay in place.

    Pro Tip 3: Refrigerate for At Least 2 Hours

    Do not cut into this cake too early. The cookies need at least 2 hours (preferably 4 or overnight) to fully absorb the milk mixture and transform into a cohesive cake. Cutting it before this time will result in a runny, unset dessert. Patience is the only technique this recipe requires.

    More Mexican Dessert Recipes

    If you love this Carlota de Limón, you will also enjoy our easy Mexican salsa verde for a savoury contrast, or explore more refreshing desserts like our fresh mango sorbet.

    Frequently Asked Questions

    What are Maria cookies and where can I find them?

    Maria cookies (galletas Marias) are a classic Mexican plain biscuit with mild vanilla and ginger flavour. They are available at any Latin or Mexican grocery store, and also online. The Gamesa brand is the most authentic. Graham crackers can work as a substitute but will give a slightly different flavour.

    Can I add cream cheese to this recipe?

    Yes — many Mexican families add cream cheese for a richer, thicker texture. Blend 4 oz of cream cheese into the milk mixture before assembling. It makes the cake denser and more indulgent.

    How long does Carlota de Limón keep in the fridge?

    Covered with plastic wrap, this cake keeps well for up to 3 days in the refrigerator. The texture actually improves after the first few hours as the cookies continue to soften.

    Can I use lemon instead of lime?

    You can, but the result will be different. Mexican limes (Key limes) have a more floral, intense flavour than standard lemons. Lime is the traditional and most recommended choice. If using lemons, you may want to add slightly more juice to achieve the same brightness.

    Why is my Carlota too runny?

    Either it was not refrigerated long enough, or the ratio of condensed to evaporated milk was off. Give it at least 4 hours in the fridge, or ideally overnight. If it is still runny, there may be too much liquid — try reducing the evaporated milk by 1/4 cup next time.

    Can I make this the night before a party?

    Absolutely — and it is actually better when made ahead. The overnight rest in the fridge gives the cookies maximum time to absorb and the cake to fully set. Simply cover and refrigerate, then slice and serve directly from the dish.

    A hand holding a plate with a slice of carlota de limón

    Mexican Lime Icebox Cake “Carlota de Limón”

    Mexican Lime Icebox Cake is an explosion of flavour and texture! You get the big tasty hit of condensed milk and lime. Around the end of the cake, you get a soft cake-like texture, while the inside remains crumbly and crunchy like the cookie. 
    Prep Time 10 minutes
    Total Time 2 hours 10 minutes
    Servings: 8 people
    Course: Dessert
    Cuisine: Mexican
    Calories: 360

    Ingredients
      

    • 2-3 package of Marias Cookies
    • ¾ cup lime juice 6 Mexican Limes
    • 375 g condensed milk 1 can
    • 360 g evaporated milk 1 can
    • lime zest

    Equipment

    • 8 x 8 glass baking dish

    Method
     

    1. Juice the lime and filter it through a strainer.
    2. Add the lime juice to the blender along with the condensed milk and evaporated milk. Give it a good blend for 10 seconds. Alternatively, you can add everything to a large jug and whisk vigerously for 30 seconds.
    3. In a 8×8 glass baking dish, place your first layer of Marias cookies. Pour a small layer of the milk mixture until the cookies are slightly coated. Add another layer of cookie. If you need, use a spoon or a fork to press the cookies down. It might float up a bit.
      Repeat until you've stacked to the top with ¼" of space. By now you should have used up all the milk mixture. Break the cookies up if you like to fill in the gaps between the cookies.
    4. Top layer should be the milk mixture. Use a spoon the smooth out the surface. Tap the dish on the table to get rid of any bubbles that maybe be trapped between the layers. Zest the lime on top of the cake.
    5. Cover the top of the dish with foil or plastic, and let it refrigerate for 2 hours.
      Usually, I prefer to leave my cake overnight so it settles better and more solid.
      Halfway through, you can take it out and gently push the cookies down with a spoon if the cookies are still floating. Giving it one hour in the fridge, the cookies are denser so a quick push to the bottom of the pan will make it settle better.
    6. Serve with lime slices to garnish.

    Notes

    This Carlota de Limón will keep in the fridge for up to a week but preferably consume in 2 days or the cookies become too soft and soggy. 
  • Spicy Corn Dip With Manzano Pepper

    Spicy Corn Dip With Manzano Pepper

    Sweet, crunchy corn kernels coated in a creamy lime-spiked mayonnaise, studded with charred onion and the distinctive fruity heat of Manzano peppers — this dip disappears from the table faster than you can set it down. It is bold, fresh, and takes less than 30 minutes to make with only five ingredients.

    This post may contain affiliate links. If you purchase through these links, I may earn a small commission at no extra cost to you. Thank you for supporting Love & Harvest!

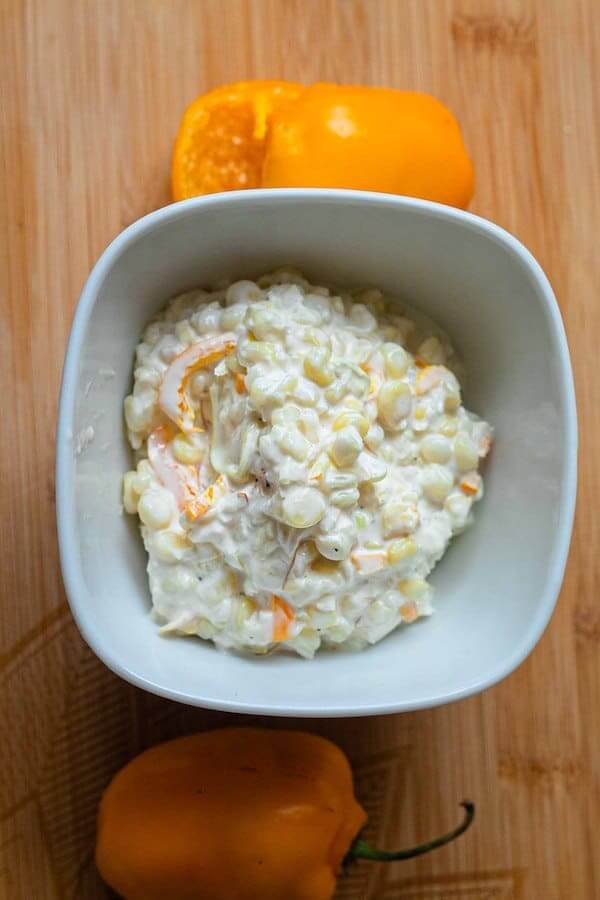
    Spicy Corn Dip with Manzano Pepper Recipe

    It is corn season and there are more ways to eat corn than BBQ corn on the cob with butter. This delicious spicy corn dip is so easy to make it will take you less than 30 minutes to prepare — and it only asks for five ingredients.

    This is a must-make for your next party or family gathering. Anyone who loves spicy food will fall in love with this recipe. After making it, corn just might become your new favourite seasonal vegetable.

    If you love spicy food, try our Easy Hummus Recipe or our Vegetarian Mango Soy Ceviche for more crowd-pleasing dips and sides.

    Ingredients

    Corn

    • Why use fresh seasonal corn: Summer corn is at peak sweetness and starch content. The kernels have a satisfying crunch and natural juiciness that frozen or canned corn cannot replicate. Any variety works — sweet corn, rainbow corn, or the starchy white corn common in Mexico. Whatever is local and fresh is the right choice.

    Manzano Peppers

    • Why Manzano over jalapeño: Manzano peppers have a unique fruity citrus character with a moderate-to-hot heat level — roughly twice as hot as jalapeños. Their black seeds and thick flesh hold up perfectly in a cooked dip. The flavour does not overwhelm the corn; it accents it. If you cannot find Manzano, jalapeño is an excellent substitute.

    White Onion

    • Why cook it first: Raw onion has a sharp, aggressive flavour that competes with the other ingredients. Sautéing the onion in oil first softens its bite, releases its natural sweetness, and creates a gentle fragrance that blends into the dip instead of fighting it.

    Mayonnaise

    • Why mayo works here: Mayonnaise binds all the flavours together with a creamy, slightly tangy base. For a lower-calorie option, swap it for full-fat or low-fat plain yogurt — the result is tangier and lighter but still delicious.

    Lime

    • Why fresh lime: Lime adds brightness and acidity that cuts through the richness of the mayo. For a stronger lime flavour, zest the skin directly into the dip. Bottled lime juice will work in a pinch but lacks the aromatic oils of fresh.

    Why You Will Love This Recipe

    • Easy recipe — cook the corn, cut the kernels off the cob, mix everything together. Done in under 30 minutes.
    • Crowd-pleaser — sweet corn is universally loved. Skip the Manzano peppers for a kid-friendly version.
    • Goes with everything — a great side dish for backyard BBQs, summer parties, and family gatherings. The best potluck food to bring.
    • Low cost — most ingredients are already in your fridge. Only the corn and Manzano peppers require a special trip.

    Frequently Asked Questions

    Can I use frozen or canned corn instead of fresh?

    Yes. Frozen corn works well — thaw it first and pat it dry so it does not water down the dip. Canned corn also works in a pinch; drain and rinse it thoroughly. Neither will have the same natural sweetness or texture as fresh peak-season corn, but both are perfectly acceptable shortcut options.

    How spicy is this dip?

    With Manzano peppers it has a genuine kick — moderate to hot. Manzano peppers are roughly twice as hot as jalapeños. For a milder dip, use only half a pepper, remove all the seeds carefully, or substitute with a small amount of jalapeño. For a non-spicy version, skip the peppers entirely and add a pinch of sweet smoked paprika for colour instead.

    Can I make this dip ahead of time?

    Yes. You can prepare the corn and the sautéed onion and peppers up to a day ahead and store them separately in the refrigerator. Mix everything together with the mayonnaise and lime just before serving for the freshest result. Once fully assembled, it keeps well for up to two days covered in the fridge.

    Can I serve this dip warm or cold?

    Both work. Served warm right after cooking, the dip is comforting and rich. Served cold after an hour in the refrigerator, it is refreshing and bright. For a summer outdoor party, cold is the way to go. For a cosy winter side dish, serve it warm.

    What is a good substitute for Manzano peppers?

    Jalapeño is the closest in texture and heat profile. For something fruitier and hotter, habanero works but use much less — habaneros are three to five times hotter than Manzano. Serrano peppers are also a good middle-ground option: hotter than jalapeño with a crisp, green flavour.

    spicy corn and Manzana Pepper Dip

    Spicy Corn and Manzano Pepper Dip

    Prep Time 15 minutes
    Cook Time 15 minutes
    Total Time 30 minutes
    Servings: 6 people
    Course: Side Dish
    Calories: 170

    Ingredients
      

    • 6 corn or sweet corn
    • 1-2 manzano peppers or jalapeno peppers
    • ¼ white onion
    • ½ cup mayonnaise or yogurt (fat free option)
    • 1 large lime juiced
    • 1 tsp salt to taste
    • black pepper to taste

    Method
     

    1. Wash and tear off the leaf of the corn if it has any. Cook the corn in their hot boiling water or steam it in an Instant Pot.
      Boiling water: Boil the corn for 10 minutes.
      Steam with Instant Pot: 10 minutes.
    2. Meanwhile, sliced the onions in thick slices, and thinly sliced the manzano peppers. In a pan, heat 2 tsp of oil and fry the onion and manzano peppers until soft and fragrance. Place them in a heat proof medium size bowl.
    3. Take out the corn and let it cool until it is ready to be handled. Use a sharp knife and cut the kernel off the corn. Place them in the same bowl with the onion and peppers.
    4. Mix the rest of the ingredient together: mayonnaise, lime juice, salt and pepper. Can be serve hot or cold.
  • Easy Homemade Focaccia Bread

    Easy Homemade Focaccia Bread

    There is something deeply satisfying about making your own focaccia. The moment you poke those dimples in the dough, drizzle on the olive oil, and pull that golden, crackling sheet from the oven — it is an experience that no store-bought bread can replicate. This easy focaccia recipe is soft, airy, gloriously fluffy, and requires almost no skill. If you have a stand mixer and a little patience, you can make this tonight.

    This post may contain affiliate links. If you purchase through these links, I may earn a small commission at no extra cost to you. Thank you for supporting Love & Harvest!

    easy homemade focaccia bread golden crust

    Bread making has been part of human civilization for thousands of years. There is a reason it feels so deeply satisfying to bake your own loaf — it connects you to something ancestral and primal. I find real solace in baking bread for my family. The aroma fills the house, the kids want to help poke the dough, and the act of breaking into a fresh loaf together is a small ritual worth protecting.

    Why You Will Love This Focaccia

    • Easiest bread recipe — soft, easy to cut, with a crunchy salt-and-rosemary top that delivers incredible texture and flavor.
    • Flexible schedule — prepare the dough in the morning and bake at night, or let it ferment overnight and bake fresh the next day.
    • Fully customizable toppings — the sea salt blend is my favorite, but you can go savory with olives and sun-dried tomatoes, or keep it simple with just olive oil and herbs.
    • Kids love making it — poking the dimples in the dough before it bakes is genuinely fun for children of any age.

    focaccia bread dimples olive oil

    Topping Options

    The standard sea salt blend (salt, black pepper, rosemary, chili flakes) is my go-to and the base recipe below. But focaccia is one of the most creative-friendly breads you can make. Other options that work beautifully:

    • Olives, sun-dried tomatoes, rosemary, and olive oil
    • Capers, red onions, and olive oil
    • Oregano, thyme, cherry tomatoes, and olive oil
    • Fresh rosemary and flaky sea salt only (classic and elegant)

    focaccia bread topping options

    Ingredients

    Flour (All-Purpose and Whole Wheat Blend)

    • Why the blend works: All-purpose flour creates the open, airy structure while whole wheat adds fiber, density, and a nutty flavor complexity that plain white focaccia lacks. The higher protein in whole wheat also contributes to a slightly chewier, more satisfying bite. The ratio (815g white to 160g whole wheat) keeps the bread accessible without making it heavy.

    A kitchen scale is essential for this recipe — weighing your flour removes all the variability from cup measurements and ensures a consistent dough every time.

    Olive Oil

    • Why only olive oil: Focaccia is an Italian bread built on olive oil — both inside the dough and generously drizzled on top before baking. Olive oil contributes a distinctive fruity, slightly peppery flavor that is irreplaceable. Do not substitute canola, sunflower, or any neutral oil. The olive oil on top also creates the crispy, golden crust that defines great focaccia.

    Sea Salt

    • Why quality matters: The salt inside the dough controls fermentation and develops gluten. The salt on top — preferably a flaky, crunchy sea salt — creates the addictive textural contrast that makes you tear off just one more piece. The Celtic Sea Salt ground variety is excellent inside the dough; use a flaky finishing salt on top if you have one.

    Instant Yeast

    • Why instant yeast: Instant yeast activates immediately when it contacts the water and flour — no pre-dissolving required. It works reliably across a wide temperature range and gives you a predictable, consistent rise. The small amount (7g) in this recipe is intentional — less yeast means a slower, longer fermentation that builds far more complex flavor.

    focaccia bread sandwich made at home

    Professional Tips for a No-Fail Focaccia

    Pro Tip 1 — Patience Is Everything

    This recipe rewards patience above all else. There is almost no active work — the stand mixer kneads, the yeast rises, time does the fermentation. The more time you give the dough (especially the overnight fridge fermentation), the more complex and flavorful the final bread will be.

    Pro Tip 2 — Use a Stand Mixer

    The dough hook does all the kneading. This is what makes the recipe truly hands-off. Use the hook attachment only — not the paddle, not the whisk. Mix on medium speed: first 10 minutes with water and yeast, then 5 minutes after adding salt, then 5 more minutes after adding olive oil. A KitchenAid 7 Qt Pro Line stand mixer is a good option.

    Pro Tip 3 — Fermentation Container

    For the full-day counter fermentation, leave the dough in the stand mixer bowl covered with plastic wrap. For overnight fridge fermentation, transfer to a large clear container with a lid so you can monitor the rise without disturbing the dough. A 6 qt clear storage container works perfectly.

    Frequently Asked Questions

    Can I make this focaccia without a stand mixer?

    Yes, but be prepared for a workout. The dough is quite wet and sticky — that high hydration is what makes the bread so airy. If mixing by hand, work the dough for at least 15–20 minutes until smooth and elastic. Wet hands help prevent sticking.

    How do I know the focaccia is fully baked?

    The top should be deep golden brown and the edges should be pulling away from the pan slightly. The bottom (lift a corner with a spatula) should also be golden, not pale. The internal temperature should reach 200–210°F (93–99°C).

    Why does my focaccia come out dense instead of airy?

    The most common causes are: not giving the dough enough time to rise, using water that is too hot (kills the yeast), not measuring ingredients precisely (use a scale), or pressing the dough too hard when dimpling (be gentle — you want to preserve the gas bubbles).

    Can I freeze focaccia?

    Yes. Cool completely, slice, wrap individual pieces in parchment, then freeze in a zip-lock bag for up to 2 months. Reheat directly from frozen in a 375°F oven for 8–10 minutes.

    What is the best way to serve focaccia?

    Tear it and dip it into extra virgin olive oil mixed with balsamic vinegar. Use it as sandwich bread for picnics. Serve alongside soups and stews for dipping. It is also excellent with fresh mozzarella and roasted tomatoes.

    Can I make this recipe with sourdough starter?

    Absolutely. Replace the instant yeast with 150g active sourdough starter, reduce water slightly, and extend the bulk fermentation to 6–8 hours at room temperature or 12–16 hours in the fridge. See the sourdough bread guide for reference on starter ratios and timing.

    Golden homemade focaccia bread with herbs on a baking tray

    Easy Focaccia Bread

    Easy homemade focaccia bread that is soft, airy, and delicious with every bite. Great to use as a dipping bread with your favourite sauce or to make your favourite sandwich. It’s perfectly soft and fluffy and satisfyingly chewy. It’s sprinkled with lots of flaky sea salt herbs, and spice. Drizzled with extra olive oil, and soaks perfectly into all of those little classic holes that you have poked in the bread.
    Prep Time 15 minutes
    Cook Time 25 minutes
    Total Time 5 hours 40 minutes
    Course: Bread
    Cuisine: Italian
    Calories: 210

    Ingredients
      

    • 815 g white flour
    • 160 g whole wheat flour
    • 830 g warm water
    • 5 g sugar
    • 7 g instant dry yeast
    • 20 g sea salt blend (see below)
    • 20 g olive oil
    Sea Salt Blend (1 serving)
    • 1 tbsp sea salt
    • 1 tsp black pepper
    • 1 tbsp dried rosemary
    • 1 tbsp dried chili flakes
    Sea Salt Blend (small jar)
    • ¼ cup sea salt
    • 1 tbsp black pepper
    • 3 tbsp dried rosemary
    • 3 tbsp dried chili flakes

    Equipment

    • stand mixer
    • large 13 x 18" baking sheet

    Method
     

    1. in a stand mixer, add the flour and whole wheat flour together.
    2. Using a dough hook attachment, slowly add the warm water, yeast, and sugar together with the flour. Mix on medium speed for 10 minutes. Occasionally use a scraper and scrape down the sides so all the flour is well incorporated in the dough.
    3. Add the salt and mix for another 5 minutes.
    4. Add the olive oil and mix for another 5 minutes.
    5. In a large container, put the dough inside and drizzle some oil on top and on the side. Close the lid or wrap the top with plastic.
    To bake at night on the same day
    1. Start your process at 10am. Leave the dough on the counter top and let it rise for 3 hours. After punch the gas out of the dough and fold the dough. Let it rise again for another 2 hours.
    2. After the last rise, spray the baking sheet with oil, and fold the dough inside. stretch the dough until it is even and has stretch to all sides of the baking sheet. Wrap it in plastic and let it ferment on it's last rise for 2 hours.
    To bake in the morning for the next day
    1. Start your process anytime at night: In a 3-4qt container, generously spray with oil along with a drizzle of olive oil. Toss the dough and cover with a greased lid.
    2. Place in the fridge for 8-12 hours
    3. Spray oil in the large baking tray and fold the dough into the baking sheet. Stretch the dough until its even at the top and stretch the dough to all sides of the baking sheet. Wrap it in plastic and let it ferment on it's last rise for 3 hours.
    Baking
    1. Once the dough has finished the last rise. Preheat oven 500-550F.
    2. Once ready to go in the oven, drizzle generously with 20g of olive oil at the top and sprinkle the sea salt blend. Poke some holes using your fingers on the top of the bread evenly.
    3. Bake for 20-25 minutes.

    If you love baking your own bread, try the Crusty Artisan Purple Yam Bread or the Savoury Rosemary Beer Bread — two more recipes where simple ingredients and a little patience produce extraordinary results.