Category: camping meals

  • Mexican Fire Roast Chicken

    Mexican Fire Roast Chicken

    If you have ever walked past a pollo asado shop in Mexico and smelled that charcoal smoke, you already know why this chicken shows up on our table. It’s juicy, a little smoky, and the kind of dinner the whole family cleans up without a fight.

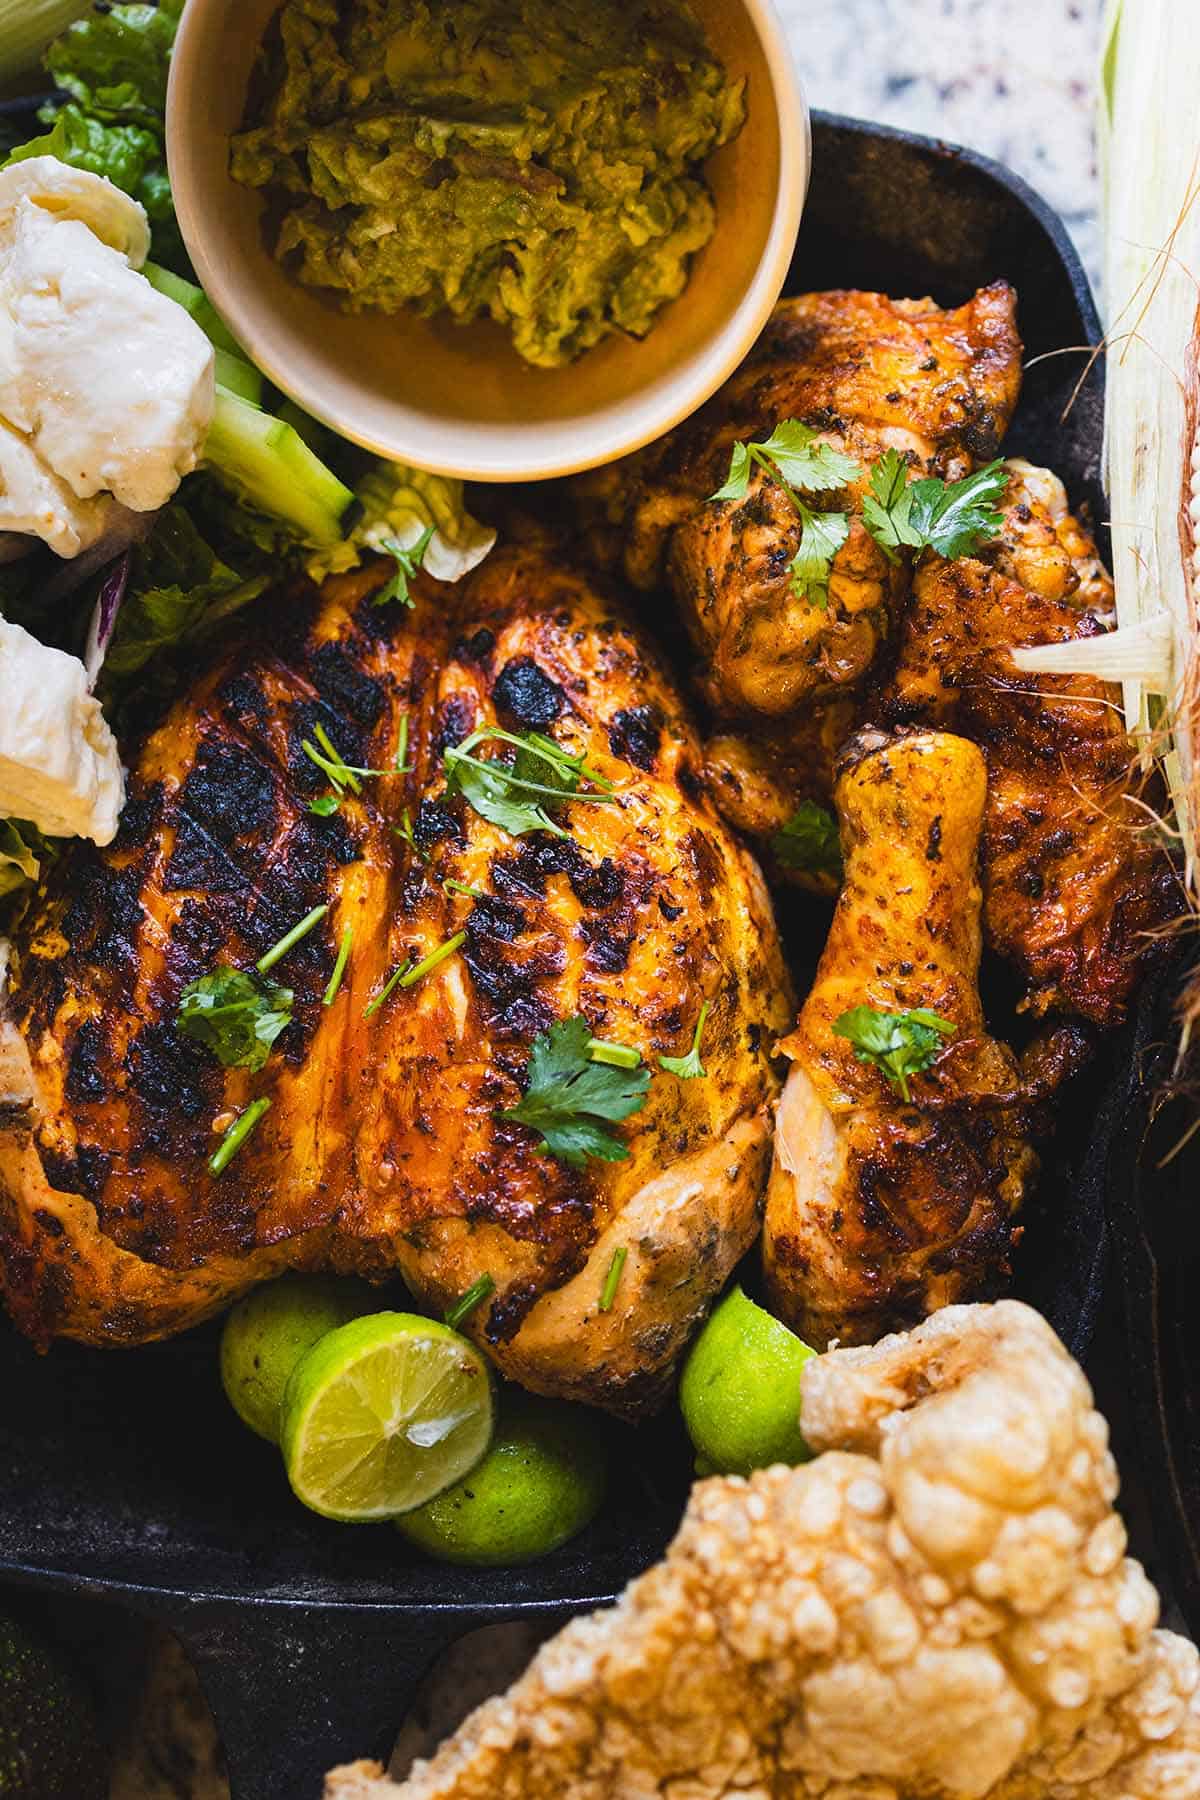
    Mexican fire roast chicken on a platter with limes and fresh herbs

    This is my homemade take on the charcoal-grilled chicken made famous by Mexican chains like Pollo Feliz. Love & Harvest is not affiliated with or endorsed by Pollo Feliz; Pollo Feliz® is a trademark of its owner.

    The chicken sits in an overnight marinade so the flavour has time to sink in. Charcoal is my favourite way to cook it. The oven works too when we don’t feel like lighting the grill.

    Let me show you how we make it!

    Want a week of dinners planned for you? Get my free dinners

    Mexican Charcoal Roast Chicken at Home

    Sure, you can roast it in the oven. If you have the chance, go for charcoal. It makes all the difference.

    Charcoal-grilled chicken halves and drumsticks in a cast iron pan

    Flavour

    This chicken is anything but ordinary. Achiote and annatto powder give it that reddish-golden colour, while garlic, oregano, and a touch of chili bring the bold bits. Milk and vinegar help tenderize the meat, so every bite comes out juicy.

    You get smoky, tangy, garlicky chicken with just a hint of spice. That is what we want.

    Why We Love This Recipe

    • That charcoal-shop vibe – the same style of pollo asado you find all over Mexico, made at home.
    • Juicy and tender – thanks to the milk and lemon in the marinade.
    • Flexible cooking – charcoal for smokiness, or oven roasting when it’s Tuesday and nobody wants to deal with coals.
    • Family favourite – rice, tortillas, or a simple salad all work next to it.

    Close-up of the charred, marinated skin of grilled chicken

    Charcoal for the Win

    Yes, you can roast it in the oven. Grilling over charcoal is the way to go if you want that street-food style flavour. Charcoal adds a layer of smokiness that no oven can copy.

    Tip: make sure the coals are hot but not flaming. Cook the chicken low and slow for the juiciest results.

    The links below are Amazon affiliate links. As an Amazon Associate I earn from qualifying purchases, at no extra cost to you.

    Recommended tools

    Any comparable thermometer and roasting pan work.

    Ingredients That Matter

    Achiote Powder (or Annatto / Paprika)

    Why I use it: Achiote is the heart of a lot of Mexican grilled chicken. It gives the chicken its reddish-golden colour and a slightly earthy, peppery flavour. Without it, you miss that classic pollo asado look.

    Mexican Oregano

    Why I use it: Different from Mediterranean oregano. Mexican oregano has citrusy, floral notes that brighten the marinade and balance the garlic and chili.

    Garlic (Fresh + Powder)

    Why I use it: Garlic is doing a lot of work here. Fresh garlic gives a sharp punch. The powder adds depth that clings to the chicken.

    Milk

    Why I use it: Milk works as a natural tenderizer. It softens the chicken so it stays juicy after roasting or grilling, and it mellows the sharper flavours in the marinade.

    Vinegar + Lemon Juice

    Why I use it: These acids help the marinade soak deeper, and they brighten the flavour so the chicken doesn’t taste flat. Toss the squeezed lemon half into the bowl for extra citrus aroma.

    Grilled chicken with limes, salsa and chicharrón on a serving platter

    Inspired by Mexican Charcoal Chicken Chains

    This is my homemade take on the pollo asado you buy by the whole bird at roast-chicken shops all over Mexico. Nothing beats grabbing one straight off the grill when you’re out, but this version gets us pretty close at home.

    The overnight marinade is the key. Give it at least 8 to 12 hours so the flavours fully penetrate the chicken. Then roast or grill until golden, and serve with warm tortillas, salsa, and maybe grilled onions and peppers.

    Mexican charcoal chicken spread with salad, corn, salsa and chicharrón

    Frequently Asked Questions

    What is Mexican charcoal chicken (pollo asado)?

    Pollo asado is whole chicken seasoned and cooked over charcoal, the kind you buy by the bird at roast-chicken shops across Mexico. This recipe is my homemade version of that style: an overnight achiote marinade, then charcoal (or the oven) until the chicken is juicy and golden.

    Can I use chicken pieces instead of a whole chicken?

    Absolutely! Chicken thighs, drumsticks, or a spatchcocked (butterflied) chicken all work with this marinade. Bone-in, skin-on pieces are best for flavour. Reduce cook time a little. Bone-in pieces usually take 35 to 45 minutes on the grill.

    What is achiote powder and where can I find it?

    Achiote (also called annatto) is a red-orange spice made from the seeds of the annatto tree. It’s widely used in Mexican and Latin American cooking and gives this chicken its golden-red colour. You can find it in most Latin grocery stores, or substitute with a mix of paprika and a pinch of turmeric if needed.

    How long should I marinate the chicken?

    For best results, marinate overnight, at least 8 to 12 hours. If you’re short on time, a minimum of 2 hours still works, though the flavour won’t be as deep.

    Can I freeze this chicken?

    Yes. You can freeze the marinated (uncooked) chicken in the marinade for up to 3 months. You can also freeze leftover cooked chicken for up to 2 months. Reheat in the oven at 350°F until warmed through to keep it juicy.

    What should I serve with Mexican fire roast chicken?

    Serve it the charcoal-shop way: warm corn tortillas, smoky tomato salsa, grilled green onions, and Mexican rice on the side. Avocado or guacamole, refried beans, or a fresh cabbage slaw also pair well.

    Charcoal-grilled chicken halves and drumsticks in a cast iron pan

    Mexican Fire Roast Chicken

    Whole chicken marinated overnight with achiote, Mexican oregano, garlic, chili flakes, vinegar and lemon, then cooked on a charcoal grill over indirect heat (or in the oven). Serves 6.
    Prep Time 10 minutes
    Cook Time 1 hour
    Marinate 8 hours
    Total Time 9 hours 10 minutes
    Servings: 6 people
    Calories: 340

    Ingredients
      

    Chicken Marinate
    • 2 kg whole chicken
    • 1 tbsp ground achiote powder
    • 1 tbsp annatto powder / paprika powder
    • 1 tbsp Mexican oregano
    • 1½ tbsp minced garlic
    • 1 tbsp dried garlic powder
    • 1 tsp sugar
    • 1 tsp chili flake
    • 2 tbsp distilled white vinegar
    • ½ fresh lemon
    • 2 tbsp soy sauce
    • 1 cup milk
    • ½ tsp salt and pepper

    Equipment

    • charcoal grill

    Method
     

    Marinate Chicken Overnight
    1. In a large mixing bowl, combine achiote powder, annatto (or paprika), oregano, minced garlic, garlic powder, sugar, chili flakes, vinegar, soy sauce, milk, salt, pepper, and the juice of half a lemon.
    2. Toss the squeezed lemon half into the bowl as well to infuse extra citrus flavour. Mix everything until well combined.
    3. Place your cleaned whole chicken (or chicken pieces) into a large zip-top bag or deep dish.
      Pour the marinade over the chicken, making sure it is fully coated.
      Cover and refrigerate overnight (8–12 hours) for best results. This step ensures the flavours soak deep into the meat.
    To Grill the Chicken over Charcoal
    1. Remove the chicken from the fridge about 30 minutes before cooking so it comes closer to room temperature. Discard the lemon half from the marinade. And reserve half the marinade to baste the chicken with its juices while cooking to keep it moist and flavourful.
    2. Preheat your charcoal grill until hot and glowing.
      Place the chicken on the grill over indirect heat (not directly above the flames) and cover.
      Cook, turning occasionally, until the chicken is golden brown and reaches an internal temperature of 165°F (74°C) at the thickest part of the meat. Remember half way through cooking, baste the chicken with the juice and marinade.
      This usually takes 45–60 minutes, depending on the size of your chicken.
    To Oven Roast Chicken
    1. Preheat your oven to 375°F (190°C).
      Place the chicken on a roasting rack in a baking dish.
      Roast for about 60–75 minutes, or until the chicken reaches an internal temperature of 165°F (74°C). Remember half way through cooking, baste the chicken with the juice and marinade.
      For extra crispy skin, broil on high for the last 3–5 minutes.
    Rest the Chicken
    1. Let the chicken rest for 10 minutes before carving to allow the juices to redistribute.
      Serve with warm tortillas, salsa, or your favorite Mexican sides.

    Cooking this one this week? Get my free PDF with seven easy family dinners, so the rest of the week is planned too. Get the free dinners
  • Campfire Hot Honey Brie Cheese Recipe

    Campfire Hot Honey Brie Cheese Recipe

    There’s something magical about that first bite around the fire, especially when it’s oozing brie cheese kissed with hot honey, grilled mango, and a touch of thyme. This Campfire Hot Honey Brie Cheese has quickly become one of our go-to camping snacks—simple to make, yet indulgent enough to make the campground feel like a gourmet retreat.

    This post may contain affiliate links. If you purchase through these links, I may earn a small commission at no extra cost to you. Thank you for supporting Love & Harvest!

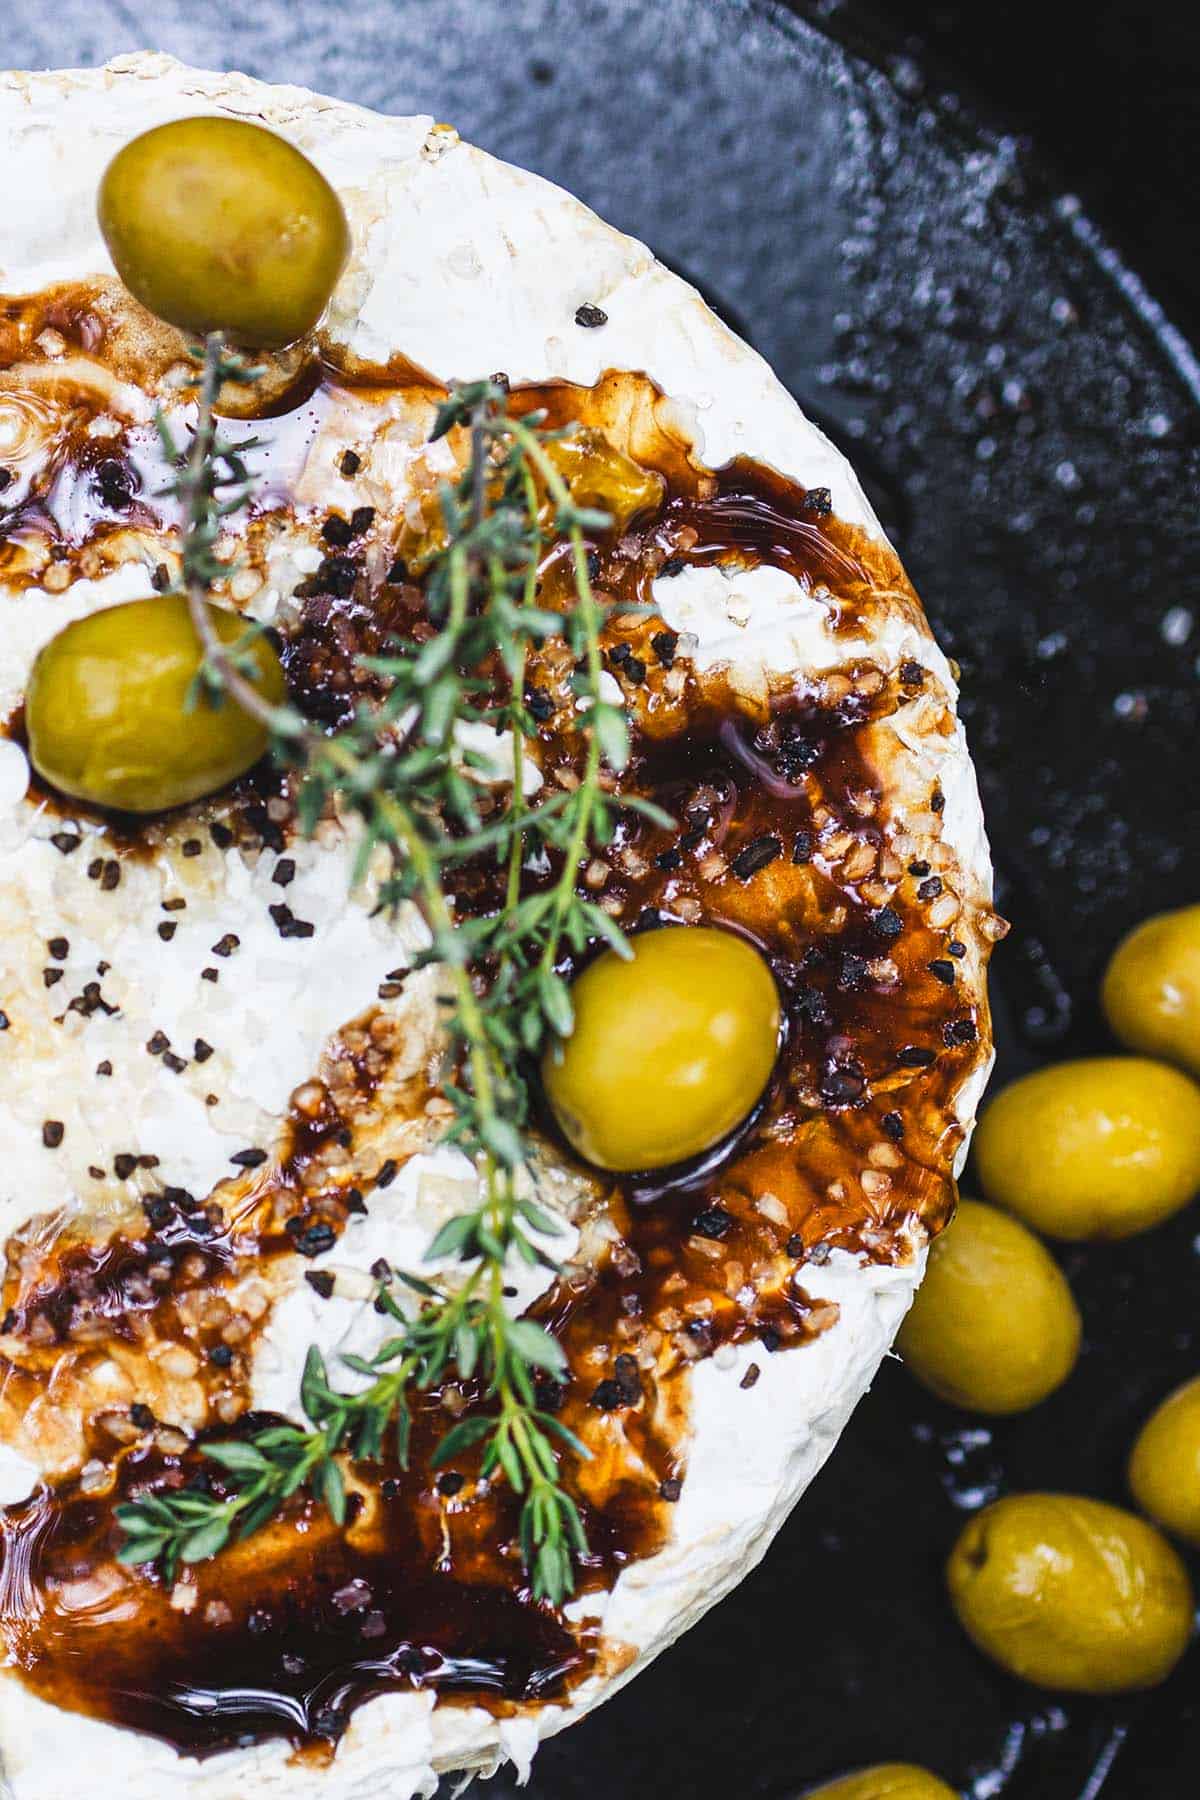
    Cheese, mango, and green olives on a skillet with herbs, highlighting farm-fresh ingredients for gourmet cooking.

    Hot Honey and Brie Cheese Flavour

    Imagine the creamy melt of brie infused with golden hot honey, the zing of balsamic vinegar, the salty olives, and the earthy aroma of thyme. Add a grilled mango slice for a little caramelized sweetness and you’ve got a whole explosion of flavour in one bite.

    Dip a pita chip or a crunchy carrot stick in it, and you’re in for a rustic-meets-exotic treat that’ll have your camping neighbours sniffing the air and asking what’s cooking.

    Easy Hot Honey Brie Cheese Recipe

    This appetizer takes just a few minutes to assemble and about 15 minutes on a hot fire or grill. It’s a total win when you’re multitasking between setting up your tent, unpacking gear, or prepping for the main meal. Minimal cleanup, maximum satisfaction.

    Here’s how we do it:

    1. Place a whole block of Costco brie on a piece of foil or a small cast iron pan.
    2. Drizzle generously with organic honey and a splash of balsamic vinegar.
    3. Top with a few pitted olives, fresh thyme, a pinch of salt and pepper (go with smoked salt if you’re feeling fancy).
    4. If you’ve got a mango on hand, grill one side and add it on top for a sweet bonus.
    5. Wrap loosely or place in your campfire-safe pan and cook over the fire for 15 minutes or until gooey and golden.
    6. Serve with pita chips, celery, or carrot sticks. Trust us, extra honey on top doesn’t hurt.

    Creamy Brie cheese topped with balsamic glaze, black pepper, and fresh herbs on a dark background.

    One of Our Camping Hacks

    Honestly, Campfire Brie is one of our best camping hacks. You don’t need much, and it’s versatile. Swap the mango for figs, skip the olives if you’re not a fan, or throw in some crushed walnuts if you want a little crunch. It never disappoints. We always keep a Costco brie in our cooler just in case.

    Main Ingredients

    Ingredients

    Brie Cheese

    • One full block of brie — Costco’s double-crème brie is our go-to. It melts beautifully and has that buttery, mushroomy flavor that pairs perfectly with honey. Make sure it’s at room temperature before cooking for the fastest, most even melt.

    Organic Honey

    • The sweet base of this recipe. Raw, unfiltered organic honey has a deeper flavor than commercial honey — and it has a slightly higher heat tolerance, which makes it better for campfire cooking. Plus extra for drizzling at the end.

    Balsamic Vinegar

    • Just a splash of quality balsamic vinegar adds a tangy complexity that cuts through the richness of the cheese and honey. It’s the secret ingredient that elevates this from “camping snack” to “campfire gourmet.”

    Fresh Thyme

    • Earthy and aromatic — fresh thyme is what gives this dish its herbaceous, almost savory backbone against all that sweetness. Strip the leaves off the stems and scatter generously.

    Smoked Salt

    • Optional but highly recommended. Smoked salt brings a subtle campfire-appropriate flavor to the cheese even before it goes on the actual fire. Just a pinch over the top before cooking is enough.

    We Love This Hot Honey Brie Cheese Recipe

    • It’s fast.
    • It feels fancy, even in the wild.
    • It makes camp life taste incredible.
    • It’s crowd-pleasing—especially for hungry little snackers or curious fellow campers walking by your site. If you love bold appetizers, our easy hummus recipe and fluffy naan bread are perfect companions for your next gathering.

    This is more than an appetizer—it’s a camping ritual. A moment to stop, snack, and soak in the wilderness while you cook the bigger stuff.

    A hand slicing baked brie topped with olives and herbs in a cast iron pan

    Frequently Asked Questions

    Can I make campfire brie at home without a fire?

    Absolutely. This recipe works just as well in your oven at 375°F (190°C) for about 12–15 minutes, or on a stovetop grill pan over medium heat. You lose the campfire atmosphere but none of the flavor. A small cast iron skillet is perfect for both methods.

    What type of brie should I use?

    Any full wheel of brie works — we love Costco’s double-crème brie for its high fat content and excellent melting quality. If you can find a brie labeled “double or triple crème,” grab it. Avoid pre-sliced brie as it won’t hold its shape while melting.

    Can I make this without a cast iron pan?

    Yes — heavy-duty aluminum foil works great. Create a small “boat” around the brie by folding the foil up around the sides, leaving the top open. This keeps all the melted cheese contained and makes cleanup incredibly easy.

    What can I use instead of mango?

    Figs are the most elegant substitute — they caramelize beautifully and complement the honey and brie. Fresh pears, apricots, or even pineapple rings all work wonderfully. The goal is a fruit with some sweetness that can handle direct heat without turning to mush.

    How do I transport brie for camping?

    Keep the brie sealed in its original packaging in a cooler with ice packs. It stays fresh for up to 5 days when kept cold. Transport the honey, balsamic, and herbs in small sealed containers in your camp kitchen kit. Everything assembles in under 2 minutes at the campsite.

    Cheese, mango, and green olives on a skillet with herbs, highlighting farm-fresh ingredients for gourmet cooking.

    Campfire Hot Honey Brie Cheese Recipe

    The perfect rustic-meets-gourmet appetizer for the outdoors—or indoors.
    Prep Time 5 minutes
    Cook Time 15 minutes
    Total Time 20 minutes
    Course: Appetizer
    Cuisine: American
    Calories: 220

    Ingredients
      

    • 1 wheel or block of brie cheese  (Costco’s version works great)
    • 2 tbsp organic honey, plus more for drizzling
    • 1 tsp balsamic vinegar
    • 5 olives, pitted and sliced (green or black)
    • 2 springs sprigs fresh thyme (or ½ tsp dried thyme)
    • salt and pepper optional: smoked salt
    • 2 slices of mango
    • pita chips, carrot sticks, and celery for dipping

    Equipment

    • cast iron skillet

    Method
     

    At Camp
    1. Prep the Brie: Place the brie wheel into the cast iron skillet.
    2. Top it Off: Drizzle the honey and balsamic vinegar over the cheese. Add olives, thyme, salt, and pepper.
    3. Grill the Mango: Place mango slice directly on the grill (or pan), sear one side until lightly charred, then place on top of the brie
    4. Cook on Fire: Set the skillet over hot coals or on a campfire grate. Cover loosely with foil (to prevent ash) and cook for 12–15 minutes, until cheese is soft and gooey.
    5. Cook on Stovetop: Turn heat to medium-high, cover with a lid, and let cook for 10–12 minutes, checking often. Once the center feels soft and melty, it’s ready.
    6. Serve Warm: Carefully remove from heat, drizzle with extra honey, and serve with pita chips and veggies.

    Notes

    Tips:

    • No thyme? Try rosemary or crushed walnuts for a twist.
    • Want it spicier? Add a dash of chili flakes or hot honey.
    • Works great with GF crackers or even apple slices for dipping.

    Storage Tip: Brie is best served fresh and warm. If you have leftovers (unlikely!), refrigerate and reheat gently.
  • Instant Pot Easy Chili Recipe

    Instant Pot Easy Chili Recipe

    There’s something timeless about a big pot of chili — rich, hearty, and packed with flavour. Thanks to the Instant Pot, making this classic dish has never been easier. No more juggling multiple pots and pans or waiting hours for everything to simmer down just right. One pot, 30 minutes of pressure cooking, and you’ve got a bowl of deeply spiced, stick-to-your-ribs chili that works at home and at the campsite.

    Looking for a thick stovetop version with Mexican chorizo? Try my ground beef chili with chorizo (simmered uncovered on the stove).

    This post may contain affiliate links. If you purchase through these links, I may earn a small commission at no extra cost to you. Thank you for supporting Love & Harvest!

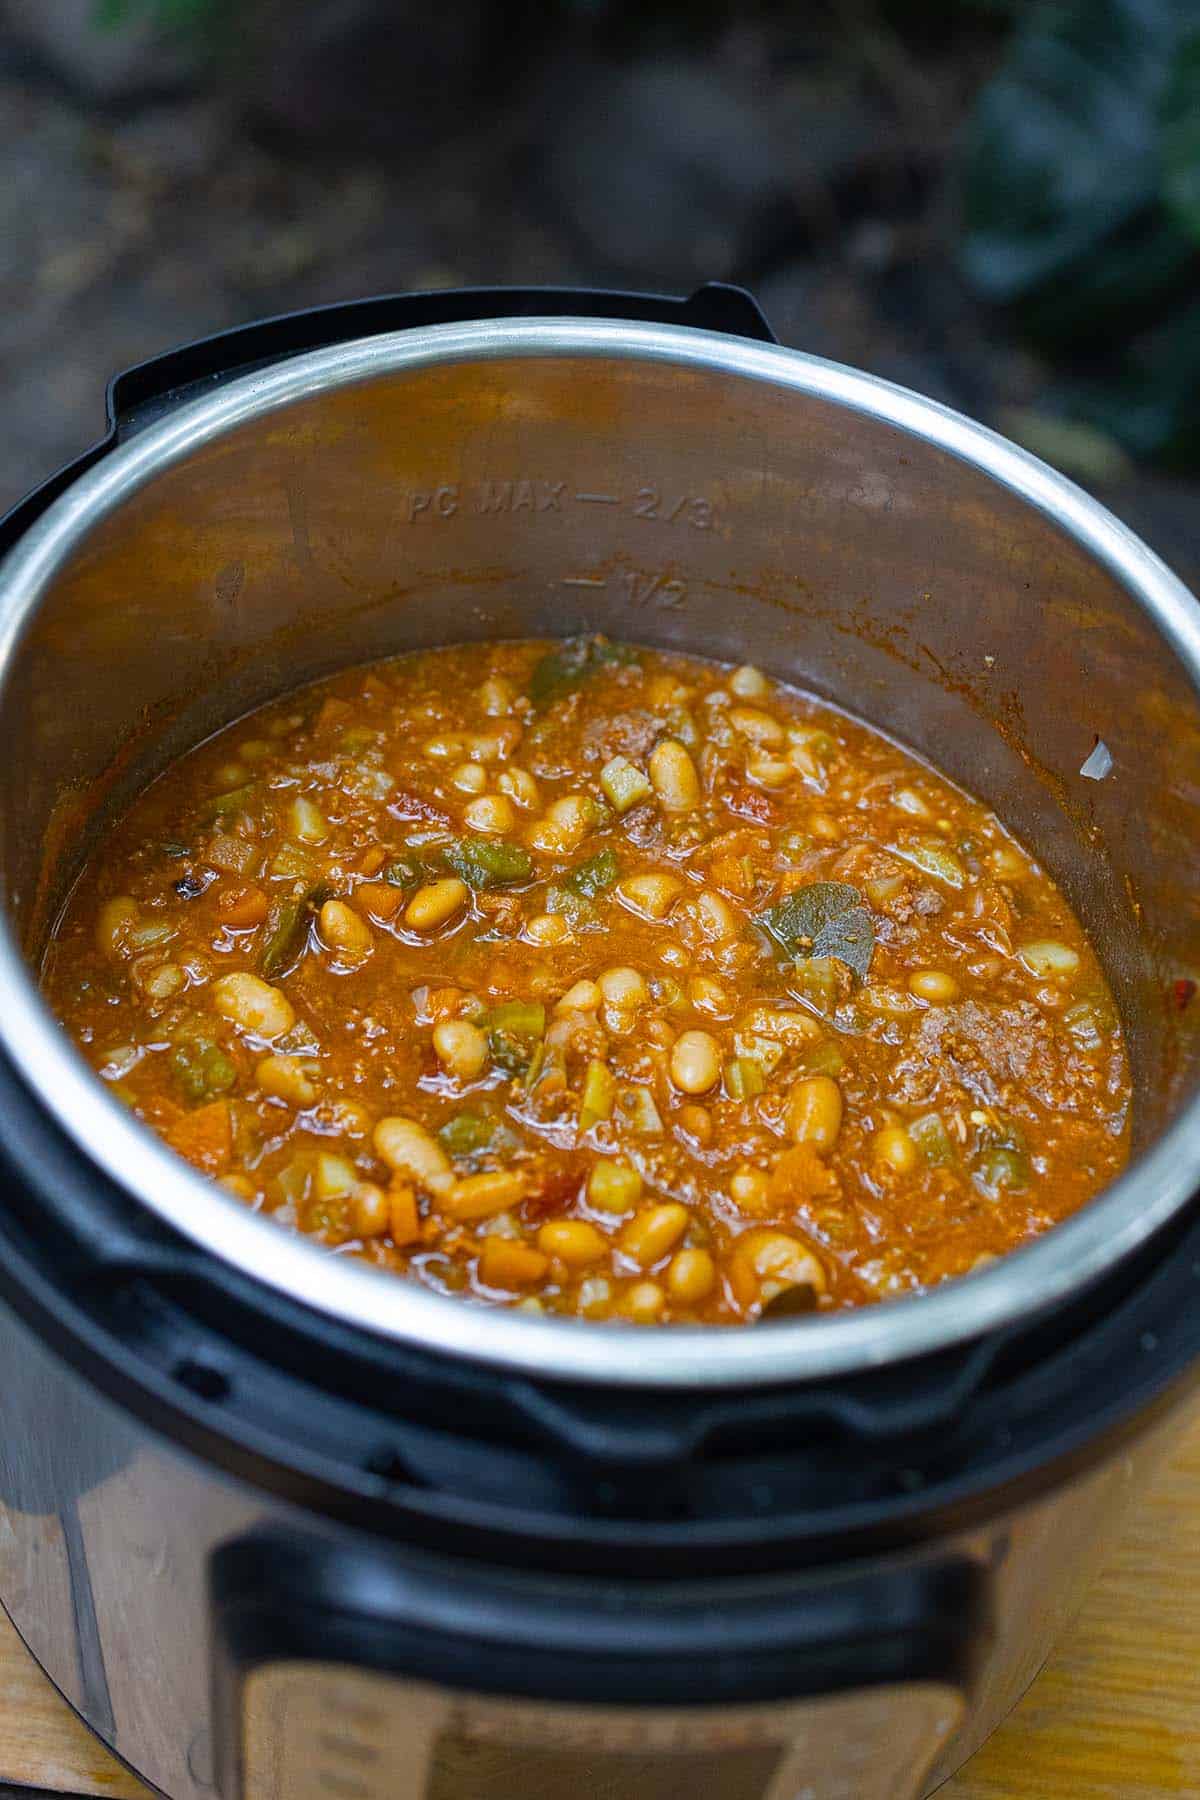
    Pot of bean chili with a wooden spoon next to grilled meat on a large green leaf

    This post shows you how to make a quick and flavourful chili using an Instant Pot. It’s a favourite in our home — and so easy, we even bring our Instant Pot camping! The recipe includes ground beef, chorizo, beans, tomato paste, and more hearty ingredients for a rich, satisfying meal with minimal effort.

    This Easy Instant Pot Chili has become a must-have on all our camping trips. We bring the Instant Pot right along with us (yes, even when camping!), because nothing beats the comfort of a hearty bowl of chili after a long day outdoors. Whether we’re spooning it over grilled potatoes, tossing it with pasta, or squishing it between fresh bread, it’s always dense, hearty, and absolutely delicious.

    Why We Love This Easy Instant Pot Chili

    One word: simplicity. This recipe is straightforward, no-fuss, and makes cleanup a breeze — everything cooks in one pot! Plus, it’s versatile enough to enjoy in different ways: ladled over baked potatoes, stirred into pasta, or served sandwich-style for a rustic campfire meal. Better yet, it’s a recipe we keep coming back to because it’s reliable, hearty, and so satisfying that it keeps us full well into the night — essential when camping days are packed with hiking, swimming, and exploring.

    Bean chili cooked in the Instant Pot inner pot

    Key Ingredients

    Ingredients

    Ground Beef

    • Rich, hearty, and satisfying — the backbone of a great chili. Look for 80/20 blend for best flavour.

    Chorizo

    • Adds a smoky, slightly spicy kick that sets this chili apart. Mexican-style fresh chorizo works best here.

    Smoked Paprika & Cumin

    • These two spices are what make this chili sing. Get your smoked paprika fresh for maximum impact — it makes a huge difference over regular paprika.

    Kidney Beans & Diced Tomatoes

    • Essential for bulk, protein, and fibre. The canned tomatoes add acidity that balances the rich meat perfectly.

    Tomato Paste

    • Deepens the flavour and ties everything together with a concentrated, slightly sweet tomato richness.

    For the best results, use a quality Instant Pot 6qt Duo — it’s what we use in this recipe and it makes the process completely hands-free. A wooden spoon set is also handy for breaking up the meat during the sauté step.

    Instant Pot chili with beans in a steel pot beside grilled chicken on a large green leaf

    Chili and Camping

    Camping is full of activities — and let’s be honest, who wants to spend hours cooking after a full day of adventures? This Instant Pot Chili solves that problem beautifully. It’s quick to prep, cooks hands-free, and one big pot feeds a crowd. Even better, it tastes even better the next day, which means leftovers are a bonus you’ll actually look forward to. Plus, when you cook it in the Instant Pot, you don’t have to babysit the pot over the fire — you can set it, forget it, and get back to enjoying the outdoors.

    If you love camping recipes, check out our Easy Camping Shrimp Pasta and Lemongrass Chicken Drumsticks — both are campfire favourites in our family.

    A man and three children eating at an outdoor picnic table while camping

    Frequently Asked Questions

    Can I make this chili without an Instant Pot?

    Yes! If you don’t have an Instant Pot, you can make this chili on the stovetop in a large Dutch oven. Simply follow the same sauté steps, then add all the remaining ingredients and simmer covered on low heat for 45–60 minutes, stirring occasionally until the flavours meld and the chili thickens to your liking.

    Can I freeze Instant Pot chili?

    Absolutely. This chili freezes beautifully. Let it cool completely, then portion it into freezer-safe containers or bags. It keeps well for up to 3 months. Thaw overnight in the fridge and reheat on the stovetop or in the microwave. The flavour actually deepens after freezing!

    What can I serve with Instant Pot chili?

    The options are endless. Serve it over steamed rice, baked potatoes, or corn chips for nachos. It’s also fantastic stuffed into tacos or burritos. For camping, we love serving it with crusty bread or spooned over grilled potatoes cooked in the embers.

    How do I thicken chili that’s too watery?

    If your chili is thinner than you’d like after pressure cooking, simply switch the Instant Pot back to Sauté mode and let it simmer uncovered for 5–10 minutes, stirring occasionally, until it reaches your desired consistency. You can also mash a handful of the beans against the side of the pot to add body.

    Can I make this chili spicier?

    Definitely. Add a chopped jalapeño with the onion during the sauté step, or stir in a teaspoon of cayenne pepper with the spices. Chipotle peppers in adobo are another great option — try one or two chipotle peppers in adobo sauce for a deep, smoky heat.

    Pot of bean chili with a wooden spoon next to grilled meat on a large green leaf

    Instant Pot Easy Chili Recipe

    Easy Instant Pot Recipe that you can bring it to go camping. Packed with ground beef, chorizo, bean, and so much more! A classic but a goodie.
    Prep Time 10 minutes
    Cook Time 30 minutes
    Total Time 40 minutes
    Servings: 6 servings
    Course: Main Course
    Cuisine: American
    Calories: 380

    Ingredients
      

    • 1 tbsp olive oil
    • ½ kg ground beef
    • 3 garlic cloves minced
    • 1 white onion minced
    • 3 chorizo sausages roughly chopped
    • 1 tsp dried oregano
    • 2 tbsp tomato paste
    • 1 can (540ml) kidney beans
    • 1 can diced tomatoes
    • 1 water or chicken stock
    • 1 tbsp Old Bay Seasoning
    • 1 tsp smoked paprika
    • 1 tsp ground cumin
    • salt and pepper

    Equipment

    • Instant Pot

    Method
     

    1. Sauté the base Turn the Instant Pot to Sauté mode. Add olive oil, then sauté ground beef with the garlic and onions for 2–3 minutes until fragrant.
    2. Add chorizo. Cook for 5–7 minutes until browned, breaking it up with a spoon. Drain excess fat if needed. Then add oregano and fry the tomato paste until fragrant.
    3. Add remaining ingredients Stir in the beans, diced tomatoes, broth, and all spices. Mix well.
    4. Pressure cook Cancel Sauté mode. Secure the lid and set the valve to Sealing. Cook on Manual / Pressure Cook for 15 minutes.
    5. Natural release Let the pressure release naturally for 10 minutes, then do a quick release for any remaining pressure.
    6. Stir and serve Open the lid, stir well, and taste. Adjust seasoning if needed. Let it sit on Keep Warm for 10–15 minutes to thicken.
  • Lemongrass Chicken Drumsticks

    Lemongrass Chicken Drumsticks

    After a long day on the trail, nothing hits quite like the scent of lemongrass drifting over a campfire. These Lemongrass Chicken Drumsticks have become our family’s most-requested camping meal — marinated overnight in a bold blend of fish sauce, dark soy, brown sugar, and fragrant lemongrass, then grilled until the skin is gloriously crispy and caramelized. The best part: all the work happens at home. At the campsite, you just fire up the grill.

    This post may contain affiliate links. If you purchase through these links, I may earn a small commission at no extra cost to you. Thank you for supporting Love & Harvest!

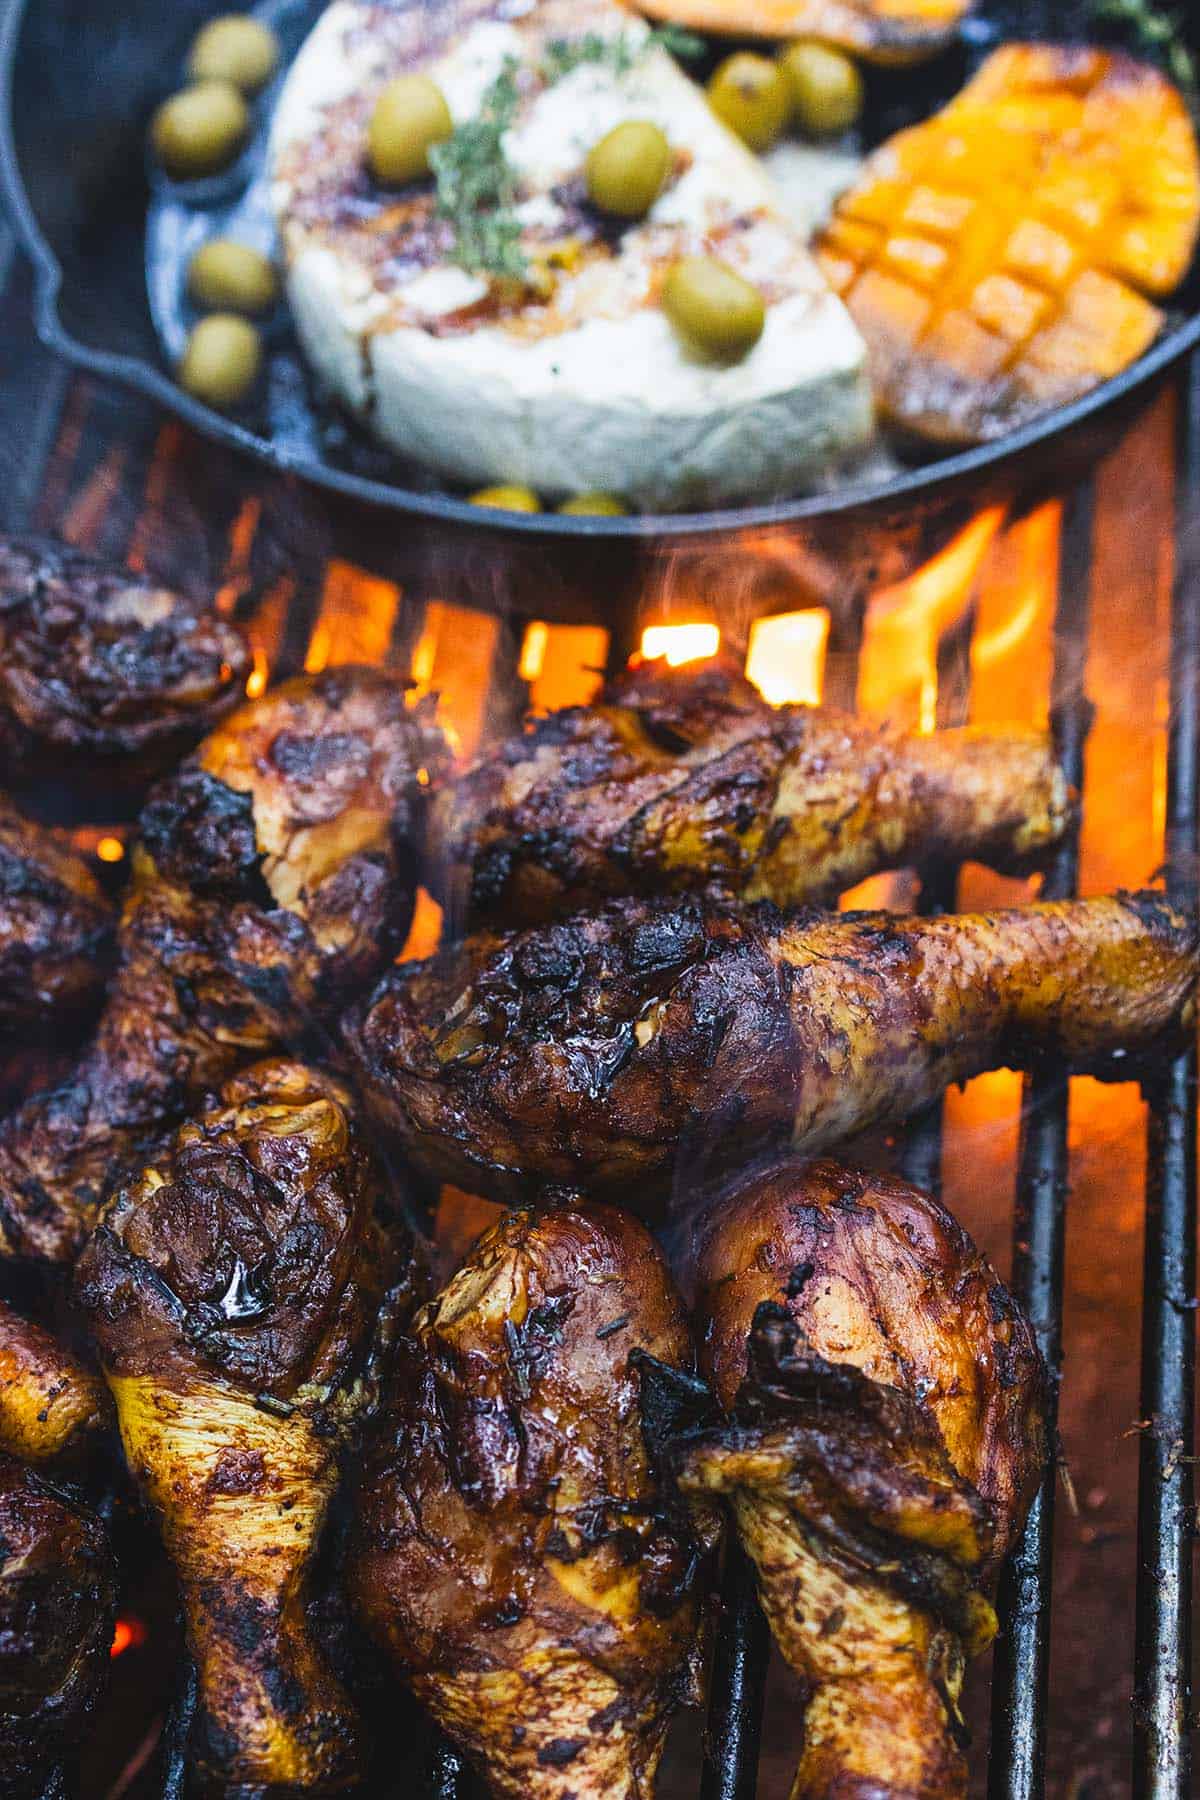
    Lemongrass chicken drumsticks charring on a grill over open flame

    This post features a lemongrass chicken recipe using the drumstick cut that’s perfect for summer grilling or family camping trips. A flavourful lemongrass marinade with fish sauce, brown sugar, soy sauce, and grated onion makes every bite irresistible.

    Why Try This Lemongrass Chicken Drumstick Recipe?

    Cooking at home means you can take the time to let flavours develop, and this recipe benefits from an overnight marinade that ensures every bite is packed with savoury, aromatic goodness.

    The combination of lemongrass, soy sauce, and fish sauce creates a balance of umami, sweetness, and depth, making this dish a household favourite. Minimal work, maximum flavour — this lemongrass chicken drumstick is the definition of gourmet campfire food without the effort. I’ve shared this recipe countless times, even with neighbouring tents at the campground!

    Lemongrass chicken drumsticks on a large green leaf beside a pot and skillet on a picnic table

    Juicy grilled chicken drumsticks cooking on barbecue grill with flames, side of baked cheese and green olives in a cast iron skillet.

    Key Ingredients

    Ingredients

    Lemongrass

    • The star of this marinade. Finely chop or grind the tender inner stalks for maximum fragrance. If fresh lemongrass isn’t available, lemongrass paste is a convenient substitute that works beautifully.

    Fish Sauce

    • Brings an authentic umami depth that is essential to Southeast Asian marinades. Use a good-quality fish sauce — Red Boat fish sauce is our preferred brand for its clean, pure flavour.

    Dark Soy Sauce

    • Provides deep colour and rich umami. It’s what gives the chicken skin that beautiful dark, caramelized finish on the grill.

    Brown Sugar

    • Helps caramelize the skin beautifully when grilled and balances the saltiness of the fish sauce and soy. Don’t substitute with white sugar — the molasses in brown sugar adds a richer depth.

    Grated Onion

    • Adds moisture and sweetness to the marinade, and the enzymes in the onion help tenderize the chicken. Grate it finely so it integrates fully into the marinade rather than sitting in chunks.

    Why the Drumstick Cut?

    Drumsticks are the perfect cut for this lemongrass chicken recipe because they are juicy, flavourful, and ideal for grilling over an open fire. The bone helps retain moisture, preventing the meat from drying out, while the skin crisps up beautifully, creating a delicious caramelized crust. Plus, drumsticks are easy to handle — no forks and knives, just grab and enjoy!

    Mexican pickled red onion recipe: grilled drumsticks topped with pickled onions

    We love to add pickled red onions on top of the chicken — get the recipe for Mexican Pickled Red Onion here. The brightness of the pickled onions cuts through the richness of the glaze perfectly.

    A Must-Try Recipe for Camping

    This recipe is perfect for camping because it takes the stress out of outdoor cooking. Simply marinate the chicken overnight, freeze it, and by the time it thaws at the campsite, it’s ready for the grill or fire. The open flame adds a beautiful caramelization, creating a crispy, smoky skin that’s absolutely irresistible.

    Pair these with our Easy Camping Shrimp Pasta for a full campfire feast the whole family will love.

    Succulent grilled chicken and roasted vegetables on a barbecue grill, perfect for outdoor dining.

    Frequently Asked Questions

    How long should I marinate the chicken?

    For the best results, marinate the chicken for at least 4 hours, but overnight is ideal. The longer the chicken sits in the marinade, the deeper the flavours penetrate the meat. For camping, we marinate the night before, freeze the chicken in the marinade bag, and it thaws perfectly by dinner time at the campsite.

    Can I bake these instead of grilling?

    Yes! Preheat your oven to 200°C (400°F). Arrange the drumsticks on a wire rack over a baking sheet and roast for 35–40 minutes, flipping halfway, until the skin is dark and caramelized and the internal temperature reaches 74°C (165°F). You can finish under the broiler for 2–3 minutes for extra crispiness.

    What if I can’t find fresh lemongrass?

    Lemongrass paste is a great substitute and is much easier to find in most grocery stores. Use about 1 tablespoon of paste for every stalk of fresh lemongrass. You can also find it online — we recommend this lemongrass paste which works beautifully in this marinade.

    Can I use chicken thighs or breasts instead of drumsticks?

    Absolutely. Bone-in thighs are the closest substitute and will give a similar juicy result. Boneless thighs will cook faster — check at 25 minutes. Chicken breasts work too but are more prone to drying out; marinate them for the full overnight period and keep a close eye on the internal temperature.

    Succulent grilled chicken and roasted vegetables on a barbecue grill, perfect for outdoor dining.

    Lemongrass Chicken Drumsticks

    A delicious, aromatic lemongrass chicken recipe that guarantees juicy, bouncy texture and deep flavor. Perfect for home cooking and an excellent choice for camping, as the marinade does all the work while you enjoy the outdoors!
    Prep Time 10 minutes
    Cook Time 35 minutes
    Total Time 45 minutes
    Servings: 5 people
    Course: Main Course
    Cuisine: Vietnamese
    Calories: 290

    Ingredients
      

    • 8-10 chicken drumsticks, with skin
    • ¼ cup lemongrass, finely grounded or chopped
    • 1 onion, grated
    • 6 garlic cloves, grated
    • 3 tbsp light soy sauce
    • 1 tbsp dark soy sauce
    • 2 tbsp maggi sauce
    • ¼ cup brown sugar
    • 2 tsp paprika
    • 2 tbsp fish sauce

    Method
     

    1. In a large bowl or ziplock bag, combine all the ingredients and coat the chicken well. Let it marinate overnight in the fridge for maximum flavor.
    2. Freeze for Camping – If taking it camping, freeze the marinated chicken. It will slowly defrost in your cooler, and by the time you need to cook it, it’s ready to go.
    3. Grill to Perfection – Cook the chicken over a hot grill or campfire, turning occasionally, until the skin is caramelized and crispy, and the inside is cooked through (internal temp 165°F). Approximately 35 minutes, depending on the intensity of the open fire.
    4. Serve and Enjoy – Let it rest for a few minutes before serving with rice, fresh herbs, or grilled vegetables.
  • Easy Camping Shrimp Pasta

    Easy Camping Shrimp Pasta

    Some of our best family memories are made around a campfire with a cast iron pan and a bag of frozen shrimp. This Easy Camping Shrimp Pasta is proof that you don’t need a full kitchen to make something that feels restaurant-quality. Garlicky shrimp, nutty Manchego cheese, a bright hit of lemon, and the subtle warmth of Old Bay — all tossed with pasta in under 30 minutes. It’s become the most-requested dinner of every camping trip we take.

    This post may contain affiliate links. If you purchase through these links, I may earn a small commission at no extra cost to you. Thank you for supporting Love & Harvest!

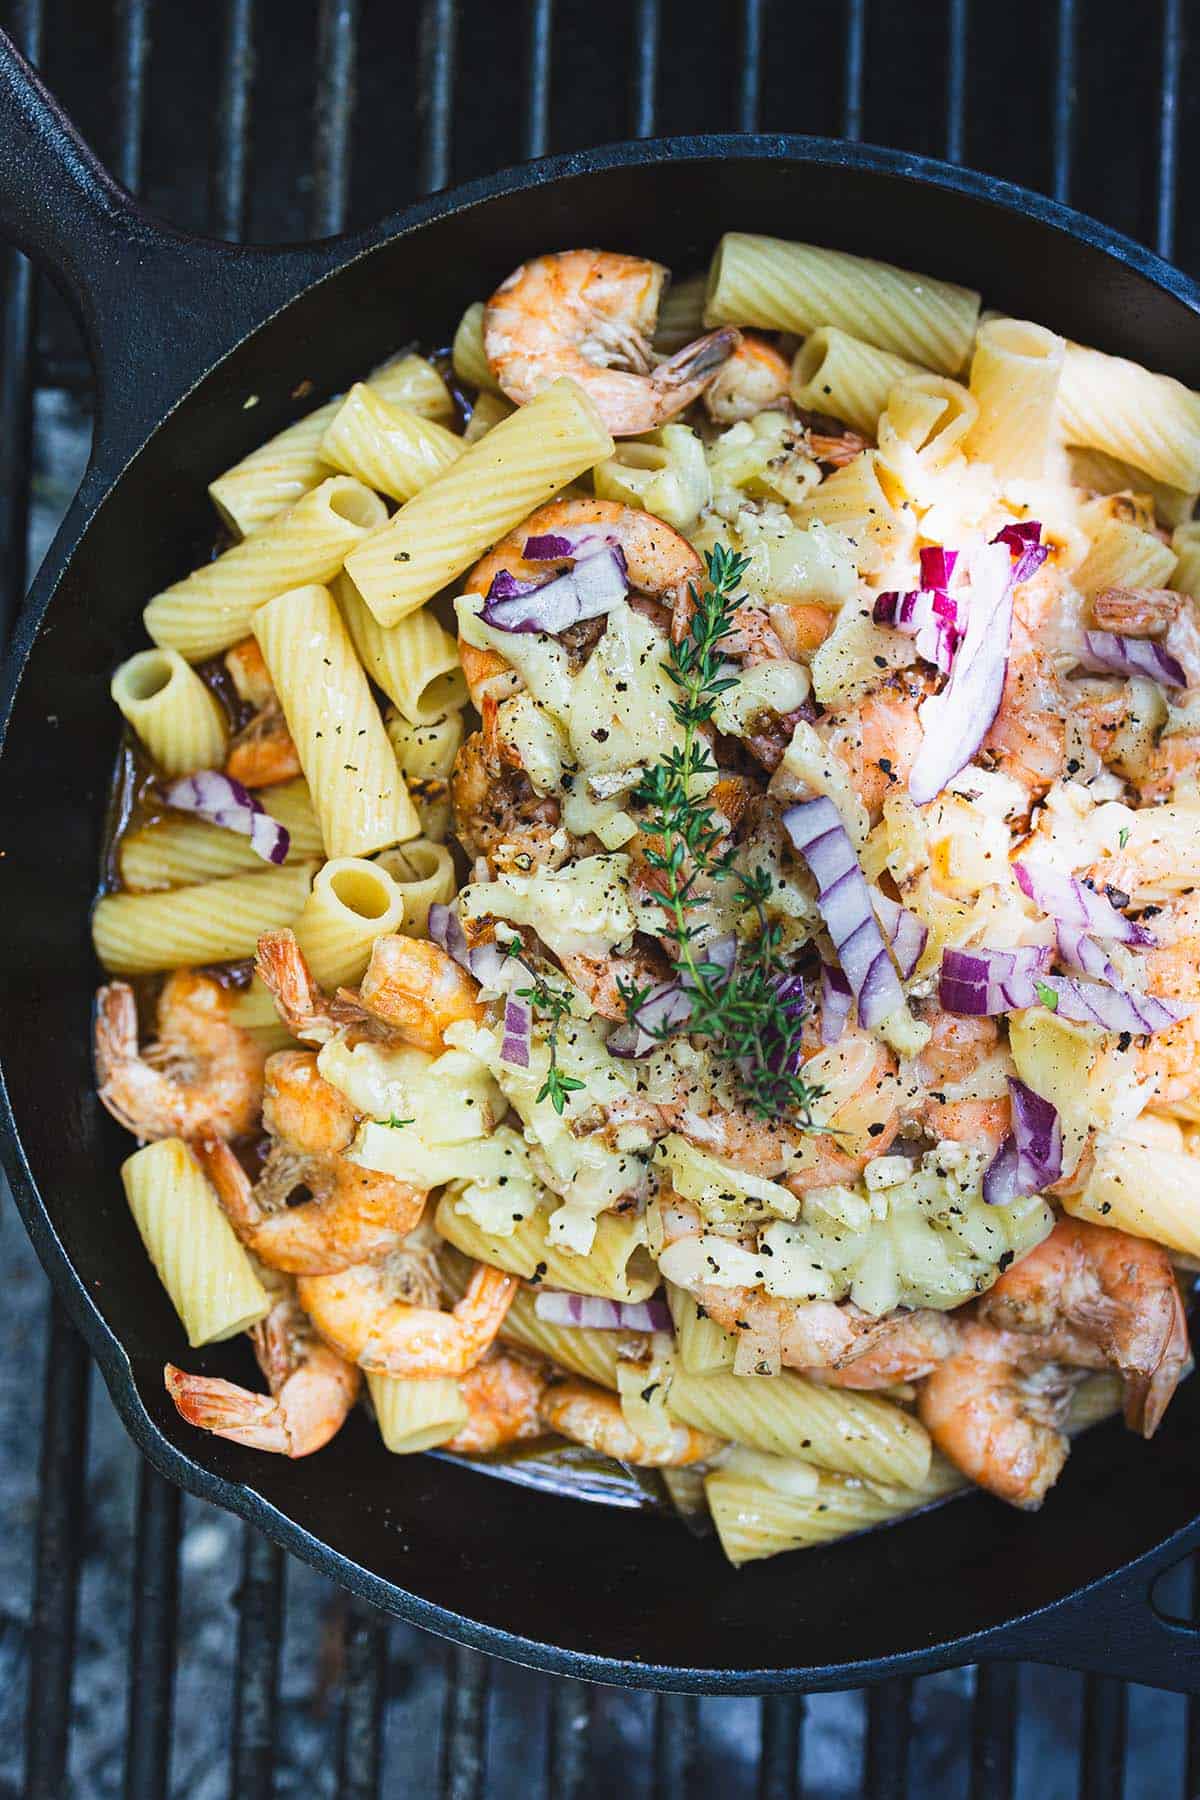
    Shrimp rigatoni with red onion and herbs in a cast iron skillet on the grill

    Why This Shrimp Pasta Is Perfect for Camping

    When it comes to cooking while camping, I always look for recipes that are simple, delicious, and require minimal ingredients. This shrimp pasta has become a go-to for my family of five because it checks all the boxes.

    With frozen shrimp that naturally thaw by the time you’re ready to cook, a handful of bold flavours, and a quick assembly over the fire, this meal makes campsite cooking effortless. Plus, nothing beats enjoying a warm, garlicky, lemony pasta under the open sky!

    Creamy pasta with shrimp, herbs, and vegetables in a skillet, featuring pasta, seafood, and fresh garnish.

    Key Ingredients

    Ingredients

    Frozen Shrimp

    • Frozen shrimp (shell-off for convenience) are easy to store and naturally thaw by the time you’re ready to cook. They’re the ultimate camping protein — no cooler stress, no spoilage risk.

    Old Bay Seasoning

    • A mix of warm spices that complements the shrimp and brings out a slightly smoky depth. It’s the secret weapon in this dish. Keep a tin of Old Bay Seasoning in your camping kit at all times.

    Manchego Cheese

    • This cheese melts beautifully and adds a nutty, creamy finish to the pasta. It’s a slightly unusual choice for a camping pasta, but the nutty character pairs incredibly well with shrimp and lemon. Grated mozzarella works as a substitute if Manchego isn’t available.

    Garlic

    • Garlic infuses the dish with deep, savoury flavour that elevates the shrimp. Use freshly minced for the best result — pre-minced jarred garlic works in a pinch at the campsite.

    Lemon

    • The fresh acidity brightens the entire dish and balances the richness of the butter and cheese. Don’t skip it — it’s what makes this pasta feel light and fresh despite being hearty.

    We cook this in a quality Lodge 12″ Cast Iron Skillet which goes straight over the campfire. A set of silicone tongs makes handling the shrimp much easier over an open flame.

    Sweet shrimp pasta with fresh herbs in a cast iron skillet.

    Not Just for Camping — Make It at Home Too

    While this recipe shines as an easy camping meal, it’s just as fantastic for a quick weeknight dinner at home. Swap the campfire for your stovetop, and in under 30 minutes, you’ll have a restaurant-quality pasta that the whole family will love. The simplicity of ingredients and the bold, fresh flavours make this dish a staple, no matter where you cook it!

    Love camping recipes? Try our Lemongrass Chicken Drumsticks and Instant Pot Easy Chili for more campfire-ready meals the whole family will love.

    Sweet shrimp pasta salad with green olives and fresh herbs in a black skillet, perfect for summer meals.

    Frequently Asked Questions

    Can I use fresh shrimp instead of frozen?

    Yes! Fresh shrimp work perfectly in this recipe. If using fresh shrimp at a campsite, keep them in your cooler and use them on the first night of your trip. Fresh shrimp cook slightly faster than thawed frozen shrimp, so watch for them to turn pink and curl — usually 2–3 minutes per side.

    What pasta shape works best?

    Rigatoni or penne are ideal because their ridges and tubes hold onto the sauce beautifully. In a pinch, any short pasta works well — farfalle, rotini, or fusilli are all great camping choices because they pack easily and cook consistently. Avoid delicate long pasta shapes like spaghetti at a campsite as they’re harder to manage over a fire.

    Can I substitute the Manchego cheese?

    Absolutely. Grated Parmesan or Pecorino Romano are the closest substitutes in terms of flavour profile — both add a salty, nutty depth. Mozzarella melts more smoothly if you prefer a creamier texture. For camping convenience, pack pre-grated cheese in a ziplock bag.

    How do I keep the shrimp from getting rubbery?

    The key is not to overcook them. Shrimp are done the moment they turn fully pink and curl into a C-shape — usually just 2–3 minutes over medium-high heat. If they curl tightly into an O-shape, they are overcooked. Add them last and remove the pan from heat as soon as they are done.

    Pink pasta tossed in a creamy spinach and sour cream sauce

    Sweet shrimp pasta with fresh herbs in a cast iron skillet.

    Easy Camping Shrimp Pasta

    A quick and flavorful shrimp pasta that comes together in just 30 minutes, perfect for cooking over a campfire or on the stovetop. With frozen shrimp, Manchego cheese, and a touch of lemon, this dish is simple, delicious, and great for both camping and home cooking
    Prep Time 25 minutes
    Cook Time 30 minutes
    Total Time 55 minutes
    Servings: 5 servings
    Course: Main Course
    Calories: 440

    Ingredients
      

    • ½ kg frozen shrimp (shell-off for convenience)
    • 450 g pasta of choice rigatoni or penne
    • 3 tbsp butter
    • 1 small onion, diced
    • 1 tsp Old Bay Seasoning see blog note
    • 3 cloves garlic, minced
    • 1 lemon, juiced
    • 1 cup manchego cheese, grate or grated mozzarella cheese
    • ¼ red onion, diced
    • ¼ cup olives

    Method
     

    1. Thaw the Shrimp – Take frozen shrimp out of the freezer 30-40 minutes before cooking.
    2. Cook the Pasta – Boil a pot of water over the fire or camp stove and cook the pasta until al dente (slightly undercooked is fine). Reserve 1 cup of pasta water, drain the rest, and set aside.
    3. In a cast iron pan over the fire, melt butter and sauté the diced onion until soft and fragrant.
    4. Add the shrimp to the pan, then season with bay spice blend, garlic, salt, and pepper. Cook until pink and slightly crispy on the edges.
    5. Add the cooked pasta, manchego cheese, and reserved cup of pasta water to the pan and toss everything together.
    6. Remove from heat and top with red onions and olives for a fresh, briny finish.
  • Mole Ayocote – Purple Camp Bean Recipe

    Mole Ayocote – Purple Camp Bean Recipe

    I discovered this recipe in a small rural town outside Puebla while learning to grow oyster mushrooms with a government agricultural program. The workshop owner, Doña Mari, quietly invited us to brunch and set down a bowl of deep purple beans swimming in a rich red chile sauce she called Mole Ayocote. I fell in love on the first spoonful. This authentic, little-known Mexican camp bean recipe is now one of my most requested at the campsite.

    This post may contain affiliate links. If you purchase through these links, I may earn a small commission at no extra cost to you. Thank you for supporting Love & Harvest!

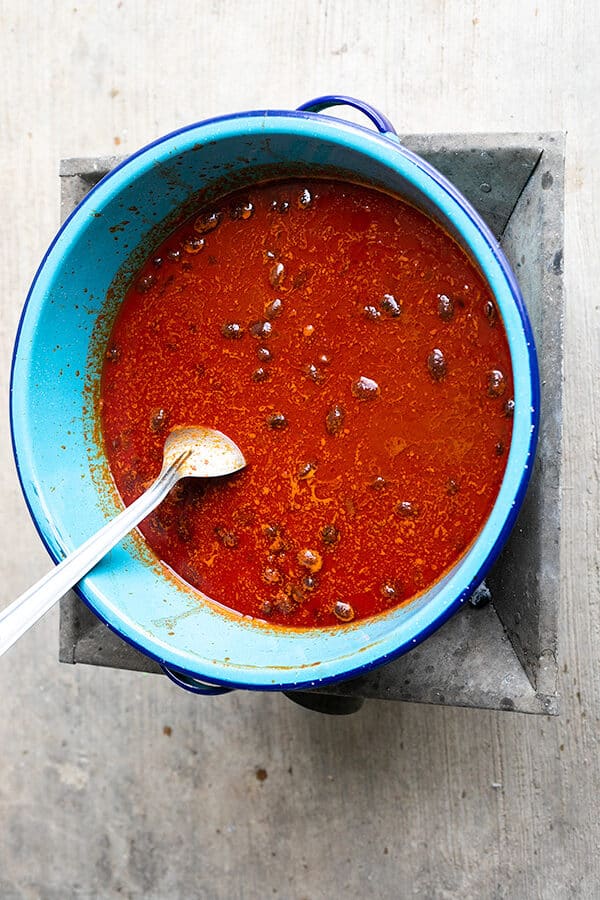
    Pot of purple ayocote beans simmering in red mole sauce

    Why This Is the Ultimate Camp Bean Recipe

    Beans are always an easy camping food — high in protein and filling. But flavorless canned beans are a letdown. Mole Ayocote is different: it is a purple broad bean stew built on a chilli puree of ancho peppers, guajillo peppers, cumin, garlic, and oregano. Make the red chile puree at home, bring it to the campsite, and the rest comes together in one pot over the fire.

    Why You Will Love This Recipe

    • Great vegetarian option — no meat needed. The combination of spice, peppers, and beans is hearty and deeply satisfying.
    • Authentic Mexican flavour — with these peppers and spices, you get the full Mexican experience from a single dish.
    • Delicious — the flavour is layered and complex, and the colour of the purple ayocote beans in brilliant red sauce is stunning.
    • Easy campsite cooking — minimal gear required. If the chile puree is made ahead, all you need is a pot and a fire.

    trail camp beans recipe

    Ingredients Deep-Dive

    Ayocote Beans (Purple Broad Beans)

    Ayocote is a type of Mexican purple runner bean — large, meaty, and with a savoury, nutty flavour that is almost meat-like. The creamy, starchy texture makes it an outstanding meat substitute for vegetarians. If you cannot find purple broad beans, any other broad beans work well. Avoid fava beans — they have a strong distinctive taste that clashes with the chile sauce.

    • Why it matters: The density and earthiness of ayocote beans stand up to the bold chile puree in a way that smaller beans simply cannot. The colour turning deep purple-red in the sauce is part of what makes this dish so visually spectacular.

    Ancho Peppers

    Ancho pepper is the dried version of the poblano. It is not spicy — it is used almost entirely as a colouring and flavouring agent, giving Mexican dishes like pozole and red enchilada sauce their deep warm red colour. It brings a mild smoky sweetness to the stew.

    • Why it matters: Without ancho, the stew turns pale and loses its rich visual appeal. A bag of dried mulato or ancho chiles lasts for months in your pantry.

    Guajillo Peppers

    Slightly spicy, but manageable. When using dried guajillo, always discard the seeds and stem — the flesh gives you the flavour and colour while removing most of the heat. Using both long and short guajillo (as Dona Mari taught) adds complexity without any extra effort.

    • Why it matters: Guajillo is the backbone of the stew’s flavour. Toasting it lightly before soaking unlocks a smoky dimension that transforms the sauce.

    Cumin

    This recipe has a strong cumin presence. In Mexico it is called comino and it is foundational to Mexican cooking — earthy, warm, and slightly bitter.

    • Why it matters: Cumin ties together all the other spice notes. Do not skip it or reduce the quantity.

    Oregano

    Use Mexican oregano if you can find it. It has a stronger, more earthy tone than Mediterranean oregano and a hint of citrus. The aroma is noticeably more complex.

    • Why it matters: Mexican oregano completes the authentic small-town Puebla flavour profile that makes this recipe so special.

    Manteca (Animal Lard)

    In small towns across Mexico, manteca is cheaper than cooking oil and adds a richness and depth that vegetable oil cannot replicate. For a vegan version, substitute with canola or sunflower oil — the dish still works beautifully.

    • Why it matters: Frying the onion and garlic in manteca before adding the chile sauce creates a flavour base (sofrito) that gives the stew its round, satisfying finish.

    cowboy bean recipe

    How to Cook Ayocote Beans

    Instant Pot Method

    Rinse the dried beans and fill the pot with 1/2 litre of water. Set to “Pressure Cook” for 40 minutes with the valve on. After the timer, let the valve release naturally. Reserve the bean water.

    Stovetop Method

    Rinse dried beans and fill a pot with 1 litre of water. Boil until tender — up to 80 minutes. Test after 80 minutes; if not soft, add 10 more minutes and more water. Reserve the bean water.

    How to Cook Beans While Camping

    A campfire Dutch oven is the best investment for camp cooking — heavy and bulky, but you can make anything in it, including these beans over an open fire. Fill with water, hang over the campfire or lay on a campfire grate, and cook for 45 minutes. Manage heat by adjusting the fuel and monitor water levels to prevent burning.

    Professional Tips for No-Fail Mole Ayocote

    Pro Tip 1: Soak the Beans Overnight

    Soaked beans in the Instant Pot cook in 15–25 minutes instead of 40. Unsoaked dried beans need 37–42 minutes. If you know you are making this the next day, soak overnight every time.

    Pro Tip 2: Use a Pressure Cooker

    Beans cook perfectly in a pressure cooker and in a fraction of the time. Unsoaked: 37–42 minutes. Well-soaked: 15–25 minutes.

    Pro Tip 3: Keep the Bean Water

    After the beans finish cooking, reserve that starchy water. When the sauce and beans simmer together for 30 minutes, the bean water adds depth and enriches the final stew.

    Pro Tip 4: Lightly Toast the Chile Peppers

    Toast the guajillo and ancho peppers in a dry pan until slightly browned and fragrant — the smoky flavour really comes through. After toasting, soak them in hot water for 10 minutes to rehydrate before blending.

    How to Serve Mole Ayocote

    • Bread — dip bread into the sauce to soak it all up while eating the beans with a spoon.
    • Rice — lay the purple camp beans over rice for the best and most simple supper.
    • Mashed potato — serve with mashed potato and vegetables, drizzled with the red sauce.
    • Vegetables — pair with rice and roasted vegetables for a complete vegetarian meal.

    More Mexican Bean and Stew Recipes

    If you love this Mole Ayocote, you will enjoy our green pozole (pozole verde) — another bold Mexican stew with equally deep flavour. For a warming bean-based soup with spice, check out instant pot Mexican menudo.

    Frequently Asked Questions

    What can I substitute for ayocote beans?

    Any large purple broad bean or runner bean works well. Black beans or pinto beans can work in a pinch for a different texture. Avoid fava beans — their distinctive strong flavour does not complement the chile sauce.

    Is this recipe spicy?

    No. Ancho peppers are mild and used mostly for colour. Guajillo adds a gentle warmth, but removing the seeds keeps the heat very low. This is suitable for children and those sensitive to spice.

    Can I make this vegan?

    Yes. Simply substitute the manteca (animal lard) with canola or sunflower oil. The rest of the recipe is fully plant-based.

    Can I make the chile puree ahead of time?

    Absolutely — this is the recommended approach for camping. Make the red chile puree at home, store it in a sealed container in the fridge or cooler, and at the campsite you only need to cook the beans and assemble.

    Where can I find ayocote or guajillo peppers?

    Mexican grocery stores carry both. Online, you can find dried mulato chiles that work similarly. For guajillo, most Latin food sections in larger supermarkets carry them dried.

    How long does this stew keep?

    Stored in an airtight container in the refrigerator, Mole Ayocote keeps well for up to 4 days. The flavours actually deepen overnight. It also freezes well for up to 3 months.

    Ladle in a blue pot of mole ayocote bean stew

    Mole Ayocote – Purple Camp Bean Recipe

    Delicious Mexican camp bean recipe to make on your next camping trip! Packed with the delicious flavour of ancho and guajillo peppers, cumin, thyme, oregano, and garlic This surely will be your favourite camping bean recipe! Print Recipe Pin RecipeServings: 6 people

    Equipment

    • blender

    Ingredients

    • 300 g ayocote beans or purple broad beans
    • 2 guajillo pepper
    • 1 ancho pepper
    • 1 tsp cumin powder
    • ¼ tsp clove powder
    • ¼ tsp black pepper
    • 1 tsp oregano dried
    • 1 tsp thyme dried
    • 3 bay leaf
    • ¼ cup manteca or cooking oil
    • ½ white onion
    • 3 clove of garlic
    • ½ L water
    • sea salt to taste

    Instructions

    Cooking ayocote beans with an Instant Pot

    • Rinse the dried beans in tap water and refill it with ½ litre of water.
    • Set the mode to “Pressure Cook” and set the timer to 40 minutes. Close the lid with the valve on.
    • After the timer sets off, let the beans sit until the valve naturally unlocks itself.
    • Take the beans out, but reserve the bean water. Set aside.

    Cooking ayocote beans with a pot on the stove

    • Rinse the dried beans in tap water and refill with ½L of water.
    • Boil the beans until tender. It can take up to 80 minutes depending on size.
    • After 80 minutes test the bean to see if the inside is soft. If needed, give it an extra 10 minutes and add more water.
    • Take the beans out once soft and tender, but reserve the bean water. Set aside.

    Cooking the Mole Ayocote

    • In a dry pan, place the guajillo and ancho peppers. Heat on high. Toast until browned and fragrant on the outside. Let cool.
    • Discard the seeds and stem. Pour hot water over the peppers until completely submerged. Soak for 10 minutes.
    • Place the soaked peppers in a blender with 1 cup of water. Add cumin, clove, oregano, thyme, and black pepper. Blend until smooth. Set aside.
    • In a large pot, place the manteca or cooking oil. Heat on medium-high.
    • Add onion and garlic. Fry until fragrant, about 2 minutes.
    • Add the red chilli puree, beans, bay leaf, and reserved bean water. Cook on medium-low heat for 20 minutes. Season with salt to taste. Serve.
  • Easy Ribs Recipe with Homemade BBQ Sauce

    Easy Ribs Recipe with Homemade BBQ Sauce

    This post may contain affiliate links. If you purchase through these links, I may earn a small commission at no extra cost to you. Thank you for supporting Love & Harvest!

    The biggest mistake people make with ribs at home is trying to grill them raw. That’s how you end up with a chewy, undercooked rack that nobody’s proud of. This recipe flips the script: slow-bake the ribs in the oven first until they’re impossibly tender, then finish them over charcoal for that caramelised, smoky crust. The result is fall-off-the-bone ribs that look like a grill master pulled them off — even if you’ve never grilled before.

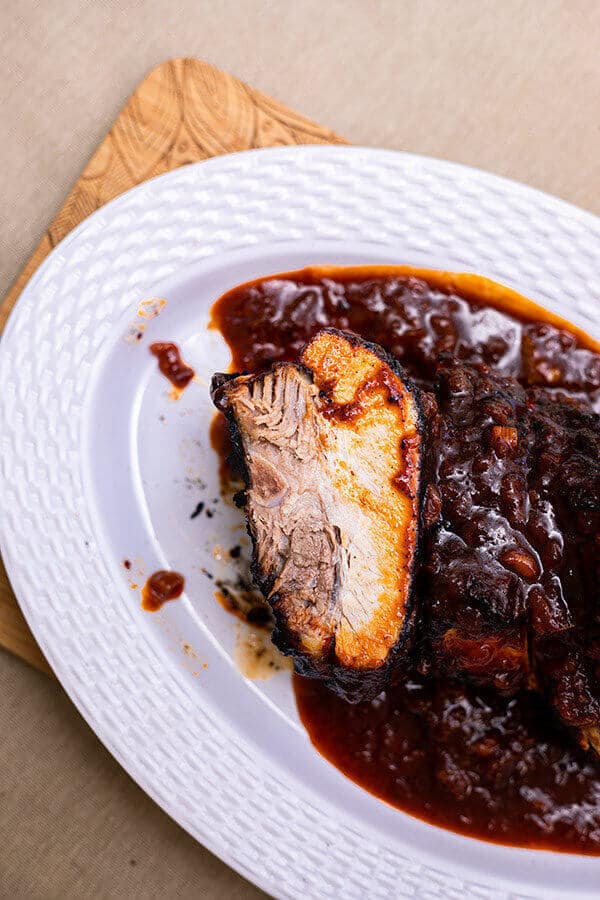
    Glazed BBQ ribs on a white platter with homemade sauce

    Why This Ribs Recipe Works

    Reason 1: Bake Ahead, Grill with Confidence

    My husband loves this recipe because it removes all the pressure from grilling. The ribs are already fully cooked before they touch the grill — there’s no stress about raw meat, no thermometers required for doneness. All the grill needs to do is add caramelisation and char. He can focus on the performance and let the oven do the real work.

    bbq ribs recipe grill

    Reason 2: The Flavour Is Extraordinary

    The dry rub and homemade BBQ sauce use pantry staples, but together they produce something that tastes restaurant-calibre. The sugar in the rub caramelises on the grill. The liquid smoke, tamarind vodka, and molasses in the sauce create layers of smoky, tangy, deep flavour that store-bought BBQ sauce simply cannot mimic.

    Reason 3: Truly Hands-Off

    95% of the cooking time requires nothing from you. The ribs bake in foil for 2.5 hours, and then you grill them for 7–10 minutes. It’s dummy-proof. Once those ribs finish the slow bake, they will taste good no matter what happens on the grill. A great recipe for beginners and pros alike.

    Rack of ribs searing on a charcoal grill

    Ingredients Deep-Dive

    Ingredients

    The Dry Rub

    The rub is where the ribs’ flavour foundation is built. Kosher salt draws moisture to the surface and seasons the meat deeply. Brown sugar creates the caramelised crust on the grill and balances the savoury spices. Smoked paprika adds colour and a subtle smokiness even before the grill. Cumin adds an earthy warmth that makes the flavour complex without being identifiable as a single spice. Grind the rub fresh if you can — the difference is notable.

    Liquid Smoke

    This is what gives indoor or charcoal-light BBQ that authentic smoked-meat flavour. The concentrate I use is all-natural hickory liquid smoke — a few drops go a long way. I also use it on my Cured Salmon Gravlax recipe. Hickory and mesquite combined gives a complex, campfire-style depth that no dry spice can replicate.

    Molasses and Brown Sugar

    Together these two are the backbone of the BBQ sauce. They don’t make it sweet in a candy way — they create the deep, jammy thickness that makes a great BBQ sauce cling to the ribs. The molasses also adds a slight bitterness that balances the honey and vinegar.

    Smirnoff Spicy Tamarind Vodka

    This is the ingredient that sets this BBQ sauce apart from everything else. In Mexico it’s easy to find; elsewhere, substitute with dark rum. The tamarind adds a fruity tartness and the spice builds quietly in the background. It’s the unexpected ingredient that makes people ask “what is in this sauce?”

    Smoker Chips

    If you’re using charcoal, add wood chips to the coals. Apple or hickory smoker chips added to the coals give the ribs a real smoke character that liquid smoke alone can’t fully replicate. Soak the chips in water for 30 minutes before adding so they smoulder rather than burn.

    pork ribs recipe

    Charcoal, Propane, or Smoker?

    All three work. For the grilling step we just need high heat to caramelise the exterior — the ribs are already fully cooked. Personally, I prefer charcoal with a handful of wood for the smoke it generates. But if all you have is a propane grill set to high, these ribs will still be outstanding.

    Small blue kettle charcoal grill on a stone patio

    What to Serve with the Ribs

    Here are my favourite sides with these fall-off-the-bone ribs:

    • Tortillas — a favourite around here in Mexico. A warm tortilla is perfect for wrapping the meat with the BBQ sauce.
    • Potatoes — mashed, baked, or potato salad. All work beautifully as a starchy companion.
    • Salads — greens help cut through the richness. Try our Cold Beet and Avocado Sashimi — it’s elegant and goes perfectly with BBQ.
    • Bread — the best way to soak up extra sauce. Our Best Fried Chicken also makes an incredible pairing for a full feast.

    bbq pork ribs recipe

    Frequently Asked Questions

    Can I make these ribs ahead of time?

    Yes — and in fact they’re better that way. Bake the ribs up to 3 days ahead. The flavour develops more fully and the cold, firm ribs hold together better on the grill. Refrigerate wrapped in foil and grill straight from the fridge, adding a few extra minutes for the heat to penetrate.

    What if I burnt the ribs on the grill?

    Honestly? The burnt edges taste great. Because of the sugar in the rub, the meat chars quickly — and that slightly burnt, caramelised exterior with the homemade BBQ sauce is absolutely delicious. Don’t panic if parts get darker than expected.

    Can I make these for camping?

    These are arguably the perfect camping food. Bake them at home, transport them wrapped in foil. At the campsite, all you need is a grill and 10 minutes. They’re fast, impressive, and make you look like you cooked all day.

    How spicy is the BBQ sauce?

    Mildly spicy. The red chili pepper and tamarind vodka add a background warmth, not heat. If you want more kick, double the chili pepper or add a few drops of hot sauce to the finished sauce. Kids in our house eat this without complaint.

    Can I use spareribs instead of baby back ribs?

    Yes. Spareribs are larger and take longer to bake — allow 3.5 hours instead of 2.5 hours. Everything else in the recipe stays the same. Baby back ribs are leaner and more tender; spareribs have more fat and flavour.

    What’s the best way to reheat leftovers?

    Wrap leftover ribs in foil and reheat in a 300°F oven for 20–25 minutes. Unwrap for the last 5 minutes to re-crisp the exterior. Avoid microwaving — it makes the crust soggy and toughens the meat.

    Sliced BBQ ribs covered in homemade sauce on a white platter

    Easy Fall-Off-The-Bone Ribs with Homemade BBQ Sauce

    Easy and delicious slow-baked ribs in the oven for that juicy tender interior, and grilled over charcoal for that crispy caramalized exterior. Super addicting and adored by many! Print Recipe Pin RecipePrep Time:10 minsCook Time:3 hrsCourse: Main CourseCuisine: AmericanKeyword: BBQ, BBQ Sauce, Grill, Grilled Ribs, oven-baked ribs, Ribs, Ribs RecipeServings: 8 people

    Equipment

    • charcoal grill

    Ingredients

    Ribs Dry Rub

    • 2½ tbsp kosher salt
    • 1 tbsp garlic powder
    • 1 tbsp onion powder
    • 1 tbsp ground cumin
    • 3 tbsp brown sugar
    • 1 tbsp smoked paprika
    • ½ tsp Mexican spice
    • ½ tsp ground black pepper
    • 4 kg baby back pork ribs roughly about 8 racks

    BBQ Sauce

    • 2¼ tbsp vegetable oil
    • ½ white onion finely chopped
    • 1½ cup water
    • ½ cup tomato paste
    • ½ cup white vinegar
    • ⅓ cup brown sugar
    • 2½ tbsp honey
    • 2 tbsp worcestershire sauce
    • 2 tsp salt
    • ¼ tsp black pepper
    • 1¼ tsp liquid smoke flavouring
    • 2 tsp Smirnoff Tamarind Vodka
    • 3 garlic clove grated
    • ¼ tsp smoked paprika
    • 1 tbsp dark molasses
    • ½ tsp red Chili pepper
    • rib juice reserved

    Instructions

    Ribs Marinate

    • Preheat oven to 300°F.
    • Combine salt, garlic powder, onion powder, cumin, brown sugar, smoked paprika, mexican spice, and black pepper in a small bowl.
    • Place each rack of ribs on a double layer of foil; sprinkle rub all over ribs. Wrap racks individually and divide between 2 baking sheets.Bake ribs until very tender but not falling apart, about 2.5 hours for baby backs and 3.5 hours for spareribs.

    Best BBQ Sauce

    • Heat oil in a medium saucepan over medium heat. Cook and stir the onions in oil for 5 minutes. Stir in water, tomato paste, vinegar, brown sugar, honey, and Worcestershire sauce.
    • Season with 2 teaspoons salt, 1/4 teaspoon black pepper, liquid smoke, tamarind liquor / rum, garlic, smoked paprika, dark molasses, rib juice, and 1/2 tablespoon ground chile pepper. Bring mixture to a boil, then reduce heat. Simmer for 45 minutes, uncovered, or until sauce thickens. Remove from heat, and set sauce aside.
    • Carefully unwrap ribs; pour any juices from foil into a 4-cup heatproof measuring cup; reserve juices. Let ribs cool completely. Cover and chill juices. Rewrap ribs in foil and chill. Build a medium-hot fire in a charcoal grill, or heat a gas grill to high. If youre using charcoal, add some wood chips so there's a slight smoke to smoke the ribs to give it more flavour.
    • Add bbq sauce.
    • ***DO AHEAD: Ribs can be baked up to 3 days ahead (the flavor will be more developed, and the cold ribs will hold together better on the grill as they heat through).***

    Grilling

    • Grill ribs, basting with barbecue sauce mixture and turning frequently, until lacquered and charred in places and heated through, 7-10 minutes. Transfer to a cutting board; cut between ribs to separate. Transfer to a platter and serve with additional barbecue sauce.

    Notes

    ***DO AHEAD: Ribs can be baked up to 3 days ahead (the flavour will be more developed, and the cold ribs will hold together better on the grill as they heat through).***