Category: kids meals

  • Homemade Beef Jerky

    Homemade Beef Jerky

    Homemade beef jerky is thin strips of beef marinated in soy sauce, Worcestershire sauce, liquid smoke and spices, heated to 160°F for safety, then dried at 135°F in an air fryer, oven or dehydrator until firm but still bendy. Plan on an overnight marinade and about 8 hours of drying.

    Jump to Recipe

    This post may contain affiliate links. As an Amazon Associate I earn from qualifying purchases.

    There is something so satisfying about having a homemade snack ready whenever hunger strikes. In our house, this homemade beef jerky has become a family favourite. It’s savoury, a little smoky, and so good that my son loves it enough to learn the recipe himself!

    We started making jerky because we were looking for snacks to take on our trips. Store-bought beef jerky is expensive, but it was always what we ended up buying at the convenience store instead of chips, packaged cookies or instant ramen. So we started making our own!

    Now it’s our snack for trips and for that rush between school and afternoon classes, when there’s no time to sit down and eat. The kids grab it, and honestly, so do the grown-ups.

    Living in Mexico, I find that convenience stores are filled with packaged snacks and sweets. There is nothing wrong with a treat, but a jar of homemade jerky is a snack we’d rather pack than chips.

    Let me show you how we make it!

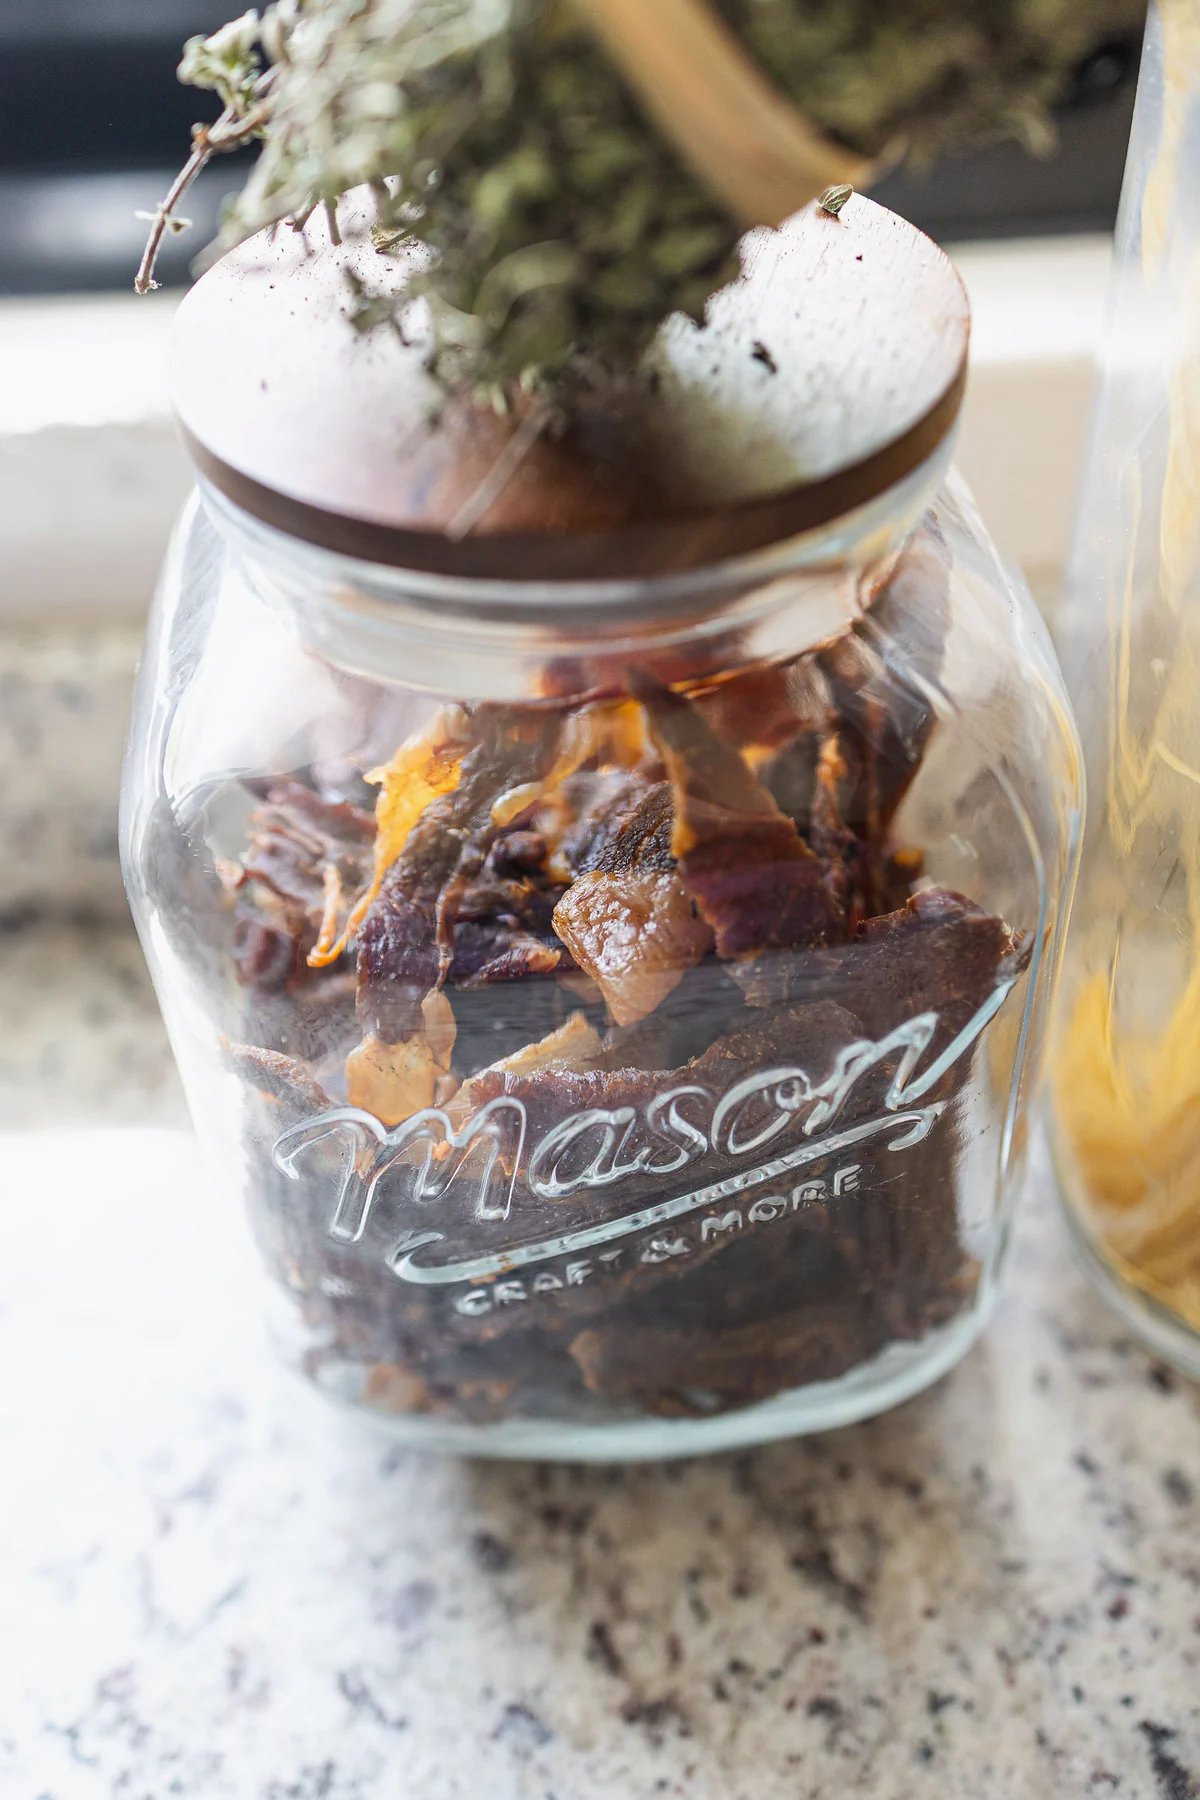
    Homemade beef jerky in a glass Mason jar with a wooden lid on a granite kitchen counter.

    Want a week of dinners planned for you? Get my free dinners

    Why we love this beef jerky recipe

    The first reason is simple: it tastes amazing! Soy sauce, Worcestershire sauce, liquid smoke, garlic, onion and paprika make a savoury, smoky jerky that is hard to stop eating.

    My son is one of its biggest fans. He loves these beef jerky sticks so much that he learned the recipe just so he would know how to make them. As a mom, I love seeing my kids get excited about food we make at home!

    I also love how convenient it is. We keep a jar on the kitchen counter for those moments when the kids or my husband walk by looking for something to eat. Instead of cookies or candy being the easiest thing to grab, there’s homemade jerky. Keep the main batch airtight in the fridge, though (more on storage below).

    Of course, jerky is still a salty snack, so we enjoy it as one snack among many. But having another option our whole family genuinely enjoys? That is a win in my book.

    Ingredients you’ll need

    You only need five things to think about: beef, soy sauce, Worcestershire sauce, liquid smoke and seasonings.

    • Beef round steak: a lean cut, which matters because fat goes rancid. Top round or eye of round both work well. I buy my sliced beef from Wild Fork. It comes frozen and cut thin, which makes prep so much easier. If your beef isn’t sliced, freeze it for 1 to 2 hours until firm, then slice it about 1/4 inch (5 mm) thick. Slice against the grain for a more tender chew, or with the grain if you like it chewier.
    • Soy sauce: regular soy sauce. Low-sodium soy sauce works too if you want it a little less salty.
    • Worcestershire sauce and liquid smoke: these two give it the smoky, “store-bought jerky” flavour.
    • Brown sugar: balances the salt.
    • Meat tenderizer: use unseasoned meat tenderizer. Most brands already contain salt, so don’t add extra.
    • Garlic powder, onion powder, sweet paprika, black pepper, salt.

    Substitutions: no liquid smoke? Use smoked paprika instead of regular paprika for a gentler smoky note. Gluten-free: use tamari and a gluten-free Worcestershire sauce.

    Recommended tools for homemade jerky

    Equipment

    • Air fryer with a dehydrate function (that’s what I use), or an oven that can hold 135°F, or a food dehydrator with an adjustable thermostat
    • Instant-read meat thermometer
    • Large bowl or zip-top bag for marinating
    • Sheet pan with a wire rack (for the 160°F pre-heat step)
    • Long, sharp slicing knife and cutting board (if slicing your own beef)
    • Clean airtight jars or zip-top bags

    How to make homemade beef jerky

    Step 1: Make the marinade. In a large bowl, stir together the soy sauce, Worcestershire sauce, liquid smoke, brown sugar, salt, black pepper, meat tenderizer, garlic powder, onion powder and paprika until well combined.

    Step 2: Marinate the beef. Add the thin beef strips and toss so every piece is coated. Cover and refrigerate overnight, at least 6 and up to 24 hours. Always marinate in the fridge, never on the counter, and throw out the marinade afterwards.

    Step 3: Drain. Take the beef out of the marinade and let the excess drip off. Pat the strips lightly with paper towels so they dry faster.

    Step 4: Heat to 160°F first. This is the food safety step. The USDA recommends heating beef to 160°F (71°C) before dehydrating, because drying alone may never get the meat hot enough to kill bacteria. Lay the strips in a single layer on a wire rack set over a sheet pan and roast at 325°F (163°C) until an instant-read thermometer in the thickest strip reads 160°F. Thin strips usually take 10 to 15 minutes, but go by the thermometer, not the clock. You can also steam them.

    Strips of homemade beef jerky on a wire cooling rack over a granite counter.

    Step 5: Dry at 135°F for about 8 hours. Once the strips have reached 160°F, arrange them in a single layer with space between pieces so air can move. I use my air fryer’s dehydrate function at 135°F (57°C) for about 8 hours. No air fryer? Use the oven at 135°F for about 8 hours, with the strips on a wire rack over a sheet pan. Check with an oven thermometer that your oven really holds 135°F, because many ovens don’t go that low; if yours doesn’t, use an air fryer or a dehydrator instead. A food dehydrator set to 135°F works the same way. The USDA says to keep the drying temperature steady between 130 and 140°F. Thinner strips can be ready sooner, so start checking around 6 hours.

    Step 6: Check the texture. Done jerky is dry and firm but still bends and cracks without snapping in half. No wet or soft spots in the middle. Let it cool completely before storing.

    Homemade beef jerky strips sticking out of a glass Mason jar.

    And that’s it! TA-DA, you got yourself a batch of homemade beef jerky for the next snack attack.

    Tips and common mistakes

    • Don’t skip the 160°F step. Marinating doesn’t make raw meat safe, and 135°F drying is too low to do the job alone.
    • Keep the slices even. Thick and thin strips on the same tray dry at different speeds. Pull the thin ones early.
    • Trim visible fat. Fat doesn’t dry and makes jerky go off sooner.
    • Give it room. Overlapping strips stay wet where they touch.
    • Use a thermometer, not a guess. Thin strips heat fast, so check early.

    Amazing snacks for the family

    Close-up of homemade beef jerky through the glass of a Mason jar.

    One of my favourite things about this recipe is how easily it fits into our everyday routine. Some days the kids are home looking for something to eat between activities. Other days we are rushing from one place to another, and I know we will need something in the car.

    That’s when these beef jerky sticks really shine. I pack a few sticks and a bottle of water, and it’s a simple snack for the kids while we’re out. Having something ready in my bag saves me from stopping at a convenience store every time someone gets hungry.

    My son especially loves this snack, and it’s an easy one to pack alongside fruit or crackers. Since jerky is dried and salty, I make sure the kids drink plenty of water with it, especially when they’re active or outside.

    I’m not saying we never buy packaged snacks. Real life is busy. But I love knowing I have another option ready at home or packed for the road.

    How to store homemade beef jerky

    A jar of homemade beef jerky topped with a bundle of thyme on a sunny windowsill.

    In our house it’s gone in two weeks, so the jar on the counter never sits around for long! Honestly, I would have guessed a good airtight jar keeps it about a month, but the National Center for Home Food Preservation says properly dried jerky keeps two weeks at room temperature in a sealed container, so two weeks is our counter limit. Keep the rest airtight in the fridge; the USDA says home-dried jerky can be stored 1 to 2 months. For longer, freeze it in small portions; Cornell Cooperative Extension says up to 1 year in the freezer for best quality. If you ever see moisture or mould in the jar, or it smells off, throw it out.

    • Before storing: let it cool completely and blot off any oil, then pack it in a clean, dry, airtight jar or bag.
    • On the go: pack a portion in a clean, sealed container and keep it cool. Don’t leave jerky in a hot car.

    FAQ

    Do you have to cook beef jerky before dehydrating it? Yes, for safety. The USDA recommends steaming or roasting the strips to 160°F before drying, because a dehydrator or low oven may not heat the meat enough to kill bacteria like E. coli and Salmonella.

    What is the best cut of beef for jerky? Lean cuts like round steak (top or bottom round) or eye of round work best because there is less fat to go rancid. We use thinly sliced round steak.

    How long does homemade beef jerky last? Up to 2 weeks at room temperature in a sealed container (National Center for Home Food Preservation). In the fridge, it keeps 1 to 2 months (the USDA says home-dried jerky can be stored 1 to 2 months). Freeze it for longer storage.

    How do I know when beef jerky is done? It should be dry and firm but still bend and crack without breaking in two, with no moist spots inside.

    Can I make beef jerky in an air fryer? Yes. If your air fryer has a dehydrate function, heat the strips to 160°F first, then dehydrate at 135°F for about 8 hours. That’s how we make ours.

    Can I make beef jerky in the oven? Yes, if your oven can hold a steady 135°F. Heat the strips to 160°F first, then dry them on a wire rack at 135°F for about 8 hours. Check the temperature with an oven thermometer.

    How long should I marinate beef jerky? At least 6 hours and up to 24 hours, always in the fridge.

    More recipes you’ll love

    If there is one thing I have learned as a busy mom, it’s that the snacks we keep within easy reach make everyday life a little easier. This jerky is something we can make ahead, keep ready for hungry family members, and pack when we know we’ll be out for hours.

    So make a batch, store it safely, and see how fast your family goes through it. Just be warned: once everyone finds out where you keep the jerky, that jar may need refilling sooner than you think!

    Happy snacking!

    Get my free dinners

    Homemade beef jerky in a glass jar.

    Homemade Beef Jerky

    Thin strips of beef round marinated in soy sauce, Worcestershire, liquid smoke and spices, heated to 160°F for safety, then dried at 135°F in the air fryer or oven until firm but bendable.
    Prep Time 20 minutes
    Cook Time 8 hours 15 minutes
    Marinate 12 hours
    Total Time 20 hours 35 minutes
    Servings: 10 servings (about 1 oz each)
    Course: Snack
    Cuisine: American

    Ingredients
      

    For the beef
    • 1.2 kg beef round steak top round or eye of round, sliced about 1/4 inch (5 mm) thick (about 2.6 lb)
    For the marinade
    • ¼ cup soy sauce regular or low-sodium
    • 2 tbsp Worcestershire sauce
    • 1 ½ tbsp liquid smoke
    • 2 tbsp brown sugar
    • 2 tsp salt
    • 1 tsp ground black pepper
    • 1 tsp meat tenderizer unseasoned
    • 1 tsp garlic powder
    • 1 tsp onion powder
    • 1 tsp sweet paprika

    Equipment

    • Air fryer with a dehydrate function or an oven that holds 135°F, or a food dehydrator
    • Instant-read meat thermometer
    • Slicing knife if slicing your own beef
    • Wire rack and sheet pan
    • Airtight jars or zip-top bags

    Method
     

    1. In a large bowl, stir together the soy sauce, Worcestershire sauce, liquid smoke, brown sugar, salt, pepper, meat tenderizer, garlic powder, onion powder and paprika.
    2. Add the beef strips and toss to coat every piece. Cover and refrigerate overnight (6 to 24 hours). Discard the marinade afterwards.
    3. Drain the strips and pat them lightly dry with paper towels.
    4. Lay the strips in a single layer on a wire rack over a sheet pan and roast at 325°F (163°C) until the thickest strip reads 160°F (71°C) on an instant-read thermometer, usually 10 to 15 minutes. Go by the thermometer, not the clock.
      Strips of homemade beef jerky on a wire cooling rack over a granite counter.
    5. Arrange the strips in a single layer with space between pieces. Dry at 135°F (57°C) for about 8 hours using the air fryer’s dehydrate function, an oven that holds 135°F, or a dehydrator, until dry and firm but still bendable. Start checking around 6 hours.
    6. Cool completely. Store in an airtight container in the fridge, or freeze for longer storage.
      Homemade beef jerky strips sticking out of a glass Mason jar.

    Notes

    I use my air fryer’s dehydrate function at 135°F. No air fryer? Use the oven at 135°F for about 8 hours, but check with an oven thermometer that it really holds 135°F. A food dehydrator at 135°F works too (USDA: keep drying between 130 and 140°F). The USDA recommends heating beef to 160°F before drying. Thin, even slices dry evenly; pull thinner strips early. Storage: up to 2 weeks at room temperature in a sealed container (NCHFP). Keep the rest airtight in the fridge; the USDA says home-dried jerky can be stored 1 to 2 months. Freeze it for longer storage.
    Yield: about 300 g (10 to 11 oz) of jerky from 1.2 kg raw beef.
  • 30-Minute Thai Basil Chicken

    30-Minute Thai Basil Chicken

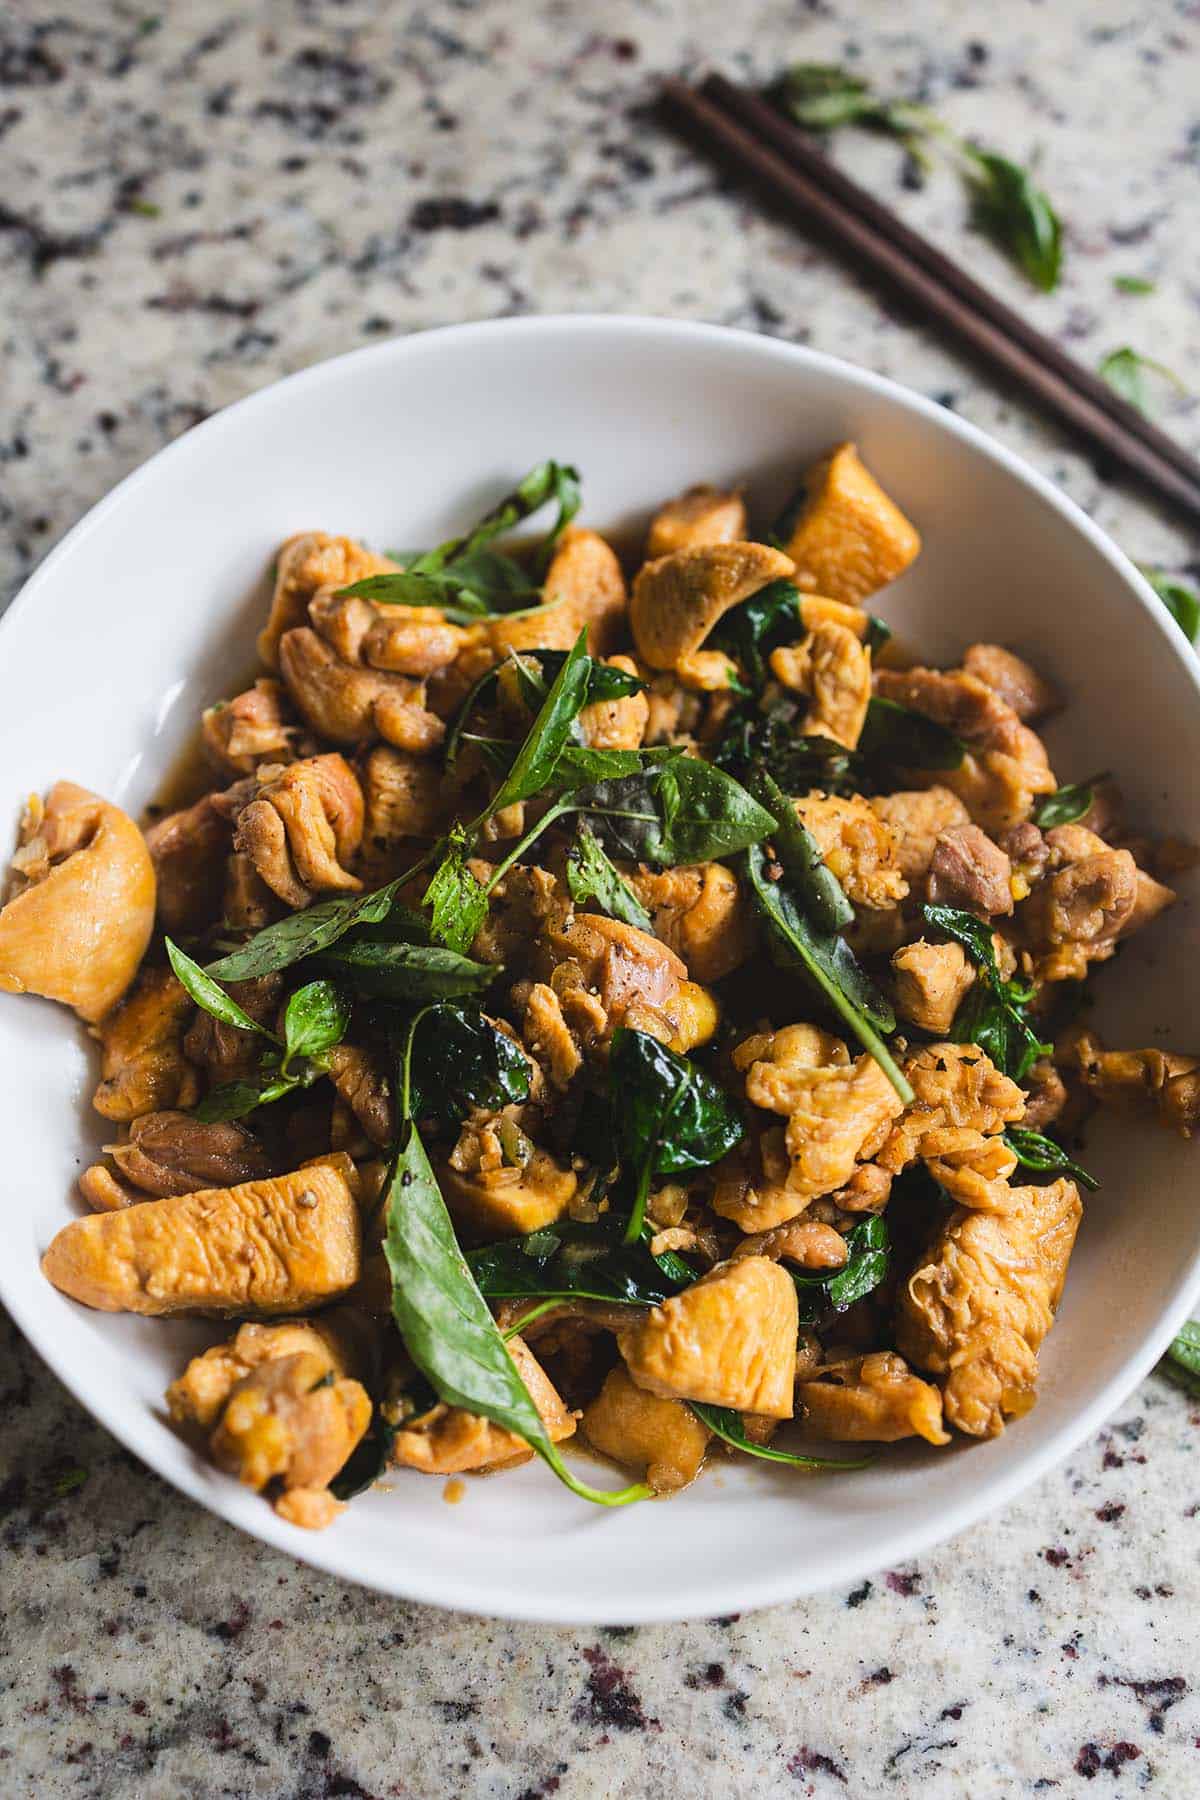
    Bold, aromatic, and on the table in 30 minutes — this Thai Basil Chicken (Pad Kra Pao) is our family’s most-cooked weeknight dinner. A handful of pantry staples, one wok, and dinner is done.

    This post may contain affiliate links. If you purchase through these links, I may earn a small commission at no extra cost to you. Thank you for supporting Love & Harvest!

    Thai basil chicken stir-fry in a white bowl on a granite counter

    Why We Love This Easy Thai Basil Chicken

    This recipe is one of those rare gems that checks all the boxes: it’s quick, uses simple ingredients, and delivers bold, authentic flavours. In our household, it’s a staple. The kids love it because of its tangy kick from the lime juice — they always squeeze extra on top. We love it because it’s a wholesome meal that doesn’t take all evening to prepare. Any leftovers make fantastic lunchbox additions for the next day.

    Why You Should Try It

    If you’re new to Thai-inspired cooking, this dish is the perfect introduction. It’s simple enough for beginners and requires no fancy equipment — just a skillet or wok. The flavours are bold yet approachable, with a balance of sweet, salty, tangy, and aromatic notes that’ll make you feel like a pro chef. You can easily add bell peppers or green beans if you want to sneak in more vegetables.

    Close-up of Thai basil chicken with wilted basil leaves

    Ingredients

    Thai Basil

    • The star of the dish — its slightly peppery, licorice-like flavour is what separates this from any regular stir-fry. Thai basil holds up to high heat far better than Italian basil, wilting into the sauce without losing its character. Add it right at the end and toss just 30 seconds. If your family finds basil too intense, start with half a cup and adjust.

    Fish Sauce

    • The secret behind the umami depth. Fish sauce adds a savoury complexity that soy sauce alone can’t replicate — it’s funky, salty, and absolutely essential for authentic Thai flavour. Use a high-quality brand like Red Boat Fish Sauce for the cleanest flavour. Start with less and add more to taste.

    Oyster Sauce

    • Adds a sticky, slightly sweet, and deeply savoury coating to the chicken. It’s the binding element of the sauce that gives this dish its characteristic glossy finish. Use a good oyster sauce — it makes a real difference.

    Chicken Thigh vs. Breast

    • Chicken thigh stays juicier at high stir-fry heat and absorbs sauce better than breast. Either works — thigh for flavour, breast for leaner preference. Cut into uniform small pieces so everything cooks evenly in under 10 minutes.

    Garlic and Thai Chili

    • Pound them together in a mortar and pestle for the most flavourful base, or mince finely. This aromatic foundation hits the hot wok first, perfuming the oil before anything else is added. Skip the chili or reduce to one pepper for family-friendly heat levels.

    Bowl of Thai basil chicken with fresh basil leaves on the side

    Why It’s a Family Favourite

    This dish hits the sweet spot between fast and flavourful. It’s the kind of meal that comes together faster than you can decide what to order for takeout. Cooking it fills the house with an irresistible aroma that draws everyone to the table.

    Use a Carbon Steel Wok for authentic high-heat stir-frying — the carbon steel develops a natural seasoning over time and distributes heat perfectly for this style of cooking.

    Serve alongside our Instant Pot Taiwanese Beef Noodle Soup for a full Thai-inspired feast, try the Lemongrass Chicken Drumsticks for another Southeast Asian weeknight favourite, or check out our Thai Chicken Salad for a lighter meal using similar flavours.

    “This dish is proof that the simplest ingredients, cooked with love, create the most incredible flavours.”

    Sammi Chow — Love and Harvest

    Thai basil chicken in a white bowl with chopsticks

    Frequently Asked Questions

    Can I substitute regular Italian basil for Thai basil?

    You can in a pinch, but the flavour will be noticeably different. Italian basil is sweeter and more delicate; Thai basil has a peppery, anise-like quality that is central to the dish’s identity. If you can’t find Thai basil, adding a tiny pinch of anise or fennel with Italian basil gets you closer.

    What rice goes best with Thai Basil Chicken?

    Jasmine rice is the classic pairing — its fragrant, slightly sticky texture soaks up the sauce beautifully. Cook it slightly wet so the grains are soft and clingy. Brown jasmine rice also works well if you prefer a whole grain option, though the texture is slightly chewier.

    Can I make this dish vegetarian?

    Yes. Replace chicken with firm tofu (pressed and cubed) or mushrooms. Substitute fish sauce with soy sauce or coconut aminos and replace oyster sauce with a vegan mushroom oyster sauce. The cooking time is the same — just watch the tofu as it browns faster than chicken.

    How do I prevent the basil from turning black?

    Add the basil off the heat or in the final 30 seconds of cooking. High direct heat for too long will blacken and bitter the leaves. Toss quickly and serve immediately. The basil should be wilted but still vibrant green.

    Is this recipe good for meal prep?

    Absolutely. It reheats beautifully in a pan with a tiny splash of water. Pack with rice in containers — it keeps in the refrigerator for 3 days and makes excellent lunches. The basil will darken slightly upon reheating but the flavour stays great.

    Can I use frozen chicken?

    Always thaw chicken completely before stir-frying. Frozen or partially frozen chicken releases excess water in the wok, which prevents proper browning and turns the dish steamed rather than stir-fried. Thaw overnight in the refrigerator for best results.

    Thai basil chicken stir-fry in a white bowl on a granite counter

    30-Minute Meal Thai Basil Chicken

    Prep Time 10 minutes
    Cook Time 20 minutes
    Total Time 30 minutes
    Servings: 4
    Course: Main Course
    Cuisine: Thai
    Calories: 340

    Ingredients
      

    • 1 whole chicken deboned and cut into small chunks
    • 2 tbsp soy sauce
    • 1 tsp hoisin sauce
    • 2 tbsp brown sugar
    • 1 tbsp fish sauce
    • 2 tbsp cooking oil
    • 1 tsp chicken stock powder
    • ½ cup water
    • 1 cup fresh basil leaves divided (reserve some for garnish)
    • black pepper garnish
    • lime juice optional

    Method
     

    1. In a bowl, mix the chicken chunks with soy sauce, hoisin sauce, brown sugar, and fish sauce. Let it marinate for at least 15 minutes, or up to 1 hour for deeper flavor.
    2. Heat the cooking oil in a large skillet or wok over medium-high heat.
    3. Add the marinated chicken and sauté until the chicken is cooked through and starts to brown slightly, about 5–7 minutes.
    4. Sprinkle the chicken stock powder over the chicken and pour in the water. Stir well.
    5. Let the mixture simmer until the liquid reduces down to a thick sauce, about 3–5 minutes.
    6. Add most of the Thai basil leaves to the pan and stir until they wilt and become fragrant, about 1 minute.
    7. Transfer the chicken to a serving plate. Garnish with the reserved Thai basil leaves and a generous sprinkle of freshly cracked black pepper. Additionally, you can add some lime juice on top of the basil chicken.

    Notes

    Serving Suggestion

    Serve hot over steamed jasmine rice or alongside stir-fried vegetables for a complete meal.

  • Easy Chinese Scallion Pancakes

    Easy Chinese Scallion Pancakes

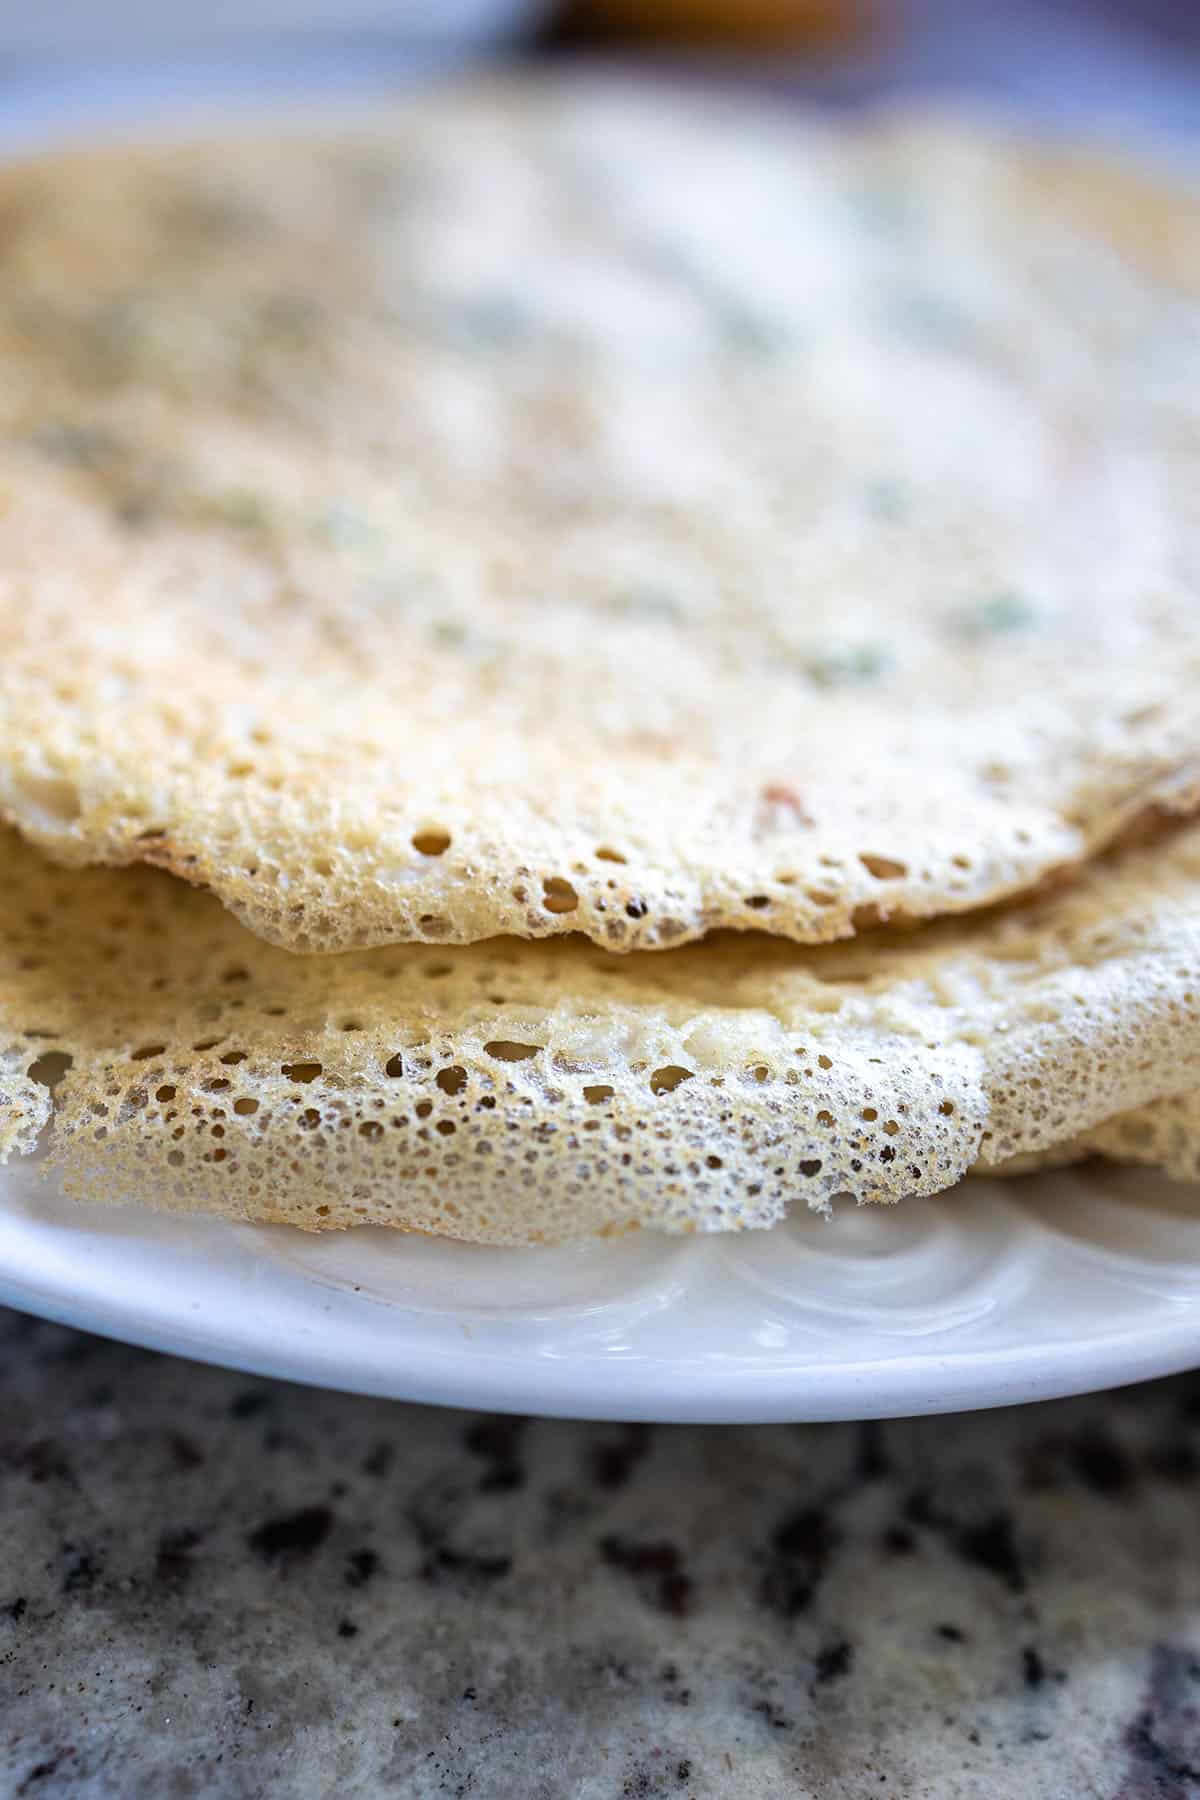
    These easy Chinese scallion pancakes take about 30 minutes, from gathering everything to cooking, need just a handful of pantry ingredients, and make an easy breakfast any day of the week. My kids beg for them every morning — and after trying them, someone in your family will too!

    Thin scallion pancake on a plate next to a bowl of fillings

    This post may contain affiliate links. If you purchase through these links, I may earn a small commission at no extra cost to you. Thank you for supporting Love & Harvest!

    This post is a recipe for easy Chinese scallion pancakes. An easy recipe made with flour, eggs, water, green onion and salt.

    Why You’ll Love This Recipe

    • Quick and Easy: The recipe takes about 30 minutes from start to finish, making it perfect for busy mornings or a quick snack.
    • Simple Ingredients: With just six pantry ingredients, there’s no special shopping trip required.
    • Just 2 Tablespoons of Oil in the Batter: Made with eggs, green onion, flour and just 2 tablespoons of oil in the batter.
    • Kid-Friendly: Children love the mild savoury flavour and the fun of rolling them up with a sauce inside.
    • Culturally Rich: Every bite carries generations of Shandong Province culinary tradition.

    Two folded scallion pancakes on a white plate

    My Story

    In the mornings of my youth, my father would rise early and craft scallion pancakes for our breakfast. The scent of sizzling dough and fresh scallions was an uncommon delight, for my father seldom ventured into the kitchen. Each aromatic whiff was a herald of something special, a rare treat that painted our mornings with joy.

    My father’s roots trace back to Shandong Province in China, where this recipe was born and lovingly passed down. It carries the essence of his childhood, the warmth of his mother’s kitchen, and now it lives on in our own family’s tradition.

    As a parent, I understand the challenge of waking early to prepare breakfast every day. Yet, not a moment spent in this ritual is one I would ever regret. I urge every parent to discover that one recipe their children adore — one that will nestle in their hearts and become a cherished memory.

    Folded scallion pancakes stacked on a plate

    The Recipe That Connects Generations

    Food has a unique way of bringing us closer to our heritage. Every time I make these scallion pancakes, I feel a deep connection to my dad and my grandmother. It is more than just a recipe; it is a piece of our family history. In sharing it here, I hope it brings you and your loved ones as much joy as it has brought us.

    Ingredients

    Ingredients

    Green Onion

    • Why it matters: Fresh green onion is the soul of this recipe. Use both the white and green parts, chopped finely. The white parts add a gentle sharpness; the green parts provide colour and a lighter onion flavour that mellows beautifully in the pan.

    Eggs

    • Why it matters: Three large eggs bind the batter, create structure, and give these pancakes their fluffy, tender texture. They are also what makes this recipe so quick — no yeast, no resting time, just eggs and a whisk.

    Flour

    • Why it matters: Cake flour or all-purpose flour both work well. Cake flour produces a slightly softer, more delicate pancake. Whatever you use, add it gradually while whisking to avoid lumps. A kitchen scale helps you measure consistently every time.

    Water

    • Why it matters: Regular drinkable water thins the batter to the right consistency. The ratio of water to egg determines whether the pancake is crispy or soft — a thinner batter spreads wider and crisps faster.

    Fillings

    • Why it matters: Our children love rolling the pancakes around ketchup. Worcestershire sauce, Maggi sauce, or soy sauce all work beautifully. The filling adds a burst of flavour and makes the pancakes even more interactive for kids.

    How to Make Chinese ShanDong Scallion Pancakes

    Preparation

    Wash the green onions well and remove any yellow or unusable stems. Thinly slice them on a chopping board and set aside. In a large bowl, combine the chopped green onions, eggs, and water. Whisk vigorously until the mixture is foamy and slightly thicker. Slowly add the flour while continuing to whisk. Once fully combined with no lumps, add a pinch of salt and whisk a few more rounds. The batter should be pourable and not too thick.

    Cooking

    Preheat a non-stick frying pan over medium-high heat. Drizzle a bit of oil and swirl to coat evenly. Ladle about ½ cup of batter into the pan, swirling to spread it evenly to the edges. Once the edges begin to brown and curl, flip the pancake and cook for 1–2 minutes on the other side until golden. Repeat until all batter is used. I like to use a silicone spatula and tongs for easy flipping. Running two pans simultaneously speeds things up considerably if you are feeding a family.

    A hand lifting a folded scallion pancake from the plate

    Frequently Asked Questions

    Can I use a cast iron skillet instead of a non-stick pan?

    Yes. A well-seasoned cast iron skillet actually produces a slightly crispier bottom. Make sure it is properly preheated before adding oil and batter, and use a little more oil than you would with a non-stick pan to prevent sticking.

    Why is my batter too thick or too thin?

    The batter should be about the consistency of thin crepe batter — pourable and spreadable when you swirl the pan. If it is too thick, add water a tablespoon at a time. If it is too thin, add a spoonful of flour and whisk again. The right consistency gives you a pancake that spreads on its own to the edge of the pan.

    Can I make the batter ahead of time?

    Yes. The batter keeps well in the refrigerator for up to 24 hours in a covered container. Give it a good stir before using, as the flour tends to settle. Do not make it more than a day ahead as the green onions can become slightly slimy.

    Are these scallion pancakes the same as the flaky Chinese ones?

    No. Traditional flaky scallion pancakes (cong you bing) are made with unleavened dough and require rolling and laminating with oil. This Shandong version is made from a quick egg-and-flour batter — much simpler, faster, and just as delicious. Think of it more as a savoury crepe than a bread-based flatbread.

    What dipping sauces pair best with these pancakes?

    Soy sauce mixed with a little rice vinegar and sesame oil is classic. Hoisin sauce is popular with kids. Worcestershire sauce or Maggi seasoning gives a deep umami kick. For a sweeter version, ketchup or sweet chili sauce works wonderfully, especially for children.

    Can I freeze leftover scallion pancakes?

    Yes. Let them cool completely, stack with parchment paper between each one, and freeze in a zip-lock bag for up to 1 month. Reheat in a dry pan over medium heat for 2–3 minutes per side, or in a toaster oven at 375°F (190°C) for 5 minutes. They crisp up beautifully from frozen.

    Stack of thin, golden scallion pancakes on a white plate

    Easy Chinese Scallion Pancakes

    The recipe takes about 30 minutes from start to finish, making it convenient for busy mornings or a quick snack. This family recipe originated from Shandong Province in China. The combination of crispy texture and savory scallions is likely to be a hit with anyone who tries them.
    Prep Time 10 minutes
    Cook Time 20 minutes
    Total Time 30 minutes
    Servings: 15 pancakes
    Course: Breakfast
    Cuisine: Chinese
    Calories: 90

    Ingredients
      

    • 1 cup chopped green onion
    • 3 large eggs
    • 2 tbsp vegetable oil
    • 7 cups water
    • 3 cups all-purpose flour
    • 1 tsp salt

    Equipment

    • whisk
    • 2-1 non-stick frying pan
    • ladle

    Method
     

    1. In a large bowl, combine the green onions, eggs, vegetable oil and water. While you're whisking the liquid mixture together, slowly add the flour little by little. Make sure there is no small balls of flour in the mixture. Add the salt, give it a few good whisks, and set it aside.
    2. Heat a teaspoon of oil in a non-stick skillet over medium heat. Use two skillet if you think you can manage two cooking at the same time. Spoon a ladle-sized amount (1/2 cup) of pancake mixture onto the hot pan, making sure to include some of the green onions in each scoop. 
    3. Swiftly rotate the pan to spread the mixture evenly along the edges. Once the edges begin to brown or curl up, flip the pancake and cook for 1-2 minutes on the other side. Repeat this process until all the mixture is used up.
    4. To serve: squeeze a line of your favourite condiments (ketchup, soy sauce, etc). Roll it up and serve immediately.

    If you enjoyed these pancakes, try our Easy Homemade Soy Milk as the perfect morning pairing. For another quick breakfast, our Mixed Berry Smoothie with Pomegranate and Nopal is a family favourite. And if you love exploring Asian-inspired recipes, our Steam Preserved Vegetables with Zha Choy and Pork is a wonderful next step.

  • Hairy Amaranth (Huauzontle) Breakfast Graveyard

    Hairy Amaranth (Huauzontle) Breakfast Graveyard

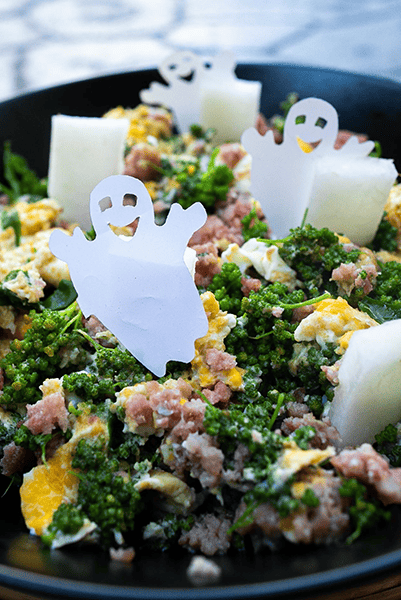
    Before the Halloween candy starts, this graveyard breakfast hash gets eggs, ham and huauzontle into the kids first. Built around huauzontle (hairy amaranth) — a Mexican green with mild, earthy flavor similar to spinach — this spooky dish has become our family’s annual Halloween morning tradition.

    This post may contain affiliate links. If you purchase through these links, I may earn a small commission at no extra cost to you. Thank you for supporting Love & Harvest!

    hairy amaranth huauzontle breakfast graveyard halloween

    A Spooky Graveyard Breakfast for Halloween

    Made with huauzontle florets, eggs, ham, and jicama carved into tiny gravestones, this dish is hauntingly delicious. Our family runs on a good breakfast before embarking on any adventure, and Halloween is no exception. Some other Halloween recipes we adore: the Spooky Breakfast Bowl and our Cute Halloween Screamers.

    Ingredients for This Graveyard Breakfast Hash

    Ingredients

    Huauzontle (Hairy Amaranth)

    • Why it matters: Huauzontle is a Mexican green vegetable from the quinoa family. It is harvested for its flower clusters, which have a mild, earthy flavor similar to spinach or broccoli. The florets hold up well to quick cooking — two minutes in boiling water is all they need before going into the pan. If you cannot find huauzontle at a Mexican market, spinach or broccoli florets are easy substitutes that give you a similar look.

    Eggs

    • Why they matter: Eggs provide the protein backbone of this hash. We give one egg per child and two per adult. Free-range eggs with orange yolks are worth seeking out for the colour they bring to the plate.

    Ham and Sausage

    • Why they matter: Smoked ham and Argentina chorizo (a pale, herb-seasoned sausage without the red pepper coloring of Mexican chorizo) add savory depth. The smoky notes from the ham complement the earthy huauzontle. Substitute with any sausage you prefer — Italian, breakfast links, or even turkey sausage all work. You can order uncured applewood smoked ham (B0923SPBN8) if you prefer an uncured ham.

    Jicama (Mexican Potato)

    • Why it matters: Jicama is the raw, crunchy element that gets carved into mini gravestones — its firm white flesh holds a clean shape perfectly. Fresh starchy taste, mild and slightly sweet. Mexicans typically eat jicama with Tajin and lime. For this recipe, we use it raw as a decorative and textural element. Fresh jicama (B00B6QUFK2) is widely available at Latin markets; always peel before eating.

    hairy amaranth huauzontle plant

    How to Cook Huauzontle

    Take the huauzontle stems and pluck the small florets from the branch tips. Place a handful of florets into a bowl of water and rinse thoroughly. Strain and set aside.

    Bring a large pot of water to a boil. Add the florets and cook for 2 minutes — no longer, or they will turn mushy. Drain immediately and set aside. Your huauzontle is now ready to fold into the hash.

    jicama graveyard tombstones carved

    Frequently Asked Questions

    Where can I find huauzontle?

    In Mexico, huauzontle is widely available at traditional markets (tianguis) from late summer through fall. In the US, look for it at Latin specialty grocery stores. If you cannot find it, broccoli florets or baby spinach are the most reliable substitutes for both texture and nutrition.

    Can I make this dish for kids under age 3?

    Yes, but with one important caveat: the ghost decorations and jicama tombstones are choking hazards for very young children. Always remove all plastic decorations and small carved pieces before the children eat. Never leave the dish unattended with toddlers.

    How long does it take to carve the jicama tombstones?

    About 10 minutes once you get the hang of it. Use a sharp paring knife. Start by cutting ¼-inch slices, then rough-cut a tombstone arch shape from each slice. The jicama does not need to be perfect — slightly irregular shapes actually look more spooky and graveyard-authentic.

    Can I meal-prep this breakfast?

    The huauzontle can be blanched the night before and refrigerated. The jicama tombstones can be carved and stored in water in the fridge overnight. The actual cooking of the hash takes only 10–12 minutes, so morning assembly is quick even with the prep already done.

    What other vegetables can I add to this hash?

    Bell peppers (especially orange or black for Halloween color!) and sautéed mushrooms add volume and nutrition without overpowering the huauzontle. A handful of baby spinach stirred in at the end adds extra iron and wilts beautifully into the eggs.

    hairy amaranth huauzontle breakfast graveyard

    Hairy Amaranth (Huauzontle) Breakfast Graveyard

    Delicious graveyard hash with eggs, ham and sausage. It is made with the Mexican plant “Huauzontle”, jicama, eggs, and sausages. A fun Halloween breakfast dish in the morning!
    Print Recipe
    Pin Recipe
    Prep Time:10 minutes
    Cook Time:7 minutes
    Course: Breakfast
    Cuisine: Mexican
    Keyword: halloween breakfast
    Servings: 4 people

    Ingredients

    • ½ cup huauzontle florets
    • 1 jicama
    • 4 ham slices, thinly cut
    • 1 Argentina sausage or any sausage of your choice
    • 4–5 large eggs
    • salt and pepper
    • ghost decorations (for display only — remove before eating)

    Instructions

    • Prepare huauzontle: take the stems of the huauzontle plant and pick out the florets. Quickly soak in water and drain. Bring a pot of water to a boil and blanch for 2 minutes. Drain and set aside.
    • Prepare jicama tombstones: cut off the ends of the jicama and peel completely with a vegetable peeler. Slice ¼ inch thick. Using a paring knife, carve out mini tombstone shapes from each slice. You will need around 5–7 pieces.
    • In a frying pan, heat 1 tsp of oil over medium-high. Lightly sauté the ham until slightly brown, then add sliced sausage. Cook for 5 minutes.
    • Add the eggs. Scramble until half-cooked, then add the huauzontle florets. Keep stirring and breaking up the eggs. Season with salt and pepper.
    • Place everything in a shallow bowl. Arrange the jicama tombstones evenly around the dish, then add the ghost decorations spaced throughout. Serve immediately. Important: if you have children age 3 or under, remove all plastic ghost decorations and jicama tombstones before the children eat. Small plastics and carved pieces can be a choking hazard.
  • Halloween Monster Apple Snacks

    Halloween Monster Apple Snacks

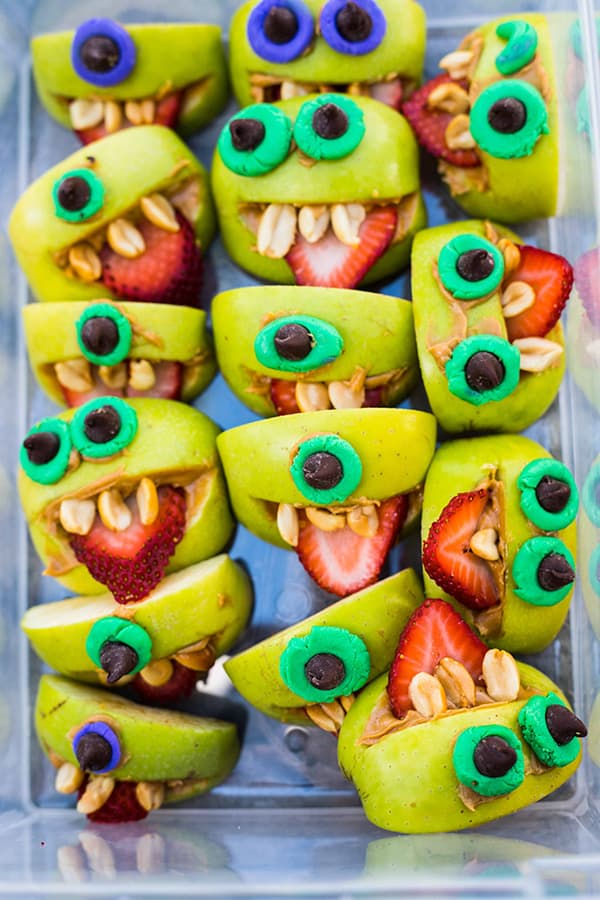
    The cutest monster apple snacks for Halloween! Watch your kids light up when they open their lunchbox and see these boo-licious apple snacks. Great as a lunch box idea that is adorably appetizing — and the best part is the kids can help build them too.

    apple monster halloween

    This post may contain affiliate links. If you purchase through these links, I may earn a small commission at no extra cost to you. Thank you for supporting Love & Harvest!

    These super cute Halloween Monster Apple Snacks are Boo-liciously tasty. The perfect Halloween snacks for your kids!

    These cute monsters are made with green apple slices, peanut butter, chocolate chips, strawberries, peanuts, and some leftover cake fondants.

    Making these Halloween monster apple snacks is easy and even the kids can join in on the fun! Making Halloween snacks can be fun, educational, and creative for children!

    Can you imagine the surprise and delight when they open their lunchbox to find these cute monsters waiting for them? I know as parents we always want to surprise our kids with something that is not materialistic, and this is the best intangible surprise you can give your little ones!

    Make these for them, and I’m sure they will feel your effort and love for them! For more fun Halloween food ideas, check out our Halloween Frankenstein guacamole — another crowd-pleaser for kids.

    Let’s get started on how to assemble these cute Halloween Monster Apple Snacks!

    Why You Will Love These Halloween Monster Apple Snacks

    • Creative: let the kids be involved with this process! There’s nothing more creative than letting the kids build their own food! The best part is that all parts of this project are edible — nothing goes to waste.
    • Fun snack for kids: building education through play is the best tactic for getting your kids to learn! They get to recognize forms and shapes!
    • Put a smile on your kid: building these apple snacks with your kids is a great way of bonding. Even if you don’t have the time to work on them with the kids, making these monsters yourself and putting them in their lunchboxes will make them feel loved and treasured. They will feel your effort and amor for them!

    Ingredients

    Apples

    We will need green apples for this project. I use Granny Smith green apples. They taste excellent and all kids love this variety of apples! The tartness of Granny Smith balances perfectly with the sweet peanut butter and chocolate chips.

    Peanut Butter

    Besides the fact that peanut butter is delicious, it serves as the glue for this snack project and helps hold everything together. Use smooth peanut butter for the easiest spreading. A natural smooth peanut butter is the best choice here.

    Peanuts

    There’s something delightfully cute about these crooked teeth made out of peanuts. They stick really well with the peanut butter, and it’s so satisfying sticking these teeth in the monster’s mouths!

    Strawberries

    Monsters can’t be monsters without a funny tongue to showcase! We are thinly slicing the strawberries as the tongue for the monsters. So cute! Make sure to cut each strawberry thinly enough so it fits snugly in the apple mouth slot.

    Chocolate Chips

    I don’t know any kid who doesn’t love chocolate chips, and they are the perfect size for the eyes! I promise you, these eyes are the first to go once the kids see them. Use semi-sweet or dark chocolate chips for the best look.

    Fondants or Dried Fruits

    The fondants go around the rim of the eye. They help enhance the eye and make it pop out more. If you don’t have fondant, you can easily replace it with sliced dried fruits, sliced marshmallow, flat circular candies, or even Cheerios cereal.

    halloween monster apple bites

    To keep these vegan, use dairy-free chocolate chips and a gelatin-free fondant (check the labels), or use sliced dried fruit for the eye rims. Skip the marshmallow and Cheerios options if you need them vegan.

    Frequently Asked Questions

    How do I stop the apples from turning brown?

    Dip or brush lime juice (or lemon juice) onto the flesh of the apple immediately after cutting. The citric acid prevents oxidation and keeps the apple looking fresh and green. Assemble the monsters close to serving time for the best results.

    Can I make these ahead of time?

    You can prep the components the night before — cut the apples and brush with lime juice, portion out the peanut butter, and slice the strawberries. Store everything separately in the fridge and assemble the morning of for the freshest look.

    What can I use instead of peanut butter for nut-free schools?

    Sunflower seed butter (sunbutter) is the best nut-free substitute and has a very similar texture and taste. You can also use tahini, cream cheese, or a soy nut butter.

    How many apple snacks does this recipe make?

    With 4-5 apples, cutting each into quarters, you get about 16-20 apple monster pieces. Plan for about 4 monsters per child as a snack serving.

    Can I use red apples instead of green?

    Yes! Green Granny Smith apples are ideal because their tart flavour balances the sweet peanut butter, but red apples like Fuji or Gala work just as well. The monsters will look just as adorable.

    Are these suitable for toddlers?

    Skip the peanuts as whole peanuts are a choking hazard for young children. You can use finely chopped peanuts or leave the teeth out altogether.

    Halloween monster apple snacks

    Halloween Monster Apple Snacks

    Print Recipe Pin RecipePrep Time:15 minsServings: 4 people

    Ingredients

    • 4-5 Granny Smith's Green Apples
    • 3 tbsp peanut butter smooth
    • 3 strawberries medium or small sizes thinly sliced
    • 15-20 peanuts
    • 1 inch fondant ball or sliced dried fruits or 20 pcs cheerios cereal
    • 20 chocolate chips

    Instructions

    • Wash and dry the apples. Cut the apples in quarters (cut 4 pieces per apple). Also cut out the stem and the core of the apple.
    • Take a slice of the apple, and using a paring knife, cut a hole in the center of the skin of the apple (this is where the mouth will be). Adjust the size of the mouth according to the slice of the strawberries. Each mouth will be a different size depending on the size of the strawberry.
    • Add peanut butter all over the cut hole. Grab a piece of sliced strawberry and firmly press it to the mouth. Add the peanuts to the top of the mouth and firmly press the peanuts into the mouth as well.You can add as many or as few peanuts as you like. Be creative!
    • Lastly, take a small piece of fondant and press it down to a flat circular shape (or whatever food you choose that is flat and circular). Tap some peanut butter to the back and front of the circular object. First glue the fondant to the apple slices and then press the chocolate chips on top.You can add one eye or up to three eyes per monster.

    Notes

    • To keep the apples from going brown, dip or brush lime juice to the flesh of the apples.
  • Floating Halloween Screamer Dessert

    Floating Halloween Screamer Dessert

    What if dessert could be both hauntingly beautiful and genuinely delicious? These Floating Halloween Screamers are inspired by Edvard Munch’s iconic painting and built from a purple yam base swirled with coconut cream, sweet black rice, and chewy tapioca pearls. Kids go absolutely wild for them — mine eat two or three bowls each!

    halloween desserts ideas

    This post is all about a cute Halloween dessert inspired by The Scream by Edvard Munch: purple yam pudding with coconut cream, sweet black rice, and tapioca served in clear cups with a floating banana ghost.

    Food art can be inspired by anywhere — like this Halloween dessert inspired by the famous painting The Scream by Edvard Munch.

    Edvard Munch, The Scream, 1893, National Gallery, Oslo (1) (35658212823)

    Richard Mortel from Riyadh, Saudi Arabia, CC BY 2.0, via Wikimedia Commons

    I’m sure you’ve seen this painting somewhere in your life — and this is the edible Halloween version of it.

    halloween desserts pinterest

    Not only is this dessert adorable, it is also incredibly delicious! The vibrant purple color comes from purple yam, beautifully swirled with coconut cream. Inside you will find sweet black rice and tapioca pearls adding a delightful chew and texture. It is a feast for the eyes and the palate — and it is sure to be a hit at your Halloween party!

    traditional halloween desserts

    The Screaming Flavour

    Coconut cream adds a tropical flavour and enhances the creamy texture of the purple yam. We love pairing coconut cream with purple yam because the combination is simply perfect.

    Purple yam has a naturally sweet, floral taste with a texture similar to sweet potato. If you enjoy rice-based desserts like horchata, you will love this — it features sweet black rice and chewy tapioca for a unique textural experience.

    Key Ingredients

    Ingredients

    Purple Yam (Ube)

    Steamed and pureed into a smooth, vibrant base for the dessert cups.

    • Why it matters: Purple yam gives these cups their signature deep purple color and naturally sweet, floral flavour.

    Coconut Cream

    Poured slowly over the purple yam puree to create beautiful swirls in the glass cups.

    • Why it matters: Coconut cream adds fat and richness that balances the earthy sweetness of the purple yam. The key is to pour it gently and close to the surface — this creates those gorgeous swirl patterns. Do NOT mix it in during cooking.

    Sweet Black Rice and Tapioca

    Cooked separately and layered into the cups with the purple yam.

    • Why it matters: The black rice adds a nutty, slightly chewy element and a dramatic colour contrast. Tapioca pearls add another layer of texture — soft and pillowy. Use clear glass ramekins or dessert cups so the layered colours show through beautifully.

    Banana Ghost

    Sliced banana floated on top with chocolate chip eyes and a sunflower seed (or chocolate chip) mouth.

    • Why it matters: This is the detail that makes the dessert an experience. Wash the banana outside gently with mild soap, rinse thoroughly, then slice at an angle into half-inch pieces. The banana will float for a while — serve promptly as it will start to brown over time. To pipe on the face, a set of small piping bags with melted chocolate works beautifully.

    How to Make the Screamer Cups

    Step 1 — Make the Purple Yam and Black Rice Base

    Find the Purple Yam and Sweet Black Rice recipe in our dedicated post — it uses just a few key ingredients. Steam the purple yam, prepare the sweet black rice and tapioca separately, then combine them. Remember: do not add the coconut cream during cooking. Save it for assembly.

    Step 2 — Fill the Cups

    Use clear 10oz glass cups. Fill each cup with the dessert mixture, leaving about half an inch of space at the top for the coconut cream swirl.

    Step 3 — Add the Coconut Cream Swirl

    Pour the coconut cream slowly and close to the surface. Pouring gently and close to the cup creates beautiful swirls in the purple yam puree.

    classic halloween desserts

    Step 4 — Decorate the Screamer Face

    Gently wash the outside of the banana with mild soap and rinse thoroughly. Slice the banana at an angle into half-inch pieces. For the eyes, use chocolate chips. For the mouth, get creative — sunflower seeds or another chocolate chip work great. Float the banana slice on top and you are done!

    easy halloween desserts for adults

    This Halloween Screamer Dessert Is Perfect for Your Party!

    There is nothing more adorable and mesmerizing than having these mini bowls laid out on your table. Kids are drawn to them and won’t stop eating. What makes this dessert even more special is its unique and delicious flavour. Forget the usual hot dog mummies and Halloween pizza — serve this creative dessert and watch everyone scream for more!

    Looking for more Halloween food ideas? Try our Halloween Spooky Breakfast Bowl to start the spooky day right, or make a batch of Homemade Halloween Sugar Cookies for the whole family.

    Frequently Asked Questions

    Where do I find purple yam?

    Look in Asian grocery stores — it is sold fresh, frozen, or as powdered ube. Filipino and Vietnamese markets almost always carry it. It is sometimes labelled as ube (Filipino) or taro (though taro is different — purple yam is sweeter). You can also find it online.

    Can I make this dessert ahead of time?

    Yes, with one caveat. Prepare the purple yam base, black rice, and tapioca up to 2 days ahead and refrigerate separately. Assemble and add the coconut cream swirl right before serving. The banana ghost should always be placed just before serving to avoid browning.

    Can I use tapioca pearls from boba tea?

    Absolutely! Large boba tapioca pearls work perfectly and add a fun chewiness. Cook according to package instructions before assembling the cups.

    How do I keep the banana from turning brown?

    Serve these cups immediately after placing the banana ghost. If you need a tiny bit of extra time, a squeeze of lemon juice on the cut banana surface will slow browning. Do not prepare the banana slices more than 30 minutes before serving.

    What if I can’t find fresh coconut cream?

    Canned full-fat coconut cream works excellently. Refrigerate the can overnight and use the thick cream that separates to the top — it will pour slowly and create even more dramatic swirls.

    Can this dessert be made vegan and gluten-free?

    It already is! Purple yam, coconut cream, black rice, tapioca, and banana are naturally vegan and gluten-free. Just make sure your chocolate chips are dairy-free if needed.

  • Halloween Spooky Breakfast Bowl

    Halloween Spooky Breakfast Bowl

    Halloween is the best time to showcase your creativity with food! Let your food art do all the talking and have some fun!

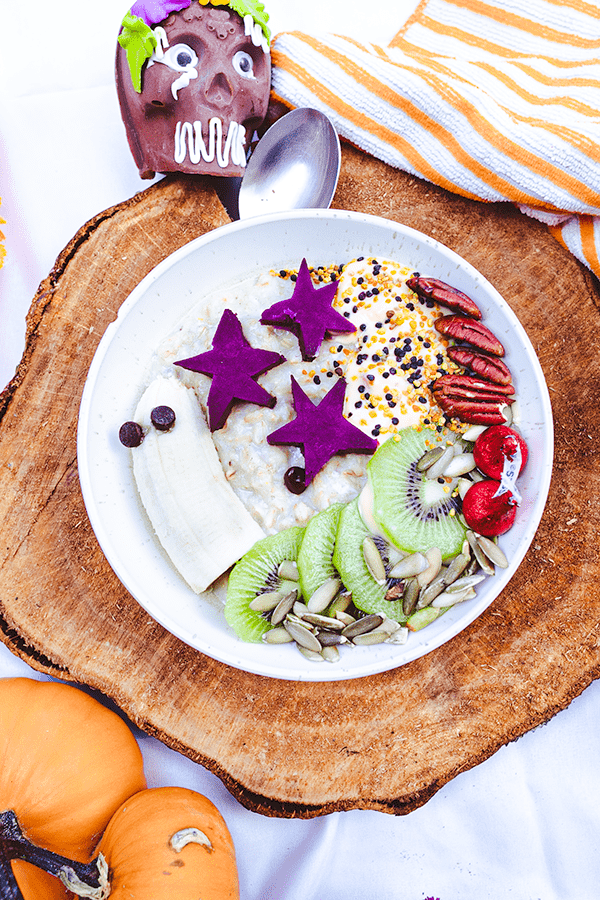
    halloween breakfast ideas

    This post is about a spooky Halloween breakfast bowl — made with purple yam, banana, chocolate, yogurt, kiwi, and bee pollen. Fun, colorful, and ready in under 15 minutes.

    I cast thy away, boring breakfast food!

    And I bring you this fun and adorable Halloween theme oatmeal bowl! This bowl is so yummy your kids will gobble it up in minutes. There is nothing more exciting than waking up to a bowl of Halloween ghosts floating on milk and oatmeal. Kids love fun food art. They love making it and eating it. Halloween is the best time to let them lead!

    Looking for more Halloween ideas? Check out our Floating Halloween Screamer Dessert for a stunning party showpiece, and our Halloween Frankenstein Guacamole for a fun savory option.

    Creative Food Is Good for Kids

    Allowing your kids to be creative is great for their minds and leadership. Here are some benefits of cooking with your kids:

    • Develops an adventurous eater: Kids who cook tend to have a more varied palate. If you want your kids to be open-minded world leaders, start them young in the kitchen.
    • Life skill: We all learn to cook for ourselves one day. Starting them young helps them adapt well to adulthood.

    Key Ingredients

    Ingredients

    Purple Yam

    Steamed, cooled, and cut into star shapes using a cookie cutter or knife.

    • Why it matters: Purple yam provides the hauntingly beautiful deep purple color for the bowl. Its naturally sweet, floral flavour pairs wonderfully with oatmeal. Steam it in a bamboo steamer or a regular steamer pot for 10 minutes.

    Banana Ghost

    Half a banana with chocolate chip eyes makes the iconic floating ghost.

    • Why it matters: The banana ghost is the centrepiece of the whole bowl — it floats on top of the milk-soaked oatmeal. Place it just before serving to prevent browning. Use chocolate chips or food coloring for expressive ghost faces.

    Oatmeal Base

    About 1.5 cups of cooked oatmeal with a pinch of cinnamon and a teaspoon of sugar.

    • Why it matters: Oatmeal is the blank canvas for all the Halloween decoration. For a creamier texture, stir in one egg right before turning off the heat — it cooks through from the residual heat and makes the oatmeal incredibly smooth and protein-rich. Adding half a cup of milk (not stirred in — let it float) creates the spooky foggy effect.

    Toppings and Decoration

    Yogurt, kiwi, bee pollen, pecan nuts, Hersey Kisses, and sunflower seeds.

    • Why it matters: Each topping adds colour and texture. The yogurt creates a contrasting white zone for the pecan nuts. The kiwi adds bright green. The bee pollen dusted on yogurt adds golden colour. It is edible art.

    Prepping the Bowl

    1. Steam the purple yam for 10 minutes. Let it cool and peel the skin off. Using a star cookie cutter or a knife, cut 3 star shapes. They don’t need 5 points — be creative.

    2. Cook your oatmeal as you like it. Add a pinch of cinnamon and 1 tsp sugar. For smoother consistency: just before turning off the heat, stir in one egg and let it cook through from the residual heat.

    3. Slice the kiwi.

    4. Cut half the banana and peel the skin off.

    Arranging the Breakfast Bowl

    1. In a shallow bowl, add about 1.5 cups of oatmeal. Then add half a cup of milk. Do not stir — let it float on top of the oatmeal for the spooky fog effect.

    2. Place the banana on one side of the bowl.

    3. Place yogurt on the other side, opposite the banana.

    4. Arrange the pecan nuts on top of the yogurt and along the side of the bowl.

    5. Sprinkle bee pollen on top of the yogurt.

    6. Place the kiwi at the bottom of the bowl and add some sunflower seeds on top.

    7. Finally add chocolate chips for eyes on the banana, and some Hershey Kisses on the side of the bowl.

    halloween breakfast bowl recipe

    Frequently Asked Questions

    Can I make this Halloween breakfast bowl the night before?

    Partially, yes. Cook the oatmeal, steam the purple yam, and slice the kiwi the night before — store everything separately in the fridge. In the morning, reheat the oatmeal, assemble the bowl, and add the banana ghost right before serving to prevent browning.

    What can I substitute for bee pollen?

    Honey drizzled over the yogurt gives a similar golden colour and sweetness. Granola or hemp seeds also work and add a nice crunch.

    My kids don’t like purple yam — what else can I use for the purple colour?

    Blueberries or acai powder stirred into a small amount of yogurt creates a deep purple-blue colour. You can also use butterfly pea flower tea as a natural food dye — it turns vivid blue-purple and is flavourless.

    What other Halloween breakfast bowls can I make?

    This same base concept works with different characters — try a mummy bowl (white yogurt lines over dark oatmeal), a jack-o-lantern bowl (orange butternut squash puree), or a witch bowl (green matcha oatmeal). See our Halloween Monster Apple Snacks for another quick spooky idea.

    What’s in this breakfast bowl?

    Oatmeal cooked with milk, an egg and a teaspoon of sugar, purple yam stars, a banana ghost, yogurt, kiwi, pecans, sunflower seeds and a sprinkle of bee pollen. The full ingredient list is on the recipe card. The chocolate chips and Hershey Kisses are the treat part, and on Halloween, that is perfectly fine.

    How do I keep the banana from sinking into the oatmeal?

    Add the banana slice last, right after pouring the milk. The milk creates a surface film on the oatmeal that helps the banana float briefly. Serve immediately for the full floating ghost effect.

  • Halloween Frankenstein Guacamole

    Halloween Frankenstein Guacamole

    This Frankenstein guacamole is the most adorable dip you can make, and it will be hard to be the first to dig into his sweet face!

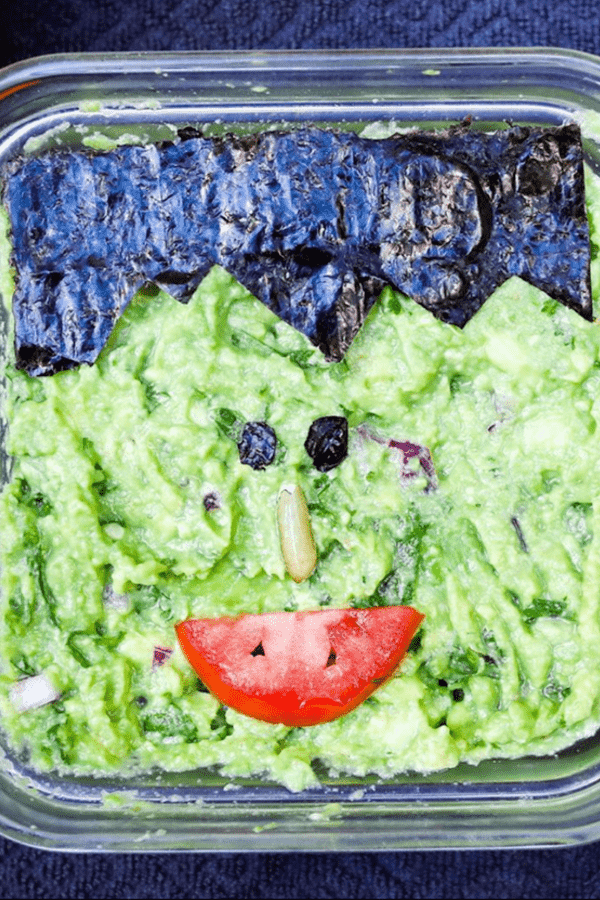
    Guacamole decorated as Frankenstein with nori hair and a tomato mouth

    This post is all about Halloween Frankenstein Guacamole. The food design of this adorable Frankenstein is made with sushi seaweed papers, sunflower seeds, and tomatoes.

    This post may contain affiliate links. If you purchase through these links, I may earn a small commission at no extra cost to you. Thank you for supporting Love & Harvest!

    This delicious guacamole recipe is so refreshing and delicious that we gave him life and turned him Mexican! At least until people start dipping his presence away!

    A cute recipe for food styling to bring to kids’ Halloween parties. It is an easy no-brainer side dish you can whip up in minutes. Halloween is a big week — kids are hammering you about costumes and parties. Don’t overthink the food. Make this easy peasy guacamole for Halloween today!

    The best part is that you can make this any size you want. All you need is to scale the design to fit the serving dish you are bringing.

    Key Ingredients

    Ingredients

    Avocado

    The star of the show — ripe, creamy avocados are the green canvas for Frankie’s face.

    • Why it matters: A ripe avocado should give slightly when pressed. Under-ripe avocados are grainy and hard to mash smoothly. Over-ripe avocados taste off. The lime juice you add prevents browning and adds essential citrus brightness. Traditionally in Mexico, we mash avocados in a mortar and pestle for authentic texture — chunky or smooth, your choice.

    Sushi Nori (Seaweed Paper)

    Nori sheets cut into Frankenstein hair and eyes.

    • Why it matters: Nori is what gives Frankie his iconic flat-top hairstyle and dark eyes. It cuts cleanly with scissors and holds its shape on the guacamole surface for serving time. It does not stay crisp for hours — serve within 30 minutes of decorating for best presentation.

    Lime

    Freshly squeezed lime juice mixed into the guacamole.

    • Why it matters: Lime does two critical jobs: adds citrus acidity that brightens all the flavours, and prevents oxidation (browning). If the guacamole will sit before serving, squeeze in an extra half lime and press plastic wrap directly onto the surface of the dip to exclude air.

    How to Make the Guacamole

    It only requires a few easy ingredients available in any grocery store: avocado, tomato, red onion, cilantro, and lime.

    First, pit the avocado and mash the flesh with a fork in a large bowl. Juice the lime into the avocado and mix well. Chop the tomato, red onion, and cilantro into small pieces. Add to the bowl. Salt to taste. It is that simple and so very delicious!

    How to Cut the Frankie Design

    Use sushi seaweed paper (nori) for the hair and eyes. Measure the length of your serving container, then use a cutting board and scissors to cut the fringe hair design. Be creative — play with the distance between the eyes and create your own version of Frankie. I use a sunflower seed as his nose, but it can be anything!

    Frankie Is Just the Beginning

    A Halloween Frankenstein Guacamole is just the start! How about a three-eye monster guacamole? A silhouette of a haunted house? The options are endless. For more Halloween fun, check out our Halloween Spooky Breakfast Bowl and Homemade Halloween Sugar Cookies.

    Why You Will Love This Halloween Frankenstein Guacamole

    • Easy recipe — just a few ingredients, no cooking required. Fresh and excellent tasting.
    • Fun design — Frankenstein is just the beginning! Design your own monsters at your own skill level.
    • Fun potluck dish — easy to make and bring, and completely captivating at Halloween parties.
    • Halloween food the kids will actually eat — avocado, lime and a few fun toppings.

    Frequently Asked Questions

    How do I keep guacamole from turning brown?

    Two methods work best: add extra lime juice (the acid slows oxidation), and press plastic wrap directly onto the surface of the guacamole, eliminating all air contact. An avocado pit in the bowl is a common tip but less effective than the plastic wrap method. Make the guacamole no more than 2 hours before serving for best color and freshness.

    How do I know if my avocados are ripe enough?

    Gently press the avocado near the stem end — it should give slightly under firm pressure but not feel mushy. The skin should be dark green to black. If the stem pops out easily and the flesh underneath is green (not brown), it is perfectly ripe.

    Can I add spice to this guacamole?

    Absolutely — and we encourage it! Add finely minced jalapeño or serrano pepper for a good kick. Serrano is hotter than jalapeño. Start with half a pepper, taste, and adjust from there. A pinch of cayenne also works if you want even heat distribution.

    Can I make this guacamole ahead for a party?

    Make it up to 2 hours ahead. Press plastic wrap directly onto the surface (no air gaps) and refrigerate. Decorate with the nori Frankenstein design right before serving — nori softens quickly once it contacts moisture.

    What can I serve with this guacamole besides tortilla chips?

    Sliced bell peppers, cucumber rounds, jicama sticks, and mini tostadas all work beautifully. For a Halloween theme, use black sesame crackers or triangle-cut tortilla chips arranged to look like bat wings around Frankie’s face.

    How large a batch should I make for a Halloween party?

    Plan on 1 medium avocado per 2 guests as a rough guideline. For a party of 20, use 10 avocados and scale all other ingredients proportionally. Use a large serving platter and scale up the Frankenstein design to match.

    Authentic Guacamole

    A simple yet delicious guacamole recipe that takes a matter of minutes to whip up!
    Prep Time 15 minutes
    Total Time 15 minutes
    Servings: 4 people
    Course: Appetizer
    Cuisine: Mexican
    Calories: 195

    Ingredients
      

    • 4-5 medium sized avocado
    • 1 – 1½ lime juice
    • 1 medium tomato diced
    • 1 branch cilantro chopped
    • ¼ red onion chopped
    • sea salt

    Method
     

    1. In a large mixing bowl, cut the avocado in half. Pit the centre seed out and scoop the green flesh into the bowl with a spoon.
    2. Use a fork and press the avocado. The more you mash the avocado the smoother the texture will be.
    3. Drizzle the lime on to the avocado and mix well. 1 lime is perfect but if you like to more acidic, you can half half a lime more.
      (Half half a lime more if you know it will not be eaten immediately to help it not turn brown).
    4. Add the chopped cilantro, tomato ,and red onion. Mix well. salt to taste

    Notes

    • Spicy: you’re more than welcome to add jalapeno or serrano peppers to give it a good kick.

  • Super Moist Cherry Loaf

    Super Moist Cherry Loaf

    There is one loaf you absolutely must bake before summer ends — a super moist cherry loaf bursting with juicy cherries, warm almond extract, and a golden crumb that somehow stays tender for days. This is the loaf that makes you wish summer never ended.

    This post may contain affiliate links. If you purchase through these links, I may earn a small commission at no extra cost to you. Thank you for supporting Love & Harvest!

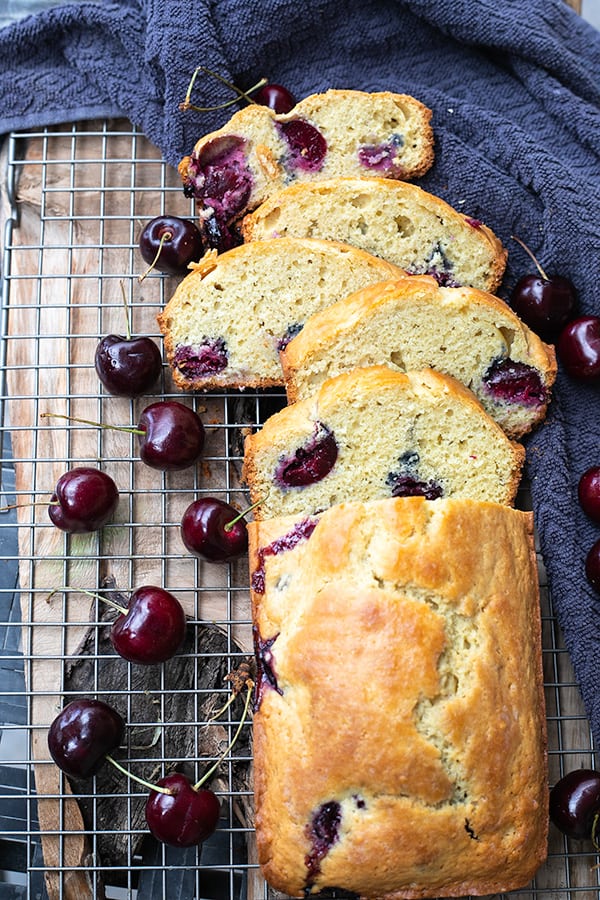
    Slices of super moist cherry loaf with fresh cherries on a wire rack

    This post is all about the best cherry loaf — a moist, crumbly recipe loaded with juicy cherries and a hint of almond. Perfect with your morning coffee or afternoon tea.

    It’s that time of the year when cherries take over the market stands — deep red, plump, and impossibly sweet. Before you let them go to waste, bake them into this simple loaf that celebrates the very best of late summer.

    The recipe comes together in one bowl, requires no stand mixer, and is forgiving enough for beginner bakers. Kids love helping fold in the cherries. And the smell while it bakes? Pure summer.

    Why You Will Love This Recipe

    • Perfect late-summer recipe — use up your cherry harvest before the season ends
    • Works with sweet or sour cherries — both varieties bake beautifully in this loaf
    • One-bowl, no mixer needed — simple enough for kids to help, done in under an hour
    • Butter-free swap — replace butter with apple sauce 1:1
    • Best morning loaf with coffee — pairs perfectly with a hot cup or a pat of butter on top

    Golden cherry loaf baked in a white loaf pan

    Ingredients

    Cherries

    Sweet cherries are best for this recipe. The sweetness really pulls through with the almond extract. Look for cherries that are fully ripe — the skin is soft and plump and easy to split in half. Fresh summer cherries are ideal, but if you can only find frozen, thaw and pat them dry before folding in.

    • Why they matter: Cherries are the star — they provide pockets of juicy fruit in every slice and keep the loaf moist even after a day or two.

    Almond Extract

    Almond and cherry are the best partners in the baking world. You can use coloured or clear almond extract — either works. Half a teaspoon is enough to perfume the entire loaf without overpowering it.

    • Why it matters: Almond extract amplifies the cherry flavour in a way vanilla simply cannot. Do not skip it.

    Eggs

    Two large eggs at room temperature give the loaf structure and lift. Cold eggs can cause the butter to seize, so take them out 20 minutes before you start.

    • Why they matter: Eggs bind the batter and are the key to that moist, tender crumb.

    Sugar

    Half a cup of natural cane sugar is just right. If you want to cut sweetness, a quarter cup works fine — the cherries carry plenty of natural sweetness on their own.

    • Why it matters: Sugar tenderises the crumb and helps the top brown to a golden finish.

    Loaf Pan

    A standard 9×5 loaf pan is all you need. Prep it with baking spray so the loaf releases cleanly after cooling.

    • Why it matters: A well-prepared pan means no sticking and a clean, even crust all the way around.

    Cherry loaf cooling on a wire rack surrounded by fresh cherries

    How to Make It with Apple Sauce Instead of Butter

    Replace butter with apple sauce. It is tried and tested, and it’s a delicious substitute. The loaf comes out even more spongy and is just as flavourful — maybe even better. Use a 1:1 swap.

    Cherry loaf batter studded with cherries in a white loaf pan

    What Goes Well with This Cherry Loaf?

    • A hot black coffee
    • Butter, lightly toasted
    • Nutella spread
    • Peach jam or blackberry jam
    • Iced peach tea

    Baking Time Tips

    Bake at 350°F for 55–60 minutes. For the last 5 minutes, watch closely. Once the top is slightly golden and the loaf has pulled away from the sides, take it out. The centre should still be slightly moist — that is what keeps it juicy. Let it cool in the pan for 5 minutes, then transfer to a rack.

    Slice of cherry loaf showing whole cherries in the crumb

    More Cherry and Baking Recipes

    If you loved this loaf, try these next: Cherry Syrup Recipe for topping pancakes and ice cream, and Cherry Clafoutis Pie for a French-inspired dessert using the same summer cherries. For a chocolate twist, the Dairy-Free Chocolate Cake is a crowd pleaser any time of year.

    Frequently Asked Questions

    Can I use frozen cherries instead of fresh?

    Yes. Thaw the cherries completely and pat them dry with paper towels before folding them into the batter. Excess moisture from frozen cherries can make the loaf gummy.

    How do I keep the cherries from sinking to the bottom?

    Toss the pitted and halved cherries in a tablespoon of flour before folding them into the batter. The light coating helps them stay suspended throughout the loaf.

    Can I replace the butter entirely?

    Yes — apple sauce is a great 1:1 substitute. The loaf comes out slightly more spongy but equally moist and delicious with fewer calories.

    How should I store this cherry loaf?

    Wrap tightly in plastic wrap or store in an airtight container at room temperature for up to 3 days. For longer storage, slice and freeze individual pieces — they thaw in 15 minutes.

    What type of cherries work best?

    Sweet cherries like Bing or Rainier are ideal because their sweetness pairs beautifully with almond extract. Sour cherries also work — just add an extra tablespoon of sugar to balance them.

    Can I add other mix-ins to this loaf?

    Absolutely. Chocolate chips, slivered almonds, or lemon zest all work well. Keep the total add-ins to about one cup so the batter is not overloaded.

    Moist Cherry Loaf

    Delicious cherry loaf that is moist and filled with perfectly cooked juicy cherries. Print RecipePrep Time:10 minsCook Time:50 minsCourse: DessertCuisine: AmericanKeyword: cherry loaf

    Ingredients

    • ¼ cup butter soft
    • ½ tsp almond extract
    • ½ cup sugar
    • 2 large eggs room temperature
    • 2 cup all-purpose flour
    • ¾ tsp baking powder
    • ½ tsp baking soda
    • ½ tsp salt
    • ½ cup milk
    • 1 cup sweet cherries pitted sliced in halves

    Instructions

    • Preheat the oven to 350 degrees F. Prepare a bread pan with baking spray.
    • In a mixing bowl, whisk together the apple sauce, sugar and almond extract until well blended. Add and whisk the eggs one at a time.
    • Sift together the flour, baking powder, baking soda and salt and add to the sugar mixture alternating with the milk. Gently fold in the cherries.
    • Pour the batter into the bread pan and bake for 55-60 minutes or until the bread has pulled away from the sides of the pan and the top is golden brown. Let cool in the pan for 5 minutes then transfer to a cooling rack. Serve warm or at room temperature.
  • Homemade Halloween Sugar Cookies

    Homemade Halloween Sugar Cookies

    You do not need Halloween cookie cutters to make the best Halloween cookies on the block. Pull out your Christmas cookie cutters, add orange, black, and purple icing, and watch a gingerbread man become Frankenstein. This sugar cookie recipe has been the go-to for over 10 years — Halloween, Christmas, Easter, birthdays. The texture is perfect and it holds every design.

    This post may contain affiliate links. If you purchase through these links, I may earn a small commission at no extra cost to you. Thank you for supporting Love & Harvest!

    homemade halloween cookies

    This post is all about making homemade Halloween sugar cookies using Christmas cookie cutters. We have the best tasting and best-texture cookie recipe for aspiring cookie designers of all ages.

    Halloween is the perfect excuse to be creative in the kitchen with the kids. The only rule: no rules. Your gingerbread man can become a zombie. Your snowman becomes a witch. Your Christmas tree becomes a candy corn. The shapes are all there — you just have to see them differently.

    Why You Will Love This Recipe

    • Saves money — no need to buy specialty Halloween cookie cutters when your Christmas set already has every shape you need
    • No blueprints required — your creativity defines the design, not a stencil
    • 10-year tested recipe — used for every holiday for over a decade, always works
    • Perfect for kids of all ages — younger kids use royal icing only, older kids add flood icing details

    Why Use Christmas Cookie Cutters for Halloween Cookies?

    Every essential Halloween shape already exists in a Christmas cutter set. You just need to see it. A gingerbread man becomes a zombie, mummy, skeleton, or Frankenstein. A snowman becomes a witch or pumpkin-head. A snowflake becomes a spider web. A candy cane becomes a snake. The shapes are all there — all it takes is creative icing.

    easy homemade halloween cookies

    Ingredients

    Cold Unsalted Butter (2 sticks / 1 cup)

    Cold butter, cut into cubes, is the key to a flaky, tender cookie that holds its shape under the cutter. Room temperature butter creates a softer, spread-prone dough that loses detail at the edges.

    • Why it matters: Cold butter creates small fat pockets in the dough that steam during baking, giving the cookies their characteristic crispness at the rim and tenderness in the centre.

    All-Purpose Flour (3-4 cups)

    Start with 3 cups and add a fourth if the dough is too sticky to roll. Different climates and measuring styles affect how much flour you need.

    • Why it matters: Flour provides structure. Too little and the cookies spread and lose shape. Too much and they become dense and crumbly.

    Stand Mixer

    A stand mixer with a paddle attachment makes creaming cold butter and sugar much easier and produces a more consistent dough than hand mixing.

    • Why it matters: Consistent dough = consistent cookie texture across the whole batch.

    Cookie Sheet

    A light-coloured, heavy-gauge cookie sheet bakes evenly without over-browning the bottoms. Dark pans absorb more heat and can burn the base before the centre sets.

    • Why it matters: Even heat distribution is the difference between perfectly golden cookies and cookies with burnt bottoms and raw centres.

    Gel Food Colouring

    Gel colouring is far more concentrated than liquid drops — a tiny amount gives intense, vivid colour without thinning the icing. The AmeriColor gel food colouring set is the go-to choice for serious cookie decorating.

    • Why it matters: Liquid colouring adds too much water to the icing, affecting consistency. Gel colouring gives you vibrant results with just a drop or two.

    Piping Bags

    Professional piping bags give you the control needed for clean outlines and precise flood fill. If you do not have them, freezer-quality ziplock bags work as a substitute — cut a tiny corner and use it exactly like a piping bag. Do not use thin sandwich bags; they cannot handle the squeezing pressure.

    • Why it matters: The tip size directly controls your line detail. Start small and cut more if needed — you cannot go back.

    Christmas Cutter to Halloween Cookie Conversion Ideas

    • Gingerbread man — zombie, Dracula, skeleton, Frankenstein, mummy
    • Candy cane — snake, black and purple candy cane
    • Snowman (cut the body out) — pumpkin head with hat, witch
    • Wreath — pumpkin, Halloween wreath
    • Mitten — ghost, 3-eye monster, gravestone (trim the thumb)
    • Snowflake — spider web, spider
    • Christmas tree — candy corn (trim the rigid edges)
    • Reindeer — black cat, zombie reindeer
    • Circle — Halloween faces, words (Boo, Eek), pumpkins
    • Angel — witch, bat (use only head and arms)

    halloween cookie cutters

    Royal Icing vs Flood Icing

    Royal icing is the thick outline — it holds its shape exactly where you pipe it and creates a perimeter wall. Flood icing is the same icing thinned with a few drops of water — it flows freely and fills larger areas smoothly inside the royal icing border. You need both for professional-looking results. For kids under 7, royal icing only is perfectly fine and much easier to control.

    Essential Colours for Halloween Cookies

    • Black
    • Purple
    • Orange
    • White
    • Red

    Fool-Proof Professional Tips

    Pro Tip 1: Bake Until Just Slightly Brown at the Rim

    Once the edges show a slight golden colour, the cookies are done. Do not wait for the tops to brown — these cookies will continue to firm up as they cool, and over-baked sugar cookies become too hard to decorate enjoyably.

    Pro Tip 2: Flip Cookies Upside Down Right Out of the Oven

    Flipping the cookies guarantees a flat decorating surface. The domed top side becomes the bottom while the flatter bottom becomes your canvas. A curved surface causes flood icing to run off the edges.

    Pro Tip 3: Chill the Dough as a Flat Disk

    After mixing, flatten the dough into a 2-inch disk before wrapping and refrigerating. A cold, flat disk rolls out more evenly with fewer cracks at the edges. Never chill dough in a ball — you will fight it when you try to roll it.

    Pro Tip 4: Start with a Small Piping Tip Opening

    Cut the tip of the piping bag small. You can always make it larger, but a cut that is too wide ruins fine detail work. Thinner openings give you control; wider openings are for flooding large areas quickly.

    Pro Tip 5: Mix and Colour Icing in Separate Bowls

    Once you know your colours, divide the icing into individual bowls and colour each separately. Cover unused bowls with a damp paper towel — royal icing dries out fast. Then divide each colour again into a royal icing portion (thick, for outlining) and a flood icing portion (thinned with drops of water, for filling).

    Pro Tip 6: Decorate Only Completely Cooled Cookies

    Icing applied to a warm cookie melts and spreads everywhere. Wait until the cookie is completely cool — touch the bottom of the cookie to check. This is the most common beginner mistake and the most preventable one.

    halloween cookies recipe

    More Cookie and Baking Recipes

    If you loved decorating these, try the Birthday Rainbow Sugar Cookies for a colourful celebration version of the same base recipe. For a spooky Halloween appetizer to go alongside your cookie decorating station, the Halloween Frankenstein Guacamole is always a hit with kids.

    Frequently Asked Questions

    Can I make the sugar cookie dough ahead of time?

    Yes. The dough can be made up to 3 days ahead and stored in the fridge as a wrapped flat disk. You can also freeze the dough for up to 3 months — thaw overnight in the fridge before rolling.

    How far ahead can I bake the cookies before decorating?

    Baked, undecorated cookies keep in an airtight container at room temperature for up to 5 days. Decorated cookies are best within 3 days as the icing can become brittle.

    My icing keeps drying out before I finish. What should I do?

    Keep any icing you are not actively using covered with a damp paper towel or plastic wrap directly touching the surface. If the icing has already started to firm up, add a drop or two of water and stir. Avoid adding too much — it will thin the icing to flooding consistency even if you wanted outline thickness.

    What is the 15-second icing test?

    Run a butter knife through your royal icing. If the surface smooths back out within 15 seconds, the consistency is right for flooding. If it takes longer, it is too thick and needs a few more drops of water. If it smooths instantly, it is too thin and needs more powdered sugar.

    Can I use a ziplock bag instead of a piping bag?

    Yes — use freezer-quality ziplock bags only. Thin sandwich bags split under pressure. Fill the bag, secure the top with an elastic band, and snip a tiny corner to create your tip. Start smaller than you think you need.

    How should I store decorated Halloween cookies?

    Store in a single layer in an airtight container at room temperature. Do not stack cookies until the icing is fully set and dry — usually 4–6 hours after decorating. Once dry, you can layer them with parchment paper between each row.

    Plain sugar cookies on a rack next to piping bags of colored icing

    Decorate Sugar Cookies

    An all purpose sugar cookie recipe for cookie designers! Great in both flavour and texture for your design! Print Recipe Pin RecipeCourse: CookieCuisine: AmericanKeyword: creative food, design, sugar cookie

    Equipment

    • stand mixer
    • large bowl
    • spatula
    • small spoons
    • freezer quality ziplock bags
    • elastic bands

    Ingredients

    Sugar Cookies

    • 1 cup unsalted butter (2 sticks) cubed cold
    • 1 cup granulated sugar
    • 2 eggs
    • 1 tsp vanilla extract
    • 3 cups all purpose flour you might need 4 cups
    • 1 tsp baking powder
    • 2 tsp salt

    Royal Icing

    • 4 cups powdered sugar
    • 4 tbsp meringue powder
    • 4 tbsp water warm
    • 2 tsp vanilla extract clear colour extract
    • 1 tsp almond extract clear colour extract

    Instructions

    Sugar Cookies

    • In a large bowl, cream together butter and sugar until smooth. Beat in eggs and vanilla. Stir in the flour, baking powder, and salt.
    • Flatten the dough into a 2-inch disk. Do not chill the dough in a ball. Cover, and chill dough for at least one hour (or overnight).
    • Preheat oven to 400°F (200°C).
    • Roll out dough on floured surface 1/4 to 1/2 inch thick. Cut into shapes with any cookie cutter. Place cookies 1 inch apart on ungreased cookie sheets.
    • Bake 6 to 8 minutes or until the rims show a slight golden colour. Cool completely before decorating.

    Royal Icing

    • In a large bowl, add powdered sugar and meringue powder and mix. Using an electric mixer on low, add in the extracts and water (1 tablespoon at a time) and mix until smooth.
    • If colouring the icing, divide into smaller bowls and colour each separately. Keep unused bowls covered with a damp paper towel.
    • Use the 15-second test: run a knife through the icing — if it smooths back in 15 seconds, consistency is correct for outlining. If it smooths instantly, it needs more powdered sugar.
    • Transfer to piping bags and decorate cookies. Keep unused icing covered with plastic wrap — it dries out very quickly.

    Flood Icing

    • Take the desired colour of royal icing in a bowl. Add a few drops of water and mix vigorously until it reaches flooding consistency. Transfer to a piping bag and carefully flood inside the outlined perimeter.

    Notes

    • If icing has started to harden, add a drop or two of water to restore consistency. Do not over-thin or it will create air bubbles.
    • Always outline first with royal icing, then flood inside the perimeter.
    • Add water a few drops at a time and test consistency with a knife before flooding.
  • Blender Oatmeal Pancakes

    Blender Oatmeal Pancakes

    These blender oatmeal pancakes have become our family’s most-requested breakfast — and they have replaced buttermilk pancakes in our household for good. Made from just bananas, oats, eggs, and baking powder, everything goes straight into the blender and onto the griddle. The cleanup is one blender. The result is a soft, fluffy, naturally sweet pancake that keeps you full until lunch. My IHOP-loving husband is the proof of concept.

    This post may contain affiliate links. If you purchase through these links, I may earn a small commission at no extra cost to you. Thank you for supporting Love & Harvest!

    Stack of oat banana pancakes with syrup, banana slices and pomegranate

    This post features a blender oatmeal pancake recipe using banana, oatmeal, vanilla, and eggs, all blended together.

    Why Make This Recipe?

    Pancakes for breakfast is probably one of the most popular breakfasts around the world. But can you make a version that’s easy and comes together in a blender? Yes. These oatmeal pancakes do. They are packed with whole grains from the oatmeal and natural sweetness from the bananas. Just 2 tablespoons of maple syrup in the whole batch. No flour. No special skills required.

    Mornings can be hectic. This recipe respects that — all the ingredients go into a blender, and cleanup is just the blender. That is it. It has been tested and approved by my IHOP-pancake-loving husband, who is not going back to buttermilk pancakes.

    Tall stack of pancakes topped with banana and pomegranate seeds

    Can These Pancakes Be Gluten-Free?

    I make these with regular oatmeal at home — not certified gluten-free oats — so as written they are not a gluten-free recipe. If you need them gluten-free, use certified gluten-free oats (and know that cross-contact can still happen in some kitchens and facilities). The only added sweetener is 2 tablespoons of maple syrup. They come out soft, fluffy, and full of flavour — perfect with maple syrup or any topping you love.

    Ingredients Deep-Dive

    Ingredients

    Oatmeal

    Either old-fashioned oats or quick-cooked oats both work. The oatmeal is the base of these pancakes — it replaces flour entirely.

    • Why it matters: Oats give these pancakes their hearty texture, no flour needed. I use regular rolled or quick oats. If you need a gluten-free version, choose certified gluten-free rolled oats or oat flour — oats are naturally gluten-free but can pick up wheat in processing, and cross-contact is still possible.

    Bananas

    Use overripe bananas — the riper, the better. The spots on the peel are your best friends here. Riper bananas are sweeter and blend more smoothly.

    • Why it matters: Bananas serve as both the natural sweetener and the binding agent in this recipe. They replace both sugar and part of the fat you would find in a traditional pancake recipe. Overripe bananas have higher natural sugar content and a more intense banana flavour.

    Eggs

    Eggs help the pancake rise and give it a fluffy texture. They are also the primary structural ingredient that binds the oats and banana together.

    • Why it matters: Without eggs, the batter would be too loose to hold together on the griddle. The protein in eggs sets when heated, creating the structure that gives these pancakes their lift.

    Baking Powder

    Baking powder creates the bubbles and air pockets inside the pancake that give it that light and fluffy texture. It is essential in all pancake recipes.

    • Why it matters: Without baking powder, these pancakes will come out flat and dense. The reaction between baking powder and the moisture in the batter produces CO2 bubbles that make the pancakes puff up on the griddle.

    Stack of pancakes with a forkful cut out to show the fluffy inside

    Pro Tips for Perfect Oatmeal Pancakes

    Pro Tip 1 — Use a Griddle

    A cast iron griddle has a larger surface area than regular pans, letting you cook more pancakes at once. It also creates an even surface of heat so every pancake cooks consistently.

    Pro Tip 2 — Cook the Pancakes with Butter

    Always add a thin layer of butter on the griddle before adding the batter. This prevents sticking and adds flavour. Butter tastes better than regular cooking oil for pancakes.

    Pro Tip 3 — When to Flip the Pancakes

    Flip when you see little air pockets forming in the middle of the pancake and the edges stop looking wet — they will have a soft, matte texture. This is the signal that the bottom is set and the pancake is ready to flip without breaking.

    Pancake stack in a pool of syrup with banana slices on a blue plate

    Looking for more breakfast ideas? Try our Mixed Berry Smoothie with Pomegranate and Nopal or our Celery Juice to pair alongside these pancakes for a complete morning meal.

    Tall stack of pancakes topped with banana and pomegranate seeds

    Blender Oatmeal Pancakes

    Delicious pancakes made with oatmeal and banana. All made with just a blender. Gluten-free when made with certified gluten-free oats.
    Prep Time 7 minutes
    Cook Time 15 minutes
    Total Time 22 minutes
    Servings: 4 people
    Course: Breakfast
    Cuisine: American
    Calories: 295

    Ingredients
      

    • 2 cups royal oats or quick oats
    • 1 cup water
    • 1 medium riped banana
    • 2 eggs
    • 2 tbsp melted butter
    • 2 tbsp maple syrup
    • 1 tbsp baking powder
    • ½ tsp baking soda
    • ½ tsp salt
    • ½ tsp ground cinnamon
    • 2 tsp vanilla extract

    Equipment

    • high speed blender

    Method
     

    1. Preheat your griddle on the stovetop and set it on medium low heat.
    2. In the blender put all the ingredients together and blend on high for 30 seconds. Batter should be smooth with no lump.
    3. lightly brush the surface of your griddle with butter.
    4. With your ⅓ measuring cup, scoop the batter with the mesuring cup, and slowly drop the batter on the griddle. Leave enough space between pancakes so they are not touching each other.
    5. Cook until small bubbles start to form in the middle of the pancake the sides have turned into a matte texture. Flip the pancake and cook for another 1-2 minutes.
    6. Serve right away with a small slice of butter on top and maple syrup.

    Frequently Asked Questions

    Do these oatmeal pancakes taste like banana?

    Yes, mildly. The banana flavour is present but not overwhelming. The more overripe your bananas are, the stronger the banana flavour. If you want to reduce it, use one banana instead of two and add a tablespoon of nut butter for binding. The oat flavour balances out the banana very well.

    Can I make this recipe without a blender?

    Yes, but the texture will be coarser. Mash the bananas very well with a fork, then mix in the eggs, and finally stir in the oats and baking powder. For a smoother texture without a blender, use certified gluten-free oat flour instead of whole rolled oats — it blends into the batter without the blender step.

    Are these pancakes suitable for toddlers?

    Yes. They have no refined flour, and the only sweetener is the banana plus 2 tablespoons of maple syrup in the whole batch. They do contain butter and eggs. They are soft, easy to chew, and naturally sweet from the banana. Cut them into small pieces or serve as finger food for younger toddlers. They are also an easy way to serve oats and eggs at a toddler breakfast.

    How do I store leftover oatmeal pancakes?

    Let the pancakes cool completely, then store in an airtight container in the refrigerator for up to 3 days. For longer storage, freeze with parchment paper between each pancake and reheat directly from frozen in a toaster or non-stick pan. They reheat very well and taste just as good the next day.

    Can I add protein powder to this recipe?

    Yes. Add one scoop of plant-based protein powder to the blender along with the other ingredients. The batter may thicken slightly — if it does, add a tablespoon of water to reach the right consistency. A vanilla or unflavored protein powder works best so it does not compete with the banana.

    Why are my pancakes coming out flat?

    The most common reason is old baking powder. Baking powder loses its potency over time — test yours by dropping a teaspoon into hot water. If it bubbles vigorously, it is still good. If not, replace it. Also make sure you are not overmixing the batter after adding the baking powder — stir just until combined to keep the air pockets intact.