Category: fresh & simple recipes

  • Oatmeal Chai Breakfast Cookies

    Oatmeal Chai Breakfast Cookies

    What if a breakfast cookie could taste like a warm chai latte, come packed with chewy rolled oats, and be ready in 30 minutes? These Oatmeal Chai Breakfast Cookies do exactly that — chewy rolled oats, warming spices, and sweet-tart dried cranberries in every bite. They are the fall treat your family will ask for twice a month.

    This post may contain affiliate links. If you purchase through these links, I may earn a small commission at no extra cost to you. Thank you for supporting Love & Harvest!

    oatmeal chai cookies on a cooling rack

    The Chai-Spiced Magic

    Chai spices have long been associated with autumn, with their rich, warming flavours that seem tailor-made for this season. Cinnamon, cardamom, ginger, and cloves come together in a harmonious blend that captures the essence of fall. When these spices are incorporated into the oatmeal chai cookie recipe, the result is pure magic.

    oatmeal chai cookies spice mix

    Ingredients

    Key Ingredients

    Rolled Oats

    Rolled oats lend a delightful chewiness and a hearty texture to these cookies.

    • Why they matter: Oats provide structure, fiber, and that signature chewy bite that makes these cookies satisfying as a breakfast or snack.

    We love using Bob’s Red Mill Oat Flour for a gluten-free variation, or classic rolled oats for full texture.

    Chai Spice Blend

    Cinnamon, cardamom, ginger, and cloves are the star of the show. They provide the unmistakable chai flavour that makes these cookies perfect for autumn.

    • Why they matter: Chai spices are warming and create the aroma that fills your kitchen and your heart.

    Grab a quality pre-made Chai Spice Blend if you want to skip making your own.

    Coconut Sugar or Brown Sugar

    Adds depth of flavour and helps keep the cookies moist and tender.

    • Why it matters: It contributes a subtle caramel-molasses note that plays beautifully with the spices.

    Try Coconut Sugar for a more natural sweetener option.

    Dried Cranberries

    The chewy and slightly tart dried cranberries complement the spiced chai flavors beautifully and add a pop of colour.

    • Why they matter: They balance the warm sweetness of the spices with a fruity brightness that keeps every bite interesting.

    Alternative Ways to Enjoy Your Oatmeal Chai Breakfast Cookies

    We love these oatmeal chai cookies not just because they taste great, but because they are very versatile! Here are some ways we eat them.

    1. Crumble on top of porridge

    oatmeal chai cookie crumbled on porridge

    Add a crumbled cookie with some bee pollen, brown sugar, and blueberries on top of a matcha porridge for a cozy morning bowl.

    2. Great side snack to pack for school

    Sometimes I run out of ideas on what to bring for the kids’ lunchbox. I avoid processed food and anything with plastic wrap. These cookies are my favourite thing to pack for the kids. They keep them full and happy. There is a reason why I make them at least twice a month!

    oatmeal chai cookies packed for school

    3. Decorate them for any event

    These cookies are a lot of fun to decorate. Chai flavour is great for fall, and they are even better for Halloween decoration. Because the texture is bumpy, we love making funny scary faces on them!

    4. Add mix-ins

    Toss in mix-ins like chopped nuts, seeds, or dried fruits. They add texture and flavour.

    oatmeal chai cookies batch

    Frequently Asked Questions

    Can I make these oatmeal chai cookies gluten-free?

    Yes. Swap the all-purpose flour for a 1:1 gluten-free flour blend and use certified gluten-free rolled oats. The texture will be slightly more crumbly but still delicious.

    How do I store oatmeal chai breakfast cookies?

    Store in an airtight container at room temperature for up to 5 days. They also freeze well for up to 3 months — just thaw at room temperature for 20 minutes.

    Can I substitute the dried cranberries?

    Absolutely. Dried blueberries, raisins, chopped dried apricots, or even chocolate chips all work wonderfully. Use whatever dried fruit you love or have on hand.

    Do I need a stand mixer?

    No. A hand mixer or even a wooden spoon works fine. A KitchenAid Stand Mixer makes the process faster and easier, especially when creaming the butter and sugar, but it is not required.

    Why are my cookies spreading too much?

    Butter that is too soft or too warm is the most common culprit. Make sure your butter is at room temperature — soft but not melted. You can also chill the shaped dough balls for 15 minutes before baking to reduce spreading.

    Can I make the chai spice mix ahead of time?

    Yes, and we recommend it. Mix a double or triple batch and store it in a sealed jar. It keeps well for 6 months and works great in lattes, oatmeal, and pancakes too.

    oatmeal chai breakfast cookies

    Oatmeal Chai Breakfast Cookies

    These delightful treats are not only a delicious taste of fall but also a perfect way to bring the family together during this cozy time of year. Cinnamon, cardamom, ginger, and cloves come together in a harmonious blend of oatmeal and cranberries that captures the essence of fall.
    Print Recipe
    Pin Recipe
    Prep Time:15 minutes
    Cook Time:15 minutes
    Course: Cookie
    Keyword: chai, cookies, halloween breakfast, oatmeal

    Ingredients

    Chai Spice

    • 3 tbsp ground cinnamon
    • 1 tbsp ground cardamom
    • 1 tbsp ground ginger
    • ½ tbsp ground allspice
    • ½ tbsp ground clove
    • ½ tbsp ground nutmeg

    Oatmeal Chai Cookies

    • ½ cup butter room temperature
    • ½ cup brown sugar
    • ½ cup granulated sugar
    • 1 large egg room temperature
    • ½ tsp vanilla extract
    • ½ tsp baking soda
    • ½ tsp salt
    • 3 tsp chai spice (see 'Chai Spice' Recipe above)
    • ¾ cup all-purpose flour
    • 1½ cups rolled oats
    • 1 cup dried berries (ex: cranberry, blueberries, strawberries, etc)

    Instructions

    Chai Spice

    • In a bowl, combine all the ingredients together. Whisk it very well. Store it in a tight plastic container and label the container.

    Oatmeal Chai Cookies

    • Preheat your oven to 350°F (175°C) and line two baking sheets with parchment paper.
    • In a large mixing bowl or in a stand mixer, place the butter inside. Cream until the colour is more light, and texture is fluffy.
    • Add the brown sugar and granulated sugar. Combine at medium-high speed for 1 minute. Add the egg and vanilla, and mix well.
    • In another bowl, add all your dry ingredients together: baking soda, salt, chai spice, flour, and oats.
    • Combine the dry ingredients with your wet by adding the dry into the wet ingredients. Start the speed slowly so the flour does not come out of the bowl. Once everything looks moist, speed it up to medium speed, and mix for 1-2 minutes. Fold in the berries.
    • Drop rounded tablespoons of cookie dough onto the prepared baking sheets, spacing them about 2 inches apart.
    • Bake in the preheated oven for 10-12 minutes, or until the edges of the cookies are golden brown and the centers are set.
    • Allow the cookies to cool on the baking sheets for a few minutes before transferring them to wire racks to cool completely.

    Love these chai cookies? Try our Homemade Vanilla Extract to make the most flavourful batch possible, or check out our Birthday Rainbow Sugar Cookies for another festive bake the whole family will love.
  • Vegetarian Mango Soy Ceviche

    Vegetarian Mango Soy Ceviche

    This Vegetarian Mango Soy Ceviche is proof that plant-based food can be just as vibrant and satisfying as anything from the sea. Juicy mango, tangy lime, jalapeño heat, and tender soy protein come together in a refreshing dish that is perfect for warm summer days — and ready in under 40 minutes.

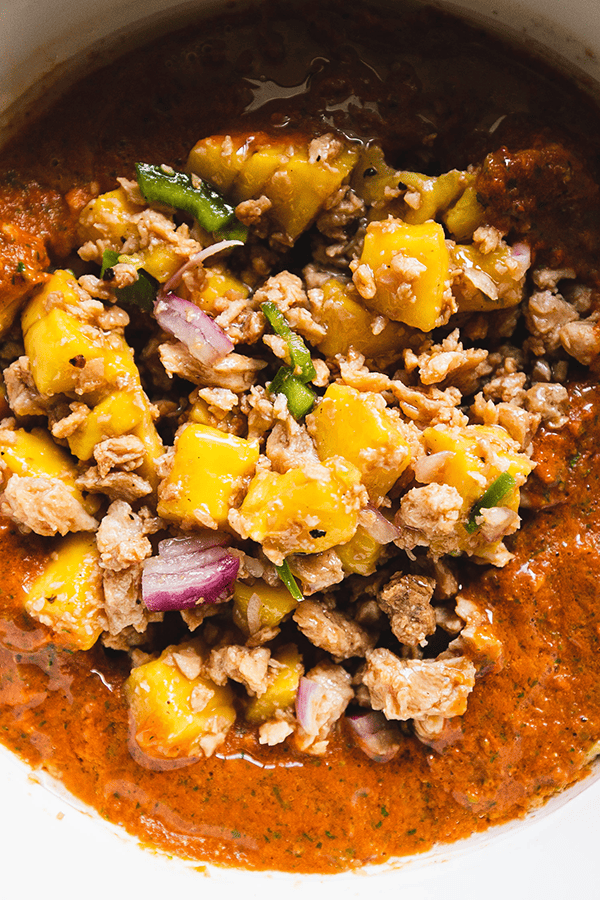
    Vegetarian Mango Soy Ceviche plated with red salsa

    This post may contain affiliate links. If you purchase through these links, I may earn a small commission at no extra cost to you. Thank you for supporting Love & Harvest!

    What Is Ceviche?

    Ceviche is a vibrant and refreshing dish that hails from the coastal regions of Latin America. Traditionally it is made by marinating raw fish or shellfish in citrus juice — the acid “cooks” the seafood, denaturing the proteins and giving it a firm texture. The result is a zesty and flavourful dish enjoyed as an appetizer or a light meal.

    Here in Mexico, ceviche is a celebration of fresh ingredients and bold flavours. It features an array of complementary components such as onions, tomatoes, herbs like cilantro, and a touch of heat from jalapeños. The beauty of ceviche lies in its versatility — vegetarian versions like this Mango Soy Ceviche use vegetables and fruits as the base, marinated in citrusy goodness to create a refreshing and tangy medley of flavours.

    Vegetarian Mango Soy Ceviche ingredients laid out

    My Vegetarian Journey in Mexico

    In my culinary journey through Mexico, I noticed the abundance of fresh vegetables and fruits in the markets, and also that vegetarian dishes did not always take the spotlight in traditional Mexican cuisine. As someone passionate about vegetarian food, I was inspired to create a dish that proves vegetarian cuisine is anything but mundane.

    With each bite of the Mango Soy Vegetarian Ceviche, I am transported to the bustling streets of Mexico, where the lively atmosphere and rich culinary heritage come alive. The succulent mangoes bring a burst of sweetness, the tangy lime juice adds a refreshing kick, and the dried soy protein creates a satisfying hearty texture that makes this dish a complete meal.

    Ingredients for Vegetarian Mango Soy Ceviche

    Dried Soy Protein

    • Why it matters: Dried soy protein (also called textured vegetable protein or TVP) is the meat substitute that gives this ceviche its hearty, chewy texture. Once boiled and cooled, it absorbs the lime, Maggie sauce, and spices beautifully, mimicking the texture of seafood without any fish. Look for it in health food stores or order it online.

    Ripe Mango

    • Why it matters: The mango delivers natural sweetness and tropical flavour that balances the acidity of the lime and the savoury depth of the sauces. Choose a mango that yields slightly to pressure — too firm and it won’t have enough flavour, too soft and it turns mushy in the dish.

    Fresh Lime Juice

    • Why it matters: Lime is the soul of any ceviche. The citric acid brightens every ingredient and ties the flavours together. Use freshly squeezed lime juice — two small limes — for the best results.

    Maggie Sauce

    • Why it matters: Maggie sauce adds a savoury, umami depth that makes this vegetarian ceviche taste complex and restaurant-worthy. It is a beloved Mexican condiment found in almost every kitchen in Mexico. A little goes a long way.

    Jalapeño

    • Why it matters: The jalapeño brings the heat that makes ceviche addictive. Finely chop it for even distribution. Remove the seeds for a milder version or keep them for full heat.

    Plated mango soy ceviche with red salsa base

    Why Try This Mango Soy Vegetarian Ceviche?

    1. Bursting with vibrant flavours: The combination of ripe mangoes, zesty lime juice, and the umami richness of Maggie sauce creates a harmonious balance that dances on your palate.
    2. Refreshing and light: The citrusy marinade paired with juicy mangoes provides a delightful burst of freshness, making it perfect for warm weather indulgence.
    3. Vegetarian delight: This ceviche showcases the beauty and versatility of vegetarian cuisine — you can enjoy the essence of a traditional ceviche while staying fully plant-based.
    4. Texture experience: The soy protein, juicy mango, and crisp jalapeño add layers of texture to every bite.
    5. Easy and quick: With straightforward instructions, you can have this on the table in under 40 minutes.
    6. Sustainable choice: Overfishing and unsustainable fishing practices have depleted marine resources worldwide. Choosing plant-based alternatives like this ceviche lets you enjoy a delicious meal with a lighter impact on the planet.

    Vegetarian ceviche close-up showing texture

    Vegetarian Ceviche Flavour Profile

    The flavour of Mango Soy Vegetarian Ceviche can be described as a tantalizing combination of sweet, tangy, savoury, and refreshing notes in perfect harmony. The ripe mangoes bring natural sweetness, the lime juice provides a bright citrusy kick that balances that sweetness, and the Maggie sauce and vegan fish sauce layer in a complex, savoury depth that makes this dish genuinely surprising for first-time tasters.

    Love fresh and vibrant Mexican-inspired dishes? Try these others from Love & Harvest:

    Frequently Asked Questions

    What is dried soy protein and where do I find it?

    Dried soy protein (also called TVP — textured vegetable protein) is a high-protein meat substitute made from defatted soy flour. It comes in small granules or chunks, is shelf-stable, and doubles in size when rehydrated. Find it at health food stores, Latin markets, or order a bag of dried soy protein on Amazon.

    Can I make this ceviche ahead of time?

    Yes. The red salsa and the soy protein can be prepared up to a day in advance and stored separately in the refrigerator. Combine everything and add the fresh mango just before serving to keep the texture and colour at their best.

    How do I make this dish spicier or milder?

    For more heat, keep the jalapeño seeds and add a second jalapeño. For a milder version, remove all seeds and membrane from the jalapeño before chopping, or substitute a milder pepper like poblano.

    Can I use fresh soy protein instead of dried?

    The recipe calls for dried soy protein specifically because its texture after rehydration mimics seafood. Fresh tofu can be substituted — press it dry, cube it, and use it directly without boiling. The flavour absorption will be different but still delicious.

    What can I serve this ceviche with?

    Serve with tostadas, corn tortilla chips, or slices of avocado. The red salsa base is also wonderful on its own as a dip. A squeeze of extra lime over the top just before serving brings out all the flavours.

    Is this ceviche gluten-free?

    The base ingredients are naturally gluten-free, but check your brand of dried soy protein and Maggie sauce — some brands add wheat-based ingredients. Substitute coconut aminos for the Maggie sauce if you need a certified gluten-free alternative.

    Vegetarian Mango Soy Ceviche

    Vegetarian Mango Soy Ceviche

    A delightful twist on the traditional seafood-based ceviche. Our Mango Soy Ceviche is bursting with vibrant colours and flavours, which offer a refreshing and tangy taste, perfect for warm summer days. Print Recipe Pin RecipePrep Time:20 minutes Cook Time:15 minutes Course: AppetizerCuisine: MexicanKeyword: ceviche, soy, vegetarianServings: 6 people

    Equipment

    • high speed blender
    • colander

    Ingredients

    • 2 cups dried soy protein
    • 1 ripe mango cubed
    • 1 jalapeno finely chopped
    • 1 tbsp red onion finely chopped
    • 2 small lime juiced
    • 1 tsp Maggie sauce
    • 2 tsp vegan fish sauce
    • 1 tsp salt
    • 1 tbsp olive oil garnish

    Red Salsa

    • 1-2 tsp olive oil
    • 4 small roman tomatoes
    • 3 branches of cilantro
    • 1 tsp apple cider vinegar
    • pinch of salt

    Instructions

    Red Sauce

    • In a saucepan, turn the heat to medium-high. Slice the tomatoes into quarter-inch slices. Add the oil to the pan and sear the sides of all the tomatoes until slightly browned. Remove from heat.
    • In a high-speed blender, add the grilled tomatoes, cilantro, vinegar, and salt. Blend until smooth. Set aside.

    Mango Soy Ceviche

    • Add the dried soy proteins to a colander. Rinse under the faucet to remove any dust particles. Set aside.
    • Bring 1 litre of water to a boil, then add the rinsed soy protein. Cook on medium heat for about 10 to 15 minutes. Watch the pot carefully as it can foam up. Drain through a colander and let the cooked soy protein cool to room temperature.
    • In a large bowl, combine the cubed mango, jalapeño, red onion, lime juice, Maggie sauce, vegan fish sauce, and salt. Add the cooled soy proteins and mix well.
    • On the serving dish, spread the red salsa as the base. Place the mango soy ceviche on top in the centre. Drizzle the olive oil evenly over the top. Serve cold.
  • Matcha Green Tea Popsicles

    Matcha Green Tea Popsicles

    Imagine biting into an ice-cold, creamy popsicle that cools you down from the inside out. That is exactly what these Matcha Green Tea Popsicles deliver — a tropical blend of coconut milk and ceremonial matcha that is as creamy as it is refreshing. One batch and you will want a stash in your freezer all summer.

    This post may contain affiliate links. If you purchase through these links, I may earn a small commission at no extra cost to you. Thank you for supporting Love & Harvest!

    A hand holding a matcha green tea popsicle over ice

    Quench your summer cravings with the refreshing delight of Matcha popsicles. These vibrant treats satisfy your sweet tooth with that earthy matcha flavor.

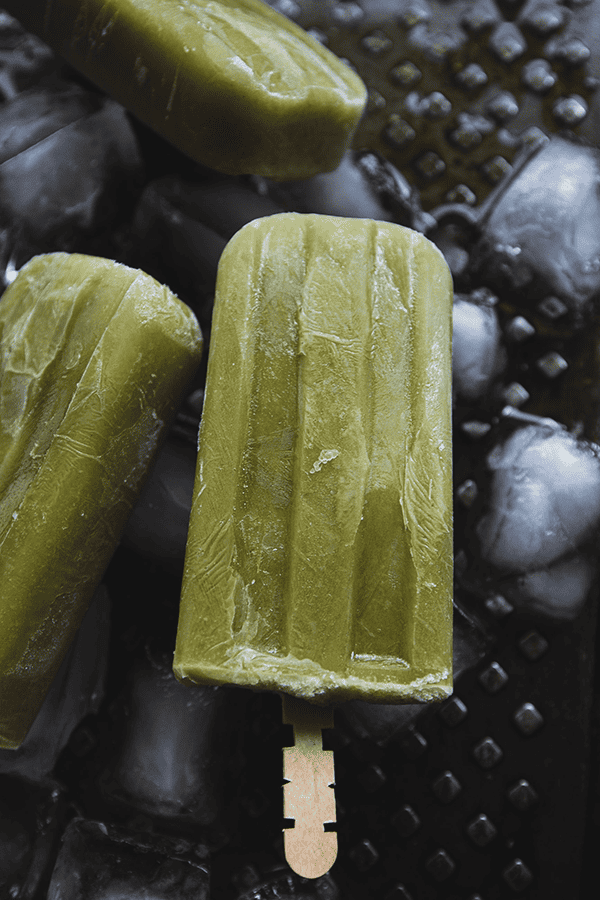
    Matcha green tea popsicles resting on ice cubes

    What is Matcha Green Tea?

    Matcha green tea is a type of powdered green tea that has been a traditional part of Japanese culture for centuries. It is made from the leaves of the Camellia sinensis plant, the same plant used to produce other types of green tea. However, what sets matcha apart is the way it is grown, harvested, and processed.

    The cultivation of matcha involves shading the tea plants for several weeks before harvest, which boosts the chlorophyll content and gives the leaves a vibrant green color. After harvest, the stems and veins are removed, and the leaves are ground into a fine powder using traditional granite stone mills.

    Why Use Xanthan Gum in Matcha Popsicles?

    Xanthan gum is a common ingredient used in the production of matcha popsicles and other frozen desserts. Here are a few reasons why xanthan gum is often included:

    1. Texture and Mouthfeel: Xanthan gum acts as a thickening and stabilizing agent, giving the popsicle mixture a smooth and creamy texture. It helps prevent ice crystals from forming, resulting in a more enjoyable mouthfeel and preventing the popsicles from becoming too icy.
    2. Emulsification: Xanthan gum can help emulsify and bind the ingredients together, ensuring that the matcha and other components in the popsicle mixture are evenly distributed. This contributes to a consistent flavour throughout the popsicle.
    3. Suspension of Ingredients: Matcha powder can sometimes settle at the bottom of the popsicle mixture due to its weight. Xanthan gum helps suspend the matcha particles and other ingredients evenly throughout the mixture, preventing separation and ensuring a consistent distribution of flavour.
    4. Enhanced Stability: Xanthan gum improves the stability of the popsicle mixture, preventing ingredient separation and reducing the chances of the mixture separating or becoming watery during the freezing process.
    5. Reduced Melting: Xanthan gum can help slow down the melting rate of popsicles, allowing them to maintain their shape and texture for a longer period, particularly in warmer temperatures.

    What I Love About Homemade Matcha Popsicles

    • Control the sugar content in each lick
    • Great way to use seasonal summer fruits
    • Easy recipe for kids to follow and tons of fun!
    • A great way of making homemade frozen treats
    • An infinite avenue for creativity

    Ingredients

    You only need 5 ingredients to make these matcha green tea popsicles. Simple, clean, and packed with flavour.

    Coconut Milk

    Full-fat coconut milk is the backbone of this recipe.

    • Why it matters: The high fat content creates that creamy, ice-cream-like texture without any dairy. It also carries the matcha flavour beautifully and prevents an icy, hard bite.

    Matcha Powder

    Use ceremonial-grade matcha powder for the best results.

    • Why it matters: Ceremonial grade matcha is brighter green and less bitter. Culinary grade works but produces a slightly more bitter flavour.

    Plant-Based Milk

    Almond milk, oat milk, or any plant-based milk you prefer.

    • Why it matters: This thins the coconut milk to a pourable consistency and adds volume without adding heaviness. Use unsweetened almond milk so the honey is the only sweetener.

    Honey

    Raw varietal honey or ¼ cup sugar work equally well.

    • Why it matters: Sweetness is essential in frozen desserts because cold temperatures dull flavor perception. Honey adds complexity that plain sugar cannot match.

    How To Make Matcha Popsicles

    In a high speed blender add coconut milk, almond milk, xanthan gum, matcha powder, and honey. Blend on high until the mixture comes together smoothly. Leave it on high for about 30–40 seconds until the top of the liquid gets frothy. The froth at the top of the popsicle mold gives it a beautiful look once frozen.

    Fingers lifting a frothy-topped matcha popsicle from a bed of ice

    What Do You Need to Make Homemade Popsicles?

    Firstly, you will need a popsicle mold. The one I like is silicone because you can stretch and pull to get the popsicles out. It is easier to store in cabinets too. Another thing I like about silicone molds is that I can use wooden sticks.

    I mean, come on, who hates it when a plastic stick goes missing, and you’re running through the kitchen looking for it? I despise playing hide-and-seek with the reusable sticks because I end up looking like a crazy lady searching for them.

    If you have kids and want a smaller size, you can buy a 6-cavity silicone mold — it makes about 3.3oz per popsicle, perfect for children!

    If you have a preferred mould, use it. In essence, they are all the same, so long as you have a popsicle at the end of the day.

    Two matcha green tea popsicles on dark ice cubes

    Create A Memorable Family Moment!

    This matcha popsicle recipe is so simple and delicious that asking the kids to join in can create a fantastic summer memory for them.

    When the kids see me laying out the limes on the kitchen counter with a big bowl beside it, they always know it’s popsicle-making time! Engaging kids in the process of making popsicles can be a wonderfully enjoyable and educational experience. They can learn about flavours, textures, measuring, and the science of freezing — all while having a great time.

    If you love frozen treats, you might also enjoy our Matcha Avocado Popsicles or the fun and fruity Loco Mango Popsicles. And for something completely different, try our Mixed Berry Smoothie with Pomegranate and Nopal, another family favourite.

    Frequently Asked Questions

    Can I use culinary grade matcha instead of ceremonial grade?

    Yes, you can. Culinary grade matcha is less expensive and works well in recipes. However, ceremonial grade produces a more vibrant green colour and a less bitter flavour. If you are sensitive to bitterness, stick with ceremonial grade.

    Can I make these popsicles without xanthan gum?

    Yes, but the texture will be icier. Xanthan gum is what prevents large ice crystals from forming, giving these popsicles their smooth, creamy bite. If you skip it, the popsicles will still be delicious — just slightly less creamy.

    How long do matcha popsicles last in the freezer?

    Stored in an airtight container or individually wrapped in plastic wrap, these matcha popsicles keep well for up to 2 months in the freezer. After that, they may develop freezer burn.

    Can I use a different sweetener?

    Absolutely. Maple syrup, agave nectar, or even coconut sugar all work well. Just note that liquid sweeteners blend more easily than granulated sugars. If using coconut sugar, blend an extra 10 seconds to fully dissolve.

    What popsicle mold size do I need?

    This recipe makes about 10 standard-size popsicles (roughly 3 oz each). If you are using a smaller mold — like a children’s size — you will get more pieces. Just adjust freeze time accordingly; smaller molds may be ready in 4 hours.

    Can I add fruit to this matcha popsicle recipe?

    Yes! Sliced mango, kiwi, or blueberries can be placed inside the mold before pouring the matcha mixture for a beautiful and flavourful twist. Make sure the fruit pieces are small enough to fit without blocking the popsicle stick.

    A hand holding a matcha green tea popsicle over ice

    Matcha Green Tea Popsicles

    After indulging in a hearty BBQ meal, these matcha green tea popsicles make a refreshing, light finish. They provide a refreshing and light option to balance out the richness of the barbecue flavours. The creamy texture, combined with the subtle tropical breeze of coconut milk, creates a harmonious blend that will transport your taste buds to a serene paradise.
    Prep Time 10 minutes
    Freeze Time 6 hours
    Total Time 6 hours 10 minutes
    Servings: 10 people
    Course: Dessert
    Calories: 90

    Ingredients
      

    • 1 15oz can coconut milk
    • 1 cup almond milk or any other vegan milk
    • 1 tsp xanthan gum
    • 1 tbsp matcha green tea powder
    • 3 tbsp honey or ¼ cup sugar

    Equipment

    • silicon popsicle mould

    Method
     

    1. In a high-speed blender, add coconut milk, almond milk, xanthin gum, matcha powder, and honey. Blend on high until the mixture comes together smoothly.
    2. Pour the mixture to fill each popsicle mould. Place lid over moulds, then insert popsicle sticks.
    3. Place it in the freezer for 6 hours or overnight.
    4. When it is ready, leave the popsicles out for 30 minutes so it is easier to squeeze them out.
  • Easy Blueberry Ice Cream

    Easy Blueberry Ice Cream

    When summer’s heat beckons, what better way to cool down than with a scoop of homemade blueberry ice cream? Bursting with vibrant hues and a delightful blend of sweet and floral flavours, this blueberry ice cream is an exquisite treat that captures the essence of the season. The best part? No artificial colouring, no mystery ingredients — just real blueberries, cream, and a squeeze of lemon.

    This post may contain affiliate links. If you purchase through these links, I may earn a small commission at no extra cost to you. Thank you for supporting Love & Harvest!

    Scoops of purple blueberry ice cream in a loaf pan with fresh blueberries

    An Explosion of Flavour

    The first taste of blueberry ice cream is a revelation — an explosion of flavour that harmonizes the richness of cream with the bright tanginess of blueberries. The subtle tartness of the berries balances perfectly with the creaminess, creating a symphony on your taste buds. Whether enjoyed in a crispy waffle cone or a delicate dish, this frozen creation is a celebration of summer.

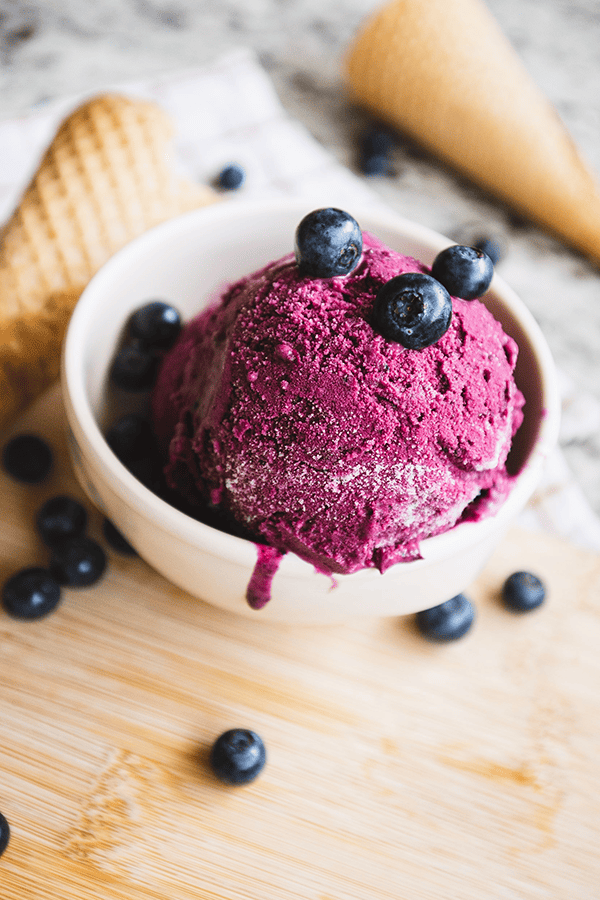
    Bowl of blueberry ice cream topped with fresh blueberries next to waffle cones

    Blueberry Ice Cream Pairing

    This easy blueberry ice cream pairs beautifully with a variety of complementary flavours. Here are some wonderful pairing ideas:

    • Cherry Syrup — drizzle a spoonful of homemade cherry syrup over a scoop of blueberry ice cream for a stunning berry-on-berry contrast.
    • Dark Chocolate — the combination of creamy blueberry ice cream and decadent chocolate creates a luxurious and irresistible dessert. Try it with a triple chocolate brownie!
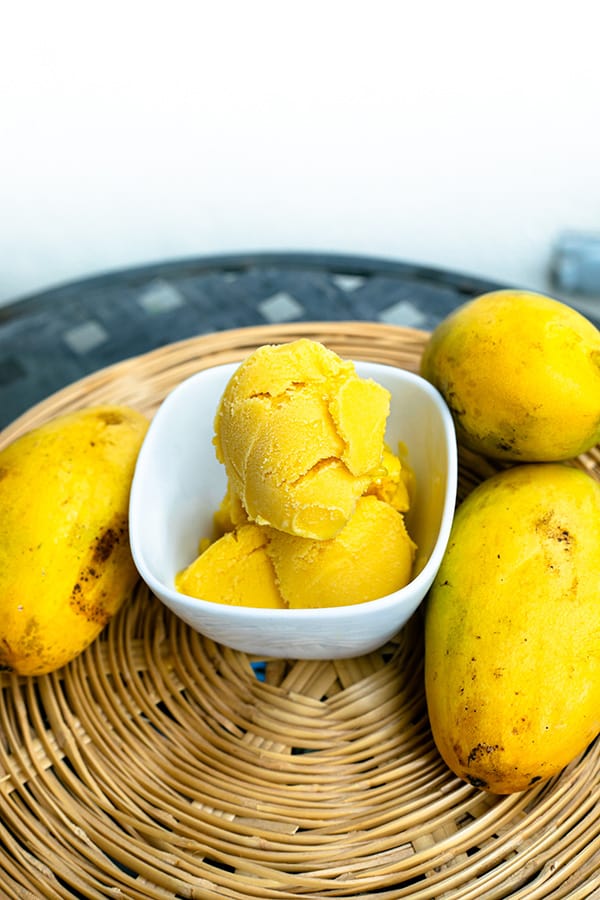
    • Mango Sorbet — the vibrant tropical flavours of Fresh Mango Sorbet harmonize beautifully with the sweet and tangy blueberry ice cream. We also have a Chili Mango Sorbet if you want something with a kick!

    A hand holding a waffle cone of blueberry ice cream

    Blueberry Flavour

    Blueberry ice cream is a magical symphony of flavours. As you take your first spoonful, the velvety smoothness of the ice cream caresses your palate. Then, the subtle floral notes of the blueberries gradually unfold, complementing the rich creaminess in a way that feels absolutely divine. The balance between sweet and tart creates a harmonious melody that leaves you craving more.

    A hand holding a double scoop of blueberry ice cream in a waffle cone

    Why Churn Instead of High-Speed Blending

    To achieve the perfect texture and flavour, blueberry ice cream undergoes a meticulous churning process. Freshly picked blueberries are gently cooked down to release their natural juices and concentrated flavours.

    The resulting vibrant blueberry puree is then swirled into a creamy base, crafted from a combination of milk, cream, sugar, and a touch of lemon juice. The mixture is churned slowly, allowing air to incorporate, resulting in a light and velvety ice cream that melts effortlessly on the tongue.

    The ice cream maker I’ve been using for the past 10 years is the Cuisinart Ice Cream Maker Machine. I had one in Canada and loved the compact size and reliable performance. Now that we are living in Mexico, I bought the same model and they still haven’t changed the machinery in 20 years!

    Blueberry ice cream churning in an ice cream machine

    Why I Love Homemade Ice Cream

    • Control the sugar content in each scoop
    • Great way to use seasonal summer fruits
    • Easy recipe for kids to follow and tons of fun!
    • A great way of making homemade frozen treats
    • An infinite avenue for creativity

    Saucepan full of fresh blueberries

    Ingredients

    Five simple ingredients. That’s all it takes.

    Fresh or Frozen Blueberries

    Use the freshest blueberries you can find. Frozen blueberries work well too and can actually produce a deeper colour.

    • Why it matters: Blueberries are the star of this recipe. Cooking them down first concentrates their flavour and releases the deep purple pigment that gives this ice cream its beautiful colour. Do not skip the cooking step — raw blueberries blended into cream taste flat by comparison.

    Sugar

    Plain granulated white sugar keeps the flavour clean and lets the blueberry shine.

    • Why it matters: Sugar does more than sweeten — it also lowers the freezing point of the mixture, which keeps the ice cream scoopable at freezer temperature. Reducing the sugar significantly will result in a rock-hard, icy product.

    Cream

    Use heavy whipping cream (35% fat or higher) for the richest result.

    • Why it matters: Fat is what makes ice cream creamy rather than icy. The fat molecules interfere with ice crystal formation during churning, creating a smooth, velvety texture. Substituting with half-and-half or whole milk alone will produce a noticeably icier result.

    Milk

    Whole milk balances the richness of the cream and lightens the texture slightly.

    • Why it matters: A pure cream base would be too heavy and buttery. The milk thins it to the ideal consistency for churning and creates that classic ice cream “scoop” texture that holds its shape without being too dense.

    Fresh Lemon Juice

    Just one teaspoon added while the machine is churning.

    • Why it matters: Lemon juice brightens the blueberry flavour and prevents the colour from turning muddy purple-grey. The acid also balances the sweetness and gives the ice cream a more complex, layered taste.

    How to Make This Easy Blueberry Ice Cream

    Making homemade blueberry ice cream is a delightful and rewarding process. First, we wash the blueberries and coat them with some sugar. We heat a large saucepan over medium heat and slowly cook the blueberries to release the juice and concentrate the flavour. After 5 minutes, I use a potato masher to mash the blueberries and simmer for another 10 minutes. Turn the heat off.

    Let the blueberry mixture cool on the side. Meanwhile, combine the cream and milk together. Once the blueberry mixture is cool to room temperature, blend it in a high-speed blender until smooth. Then pour the blueberry liquid into the cream. Refrigerate until cold, about 3 hours.

    Lastly, set up the ice cream churner. Pour the blueberry mixture into the machine. While the machine is running, add freshly squeezed lemon juice. It should take around 20-25 minutes. Once churned, transfer the blueberry ice cream to a lidded container, smoothing the surface. Place a piece of parchment paper directly on top to prevent ice crystals from forming, then cover with the lid.

    Loaf pan of blueberry ice cream with a scoop, fresh blueberries and a waffle cone

    Why You Should Make This Blueberry Ice Cream

    Picture this: you get to handpick the juiciest, plump blueberries, ensuring the ultimate freshness and quality. Then, you dive into a world of culinary creativity, customizing the recipe to match your unique taste buds. Want an extra burst of blueberry goodness? Toss in more! And the satisfaction you’ll feel when you scoop that creamy, dreamy homemade blueberry ice cream is out of this world.

    It’s not just about the flavour — it’s about the experience. The laughter, the memories made in the kitchen with loved ones, and that moment of pure bliss when you savour each mouthwatering spoonful. So, grab those blueberries, unleash your inner culinary genius, and let’s dive into frozen dessert perfection.

    A child holding up a waffle cone piled with blueberry ice cream

    View this post on Instagram

    A post shared by Sammi C. | love & harvest (@loveandharvest)

    [tcb-script async=”” src=”//www.instagram.com/embed.js”][/tcb-script]

    Looking for more frozen desserts? Try our Vanilla Bean Ice Cream — a classic that pairs perfectly with just about everything.

    Frequently Asked Questions

    Do I need an ice cream maker to make this recipe?

    Yes, this recipe is designed for an ice cream maker. If you don’t own one, you can try a no-churn method: whip the cream to soft peaks separately, fold in the cooled blueberry puree gently, and freeze in a lidded container. Stir vigorously every 30 minutes for the first 3 hours to break up ice crystals. The texture won’t be as smooth, but it will still be delicious.

    Can I use frozen blueberries instead of fresh?

    Yes. Frozen blueberries work very well in this recipe since you are cooking them down anyway. They can actually produce a more intense purple colour than fresh blueberries. There is no need to thaw them first — just add them directly to the saucepan with the sugar.

    Why did my ice cream turn out icy instead of creamy?

    The most common causes are: the mixture was not cold enough before churning (it needs to be thoroughly chilled — at least 3 hours), the cream-to-milk ratio was off, or the churn time was too short. Make sure the ice cream maker bowl is fully frozen (at least 24 hours) before use.

    How long does homemade blueberry ice cream last?

    Stored in an airtight freezer-safe container with parchment pressed directly on the surface, this ice cream keeps well for up to 2 weeks before ice crystals begin to form. After the first week, the texture is best if you let it sit at room temperature for 3-5 minutes before scooping.

    Can I make this ice cream dairy-free?

    Yes. Substitute the milk and cream with full-fat coconut cream (two cans). The result will be a slightly coconutty, tropical blueberry ice cream that is absolutely delicious. Oat cream also works and has a more neutral flavour if you want to keep the pure blueberry taste front and centre.

    How do I prevent freezer burn on homemade ice cream?

    Press a sheet of plastic wrap or parchment paper directly onto the surface of the ice cream before putting the lid on. This eliminates the air gap between the ice cream and the container lid — the air gap is what causes freezer burn. A tight-fitting lid is also essential.

    A hand holding a double scoop of blueberry ice cream in a waffle cone

    Easy Blueberry Ice Cream

    Bursting with vibrant hues and a delightful blend of sweet and floral flavours, blueberry ice cream is an exquisite treat that captures the essence of the season.
    Prep Time 20 minutes
    Cook Time 25 minutes
    Chill & Freeze 11 hours
    Total Time 11 hours 45 minutes
    Servings: 8 people
    Course: Dessert
    Cuisine: American
    Calories: 230

    Ingredients
      

    • 3 cups fresh or frozen blueberries
    • 1 cup sugar
    • 3 cups milk
    • 1 cup cream
    • 1 tsp fresh lemon juice

    Equipment

    • ice cream churner
    • potato masher

    Method
     

    1. Rinse the blueberries from a running facet. Lay the blueberries on a kitchen towel and lightly toss it to dry them. Add the blueberries in a large bowl and toss it with sugar. Heat a large saucepan over medium heat and slowly cook the blueberries to release the juice and concentrate the flavour. After 5 minutes, use a potato mash and mash the blueberries to release their flavour and simmer for another 10 minutes. Turn the heat off.
    2. Let the blueberry mixture cool on the side. Meanwhile, combine the cream and milk together. Once the blueberry mixture is cool to room temperature, blend it in a high-speed blender until smooth. Then pour the blueberry liquid into the cream. Refrigerate until it is cold, about 3 hours. 
    3. Set up the ice cream churner and turn it on according to the manufacturer's instructions. Pour the blueberry mixture into the machine. While the machine is running add a freshly squeezed lemon juice. It should take around 20-25 minutes. 
    4. Transfer ice cream to a freezer-safe container and freeze until solid. About 8 hours.
  • Delicious Meatless Spicy Peanut Noodle

    Delicious Meatless Spicy Peanut Noodle

    This vegetarian peanut noodle is so easy to make and RIDICULOUSLY delicious. The perfect umami slurp that’s meatless.

    veggie peanut butter noodles

    This post may contain affiliate links. If you purchase through these links, I may earn a small commission at no extra cost to you. Thank you for supporting Love & Harvest!

    My summer is never complete without making this vegetarian spicy peanut noodle with cooling cucumber. Imagine a nutty and tangy peanut noodle pasta served with a refreshing cucumber and sesame oil salad on top. This dish is the epiphany of what life is all about!

    Back a few years ago when I was teaching cooking classes in Mexico, this vegetarian Spicy Peanut Noodle with cooling cucumber recipe was one of my students’ favourite recipes. Till this day I have past students of mine messaging me and telling me this recipe had stuck with them for a long time and they are now feeding their children with the exact same recipe.

    It’s a humble experience knowing I’ve gifted them something that is now being passed down as a family meal. And now I want everyone to have the same experience as all my students once had.

    This recipe is easy and very good for a fast-paced family who are always on the go. It’s also a kid-friendly meal, minus the spice. My kids love this a lot and occasionally request it. If you know a child who loves peanut butter sandwiches and you can’t get them to eat anything else, this is what they need in their life. You will not struggle with time using this recipe!

    peanut noodles

    How Does It Taste?

    It is spicy, tangy, nutty, and thick. You can serve it hot or cold — the options are yours. In the summer I make it with less sauce so it just lightly coats the noodle. I bring it to picnic trips and road trips. Then I top it off with some cold cucumber sesame oil salad.

    In the winter I like it more hot and with more of the sauce to warm around the noodle, almost like a noodle soup. Sometimes I ladle a hot cup of chicken stock into the sauce so it thins out and turns it into a noodle soup. The recipe is super versatile.

    What Noodles Should I Use?

    Original Chinese noodles will do. DragonMall Wu Mu Noodles are a good option. They cook very easily and coat the peanut sauce well. They remind me a lot of how Shandong noodles are made and taste.

    If you don’t have access to these noodles you can make your own! I have my 3 minute homemade ramen noodle recipe here if you’re interested in going the extra mile. Regular spaghetti noodles also work if neither option is available — not the authentic style, but we do what we have to do. You could also try pairing this sauce with a simple noodle base like this spinach pasta for a creative variation.

    peanut noodle recipe

    Why You Will Love This Meatless Recipe

    • Easy Meal – it takes only 30 minutes to make this meal! You make your sauce all in the blender, toss it with some hot noodles, and lay the cucumber sesame oil salad on top.
    • Vegetarian and Vegan – Looking for a meatless meal that’s still delicious and cooling for summer and into fall? This recipe is perfect for something cooling to eat in the summer.
    • Have it hot or cold – yes, you can make it cold for summer days or hot for colder weather. There is no season preference.
    • It’s super tasty – in the sauce there’s soy sauce, garlic, peanut butter, and black vinegar. It has a super umami taste and a slurp of this bad boy is unreal.
    • The best slurp experience – who doesn’t love noodles? You’re going to get the best slurp experience with these noodles because they’re packed with flavour and spiciness you’ll truly enjoy. Then we add the cucumber salad to cool your tongue.

    vegan spicy peanut noodles

    How to Make the Spicy Peanut Noodle Sauce

    The sauce is made purposefully easy because we want to make it hassle free. Here are the simple steps:

    • In your blender add: soy sauce, peanut butter, garlic, ginger, sesame oil, peppers, vinegar, dark soy sauce, and chicken stock.
    • Cook the noodles as instructed. You do not need to rinse the noodles in water. The starch from the cooked noodles will help make the sauce thicker and coat it better.
    • Toss the sauce and noodle together.

    vegan thai peanut noodles

    How to Make the Cucumber Salad

    Easy and delicious cucumber salad. I use it to garnish the top of the noodles. Once you make it make sure to serve it immediately.

    • Wash the cucumbers, and slice off the ends. Using a vegetable peeler, start to slice it lengthwise to get these thin beautiful slices. Put them in a strainer to let the excess water run off.
    • Give them a good pat with a paper towel and soak up any excess water.
    • Toss the cucumber ribbons with sesame oil, salt, and sesame seeds.
    • Garnish on top of the noodles and try to build and fluff it up as high as possible on the noodle.

    To thinly cut the cucumber I am using the Vegetable Spiralizer to cut my cucumber perfectly.

    vegan peanut noodle bowl

    Ingredients

    Your Favourite Chili Oil

    If you have a favourite Asian chilli oil and don’t have much opportunity to use it, this is the time! This meatless peanut noodle goes well with any Asian chilli oil. Slather it in the soup or just add a small spoon on top. Whatever portion is perfect here.

    Peanut Butter

    I like to use smooth peanut butter. Chunky peanut butter is fine too. We are adding everything to the blender so the texture of peanut butter doesn’t matter here. For a sesame-forward variation, try tahini as a substitute — it gives the sauce a slightly nuttier depth.

    Salted Mustard

    This is a must for this dish. Do not skip it. Lots of the unknown umami flavour is from here. Pickled mustard is a bit strange in flavour on its own, but when added to other things like soup, it adds lots of dimensions of flavour!

    cold thai peanut noodles

    Soy Sauce

    To give this sauce the umami flavour, we are adding soy sauce. Uncooked soy sauce has a strong and special umami flavour that’s going to lift this sauce into its glorious taste.

    Ginger

    A small finger-tip size ginger helps round out the flavour of the sauce. We are using fresh ginger, not the dry powder form.

    Garlic

    Adding a couple cloves of garlic makes this sauce very tasty. If two is too much for your taste, just add one.

    Sesame Oil

    The toasty taste of sesame oil tells you right away this is an Asian dish! You have the option to add it in the blender or when you toss the noodle and sauce together.

    Vegetable Stock / Chicken Stock

    I give these two options because we all have different dietary restrictions. I love the taste of vegetable stock whether it is store-bought or homemade — I’d much prefer homemade if you ask me. When it is winter and I need to add more protein or bone-brothy goodness for the kids, I will add my homemade chicken stock. Store-bought chicken stock or chicken powder also works.

    Chinese Black Vinegar

    This is a common ingredient in Chinese cooking. We are adding a little bit of vinegar to get that tangy flavour. Black vinegar is a good option here.

    Cabbage

    To thicken and add texture to the sauce, we are adding some pre-boiled chopped cabbage. A pure liquid sauce to coat the noodles is not enough. To add some elegance and texture, we are adding cabbage and salted mustard.

    thai peanut noodles recipe

    Love noodle dishes? Try our homemade pesto gnocchi for another satisfying pasta night.

    Frequently Asked Questions

    Can I make this peanut noodle gluten-free?

    Yes! Swap regular soy sauce for tamari or a certified gluten-free soy sauce, and use rice noodles instead of wheat noodles. The flavour profile stays the same.

    Can I add protein to this meatless noodle?

    Absolutely. Tofu, edamame, or a soft-boiled egg all work beautifully. For non-vegetarians, shredded rotisserie chicken or sauteed shrimp are great additions.

    How long does the peanut sauce keep?

    Store leftover peanut sauce in a sealed jar in the refrigerator for up to 5 days. It will thicken as it chills — thin it back out with a splash of warm water or vegetable stock before using.

    Can I make this dish ahead of time?

    Make the peanut sauce and cucumber salad up to one day ahead and store them separately. Cook the noodles fresh when ready to serve for the best texture.

    What is Chinese black vinegar and can I substitute it?

    Chinese black vinegar (Chinkiang vinegar) has a deep, malty-sweet tang. The closest substitute is a mix of balsamic vinegar and a splash of rice vinegar. Regular rice vinegar on its own also works but the flavour will be lighter.

    Is this recipe suitable for kids?

    Yes, with adjustments. Simply omit or reduce the chilli oil and peppers for the kids’ portion. The base peanut sauce is kid-friendly and many children love the nutty noodle flavour.

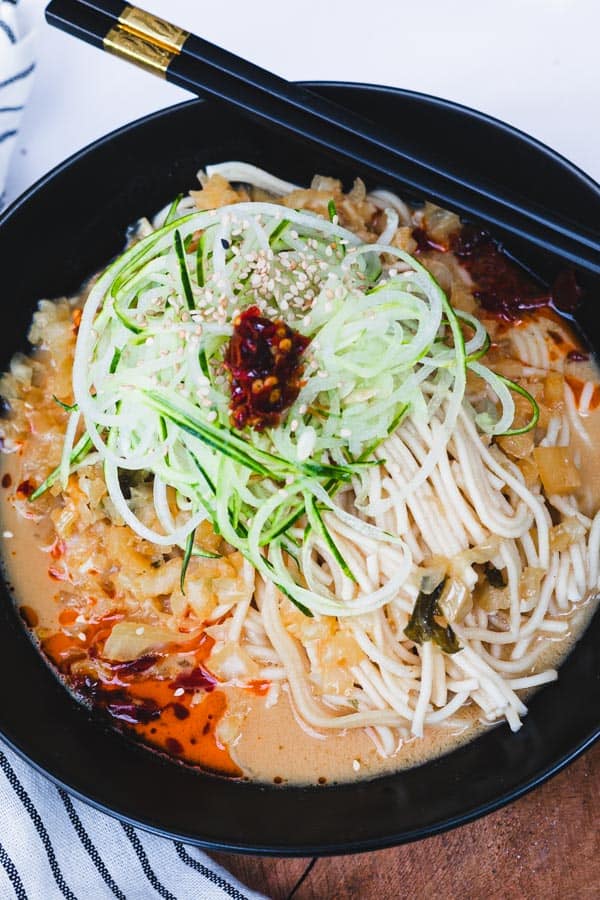
    Spicy peanut noodles topped with cucumber ribbons and chili oil

    Meatless Spicy Peanut Noodle

    This Meatless Spicy Peanut Noodle recipe is a delicious bowl of slurp! Spicy, nutty, and tangy. A favourite among kids and adults. Print Recipe Pin RecipePrep Time:25 minsCook Time:15 minsCourse: Main CourseCuisine: ChineseKeyword: Spicy Meatless Peanut NoodleServings: 5 people

    Ingredients

    Peanut Sauce

    • 3 tbsp smooth peanut butter or tahini
    • ½ cup soy sauce
    • 2 cups vegetable stock
    • 2 garlic clove
    • ¼ inch fresh ginger
    • 1 tbsp chinese black vinegar
    • 500g Dried Asian noodles
    • 2 tbsp minced pickled mustard do not blend with the sauce
    • 1 tsp sesame oil
    • 1 tsp chilli oil

    Cucumber Salad

    • 2 medium size cucumber
    • 1 tsp sesame oil
    • 1 tsp sesame seed
    • ½ tsp sea salt add only when you're ready to serve

    Cabbage Side

    • ¼ small cabbage
    • 1 tsp salt
    • ½ litre water

    Instructions

    To Make Peanut Sauce

    • In a blender add the peanut sauce, soy sauce, vegetable stock, garlic, ginger, and black vinegar. Blend until smooth.

    To Make Cucumber Salad

    • Using the vegetable spiralizer, attach the cucumber and spiralize the cucumber into ribbons. Toss it with some sesame oil. Salt: do not add the salt until you're ready to serve. Salt will quickly turn the cucumber into mush.

    To Make the Cabbage Side

    • Take the food processor and add roughly cut cabbage into the machine. Pulse it a few times and turn it completely "on" to finely chop the cabbage. Add the chopped cabbage to boiling water with salt for 5 minutes. Strain the water and set it aside.

    Assemble the Noodle Soup

    • Meanwhile, cook the asian noodles you like. See package for instructions. Set the noodle aside in the bowl.
    • In a pot, add the peanut sauce and bring it to a boil. Add the minced pickled mustard, and cabbage. Cook for about 5 minutes. Test the soup for saltiness. If you think it's too salty, add some water to dilute it. Alternatively you can add non-salted vegetable broth as well.
    • Ladle the hot soup on to the noodles and add the cucumber salad on top.
    • Garnish with some salt on top of the cucumber salad (if desired), sesame seeds, sesame oil, and chili oil. Serve immediately.
  • Frozen Yogurt Bark

    Frozen Yogurt Bark

    These yummy frozen yogurt bark treats are so tasty you’ll want seconds and thirds — and they come together in less time than it takes a baby to nap.

    frozen yogurt bark chocolate

    This post may contain affiliate links. If you purchase through these links, I may earn a small commission at no extra cost to you. Thank you for supporting Love & Harvest!

    These gorgeous frozen yogurt barks are so easy to make you’ll only need a few minutes from your busy schedule to prepare them.

    I managed to make this in between my baby’s nap, and also had some time to pour myself a cup of hot fresh coffee. Impressive right?

    Besides their good looks, they are effortless. Once you make them they can be stored easily in your freezer for up to 6 months — but I guarantee you’ll need only a few days before they get cleared out! This recipe is made with assorted fruits and assorted goodies. It’s a great way to pack in all your summer fruits together.

    We also like saving these barks for winter, when fruits are not readily available.

    frozen yogurt bark with berries and coconut

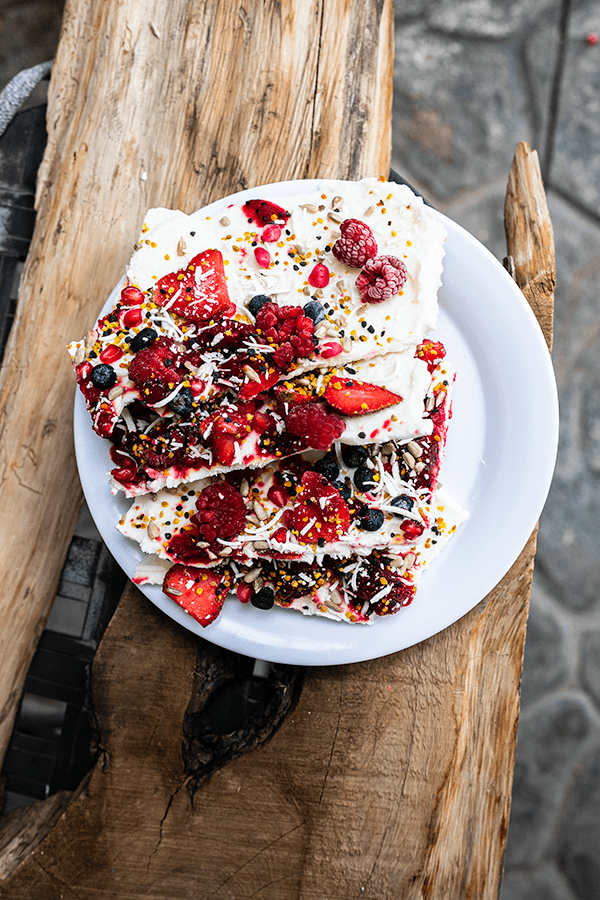
    Frozen yogurt barks are gorgeous! They are made with greek yogurt, sunflower seeds, bee pollens, and coconut strips. We are using fresh summer fruits like red cactus pears, blueberries, pomegranate seeds, strawberries, and raspberries.

    Gorgeous and easy — what more can you ask for, right? If you enjoy frozen treats, you might also love our matcha avocado popsicles or our easy blueberry ice cream for another refreshing option.

    frozen yogurt bark pioneer woman

    Why You Will Love These Frozen Yogurt Barks

    • Easy summer dessert treat: hot summers can feel dreadful, but enjoying these barks on a hot summer day can easily cool you off!

    frozen yogurt bark with fruit toppings

    Why Use Greek Yogurt?

    Greek yogurt is the best yogurt to use compared to others because it is higher in protein (nearly twice the amount). Greek yogurt has a thicker, creamier texture because the liquid whey is strained out.

    It’s also lower in lactose.

    Can I Sweeten My Frozen Yogurt Barks?

    Absolutely! I would recommend using natural maple syrup to sweeten them. After you spread the greek yogurt along the parchment paper, drizzle maple syrup everywhere evenly. You can also add vanilla extract for extra taste!

    Summer Fruits

    In my recipe I made it with the fruits available to me here in Mexico.

    Red cactus pear may be hard or even impossible to find in your area, but locally sourced fruits available in your area can be a great option!

    frozen yogurt bark with cactus pear

    What Else Can You Do With These Barks?

    In the winter time, fruits are not always available. What we also do is save these frozen yogurt barks to make smoothies. We add a few chunks in a blender, toss in some soy milk and banana and we have ourselves a delicious smoothie.

    I love making this smoothie in the morning when we are late. It’s quick and easy for the kids to drink up before they go to school!

    Ingredients

    Greek Yogurt

    One of the best yogurts you can use for this recipe. Chobani whole milk Greek yogurt is a great choice. Other options include all-natural yogurt. The key is using a thick yogurt so your bark sets firmly in the freezer.

    Sunflower Seeds

    Natural sunflower seeds add a great crunch to the barks. If you like, toast the sunflower seeds to give them more flavour.

    Bee Pollen

    I like to add bee pollen because they look like sprinkles once laid on top of the barks — all kids love sprinkles on top of everything! Skip the bee pollen for anyone with pollen or bee allergies.

    Coconut Strips

    I love the coconut strips taste in the bark.

    Pieces of frozen yogurt bark with berries and coconut strips on a white plate

    For my frozen yogurt barks, I use fresh fruits available to me here in Mexico. Some of the fresh summer fruits I am using for this recipe are:

    Red Cactus Pears

    Prickly cactus pear are also known as “tuna” here in Mexico. They range from green (less sweet but more flavour) to red (more sweet but less flavour). They are usually eaten raw with tons of seeds inside which you can bite through and are safe to swallow. The red cactus pear has a beautiful colour.

    Blueberries

    We have to eat the colours of the rainbow which is why we are adding some blue to the frozen yogurt barks. Blueberries add a lovely acidity to the barks.

    Strawberries

    I love the taste of frozen strawberries and that is why they are showing up on these barks! I usually cut one strawberry into 4 to 6 pieces so it is easier to bite into.

    Raspberries

    I love the fuzzy texture of raspberries, and it’s a no-brainer to add raspberries to the barks.

    How to Prepare the Barks

    Cut Up All Your Fruits

    Once you know what fruits you’re using, cut them all up in small cubes. The smaller the better so in one bite you can get a variety of all the ingredients without missing anything. Cutting them small also helps in sprinkling them onto the yogurt evenly.

    Put Everything in Small Cups

    Once you’re ready to sprinkle all your ingredients on to the bark, it’s good to have everything on the side and ready. It will be difficult to have your hands dirty and need to open a bag of sunflower seeds mid-process. Having everything ready makes the process easier and cleaner.

    Frozen yogurt bark with fresh summer fruit and coconut strips

    Parchment Paper

    Line your baking sheet with parchment paper. This will help the bark come off easily once it is frozen. It is much easier to spread the yogurt on top of parchment paper. To make this even easier, use a Greek yogurt strainer to get the thickest, creamiest yogurt for your base.

    Spatula

    Using a spatula helps spread the yogurt easier on the parchment paper. If you have an offset spatula, it will make the process much easier.

    frozen yogurt bark recipe

    Frequently Asked Questions

    How long do frozen yogurt barks last in the freezer?

    Stored in an airtight container in the freezer, they keep well for up to 6 months. Separate layers with parchment paper to prevent them from sticking together.

    Why is my frozen yogurt bark too soft?

    This usually happens if the yogurt layer is too thick or the freezer was not cold enough. Spread the yogurt to about 1/4 inch thickness for the best results. Freeze for at least 2 hours, or overnight for a firmer bark.

    Can I use regular yogurt instead of Greek yogurt?

    You can, but regular yogurt contains more water and will result in a less firm, icier bark. Greek yogurt is recommended because it is thicker, creamier, and higher in protein.

    What fruits work best for frozen yogurt bark?

    Any fruit that freezes well works great — berries, kiwi, mango, peaches, and pomegranate seeds are all excellent choices. Avoid high-water fruits like watermelon as they can make the bark watery.

    Can I add chocolate to frozen yogurt bark?

    Absolutely! Drizzle melted dark chocolate over the top of the fruit before freezing, or sprinkle chocolate chips or cacao nibs for added flavour and crunch.

    Frozen yogurt bark topped with strawberries, blueberries and seeds

    Frozen Yogurt Bark

    These yummy frozen yogurt barks are so tasty you’ll want seconds and thirds. Great summer treats for both kids and adults! Print Recipe Pin RecipePrep Time:10 minsCourse: DessertKeyword: dessert, frozen yogurt barkServings: 6 people

    Equipment

    • large baking sheet
    • spatula
    • parchment paper

    Ingredients

    • 3-4 cups natural greek yogurt
    • ¼ cup natural maple syrup optional
    • 1 red prickly cactus pear
    • ½ cup blueberries
    • ¼ cup pomegranate seeds
    • 5-6 strawberries sliced thinly
    • 10-12 raspberries
    • 2 tsp bee pollen
    • ¼ cup coconut strips
    • 2 tbsp sunflower seeds

    Instructions

    • Take out your large cookie baking sheet and spread parchment paper that covers the whole bottom. Use the spatula and spread the greek yogurt along the edge of the parchment paper.
    • Optional: drizzle maple syrup and vanilla. Use the spatula to spread the syrup and vanilla evenly.
    • Always place the largest fruit cubes on first.
    • Gently and evenly put in your first fruit layer. I normally put it in these sequences: strawberry, raspberry, blueberry, and pomegranate seed.
    • Next I add my other ingredients, which are: coconut strips, sunflower seeds and bee pollens.
    • Freeze until firm, roughly about 2 hours. Break into pieces and store in a covered container in the freezer.
  • Halloween Monster Apple Snacks

    Halloween Monster Apple Snacks

    The cutest monster apple snacks for Halloween! Watch your kids light up when they open their lunchbox and see these boo-licious apple snacks. Great as a lunch box idea that is adorably appetizing — and the best part is the kids can help build them too.

    apple monster halloween

    This post may contain affiliate links. If you purchase through these links, I may earn a small commission at no extra cost to you. Thank you for supporting Love & Harvest!

    These super cute Halloween Monster Apple Snacks are Boo-liciously tasty. The perfect Halloween snacks for your kids!

    These cute monsters are made with green apple slices, peanut butter, chocolate chips, strawberries, peanuts, and some leftover cake fondants.

    Making these Halloween monster apple snacks is easy and even the kids can join in on the fun! Making Halloween snacks can be fun, educational, and creative for children!

    Can you imagine the surprise and delight when they open their lunchbox to find these cute monsters waiting for them? I know as parents we always want to surprise our kids with something that is not materialistic, and this is the best intangible surprise you can give your little ones!

    Make these for them, and I’m sure they will feel your effort and love for them! For more fun Halloween food ideas, check out our Halloween Frankenstein guacamole — another crowd-pleaser for kids.

    Let’s get started on how to assemble these cute Halloween Monster Apple Snacks!

    Why You Will Love These Halloween Monster Apple Snacks

    • Creative: let the kids be involved with this process! There’s nothing more creative than letting the kids build their own food! The best part is that all parts of this project are edible — nothing goes to waste.
    • Fun snack for kids: building education through play is the best tactic for getting your kids to learn! They get to recognize forms and shapes!
    • Put a smile on your kid: building these apple snacks with your kids is a great way of bonding. Even if you don’t have the time to work on them with the kids, making these monsters yourself and putting them in their lunchboxes will make them feel loved and treasured. They will feel your effort and amor for them!

    Ingredients

    Apples

    We will need green apples for this project. I use Granny Smith green apples. They taste excellent and all kids love this variety of apples! The tartness of Granny Smith balances perfectly with the sweet peanut butter and chocolate chips.

    Peanut Butter

    Besides the fact that peanut butter is delicious, it serves as the glue for this snack project and helps hold everything together. Use smooth peanut butter for the easiest spreading. A natural smooth peanut butter is the best choice here.

    Peanuts

    There’s something delightfully cute about these crooked teeth made out of peanuts. They stick really well with the peanut butter, and it’s so satisfying sticking these teeth in the monster’s mouths!

    Strawberries

    Monsters can’t be monsters without a funny tongue to showcase! We are thinly slicing the strawberries as the tongue for the monsters. So cute! Make sure to cut each strawberry thinly enough so it fits snugly in the apple mouth slot.

    Chocolate Chips

    I don’t know any kid who doesn’t love chocolate chips, and they are the perfect size for the eyes! I promise you, these eyes are the first to go once the kids see them. Use semi-sweet or dark chocolate chips for the best look.

    Fondants or Dried Fruits

    The fondants go around the rim of the eye. They help enhance the eye and make it pop out more. If you don’t have fondant, you can easily replace it with sliced dried fruits, sliced marshmallow, flat circular candies, or even Cheerios cereal.

    halloween monster apple bites

    To keep these vegan, use dairy-free chocolate chips and a gelatin-free fondant (check the labels), or use sliced dried fruit for the eye rims. Skip the marshmallow and Cheerios options if you need them vegan.

    Frequently Asked Questions

    How do I stop the apples from turning brown?

    Dip or brush lime juice (or lemon juice) onto the flesh of the apple immediately after cutting. The citric acid prevents oxidation and keeps the apple looking fresh and green. Assemble the monsters close to serving time for the best results.

    Can I make these ahead of time?

    You can prep the components the night before — cut the apples and brush with lime juice, portion out the peanut butter, and slice the strawberries. Store everything separately in the fridge and assemble the morning of for the freshest look.

    What can I use instead of peanut butter for nut-free schools?

    Sunflower seed butter (sunbutter) is the best nut-free substitute and has a very similar texture and taste. You can also use tahini, cream cheese, or a soy nut butter.

    How many apple snacks does this recipe make?

    With 4-5 apples, cutting each into quarters, you get about 16-20 apple monster pieces. Plan for about 4 monsters per child as a snack serving.

    Can I use red apples instead of green?

    Yes! Green Granny Smith apples are ideal because their tart flavour balances the sweet peanut butter, but red apples like Fuji or Gala work just as well. The monsters will look just as adorable.

    Are these suitable for toddlers?

    Skip the peanuts as whole peanuts are a choking hazard for young children. You can use finely chopped peanuts or leave the teeth out altogether.

    Halloween monster apple snacks

    Halloween Monster Apple Snacks

    Print Recipe Pin RecipePrep Time:15 minsServings: 4 people

    Ingredients

    • 4-5 Granny Smith's Green Apples
    • 3 tbsp peanut butter smooth
    • 3 strawberries medium or small sizes thinly sliced
    • 15-20 peanuts
    • 1 inch fondant ball or sliced dried fruits or 20 pcs cheerios cereal
    • 20 chocolate chips

    Instructions

    • Wash and dry the apples. Cut the apples in quarters (cut 4 pieces per apple). Also cut out the stem and the core of the apple.
    • Take a slice of the apple, and using a paring knife, cut a hole in the center of the skin of the apple (this is where the mouth will be). Adjust the size of the mouth according to the slice of the strawberries. Each mouth will be a different size depending on the size of the strawberry.
    • Add peanut butter all over the cut hole. Grab a piece of sliced strawberry and firmly press it to the mouth. Add the peanuts to the top of the mouth and firmly press the peanuts into the mouth as well.You can add as many or as few peanuts as you like. Be creative!
    • Lastly, take a small piece of fondant and press it down to a flat circular shape (or whatever food you choose that is flat and circular). Tap some peanut butter to the back and front of the circular object. First glue the fondant to the apple slices and then press the chocolate chips on top.You can add one eye or up to three eyes per monster.

    Notes

    • To keep the apples from going brown, dip or brush lime juice to the flesh of the apples.
  • Halloween Frankenstein Guacamole

    Halloween Frankenstein Guacamole

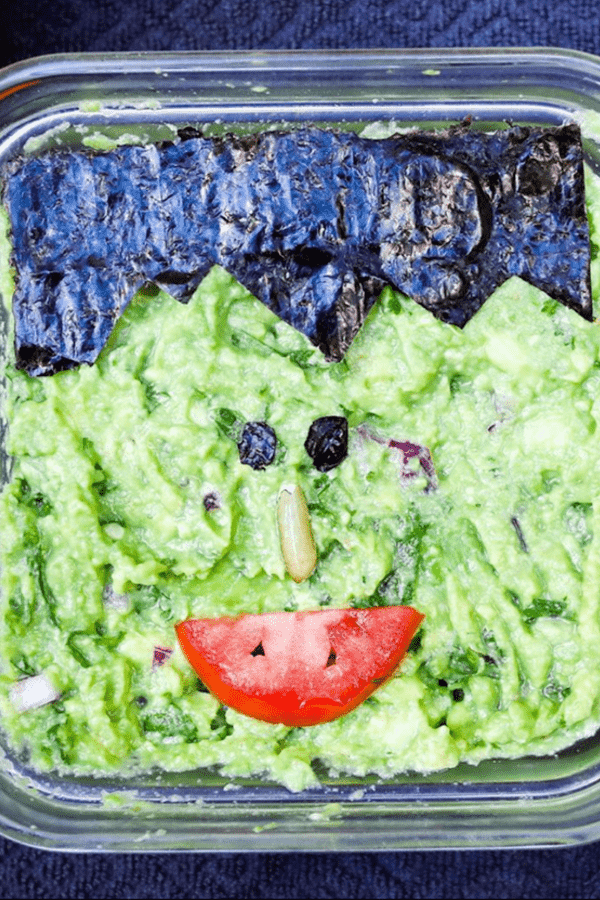
    This Frankenstein guacamole is the most adorable dip you can make, and it will be hard to be the first to dig into his sweet face!

    Guacamole decorated as Frankenstein with nori hair and a tomato mouth

    This post is all about Halloween Frankenstein Guacamole. The food design of this adorable Frankenstein is made with sushi seaweed papers, sunflower seeds, and tomatoes.

    This post may contain affiliate links. If you purchase through these links, I may earn a small commission at no extra cost to you. Thank you for supporting Love & Harvest!

    This delicious guacamole recipe is so refreshing and delicious that we gave him life and turned him Mexican! At least until people start dipping his presence away!

    A cute recipe for food styling to bring to kids’ Halloween parties. It is an easy no-brainer side dish you can whip up in minutes. Halloween is a big week — kids are hammering you about costumes and parties. Don’t overthink the food. Make this easy peasy guacamole for Halloween today!

    The best part is that you can make this any size you want. All you need is to scale the design to fit the serving dish you are bringing.

    Key Ingredients

    Ingredients

    Avocado

    The star of the show — ripe, creamy avocados are the green canvas for Frankie’s face.

    • Why it matters: A ripe avocado should give slightly when pressed. Under-ripe avocados are grainy and hard to mash smoothly. Over-ripe avocados taste off. The lime juice you add prevents browning and adds essential citrus brightness. Traditionally in Mexico, we mash avocados in a mortar and pestle for authentic texture — chunky or smooth, your choice.

    Sushi Nori (Seaweed Paper)

    Nori sheets cut into Frankenstein hair and eyes.

    • Why it matters: Nori is what gives Frankie his iconic flat-top hairstyle and dark eyes. It cuts cleanly with scissors and holds its shape on the guacamole surface for serving time. It does not stay crisp for hours — serve within 30 minutes of decorating for best presentation.

    Lime

    Freshly squeezed lime juice mixed into the guacamole.

    • Why it matters: Lime does two critical jobs: adds citrus acidity that brightens all the flavours, and prevents oxidation (browning). If the guacamole will sit before serving, squeeze in an extra half lime and press plastic wrap directly onto the surface of the dip to exclude air.

    How to Make the Guacamole

    It only requires a few easy ingredients available in any grocery store: avocado, tomato, red onion, cilantro, and lime.

    First, pit the avocado and mash the flesh with a fork in a large bowl. Juice the lime into the avocado and mix well. Chop the tomato, red onion, and cilantro into small pieces. Add to the bowl. Salt to taste. It is that simple and so very delicious!

    How to Cut the Frankie Design

    Use sushi seaweed paper (nori) for the hair and eyes. Measure the length of your serving container, then use a cutting board and scissors to cut the fringe hair design. Be creative — play with the distance between the eyes and create your own version of Frankie. I use a sunflower seed as his nose, but it can be anything!

    Frankie Is Just the Beginning

    A Halloween Frankenstein Guacamole is just the start! How about a three-eye monster guacamole? A silhouette of a haunted house? The options are endless. For more Halloween fun, check out our Halloween Spooky Breakfast Bowl and Homemade Halloween Sugar Cookies.

    Why You Will Love This Halloween Frankenstein Guacamole

    • Easy recipe — just a few ingredients, no cooking required. Fresh and excellent tasting.
    • Fun design — Frankenstein is just the beginning! Design your own monsters at your own skill level.
    • Fun potluck dish — easy to make and bring, and completely captivating at Halloween parties.
    • Halloween food the kids will actually eat — avocado, lime and a few fun toppings.

    Frequently Asked Questions

    How do I keep guacamole from turning brown?

    Two methods work best: add extra lime juice (the acid slows oxidation), and press plastic wrap directly onto the surface of the guacamole, eliminating all air contact. An avocado pit in the bowl is a common tip but less effective than the plastic wrap method. Make the guacamole no more than 2 hours before serving for best color and freshness.

    How do I know if my avocados are ripe enough?

    Gently press the avocado near the stem end — it should give slightly under firm pressure but not feel mushy. The skin should be dark green to black. If the stem pops out easily and the flesh underneath is green (not brown), it is perfectly ripe.

    Can I add spice to this guacamole?

    Absolutely — and we encourage it! Add finely minced jalapeño or serrano pepper for a good kick. Serrano is hotter than jalapeño. Start with half a pepper, taste, and adjust from there. A pinch of cayenne also works if you want even heat distribution.

    Can I make this guacamole ahead for a party?

    Make it up to 2 hours ahead. Press plastic wrap directly onto the surface (no air gaps) and refrigerate. Decorate with the nori Frankenstein design right before serving — nori softens quickly once it contacts moisture.

    What can I serve with this guacamole besides tortilla chips?

    Sliced bell peppers, cucumber rounds, jicama sticks, and mini tostadas all work beautifully. For a Halloween theme, use black sesame crackers or triangle-cut tortilla chips arranged to look like bat wings around Frankie’s face.

    How large a batch should I make for a Halloween party?

    Plan on 1 medium avocado per 2 guests as a rough guideline. For a party of 20, use 10 avocados and scale all other ingredients proportionally. Use a large serving platter and scale up the Frankenstein design to match.

    Authentic Guacamole

    A simple yet delicious guacamole recipe that takes a matter of minutes to whip up!
    Prep Time 15 minutes
    Total Time 15 minutes
    Servings: 4 people
    Course: Appetizer
    Cuisine: Mexican
    Calories: 195

    Ingredients
      

    • 4-5 medium sized avocado
    • 1 – 1½ lime juice
    • 1 medium tomato diced
    • 1 branch cilantro chopped
    • ¼ red onion chopped
    • sea salt

    Method
     

    1. In a large mixing bowl, cut the avocado in half. Pit the centre seed out and scoop the green flesh into the bowl with a spoon.
    2. Use a fork and press the avocado. The more you mash the avocado the smoother the texture will be.
    3. Drizzle the lime on to the avocado and mix well. 1 lime is perfect but if you like to more acidic, you can half half a lime more.
      (Half half a lime more if you know it will not be eaten immediately to help it not turn brown).
    4. Add the chopped cilantro, tomato ,and red onion. Mix well. salt to taste

    Notes

    • Spicy: you’re more than welcome to add jalapeno or serrano peppers to give it a good kick.
  • Steamed Soy Sauce Fish with Preserved Lemon

    Steamed Soy Sauce Fish with Preserved Lemon

    There are fish recipes, and then there is this fish recipe. Cantonese steamed soy sauce fish with preserved lemon is the dish my family in Hong Kong has made for generations — fall-off-the-bone tender, swimming in a golden ginger broth, with the preserved lemon cutting every trace of fishiness so cleanly your kids will ask for seconds before you sit down.

    This post may contain affiliate links. If you purchase through these links, I may earn a small commission at no extra cost to you. Thank you for supporting Love & Harvest!

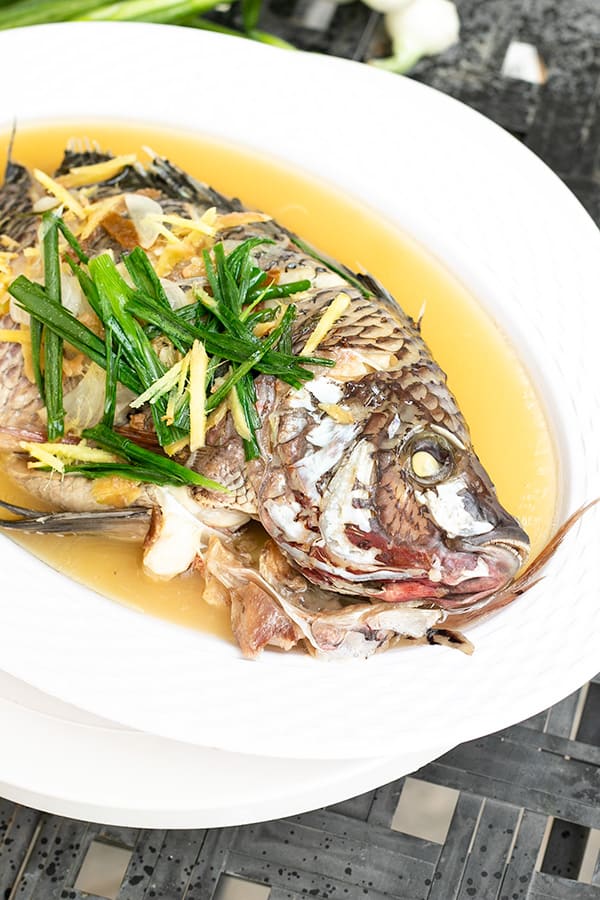
    Steamed Soy Sauce Fish

    What Makes This Cantonese Steamed Soy Sauce Fish Special

    This steamed soy sauce fish is simple, quick, and lets the fish be the star. What sets it apart from every other steamed fish recipe is the preserved lemon.

    A widely popular seafood dish among Chinese families and restaurants, fresh fish is steamed with ginger and preserved lemon, then finished with a sizzle of hot oil before serving. The preserved lemon helps cut out that strong fishy taste so you get the clean, fresh fish flavour without the pungent smell — making it one of the most kid-friendly fish recipes you will ever make.

    steamed fish

    Why You Will Love This Recipe

    • Moist, soft, and fluffy texture — steaming guarantees a soft and flakey texture with tons of moisture and flavour.
    • Straightforward recipe — a relatively easy recipe with just a few things to keep in mind. Step-by-step photos guide you to a no-fail result.
    • No strong fishy taste — the preserved lemon cuts the oily fish taste and softens the strong fish smell. Suitable for children.
    • Addictingly delicious — steaming creates a beautiful thick lemon soup that is incredible on rice.

    steamed whole fish

    Hong Kong Cantonese Fish: A Cultural Staple

    Fish in Chinese culture represents abundance and increased prosperity. It is an essential dish for New Year, birthdays, and anniversaries. Hong Kong is a coastal city rich in seafood resources — back when it was a large fishing port and world exporter, fish became an easy everyday staple. This recipe comes from my family, who still use it today.

    We love this steamed soy sauce fish so much in our family. Kids are rarely excited about fish unless it is a fish stick — but this recipe is so good my kids constantly ask for it. They get genuinely excited when they know I am making Cantonese steamed soy sauce fish with preserved lemon.

    Ingredients Deep-Dive

    Tilapia Fish

    The best fish to use for this recipe is tilapia or halibut (if you are willing to splurge). Tilapia steams perfectly — it is firm enough to hold its shape yet soft enough to fall off the bone. Your fishmonger will descale and gut it for you. Always make sure the belly is cleaned well under the fins.

    • Why it matters: The right fish gives you that silky, fall-off-the-bone texture that defines this dish. Too thin a fish overcooks quickly; too thick and the center stays raw.

    Preserved Lemon

    This is the secret weapon. Preserved lemon provides salt, umami, and a citrus sharpness that no fresh lemon can replicate. Rub it inside the cavity and along the cuts — it penetrates the flesh as it steams and eliminates that pungent fishy smell entirely. You can make your own preserved salty lemons at home with just lemons and salt.

    • Why it matters: Without preserved lemon, you have steamed fish. With it, you have a Cantonese classic your family will request every week.

    Pick up a jar of preserved lemon if you do not have any on hand yet.

    Ginger

    Thinly slice fresh ginger — as thin as you can manage. Half goes inside the cavity of the fish, half rests on top during steaming. Ginger adds warmth and its own aromatic quality that pairs perfectly with soy sauce and lemon.

    • Why it matters: Ginger neutralises fishy odours during cooking while adding a gentle heat and fragrance that makes every bite interesting.

    Soy Sauce

    Added at the very end — never cooked into the fish. This preserves the fresh, bright soy taste. Cooked soy sauce takes on a bitter, heavier flavour that would overpower the delicate fish.

    • Why it matters: Timing the soy sauce correctly is what separates home cooks from Cantonese masters. Get a quality soy sauce — the flavour difference is real.

    Essential Steps for Restaurant-Quality Steamed Fish

    cantonese steamed fish

    1. Wash the Fish Inside and Outside

    Descale the fish — your fishmonger will do this for you. Once home, open the belly. You will see a grey residue: this is what causes strong fishy smell and taste. Use your fingers and fingernails to rub it all off. Then find the second pocket along the back of the spine, cut it open with a knife, and clean that out too.

    chinese steamed fish recipe

    2. Rub Preserved Lemon Inside and Outside

    Take 1 tbsp of preserved lemon to the chopping board. Chop it finely and rub with your finger to release the brine. Rub the lemon and salt inside the cavity and outside the fish, working it into all the cuts.

    steamed fish in light soy sauce

    3. Add Ginger to the Cavity

    Scrape the skin off a 1-inch piece of ginger with a knife. Slice it as thinly as possible. Place half inside the cavity; the other half rests on top of the fish while steaming. A quality fish sauce can be added as an optional finishing touch alongside the soy sauce.

    4. Steam the Fish

    Place the fish in a heat-proof bowl or deep dish that will catch the golden juice as it steams. Use a bamboo steamer or your Instant Pot — whichever fits the fish comfortably.

    calories in steamed fish with soy sauce

    Instant Pot Steaming Instructions

    1. Add about 2 cups of water to the pot and place the steaming basket inside. Place the fish in a bowl that fits inside the Instant Pot with enough room for steam to rise around it.

    2. Set the mode to “Steam” for 20 minutes. Place the fish in the bowl with ginger on top. Close the lid and turn the valve OFF.

    3. Once the timer goes off, release the valve.

    steamed fish fillet soy sauce ginger

    5. Quick Oil Fry Finish

    Take the fish out and place thinly sliced scallion (green parts only) on top. Heat 1/4 cup of canola oil in a pan until it just starts to smoke. Bring the fish to the sink or outside. Pour the hot oil directly over the scallion — the oil will sizzle loudly and smoke. Add 2 tsp of soy sauce and a dash of white pepper. Serve immediately.

    Professional Tips for No-Fail Steamed Soy Sauce Fish

    Tip 1: Add Soy Sauce at the Very End

    Cooked soy sauce develops a heavier, more bitter taste. Adding it fresh at the end keeps the soy sauce tasting bright and original — that is what gives this dish its clean, restaurant-quality finish.

    Tip 2: Serve Immediately

    Steamed soy sauce fish should always be eaten hot or warm. The gelatin-rich broth at the bottom turns solid at room temperature and loses its appeal. Eat it warm over a bowl of rice.

    Tip 3: Tilapia Is the Best Choice

    Tilapia is ideal for this recipe. Halibut works beautifully if you want to splurge. My economical mom sometimes uses a fish head for the same recipe — equally delicious.

    Related Cantonese Recipes

    If you love this steamed fish, you will also enjoy steamed preserved vegetables with pork — another family favourite that uses the same steaming technique. For a completely different take on fresh seafood flavours, try our homemade sashimi.

    Frequently Asked Questions

    What fish is best for Cantonese steamed fish?

    Tilapia is the most economical and forgiving choice — firm enough to hold up in the steamer yet soft enough to become fall-off-the-bone tender. Halibut is the premium option. Avoid very thin fish fillets as they overcook too quickly.

    Can I use fresh lemon instead of preserved lemon?

    You can, but you will lose the umami depth that preserved lemon brings. Preserved lemon adds salt and fermented flavour that fresh lemon simply cannot replicate. It is worth making a batch of your own preserved salty lemons — they last months in the fridge.

    How long do I steam the fish?

    Steam on high for 20 minutes for a whole tilapia around 1 kg. The fish is ready when the flesh flakes easily away from the bone with a fork. Do not overcook — even a few extra minutes will dry it out.

    Can I make this without an Instant Pot?

    Absolutely. A traditional bamboo steamer over a wok works beautifully and is what most Cantonese families use. Any steamer setup that fits the fish and allows steam to circulate around it will give you the same result.

    Why do I pour hot oil over the fish at the end?

    The hot oil sizzle is the signature Cantonese finishing technique. It cooks the raw scallion instantly, creating a fragrant aromatic oil that infuses into the fish. It also gives the skin a slightly crisp texture on the surface while the flesh stays tender.

    How do I store and reheat leftovers?

    Store leftovers covered in the refrigerator for up to 2 days. Reheat gently in the microwave or in the steamer for 3–4 minutes. The broth will re-liquefy as it warms. Avoid the oven — it will dry out the fish.

    Whole steamed fish with ginger and green onions in soy sauce broth

    Steamed Soy Sauce Fish with Preserved Lemon

    This Cantonese Steamed Fish with Preserved lemon is the best fall-off-the-bone fish recipe! It’s flakey soft and oh.em.gee. tasty. Print Recipe Pin RecipePrep Time:10 minsCook Time:20 minsCourse: Main CourseCuisine: ChineseKeyword: fish, preserved salty lemon, seafood, steamed fishServings: 4 people

    Equipment

    • steamer

    Ingredients

    • 1 kg tilapia fish descaled, gutted, and cleaned
    • 1 inch ginger thinly sliced
    • 1 tbsp preserved lemon
    • ¼ cup canola oil
    • 1 inch scallion thinly sliced (green parts only)
    • 2 tsp soy sauce
    • dash of grounded white pepper

    Instructions

    Clean the fish

    • Rinse the fish with cold tap water. Touch around the fish and descale any scales still stuck on the fish.
    • Open the belly. You will see a grey residue — this is what causes the strong fishy smell and taste. Rub it all off with your fingers and fingernails.
    • Find the second pocket along the back of the spine. Use a knife to cut it open. Clean it out and you will be able to touch the spine of the fish.
    • Take 1 tbsp of preserved lemon to the chopping board. Chop finely and rub with your finger. Rub inside the cavity and outside the fish along all the cuts.
    • Scrape the skin off a 1-inch piece of ginger. Slice as thinly as possible. Place half inside the cavity; the other half rests on top of the fish while steaming.

    Steaming the fish

    • Place the fish in a heat-proof bowl or deep plate that will catch the golden juice while steaming.Use the steamer you are comfortable with that also fits the fish. Steam on high for 20 minutes.

    Instant Pot Steaming Instructions

    • Add about 2 cups of water to the pot and place the steaming basket inside. Place the fish bowl inside the Instant Pot with enough room for steam to rise.Set the mode to “Steam” for 20 minutes. Place the fish with ginger on top. Close the lid and turn the valve OFF.Once the timer goes off, release the valve.

    Final Steps

    • Take the fish out and place thinly sliced scallion (green parts only) on top.Heat 1/4 cup of canola oil in a pan until it just starts to smoke. Place the fish near the sink or outside. Pour the hot oil directly over the scallion — it will sizzle loudly.
    • Add 2 tsp of soy sauce on top of the fish and a dash of white pepper. Serve immediately.
  • Fresh Mango Sorbet

    Fresh Mango Sorbet

    When mango season hits and you have a bag of frozen ripe mango in the freezer, there is no faster or more satisfying frozen dessert to make than this. Three ingredients, a high-speed blender, and 6 hours in the freezer — that is all it takes to make a fresh mango sorbet that tastes like summer in a bowl.

    This post may contain affiliate links. If you purchase through these links, I may earn a small commission at no extra cost to you. Thank you for supporting Love & Harvest!

    Bowl of fresh mango sorbet on a woven basket with whole mangoes

    Why This Is the Best Mango Sorbet Recipe

    No ice cream machine needed, no churning, no complicated techniques. This vegan mango sorbet recipe contains no dairy — just water, sugar, lime, and mango. Fresh mango and lime are the best flavour combination: the lime juice lifts the mango and makes every spoonful taste intensely fruity. If you want more lime, simply add it — you can turn this into a mango lime sorbet just like that.

    Store-bought sorbet never tastes this fresh. When you freeze ripe mango at its peak and blend it with a bright hit of lime, the result is incomparable. You can also try our chili mango sorbet for a spicy-sweet variation, or our matcha avocado popsicles for another quick frozen treat.

    Scoops of bright yellow mango sorbet in a white bowl beside ripe mangoes

    Ingredients Deep-Dive

    Frozen Mango

    Use mango that was frozen at its ripest point — this is when the true flavour and sweetness are fully developed. Freezing locks in that peak-season freshness so every spoonful tastes like biting into a ripe mango. Cubed frozen mango is available year-round in most grocery stores.

    • Why it matters: Ripe mango = naturally sweet sorbet. Under-ripe mango produces a flat, slightly sour result even with extra sugar.

    Lime Juice

    Fresh lime juice only — not bottled. The lime acts as a flavour amplifier: a small amount makes the mango taste more intensely like mango. Lime zest on top adds an extra burst of citrus aroma.

    • Why it matters: Lime brightens the entire sorbet. Without it, even the best mango tastes a bit flat and one-dimensional when frozen.

    Sugar Simple Syrup

    Dissolving sugar in water before adding the mango ensures the sugar distributes evenly through the sorbet — no grainy texture, no undissolved crystals. Blend water and sugar first on high for 10 seconds until fully dissolved.

    • Why it matters: Sugar not only sweetens — it controls the hardness of the frozen sorbet. Too little sugar and the sorbet freezes rock solid; the right amount keeps it scoopable.

    High-Speed Blender

    A powerful blender like the Vitamix is what makes this recipe work without an ice cream machine. It blends frozen mango into a silky smooth, thick consistency that goes directly into the freezer. A regular blender may struggle with fully frozen chunks — let the mango soften for 5 minutes at room temperature before blending if needed.

    • Why it matters: The quality of the blend directly affects the texture of the final sorbet. A powerful blender creates a creamier, more uniform consistency.

    How to Make Mango Sorbet in the Blender

    • Add water and sugar together in the blender. Blend on high for 10 seconds until the sugar is completely dissolved with no visible crystals.
    • Add frozen cubed mango and lime juice. Optional: add 1 tsp vodka to keep the sorbet softer.
    • Blend on high until smooth and thick.
    • Pour into a freezer-safe container with a tight lid. Freeze for about 6 hours until firm.

    How to Make Mango Sorbet with an Ice Cream Maker

    • Add water and sugar together in the blender. Blend on high for 10 seconds until fully dissolved.
    • Add fresh or frozen mango and lime juice. Blend until completely smooth.
    • Turn on the ice cream machine and slowly pour the mango mixture in through the top opening.
    • Add vodka (optional).
    • Process according to your machine’s instructions — within 10–20 minutes you will have churned mango sorbet.
    • Transfer to a freezer-safe container with a lid and freeze for about 6 hours until firm.

    Tall container of churned mango sorbet between two mangoes

    Professional Tips for Perfect Mango Sorbet

    Pro Tip 1: Use a Lid in the Freezer

    Every freezer has its own smell. An airtight lid prevents that odour from seeping into your sorbet and altering the flavour. A tight lid also prevents freezer burn on the surface of the sorbet.

    Pro Tip 2: Freeze Mango at Peak Ripeness

    Cut and freeze mango when it is very ripe — the sweetness and flavour are at their maximum. When you use it straight from frozen, you lock in that peak freshness. This is the single most important step for extraordinary sorbet.

    Pro Tip 3: Add a Small Amount of Alcohol

    A teaspoon of vodka or 1 tablespoon of corn syrup in the mix softens the sorbet so it is easier to scoop straight from the freezer. The alcohol does not freeze, which keeps the texture more yielding. You will not taste it at all.

    Mango Sorbet Variations to Try

    • Pineapple mango sorbet — add 1/2 cup frozen pineapple to the blend
    • Coconut mango sorbet — replace 1/2 cup water with full-fat coconut milk
    • Chili mango sorbet — add a pinch of chili powder and Tajin on top

    Frequently Asked Questions

    Can I make mango sorbet without a high-speed blender?

    Yes, but let the frozen mango thaw for 5–10 minutes before blending so a standard blender can handle it. Blend in batches if needed. The result may be slightly less smooth, but still delicious.

    Why is my sorbet too hard to scoop?

    This usually means not enough sugar or no alcohol was added. Sugar and alcohol both lower the freezing point of the mixture, keeping it scoopable. Try adding an extra tablespoon of sugar or a teaspoon of vodka next time. Also let it sit at room temperature for 5 minutes before scooping.

    Can I use fresh mango instead of frozen?

    Yes — add a cup of ice to the blender along with fresh mango to compensate for the frozen element. Frozen mango gives a thicker, creamier result, but fresh mango with ice works well too.

    How long does homemade mango sorbet last in the freezer?

    Up to 2 weeks in an airtight container. After that, freezer burn can affect the flavour. For best results, eat within the first week.

    Is this mango sorbet vegan?

    Yes. This recipe contains no dairy, no eggs, and no animal products — just mango, lime, sugar, and water. It is naturally vegan and gluten-free.

    What kind of mango is best for sorbet?

    Ataulfo (champagne) mangoes are the sweetest and least fibrous — ideal for a smooth sorbet. Tommy Atkins mangoes are widely available frozen and work well. The riper the variety, the better the result.

    Close-up of mango sorbet scoops in a white bowl

    Fresh Mango Sorbet

    Frozen mango sorbet made at home! You can taste the fresh mango and lime – the best summer dessert! We got the recipe for both methods of using a blender and an ice cream maker. Print Recipe Pin Recipe

    Equipment

    • high speed blender or
    • ice cream maker

    Ingredients

    • 1 cup water
    • ¾ cup sugar
    • 2 cups frozen mango cubed
    • 2 tbsp lime
    • 1 tsp vodka optional

    Instructions

    Mango Sorbet Made In a Blender

    • In the blender add the water and sugar together. Blend on high for 10 seconds until the sugar is completely dissolved with no texture of sugar in the water.
    • Add the mango and lime into the water. Optional: Add vodka. Start on medium speed and gradually increase to highest. Blend until icy smooth.
    • Scoop the mango sorbet into a freezer-safe container with a lid and freeze until firm, about 6 hours.

    Mango Sorbet Made in an Ice Cream Maker

    • In the blender add the water and sugar together. Blend on high for 10 seconds until fully dissolved.
    • Add the mango and lime. Start on medium speed and increase to highest. Blend until icy smooth.
    • Turn on your ice cream machine, and while it is running slowly pour in the mango puree.
    • Add the vodka (optional).
    • Process according to the machine’s instructions until the mixture forms ice crystals and firms up, then stop the machine.
    • Scoop into a freezer-safe container with a lid and freeze until firm, about 6 hours.
  • Fresh Beet Pasta & Lemon Garlic Alfredo

    Fresh Beet Pasta & Lemon Garlic Alfredo

    This post may contain affiliate links. If you purchase through these links, I may earn a small commission at no extra cost to you. Thank you for supporting Love & Harvest!

    The first time you serve this pasta, people will think you spent hours in the kitchen. You didn’t. The colour comes from beet juice, the creaminess from a simple lemon garlic alfredo, and the pasta itself takes about 3 minutes in a machine. What you get on the plate looks stunning, tastes extraordinary, and is 100% vegetarian. It’s become one of our family’s most requested meals — including by the kids, who love calling it “pink pasta.”

    beet pasta

    Why You’ll Love This Beet Pasta

    • Stunning colour — The beet turns the pasta a vivid magenta. Once it meets the cream sauce it shifts to a deep rose-pink. It’s genuinely beautiful on a plate.
    • Unbeatable fresh pasta flavour — There is no comparison between homemade fresh pasta and store-bought dried. The texture is silky, the bite is tender, and the beet adds a subtle earthiness that’s unlike anything else.
    • Fun family project — Kids love feeding the pasta machine and watching the pink noodles come out. It turns cooking into a small event.
    • Ready in 3 minutes — With the Philips Pasta Maker, the dough kneading and extrusion is automated. You handle the prep and cooking; the machine does the labour.

    beet pasta with lemon garlic Alfredo

    Ingredients Deep-Dive

    Ingredients

    Beet — The Star Ingredient

    Beets are available year-round in most markets in red, purple, yellow, and white varieties — sometimes even striped. For this pasta, use red or purple for the most dramatic colour.

    The earthy, slightly sweet flavour of beet is the reason this pasta needs a bright sauce. The lemon tang in the alfredo brings out the beet’s natural depth and creates a balance that makes the dish feel complete rather than just colourful.

    Flour — All-Purpose or Bread Flour?

    All-purpose flour is the standard choice for homemade pasta — it produces a soft, pliable dough with good stretch. If you want a chewier pasta with more bite, substitute 50% of the all-purpose with bread flour. Bread flour has higher protein content which creates more gluten structure — the pasta cooks firmer and has more resistance when you bite through it. Both versions are excellent; it’s a texture preference.

    The Pasta Machine

    This recipe is built around the Philips Pasta and Noodle Maker. It kneads the dough, extrudes it through a disk, and produces fresh pasta in under 3 minutes. You can change the disk to produce spaghetti, penne, fettuccine, and other shapes. It’s one of the most-used machines in our kitchen. If you want the upgraded version with a built-in scale and more disk options, the Philips Avance Automatic Pasta Maker Plus is worth the investment if you make pasta regularly.

    Cream Cheese — The Alfredo Secret

    The alfredo sauce uses cream cheese instead of heavy cream. This produces a sauce that’s thicker, tangier, and more stable — it doesn’t break or turn greasy when reheated the way cream-based alfredo does. Philadelphia Cream Cheese is the standard choice; its consistent quality makes the sauce reliable every time. The cream cheese melts into the hot milk and butter without needing to be at room temperature.

    Lemon — Juice and Zest

    Both the juice and the zest go into the sauce. The juice provides the acid that cuts through the fat and makes the cream cheese sauce taste bright rather than heavy. The zest adds fragrance — a floral lemon note that elevates the dish without being harsh. Meyer lemons are slightly sweeter; Eureka lemons are more traditional. Either works. Always strain out seeds when squeezing — biting into a lemon seed is memorably unpleasant.

    Parmesan Cheese

    Use a block of real Parmigiano-Reggiano and grate it yourself. The pre-grated powdered version has added anti-caking agents that prevent it from melting properly — it clumps in the sauce rather than incorporating smoothly. A fresh block has a nutty, crystalline richness that makes the difference between a good alfredo and a great one.

    beet pasta recipe

    Pro Tips

    Pro Tip 1: Blend the Beet, Don’t Juice It

    You have two options for adding beet to the pasta dough: juice the beet (concentrated, vibrant colour) or blend the cooked beet into a smooth puree (retains all the fibre). Juicing produces a slightly more electric colour; blending keeps the whole beet in the pasta without any texture difference in the finished noodles. I prefer blending: you use the whole beet and lose nothing in the process. Blend on high until completely smooth with no chunks before adding to the pasta machine.

    Pro Tip 2: The 216g Liquid Measurement

    The Philips Pasta Maker requires a specific liquid-to-flour ratio for optimal results. For this recipe: place a container on a scale, zero it, add 2 eggs, then fill with beet puree until the total reaches exactly 216g. This precision ensures the dough is the right consistency every time — not too dry to extrude, not too wet to hold its shape.

    Pro Tip 3: Add Protein to Make It Hearty

    This is a naturally vegetarian dish. Grilled chicken, sautéed shrimp, or seared beef strips all work beautifully alongside the pasta and sauce. Make a slightly larger batch of the alfredo sauce if you’re adding protein so you have enough to coat everything generously.

    What to Serve Alongside

    For a complete dinner table, this beet pasta pairs magnificently with our Beet and Avocado Sashimi Appetizer — both dishes feature beet and create a visually stunning spread. A crisp green salad or garlic bread rounds out the meal. For a meat option to accompany, our Best Homemade Fried Chicken provides a satisfying contrast to the pasta’s creaminess.

    beetroot pasta

    Frequently Asked Questions

    Do I need a pasta machine for this recipe?

    The Philips Pasta Maker automates the kneading and extrusion and makes the process fast and consistent. That said, you can make beet pasta by hand: mix the flour and beet-egg liquid into a dough, knead for 8–10 minutes until smooth, rest for 30 minutes, then roll thin with a rolling pin and cut into strips. It takes more time and arm strength, but the result is the same.

    Can I make this pasta without eggs (vegan)?

    Yes. Replace the eggs with additional beet puree. You’ll need to adjust the liquid amount slightly — start with the same 216g total and add a tablespoon more puree if the dough seems too dry. The pasta will be slightly less rich but still colourful and delicious. The alfredo sauce can be made vegan with plant-based cream cheese and milk.

    Can I make the pasta ahead of time?

    Fresh beet pasta is best cooked the day it’s made. If you need to make it ahead, lay the extruded pasta flat (not overlapping) on a floured baking sheet, dust lightly with flour, and refrigerate for up to 24 hours. Alternatively, allow the pasta to dry at room temperature for 2 hours, then store loosely in an airtight container for up to 2 days.

    Why does my beet pasta turn pink instead of deep red?

    This is normal. The alkaline proteins in the egg and the heat from boiling water both affect the beet’s pigment. Once you add the cream sauce, the pasta turns a beautiful rose-pink. If you want a deeper colour, use more beet puree and less egg, or use only the beet without egg (vegan version).

    Can I use beet powder instead of fresh beet?

    Yes. Beet powder is a convenient alternative — add 2–3 tablespoons to the flour before mixing. You’ll still get colour and a mild beet flavour, though it’s slightly less vibrant than fresh beet puree. The nutritional profile is also slightly different since processing removes some of the whole beet’s fibre.

    What pasta shapes work best with this sauce?

    Spaghetti and fettuccine are the most visually striking — the long strands show off the colour best. Penne and rigatoni also work well because the alfredo sauce clings inside the tubes. Avoid very thin pasta shapes like angel hair — the sauce is too thick and they tend to clump.

    Pink beet pasta tossed in lemon garlic Alfredo with a lemon half

    Fresh Beet Pasta and Lemon Garlic Alfredo Sauce

    Delicious homemade beet pasta with a lemon garlic alfredo sauce. It's tangy, garlicky, and oh so creamy! Print Recipe Pin RecipePrep Time:20 mins35 minsCourse: Main CourseCuisine: American, MediterraneanKeyword: alfredo, beet, fresh, fresh pasta, garlic, homemade pasta, lemon, pasta, phillips pasta and noodle machineServings: 6 people

    Equipment

    • high speed blender
    • Philips Pasta and Noodle Maker

    Ingredients

    Beet Pasta

    • 1 medium size beet root
    • 2 eggs
    • 550 g all purpose flour
    • 7 g salt

    Lemon Garlic Alfredo Sauce

    • ½ cup butter
    • 3 garlic clove grated
    • 1½ cup whole milk
    • 1 8oz cream cheese
    • 2 tsp sea salt
    • ½ lemon juice
    • lemon zest
    • ¼ cup parmesan cheese grated
    • black pepper

    Instructions

    Beet Pasta

    • Peel the skin off the beet and cut it in half. fill a small pot with water and put the beets in. cover it with a lid and cook it for 10 minutes. Let it cool, but reserve the water.
    • Place the beet within a high-speed blender with ½ cup of its reserved water. Blend on high until it is a smooth smoothie. set aside.
    • On a measuring scale, put a medium size container, and turn it on. Make sure it says 0g. Add 2 eggs to the container and fill the container up with beet juice until it reaches 216g. Set aside.

    Philips Pasta machine

    • take out the Philips pasta and noodle maker. Make sure you have the spaghetti disk attached to the ends. Open the lid, and put in the flour and salt. Close the lid.
    • Turn the machine on and press ‘Start.’ Slowly pour in the beet and egg liquid.
    • Let the machine knead the dough for 3 minutes. It will beep once it is ready to extrude the pasta.
    • Cut the pasta when it is about 20-25cm long.
    • Lay the fresh pasta on a baking sheet, and don’t overlap the pasta on top with more.

    Cooking the Beet Pasta

    • Using a large pot, fill it ¾ full and add 3 tsp of salt (roughly 4L of water). Wait for it to boil.
    • Once the water is rapidly boiling, slowly add the fresh pasta to the water. Immediately stir it with chopsticks or something soft that won’t break the pasta apart. Cook for 2 minutes.
    • Add the cooked pasta to a bowl of water. Move the noodles in the water around. Rinse and repeat at least once. strain the noodles and place them in a large bowl. Again don’t place more noodles on top of the weight will have the noodles stick together.

    Lemon Garlic Alfredo Sauce

    • In a medium-size pot, turn heat to medium-high and place butter inside until melted. Add the garlic and cook for 2 minutes or until soft. Add the milk and cream cheese. Turn the heat to low. Add sea salt.
    • Add the fresh beet pasta to the sauce and give it a few good stirs. Add the lemon juice and parmesan cheese. Softly toss the noodle until the cheese is melted and the alfredo sauce is well coated with the pasta.
    • Garnish pepper on top. Serve immediately.
  • Perfect Make-Ahead Cold Appetizers With Avocado & Beet

    Perfect Make-Ahead Cold Appetizers With Avocado & Beet

    This post may contain affiliate links. If you purchase through these links, I may earn a small commission at no extra cost to you. Thank you for supporting Love & Harvest!

    This appetizer looks like it belongs on the table of a fine dining restaurant. Sliced paper-thin and fanned out on the plate, with a light soy-sesame dressing drizzled on top — it’s one of those dishes that earns genuine reactions when people see it. The best part? It takes about 20 minutes, costs almost nothing, and can be prepared entirely ahead of time. The beet keeps for days in the fridge. The avocado is sliced at serving time. Done.

    Beet sashimi slices with a fanned avocado on a bed of greens

    Why You Should Try This

    The taste is fresh and packed with flavour. It’s a beautiful presentation dish — elegant without effort. For vegetarians and anyone who can’t eat salmon sashimi, this is the showstopper appetizer that replaces it. The paper-thin slices create the visual of sashimi without the fish, and the beet and avocado together provide a combination of earthy depth and creamy richness that works surprisingly well.

    It’s also one of the most make-ahead-friendly dishes you’ll find. Cooked beet keeps in the fridge for up to a week. Prep the beet on Sunday, and this appetizer can be on the table in 5 minutes on any night of the week.

    sliced avocado appetizer

    Ingredients Deep-Dive

    Ingredients

    Beets — Colour and Flavour

    It took me a while to fully appreciate beets. The earthy, slightly sweet flavour is distinctive and takes some getting used to. Now I love them — the colour they bring to a plate is unmatched. For this appetizer, use large red beets — they produce the most dramatic colour and hold their shape well after cooking.

    Avocado — Creamy Texture

    Avocado brings a creamy richness without being heavy, and its mild, buttery flavour is the perfect counterpoint to the earthy beet. Select avocados that are just ripe — they should yield slightly to gentle pressure but not feel mushy. Overripe avocados won’t hold their shape when sliced thin. An interesting fact: the avocado was first domesticated in Puebla, Mexico — the city where I currently live.

    The Soy Sauce Dressing

    Simple and versatile. Soy sauce provides the salt and umami backbone; sesame oil adds a toasted nuttiness; white vinegar brings brightness; olive oil adds body; sugar balances. Together they produce a dressing that tastes specifically right with this dish — neither heavy nor watery, and it soaks into the thinly sliced beet and avocado beautifully. Use Kikkoman soy sauce as the benchmark — it’s consistently balanced and available everywhere.

    The dressing recipe comes in two sizes: a small serving for 2–4 people, and a larger ±1 cup batch for parties. Both are included in the recipe card below.

    easy cold appetizers to make ahead

    Pro Tips for Perfect Results

    Pro Tip 1: How to Cook the Beets

    Peel the beet with a vegetable peeler, cut off the ends, and halve. Place in a pot, cover with water, and boil for 10 minutes. Then drain and let the beets cool inside the covered pot — this way the residual steam keeps the beet moist rather than drying it out. You want it fully cooked but still juicy and firm enough to slice paper-thin. A good stainless saucepan with a tight lid makes this step easy. Refrigerate the cooked beet covered until needed — it keeps for up to a week.

    Pro Tip 2: How to Slice Paper-Thin

    Place the beet or avocado flat-side down on the cutting board. Use a long, sharp knife and slice as thin as you possibly can, keeping the slices in order as you cut. When you lift the knife, the slices will try to stick to the blade — use a finger to guide them back down onto the cutting board. Once the whole vegetable is sliced, gently squeeze the sides to fan the slices out into a cascading shape. From here you can arrange them in a long line, a wave, or roll sections into a rose. Wash the knife and board between the beet and avocado so beet colour doesn’t transfer.

    Serving Ideas

    This appetizer is extraordinarily versatile at the table. It works beautifully alongside our Fresh Beet Pasta for a beet-themed dinner that looks deliberately styled. For BBQ parties, pair it with our Fall-Off-the-Bone Ribs — the fresh, cold appetizer contrasts wonderfully against warm, smoky meat. Place on a bed of lettuce or micro-greens to elevate the presentation further.

    Frequently Asked Questions

    How far ahead can I prepare this?

    The beet can be cooked and refrigerated up to a week in advance. The dressing can be made 3–4 days ahead. Slice the avocado only when you know serving time is close — avocado browns quickly once cut. To preserve sliced avocado for a few hours, squeeze lime juice over it immediately after slicing and keep covered in the fridge. Don’t slice the avocado the night before; it won’t look as fresh.

    How do I keep the avocado from browning?

    Squeeze fresh lime juice over every cut surface immediately. This slows oxidation significantly. Keep the sliced avocado covered with plastic wrap pressed directly against the surface — minimising air contact is the key. Even with lime juice, sliced avocado is best used within 2–3 hours of cutting.

    Can I serve this as a main dish?

    As an appetizer it serves 4–6 people generously. As a light main for 2, it works beautifully alongside a bowl of soup or a slice of crusty bread. Add a soft-boiled egg on top and it becomes a more substantial vegetarian plate.

    What if I can’t slice the vegetables thin enough?

    A mandoline slicer will produce perfectly uniform paper-thin slices with minimal effort. Set it to 1–2mm thickness. Exercise caution with the finger guard — mandolines are notoriously sharp. If you’re slicing by hand, a thin-bladed knife (a Japanese-style gyuto or slicing knife) works much better than a thick chef’s knife for this task.

    Can I make the dressing without sugar?

    Yes. For the dressing, omit the sugar and use a low-sodium soy sauce or tamari. The resulting dish is still flavourful and satisfying.

    Can I add other vegetables to the sashimi plate?

    Yes. Thinly sliced cucumber, radish, or yellow beet all work beautifully alongside red beet and avocado. Cucumber adds crunch and freshness; radish adds a peppery bite; yellow beet provides a softer flavour than red while maintaining the visual contrast. A plate with all four becomes a genuine centrepiece.

    Bowl of thin beet slices and avocado on a woven placemat

    Delicious Make-ahead Beet and Avocado Sashimi Appetizer

    Print Recipe Pin RecipePrep Time:10 minsCook Time:10 mins

    Ingredients

    • 2 large beets
    • 2 ripe avocado

    Small Serving Soy Sauce Dressing

    • 1 tbsp soy sauce
    • 2 tsp sesame oil
    • 1 tbsp white vinegar
    • 1 tbsp olive oil
    • 1 tbsp white sugar

    ± 1 Cup Serving Soy Sauce Dressing

    • ¼ cup soy sauce
    • 2 tsp sesame oil
    • ¼ cup white vinegar
    • ¼ cup olive oil
    • ¼ cup white sugar

    Instructions

    To Cook the Beet

    • Using a vegetable peeler, take out the skin of the beet and cut the ends off. Split it in half.
    • Place the beets inside a pot and fill it up with water until the beets are covered. Place the lid on top. Boil for 10 minutes. Drain and let the beets cool inside the pot with the lid on.

    Arranging the Salad

    • Use a paper towel to dry the beets, and place the beet flat side down on the cutting board. With a very sharp and thin knife, carefully slice the beet. When you lift the knife, the thinly sliced beet will try to stick to the knife. Use a finger to stop the sheet from falling out and place it back in the beet in the same arrangement. Slice the following slice and try to keep it has thin as possible. Repeat until the whole beet is thinly sliced.
    • Using the same methodology, slice the avocados. Remember to wash the board and knife so the beet colour doesn't stick to the avocado.
    • Fan out beet and avocado slices so that they form a long line with the slices overlapping each other. I usually remove the small slices from the ends because they are difficult to shape. Starting from one end, curl avocado slices toward the center, until I get a wave.
    • Use a piece of leaf or anything decorative to place it on the plate. Then place the beet and avocado sashimi on top.

    Dressing

    • Combine all the ingredients together and place it in a cup. When you're about to add it to the salad, give it a good shake or stir and drizzle it on top of the avocado and beet.

    Notes

    • to keep the avocado from browning, squeeze the juice of the lime on top of the avocado to preserve it from browning. Still, cut the avocado when you know serving time is almost there. Try not to cut it the day before like the beets. They don’t preserve the same.
    • No-sugar option: leave the sugar out of the soy sauce dressing.