Category: appetizers recipes

  • Salt and Pepper Chicken Wings with Crispy Lemongrass

    Salt and Pepper Chicken Wings with Crispy Lemongrass

    These salt and pepper chicken wings are marinated for at least 2 hours, double-fried until deep golden, then tossed in a hot wok with crispy lemongrass, garlic, jalapeño and a homemade toasted-rice flavour powder. Plan about 3 hours start to finish, with most of that hands-off marinating. Cook the chicken to 165°F (74°C).

    This post contains affiliate links. As an Amazon Associate I earn from qualifying purchases.

    Fall is all about pumpkin spice and sweet treats, so I’m going the other way today! My husband’s favourite snack, when he is stuffed full of cinnamon rolls, Thanksgiving roasted lemon garlic chicken and warm lentil and sweet potato salad, is something totally different: salty, spicy and crunchy. Enter these wings!

    They are fried twice, then tossed in a hot wok with fried lemongrass, garlic and fresh jalapeño. The toasted rice flavour powder is the secret. It’s nutty, salty and so good. Put the NFL, hockey or any weekend game on and you will laugh right through the burger and pizza commercials.

    There is no heavy batter here, just a light cornstarch and flour coating. If you’d rather go tangy than toasty, my crispy pickle brine chicken wings are the other direction.

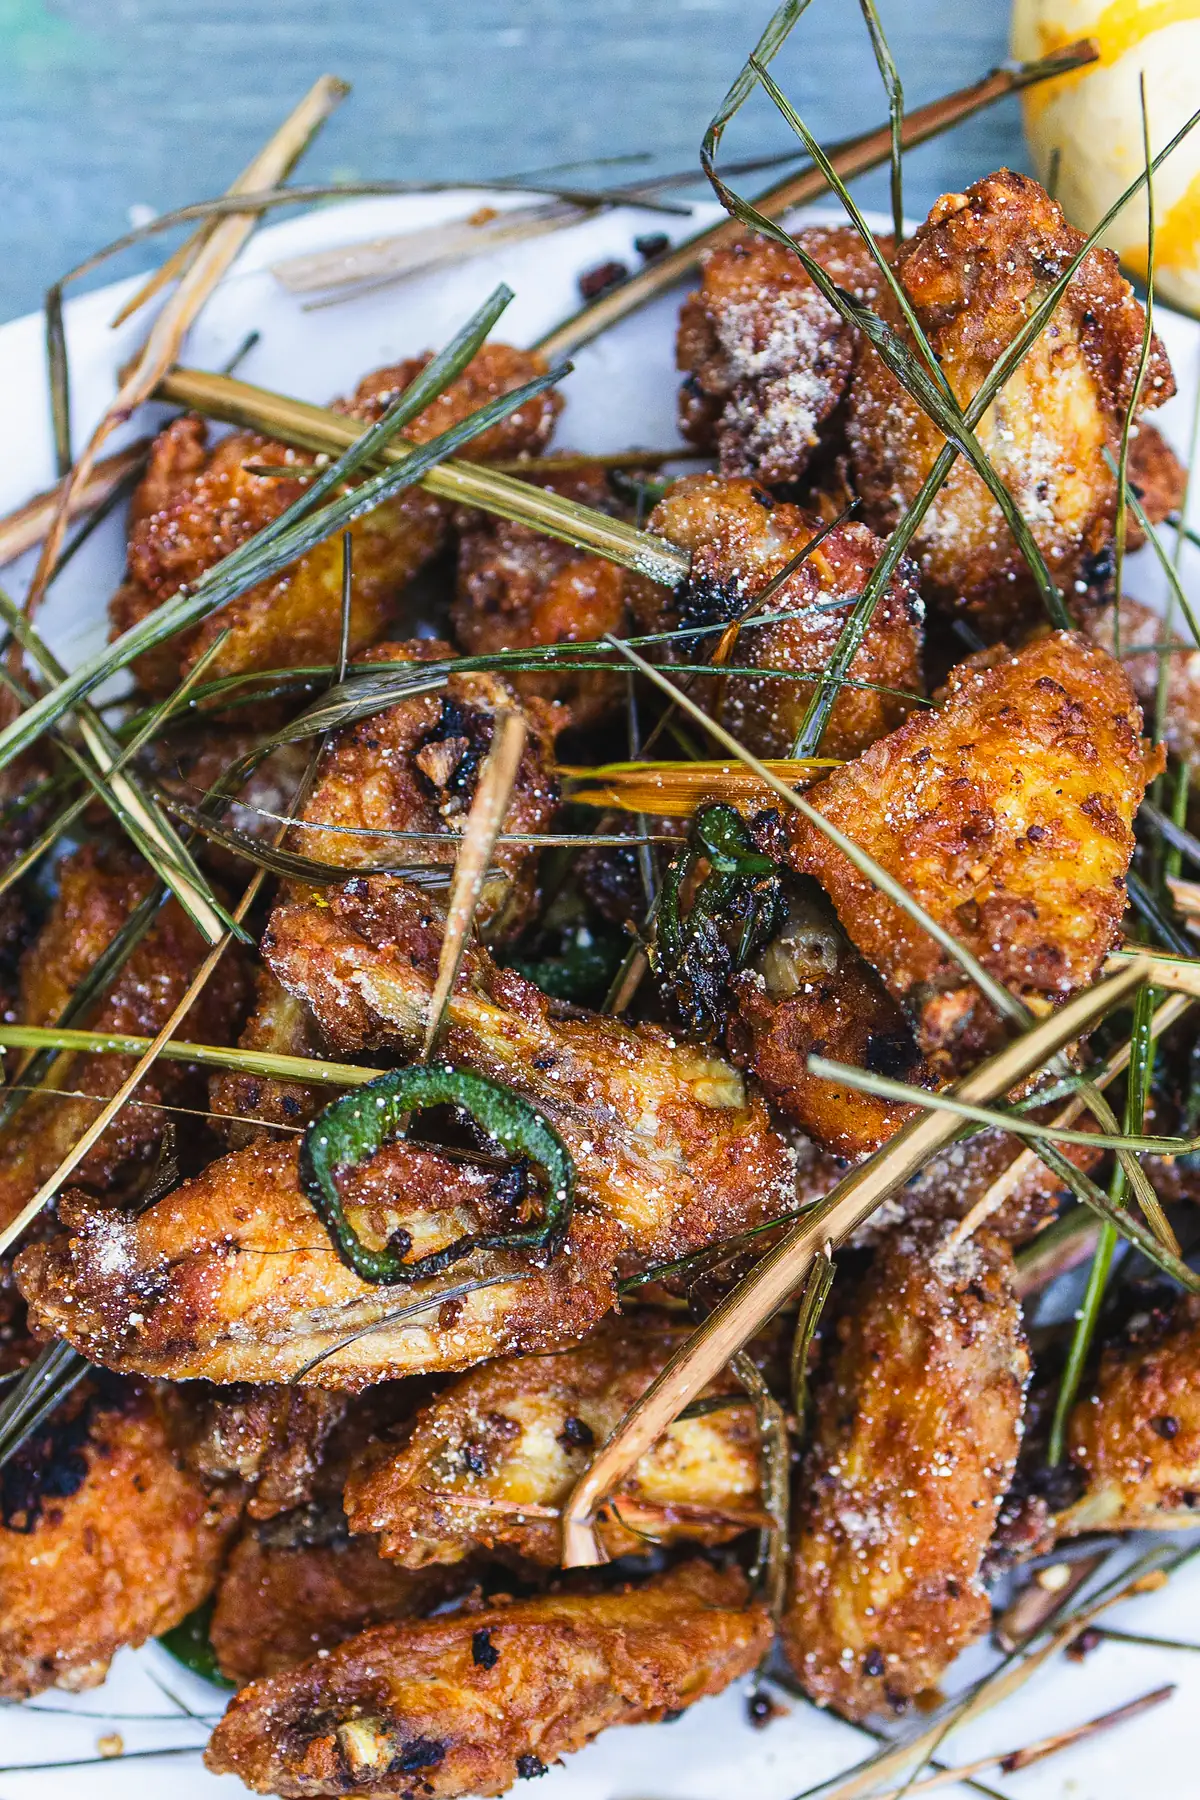
    Plate of crispy salt and pepper chicken wings piled with fried lemongrass strands and a green jalapeño slice, with a small striped gourd on the table.

    Want a week of dinners planned for you? Get my free dinners

    Ingredients

    Most of this is easy to find. The flavour powder is the part to plan ahead for: it uses glutinous sweet rice, vinegar powder and Hat Nem seasoning (or Old Bay).

    • Chicken marinade: 1.5 lb (680 g) chicken wings, split into flats and drumettes (about 16 pieces), plus cornstarch, all-purpose flour, soy sauce, salt, sugar and white pepper.
    • Flavour powder: 50 g glutinous sweet rice, salt, MSG, vinegar powder, sugar, white pepper and Hat Nem seasoning (or Old Bay).
    • For frying: 5 cups neutral cooking oil for the double fry, plus 3 tablespoons of fresh neutral oil for the final toss in a second clean, dry pan.
    • Aromatics: 3 stalks lemongrass sliced very thinly, 3 garlic cloves and 1 jalapeño.

    The flavour powder makes more than you need. You only use 2 teaspoons on the wings, so there is TONS left for next time. Exact amounts are in the recipe card below.

    Equipment you’ll need

    These are Amazon affiliate links. As an Amazon Associate I earn from qualifying purchases.

    How to make salt and pepper chicken wings

    Step 1: Marinate the wings. If your wings are frozen, thaw them completely in the fridge first. Pat the wings dry. In a large bowl, toss them with 2 tablespoons cornstarch, 1/4 cup all-purpose flour, 1 tablespoon soy sauce, 1 teaspoon salt, 1 teaspoon sugar and 2 teaspoons white pepper until every wing is lightly coated. Cover and refrigerate for at least 2 hours. Wash your hands, the cutting board and any tools that touched the raw chicken with hot soapy water, and keep the raw wings away from the finished ones. Don’t rinse the chicken. Use separate tongs or strainers for raw and cooked wings.

    Step 2: Make the flavour powder. Toast 50 g glutinous sweet rice in a dry pan over medium heat, stirring constantly, until golden brown and nutty. Let it cool for a few minutes, then tip it into a high-speed blender with 2 tablespoons salt, 1 teaspoon MSG, 1 teaspoon vinegar powder, 1 teaspoon sugar, 2 teaspoons white pepper and 1 teaspoon Hat Nem seasoning. Blend until fine, then measure out 2 teaspoons for the wings.

    Step 3: Fry the wings twice. Heat 5 cups oil in a wok or deep pot over medium-high heat to 375°F (190°C). The pot should be no more than half full. Working in small batches, lift each wing from the bowl, shake off the loose coating and lower it slowly into the oil, away from you. Fry the wings for about 5 to 7 minutes until pale gold and cooked through. Times vary with wing size and oil temperature. The oil temperature will dip when the wings go in, so adjust the heat to keep it around 350 to 375°F. Check the largest wing of each batch at the thickest part, away from the bone, with an instant-read thermometer: it needs 165°F (74°C). Keep frying any wing that is under 165°F. Move the wings to a wire rack and let them rest about 10 minutes. Turn the heat to low during the rest, then bring the oil back up to 375°F and fry them a second time, a few at a time, for about 2 to 3 minutes until deeply golden and crisp. Drain on the rack.

    Step 4: Crisp the lemongrass. Pat the sliced lemongrass dry and add it to the same hot oil in small handfuls, standing back, because it will bubble up. Fry until golden and crispy. Fish it out with a strainer or slotted spoon, drain, and set it aside in a small bowl. Turn off the heat and leave the pot where it is, away from kids and pets. Never move hot oil. Let it cool while you finish Step 5.

    Step 5: Toss and serve. Heat 3 tablespoons of fresh oil in a second clean, dry wok or pan over high heat until shimmering. Add the minced garlic and sliced jalapeño, give them 2 to 3 quick stirs, then tip in the double-fried wings. Toss hard, scatter in the crispy lemongrass and 2 teaspoons of the flavour powder, and keep tossing until every wing is coated. Plate right away and eat them hot!

    Close-up of golden double-fried chicken wings dusted with flavour powder, with crispy lemongrass and a jalapeño slice.

    Step 6: Clean up after dinner. Once the frying oil is completely cold, which takes a couple of hours, strain it into a sealable container and put it in the trash, or take it to a local oil recycling drop-off. Check your local rules. Never pour it down the drain.

    Tips for crispy wings and mistakes to skip

    • Use a thermometer, not your eyes. Pale gold wings can still be raw inside. Probe the thickest part of the largest wing in each batch, away from the bone, until it reads 165°F (74°C), and keep frying any wing that is under it. This is the USDA safe minimum for chicken.
    • Don’t crowd the pot. Too many wings at once drops the oil temperature and gives you greasy, pale wings. Small batches, trust me.
    • Rest between fries. A short rest on a wire rack lets steam escape so the second fry can really crisp the skin.
    • Have everything ready for the final toss. Garlic goes from fragrant to bitter in seconds. Measure the powder and set out the lemongrass before the wok gets hot.
    • Respect the hot oil. Never leave heating oil unattended and keep a lid nearby. Shake off loose coating, then lower the wings in slowly with a spider strainer or tongs, away from you, so the oil doesn’t spit. Do the final toss in a second clean, dry wok or pan with fresh oil so you never move hot oil. Keep kids and pets away from the pot while the oil cools, and clean it up as described in Step 6. Never pour it down the drain.
    • If oil catches fire: slide a lid over the pot, turn off the heat, and never use water.

    How to store and reheat leftover wings

    Salt and pepper chicken wings with crisp lemongrass strands and a jalapeño slice on a white plate.

    Refrigerate leftover wings within 2 hours of cooking (1 hour if the room is above 90°F / 32°C), in a shallow airtight container. Eat them within 3 to 4 days. Reheat until steaming hot and 165°F (74°C) in the middle. A hot oven with the wings on a wire rack can work, since the rack lets air circulate around them.

    Keep the leftover flavour powder in an airtight container, away from heat and moisture.

    Salt and pepper chicken wings FAQ

    Do you have to double-fry salt and pepper wings?

    The first fry cooks the wings through. The second fry is what makes the skin extra crunchy. If you skip it, you’ll get a softer wing.

    What temperature should chicken wings be cooked to?

    The USDA says chicken is safe at an internal temperature of 165°F (74°C). Check the largest wing in each batch, at the thickest part and away from the bone, and keep frying any wing that is under 165°F.

    What is in salt and pepper seasoning?

    Here it’s a flavour powder made from toasted glutinous sweet rice blended with salt, white pepper, a little sugar, MSG, vinegar powder and Hat Nem seasoning. You only use 2 teaspoons on the wings.

    What temperature do you fry chicken wings at?

    Heat the oil to 375°F (190°C) before the wings go in. It drops as the chicken goes in, so fry in small batches and adjust the heat to keep it from falling too far.

    What oil is best for frying wings?

    Use a neutral cooking oil, so it doesn’t compete with the lemongrass, garlic and jalapeño. Heat it in a wok or deep pot and don’t fill the pot more than halfway.

    How do you keep fried wings crispy?

    Drain them on a wire rack instead of a flat plate, and do the final toss right before serving. Wings left to sit in a covered dish lose their crunch.

    More recipes you’ll love

    Make it your own, and make the extra powder. You’ll find a use for it!

    Need more dinner ideas? Grab my free dinners

    Overhead view of salt and pepper chicken wings with fried lemongrass, a jalapeño slice and a small striped gourd.

    Salt and Pepper Chicken Wings

    Chicken wings coated in a light cornstarch and flour marinade, double-fried, then tossed in a hot wok with crispy lemongrass, garlic, jalapeño and a homemade toasted-rice flavour powder. Cook the chicken to 165°F.
    Prep Time 25 minutes
    Cook Time 45 minutes
    Marinate 2 hours
    Total Time 3 hours 10 minutes
    Servings: 4 appetizer portions
    Course: Appetizer, Snack
    Cuisine: Asian

    Ingredients
      

    Chicken marinade
    • 1.5 lb chicken wings about 680 g; split into flats and drumettes (about 16 pieces), patted dry
    • 2 tbsp cornstarch
    • ¼ cup all-purpose flour
    • 1 tbsp soy sauce
    • 1 tsp salt
    • 1 tsp sugar
    • 2 tsp white pepper
    Flavour powder
    • 50 g glutinous sweet rice
    • 2 tbsp salt
    • 1 tsp MSG
    • 1 tsp vinegar powder
    • 1 tsp sugar
    • 2 tsp white pepper
    • 1 tsp Hat Nem seasoning or Old Bay; this makes more powder than you need, you only use 2 teaspoons
    For frying
    • 5 cups neutral cooking oil for the double fry
    • 3 tbsp fresh neutral cooking oil for the final toss in a second clean, dry wok or pan
    Aromatics
    • 3 stalks lemongrass sliced very thinly
    • 3 cloves garlic minced
    • 1 jalapeño sliced thinly

    Equipment

    • Wok or deep pot for the double fry
    • Second clean, dry wok or large pan for the final toss with fresh oil
    • Lid that fits your wok or pot keep it nearby for oil safety
    • Tongs use separate tongs for raw and cooked wings
    • Deep-fry thermometer to hold the oil near 375°F / 190°C
    • Instant-read thermometer for 165°F / 74°C
    • Wire rack for resting and draining
    • Spider strainer or slotted spoon for the lemongrass
    • high speed blender for the flavour powder
    • Dry skillet or pan for toasting the rice

    Method
     

    1. If your wings are frozen, thaw them completely in the fridge first. Pat the wings dry. In a large bowl, toss the wings with the cornstarch, flour, soy sauce, 1 teaspoon salt, 1 teaspoon sugar and 2 teaspoons white pepper until every wing is lightly coated. Cover and refrigerate for at least 2 hours. Wash your hands, the cutting board and any tools that touched the raw chicken with hot soapy water, and keep the raw wings away from the finished ones. Don’t rinse the chicken. Use separate tongs or strainers for raw and cooked wings.
    2. Toast the glutinous sweet rice in a dry pan over medium heat, stirring constantly, until golden brown and nutty. Let it cool for a few minutes, then tip it into a high-speed blender with the 2 tablespoons salt, MSG, vinegar powder, 1 teaspoon sugar, 2 teaspoons white pepper and Hat Nem seasoning. Blend until fine. Measure out 2 teaspoons for the wings and keep the rest in an airtight container.
    3. Heat the 5 cups oil in a wok or deep pot (no more than half full) over medium-high heat to 375°F (190°C). In small batches, lift each wing from the bowl, shake off the loose coating and lower it slowly into the oil, away from you. Fry the wings about 5 to 7 minutes until pale gold and cooked through. Times vary with wing size and oil temperature. The oil temperature dips when the wings go in, so adjust the heat to keep it around 350 to 375°F. Check the largest wing of each batch at the thickest part, away from the bone, with an instant-read thermometer: it must reach 165°F (74°C). Keep frying any wing that is under 165°F. Rest the wings on a wire rack about 10 minutes and turn the heat to low during the rest.
    4. Bring the oil back to 375°F (190°C) and fry the wings a second time, a few at a time, about 2 to 3 minutes until deeply golden and crisp. Drain on the wire rack.
    5. Pat the sliced lemongrass dry and add it to the same hot oil in small handfuls, standing back, because it will bubble up. Fry until golden and crispy. Fish it out with a strainer, drain and set aside. Turn off the heat and leave the pot where it is, away from kids and pets. Never move hot oil. Let it cool while you finish the next step.
    6. Heat 3 tablespoons of fresh oil in a second clean, dry wok or pan over high heat until shimmering. Add the garlic and jalapeño and stir 2 to 3 times. Tip in the double-fried wings, add the crispy lemongrass and 2 teaspoons flavour powder, and toss until every wing is coated. Plate right away and serve hot.
      Close-up of golden double-fried chicken wings dusted with flavour powder, with crispy lemongrass and a jalapeño slice.
    7. Once the frying oil is completely cold, which takes a couple of hours, strain it into a sealable container and put it in the trash, or take it to a local oil recycling drop-off. Check your local rules. Never pour it down the drain.
    Notes

    Hot oil safety: never leave heating oil unattended and keep a lid nearby. If oil catches fire, slide a lid over the pot, turn off the heat, and never use water. Lower wings in slowly with a spider strainer or tongs, away from you. Never move hot oil: do the final toss in a second clean, dry wok or pan with fresh oil. Keep kids and pets away from the pot while the oil cools. Once it is completely cold (a couple of hours), strain it into a sealable container and put it in the trash, or take it to a local oil recycling drop-off. Check your local rules. Do not pour it down the drain.
    Thaw frozen wings completely in the fridge first. Wash your hands, the cutting board and any tools that touched raw chicken with hot soapy water, and use separate tongs or strainers for raw and cooked wings.
    The marinade is at least 2 hours. Prep, cooking and resting times are estimates and vary with wing size and oil temperature.
    The flavour powder makes more than you need. Store the leftover in an airtight container, away from heat and moisture.
    Refrigerate leftovers within 2 hours of cooking (1 hour if the room is above 90°F / 32°C), eat within 3 to 4 days, and reheat until steaming hot and 165°F (74°C) in the middle.
  • Warm Lentil and Sweet Potato Salad

    Warm Lentil and Sweet Potato Salad

    This Warm Lentil and Sweet Potato Salad is the perfect dish to celebrate the cooler months. It’s beautiful enough to impress guests, cozy enough for a family meal, and packed with flavour. Oven-roasted sweet potatoes, hearty lentils, and a silky peanut butter-cumin dressing come together in a bowl that feels both comforting and indulgent — ready in under an hour.

    This post may contain affiliate links. If you purchase through these links, I may earn a small commission at no extra cost to you. Thank you for supporting Love & Harvest!

    Warm lentil and sweet potato salad in a bowl

    Why We Love This Warm Salad

    There’s something magical about warm salads, especially during the fall and winter seasons. They bridge the gap between comfort food and a big bowl of vegetables so perfectly. This salad is hearty and has just the right amount of indulgence thanks to the creamy dressing. It’s vibrant and inviting on the plate — tender roasted sweet potatoes, nutty lentils, fresh greens, and a silky dressing that clings to every bite. Whether you’re feeding family or hosting friends, it feels a little special, yet it’s so easy to put together.

    Flavour Profile

    The taste is simply beautiful. Roasted sweet potatoes bring a natural caramelised sweetness that balances the earthy depth of lentils. The peanut butter-cumin dressing is what truly makes this salad sing — nutty, savoury, slightly smoky, and warmly spiced without being overwhelming. Every forkful is a perfect combination of soft and tender textures with a hint of crunch from honey-coated almonds sprinkled on top. It’s comfort food that still feels fresh and alive.

    Lentil and sweet potato salad close-up showing texture

    Key Ingredients

    Ingredients

    Sweet Potatoes

    • Roasted until golden and slightly crispy on the edges, sweet potatoes bring natural caramelized sweetness and warmth. Cut them evenly so they roast at the same rate. Use a cast iron skillet or sheet pan lined with parchment for the best caramelization.

    Lentils

    • Earthy and hearty, lentils form the perfect base for this salad. French green lentils or black beluga lentils are ideal because they hold their shape beautifully after cooking, unlike red lentils which turn mushy. Rinse well before cooking and don’t skip the simmer time.

    Peanut Butter (or Tahini)

    • Creamy and rich, peanut butter is the secret to the dressing’s luxurious texture and depth. Chunky peanut butter adds even more character. You can swap for tahini for a more traditional Middle Eastern flavour — both work wonderfully. A KitchenAid immersion blender makes blending the dressing smooth and effortless.

    Cumin

    • Toasted cumin adds warmth and a hint of smoky spice that ties the whole dish together. Ground cumin is used both in roasting the sweet potatoes and in the dressing, building layers of flavour throughout.

    Fresh Dill & Parsley

    • Fresh herbs brighten the whole dish with clean, vibrant flavour that cuts through the richness of the dressing. Don’t substitute dried herbs here — fresh dill and parsley make a noticeable difference in both flavour and visual appeal.

    Ingredients for warm lentil sweet potato salad

    Why You Should Make This Salad

    This salad isn’t just a side dish — it’s a celebration of simple, fresh ingredients coming together in the most beautiful way. It’s hearty enough to stand alone as a meal, or it can be served alongside roasted chicken or a crusty loaf of bread for a feast. Plus, it’s naturally gluten-free and can easily be made vegan. The peanut butter and cumin dressing is a conversation starter in itself — it’s that good.

    If you love warm, salad-style recipes, you’ll also enjoy our Thai Chicken Salad if you want chicken in it, or keep it plant-based with our Easy Hummus Recipe as a side. For another warming winter dish, our Instant Pot Taiwanese Beef Noodle Soup is endlessly comforting.

    Warm lentil sweet potato salad served on a plate

    Frequently Asked Questions

    Can I make this salad ahead of time?

    Yes! This salad is great for meal prep. Roast the sweet potatoes and cook the lentils up to 3 days in advance and store them separately in the fridge. Make the dressing ahead too — it keeps for up to a week refrigerated. Assemble and toss just before serving for the best texture.

    What type of lentils work best?

    French green lentils (Puy lentils) or black beluga lentils are ideal because they hold their shape after cooking. Avoid red or orange lentils for this recipe as they become too soft and mushy. If you can only find regular green or brown lentils, those work too — just watch the cooking time carefully.

    Is this recipe vegan and gluten-free?

    It is gluten-free as written. It is vegan if you swap the honey-coated almonds for plain toasted almonds; everything else in the salad is plant-based.

    What can I serve alongside this salad?

    This warm salad works beautifully as a standalone meal or as a side dish. It pairs wonderfully with roasted chicken, pan-seared salmon, or a thick slice of sourdough bread. For a full plant-based spread, serve it with hummus and warm flatbread.

    How do I store leftovers?

    Store leftovers in an airtight container in the refrigerator for up to 3 days. The flavours actually deepen overnight, making it a fantastic next-day lunch. Reheat gently in the microwave or enjoy at room temperature. Add a splash of water to the dressing if it thickens up in the fridge.

    Lentil and roasted sweet potato salad with a green herb dressing

    Warm Lentil and Sweet Potato Salad

    Warm Lentil and Sweet Potato Salad has creamy peanut butter and earthy cumin in the dressing bring it all together with a richness and warmth.
    Prep Time 15 minutes
    Cook Time 35 minutes
    Total Time 50 minutes
    Servings: 4 people
    Course: Salad
    Calories: 340

    Ingredients
      

    Roast Sweet Potato
    • 4 medium sweet potatoes, rinsed
    • 1 cup dried mixed lentils
    • 1 tbsp olive oil or cooking oil
    • ½ tsp ground cumin
    • sea salt and pepper
    Roasted Garlic Tahini Dressing:
    • 4 garlic clove
    • ¼ cup fresh parsley, chopped
    • 2 tbsp fresh dill, chopped
    • ¼ cup chunky peanut butter or tahini
    • 1 lime, juiced
    • 1 tbsp olive oil
    • ½ tsp ground cumin
    • sea salt and pepper
    • 4-5 tbsp water
    Garnish
    • little more parsley
    • ¼ cup chopped honey coated almonds
    • 1 tbsp capers

    Method
     

    1. Preheat oven to 400°F (200°C).
    2. Wash sweet potatoes well and cut into cubes. Toss with olive oil, cumin, salt, and pepper. Spread evenly on a baking tray.
      Roast for 25–30 minutes, until tender and golden.
    3. Rinse lentils under cold water. Place in a pot with 3 cups water and a pinch of salt.
    4. Bring to a boil, then reduce heat and simmer for 20–25 minutes, until lentils are tender but not mushy. Drain and set aside.
    5. Dressing: Roast garlic cloves in the oven (wrapped in foil or in a small dish) until soft, about 15 minutes.
      In a blender or food processor, combine roasted garlic, parsley, dill, peanut butter/tahini, lime juice, olive oil, cumin, salt, and pepper.
      Add water gradually until smooth and creamy.
    6. In a large bowl, combine roasted sweet potatoes and cooked lentils. Toss with dressing until well coated.
    7. Top with fresh parsley, chopped honey-coated almonds, and a few capers. Serve warm or at room temperature as a hearty side dish or light main meal.

  • Easy Plum Jam

    Easy Plum Jam

    This easy plum jam, made with seasonal Mexican ciruela roja, is a fun and rewarding way to turn fresh fruit into something delicious—with plenty of hands-on help from the kids.

    This post may contain affiliate links. If you purchase through these links, I may earn a small commission at no extra cost to you. Thank you for supporting Love & Harvest!

    Open jar of homemade red plum jam with a spoon

    Jamming at Home

    There’s something magical about making jam at home—especially when your little ones are part of the process. In our kitchen, it’s a full family affair.

    The kids love squishing the fruit, stirring the bubbling pot (maybe a bit too enthusiastically), and watching simple ingredients transform into something sweet and spreadable. Sure, the stove might get a little sticky, and the counters might sparkle with sugar syrup splatters, but I wouldn’t trade it for anything.

    Cooking from scratch teaches my kids a deep appreciation for where food comes from—and that many things we buy at the supermarket can be made right at home, often tasting even better.

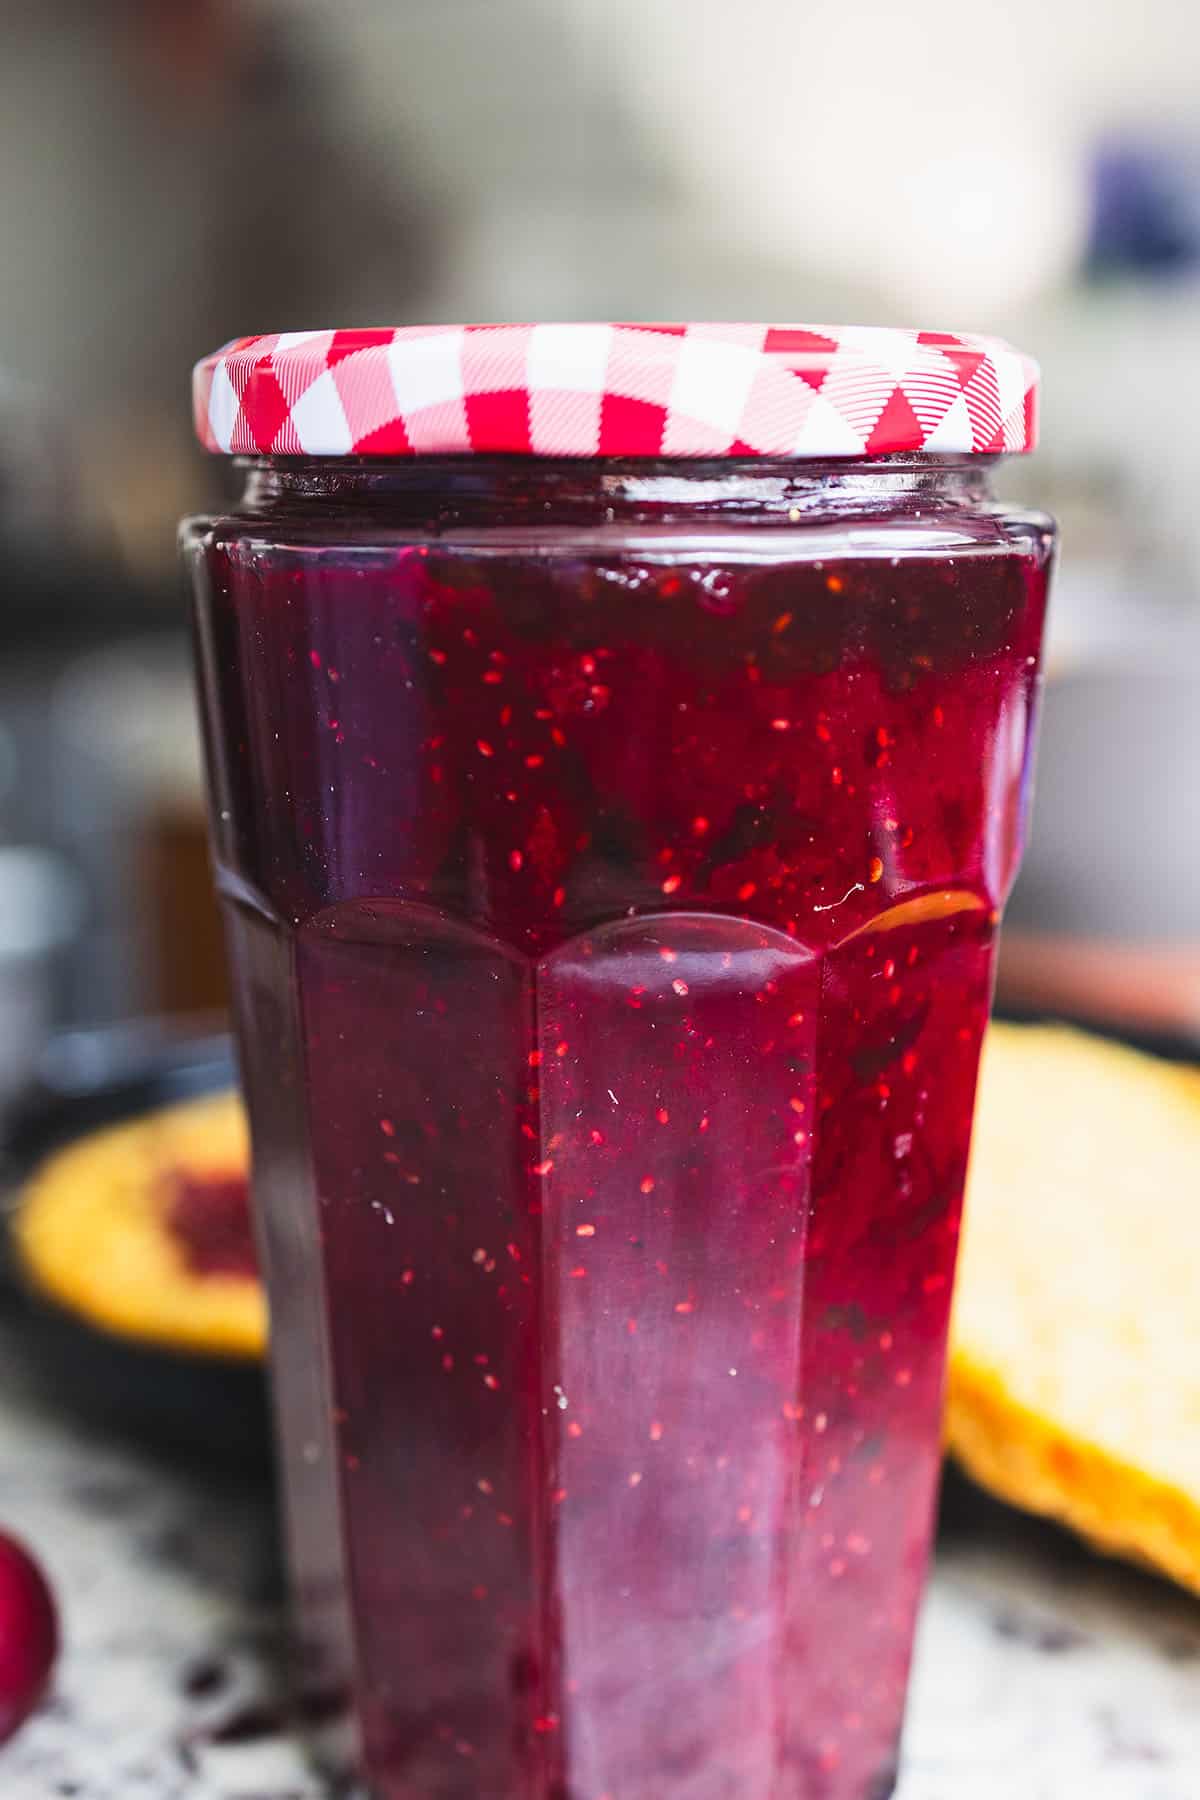
    Tall jar of homemade plum jam with a gingham lid

    Main Ingredients

    This jam is all about simplicity. Here’s all you need:

    Ingredients

    Fresh Red Plums (Ciruela Roja)

    • The star of the show — pitted and chopped. Their natural sweetness and acidity make them ideal for jam-making without needing excessive sugar.

    Granulated Sugar

    • Brings out the fruit’s natural sweetness and helps the jam set and preserve. The ratio matters — too little and it won’t set; too much and it overpowers the fruit.

    Fresh Lemon Juice

    • Brightens the flavour, activates the pectin for a better set, and helps with preservation. Always use fresh — bottled just isn’t the same.

    Fruit Pectin or Gelatine

    • The setting agent that gives your jam that perfect spreadable consistency without endless boiling. We love using a canning funnel and jelly jars to bottle this up cleanly.

    What Is Ciruela Roja?

    Ciruela roja is the Mexican red plum—small, vibrant, and sweet-tart with a deep red skin and juicy flesh. It’s a seasonal fruit that shows up in abundance at local markets during summer, and its natural balance of sweetness and acidity makes it perfect for jam-making. When in season, we grab them by the kilo to preserve their flavor in jars we can enjoy year-round.

    Jar of plum jam next to fresh red plums and basil

    Great Substitutes for Ciruela Roja

    If you can’t find ciruela roja, don’t worry—this jam recipe works beautifully with other types of plums, especially:

    • Black plums – dark, juicy, and rich in flavour

    • Santa Rosa plums – sweet-tart with a fragrant aroma

    • Yellow plums (Mirabelle) – slightly milder, but still great for jam

    • Apricots or peaches – for a softer, sweeter twist

    Spoonful of plum jam over a creamy dessert with a golden crust

    The Magic Tool: Potato Masher

    You don’t need fancy equipment to make great jam. One of our favorite tools? The humble potato masher. The kids love using it to break down the cooked plums into a chunky, rustic texture. It’s safe, satisfying, and lets them feel like real little chefs. No blender needed—just old-school mashing fun.

    Why We Love This Easy Plum Jam Recipe

    • It’s seasonal – We use Mexican ciruela roja when it’s in full swing, usually around summer. When plums are everywhere in the local markets, we grab kilos and turn them into jam jars we enjoy all year.

    • It’s fast – No long hours of boiling needed. This is a quick jam recipe you can make in under an hour.

    • It’s kid-approved – From making to eating, kids are all in.

    • It’s a pantry hero – It keeps well in the fridge and makes a perfect little homemade gift.

    Other Ways of Using Jam

    Sure, plum jam and peanut butter on homemade sourdough is a classic. But don’t stop there! We love layering it between cakes, spooning it into cupcake centers, or swirling it into yogurt for a fruity breakfast. Try glazing roasted meats with it, folding it into thumbprint cookies, or even mixing a spoonful into your vinaigrette for a sweet-savory salad twist. It also pairs beautifully alongside our vanilla bean ice cream for a fruity sundae, or drizzled over our super moist cherry loaf.

    A hand spreading plum jam over golden cornbread in a slow cooker

    Frequently Asked Questions

    Can I make this jam without pectin?

    Yes! Plums are naturally high in pectin, especially when slightly underripe. You can cook the jam a bit longer—about 25–30 minutes total—and it will thicken on its own. Just do the cold plate test to check consistency.

    How long does homemade plum jam last?

    Stored in a clean, sealed jar in the refrigerator, this jam will keep for up to 3 weeks. For longer storage, pour into sterilized jars while hot and freeze for up to 6 months.

    Can I use frozen plums?

    Absolutely. Thaw them first and drain any excess liquid before cooking. Frozen plums work great and often have excellent flavor since they’re picked at peak ripeness.

    My jam didn’t set — what went wrong?

    The most common cause is either not enough pectin or not cooking long enough. You can rescue it by returning to the heat, adding a little more lemon juice, and boiling for another 5–10 minutes. The cold plate wrinkle test is your best friend here.

    What can I do with leftover jam besides spreading on toast?

    So many things! Use it as a cake filling, swirl into yogurt, glaze roasted meats, fill thumbprint cookies, or spoon over vanilla ice cream. Even a spoonful in your salad dressing adds a lovely sweet-tart depth. Also try it alongside our cherry syrup recipe for a fruit preserve duo.

    Tall jar of homemade plum jam with a gingham lid

    Easy Plum Jam Recipe

    An easy plum jam recipe made with just four ingredients—fresh plums, sugar, lemon juice, and pectin or gelatine. A pantry hero that celebrates this delicious seasonal fruit.
    Prep Time 15 minutes
    Cook Time 20 minutes
    Total Time 35 minutes
    Servings: 1 large jar (1L)
    Course: Condiment
    Calories: 55

    Ingredients
      

    • 1 kg (2.2 lbs) fresh plums (ciruela roja or any ripe plums), pitted and chopped
    • 500 g (2 ½ cups) granulated sugar
    • 2 tbsp fresh lemon juice
    • 1 package (about 7 g or 1 tbsp) fruit pectin or 1 tbsp unflavored powdered gelatine

    Equipment

    • potato masher

    Method
     

    1. Wash, pit, and chop the plums. You can leave the skin on—it adds beautiful color and texture.
    2. Place the plums in a large saucepan over medium heat. Add lemon juice and stir occasionally. Cook for about 10–15 minutes until the fruit softens and begins to break down.
    3. Use a potato masher to mash the plums into your desired consistency—chunky or smooth.
    4. Stir in the sugar and bring the mixture to a gentle boil. Once boiling, sprinkle in the pectin or gelatine and stir well to dissolve completely.
    5. Continue to cook for another 10–15 minutes, stirring frequently, until the jam thickens slightly. To test the consistency, place a spoonful on a chilled plate—if it wrinkles when pushed, it's ready.
    6. Remove from heat and let cool for 5–10 minutes. Pour into clean jars and allow to cool fully before sealing. Store in the fridge for up to 3 weeks or freeze for longer storage.

  • Thai Chicken Salad

    Thai Chicken Salad

    This Thai Chicken Salad is a fresh, vibrant dish with shredded chicken, crunchy veggies, and a tangy dressing. It’s light, easy to make, and perfect for hot days when you want something fresh without turning on the stove.

    This post may contain affiliate links. If you purchase through these links, I may earn a small commission at no extra cost to you. Thank you for supporting Love & Harvest!

    Fresh shredded chicken and vibrant vegetables in a colorful salad.

    Why We Love This Recipe

    When the weather heats up and the last thing you want is to turn on the stove, this Thai Chicken Salad is the answer. It’s bright, refreshing, and loaded with crunchy vegetables, tender chicken, and a zesty, tangy dressing that pulls it all together.

    We love how quick and easy it is to throw together — especially if you use pre-cooked or leftover chicken. You get a full, satisfying meal without heating up your kitchen. It’s the kind of salad that is light but filling, and packed with flavor.

    And let’s not forget the peanuts — they add the perfect crunch and a nutty finish that makes every bite exciting.

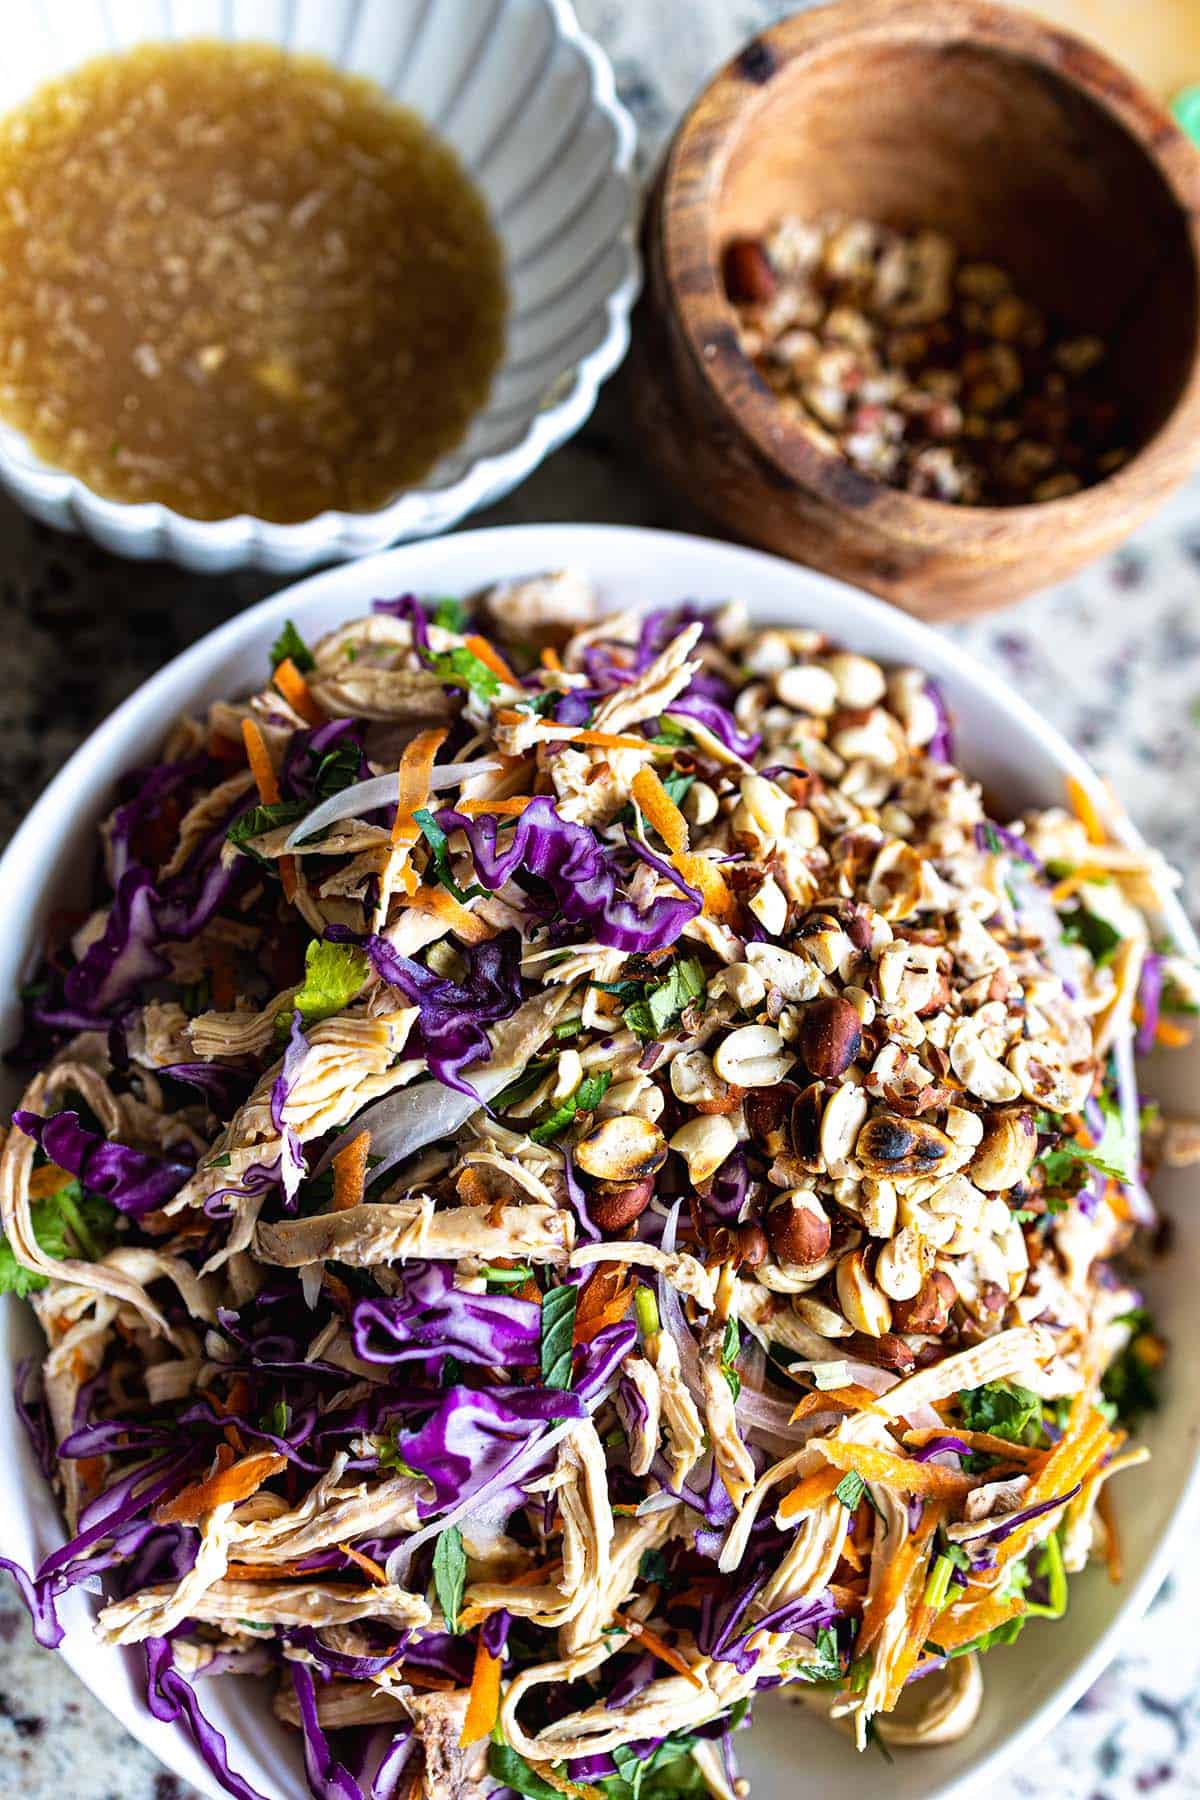
    Thai chicken salad with purple cabbage, carrots and herbs in a white bowl

    One of Our Picnic Favourite Recipes

    This salad travels so well, which makes it a top pick for picnics, potlucks, and even lunch on the go. The veggies stay crisp, and the flavours actually get better as they sit and marinate a bit in the dressing.

    You can keep the dressing on the side until you’re ready to serve, or toss everything together right before heading out — it holds up beautifully either way.

    Why we love it as a family is that it’s dairy-free, and gluten-free if your fish sauce is labelled gluten-free, so it works for almost everyone at the table.

    Thai Chicken Salad Ingredients

    Here’s what you’ll need to make it:

    Ingredients

    Cooked Chicken

    • Shredded or sliced — grilled, poached, or rotisserie all work. Using leftover chicken makes this a genuinely no-cook meal. The chicken provides that filling protein base that turns this from a side salad into a complete meal.

    Shredded Cabbage or Lettuce

    • The crunchy, fresh base of the salad. Napa cabbage gives the most authentic Thai crunch, but any crisp variety works. Shred it thin for the best texture.

    Fresh Cilantro and Mint

    • These herbs give the salad its unmistakable Thai freshness. Don’t skip them — they’re what make this salad taste alive and aromatic. Use both generously.

    Fish Sauce

    • The secret weapon in the dressing. I use Three Crabs fish sauce — the brand I actually keep in the kitchen. A little goes a long way in building that deep umami base.

    Chopped Peanuts

    • For crunch and a nutty contrast. Toast them lightly in a dry pan for even more depth of flavor.

    The Dressing

    • A tangy blend of lime juice, a touch of honey or sugar, fish sauce or soy sauce, garlic, and a little chili for heat. Balance is key — it should be sour, salty, sweet, and just a little spicy all at once.

    Cabbage and carrot slaw with chopped peanuts and a bowl of dressing on the side

    Other Food to Pair with This Salad

    This Thai Chicken Salad is a meal on its own, but here are some delicious sides or extras to serve with it:

    • Sticky rice or jasmine rice – A great way to turn it into a heartier dinner.

    • Fresh spring rolls – Another no-cook favourite with rice paper and veggies or boiled shrimps (optional).

    • Grilled corn or skewers – If you’re firing up the BBQ, a few grilled additions pair perfectly.

    • Thai iced tea or cucumber water – Something cool and refreshing to drink alongside it.

    A Summer Meal

    Whether you’re hosting a backyard lunch, prepping meals for the week, or just trying to avoid heating up the stove, this Thai Chicken Salad checks all the boxes: easy, fresh, and seriously delicious. If you love Asian-inspired flavors, you’ll also enjoy our 30-minute Thai basil chicken or the bold flavors in our lemongrass chicken drumsticks.

    Frequently Asked Questions

    Can I make Thai Chicken Salad ahead of time?

    Yes — prepare all the components separately and store in the fridge for up to 2 days. Keep the dressing in a separate container and toss just before serving to maintain maximum crunch.

    What can I use instead of fish sauce?

    Soy sauce or tamari are great substitutes for a vegetarian version. You can also use coconut aminos for a soy-free alternative. The dressing will have a slightly different flavor but will still be delicious.

    How do I cook the chicken for this salad?

    Poaching is our favorite method — place chicken breasts in simmering salted water for 15–18 minutes, then shred with two forks. Rotisserie chicken is an even quicker shortcut. Grilled chicken also adds a lovely smoky dimension.

    Is Thai Chicken Salad gluten-free?

    It can be, when your fish sauce (and any soy sauce swap) is gluten-free. Just double-check the label — some fish sauce brands add wheat. I use Three Crabs; always verify the bottle you buy if gluten is a concern.

    Can I add noodles to this salad?

    Absolutely! Rice noodles or glass noodles cooked according to package directions and tossed with the dressing make a more substantial noodle salad. It’s essentially a Thai noodle bowl at that point — just as delicious.

    Thai chicken salad with shredded chicken, purple cabbage, carrots and chopped peanuts, with a bowl of lime dressing on the side.

    Thai Chicken Salad

    We love how quick and easy it is to throw together — especially if you use pre-cooked or leftover chicken. You get a full, satisfying meal without heating up your kitchen. It’s the kind of salad that is light but filling, and packed with flavor.
    Prep Time 20 minutes
    Cook Time 25 minutes
    Total Time 45 minutes
    Servings: 6 people
    Course: Appetizer, Salad
    Cuisine: Thai
    Calories: 280

    Ingredients
      

    Salad
    • 3 cups poached chicken breast or rotisserie chicken
    • 3 cups shredded white cabbage
    • 3 cups shredded purple cabbage
    • 1 cups shredded carrots
    • ½ cup shredded red onion
    • ¼ cup chopped mint leaves
    • 1 cup chopped cilantro
    • ½ cup roasted peanuts, chopped
    Lime and Fish Sauce Dressing (Nuoc Cham)
    • ¼ cup fresh lime juice
    • 2 tbsp fish sauce
    • 2 tbsp rice vinegar
    • 1 tbsp honey
    • 1 garlic clove
    • 1 red chili, finely minced (optional)

    Method
     

    Salad
    1. In a large bowl, combine the shredded chicken, cabbage, carrots, red onion, mint, and cilantro. Toss well to mix.
    Dressing
    1. In a small bowl, whisk together the lime juice, fish sauce, rice vinegar, honey or sugar, garlic, and chili (if using) until the sugar dissolves.
    2. When ready to serve, pour the dressing over the salad and toss well to coat everything evenly.
    3. Transfer to a serving platter or individual bowls. Top with the chopped peanuts. Serve immediately and enjoy!

  • Campfire Hot Honey Brie Cheese Recipe

    Campfire Hot Honey Brie Cheese Recipe

    There’s something magical about that first bite around the fire, especially when it’s oozing brie cheese kissed with hot honey, grilled mango, and a touch of thyme. This Campfire Hot Honey Brie Cheese has quickly become one of our go-to camping snacks—simple to make, yet indulgent enough to make the campground feel like a gourmet retreat.

    This post may contain affiliate links. If you purchase through these links, I may earn a small commission at no extra cost to you. Thank you for supporting Love & Harvest!

    Cheese, mango, and green olives on a skillet with herbs, highlighting farm-fresh ingredients for gourmet cooking.

    Hot Honey and Brie Cheese Flavour

    Imagine the creamy melt of brie infused with golden hot honey, the zing of balsamic vinegar, the salty olives, and the earthy aroma of thyme. Add a grilled mango slice for a little caramelized sweetness and you’ve got a whole explosion of flavour in one bite.

    Dip a pita chip or a crunchy carrot stick in it, and you’re in for a rustic-meets-exotic treat that’ll have your camping neighbours sniffing the air and asking what’s cooking.

    Easy Hot Honey Brie Cheese Recipe

    This appetizer takes just a few minutes to assemble and about 15 minutes on a hot fire or grill. It’s a total win when you’re multitasking between setting up your tent, unpacking gear, or prepping for the main meal. Minimal cleanup, maximum satisfaction.

    Here’s how we do it:

    1. Place a whole block of Costco brie on a piece of foil or a small cast iron pan.
    2. Drizzle generously with organic honey and a splash of balsamic vinegar.
    3. Top with a few pitted olives, fresh thyme, a pinch of salt and pepper (go with smoked salt if you’re feeling fancy).
    4. If you’ve got a mango on hand, grill one side and add it on top for a sweet bonus.
    5. Wrap loosely or place in your campfire-safe pan and cook over the fire for 15 minutes or until gooey and golden.
    6. Serve with pita chips, celery, or carrot sticks. Trust us, extra honey on top doesn’t hurt.

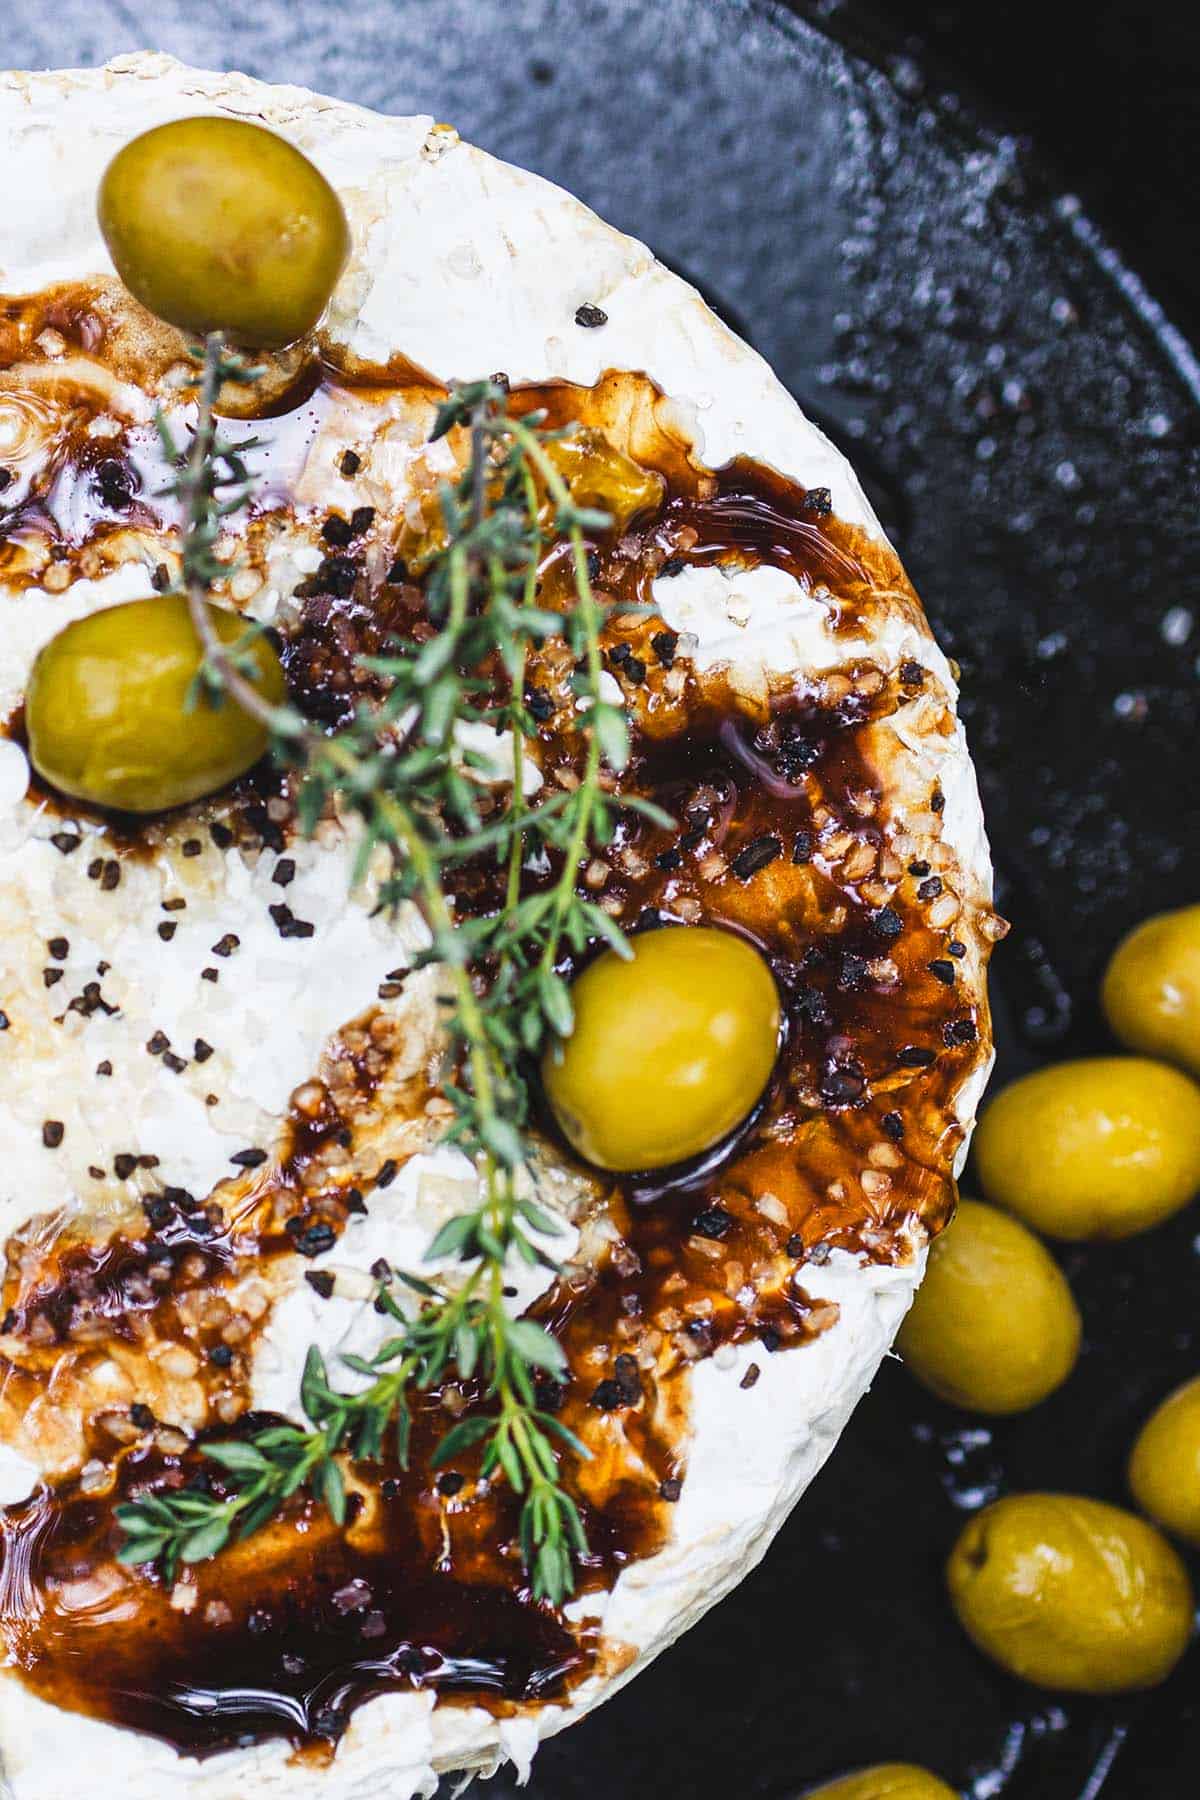
    Creamy Brie cheese topped with balsamic glaze, black pepper, and fresh herbs on a dark background.

    One of Our Camping Hacks

    Honestly, Campfire Brie is one of our best camping hacks. You don’t need much, and it’s versatile. Swap the mango for figs, skip the olives if you’re not a fan, or throw in some crushed walnuts if you want a little crunch. It never disappoints. We always keep a Costco brie in our cooler just in case.

    Main Ingredients

    Ingredients

    Brie Cheese

    • One full block of brie — Costco’s double-crème brie is our go-to. It melts beautifully and has that buttery, mushroomy flavor that pairs perfectly with honey. Make sure it’s at room temperature before cooking for the fastest, most even melt.

    Organic Honey

    • The sweet base of this recipe. Raw, unfiltered organic honey has a deeper flavor than commercial honey — and it has a slightly higher heat tolerance, which makes it better for campfire cooking. Plus extra for drizzling at the end.

    Balsamic Vinegar

    • Just a splash of quality balsamic vinegar adds a tangy complexity that cuts through the richness of the cheese and honey. It’s the secret ingredient that elevates this from “camping snack” to “campfire gourmet.”

    Fresh Thyme

    • Earthy and aromatic — fresh thyme is what gives this dish its herbaceous, almost savory backbone against all that sweetness. Strip the leaves off the stems and scatter generously.

    Smoked Salt

    • Optional but highly recommended. Smoked salt brings a subtle campfire-appropriate flavor to the cheese even before it goes on the actual fire. Just a pinch over the top before cooking is enough.

    We Love This Hot Honey Brie Cheese Recipe

    • It’s fast.
    • It feels fancy, even in the wild.
    • It makes camp life taste incredible.
    • It’s crowd-pleasing—especially for hungry little snackers or curious fellow campers walking by your site. If you love bold appetizers, our easy hummus recipe and fluffy naan bread are perfect companions for your next gathering.

    This is more than an appetizer—it’s a camping ritual. A moment to stop, snack, and soak in the wilderness while you cook the bigger stuff.

    A hand slicing baked brie topped with olives and herbs in a cast iron pan

    Frequently Asked Questions

    Can I make campfire brie at home without a fire?

    Absolutely. This recipe works just as well in your oven at 375°F (190°C) for about 12–15 minutes, or on a stovetop grill pan over medium heat. You lose the campfire atmosphere but none of the flavor. A small cast iron skillet is perfect for both methods.

    What type of brie should I use?

    Any full wheel of brie works — we love Costco’s double-crème brie for its high fat content and excellent melting quality. If you can find a brie labeled “double or triple crème,” grab it. Avoid pre-sliced brie as it won’t hold its shape while melting.

    Can I make this without a cast iron pan?

    Yes — heavy-duty aluminum foil works great. Create a small “boat” around the brie by folding the foil up around the sides, leaving the top open. This keeps all the melted cheese contained and makes cleanup incredibly easy.

    What can I use instead of mango?

    Figs are the most elegant substitute — they caramelize beautifully and complement the honey and brie. Fresh pears, apricots, or even pineapple rings all work wonderfully. The goal is a fruit with some sweetness that can handle direct heat without turning to mush.

    How do I transport brie for camping?

    Keep the brie sealed in its original packaging in a cooler with ice packs. It stays fresh for up to 5 days when kept cold. Transport the honey, balsamic, and herbs in small sealed containers in your camp kitchen kit. Everything assembles in under 2 minutes at the campsite.

    Cheese, mango, and green olives on a skillet with herbs, highlighting farm-fresh ingredients for gourmet cooking.

    Campfire Hot Honey Brie Cheese Recipe

    The perfect rustic-meets-gourmet appetizer for the outdoors—or indoors.
    Prep Time 5 minutes
    Cook Time 15 minutes
    Total Time 20 minutes
    Course: Appetizer
    Cuisine: American
    Calories: 220

    Ingredients
      

    • 1 wheel or block of brie cheese  (Costco’s version works great)
    • 2 tbsp organic honey, plus more for drizzling
    • 1 tsp balsamic vinegar
    • 5 olives, pitted and sliced (green or black)
    • 2 springs sprigs fresh thyme (or ½ tsp dried thyme)
    • salt and pepper optional: smoked salt
    • 2 slices of mango
    • pita chips, carrot sticks, and celery for dipping

    Equipment

    • cast iron skillet

    Method
     

    At Camp
    1. Prep the Brie: Place the brie wheel into the cast iron skillet.
    2. Top it Off: Drizzle the honey and balsamic vinegar over the cheese. Add olives, thyme, salt, and pepper.
    3. Grill the Mango: Place mango slice directly on the grill (or pan), sear one side until lightly charred, then place on top of the brie
    4. Cook on Fire: Set the skillet over hot coals or on a campfire grate. Cover loosely with foil (to prevent ash) and cook for 12–15 minutes, until cheese is soft and gooey.
    5. Cook on Stovetop: Turn heat to medium-high, cover with a lid, and let cook for 10–12 minutes, checking often. Once the center feels soft and melty, it’s ready.
    6. Serve Warm: Carefully remove from heat, drizzle with extra honey, and serve with pita chips and veggies.

    Notes

    Tips:

    • No thyme? Try rosemary or crushed walnuts for a twist.
    • Want it spicier? Add a dash of chili flakes or hot honey.
    • Works great with GF crackers or even apple slices for dipping.

    Storage Tip: Brie is best served fresh and warm. If you have leftovers (unlikely!), refrigerate and reheat gently.

  • Sticky Honey Garlic Spareribs

    Sticky Honey Garlic Spareribs

    In our house, the moment a plate of sticky honey garlic spareribs lands on the table, every conversation stops. The sweet caramelized glaze, the tender fall-off-the-bone pork, the irresistible fragrance of garlic — this Cantonese classic is pure comfort food that disappears within minutes. And the best part? It comes together in under 30 minutes.

    This post may contain affiliate links. If you purchase through these links, I may earn a small commission at no extra cost to you. Thank you for supporting Love & Harvest!

    Sticky honey garlic spareribs with sesame seeds in a white bowl

    This post features a classic Cantonese favourite — sticky honey garlic spareribs. An easy-to-follow recipe that comes together in under 30 minutes, making it a perfect choice for both appetizers and dinner. A simple yet flavourful dish made with just a few essential Chinese ingredients: soy sauce, dark soy sauce, honey, garlic, and a sprinkle of sesame seeds.

    Why You Will Love This Recipe

    Sticky, caramelized, and packed with bold flavour, these spareribs are an instant hit at any gathering. The combination of honey and garlic creates a perfect glaze that coats the ribs beautifully, making them irresistible. Plus, they require minimal effort but deliver maximum flavour, making them ideal for both weeknight meals and special occasions.

    In a Cantonese family, a plate of sticky honey garlic spareribs means more than just food — it’s warmth, laughter, and a reminder that the best moments are shared around the table.

    Key Ingredients

    Ingredients

    Pork Spareribs

    • Tender and flavourful, they absorb the sauce beautifully. Ask your butcher to cut them into individual pieces, or do it yourself at home.

    Honey

    • Adds a rich sweetness that caramelizes into the perfect sticky glaze. Raw or clover honey both work well here.

    Garlic

    • The star ingredient that brings an aromatic depth to the dish. Use freshly minced — not jarred — for the best flavour.

    Soy Sauce & Dark Soy Sauce

    • Soy sauce provides umami and a savoury backbone to balance the sweetness. Dark soy sauce adds colour and a slightly caramel depth. Use a quality hoisin sauce alongside if you want an extra layer of flavour.

    Rice Vinegar

    • A hint of acidity cuts through the richness and enhances the overall flavour balance. Fish sauce Red Boat is another excellent addition for deeper umami if you want to experiment.

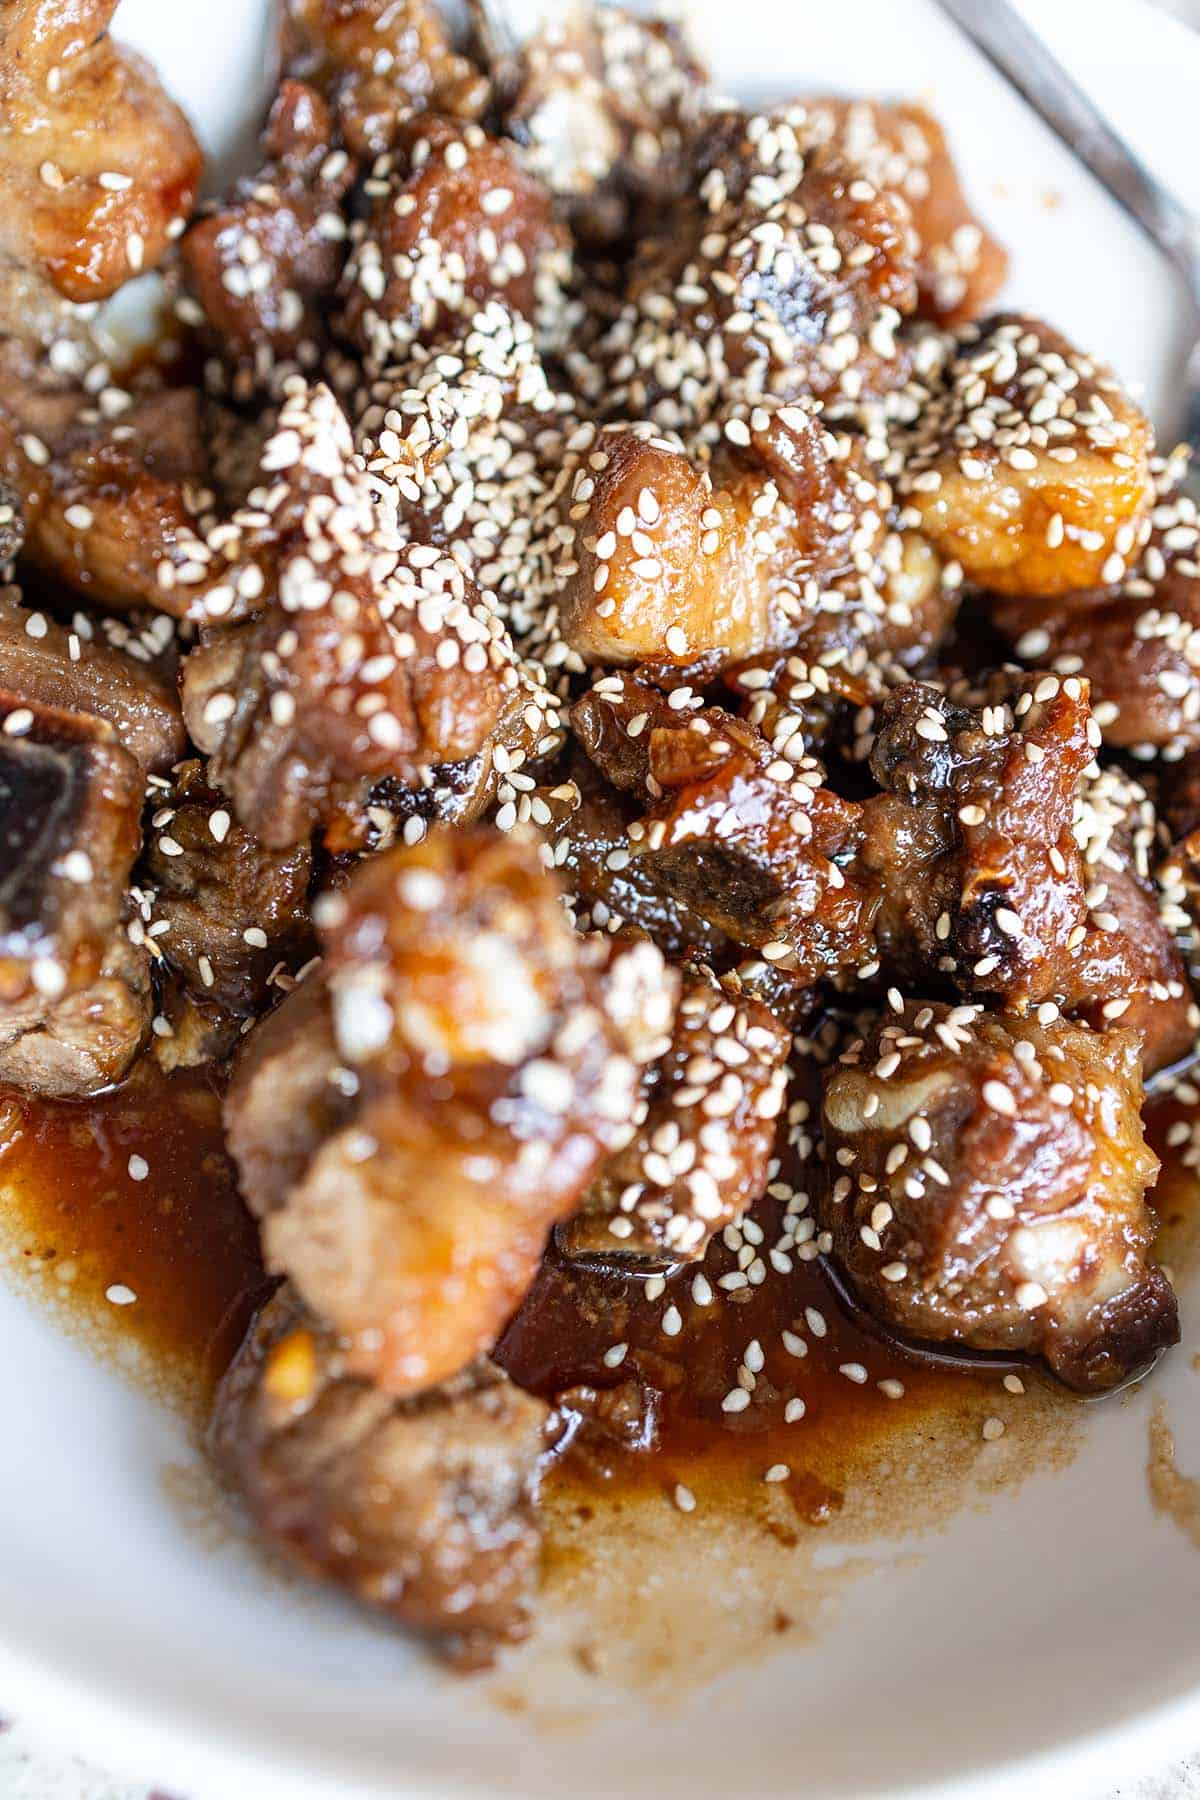
    Close-up of honey garlic spareribs glazed and topped with sesame seeds

    The Perfect Balance of Flavours

    This dish is all about balance. The rich, meaty spareribs absorb the sweet, garlicky sauce, while soy sauce and a touch of vinegar add depth and contrast. The result? A sticky, savoury dish with just the right amount of sweetness — one that keeps you reaching for more.

    Why Cantonese Cooks Love Honey Garlic Spareribs

    In Cantonese cuisine, simplicity and flavour go hand in hand, and this recipe is a perfect example. The key to great honey garlic spareribs lies in the method: slow simmering to tenderize the meat, followed by a quick glaze that locks in flavour. This technique ensures the ribs are succulent, juicy, and coated in an addictive sticky sauce that clings to every bite. It’s no surprise that this dish is a staple at dim sum restaurants and home kitchens alike!

    If you love Asian-inspired recipes like this one, try our 30-Minute Thai Basil Chicken or the flavour-packed Lemongrass Chicken Drumsticks next.

    A spoon lifting sticky honey garlic spareribs from the bowl

    Frequently Asked Questions

    Do I have to blanch the ribs first?

    Yes, blanching is the Cantonese technique that removes impurities and blood from the pork, resulting in a cleaner-tasting, more tender rib. It only takes 3–5 minutes and makes a noticeable difference in the final flavour. Don’t skip this step!

    Can I use baby back ribs instead of spareribs?

    Yes! Baby back ribs work well in this recipe and tend to be slightly more tender. Reduce the simmering time by about 10 minutes since they are smaller. Spareribs give a more traditional Cantonese result with more connective tissue that breaks down into the sauce.

    How do I know when the ribs are done?

    The ribs are ready when they are tender and the meat pulls away easily from the bone. The sauce should be thick and glossy, coating every piece. If the sauce is still thin, remove the lid and turn up the heat for a few minutes to reduce it down to a sticky glaze.

    Can I make these spareribs ahead of time?

    Absolutely. These ribs taste even better the next day as the flavours deepen. Store them in an airtight container in the fridge for up to 3 days. Reheat gently on the stovetop with a splash of water to loosen the sauce, or microwave covered until heated through.

    Tender pork ribs glazed with savory sauce and sprinkled with sesame seeds. Perfect for cozy family meals and flavorful dinners.

    Tender pork ribs glazed with savory sauce and sprinkled with sesame seeds. Perfect for cozy family meals and flavorful dinners.

    Sticky Honey Garlic Spareribs

    A quick and effortless appetizer that always impresses! These sticky honey garlic spareribs are the ultimate crowd-pleaser, balancing sweet, savory, and umami flavors in every bite. Whether served as a starter or a main dish, they disappear fast—so make sure to cook more than you think you’ll need!
    Prep Time 15 minutes
    Cook Time 45 minutes
    Total Time 1 hour
    Servings: 6 people
    Course: Main Course
    Cuisine: Cantonese
    Calories: 320

    Ingredients
      

    • 1 kg pork spareribs 1cut into individual pieces
    • 1 tbsp canola oil
    • 4 garlic cloves smashed and minced
    • 2 tbsp soy sauce
    • 3 tbsp honey
    • ½ cup water
    • 1 tsp sesame oil
    • toasted sesame seeds garnish

    Method
     

    Blanched the ribs
    1. Place ribs in a pot of boiling water and cook for 3–5 minutes to remove impurities.
    2. Drain and rinse under cold water. Pat dry with paper towels.
    Sear the Ribs
    1. Heat oil in a pan or wok over medium-high heat.
    2. Add the ribs and sear until lightly browned on all sides.
    3. Push the ribs to one side. Add minced garlic and sauté until fragrant (don’t burn it!).
    4. Mix in soy sauce, dark soy sauce, honey, and water.
    Simmer
    1. Stir everything together and bring to a simmer.
    2. Cover and simmer on low heat for 30–40 minutes, stirring occasionally, until ribs are tender and the sauce has reduced.
    To Finish
    1. Drizzle in sesame oil and toss to coat. Sprinkle with toasted sesame seeds. Serve hot with steamed white rice or noodles.

  • Easy Hummus Recipe

    Easy Hummus Recipe

    Creamy, flavourful, and ready in 10 minutes — this homemade hummus beats anything from the grocery store. Made with chickpeas, tahini, lemon, garlic, and finished with a drizzle of olive oil and a sprinkle of sumac.

    This post may contain affiliate links. If you purchase through these links, I may earn a small commission at no extra cost to you. Thank you for supporting Love & Harvest!

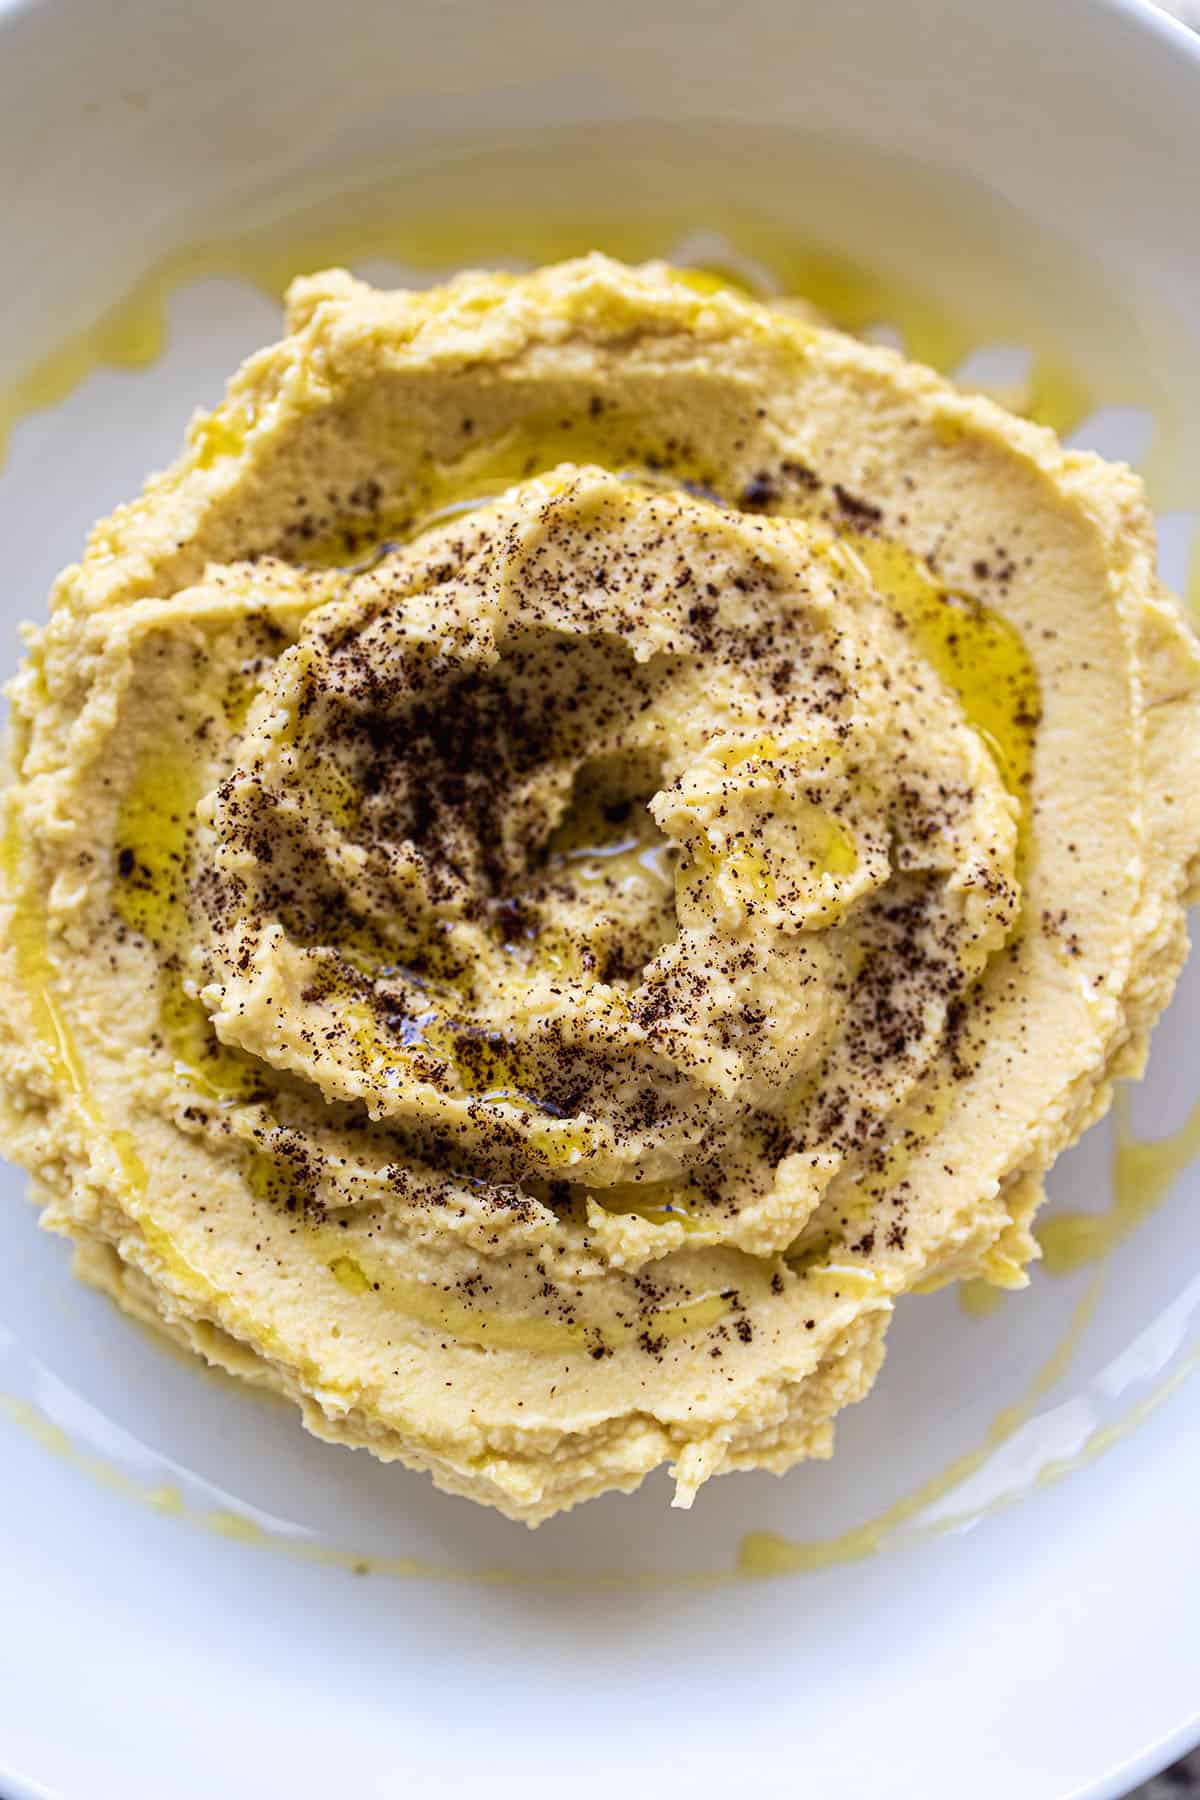
    Homemade hummus swirled on a white plate with olive oil and ground sumac

    Why You Should Try This Recipe

    Hummus is a versatile, satisfying snack that’s perfect for dipping veggies, spreading on sandwiches, or serving alongside your favourite meals. Making it at home not only saves money but also lets you control the flavour and texture. Whether you soak chickpeas overnight for fresh-from-scratch flavour or use canned chickpeas for convenience, this recipe will become your go-to dip in no time.

    Creamy homemade hummus with a pool of olive oil and ground spice on top

    Why Garnish the Hummus with Sumac?

    Sprinkling sumac on top of hummus adds a burst of tangy, citrus-like flavour that complements the creamy richness beautifully. It enhances the visual appeal with its deep red colour and provides a bright, zesty finish that balances the dish. Sumac is also a traditional Middle Eastern spice, giving your hummus an authentic touch.

    Ingredients

    Chickpeas

    • The heart of the recipe — they provide the creamy, starchy base and nutty flavour. For the smoothest hummus, use canned chickpeas (rinsed well) or cook dried chickpeas from scratch. If using canned, reserve the aquafaba (chickpea water) to thin the hummus to your preferred consistency. Find quality tahini paste while you’re at it — it’s equally essential.

    Tahini

    • Ground sesame seed paste — the ingredient that separates great hummus from good hummus. Use a runny, well-stirred tahini made from hulled sesame seeds. It adds richness, nuttiness, and binds everything into a silky paste. Don’t substitute with peanut butter — the flavour profile is completely different.

    Fresh Lemon Juice

    • Always fresh, never bottled. Lemon juice provides the bright acidity that lifts all the other flavours and prevents the hummus from tasting flat or heavy. Start with half a lemon and adjust — the right amount makes the whole dip come alive.

    Extra Virgin Olive Oil

    • Drizzled on top and blended in for silkiness. Use a good quality extra virgin olive oil — its fruity, peppery finish is a key part of the final flavour. Don’t use light or regular olive oil; the flavour difference matters here.

    Garlic

    • Raw garlic adds a sharp, savoury kick that’s traditional in hummus. For a milder result, roast a whole head of garlic in the oven first — roasted garlic gives a sweet, mellow depth without any bite. Start with one clove raw; you can always add more to taste.

    Sumac

    • A dried, ground berry from the Middle East with a tart, citrus flavour. It’s the classic finishing spice for hummus — adds colour and a pop of brightness that elevates the whole presentation. Find it in Middle Eastern grocery stores or here on Amazon.

    Hummus swirled in a bowl and topped with olive oil and ground sumac

    Our Favourite Side Dishes

    We love pairing this hummus with fresh veggies like carrots, cucumbers, and bell pepper slices. Pita bread or crackers are also fantastic options. For a heartier snack, try it with grilled chicken or falafel. For homemade bread to serve alongside, our Fluffy Naan Bread is perfect — warm and soft, ideal for scooping.

    Love Mediterranean flavours? Try our Chicken Shawarma Wrap with Caesar Salad where this hummus makes an excellent spread, or our Best Garlic Mashed Potatoes for another crowd-pleasing dip alternative at the table.

    A good food processor is the most important tool for smooth hummus — blend for at least 3 minutes for a truly silky texture.

    How to Make It Easier and Faster

    • Soak the Chickpeas: If making from scratch, soak dried chickpeas overnight and cook them until soft. More time-intensive but yields the creamiest texture.
    • Use Canned Chickpeas: For a quicker option, grab a can of chickpeas. Just rinse them well before blending.
    • Peel the Chickpeas (Optional): For extra-smooth hummus, peel the skins off the chickpeas. While not necessary, it’s worth it if you want a velvety texture.

    Making hummus at home is an easy way to elevate any meal or snack. Whether you’re prepping for a family gathering, a quick lunch, or a cozy night in, this recipe will always deliver. Give it a try — you won’t regret it!

    Sammi Chow — Love and Harvest

    Frequently Asked Questions

    Can I use dried chickpeas instead of canned?

    Yes, and the results are even creamier. Soak 1 cup of dried chickpeas overnight in plenty of cold water. Drain, then simmer for 1–2 hours until very soft (they should crush easily between your fingers). Cool before blending. Dried chickpeas make about 2.5 cups cooked — the equivalent of one large can.

    Why is my hummus grainy and not smooth?

    Two reasons: not blending long enough, and not using enough tahini or liquid. Blend for a minimum of 3 minutes, scraping down the sides. Add aquafaba (chickpea water), ice water, or more lemon juice one tablespoon at a time until you reach the silky consistency you want. Warm chickpeas also blend smoother than cold ones.

    How long does homemade hummus keep?

    Store in an airtight container in the refrigerator for up to 5 days. Drizzle a thin layer of olive oil on top before sealing to keep it fresh and prevent it from drying out. Give it a stir before serving as it may thicken slightly in the fridge.

    Can I freeze hummus?

    Yes. Freeze in individual portions in airtight containers for up to 3 months. Thaw overnight in the refrigerator and stir well before serving. The texture may be slightly different after freezing — add a drizzle of olive oil and a squeeze of lemon to refresh it.

    What is sumac and can I substitute it?

    Sumac is a dried ground berry with a tangy, citrus-like flavour. If you can’t find it, a small pinch of lemon zest on top provides a similar brightness. Smoked paprika is another common topping that adds colour and a warm, smoky note instead of the citrus tang.

    What’s in hummus?

    It’s mostly chickpeas and tahini, blended with fresh lemon juice, extra virgin olive oil, garlic, salt and a splash of aquafaba, with a pinch of sumac on top.

  • Cha Gio Fried Spring Rolls with Shiso Leaves

    Cha Gio Fried Spring Rolls with Shiso Leaves

    Golden, shatteringly crisp on the outside, juicy and aromatic on the inside — these Cha Gio Vietnamese Fried Spring Rolls with Shiso Leaves are a next-level twist on a beloved classic that will have everyone at the table reaching for seconds.

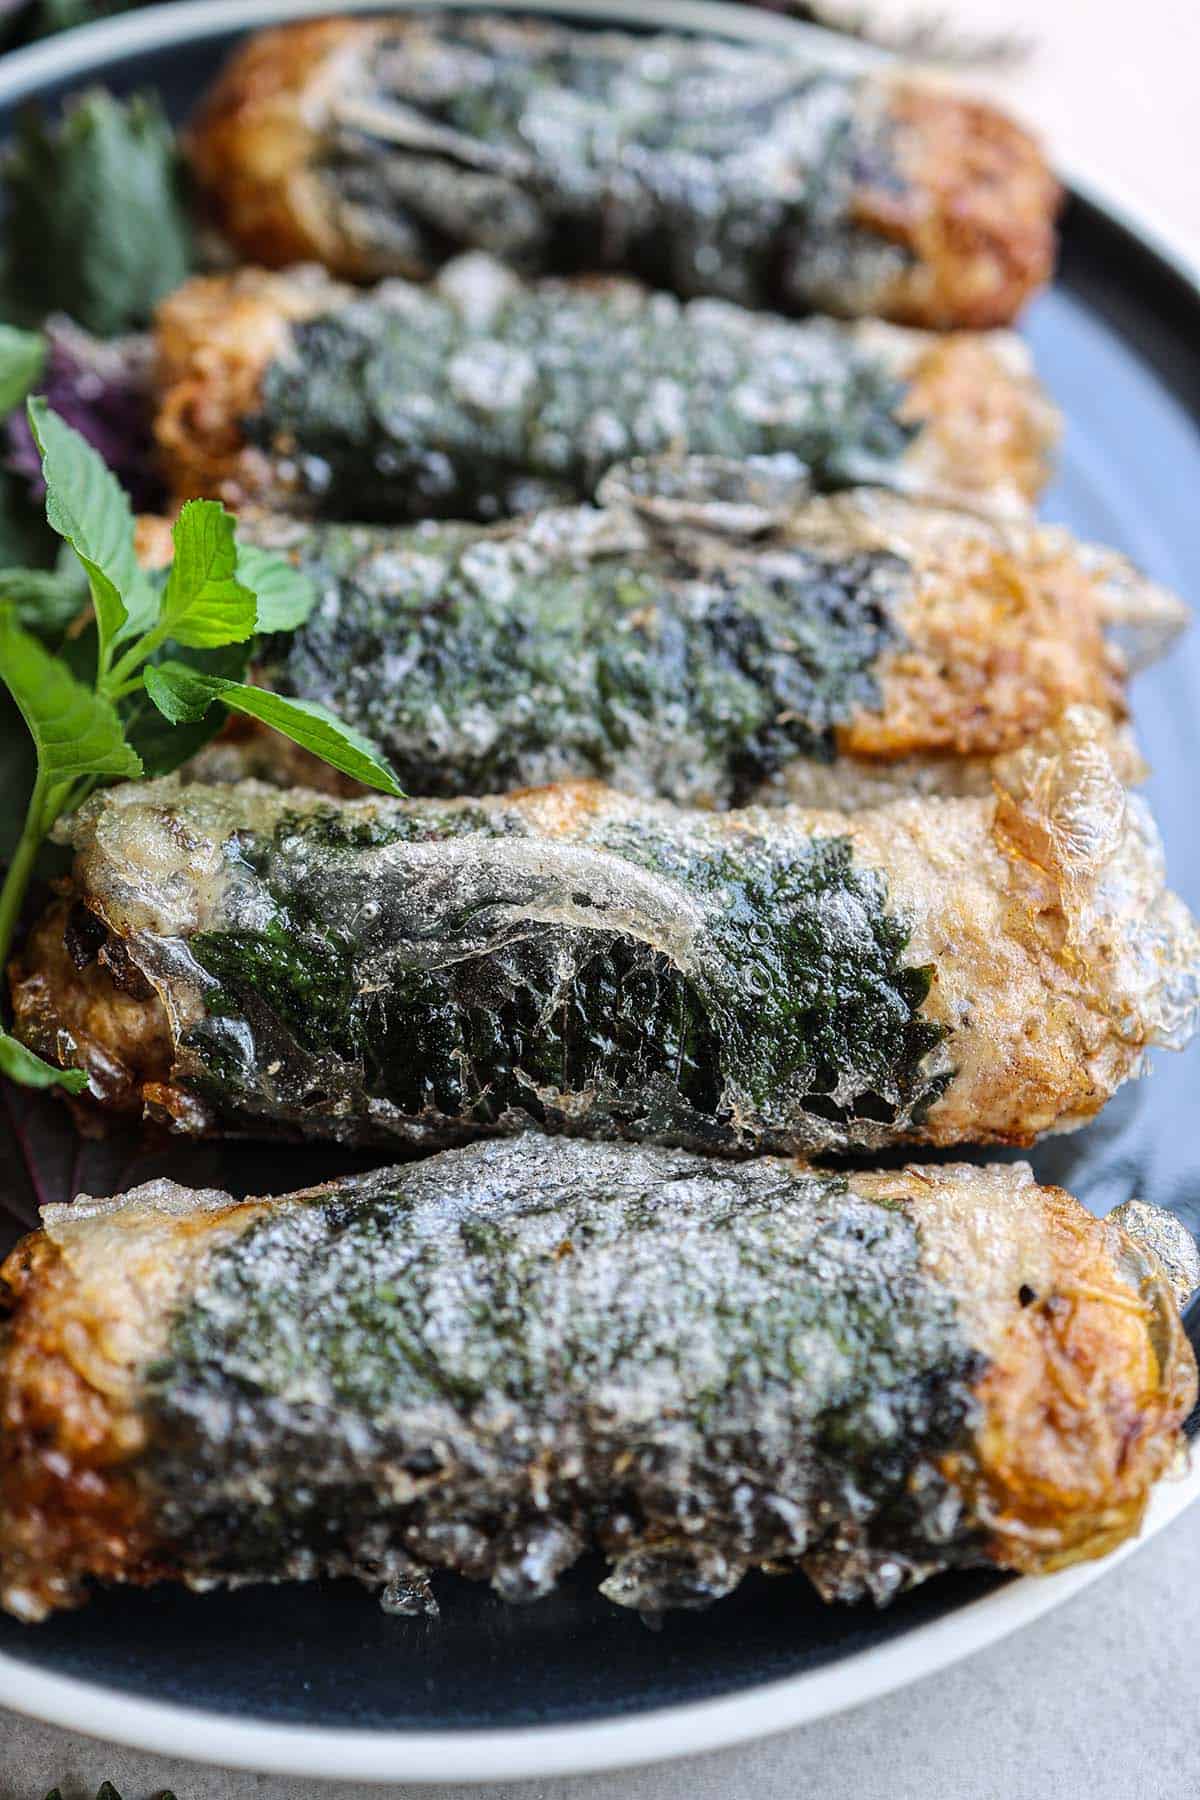
    Cha gio fried spring rolls wrapped in shiso leaves with fresh herbs on a platter

    This post may contain affiliate links. If you purchase through these links, I may earn a small commission at no extra cost to you. Thank you for supporting Love & Harvest!

    This post features a cha gio Vietnamese fried spring roll recipe with shiso leaves — a fun, beautiful, and tasty twist on the traditional spring rolls.

    Why Try This Recipe?

    Cha Gio, or Vietnamese fried spring rolls, are a beloved dish known for their crispy texture and flavorful filling. By incorporating shiso leaves, this recipe elevates the traditional spring rolls to a whole new level. Shiso leaves add a unique citrusy flavour, enhancing the overall taste and providing a refreshing balance to the rich pork filling. Whether you’re a seasoned chef or a home cook looking for a new challenge, this recipe is sure to impress.

    Row of golden cha gio spring rolls with shiso leaves and herbs

    What’s Special About This Recipe?

    What sets this Cha Gio recipe apart is the addition of shiso leaves. Shiso, also known as perilla, is a popular herb in Asian cuisine, known for its distinctive flavour that combines hints of mint, basil, and citrus. When wrapped around the spring rolls, shiso leaves not only add a burst of freshness but also create a beautiful presentation. The combination of textures — crispy on the outside and juicy on the inside — along with the unique flavor profile makes this dish truly special.

    Occasions to Make This Recipe

    Cha Gio with shiso leaves is a versatile dish that suits a variety of occasions:

    • Family Gatherings: Impress your loved ones with these flavorful spring rolls at your next family dinner.
    • Dinner Parties: Serve them as an appetizer or main course. Their unique flavor and presentation will be a hit.
    • Special Celebrations: Whether it’s a birthday, anniversary, or holiday, Cha Gio makes a delightful addition to any celebratory meal.
    • Casual Get-Togethers: Perfect for a weekend lunch or a casual gathering with friends.

    Close-up of crispy cha gio spring rolls wrapped in shiso leaves

    How to Make Cha Gio Rolls

    Prepare the Filling

    In a large bowl, combine ground pork, cooked vermicelli noodles, grated carrots, chopped onion, minced garlic, fish sauce, soy sauce, sugar, and pepper. Mix well until all ingredients are evenly distributed.

    Wrap the Rolls

    Lay a rice flour spring roll wrapper on a flat surface. Place a shiso leaf on top of the wrapper. Add a spoonful of the pork mixture onto the shiso leaf. Fold the sides of the wrapper over the filling, then roll tightly. Seal the edge with a bit of beaten egg.

    Fry the Rolls

    Heat oil in a deep pan or carbon steel wok to 350°F (175°C). Use a deep-fry thermometer to maintain the correct temperature. Carefully add the spring rolls to the hot oil, a few at a time, and fry until golden brown and crispy, about 5–7 minutes. Remove and drain on paper towels.

    Serve

    Serve hot with your favourite dipping sauce, such as nuoc cham (Vietnamese dipping sauce) or a simple soy sauce and vinegar mix.

    Crispy fried cha gio spring rolls wrapped with shiso leaves on a dark plate

    Ingredients

    To make these delicious Cha Gio Vietnamese fried spring rolls with shiso leaves, you’ll need the following ingredients:

    Ingredients

    Rice Paper Wrappers

    • Why it matters: These form the crispy shell. Look for thin spring roll wrappers (not the thick egg roll kind) — they fry up shattery and light. Rice flour wrappers are ideal for an authentic result.

    Ground Pork

    • Why it matters: Lean pork is the base of the filling. A small amount of fat keeps the rolls juicy and adds flavour — don’t trim it all away.

    Shiso Leaves

    • Why it matters: Shiso (perilla) adds a citrusy, minty, basil-like aroma that transforms the rolls from good to unforgettable. Use the two-toned variety — green on one side, dark mahogany on the other — for the best flavour and visual contrast.

    Vermicelli Noodles

    • Why it matters: Cooked rice vermicelli binds the filling, adds a soft chewy bite, and helps the rolls hold their shape. They also bulk up the filling without overpowering the other flavours.

    Jicama

    • Why it matters: Jicama absorbs excess moisture from the meat and vegetables. Too much moisture in the filling causes dangerous oil splatter when frying — jicama is your insurance policy.

    Black Ear Fungus

    • Why it matters: Also called wood ear mushroom, it adds a satisfying crunch and visual contrast inside the roll, plus a subtle earthy flavour that rounds out the filling.

    Fish Sauce

    • Why it matters: Fish sauce is the umami backbone of the filling. Even a tablespoon adds that unmistakably Vietnamese depth of flavour that makes cha gio taste authentic.

    Frequently Asked Questions

    Can I use egg roll wrappers instead of rice paper?

    Yes, but the texture will be different. Egg roll wrappers produce a thicker, chewier shell. Rice paper wrappers give you the traditional thin, shatteringly crispy result. For the most authentic cha gio, stick with rice paper or thin spring roll wrappers.

    What oil is best for frying cha gio?

    Use a neutral oil with a high smoke point — vegetable, canola, or peanut oil all work well. Avoid olive oil; its low smoke point makes it unsuitable for deep frying. Heat to exactly 350°F (175°C) for the crispiest results without burning.

    Why do my spring rolls burst open when frying?

    The most common cause is too much moisture in the filling. Make sure you squeeze excess water out of any vegetables and include jicama to absorb moisture. Also seal the edges of the wrapper firmly with beaten egg before frying.

    Can I make cha gio ahead of time?

    Yes. You can roll the spring rolls up to 24 hours in advance and refrigerate them on a tray, uncovered. Fry them directly from the fridge — no need to bring to room temperature. You can also freeze uncooked rolls and fry from frozen, adding 2–3 extra minutes to the frying time.

    What dipping sauce goes best with cha gio?

    Nuoc cham is the classic pairing: fish sauce, lime juice, sugar, water, garlic, and chili. A simple mixture of soy sauce and rice vinegar also works beautifully. Hoisin sauce with crushed peanuts is a popular alternative for those who prefer a sweeter, richer sauce.

    Can I bake or air-fry cha gio instead of deep-frying?

    Yes. Brush or spray the rolls lightly with oil, then air-fry at 400°F (200°C) for 12–15 minutes, turning halfway through. Bake at 425°F (220°C) for 18–22 minutes. The texture won’t be quite as crispy as deep-fried, but both methods produce delicious results.

    Cha Gio Fried Spring Rolls With Shiso Leaves

    Try our delicious cha gio Vietnamese spring rolls with a citrusy twist from shiso leaves, perfectly balancing the savory pork.
    Prep Time 30 minutes
    Cook Time 30 minutes
    Total Time 1 hour
    Servings: 6 people
    Course: Appetizer
    Cuisine: Vietnamese
    Calories: 280

    Ingredients
      

    Filling
    • 200 g ground pork
    • 100 g shrimp finely chopped
    • 1 medium carrot grated
    • 1 small jicama grated
    • 50 g black ear fungus soaked and finely chopped
    • 100g rice vermicelli noodles soaked and chopped
    • 2 garlic cloves minced
    • 1 tbsp fish sauce
    • 1 tsp sugar
    • ½ tsp ground white pepper
    • 1 egg lightly beaten
    Wrapping
    • Rice papers
    • 10-12 fresh shiso leaves
    Dipping Sauce
    • 4 tbsp fish sauce
    • 2 tbsp lime juice
    • 2 tbsp sugar
    • ½ cup water
    • 1 garlic clove grated
    • 1 small chili finely chopped
    • 2 tbsp carrots grated

    Method
     

    Prepare the filling
    1. In a large bowl, combine ground pork, chopped shrimp, carrot, jicama, black ear fungus, rice vermicelli noodles, garlic, fish sauce, sugar, and white pepper.
    2. Mix well until all ingredients are thoroughly combined.
    3. Add the beaten egg to the mixture and mix again to ensure everything is well bound together.
    Wrap the cha gio
    1. Prepare a large plate of warm water to soften the rice paper wrappers.
    2. Dip one rice paper wrapper in the warm water for a few seconds until it becomes pliable. Lay it flat on a clean surface.
    3. Place a shiso leaf on the softened rice paper. I like to alternate the double side if you're fortunate enough to have the shiso leaves with two different colours of each side.
    4. Add about 1-2 tablespoons of the filling mixture onto the center of the wrapper.
    5. Fold the bottom of the wrapper up over the filling, then fold in the sides, and roll tightly to form a compact roll.
    6. Repeat the process with the remaining wrappers and filling.
    Fry the cha gio
    1. Heat oil in a deep frying pan or pot over medium-high heat.
    2. Once the oil is hot, carefully add the spring rolls in batches, making sure not to overcrowd the pan.
    3. Fry until the spring rolls are golden brown and crispy, about 5-7 minutes per batch.
    4. Remove the spring rolls and drain on paper towels to remove excess oil.
    Dipping sauce
    1. In a small bowl, combine fish sauce, lime juice, sugar, water, garlic, and chili.
    2. Stir until the sugar is completely dissolved. Add grated carrot for garnish.

    If you loved these crispy rolls, try our Homemade Sashimi, a classic Vietnamese favourite to round out the meal. For more pickling and fermented flavours, check out our Traditional Kimchi. And if you’re looking for another crowd-pleasing appetizer, our 30-Minute Thai Basil Chicken is always a hit.

  • Crispy Pickle Brine Chicken Wings

    Crispy Pickle Brine Chicken Wings

    Do you have leftover pickle brine and wonder if there’s more to its fate than the drain? Hold off — because these crispy pickle brine chicken wings are the perfect blend of tangy, juicy, and crunchy and they will change the way you think about brining forever.

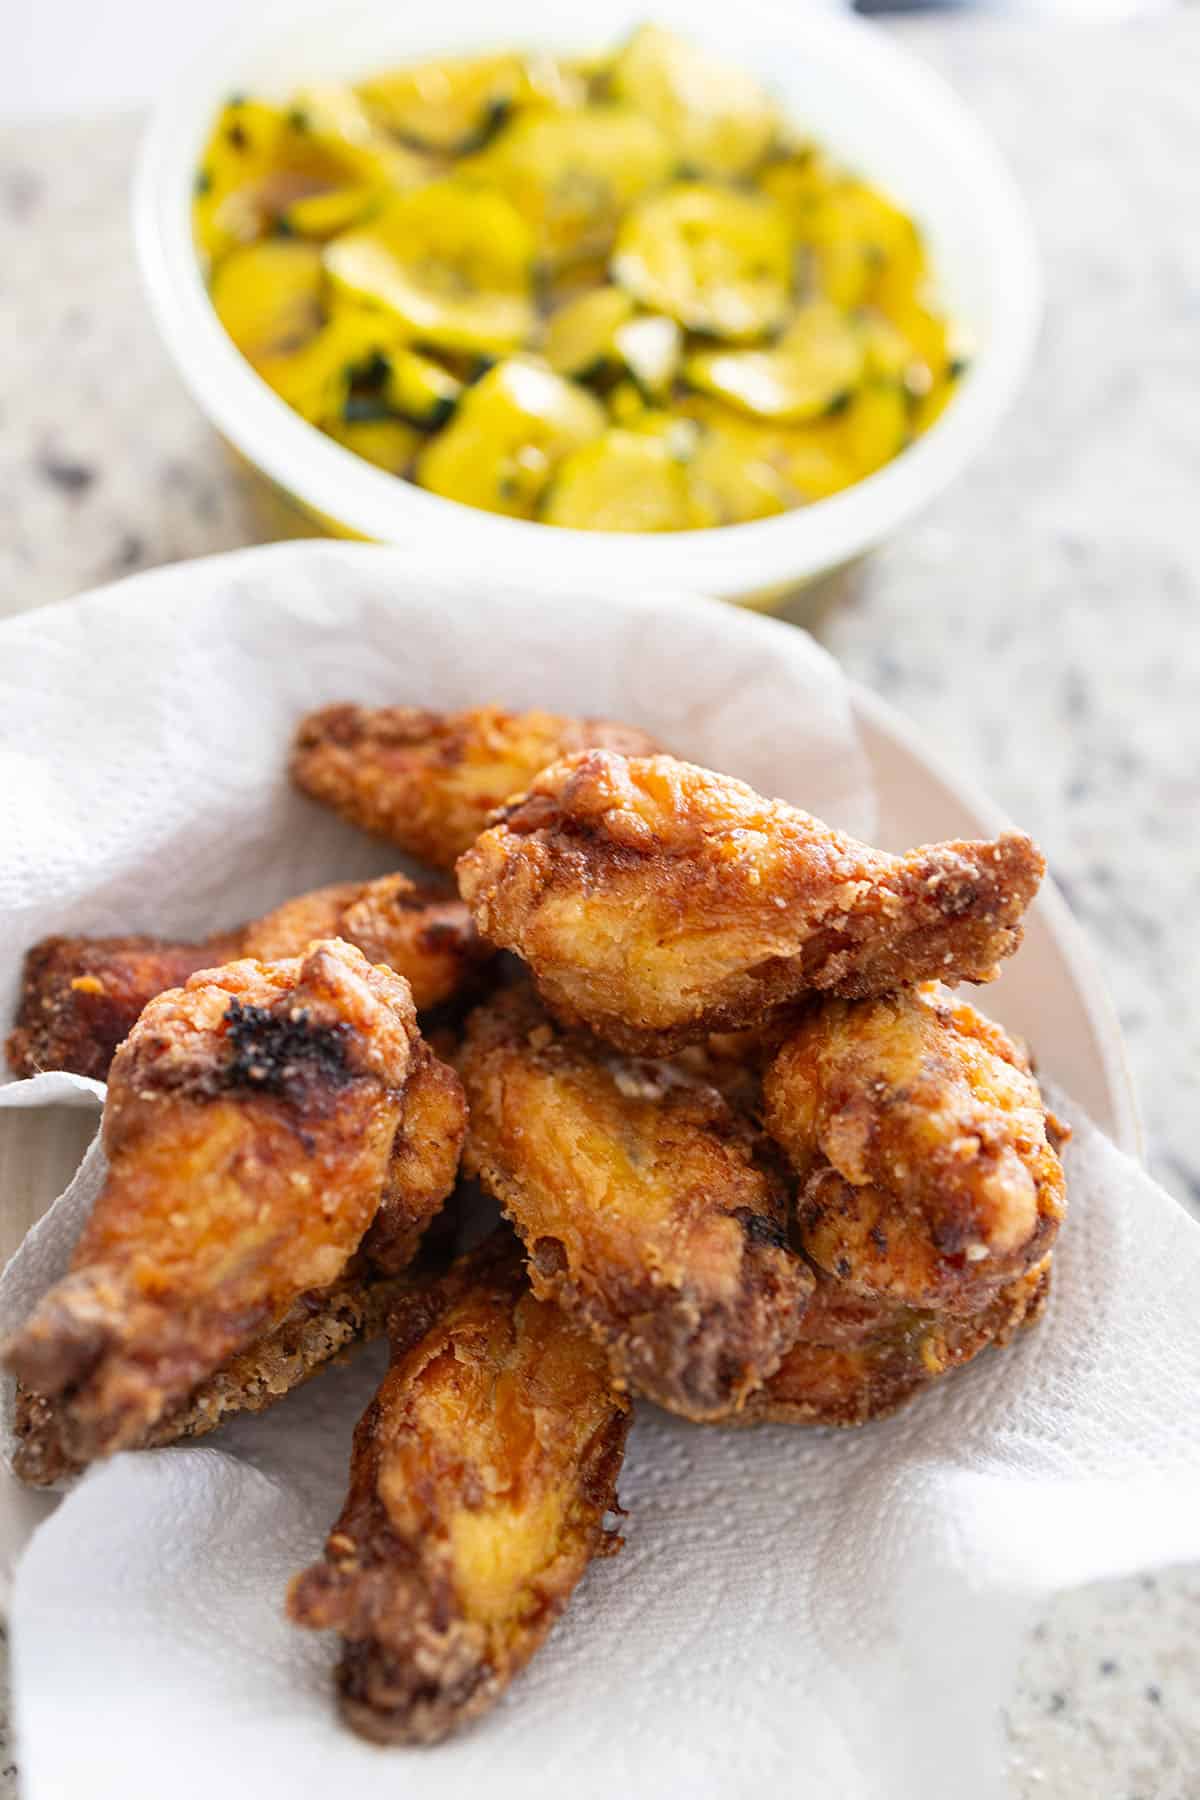
    Platter of crispy pickle brine chicken wings around a bowl of dipping sauce

    This post may contain affiliate links. If you purchase through these links, I may earn a small commission at no extra cost to you. Thank you for supporting Love & Harvest!

    In this post, you’ll find the recipe for making crispy, juicy, flavourful chicken wings using leftover pickle juice to brine the wings.

    This little-known secret can transform your homemade chicken wings into a culinary delight that rivals your favourite restaurant.

    Discover the Secret to Juicy Chicken Wings: Pickle Brine Magic!

    Many restaurants use pickle brine to soak their chicken parts overnight — it’s the secret behind wings that stay juicy every single time they hit the fryer. Pickle brine is tangy, sweet, and packed with flavours that enhance the taste of the chicken, lock in moisture during frying, and penetrate deep into the meat.

    Learn how we make our juicy wings, and you’ll never think twice about throwing away that precious liquid again. We also provide our recipe for our BEST Bread and Butter Pickled Cucumbers — so delicious and crunchy that we’ve turned many pickle-haters into pickle lovers.

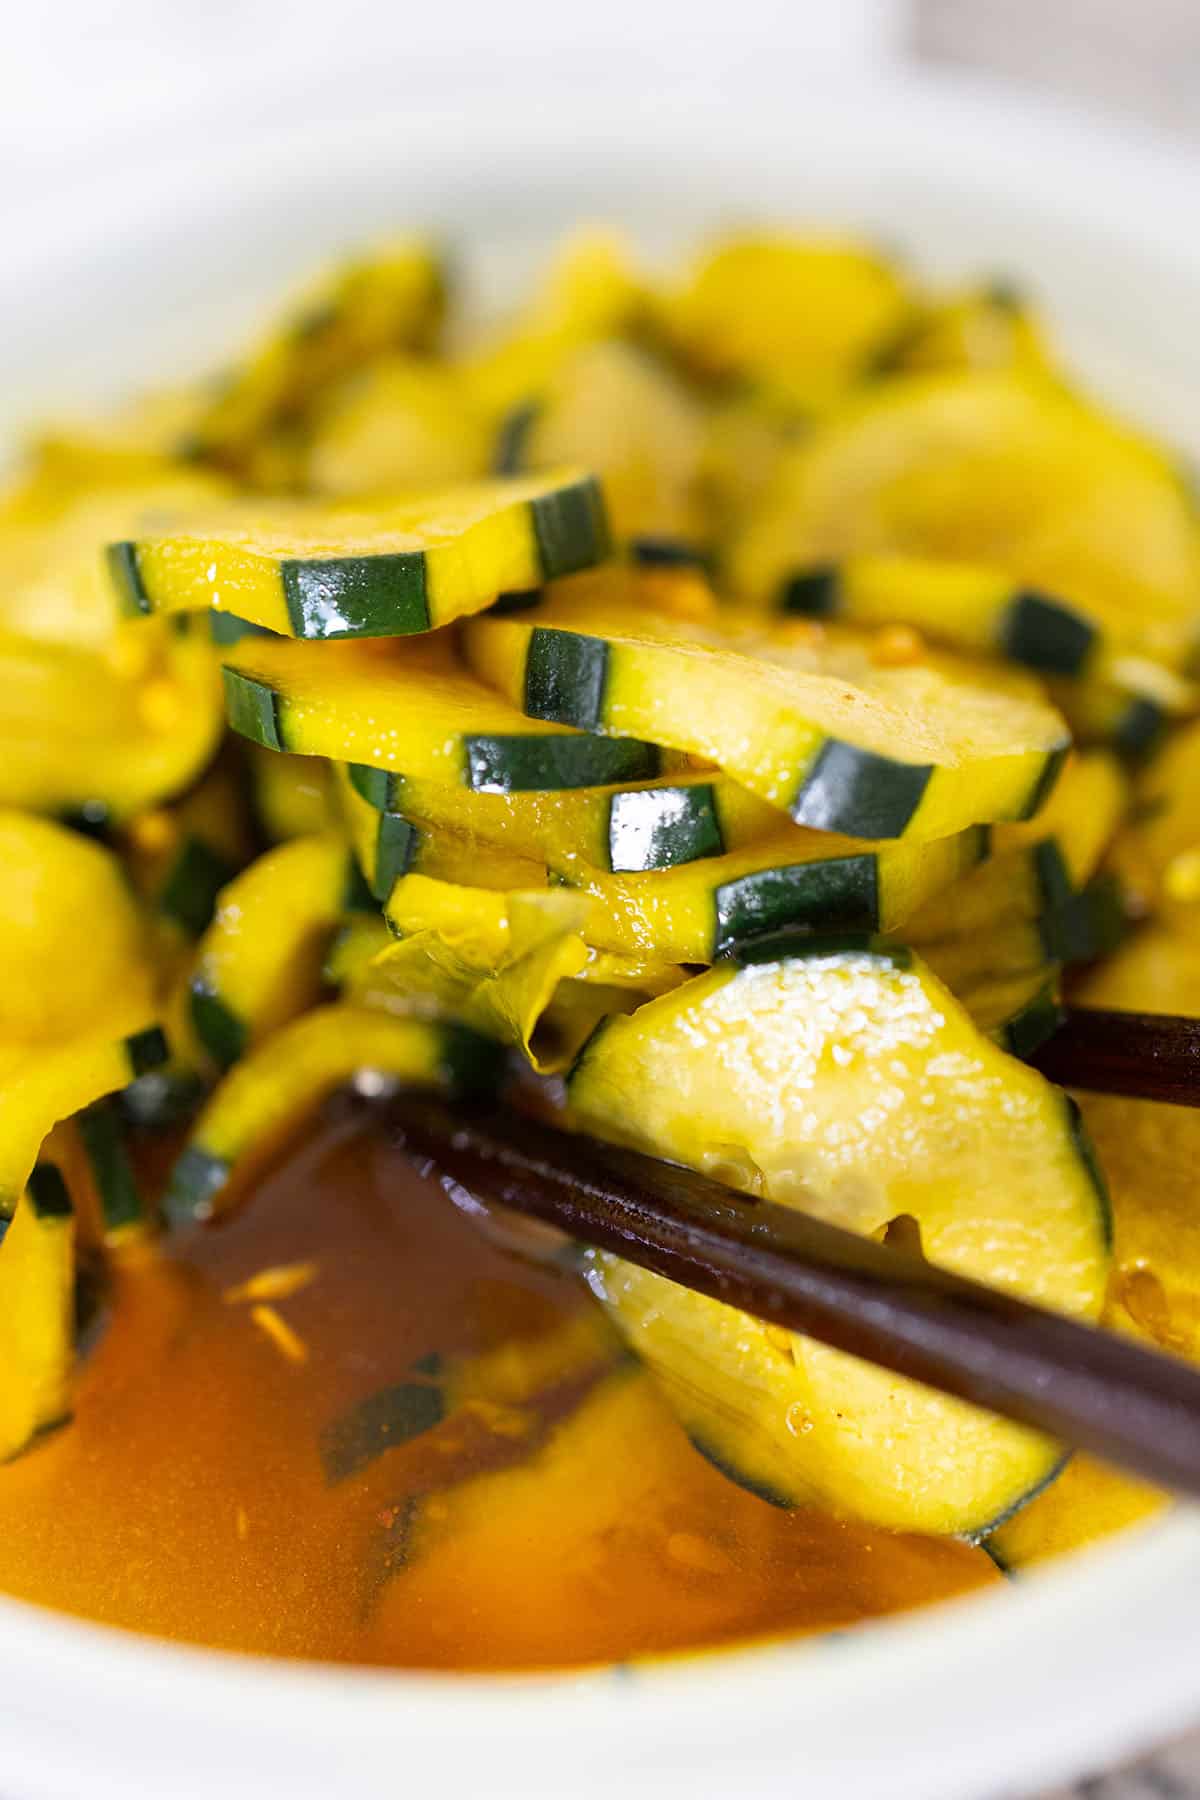
    Bowl of bread and butter pickles in their brine with chopsticks

    Why Pickle Brine?

    The acidity of the brine tenderises the meat, allowing the flavours to penetrate deep into the chicken. When you fry the brined chicken, the brine locks in moisture, resulting in wings that are incredibly juicy on the inside and perfectly crispy on the outside. No other marinade achieves this dual effect with such simplicity.

    What Makes Them So Special?

    1. Pickle Brine Magic: These wings are marinated in pickle brine, infusing them with a unique tangy flavour and ensuring they stay incredibly moist and tender.
    2. Perfectly Crispy: After marinating, the wings are fried to perfection, achieving a golden, crispy exterior that contrasts beautifully with the succulent interior.
    3. Unmatched Flavor: The combination of tangy pickle brine with savoury spices in the breading creates a flavour explosion that will leave you craving more.

    Bowl of crispy fried chicken wings on paper

    Ingredients

    Ingredients

    Pickle Brine

    • Why it matters: The star of this recipe. Use brine from your homemade bread and butter pickles for the best flavour. The salt, vinegar, sugar, and spices in the brine work together to tenderise the meat while infusing it with tangy depth. Refrigerate the wings in brine for at least 4 hours, ideally overnight.

    Chicken Wings

    • Why it matters: Fresh or thawed wings work equally well. Pat them completely dry after brining — this is the single most important step for achieving a truly crispy crust. Moisture is the enemy of crunch.

    Cornstarch Coating

    • Why it matters: A mixture of cornstarch, salt, pepper, garlic powder, and paprika creates a light, shatteringly crispy crust. Cornstarch absorbs surface moisture and fries up crispier than flour alone. Coat the wings immediately before frying for the best texture.

    Frying Oil

    • Why it matters: Use a neutral high-smoke-point oil — vegetable, canola, or peanut. Heat to 350°F (175°C) and use a deep-fry thermometer to maintain the temperature. Oil that is too cool produces greasy wings; oil that is too hot burns the outside before the inside cooks through.

    How to Make Them

    1. Marinate: Place the chicken wings in a bowl or glass jar and cover with pickle brine. Refrigerate for at least 4 hours, preferably overnight.
    2. Dry and Coat: Remove the wings from the brine and pat them completely dry with paper towels. Coat in a mixture of cornstarch, salt, pepper, and your favourite spices.
    3. Fry: Fry in hot oil at 350°F (175°C) until golden brown and crispy, about 8–10 minutes. Drain on paper towels.
    4. Enjoy: Serve hot with your favourite dipping sauces.

    Flour-coated chicken wings resting on a wire rack before frying

    Frequently Asked Questions

    How long should I brine the chicken wings in pickle juice?

    A minimum of 4 hours produces noticeable results, but overnight (8–12 hours) is the sweet spot. Beyond 24 hours the texture can become slightly mushy as the acid breaks down the meat fibres too aggressively. Plan ahead and brine the night before you want to cook them.

    Can I use store-bought pickle brine instead of homemade?

    Yes, absolutely. Any pickle brine works — dill, bread and butter, or spicy. Each variety will impart a slightly different flavour profile. Bread and butter brine gives a sweeter, more complex result. Dill brine produces a sharper, more classic wing flavour similar to what fast-food chicken chains use.

    Should I bake or air-fry instead of deep-frying?

    Yes. For air-frying: pat the wings dry, coat lightly in oil and cornstarch, then air-fry at 400°F (200°C) for 20–25 minutes, flipping halfway. For baking: place on a wire rack over a sheet pan and bake at 425°F (220°C) for 40–45 minutes, flipping once. Deep-frying gives the crispiest result, but both alternatives are delicious and lower in fat.

    Why do I need to dry the wings after brining?

    Surface moisture creates steam when the wing hits the hot oil, which prevents the crust from crisping properly. Pat each wing firmly with paper towels until the surface feels dry to the touch. Some cooks leave the wings uncovered in the refrigerator for 1 hour after drying to achieve an even drier surface before frying.

    What dipping sauces pair best with pickle brine wings?

    Ranch dressing is the classic pairing — the creamy tang complements the pickle flavour beautifully. Blue cheese dip, honey mustard, and sriracha mayo are all excellent alternatives. For a Vietnamese-inspired twist, a nuoc cham dipping sauce adds a bright citrusy contrast.

    Can I use the same brine again after marinating the chicken?

    No. Once raw chicken has marinated in the brine, discard it. Do not reuse it for more chicken or for anything else. Cross-contamination is a serious food safety risk. Always use fresh brine for a second batch.

    Crispy chicken drumette resting on a bowl of bread and butter pickles

    Crispy Pickle Brine Chicken Wings

    Our crispy pickle brine chicken wings are the perfect blend of tangy, juicy, and crunchy. This little-known secret can transform your homemade chicken wings into a culinary delight that rivals your favorite restaurant.
    Prep Time 5 minutes
    Cook Time 10 minutes
    Resting Time 8 hours
    Total Time 8 hours 15 minutes
    Servings: 6 people
    Course: Appetizer
    Cuisine: American
    Calories: 340

    Ingredients
      

    Chicken Wings Marinate
    • 2 cups pickle brine (from a jar of pickles)
    • 1kg chicken wings separated into drumettes and flats
    For the coating
    • 1 cup cornstarch
    • 2 tsp garlic powder
    • 1 tsp onion powder
    • 1 tsp salt
    • 2 cups vegetable oil
    Lime Dipping Sauce
    • 1 tbsp fish sauce
    • ¼ cup warm water
    • 1 tbsp sugar
    • 3 tbsp lime juice freshly squeezed
    • 1 lime slice thinly sliced

    Method
     

    Marinate
    1. Combine all the ingredients together, and put it in a large non-reactive bowl. Cover the top and let it marinate overnight in the fridge.
    Fying
    1. Give the chicken wings good stir in the juice, and strain the liquid out. Let it sit out and dry on a drying rack.
    2. Meanwhile, combine all the dry ingredients together. Whisk well.
    3. Get a large frying pot (like a dutch oven), add the oil, and heat the oil to 375℉.
    4. Dredge each chicken wing in the dry mixture, ensuring an even coating. Shake off any excess.
    5. Carefully add the coated wings to the hot oil in batches, avoiding overcrowding.
    6. Fry the wings for about 8-10 minutes, turning occasionally, until they are golden brown and crispy.
    7. Use a slotted spoon or tongs to remove the wings from the oil and place them on a paper towel-lined plate to drain any excess oil.
    Dipping Sauce
    1. Combine all the ingredients together. Make sure the sugar is completely dissolved. Add the slice of lime as garnish
    Platting
    1. Arrange the crispy pickle brined chicken wings on a serving platter. Also place a small bowl with the dipping sauce.

    These wings are even better when you make your own brine — check out our BEST Bread and Butter Pickled Cucumbers for the full recipe. If you love crispy fried chicken, our Beer Batter Fish and Chips uses the same deep-fry method with equally spectacular results. And for another brine-forward recipe, try our Mexican Pickled Red Onion — a 10-minute condiment that elevates everything.

  • The BEST Bread and Butter Pickled Cucumbers

    The BEST Bread and Butter Pickled Cucumbers

    These are the best-tasting pickles you’ll ever have on your burgers, hot dogs, or eaten straight from the jar. After trying them, you won’t go back to store-bought pickles ever again.

    Bowl of homemade bread and butter pickle slices in brine

    This post may contain affiliate links. If you purchase through these links, I may earn a small commission at no extra cost to you. Thank you for supporting Love & Harvest!

    This post is a recipe for the best bread and butter pickled cucumbers — a simple recipe with cucumbers, turmeric, coriander seeds, bay leaf, apple cider vinegar, sugar, and more.

    These are truly the BEST Bread and Butter Pickled Cucumbers. This recipe, a breeze to prepare, offers simplicity and delight. The most challenging part? A bit of waiting — but I assure you, the patience is richly rewarded.

    These pickles are perfect companions to any dish and stand unrivalled in flavour. Once you savour this recipe, no other will ever compare. It will carve a cherished place in your heart.

    Why You Only Need This Pickle Recipe

    With each batch, I find myself drawn back to its simplicity and perfection. This recipe consistently delivers on taste and quality — it has become my go-to, my tried-and-true, my culinary comfort zone. And the bonus? The leftover brine becomes the secret ingredient for the crispiest chicken wings you have ever made.

    Bread and butter pickled cucumber slices in a white bowl with chopsticks

    Don’t Throw Away the Brine!

    Do you have some pickle brine left after finishing the jar? Learn how to make our Crispy Pickle Brine Chicken Wings — the brine marinates the chicken overnight, infusing it with a unique tangy flavour and keeping it incredibly moist and tender.

    How to Get a Crunchy Texture

    To enhance crispiness, slice the cucumbers into a bowl and add a dash of sea salt. Include the sliced onions, then cover the mixture with crushed ice and press it down with a plate to keep the cucumbers submerged as the ice melts. Cover and refrigerate overnight. This process draws out excess moisture and guarantees an optimal crunchiness that elevates the pickles to perfection.

    Ingredients

    Ingredients

    Cucumbers

    • Why it matters: Kirby cucumbers or Persian cucumbers are ideal — they have thinner skin, fewer seeds, and stay crunchier in the jar than regular cucumbers. I peel half the skin off in alternating strips so the finished pickle looks beautiful in the jar. A mandoline slicer produces perfectly even slices for consistent pickling.

    Turmeric

    • Why it matters: Turmeric is what makes these pickles truly distinctive. It adds a warm, slightly peppery depth that no one can quite identify — they just know the pickles taste exceptional. It also gives the brine that gorgeous golden hue that makes these pickles stand out on any table.

    Apple Cider Vinegar

    • Why it matters: Apple cider vinegar adds a rounder, more complex tang compared to plain white vinegar. It also brings subtle fruity notes that complement the sweetness of the bread and butter style. I increase the vinegar-to-water ratio slightly for a more pronounced pickle flavour.

    Spices

    • Why it matters: The brine includes celery powder, coriander seeds, bay leaf, and clove. None of them is overpowering individually, but together they create a layered, aromatic brine that tastes like something your grandmother spent hours perfecting.

    Mason Jars

    • Why it matters: Use wide-mouth mason jars with a canning funnel for easy filling. Wide-mouth jars make it far easier to pack in the cucumbers tightly and retrieve the pickles without a mess.

    Frequently Asked Questions

    How long do homemade bread and butter pickles last?

    Stored in a sealed jar in the refrigerator, these pickles keep beautifully for up to 3 months. The flavour actually improves after the first 48 hours as the cucumbers absorb the brine. For the absolute best taste, wait at least 24 hours before opening the jar.

    Do I need to process these jars in a water bath?

    For refrigerator pickles (the method in this recipe), no water bath canning is needed. These are quick pickles intended to be stored in the fridge and consumed within 3 months. If you want shelf-stable pickles that can be stored in the pantry for up to 1 year, you will need to process the sealed jars in a boiling water bath for 10 minutes. Follow a tested canning recipe for safety.

    Why do my pickles turn soft instead of staying crunchy?

    The most common culprits are: not soaking in salt and ice overnight, using regular slicing cucumbers instead of Kirby or Persian varieties, or packing them too loosely. The ice-and-salt method is key — it firms the flesh and draws out the moisture that would otherwise make the pickles go limp. Do not skip this step.

    Can I use white vinegar instead of apple cider vinegar?

    Yes, but the flavour will be sharper and less complex. Apple cider vinegar adds a natural sweetness and depth that works particularly well with the bread and butter style. If you use white vinegar, consider reducing the amount slightly to avoid an overly acidic brine.

    What is the difference between bread and butter pickles and dill pickles?

    Bread and butter pickles use a sweet-tangy brine with sugar and warm spices like turmeric, coriander, and celery seed. Dill pickles use a sharp vinegar brine with fresh or dried dill and garlic, with little to no sugar. Bread and butter pickles are sweeter, milder, and more aromatic. They are the classic choice for burgers and sandwiches.

    Can I pickle other vegetables with this brine?

    Absolutely. This brine works wonderfully with thinly sliced red onions, banana peppers, cauliflower florets, and green beans. Adjust the brining time based on the vegetable — denser vegetables like cauliflower benefit from a slightly longer soak of 48–72 hours.

    Chopsticks lifting bread and butter pickle slices from a bowl of brine

    The BEST Bread and Butter Pickled Cucumbers

    Prep Time 20 minutes
    Total Time 20 minutes
    Servings: 8
    Course: Condiment
    Cuisine: American
    Calories: 120

    Ingredients
      

    • 1 kg Kirby Cucumbers or 2 pounds
    • 2 cups small diced sweet white onions
    • ¼ cup kosher salt
    • ½ kg crushed ice or 1 pound
    • 2 cups sugar
    • 1 tbsp yellow mustard seeds
    • 1 tsp celery seeds
    • 2 cups apple cider vinegar
    • 1 fresh bay leaf torn into pieces
    • 3 whole cloves
    • ½ jalapeno sliced paper thin with seeds

    Method
     

    1. Slice cucumbers into ⅛ inch thick slices. To draw out the liquid for extra crunch: layer the cucumber slice with onions, salt and ice in a glass or stainless steel container and weight with a plate large enough to cover the cucumbers and keep them submerged when the ice melts.
      Cover and refrigerate overnight.
    2. Next day, sterilize three 1L canning jars, along with their rings nd lids, and put them on a clean dish towel or wire rack.
    3. Drain the cucumbers and onions, put them in a large non reactive pot, and add the sugar, mustard seeds, turmeric, celery seeds, vinegar, bay leaf, cloves, and jalapeño. Bring to a simmer over high heat, stirring to completely dissolve the sugar. About 5 minutes. Skim off any foam that has formed at the top.
    4. Divide the batch in three parts for the jars. Ladle the hot vinegar liquid over the cucumbers leaving a ¼ inch headspace. White the rims and threads clean, put the lids and rings on the jars, and tighten the rings. Cool the jars to room temperature.
    5. Refrigerate the jars and let the pickle cure for at least 1 week before eating. Unopened, the pickles will keep for up to 2 months in the fridge.

    Once you have a jar of these pickles, the natural next step is our Crispy Pickle Brine Chicken Wings — where the leftover brine does the heavy lifting. For more fermented and preserved favourites, explore our Traditional Kimchi and Mexican Pickled Red Onion.

  • Chicken Shawarma Wrap with Caesar Salad

    Chicken Shawarma Wrap with Caesar Salad

    Picture this: warm, pillowy naan bread wrapped around juicy yogurt-marinated chicken, crisp romaine Caesar salad, and a shower of freshly grated Parmesan — all held together by one gloriously messy squeeze. This Chicken Shawarma Wrap with Caesar Salad is the meal I make on repeat for road trips, school lunches, and dinner parties alike. It takes 30 minutes to assemble once the chicken has marinated overnight, and it never fails to impress.

    This post may contain affiliate links. If you purchase through these links, I may earn a small commission at no extra cost to you. Thank you for supporting Love & Harvest!

    Chicken shawarma wrap with Caesar salad on naan bread

    Succulent chicken marinated overnight in yogurt, dill, turmeric, and lime juice — wrapped up with crisp Caesar salad inside warm, fluffy naan. One squeeze and the juices spill from every corner.

    Why You Should Try This Chicken Shawarma Recipe

    1. It is totally different: Combining two classic recipes into one — shawarma and Caesar salad — is the most original twist on a weeknight wrap.
    2. Bursting with flavor: The overnight marinade of yogurt, dill, turmeric, and lime juice ensures every bite is bold and aromatic.
    3. Perfectly juicy chicken: Marinating overnight guarantees plump, tender chicken pieces that don’t dry out on the grill.
    4. Crisp Caesar salad: Crunchy romaine, tangy dressing, and salty Parmesan add a fresh, savory contrast inside the wrap.

    Chicken shawarma ingredients laid out

    My Favorite On-the-Go Meal

    I’m not exaggerating when I say this is my favorite go-to meal when I need something quick and delicious. With the chicken marinating overnight, all I have to do is grill it and toss the Caesar salad. It takes 30 minutes and works for picnics, road trips, school lunches, and camping, basically anywhere you need a satisfying meal that travels well.

    Chicken shawarma wrap ready to eat

    What Makes This Recipe Different

    1. Naan bread: Soft, fluffy homemade naan instead of standard pita adds a chewy, slightly sweet element that makes every bite better.
    2. Caesar salad inside: Most shawarma wraps use plain lettuce and tomato. We go full Caesar — romaine, tangy dressing, Parmesan — for a restaurant-quality finish.
    3. Easy to make: A few simple ingredients, overnight marinating, and 30 minutes of assembly. That’s it.

    Ingredients

    Key Ingredients

    Natural Yogurt

    Yogurt tenderizes the chicken by breaking down proteins with its acidity, resulting in a juicy texture. It also acts as a carrier for the spices, ensuring they penetrate deeply into the meat. During grilling, yogurt keeps the chicken moist and prevents it from drying out.

    • Why it matters: Without yogurt in the marinade, the chicken loses its characteristic tenderness and the flavors stay surface-level.

    Dill

    Dill adds a fresh, slightly tangy flavor that lifts the entire marinade. It complements the warm spices and contributes to the Mediterranean character of this dish. You can use a quality dried dill if fresh is not available.

    • Why it matters: Dill is what distinguishes this shawarma from generic chicken marinades. Don’t skip it.

    Turmeric

    Turmeric gives the chicken its golden color and adds a warm, earthy flavor to the marinade. A good organic turmeric powder makes a real difference in both color and taste.

    • Why it matters: That vibrant yellow color is the visual hallmark of shawarma — and it signals depth of flavor.

    Lemon Juice

    The acidity in lemon juice tenderizes the chicken further, adds brightness, and balances the warm spices in the marinade. Use freshly squeezed for the cleanest flavor.

    • Why it matters: Lemon juice prevents the marinade from becoming heavy or one-dimensional. It is the flavor activator.

    Garlic

    Garlic amplifies every other flavor in the marinade. It brings out the chicken and makes all the herbs and spices taste more pronounced. Crush it fresh for maximum potency.

    Caesar Salad Dressing

    You can use any quality store-bought Caesar dressing. The secret upgrade: stir in a squeeze of fresh lemon juice and some freshly grated Parmesan. It takes a standard dressing to another level.

    • Why it matters: The Caesar dressing is the bridge between the hot, spiced chicken and the cool, crisp lettuce. It holds the whole wrap together.

    Grilled chicken shawarma plated
    Assembling the chicken shawarma wrap

    This wrap pairs beautifully with our fluffy naan bread recipe — they were made for each other. For a lighter side, try our homemade Caesar salad dressing or the Thai chicken salad for an Asian-inspired variation on the same flavor profile.

    Frequently Asked Questions

    Can I use chicken breast instead of thighs?

    Yes, but chicken thighs are strongly recommended. They stay juicier on the grill and hold up better in the wrap. If using breast, reduce grill time by 2–3 minutes per side and watch closely to avoid drying out.

    How long should I marinate the chicken?

    Overnight is ideal — 8 to 12 hours in the refrigerator. The minimum is 4 hours. Anything less and the flavors won’t fully penetrate the meat.

    Can I make this ahead of time?

    Yes. Grill the chicken and store it separately from the Caesar salad and naan. Assemble the wraps just before serving to keep the naan from getting soggy.

    What can I substitute for naan bread?

    Pita, flatbread, or large flour tortillas all work. Naan gives the best result because of its softness and chew, but the recipe is flexible.

    Is this recipe kid-friendly?

    Very much so. Kids love the mild flavors and the handheld format. You can reduce the turmeric slightly for younger kids and pack extra Caesar dressing on the side for dipping.

    Can I cook the chicken in a pan instead of grilling?

    Absolutely. A cast iron skillet on medium-high heat gives you a great sear. Cook 4–5 minutes per side depending on thickness. A Lodge 12-inch cast iron skillet is perfect for this.

    Two halves of a chicken shawarma wrap with Caesar salad filling

    Chicken Shawarma Wrap

    Incredibly juicy, tender chunks of chicken marinated overnight with yogurt, dill, lemon juice, and turmeric, all wrapped up with Caesar salad. It's an easy meal perfect for dinner or for taking on road trips.
    Prep Time 20 minutes
    Cook Time 15 minutes
    Total Time 35 minutes
    Servings: 6 people
    Course: Main Course
    Cuisine: Indian
    Calories: 420

    Ingredients
      

    Chicken Shawarma
    • ½ kg chicken meat (can be chicken breast, chicken leg, or assorted) 1.1 pounds of chicken meat
    • 1 cup natural yogurt no sugar
    • 3 garlic cloves grated
    • 2 tsp dried dill
    • 1 tsp cumin powder
    • 1 tsp turmeric powder
    • 1 tbsp paprika
    • 1 tsp lemon juice
    • 2 tsp sea salt
    • ½ tsp black pepper
    • 6-8 large naan bread or tortilla wraps
    Caesar Salad
    • 4 cups chopped romaine lettuce
    • ¼ cup grated Parmesan cheese
    • ¼ cup Caesar salad dressing
    • 1 tbsp lemon juice
    • salt and pepper to taste

    Method
     

    1. With a clean chopping board, slice the chicken into medium size cubes. They need to be large enough to be on skewers. About 1 inch cubes.
    2. In a large bowl, combine the yogurt, grated garlic, dill, cumin, turmeric, paprika, lemon juice, salt, and pepper. Add the sliced chicken thighs and toss until well coated. Cover and refrigerate for at least 2 hours, preferably overnight.
    3. Preheat a grill or grill pan over medium-high heat. Remove the chicken from the marinade and thread onto skewers. Grill for 5-6 minutes on each side, or until the chicken is cooked through and slightly charred. Remove from the grill and place it on a plate.
    4. In a large mixing bowl, combine the chopped romaine lettuce, grated Parmesan cheese, Caesar salad dressing, lemon juice, salt, and pepper. Toss until the lettuce is evenly coated with the dressing.
    5. To assemble the wraps, warm the pita bread or tortilla wraps according to package instructions. Place a generous amount of Caesar salad on each wrap, then top with the grilled chicken shawarma slices.
    6. Roll up the wraps tightly, folding in the sides as you go. Cut in half diagonally and serve immediately.

  • Best Garlic Mashed Potatoes

    Best Garlic Mashed Potatoes

    Some recipes just stay with you. I’ve been making this garlic mashed potatoes since high school, and it has never once left leftovers on the table — not at family dinners, not at parties, not at potlucks. It’s creamy, fluffy, and loaded with savory garlic flavor, and it comes together in under 40 minutes. The secret is in five simple tips that most people skip: the right potato, the right timing on the garlic, room-temperature butter, proper mashing technique, and a touch of patience. Once you nail this, every roast, chicken, or grilled salmon on your table gets an instant upgrade.

    This post may contain affiliate links. If you purchase through these links, I may earn a small commission at no extra cost to you. Thank you for supporting Love & Harvest!

    Best garlic mashed potatoes creamy and fluffy

    Why Make This Best Garlic Mashed Potatoes Recipe

    Garlic mashed potatoes are one of the most versatile side dishes in any kitchen. They pair beautifully with roast beef, grilled chicken, salmon, ribs — essentially anything that benefits from a rich, savory accompaniment.

    Bowl of creamy garlic mashed potatoes with a serving spoon

    We Have Loved This Recipe for Years and You Will Too

    This is the dish I reach for when there’s nothing in the fridge. It’s customizable, fast, and everyone who tries it asks for the recipe. Whether you’re cooking for a weeknight dinner or a dinner party, garlic mashed potatoes are a guaranteed hit.

    Creamy mashed potatoes with garlic butter close-up

    Ingredients

    Key Ingredients

    Russet Potatoes

    Russet potatoes are the gold standard for mashed potatoes. They have a low moisture content and high starch level that results in a light, fluffy mash rather than a dense or gluey one. Yukon Gold is a good second option for a slightly creamier, butterier result.

    • Why it matters: Waxy potatoes (like red or fingerling) hold too much water and produce a dense, gummy mash. Russets are the correct choice for this texture.

    Garlic

    Fresh garlic sauteed in butter is the backbone of this recipe. The key is timing — garlic must be added to heated butter and cooked for only 1–2 minutes until fragrant. A good stainless steel garlic press makes mincing fast and consistent.

    • Why it matters: Burned garlic turns bitter and unpleasant. Under-cooked garlic stays sharp and raw-tasting. Exactly 1–2 minutes in warm butter is the sweet spot.

    Butter

    Use unsalted butter at room temperature. Cold butter does not incorporate smoothly into the mash and can cause a lumpy, streaky texture. Room-temperature butter blends in effortlessly and creates a silkier finish.

    • Why it matters: Temperature of your fat directly determines the smoothness of your final mash. This is one of the most common mistakes home cooks make.

    Heavy Cream or Whole Milk

    Heavy cream delivers the richest, most luxurious mash. Whole milk produces a lighter result. Both must be warmed before adding — cold dairy seizes the starch in the potato and creates a gummy texture. A potato ricer gives you a smoother result than a standard masher.

    • Why it matters: Cold cream = lumps. Warm cream = velvet. This single step separates average mashed potatoes from extraordinary ones.

    Professional Tips

    Pro Tip 1: Use Russet Potatoes

    Russet potatoes have a buttery texture and less moisture than waxy varieties, which means a creamier, lighter mash. For more on choosing the right potato, see Bon Appetit’s guide to the best potatoes for mashing.

    Pro Tip 2: Do Not Overcook the Potatoes

    Overcooked potatoes become waterlogged and mushy, which ruins the texture. Check frequently and remove from heat the moment a fork slides in with minimal resistance. Do not wait for the potato to fall apart.

    Pro Tip 3: Use Room Temperature Ingredients

    Cold butter and cold cream cause the mash to seize and turn lumpy. Pull your butter out of the fridge 30 minutes before cooking and warm your cream in a small saucepan before adding it to the potatoes.

    Pro Tip 4: Add Garlic at the Right Time

    Add garlic to butter only after the butter is heated. Saute for 1–2 minutes until fragrant, then immediately incorporate into the mash. Do not let the garlic sit in the pan unattended — it burns in seconds.

    Pro Tip 5: Mash the Potatoes Properly

    Use a potato ricer for the smoothest result, or a hand masher for a slightly chunkier texture. Never use an electric mixer or food processor — over-processing breaks down the starch structure and creates a sticky, gluey paste.

    This mashed potato recipe pairs perfectly with lemongrass chicken drumsticks or a crispy pan-seared salmon. For another classic comfort dish, try our 30-minute Thai basil chicken — it is equally fast and deeply satisfying.

    Frequently Asked Questions

    What potatoes are best for mashed potatoes?

    Russet potatoes are the top choice for their low moisture content and fluffy texture when mashed. Yukon Gold is a close second for a creamier, buttery result. Avoid waxy potatoes like red potatoes or fingerlings — they produce a dense, gummy mash.

    Can I make garlic mashed potatoes ahead of time?

    Yes. Make them up to 2 days ahead and store covered in the refrigerator. Reheat gently on the stovetop with a splash of warm cream or milk to restore the creamy consistency. Do not reheat in a microwave without adding moisture — they will dry out.

    Why are my mashed potatoes gummy or glue-like?

    The most common cause is over-mashing or using a food processor. This activates too much starch in the potato and creates a sticky paste. Use a ricer or hand masher and stop as soon as the potatoes are smooth.

    Can I use garlic powder instead of fresh garlic?

    You can in a pinch, but fresh sauteed garlic produces a noticeably richer, more aromatic flavor. Garlic powder tends to taste flat in comparison. Use 1/2 teaspoon of garlic powder as a substitute if needed.

    How do I keep mashed potatoes warm for a dinner party?

    Transfer the finished mashed potatoes to a heatproof bowl set over a pot of barely simmering water (double-boiler method). Cover with a lid or foil and they will hold for up to 2 hours with occasional stirring.

    Can I freeze mashed potatoes?

    Yes. Spread them in a single layer on a baking sheet to flash freeze, then transfer to airtight bags. They keep for up to 1 month. Reheat from frozen in a covered saucepan with added butter and cream, stirring frequently.

    Garlic mashed potatoes in a white bowl on a striped cloth with flowers

    Best Garlic Mashed Potatoes

    The best garlic mashed potato dish that is creamy, fluffy, and bursting with savoury garlic flavour.
    Prep Time 15 minutes
    Cook Time 20 minutes
    Servings: 6 people
    Course: Side Dish
    Cuisine: American
    Calories: 260

    Ingredients
      

    • 1½ kg russets potato cut into large chunks
    • 1 litre water
    • 5 tbsp butter room temperature
    • 5 garlic clove grated
    • 1 white onion finely diced
    • 2 tsp dried basil
    • ½ cup sour cream
    • salt
    • black pepper

    Method
     

    1. Run the potatoes in the water and give it a good scrub. Cut the potatoes into large wedges. (For a large potato I usually cut it into 5 wedges). Give it another good rinse to wash away all the starch. Place them into a large pot and make sure it is covered by water (roughly about 1L of water). Place lid on top, and heat the pot on the stove on high.
    2. Once the pot is boiling, move the lid slightly open so the water doesn't boil over. Boil the potatoes on medium-high for 20 minutes. You know the potatoes are done if you can easily poke thru the potato wedges with a fork.
    3. Meanwhile, in a frying pan heat it in high heat. Place 5 tbsp of butter inside. Sauce the onion until soft and slightly translucent. Add the garlic and sauté it until it's aromatic. Stir in the dried basil. Turn the heat off and set it aside.
    4. Discard the water, and let the potatoes cool until it is warm or when your hands can touch it without burning.
    5. Peel the skin of the potato with your hands and place them in a large mixing bowl. Place another 2 tbsp of butter inside the warm peeled potatoes. Using a hand potato masher or a potato rice, mash the potatoes until smooth and no large chunks are visible.
    6. Fold in the butter garlic. You don't want to deflate the fluffiness.
    7. Stir in the sour cream until well combined. Add salt and pepper to your liking.