Category: appetizers recipes

  • Homemade Sashimi

    Homemade Sashimi

    Making sashimi at home is one of the most rewarding things you can do in the kitchen — and it is far more achievable than most people think. This guide walks you through how to safely source, freeze, and slice salmon so you can enjoy restaurant-quality sashimi without leaving your house.

    This post may contain affiliate links. If you purchase through these links, I may earn a small commission at no extra cost to you. Thank you for supporting Love & Harvest!

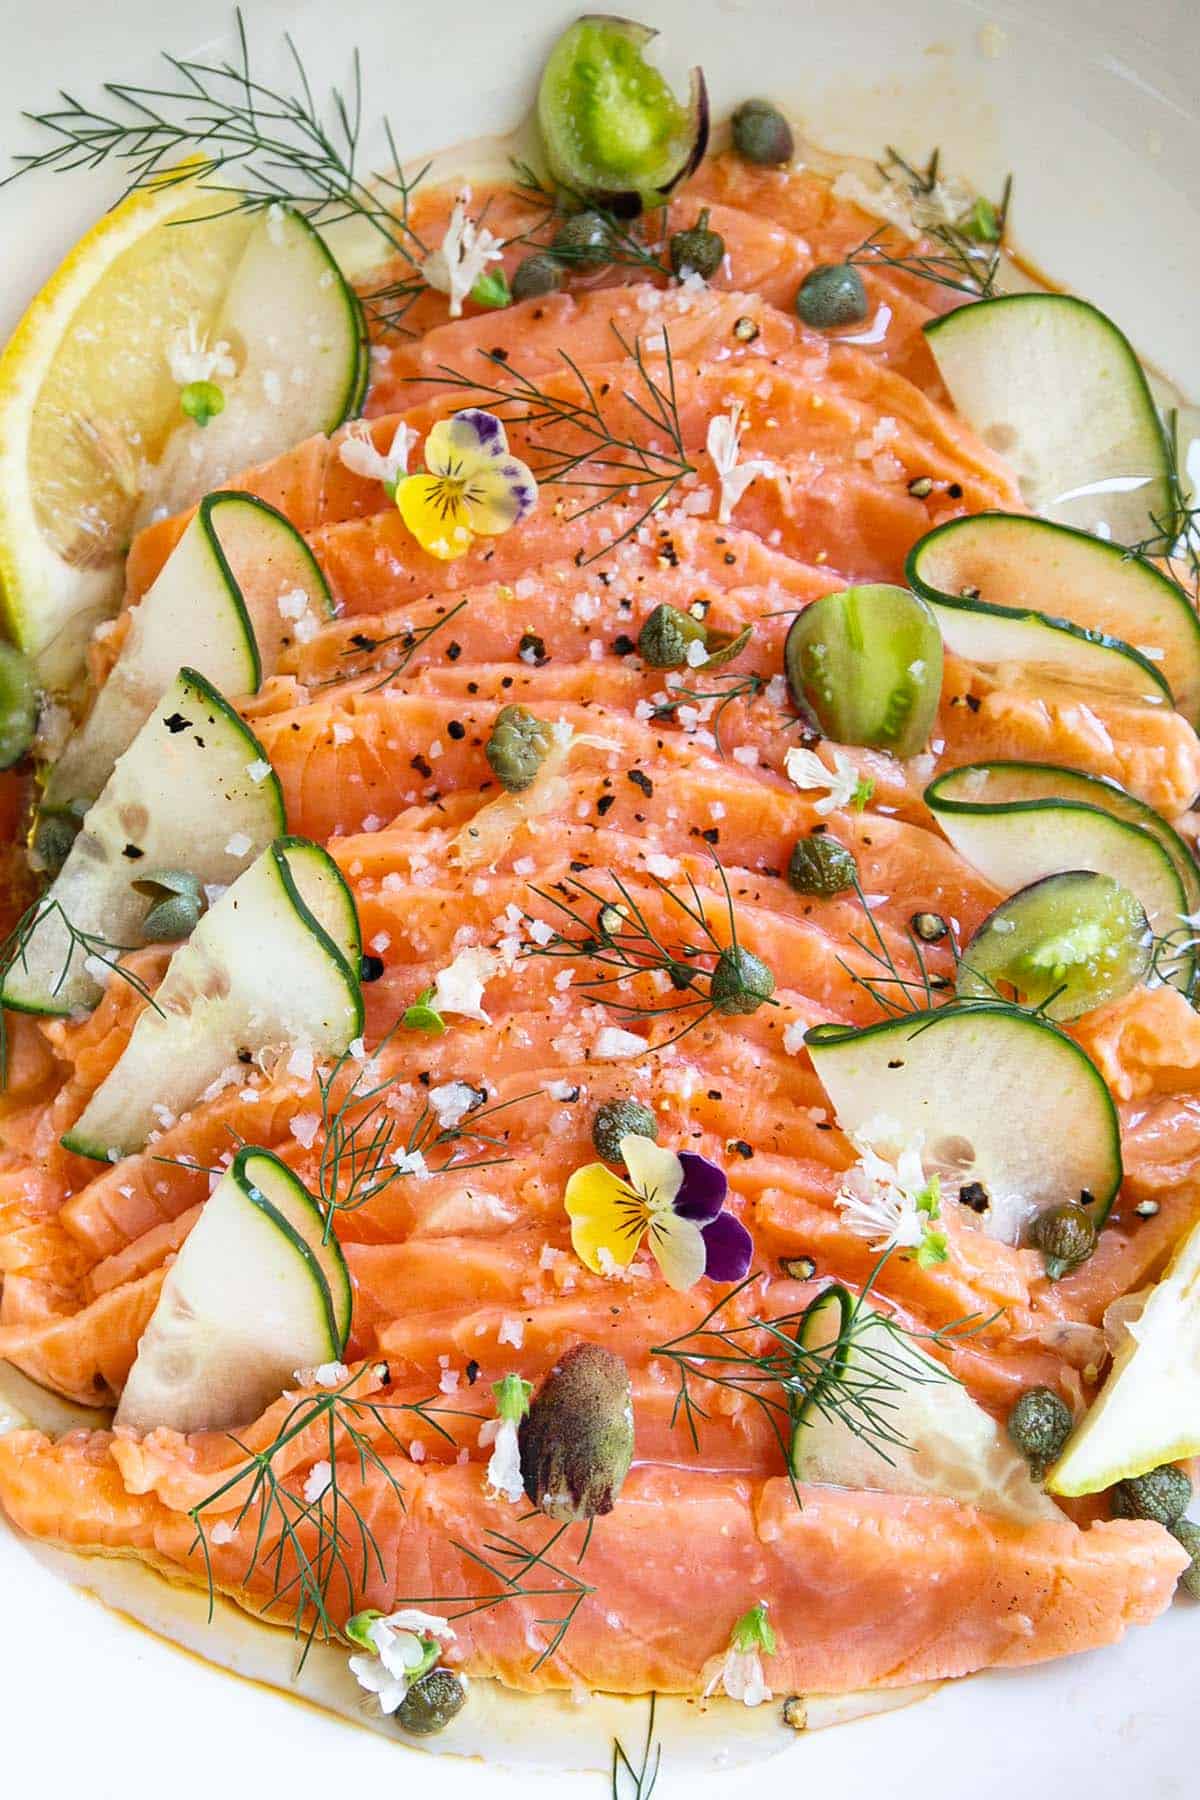
    Close-up of thinly sliced salmon sashimi with cucumber, capers, dill and edible flowers

    How I Started Making Sashimi at Home

    Allow me to share a little secret: crafting homemade sashimi has been quite the adventure for me. Living in Mexico, where authentic sashimi experiences are scarce and restaurants often overcharge for mediocre quality, I seized the opportunity and started experimenting. What followed was years of research, countless batches of salmon, and a method I use every time.

    In this guide I will share exactly how I safely freeze salmon fillets to achieve sashimi-grade quality, the shortcut I discovered for sourcing great fish, my personal experience using Costco salmon, and a simple plating recipe to pull it all together.

    This post shares how I prepare salmon at home. Raw fish always carries some risk; follow the freezing guideline below, and skip raw fish if you are pregnant, immunocompromised, very young or elderly.

    Homemade salmon sashimi fanned out on a white plate with cucumber, lemon, capers and dill

    What Fish Should I Use?

    Contrary to popular belief, you do not need to break the bank to source sashimi-grade fish. With the right knowledge and a keen eye, you can find excellent options at your local fish market or even in the frozen section of your grocery store. Check the labeling and ensure the fish has been frozen at the appropriate temperature to kill any potential parasites.

    Salmon sashimi plated with lemon wedges, cucumber slices, capers and edible flowers

    Wild Salmon vs. Farmed Salmon for Sashimi

    The choice between wild-caught and farmed salmon depends on your personal preferences and priorities. Both can work beautifully for sashimi when handled correctly.

    1. Flavor Preference: Wild-caught salmon tends to have a richer, more intense flavor. Farmed salmon is milder and consistently fatty — often preferred for sashimi.
    2. Nutritional Considerations: Wild salmon generally contains higher omega-3 levels. Both are excellent, nutritious options.
    3. Sustainability: Some prefer wild-caught for environmental reasons, though responsible farmed options exist.
    4. Availability and Price: Farmed salmon is more readily available year-round and typically more affordable.

    Overhead close-up of salmon sashimi slices sprinkled with sea salt, pepper and dill

    How to Safely Freeze Salmon for Sashimi

    To eliminate potential parasites in fresh salmon, the FDA recommends freezing at -4°F (-20°C) or below for at least 7 days. This is the step I never skip.

    Step-by-Step Freezing Guide

    1. Select Fresh Salmon: Begin with high-quality, fresh salmon fillets. Start with fish that is fresh and shows no signs of spoilage.

    2. Inspect and Clean: Check for discoloration or odor. Pat dry with paper towels.

    3. Portion the Salmon: Cut into even portions for uniform freezing.

    4. Wrap Tightly: Wrap each portion in plastic wrap or seal in airtight freezer bags, removing as much air as possible.

    5. Label and Date: Mark each portion with the date and fish type.

    6. Freeze Cold Enough, Long Enough: The FDA standard is -4°F (-20°C) or colder for at least 7 days. Many home freezers sit around 0°F (-18°C), which is not cold enough, so set yours to its coldest setting and leave space between portions for airflow.

    7. Check the Temperature: Use a freezer thermometer to confirm it holds -4°F (-20°C) or colder for the full 7 days.

    8. Thaw Safely: Thaw overnight in the refrigerator, or in a sealed bag under cold running water. Never at room temperature.

    Freezing kills parasites, not bacteria. Pregnant people, young children, older adults and anyone with a weakened immune system should skip raw fish.

    White plate of salmon sashimi with lemon and cucumber on a grey table

    Other Ways to Source Sashimi-Grade Salmon

    From frozen specialty stores: In Mexico I discovered WildFork, a store that sources fresh seafood and freezes it immediately at extremely low temperatures. Ask the store whether it was frozen to the FDA parasite standard; if they can’t confirm, freeze it yourself as above.

    From fresh fish stores: Check the store’s description for high-quality, fresh salmon sourcing. Inspect fillets carefully — no discoloration, no odor, firm to the touch. To prepare our sashimi we also use a sashimi knife set for clean, precise slicing.

    Salmon sashimi slices with dill, cucumber and lemon in a white bowl

    I Have Used Costco Salmon for Sashimi

    I anticipate mixed opinions on this, but I have personally used Costco salmon to make sashimi — many times. Despite what social media says, Costco salmon has worked well for me, always after freezing it myself as described above.

    What About the Cautionary Labels at Costco?

    Take those labels seriously: Costco does not sell this salmon as sashimi-grade, so if you want to eat it raw, freeze it first as shown above. Always check the packaging date on the day of purchase, look for firmness, and verify there are no signs of water leakage, discoloration, or odor.

    While I acknowledge inherent risks, I have prepared gravlax and sashimi from Costco salmon many times, always freezing it first. For presentation, I serve on a bamboo sushi mat with soy sauce and wasabi paste.

    How to Make Sashimi

    Once your salmon is properly thawed, making sashimi is all about technique and a sharp knife.

    1. Thaw the Salmon: Remove from the freezer and thaw in the refrigerator overnight, or in a sealed bag under cold running water for faster results. Fully thaw before slicing.
    2. Prepare the Salmon: Pat fillets dry with paper towels to remove excess moisture. Dry fish slices cleanly and looks better on the plate.
    3. Slice the Salmon: Using a sharp knife, slice thinly and evenly against the grain — approximately 1/4 to 1/2 inch thick. Take your time for uniform, beautiful slices.
    4. Serve and Garnish: Arrange on a platter with thinly sliced cucumber, pickled ginger, and wasabi. Sesame seeds or microgreens add a nice touch.
    5. Serve Immediately: Sashimi is best fresh. Serve right after slicing. A bed of ice helps keep it chilled during presentation.
    6. Enjoy Responsibly: Handle raw fish with care. Proper hygiene throughout the process is non-negotiable.

    Ingredients

    Salmon Fillet

    The star of the dish. Choose a fresh, high-quality salmon — wild or farmed — that has been properly frozen to sashimi-grade standards.

    • Why it matters: The quality of your salmon determines everything. Do not compromise on freshness.

    Soy Sauce

    A classic dipping sauce for sashimi. Look for a good-quality Japanese soy sauce — it should have a clean, rounded umami flavor rather than just saltiness.

    • Why it matters: A quality soy sauce enhances the delicate salmon flavor without overpowering it.

    Wasabi Paste

    Traditional accompaniment. Use real wasabi paste rather than horseradish-based imitations when possible.

    • Why it matters: Wasabi does more than add heat — it provides a sharp, clean flavor contrast that elevates the entire experience.

    Pickled Ginger

    Served between pieces to cleanse the palate. The acidity refreshes your taste buds between bites so each slice of salmon tastes as good as the first.

    • Why it matters: It is not just garnish — it is a functional part of the sashimi ritual.

    Frequently Asked Questions

    Is it safe to eat store-bought frozen salmon as sashimi?

    If the salmon has been frozen at -4°F (-20°C) or below for at least 7 days, it meets the FDA parasite guideline; freezing does not remove bacteria. Always verify the source and freezing practices of your specific store.

    Can I use tuna or other fish for sashimi?

    Yes — tuna (bluefin, yellowfin, bigeye), yellowtail, halibut, and sea bass are all popular choices. The same freezing and freshness standards apply regardless of the fish species.

    What is the difference between sashimi and sushi?

    Sashimi is simply raw fish served on its own, typically with soy sauce, wasabi, and ginger. Sushi refers to vinegared rice combined with other ingredients — it may or may not include raw fish.

    How thin should I slice sashimi?

    For salmon, aim for slices between 1/4 and 1/2 inch (6–12 mm) thick, cut against the grain. Thinner slices work better for leaner fish. A sharp knife and a steady hand make all the difference.

    Does Costco salmon require additional freezing before eating raw?

    Yes. Costco’s fresh Atlantic salmon is not sold as sashimi-grade, so freeze it at -4°F (-20°C) or colder for 7 days before eating it raw. I do this every time.

    Can I make sashimi without a special knife?

    Any sharp, long-bladed knife can work in a pinch, but a dedicated sashimi knife produces far cleaner cuts. A clean cut protects the fish’s delicate muscle fibers and results in better texture.

    If you love Japanese-inspired recipes, also check out our homemade sushi roe guide and our Cha Gio fried spring rolls for more fresh, vibrant dishes from the kitchen.

    Homemade Sashimi

    Restaurant-quality salmon sashimi made at home — properly sourced, frozen to the FDA guideline, then sliced thin and served with soy sauce, wasabi, and pickled ginger.
    Prep Time 15 minutes
    Total Time 15 minutes
    Servings: 2 servings
    Course: Appetizer
    Cuisine: Japanese
    Calories: 210

    Ingredients
      

    • 300 g sashimi-grade salmon fillet previously frozen at -4°F (-20°C) for at least 7 days to eliminate parasites, then thawed overnight in fridge
    • 3 tbsp Japanese soy sauce for dipping
    • 1 tsp wasabi paste real wasabi or horseradish-based, to taste
    • 2 tbsp pickled ginger for palate cleansing between pieces
    • ½ cucumber thinly sliced, for garnish and serving
    • 1 tsp sesame seeds optional garnish
    • microgreens optional garnish

    Method
     

    1. Thaw the frozen salmon overnight in the refrigerator. Never thaw at room temperature.
    2. Pat the thawed salmon fillet dry with paper towels to remove excess moisture — dry fish slices cleanly and looks better on the plate.
    3. Using a sharp knife, slice the salmon thinly and evenly against the grain — approximately 1/4 to 1/2 inch (6–12 mm) thick. Take your time for uniform, beautiful slices.
    4. Arrange slices on a serving platter with thinly sliced cucumber. Add pickled ginger on the side.
    5. Serve immediately with soy sauce and wasabi for dipping. A bed of ice helps keep the sashimi chilled during presentation.
    Notes

    SAFETY NOTE: Always freeze salmon at -4°F (-20°C) or below for at least 7 days before eating raw to eliminate potential parasites (FDA recommendation). Most home freezers sit near 0°F (-18°C), which is not cold enough; check with a freezer thermometer. Thaw overnight in the refrigerator, or in a sealed bag under cold running water. Never at room temperature. Sashimi is best eaten immediately after slicing. A sharp, long-bladed sashimi knife produces the cleanest cuts and best texture.
  • Traditional Kimchi

    Traditional Kimchi

    This is the traditional kimchi recipe I have been making for years — the one I use to produce batches from 1 pound all the way up to 5 kilograms for family, friends, and neighbors here in Puebla, Mexico. It is basic, approachable, and genuinely delicious every single time.

    This post may contain affiliate links. If you purchase through these links, I may earn a small commission at no extra cost to you. Thank you for supporting Love & Harvest!

    Jump to Recipe

    Bowl of freshly mixed traditional kimchi with red chili paste

    This post is about a traditional kimchi recipe — one I have used for many years to make for family and friends from 1 lb to 5 kg. It is a beloved recipe I keep coming back to.

    I adore my kimchi, and it holds a special place in the fridge. While some, like my husband, find the aroma off-putting, the rest of us relish the flavor and delight in the crunch of the Napa as it absorbs the marinade.

    The recipe I am about to share is not an heirloom passed down to me — I am Chinese, not Korean — but that does not hinder my deep appreciation for this Korean culinary treasure. Much like dedicated Korean homemakers, I prepare massive batches of kimchi, enjoy it on its own, incorporate it into fried rice, add it to soups, and share it generously with everyone around me.

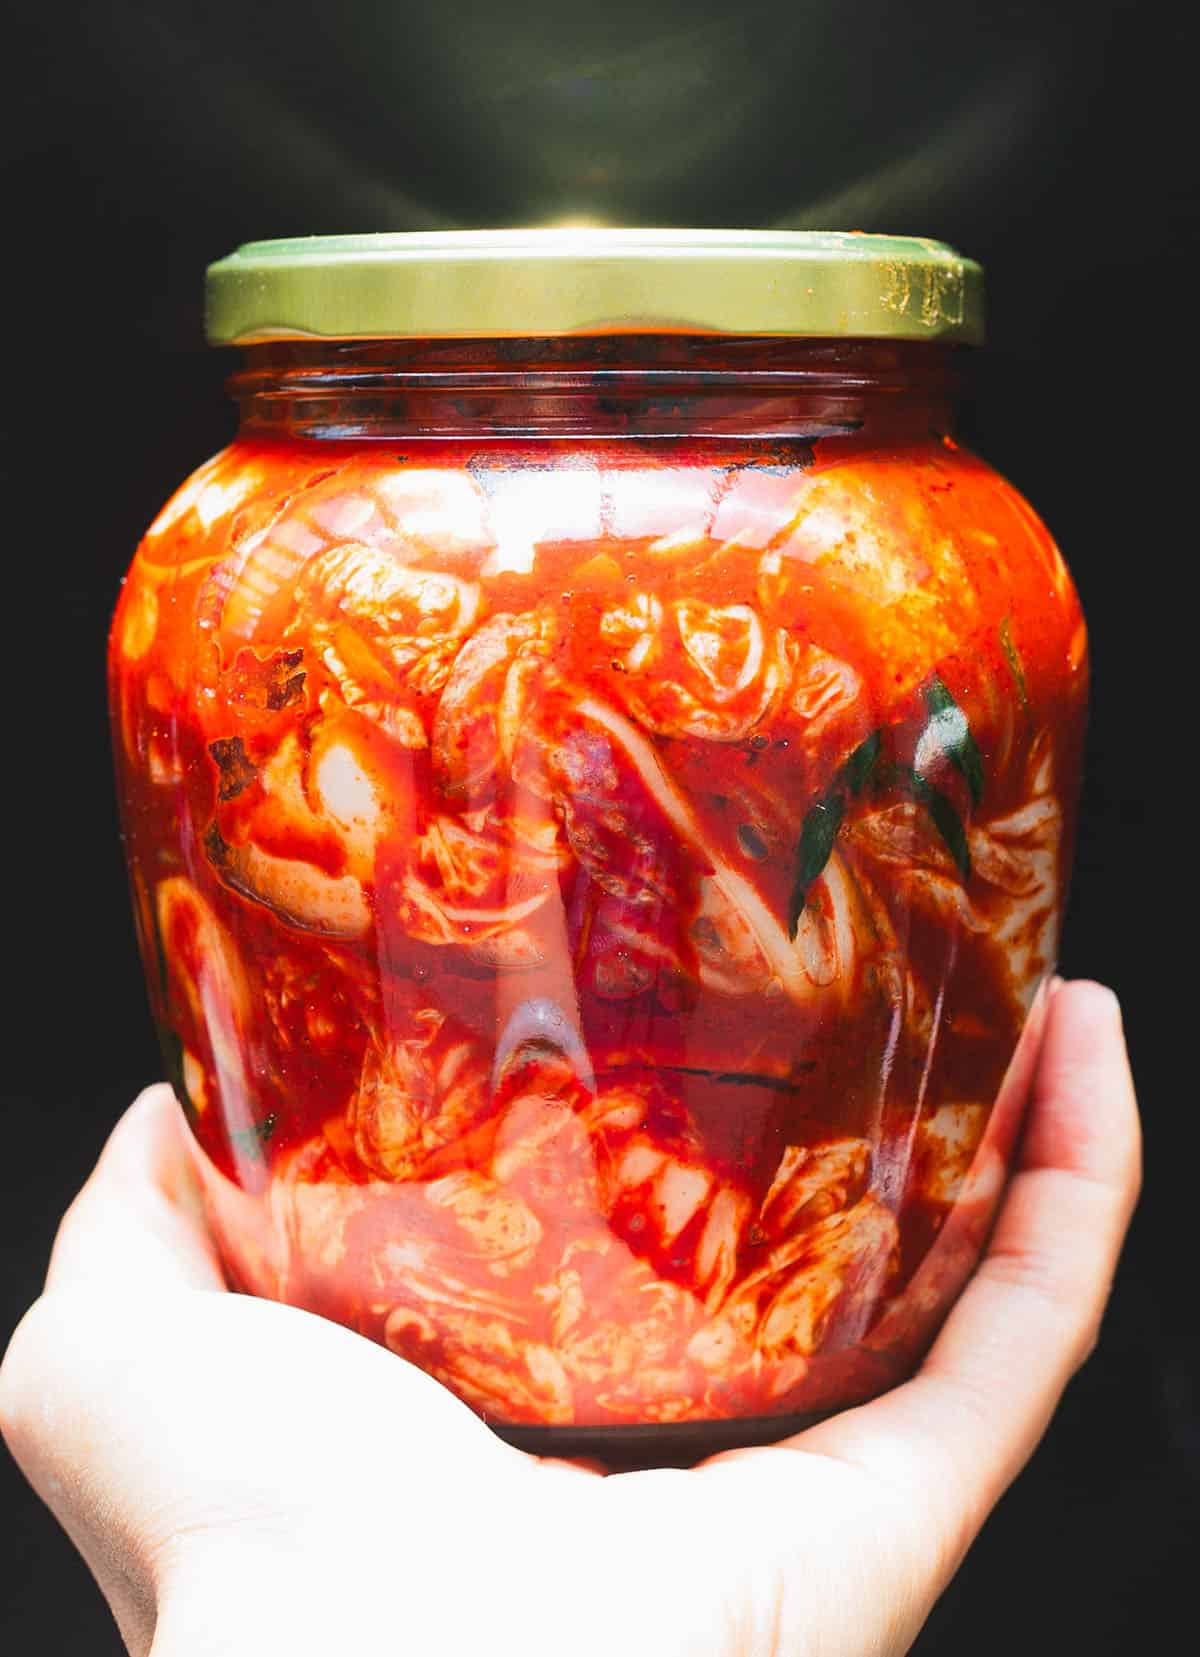
    Hands holding a glass jar packed with homemade kimchi

    In the vast landscape of kimchi recipes, this one stands out for three reasons:

    1. Authenticity First: This recipe honors the time-honored techniques and authentic ingredients that define traditional kimchi. From the spice blend to the layering of flavors, it captures the true essence of the original.

    2. Perfect Balance of Flavors: The marriage of heat, tanginess, and umami is carefully calibrated. Nothing overpowers — everything harmonizes.

    3. Clear Instructions for Any Level: I give this recipe to local Mexicans here in Puebla and they absolutely love it. If someone with zero kimchi background can nail it, so can you.

    Two glass jars of fermenting traditional kimchi

    Ingredients

    Napa Cabbage

    The non-negotiable base of any kimchi. Always choose the freshest Napa cabbage available — no brown spots, leaves that are crisp and slightly green and yellow at the tips.

    • Why it matters: Fresh cabbage retains the crunch that makes kimchi satisfying. Wilted cabbage produces a mushy result no amount of seasoning can fix.

    Pear

    Pear contributes natural sweetness, aids fermentation by feeding beneficial bacteria, and enhances the overall flavor depth of the paste.

    • Why it matters: The enzymes in pear help tenderize the cabbage and balance the heat of the gochugaru, producing a rounder, less aggressive spice.

    Apple

    Blended into the porridge, apple enhances flavor and improves the consistency of the paste — it makes it smoother and more spreadable.

    • Why it matters: Apple adds a subtle sweetness and body to the paste that pear alone does not quite achieve.

    Radish

    The more vegetables the better. I grow my own radish, which is why you see a variety of colors in my bowl. Any radish works. Traditionally Korean kimchi uses large white Korean radish (mu). I often use Red Meat or Purple Daikon varieties.

    • Why it matters: Radish adds crunch, slight bitterness, and a peppery note that contrasts beautifully with the savory paste.

    Carrots

    Carrots add crunch and a gentle sweetness to the kimchi. I like to add them generously, but adjust to your preference.

    • Why it matters: They balance the heat and provide a visually appealing color contrast in the jar.

    Sea Salt

    I highly recommend natural sea salt over table salt. Table salt contains anti-caking additives that can interfere with fermentation and produce an off taste. If you are investing this much effort, use better salt.

    • Why it matters: Salt draws moisture out of the cabbage through osmosis. That extracted liquid is what creates the brine. Without the right salt, fermentation is compromised.

    Gochugaru (Korean Red Pepper Flakes)

    The defining ingredient. Gochugaru is a Korean red pepper powder with a coarse texture that contributes both heat and a distinctive fruity, smoky flavor unique to kimchi. Regular chili powder or cayenne are not substitutes.

    • Why it matters: No other chili produces the same color, heat profile, or flavor. Gochugaru is what makes kimchi taste like kimchi.

    Fish Sauce

    Fish sauce elevates the kimchi’s umami depth dramatically. Brand matters — not every bottle smells or tastes the same. I use Three Crabs fish sauce. My mom always said “buy the three crabs!” — and she was right.

    • Why it matters: Fish sauce provides the savory backbone that keeps the kimchi’s flavor complex and addictive even as it ferments over weeks.

    Fish Paste

    Traditional Korean kimchi uses dried anchovies soaked and blended in. My shortcut is LEE KUM KEE Fish Paste — it delivers that same rich depth in far less time.

    • Why it matters: Fish paste adds layers of umami that you cannot achieve with fish sauce alone. It is the flavor insurance policy in this recipe.

    Julienned scallions, radish, carrot and chives in a green bowl for kimchi

    Professional Tips for Perfect Kimchi

    These five tips will elevate your kimchi from good to extraordinary.

    Pro Tip #1: Be Generous with the Salt

    Use coarse or natural sea salt rather than fine table salt. Coarse salt adheres better to the cabbage, drawing out moisture more effectively and ensuring a controlled salting process. I recommend this Natural Sea Salt.

    Pro Tip #2: Press Down on the Cabbage

    When pressing salted Napa, apply even pressure to ensure uniform salting. Use your hands or a flat kitchen tool to press gently but firmly. I normally flip a large glass dish and weight it down with a jar of water or canned food.

    Pro Tip #3: Get the Porridge Right

    • Ensure the porridge has a smooth, lump-free consistency. Use a whisk or sieve to achieve a velvety texture — this helps the seasoning distribute evenly throughout every leaf of cabbage.

    • Most importantly: allow the porridge to cool completely before adding it to the kimchi mixture. Hot porridge wilts the vegetables and destroys the crunch you are working hard to preserve.

    Pot of red chili paste made with rice porridge for kimchi

    Pro Tip #4: Wear Gloves

    Essential — not optional. Gochugaru stains everything and the garlic-fish paste combination will linger on your fingertips for the rest of the day regardless of how much soap you use. Use disposable nitrile gloves.

    A gloved hand mixing vegetables with chili paste in a green bowl

    Pro Tip #5: Store in Glass Containers

    Glass containers have clear advantages. The red marinade will permanently stain plastic containers. Glass also does not absorb BPA or other plasticizers — even BPA-free plastics can leach over time. A dedicated kimchi container is a good option for storage. It keeps fermentation controlled and makes a huge difference in shelf life and flavor consistency.

    Hands holding a large glass jar filled with kimchi

    Frequently Asked Questions

    How long does kimchi last in the fridge?

    Fresh kimchi (just made, minimal fermentation) lasts 2–3 weeks in the refrigerator. Moderately fermented kimchi — after a few weeks — keeps for another 2–3 months. Fully fermented kimchi can last 6 months or more. Fermentation itself acts as a natural preservative. Always use clean utensils when serving to avoid introducing contaminants.

    Does kimchi need to ferment before eating?

    No. You can eat kimchi immediately after making it — fresh kimchi has a bright, lightly spicy, crunchy quality that many people love. As it ferments it becomes tangier, softer, and more complex. Both stages are delicious; they are just different experiences.

    Can I make kimchi without fish sauce to keep it vegan?

    Yes. Substitute the fish sauce with soy sauce or coconut aminos, and omit the fish paste. Add a bit more gochugaru and garlic to compensate for the lost depth. The kimchi will taste slightly less complex but is still excellent and fully vegan.

    Why is my kimchi too salty?

    Insufficient rinsing after the salting step is the most common cause. After the 2-hour salt press, rinse the cabbage thoroughly under cold running water at least 2–3 times and taste a small piece before proceeding. It should taste pleasantly salty — not aggressively so.

    Can I use regular cabbage instead of Napa?

    Traditional kimchi requires Napa cabbage — its wide, tender leaves hold the paste and allow proper fermentation. Regular green cabbage is too tough and does not ferment the same way. Napa cabbage is widely available in most Asian grocery stores and increasingly in mainstream supermarkets.

    How do I know if my kimchi has gone bad?

    Trust your senses. Signs of spoilage include unusually foul odors beyond the typical fermented smell, slimy texture, unusual discoloration like gray or black patches, or visible mold. Properly fermented kimchi has a tangy, slightly funky smell but should never smell putrid. When in doubt, discard it.

    Love fermented and preserved foods? Also try our steam preserved vegetables with Zha Choy and pork, our homemade sashimi guide, and our vegetarian mango soy ceviche.

    Bowl of freshly mixed traditional kimchi with red chili paste

    Traditional Kimchi

    Our traditional kimchi recipe is basic, easy, and super delicious. From 1lb to 10lbs, we make it all the time for family and friends. We have all the details on how to make it, and some professional tips to get you started almost guaranteeing a delicious results!
    Prep Time 45 minutes
    Total Time 2 hours 45 minutes
    Servings: 20 servings
    Course: Side Dish
    Cuisine: Korean
    Calories: 45

    Ingredients
      

    Salting Cabbage
    • 2.7 kg napa cabbage
    • ½ cup natural sea salt
    Porridge
    • 2 cups water
    • 2 tbsp sweet rice flour
    • 2 tbsp sugar
    Vegetables
    • 2 cups radish matchsticks
    • 1 cup carrots matchsticks
    • 7-8 green onion chopped into quarters
    • 3 pears core taken out and thinly sliced
    Seasoning
    • 12 cloves garlic
    • 2 tsp ginger grated
    • 1 white onion, medium minced
    • ½ cup fish sauce
    • 3 tbsp shrimp paste
    • 1 apple peeled and core taken out
    • 1¼ cups hot pepper flakes

    Equipment

    • 3-4 non-reactive large metal or plastic bowls
    • gloves
    • glass jars

    Method
     

    1. Split the cabbages in half and give it a good rinse especially close the bottom of the cabbage and the out layers.
    2. Put the cabbage in a large container/basin and rub salt all over the between the leafs. Arrange all the cabbage in a large basic and place a large plate on top. The plate needs to cover the whole basin. Add some cans or jugs of water on top. Let that sit for 2 hours. Remember to flip occasionally – every 30 minutes.
    3. While the cabbage is salting, make the porridge.
      Combine the water and flour and cook on medium heat for 10 minutes. Stir frequently with a balloon whisk. Slowly add the sugar and cook for 1 minute. Remove from the heat and let it sit on the counter until it is cool completely. Pour the porridge in a blender and add all the seasoning ingredients. The texture should be similar to a thin paste.
    4. After wash all the salt out of the cabbage. Split the cabbage half again and cut the core out. Let the cabbage sit in the strainer. You can test the cabbage if it's ready by tearing a piece to eat. the texture should be crunchy and salty at the same time.
    5. In another bowl, combine all the vegetables together. While wearing gloves, pour the spicy marinate into vegetables and mix well. Set aside.
    6. In a large basin that you used to salt the cabbage, spread the kimchi paste on each cabbage leaf. Open up the leafs between the cabbage and generously spread the marinate. Make sure each leaf is coated and even distribution.
    7. Once all the leaves are coated with the marinate, you can start to individually jar the kimchi separately. Pack the kimchi intoa clean, airtight container. Press hard and seal it. This can be eaten right after it is marinated.

    Notes

    SHELF LIFE
    The shelf life of kimchi in the fridge can vary based on factors such as the level of fermentation, storage conditions, and personal preferences for taste. Generally, kimchi can last for different durations depending on its stage of fermentation:
    1. Fresh Kimchi: If you’ve just made the kimchi and it hasn’t undergone significant fermentation, it can last for about 2-3 weeks in the refrigerator. During this period, the flavors are still mild, and the texture remains relatively crisp.
    2. Moderately Fermented Kimchi: As kimchi ferments further, it develops a stronger flavor and the texture may become softer. At this stage, which usually occurs after a few weeks in the fridge, it can last for an additional 2-3 months. The taste will continue to evolve during this time.
    3. Well-Fermented Kimchi: Fully fermented kimchi, with a tangy and complex flavor, can last for several months, sometimes even up to 6 months or more. While the texture may continue to soften, the fermentation process acts as a natural preservative, allowing the kimchi to maintain its quality for an extended period.
    It’s important to store kimchi properly to maximize its shelf life. Keep it in an airtight container to prevent exposure to air, which can lead to faster deterioration. Additionally, use clean utensils when serving kimchi to avoid introducing contaminants.
    Always trust your senses. If you notice any signs of spoilage, such as off odors, unusual colors, or a slimy texture, it’s best to discard the kimchi. While kimchi is known for its long shelf life, individual preferences for taste and texture play a significant role in determining when it is most enjoyable.
  • Mexican Fava Bean Salad

    Mexican Fava Bean Salad

    This Mexican fava bean salad is one of those dishes that surprises people — hearty enough to stand on its own as a meal, yet light and bright enough to serve alongside anything on the table. Fava beans, grilled cactus paddles, fresh tomatoes, cilantro, and jalapeños come together in a zesty lime dressing. It tastes like Mexico in a bowl.

    This post may contain affiliate links. If you purchase through these links, I may earn a small commission at no extra cost to you. Thank you for supporting Love & Harvest!

    Jump to Recipe

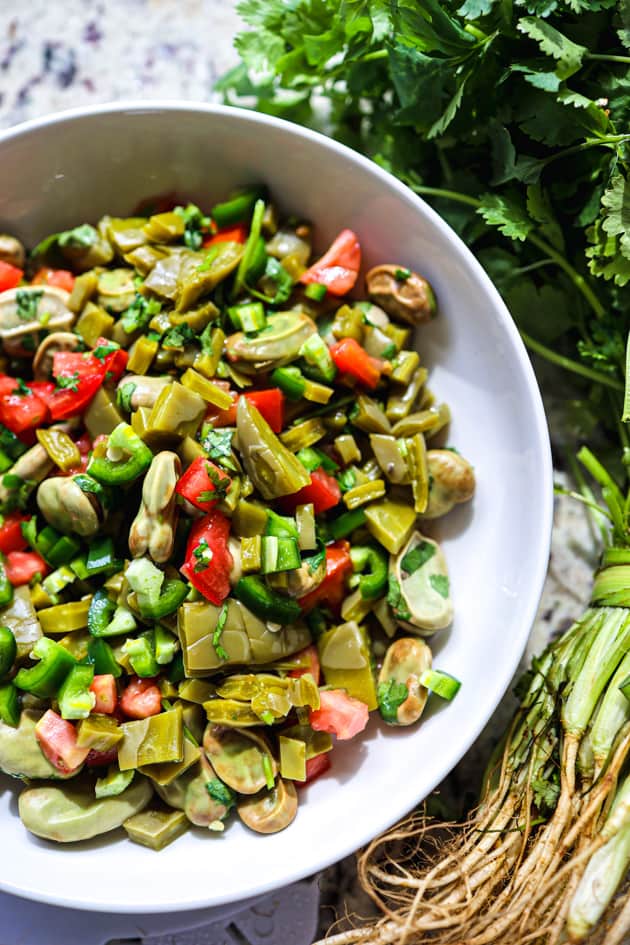
    Mexican fava bean salad with nopales, tomato and green onion in a white bowl

    What Makes This Salad Special?

    This salad stands out for its unique blend of flavors and textures. The fava beans give the salad its creamy, hearty base, the nopales add a slightly acidic green note that balances everything out, and the lime dressing pulls it all together with brightness and heat. Whether you use fresh or canned fava beans, this is a reliable, versatile, and deeply satisfying dish.

    Why Try This Salad?

    • Hearty and filling: about 8 g protein and 7 g fiber per serving, per the recipe card.
    • Offers a burst of authentic Mexican flavors that will surprise your palate.
    • An easy addition to any meal plan, dressed with just lime juice, olive oil and oregano.
    • Accessible year-round thanks to canned fava beans.

    Spoonful of fava bean and nopal salad lifted from the bowl

    Ingredients

    Key Ingredients

    Fava Beans

    You can use fresh or dried fava beans — both work beautifully. Canned fava beans are the most convenient option and require only a rinse before use.

    • Why they matter: Fava beans are the protein backbone of the salad. Their creamy, slightly earthy flavor pairs perfectly with the bright acidity of lime and the freshness of cactus.

    Cactus Paddles (Nopales)

    Nopales are a staple of Mexican cooking — slightly acidic, green, and succulent. Look for them fresh at Mexican grocery stores, or use jarred nopales as a convenient alternative.

    • Why they matter: Their mild acidity and firm texture balance the creaminess of the fava beans and keep the salad from feeling heavy.

    Tomatoes

    Use fresh, ripe tomatoes. Remove the seeds and use only the flesh to prevent the salad from becoming watery.

    • Why they matter: They add juiciness and a touch of sweetness that rounds out the acidity of the lime dressing.

    Cilantro

    Fresh cilantro is non-negotiable here. Its robust, herbal taste is one of the defining flavors of the Mexican profile in this dish.

    • Why it matters: Cilantro brings a refreshing herbaceousness that lightens every bite and adds that unmistakable Mexican identity.

    Jalapenos

    One to two jalapeños, roughly chopped, adds just the right level of heat without overpowering the other flavors. Remove the seeds for a milder kick.

    • Why they matter: Heat activates the other flavors in the salad and makes every bite more dynamic.

    Lime

    Generous lime juice forms the base of the dressing. Do not be shy — this salad needs real citrus brightness.

    • Why it matters: Lime acid brightens every ingredient, makes the beans taste fresher, and ties the dressing together.

    Mexican Oregano

    Mexican oregano has an earthy, slightly citrusy flavor that is distinct from Mediterranean oregano. It is worth seeking out for this recipe.

    • Why it matters: It adds depth and authenticity to the dressing — the flavor note that makes this taste unmistakably Mexican.

    Mexican fava bean salad with tomato and cilantro beside fresh green onions

    How to Cook Fresh Fava Beans

    Cooking fresh fava beans only takes 5–7 minutes depending on pod size. Remove the beans from their shells and boil them in salted water for 5–7 minutes. Meanwhile, prepare a bowl of ice water. Once the beans turn a vibrant moss green, transfer them to the ice bath immediately. Once cool, use your fingers to peel off the pale outer skin — the bright green inner bean is what you want.

    How to Cook Dried Fava Beans

    Dried fava beans require soaking and simmering before use.

    1. Place beans in a large bowl and cover with water. Soak overnight or for at least 8 hours.
    2. Drain, rinse, and place in a pot. Cover with fresh water at least 2 inches above the beans.
    3. Bring to a boil, then reduce to a simmer. Cook for 1 to 1.5 hours until tender, adding water as needed.

    For another hearty Mexican salad, try the original pico de gallo or the warm lentil and sweet potato salad.

    Fava bean and nopal salad on a white plate next to roast chicken and rice

    Frequently Asked Questions

    Can I use canned fava beans instead of fresh?

    Yes — canned fava beans are the easiest option. Simply drain, rinse thoroughly under cold water, and they are ready to use. The texture is slightly softer than fresh but the flavor is excellent, especially once dressed.

    What can I substitute for nopales?

    If you cannot find cactus paddles, you can substitute with blanched green beans, sliced zucchini, or cucumber for a similar crunchy, fresh element. The flavor profile will shift slightly but the salad will still be delicious.

    How long does fava bean salad keep?

    Store undressed salad in the refrigerator for up to 3 days. If already dressed, it is best consumed within 24 hours as the acid in the lime juice will continue to soften the vegetables.

    Is this salad served warm or cold?

    It is typically served at room temperature or slightly chilled. If using freshly cooked beans or nopales, allow them to cool before dressing and combining.

    Can I make the dressing ahead of time?

    Absolutely. Whisk all dressing ingredients together and store in a sealed jar in the refrigerator for up to 5 days. Give it a good shake before using.

    Mexican fava bean salad with tomato and cilantro beside fresh green onions

    Mexican Fava Bean Salad

     Try the amazing flavours of Mexico with our delicious fava bean salad! This dish features fresh cactus paddles, juicy tomatoes, and zesty onions. 
    Prep Time 30 minutes
    Cook Time 10 minutes
    Total Time 40 minutes
    Course: Salad
    Cuisine: Mexican
    Calories: 195

    Ingredients
      

    • 1 can (15pz) fava beans, drained and rinsed 2.5 cups of shelled and peeled fresh fava beans
    • 1 cup diced fresh tomatoes
    • 1 cup diced fresh cactus paddles "nopales"
    • ½ cup red onion, finely chopped
    • ¼ cup cilantro, finely chopped
    • 1-2 jalapeños, roughly chopped
    Salad Dressing
    • 2 limes, juiced
    • 1 tsp dried oregano
    • ¼ cup olive oil
    • 1 tsp sugar
    • 1 tsp salt to taste
    • black pepper to taste

    Method
     

    1. FRESH FAVA BEANS: bring a large pot of water to a boil. Remove the bean from the shell, and boil them for 5-7 minutes. 
       Once the pods have turned into a moss colour green, remove them and quickly place them in the ice bath. Now use your fingers to peel off the tough outer skin of each bean. The vibrant green inner bean is what you want to keep.
    2. CANNED FAVA BEANS: Remove the beans from the can and strain out the liquid. Give them a good rinse in water. Strain.
    3. DRESSING: Put all the ingredients together and give it a good stir with a whisk.
    4. PUTTING IT TOGETHER: Add all the fava beans tomato, cactus paddles, red onion, cilantro, and jalapeños together in a large bowl. Give it a good toss, and top it off with the dressing and give it another good toss. Serve immediately.
  • Vegetarian Mango Soy Ceviche

    Vegetarian Mango Soy Ceviche

    This Vegetarian Mango Soy Ceviche is proof that plant-based food can be just as vibrant and satisfying as anything from the sea. Juicy mango, tangy lime, jalapeño heat, and tender soy protein come together in a refreshing dish that is perfect for warm summer days — and ready in under 40 minutes.

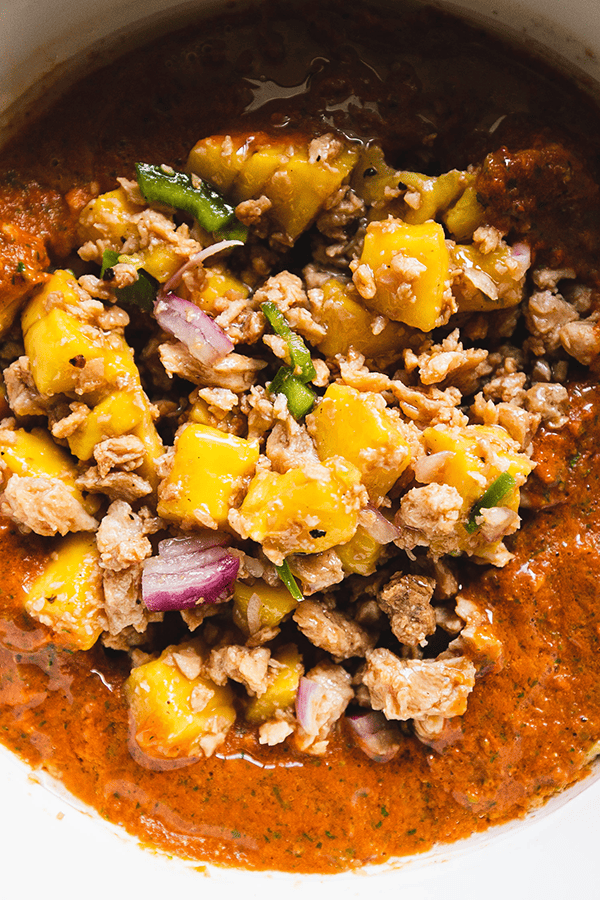
    Vegetarian Mango Soy Ceviche plated with red salsa

    This post may contain affiliate links. If you purchase through these links, I may earn a small commission at no extra cost to you. Thank you for supporting Love & Harvest!

    What Is Ceviche?

    Ceviche is a vibrant and refreshing dish that hails from the coastal regions of Latin America. Traditionally it is made by marinating raw fish or shellfish in citrus juice — the acid “cooks” the seafood, denaturing the proteins and giving it a firm texture. The result is a zesty and flavourful dish enjoyed as an appetizer or a light meal.

    Here in Mexico, ceviche is a celebration of fresh ingredients and bold flavours. It features an array of complementary components such as onions, tomatoes, herbs like cilantro, and a touch of heat from jalapeños. The beauty of ceviche lies in its versatility — vegetarian versions like this Mango Soy Ceviche use vegetables and fruits as the base, marinated in citrusy goodness to create a refreshing and tangy medley of flavours.

    Vegetarian Mango Soy Ceviche ingredients laid out

    My Vegetarian Journey in Mexico

    In my culinary journey through Mexico, I noticed the abundance of fresh vegetables and fruits in the markets, and also that vegetarian dishes did not always take the spotlight in traditional Mexican cuisine. As someone passionate about vegetarian food, I was inspired to create a dish that proves vegetarian cuisine is anything but mundane.

    With each bite of the Mango Soy Vegetarian Ceviche, I am transported to the bustling streets of Mexico, where the lively atmosphere and rich culinary heritage come alive. The succulent mangoes bring a burst of sweetness, the tangy lime juice adds a refreshing kick, and the dried soy protein creates a satisfying hearty texture that makes this dish a complete meal.

    Ingredients for Vegetarian Mango Soy Ceviche

    Dried Soy Protein

    • Why it matters: Dried soy protein (also called textured vegetable protein or TVP) is the meat substitute that gives this ceviche its hearty, chewy texture. Once boiled and cooled, it absorbs the lime, Maggie sauce, and spices beautifully, mimicking the texture of seafood without any fish. Look for it in health food stores or order it online.

    Ripe Mango

    • Why it matters: The mango delivers natural sweetness and tropical flavour that balances the acidity of the lime and the savoury depth of the sauces. Choose a mango that yields slightly to pressure — too firm and it won’t have enough flavour, too soft and it turns mushy in the dish.

    Fresh Lime Juice

    • Why it matters: Lime is the soul of any ceviche. The citric acid brightens every ingredient and ties the flavours together. Use freshly squeezed lime juice — two small limes — for the best results.

    Maggie Sauce

    • Why it matters: Maggie sauce adds a savoury, umami depth that makes this vegetarian ceviche taste complex and restaurant-worthy. It is a beloved Mexican condiment found in almost every kitchen in Mexico. A little goes a long way.

    Jalapeño

    • Why it matters: The jalapeño brings the heat that makes ceviche addictive. Finely chop it for even distribution. Remove the seeds for a milder version or keep them for full heat.

    Plated mango soy ceviche with red salsa base

    Why Try This Mango Soy Vegetarian Ceviche?

    1. Bursting with vibrant flavours: The combination of ripe mangoes, zesty lime juice, and the umami richness of Maggie sauce creates a harmonious balance that dances on your palate.
    2. Refreshing and light: The citrusy marinade paired with juicy mangoes provides a delightful burst of freshness, making it perfect for warm weather indulgence.
    3. Vegetarian delight: This ceviche showcases the beauty and versatility of vegetarian cuisine — you can enjoy the essence of a traditional ceviche while staying fully plant-based.
    4. Texture experience: The soy protein, juicy mango, and crisp jalapeño add layers of texture to every bite.
    5. Easy and quick: With straightforward instructions, you can have this on the table in under 40 minutes.
    6. Sustainable choice: Overfishing and unsustainable fishing practices have depleted marine resources worldwide. Choosing plant-based alternatives like this ceviche lets you enjoy a delicious meal with a lighter impact on the planet.

    Vegetarian ceviche close-up showing texture

    Vegetarian Ceviche Flavour Profile

    The flavour of Mango Soy Vegetarian Ceviche can be described as a tantalizing combination of sweet, tangy, savoury, and refreshing notes in perfect harmony. The ripe mangoes bring natural sweetness, the lime juice provides a bright citrusy kick that balances that sweetness, and the Maggie sauce and vegan fish sauce layer in a complex, savoury depth that makes this dish genuinely surprising for first-time tasters.

    Love fresh and vibrant Mexican-inspired dishes? Try these others from Love & Harvest:

    Frequently Asked Questions

    What is dried soy protein and where do I find it?

    Dried soy protein (also called TVP — textured vegetable protein) is a high-protein meat substitute made from defatted soy flour. It comes in small granules or chunks, is shelf-stable, and doubles in size when rehydrated. Find it at health food stores, Latin markets, or order a bag of dried soy protein on Amazon.

    Can I make this ceviche ahead of time?

    Yes. The red salsa and the soy protein can be prepared up to a day in advance and stored separately in the refrigerator. Combine everything and add the fresh mango just before serving to keep the texture and colour at their best.

    How do I make this dish spicier or milder?

    For more heat, keep the jalapeño seeds and add a second jalapeño. For a milder version, remove all seeds and membrane from the jalapeño before chopping, or substitute a milder pepper like poblano.

    Can I use fresh soy protein instead of dried?

    The recipe calls for dried soy protein specifically because its texture after rehydration mimics seafood. Fresh tofu can be substituted — press it dry, cube it, and use it directly without boiling. The flavour absorption will be different but still delicious.

    What can I serve this ceviche with?

    Serve with tostadas, corn tortilla chips, or slices of avocado. The red salsa base is also wonderful on its own as a dip. A squeeze of extra lime over the top just before serving brings out all the flavours.

    Is this ceviche gluten-free?

    The base ingredients are naturally gluten-free, but check your brand of dried soy protein and Maggie sauce — some brands add wheat-based ingredients. Substitute coconut aminos for the Maggie sauce if you need a certified gluten-free alternative.

    Vegetarian Mango Soy Ceviche

    Vegetarian Mango Soy Ceviche

    A delightful twist on the traditional seafood-based ceviche. Our Mango Soy Ceviche is bursting with vibrant colours and flavours, which offer a refreshing and tangy taste, perfect for warm summer days. Print Recipe Pin RecipePrep Time:20 minutes Cook Time:15 minutes Course: AppetizerCuisine: MexicanKeyword: ceviche, soy, vegetarianServings: 6 people

    Equipment

    • high speed blender
    • colander

    Ingredients

    • 2 cups dried soy protein
    • 1 ripe mango cubed
    • 1 jalapeno finely chopped
    • 1 tbsp red onion finely chopped
    • 2 small lime juiced
    • 1 tsp Maggie sauce
    • 2 tsp vegan fish sauce
    • 1 tsp salt
    • 1 tbsp olive oil garnish

    Red Salsa

    • 1-2 tsp olive oil
    • 4 small roman tomatoes
    • 3 branches of cilantro
    • 1 tsp apple cider vinegar
    • pinch of salt

    Instructions

    Red Sauce

    • In a saucepan, turn the heat to medium-high. Slice the tomatoes into quarter-inch slices. Add the oil to the pan and sear the sides of all the tomatoes until slightly browned. Remove from heat.
    • In a high-speed blender, add the grilled tomatoes, cilantro, vinegar, and salt. Blend until smooth. Set aside.

    Mango Soy Ceviche

    • Add the dried soy proteins to a colander. Rinse under the faucet to remove any dust particles. Set aside.
    • Bring 1 litre of water to a boil, then add the rinsed soy protein. Cook on medium heat for about 10 to 15 minutes. Watch the pot carefully as it can foam up. Drain through a colander and let the cooked soy protein cool to room temperature.
    • In a large bowl, combine the cubed mango, jalapeño, red onion, lime juice, Maggie sauce, vegan fish sauce, and salt. Add the cooled soy proteins and mix well.
    • On the serving dish, spread the red salsa as the base. Place the mango soy ceviche on top in the centre. Drizzle the olive oil evenly over the top. Serve cold.
  • Halloween Frankenstein Guacamole

    Halloween Frankenstein Guacamole

    This Frankenstein guacamole is the most adorable dip you can make, and it will be hard to be the first to dig into his sweet face!

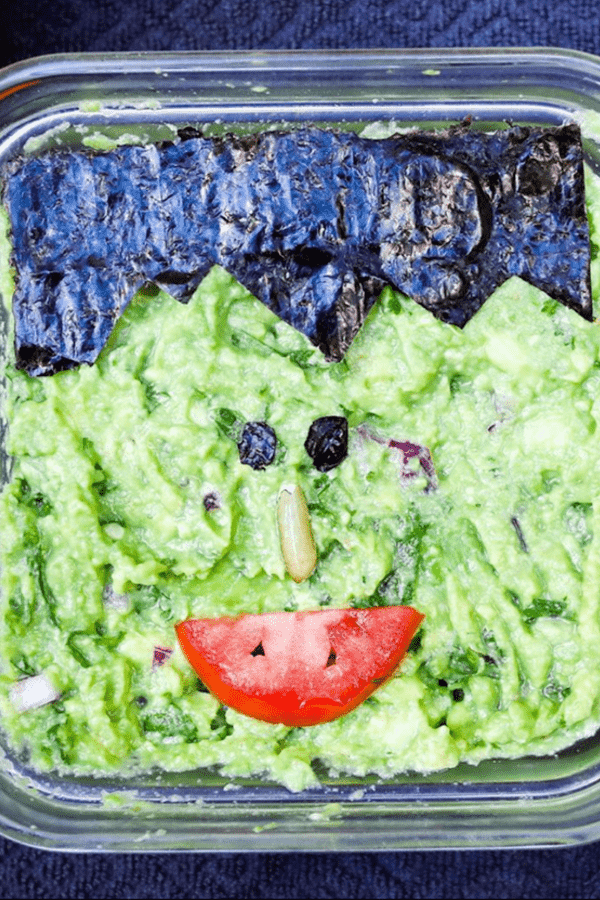
    Guacamole decorated as Frankenstein with nori hair and a tomato mouth

    This post is all about Halloween Frankenstein Guacamole. The food design of this adorable Frankenstein is made with sushi seaweed papers, sunflower seeds, and tomatoes.

    This post may contain affiliate links. If you purchase through these links, I may earn a small commission at no extra cost to you. Thank you for supporting Love & Harvest!

    This delicious guacamole recipe is so refreshing and delicious that we gave him life and turned him Mexican! At least until people start dipping his presence away!

    A cute recipe for food styling to bring to kids’ Halloween parties. It is an easy no-brainer side dish you can whip up in minutes. Halloween is a big week — kids are hammering you about costumes and parties. Don’t overthink the food. Make this easy peasy guacamole for Halloween today!

    The best part is that you can make this any size you want. All you need is to scale the design to fit the serving dish you are bringing.

    Key Ingredients

    Ingredients

    Avocado

    The star of the show — ripe, creamy avocados are the green canvas for Frankie’s face.

    • Why it matters: A ripe avocado should give slightly when pressed. Under-ripe avocados are grainy and hard to mash smoothly. Over-ripe avocados taste off. The lime juice you add prevents browning and adds essential citrus brightness. Traditionally in Mexico, we mash avocados in a mortar and pestle for authentic texture — chunky or smooth, your choice.

    Sushi Nori (Seaweed Paper)

    Nori sheets cut into Frankenstein hair and eyes.

    • Why it matters: Nori is what gives Frankie his iconic flat-top hairstyle and dark eyes. It cuts cleanly with scissors and holds its shape on the guacamole surface for serving time. It does not stay crisp for hours — serve within 30 minutes of decorating for best presentation.

    Lime

    Freshly squeezed lime juice mixed into the guacamole.

    • Why it matters: Lime does two critical jobs: adds citrus acidity that brightens all the flavours, and prevents oxidation (browning). If the guacamole will sit before serving, squeeze in an extra half lime and press plastic wrap directly onto the surface of the dip to exclude air.

    How to Make the Guacamole

    It only requires a few easy ingredients available in any grocery store: avocado, tomato, red onion, cilantro, and lime.

    First, pit the avocado and mash the flesh with a fork in a large bowl. Juice the lime into the avocado and mix well. Chop the tomato, red onion, and cilantro into small pieces. Add to the bowl. Salt to taste. It is that simple and so very delicious!

    How to Cut the Frankie Design

    Use sushi seaweed paper (nori) for the hair and eyes. Measure the length of your serving container, then use a cutting board and scissors to cut the fringe hair design. Be creative — play with the distance between the eyes and create your own version of Frankie. I use a sunflower seed as his nose, but it can be anything!

    Frankie Is Just the Beginning

    A Halloween Frankenstein Guacamole is just the start! How about a three-eye monster guacamole? A silhouette of a haunted house? The options are endless. For more Halloween fun, check out our Halloween Spooky Breakfast Bowl and Homemade Halloween Sugar Cookies.

    Why You Will Love This Halloween Frankenstein Guacamole

    • Easy recipe — just a few ingredients, no cooking required. Fresh and excellent tasting.
    • Fun design — Frankenstein is just the beginning! Design your own monsters at your own skill level.
    • Fun potluck dish — easy to make and bring, and completely captivating at Halloween parties.
    • Halloween food the kids will actually eat — avocado, lime and a few fun toppings.

    Frequently Asked Questions

    How do I keep guacamole from turning brown?

    Two methods work best: add extra lime juice (the acid slows oxidation), and press plastic wrap directly onto the surface of the guacamole, eliminating all air contact. An avocado pit in the bowl is a common tip but less effective than the plastic wrap method. Make the guacamole no more than 2 hours before serving for best color and freshness.

    How do I know if my avocados are ripe enough?

    Gently press the avocado near the stem end — it should give slightly under firm pressure but not feel mushy. The skin should be dark green to black. If the stem pops out easily and the flesh underneath is green (not brown), it is perfectly ripe.

    Can I add spice to this guacamole?

    Absolutely — and we encourage it! Add finely minced jalapeño or serrano pepper for a good kick. Serrano is hotter than jalapeño. Start with half a pepper, taste, and adjust from there. A pinch of cayenne also works if you want even heat distribution.

    Can I make this guacamole ahead for a party?

    Make it up to 2 hours ahead. Press plastic wrap directly onto the surface (no air gaps) and refrigerate. Decorate with the nori Frankenstein design right before serving — nori softens quickly once it contacts moisture.

    What can I serve with this guacamole besides tortilla chips?

    Sliced bell peppers, cucumber rounds, jicama sticks, and mini tostadas all work beautifully. For a Halloween theme, use black sesame crackers or triangle-cut tortilla chips arranged to look like bat wings around Frankie’s face.

    How large a batch should I make for a Halloween party?

    Plan on 1 medium avocado per 2 guests as a rough guideline. For a party of 20, use 10 avocados and scale all other ingredients proportionally. Use a large serving platter and scale up the Frankenstein design to match.

    Authentic Guacamole

    A simple yet delicious guacamole recipe that takes a matter of minutes to whip up!
    Prep Time 15 minutes
    Total Time 15 minutes
    Servings: 4 people
    Course: Appetizer
    Cuisine: Mexican
    Calories: 195

    Ingredients
      

    • 4-5 medium sized avocado
    • 1 – 1½ lime juice
    • 1 medium tomato diced
    • 1 branch cilantro chopped
    • ¼ red onion chopped
    • sea salt

    Method
     

    1. In a large mixing bowl, cut the avocado in half. Pit the centre seed out and scoop the green flesh into the bowl with a spoon.
    2. Use a fork and press the avocado. The more you mash the avocado the smoother the texture will be.
    3. Drizzle the lime on to the avocado and mix well. 1 lime is perfect but if you like to more acidic, you can half half a lime more.
      (Half half a lime more if you know it will not be eaten immediately to help it not turn brown).
    4. Add the chopped cilantro, tomato ,and red onion. Mix well. salt to taste

    Notes

    • Spicy: you’re more than welcome to add jalapeno or serrano peppers to give it a good kick.
  • Mole Ayocote – Purple Camp Bean Recipe

    Mole Ayocote – Purple Camp Bean Recipe

    I discovered this recipe in a small rural town outside Puebla while learning to grow oyster mushrooms with a government agricultural program. The workshop owner, Doña Mari, quietly invited us to brunch and set down a bowl of deep purple beans swimming in a rich red chile sauce she called Mole Ayocote. I fell in love on the first spoonful. This authentic, little-known Mexican camp bean recipe is now one of my most requested at the campsite.

    This post may contain affiliate links. If you purchase through these links, I may earn a small commission at no extra cost to you. Thank you for supporting Love & Harvest!

    Pot of purple ayocote beans simmering in red mole sauce

    Why This Is the Ultimate Camp Bean Recipe

    Beans are always an easy camping food — high in protein and filling. But flavorless canned beans are a letdown. Mole Ayocote is different: it is a purple broad bean stew built on a chilli puree of ancho peppers, guajillo peppers, cumin, garlic, and oregano. Make the red chile puree at home, bring it to the campsite, and the rest comes together in one pot over the fire.

    Why You Will Love This Recipe

    • Great vegetarian option — no meat needed. The combination of spice, peppers, and beans is hearty and deeply satisfying.
    • Authentic Mexican flavour — with these peppers and spices, you get the full Mexican experience from a single dish.
    • Delicious — the flavour is layered and complex, and the colour of the purple ayocote beans in brilliant red sauce is stunning.
    • Easy campsite cooking — minimal gear required. If the chile puree is made ahead, all you need is a pot and a fire.

    trail camp beans recipe

    Ingredients Deep-Dive

    Ayocote Beans (Purple Broad Beans)

    Ayocote is a type of Mexican purple runner bean — large, meaty, and with a savoury, nutty flavour that is almost meat-like. The creamy, starchy texture makes it an outstanding meat substitute for vegetarians. If you cannot find purple broad beans, any other broad beans work well. Avoid fava beans — they have a strong distinctive taste that clashes with the chile sauce.

    • Why it matters: The density and earthiness of ayocote beans stand up to the bold chile puree in a way that smaller beans simply cannot. The colour turning deep purple-red in the sauce is part of what makes this dish so visually spectacular.

    Ancho Peppers

    Ancho pepper is the dried version of the poblano. It is not spicy — it is used almost entirely as a colouring and flavouring agent, giving Mexican dishes like pozole and red enchilada sauce their deep warm red colour. It brings a mild smoky sweetness to the stew.

    • Why it matters: Without ancho, the stew turns pale and loses its rich visual appeal. A bag of dried mulato or ancho chiles lasts for months in your pantry.

    Guajillo Peppers

    Slightly spicy, but manageable. When using dried guajillo, always discard the seeds and stem — the flesh gives you the flavour and colour while removing most of the heat. Using both long and short guajillo (as Dona Mari taught) adds complexity without any extra effort.

    • Why it matters: Guajillo is the backbone of the stew’s flavour. Toasting it lightly before soaking unlocks a smoky dimension that transforms the sauce.

    Cumin

    This recipe has a strong cumin presence. In Mexico it is called comino and it is foundational to Mexican cooking — earthy, warm, and slightly bitter.

    • Why it matters: Cumin ties together all the other spice notes. Do not skip it or reduce the quantity.

    Oregano

    Use Mexican oregano if you can find it. It has a stronger, more earthy tone than Mediterranean oregano and a hint of citrus. The aroma is noticeably more complex.

    • Why it matters: Mexican oregano completes the authentic small-town Puebla flavour profile that makes this recipe so special.

    Manteca (Animal Lard)

    In small towns across Mexico, manteca is cheaper than cooking oil and adds a richness and depth that vegetable oil cannot replicate. For a vegan version, substitute with canola or sunflower oil — the dish still works beautifully.

    • Why it matters: Frying the onion and garlic in manteca before adding the chile sauce creates a flavour base (sofrito) that gives the stew its round, satisfying finish.

    cowboy bean recipe

    How to Cook Ayocote Beans

    Instant Pot Method

    Rinse the dried beans and fill the pot with 1/2 litre of water. Set to “Pressure Cook” for 40 minutes with the valve on. After the timer, let the valve release naturally. Reserve the bean water.

    Stovetop Method

    Rinse dried beans and fill a pot with 1 litre of water. Boil until tender — up to 80 minutes. Test after 80 minutes; if not soft, add 10 more minutes and more water. Reserve the bean water.

    How to Cook Beans While Camping

    A campfire Dutch oven is the best investment for camp cooking — heavy and bulky, but you can make anything in it, including these beans over an open fire. Fill with water, hang over the campfire or lay on a campfire grate, and cook for 45 minutes. Manage heat by adjusting the fuel and monitor water levels to prevent burning.

    Professional Tips for No-Fail Mole Ayocote

    Pro Tip 1: Soak the Beans Overnight

    Soaked beans in the Instant Pot cook in 15–25 minutes instead of 40. Unsoaked dried beans need 37–42 minutes. If you know you are making this the next day, soak overnight every time.

    Pro Tip 2: Use a Pressure Cooker

    Beans cook perfectly in a pressure cooker and in a fraction of the time. Unsoaked: 37–42 minutes. Well-soaked: 15–25 minutes.

    Pro Tip 3: Keep the Bean Water

    After the beans finish cooking, reserve that starchy water. When the sauce and beans simmer together for 30 minutes, the bean water adds depth and enriches the final stew.

    Pro Tip 4: Lightly Toast the Chile Peppers

    Toast the guajillo and ancho peppers in a dry pan until slightly browned and fragrant — the smoky flavour really comes through. After toasting, soak them in hot water for 10 minutes to rehydrate before blending.

    How to Serve Mole Ayocote

    • Bread — dip bread into the sauce to soak it all up while eating the beans with a spoon.
    • Rice — lay the purple camp beans over rice for the best and most simple supper.
    • Mashed potato — serve with mashed potato and vegetables, drizzled with the red sauce.
    • Vegetables — pair with rice and roasted vegetables for a complete vegetarian meal.

    More Mexican Bean and Stew Recipes

    If you love this Mole Ayocote, you will enjoy our green pozole (pozole verde) — another bold Mexican stew with equally deep flavour. For a warming bean-based soup with spice, check out instant pot Mexican menudo.

    Frequently Asked Questions

    What can I substitute for ayocote beans?

    Any large purple broad bean or runner bean works well. Black beans or pinto beans can work in a pinch for a different texture. Avoid fava beans — their distinctive strong flavour does not complement the chile sauce.

    Is this recipe spicy?

    No. Ancho peppers are mild and used mostly for colour. Guajillo adds a gentle warmth, but removing the seeds keeps the heat very low. This is suitable for children and those sensitive to spice.

    Can I make this vegan?

    Yes. Simply substitute the manteca (animal lard) with canola or sunflower oil. The rest of the recipe is fully plant-based.

    Can I make the chile puree ahead of time?

    Absolutely — this is the recommended approach for camping. Make the red chile puree at home, store it in a sealed container in the fridge or cooler, and at the campsite you only need to cook the beans and assemble.

    Where can I find ayocote or guajillo peppers?

    Mexican grocery stores carry both. Online, you can find dried mulato chiles that work similarly. For guajillo, most Latin food sections in larger supermarkets carry them dried.

    How long does this stew keep?

    Stored in an airtight container in the refrigerator, Mole Ayocote keeps well for up to 4 days. The flavours actually deepen overnight. It also freezes well for up to 3 months.

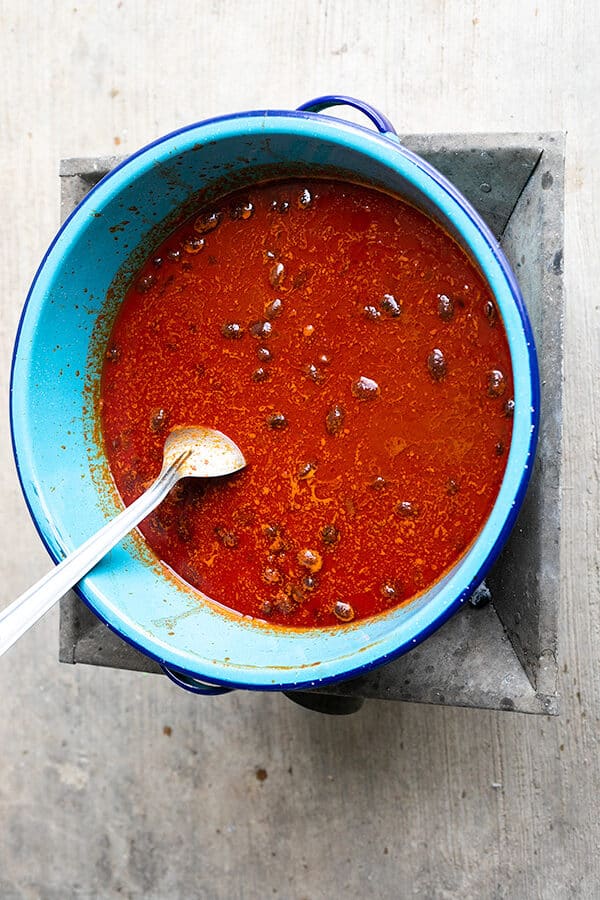
    Ladle in a blue pot of mole ayocote bean stew

    Mole Ayocote – Purple Camp Bean Recipe

    Delicious Mexican camp bean recipe to make on your next camping trip! Packed with the delicious flavour of ancho and guajillo peppers, cumin, thyme, oregano, and garlic This surely will be your favourite camping bean recipe! Print Recipe Pin RecipeServings: 6 people

    Equipment

    • blender

    Ingredients

    • 300 g ayocote beans or purple broad beans
    • 2 guajillo pepper
    • 1 ancho pepper
    • 1 tsp cumin powder
    • ¼ tsp clove powder
    • ¼ tsp black pepper
    • 1 tsp oregano dried
    • 1 tsp thyme dried
    • 3 bay leaf
    • ¼ cup manteca or cooking oil
    • ½ white onion
    • 3 clove of garlic
    • ½ L water
    • sea salt to taste

    Instructions

    Cooking ayocote beans with an Instant Pot

    • Rinse the dried beans in tap water and refill it with ½ litre of water.
    • Set the mode to “Pressure Cook” and set the timer to 40 minutes. Close the lid with the valve on.
    • After the timer sets off, let the beans sit until the valve naturally unlocks itself.
    • Take the beans out, but reserve the bean water. Set aside.

    Cooking ayocote beans with a pot on the stove

    • Rinse the dried beans in tap water and refill with ½L of water.
    • Boil the beans until tender. It can take up to 80 minutes depending on size.
    • After 80 minutes test the bean to see if the inside is soft. If needed, give it an extra 10 minutes and add more water.
    • Take the beans out once soft and tender, but reserve the bean water. Set aside.

    Cooking the Mole Ayocote

    • In a dry pan, place the guajillo and ancho peppers. Heat on high. Toast until browned and fragrant on the outside. Let cool.
    • Discard the seeds and stem. Pour hot water over the peppers until completely submerged. Soak for 10 minutes.
    • Place the soaked peppers in a blender with 1 cup of water. Add cumin, clove, oregano, thyme, and black pepper. Blend until smooth. Set aside.
    • In a large pot, place the manteca or cooking oil. Heat on medium-high.
    • Add onion and garlic. Fry until fragrant, about 2 minutes.
    • Add the red chilli puree, beans, bay leaf, and reserved bean water. Cook on medium-low heat for 20 minutes. Season with salt to taste. Serve.
  • Best Homemade Fried Chicken with Ranch Sauce

    Best Homemade Fried Chicken with Ranch Sauce

    This post may contain affiliate links. If you purchase through these links, I may earn a small commission at no extra cost to you. Thank you for supporting Love & Harvest!

    There’s a moment when you bite into a piece of perfectly fried chicken — that ear-splitting crunch, the steam that hits your face, and then the juice that runs — where you realize not all fried chicken is created equal. This recipe was gifted to me by a stranger on a Facebook group who had spent years in restaurant kitchens. He asked nothing in return. I’m passing it on to you the same way.

    Pile of crispy homemade fried chicken on a plate outdoors

    Why This Is the Best Homemade Fried Chicken

    Fried chicken is a social affair. It’s gathering food — the kind that fills a table with noise and happiness. What makes this recipe stand out is a two-part process: a citrus brine overnight and a double-fry method that locks in moisture while building a shattering crust. The result is chicken that’s deeply flavoured all the way to the bone, never dry, never greasy.

    Thank you, Ethan Chavoya, wherever you are.

    Golden fried chicken drumsticks and thighs with a crunchy crust

    Ingredients Deep-Dive

    Ingredients

    The Citrus Brine

    The brine is the heart of this recipe. Lemon juice breaks down the muscle fibres, salt draws moisture in rather than out (counterintuitively), and ginger adds a subtle warmth that doesn’t read as “ginger” in the finished chicken — it just tastes more alive. Sugar balances acidity and encourages browning during frying. Give the chicken a full 12 hours in the brine. Overnight is not optional here — it’s what separates good from unforgettable.

    The Dredge Liquid: Hot Sauce + Buttermilk

    The secret is a sour-base hot sauce mixed into the buttermilk. It tenderises further and leaves a faint tang in the finished crust. In Mexico, Valentina works perfectly. Elsewhere, Frank’s Red Hot Buffalo Sauce is the benchmark. Can’t find buttermilk? Mix 1 cup whole milk with 1 tbsp white vinegar, wait 5 minutes — done.

    The Breading Blend

    The combination of flour, breadcrumbs, and cornmeal creates three different textures in the crust: the flour gives it body, the breadcrumbs add a coarse chew, and the cornmeal produces those irresistible sharp ridges that stay crispy long after the chicken comes out of the oil. The spice blend — paprika, cayenne, garlic and onion powder, poultry seasoning — seasons the crust, not just the meat.

    The Oil and Temperature

    Use a neutral oil with a high smoke point: canola is ideal. The first fry at 275°F sets the crust and partially cooks the meat without burning. A second fry finishes the job and produces the deep amber colour. A deep-fry thermometer is your best tool here — guessing oil temperature is how you get pale, greasy chicken. For air frying, see the section below.

    The Ranch Sauce

    Sour cream base instead of mayonnaise keeps it tangy and light. Fresh chives and parsley are non-negotiable — dried herbs flatten the flavour. A touch of dried dill and white vinegar ties everything together. This ranch keeps for a week in the fridge and will be raided for carrots, celery, and anything else within reach.

    How to Make the Best Fried Chicken (Step-by-Step with Photos)

    Step 1 — Brine the Chicken

    In a large bowl, combine the chicken pieces with all the dry brine ingredients. Add the lemon juice and zest. Toss until everything is evenly coated. Transfer to a sealed bag or covered bowl and refrigerate for 12 hours minimum.

    Step photos: chicken pieces tossed with the brine ingredients in a bowl
    Step photos: chicken pieces lightly coated in buttermilk brine

    Step 2 — Air Dry and Dredge

    The next day, place the chicken on a wire rack over a baking sheet and return to the fridge — uncovered — for 2 hours. This surface drying is critical; wet chicken in hot oil spatters dangerously and produces a soggy crust. While it dries, whisk together the buttermilk, eggs, and hot sauce in one bowl. Combine all the breading ingredients in a second bowl.

    One piece at a time: dip in the wet mixture, then press firmly into the breading on all sides. Place back on the rack. Let the coated pieces rest in the fridge for 1 hour so the breading fully adheres.

    Step photos: hands dredging buttermilk chicken in seasoned flour on all sides

    Step 3 — First Fry (275°F)

    Heat the oil in a large wok or heavy pot to 275°F. Fry 3 pieces at a time — never crowd the pan. Lower each piece in slowly, holding the end for 3 seconds before releasing. Fry for 12–15 minutes until cooked through, then transfer to a paper-towel-lined rack. Repeat with remaining pieces.

    Step photo: tossing a floured chicken piece to shake off excess breading

    Step 4 — Second Fry (375°F) for Extra Crunch

    Raise the oil to 375°F. Fry each piece a second time for 3–5 minutes until deeply golden. The second fry is what produces the signature crunch. Transfer to fresh paper towels. Do not cover — steam will soften the crust.

    Breaded chicken pieces resting on a wire rack before frying
    Tray of flour-coated chicken pieces on a rack next to the dredging bowls

    Air Fryer Method

    Preheat to 400°F for 5 minutes. Cook drumsticks and thighs for 10 minutes, flip, then cook for another 10 minutes. Check doneness with a knife poke at the thickest point — juice should run clear. Internal temperature must reach 165°F. An air-fried version won’t match the deep-fried crunch, but it’s a solid weeknight alternative.

    What to Serve with Fried Chicken

    This chicken pairs beautifully with bright, acidic sides that cut through the richness. Try it alongside our Beet and Avocado Sashimi Appetizer for a party spread, or keep it classic with coleslaw and cornbread. The ranch sauce doubles as a vegetable dip — our kids have it with carrots and celery weekly.

    For a complete feast, the Easy Fall-Off-the-Bone Ribs make an incredible companion for big gatherings. Both can be prepped ahead and served together.

    Frequently Asked Questions

    Can I use chicken wings instead of drumsticks and thighs?

    Yes. Wings work well and make a great appetizer-sized serving. Note that wings cook significantly faster than thighs — reduce the first fry time to around 8 minutes and check doneness before the second fry.

    What if I can’t find buttermilk?

    Make it yourself in 5 minutes: combine 1 cup of whole milk with 1 tablespoon of white vinegar, stir, and let stand for 5 minutes. You’ll see the milk thicken slightly — that’s your buttermilk ready to use.

    How far ahead can I prep this recipe?

    The brine step can be done 24 hours in advance. The fully dredged, uncooked chicken can sit on the rack in the fridge for up to 2 hours before frying. The first fry can be done several hours ahead; just do the second fry right before serving for maximum crunch.

    Can I bake this instead of frying?

    You can, though the crust won’t achieve the same crunch. Bake on a wire rack at 425°F for 35–40 minutes, flipping halfway. Spray lightly with oil before baking to help the breading brown.

    How do I keep the chicken warm for a party?

    After the second fry, place on a wire rack set over a baking sheet in a 200°F oven. This keeps the chicken warm for up to 45 minutes without softening the crust. Do not cover or wrap — trapped steam is the enemy of crispy.

    Is there a Lodge cast iron skillet option?

    Absolutely. A Lodge 12″ cast iron skillet is excellent for shallow-frying this chicken with less oil. Use about 2 inches of oil and maintain temperature carefully — cast iron holds heat well but responds slowly to adjustments.

    best fried chicken love and harvest

    BEST Homemade Fried Chicken with Ranch Sauce

    Incredibley crispy golden brown fried chicken with super juicy flesh inside. The BEST homemade fried chicken you'll taste all made with fresh herbs and spices. A gorgeous bright and fresh brine that will tenderize your chicken for that super moist and juicy texture. All matched with an amazing ranch sauce that will get your guests dipping and crunching away. There is no better way of serving chicken than this. Print Recipe Pin RecipePrep Time:15 minsCook Time:30 minsCourse: Main CourseCuisine: AmericanKeyword: chicken, fried chickenServings: 5 people

    Ingredients

    Chicken Brine

    • 2 kg chicken legs and chicken wings mix
    • 1 TBSP salt
    • 1 TSP pepper
    • 1 spring fresh rosemary chopped
    • ½ TSP fresh thyme chopped
    • 1 TSP fresh ginger grated
    • 1 lemon juice
    • 1 lemon zest
    • 2 TSP sugar
    • 1 TSP chili flakes

    Dredge Liquid

    • 2 eggs
    • 1 cup buttermilk
    • 2 TBSP hot sauce

    Fried Chicken Breading

    • 2 cups flour
    • ½ cup bread crumbs
    • 3 TBSP cornmeal
    • 2 TBSP salt
    • 2 TSP pepper
    • 1 TBSP paprika
    • 2 TSP garlic powder salt
    • 2 TSP onion powder
    • 1 TSP poultry seasoning
    • 1 TSP cayenne powder

    Deep Fry

    • 4 cups canola oil

    Ranch Sauce

    • 1 ½ cups sour cream
    • 5 tsp white vinegar / lemon juice
    • 2 TBSP fresh chives chopped
    • ½ TSP fresh parsley chopped
    • 1 TSP dried dill
    • 1 TSP garlic powder
    • 1 TSP onion powder
    • 2 TSP salt
    • ½ TSP pepper

    Instructions

    Chicken Brine

    • In a large bowl, clean and rinse the chicken. Pat try. Cut the legs into two pieces separating the drumstick and thigh. Add the salt, pepper, rosemary, thyme, ginger, lemon juice, lemon zest, sugar, and chili flakes with the chicken. Toss and rub the chicken with the marinate. Put everything in a plastic bag and marinate overnight (12 hours).

    To Prepare Fried Chicken

    • Next day, take out a baking rack with a fitted baking sheet underneath. Take the bag of chicken out the fridge and give it a light toss to flick out access liquid. Put all the chicken pieces in the rack to air dry in the fridge.
    • Prepare the dredge liquid by combining the egg, buttermilk and hot sauce together with a whisk in a large bowl.
    • In a separate bowl (preferably a smaller bowl with tall wall – like a small pot) put the breading ingredients together. Combine well the flour, bread crumbs, cornmeal, salt, pepper, paprika, garlic salt powder, onion powder, poultry seasoning, and cayenne powder together.
    • Take the chicken out the fridge. Dip each chicken pieces separately in the liquid first. make sure all surface is covered with the liquid, and quickly drop the chicken piece in the breading bowl. Rub and put pressure to make sure all surface area is covered with the breading flour. if you see a gap, add some flour and rub it in. Give it a few taps for access flour, and place it back on the drying rack. Repeat until all the chicken pieces are dredge and breaded. Let them rest in the fridge for 1 hour before deep frying.

    To Make Fried Chicken

    • Heat your vessel to deep fry. I have a wok and I enjoy deep frying everything there. Add 4 cups of fresh canola oil. Preheat oil to 275F.
    • Depending how big the deep fryer you have, add enough chicken pieces where it has room to swim around and not be over crowded. I recommend 3 pieces at the same time.
    • Carefully dip half the chicken in the oil and hold on to the end for 3 seconds, and let it all go in the deep fryer. This is the reason we need the chicken as dry as possible. If there's liquid on the chicken, the oil will explode and burn your hand. Repeat until you have three pieces in the deep fryer. Fry for 12-15 minutes.
    • In a drying rack, add some paper towels. When the chicken is done cooking, take them out and place them on top of the paper towel. Make sure you're not over crowding the chickens. For them to maintain crispy, it needs air circulation to completely dry and not have any moisture. Serve

    Ranch Sauce

    • Whisk together the sour cream, white vinegar / lemon juice, fresh chives, and fresh parsley. Add the spices. Pour into a jar and chill in the refrigerator until ready to serve. This dressing will keep nicely in the refrigerator for up to a week. Enjoy!
  • Easy Ribs Recipe with Homemade BBQ Sauce

    Easy Ribs Recipe with Homemade BBQ Sauce

    This post may contain affiliate links. If you purchase through these links, I may earn a small commission at no extra cost to you. Thank you for supporting Love & Harvest!

    The biggest mistake people make with ribs at home is trying to grill them raw. That’s how you end up with a chewy, undercooked rack that nobody’s proud of. This recipe flips the script: slow-bake the ribs in the oven first until they’re impossibly tender, then finish them over charcoal for that caramelised, smoky crust. The result is fall-off-the-bone ribs that look like a grill master pulled them off — even if you’ve never grilled before.

    Glazed BBQ ribs on a white platter with homemade sauce

    Why This Ribs Recipe Works

    Reason 1: Bake Ahead, Grill with Confidence

    My husband loves this recipe because it removes all the pressure from grilling. The ribs are already fully cooked before they touch the grill — there’s no stress about raw meat, no thermometers required for doneness. All the grill needs to do is add caramelisation and char. He can focus on the performance and let the oven do the real work.

    bbq ribs recipe grill

    Reason 2: The Flavour Is Extraordinary

    The dry rub and homemade BBQ sauce use pantry staples, but together they produce something that tastes restaurant-calibre. The sugar in the rub caramelises on the grill. The liquid smoke, tamarind vodka, and molasses in the sauce create layers of smoky, tangy, deep flavour that store-bought BBQ sauce simply cannot mimic.

    Reason 3: Truly Hands-Off

    95% of the cooking time requires nothing from you. The ribs bake in foil for 2.5 hours, and then you grill them for 7–10 minutes. It’s dummy-proof. Once those ribs finish the slow bake, they will taste good no matter what happens on the grill. A great recipe for beginners and pros alike.

    Rack of ribs searing on a charcoal grill

    Ingredients Deep-Dive

    Ingredients

    The Dry Rub

    The rub is where the ribs’ flavour foundation is built. Kosher salt draws moisture to the surface and seasons the meat deeply. Brown sugar creates the caramelised crust on the grill and balances the savoury spices. Smoked paprika adds colour and a subtle smokiness even before the grill. Cumin adds an earthy warmth that makes the flavour complex without being identifiable as a single spice. Grind the rub fresh if you can — the difference is notable.

    Liquid Smoke

    This is what gives indoor or charcoal-light BBQ that authentic smoked-meat flavour. The concentrate I use is all-natural hickory liquid smoke — a few drops go a long way. I also use it on my Cured Salmon Gravlax recipe. Hickory and mesquite combined gives a complex, campfire-style depth that no dry spice can replicate.

    Molasses and Brown Sugar

    Together these two are the backbone of the BBQ sauce. They don’t make it sweet in a candy way — they create the deep, jammy thickness that makes a great BBQ sauce cling to the ribs. The molasses also adds a slight bitterness that balances the honey and vinegar.

    Smirnoff Spicy Tamarind Vodka

    This is the ingredient that sets this BBQ sauce apart from everything else. In Mexico it’s easy to find; elsewhere, substitute with dark rum. The tamarind adds a fruity tartness and the spice builds quietly in the background. It’s the unexpected ingredient that makes people ask “what is in this sauce?”

    Smoker Chips

    If you’re using charcoal, add wood chips to the coals. Apple or hickory smoker chips added to the coals give the ribs a real smoke character that liquid smoke alone can’t fully replicate. Soak the chips in water for 30 minutes before adding so they smoulder rather than burn.

    pork ribs recipe

    Charcoal, Propane, or Smoker?

    All three work. For the grilling step we just need high heat to caramelise the exterior — the ribs are already fully cooked. Personally, I prefer charcoal with a handful of wood for the smoke it generates. But if all you have is a propane grill set to high, these ribs will still be outstanding.

    Small blue kettle charcoal grill on a stone patio

    What to Serve with the Ribs

    Here are my favourite sides with these fall-off-the-bone ribs:

    • Tortillas — a favourite around here in Mexico. A warm tortilla is perfect for wrapping the meat with the BBQ sauce.
    • Potatoes — mashed, baked, or potato salad. All work beautifully as a starchy companion.
    • Salads — greens help cut through the richness. Try our Cold Beet and Avocado Sashimi — it’s elegant and goes perfectly with BBQ.
    • Bread — the best way to soak up extra sauce. Our Best Fried Chicken also makes an incredible pairing for a full feast.

    bbq pork ribs recipe

    Frequently Asked Questions

    Can I make these ribs ahead of time?

    Yes — and in fact they’re better that way. Bake the ribs up to 3 days ahead. The flavour develops more fully and the cold, firm ribs hold together better on the grill. Refrigerate wrapped in foil and grill straight from the fridge, adding a few extra minutes for the heat to penetrate.

    What if I burnt the ribs on the grill?

    Honestly? The burnt edges taste great. Because of the sugar in the rub, the meat chars quickly — and that slightly burnt, caramelised exterior with the homemade BBQ sauce is absolutely delicious. Don’t panic if parts get darker than expected.

    Can I make these for camping?

    These are arguably the perfect camping food. Bake them at home, transport them wrapped in foil. At the campsite, all you need is a grill and 10 minutes. They’re fast, impressive, and make you look like you cooked all day.

    How spicy is the BBQ sauce?

    Mildly spicy. The red chili pepper and tamarind vodka add a background warmth, not heat. If you want more kick, double the chili pepper or add a few drops of hot sauce to the finished sauce. Kids in our house eat this without complaint.

    Can I use spareribs instead of baby back ribs?

    Yes. Spareribs are larger and take longer to bake — allow 3.5 hours instead of 2.5 hours. Everything else in the recipe stays the same. Baby back ribs are leaner and more tender; spareribs have more fat and flavour.

    What’s the best way to reheat leftovers?

    Wrap leftover ribs in foil and reheat in a 300°F oven for 20–25 minutes. Unwrap for the last 5 minutes to re-crisp the exterior. Avoid microwaving — it makes the crust soggy and toughens the meat.

    Sliced BBQ ribs covered in homemade sauce on a white platter

    Easy Fall-Off-The-Bone Ribs with Homemade BBQ Sauce

    Easy and delicious slow-baked ribs in the oven for that juicy tender interior, and grilled over charcoal for that crispy caramalized exterior. Super addicting and adored by many! Print Recipe Pin RecipePrep Time:10 minsCook Time:3 hrsCourse: Main CourseCuisine: AmericanKeyword: BBQ, BBQ Sauce, Grill, Grilled Ribs, oven-baked ribs, Ribs, Ribs RecipeServings: 8 people

    Equipment

    • charcoal grill

    Ingredients

    Ribs Dry Rub

    • 2½ tbsp kosher salt
    • 1 tbsp garlic powder
    • 1 tbsp onion powder
    • 1 tbsp ground cumin
    • 3 tbsp brown sugar
    • 1 tbsp smoked paprika
    • ½ tsp Mexican spice
    • ½ tsp ground black pepper
    • 4 kg baby back pork ribs roughly about 8 racks

    BBQ Sauce

    • 2¼ tbsp vegetable oil
    • ½ white onion finely chopped
    • 1½ cup water
    • ½ cup tomato paste
    • ½ cup white vinegar
    • ⅓ cup brown sugar
    • 2½ tbsp honey
    • 2 tbsp worcestershire sauce
    • 2 tsp salt
    • ¼ tsp black pepper
    • 1¼ tsp liquid smoke flavouring
    • 2 tsp Smirnoff Tamarind Vodka
    • 3 garlic clove grated
    • ¼ tsp smoked paprika
    • 1 tbsp dark molasses
    • ½ tsp red Chili pepper
    • rib juice reserved

    Instructions

    Ribs Marinate

    • Preheat oven to 300°F.
    • Combine salt, garlic powder, onion powder, cumin, brown sugar, smoked paprika, mexican spice, and black pepper in a small bowl.
    • Place each rack of ribs on a double layer of foil; sprinkle rub all over ribs. Wrap racks individually and divide between 2 baking sheets.Bake ribs until very tender but not falling apart, about 2.5 hours for baby backs and 3.5 hours for spareribs.

    Best BBQ Sauce

    • Heat oil in a medium saucepan over medium heat. Cook and stir the onions in oil for 5 minutes. Stir in water, tomato paste, vinegar, brown sugar, honey, and Worcestershire sauce.
    • Season with 2 teaspoons salt, 1/4 teaspoon black pepper, liquid smoke, tamarind liquor / rum, garlic, smoked paprika, dark molasses, rib juice, and 1/2 tablespoon ground chile pepper. Bring mixture to a boil, then reduce heat. Simmer for 45 minutes, uncovered, or until sauce thickens. Remove from heat, and set sauce aside.
    • Carefully unwrap ribs; pour any juices from foil into a 4-cup heatproof measuring cup; reserve juices. Let ribs cool completely. Cover and chill juices. Rewrap ribs in foil and chill. Build a medium-hot fire in a charcoal grill, or heat a gas grill to high. If youre using charcoal, add some wood chips so there's a slight smoke to smoke the ribs to give it more flavour.
    • Add bbq sauce.
    • ***DO AHEAD: Ribs can be baked up to 3 days ahead (the flavor will be more developed, and the cold ribs will hold together better on the grill as they heat through).***

    Grilling

    • Grill ribs, basting with barbecue sauce mixture and turning frequently, until lacquered and charred in places and heated through, 7-10 minutes. Transfer to a cutting board; cut between ribs to separate. Transfer to a platter and serve with additional barbecue sauce.

    Notes

    ***DO AHEAD: Ribs can be baked up to 3 days ahead (the flavour will be more developed, and the cold ribs will hold together better on the grill as they heat through).***

  • How To Make Gourmet Homemade Sausages: Chorizo & Apple Sage

    How To Make Gourmet Homemade Sausages: Chorizo & Apple Sage

    This post may contain affiliate links. If you purchase through these links, I may earn a small commission at no extra cost to you. Thank you for supporting Love & Harvest!

    Once you make sausages from scratch, it’s very hard to go back to the grocery store kind. Not because it’s faster or cheaper — it isn’t — but because the taste of fresh, nitrate-free sausage made with real herbs and your own choice of spices is in a different league entirely. This guide walks you through two gourmet recipes: a vibrant, chilli-red Classic Chorizo and a sweet, aromatic Apple Sage Maple Syrup breakfast sausage. Both are easier than you think.

    homemade sausages

    Why Make Your Own Sausages?

    Commercial sausages contain nitrates — preservatives that help give them their pink colour and extended shelf life. At low levels they’re considered safe, but they’re still there. When you make sausages at home, you control every ingredient: the quality of the pork, the salt type, the herbs. You know exactly what’s inside. The taste reflects that.

    This is also a surprisingly fun family project. Kids love the stuffing process, and the moment the first batch hits a hot cast iron skillet, the smell alone makes everyone appear in the kitchen.

    homemade sausage seasoning

    Ingredients Deep-Dive

    Ingredients

    The Meat Ratio: Pork + Pork Fat

    The standard ratio is 80% lean ground pork to 20% back fat. The fat is not optional — it’s what gives the sausage its juicy, succulent texture and prevents it from drying out during cooking. Ask your butcher to grind both the lean and fat together twice through the machine. Two passes through a fine grinder creates the smooth, emulsified texture that commercial sausages achieve with machinery. If you want to invest in your own machine, a KitchenAid meat grinder attachment is excellent for home use.

    Classic Chorizo: Ancho and Guajillo Chillies

    These two dried Mexican chillies are the soul of the chorizo. Ancho is the dried version of a poblano — it’s fruity, mild, and adds deep colour. Guajillo is slightly more tannic with a berry-like flavour. Neither is hot. Together, they produce the brick-red colour and complex flavour that makes Mexican chorizo unmistakable. Combined with white vinegar (which tenderises the meat and brightens the flavour), Mexican oregano, and a pinch of clove and cinnamon, this is a chorizo that tastes authentic and homemade in the best possible way.

    Apple Sage Maple Syrup: Sweetness with Depth

    This sausage is an homage to the breakfast sausages I grew up eating in Vancouver — sweet, fat-rich, and deeply comforting. Grated apple adds natural sweetness and moisture. Fresh sage provides an herbal backbone. Maple syrup creates the sticky-sweet glaze when the sausages hit a hot pan. A splash of sweet red wine rounds everything out. These are remarkable on their own, but also extraordinary crumbled into pasta or egg dishes.

    The Casing

    Natural hog casings are available at most butchers and specialty meat shops. They give the sausages that classic snap when you bite in, and they hold up beautifully on a cast iron skillet. Submerge them in lukewarm water and rinse the insides by running water through the tubes before use. If you can’t source natural casings locally, sausage stuffers and casing kits are available online.

    Salt Choice Matters

    Skip curing salt (sodium nitrate) — it’s unnecessary for fresh sausages you’ll cook within a few days. Use high-quality sea salt. We use Sal Faro Verde from Colima, Mexico — a western state famous for its natural sea salt. The mineral content affects flavour in a noticeable way. Good sea salt is an investment that pays off in every dish you make.

    gourmet sausage recipes

    Tools You Need

    This recipe is designed to require minimal equipment. All you need:

    • A butcher who will grind your pork and fat (twice)
    • A large funnel (wider mouth is easier)
    • Natural hog casings (from your butcher or online)
    • A toothpick for air bubbles

    That’s it. No sausage stuffer machine required, though you’re welcome to upgrade. The funnel method is slower but completely achievable for home batches. If you cook sausages often, a dedicated vertical sausage stuffer will save you significant time on larger batches.

    unique homemade sausage recipes

    How to Stuff the Sausages

    Tie one end of the casing tightly. Feed the casing onto the funnel accordion-style, leaving about 4 inches hanging off the end. Fill the funnel with meat and use your thumb to push it through. Work slowly — you want firm, evenly filled sausages without air pockets. Poke any air bubbles with a toothpick as they appear.

    Don’t overstuff. Leave room in the casing for expansion during cooking. An overstuffed sausage will split open on the heat. A split sausage still tastes good, but it reveals all the filling and loses its shape. When all the casing is filled, twist into links at 5-inch intervals, alternating the direction of each twist.

    The 12-Hour Fridge Rest

    After stuffing, lay the sausage links uncovered on a rack over a baking sheet and refrigerate for at least 12 hours. This step is essential for two reasons: it lets the meat absorb the seasoning fully, and it dries the outer casing slightly so it doesn’t burst from excess moisture during cooking.

    Serving Suggestions

    The Chorizo is spectacular in scrambled eggs, crumbled over fresh homemade pasta, or simply pan-fried and served with crusty bread. The Apple Sage sausages are outstanding as a breakfast plate alongside eggs and toast, or paired with a bright salad like our Beet and Avocado Sashimi for a brunch board.

    Frequently Asked Questions

    How long do homemade sausages keep?

    Fresh sausage links keep in the refrigerator for up to 2 days after the drying stage. For longer storage, freeze them for up to 3 months. Freeze individually or separated by parchment paper so they don’t stick together. Thaw overnight in the refrigerator before cooking — never on the counter.

    Do I need a sausage machine?

    No. A large funnel and your hands are sufficient for home batches. The process is slower than a dedicated stuffer, but entirely achievable. If you plan to make sausages regularly, a vertical sausage stuffer is a worthwhile upgrade — they fill casings much faster and with more even pressure.

    What if the casing breaks during stuffing?

    It happens to everyone, especially on the first batch. If the casing tears, stop, tie off what you have, and start a new section. A casing tear doesn’t affect the taste — the sausage just won’t hold its shape as neatly. Those broken ones become the cook’s snack.

    Can I skip the casings and make sausage patties instead?

    Absolutely. Shape the seasoned meat into patties and cook directly in a cast iron skillet over medium heat. You lose the snap of the casing but the flavour is identical. This is also a great way to test your seasoning before investing in casing materials.

    Can I freeze the sausage meat before stuffing?

    Yes. Season the meat, mix thoroughly, then freeze in portions before the stuffing step. Thaw overnight in the fridge, then stuff and proceed with the drying step. This is helpful if you want to prep the meat one weekend and stuff the following weekend.

    What’s a good sausage flavour variation to try next?

    Some excellent combinations to experiment with: rosemary with cayenne and sea salt; habanero with garlic and onion powder; blueberry with ginger, nutmeg, and maple syrup; cheddar cheese cubed into the pork with paprika; or a Cajun blend of cumin, cayenne, and paprika. The template is always the same — 1kg pork, 200g fat, 2 tbsp sea salt — and everything else is creative freedom.

    homemade fresh chorizo

    Gourmet Fresh Sausages: Classic Chorizo & Apple Sage

    Learn how to make fresh gourmet Sausages right at home. Two simple recipes, Classic Chorizo and Apple Sage Maple Syrup sausages. You'll fall in love with these two popular choices that is bursting with flavour and colour. Print Recipe Pin RecipePrep Time:30 minsCook Time:12 mins

    Equipment

    • funnel

    Ingredients

    Classic Chorizo

    • 1 kg ground pork grounded twice in the machine of your butcher
    • 200 g pork back fat, grounded
    • 5 tbsp white vinegar
    • 1 ancho chili
    • 2 guajillo chili
    • 1.5 tsp paprika
    • 1 tsp vegetable oil
    • 2 tbsp sea salt
    • ½ tsp ground cumin
    • ¼ tsp ground black pepper
    • 1 tbsp mexican oregano
    • a pinch of clove
    • ¼ tsp cinnamon
    • 1 garlic, grated
    • 6 feet small hog casings

    Apple Sage Maple Syrup Breakfast Sausages

    • 1 kg ground pork grounded twice in the machine of your butcher
    • 200 g ground pork back fat
    • 2 tbsp sea salt
    • 2 tsp ground fresh black peppers
    • 3 tbsp brown sugar
    • 2 small apple, peeled and grated
    • 2 garlic clove, grated
    • 10 fresh sage leaf, chopped
    • ½ cup maple syrup
    • ¼ cup sweet red wine
    • 6 feet small hog casings

    Instructions

    Classic Chorizo

    • Combine all ingredients in a large bowl. Wear gloves in this process and mix, push, knead and squeeze the mixture until well blended.
    • Wrap well and chill overnight or around 8 hours before using.
    • To taste for seasoning, make a small patty of the sausage mixture and cook it in a small skillet over medium-low heat. Taste and adjust the seasoning to your liking. If not shaping the sausages immediately, refrigerate until you’re ready to proceed.
    • To make sausage links, put the casings in a medium bowl and set it in the sink. Rinse the casings under cool running water: Hold one end of each piece of casing open under the tap and flush it out by gently running cool water through it. (Once you fill part of the casing, use your hands to push the water through to other end.) Fill the bowl with fresh, cool water and let the casings soak for 10 minutes.
    • Take out your large funnel. Splash cool water onto the end to moisten it. Open an end of one piece of casing and pull it over the end of the tube. Push the rest of the casing onto the tube accordion-style, leaving 3 or 4 inches hanging off the end.
    • Fill the funnel with the sausage mixture and feed it through with your thumb or fingers just until it reaches the end of the tub. Tie the end of the attached casing into a knot, and slide it up over the tube until the knot hits the tip of the tube.
    • Continue to feed the meat mixture through the tube to fill the casing, pressing your thumb and forefinger against the tip of the tube to control the rate and tightness of the filling. Go slowly, don’t overstuff (but do stuff firmly), and watch for air holes. When there are only 3 to 4 inches of empty casing left, stop the feed, slip the casing off the tube and tie it in a knot about 1/2 inch from the end of the sausage filling—this extra space will fill in as you make links
    • Use a skewer or toothpick to prick any air holes that have formed during stuffing. Repeat with the remaining casings and sausage mixture.
    • To make links, lay one sausage at a time on a clean work surface, with the front end of the sausage (the end where you began filling) in front of you and the rest of the sausage lying to the right. Measure 5 inches from left to right and pinch the casing at that spot between your thumb and forefinger. Twist the unlinked portion away from you at least 4 or 5 turns to bind off the link on the left. Measure another 5 inches and pinch and twist away from you to form another link. Repeat until you reach the end of the casing, always twisting in the same direction. Prick any remaining air holes.
    • Lay the links, uncovered, on a rack set over a rimmed baking sheet. Dry in the refrigerator for 12 hours to allow the flavors to meld and to give the casings a good bite when cooked. Drying will also reduce the amount of moisture in the meat, too much of which can steam and lead to bursting.
    • To cook the sausage links, heat the oil in a large, preferably cast-iron, skillet over medium heat. Cook, turning as needed, until browned and cooked through, about 12 minutes.

    Apple Sage Maple Syrup Sausages

    • In a small bowl, mix the salt, pepper, garlic, and sage. Add the seasonings and the wine to the ground meat and mix briefly but thoroughly with your hands. Don’t overmix, or the fat could begin to melt.
    • To taste for seasoning, make a small patty of the sausage mixture and cook it in a small skillet over medium-low heat. Taste and adjust the seasoning to your liking. If not shaping the sausages immediately, refrigerate until you’re ready to proceed.
    • To make sausage links, put the casings in a medium bowl and set it in the sink. Rinse the casings under cool running water: Hold one end of each piece of casing open under the tap and flush it out by gently running cool water through it. (Once you fill part of the casing, use your hands to push the water through to other end.) Fill the bowl with fresh, cool water and let the casings soak for 10 minutes.
    • Take out your large funnel. Splash cool water onto the end to moisten it. Open an end of one piece of casing and pull it over the end of the tube. Push the rest of the casing onto the tube accordion-style, leaving 3 or 4 inches hanging off the end.
    • Fill the funnel with the sausage mixture and feed it through with your thumb or fingers just until it reaches the end of the tub. Tie the end of the attached casing into a knot, and slide it up over the tube until the knot hits the tip of the tube.
    • Continue to feed the meat mixture through the tube to fill the casing, pressing your thumb and forefinger against the tip of the tube to control the rate and tightness of the filling. Go slowly, don’t overstuff (but do stuff firmly), and watch for air holes. When there are only 3 to 4 inches of empty casing left, stop the feed, slip the casing off the tube and tie it in a knot about 1/2 inch from the end of the sausage filling—this extra space will fill in as you make links
    • Use a skewer or toothpick to prick any air holes that have formed during stuffing. Repeat with the remaining casings and sausage mixture.
    • To make links, lay one sausage at a time on a clean work surface, with the front end of the sausage (the end where you began filling) in front of you and the rest of the sausage lying to the right. Measure 5 inches from left to right and pinch the casing at that spot between your thumb and forefinger. Twist the unlinked portion away from you at least 4 or 5 turns to bind off the link on the left. Measure another 5 inches and pinch and twist away from you to form another link. Repeat until you reach the end of the casing, always twisting in the same direction. Prick any remaining air holes.
    • Lay the links, uncovered, on a rack set over a rimmed baking sheet. Dry in the refrigerator for 12 hours to allow the flavors to meld and to give the casings a good bite when cooked. Drying will also reduce the amount of moisture in the meat, too much of which can steam and lead to bursting.
    • To cook the sausage links, heat the oil in a large, preferably cast-iron, skillet over medium heat. Cook, turning as needed, until browned and cooked through, about 12 minutes.
  • Perfect Make-Ahead Cold Appetizers With Avocado & Beet

    Perfect Make-Ahead Cold Appetizers With Avocado & Beet

    This post may contain affiliate links. If you purchase through these links, I may earn a small commission at no extra cost to you. Thank you for supporting Love & Harvest!

    This appetizer looks like it belongs on the table of a fine dining restaurant. Sliced paper-thin and fanned out on the plate, with a light soy-sesame dressing drizzled on top — it’s one of those dishes that earns genuine reactions when people see it. The best part? It takes about 20 minutes, costs almost nothing, and can be prepared entirely ahead of time. The beet keeps for days in the fridge. The avocado is sliced at serving time. Done.

    Beet sashimi slices with a fanned avocado on a bed of greens

    Why You Should Try This

    The taste is fresh and packed with flavour. It’s a beautiful presentation dish — elegant without effort. For vegetarians and anyone who can’t eat salmon sashimi, this is the showstopper appetizer that replaces it. The paper-thin slices create the visual of sashimi without the fish, and the beet and avocado together provide a combination of earthy depth and creamy richness that works surprisingly well.

    It’s also one of the most make-ahead-friendly dishes you’ll find. Cooked beet keeps in the fridge for up to a week. Prep the beet on Sunday, and this appetizer can be on the table in 5 minutes on any night of the week.

    sliced avocado appetizer

    Ingredients Deep-Dive

    Ingredients

    Beets — Colour and Flavour

    It took me a while to fully appreciate beets. The earthy, slightly sweet flavour is distinctive and takes some getting used to. Now I love them — the colour they bring to a plate is unmatched. For this appetizer, use large red beets — they produce the most dramatic colour and hold their shape well after cooking.

    Avocado — Creamy Texture

    Avocado brings a creamy richness without being heavy, and its mild, buttery flavour is the perfect counterpoint to the earthy beet. Select avocados that are just ripe — they should yield slightly to gentle pressure but not feel mushy. Overripe avocados won’t hold their shape when sliced thin. An interesting fact: the avocado was first domesticated in Puebla, Mexico — the city where I currently live.

    The Soy Sauce Dressing

    Simple and versatile. Soy sauce provides the salt and umami backbone; sesame oil adds a toasted nuttiness; white vinegar brings brightness; olive oil adds body; sugar balances. Together they produce a dressing that tastes specifically right with this dish — neither heavy nor watery, and it soaks into the thinly sliced beet and avocado beautifully. Use Kikkoman soy sauce as the benchmark — it’s consistently balanced and available everywhere.

    The dressing recipe comes in two sizes: a small serving for 2–4 people, and a larger ±1 cup batch for parties. Both are included in the recipe card below.

    easy cold appetizers to make ahead

    Pro Tips for Perfect Results

    Pro Tip 1: How to Cook the Beets

    Peel the beet with a vegetable peeler, cut off the ends, and halve. Place in a pot, cover with water, and boil for 10 minutes. Then drain and let the beets cool inside the covered pot — this way the residual steam keeps the beet moist rather than drying it out. You want it fully cooked but still juicy and firm enough to slice paper-thin. A good stainless saucepan with a tight lid makes this step easy. Refrigerate the cooked beet covered until needed — it keeps for up to a week.

    Pro Tip 2: How to Slice Paper-Thin

    Place the beet or avocado flat-side down on the cutting board. Use a long, sharp knife and slice as thin as you possibly can, keeping the slices in order as you cut. When you lift the knife, the slices will try to stick to the blade — use a finger to guide them back down onto the cutting board. Once the whole vegetable is sliced, gently squeeze the sides to fan the slices out into a cascading shape. From here you can arrange them in a long line, a wave, or roll sections into a rose. Wash the knife and board between the beet and avocado so beet colour doesn’t transfer.

    Serving Ideas

    This appetizer is extraordinarily versatile at the table. It works beautifully alongside our Fresh Beet Pasta for a beet-themed dinner that looks deliberately styled. For BBQ parties, pair it with our Fall-Off-the-Bone Ribs — the fresh, cold appetizer contrasts wonderfully against warm, smoky meat. Place on a bed of lettuce or micro-greens to elevate the presentation further.

    Frequently Asked Questions

    How far ahead can I prepare this?

    The beet can be cooked and refrigerated up to a week in advance. The dressing can be made 3–4 days ahead. Slice the avocado only when you know serving time is close — avocado browns quickly once cut. To preserve sliced avocado for a few hours, squeeze lime juice over it immediately after slicing and keep covered in the fridge. Don’t slice the avocado the night before; it won’t look as fresh.

    How do I keep the avocado from browning?

    Squeeze fresh lime juice over every cut surface immediately. This slows oxidation significantly. Keep the sliced avocado covered with plastic wrap pressed directly against the surface — minimising air contact is the key. Even with lime juice, sliced avocado is best used within 2–3 hours of cutting.

    Can I serve this as a main dish?

    As an appetizer it serves 4–6 people generously. As a light main for 2, it works beautifully alongside a bowl of soup or a slice of crusty bread. Add a soft-boiled egg on top and it becomes a more substantial vegetarian plate.

    What if I can’t slice the vegetables thin enough?

    A mandoline slicer will produce perfectly uniform paper-thin slices with minimal effort. Set it to 1–2mm thickness. Exercise caution with the finger guard — mandolines are notoriously sharp. If you’re slicing by hand, a thin-bladed knife (a Japanese-style gyuto or slicing knife) works much better than a thick chef’s knife for this task.

    Can I make the dressing without sugar?

    Yes. For the dressing, omit the sugar and use a low-sodium soy sauce or tamari. The resulting dish is still flavourful and satisfying.

    Can I add other vegetables to the sashimi plate?

    Yes. Thinly sliced cucumber, radish, or yellow beet all work beautifully alongside red beet and avocado. Cucumber adds crunch and freshness; radish adds a peppery bite; yellow beet provides a softer flavour than red while maintaining the visual contrast. A plate with all four becomes a genuine centrepiece.

    Bowl of thin beet slices and avocado on a woven placemat

    Delicious Make-ahead Beet and Avocado Sashimi Appetizer

    Print Recipe Pin RecipePrep Time:10 minsCook Time:10 mins

    Ingredients

    • 2 large beets
    • 2 ripe avocado

    Small Serving Soy Sauce Dressing

    • 1 tbsp soy sauce
    • 2 tsp sesame oil
    • 1 tbsp white vinegar
    • 1 tbsp olive oil
    • 1 tbsp white sugar

    ± 1 Cup Serving Soy Sauce Dressing

    • ¼ cup soy sauce
    • 2 tsp sesame oil
    • ¼ cup white vinegar
    • ¼ cup olive oil
    • ¼ cup white sugar

    Instructions

    To Cook the Beet

    • Using a vegetable peeler, take out the skin of the beet and cut the ends off. Split it in half.
    • Place the beets inside a pot and fill it up with water until the beets are covered. Place the lid on top. Boil for 10 minutes. Drain and let the beets cool inside the pot with the lid on.

    Arranging the Salad

    • Use a paper towel to dry the beets, and place the beet flat side down on the cutting board. With a very sharp and thin knife, carefully slice the beet. When you lift the knife, the thinly sliced beet will try to stick to the knife. Use a finger to stop the sheet from falling out and place it back in the beet in the same arrangement. Slice the following slice and try to keep it has thin as possible. Repeat until the whole beet is thinly sliced.
    • Using the same methodology, slice the avocados. Remember to wash the board and knife so the beet colour doesn't stick to the avocado.
    • Fan out beet and avocado slices so that they form a long line with the slices overlapping each other. I usually remove the small slices from the ends because they are difficult to shape. Starting from one end, curl avocado slices toward the center, until I get a wave.
    • Use a piece of leaf or anything decorative to place it on the plate. Then place the beet and avocado sashimi on top.

    Dressing

    • Combine all the ingredients together and place it in a cup. When you're about to add it to the salad, give it a good shake or stir and drizzle it on top of the avocado and beet.

    Notes

    • to keep the avocado from browning, squeeze the juice of the lime on top of the avocado to preserve it from browning. Still, cut the avocado when you know serving time is almost there. Try not to cut it the day before like the beets. They don’t preserve the same.
    • No-sugar option: leave the sugar out of the soy sauce dressing.
  • The best savoury Easy Rosemary Beer Bread

    The best savoury Easy Rosemary Beer Bread

    This Easy Rosemary Beer Bread is the one recipe people always ask me about after they try it. No yeast, no kneading, no overnight fermentation — just one loaf pan and about an hour. The combination of rosemary, beer, and toasted walnuts gives it a depth of flavour that most people do not expect from such a fast bread. Slather it with fresh butter and a pinch of sea salt and you will understand why my aunt requests this every single time she visits.

    This post may contain affiliate links. If you purchase through these links, I may earn a small commission at no extra cost to you. Thank you for supporting Love & Harvest!

    easy rosemary bread no yeast

    This post is all about no-knead bread with rosemary and beer — the best savoury bread that is super easy to make.

    My Story

    A few years ago when I was visiting an aunt from Texas, she showed me her large rosemary bush at the front of her house. She was very proud it grew so large on its own. She asked me to make something with it because she had so much. This artisan bread always brings me back to that day. She loves this bread so much that every time she visits me in Mexico she asks if I have time to make it — and now I just always show up with a loaf without her ever needing to ask.

    Easy Rosemary Beer Bread

    Ingredients Deep-Dive

    Ingredients

    Flour

    The recipe calls for all-purpose white flour. You can substitute whole wheat, but do not go 100% whole wheat — it will make the bread dense and heavy. A 50/50 blend of all-purpose and whole wheat gives you a slightly nuttier loaf without sacrificing the texture.

    • Why it matters: All-purpose flour has the right protein content to give the bread structure without making it tough. Since there is no kneading here, the flour does all the structural work on its own.

    Beer

    One 12oz can or bottle of beer. Any beer works — lager, ale, stout. Each will give a slightly different flavour. A light lager gives a mild, slightly hoppy note. A dark stout gives a richer, almost caramel-like depth.

    • Why it matters: The carbonation in beer acts as a natural leavening agent, working alongside the baking powder to give the bread lift. The sugars in the beer also contribute to the golden crust. Without the beer, you do not have this recipe.

    Rosemary

    Fresh chopped rosemary is preferred — 1 tablespoon. If using dried, reduce to 1 teaspoon. The recipe also works with dried dried rosemary if you do not have fresh on hand.

    • Why it matters: Rosemary’s piney, woodsy aroma is the signature of this bread. It pairs perfectly with the malt from the beer and the butter on top. Fresh rosemary is more fragrant, but dried is perfectly fine in this recipe.

    Walnuts

    A quarter cup of chopped walnuts adds texture and a pleasant bitterness that rounds out the sweetness from the sugar.

    • Why it matters: The walnuts give this bread a rustic, artisan quality. They create little pockets of crunch that contrast beautifully with the dense, tender crumb. Do not skip them.

    Baking Powder

    Three teaspoons. This is the primary leavening agent — no yeast required.

    • Why it matters: Baking powder reacts with liquid and heat to produce CO2 bubbles that make the bread rise. Because we are not using yeast, the oven does all the heavy lifting. This is why the recipe does not need fermentation time — the chemistry is instant.

    Loaf Pan

    A nonstick bread loaf pan is all you need. I love mine from this nonstick loaf pan set — it comes in two identical pans, which is great for making double batches. The consistent size ensures even baking every time.

    • Why it matters: This recipe is so hydrated that it needs to be contained in a loaf pan to hold its shape during baking. Unlike yeasted breads that can be shaped and hold themselves, this batter is more like a thick cake batter than a classic dough.

    rosemary bread recipes

    Stand Mixer and Baking Tips

    For this recipe you will need a stand mixer with a dough hook. It makes the dough come together much faster. I personally use the KitchenAid 7 Quart Stand Mixer — it doubles as an assistant for pies, cookies, cakes, pasta, and more.

    Oven Temperature

    The oven needs to reach 350°F. Most breads require 400–450°F, but because we are using baking powder instead of yeast, the bread does not need that intense pull of heat. Lower and slower is the right approach here — it is closer to cake baking than bread baking.

    Cut the Bread Only After It Is Completely Cooled

    This is the hardest part. When the bread comes out of the oven, it is still cooking on the inside as it cools. Cutting into it too soon causes the inside to be undercooked and gummy, and releases all the moisture into the open air. Wait until it is fully cool — your patience will be rewarded.

    rustic rosemary bread

    If you love baking bread, try our Sourdough Bread, our Easy Homemade Focaccia, or our Fluffy Naan Bread.

    A hand holding two halves of rosemary beer bread showing the crumb

    Easy No-Knead Rosemary Beer Artisan Bread

    Print Recipe
    Pin Recipe
    Prep Time:10 minsCook Time:50 minsTotal Time:60 mins

    Ingredients

    • 3 cups all purpose flour sifted
    • 3 tsp baking powder
    • 1 tsp salt
    • ¼ cup sugar
    • ¼ cup chopped walnut
    • 1 tbsp fresh chopped rosemary or 1 tsp dried rosemary
    • 1 12oz beer
    • ⅓ cup melted butter for top of bread before baking

    Instructions

    • Preheat oven to 350°F and place the rack at the middle of the oven.
    • Grease a large loaf pan with spray or butter. Set aside.
    • Using a stand mixer with the dough hook attachment, place all the dry ingredients together. Mix for 1 minute.
    • With the machine running on medium-low, slowly pour the can of beer into the batter.
    • Place the batter into the greased pan and drizzle the melted butter on top. Run a knife along the edges so the butter touches all the sides.
    • Place the pan on the middle rack and bake for 50 minutes until the top is slightly golden brown.
    • Allow the bread to cool completely before cutting.

    Frequently Asked Questions

    Can I make this rosemary bread without beer?

    Technically yes, but the result will be quite different. The beer contributes both leavening (from carbonation) and flavour (malt and hops). If you want to substitute, use sparkling water or club soda for the leavening effect, though the bread will be more neutral in flavour. Ginger ale can work as a semi-sweet alternative.

    Does the bread taste like beer?

    Not strongly. The beer flavour mellows significantly during baking — what remains is a subtle, slightly malty background note that pairs beautifully with the rosemary. If you use a very dark beer like a stout, you will taste it more. If you use a light lager, it is barely detectable.

    Can I substitute the all-purpose flour for whole wheat?

    Partially, yes. A 50/50 blend of all-purpose and whole wheat flour works well and adds a nuttier flavour. Going 100% whole wheat will make the bread very dense. If you want a lighter whole grain option, spelt flour at a 1:1 substitution produces a better texture than whole wheat.

    Why does my bread come out gummy in the middle?

    Almost always this is because the bread was cut before it was fully cooled. The interior continues to cook and set as the loaf cools on the counter. Cutting it hot releases the steam and moisture prematurely, leaving the crumb gummy. Wait at least 45 minutes after taking it out of the oven before slicing.

    Can I add other herbs or mix-ins?

    Yes. Thyme, sage, or a combination of herbs all work well. You can also add grated Parmesan or sharp cheddar into the batter for a cheesy herb bread. Sun-dried tomatoes and olives are another great combination. Keep add-ins to about 1/3 cup total to not overwhelm the structure.

    How do I store this rosemary beer bread?

    Wrap the cooled loaf in a clean kitchen towel or beeswax wrap and store at room temperature for up to 2 days. For longer storage, slice the loaf, freeze the slices in a zip-lock bag, and toast directly from frozen. Avoid storing in plastic wrap at room temperature — it traps moisture and makes the crust go soft.

  • Sweet Watermelon Salad with Mint

    Sweet Watermelon Salad with Mint

    Imagine biting into a cold, sweet cube of watermelon on a blazing summer afternoon — then hitting a burst of fresh mint and a squeeze of lime. That one-two punch of sweet and refreshing is exactly what this sweet watermelon salad with mint delivers. It comes together in 10 minutes, requires zero cooking, and disappears from the table even faster.

    This post may contain affiliate links. If you purchase through these links, I may earn a small commission at no extra cost to you. Thank you for supporting Love & Harvest!

    watermelon salad with mint

    Why You Will Love This Watermelon Salad

    When watermelon season is in full bloom, it is great to find another way of eating it. This watermelon salad with mint is light and zesty — made with mint, lime juice, and honey. Sweet watermelon is great on its own, but it is even better when turned into a cold refreshing salad. Do you have mint in your garden and do not know how to use it? You can definitely add it here.

    How to Pick a Great Watermelon

    I was taught to give the watermelon a good hit to hear the echo — a deep hollow sound usually means a lot of water inside. But sound alone does not guarantee sweetness.

    First, look at the variety. Most sweet watermelon varieties will give you a cold, sweet slice. Beyond variety, look for an even oval shape, a creamy yellow field spot on the bottom (where it rested on the ground while ripening), and a watermelon that feels heavy for its size. Color should be deep and consistent. If you want kids to help prepare it, try the Watermelon Cutter Knife — it makes slicing safe and fun.

    Ingredients Deep-Dive

    Watermelon

    • Why it matters: The star of the dish — choose a ripe, sweet variety for maximum flavor and hydration. Cold watermelon makes the salad extra refreshing.

    Fresh Mint

    • Why it matters: Mint provides a cooling contrast to the sweetness. Use garden-fresh mint if possible — the oils in fresh leaves are incomparably more vibrant than dried.

    Lime Juice

    • Why it matters: The acidity brightens the flavor and keeps the watermelon from tasting flat. Always use fresh-squeezed. A lime juicer makes this effortless.

    Honey

    • Why it matters: A light drizzle of honey rounds out the tartness of the lime. Use raw honey if you have it — the floral notes complement mint beautifully.

    watermelon salad with mint and lime

    Watermelon Salad with Balsamic

    The recipe for this sweet watermelon salad with mint calls for lime and mint — tangy, sweet, and cooling. If your palate wants a stronger punch of flavor, you can make a watermelon salad with balsamic dressing instead.

    Balsamic works very well with watermelon. In a bowl, mix balsamic vinegar, olive oil, thyme, and a pinch of salt. Whisk until emulsified and drizzle over cold cubed watermelon. Adding basil alongside mint also works beautifully — basil and balsamic is magic. The balsamic I love using is the Kirkland Signature Balsamic Vinegar.
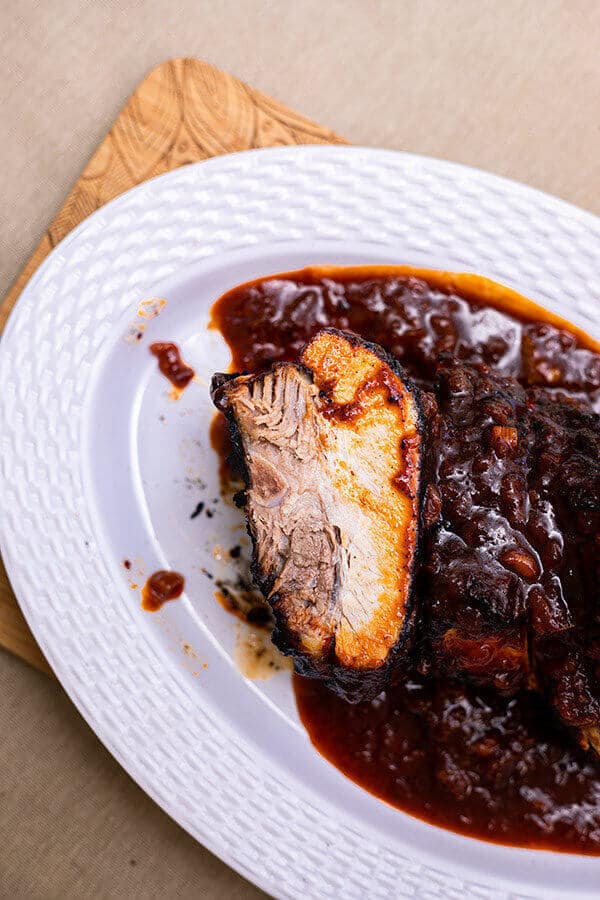
    Salad with Protein

    If the salad feels too light, add feta cheese for more protein. Watermelon salad with feta and balsamic dressing is heartier and great as summer winds down when watermelon season is closing. Red onion adds a slight bite that works well — watermelon salad with red onion and feta is a popular variation for onion lovers.

    watermelon salad with mint and basil

    Serving and Pairing Suggestions

    This salad is an amazing side for heavy summer meals. It is light and sweet — a perfect companion to BBQ, grilled meat, and fried chicken. Serve it cold, straight from the fridge, so the mint stays crisp and the watermelon stays firm. For more fresh salads, try the Vegetarian Caesar Salad or the Thai Chicken Salad to keep variety on your summer table.

    Frequently Asked Questions

    Can I make this watermelon salad ahead of time?

    Yes, but with one important step: keep the dressing (lime juice and honey) separate until just before serving. If you dress the watermelon too early, it draws out the juice and the salad becomes watery. Cube the watermelon and refrigerate it, then toss with mint, lime, and honey right before serving.

    How long does watermelon salad with mint last?

    It is best eaten the day it is made. Leftovers can be stored in the fridge for up to 24 hours, though the texture softens. Keep it in a sealed container and pour off any excess liquid before serving again.

    Can I use dried mint instead of fresh?

    Fresh mint is strongly preferred here. Dried mint has a more concentrated, slightly musty flavor that does not work as well in a raw salad. If you absolutely cannot find fresh mint, use just a small pinch of dried and supplement with fresh basil.

    What other fruits can I add to this salad?

    Cucumber is a natural companion — it is also hydrating and adds a satisfying crunch. Strawberries, blueberries, and kiwi also work well. Keep the fruit cold and cut it into similar-sized pieces so the salad is easy to eat.

    Why is watermelon salad so refreshing?

    Watermelon is over 90% water, so it’s super refreshing on hot days. Mint and lime keep it bright, and 2 tablespoons of honey balance the lime.

    Can I make this for a crowd?

    Yes — this recipe scales easily. For a large group, buy a whole seedless watermelon and cube it the morning of. Keep everything chilled separately, then toss together just before serving. A mandoline slicer can speed up prep if you are working with large quantities — a mandoline slicer gives you even cuts quickly.

    watermelon salad with mint

    Sweet Watermelon Salad with Mint

    Prep Time 10 minutes
    Total Time 10 minutes
    Course: Salad
    Calories: 100

    Ingredients
      

    • ½ sweet watermelon cubed
    • 2 tsp lime juice 1 – 2 lime
    • ¼ cup mint chopped
    • 2 tbsp honey

    Method
     

    1. In a large mixing bowl, cut and cubed half a medium size watermelon.
    2. toss the watermelon with the lime juice and mint. Plate it on the final presentation dish.
    3. Slowly and methodically drizzle honey on top of the watermelon. Serve immediately