Category: vegetarian recipes

  • Fresh Beet Pasta & Lemon Garlic Alfredo

    Fresh Beet Pasta & Lemon Garlic Alfredo

    This post may contain affiliate links. If you purchase through these links, I may earn a small commission at no extra cost to you. Thank you for supporting Love & Harvest!

    The first time you serve this pasta, people will think you spent hours in the kitchen. You didn’t. The colour comes from beet juice, the creaminess from a simple lemon garlic alfredo, and the pasta itself takes about 3 minutes in a machine. What you get on the plate looks stunning, tastes extraordinary, and is 100% vegetarian. It’s become one of our family’s most requested meals — including by the kids, who love calling it “pink pasta.”

    beet pasta

    Why You’ll Love This Beet Pasta

    • Stunning colour — The beet turns the pasta a vivid magenta. Once it meets the cream sauce it shifts to a deep rose-pink. It’s genuinely beautiful on a plate.
    • Unbeatable fresh pasta flavour — There is no comparison between homemade fresh pasta and store-bought dried. The texture is silky, the bite is tender, and the beet adds a subtle earthiness that’s unlike anything else.
    • Fun family project — Kids love feeding the pasta machine and watching the pink noodles come out. It turns cooking into a small event.
    • Ready in 3 minutes — With the Philips Pasta Maker, the dough kneading and extrusion is automated. You handle the prep and cooking; the machine does the labour.

    beet pasta with lemon garlic Alfredo

    Ingredients Deep-Dive

    Ingredients

    Beet — The Star Ingredient

    Beets are available year-round in most markets in red, purple, yellow, and white varieties — sometimes even striped. For this pasta, use red or purple for the most dramatic colour.

    The earthy, slightly sweet flavour of beet is the reason this pasta needs a bright sauce. The lemon tang in the alfredo brings out the beet’s natural depth and creates a balance that makes the dish feel complete rather than just colourful.

    Flour — All-Purpose or Bread Flour?

    All-purpose flour is the standard choice for homemade pasta — it produces a soft, pliable dough with good stretch. If you want a chewier pasta with more bite, substitute 50% of the all-purpose with bread flour. Bread flour has higher protein content which creates more gluten structure — the pasta cooks firmer and has more resistance when you bite through it. Both versions are excellent; it’s a texture preference.

    The Pasta Machine

    This recipe is built around the Philips Pasta and Noodle Maker. It kneads the dough, extrudes it through a disk, and produces fresh pasta in under 3 minutes. You can change the disk to produce spaghetti, penne, fettuccine, and other shapes. It’s one of the most-used machines in our kitchen. If you want the upgraded version with a built-in scale and more disk options, the Philips Avance Automatic Pasta Maker Plus is worth the investment if you make pasta regularly.

    Cream Cheese — The Alfredo Secret

    The alfredo sauce uses cream cheese instead of heavy cream. This produces a sauce that’s thicker, tangier, and more stable — it doesn’t break or turn greasy when reheated the way cream-based alfredo does. Philadelphia Cream Cheese is the standard choice; its consistent quality makes the sauce reliable every time. The cream cheese melts into the hot milk and butter without needing to be at room temperature.

    Lemon — Juice and Zest

    Both the juice and the zest go into the sauce. The juice provides the acid that cuts through the fat and makes the cream cheese sauce taste bright rather than heavy. The zest adds fragrance — a floral lemon note that elevates the dish without being harsh. Meyer lemons are slightly sweeter; Eureka lemons are more traditional. Either works. Always strain out seeds when squeezing — biting into a lemon seed is memorably unpleasant.

    Parmesan Cheese

    Use a block of real Parmigiano-Reggiano and grate it yourself. The pre-grated powdered version has added anti-caking agents that prevent it from melting properly — it clumps in the sauce rather than incorporating smoothly. A fresh block has a nutty, crystalline richness that makes the difference between a good alfredo and a great one.

    beet pasta recipe

    Pro Tips

    Pro Tip 1: Blend the Beet, Don’t Juice It

    You have two options for adding beet to the pasta dough: juice the beet (concentrated, vibrant colour) or blend the cooked beet into a smooth puree (retains all the fibre). Juicing produces a slightly more electric colour; blending keeps the whole beet in the pasta without any texture difference in the finished noodles. I prefer blending: you use the whole beet and lose nothing in the process. Blend on high until completely smooth with no chunks before adding to the pasta machine.

    Pro Tip 2: The 216g Liquid Measurement

    The Philips Pasta Maker requires a specific liquid-to-flour ratio for optimal results. For this recipe: place a container on a scale, zero it, add 2 eggs, then fill with beet puree until the total reaches exactly 216g. This precision ensures the dough is the right consistency every time — not too dry to extrude, not too wet to hold its shape.

    Pro Tip 3: Add Protein to Make It Hearty

    This is a naturally vegetarian dish. Grilled chicken, sautéed shrimp, or seared beef strips all work beautifully alongside the pasta and sauce. Make a slightly larger batch of the alfredo sauce if you’re adding protein so you have enough to coat everything generously.

    What to Serve Alongside

    For a complete dinner table, this beet pasta pairs magnificently with our Beet and Avocado Sashimi Appetizer — both dishes feature beet and create a visually stunning spread. A crisp green salad or garlic bread rounds out the meal. For a meat option to accompany, our Best Homemade Fried Chicken provides a satisfying contrast to the pasta’s creaminess.

    beetroot pasta

    Frequently Asked Questions

    Do I need a pasta machine for this recipe?

    The Philips Pasta Maker automates the kneading and extrusion and makes the process fast and consistent. That said, you can make beet pasta by hand: mix the flour and beet-egg liquid into a dough, knead for 8–10 minutes until smooth, rest for 30 minutes, then roll thin with a rolling pin and cut into strips. It takes more time and arm strength, but the result is the same.

    Can I make this pasta without eggs (vegan)?

    Yes. Replace the eggs with additional beet puree. You’ll need to adjust the liquid amount slightly — start with the same 216g total and add a tablespoon more puree if the dough seems too dry. The pasta will be slightly less rich but still colourful and delicious. The alfredo sauce can be made vegan with plant-based cream cheese and milk.

    Can I make the pasta ahead of time?

    Fresh beet pasta is best cooked the day it’s made. If you need to make it ahead, lay the extruded pasta flat (not overlapping) on a floured baking sheet, dust lightly with flour, and refrigerate for up to 24 hours. Alternatively, allow the pasta to dry at room temperature for 2 hours, then store loosely in an airtight container for up to 2 days.

    Why does my beet pasta turn pink instead of deep red?

    This is normal. The alkaline proteins in the egg and the heat from boiling water both affect the beet’s pigment. Once you add the cream sauce, the pasta turns a beautiful rose-pink. If you want a deeper colour, use more beet puree and less egg, or use only the beet without egg (vegan version).

    Can I use beet powder instead of fresh beet?

    Yes. Beet powder is a convenient alternative — add 2–3 tablespoons to the flour before mixing. You’ll still get colour and a mild beet flavour, though it’s slightly less vibrant than fresh beet puree. The nutritional profile is also slightly different since processing removes some of the whole beet’s fibre.

    What pasta shapes work best with this sauce?

    Spaghetti and fettuccine are the most visually striking — the long strands show off the colour best. Penne and rigatoni also work well because the alfredo sauce clings inside the tubes. Avoid very thin pasta shapes like angel hair — the sauce is too thick and they tend to clump.

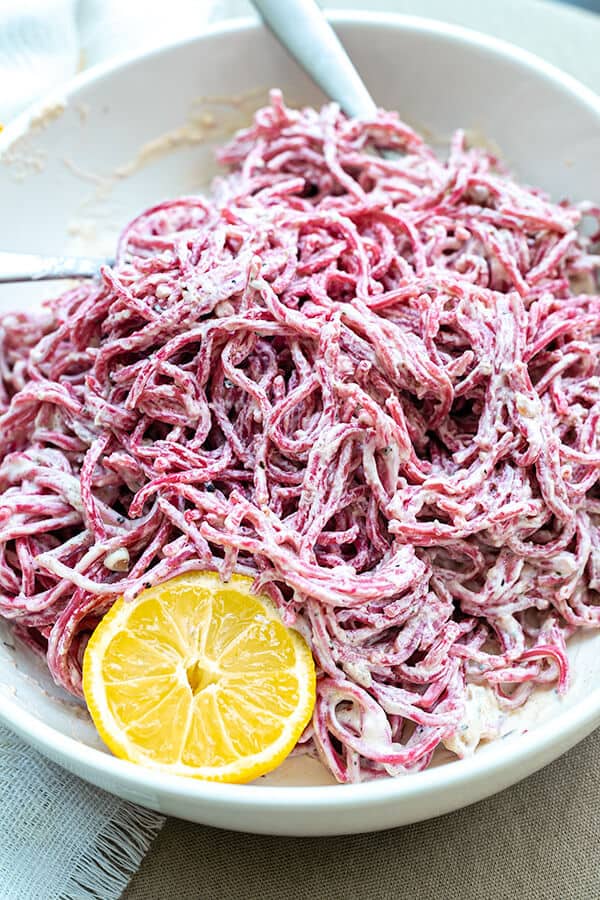
    Pink beet pasta tossed in lemon garlic Alfredo with a lemon half

    Fresh Beet Pasta and Lemon Garlic Alfredo Sauce

    Delicious homemade beet pasta with a lemon garlic alfredo sauce. It's tangy, garlicky, and oh so creamy! Print Recipe Pin RecipePrep Time:20 mins35 minsCourse: Main CourseCuisine: American, MediterraneanKeyword: alfredo, beet, fresh, fresh pasta, garlic, homemade pasta, lemon, pasta, phillips pasta and noodle machineServings: 6 people

    Equipment

    • high speed blender
    • Philips Pasta and Noodle Maker

    Ingredients

    Beet Pasta

    • 1 medium size beet root
    • 2 eggs
    • 550 g all purpose flour
    • 7 g salt

    Lemon Garlic Alfredo Sauce

    • ½ cup butter
    • 3 garlic clove grated
    • 1½ cup whole milk
    • 1 8oz cream cheese
    • 2 tsp sea salt
    • ½ lemon juice
    • lemon zest
    • ¼ cup parmesan cheese grated
    • black pepper

    Instructions

    Beet Pasta

    • Peel the skin off the beet and cut it in half. fill a small pot with water and put the beets in. cover it with a lid and cook it for 10 minutes. Let it cool, but reserve the water.
    • Place the beet within a high-speed blender with ½ cup of its reserved water. Blend on high until it is a smooth smoothie. set aside.
    • On a measuring scale, put a medium size container, and turn it on. Make sure it says 0g. Add 2 eggs to the container and fill the container up with beet juice until it reaches 216g. Set aside.

    Philips Pasta machine

    • take out the Philips pasta and noodle maker. Make sure you have the spaghetti disk attached to the ends. Open the lid, and put in the flour and salt. Close the lid.
    • Turn the machine on and press ‘Start.’ Slowly pour in the beet and egg liquid.
    • Let the machine knead the dough for 3 minutes. It will beep once it is ready to extrude the pasta.
    • Cut the pasta when it is about 20-25cm long.
    • Lay the fresh pasta on a baking sheet, and don’t overlap the pasta on top with more.

    Cooking the Beet Pasta

    • Using a large pot, fill it ¾ full and add 3 tsp of salt (roughly 4L of water). Wait for it to boil.
    • Once the water is rapidly boiling, slowly add the fresh pasta to the water. Immediately stir it with chopsticks or something soft that won’t break the pasta apart. Cook for 2 minutes.
    • Add the cooked pasta to a bowl of water. Move the noodles in the water around. Rinse and repeat at least once. strain the noodles and place them in a large bowl. Again don’t place more noodles on top of the weight will have the noodles stick together.

    Lemon Garlic Alfredo Sauce

    • In a medium-size pot, turn heat to medium-high and place butter inside until melted. Add the garlic and cook for 2 minutes or until soft. Add the milk and cream cheese. Turn the heat to low. Add sea salt.
    • Add the fresh beet pasta to the sauce and give it a few good stirs. Add the lemon juice and parmesan cheese. Softly toss the noodle until the cheese is melted and the alfredo sauce is well coated with the pasta.
    • Garnish pepper on top. Serve immediately.
  • Blender Oatmeal Pancakes

    Blender Oatmeal Pancakes

    These blender oatmeal pancakes have become our family’s most-requested breakfast — and they have replaced buttermilk pancakes in our household for good. Made from just bananas, oats, eggs, and baking powder, everything goes straight into the blender and onto the griddle. The cleanup is one blender. The result is a soft, fluffy, naturally sweet pancake that keeps you full until lunch. My IHOP-loving husband is the proof of concept.

    This post may contain affiliate links. If you purchase through these links, I may earn a small commission at no extra cost to you. Thank you for supporting Love & Harvest!

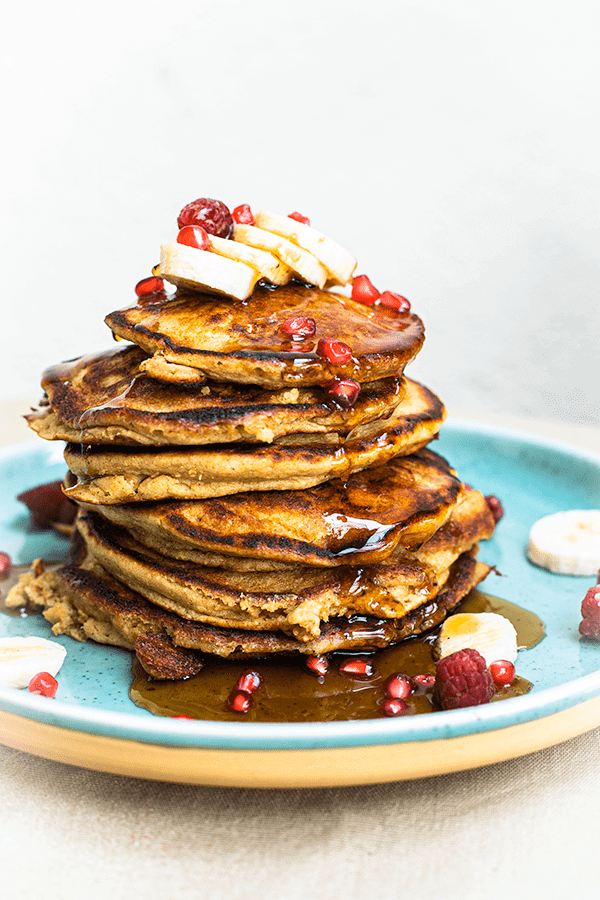
    Stack of oat banana pancakes with syrup, banana slices and pomegranate

    This post features a blender oatmeal pancake recipe using banana, oatmeal, vanilla, and eggs, all blended together.

    Why Make This Recipe?

    Pancakes for breakfast is probably one of the most popular breakfasts around the world. But can you make a version that’s easy and comes together in a blender? Yes. These oatmeal pancakes do. They are packed with whole grains from the oatmeal and natural sweetness from the bananas. Just 2 tablespoons of maple syrup in the whole batch. No flour. No special skills required.

    Mornings can be hectic. This recipe respects that — all the ingredients go into a blender, and cleanup is just the blender. That is it. It has been tested and approved by my IHOP-pancake-loving husband, who is not going back to buttermilk pancakes.

    Tall stack of pancakes topped with banana and pomegranate seeds

    Can These Pancakes Be Gluten-Free?

    I make these with regular oatmeal at home — not certified gluten-free oats — so as written they are not a gluten-free recipe. If you need them gluten-free, use certified gluten-free oats (and know that cross-contact can still happen in some kitchens and facilities). The only added sweetener is 2 tablespoons of maple syrup. They come out soft, fluffy, and full of flavour — perfect with maple syrup or any topping you love.

    Ingredients Deep-Dive

    Ingredients

    Oatmeal

    Either old-fashioned oats or quick-cooked oats both work. The oatmeal is the base of these pancakes — it replaces flour entirely.

    • Why it matters: Oats give these pancakes their hearty texture, no flour needed. I use regular rolled or quick oats. If you need a gluten-free version, choose certified gluten-free rolled oats or oat flour — oats are naturally gluten-free but can pick up wheat in processing, and cross-contact is still possible.

    Bananas

    Use overripe bananas — the riper, the better. The spots on the peel are your best friends here. Riper bananas are sweeter and blend more smoothly.

    • Why it matters: Bananas serve as both the natural sweetener and the binding agent in this recipe. They replace both sugar and part of the fat you would find in a traditional pancake recipe. Overripe bananas have higher natural sugar content and a more intense banana flavour.

    Eggs

    Eggs help the pancake rise and give it a fluffy texture. They are also the primary structural ingredient that binds the oats and banana together.

    • Why it matters: Without eggs, the batter would be too loose to hold together on the griddle. The protein in eggs sets when heated, creating the structure that gives these pancakes their lift.

    Baking Powder

    Baking powder creates the bubbles and air pockets inside the pancake that give it that light and fluffy texture. It is essential in all pancake recipes.

    • Why it matters: Without baking powder, these pancakes will come out flat and dense. The reaction between baking powder and the moisture in the batter produces CO2 bubbles that make the pancakes puff up on the griddle.

    Stack of pancakes with a forkful cut out to show the fluffy inside

    Pro Tips for Perfect Oatmeal Pancakes

    Pro Tip 1 — Use a Griddle

    A cast iron griddle has a larger surface area than regular pans, letting you cook more pancakes at once. It also creates an even surface of heat so every pancake cooks consistently.

    Pro Tip 2 — Cook the Pancakes with Butter

    Always add a thin layer of butter on the griddle before adding the batter. This prevents sticking and adds flavour. Butter tastes better than regular cooking oil for pancakes.

    Pro Tip 3 — When to Flip the Pancakes

    Flip when you see little air pockets forming in the middle of the pancake and the edges stop looking wet — they will have a soft, matte texture. This is the signal that the bottom is set and the pancake is ready to flip without breaking.

    Pancake stack in a pool of syrup with banana slices on a blue plate

    Looking for more breakfast ideas? Try our Mixed Berry Smoothie with Pomegranate and Nopal or our Celery Juice to pair alongside these pancakes for a complete morning meal.

    Tall stack of pancakes topped with banana and pomegranate seeds

    Blender Oatmeal Pancakes

    Delicious pancakes made with oatmeal and banana. All made with just a blender. Gluten-free when made with certified gluten-free oats.
    Prep Time 7 minutes
    Cook Time 15 minutes
    Total Time 22 minutes
    Servings: 4 people
    Course: Breakfast
    Cuisine: American
    Calories: 295

    Ingredients
      

    • 2 cups royal oats or quick oats
    • 1 cup water
    • 1 medium riped banana
    • 2 eggs
    • 2 tbsp melted butter
    • 2 tbsp maple syrup
    • 1 tbsp baking powder
    • ½ tsp baking soda
    • ½ tsp salt
    • ½ tsp ground cinnamon
    • 2 tsp vanilla extract

    Equipment

    • high speed blender

    Method
     

    1. Preheat your griddle on the stovetop and set it on medium low heat.
    2. In the blender put all the ingredients together and blend on high for 30 seconds. Batter should be smooth with no lump.
    3. lightly brush the surface of your griddle with butter.
    4. With your ⅓ measuring cup, scoop the batter with the mesuring cup, and slowly drop the batter on the griddle. Leave enough space between pancakes so they are not touching each other.
    5. Cook until small bubbles start to form in the middle of the pancake the sides have turned into a matte texture. Flip the pancake and cook for another 1-2 minutes.
    6. Serve right away with a small slice of butter on top and maple syrup.

    Frequently Asked Questions

    Do these oatmeal pancakes taste like banana?

    Yes, mildly. The banana flavour is present but not overwhelming. The more overripe your bananas are, the stronger the banana flavour. If you want to reduce it, use one banana instead of two and add a tablespoon of nut butter for binding. The oat flavour balances out the banana very well.

    Can I make this recipe without a blender?

    Yes, but the texture will be coarser. Mash the bananas very well with a fork, then mix in the eggs, and finally stir in the oats and baking powder. For a smoother texture without a blender, use certified gluten-free oat flour instead of whole rolled oats — it blends into the batter without the blender step.

    Are these pancakes suitable for toddlers?

    Yes. They have no refined flour, and the only sweetener is the banana plus 2 tablespoons of maple syrup in the whole batch. They do contain butter and eggs. They are soft, easy to chew, and naturally sweet from the banana. Cut them into small pieces or serve as finger food for younger toddlers. They are also an easy way to serve oats and eggs at a toddler breakfast.

    How do I store leftover oatmeal pancakes?

    Let the pancakes cool completely, then store in an airtight container in the refrigerator for up to 3 days. For longer storage, freeze with parchment paper between each pancake and reheat directly from frozen in a toaster or non-stick pan. They reheat very well and taste just as good the next day.

    Can I add protein powder to this recipe?

    Yes. Add one scoop of plant-based protein powder to the blender along with the other ingredients. The batter may thicken slightly — if it does, add a tablespoon of water to reach the right consistency. A vanilla or unflavored protein powder works best so it does not compete with the banana.

    Why are my pancakes coming out flat?

    The most common reason is old baking powder. Baking powder loses its potency over time — test yours by dropping a teaspoon into hot water. If it bubbles vigorously, it is still good. If not, replace it. Also make sure you are not overmixing the batter after adding the baking powder — stir just until combined to keep the air pockets intact.

  • Sweet Watermelon Salad with Mint

    Sweet Watermelon Salad with Mint

    Imagine biting into a cold, sweet cube of watermelon on a blazing summer afternoon — then hitting a burst of fresh mint and a squeeze of lime. That one-two punch of sweet and refreshing is exactly what this sweet watermelon salad with mint delivers. It comes together in 10 minutes, requires zero cooking, and disappears from the table even faster.

    This post may contain affiliate links. If you purchase through these links, I may earn a small commission at no extra cost to you. Thank you for supporting Love & Harvest!

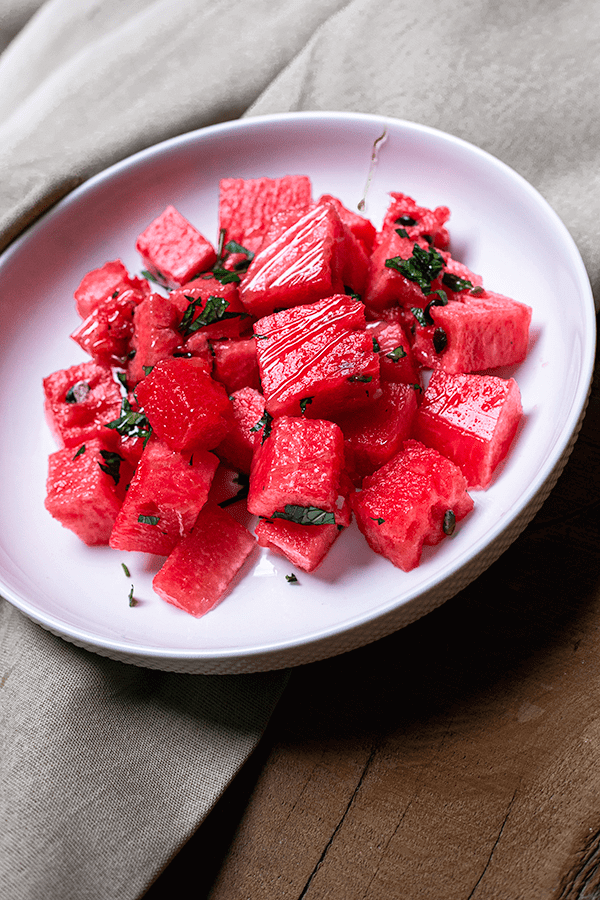
    watermelon salad with mint

    Why You Will Love This Watermelon Salad

    When watermelon season is in full bloom, it is great to find another way of eating it. This watermelon salad with mint is light and zesty — made with mint, lime juice, and honey. Sweet watermelon is great on its own, but it is even better when turned into a cold refreshing salad. Do you have mint in your garden and do not know how to use it? You can definitely add it here.

    How to Pick a Great Watermelon

    I was taught to give the watermelon a good hit to hear the echo — a deep hollow sound usually means a lot of water inside. But sound alone does not guarantee sweetness.

    First, look at the variety. Most sweet watermelon varieties will give you a cold, sweet slice. Beyond variety, look for an even oval shape, a creamy yellow field spot on the bottom (where it rested on the ground while ripening), and a watermelon that feels heavy for its size. Color should be deep and consistent. If you want kids to help prepare it, try the Watermelon Cutter Knife — it makes slicing safe and fun.

    Ingredients Deep-Dive

    Watermelon

    • Why it matters: The star of the dish — choose a ripe, sweet variety for maximum flavor and hydration. Cold watermelon makes the salad extra refreshing.

    Fresh Mint

    • Why it matters: Mint provides a cooling contrast to the sweetness. Use garden-fresh mint if possible — the oils in fresh leaves are incomparably more vibrant than dried.

    Lime Juice

    • Why it matters: The acidity brightens the flavor and keeps the watermelon from tasting flat. Always use fresh-squeezed. A lime juicer makes this effortless.

    Honey

    • Why it matters: A light drizzle of honey rounds out the tartness of the lime. Use raw honey if you have it — the floral notes complement mint beautifully.

    watermelon salad with mint and lime

    Watermelon Salad with Balsamic

    The recipe for this sweet watermelon salad with mint calls for lime and mint — tangy, sweet, and cooling. If your palate wants a stronger punch of flavor, you can make a watermelon salad with balsamic dressing instead.

    Balsamic works very well with watermelon. In a bowl, mix balsamic vinegar, olive oil, thyme, and a pinch of salt. Whisk until emulsified and drizzle over cold cubed watermelon. Adding basil alongside mint also works beautifully — basil and balsamic is magic. The balsamic I love using is the Kirkland Signature Balsamic Vinegar.

    Salad with Protein

    If the salad feels too light, add feta cheese for more protein. Watermelon salad with feta and balsamic dressing is heartier and great as summer winds down when watermelon season is closing. Red onion adds a slight bite that works well — watermelon salad with red onion and feta is a popular variation for onion lovers.

    watermelon salad with mint and basil

    Serving and Pairing Suggestions

    This salad is an amazing side for heavy summer meals. It is light and sweet — a perfect companion to BBQ, grilled meat, and fried chicken. Serve it cold, straight from the fridge, so the mint stays crisp and the watermelon stays firm. For more fresh salads, try the Vegetarian Caesar Salad or the Thai Chicken Salad to keep variety on your summer table.

    Frequently Asked Questions

    Can I make this watermelon salad ahead of time?

    Yes, but with one important step: keep the dressing (lime juice and honey) separate until just before serving. If you dress the watermelon too early, it draws out the juice and the salad becomes watery. Cube the watermelon and refrigerate it, then toss with mint, lime, and honey right before serving.

    How long does watermelon salad with mint last?

    It is best eaten the day it is made. Leftovers can be stored in the fridge for up to 24 hours, though the texture softens. Keep it in a sealed container and pour off any excess liquid before serving again.

    Can I use dried mint instead of fresh?

    Fresh mint is strongly preferred here. Dried mint has a more concentrated, slightly musty flavor that does not work as well in a raw salad. If you absolutely cannot find fresh mint, use just a small pinch of dried and supplement with fresh basil.

    What other fruits can I add to this salad?

    Cucumber is a natural companion — it is also hydrating and adds a satisfying crunch. Strawberries, blueberries, and kiwi also work well. Keep the fruit cold and cut it into similar-sized pieces so the salad is easy to eat.

    Why is watermelon salad so refreshing?

    Watermelon is over 90% water, so it’s super refreshing on hot days. Mint and lime keep it bright, and 2 tablespoons of honey balance the lime.

    Can I make this for a crowd?

    Yes — this recipe scales easily. For a large group, buy a whole seedless watermelon and cube it the morning of. Keep everything chilled separately, then toss together just before serving. A mandoline slicer can speed up prep if you are working with large quantities — a mandoline slicer gives you even cuts quickly.

    watermelon salad with mint

    Sweet Watermelon Salad with Mint

    Prep Time 10 minutes
    Total Time 10 minutes
    Course: Salad
    Calories: 100

    Ingredients
      

    • ½ sweet watermelon cubed
    • 2 tsp lime juice 1 – 2 lime
    • ¼ cup mint chopped
    • 2 tbsp honey

    Method
     

    1. In a large mixing bowl, cut and cubed half a medium size watermelon.
    2. toss the watermelon with the lime juice and mint. Plate it on the final presentation dish.
    3. Slowly and methodically drizzle honey on top of the watermelon. Serve immediately
  • Spicy Corn Dip With Manzano Pepper

    Spicy Corn Dip With Manzano Pepper

    Sweet, crunchy corn kernels coated in a creamy lime-spiked mayonnaise, studded with charred onion and the distinctive fruity heat of Manzano peppers — this dip disappears from the table faster than you can set it down. It is bold, fresh, and takes less than 30 minutes to make with only five ingredients.

    This post may contain affiliate links. If you purchase through these links, I may earn a small commission at no extra cost to you. Thank you for supporting Love & Harvest!

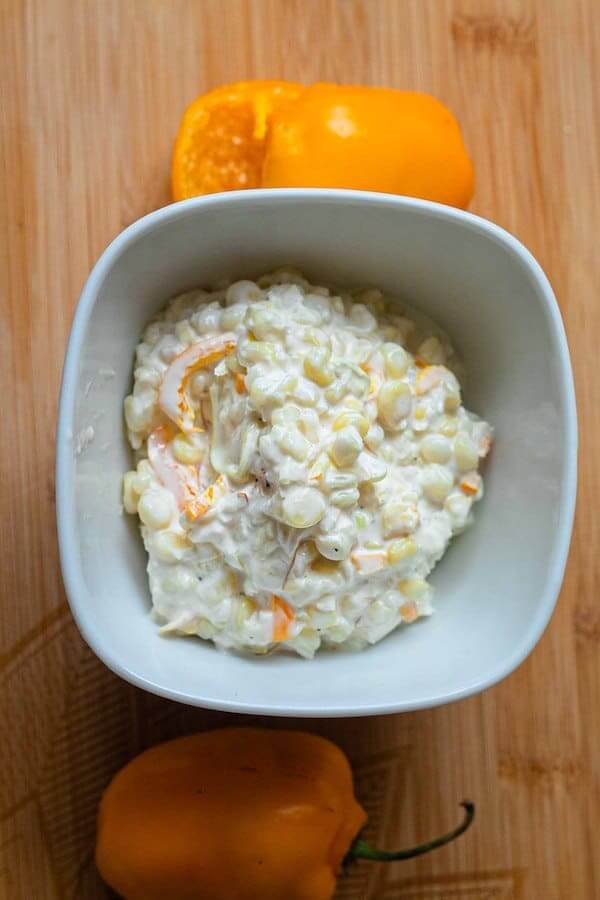
    Spicy Corn Dip with Manzano Pepper Recipe

    It is corn season and there are more ways to eat corn than BBQ corn on the cob with butter. This delicious spicy corn dip is so easy to make it will take you less than 30 minutes to prepare — and it only asks for five ingredients.

    This is a must-make for your next party or family gathering. Anyone who loves spicy food will fall in love with this recipe. After making it, corn just might become your new favourite seasonal vegetable.

    If you love spicy food, try our Easy Hummus Recipe or our Vegetarian Mango Soy Ceviche for more crowd-pleasing dips and sides.

    Ingredients

    Corn

    • Why use fresh seasonal corn: Summer corn is at peak sweetness and starch content. The kernels have a satisfying crunch and natural juiciness that frozen or canned corn cannot replicate. Any variety works — sweet corn, rainbow corn, or the starchy white corn common in Mexico. Whatever is local and fresh is the right choice.

    Manzano Peppers

    • Why Manzano over jalapeño: Manzano peppers have a unique fruity citrus character with a moderate-to-hot heat level — roughly twice as hot as jalapeños. Their black seeds and thick flesh hold up perfectly in a cooked dip. The flavour does not overwhelm the corn; it accents it. If you cannot find Manzano, jalapeño is an excellent substitute.

    White Onion

    • Why cook it first: Raw onion has a sharp, aggressive flavour that competes with the other ingredients. Sautéing the onion in oil first softens its bite, releases its natural sweetness, and creates a gentle fragrance that blends into the dip instead of fighting it.

    Mayonnaise

    • Why mayo works here: Mayonnaise binds all the flavours together with a creamy, slightly tangy base. For a lower-calorie option, swap it for full-fat or low-fat plain yogurt — the result is tangier and lighter but still delicious.

    Lime

    • Why fresh lime: Lime adds brightness and acidity that cuts through the richness of the mayo. For a stronger lime flavour, zest the skin directly into the dip. Bottled lime juice will work in a pinch but lacks the aromatic oils of fresh.

    Why You Will Love This Recipe

    • Easy recipe — cook the corn, cut the kernels off the cob, mix everything together. Done in under 30 minutes.
    • Crowd-pleaser — sweet corn is universally loved. Skip the Manzano peppers for a kid-friendly version.
    • Goes with everything — a great side dish for backyard BBQs, summer parties, and family gatherings. The best potluck food to bring.
    • Low cost — most ingredients are already in your fridge. Only the corn and Manzano peppers require a special trip.

    Frequently Asked Questions

    Can I use frozen or canned corn instead of fresh?

    Yes. Frozen corn works well — thaw it first and pat it dry so it does not water down the dip. Canned corn also works in a pinch; drain and rinse it thoroughly. Neither will have the same natural sweetness or texture as fresh peak-season corn, but both are perfectly acceptable shortcut options.

    How spicy is this dip?

    With Manzano peppers it has a genuine kick — moderate to hot. Manzano peppers are roughly twice as hot as jalapeños. For a milder dip, use only half a pepper, remove all the seeds carefully, or substitute with a small amount of jalapeño. For a non-spicy version, skip the peppers entirely and add a pinch of sweet smoked paprika for colour instead.

    Can I make this dip ahead of time?

    Yes. You can prepare the corn and the sautéed onion and peppers up to a day ahead and store them separately in the refrigerator. Mix everything together with the mayonnaise and lime just before serving for the freshest result. Once fully assembled, it keeps well for up to two days covered in the fridge.

    Can I serve this dip warm or cold?

    Both work. Served warm right after cooking, the dip is comforting and rich. Served cold after an hour in the refrigerator, it is refreshing and bright. For a summer outdoor party, cold is the way to go. For a cosy winter side dish, serve it warm.

    What is a good substitute for Manzano peppers?

    Jalapeño is the closest in texture and heat profile. For something fruitier and hotter, habanero works but use much less — habaneros are three to five times hotter than Manzano. Serrano peppers are also a good middle-ground option: hotter than jalapeño with a crisp, green flavour.

    spicy corn and Manzana Pepper Dip

    Spicy Corn and Manzano Pepper Dip

    Prep Time 15 minutes
    Cook Time 15 minutes
    Total Time 30 minutes
    Servings: 6 people
    Course: Side Dish
    Calories: 170

    Ingredients
      

    • 6 corn or sweet corn
    • 1-2 manzano peppers or jalapeno peppers
    • ¼ white onion
    • ½ cup mayonnaise or yogurt (fat free option)
    • 1 large lime juiced
    • 1 tsp salt to taste
    • black pepper to taste

    Method
     

    1. Wash and tear off the leaf of the corn if it has any. Cook the corn in their hot boiling water or steam it in an Instant Pot.
      Boiling water: Boil the corn for 10 minutes.
      Steam with Instant Pot: 10 minutes.
    2. Meanwhile, sliced the onions in thick slices, and thinly sliced the manzano peppers. In a pan, heat 2 tsp of oil and fry the onion and manzano peppers until soft and fragrance. Place them in a heat proof medium size bowl.
    3. Take out the corn and let it cool until it is ready to be handled. Use a sharp knife and cut the kernel off the corn. Place them in the same bowl with the onion and peppers.
    4. Mix the rest of the ingredient together: mayonnaise, lime juice, salt and pepper. Can be serve hot or cold.
  • Goji Berry, Red Date and Chinese Yam Tea

    Goji Berry, Red Date and Chinese Yam Tea

    This simple three-ingredient herbal tea has been part of my own routine for years, including through my pregnancies, with my doctor’s okay. Made with goji berries, Chinese red dates, and Chinese yam, it is warming and naturally sweet, and I drink it most days.

    This post may contain affiliate links. If you purchase through these links, I may earn a small commission at no extra cost to you. Thank you for supporting Love & Harvest!

    tea with goji berries and red dates

    This recipe came to me from my own Chinese medicine doctor. I drank it during and after my pregnancies, and these days I carry a full liter with me and sip it instead of coffee. That’s just my routine and what worked for me, not advice for anyone else.

    goji berry and red date tea

    Why This Tea Is Amazing

    • My coffee swap: When I’d usually reach for a coffee, I make this instead.
    • Not just for me: My husband drinks it too.

    Important: Always consult your doctor or midwife before adding any herbal preparation to your routine during pregnancy or breastfeeding, or if you take any medication, including blood thinners.

    Ingredients

    Goji Berries

    • Why they matter: The flavor is mild and slightly sweet — like a gentle raisin. A small handful is plenty; too many can overpower the tea.

    Buy dried goji berries at any Asian grocery store or online: organic dried goji berries are easy to keep on hand for daily use.

    Chinese Red Dates (Jujube / Hong Zao)

    • Why they matter: They provide natural sweetness to the tea — no added sugar needed.

    Look for them at Chinese medicine shops or Asian grocery stores. You can also find them on Amazon: dried Chinese red dates are available in resealable bags.

    Chinese Yam (Shan Yao / Rhizoma Dioscoreae)

    • Why it matters: The taste is neutral — almost imperceptible — which is exactly what you want in a tea you plan to drink every day.

    Find it dried at Chinese medicine stores or online: dried Chinese yam (Shan Yao Huai Shan) is widely available.

    Rooted in tradition: These ingredients have been used in Chinese home cooking and traditional remedies for centuries.

    goji berry date tea served in glass jar

    How to Serve and Store

    I always recommend drinking this tea warm, never cold. Warm drinks are the tradition in Chinese medicine.

    The longer the herbs steep in the bottle, the more flavor they release. That golden color deepens beautifully over the course of the day. I love using a 1L glass jar — it is large enough to hold a full day’s worth and elegant enough to bring anywhere.

    Sweetener Options

    I do not add sugar — the Chinese red dates provide enough natural sweetness. If you prefer a sweeter tea, add raw honey after brewing (never during boiling). A honey varietal set is a great way to explore different flavor profiles.

    Where to Buy the Ingredients

    Your best source is a Chinese medicine shop or Asian grocery store — the ingredients are common and affordable. If you do not have one nearby, all three herbs are available online. The links above connect you directly to reputable options.

    ***DISCLAIMER: I am not a doctor nor a healthcare provider. The information provided here is for educational purposes only and does not substitute for professional medical advice. Please consult your doctor or midwife before making any changes to your diet during pregnancy.***

    Frequently Asked Questions

    Can I drink this tea while pregnant?

    Every pregnancy is different. Please consult your doctor or midwife before adding any herbal preparation to your routine.

    Can men and non-pregnant women drink this tea?

    Yes. My husband drinks it regularly.

    How long can I store this tea?

    Brewed and stored in a sealed glass jar in the fridge, this tea keeps for 2–3 days. I prefer to brew a fresh liter daily and carry it through the day warm in a thermos.

    Can I add other herbs to this tea?

    Yes. Common additions in Chinese medicine include dried longan fruit, lotus seeds, and wolfberry leaves. Start with the base recipe and experiment from there.

    Does the tea taste bitter?

    Not at all. The red dates provide gentle sweetness, the goji berries add a mild fruity note, and the Chinese yam is essentially tasteless. The overall flavor is light, slightly sweet, and warming — nothing like a bitter herbal medicine.

    Can I use a loose-leaf tea infuser for this?

    You can use a tea infuser to hold the ingredients if you prefer not to strain at the end, though the traditional method is simply to simmer everything loose in the pot and ladle it into your jar — the herbs sink to the bottom on their own.

    A person holding a glass bottle of goji berry and red date tea

    Goji Berry, Red Date and Chinese Yam Tea

    A warm tea of goji berries, Chinese red dates and Chinese yam, simmered for 10 minutes and sipped through the day.
    Prep Time 5 minutes
    Cook Time 10 minutes
    Total Time 15 minutes
    Servings: 1 litre
    Course: Drinks
    Cuisine: Chinese
    Calories: 30

    Ingredients
      

    • 10-15 dried goji berries
    • 2 dried Chinese yam
    • 2-3 dried Chinese red dates
    • 1 litre of filtered water

    Method
     

    1. Give the goji berries, Chinese yam and red dates a rinse in cold water.
    2. Bring a pot and boil the 1 litre of water. Add the ingredients into the water in medium heat. cook for 10 minutes with lid on.
    3. Serve into a heat proof bottle (I recommend glass), and enjoy through out the day. Serve warm.

    Looking for more drinks from my kitchen? Try the Mixed Berry Smoothie with Pomegranate and Nopal or the Celery Juice.