Category: side dishes

  • Asian Smashed Cucumber Salad

    Asian Smashed Cucumber Salad

    This Asian smashed cucumber salad is cucumbers smashed, salted and drained, then tossed in a garlicky dressing of rice vinegar, soy sauce, sesame oil and a little sugar. It’s a no-cook side that makes about 5 servings in about 20 minutes, including the salting time.

    This post contains affiliate links. As an Amazon Associate I earn from qualifying purchases.

    This is the side dish we lean on during hectic, crazy days, when I still want to pack something special for the family, even for lunch. It takes a few basic ingredients and no cooking at all, unless you add the optional hot oil finish.

    When the lunchboxes open, the nutty smell of sesame oil and the tangy scent of rice vinegar float into the air, and the other kids always come over to check my kids’ lunchboxes to see what that smell is! It’s a huge kid-favourite in our house. For the adult version, we add some extra dried chili flakes on top.

    If you only know cucumbers from my bread and butter pickled cucumbers, this one is the opposite: no jars and no waiting. You smash, salt, drain and toss, and it’s ready to eat. It sits nicely next to Hainanese chicken or a plate of noodles.

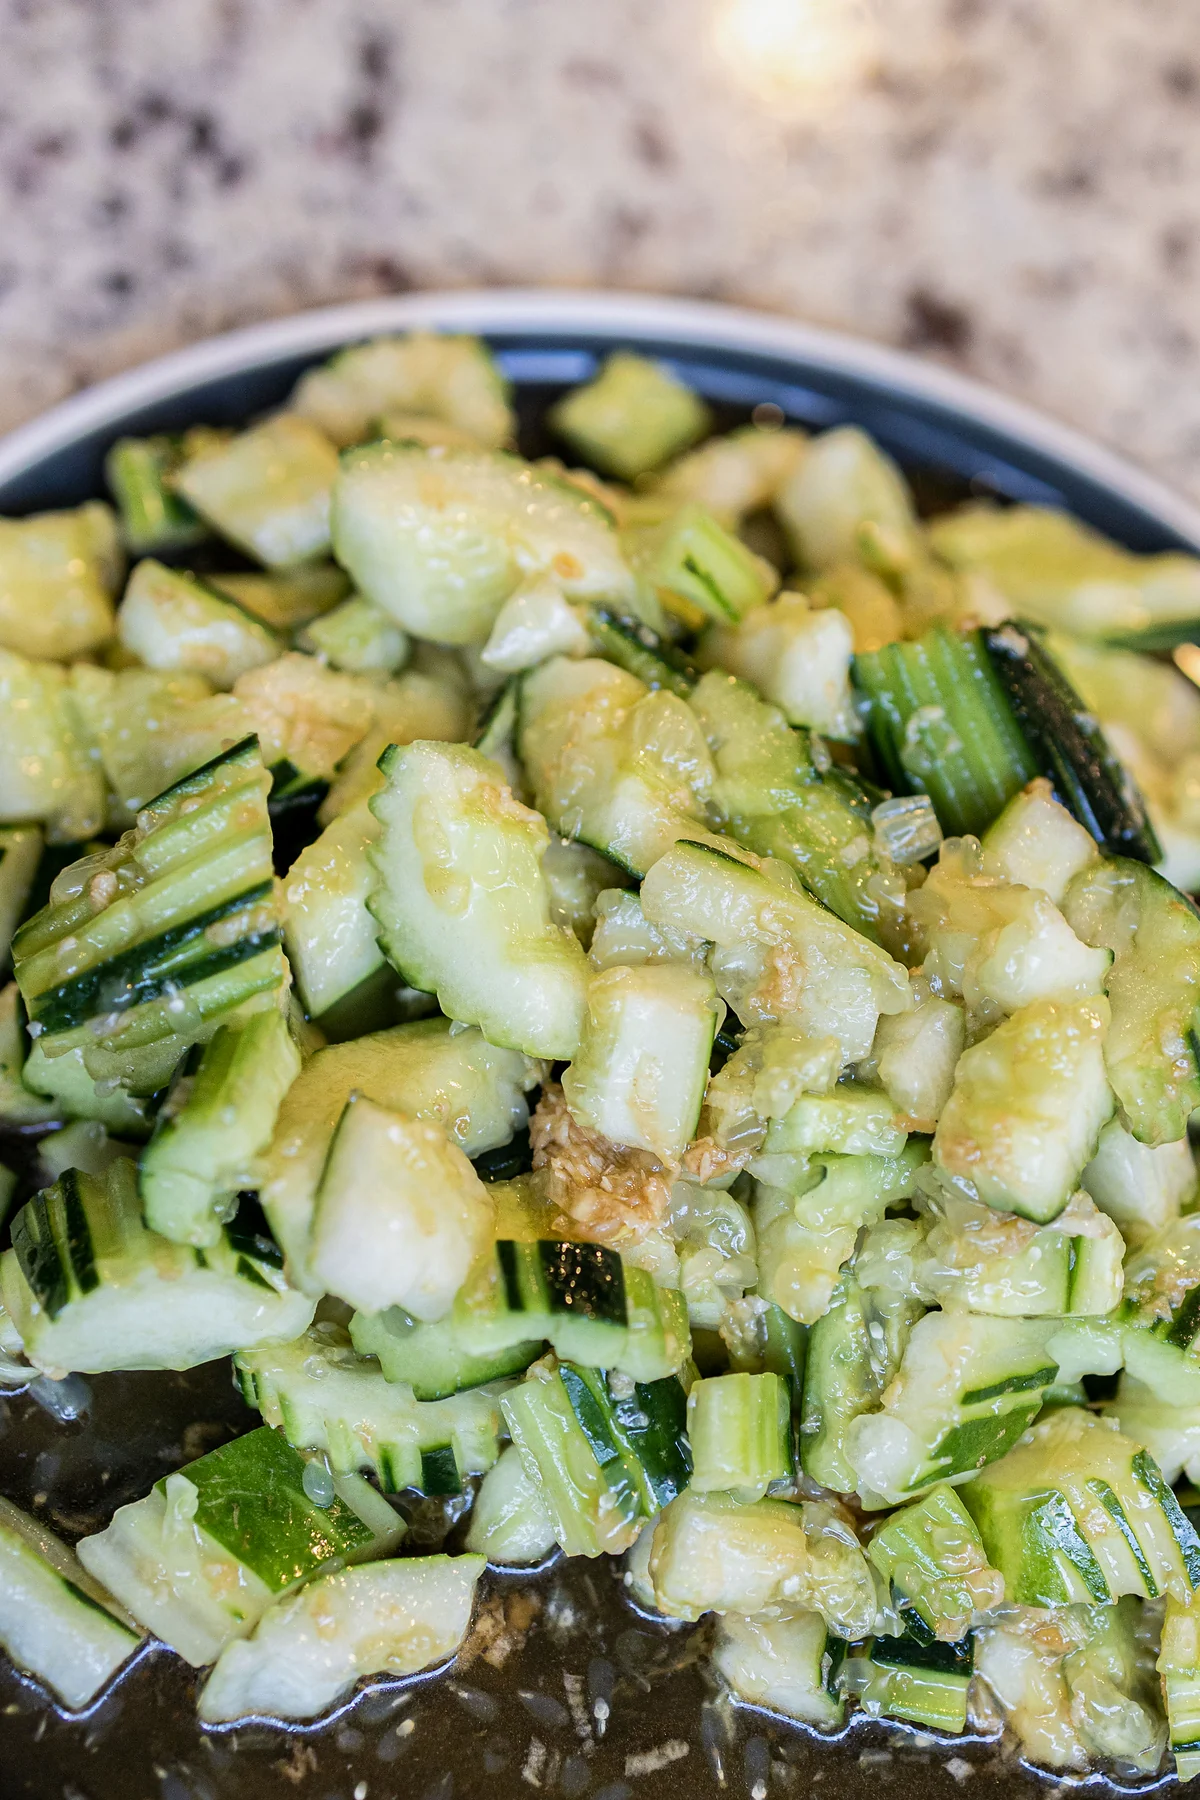
    A dark plate heaped with smashed cucumber pieces, partly peeled in stripes and glossy with sesame dressing.

    Want a week of dinners planned for you? Get my free dinners

    Ingredients

    • Cucumbers: 4 medium cucumbers.
    • Salt: 1 teaspoon, to draw out some of the water.
    • Dressing: 1 garlic clove (minced), 3 teaspoons sugar, 2 teaspoons sesame oil, 3 teaspoons soy sauce and 2 tablespoons rice vinegar.
    • Optional toppings: 1 teaspoon dried chili flakes or chili oil, and 2 teaspoons sesame seeds. No chili oil? 1 tablespoon of a neutral oil like canola for the optional hot oil finish (see Tips).

    Allergens: contains sesame and soy, and most soy sauce also contains wheat. If you need to avoid wheat, use a soy sauce or tamari labelled wheat-free. For a sesame-free version, skip the sesame seeds and use a neutral oil instead of sesame oil.

    Equipment you’ll need

    These are Amazon affiliate links. As an Amazon Associate I earn from qualifying purchases.

    How to make Asian smashed cucumber salad

    Step 1: Wash the cucumbers. Rinse the cucumbers under cool running water, rubbing them with your hands or a clean produce brush (no soap). Dry them with a clean towel and trim off the ends.

    Step 2: Smash and cut. Lay a cucumber on a cutting board, put the flat side of a cleaver or large knife on top, with the sharp edge facing away from you, and press down firmly with the heel of your hand, keeping your fingers clear of the edge (or give it a few firm whacks with a rolling pin) until it cracks open. Break it into about 4 long sections, then cut them into bite-size pieces on a 45 degree angle. Repeat with the rest.

    Step 3: Salt and drain. Put the cucumbers in a large bowl and toss them with 1 teaspoon salt. Let them sit 5 to 10 minutes, then pour off the water they release.

    Step 4: Mix the dressing. In a small bowl, stir together the minced garlic, 3 teaspoons sugar, 2 teaspoons sesame oil, 3 teaspoons soy sauce and 2 tablespoons rice vinegar until the sugar dissolves.

    Step 5: Toss and top. Pour the dressing over the cucumbers and toss well. Top with chili flakes or chili oil, if using, and the sesame seeds. For the optional hot oil finish, see Tips below. Serve right away, or cover and refrigerate within 2 hours.

    Close-up of smashed cucumber chunks coated in dressing with bits of minced garlic.

    Tips for the best smashed cucumber salad

    • Smash, don’t slice. The cracked, rough edges hold on to more dressing than neat slices do.
    • Don’t skip the draining. Pouring off the salty water keeps the dressing from getting thin.
    • No chili oil? In Chinese cooking, uncooked and cooked oil taste different. Make sure the cucumbers are well drained and the salad is in a metal or other heatproof bowl at room temperature (not a cold glass bowl straight from the fridge). Heat 1 tablespoon of a neutral oil like canola in a small pan over medium heat just until it shimmers, and stay with the pan the whole time. If it starts to smoke, turn off the heat, let the oil cool completely and start over with fresh oil. As soon as it shimmers, take the pan off the heat and, as the very last step after the salad is tossed and topped, slowly drizzle the oil over the top. Hold the pan low and close to the bowl, pour away from yourself and keep your face back. The oil is very hot and will sizzle and may spatter, so keep kids away from the stove and the bowl.
    • Make it two ways. Toss it mild for the kids, then scoop out a portion for the grown-ups and add extra chili flakes.
    • Packing it for lunch? Pack it straight from the fridge in an insulated lunchbox with two cold sources, like two frozen ice packs, and throw out anything that comes home uneaten.

    What to serve with it

    In the photos it’s served with noodles and a browned patty. It also goes well with salt and pepper chicken wings.

    A white scalloped plate with smashed cucumber salad, noodles and a browned patty, with a dish of cucumber salad behind it.

    How to store Asian cucumber salad

    Smashed cucumber salad next to noodles and a browned patty on a white plate.

    Refrigerate leftovers within 2 hours (1 hour if the room is above 90°F / 32°C) in an airtight container. It usually keeps 1 to 3 days, but it’s best the day you make it. If you keep it overnight, the cucumbers release extra water and get softer, so simply drain it off before serving. Because the dressing has raw garlic in oil, keep the salad cold and don’t leave it out at room temperature for more than 2 hours.

    FAQ

    Why smash the cucumbers?

    Smashing cracks the cucumber open, so the rough edges soak up more of the dressing than clean slices would.

    Do I have to salt the cucumbers first?

    It helps. The salt pulls out some of the water, which you pour off, so the salad stays crunchier and the dressing doesn’t get watered down as fast.

    Can I make Asian cucumber salad ahead of time?

    Yes. Mix the dressing and keep it covered in the fridge, then smash, salt and drain the cucumbers and toss everything just before serving. Since the dressing has raw garlic in oil, keep it covered in the fridge and use it within 3 days. Don’t leave it out at room temperature for more than 2 hours.

    How long does cucumber salad last in the fridge?

    It usually keeps 1 to 3 days in an airtight container in the fridge. The cucumbers keep releasing water and soften as it sits, so drain it before serving.

    Is this cucumber salad spicy?

    Not unless you add chili. The base salad is garlicky and tangy, so you can keep it mild for the kids and add dried chili flakes or chili oil for the adults.

    More recipes you’ll love

    Pack it once, and see who comes over to check the lunchbox!

    Need more dinner ideas? Grab my free dinners

    Smashed cucumber salad on a dark plate, glossy with sesame and rice vinegar dressing.

    Asian Smashed Cucumber Salad

    Cucumbers smashed, salted and drained, then tossed with a garlicky dressing of rice vinegar, soy sauce, sesame oil and a little sugar. A no-cook side with optional chili on top.
    Prep Time 10 minutes
    Salt and drain 10 minutes
    Total Time 20 minutes
    Servings: 5 servings
    Course: Salad, Side Dish
    Cuisine: Asian, Chinese

    Ingredients
      

    Salad
    • 4 medium cucumbers
    • 1 tsp salt
    Dressing
    • 1 clove garlic minced
    • 3 tsp sugar 1 tablespoon
    • 2 tsp sesame oil
    • 3 tsp soy sauce 1 tablespoon; regular soy sauce
    • 2 tbsp rice vinegar
    Optional toppings
    • 1 tsp dried chili flakes or chili oil plus extra flakes for the adults
    • 2 tsp sesame seeds
    • 1 tbsp neutral oil like canola optional hot oil finish

    Equipment

    • Cutting board
    • Cleaver or large knife the flat side is for smashing
    • Rolling Pin optional, for smashing
    • Large mixing bowl (use a metal one for the hot oil finish)
    • Small bowl for the dressing
    • Airtight container for leftovers

    Method
     

    1. Rinse the cucumbers under cool running water, rubbing them with your hands or a clean produce brush (no soap). Dry them with a clean towel and trim off the ends.
    2. Lay a cucumber on a cutting board, put the flat side of a cleaver or large knife on top, with the sharp edge facing away from you, and press down firmly with the heel of your hand, keeping your fingers clear of the edge (or give it a few firm whacks with a rolling pin) until it cracks open. Break it into about 4 long sections, then cut them into bite-size pieces on a 45 degree angle. Repeat with the rest.
    3. Put the cucumbers in a large bowl and toss them with 1 teaspoon salt. Let them sit 5 to 10 minutes, then pour off the water they release.
    4. In a small bowl, stir together the minced garlic, 3 teaspoons sugar, 2 teaspoons sesame oil, 3 teaspoons soy sauce and 2 tablespoons rice vinegar until the sugar dissolves.
    5. Pour the dressing over the cucumbers and toss well. Top with chili flakes or chili oil, if using, and the sesame seeds. For the optional hot oil finish, see the notes. Serve right away, or cover and refrigerate within 2 hours.
      Close-up of smashed cucumber chunks coated in dressing with bits of minced garlic.

    Notes

    Rinse the cucumbers under running water before cutting, even if you plan to peel them. Skip the soap.
    No chili oil? Make sure the cucumbers are well drained and the salad is in a metal or other heatproof bowl at room temperature (not a cold glass bowl straight from the fridge). Heat 1 tablespoon of a neutral oil like canola in a small pan over medium heat just until it shimmers, and stay with the pan the whole time. If it starts to smoke, turn off the heat, let the oil cool completely and start over with fresh oil. As soon as it shimmers, take the pan off the heat and, as the very last step after the salad is tossed and topped, slowly drizzle the oil over the top. Hold the pan low and close to the bowl, pour away from yourself and keep your face back. The oil is very hot and will sizzle and may spatter, so keep kids away from the stove and the bowl.
    Servings, prep and salting times are estimates and vary with the size of your cucumbers.
    Refrigerate within 2 hours (1 hour if the room is above 90°F / 32°C) in an airtight container. It usually keeps 1 to 3 days, but the cucumbers keep releasing water and soften, so it’s best the day you make it. Drain off the extra water before serving. Because the dressing has raw garlic in oil, keep it cold and don’t leave it out at room temperature for more than 2 hours.
    For a lunchbox, pack it straight from the fridge in an insulated lunchbox with two cold sources, like two frozen ice packs, and throw out anything that comes home uneaten.
    Allergens: contains sesame and soy, and most soy sauce also contains wheat. If you need to avoid wheat, use a soy sauce or tamari labelled wheat-free. For a sesame-free version, skip the sesame seeds and use a neutral oil instead of sesame oil.
  • Easy Mexican Green Rice

    Easy Mexican Green Rice

    Mexican green rice (arroz verde) is long-grain rice cooked in a blended sauce of cilantro, jalapeño, garlic, onion, lime and broth until fluffy and fragrant. Blend the sauce, simmer covered for 20 minutes, then rest 10 minutes before fluffing. Ready in about 40 minutes.

    Jump to Recipe

    This post may contain affiliate links. As an Amazon Associate I earn from qualifying purchases.

    You have heard of Mexican red rice, but have you ever heard of Mexican green rice? Probably not! This is a recipe I put together after gathering inspiration from the ingredients and flavours I came across at a local mercado. I took the same idea behind traditional Mexican red rice, but instead of tomatoes I went with fresh herbs, garlic, lime and a little jalapeño.

    The cilantro turns the rice that bright green colour, the lime keeps it fresh, and the jalapeño brings just enough warmth to keep every bite interesting.

    In our family we love this Mexican green rice alongside just about anything: meat, chicken, seafood, even a vegetarian plate. One of our absolute favourite combinations is serving it with Mexican fire-roasted chicken. Honestly, though, there are so many other delicious ways to eat it.

    The best part? It is super easy. You blend the green sauce, cook the rice in it, and let everything steam until fluffy. A simple side that makes an ordinary dinner feel a little more special!

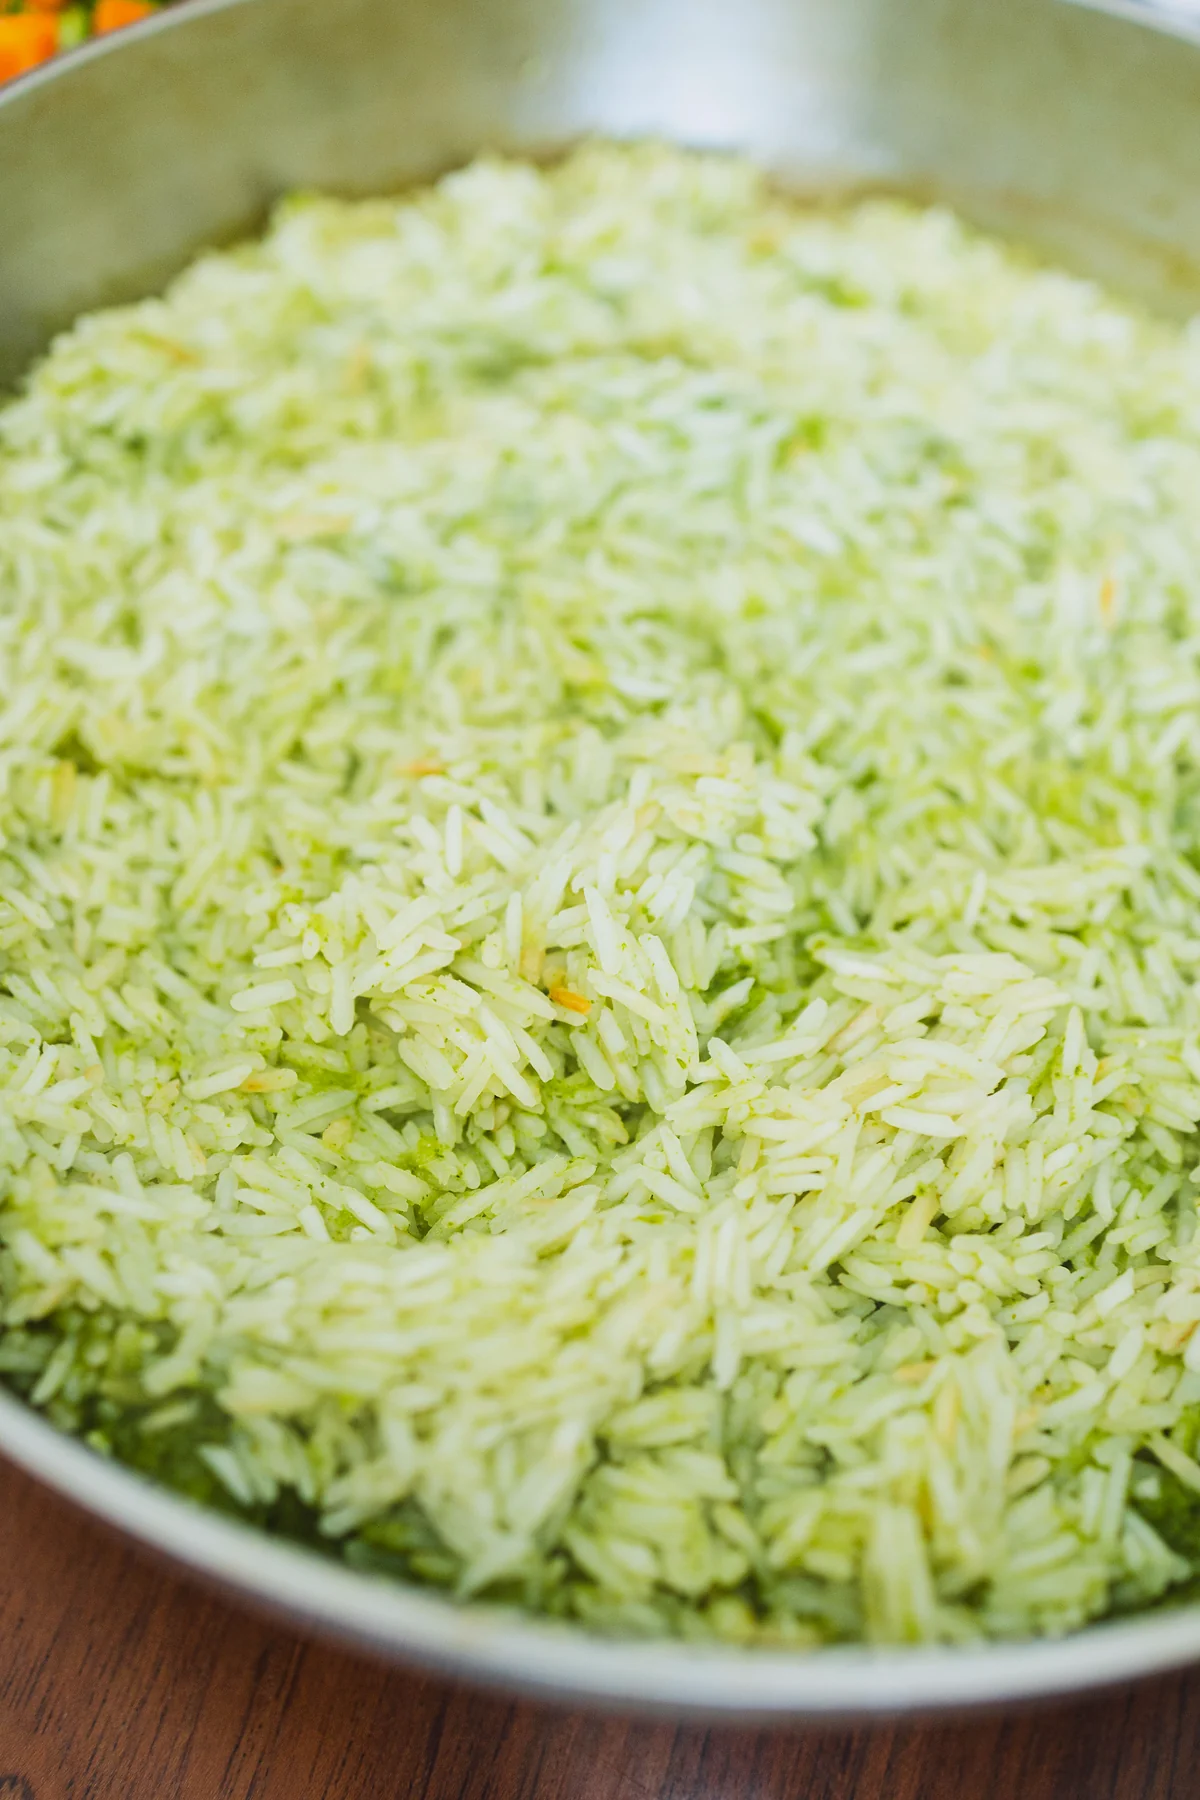
    Fluffy Mexican green rice (arroz verde) filling a stainless steel skillet on a wooden table.

    Want a week of dinners planned for you? Get my free dinners

    Why we love this Mexican green rice

    There is something fun about taking a familiar dish and giving it a completely new twist. We all know Mexican red rice. This green version brings something different to the table.

    Instead of tomatoes for colour and flavour, this recipe uses fresh cilantro, jalapeño, garlic, onion and lime. Everything gets blended into a green sauce that the rice soaks up as it cooks. You get herby rice with a little citrus, and it tastes as good as it looks.

    I also love how simple the cooking is. Just like red rice, you cook the grains in a flavourful liquid instead of plain water. Here that liquid is our homemade green sauce, so all those fresh ingredients go straight into the rice.

    And can we talk about the colour? It looks so good next to golden roasted chicken, grilled meat or a pile of roasted vegetables!

    Sometimes we want a simple side next to our protein. Other times we build a whole meal around a few different flavours and textures. This rice works for both.

    Ingredients you’ll need

    You only need a handful of simple ingredients. Most of the flavour comes from blending fresh herbs and aromatics into the green sauce.

    • Garlic, onion and jalapeño: the base of the sauce. Seed the jalapeño for a milder pot, or leave the seeds in if you like a little extra heat!
    • Fresh cilantro: a whole bunch, with a few leaves saved for garnish. This is what turns the rice green.
    • Lime juice: juice of 1 small lime for that citrusy kick.
    • Low-sodium chicken broth: 2 cups. Water also works.
    • Ground cumin, salt and black pepper.
    • White basmati or jasmine rice: 1 cup. I like these because they stay fluffy with the green sauce. Stick to one type and follow the method so the grains do not go mushy.

    Want it spicier? Leave the jalapeño seeds in. Serving kids or anyone sensitive to spice? Take the seeds and membranes out for a milder flavour.

    Recommended tools

    How to make easy Mexican green rice

    Step 1: Blend the green sauce. Add the garlic, onion, jalapeño, cilantro, lime juice, chicken broth, cumin, salt and black pepper to a high-powered blender or food processor. Blend until completely smooth. It should look bright green and smell wonderfully fresh.

    This green sauce is the heart of the recipe, so blend it well before you move on.

    Step 2: Toast the rice, then add the green sauce. Do not rinse the rice. Place a medium pot over medium heat. Add the dry rice and toast, stirring, until the grains look lightly browned. Then pour in the green sauce, stir gently so the grains sit evenly in the liquid, and bring it to a simmer.

    White rice simmering in a bright green cilantro sauce in a stainless steel pan on the stove.

    Step 3: Cover and cook. Once it is simmering, reduce the heat to low and immediately cover with a tight-fitting lid. Cook for 20 minutes without lifting the lid. Keeping it covered lets the rice absorb the liquid and cook evenly.

    Close-up of Mexican green rice bubbling in green herb sauce on the stovetop.

    Step 4: Let the rice steam. After 20 minutes, take the pot off the heat, but keep the lid on. Do not open it just yet! Let it rest and steam for another 10 minutes. That resting time finishes the grains and gives you that fluffy texture.

    Step 5: Fluff and serve. Remove the lid and gently fluff the rice with a fork. Garnish with extra cilantro leaves or a few jalapeño slices if you like a little kick. Serve warm.

    Close-up of fluffy long-grain Mexican green rice showing herb flecks.

    And that’s it! TA-DA, you got yourself a pot of fluffy Mexican green rice.

    Tips and common mistakes

    • Do not rinse the rice. Use it dry straight from the bag or canister.
    • Toast until lightly browned. Dry-toast the rice in the pot over medium heat before you add the green sauce — that light colour on the grains is what you want.
    • Do not lift the lid during the 20 minutes. Steam is doing the work. Peeking lets it out.
    • Use a tight-fitting lid. If yours is loose, the liquid evaporates too fast and the rice stays underdone.
    • Rest the full 10 minutes. I know it is hard to wait. That rest is what keeps the grains fluffy instead of wet.
    • Stick to basmati or jasmine. Mixing rice types or swapping in a short-grain rice changes the liquid ratio and can turn mushy.
    • Taste the sauce before it hits the pot. Salt levels vary by broth brand. Adjust before you pour.

    How to store homemade Mexican green rice

    A skillet of Mexican green rice on a wooden table next to a garden salad and broccoli.

    One of the best things about making rice at home is having leftovers ready for another meal. Cooked rice does need careful storage.

    • Refrigerator: transfer leftovers into shallow containers and refrigerate within 2 hours (sooner is better for rice; aim for within 1 hour). Keep at 40°F (4°C) or below. As a cautious food-safety guideline for cooked rice, use it within 24 hours.
    • Freezer: divide into individual portions and freeze promptly in airtight containers. For best texture, use within 1 to 2 months.
    • Reheating: reheat until steaming hot throughout, ideally 165°F (74°C). Add a small splash of water or broth, and avoid reheating the same portion more than once.
    • A helpful tip: never leave cooked rice sitting at room temperature for several hours. Rice can contain spores of Bacillus cereus, which can survive cooking and produce toxins if the rice is stored improperly.

    FAQ

    What is Mexican green rice (arroz verde)?

    It is rice cooked in a blended green sauce, usually cilantro with onion, garlic and green chile, instead of the tomato base used for Mexican red rice. This version uses cilantro, jalapeño, garlic, onion, lime and broth.

    Does this green rice use spinach?

    This recipe’s colour comes from cilantro (and jalapeño), not spinach.

    Is Mexican green rice spicy?

    It depends on the jalapeño. Seeded, it stays mild with a little warmth. Leave the seeds in for more heat, or take them out when you are cooking for kids or anyone sensitive to spice.

    Can I use water instead of broth?

    Yes. Broth adds more flavour; water still works.

    How do I keep the rice fluffy, not mushy?

    Do not rinse the rice. Toast the dry grains until lightly browned, then add the green sauce. Use one type of long-grain rice (basmati or jasmine — both work), keep the lid on for the full 20 minutes, then rest 10 minutes before fluffing with a fork.

    How long do leftovers keep?

    Refrigerate promptly and, as a cautious guideline for cooked rice, use within 24 hours. Freeze portions for 1 to 2 months. Always reheat until steaming hot.

    More recipes you’ll love

    Of course, you do not need a special main dish. This rice is just as good next to grilled vegetables, sautéed mushrooms or whatever protein you already have going.

    That is what makes this Mexican green rice so special to us. Familiar ingredients, a straightforward method, and a pot of something colourful and full of flavour.

    So the next time you are planning dinner, skip the usual rice for a change and give this green version a try. You might just discover a new family favourite!

    Get my free dinners

    Mexican green rice in a skillet.

    Easy Mexican Green Rice

    White rice simmered in a blended cilantro, jalapeño, garlic, onion, lime and broth sauce, a fresh green take on Mexican rice (arroz verde).
    Prep Time 10 minutes
    Cook Time 20 minutes
    Rest 10 minutes
    Total Time 40 minutes
    Servings: 4 servings
    Course: Side Dish
    Cuisine: Mexican

    Ingredients
      

    • 3 cloves garlic
    • ½ white or yellow onion roughly chopped
    • 1 jalapeño seeded (leave seeds for more heat)
    • 1 bunch fresh cilantro reserve a few leaves for garnish
    • 1 small lime juiced
    • 2 cups low-sodium chicken broth or water
    • ½ tsp ground cumin
    • ½ tsp salt
    • freshly ground black pepper to taste
    • 1 cup white basmati or jasmine rice

    Equipment

    • High-speed blender or food processor any comparable blender works
    • Medium pot with a tight-fitting lid
    • Measuring cups and spoons
    • Fork for fluffing

    Method
     

    1. Add the garlic, onion, jalapeño, cilantro, lime juice, chicken broth, cumin, salt and black pepper to a high-powered blender or food processor. Blend until completely smooth and vibrant green.
    2. Do not rinse the rice. Place a medium pot over medium heat. Add the dry rice and toast, stirring, until the grains look lightly browned. Pour in the green sauce, stir gently, and bring to a simmer.
    3. Reduce heat to low, immediately cover with a tight-fitting lid, and cook for 20 minutes without lifting the lid.
    4. Remove from heat and keep covered. Let the rice rest and steam for 10 minutes.
    5. Fluff with a fork. Garnish with cilantro or jalapeño slices. Serve warm.
      Fluffy Mexican green rice (arroz verde) filling a stainless steel skillet on a wooden table.

    Notes

    For milder rice, remove jalapeño seeds and membranes. For more heat, leave them in. Water can replace broth. Store leftovers promptly in the fridge and reheat until steaming hot (see post storage section).
  • Warm Lentil and Sweet Potato Salad

    Warm Lentil and Sweet Potato Salad

    This Warm Lentil and Sweet Potato Salad is the perfect dish to celebrate the cooler months. It’s beautiful enough to impress guests, cozy enough for a family meal, and packed with flavour. Oven-roasted sweet potatoes, hearty lentils, and a silky peanut butter-cumin dressing come together in a bowl that feels both comforting and indulgent — ready in under an hour.

    This post may contain affiliate links. If you purchase through these links, I may earn a small commission at no extra cost to you. Thank you for supporting Love & Harvest!

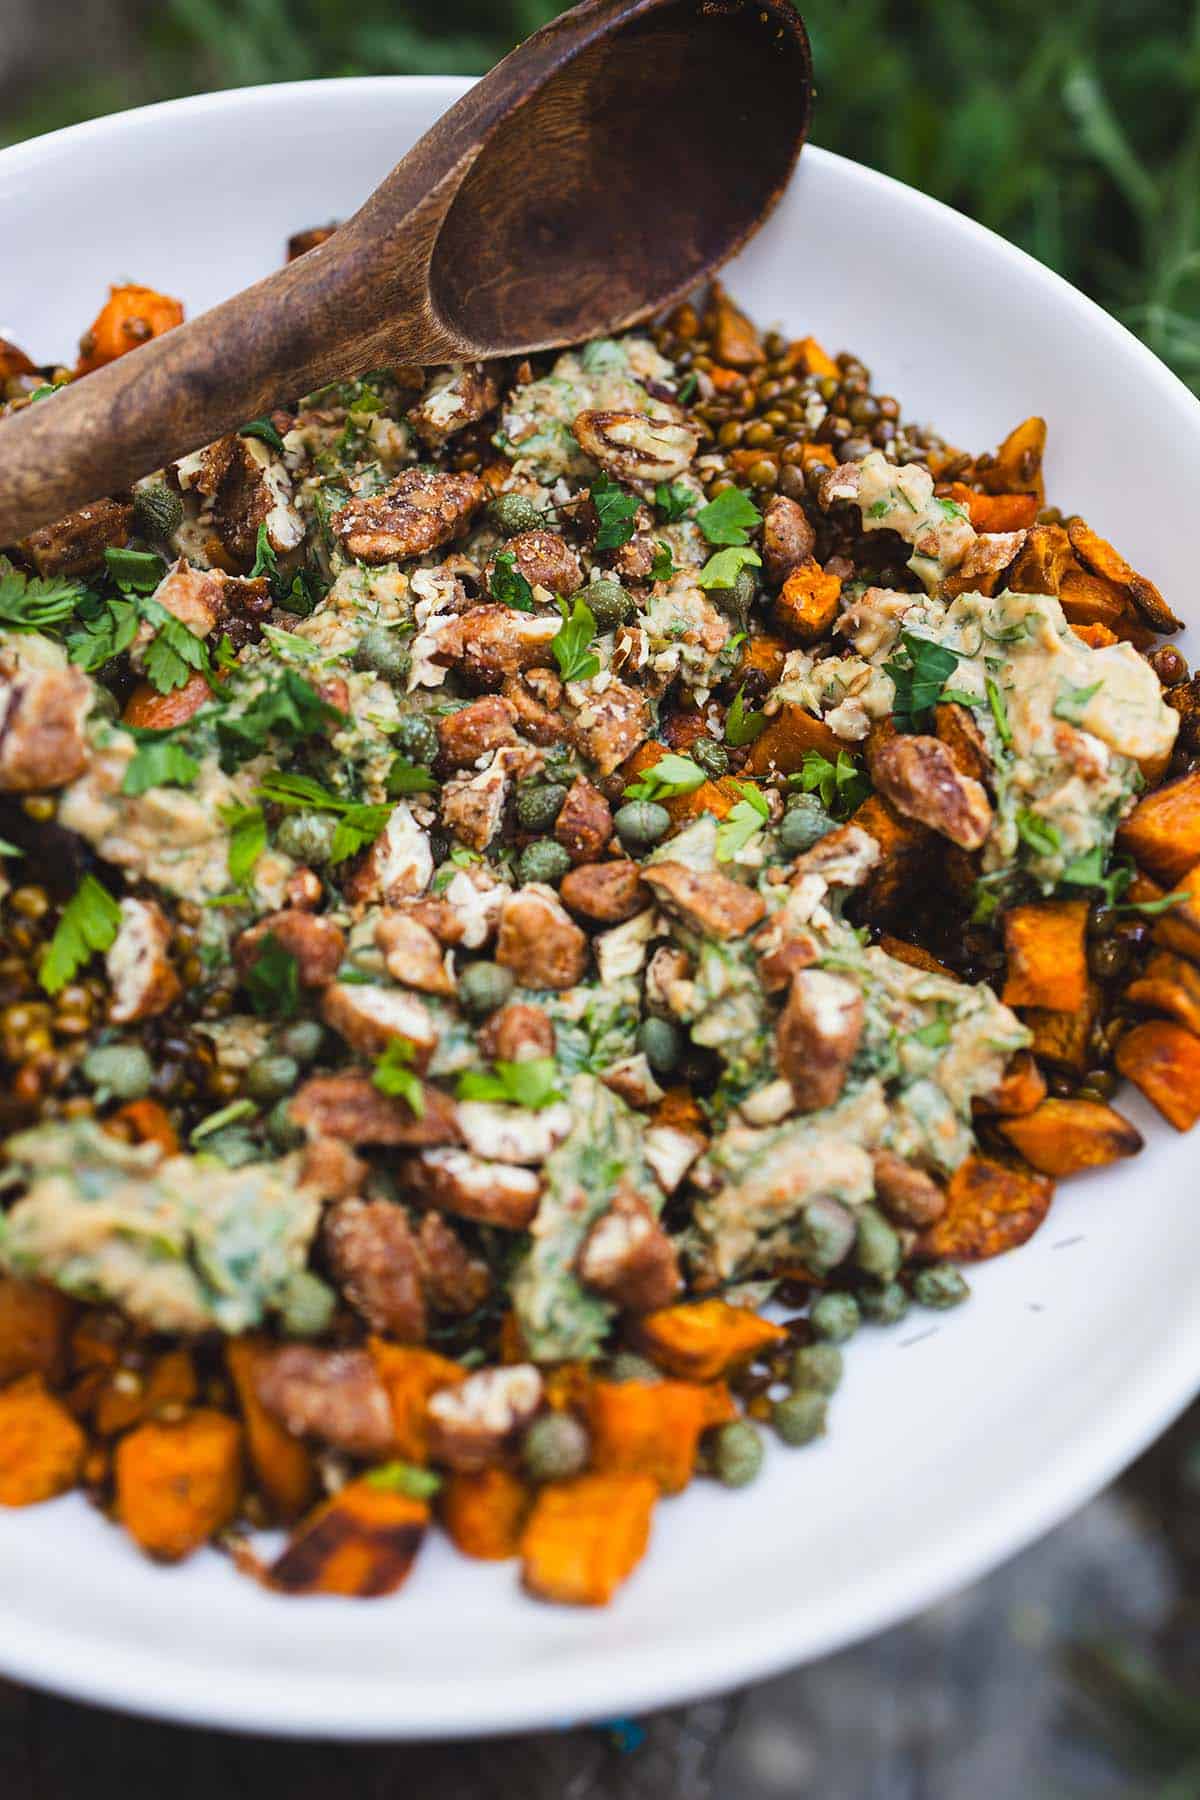
    Warm lentil and sweet potato salad in a bowl

    Why We Love This Warm Salad

    There’s something magical about warm salads, especially during the fall and winter seasons. They bridge the gap between comfort food and a big bowl of vegetables so perfectly. This salad is hearty and has just the right amount of indulgence thanks to the creamy dressing. It’s vibrant and inviting on the plate — tender roasted sweet potatoes, nutty lentils, fresh greens, and a silky dressing that clings to every bite. Whether you’re feeding family or hosting friends, it feels a little special, yet it’s so easy to put together.

    Flavour Profile

    The taste is simply beautiful. Roasted sweet potatoes bring a natural caramelised sweetness that balances the earthy depth of lentils. The peanut butter-cumin dressing is what truly makes this salad sing — nutty, savoury, slightly smoky, and warmly spiced without being overwhelming. Every forkful is a perfect combination of soft and tender textures with a hint of crunch from honey-coated almonds sprinkled on top. It’s comfort food that still feels fresh and alive.

    Lentil and sweet potato salad close-up showing texture

    Key Ingredients

    Ingredients

    Sweet Potatoes

    • Roasted until golden and slightly crispy on the edges, sweet potatoes bring natural caramelized sweetness and warmth. Cut them evenly so they roast at the same rate. Use a cast iron skillet or sheet pan lined with parchment for the best caramelization.

    Lentils

    • Earthy and hearty, lentils form the perfect base for this salad. French green lentils or black beluga lentils are ideal because they hold their shape beautifully after cooking, unlike red lentils which turn mushy. Rinse well before cooking and don’t skip the simmer time.

    Peanut Butter (or Tahini)

    • Creamy and rich, peanut butter is the secret to the dressing’s luxurious texture and depth. Chunky peanut butter adds even more character. You can swap for tahini for a more traditional Middle Eastern flavour — both work wonderfully. A KitchenAid immersion blender makes blending the dressing smooth and effortless.

    Cumin

    • Toasted cumin adds warmth and a hint of smoky spice that ties the whole dish together. Ground cumin is used both in roasting the sweet potatoes and in the dressing, building layers of flavour throughout.

    Fresh Dill & Parsley

    • Fresh herbs brighten the whole dish with clean, vibrant flavour that cuts through the richness of the dressing. Don’t substitute dried herbs here — fresh dill and parsley make a noticeable difference in both flavour and visual appeal.

    Ingredients for warm lentil sweet potato salad

    Why You Should Make This Salad

    This salad isn’t just a side dish — it’s a celebration of simple, fresh ingredients coming together in the most beautiful way. It’s hearty enough to stand alone as a meal, or it can be served alongside roasted chicken or a crusty loaf of bread for a feast. Plus, it’s naturally gluten-free and can easily be made vegan. The peanut butter and cumin dressing is a conversation starter in itself — it’s that good.

    If you love warm, salad-style recipes, you’ll also enjoy our Thai Chicken Salad if you want chicken in it, or keep it plant-based with our Easy Hummus Recipe as a side. For another warming winter dish, our Instant Pot Taiwanese Beef Noodle Soup is endlessly comforting.

    Warm lentil sweet potato salad served on a plate

    Frequently Asked Questions

    Can I make this salad ahead of time?

    Yes! This salad is great for meal prep. Roast the sweet potatoes and cook the lentils up to 3 days in advance and store them separately in the fridge. Make the dressing ahead too — it keeps for up to a week refrigerated. Assemble and toss just before serving for the best texture.

    What type of lentils work best?

    French green lentils (Puy lentils) or black beluga lentils are ideal because they hold their shape after cooking. Avoid red or orange lentils for this recipe as they become too soft and mushy. If you can only find regular green or brown lentils, those work too — just watch the cooking time carefully.

    Is this recipe vegan and gluten-free?

    It is gluten-free as written. It is vegan if you swap the honey-coated almonds for plain toasted almonds; everything else in the salad is plant-based.

    What can I serve alongside this salad?

    This warm salad works beautifully as a standalone meal or as a side dish. It pairs wonderfully with roasted chicken, pan-seared salmon, or a thick slice of sourdough bread. For a full plant-based spread, serve it with hummus and warm flatbread.

    How do I store leftovers?

    Store leftovers in an airtight container in the refrigerator for up to 3 days. The flavours actually deepen overnight, making it a fantastic next-day lunch. Reheat gently in the microwave or enjoy at room temperature. Add a splash of water to the dressing if it thickens up in the fridge.

    Lentil and roasted sweet potato salad with a green herb dressing

    Warm Lentil and Sweet Potato Salad

    Warm Lentil and Sweet Potato Salad has creamy peanut butter and earthy cumin in the dressing bring it all together with a richness and warmth.
    Prep Time 15 minutes
    Cook Time 35 minutes
    Total Time 50 minutes
    Servings: 4 people
    Course: Salad
    Calories: 340

    Ingredients
      

    Roast Sweet Potato
    • 4 medium sweet potatoes, rinsed
    • 1 cup dried mixed lentils
    • 1 tbsp olive oil or cooking oil
    • ½ tsp ground cumin
    • sea salt and pepper
    Roasted Garlic Tahini Dressing:
    • 4 garlic clove
    • ¼ cup fresh parsley, chopped
    • 2 tbsp fresh dill, chopped
    • ¼ cup chunky peanut butter or tahini
    • 1 lime, juiced
    • 1 tbsp olive oil
    • ½ tsp ground cumin
    • sea salt and pepper
    • 4-5 tbsp water
    Garnish
    • little more parsley
    • ¼ cup chopped honey coated almonds
    • 1 tbsp capers

    Method
     

    1. Preheat oven to 400°F (200°C).
    2. Wash sweet potatoes well and cut into cubes. Toss with olive oil, cumin, salt, and pepper. Spread evenly on a baking tray.
      Roast for 25–30 minutes, until tender and golden.
    3. Rinse lentils under cold water. Place in a pot with 3 cups water and a pinch of salt.
    4. Bring to a boil, then reduce heat and simmer for 20–25 minutes, until lentils are tender but not mushy. Drain and set aside.
    5. Dressing: Roast garlic cloves in the oven (wrapped in foil or in a small dish) until soft, about 15 minutes.
      In a blender or food processor, combine roasted garlic, parsley, dill, peanut butter/tahini, lime juice, olive oil, cumin, salt, and pepper.
      Add water gradually until smooth and creamy.
    6. In a large bowl, combine roasted sweet potatoes and cooked lentils. Toss with dressing until well coated.
    7. Top with fresh parsley, chopped honey-coated almonds, and a few capers. Serve warm or at room temperature as a hearty side dish or light main meal.
  • Campfire Hot Honey Brie Cheese Recipe

    Campfire Hot Honey Brie Cheese Recipe

    There’s something magical about that first bite around the fire, especially when it’s oozing brie cheese kissed with hot honey, grilled mango, and a touch of thyme. This Campfire Hot Honey Brie Cheese has quickly become one of our go-to camping snacks—simple to make, yet indulgent enough to make the campground feel like a gourmet retreat.

    This post may contain affiliate links. If you purchase through these links, I may earn a small commission at no extra cost to you. Thank you for supporting Love & Harvest!
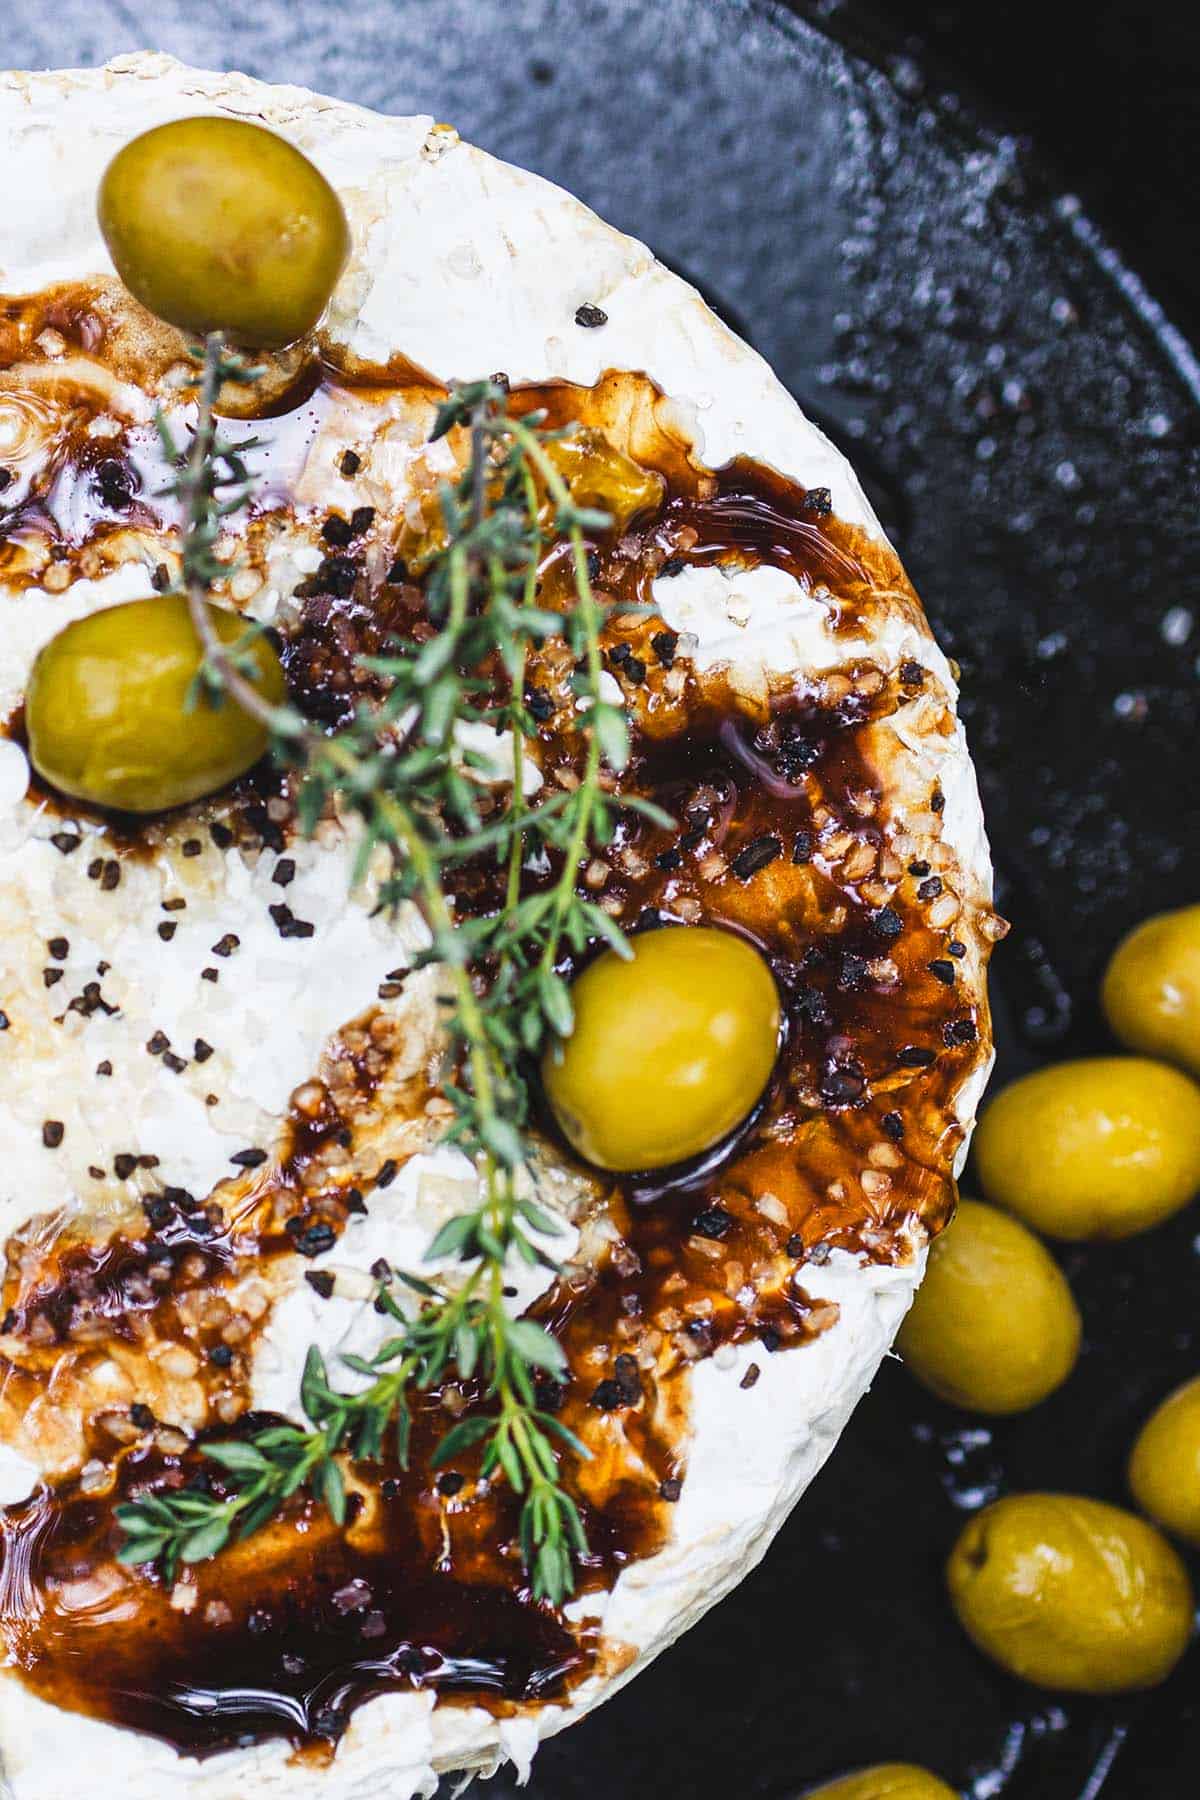
    Cheese, mango, and green olives on a skillet with herbs, highlighting farm-fresh ingredients for gourmet cooking.

    Hot Honey and Brie Cheese Flavour

    Imagine the creamy melt of brie infused with golden hot honey, the zing of balsamic vinegar, the salty olives, and the earthy aroma of thyme. Add a grilled mango slice for a little caramelized sweetness and you’ve got a whole explosion of flavour in one bite.

    Dip a pita chip or a crunchy carrot stick in it, and you’re in for a rustic-meets-exotic treat that’ll have your camping neighbours sniffing the air and asking what’s cooking.

    Easy Hot Honey Brie Cheese Recipe

    This appetizer takes just a few minutes to assemble and about 15 minutes on a hot fire or grill. It’s a total win when you’re multitasking between setting up your tent, unpacking gear, or prepping for the main meal. Minimal cleanup, maximum satisfaction.

    Here’s how we do it:

    1. Place a whole block of Costco brie on a piece of foil or a small cast iron pan.
    2. Drizzle generously with organic honey and a splash of balsamic vinegar.
    3. Top with a few pitted olives, fresh thyme, a pinch of salt and pepper (go with smoked salt if you’re feeling fancy).
    4. If you’ve got a mango on hand, grill one side and add it on top for a sweet bonus.
    5. Wrap loosely or place in your campfire-safe pan and cook over the fire for 15 minutes or until gooey and golden.
    6. Serve with pita chips, celery, or carrot sticks. Trust us, extra honey on top doesn’t hurt.

    Creamy Brie cheese topped with balsamic glaze, black pepper, and fresh herbs on a dark background.

    One of Our Camping Hacks

    Honestly, Campfire Brie is one of our best camping hacks. You don’t need much, and it’s versatile. Swap the mango for figs, skip the olives if you’re not a fan, or throw in some crushed walnuts if you want a little crunch. It never disappoints. We always keep a Costco brie in our cooler just in case.

    Main Ingredients

    Ingredients

    Brie Cheese

    • One full block of brie — Costco’s double-crème brie is our go-to. It melts beautifully and has that buttery, mushroomy flavor that pairs perfectly with honey. Make sure it’s at room temperature before cooking for the fastest, most even melt.

    Organic Honey

    • The sweet base of this recipe. Raw, unfiltered organic honey has a deeper flavor than commercial honey — and it has a slightly higher heat tolerance, which makes it better for campfire cooking. Plus extra for drizzling at the end.

    Balsamic Vinegar

    • Just a splash of quality balsamic vinegar adds a tangy complexity that cuts through the richness of the cheese and honey. It’s the secret ingredient that elevates this from “camping snack” to “campfire gourmet.”

    Fresh Thyme

    • Earthy and aromatic — fresh thyme is what gives this dish its herbaceous, almost savory backbone against all that sweetness. Strip the leaves off the stems and scatter generously.

    Smoked Salt

    • Optional but highly recommended. Smoked salt brings a subtle campfire-appropriate flavor to the cheese even before it goes on the actual fire. Just a pinch over the top before cooking is enough.

    We Love This Hot Honey Brie Cheese Recipe

    • It’s fast.
    • It feels fancy, even in the wild.
    • It makes camp life taste incredible.
    • It’s crowd-pleasing—especially for hungry little snackers or curious fellow campers walking by your site. If you love bold appetizers, our easy hummus recipe and fluffy naan bread are perfect companions for your next gathering.

    This is more than an appetizer—it’s a camping ritual. A moment to stop, snack, and soak in the wilderness while you cook the bigger stuff.

    A hand slicing baked brie topped with olives and herbs in a cast iron pan

    Frequently Asked Questions

    Can I make campfire brie at home without a fire?

    Absolutely. This recipe works just as well in your oven at 375°F (190°C) for about 12–15 minutes, or on a stovetop grill pan over medium heat. You lose the campfire atmosphere but none of the flavor. A small cast iron skillet is perfect for both methods.

    What type of brie should I use?

    Any full wheel of brie works — we love Costco’s double-crème brie for its high fat content and excellent melting quality. If you can find a brie labeled “double or triple crème,” grab it. Avoid pre-sliced brie as it won’t hold its shape while melting.

    Can I make this without a cast iron pan?

    Yes — heavy-duty aluminum foil works great. Create a small “boat” around the brie by folding the foil up around the sides, leaving the top open. This keeps all the melted cheese contained and makes cleanup incredibly easy.

    What can I use instead of mango?

    Figs are the most elegant substitute — they caramelize beautifully and complement the honey and brie. Fresh pears, apricots, or even pineapple rings all work wonderfully. The goal is a fruit with some sweetness that can handle direct heat without turning to mush.

    How do I transport brie for camping?

    Keep the brie sealed in its original packaging in a cooler with ice packs. It stays fresh for up to 5 days when kept cold. Transport the honey, balsamic, and herbs in small sealed containers in your camp kitchen kit. Everything assembles in under 2 minutes at the campsite.

    Cheese, mango, and green olives on a skillet with herbs, highlighting farm-fresh ingredients for gourmet cooking.

    Campfire Hot Honey Brie Cheese Recipe

    The perfect rustic-meets-gourmet appetizer for the outdoors—or indoors.
    Prep Time 5 minutes
    Cook Time 15 minutes
    Total Time 20 minutes
    Course: Appetizer
    Cuisine: American
    Calories: 220

    Ingredients
      

    • 1 wheel or block of brie cheese  (Costco’s version works great)
    • 2 tbsp organic honey, plus more for drizzling
    • 1 tsp balsamic vinegar
    • 5 olives, pitted and sliced (green or black)
    • 2 springs sprigs fresh thyme (or ½ tsp dried thyme)
    • salt and pepper optional: smoked salt
    • 2 slices of mango
    • pita chips, carrot sticks, and celery for dipping

    Equipment

    • cast iron skillet

    Method
     

    At Camp
    1. Prep the Brie: Place the brie wheel into the cast iron skillet.
    2. Top it Off: Drizzle the honey and balsamic vinegar over the cheese. Add olives, thyme, salt, and pepper.
    3. Grill the Mango: Place mango slice directly on the grill (or pan), sear one side until lightly charred, then place on top of the brie
    4. Cook on Fire: Set the skillet over hot coals or on a campfire grate. Cover loosely with foil (to prevent ash) and cook for 12–15 minutes, until cheese is soft and gooey.
    5. Cook on Stovetop: Turn heat to medium-high, cover with a lid, and let cook for 10–12 minutes, checking often. Once the center feels soft and melty, it’s ready.
    6. Serve Warm: Carefully remove from heat, drizzle with extra honey, and serve with pita chips and veggies.

    Notes

    Tips:

    • No thyme? Try rosemary or crushed walnuts for a twist.
    • Want it spicier? Add a dash of chili flakes or hot honey.
    • Works great with GF crackers or even apple slices for dipping.

    Storage Tip: Brie is best served fresh and warm. If you have leftovers (unlikely!), refrigerate and reheat gently.

  • Easy Hummus Recipe

    Easy Hummus Recipe

    Creamy, flavourful, and ready in 10 minutes — this homemade hummus beats anything from the grocery store. Made with chickpeas, tahini, lemon, garlic, and finished with a drizzle of olive oil and a sprinkle of sumac.

    This post may contain affiliate links. If you purchase through these links, I may earn a small commission at no extra cost to you. Thank you for supporting Love & Harvest!

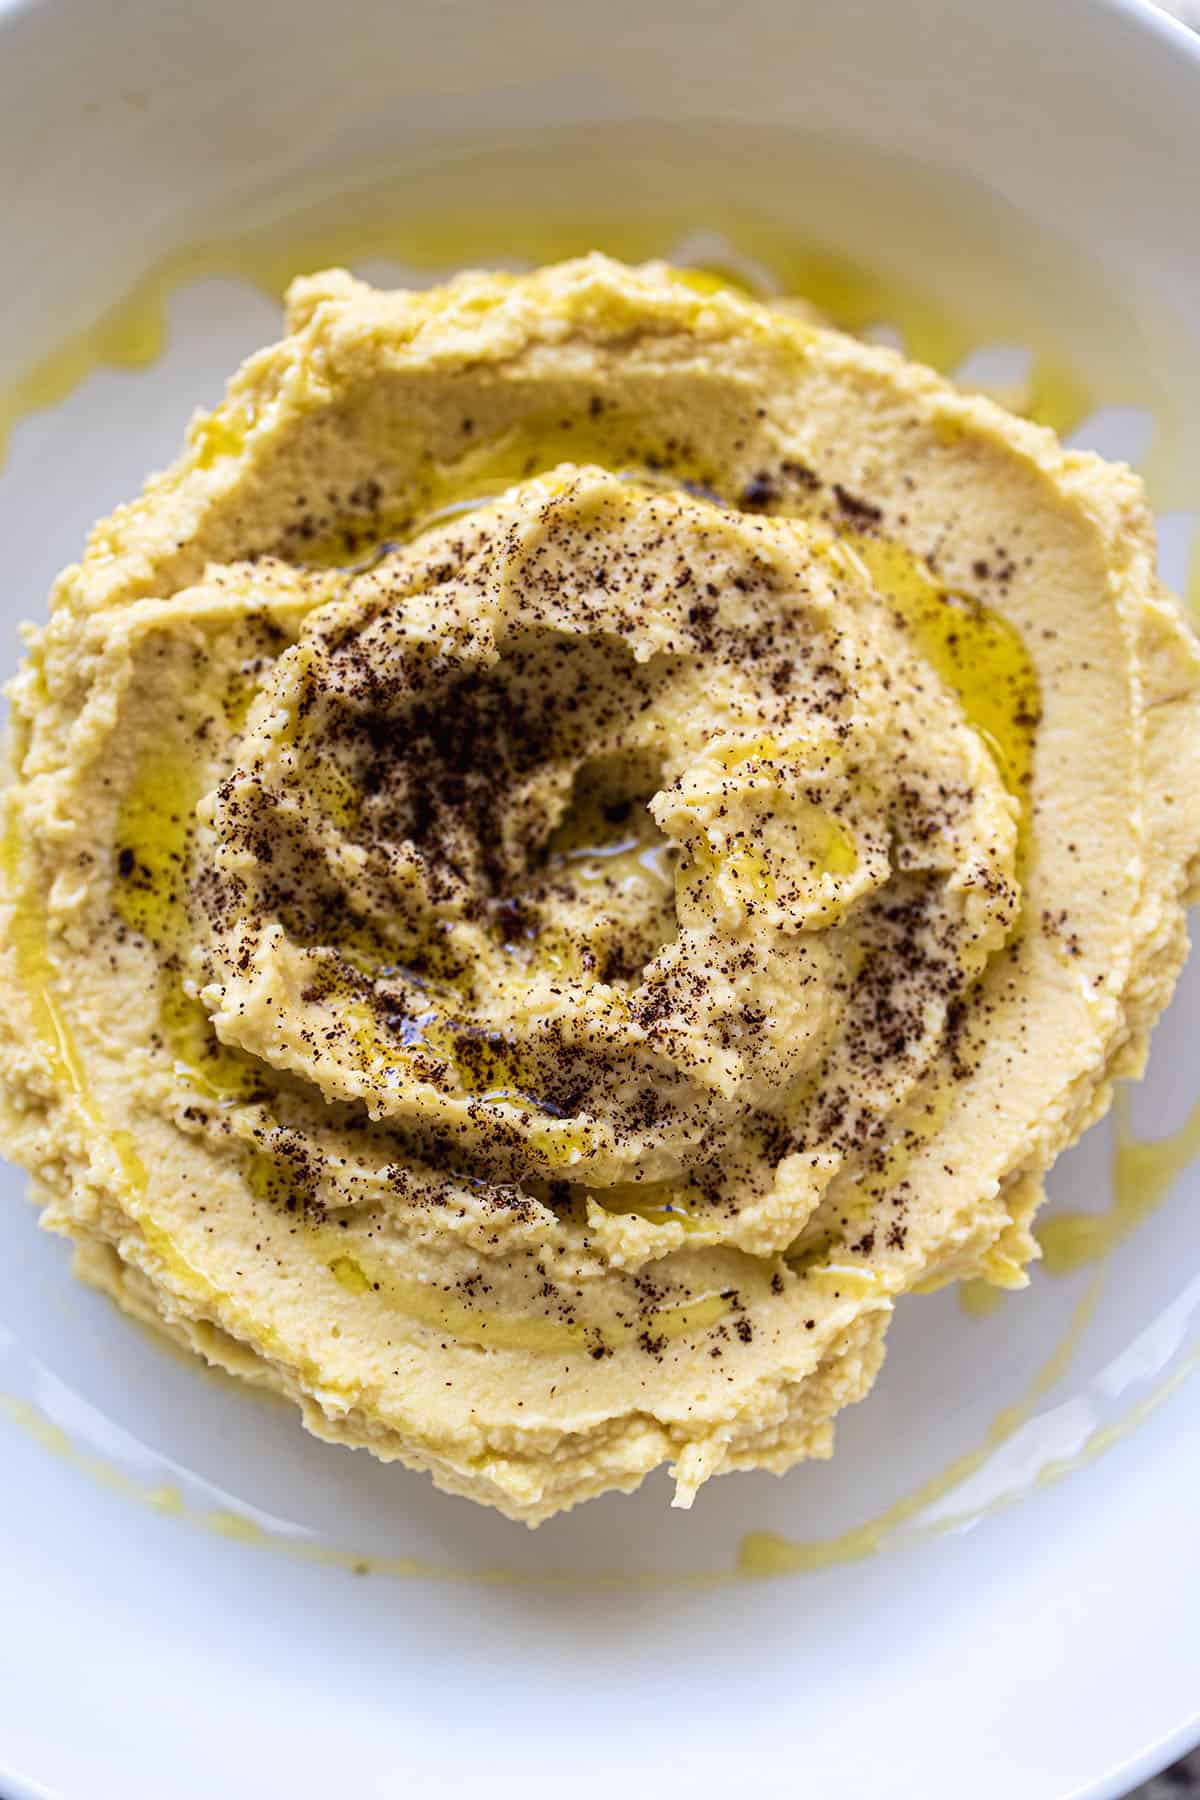
    Homemade hummus swirled on a white plate with olive oil and ground sumac

    Why You Should Try This Recipe

    Hummus is a versatile, satisfying snack that’s perfect for dipping veggies, spreading on sandwiches, or serving alongside your favourite meals. Making it at home not only saves money but also lets you control the flavour and texture. Whether you soak chickpeas overnight for fresh-from-scratch flavour or use canned chickpeas for convenience, this recipe will become your go-to dip in no time.

    Creamy homemade hummus with a pool of olive oil and ground spice on top

    Why Garnish the Hummus with Sumac?

    Sprinkling sumac on top of hummus adds a burst of tangy, citrus-like flavour that complements the creamy richness beautifully. It enhances the visual appeal with its deep red colour and provides a bright, zesty finish that balances the dish. Sumac is also a traditional Middle Eastern spice, giving your hummus an authentic touch.

    Ingredients

    Chickpeas

    • The heart of the recipe — they provide the creamy, starchy base and nutty flavour. For the smoothest hummus, use canned chickpeas (rinsed well) or cook dried chickpeas from scratch. If using canned, reserve the aquafaba (chickpea water) to thin the hummus to your preferred consistency. Find quality tahini paste while you’re at it — it’s equally essential.

    Tahini

    • Ground sesame seed paste — the ingredient that separates great hummus from good hummus. Use a runny, well-stirred tahini made from hulled sesame seeds. It adds richness, nuttiness, and binds everything into a silky paste. Don’t substitute with peanut butter — the flavour profile is completely different.

    Fresh Lemon Juice

    • Always fresh, never bottled. Lemon juice provides the bright acidity that lifts all the other flavours and prevents the hummus from tasting flat or heavy. Start with half a lemon and adjust — the right amount makes the whole dip come alive.

    Extra Virgin Olive Oil

    • Drizzled on top and blended in for silkiness. Use a good quality extra virgin olive oil — its fruity, peppery finish is a key part of the final flavour. Don’t use light or regular olive oil; the flavour difference matters here.

    Garlic

    • Raw garlic adds a sharp, savoury kick that’s traditional in hummus. For a milder result, roast a whole head of garlic in the oven first — roasted garlic gives a sweet, mellow depth without any bite. Start with one clove raw; you can always add more to taste.

    Sumac

    • A dried, ground berry from the Middle East with a tart, citrus flavour. It’s the classic finishing spice for hummus — adds colour and a pop of brightness that elevates the whole presentation. Find it in Middle Eastern grocery stores or here on Amazon.

    Hummus swirled in a bowl and topped with olive oil and ground sumac

    Our Favourite Side Dishes

    We love pairing this hummus with fresh veggies like carrots, cucumbers, and bell pepper slices. Pita bread or crackers are also fantastic options. For a heartier snack, try it with grilled chicken or falafel. For homemade bread to serve alongside, our Fluffy Naan Bread is perfect — warm and soft, ideal for scooping.

    Love Mediterranean flavours? Try our Chicken Shawarma Wrap with Caesar Salad where this hummus makes an excellent spread, or our Best Garlic Mashed Potatoes for another crowd-pleasing dip alternative at the table.

    A good food processor is the most important tool for smooth hummus — blend for at least 3 minutes for a truly silky texture.

    How to Make It Easier and Faster

    • Soak the Chickpeas: If making from scratch, soak dried chickpeas overnight and cook them until soft. More time-intensive but yields the creamiest texture.
    • Use Canned Chickpeas: For a quicker option, grab a can of chickpeas. Just rinse them well before blending.
    • Peel the Chickpeas (Optional): For extra-smooth hummus, peel the skins off the chickpeas. While not necessary, it’s worth it if you want a velvety texture.

    Making hummus at home is an easy way to elevate any meal or snack. Whether you’re prepping for a family gathering, a quick lunch, or a cozy night in, this recipe will always deliver. Give it a try — you won’t regret it!

    Sammi Chow — Love and Harvest

    Frequently Asked Questions

    Can I use dried chickpeas instead of canned?

    Yes, and the results are even creamier. Soak 1 cup of dried chickpeas overnight in plenty of cold water. Drain, then simmer for 1–2 hours until very soft (they should crush easily between your fingers). Cool before blending. Dried chickpeas make about 2.5 cups cooked — the equivalent of one large can.

    Why is my hummus grainy and not smooth?

    Two reasons: not blending long enough, and not using enough tahini or liquid. Blend for a minimum of 3 minutes, scraping down the sides. Add aquafaba (chickpea water), ice water, or more lemon juice one tablespoon at a time until you reach the silky consistency you want. Warm chickpeas also blend smoother than cold ones.

    How long does homemade hummus keep?

    Store in an airtight container in the refrigerator for up to 5 days. Drizzle a thin layer of olive oil on top before sealing to keep it fresh and prevent it from drying out. Give it a stir before serving as it may thicken slightly in the fridge.

    Can I freeze hummus?

    Yes. Freeze in individual portions in airtight containers for up to 3 months. Thaw overnight in the refrigerator and stir well before serving. The texture may be slightly different after freezing — add a drizzle of olive oil and a squeeze of lemon to refresh it.

    What is sumac and can I substitute it?

    Sumac is a dried ground berry with a tangy, citrus-like flavour. If you can’t find it, a small pinch of lemon zest on top provides a similar brightness. Smoked paprika is another common topping that adds colour and a warm, smoky note instead of the citrus tang.

    What’s in hummus?

    It’s mostly chickpeas and tahini, blended with fresh lemon juice, extra virgin olive oil, garlic, salt and a splash of aquafaba, with a pinch of sumac on top.

  • Mexican Pickled Red Onion

    Mexican Pickled Red Onion

    Crisp, tangy, and with just the right kick of heat — Mexican pickled red onions are the condiment that quietly makes every meal better. Once you try them on tacos, they become non-negotiable.

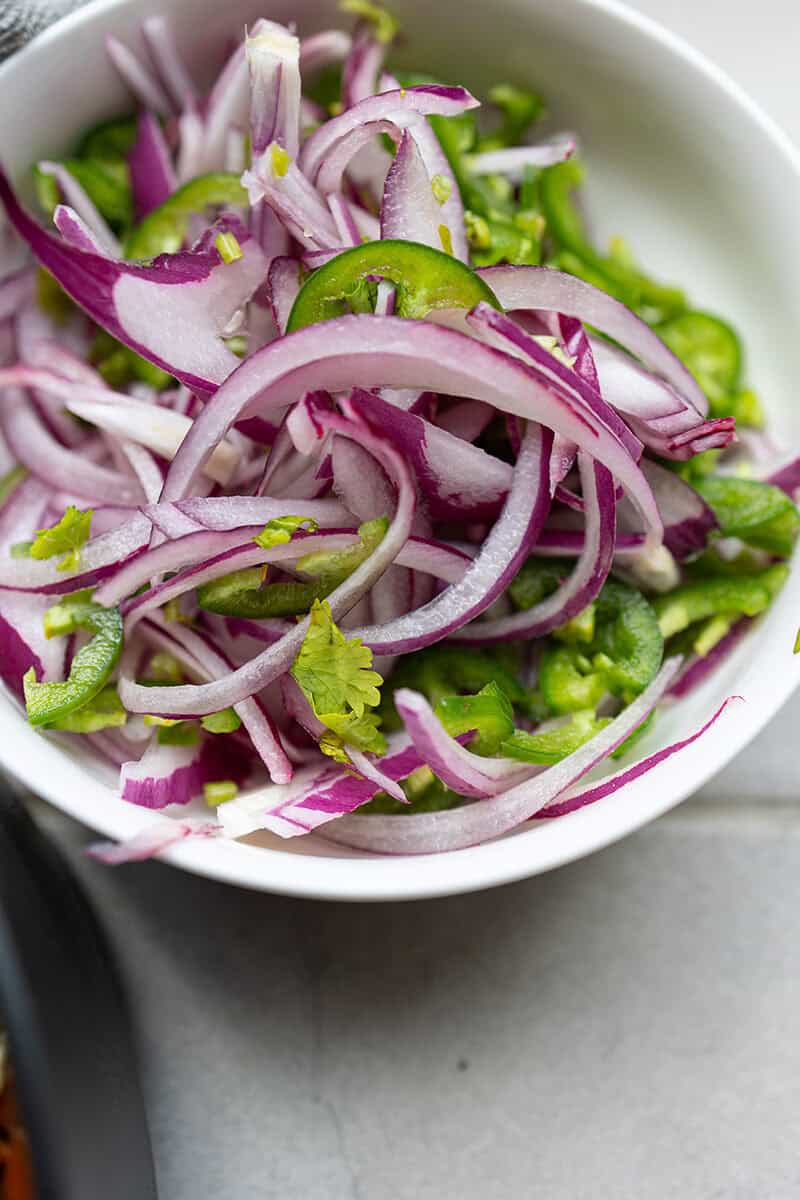
    Mexican pickled red onion with green chiles in a white bowl

    This post may contain affiliate links. If you purchase through these links, I may earn a small commission at no extra cost to you. Thank you for supporting Love & Harvest!

    Why You’ll Love This Recipe

    Made with just four ingredients — red onion, lime juice, jalapeño, and sea salt — this recipe takes less than 10 minutes to prepare and transforms anything it touches. The onions soak up the acidity of the lime while the blistered jalapeños lend a smoky heat that makes this side dish truly irresistible.

    Ingredient Deep-Dive

    Ingredients

    Red Onion

    • Why it matters: One large or two medium red onions, sliced thin. Red onion has natural sugars that balance the acid perfectly and turn a gorgeous magenta color in the lime juice. Thin slices pickle faster and have better texture. These store well in the fridge for 3–4 days.

    Fresh Lime Juice

    • Why it matters: The acid is the “pickling” agent here — no vinegar needed. Fresh lime juice (not bottled) gives a bright, clean tanginess that bottled juice simply can’t replicate. Squeeze just before using.

    Jalapeños

    • Why it matters: Thinly sliced, blistered jalapeños add smoky heat. Blister them in a dry cast iron pan for 2–3 minutes before slicing to bring out their depth. Use one jalapeño for mild heat, two for a proper kick.

    Sea Salt

    • Why it matters: Salt draws moisture from the onion, softens its raw bite, and enhances all the flavors. Use fine sea salt for even distribution — coarse salt can leave salty pockets.

    How to Pair This Dish

    Mexican pickled red onions are perfect on tacos, tostadas, or pulled pork. Their tangy flavor pairs especially well with rich meats like carnitas, barbacoa, or grilled steak. Try them in salads, sandwiches, grain bowls, or even on top of guacamole and nachos.

    Slow cooker Mexican pulled pork recipe: pork being shredded in a baking dish

    Super tasty Mexican Slow Cooked Pulled Pork

    One pot lemon garlic chicken and rice topped with lemon slices, with pickled red onion on the side

    Easy One Pot Lemon Garlic Chicken with Rice Pilaf

    Mexican pickled red onion with sliced green chiles in a white bowl

    Frequently Asked Questions

    How long do Mexican pickled red onions last in the fridge?

    Stored in an airtight jar or container, they keep well for 3–4 days in the refrigerator. The flavor actually deepens on day 2, so don’t be afraid to make them the night before.

    Do I need to cook the onions first?

    No. The acid from the lime juice does all the work. The onions are raw but the lime “quick-pickles” them, softening their sharp bite while keeping a satisfying crunch.

    Can I use lemon juice instead of lime?

    Yes, though lime is traditional for Mexican-style pickled onions. Lemon gives a slightly different flavor — less floral, more straightforward sour. A combination of both works well too.

    Why keep pickled red onions on hand?

    They add a ton of flavour for very little: just red onion, jalapeños, lime juice and salt, so they’re one of the best condiments you can keep on hand.

    How do I make them less spicy?

    Remove the jalapeño seeds before slicing — most of the heat lives in the seeds and white membrane. Or swap jalapeños for a milder pepper like serrano (used sparingly) or skip the chili entirely for a purely tangy version.

    Can I add other ingredients?

    Absolutely. Fresh oregano, a pinch of cumin, or a bay leaf are popular additions. Some recipes add a splash of apple cider vinegar alongside the lime for extra preservation and complexity.

    Thinly sliced pickled red onion and green chile beside a dish of rice

    Mexican pickled red onion with green chiles in a white bowl

    Mexican Pickled Red Onion

    Crisp, tangy, and with just the right amount of heat, these Mexican pickled red onion brings a refreshing punch of flavour to any dish. You can use this on anything like pull pork, enchiladas, tacos, and so much more!
    Prep Time 10 minutes
    Cook Time 5 minutes
    Total Time 15 minutes
    Course: Condiment
    Cuisine: Mexican
    Calories: 25

    Ingredients
      

    • 1 large red onion
    • 2 jalapenos
    • 3-5 limes
    • 1 tsp sea salt

    Method
     

    1. Slice the red onions and jalapeños thinly.
    2. In a small bowl, juice a few limes until you have enough liquid to cover the onions and jalapeños.
    3. Add the sea salt to the lime juice, stirring until dissolved.
    4. Combine the onions, jalapeños, and any optional add-ins in a jar or bowl.
    5. Pour the lime juice mixture over the onions until fully submerged.
    6. Let the mixture sit at room temperature for about 30 minutes to an hour before serving, or refrigerate for longer marination.

    Love pickled and fermented flavors? Try our Best Bread and Butter Pickled Cucumbers or our Preserved Salty Lemons — both are pantry staples you’ll reach for again and again. These pickled onions are also the perfect topping for our 4 Ingredients Chicken Sandwich Deli.

  • Best Garlic Mashed Potatoes

    Best Garlic Mashed Potatoes

    Some recipes just stay with you. I’ve been making this garlic mashed potatoes since high school, and it has never once left leftovers on the table — not at family dinners, not at parties, not at potlucks. It’s creamy, fluffy, and loaded with savory garlic flavor, and it comes together in under 40 minutes. The secret is in five simple tips that most people skip: the right potato, the right timing on the garlic, room-temperature butter, proper mashing technique, and a touch of patience. Once you nail this, every roast, chicken, or grilled salmon on your table gets an instant upgrade.

    This post may contain affiliate links. If you purchase through these links, I may earn a small commission at no extra cost to you. Thank you for supporting Love & Harvest!

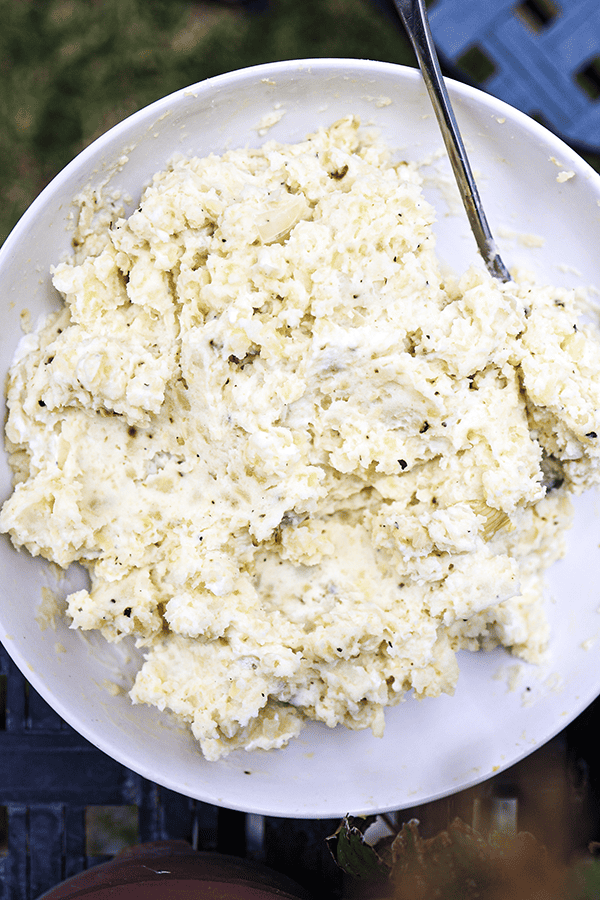
    Best garlic mashed potatoes creamy and fluffy

    Why Make This Best Garlic Mashed Potatoes Recipe

    Garlic mashed potatoes are one of the most versatile side dishes in any kitchen. They pair beautifully with roast beef, grilled chicken, salmon, ribs — essentially anything that benefits from a rich, savory accompaniment.

    Bowl of creamy garlic mashed potatoes with a serving spoon

    We Have Loved This Recipe for Years and You Will Too

    This is the dish I reach for when there’s nothing in the fridge. It’s customizable, fast, and everyone who tries it asks for the recipe. Whether you’re cooking for a weeknight dinner or a dinner party, garlic mashed potatoes are a guaranteed hit.

    Creamy mashed potatoes with garlic butter close-up

    Ingredients

    Key Ingredients

    Russet Potatoes

    Russet potatoes are the gold standard for mashed potatoes. They have a low moisture content and high starch level that results in a light, fluffy mash rather than a dense or gluey one. Yukon Gold is a good second option for a slightly creamier, butterier result.

    • Why it matters: Waxy potatoes (like red or fingerling) hold too much water and produce a dense, gummy mash. Russets are the correct choice for this texture.

    Garlic

    Fresh garlic sauteed in butter is the backbone of this recipe. The key is timing — garlic must be added to heated butter and cooked for only 1–2 minutes until fragrant. A good stainless steel garlic press makes mincing fast and consistent.

    • Why it matters: Burned garlic turns bitter and unpleasant. Under-cooked garlic stays sharp and raw-tasting. Exactly 1–2 minutes in warm butter is the sweet spot.

    Butter

    Use unsalted butter at room temperature. Cold butter does not incorporate smoothly into the mash and can cause a lumpy, streaky texture. Room-temperature butter blends in effortlessly and creates a silkier finish.

    • Why it matters: Temperature of your fat directly determines the smoothness of your final mash. This is one of the most common mistakes home cooks make.

    Heavy Cream or Whole Milk

    Heavy cream delivers the richest, most luxurious mash. Whole milk produces a lighter result. Both must be warmed before adding — cold dairy seizes the starch in the potato and creates a gummy texture. A potato ricer gives you a smoother result than a standard masher.

    • Why it matters: Cold cream = lumps. Warm cream = velvet. This single step separates average mashed potatoes from extraordinary ones.

    Professional Tips

    Pro Tip 1: Use Russet Potatoes

    Russet potatoes have a buttery texture and less moisture than waxy varieties, which means a creamier, lighter mash. For more on choosing the right potato, see Bon Appetit’s guide to the best potatoes for mashing.

    Pro Tip 2: Do Not Overcook the Potatoes

    Overcooked potatoes become waterlogged and mushy, which ruins the texture. Check frequently and remove from heat the moment a fork slides in with minimal resistance. Do not wait for the potato to fall apart.

    Pro Tip 3: Use Room Temperature Ingredients

    Cold butter and cold cream cause the mash to seize and turn lumpy. Pull your butter out of the fridge 30 minutes before cooking and warm your cream in a small saucepan before adding it to the potatoes.

    Pro Tip 4: Add Garlic at the Right Time

    Add garlic to butter only after the butter is heated. Saute for 1–2 minutes until fragrant, then immediately incorporate into the mash. Do not let the garlic sit in the pan unattended — it burns in seconds.

    Pro Tip 5: Mash the Potatoes Properly

    Use a potato ricer for the smoothest result, or a hand masher for a slightly chunkier texture. Never use an electric mixer or food processor — over-processing breaks down the starch structure and creates a sticky, gluey paste.

    This mashed potato recipe pairs perfectly with lemongrass chicken drumsticks or a crispy pan-seared salmon. For another classic comfort dish, try our 30-minute Thai basil chicken — it is equally fast and deeply satisfying.

    Frequently Asked Questions

    What potatoes are best for mashed potatoes?

    Russet potatoes are the top choice for their low moisture content and fluffy texture when mashed. Yukon Gold is a close second for a creamier, buttery result. Avoid waxy potatoes like red potatoes or fingerlings — they produce a dense, gummy mash.

    Can I make garlic mashed potatoes ahead of time?

    Yes. Make them up to 2 days ahead and store covered in the refrigerator. Reheat gently on the stovetop with a splash of warm cream or milk to restore the creamy consistency. Do not reheat in a microwave without adding moisture — they will dry out.

    Why are my mashed potatoes gummy or glue-like?

    The most common cause is over-mashing or using a food processor. This activates too much starch in the potato and creates a sticky paste. Use a ricer or hand masher and stop as soon as the potatoes are smooth.

    Can I use garlic powder instead of fresh garlic?

    You can in a pinch, but fresh sauteed garlic produces a noticeably richer, more aromatic flavor. Garlic powder tends to taste flat in comparison. Use 1/2 teaspoon of garlic powder as a substitute if needed.

    How do I keep mashed potatoes warm for a dinner party?

    Transfer the finished mashed potatoes to a heatproof bowl set over a pot of barely simmering water (double-boiler method). Cover with a lid or foil and they will hold for up to 2 hours with occasional stirring.

    Can I freeze mashed potatoes?

    Yes. Spread them in a single layer on a baking sheet to flash freeze, then transfer to airtight bags. They keep for up to 1 month. Reheat from frozen in a covered saucepan with added butter and cream, stirring frequently.

    Garlic mashed potatoes in a white bowl on a striped cloth with flowers

    Best Garlic Mashed Potatoes

    The best garlic mashed potato dish that is creamy, fluffy, and bursting with savoury garlic flavour.
    Prep Time 15 minutes
    Cook Time 20 minutes
    Servings: 6 people
    Course: Side Dish
    Cuisine: American
    Calories: 260

    Ingredients
      

    • 1½ kg russets potato cut into large chunks
    • 1 litre water
    • 5 tbsp butter room temperature
    • 5 garlic clove grated
    • 1 white onion finely diced
    • 2 tsp dried basil
    • ½ cup sour cream
    • salt
    • black pepper

    Method
     

    1. Run the potatoes in the water and give it a good scrub. Cut the potatoes into large wedges. (For a large potato I usually cut it into 5 wedges). Give it another good rinse to wash away all the starch. Place them into a large pot and make sure it is covered by water (roughly about 1L of water). Place lid on top, and heat the pot on the stove on high.
    2. Once the pot is boiling, move the lid slightly open so the water doesn't boil over. Boil the potatoes on medium-high for 20 minutes. You know the potatoes are done if you can easily poke thru the potato wedges with a fork.
    3. Meanwhile, in a frying pan heat it in high heat. Place 5 tbsp of butter inside. Sauce the onion until soft and slightly translucent. Add the garlic and sauté it until it's aromatic. Stir in the dried basil. Turn the heat off and set it aside.
    4. Discard the water, and let the potatoes cool until it is warm or when your hands can touch it without burning.
    5. Peel the skin of the potato with your hands and place them in a large mixing bowl. Place another 2 tbsp of butter inside the warm peeled potatoes. Using a hand potato masher or a potato rice, mash the potatoes until smooth and no large chunks are visible.
    6. Fold in the butter garlic. You don't want to deflate the fluffiness.
    7. Stir in the sour cream until well combined. Add salt and pepper to your liking.

  • Halloween Frankenstein Guacamole

    Halloween Frankenstein Guacamole

    This Frankenstein guacamole is the most adorable dip you can make, and it will be hard to be the first to dig into his sweet face!

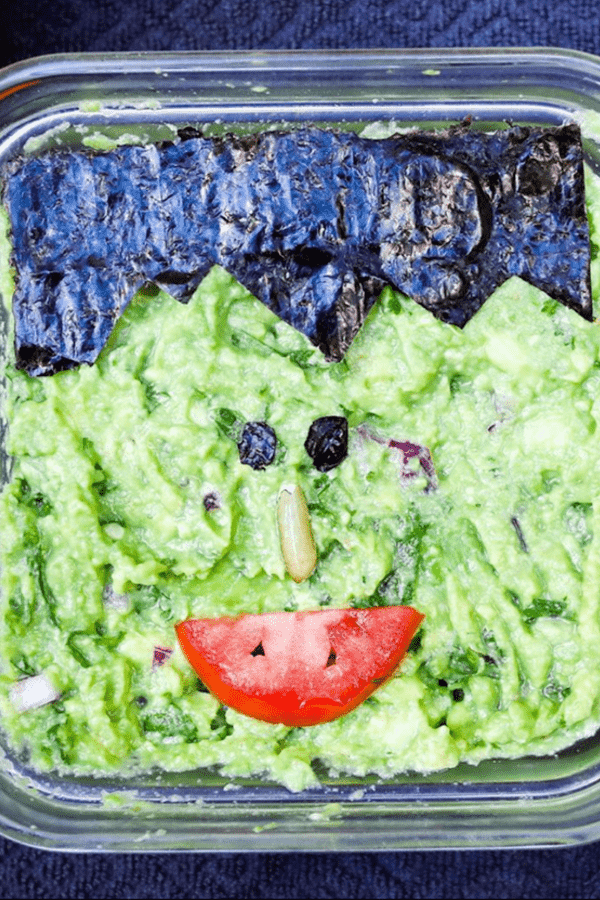
    Guacamole decorated as Frankenstein with nori hair and a tomato mouth

    This post is all about Halloween Frankenstein Guacamole. The food design of this adorable Frankenstein is made with sushi seaweed papers, sunflower seeds, and tomatoes.

    This post may contain affiliate links. If you purchase through these links, I may earn a small commission at no extra cost to you. Thank you for supporting Love & Harvest!

    This delicious guacamole recipe is so refreshing and delicious that we gave him life and turned him Mexican! At least until people start dipping his presence away!

    A cute recipe for food styling to bring to kids’ Halloween parties. It is an easy no-brainer side dish you can whip up in minutes. Halloween is a big week — kids are hammering you about costumes and parties. Don’t overthink the food. Make this easy peasy guacamole for Halloween today!

    The best part is that you can make this any size you want. All you need is to scale the design to fit the serving dish you are bringing.

    Key Ingredients

    Ingredients

    Avocado

    The star of the show — ripe, creamy avocados are the green canvas for Frankie’s face.

    • Why it matters: A ripe avocado should give slightly when pressed. Under-ripe avocados are grainy and hard to mash smoothly. Over-ripe avocados taste off. The lime juice you add prevents browning and adds essential citrus brightness. Traditionally in Mexico, we mash avocados in a mortar and pestle for authentic texture — chunky or smooth, your choice.

    Sushi Nori (Seaweed Paper)

    Nori sheets cut into Frankenstein hair and eyes.

    • Why it matters: Nori is what gives Frankie his iconic flat-top hairstyle and dark eyes. It cuts cleanly with scissors and holds its shape on the guacamole surface for serving time. It does not stay crisp for hours — serve within 30 minutes of decorating for best presentation.

    Lime

    Freshly squeezed lime juice mixed into the guacamole.

    • Why it matters: Lime does two critical jobs: adds citrus acidity that brightens all the flavours, and prevents oxidation (browning). If the guacamole will sit before serving, squeeze in an extra half lime and press plastic wrap directly onto the surface of the dip to exclude air.

    How to Make the Guacamole

    It only requires a few easy ingredients available in any grocery store: avocado, tomato, red onion, cilantro, and lime.

    First, pit the avocado and mash the flesh with a fork in a large bowl. Juice the lime into the avocado and mix well. Chop the tomato, red onion, and cilantro into small pieces. Add to the bowl. Salt to taste. It is that simple and so very delicious!

    How to Cut the Frankie Design

    Use sushi seaweed paper (nori) for the hair and eyes. Measure the length of your serving container, then use a cutting board and scissors to cut the fringe hair design. Be creative — play with the distance between the eyes and create your own version of Frankie. I use a sunflower seed as his nose, but it can be anything!

    Frankie Is Just the Beginning

    A Halloween Frankenstein Guacamole is just the start! How about a three-eye monster guacamole? A silhouette of a haunted house? The options are endless. For more Halloween fun, check out our Halloween Spooky Breakfast Bowl and Homemade Halloween Sugar Cookies.

    Why You Will Love This Halloween Frankenstein Guacamole

    • Easy recipe — just a few ingredients, no cooking required. Fresh and excellent tasting.
    • Fun design — Frankenstein is just the beginning! Design your own monsters at your own skill level.
    • Fun potluck dish — easy to make and bring, and completely captivating at Halloween parties.
    • Halloween food the kids will actually eat — avocado, lime and a few fun toppings.

    Frequently Asked Questions

    How do I keep guacamole from turning brown?

    Two methods work best: add extra lime juice (the acid slows oxidation), and press plastic wrap directly onto the surface of the guacamole, eliminating all air contact. An avocado pit in the bowl is a common tip but less effective than the plastic wrap method. Make the guacamole no more than 2 hours before serving for best color and freshness.

    How do I know if my avocados are ripe enough?

    Gently press the avocado near the stem end — it should give slightly under firm pressure but not feel mushy. The skin should be dark green to black. If the stem pops out easily and the flesh underneath is green (not brown), it is perfectly ripe.

    Can I add spice to this guacamole?

    Absolutely — and we encourage it! Add finely minced jalapeño or serrano pepper for a good kick. Serrano is hotter than jalapeño. Start with half a pepper, taste, and adjust from there. A pinch of cayenne also works if you want even heat distribution.

    Can I make this guacamole ahead for a party?

    Make it up to 2 hours ahead. Press plastic wrap directly onto the surface (no air gaps) and refrigerate. Decorate with the nori Frankenstein design right before serving — nori softens quickly once it contacts moisture.

    What can I serve with this guacamole besides tortilla chips?

    Sliced bell peppers, cucumber rounds, jicama sticks, and mini tostadas all work beautifully. For a Halloween theme, use black sesame crackers or triangle-cut tortilla chips arranged to look like bat wings around Frankie’s face.

    How large a batch should I make for a Halloween party?

    Plan on 1 medium avocado per 2 guests as a rough guideline. For a party of 20, use 10 avocados and scale all other ingredients proportionally. Use a large serving platter and scale up the Frankenstein design to match.

    Authentic Guacamole

    A simple yet delicious guacamole recipe that takes a matter of minutes to whip up!
    Prep Time 15 minutes
    Total Time 15 minutes
    Servings: 4 people
    Course: Appetizer
    Cuisine: Mexican
    Calories: 195

    Ingredients
      

    • 4-5 medium sized avocado
    • 1 – 1½ lime juice
    • 1 medium tomato diced
    • 1 branch cilantro chopped
    • ¼ red onion chopped
    • sea salt

    Method
     

    1. In a large mixing bowl, cut the avocado in half. Pit the centre seed out and scoop the green flesh into the bowl with a spoon.
    2. Use a fork and press the avocado. The more you mash the avocado the smoother the texture will be.
    3. Drizzle the lime on to the avocado and mix well. 1 lime is perfect but if you like to more acidic, you can half half a lime more.
      (Half half a lime more if you know it will not be eaten immediately to help it not turn brown).
    4. Add the chopped cilantro, tomato ,and red onion. Mix well. salt to taste

    Notes

    • Spicy: you’re more than welcome to add jalapeno or serrano peppers to give it a good kick.

  • Spicy Corn Dip With Manzano Pepper

    Spicy Corn Dip With Manzano Pepper

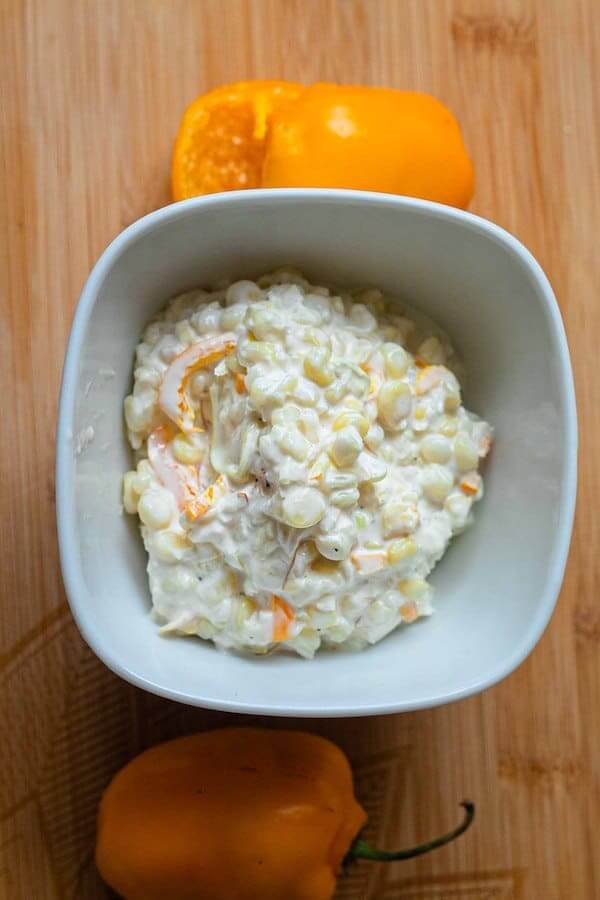
    Sweet, crunchy corn kernels coated in a creamy lime-spiked mayonnaise, studded with charred onion and the distinctive fruity heat of Manzano peppers — this dip disappears from the table faster than you can set it down. It is bold, fresh, and takes less than 30 minutes to make with only five ingredients.

    This post may contain affiliate links. If you purchase through these links, I may earn a small commission at no extra cost to you. Thank you for supporting Love & Harvest!

    Spicy Corn Dip with Manzano Pepper Recipe

    It is corn season and there are more ways to eat corn than BBQ corn on the cob with butter. This delicious spicy corn dip is so easy to make it will take you less than 30 minutes to prepare — and it only asks for five ingredients.

    This is a must-make for your next party or family gathering. Anyone who loves spicy food will fall in love with this recipe. After making it, corn just might become your new favourite seasonal vegetable.

    If you love spicy food, try our Easy Hummus Recipe or our Vegetarian Mango Soy Ceviche for more crowd-pleasing dips and sides.

    Ingredients

    Corn

    • Why use fresh seasonal corn: Summer corn is at peak sweetness and starch content. The kernels have a satisfying crunch and natural juiciness that frozen or canned corn cannot replicate. Any variety works — sweet corn, rainbow corn, or the starchy white corn common in Mexico. Whatever is local and fresh is the right choice.

    Manzano Peppers

    • Why Manzano over jalapeño: Manzano peppers have a unique fruity citrus character with a moderate-to-hot heat level — roughly twice as hot as jalapeños. Their black seeds and thick flesh hold up perfectly in a cooked dip. The flavour does not overwhelm the corn; it accents it. If you cannot find Manzano, jalapeño is an excellent substitute.

    White Onion

    • Why cook it first: Raw onion has a sharp, aggressive flavour that competes with the other ingredients. Sautéing the onion in oil first softens its bite, releases its natural sweetness, and creates a gentle fragrance that blends into the dip instead of fighting it.

    Mayonnaise

    • Why mayo works here: Mayonnaise binds all the flavours together with a creamy, slightly tangy base. For a lower-calorie option, swap it for full-fat or low-fat plain yogurt — the result is tangier and lighter but still delicious.

    Lime

    • Why fresh lime: Lime adds brightness and acidity that cuts through the richness of the mayo. For a stronger lime flavour, zest the skin directly into the dip. Bottled lime juice will work in a pinch but lacks the aromatic oils of fresh.

    Why You Will Love This Recipe

    • Easy recipe — cook the corn, cut the kernels off the cob, mix everything together. Done in under 30 minutes.
    • Crowd-pleaser — sweet corn is universally loved. Skip the Manzano peppers for a kid-friendly version.
    • Goes with everything — a great side dish for backyard BBQs, summer parties, and family gatherings. The best potluck food to bring.
    • Low cost — most ingredients are already in your fridge. Only the corn and Manzano peppers require a special trip.

    Frequently Asked Questions

    Can I use frozen or canned corn instead of fresh?

    Yes. Frozen corn works well — thaw it first and pat it dry so it does not water down the dip. Canned corn also works in a pinch; drain and rinse it thoroughly. Neither will have the same natural sweetness or texture as fresh peak-season corn, but both are perfectly acceptable shortcut options.

    How spicy is this dip?

    With Manzano peppers it has a genuine kick — moderate to hot. Manzano peppers are roughly twice as hot as jalapeños. For a milder dip, use only half a pepper, remove all the seeds carefully, or substitute with a small amount of jalapeño. For a non-spicy version, skip the peppers entirely and add a pinch of sweet smoked paprika for colour instead.

    Can I make this dip ahead of time?

    Yes. You can prepare the corn and the sautéed onion and peppers up to a day ahead and store them separately in the refrigerator. Mix everything together with the mayonnaise and lime just before serving for the freshest result. Once fully assembled, it keeps well for up to two days covered in the fridge.

    Can I serve this dip warm or cold?

    Both work. Served warm right after cooking, the dip is comforting and rich. Served cold after an hour in the refrigerator, it is refreshing and bright. For a summer outdoor party, cold is the way to go. For a cosy winter side dish, serve it warm.

    What is a good substitute for Manzano peppers?

    Jalapeño is the closest in texture and heat profile. For something fruitier and hotter, habanero works but use much less — habaneros are three to five times hotter than Manzano. Serrano peppers are also a good middle-ground option: hotter than jalapeño with a crisp, green flavour.

    spicy corn and Manzana Pepper Dip

    Spicy Corn and Manzano Pepper Dip

    Prep Time 15 minutes
    Cook Time 15 minutes
    Total Time 30 minutes
    Servings: 6 people
    Course: Side Dish
    Calories: 170

    Ingredients
      

    • 6 corn or sweet corn
    • 1-2 manzano peppers or jalapeno peppers
    • ¼ white onion
    • ½ cup mayonnaise or yogurt (fat free option)
    • 1 large lime juiced
    • 1 tsp salt to taste
    • black pepper to taste

    Method
     

    1. Wash and tear off the leaf of the corn if it has any. Cook the corn in their hot boiling water or steam it in an Instant Pot.
      Boiling water: Boil the corn for 10 minutes.
      Steam with Instant Pot: 10 minutes.
    2. Meanwhile, sliced the onions in thick slices, and thinly sliced the manzano peppers. In a pan, heat 2 tsp of oil and fry the onion and manzano peppers until soft and fragrance. Place them in a heat proof medium size bowl.
    3. Take out the corn and let it cool until it is ready to be handled. Use a sharp knife and cut the kernel off the corn. Place them in the same bowl with the onion and peppers.
    4. Mix the rest of the ingredient together: mayonnaise, lime juice, salt and pepper. Can be serve hot or cold.