Category: mexican food recipes

Mexican Food Folder

  • 15 Essential Mexican Food for an Authentic Carne Asada

    15 Essential Mexican Food for an Authentic Carne Asada

    How do you organize an authentic Carne Asada and what food should you serve? Here are 15 essential Mexican foods for the ultimate authentic Carne Asada experience — from the meat and the tortillas to the beer and the tequila.

    Marinated beef and green onions cooking on a charcoal grill

    This post may contain affiliate links. If you purchase through these links, I may earn a small commission at no extra cost to you. Thank you for supporting Love & Harvest!

    Mexicans are famous for their grill skills and their delicious meat. There’s no other place in the world that can offer both fresh produce and meat at a reasonable price. Learn what a carne asada is, the popular food served, and how to organize an authentic experience.

    “Carne Asada” essentially is a Mexican BBQ party. Obviously, there’s meat involved, but there’s so much more! Normally there’s also tortilla, grilled green onion, cactus paddle, guacamole, Coca-Cola, and beer! Those are the essential items, but there’s so much more we have not mentioned!

    Typically Sunday in Mexico is a day to grill meat and drink a bottle of beer with friends and family. Families gather to eat, talk, and enjoy each other’s company. There are adults chatting and cooking, children running around like feral animals, and dogs begging for a piece of meat from their owners.

    Thinly sliced carne asada and whole green onions on a large grill

    Let me tell you something — Mexicans know a lot about delicious food and where to get it. But most importantly they know more about the importance of family time. Carne Asada is not about eating and dashing. It’s about spending half the day reconnecting with family and friends while sharing amazing BBQ food. There’s no better way to start a conversation over a cold beer and hot sizzling meat.

    Before we take a look at the 15 essential Mexican foods for an authentic carne asada, let’s discuss how to organize a GREAT Carne Asada party.

    How to Organize an Authentic Carne Asada

    Location

    It doesn’t matter if it’s at a park or at the back of your house. There’s no discrimination when it comes to where you’re going to do the Carne Asada. There are times people would throw some wood in a metal can, start the fire, and BBQ meat right there.

    Mexicans are great like that. As long as there’s a fire, people will start to bring the things you need to make a Carne Asada successful!

    Company

    Carne asada is nothing if you’re not with great company! So invite your close friends and families with whom you want to hang out. These are the people you want to share a beer with on a Sunday afternoon.

    A woman and a man smiling on a patio during a carne asada gathering

    A Big Gathering Table

    We like to eat together and share everything together as well. It is not important to have one perfect big table. If we find extra tables laying around, we move them all together and join them into an uneven-shaped round table.

    Food Cover

    There’s nothing more annoying than eating when flies are landing on the food. Having plastic covers or even a clean cloth to cover the food helps avoid these pesky flies.

    If you’re using coal to cook, another way to eliminate bugs once you finish cooking is to lay some fresh citronella and rosemary leaves on the coal. The scent will help deter them away.

    Label Cups

    Let’s save plastic usage! Usually, we have more than one variety of drinks at a carne asada, which means more than one cup per person. Labelling guests’ cups can significantly save on plastic usage and unnecessary dishwashing at the end of the day.

    Additional Children-Friendly Food

    Sometimes carne asada may not be a good fit for children. We sometimes prepare something extra for kids like macaroni ham pasta, pesto pasta, or club sandwiches.

    Coal — Our Favourite Way of BBQing

    Most of the time in Mexico we use coal for all our carne asada. Be aware coal requires some time to heat up. Give it a minimum of 30 minutes before it heats to the ideal temperature.

    I love this charcoal chimney starter. It can get your coal ready in 10-15 minutes (depending on the weather). To cook the meat properly, a quality cast iron comal or griddle is one of the best tools for achieving those beautiful grill marks on the meat.

    Charcoal heating up in a grill basket for carne asada

    Is Carne Asada Seasonal?

    Absolutely not! Carne asada is very common in Mexico, most notoriously in the north of Mexico. Rumour has it that they have carne asada almost every Sunday.

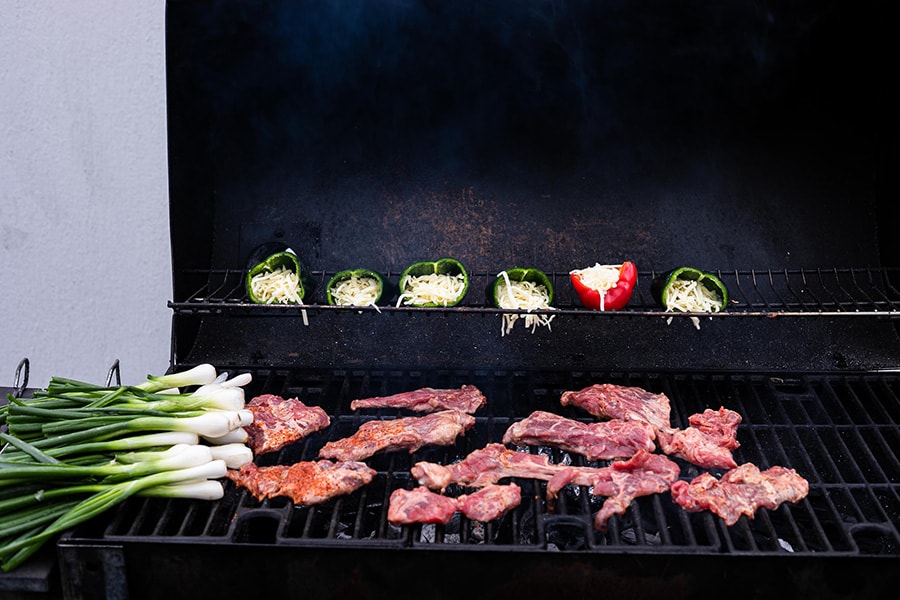
    Stuffed peppers and thin beef steaks cooking on a grill

    Now that we’ve covered some helpful organizational pointers on how to make a successful and authentic Carne Asada, let’s take a look at the 15 essential foods for an authentic Mexican Carne Asada.

    1. Meat

    Mexican Carne Asada needs to be beef. There’s no chicken or pork. Rarely do we see seafood on the grill. Having good quality meat is essential for a Carne Asada!

    What kind of beef?

    For Mexican Carne Asada, all meat slices are cut thinly. Most butchers cut all the meat thinly for carne asada purposes. The types of cut we use are usually top sirloin, arrachera (skirt steak), ribeye, and ribs.

    Bowl of thinly sliced beef in a red marinade

    Marinate

    We do a simple marinade for the beef. Because the meat here is very fresh, we don’t want to overpower it with a strong marinade that takes away the fresh flavour.

    In my family, we toss all of the meat in a large container. We drown the meat in a bottle of beer (whatever beer we are drinking that day), Tajin, and salt. Give it a good rub and mix. Let it sit for at least 30 minutes and BBQ. Normally we prepare the meat while we heat the coal up. By the time the BBQ is ready, the meat has finished marinating.

    Tongs turning marinated beef in a large white bowl

    2. Bean Soup “Frijoles Charros”

    A popular Mexican bean soup we serve during the colder days while having a Carne Asada is called Frijoles Charros.

    A delicious hearty, warm soup made with bacon, beans, sausages, the stomach of the cow, tomatoes, cilantro, onion, and jalapeno. It’s a soothing bean soup packed with flavour and ingredients. Once this Frijoles Charros soup starts to cook on the stove, people will start gathering and lining up for it. Trust me, on a cold evening, this soup will bring you back with warmth and soul.

    3. Tortilla

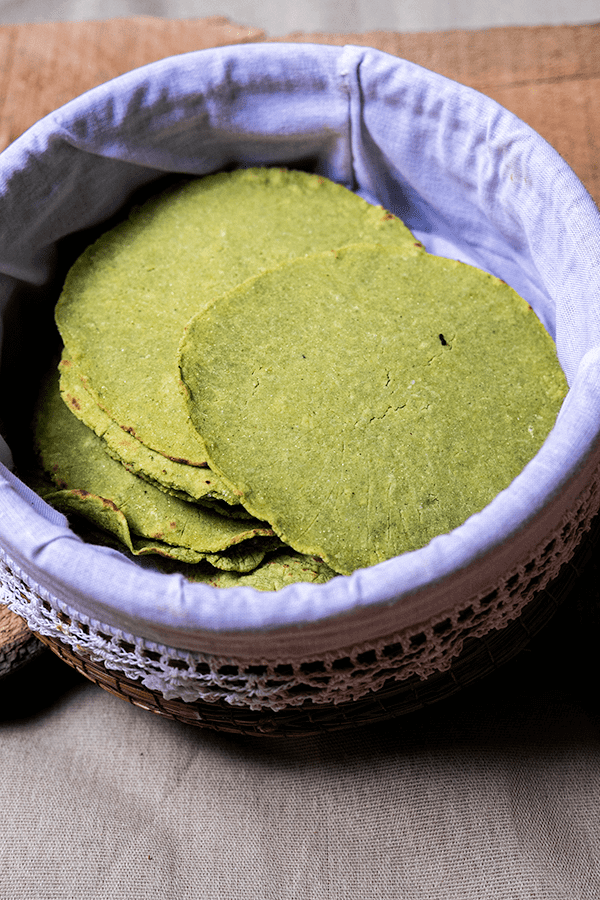
    Tortilla is an essential food for any Mexican BBQ. We have both flour and corn (masa) tortillas. We sometimes eat them as is, or wrap them with some cheese and make quesadillas. At a Carne Asada, we always use tortillas to dip into the guacamole or to insert meat, grilled onions, and salsa on top to make a taco. Check out our recipe for Green Nopales Corn Tortillas — a wonderful homemade option!

    4. Green Onion Bulbs (Cebollin)

    We find the typical green onion very different from the Mexican green onion. The Mexican green onion is stronger in taste and larger and rounder at the root.

    We tend to roast the white parts of the green onion on the BBQ. We keep the green part so it is easier to grab and toss around on the grill. After grilling, we cut it up into smaller pieces (usually one bulb into four pieces) and toss it with some lime and salt.

    On Sundays, you see many produce vendors selling fresh cebollin because this green onion is essential for a carne asada!

    5. Nopales

    One of my favourite things to look forward to at a Carne Asada. Grilled nopales have a very green and acidic taste. Once cooked over charcoal they take on a bright, smoky taste that I simply adore! We tend to cut the wings of the nopales with 3-5 slices just so they don’t curl up when cooking.

    Fresh nopal cactus paddles scored and ready to grill in a steel bowl

    6. Potatoes in Tin Foil

    Once we get the fire settled and going, we wrap our potatoes in tin foil and toss them into the outer rim of the fire. After 25 minutes or so (depending on the size of the potato and the strength of the fire) we take them out and add butter. Simple and so tasty!

    Foil-wrapped potatoes and green onions in a bowl, ready for the grill

    7. Poblano Peppers Stuffed with Cheese

    A favourite if you have a vegetarian in the family. Just two or three of them and they are quite filling!

    We cut the peppers’ tops, clean the inside and stuff them with manchego cheese. We also tin foil the bottom so they don’t burn as much. Cutting into these cheesy peppers is so good with a side of green onion bulbs.

    Halved bell and poblano peppers stuffed with shredded cheese in a glass dish

    8. Corn

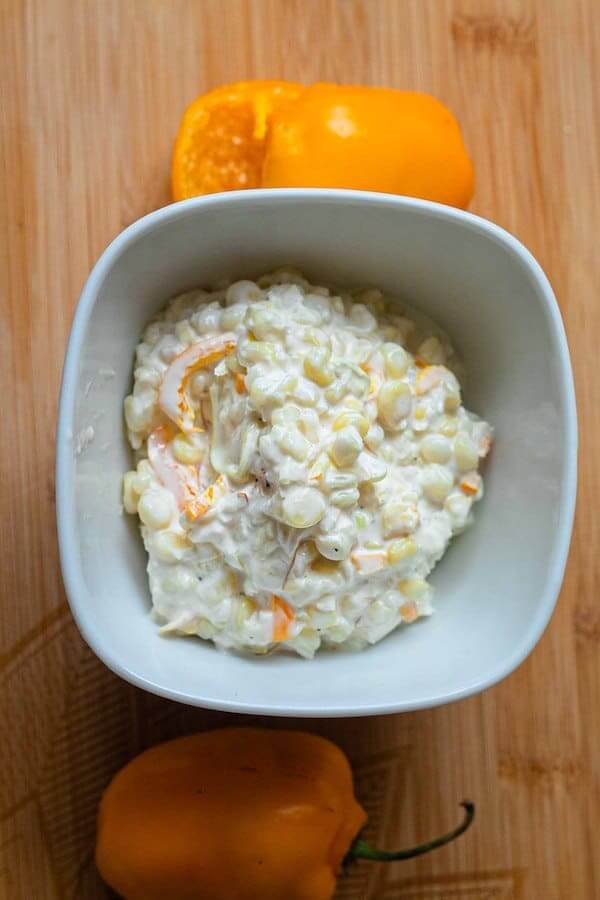
    Grilled corn with its leaves on is so delicious. We keep the leaves on so they help steam the kernels inside with their own flavour. This is how we get some perfectly cooked corn! Typically we put butter and some salt around the corn, or cut the kernels out and mix them with some lime and mayonnaise, garnished with Tajin.

    9. Guacamole

    Another great side dish that goes well with all the meat at a carne asada! I like to add lime, cilantro, red onion, tomato, and some sea salt in a large bowl with smashed avocados. Dip it with a tortilla or just have it on the side with meats. Want to take your guacamole to the next level? Try our fun guacamole recipe as inspiration.

    10. Sausages: Salchicha / Longaniza / Chorizo

    In Mexico, we have so many different kinds of sausages for different occasions. Some are used only for Carne Asada, like the longaniza sausage — a thin long sausage that is acidic to the taste and packed with flavours and fatty particles.

    Other sausages we use are chorizo and “salchicha para asar”. Salchicha is essential for both adults and kids when it comes to BBQing in Mexico.

    Packages of grilling sausages and chorizo on a tray of raw meat

    11. Coke

    America is the land of the free, and Mexico is the land of Coke. Coca-Cola is THE DRINK for all Carne Asada and THE ESSENTIAL thirst quencher. You can’t have a Mexican BBQ without it!

    If you’re invited to a real Carne Asada, bring a bottle of Coke. Pepsi is not welcome at an authentic Carne Asada unless you want to stand out like a real foreigner.

    12. Limonada and Chia Seed

    Mexico is known for its delicious green lime and they love it in water. A refreshing drink to have during a Carne Asada is Limonada with chia seeds.

    Take out your 2L jug. First mix 2 tbsp of chia seed and half a cup of sugar with some hot water to dissolve the sugar and let the chia seeds swell. Then add regular room temperature water. Serve over ice.

    13. Banana with Chocolate Chips

    Yes, you can make dessert on the grill! The type of banana we use is called “Macho Platino” — a bigger and thicker banana variety. Take the banana (with its peel) and split it in half without breaking through to the other side. Stuff chocolate chips inside and wrap it all up with tin foil. Grill over the fire for about 10 minutes. Serve with vanilla ice cream.

    14. Beer

    There’s no such thing as a fiesta without a beer in your hand. We love beer here and it’s the ultimate essential drink to cool down and chill on a nice Sunday afternoon. The beers we usually like to have at a Carne Asada are Corona, Modelo, Pacifico, and so much more!

    A hand holding up a bottle of Mexican beer at an outdoor gathering

    15. Tequila

    As the days draw to an end with a belly full of delicious food, nothing closes a day more pleasantly than a shot of tequila. We sometimes trade in tequila for mezcal liquor.

    Frequently Asked Questions

    What is the difference between carne asada and a regular BBQ?

    Carne asada is much more than just grilling meat — it’s a Mexican social tradition. A regular BBQ might focus on burgers or hot dogs, but carne asada is built around thinly sliced beef, tortillas, nopales, salsas, and specific side dishes. It’s a full cultural experience centred around family and community time.

    What is the best cut of meat for carne asada?

    The most popular cuts are arrachera (skirt steak), top sirloin, ribeye, and short ribs. Arrachera is the most traditional choice — it is thinly cut, flavourful, and cooks quickly over high heat. The key is thin slices so the meat cooks fast and stays juicy.

    How long do you marinate carne asada meat?

    A minimum of 30 minutes is enough for a simple marinade of beer, Tajin, and salt. For a deeper flavour, marinate for 2-4 hours in the refrigerator. Do not marinate for longer than 24 hours as the acid in the beer will start to break down the meat too much.

    Can you make carne asada without a grill?

    Yes! A cast iron skillet or a cast iron comal over high heat on the stovetop gives you a great char on the meat. The goal is high heat and quick cooking, which a good cast iron can deliver. A Lodge cast iron skillet is perfect for this.

    What Mexican salsa goes best with carne asada?

    Salsa verde and salsa roja are both excellent with carne asada. A smoky salsa macha from Veracruz adds a great depth. Try our easy Mexican salsa verde or our tasty hot salsa macha recipes for authentic options.

    What is the difference between longaniza and chorizo in Mexico?

    Longaniza is a thin, long sausage used almost exclusively for Carne Asada. It has an acidic, spiced profile from vinegar and dried chiles. Chorizo is a fattier, more richly spiced sausage typically used for breakfast or in bean dishes. Both are absolutely delicious on the grill.
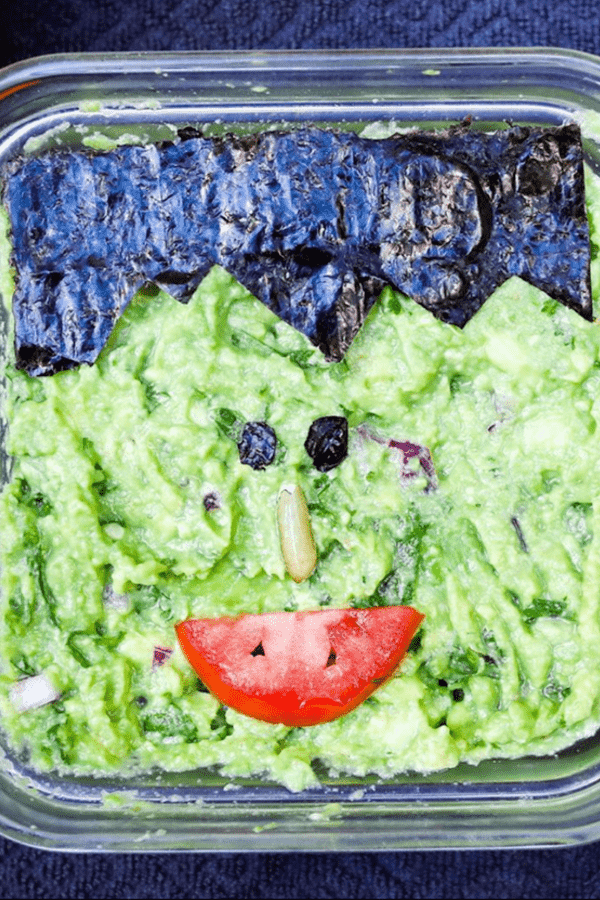
  • Halloween Frankenstein Guacamole

    Halloween Frankenstein Guacamole

    This Frankenstein guacamole is the most adorable dip you can make, and it will be hard to be the first to dig into his sweet face!

    Guacamole decorated as Frankenstein with nori hair and a tomato mouth

    This post is all about Halloween Frankenstein Guacamole. The food design of this adorable Frankenstein is made with sushi seaweed papers, sunflower seeds, and tomatoes.

    This post may contain affiliate links. If you purchase through these links, I may earn a small commission at no extra cost to you. Thank you for supporting Love & Harvest!

    This delicious guacamole recipe is so refreshing and delicious that we gave him life and turned him Mexican! At least until people start dipping his presence away!

    A cute recipe for food styling to bring to kids’ Halloween parties. It is an easy no-brainer side dish you can whip up in minutes. Halloween is a big week — kids are hammering you about costumes and parties. Don’t overthink the food. Make this easy peasy guacamole for Halloween today!

    The best part is that you can make this any size you want. All you need is to scale the design to fit the serving dish you are bringing.

    Key Ingredients

    Ingredients

    Avocado

    The star of the show — ripe, creamy avocados are the green canvas for Frankie’s face.

    • Why it matters: A ripe avocado should give slightly when pressed. Under-ripe avocados are grainy and hard to mash smoothly. Over-ripe avocados taste off. The lime juice you add prevents browning and adds essential citrus brightness. Traditionally in Mexico, we mash avocados in a mortar and pestle for authentic texture — chunky or smooth, your choice.

    Sushi Nori (Seaweed Paper)

    Nori sheets cut into Frankenstein hair and eyes.

    • Why it matters: Nori is what gives Frankie his iconic flat-top hairstyle and dark eyes. It cuts cleanly with scissors and holds its shape on the guacamole surface for serving time. It does not stay crisp for hours — serve within 30 minutes of decorating for best presentation.

    Lime

    Freshly squeezed lime juice mixed into the guacamole.

    • Why it matters: Lime does two critical jobs: adds citrus acidity that brightens all the flavours, and prevents oxidation (browning). If the guacamole will sit before serving, squeeze in an extra half lime and press plastic wrap directly onto the surface of the dip to exclude air.

    How to Make the Guacamole

    It only requires a few easy ingredients available in any grocery store: avocado, tomato, red onion, cilantro, and lime.

    First, pit the avocado and mash the flesh with a fork in a large bowl. Juice the lime into the avocado and mix well. Chop the tomato, red onion, and cilantro into small pieces. Add to the bowl. Salt to taste. It is that simple and so very delicious!

    How to Cut the Frankie Design

    Use sushi seaweed paper (nori) for the hair and eyes. Measure the length of your serving container, then use a cutting board and scissors to cut the fringe hair design. Be creative — play with the distance between the eyes and create your own version of Frankie. I use a sunflower seed as his nose, but it can be anything!

    Frankie Is Just the Beginning

    A Halloween Frankenstein Guacamole is just the start! How about a three-eye monster guacamole? A silhouette of a haunted house? The options are endless. For more Halloween fun, check out our Halloween Spooky Breakfast Bowl and Homemade Halloween Sugar Cookies.

    Why You Will Love This Halloween Frankenstein Guacamole

    • Easy recipe — just a few ingredients, no cooking required. Fresh and excellent tasting.
    • Fun design — Frankenstein is just the beginning! Design your own monsters at your own skill level.
    • Fun potluck dish — easy to make and bring, and completely captivating at Halloween parties.
    • Halloween food the kids will actually eat — avocado, lime and a few fun toppings.

    Frequently Asked Questions

    How do I keep guacamole from turning brown?

    Two methods work best: add extra lime juice (the acid slows oxidation), and press plastic wrap directly onto the surface of the guacamole, eliminating all air contact. An avocado pit in the bowl is a common tip but less effective than the plastic wrap method. Make the guacamole no more than 2 hours before serving for best color and freshness.

    How do I know if my avocados are ripe enough?

    Gently press the avocado near the stem end — it should give slightly under firm pressure but not feel mushy. The skin should be dark green to black. If the stem pops out easily and the flesh underneath is green (not brown), it is perfectly ripe.

    Can I add spice to this guacamole?

    Absolutely — and we encourage it! Add finely minced jalapeño or serrano pepper for a good kick. Serrano is hotter than jalapeño. Start with half a pepper, taste, and adjust from there. A pinch of cayenne also works if you want even heat distribution.

    Can I make this guacamole ahead for a party?

    Make it up to 2 hours ahead. Press plastic wrap directly onto the surface (no air gaps) and refrigerate. Decorate with the nori Frankenstein design right before serving — nori softens quickly once it contacts moisture.

    What can I serve with this guacamole besides tortilla chips?

    Sliced bell peppers, cucumber rounds, jicama sticks, and mini tostadas all work beautifully. For a Halloween theme, use black sesame crackers or triangle-cut tortilla chips arranged to look like bat wings around Frankie’s face.

    How large a batch should I make for a Halloween party?

    Plan on 1 medium avocado per 2 guests as a rough guideline. For a party of 20, use 10 avocados and scale all other ingredients proportionally. Use a large serving platter and scale up the Frankenstein design to match.

    Authentic Guacamole

    A simple yet delicious guacamole recipe that takes a matter of minutes to whip up!
    Prep Time 15 minutes
    Total Time 15 minutes
    Servings: 4 people
    Course: Appetizer
    Cuisine: Mexican
    Calories: 195

    Ingredients
      

    • 4-5 medium sized avocado
    • 1 – 1½ lime juice
    • 1 medium tomato diced
    • 1 branch cilantro chopped
    • ¼ red onion chopped
    • sea salt

    Method
     

    1. In a large mixing bowl, cut the avocado in half. Pit the centre seed out and scoop the green flesh into the bowl with a spoon.
    2. Use a fork and press the avocado. The more you mash the avocado the smoother the texture will be.
    3. Drizzle the lime on to the avocado and mix well. 1 lime is perfect but if you like to more acidic, you can half half a lime more.
      (Half half a lime more if you know it will not be eaten immediately to help it not turn brown).
    4. Add the chopped cilantro, tomato ,and red onion. Mix well. salt to taste

    Notes

    • Spicy: you’re more than welcome to add jalapeno or serrano peppers to give it a good kick.
  • Tasty Hot Salsa Macha From Veracruz

    Tasty Hot Salsa Macha From Veracruz

    Salsa Macha is the Mexican chilli oil you will put on absolutely everything — scrambled eggs, tacos, grilled fish, bread, rice. This Veracruz version uses just two ingredients and takes fifteen minutes to make. Once you have a jar of this in your fridge, you will wonder how you cooked without it.

    This post may contain affiliate links. If you purchase through these links, I may earn a small commission at no extra cost to you. Thank you for supporting Love & Harvest!

    best salsa macha recipe

    This post is all about salsa macha — a spicy chilli oil from Veracruz, Mexico. Made with dried chile de arbol and garlic, it is the easiest and most versatile Mexican condiment you can make at home.

    There is a lot of chilli oil on the market, but nothing comes close to the flavour of one you toast and make yourself. This recipe was taught to me by a woman in a small rural town in Mexico, passed down from her daughter in Veracruz. It is the real thing.

    What Is Salsa Macha?

    Salsa Macha is originally from Veracruz and Oaxaca and is now enjoyed throughout Mexico. Think of it as the Mexican version of Chinese chilli oil — fried chilli, garlic, and toasted aromatics suspended in hot oil. The taste is remarkably similar to the chilli oil served at Cantonese wonton restaurants. Sichuan oil has its own signature from Sichuan peppercorn, but a standard salsa macha and a standard Cantonese chilli oil are nearly indistinguishable in flavour and concept.

    Why You Will Love This Salsa Recipe

    • Authentic recipe from Veracruz — passed down from a local family, not a fusion interpretation
    • Only two main ingredients — chile de arbol and garlic, plus oil
    • Stores for months — oil-based preservation keeps it fresh for up to 6 months in the fridge
    • Perfect beginner recipe — no special skills, just toasting and pounding

    how to use salsa macha

    Ingredients

    Chile de Arbol

    A spicy, long, dried Mexican red chilli. You buy it dry, not fresh. It has a sharp, clean heat and a distinct toasted-chilli flavour once it hits the pan. It is the backbone of this salsa.

    • Why it matters: The toasting step is critical — it transforms the dried chilli from one-dimensional heat into a complex, nutty, deeply flavoured base. Do not skip it and do not walk away from the pan.

    Find dried chile de arbol online or at any Latin grocery store.

    Garlic

    Fresh garlic cloves are pounded alongside the toasted chilli in the mortar. Fresh gives a sharper, more pungent bite than pre-minced. One clove is all this recipe needs — garlic here amplifies the chilli, not the other way around.

    • Why it matters: Garlic gives salsa macha its characteristic savory depth. Together with the chilli, the two ingredients create a flavour far larger than either one alone.

    Cooking Oil

    Use a neutral oil with a high smoke point — canola or soybean oil. The oil is heated until very hot (just before smoking) and poured over the pounded chilli and garlic. This is the step that “cooks” the salsa and extracts the full flavour from the aromatics on contact.

    • Why it matters: The hot oil flash-fries the chilli and garlic in the bowl, concentrating the flavour and creating the signature aroma. Temperature matters — too cool and the salsa is flat; too hot and it burns.

    A Good Spice Grinder or Mortar and Pestle

    Traditional salsa macha is made with a mortar and pestle. If you want more texture, use a mortar. If you prefer a smoother paste, a spice grinder works well.

    • Why it matters: The grind texture controls the final mouthfeel — chunkier means more crunch and layered bites; smoother spreads more easily.

    Recipes That Use Salsa Macha

    Everything tastes better with salsa macha. Use it on the Easy Mexican Salsa Verde plate as a table condiment, drizzle it over Homemade Pico de Gallo, or serve it alongside any grilled meat or fish.

    Frequently Asked Questions

    What is the difference between salsa macha and regular chilli oil?

    Salsa macha is a toasted, coarsely pounded version while most commercial chilli oils are finely ground and may include Sichuan peppercorn, star anise, or other additives. Salsa macha is simpler, more rustic, and typically hotter with a pure dried-chilli flavour.

    How spicy is salsa macha?

    Chile de arbol is quite hot — roughly 15,000–30,000 Scoville units. You can reduce the heat by removing some or all of the seeds from the chillies before toasting. The garlic and oil temper the heat somewhat, but expect this to be a genuinely spicy condiment.

    Can I use other types of dried chilli?

    Yes. Dried guajillo chillies can be blended with chile de arbol for a milder, fruity version with more complexity. Ancho chillies add a dark, chocolatey note. The Veracruz original uses only arbol, but experimenting is encouraged.

    How long does salsa macha last?

    Stored in a sealed glass jar in the fridge, salsa macha keeps for up to 6 months. Always use a clean, dry spoon when serving to avoid introducing moisture that can shorten shelf life.

    Why does it have to go in a glass jar?

    Oil absorbs into plastic containers over time and can develop off-flavours. Glass is neutral, keeps the salsa tasting clean, and does not stain.

    Can I add nuts or seeds to this recipe?

    Absolutely. Many regional variations of salsa macha include toasted sesame seeds, pumpkin seeds, or peanuts pounded in with the chilli and garlic. Add them during the mortar-and-pestle step for a richer, nuttier version.

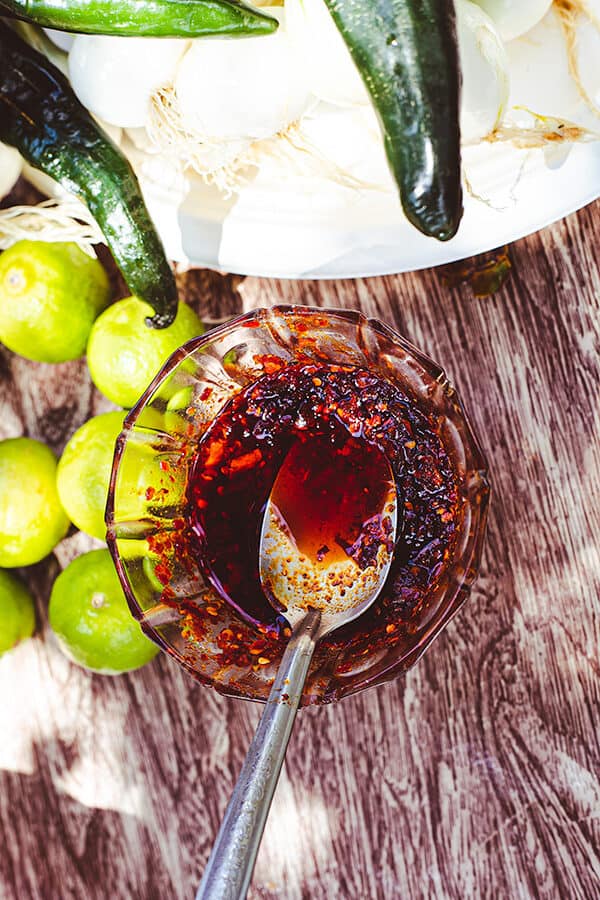
    A hand holding a glass bowl of oily red salsa macha

    Salsa Macha de Veracruz

    Toasty and tasty Mexican spicy chilli oil. Salsa Macha can be used in a whole range of different food. If you love salsa, this recipe is one you will surely want to keep. Print Recipe Pin RecipePrep Time:15 minsCuisine: MexicanKeyword: salsa macha, veracruz

    Equipment

    • mortar and pestle

    Ingredients

    • 15 dried chile de arbol
    • 1 garlic clove
    • ¼ cup cooking oil

    Instructions

    • Place a pan on the stove and heat to medium high. Place the chile de arbol on the pan and toast it. Do not walk away — it burns easily. Brown the skin of the chilli until fragrant. Set aside to cool.
    • Using a mortar and pestle, place the toasted chilli inside and crush and pound until it starts to break into smaller pieces. About 5 minutes.
    • Add the garlic clove and continue to pound and crush with the chilli. Another 5 minutes.
    • Meanwhile, heat the oil in a pan on high. Heat until very hot but not quite smoking.
    • Put the chilli and garlic in a heat-proof glass bowl and pour the hot oil on top. Stir while pouring so it does not burn the dried chilli. Be careful — both the oil and steam are very hot. Salt to taste.

    Notes

    Notes:

    • Store the salsa in a glass jar with a lid. Oil absorbs into plastic containers.
    • This chilli oil can be stored in the fridge for up to 6 months.
  • Mole Ayocote – Purple Camp Bean Recipe

    Mole Ayocote – Purple Camp Bean Recipe

    I discovered this recipe in a small rural town outside Puebla while learning to grow oyster mushrooms with a government agricultural program. The workshop owner, Doña Mari, quietly invited us to brunch and set down a bowl of deep purple beans swimming in a rich red chile sauce she called Mole Ayocote. I fell in love on the first spoonful. This authentic, little-known Mexican camp bean recipe is now one of my most requested at the campsite.

    This post may contain affiliate links. If you purchase through these links, I may earn a small commission at no extra cost to you. Thank you for supporting Love & Harvest!

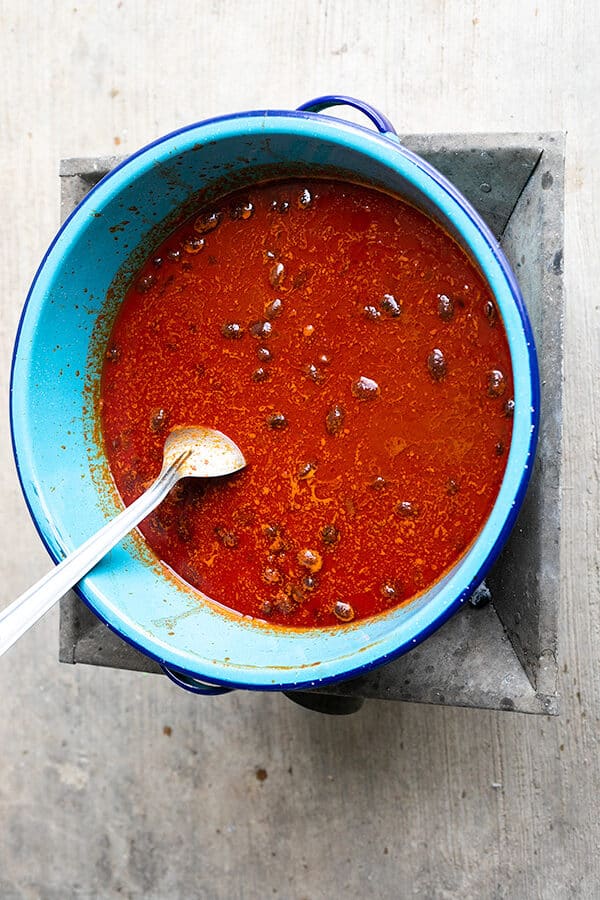
    Pot of purple ayocote beans simmering in red mole sauce

    Why This Is the Ultimate Camp Bean Recipe

    Beans are always an easy camping food — high in protein and filling. But flavorless canned beans are a letdown. Mole Ayocote is different: it is a purple broad bean stew built on a chilli puree of ancho peppers, guajillo peppers, cumin, garlic, and oregano. Make the red chile puree at home, bring it to the campsite, and the rest comes together in one pot over the fire.

    Why You Will Love This Recipe

    • Great vegetarian option — no meat needed. The combination of spice, peppers, and beans is hearty and deeply satisfying.
    • Authentic Mexican flavour — with these peppers and spices, you get the full Mexican experience from a single dish.
    • Delicious — the flavour is layered and complex, and the colour of the purple ayocote beans in brilliant red sauce is stunning.
    • Easy campsite cooking — minimal gear required. If the chile puree is made ahead, all you need is a pot and a fire.

    trail camp beans recipe

    Ingredients Deep-Dive

    Ayocote Beans (Purple Broad Beans)

    Ayocote is a type of Mexican purple runner bean — large, meaty, and with a savoury, nutty flavour that is almost meat-like. The creamy, starchy texture makes it an outstanding meat substitute for vegetarians. If you cannot find purple broad beans, any other broad beans work well. Avoid fava beans — they have a strong distinctive taste that clashes with the chile sauce.

    • Why it matters: The density and earthiness of ayocote beans stand up to the bold chile puree in a way that smaller beans simply cannot. The colour turning deep purple-red in the sauce is part of what makes this dish so visually spectacular.

    Ancho Peppers

    Ancho pepper is the dried version of the poblano. It is not spicy — it is used almost entirely as a colouring and flavouring agent, giving Mexican dishes like pozole and red enchilada sauce their deep warm red colour. It brings a mild smoky sweetness to the stew.

    • Why it matters: Without ancho, the stew turns pale and loses its rich visual appeal. A bag of dried mulato or ancho chiles lasts for months in your pantry.

    Guajillo Peppers

    Slightly spicy, but manageable. When using dried guajillo, always discard the seeds and stem — the flesh gives you the flavour and colour while removing most of the heat. Using both long and short guajillo (as Dona Mari taught) adds complexity without any extra effort.

    • Why it matters: Guajillo is the backbone of the stew’s flavour. Toasting it lightly before soaking unlocks a smoky dimension that transforms the sauce.

    Cumin

    This recipe has a strong cumin presence. In Mexico it is called comino and it is foundational to Mexican cooking — earthy, warm, and slightly bitter.

    • Why it matters: Cumin ties together all the other spice notes. Do not skip it or reduce the quantity.

    Oregano

    Use Mexican oregano if you can find it. It has a stronger, more earthy tone than Mediterranean oregano and a hint of citrus. The aroma is noticeably more complex.

    • Why it matters: Mexican oregano completes the authentic small-town Puebla flavour profile that makes this recipe so special.

    Manteca (Animal Lard)

    In small towns across Mexico, manteca is cheaper than cooking oil and adds a richness and depth that vegetable oil cannot replicate. For a vegan version, substitute with canola or sunflower oil — the dish still works beautifully.

    • Why it matters: Frying the onion and garlic in manteca before adding the chile sauce creates a flavour base (sofrito) that gives the stew its round, satisfying finish.

    cowboy bean recipe

    How to Cook Ayocote Beans

    Instant Pot Method

    Rinse the dried beans and fill the pot with 1/2 litre of water. Set to “Pressure Cook” for 40 minutes with the valve on. After the timer, let the valve release naturally. Reserve the bean water.

    Stovetop Method

    Rinse dried beans and fill a pot with 1 litre of water. Boil until tender — up to 80 minutes. Test after 80 minutes; if not soft, add 10 more minutes and more water. Reserve the bean water.

    How to Cook Beans While Camping

    A campfire Dutch oven is the best investment for camp cooking — heavy and bulky, but you can make anything in it, including these beans over an open fire. Fill with water, hang over the campfire or lay on a campfire grate, and cook for 45 minutes. Manage heat by adjusting the fuel and monitor water levels to prevent burning.

    Professional Tips for No-Fail Mole Ayocote

    Pro Tip 1: Soak the Beans Overnight

    Soaked beans in the Instant Pot cook in 15–25 minutes instead of 40. Unsoaked dried beans need 37–42 minutes. If you know you are making this the next day, soak overnight every time.

    Pro Tip 2: Use a Pressure Cooker

    Beans cook perfectly in a pressure cooker and in a fraction of the time. Unsoaked: 37–42 minutes. Well-soaked: 15–25 minutes.

    Pro Tip 3: Keep the Bean Water

    After the beans finish cooking, reserve that starchy water. When the sauce and beans simmer together for 30 minutes, the bean water adds depth and enriches the final stew.

    Pro Tip 4: Lightly Toast the Chile Peppers

    Toast the guajillo and ancho peppers in a dry pan until slightly browned and fragrant — the smoky flavour really comes through. After toasting, soak them in hot water for 10 minutes to rehydrate before blending.

    How to Serve Mole Ayocote

    • Bread — dip bread into the sauce to soak it all up while eating the beans with a spoon.
    • Rice — lay the purple camp beans over rice for the best and most simple supper.
    • Mashed potato — serve with mashed potato and vegetables, drizzled with the red sauce.
    • Vegetables — pair with rice and roasted vegetables for a complete vegetarian meal.

    More Mexican Bean and Stew Recipes

    If you love this Mole Ayocote, you will enjoy our green pozole (pozole verde) — another bold Mexican stew with equally deep flavour. For a warming bean-based soup with spice, check out instant pot Mexican menudo.

    Frequently Asked Questions

    What can I substitute for ayocote beans?

    Any large purple broad bean or runner bean works well. Black beans or pinto beans can work in a pinch for a different texture. Avoid fava beans — their distinctive strong flavour does not complement the chile sauce.

    Is this recipe spicy?

    No. Ancho peppers are mild and used mostly for colour. Guajillo adds a gentle warmth, but removing the seeds keeps the heat very low. This is suitable for children and those sensitive to spice.

    Can I make this vegan?

    Yes. Simply substitute the manteca (animal lard) with canola or sunflower oil. The rest of the recipe is fully plant-based.

    Can I make the chile puree ahead of time?

    Absolutely — this is the recommended approach for camping. Make the red chile puree at home, store it in a sealed container in the fridge or cooler, and at the campsite you only need to cook the beans and assemble.

    Where can I find ayocote or guajillo peppers?

    Mexican grocery stores carry both. Online, you can find dried mulato chiles that work similarly. For guajillo, most Latin food sections in larger supermarkets carry them dried.

    How long does this stew keep?

    Stored in an airtight container in the refrigerator, Mole Ayocote keeps well for up to 4 days. The flavours actually deepen overnight. It also freezes well for up to 3 months.

    Ladle in a blue pot of mole ayocote bean stew

    Mole Ayocote – Purple Camp Bean Recipe

    Delicious Mexican camp bean recipe to make on your next camping trip! Packed with the delicious flavour of ancho and guajillo peppers, cumin, thyme, oregano, and garlic This surely will be your favourite camping bean recipe! Print Recipe Pin RecipeServings: 6 people

    Equipment

    • blender

    Ingredients

    • 300 g ayocote beans or purple broad beans
    • 2 guajillo pepper
    • 1 ancho pepper
    • 1 tsp cumin powder
    • ¼ tsp clove powder
    • ¼ tsp black pepper
    • 1 tsp oregano dried
    • 1 tsp thyme dried
    • 3 bay leaf
    • ¼ cup manteca or cooking oil
    • ½ white onion
    • 3 clove of garlic
    • ½ L water
    • sea salt to taste

    Instructions

    Cooking ayocote beans with an Instant Pot

    • Rinse the dried beans in tap water and refill it with ½ litre of water.
    • Set the mode to “Pressure Cook” and set the timer to 40 minutes. Close the lid with the valve on.
    • After the timer sets off, let the beans sit until the valve naturally unlocks itself.
    • Take the beans out, but reserve the bean water. Set aside.

    Cooking ayocote beans with a pot on the stove

    • Rinse the dried beans in tap water and refill with ½L of water.
    • Boil the beans until tender. It can take up to 80 minutes depending on size.
    • After 80 minutes test the bean to see if the inside is soft. If needed, give it an extra 10 minutes and add more water.
    • Take the beans out once soft and tender, but reserve the bean water. Set aside.

    Cooking the Mole Ayocote

    • In a dry pan, place the guajillo and ancho peppers. Heat on high. Toast until browned and fragrant on the outside. Let cool.
    • Discard the seeds and stem. Pour hot water over the peppers until completely submerged. Soak for 10 minutes.
    • Place the soaked peppers in a blender with 1 cup of water. Add cumin, clove, oregano, thyme, and black pepper. Blend until smooth. Set aside.
    • In a large pot, place the manteca or cooking oil. Heat on medium-high.
    • Add onion and garlic. Fry until fragrant, about 2 minutes.
    • Add the red chilli puree, beans, bay leaf, and reserved bean water. Cook on medium-low heat for 20 minutes. Season with salt to taste. Serve.
  • Carlota de Limon – Mexican No-bake Lime Dessert

    Carlota de Limon – Mexican No-bake Lime Dessert

    This simple four-ingredient no-bake cake, known as Carlota de Limón, is one of the most beloved desserts in Mexican households — and once you taste it, you will understand why. Layers of crunchy Maria cookies soaked in condensed milk, evaporated milk, and fresh lime juice come together in the refrigerator into a zesty, creamy, irresistibly refreshing icebox cake. My mother-in-law has made this for years, and now our whole family asks for it every time.

    This post may contain affiliate links. If you purchase through these links, I may earn a small commission at no extra cost to you. Thank you for supporting Love & Harvest!

    no bake cake

    Why You Will Love This Recipe

    • Super easy recipe — no baking and no special equipment needed. Only 4 ingredients and a refrigerator.
    • Authentic Mexican flavour — a classic Mexican housewife recipe. Follow the recommended brands and you will taste the real thing.
    • No special grocery store trip — this cake uses pantry staples you likely already have at home.

    A Perfect No-Bake Dessert for Every Occasion

    Kid-Friendly

    There is no hot stove, no electrical equipment, and no complex techniques involved. Just stacking cookies and whisking ingredients. Even a young child can assemble this dessert — try it once and your kids will beg to help every time.

    Picnic-Friendly

    Carlota de Limón stays together firmly and travels well. Made in a glass baking dish, you do not need to worry about it falling apart in the car. The perfect portable dessert for any outdoor event.

    Camping-Friendly

    This is the ideal camping dessert. Bring all 4 ingredients to the campsite, assemble it there, let it sit for at least 2 hours in a cooler, and you will have an impressive cake that nobody will believe you made from scratch at a campsite.

    Potluck-Friendly

    Looking for a crowd-pleasing dessert that requires minimal effort? This is it. At the end of the party, you will be bringing home an empty container.

    no bake desserts

    Ingredients Deep-Dive

    Maria Cookies

    Just as popular as the name suggests, Maria cookies are a beloved everyday cookie across Mexico — a plain, slightly crispy biscuit with gentle hints of vanilla and ginger. Some people in Mexico recommend them when you have an upset stomach, which speaks to how mild and comforting they are. They absorb the milk mixture beautifully, becoming soft like cake on the outside while the center stays slightly crunchy.

    • Why it matters: Maria cookies are the structural base of this dessert. Their absorbency is precisely calibrated for this type of no-bake cake — they soften without falling apart. You can find them at any Latin grocery store or on Amazon.

    Condensed Milk

    This is where the sweetness of the cake comes from. Condensed milk is thick, very sweet, and acts as a natural thickener that helps bind the layers together. The most authentic brand to use in Mexico is La Lechera.

    • Why it matters: The right amount of condensed milk gives the cake its signature rich sweetness. Too much and it becomes cloyingly sweet; too little and the texture turns watery.

    Evaporated Milk

    Evaporated milk adds richness and creaminess without additional sugar. It gives the liquid mixture that fresh milk taste and a lighter, pourable consistency that soaks into the cookies evenly.

    • Why it matters: The combination of condensed milk (sweet and thick) and evaporated milk (fresh and creamy) is what creates the balanced flavour of this dessert. Using only one or the other throws off the texture.

    Fresh Lime

    Lime is where all the flavour lives. Fresh lime juice is essential — a bottled product simply does not deliver the same brightness. The acidity of fresh lime also slightly thickens the milk mixture as it sits, helping the cake set. Add lime zest on top before serving for an extra burst of citrus aroma.

    • Why it matters: This is called Carlota de Limón for a reason. The lime is the star ingredient. A lime juicer makes squeezing multiple limes effortless.

    Professional Tips for No-Fail Carlota de Limón

    Pro Tip 1: Use Fresh Lime Always

    Fresh lime juice and zest make an extraordinary difference in this dessert. All the flavour comes from lime — this is not the place to use bottled juice.

    Pro Tip 2: The Cookies Will Float at First

    When you begin assembling the cake, the cookies will float in the milk mixture. This is normal. As they soak and absorb the liquid, they will settle. Halfway through the sitting phase, gently press the cookies down with a spoon and they will stay in place.

    Pro Tip 3: Refrigerate for At Least 2 Hours

    Do not cut into this cake too early. The cookies need at least 2 hours (preferably 4 or overnight) to fully absorb the milk mixture and transform into a cohesive cake. Cutting it before this time will result in a runny, unset dessert. Patience is the only technique this recipe requires.

    More Mexican Dessert Recipes

    If you love this Carlota de Limón, you will also enjoy our easy Mexican salsa verde for a savoury contrast, or explore more refreshing desserts like our fresh mango sorbet.

    Frequently Asked Questions

    What are Maria cookies and where can I find them?

    Maria cookies (galletas Marias) are a classic Mexican plain biscuit with mild vanilla and ginger flavour. They are available at any Latin or Mexican grocery store, and also online. The Gamesa brand is the most authentic. Graham crackers can work as a substitute but will give a slightly different flavour.

    Can I add cream cheese to this recipe?

    Yes — many Mexican families add cream cheese for a richer, thicker texture. Blend 4 oz of cream cheese into the milk mixture before assembling. It makes the cake denser and more indulgent.

    How long does Carlota de Limón keep in the fridge?

    Covered with plastic wrap, this cake keeps well for up to 3 days in the refrigerator. The texture actually improves after the first few hours as the cookies continue to soften.

    Can I use lemon instead of lime?

    You can, but the result will be different. Mexican limes (Key limes) have a more floral, intense flavour than standard lemons. Lime is the traditional and most recommended choice. If using lemons, you may want to add slightly more juice to achieve the same brightness.

    Why is my Carlota too runny?

    Either it was not refrigerated long enough, or the ratio of condensed to evaporated milk was off. Give it at least 4 hours in the fridge, or ideally overnight. If it is still runny, there may be too much liquid — try reducing the evaporated milk by 1/4 cup next time.

    Can I make this the night before a party?

    Absolutely — and it is actually better when made ahead. The overnight rest in the fridge gives the cookies maximum time to absorb and the cake to fully set. Simply cover and refrigerate, then slice and serve directly from the dish.

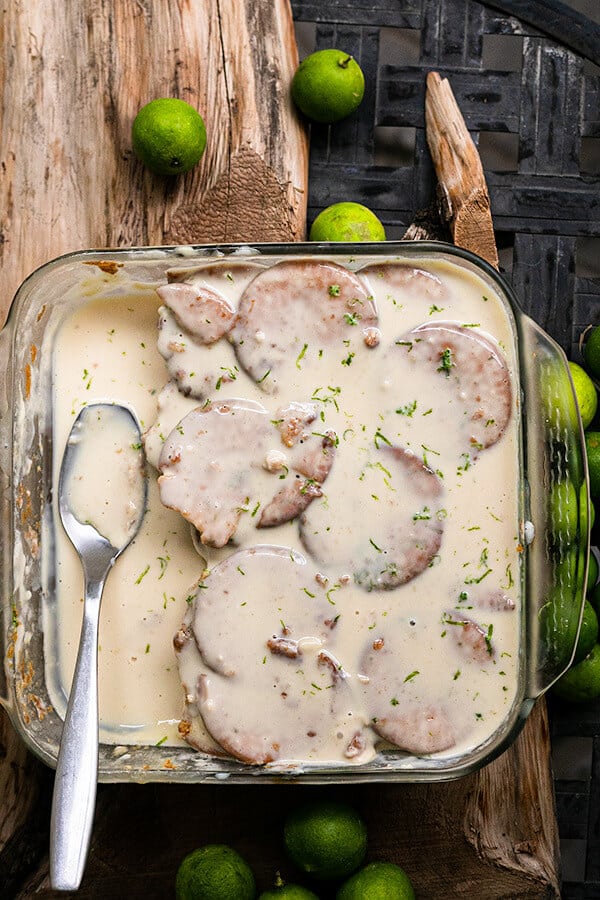
    A hand holding a plate with a slice of carlota de limón

    Mexican Lime Icebox Cake “Carlota de Limón”

    Mexican Lime Icebox Cake is an explosion of flavour and texture! You get the big tasty hit of condensed milk and lime. Around the end of the cake, you get a soft cake-like texture, while the inside remains crumbly and crunchy like the cookie. 
    Prep Time 10 minutes
    Total Time 2 hours 10 minutes
    Servings: 8 people
    Course: Dessert
    Cuisine: Mexican
    Calories: 360

    Ingredients
      

    • 2-3 package of Marias Cookies
    • ¾ cup lime juice 6 Mexican Limes
    • 375 g condensed milk 1 can
    • 360 g evaporated milk 1 can
    • lime zest

    Equipment

    • 8 x 8 glass baking dish

    Method
     

    1. Juice the lime and filter it through a strainer.
    2. Add the lime juice to the blender along with the condensed milk and evaporated milk. Give it a good blend for 10 seconds. Alternatively, you can add everything to a large jug and whisk vigerously for 30 seconds.
    3. In a 8×8 glass baking dish, place your first layer of Marias cookies. Pour a small layer of the milk mixture until the cookies are slightly coated. Add another layer of cookie. If you need, use a spoon or a fork to press the cookies down. It might float up a bit.
      Repeat until you've stacked to the top with ¼" of space. By now you should have used up all the milk mixture. Break the cookies up if you like to fill in the gaps between the cookies.
    4. Top layer should be the milk mixture. Use a spoon the smooth out the surface. Tap the dish on the table to get rid of any bubbles that maybe be trapped between the layers. Zest the lime on top of the cake.
    5. Cover the top of the dish with foil or plastic, and let it refrigerate for 2 hours.
      Usually, I prefer to leave my cake overnight so it settles better and more solid.
      Halfway through, you can take it out and gently push the cookies down with a spoon if the cookies are still floating. Giving it one hour in the fridge, the cookies are denser so a quick push to the bottom of the pan will make it settle better.
    6. Serve with lime slices to garnish.

    Notes

    This Carlota de Limón will keep in the fridge for up to a week but preferably consume in 2 days or the cookies become too soft and soggy. 
  • How To Make Gourmet Homemade Sausages: Chorizo & Apple Sage

    How To Make Gourmet Homemade Sausages: Chorizo & Apple Sage

    This post may contain affiliate links. If you purchase through these links, I may earn a small commission at no extra cost to you. Thank you for supporting Love & Harvest!

    Once you make sausages from scratch, it’s very hard to go back to the grocery store kind. Not because it’s faster or cheaper — it isn’t — but because the taste of fresh, nitrate-free sausage made with real herbs and your own choice of spices is in a different league entirely. This guide walks you through two gourmet recipes: a vibrant, chilli-red Classic Chorizo and a sweet, aromatic Apple Sage Maple Syrup breakfast sausage. Both are easier than you think.

    homemade sausages

    Why Make Your Own Sausages?

    Commercial sausages contain nitrates — preservatives that help give them their pink colour and extended shelf life. At low levels they’re considered safe, but they’re still there. When you make sausages at home, you control every ingredient: the quality of the pork, the salt type, the herbs. You know exactly what’s inside. The taste reflects that.

    This is also a surprisingly fun family project. Kids love the stuffing process, and the moment the first batch hits a hot cast iron skillet, the smell alone makes everyone appear in the kitchen.

    homemade sausage seasoning

    Ingredients Deep-Dive

    Ingredients

    The Meat Ratio: Pork + Pork Fat

    The standard ratio is 80% lean ground pork to 20% back fat. The fat is not optional — it’s what gives the sausage its juicy, succulent texture and prevents it from drying out during cooking. Ask your butcher to grind both the lean and fat together twice through the machine. Two passes through a fine grinder creates the smooth, emulsified texture that commercial sausages achieve with machinery. If you want to invest in your own machine, a KitchenAid meat grinder attachment is excellent for home use.

    Classic Chorizo: Ancho and Guajillo Chillies

    These two dried Mexican chillies are the soul of the chorizo. Ancho is the dried version of a poblano — it’s fruity, mild, and adds deep colour. Guajillo is slightly more tannic with a berry-like flavour. Neither is hot. Together, they produce the brick-red colour and complex flavour that makes Mexican chorizo unmistakable. Combined with white vinegar (which tenderises the meat and brightens the flavour), Mexican oregano, and a pinch of clove and cinnamon, this is a chorizo that tastes authentic and homemade in the best possible way.

    Apple Sage Maple Syrup: Sweetness with Depth

    This sausage is an homage to the breakfast sausages I grew up eating in Vancouver — sweet, fat-rich, and deeply comforting. Grated apple adds natural sweetness and moisture. Fresh sage provides an herbal backbone. Maple syrup creates the sticky-sweet glaze when the sausages hit a hot pan. A splash of sweet red wine rounds everything out. These are remarkable on their own, but also extraordinary crumbled into pasta or egg dishes.

    The Casing

    Natural hog casings are available at most butchers and specialty meat shops. They give the sausages that classic snap when you bite in, and they hold up beautifully on a cast iron skillet. Submerge them in lukewarm water and rinse the insides by running water through the tubes before use. If you can’t source natural casings locally, sausage stuffers and casing kits are available online.

    Salt Choice Matters

    Skip curing salt (sodium nitrate) — it’s unnecessary for fresh sausages you’ll cook within a few days. Use high-quality sea salt. We use Sal Faro Verde from Colima, Mexico — a western state famous for its natural sea salt. The mineral content affects flavour in a noticeable way. Good sea salt is an investment that pays off in every dish you make.

    gourmet sausage recipes

    Tools You Need

    This recipe is designed to require minimal equipment. All you need:

    • A butcher who will grind your pork and fat (twice)
    • A large funnel (wider mouth is easier)
    • Natural hog casings (from your butcher or online)
    • A toothpick for air bubbles

    That’s it. No sausage stuffer machine required, though you’re welcome to upgrade. The funnel method is slower but completely achievable for home batches. If you cook sausages often, a dedicated vertical sausage stuffer will save you significant time on larger batches.

    unique homemade sausage recipes

    How to Stuff the Sausages

    Tie one end of the casing tightly. Feed the casing onto the funnel accordion-style, leaving about 4 inches hanging off the end. Fill the funnel with meat and use your thumb to push it through. Work slowly — you want firm, evenly filled sausages without air pockets. Poke any air bubbles with a toothpick as they appear.

    Don’t overstuff. Leave room in the casing for expansion during cooking. An overstuffed sausage will split open on the heat. A split sausage still tastes good, but it reveals all the filling and loses its shape. When all the casing is filled, twist into links at 5-inch intervals, alternating the direction of each twist.

    The 12-Hour Fridge Rest

    After stuffing, lay the sausage links uncovered on a rack over a baking sheet and refrigerate for at least 12 hours. This step is essential for two reasons: it lets the meat absorb the seasoning fully, and it dries the outer casing slightly so it doesn’t burst from excess moisture during cooking.

    Serving Suggestions

    The Chorizo is spectacular in scrambled eggs, crumbled over fresh homemade pasta, or simply pan-fried and served with crusty bread. The Apple Sage sausages are outstanding as a breakfast plate alongside eggs and toast, or paired with a bright salad like our Beet and Avocado Sashimi for a brunch board.

    Frequently Asked Questions

    How long do homemade sausages keep?

    Fresh sausage links keep in the refrigerator for up to 2 days after the drying stage. For longer storage, freeze them for up to 3 months. Freeze individually or separated by parchment paper so they don’t stick together. Thaw overnight in the refrigerator before cooking — never on the counter.

    Do I need a sausage machine?

    No. A large funnel and your hands are sufficient for home batches. The process is slower than a dedicated stuffer, but entirely achievable. If you plan to make sausages regularly, a vertical sausage stuffer is a worthwhile upgrade — they fill casings much faster and with more even pressure.

    What if the casing breaks during stuffing?

    It happens to everyone, especially on the first batch. If the casing tears, stop, tie off what you have, and start a new section. A casing tear doesn’t affect the taste — the sausage just won’t hold its shape as neatly. Those broken ones become the cook’s snack.

    Can I skip the casings and make sausage patties instead?

    Absolutely. Shape the seasoned meat into patties and cook directly in a cast iron skillet over medium heat. You lose the snap of the casing but the flavour is identical. This is also a great way to test your seasoning before investing in casing materials.

    Can I freeze the sausage meat before stuffing?

    Yes. Season the meat, mix thoroughly, then freeze in portions before the stuffing step. Thaw overnight in the fridge, then stuff and proceed with the drying step. This is helpful if you want to prep the meat one weekend and stuff the following weekend.

    What’s a good sausage flavour variation to try next?

    Some excellent combinations to experiment with: rosemary with cayenne and sea salt; habanero with garlic and onion powder; blueberry with ginger, nutmeg, and maple syrup; cheddar cheese cubed into the pork with paprika; or a Cajun blend of cumin, cayenne, and paprika. The template is always the same — 1kg pork, 200g fat, 2 tbsp sea salt — and everything else is creative freedom.

    homemade fresh chorizo

    Gourmet Fresh Sausages: Classic Chorizo & Apple Sage

    Learn how to make fresh gourmet Sausages right at home. Two simple recipes, Classic Chorizo and Apple Sage Maple Syrup sausages. You'll fall in love with these two popular choices that is bursting with flavour and colour. Print Recipe Pin RecipePrep Time:30 minsCook Time:12 mins

    Equipment

    • funnel

    Ingredients

    Classic Chorizo

    • 1 kg ground pork grounded twice in the machine of your butcher
    • 200 g pork back fat, grounded
    • 5 tbsp white vinegar
    • 1 ancho chili
    • 2 guajillo chili
    • 1.5 tsp paprika
    • 1 tsp vegetable oil
    • 2 tbsp sea salt
    • ½ tsp ground cumin
    • ¼ tsp ground black pepper
    • 1 tbsp mexican oregano
    • a pinch of clove
    • ¼ tsp cinnamon
    • 1 garlic, grated
    • 6 feet small hog casings

    Apple Sage Maple Syrup Breakfast Sausages

    • 1 kg ground pork grounded twice in the machine of your butcher
    • 200 g ground pork back fat
    • 2 tbsp sea salt
    • 2 tsp ground fresh black peppers
    • 3 tbsp brown sugar
    • 2 small apple, peeled and grated
    • 2 garlic clove, grated
    • 10 fresh sage leaf, chopped
    • ½ cup maple syrup
    • ¼ cup sweet red wine
    • 6 feet small hog casings

    Instructions

    Classic Chorizo

    • Combine all ingredients in a large bowl. Wear gloves in this process and mix, push, knead and squeeze the mixture until well blended.
    • Wrap well and chill overnight or around 8 hours before using.
    • To taste for seasoning, make a small patty of the sausage mixture and cook it in a small skillet over medium-low heat. Taste and adjust the seasoning to your liking. If not shaping the sausages immediately, refrigerate until you’re ready to proceed.
    • To make sausage links, put the casings in a medium bowl and set it in the sink. Rinse the casings under cool running water: Hold one end of each piece of casing open under the tap and flush it out by gently running cool water through it. (Once you fill part of the casing, use your hands to push the water through to other end.) Fill the bowl with fresh, cool water and let the casings soak for 10 minutes.
    • Take out your large funnel. Splash cool water onto the end to moisten it. Open an end of one piece of casing and pull it over the end of the tube. Push the rest of the casing onto the tube accordion-style, leaving 3 or 4 inches hanging off the end.
    • Fill the funnel with the sausage mixture and feed it through with your thumb or fingers just until it reaches the end of the tub. Tie the end of the attached casing into a knot, and slide it up over the tube until the knot hits the tip of the tube.
    • Continue to feed the meat mixture through the tube to fill the casing, pressing your thumb and forefinger against the tip of the tube to control the rate and tightness of the filling. Go slowly, don’t overstuff (but do stuff firmly), and watch for air holes. When there are only 3 to 4 inches of empty casing left, stop the feed, slip the casing off the tube and tie it in a knot about 1/2 inch from the end of the sausage filling—this extra space will fill in as you make links
    • Use a skewer or toothpick to prick any air holes that have formed during stuffing. Repeat with the remaining casings and sausage mixture.
    • To make links, lay one sausage at a time on a clean work surface, with the front end of the sausage (the end where you began filling) in front of you and the rest of the sausage lying to the right. Measure 5 inches from left to right and pinch the casing at that spot between your thumb and forefinger. Twist the unlinked portion away from you at least 4 or 5 turns to bind off the link on the left. Measure another 5 inches and pinch and twist away from you to form another link. Repeat until you reach the end of the casing, always twisting in the same direction. Prick any remaining air holes.
    • Lay the links, uncovered, on a rack set over a rimmed baking sheet. Dry in the refrigerator for 12 hours to allow the flavors to meld and to give the casings a good bite when cooked. Drying will also reduce the amount of moisture in the meat, too much of which can steam and lead to bursting.
    • To cook the sausage links, heat the oil in a large, preferably cast-iron, skillet over medium heat. Cook, turning as needed, until browned and cooked through, about 12 minutes.

    Apple Sage Maple Syrup Sausages

    • In a small bowl, mix the salt, pepper, garlic, and sage. Add the seasonings and the wine to the ground meat and mix briefly but thoroughly with your hands. Don’t overmix, or the fat could begin to melt.
    • To taste for seasoning, make a small patty of the sausage mixture and cook it in a small skillet over medium-low heat. Taste and adjust the seasoning to your liking. If not shaping the sausages immediately, refrigerate until you’re ready to proceed.
    • To make sausage links, put the casings in a medium bowl and set it in the sink. Rinse the casings under cool running water: Hold one end of each piece of casing open under the tap and flush it out by gently running cool water through it. (Once you fill part of the casing, use your hands to push the water through to other end.) Fill the bowl with fresh, cool water and let the casings soak for 10 minutes.
    • Take out your large funnel. Splash cool water onto the end to moisten it. Open an end of one piece of casing and pull it over the end of the tube. Push the rest of the casing onto the tube accordion-style, leaving 3 or 4 inches hanging off the end.
    • Fill the funnel with the sausage mixture and feed it through with your thumb or fingers just until it reaches the end of the tub. Tie the end of the attached casing into a knot, and slide it up over the tube until the knot hits the tip of the tube.
    • Continue to feed the meat mixture through the tube to fill the casing, pressing your thumb and forefinger against the tip of the tube to control the rate and tightness of the filling. Go slowly, don’t overstuff (but do stuff firmly), and watch for air holes. When there are only 3 to 4 inches of empty casing left, stop the feed, slip the casing off the tube and tie it in a knot about 1/2 inch from the end of the sausage filling—this extra space will fill in as you make links
    • Use a skewer or toothpick to prick any air holes that have formed during stuffing. Repeat with the remaining casings and sausage mixture.
    • To make links, lay one sausage at a time on a clean work surface, with the front end of the sausage (the end where you began filling) in front of you and the rest of the sausage lying to the right. Measure 5 inches from left to right and pinch the casing at that spot between your thumb and forefinger. Twist the unlinked portion away from you at least 4 or 5 turns to bind off the link on the left. Measure another 5 inches and pinch and twist away from you to form another link. Repeat until you reach the end of the casing, always twisting in the same direction. Prick any remaining air holes.
    • Lay the links, uncovered, on a rack set over a rimmed baking sheet. Dry in the refrigerator for 12 hours to allow the flavors to meld and to give the casings a good bite when cooked. Drying will also reduce the amount of moisture in the meat, too much of which can steam and lead to bursting.
    • To cook the sausage links, heat the oil in a large, preferably cast-iron, skillet over medium heat. Cook, turning as needed, until browned and cooked through, about 12 minutes.
  • Super Tasty Mexican Slow Cooker Pulled Pork

    Super Tasty Mexican Slow Cooker Pulled Pork

    This Mexican Slow Cooker Pulled Pork is the definition of a set-it-and-forget-it meal that still manages to blow everyone away. Smoky guajillo and ancho peppers, red wine, apple, and cumin slow-cook together with a pork shoulder for 5 hours until the meat falls apart and drinks up every drop of that incredible sauce. It is one of our most-made dinner recipes — at least twice a month on the rotation.

    This post may contain affiliate links. If you purchase through these links, I may earn a small commission at no extra cost to you. Thank you for supporting Love & Harvest!

    slow cooker pulled pork

    This post is all about slow cooker Mexican pulled pork.

    Ingredients for This Mexican Slow Cooker Pulled Pork Recipe

    Ingredients

    Pork Shoulder

    The cut we are looking for in this recipe is the pork shoulder. The shoulder has enough meat and fat mixed in together — it is not the tough part of the pork and using the slow cook method, the meal always comes out juicy, tender, and incredibly delicious.

    • Why it matters: Fat content in the shoulder bastes the meat from the inside as it slow-cooks, creating that signature pull-apart texture you cannot get from leaner cuts like loin.

    Guajillo Peppers

    The Guajillo dried peppers are not spicy when the seeds are removed. They give the sauce a nice thick texture and a distinct citrus-smoke flavour.

    • Why it matters: Guajillos are the backbone of many Mexican red sauces. Their fruity, slightly tannic flavour is what makes this sauce taste authentically Mexican rather than generic chili pork.

    Ancho Peppers

    Ancho peppers give the sauce its deep red color. They are not spicy and don’t have a sharp taste — they are dried poblanos with a mild, chocolatey undertone.

    • Why it matters: Anchors are responsible for the sauce’s gorgeous color and the earthy depth that rounds out the guajillo’s brightness. Together they are a classic Mexican pairing.

    Cumin

    Always a great partner with pork. Use powder form, not seeds — it marinates into the meat more evenly and the flavour is more evenly distributed throughout the roast.

    • Why it matters: Cumin is the warm spice foundation of the rub. Without it the pork tastes flat. Don’t be shy with it — this recipe leans into the cumin intentionally.

    Red Wine

    A great way to tenderize the pork — it penetrates into the meat and adds a fall-and-winter depth of flavour. A Malbec or any full-bodied red wine works perfectly here.

    • Why it matters: The alcohol in the wine breaks down muscle fibers during the long cook, resulting in a more tender final product. It also adds complexity to the sauce that water or stock alone cannot achieve.

    Apple

    Three apples, peeled and shredded. Adding apples is a great way to include fibre and natural sweetness that offsets the wine’s acidity and tartness.

    • Why it matters: The natural sugars in the apple caramelize during cooking and help balance the smokiness of the peppers. The apple also adds another layer of tenderization — the malic acid breaks down protein similarly to how a citrus marinade works.

    Slow Cooker

    I use an Crock-Pot Slow Cooker or the slow cook setting on my Instant Pot 7-in-1. Both work perfectly. The slow cook method is what makes this recipe so hands-off — 90% of the time you’re just waiting for the cooker to do its magic.

    • Why it matters: Slow cooking at low temperature for a long time breaks down the tough collagen in the pork shoulder into gelatin, which gives the sauce its body and the meat its silky, fall-apart texture.

    How to Serve Pulled Pork

    There are many ways to serve this slow cooker pulled pork:

    • Bread — any bread works. Make a pulled pork burger, a torta, or sliders with small buns.
    • Burrito — wrap in a large flour tortilla.
    • Taco — serve on top of a corn tortilla for a pulled pork taco.
    • Mash potato — serve with mashed potato and veggies, drizzled with the sauce.
    • Poutine — deep fry fries, add pulled pork, black beans, cheese, and sour cream.
    • Appetizer — bake thin baguette slices and serve the pulled pork with pickled onions.

    For more Mexican-inspired recipes, try our Green Pozole (Pozole Verde) or our Easy Mexican Salsa Verde — both pair beautifully with this pulled pork.

    easy slow cooker pulled pork

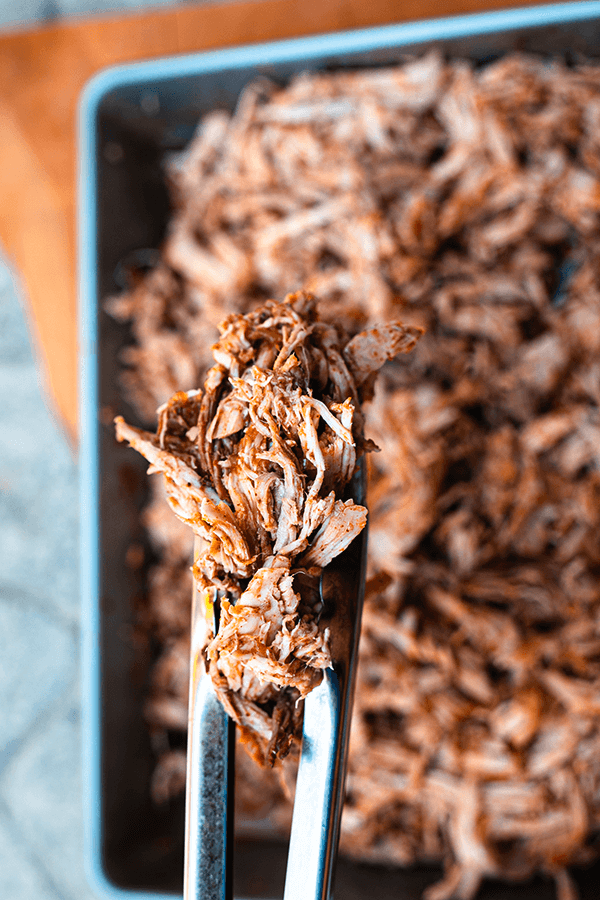
    Mexican pulled pork being shredded with forks in a dark sauce

    Mexican Slow Cooker Pulled Pork

    Easy tender and delicious pork with a Mexican sauce soaked and slow-cooked in an Instant Pot. I love serving this with tortilla, rice, or over mashed potatoes.
    Print Recipe
    Pin Recipe
    Prep Time:10 minsCook Time:5 hrsServings: 6 people

    Equipment

    • Instant Pot or Slow Cooker

    Ingredients

    Pork Marinate

    • 1 kg pork shoulder whole
    • 3 tsp sea salt
    • 1 tbsp paprika
    • 1 tbsp cumin powder
    • 1 tsp black pepper
    • 3 tbsp canola oil

    Mexican Peppers

    • 2 guajillo peppers
    • 3 ancho peppers

    Liquid

    • 1 cup red wine
    • 3 apples peeled and shredded
    • 1 white onion shredded
    • 1 cup orange juice
    • 2 tbsp vinegar
    • 3 bay leaf
    • salt to taste

    Instructions

    • Rinse and pat dry the pork shoulder with a paper towel.
    • Mix the spices and salt together for the pork marinade. Rub the spice all over the meat. Let it sit for 15–30 minutes.
    • Soak the Mexican peppers in hot boiling water. Place a plate or something heavy on top to keep the peppers fully submerged for 10 minutes.
    • Break the top off the peppers and scrape the inside clean. Add all the peppers to a blender with 1/2 cup of water. Blend until smooth.
    • Heat a pan with oil on medium-high heat. Place the pork shoulder in the pan and brown all sides.
    • Set your slow cooker or Instant Pot to the slow cook setting on high for 5 hours. Place the browned pork shoulder inside and add all the liquids and Mexican pepper puree on top.
    • Close the lid and open the valve (if using Instant Pot).
    • After 5 hours, open the lid and use two forks to shred the meat apart. This allows the sides to soak up all the juices. Add salt to taste.

    Frequently Asked Questions

    Can I make this pulled pork without a slow cooker?

    Yes. You can braise it in a Dutch oven in the oven at 300°F (150°C) for 4–5 hours with the lid on. The result is essentially the same — low heat for a long time is what does the work, regardless of the vessel. A Lodge Dutch Oven works beautifully for this.

    What cut of pork is best for pulled pork?

    Pork shoulder (also called pork butt or Boston butt) is the best cut for pulled pork. It has the right fat-to-meat ratio so the meat stays moist during the long cook. Avoid pork loin — it is too lean and will dry out.

    How spicy is this Mexican pulled pork?

    Not spicy at all, as long as you remove the seeds from the guajillo and ancho peppers before blending. Both peppers are mild when deseeded. The sauce is smoky, earthy, and slightly sweet from the apple and orange juice — not hot.

    Can I use an Instant Pot instead of a Crock-Pot?

    Yes. Use the slow cook function on your Instant Pot, set to high for 5 hours with the lid closed and the valve open. Alternatively, use the pressure cook function for 60–75 minutes on high pressure followed by a natural release — the texture will be slightly different but equally tender.

    How do I store and reheat leftover pulled pork?

    Store pulled pork in an airtight container with its juices in the refrigerator for up to 4 days, or freeze for up to 3 months. Reheat gently in a pan on low heat with a splash of water or orange juice to revive the sauce. Avoid microwaving on high as it can dry the meat out.

    What do I do if the sauce is too thin after cooking?

    Remove the pork from the slow cooker after shredding and pour the remaining liquid into a saucepan. Simmer on medium-high heat for 10–15 minutes until the sauce reduces and thickens. Pour it back over the shredded pork before serving.

  • Green Nopales Corn Tortillas

    Green Nopales Corn Tortillas

    If you have ever wanted to make authentic Mexican tortillas at home, this green tortilla recipe with nopales is your new go-to. Vibrant in color and made with just a handful of real ingredients, these tortillas are not only impressive to look at — they taste far better than anything store-bought.

    This post may contain affiliate links. If you purchase through these links, I may earn a small commission at no extra cost to you. Thank you for supporting Love & Harvest!

    Green nopales corn tortillas stacked on a wooden table

    What Are Nopales?

    Nopales are edible cactus paddles from the prickly pear cactus — one of the most iconic ingredients in Mexican cuisine. The texture is thick, slightly slimy, and meaty, with a mild acidic flavor similar to okra and asparagus. They appear in Mexican grocery stores, restaurants, and home kitchens throughout the country. For vegetarians in Mexico, nopales are a common filling alongside beans and legumes. Pair these tortillas with the Homemade Pico de Gallo or use them for Salsa Verde quesadillas.

    Fresh nopal cactus paddles with dried corn cobs on a wooden board

    Ingredients Deep-Dive

    Masa Harina (Corn Flour)

    • Why it matters: Masa is the foundation of tortilla dough. It is made from nixtamalized corn — treated with an alkaline solution. Do not substitute all-purpose flour here; it will not produce the right texture or flavor. The brand I use is White Maseca Corn Flour — widely available and reliably consistent.

    Nopales

    • Why it matters: Blended with water and spinach, nopales create the green liquid that replaces the plain water in traditional tortilla dough. They add a vivid green color, and a mild earthy flavor that does not overpower the corn. Fresh nopales give the best result.

    Spinach

    • Why it matters: Spinach deepens the green color without changing the taste. A small amount goes a long way visually.

    Bag of masa harina corn flour for making tortillas

    Pro Tip 1: Blend the Nopales and Spinach First

    Using a high-speed blender, blend the nopales and spinach with water until completely smooth — no chunks or flecks of green. This smooth green liquid replaces plain water in the masa dough, infusing every tortilla with color.

    Bright green nopales and spinach purée poured into a bowl of masa harina
    Green nopales and spinach tortilla dough in a steel bowl

    Pro Tip 2: Use a Tortilla Press

    The tortilladora is the tortilla press used in every traditional Mexican kitchen. It works only with corn dough — flour dough requires a rolling pin. A cast iron tortilla press is ideal: heavy, durable, and easy to use. The key technique is placing a plastic sheet or wax paper on both sides of the dough ball before pressing — without it, the raw tortilla will stick and tear.

    Pressed green tortilla on a blue plastic sheet in a tortilla press
    Small ball of green tortilla dough on the open tortilla press

    Pro Tip 3: Cooking Time

    Corn tortillas cook very fast. On medium-high heat, cook each side for about 1 minute. You will know it is ready when the surface develops light brown spots and the vivid green deepens to a richer hue. To speed things up, use a large flat pan or a cast iron comal where you can cook 2 to 3 tortillas simultaneously.

    A hand holding a raw green nopales tortilla

    Pro Tip 4: Storage

    Store cooked tortillas in the fridge for up to three days, wrapped in a plastic bag or sealed container. They also freeze very well — just separate each tortilla with a small piece of plastic wrap before freezing so they do not stick together. Tortillas dry out quickly when exposed to air, so keep them covered at all times.

    Green nopales corn tortillas in a cloth-lined basket
    Stack of cooked green nopales tortillas on a wooden board

    What to Make with Your Nopales Tortillas

    Once you have a stack of green tortillas, the possibilities are wide open. Make quesadillas with gouda or oaxaca cheese. Fry them in oil for homemade tortilla chips. Use them for chilaquiles — the beloved Mexican breakfast of fried tortillas simmered in salsa and topped with cheese and crema. Or simply serve them as a side with any Mexican dish and watch them disappear.

    Hands pulling apart a green tortilla quesadilla with melted cheese
    Folded green nopales tortillas on a white plate with nopal paddles and corn

    Frequently Asked Questions

    What is the difference between masa harina and regular corn flour?

    Masa harina is made from corn that has been treated through a process called nixtamalization — soaking dried corn in an alkaline lime solution. This process gives masa its distinct flavor and pliable texture. Regular corn flour or cornmeal is not nixtamalized and will not produce tortillas with the same taste or texture. Use masa harina specifically.

    Can I use store-bought nopales in a jar?

    Fresh nopales give the best color and flavor, but jarred or canned nopales work in a pinch. Rinse them well to remove the brine before blending. The color of the tortillas may be slightly less vibrant, but the flavor is preserved.

    Why does my masa dough dry out so fast?

    Masa dough loses moisture quickly when exposed to air. Keep the dough covered with a damp towel at all times while you are working with it. This is why the recipe instructs you to keep the unused dough covered as you press and cook each tortilla individually.

    Can I make these tortillas gluten-free?

    Yes — masa harina made from 100% corn is naturally gluten-free. Just verify the packaging to ensure it was not processed in a facility that also handles wheat if you have celiac disease or a serious gluten sensitivity.

    How thick should I press the tortillas?

    For tacos and quesadillas, press the tortilla fairly thin — about 2 to 3mm. For wraps or thicker applications like tlayudas, press slightly thicker. A good tortilla should be thin enough to fold without cracking but thick enough to hold fillings without tearing.

    Can I freeze the raw dough?

    Yes. Form the dough into small balls, place them on a baking sheet, and freeze until solid. Transfer to a freezer bag and store for up to 2 months. To use, thaw at room temperature for 20 to 30 minutes, then press and cook as normal.

    Stack of green nopales corn tortillas on a wooden table

    Nopales Tortilla

    Prep Time 15 minutes
    Cook Time 20 minutes
    Total Time 35 minutes
    Course: Bread
    Cuisine: Mexican
    Calories: 120

    Ingredients
      

    green water
    • 1 nopales
    • ¼ cup spinach
    • 3 cups water
    Masa Dough
    • 3 cups masa corn flour
    • 1 tsp sea salt

    Equipment

    • high speed blender

    Method
     

    Green Water
    1. In a high speed blender, add the nopale, spinach, and water. Blend until very smooth and see no clumps or chunks of greens. About 1 minute.
    Masa Dough
    1. In a large mixing bowl, add the flour and salt. Mix well. Make a dwell in the middle and add the green water. Use your hands and start to mix and incorporate the dough until you see no white but all green around. Put a wet towel on top while you get the stove ready. The masa dough dries out very quickly, so keeping it moist is important.
    2. Heat the grill or large pan on medium high heat.
    3. Meanwhile take your tortilla presser. Lay two piece of plastic or wax paper inside.
    4. Roll a small round dough about 1" in diameter and press it between the two plastic sheets. Press hard on the tortilla presser. I like to use my body weight and give it one hard press.
      Release and peel one sheet of plastic off the dough. gently lift the tortilla and place it on your hand. Lift off the other side of the tortilla from the plastic.
      Gently and carefully place the raw tortilla on the grill and cook 1 minute on each side or until it is slighly brown. Repeat
    5. After each tortilla has finished cooking, place the tortilla in between two towels to keep it moist and warm. I recommend to also place it in a container with the towel and tortilla to keep it warm and fresh.
  • Refreshing Homemade Pico de Gallo – Original Mexican Recipe

    Refreshing Homemade Pico de Gallo – Original Mexican Recipe

    Fresh, bright, and ready in 15 minutes — this refreshing homemade pico de gallo is the original Mexican recipe that belongs on every table. With just five simple ingredients and zero cooking required, it is the kind of salsa that makes everything taste better: tacos, grilled meat, eggs, crackers, and anything in between.

    This post may contain affiliate links. If you purchase through these links, I may earn a small commission at no extra cost to you. Thank you for supporting Love & Harvest!

    homemade pico de gallo

    What Makes This Pico de Gallo Authentic

    Homemade pico de gallo is one of the most fundamental salsas in Mexican cuisine. The ingredients are straightforward: ripe roma tomatoes, red onion, cilantro, serrano pepper, lime juice, and sea salt. If you had to pick only three essential ingredients it would be tomato, lime, and onion — these three form the backbone of every authentic version. No cooking, no blending, no shortcuts. Just fresh produce chopped and tossed. Serve it alongside the Nopales Green Tortillas or the Salsa Macha from Veracruz for a full Mexican spread.

    Ingredients Deep-Dive

    Roma Tomatoes

    • Why it matters: Roma tomatoes are the ideal choice because they have thick flesh, low moisture, and fewer seeds than other varieties. This means your pico de gallo stays firm rather than turning watery. Always choose tomatoes that are deep red, firm to the touch, and plump — avoid anything soft or bruised.

    Red Onion

    • Why it matters: Red onion provides a sharp, slightly sweet bite that white or yellow onion does not. It also adds a beautiful purple-pink pop of color. Chop it finely so it distributes evenly through the salsa without overpowering any single bite.

    Cilantro

    • Why it matters: Cilantro is the aromatic backbone of pico de gallo. Use both the leaves and the stems — the stems carry just as much (if not more) flavor as the leaves. Choose bushy, bright green cilantro with thin stems for the freshest taste. Not a fan? Simply omit it — the salsa still works.

    Serrano Pepper

    • Why it matters: Serrano brings clean, grassy heat that is sharper than a jalapeno. Removing the seeds tones down the intensity significantly. If you prefer milder heat, swap it for a jalapeno. If you want more heat, add a second serrano or leave some seeds in.

    Lime Juice and Sea Salt

    • Why it matters: Lime juice is non-negotiable — it brightens all the flavors and acts as a natural preservative. Sea salt makes a noticeable difference over table salt: it has a rounder, cleaner flavor and a light crunch. Always use freshly squeezed lime and a quality sea salt. A lime juicer makes quick work of extracting every drop.

    homemade pico de gallo easy

    Pro Tips for the Best Pico de Gallo

    Pro Tip 1: Everything Must Be Fresh

    Because there is no cooking to mask flavors, freshness is everything here. Pick the best produce available. Touch the tomatoes — they should feel firm and plump with a deep red color. Onion, serrano, and lime should all be firm with no bruising. Cilantro should smell strongly aromatic with a full, bushy appearance.

    Pro Tip 2: Remove the Seeds from the Tomato

    Tomato seeds carry a slight bitterness and add extra liquid. Scoop them out with a spoon, then pat the flesh dry with a paper towel before chopping. This keeps the pico de gallo from becoming watery and keeps every bite clean and firm.

    3 ingredients pico de gallo
    homemade pico de gallo with canned tomatoes

    Pro Tip 3: Use Sea Salt

    Not all salt tastes the same. Table salt is sharp and overly salty. Sea salt has a natural mineral depth and a clean, balanced flavor that makes the salsa taste fresher. It also has a subtle crunch when you bite into it. If you need a reliable sea salt, a fine ground sea salt is easy to control in recipes like this.

    Pro Tip 4: Serve Cold

    Chill the finished pico de gallo in the fridge for at least 15 minutes before serving. Cold temperatures lock in the freshness and make all the flavors more vibrant. Before bringing it to the table, give it one more toss so the lime juice redistributes through the entire salsa.

    Pro Tip 5: Use Both the Stem and Leaves of Cilantro

    The stem of cilantro has concentrated flavor — arguably more than the leaves. Do not discard it. Chop the entire stem and leaf together. This is how it is done in traditional Mexican kitchens, and it makes a difference.

    Pro Tip 6: Serve in a Molcajete

    A molcajete — a Mexican mortar and pestle carved from volcanic stone — makes the most stunning serving vessel for pico de gallo. You do not need it to make the recipe, but serving it in one is the authentic touch that elevates the whole table. You can find the exact one I use on Amazon: Granite Molcajete Grinder 6-Inch. A food processor can chop the ingredients quickly if you are making a large batch, though the texture will be slightly more uniform than hand-chopped.

    homemade pico de gallo without cilantro
    homemade pico de gallo sauce

    What’s in Homemade Pico de Gallo?

    All raw vegetables, no oil: tomatoes, red onion, serrano, cilantro, lime juice and salt. It works for vegans and vegetarians.

    Frequently Asked Questions

    How long does homemade pico de gallo last?

    Stored in a sealed container in the refrigerator, pico de gallo lasts 3 to 4 days. After the first day, it will release more liquid as the salt draws moisture from the tomatoes. Simply drain the excess liquid before serving. The flavor actually deepens slightly on day two.

    Can I make pico de gallo ahead of time?

    Yes, with one adjustment: wait to add the lime juice and salt until 30 minutes before serving. You can chop and mix all the vegetables in advance and refrigerate them, then dress with lime and salt right before serving to keep the texture firm and fresh.

    Can I use canned tomatoes for pico de gallo?

    Yes, though fresh is always preferred. If using canned, choose whole peeled tomatoes, scoop out the seeds, and pat the flesh completely dry before chopping. Canned tomatoes have more moisture, so squeezing them well prevents a watery result.

    What do I eat pico de gallo with?

    Pico de gallo is endlessly versatile. Classic uses: tortilla chips, tacos, burritos, grilled fish or chicken, scrambled eggs, and quesadillas. It also works beautifully spooned over avocado toast, mixed into rice, or served alongside black beans.

    How do I make pico de gallo less spicy?

    Use one jalapeno instead of serrano — jalapenos are noticeably milder. Remove all seeds and white membrane from whichever pepper you use, as that is where most of the heat lives. You can also reduce the amount of pepper by half or leave it out entirely for a completely mild version.

    What is the difference between pico de gallo and salsa?

    Pico de gallo (also called salsa fresca) is chunky and raw — all the ingredients are diced by hand and mixed without cooking or blending. Traditional salsa is often cooked or blended and has a smoother, more liquid consistency. Both are delicious, but pico de gallo is crunchier and fresher in flavor.

    Fresh pico de gallo in a stone molcajete next to warm tortillas

    Homemade Pico de Gallo

    Fresh uncooked salsa with just a few ingredients. With only tomato, onion, cilantro, lime, and salt it is a simple dish that is perfect side to almost everything.
    Prep Time 15 minutes
    Total Time 15 minutes
    Servings: 4 people
    Course: Condiment
    Cuisine: Mexican
    Calories: 30

    Ingredients
      

    • 5 ripe roma tomato
    • ¼ red onion
    • 1 serrano pepper deseeded and chopped
    • 3 cilantro stem with leafs
    • 2 lime juiced
    • 1 tsp sea salt

    Method
     

    1. Wash the tomato with mild soup and rinse. Also give the onion, Serrano pepper, and cilantro a good rinse under running tap water. Dry with towel or paper towel.
    2. Cut the tomato and serrano pepper in half and take out the seed.
    3. Chop the tomato and Serrano pepper into ¼" pieces
    4. Finely chop cilantro and red onion.
    5. In a mixing bowl, put everything together: tomato, onion, Serrano pepper, cilantro, lime and sea salt together. Toss to make sure everything is well coated with lime juice. Serve immediately.

    Notes

    • If you’re not ready to serve right away, chop everything in a bowl and place it in the fridge. When you’re ready to serve, just add the lime juice and salt.
    • Serrano pepper too spicy? You can always replace it with jalapeño peppers to reduce the heat level.
  • Authentic Strawberry and Nutella Mexican Bolis Recipe

    Authentic Strawberry and Nutella Mexican Bolis Recipe

    If you grew up in Mexico or married into a Mexican family, you know bolis. These frozen tubes of creamy, flavoured milk are a summertime ritual — pulled from the freezer at family gatherings, argued over, and eaten before dinner. This recipe comes straight from the hands of a family matriarch who has been making them for decades. Strawberry and Nutella side by side in one batch.

    This post may contain affiliate links. If you purchase through these links, I may earn a small commission at no extra cost to you. Thank you for supporting Love & Harvest!

    mexican bolis recipe

    Planning dinner too? My free PDF has seven easy family dinners for the weeknight table. Send me the free dinners

    What Are Mexican Bolis?

    Bolis are homemade Mexican ice pops frozen inside small plastic bags and tied at the top. Unlike a popsicle on a stick, you bite the corner off the bag and squeeze the frozen treat out as you eat. The base is a creamy milk mixture — dried milk, evaporated milk, and condensed milk — that stays smooth and creamy even fully frozen. They are popular at family gatherings, school events, and weekend markets across Mexico.

    mexican bolis in english

    Ingredients Deep-Dive

    The Triple-Milk Base

    • Why three types of milk: Each milk plays a specific role. Dried milk adds body and richness without adding liquid. Evaporated milk contributes concentrated dairy flavour and a creamy, slightly caramelised note. Condensed milk provides sweetness and a thick, smooth texture that prevents iciness when frozen. Together they create a base that is far creamier than any single-milk version.

    Use Carnation Dried Milk, Carnation Evaporated Milk, and Nestle La Lechera Condensed Milk for the most authentic Mexican flavour profile.

    Strawberry Pulp (Cooked, Not Raw)

    • Why cook the strawberries first: Cooking concentrates the strawberry flavour, breaks down the pectin for a smoother texture after blending, and reduces the water content so the frozen boli does not develop large ice crystals. Raw strawberry puree freezes icier and with a weaker flavour.

    Nesquik Chocolate Milk Powder

    • Why Nesquik for the Nutella version: The Nesquik powder dissolves smoothly into the cold milk base without seizing, giving the chocolate boli a mild, sweet cocoa flavour that complements the Nutella without overpowering it.

    Find it here: Nesquik Chocolate Milk Powder.

    The Boli Bags

    • Why specific bag size: The 8x26cm bags are the traditional size used across Mexico. They give you the right volume per serving and enough room at the top to tie a secure knot. Fill only to 3/4 capacity — the liquid expands slightly as it freezes, and you need room to tie the top without making a mess.

    If you are making bolis in the US, popsicle mold bags are a good alternative if the traditional bags are unavailable.

    The links below are Amazon affiliate links. If you buy through them, I may earn a small commission at no extra cost to you.

    Recommended tools

    Any comparable funnel, strainer and blender work.

    Other Flavour Ideas

    Once you have the base down, the flavour possibilities are unlimited. Some combinations worth trying:

    • Mamey and banana
    • Purple yam and shredded coconut
    • Coconut milk with rice (dairy-free)
    • Mango with sago tapioca
    • Horchata with rice pudding
    • Almond extract with cinnamon

    Frequently Asked Questions

    What is the difference between Mexican bolis and paletas?

    Paletas are Mexican ice pops frozen on a stick, typically made with fruit puree or cream. Bolis are frozen in a plastic bag with no stick — you squeeze the contents up as you eat. Bolis tend to have a creamier, milkier base while paletas can be either fruit or cream-based. Both are beloved, but bolis have a distinctly homemade, family-gathering quality to them.

    How long do bolis take to freeze completely?

    Allow a minimum of 6–8 hours, but overnight is best. The thicker the milk mixture, the longer it takes to freeze solid. Do not rush it — a partially frozen boli is a soggy mess.

    Can I make bolis without popsicle bags?

    Yes — popsicle molds work. Small zip-top bags also work if sealed tightly. The traditional bag format is part of the experience, but the recipe itself works in any freezer-safe container. Silicone ice pop molds will give you a cleaner presentation.

    Can I make dairy-free bolis?

    Yes. Replace the dried milk, evaporated milk, and condensed milk with full-fat coconut milk and coconut condensed milk. The base will be slightly less thick but still creamy and delicious. Coconut milk with mango is a particularly good combination.

    How long do Mexican bolis keep in the freezer?

    Up to 2 months in the freezer. After that, the milk fats can start to separate and the texture becomes less smooth. They are best eaten within the first 2–3 weeks for optimal creaminess.

    Why do my bolis taste icy instead of creamy?

    The most common cause is too much water in the mixture. Make sure your strawberry pulp is fully reduced before adding it to the milk base. Also ensure you are using condensed milk, not regular sweetened milk — the condensed milk’s lower water content is what prevents iciness.

    For more frozen dessert ideas, try the easy blueberry ice cream or homemade strawberry ice cream recipes.

    Frozen Strawberry and Nutella Bolis

    Strawberry and Nutella Frozen Mexican Bolis

    Prep Time 45 minutes
    Servings: 12 bolis (approximately)
    Course: Dessert
    Cuisine: Mexican
    Calories: 280

    Ingredients
      

    • 340g dried milk
    • 2L warm water
    • 1 can evaporated milk
    • 2 can condense milk
    • 4 tbsp Nesquik chocolate milk powder
    • ¼ cup Nutella
    Strawberry Pulp
    • 2.5 cups frozen or fresh strawberries reserve half cup on the side
    • 1 cup sugar
    • 1 tsp vanilla
    • 1 tsp lemon juice
    • 3-5 drops red food colouring optional

    Equipment

    • Basic Food Scale

    Method
     

    Strawberry Pulp
    1. In a pan, add 2 cups of strawberry (reserve ½ cup of strawberries for later), sugar, vanilla, and lemon juice. Bring the pan to a medium boil and reduce the water by half. Approximately 10 minutes.
    2. Let the mixture cool to room temperature. Puree the strawberry mixture in the blender until smooth.
    3. Use a strainer to take out chunks and seed. Reserve the strawberry pulp.
    Bolis Milk Mixture
    1. In a very large plastic bowl, combine the milk powder and warm water. Use a whisk to dissolve the powder into the water.
    2. One can at a time, use the whisk and stir in the evaporated milk and condense milk together in the milk mixture. The. base for the milk mixture is done. After here is where you add in your flavours. Split this mixture into two separate bowls.
    Nutella Bolis
    1. In one bowl of the milk mixture, add the Nutella and Nesquik powder together in the bowl with a whisk. Set aside.
    Strawberry Bolis
    1. In the other bowl, add the strawberry pulp and the milk mixture together with a whisk.
    2. Chop the remaining half cup of fresh or frozen strawberries and stir it into the mixture. Set aside.
    Assembling the Bolis
    1. Place a funnel on top of the bag and pour enough liquid to fill 3/4 of the bag. Remember to stir the liquid before placing it into the bags, for some fillings settle to the bottom.
    2. Tie the top of the bag. Repeat
    3. Place the Bolis in the freezer until completely frozen before eating. Enjoy!

    More Mexican and Frozen Dessert Recipes

    Need dinner ideas for this week? Get my free PDF with seven easy family dinners. Get the free dinners

  • Spicy Corn Dip With Manzano Pepper

    Spicy Corn Dip With Manzano Pepper

    Sweet, crunchy corn kernels coated in a creamy lime-spiked mayonnaise, studded with charred onion and the distinctive fruity heat of Manzano peppers — this dip disappears from the table faster than you can set it down. It is bold, fresh, and takes less than 30 minutes to make with only five ingredients.

    This post may contain affiliate links. If you purchase through these links, I may earn a small commission at no extra cost to you. Thank you for supporting Love & Harvest!

    Spicy Corn Dip with Manzano Pepper Recipe

    It is corn season and there are more ways to eat corn than BBQ corn on the cob with butter. This delicious spicy corn dip is so easy to make it will take you less than 30 minutes to prepare — and it only asks for five ingredients.

    This is a must-make for your next party or family gathering. Anyone who loves spicy food will fall in love with this recipe. After making it, corn just might become your new favourite seasonal vegetable.

    If you love spicy food, try our Easy Hummus Recipe or our Vegetarian Mango Soy Ceviche for more crowd-pleasing dips and sides.

    Ingredients

    Corn

    • Why use fresh seasonal corn: Summer corn is at peak sweetness and starch content. The kernels have a satisfying crunch and natural juiciness that frozen or canned corn cannot replicate. Any variety works — sweet corn, rainbow corn, or the starchy white corn common in Mexico. Whatever is local and fresh is the right choice.

    Manzano Peppers

    • Why Manzano over jalapeño: Manzano peppers have a unique fruity citrus character with a moderate-to-hot heat level — roughly twice as hot as jalapeños. Their black seeds and thick flesh hold up perfectly in a cooked dip. The flavour does not overwhelm the corn; it accents it. If you cannot find Manzano, jalapeño is an excellent substitute.

    White Onion

    • Why cook it first: Raw onion has a sharp, aggressive flavour that competes with the other ingredients. Sautéing the onion in oil first softens its bite, releases its natural sweetness, and creates a gentle fragrance that blends into the dip instead of fighting it.

    Mayonnaise

    • Why mayo works here: Mayonnaise binds all the flavours together with a creamy, slightly tangy base. For a lower-calorie option, swap it for full-fat or low-fat plain yogurt — the result is tangier and lighter but still delicious.

    Lime

    • Why fresh lime: Lime adds brightness and acidity that cuts through the richness of the mayo. For a stronger lime flavour, zest the skin directly into the dip. Bottled lime juice will work in a pinch but lacks the aromatic oils of fresh.

    Why You Will Love This Recipe

    • Easy recipe — cook the corn, cut the kernels off the cob, mix everything together. Done in under 30 minutes.
    • Crowd-pleaser — sweet corn is universally loved. Skip the Manzano peppers for a kid-friendly version.
    • Goes with everything — a great side dish for backyard BBQs, summer parties, and family gatherings. The best potluck food to bring.
    • Low cost — most ingredients are already in your fridge. Only the corn and Manzano peppers require a special trip.

    Frequently Asked Questions

    Can I use frozen or canned corn instead of fresh?

    Yes. Frozen corn works well — thaw it first and pat it dry so it does not water down the dip. Canned corn also works in a pinch; drain and rinse it thoroughly. Neither will have the same natural sweetness or texture as fresh peak-season corn, but both are perfectly acceptable shortcut options.

    How spicy is this dip?

    With Manzano peppers it has a genuine kick — moderate to hot. Manzano peppers are roughly twice as hot as jalapeños. For a milder dip, use only half a pepper, remove all the seeds carefully, or substitute with a small amount of jalapeño. For a non-spicy version, skip the peppers entirely and add a pinch of sweet smoked paprika for colour instead.

    Can I make this dip ahead of time?

    Yes. You can prepare the corn and the sautéed onion and peppers up to a day ahead and store them separately in the refrigerator. Mix everything together with the mayonnaise and lime just before serving for the freshest result. Once fully assembled, it keeps well for up to two days covered in the fridge.

    Can I serve this dip warm or cold?

    Both work. Served warm right after cooking, the dip is comforting and rich. Served cold after an hour in the refrigerator, it is refreshing and bright. For a summer outdoor party, cold is the way to go. For a cosy winter side dish, serve it warm.

    What is a good substitute for Manzano peppers?

    Jalapeño is the closest in texture and heat profile. For something fruitier and hotter, habanero works but use much less — habaneros are three to five times hotter than Manzano. Serrano peppers are also a good middle-ground option: hotter than jalapeño with a crisp, green flavour.

    spicy corn and Manzana Pepper Dip

    Spicy Corn and Manzano Pepper Dip

    Prep Time 15 minutes
    Cook Time 15 minutes
    Total Time 30 minutes
    Servings: 6 people
    Course: Side Dish
    Calories: 170

    Ingredients
      

    • 6 corn or sweet corn
    • 1-2 manzano peppers or jalapeno peppers
    • ¼ white onion
    • ½ cup mayonnaise or yogurt (fat free option)
    • 1 large lime juiced
    • 1 tsp salt to taste
    • black pepper to taste

    Method
     

    1. Wash and tear off the leaf of the corn if it has any. Cook the corn in their hot boiling water or steam it in an Instant Pot.
      Boiling water: Boil the corn for 10 minutes.
      Steam with Instant Pot: 10 minutes.
    2. Meanwhile, sliced the onions in thick slices, and thinly sliced the manzano peppers. In a pan, heat 2 tsp of oil and fry the onion and manzano peppers until soft and fragrance. Place them in a heat proof medium size bowl.
    3. Take out the corn and let it cool until it is ready to be handled. Use a sharp knife and cut the kernel off the corn. Place them in the same bowl with the onion and peppers.
    4. Mix the rest of the ingredient together: mayonnaise, lime juice, salt and pepper. Can be serve hot or cold.
  • BEST cinnamon rolls recipe with Rompope Frosting

    BEST cinnamon rolls recipe with Rompope Frosting

    Every Christmas, these cinnamon rolls become the gravitational centre of the house. Before they are even out of the oven, the whole family is already hovering in the kitchen. The rolls are soft, pull-apart fluffy, layered with Muscovado sugar and Christmas spices — and then slathered with a Rompope and white chocolate frosting that stops people mid-bite and makes them ask, “Wait, what IS that frosting?” Every. Single. Year.

    This post may contain affiliate links. If you purchase through these links, I may earn a small commission at no extra cost to you. Thank you for supporting Love & Harvest!

    If you’re baking for kids or anyone avoiding alcohol, use the non-alcoholic frosting below. These are the kind of rolls that make you feel like everything is right with the world on a cold winter morning.

    Why This Frosting Changes Everything

    Instead of the standard cream cheese frosting, this recipe uses Rompope — a Mexican creamy liquor made with egg yolks, vanilla, milk, sugar, and alcohol. Imagine eggnog from the liquor store. The Rompope is melted on the stovetop with white chocolate and vanilla, then whisked with powdered sugar into a glossy, pourable frosting. It smells amazing, and it’s unlike any cinnamon roll frosting you’ve had before.

    Heads up, this one has alcohol! The frosting is only warmed to melt the chocolate. It isn’t cooked, so it keeps the rompope’s alcohol. Serve these to adults, or use the non-alcoholic version below.

    Non-Alcoholic Frosting

    I haven’t tested this version as many times as the original yet, so start with these amounts and adjust.

    • 1/4 cup heavy cream (instead of the Rompope)
    • 2 oz white chocolate chips
    • 2 tsp alcohol-free vanilla flavouring
    • 1/4 to 1/2 tsp alcohol-free rum flavouring (brands vary a lot in strength, so start small and taste)
    • a pinch of ground cinnamon
    • 1 1/2 cups powdered sugar

    Warm the cream, white chocolate and vanilla on the lowest heat. When the chocolate is almost melted, take it off the heat and whisk until smooth. Whisk in the rum flavouring, cinnamon and powdered sugar. Too thick? Add more cream, 1 teaspoon at a time. Too thin? Add a little more powdered sugar. Check your labels! Regular vanilla and rum extracts are made with alcohol, so look for ones that say alcohol-free.

    These pair beautifully with our Best Triple Chocolate Fudgy Brownies for a complete holiday dessert spread, or serve alongside our Birthday Rainbow Sugar Cookies for a festive table.

    Ingredients

    Muscovado (Mascabado) Sugar

    • Why Muscovado over brown sugar: Muscovado is less refined and retains a high percentage of natural molasses — giving it a deeply rich, complex caramel and toffee flavour that regular brown sugar simply cannot match. Brown sugar is white sugar with molasses added back; Muscovado never had it removed in the first place. In a recipe where sugar is the star, this difference is unmistakable. It also retains moisture, resulting in softer, denser rolls.

    KitchenAid Stand Mixer

    Rompope

    • Why Rompope and not eggnog: Rompope is Mexico’s answer to eggnog — spiced, creamy, and made right here in Puebla since colonial times by the nuns of the Santa Clara Convent. It has a more concentrated, aromatic flavour than commercial eggnog. Outside Mexico, you can find it in Latin specialty stores or online. If unavailable, substitute with store-bought eggnog — the result is still delicious.

    Instant Yeast

    • Why instant yeast, not active dry: Instant yeast does not need to be proofed in warm liquid first — it goes directly into the flour. This makes the process faster and more reliable for home bakers. The dough needs at least 1 hour to double in size; in a cooler kitchen, allow up to 2 hours. A trick: place the covered bowl in the oven with just the oven light on for a warm, draft-free environment.

    Dough Scraper

    White Chocolate

    • Why white chocolate in the frosting: White chocolate adds a creamy, sweet richness that thickens and stabilises the Rompope frosting as it cools. It also amplifies the vanilla notes in the Rompope. Use good-quality white chocolate chips or a chopped white chocolate bar — not white baking chips, which contain less cocoa butter and will not melt as smoothly.

    Tested and Compared

    We tried grocery store cinnamon rolls — dry, with an over-sweet artificial frosting. We tried Cinnabon® rolls: perfect texture, but the frosting was too sweet for us. This recipe gives you light, pull-apart rolls with controlled sweetness and a frosting that is genuinely interesting. The Muscovado filling gives a depth of flavour no regular brown sugar roll can match.

    Love & Harvest is not affiliated with or endorsed by Cinnabon; Cinnabon® is a trademark of its owner.

    A Note on Sugar

    I kept the sweetness where we like it: sweet, but not overwhelming. If you want more filling sweetness, add an extra 1/4 cup Muscovado to the filling as noted in the recipe. At the end of the day, all sugars are nutritionally similar — the difference here is purely in flavour and baking performance. For a balanced diet, save these for celebrations and enjoy every single bite.

    Where to Find Rompope

    In Mexico, the most popular brands are Santa Clara and Holandesa — both available in most grocery stores. The Santa Clara brand has a particularly rich history: it was originally created by the Clarisa Nuns of the Santa Clara Convent right here in Puebla during colonial times. Outside Mexico, check Latin specialty stores, liquor stores, or online retailers. If all else fails, substitute with store-bought eggnog from the holiday section of your grocery store.

    Frequently Asked Questions

    Can I make these cinnamon rolls the night before?

    Yes. After cutting and placing the rolls in the baking dish, cover tightly with plastic wrap and refrigerate overnight instead of letting them do the second rise at room temperature. The next morning, remove from the refrigerator and let them come to room temperature and finish rising for 45–60 minutes before baking. This cold fermentation actually deepens the flavour.

    Why did my dough not rise?

    The most common cause is yeast that has been killed by liquid that was too hot. The warm milk should feel comfortable on your wrist — around 110°F (43°C). Anything hotter will kill the yeast. Also check that your instant yeast is still within its expiry date. If your kitchen is cold (below 70°F), the dough may need up to 2 hours to double in size.

    Can I substitute Rompope with something else?

    Yes. Store-bought eggnog is the closest substitute and works beautifully. Most grocery store eggnog has no alcohol, but check the label. For a frosting without alcohol, use the Non-Alcoholic Frosting above: heavy cream with alcohol-free vanilla and rum flavouring. Regular extracts contain alcohol.

    How do I get perfectly even rolls?

    Use a sharp knife or unflavoured dental floss to cut the rolls. Dental floss gives the cleanest cut — slide it under the log, cross the ends on top, and pull through without compressing the spiral. This keeps the layers intact and gives you bakery-quality rounds every time.

    Can I freeze these cinnamon rolls?

    Yes — both before and after baking. To freeze unbaked rolls, place the cut rounds on a baking sheet, freeze until solid, then transfer to a freezer bag. Bake from frozen at 350°F for 35–40 minutes. To freeze baked rolls, wrap individually without frosting and freeze for up to 2 months. Thaw, warm in the oven, and add frosting fresh.

    Why do my rolls come out dry?

    The most common cause is over-baking. The rolls are done when the tops are just lightly golden — not deep brown. They will continue to cook slightly from residual heat after leaving the oven. The internal temperature should be around 190°F. If the outside looks golden, pull them out — erring on the side of slightly under-baked produces softer, gooier rolls.

    Cinnamon Rolls with Rompope Frosting

    Soft, light cinnamon rolls with a Muscovado sugar filling, slathered with a Rompope and white chocolate frosting. The frosting isn’t cooked, so it contains alcohol; a non-alcoholic option is in the notes. A must for the holidays!
    Prep Time 15 minutes
    Cook Time 25 minutes
    Total Time 1 hour 55 minutes
    Servings: 12 rolls
    Course: Dessert
    Cuisine: American, Mexican
    Calories: 420

    Ingredients
      

    • 4 cups all purpose flour
    • 2 TSP instant yeast
    • 2 TBSP brown sugar
    • ¼ TSP sea salt
    • ¾ cup whole milk slightly warm
    • 3 large eggs room temperature
    • 1 TSP vanilla extract
    • ½ cup butter melted
    Sugar Filling
    • ½ cup mascabado sugar add 1/4 cup if you want more sugar taste
    • 2 TBSP ground cinnamon
    • 1 TSP ground clove
    • ½ cup butter soft
    Rompope Frosting
    • ¼ cup Rompope liquor
    • 2 ounce white chocolate chips
    • 2 TSP vanilla extract
    • 1 ½ cups powdered sugar
    • 1 cup toasted pecans

    Method
     

    Cinnamon Dough
    1. In a stand mixer attach the hook attachment. Add the flour, yeast, brown sugar, and salt. Give it a good stir. While the hook is running in slow, slowly add the milk, eggs, vanilla and butter. Mix for 5 minutes. Cover with film and let it sit for 1 hour or more at a warm area in the house. Let it double or triple in size. If your house is on the colder side, you might need to let it rest for 2 hours. Alternatively you can put the resting dough in the oven with the lights on.
    Sugar Filling
    1. Add the sugar and spice together. Line a 9×13 inch baking dish with parchment paper.
    2. Dust your work surface with some flower and roll the dough out. Punch out the air and roll out a rectangle about 10×16 inches. Spread the soft butter evenly over the dough. Spring the sugar filling evenly and make sure the edges are also sprinkled. Starting at the edge closest to you, roll tightly away from you, and form a long log. At the end, pinch the edges to incorporate into the log. Give it a couple gentle roll so it mends together well. Using a sharp knife, cut 12 -15 rolls and place it in the baking dish. Put a towel on top and let it rest for another 30 minutes.
    3. Preheat oven to 350F. Take out the towel and bake for 25-30 minutes, until you see the top is slightly golden brown (not too much!).
    4. Meanwhile make the frosting by using a pot in the lowest heat setting, whisk together the Rompope, white chocolate, and vanilla. When you see the chocolate has almost fully melted, take it off the heat and whisk wildly until it is all melted. Add in the powder sugar.
    5. Spread the frosting on the warm rolls and garnish with pecan nuts

    Notes

    Heads up, this one has alcohol! The frosting is only warmed to melt the chocolate. It isn’t cooked, so it keeps the rompope’s alcohol. Serve these to adults, or use the non-alcoholic frosting.
    Non-Alcoholic Frosting: I haven’t tested this version as many times as the original yet, so start with these amounts and adjust. Swap the 1/4 cup Rompope for 1/4 cup heavy cream and the 2 tsp vanilla extract for 2 tsp alcohol-free vanilla flavouring, then add 1/4 to 1/2 tsp alcohol-free rum flavouring (brands vary a lot in strength, so start small and taste) and a pinch of ground cinnamon. Keep the 2 oz white chocolate and 1 1/2 cups powdered sugar. Same method. Too thick? Add more cream, 1 teaspoon at a time. Regular vanilla and rum extracts contain alcohol, so check your labels.