Category: mexican food recipes

Mexican Food Folder

  • Ground Beef Chili with Chorizo (Stovetop)

    Ground Beef Chili with Chorizo (Stovetop)

    This stovetop ground beef chili is thick and beefy, with Mexican chorizo, kidney beans and finely diced vegetables simmered uncovered until rich. Brown the meat to 160°F, simmer 35–50 minutes, then finish with sour cream and cheddar — in a bowl, over buttered pasta or on hot dogs.

    Jump to Recipe

    This post may contain affiliate links. As an Amazon Associate I earn from qualifying purchases.

    When the weather starts getting cooler and winter is just around the corner, there is nothing quite like a big pot of homemade chili simmering on the stove. This ground beef chili is thick, packed with flavour, and full of beef, chorizo and vegetables cooked right into the pot. To make it extra creamy, we love adding a generous spoonful of sour cream when serving!

    In our family, colder months usually mean more beef on the table. This beefy chili is one of our favourite ways to enjoy that — and everyone can eat it their own way. We have it straight from a bowl, spoon it over buttered pasta, or pile it onto hot dogs with extra cheddar cheese. The hot dog version is especially popular with the kids!

    I make this recipe at least twice a month, and somehow we keep finding new ways to serve it. Prefer a pressure-cooker version? Try my Instant Pot easy chili — this one stays on the stovetop for a thicker, longer simmer.

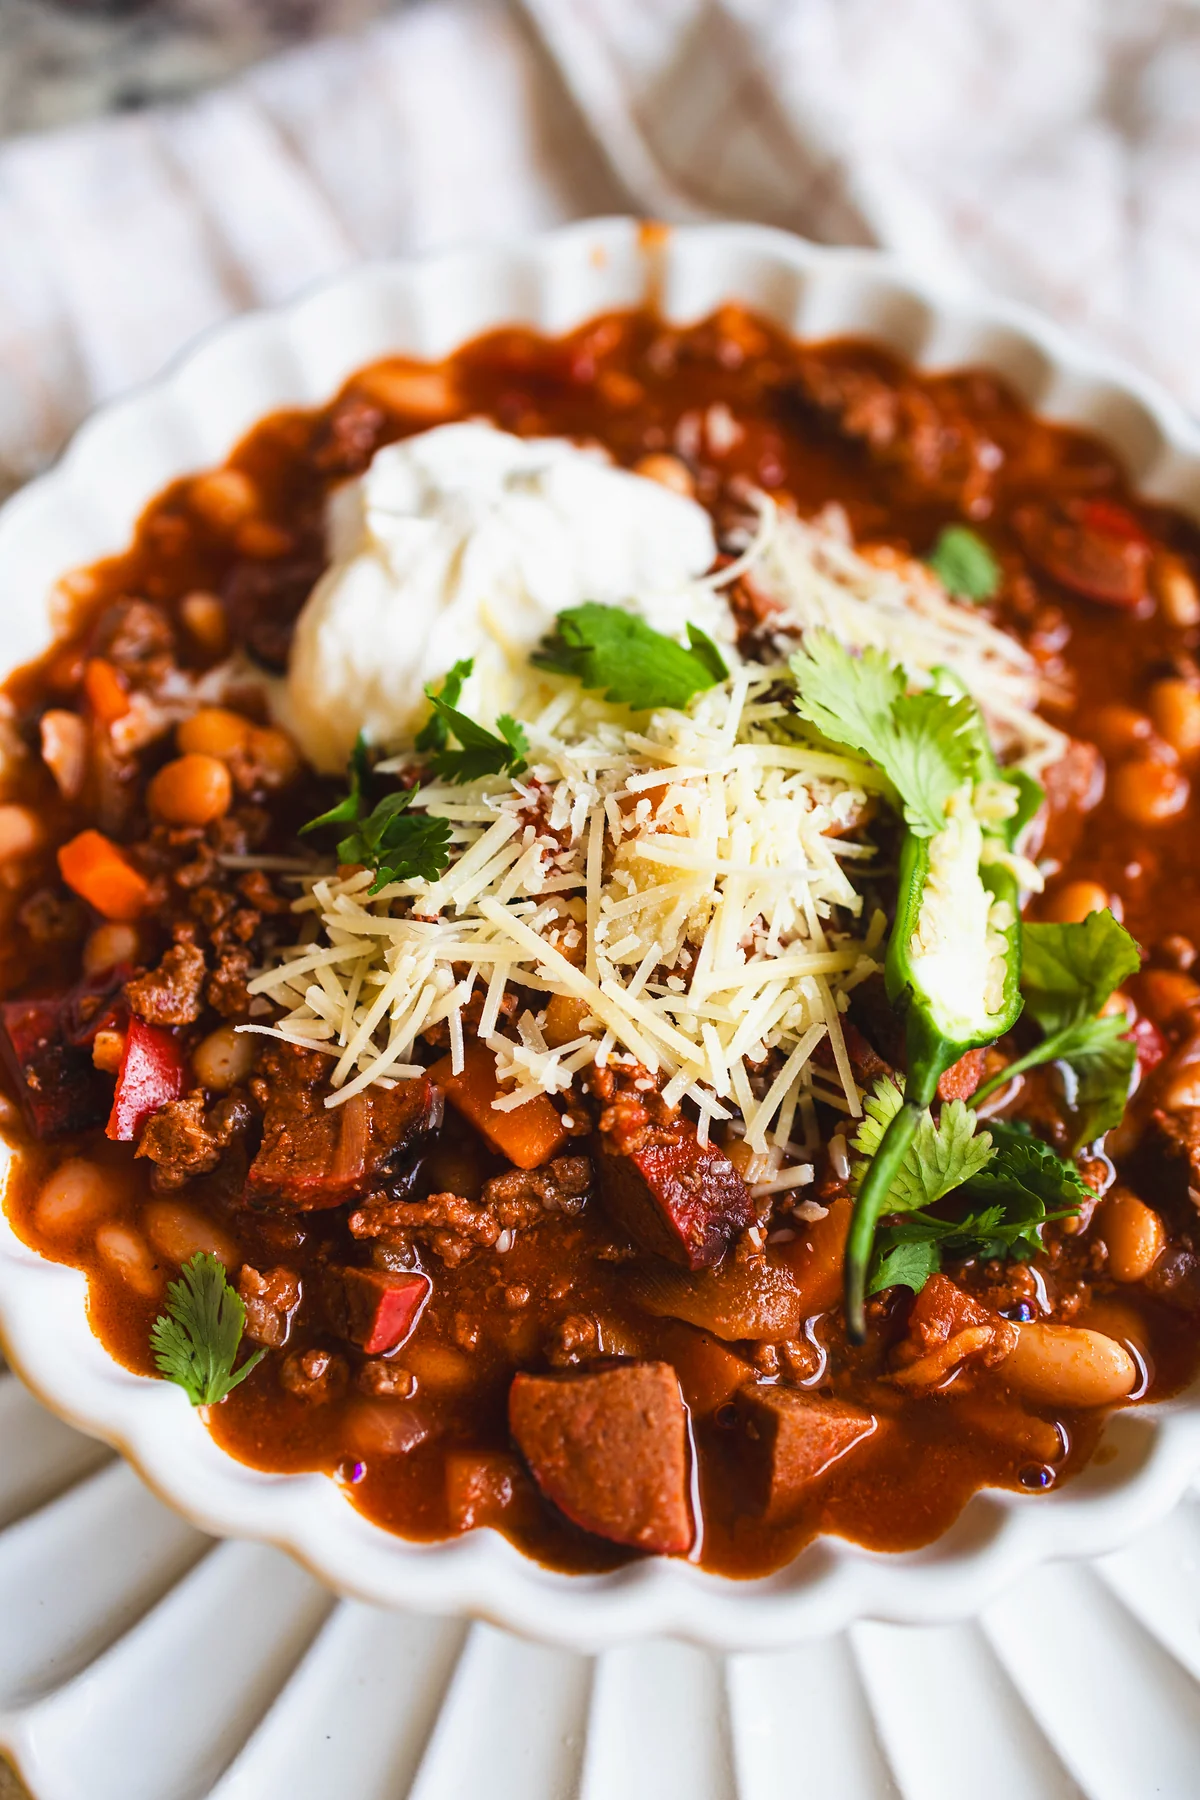
    Bowl of thick ground beef chili with beans, carrots and chorizo, topped with sour cream and shredded cheese.

    Want a week of dinners planned for you? Get my free dinners

    Why we love this ground beef chili

    The combination of ground beef and Mexican chorizo gives the chili a rich, savoury taste, while the spices add just enough warmth without making it overwhelming. This is not a thin, watery chili — it is a substantial, beefy meal that feels especially satisfying when the weather gets chilly.

    One of my favourite things about this recipe is how many vegetables go into the pot. Finely diced onion, red pepper, carrots and celery soften into the sauce, so they become part of every spoonful. As a parent, I appreciate finding ways to make vegetables a natural part of our family dinners without turning every meal into a negotiation.

    I also love that everyone can customize their bowl with sour cream, cheddar, or their favourite way of serving it. That little bit of choice makes dinner more fun for the kids.

    Ingredients you will need

    Everyday ingredients build a deeply savoury pot: ground beef for the base, Mexican chorizo for seasoning and richness, then vegetables, beans, tomatoes and spices.

    • Ground beef: 1 kg (about 2.2 lb).
    • Mexican chorizo: 250 g (about 9 oz), casings removed if needed.
    • Vegetables: 1 large onion, 1 red bell pepper, 2 carrots and 2 celery stalks, all diced (carrots and celery finely), plus 3 cloves garlic, minced.
    • Tomato paste, chopped tomatoes, maple syrup, kidney beans and beef broth to round out the pot.
    • Seasoning: chili powder, cumin, smoked paprika, bay leaves, oregano, black pepper and salt to taste.
    • For serving: sour cream, shredded cheddar, and optional buttered pasta or hot dogs and buns.

    A little note about the spice: we like enough seasoning for a lovely warmth without making it overwhelming for the kids. Chili powders and chorizo vary in heat, so start moderate and adjust.

    Recommended tools

    Equipment

    • Large heavy-bottomed pot or Dutch oven
    • Wooden spoon
    • Instant-read meat thermometer (for 160°F / 71°C on ground meat)
    • Measuring cups and spoons

    How to make stovetop ground beef chili

    Step 1: Brown the chorizo. Heat a large, heavy-bottomed pot over medium heat. Add the chorizo and cook until browned, breaking it into small pieces with a wooden spoon. The chorizo releases flavourful fat that helps build the base of the chili.

    Step 2: Cook the ground beef. Add the ground beef. Break it apart and cook until browned and no longer pink. Check with an instant-read thermometer that the meat reaches 160°F (71°C) — the USDA safe minimum for ground meats. If there is excessive fat, carefully spoon some out, leaving enough behind to flavour the vegetables.

    Step 3: Add the vegetables. If the pot looks dry after browning the meats, add up to 2 tablespoons olive oil. Stir in the diced onion, red bell pepper, carrots and celery. Cook about 5–8 minutes, stirring occasionally, until they begin to soften. Add the minced garlic and cook another minute. This is one of my favourite parts — the carrots add a subtle sweetness, while the onion, pepper and celery build layers of flavour.

    Step 4: Add the tomato paste and spices. Stir in the tomato paste, chili powder, cumin, smoked paprika, oregano and black pepper. Cook 1–2 minutes, stirring so the spices coat the meat and vegetables.

    Step 5: Add the tomatoes, beans and broth. Pour in the chopped tomatoes, maple syrup and beef broth, then add the drained kidney beans and bay leaves. Stir and bring to a gentle simmer.

    Step 6: Let the chili simmer. Reduce the heat to low and simmer uncovered for about 35–50 minutes, stirring occasionally, until thick. If it becomes thicker than you like, add a small splash of broth or water. Taste and adjust salt and spices. Remove the bay leaves before serving.

    Close-up of ground beef chili showing beans, diced carrots, red pepper and chorizo under sour cream and shredded cheese.

    Step 7: Serve with your favourite toppings. Ladle into bowls with a generous spoonful of sour cream and shredded cheddar. For a little extra comfort, spoon it over buttered pasta or onto a hot dog with plenty of cheese.

    Overhead view of a bowl of ground beef chili with sour cream and shredded cheese on a granite counter.

    Ways to serve this chili

    Although we usually think of chili as dinner, a big pot makes family meals more flexible. Some days we enjoy it just as it is, with sour cream melting into the warm sauce. Other times we spoon it over pasta tossed with butter. And then there is the hot dog version — chili spooned over a hot dog and finished with extra cheddar — which is especially handy when everyone wants something familiar.

    The chili also works well for meal prep. Make a big batch, refrigerate leftovers promptly, and reheat individual portions for quick lunches or dinners during the week.

    How to store homemade ground beef chili

    White bowl of ground beef chili topped with sour cream and shredded cheese on a striped kitchen towel.

    Divide the chili into shallow containers about 2 inches (5 cm) deep or less so it cools quickly — don’t leave a full pot sitting out on the stove. Refrigerate within 2 hours of cooking (1 hour if the room is above 90°F / 32°C). Enjoy refrigerated leftovers within 3–4 days, or freeze in meal-sized portions for 2–3 months for best quality. Thaw overnight in the fridge, or reheat from frozen until steaming hot.

    Reheat on the stovetop over medium-low heat, stirring occasionally, until it reaches 165°F (74°C). You can also reheat individual portions in the microwave: cover, stir halfway, let stand about 1 minute, and check that several spots reach 165°F (74°C). Add sour cream and cheddar after reheating rather than freezing them in the chili.

    Tips

    • 160°F for ground meat (beef and chorizo). Don’t rely on colour alone — use an instant-read thermometer on the crumbled meat (USDA safe minimum for ground meats). Brown the meats through before adding tomatoes and broth so you can probe the crumbles, not the liquid.
    • Uncovered simmer is what thickens this chili; keep an eye on the bottom of the pot so it does not stick.
    • Spice level: start moderate; chili powder and chorizo heat levels vary.
    • Prefer Instant Pot? See my Instant Pot easy chili recipe for a pressure-cooker version.

    Other recipes you may like

    It is easy to make, full of flavour, and the kind of family dinner you will find yourself returning to again and again.

    Need more weeknight ideas? Grab my free dinners

    Overhead view of ground beef chili with chorizo and beans topped with sour cream, shredded cheese and cilantro.

    Ground Beef Chili with Chorizo

    Thick stovetop chili with ground beef, Mexican chorizo, kidney beans and finely diced vegetables. Brown the meat to 160°F, simmer uncovered until thick, then finish with sour cream and cheddar.
    Prep Time 20 minutes
    Cook Time 1 hour 10 minutes
    Total Time 1 hour 30 minutes
    Servings: 8 servings
    Course: Main Course
    Cuisine: Mexican

    Ingredients
      

    For the chili
    • 1 kg ground beef about 2.2 lb
    • 250 g Mexican chorizo sausage casings removed if needed; about 9 oz
    • 1 large onion diced
    • 3 cloves garlic minced
    • 1 red bell pepper diced
    • 2 carrots finely diced
    • 2 stalks celery finely diced
    • 2 tbsp tomato paste
    • 1 can chopped tomatoes (about 14.5 oz / 400 g), undrained
    • 1 tbsp maple syrup
    • 2 cans (about 400 g each) kidney beans drained and rinsed
    • 1 cup beef broth plus more if needed
    • 2 tbsp olive oil if needed
    For the seasoning
    • 2 tbsp chili powder adjusted to taste
    • 3 tsp ground cumin
    • 2 tsp smoked paprika
    • 3 bay leaves
    • 1 tsp dried oregano
    • ½ tsp ground black pepper
    • salt to taste
    For serving
    • sour cream
    • shredded cheddar cheese
    • buttered cooked pasta optional
    • hot dogs and buns optional

    Equipment

    • Large heavy-bottomed pot or Dutch oven
    • Wooden spoon
    • Instant-read meat thermometer for 160°F / 71°C on ground meat
    • Measuring cups and spoons

    Method
     

    1. Heat a large, heavy-bottomed pot over medium heat. Add the chorizo and cook until browned, breaking it into small pieces with a wooden spoon. The chorizo releases flavourful fat that builds the base of the chili.
    2. Add the ground beef. Break it apart and cook until browned and no longer pink. Check with an instant-read thermometer that the meat reaches 160°F (71°C) (USDA safe minimum for ground meats). If there is excessive fat, spoon some out, leaving enough to flavour the vegetables.
    3. If the pot looks dry after browning the meats, add up to 2 tablespoons olive oil. Stir in the diced onion, red bell pepper, carrots and celery. Cook 5–8 minutes, stirring occasionally, until the vegetables begin to soften. Add the minced garlic and cook 1 minute more.
    4. Stir in the tomato paste, chili powder, cumin, smoked paprika, oregano and black pepper. Cook 1–2 minutes, stirring so the spices coat the meat and vegetables.
    5. Pour in the chopped tomatoes, maple syrup and beef broth, then add the drained kidney beans and bay leaves. Stir and bring to a gentle simmer.
    6. Reduce heat to low and simmer uncovered 35–50 minutes, stirring occasionally, until thick. Add a splash of broth or water if it gets thicker than you like. Taste and adjust salt and spices. Remove bay leaves before serving.
      Close-up of ground beef chili showing beans, diced carrots, red pepper and chorizo under sour cream and shredded cheese.
    7. Ladle into bowls and finish with sour cream and shredded cheddar. Or spoon over buttered pasta, or pile onto hot dogs with extra cheese.
      Overhead view of a bowl of ground beef chili with sour cream and shredded cheese on a granite counter.

    Notes

    Chili powders and chorizo vary in heat — start moderate and adjust. This recipe uses a mild US/Canadian chili powder blend (typically ground mild chile peppers with cumin, garlic and oregano) — not pure cayenne. UK/AU readers: if your “chilli powder” is a hot pure ground chilli, do not use a full 2 tablespoons one-for-one — start with far less, taste, and build (untested substitution; adjust carefully). Mexican chorizo here typically means fresh/raw (uncured) pork chorizo that crumbles when browned — not cured Spanish-style slicing chorizo; remove casings if needed. Confirm brand/heat with your package. Refrigerate leftovers within 2 hours of cooking (1 hour if the room is above 90°F / 32°C); use within 3–4 days, or freeze 2–3 months for best quality. Reheat to 165°F (74°C). In the microwave, cover, stir halfway, let stand about 1 minute, then check several spots reach 165°F (74°C).
  • Easy Mexican Green Rice

    Easy Mexican Green Rice

    Mexican green rice (arroz verde) is long-grain rice cooked in a blended sauce of cilantro, jalapeño, garlic, onion, lime and broth until fluffy and fragrant. Blend the sauce, simmer covered for 20 minutes, then rest 10 minutes before fluffing. Ready in about 40 minutes.

    Jump to Recipe

    This post may contain affiliate links. As an Amazon Associate I earn from qualifying purchases.

    You have heard of Mexican red rice, but have you ever heard of Mexican green rice? Probably not! This is a recipe I put together after gathering inspiration from the ingredients and flavours I came across at a local mercado. I took the same idea behind traditional Mexican red rice, but instead of tomatoes I went with fresh herbs, garlic, lime and a little jalapeño.

    The cilantro turns the rice that bright green colour, the lime keeps it fresh, and the jalapeño brings just enough warmth to keep every bite interesting.

    In our family we love this Mexican green rice alongside just about anything: meat, chicken, seafood, even a vegetarian plate. One of our absolute favourite combinations is serving it with Mexican fire-roasted chicken. Honestly, though, there are so many other delicious ways to eat it.

    The best part? It is super easy. You blend the green sauce, cook the rice in it, and let everything steam until fluffy. A simple side that makes an ordinary dinner feel a little more special!

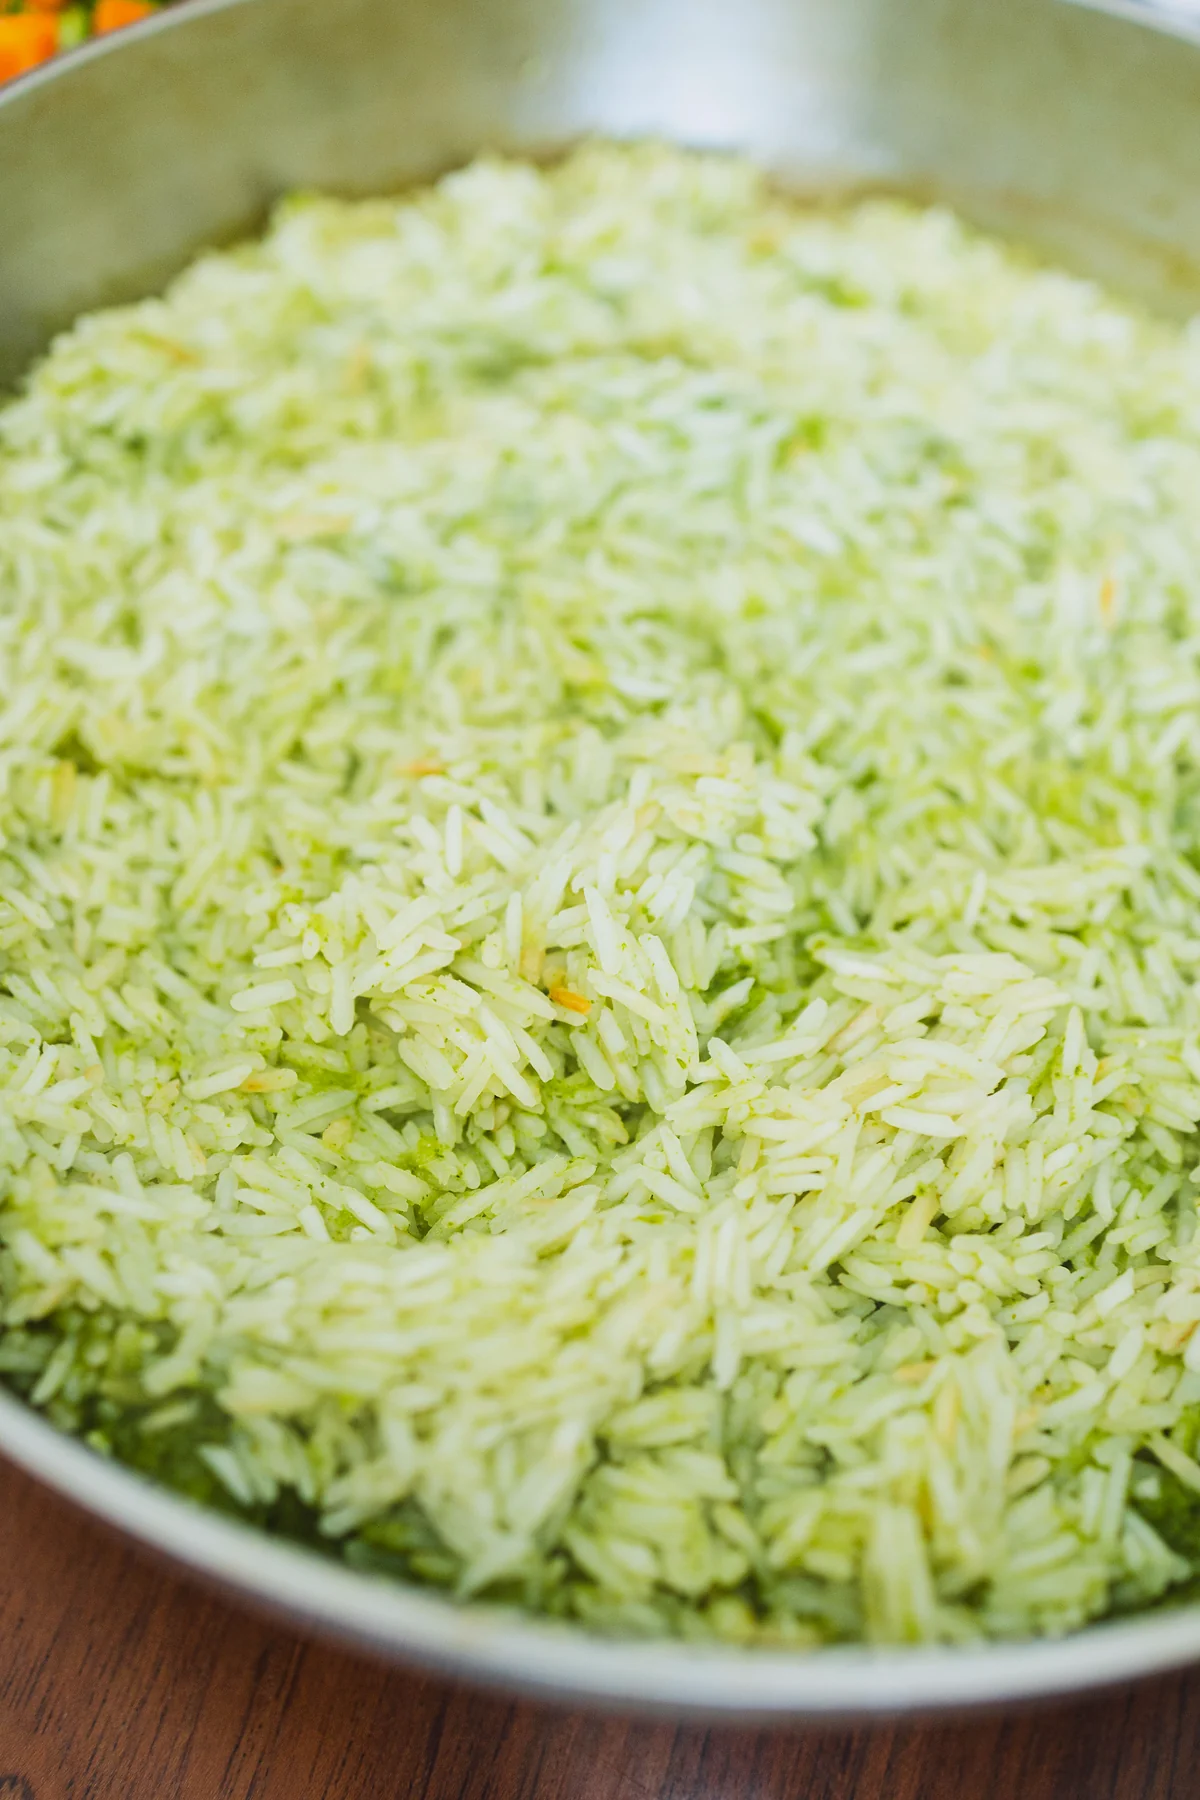
    Fluffy Mexican green rice (arroz verde) filling a stainless steel skillet on a wooden table.

    Want a week of dinners planned for you? Get my free dinners

    Why we love this Mexican green rice

    There is something fun about taking a familiar dish and giving it a completely new twist. We all know Mexican red rice. This green version brings something different to the table.

    Instead of tomatoes for colour and flavour, this recipe uses fresh cilantro, jalapeño, garlic, onion and lime. Everything gets blended into a green sauce that the rice soaks up as it cooks. You get herby rice with a little citrus, and it tastes as good as it looks.

    I also love how simple the cooking is. Just like red rice, you cook the grains in a flavourful liquid instead of plain water. Here that liquid is our homemade green sauce, so all those fresh ingredients go straight into the rice.

    And can we talk about the colour? It looks so good next to golden roasted chicken, grilled meat or a pile of roasted vegetables!

    Sometimes we want a simple side next to our protein. Other times we build a whole meal around a few different flavours and textures. This rice works for both.

    Ingredients you’ll need

    You only need a handful of simple ingredients. Most of the flavour comes from blending fresh herbs and aromatics into the green sauce.

    • Garlic, onion and jalapeño: the base of the sauce. Seed the jalapeño for a milder pot, or leave the seeds in if you like a little extra heat!
    • Fresh cilantro: a whole bunch, with a few leaves saved for garnish. This is what turns the rice green.
    • Lime juice: juice of 1 small lime for that citrusy kick.
    • Low-sodium chicken broth: 2 cups. Water also works.
    • Ground cumin, salt and black pepper.
    • White basmati or jasmine rice: 1 cup. I like these because they stay fluffy with the green sauce. Stick to one type and follow the method so the grains do not go mushy.

    Want it spicier? Leave the jalapeño seeds in. Serving kids or anyone sensitive to spice? Take the seeds and membranes out for a milder flavour.

    Recommended tools

    How to make easy Mexican green rice

    Step 1: Blend the green sauce. Add the garlic, onion, jalapeño, cilantro, lime juice, chicken broth, cumin, salt and black pepper to a high-powered blender or food processor. Blend until completely smooth. It should look bright green and smell wonderfully fresh.

    This green sauce is the heart of the recipe, so blend it well before you move on.

    Step 2: Toast the rice, then add the green sauce. Do not rinse the rice. Place a medium pot over medium heat. Add the dry rice and toast, stirring, until the grains look lightly browned. Then pour in the green sauce, stir gently so the grains sit evenly in the liquid, and bring it to a simmer.

    White rice simmering in a bright green cilantro sauce in a stainless steel pan on the stove.

    Step 3: Cover and cook. Once it is simmering, reduce the heat to low and immediately cover with a tight-fitting lid. Cook for 20 minutes without lifting the lid. Keeping it covered lets the rice absorb the liquid and cook evenly.

    Close-up of Mexican green rice bubbling in green herb sauce on the stovetop.

    Step 4: Let the rice steam. After 20 minutes, take the pot off the heat, but keep the lid on. Do not open it just yet! Let it rest and steam for another 10 minutes. That resting time finishes the grains and gives you that fluffy texture.

    Step 5: Fluff and serve. Remove the lid and gently fluff the rice with a fork. Garnish with extra cilantro leaves or a few jalapeño slices if you like a little kick. Serve warm.

    Close-up of fluffy long-grain Mexican green rice showing herb flecks.

    And that’s it! TA-DA, you got yourself a pot of fluffy Mexican green rice.

    Tips and common mistakes

    • Do not rinse the rice. Use it dry straight from the bag or canister.
    • Toast until lightly browned. Dry-toast the rice in the pot over medium heat before you add the green sauce — that light colour on the grains is what you want.
    • Do not lift the lid during the 20 minutes. Steam is doing the work. Peeking lets it out.
    • Use a tight-fitting lid. If yours is loose, the liquid evaporates too fast and the rice stays underdone.
    • Rest the full 10 minutes. I know it is hard to wait. That rest is what keeps the grains fluffy instead of wet.
    • Stick to basmati or jasmine. Mixing rice types or swapping in a short-grain rice changes the liquid ratio and can turn mushy.
    • Taste the sauce before it hits the pot. Salt levels vary by broth brand. Adjust before you pour.

    How to store homemade Mexican green rice

    A skillet of Mexican green rice on a wooden table next to a garden salad and broccoli.

    One of the best things about making rice at home is having leftovers ready for another meal. Cooked rice does need careful storage.

    • Refrigerator: transfer leftovers into shallow containers and refrigerate within 2 hours (sooner is better for rice; aim for within 1 hour). Keep at 40°F (4°C) or below. As a cautious food-safety guideline for cooked rice, use it within 24 hours.
    • Freezer: divide into individual portions and freeze promptly in airtight containers. For best texture, use within 1 to 2 months.
    • Reheating: reheat until steaming hot throughout, ideally 165°F (74°C). Add a small splash of water or broth, and avoid reheating the same portion more than once.
    • A helpful tip: never leave cooked rice sitting at room temperature for several hours. Rice can contain spores of Bacillus cereus, which can survive cooking and produce toxins if the rice is stored improperly.

    FAQ

    What is Mexican green rice (arroz verde)?

    It is rice cooked in a blended green sauce, usually cilantro with onion, garlic and green chile, instead of the tomato base used for Mexican red rice. This version uses cilantro, jalapeño, garlic, onion, lime and broth.

    Does this green rice use spinach?

    This recipe’s colour comes from cilantro (and jalapeño), not spinach.

    Is Mexican green rice spicy?

    It depends on the jalapeño. Seeded, it stays mild with a little warmth. Leave the seeds in for more heat, or take them out when you are cooking for kids or anyone sensitive to spice.

    Can I use water instead of broth?

    Yes. Broth adds more flavour; water still works.

    How do I keep the rice fluffy, not mushy?

    Do not rinse the rice. Toast the dry grains until lightly browned, then add the green sauce. Use one type of long-grain rice (basmati or jasmine — both work), keep the lid on for the full 20 minutes, then rest 10 minutes before fluffing with a fork.

    How long do leftovers keep?

    Refrigerate promptly and, as a cautious guideline for cooked rice, use within 24 hours. Freeze portions for 1 to 2 months. Always reheat until steaming hot.

    More recipes you’ll love

    Of course, you do not need a special main dish. This rice is just as good next to grilled vegetables, sautéed mushrooms or whatever protein you already have going.

    That is what makes this Mexican green rice so special to us. Familiar ingredients, a straightforward method, and a pot of something colourful and full of flavour.

    So the next time you are planning dinner, skip the usual rice for a change and give this green version a try. You might just discover a new family favourite!

    Get my free dinners

    Mexican green rice in a skillet.

    Easy Mexican Green Rice

    White rice simmered in a blended cilantro, jalapeño, garlic, onion, lime and broth sauce, a fresh green take on Mexican rice (arroz verde).
    Prep Time 10 minutes
    Cook Time 20 minutes
    Rest 10 minutes
    Total Time 40 minutes
    Servings: 4 servings
    Course: Side Dish
    Cuisine: Mexican

    Ingredients
      

    • 3 cloves garlic
    • ½ white or yellow onion roughly chopped
    • 1 jalapeño seeded (leave seeds for more heat)
    • 1 bunch fresh cilantro reserve a few leaves for garnish
    • 1 small lime juiced
    • 2 cups low-sodium chicken broth or water
    • ½ tsp ground cumin
    • ½ tsp salt
    • freshly ground black pepper to taste
    • 1 cup white basmati or jasmine rice

    Equipment

    • High-speed blender or food processor any comparable blender works
    • Medium pot with a tight-fitting lid
    • Measuring cups and spoons
    • Fork for fluffing

    Method
     

    1. Add the garlic, onion, jalapeño, cilantro, lime juice, chicken broth, cumin, salt and black pepper to a high-powered blender or food processor. Blend until completely smooth and vibrant green.
    2. Do not rinse the rice. Place a medium pot over medium heat. Add the dry rice and toast, stirring, until the grains look lightly browned. Pour in the green sauce, stir gently, and bring to a simmer.
    3. Reduce heat to low, immediately cover with a tight-fitting lid, and cook for 20 minutes without lifting the lid.
    4. Remove from heat and keep covered. Let the rice rest and steam for 10 minutes.
    5. Fluff with a fork. Garnish with cilantro or jalapeño slices. Serve warm.
      Fluffy Mexican green rice (arroz verde) filling a stainless steel skillet on a wooden table.

    Notes

    For milder rice, remove jalapeño seeds and membranes. For more heat, leave them in. Water can replace broth. Store leftovers promptly in the fridge and reheat until steaming hot (see post storage section).
  • Mexican Corn Cake with Cream Cheese

    Mexican Corn Cake with Cream Cheese

    If you’ve ever tasted Pastel de Elote, you know it’s more than just a cake—it’s a story baked into every slice. Sweet, moist, and rich with the flavor of fresh corn, this 8-ingredient Mexican Corn Cake with Cream Cheese is one of those recipes that will transport you straight to a Mexican kitchen. Whether you serve it warm at a Sunday gathering or packed for a picnic, it never fails to impress.

    This post may contain affiliate links. If you purchase through these links, I may earn a small commission at no extra cost to you. Thank you for supporting Love & Harvest!

    Mexican corn cake sliced on a wooden board

    This easy corn cake recipe uses just 8 ingredients. Also known as pastel de elote, it’s made with fresh corn, eggs, condensed milk, vanilla extract, cream cheese, flour, baking powder, and a splash of milk. No mixer needed — just a blender.

    For a little twist, I added cream cheese to my version. It’s not traditional — the original recipe does not include it — but it gives the cake a richer flavour and smoother texture. Consider it my “jazzed up” pastel de elote.

    Mexican corn cake batter being poured into a pan

    Pastel de Elote: Mexico’s Beloved Corn Cake

    Pastel de Elote is more than a dessert — it’s a piece of Mexican culinary history. This cake beautifully blends indigenous corn traditions with Spanish colonial influence, resulting in something truly unique: semi-sweet, moist, and unlike any other cake you’ve tried.

    Fun Facts About Corn in Mexico

    In Mexico, there are more ways to prepare corn than kernels on a cob. That’s no surprise considering the country is the birthplace of maize, believed to have been domesticated in Mesoamerica thousands of years ago.

    • In Mayan mythology, people were said to be created from corn.

    • The region of Oaxaca still has one of the world’s highest diversities of native corn species.

    • Corn is the base of much of the Mexican diet — including desserts like Pastel de Elote.

    This corn cake is also an example of the historic merging of Spanish colonial and indigenous cuisines. Corn was plentiful, and villagers often gifted it to monks and nuns, who had access to sugar and eggs. It’s even suspected that a nun may have invented Pastel de Elote, using ingredients readily available at the time.

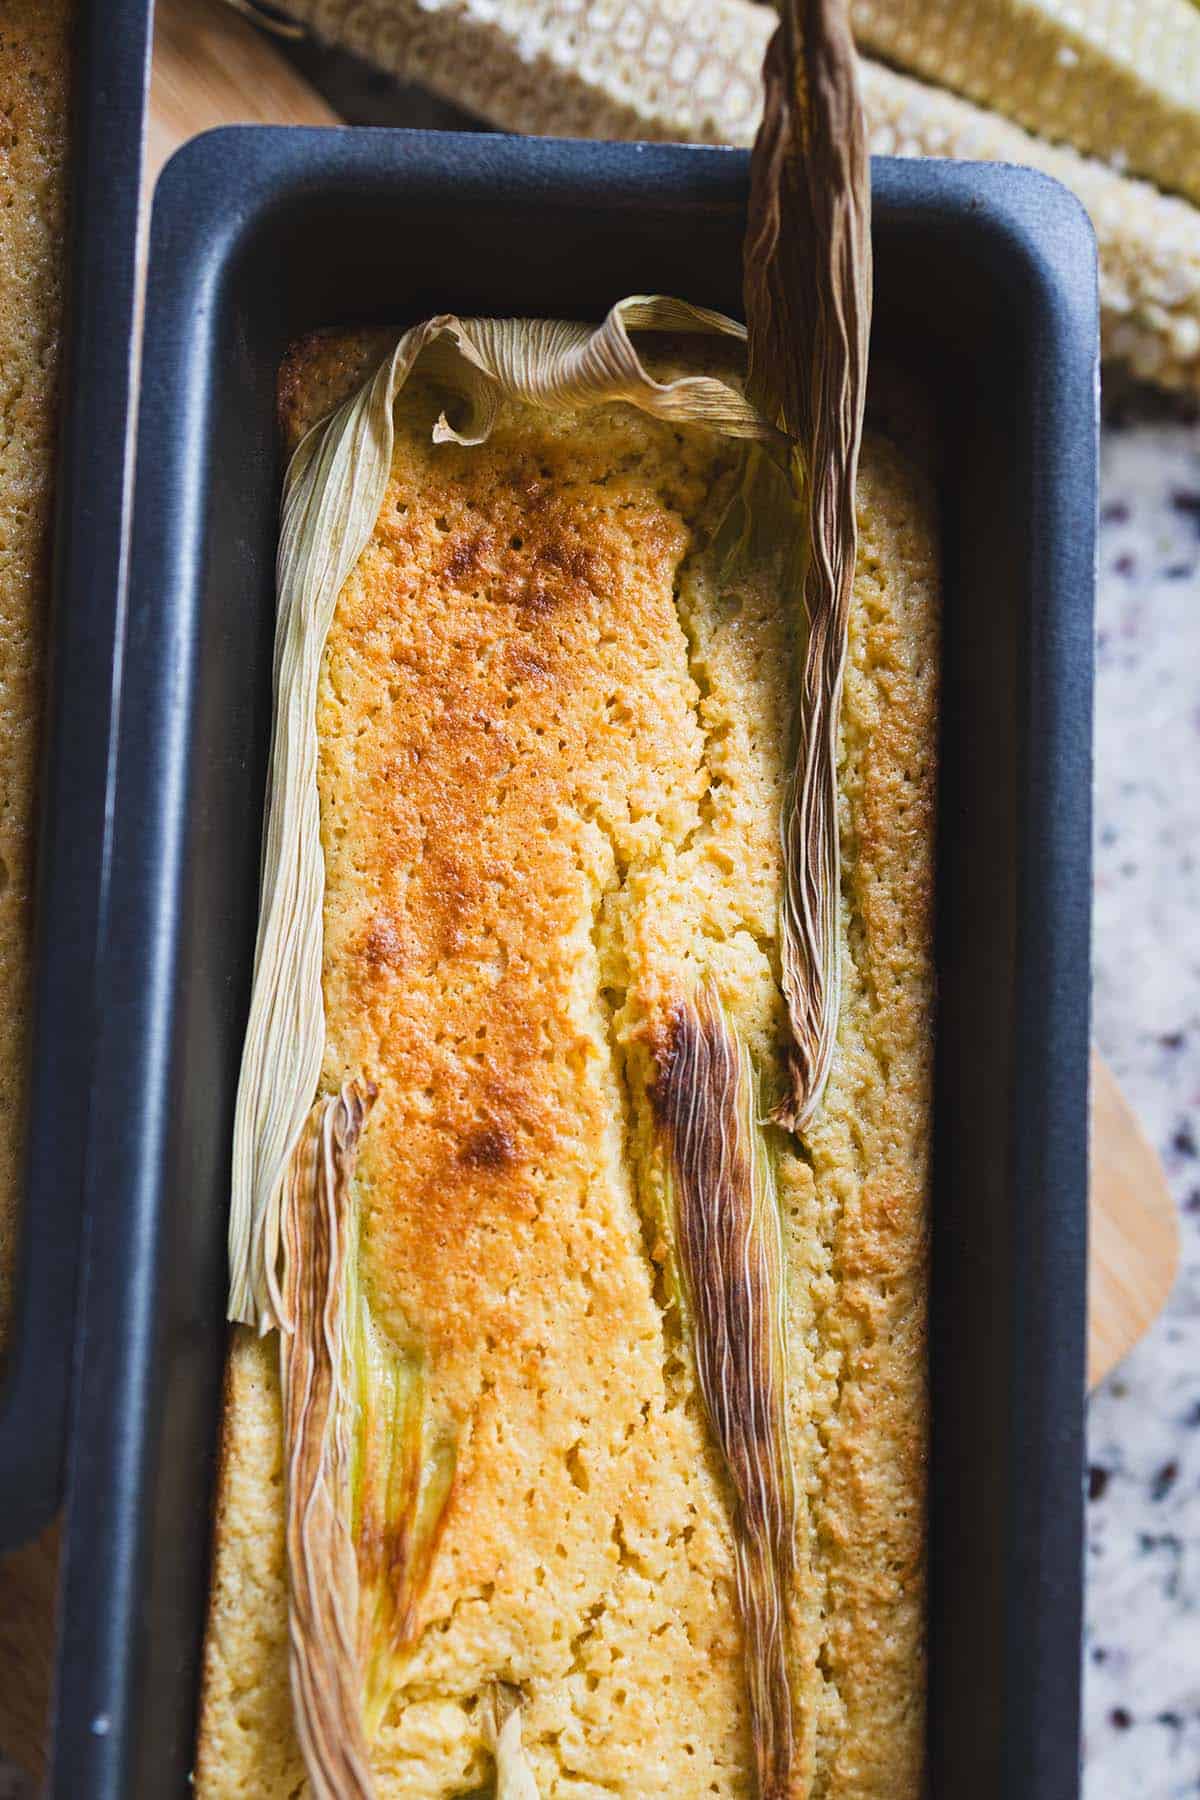
    Overhead view of Mexican corn cake

    Why We Love This Corn Cake Recipe

    There’s something magical about how Pastel de Elote balances sweet and savoury. It’s semi-sweet, never overpowering, with a moist, slightly sticky texture that feels like comfort in every bite.

    Depending on how it’s prepared, the cake can range from:

    • Moist and dense (especially when using canned corn), to

    • Light and fluffy (when made with fresh kernels).

    The colour can also vary depending on the type of corn used, making every cake a little bit unique.

    Mexican corn cake with cream cheese layer

    Ingredients for Mexican Corn Cake

    Ingredients

    Fresh Corn Kernels

    • The star of the dish — fresh corn brings natural sweetness and that unmistakable corn flavour. For a lighter, fluffier cake use fresh kernels from the cob; for a denser, moister result, canned (well-drained) corn works beautifully.

    Cream Cheese

    • The secret twist that makes this version extra special. Sliced cream cheese is layered in the middle of the batter before baking, creating a rich, luscious pocket that melts into the cake. Use a block-style cream cheese, not whipped. A 9-inch springform pan makes unmolding a breeze.

    Sweetened Condensed Milk

    • Adds a creamy richness and balanced sweetness that defines the classic pastel de elote flavour. Half a can (about 7 oz) is all you need — don’t substitute with regular milk or sugar.

    Eggs

    • Give the cake structure and help create a tender crumb. Use room-temperature eggs for a smoother batter that blends evenly.

    Vanilla Extract

    • Enhances the corn’s natural sweetness with a warm, aromatic note. Don’t skip it — it rounds out the flavour perfectly.

    All-Purpose Flour & Baking Powder

    • Flour provides body while baking powder gives the cake its gentle rise and soft, fluffy texture. Make sure your baking powder is fresh for the best results. A digital kitchen scale ensures your measurements are spot-on every time.

    Ingredients for Mexican corn cake laid out

    How to Make Mexican Corn Cake

    This recipe couldn’t be simpler — you just need a blender and a baking pan. Blend everything, pour half the batter, layer the cream cheese, pour the rest, and bake. The hardest part is waiting for it to cool! If you’re planning a full Mexican dessert spread, pair this with our Instant Pot Mexican Menudo for a complete feast, or try our Mexican Slow Cooker Pulled Pork for a savory main. And if you love easy blender cakes, our Dairy-Free Chocolate Cake is another crowd-pleaser.

    To make sure your cake bakes evenly, use a good blender to get a silky-smooth batter, and always grease your pan generously.

    Frequently Asked Questions

    Can I use canned corn instead of fresh?

    Yes, absolutely! Canned corn works well in this recipe — just make sure to drain it thoroughly. Fresh corn from the cob will give you a lighter, slightly sweeter result, while canned corn makes the cake a bit denser and moister. Both versions are delicious.

    Do I have to include the cream cheese?

    The cream cheese is optional but highly recommended! It’s not part of the traditional pastel de elote recipe, but it adds a rich, creamy layer inside the cake that makes it feel extra special. If you prefer the classic version, simply omit it.

    How do I know when the cake is done?

    Bake at 350°F (175°C) for 50–60 minutes. Insert a toothpick near the edge of the cake (not the center) — it should come out mostly clean. The center, where the cream cheese sits, will stay softer and that’s perfectly normal. The top should be golden brown.

    How should I store Mexican Corn Cake?

    Store leftovers in an airtight container in the refrigerator for up to 4 days. The cake tastes wonderful served slightly warm — just microwave individual slices for 20–30 seconds. You can also freeze slices (wrapped individually) for up to 2 months.

    Can I make this cake gluten-free?

    Yes! Substitute the all-purpose flour with a 1:1 gluten-free flour blend. Since corn is naturally gluten-free, this swap works very well in this recipe and the texture stays moist and tender.

    Slice of Mexican corn cake with cream cheese on a corn husk and a white plate

    Mexican Corn Cake with Cream Cheese

    This easy corn cake recipe only uses 8 ingredients. Corn cake, also known as pastel de elote, is made with ingredients such as fresh corn, eggs, flour, vanilla extract, cream cheese, baking powder, and a bit more.
    Prep Time 7 minutes
    Cook Time 40 minutes
    Total Time 1 hour 7 minutes
    Servings: 8 people
    Course: Dessert
    Cuisine: Mexican
    Calories: 230

    Ingredients
      

    • 2 cups fresh corn kernels  from about 3–4 cobs, or use canned/drained
    • 3 large eggs room temperature
    • ½ can sweetened condensed milk 7 oz / 200 g
    • 2 tsp vanilla extract
    • ½ cup all-purpose flour
    • 1½ tsp baking powder
    • ¼ cup whole milk
    • 100 g cream cheese  cut into thin slices for layering

    Equipment

    • highspeed blender

    Method
     

    1. Heat oven to 350°F (175°C). Grease and flour a 9×9 inch pan or loaf pan.
    2. In a blender, add corn kernels, eggs, condensed milk, vanilla, flour, baking powder, and milk.
      Blend until smooth and creamy (some small corn bits are fine for texture).
    3. Pour half the batter into the prepared pan. Arrange the cream cheese slices evenly on top of this first layer. Pour the remaining batter on top, covering the cream cheese completely.
    4. Bake for 50–60 minutes, or until golden brown and a toothpick inserted near the edge comes out mostly clean.
      (Note: The center where the cream cheese sits will remain softer.)
    5. Let the cake cool for at least 20 minutes before slicing, so the cream cheese filling sets slightly.
      Serve warm or at room temperature, with optional extra condensed milk drizzled on top.

  • Mexican Fire Roast Chicken

    Mexican Fire Roast Chicken

    If you have ever walked past a pollo asado shop in Mexico and smelled that charcoal smoke, you already know why this chicken shows up on our table. It’s juicy, a little smoky, and the kind of dinner the whole family cleans up without a fight.

    Mexican fire roast chicken on a platter with limes and fresh herbs

    This is my homemade take on the charcoal-grilled chicken made famous by Mexican chains like Pollo Feliz. Love & Harvest is not affiliated with or endorsed by Pollo Feliz; Pollo Feliz® is a trademark of its owner.

    The chicken sits in an overnight marinade so the flavour has time to sink in. Charcoal is my favourite way to cook it. The oven works too when we don’t feel like lighting the grill.

    Let me show you how we make it!

    Want a week of dinners planned for you? Get my free dinners

    Mexican Charcoal Roast Chicken at Home

    Sure, you can roast it in the oven. If you have the chance, go for charcoal. It makes all the difference.

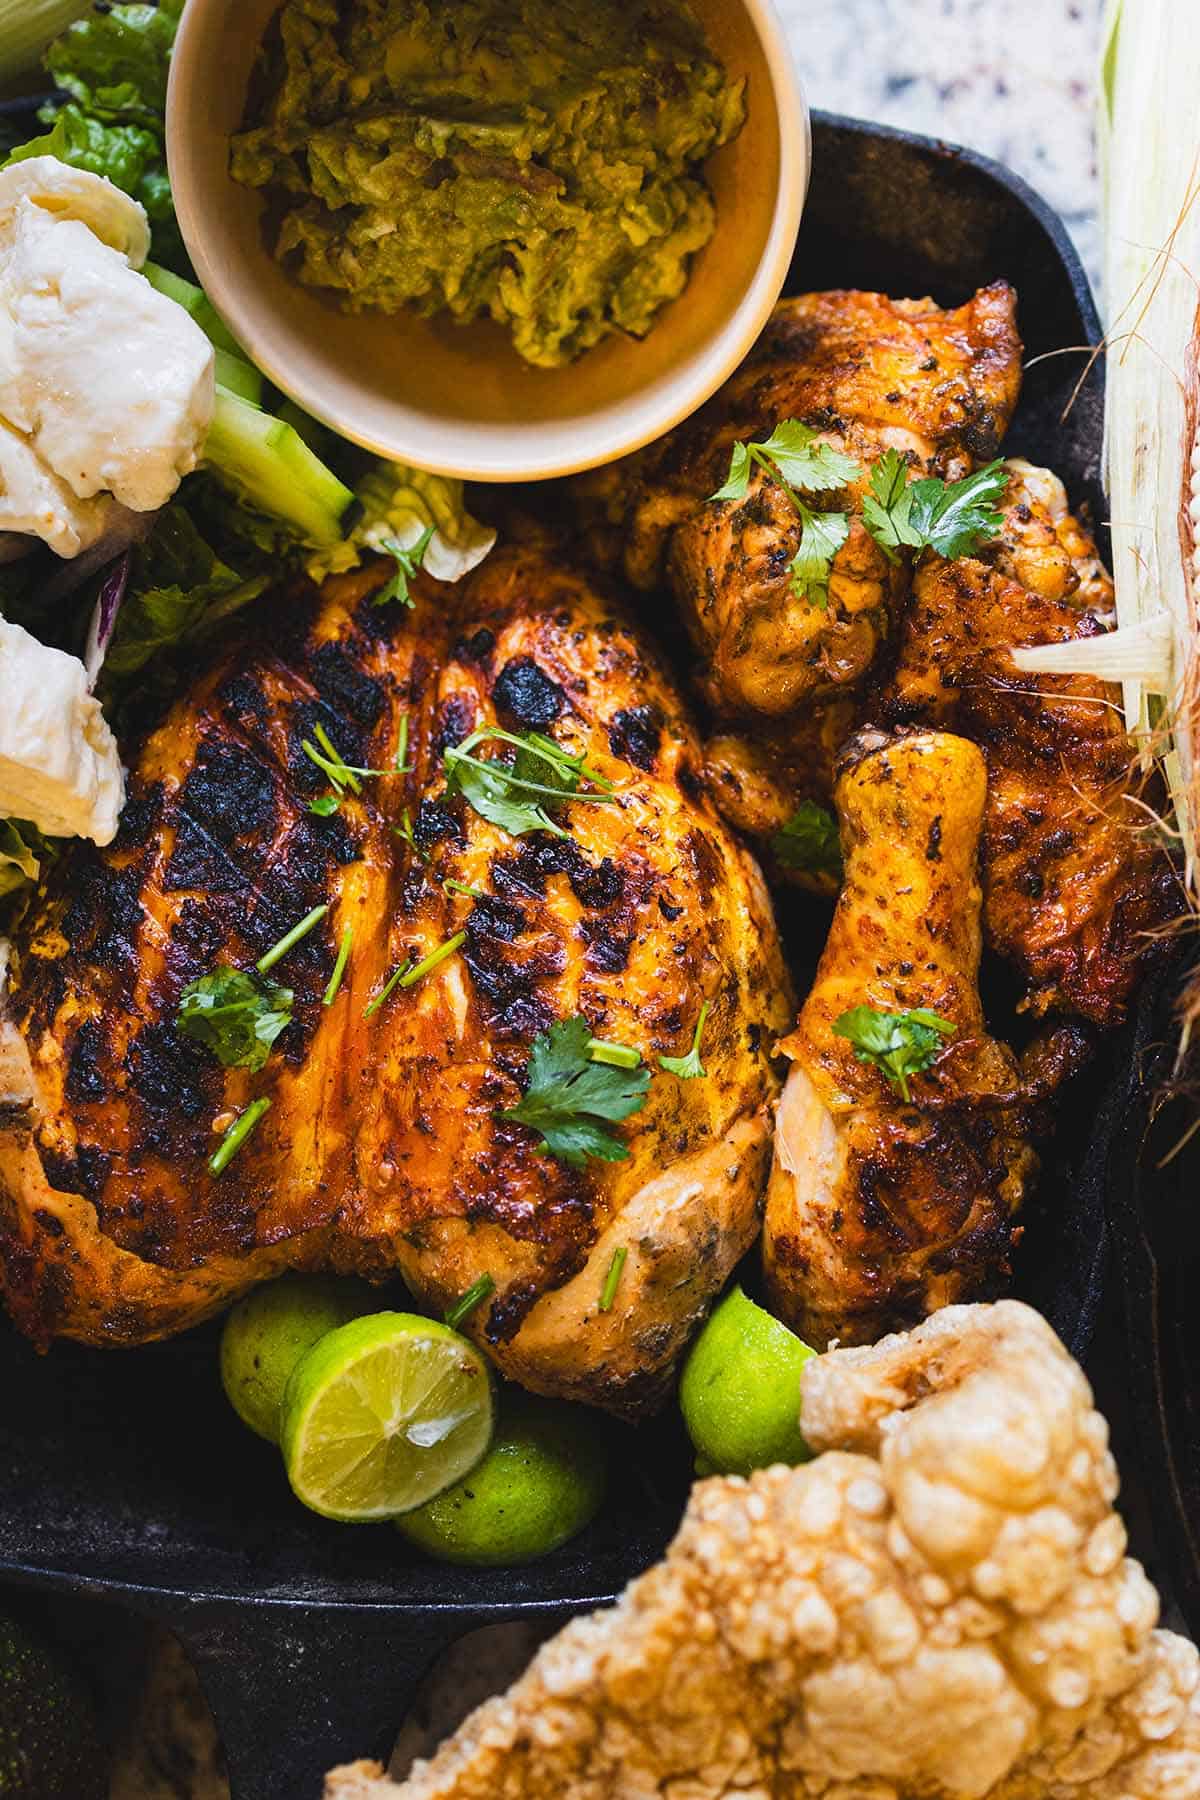
    Charcoal-grilled chicken halves and drumsticks in a cast iron pan

    Flavour

    This chicken is anything but ordinary. Achiote and annatto powder give it that reddish-golden colour, while garlic, oregano, and a touch of chili bring the bold bits. Milk and vinegar help tenderize the meat, so every bite comes out juicy.

    You get smoky, tangy, garlicky chicken with just a hint of spice. That is what we want.

    Why We Love This Recipe

    • That charcoal-shop vibe – the same style of pollo asado you find all over Mexico, made at home.
    • Juicy and tender – thanks to the milk and lemon in the marinade.
    • Flexible cooking – charcoal for smokiness, or oven roasting when it’s Tuesday and nobody wants to deal with coals.
    • Family favourite – rice, tortillas, or a simple salad all work next to it.

    Close-up of the charred, marinated skin of grilled chicken

    Charcoal for the Win

    Yes, you can roast it in the oven. Grilling over charcoal is the way to go if you want that street-food style flavour. Charcoal adds a layer of smokiness that no oven can copy.

    Tip: make sure the coals are hot but not flaming. Cook the chicken low and slow for the juiciest results.

    The links below are Amazon affiliate links. As an Amazon Associate I earn from qualifying purchases, at no extra cost to you.

    Recommended tools

    Any comparable thermometer and roasting pan work.

    Ingredients That Matter

    Achiote Powder (or Annatto / Paprika)

    Why I use it: Achiote is the heart of a lot of Mexican grilled chicken. It gives the chicken its reddish-golden colour and a slightly earthy, peppery flavour. Without it, you miss that classic pollo asado look.

    Mexican Oregano

    Why I use it: Different from Mediterranean oregano. Mexican oregano has citrusy, floral notes that brighten the marinade and balance the garlic and chili.

    Garlic (Fresh + Powder)

    Why I use it: Garlic is doing a lot of work here. Fresh garlic gives a sharp punch. The powder adds depth that clings to the chicken.

    Milk

    Why I use it: Milk works as a natural tenderizer. It softens the chicken so it stays juicy after roasting or grilling, and it mellows the sharper flavours in the marinade.

    Vinegar + Lemon Juice

    Why I use it: These acids help the marinade soak deeper, and they brighten the flavour so the chicken doesn’t taste flat. Toss the squeezed lemon half into the bowl for extra citrus aroma.

    Grilled chicken with limes, salsa and chicharrón on a serving platter

    Inspired by Mexican Charcoal Chicken Chains

    This is my homemade take on the pollo asado you buy by the whole bird at roast-chicken shops all over Mexico. Nothing beats grabbing one straight off the grill when you’re out, but this version gets us pretty close at home.

    The overnight marinade is the key. Give it at least 8 to 12 hours so the flavours fully penetrate the chicken. Then roast or grill until golden, and serve with warm tortillas, salsa, and maybe grilled onions and peppers.

    Mexican charcoal chicken spread with salad, corn, salsa and chicharrón

    Frequently Asked Questions

    What is Mexican charcoal chicken (pollo asado)?

    Pollo asado is whole chicken seasoned and cooked over charcoal, the kind you buy by the bird at roast-chicken shops across Mexico. This recipe is my homemade version of that style: an overnight achiote marinade, then charcoal (or the oven) until the chicken is juicy and golden.

    Can I use chicken pieces instead of a whole chicken?

    Absolutely! Chicken thighs, drumsticks, or a spatchcocked (butterflied) chicken all work with this marinade. Bone-in, skin-on pieces are best for flavour. Reduce cook time a little. Bone-in pieces usually take 35 to 45 minutes on the grill.

    What is achiote powder and where can I find it?

    Achiote (also called annatto) is a red-orange spice made from the seeds of the annatto tree. It’s widely used in Mexican and Latin American cooking and gives this chicken its golden-red colour. You can find it in most Latin grocery stores, or substitute with a mix of paprika and a pinch of turmeric if needed.

    How long should I marinate the chicken?

    For best results, marinate overnight, at least 8 to 12 hours. If you’re short on time, a minimum of 2 hours still works, though the flavour won’t be as deep.

    Can I freeze this chicken?

    Yes. You can freeze the marinated (uncooked) chicken in the marinade for up to 3 months. You can also freeze leftover cooked chicken for up to 2 months. Reheat in the oven at 350°F until warmed through to keep it juicy.

    What should I serve with Mexican fire roast chicken?

    Serve it the charcoal-shop way: warm corn tortillas, smoky tomato salsa, grilled green onions, and Mexican rice on the side. Avocado or guacamole, refried beans, or a fresh cabbage slaw also pair well.

    Charcoal-grilled chicken halves and drumsticks in a cast iron pan

    Mexican Fire Roast Chicken

    Whole chicken marinated overnight with achiote, Mexican oregano, garlic, chili flakes, vinegar and lemon, then cooked on a charcoal grill over indirect heat (or in the oven). Serves 6.
    Prep Time 10 minutes
    Cook Time 1 hour
    Marinate 8 hours
    Total Time 9 hours 10 minutes
    Servings: 6 people
    Calories: 340

    Ingredients
      

    Chicken Marinate
    • 2 kg whole chicken
    • 1 tbsp ground achiote powder
    • 1 tbsp annatto powder / paprika powder
    • 1 tbsp Mexican oregano
    • 1½ tbsp minced garlic
    • 1 tbsp dried garlic powder
    • 1 tsp sugar
    • 1 tsp chili flake
    • 2 tbsp distilled white vinegar
    • ½ fresh lemon
    • 2 tbsp soy sauce
    • 1 cup milk
    • ½ tsp salt and pepper

    Equipment

    • charcoal grill

    Method
     

    Marinate Chicken Overnight
    1. In a large mixing bowl, combine achiote powder, annatto (or paprika), oregano, minced garlic, garlic powder, sugar, chili flakes, vinegar, soy sauce, milk, salt, pepper, and the juice of half a lemon.
    2. Toss the squeezed lemon half into the bowl as well to infuse extra citrus flavour. Mix everything until well combined.
    3. Place your cleaned whole chicken (or chicken pieces) into a large zip-top bag or deep dish.
      Pour the marinade over the chicken, making sure it is fully coated.
      Cover and refrigerate overnight (8–12 hours) for best results. This step ensures the flavours soak deep into the meat.
    To Grill the Chicken over Charcoal
    1. Remove the chicken from the fridge about 30 minutes before cooking so it comes closer to room temperature. Discard the lemon half from the marinade. And reserve half the marinade to baste the chicken with its juices while cooking to keep it moist and flavourful.
    2. Preheat your charcoal grill until hot and glowing.
      Place the chicken on the grill over indirect heat (not directly above the flames) and cover.
      Cook, turning occasionally, until the chicken is golden brown and reaches an internal temperature of 165°F (74°C) at the thickest part of the meat. Remember half way through cooking, baste the chicken with the juice and marinade.
      This usually takes 45–60 minutes, depending on the size of your chicken.
    To Oven Roast Chicken
    1. Preheat your oven to 375°F (190°C).
      Place the chicken on a roasting rack in a baking dish.
      Roast for about 60–75 minutes, or until the chicken reaches an internal temperature of 165°F (74°C). Remember half way through cooking, baste the chicken with the juice and marinade.
      For extra crispy skin, broil on high for the last 3–5 minutes.
    Rest the Chicken
    1. Let the chicken rest for 10 minutes before carving to allow the juices to redistribute.
      Serve with warm tortillas, salsa, or your favorite Mexican sides.

    Cooking this one this week? Get my free PDF with seven easy family dinners, so the rest of the week is planned too. Get the free dinners

  • Instant Pot Menudo (My Mother-in-Law’s Recipe from Saltillo)

    Instant Pot Menudo (My Mother-in-Law’s Recipe from Saltillo)

    This is my mother-in-law’s menudo from Saltillo, made in the Instant Pot: beef tripe and beef shank in a guajillo and ancho chile broth, ready in about 1 hour 40 minutes instead of a whole morning.

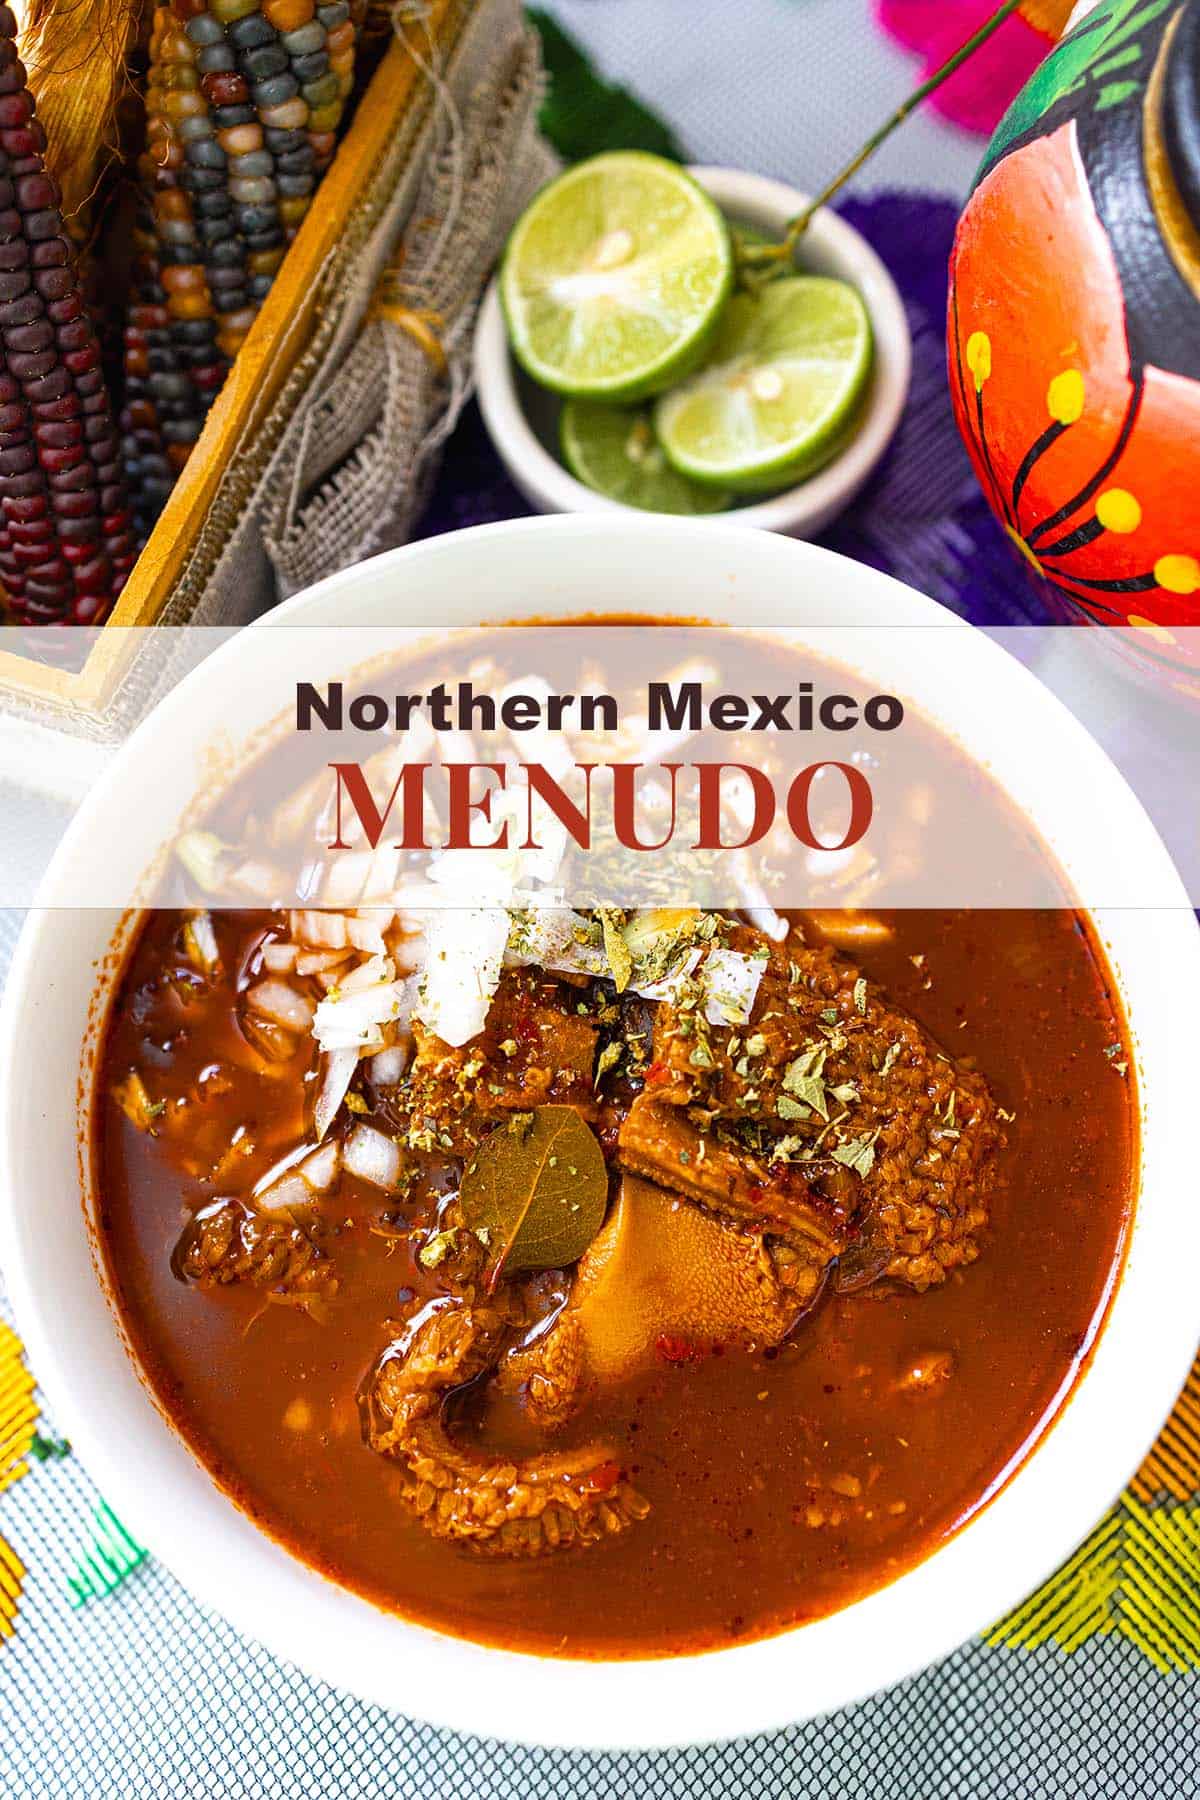
    Rich beef soup with vegetables and herbs, served in a white bowl on colorful Mexican tablecloth.

    Want more dinners like this? My free PDF has seven easy family dinners for the weeknight table. Send me the free dinners

    Why I make menudo in the Instant Pot

    The traditional way takes hours of slow simmering. I use the Instant Pot because, honestly, that’s the only way menudo happens on a weeknight in my house. Not the traditional method, but hey, we do what we have to do.

    Bowl of Instant Pot menudo with chopped onion, oregano and lime on the side

    My mother-in-law’s menudo from Saltillo

    This menudo recipe comes straight from my mother-in-law, who has been making it for years for our family gatherings.

    Saltillo is in the northern part of Mexico, about 30 minutes from Monterrey.

    Every time we make it, we make a big batch to share with friends and neighbours.

    Rocky mountains under a clear blue sky near Saltillo, in northern Mexico

    What you need

    • Beef tripe: the honeycomb tripe is the best part for menudo. It stays tender with a little chew, and soaks up the broth.
    • Beef shank: a cut from the leg, with marrow in the bone. Under pressure it turns soft and gives the broth its body.
    • Beef feet (optional): add them if you want a thicker broth.
    • Guajillo and ancho chiles: guajillos are dried mirasol chiles, bright red with mild to medium heat. Anchos are dried poblanos, darker, a little sweet and smoky. Together they make the broth red.
    • Mexican oregano: it isn’t the same as Mediterranean oregano. It’s more citrusy, and it goes in the broth and on top.
    • Cumin and garlic: in the chile paste.

    Savory beef stew with tender meat and flavorful broth, served with fresh lime and cheese toppings.

    How to make Instant Pot menudo

    The links below are Amazon affiliate links. As an Amazon Associate I earn from qualifying purchases, at no extra cost to you.

    Recommended tools

    Any medium pot and any full-size blender that can handle warm liquids work.

    1. Prep the chiles: boil the sliced tomatoes with the guajillo and ancho chiles in hot water for 20 minutes, then blend with the garlic, oregano, cumin and a little of the soaking water until smooth.
    2. Cook the meat: add the chile paste, beef shank, beef feet (if using), and the bay leaves to the Instant Pot. Cover with enough water to cover the meat, season with salt to taste, and cook on high pressure for 45 minutes.
    3. Add the tripe: let the pressure release naturally, then open the lid. Stir in the tripe and let it simmer on the soup setting for another 20 minutes.
    4. Serve: with lime juice, diced onion, diced serrano and a pinch of dried oregano, and warm corn tortillas on the side.

    Trust me, don’t skip the lime and raw onion on top.

    Menudo topped with chopped onion and oregano, with limes and dried corn behind

    How we serve it

    In my family, menudo is what we look forward to on Mexican Independence Day and on cold winter mornings.

    It’s also a New Year’s Day tradition, a comforting, traditional bowl many families enjoy the morning after a celebration.

    Love bold Mexican soups? Try our Green Pozole (Pozole Verde) for another classic, or the Easy Mexican Salsa Verde as the perfect fresh topping. Our Mexican Fire Roast Chicken is another family-favourite recipe from the same culinary tradition.

    Savory beef stew with herbs, chopped vegetables, and rich broth in a white bowl.

    Savory beef stew with herbs, chopped vegetables, and rich broth in a white bowl.

    Instant Pot Menudo

    My mother-in-law’s menudo from Saltillo, made in the Instant Pot. Tripe and beef shank in a guajillo and ancho chile broth.
    Prep Time 20 minutes
    Cook Time 1 hour
    Total Time 1 hour 40 minutes
    Servings: 6 people
    Course: Soup
    Cuisine: Mexican
    Calories: 320

    Ingredients
      

    • 1 kg beef tripe cut into bite-sized pieces
    • 1 kg beef shank
    • 2 beef feet (optional, for a thicker broth)
    • 1 litre water or beef broth
    • 6 guajillo peppers
    • 4 ancho peppers
    • 4 garlic cloves
    • 7 bay leaf
    • salt to taste
    • 1 tbsp dried oregano
    • 1 tbsp cumin powder
    • 5 medium tomatoes
    • white onion, diced garnish
    • 2 serrano peppers, diced garnish
    • dried oregano garnish
    • 6 limes garnish

    Equipment

    • Instant Pot

    Method
     

    1. Prep the Chiles:
      In a medium pot, combine the sliced tomatoes, guajillo chiles, and ancho chiles. Boil them in hot water for 20 minutes until softened. Transfer the softened ingredients to a blender, add the garlic, oregano, cumin, and 1 cup of the soaking water. Blend until smooth and set aside.
    2. Cook the Meat:
      In the Instant Pot, add the blended chile paste, the beef shank, the beef feet (if using), and the bay leaves. Pour in enough water to fully cover the meat and season with salt to taste. Seal the lid and cook on high pressure for 45 minutes.
      (The beef tripe goes in later, not now.)
    3. Add the Tripe:
      Let the pressure release naturally, then open the lid. Add the beef tripe to the pot. Switch to the soup setting and simmer for another 20 minutes.
    4. Serve:
      Ladle the menudo into bowls and garnish with a squeeze of fresh lime juice, diced onion, diced serrano, and a sprinkle of dried oregano. Serve with warm corn tortillas on the side.

    Cooking this one this week? Get my free PDF with seven easy family dinners, so the rest of the week is planned too. Get the free dinners

  • Mexican Pickled Red Onion

    Mexican Pickled Red Onion

    Crisp, tangy, and with just the right kick of heat — Mexican pickled red onions are the condiment that quietly makes every meal better. Once you try them on tacos, they become non-negotiable.

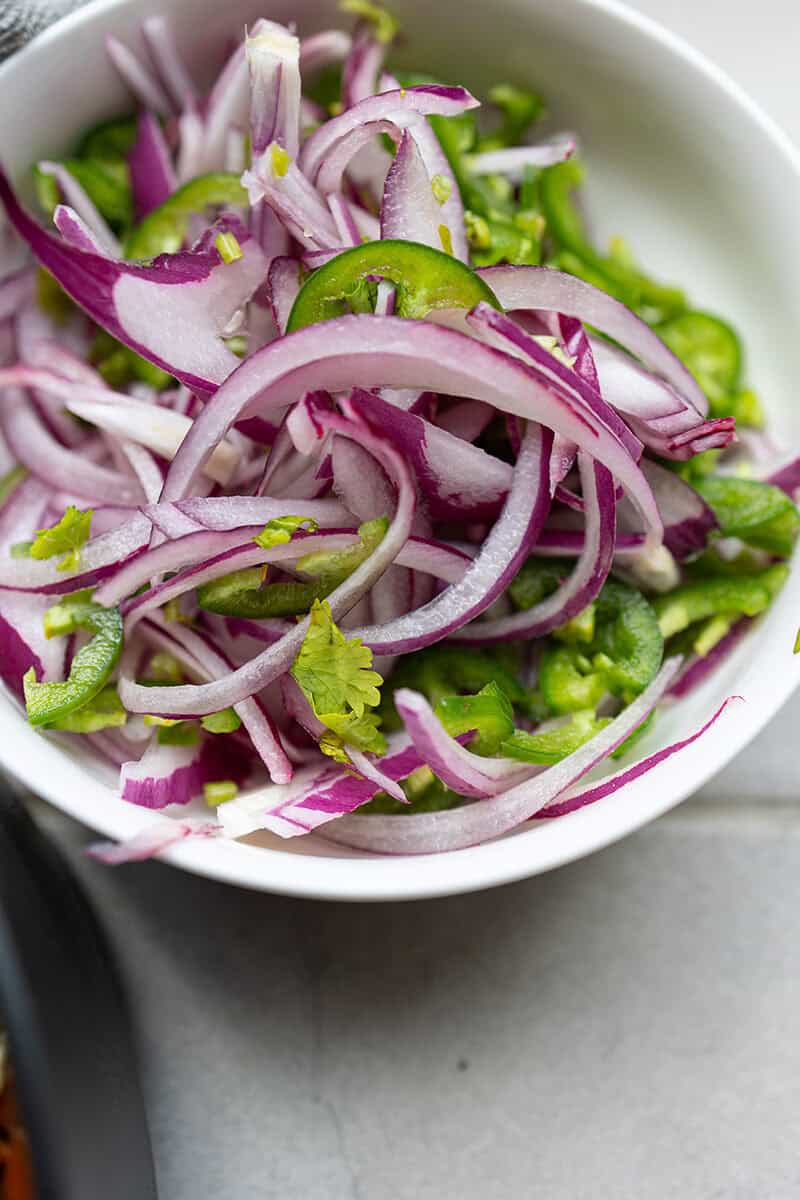
    Mexican pickled red onion with green chiles in a white bowl

    This post may contain affiliate links. If you purchase through these links, I may earn a small commission at no extra cost to you. Thank you for supporting Love & Harvest!

    Why You’ll Love This Recipe

    Made with just four ingredients — red onion, lime juice, jalapeño, and sea salt — this recipe takes less than 10 minutes to prepare and transforms anything it touches. The onions soak up the acidity of the lime while the blistered jalapeños lend a smoky heat that makes this side dish truly irresistible.

    Ingredient Deep-Dive

    Ingredients

    Red Onion

    • Why it matters: One large or two medium red onions, sliced thin. Red onion has natural sugars that balance the acid perfectly and turn a gorgeous magenta color in the lime juice. Thin slices pickle faster and have better texture. These store well in the fridge for 3–4 days.

    Fresh Lime Juice

    • Why it matters: The acid is the “pickling” agent here — no vinegar needed. Fresh lime juice (not bottled) gives a bright, clean tanginess that bottled juice simply can’t replicate. Squeeze just before using.

    Jalapeños

    • Why it matters: Thinly sliced, blistered jalapeños add smoky heat. Blister them in a dry cast iron pan for 2–3 minutes before slicing to bring out their depth. Use one jalapeño for mild heat, two for a proper kick.

    Sea Salt

    • Why it matters: Salt draws moisture from the onion, softens its raw bite, and enhances all the flavors. Use fine sea salt for even distribution — coarse salt can leave salty pockets.

    How to Pair This Dish

    Mexican pickled red onions are perfect on tacos, tostadas, or pulled pork. Their tangy flavor pairs especially well with rich meats like carnitas, barbacoa, or grilled steak. Try them in salads, sandwiches, grain bowls, or even on top of guacamole and nachos.

    Slow cooker Mexican pulled pork recipe: pork being shredded in a baking dish

    Super tasty Mexican Slow Cooked Pulled Pork

    One pot lemon garlic chicken and rice topped with lemon slices, with pickled red onion on the side

    Easy One Pot Lemon Garlic Chicken with Rice Pilaf

    Mexican pickled red onion with sliced green chiles in a white bowl

    Frequently Asked Questions

    How long do Mexican pickled red onions last in the fridge?

    Stored in an airtight jar or container, they keep well for 3–4 days in the refrigerator. The flavor actually deepens on day 2, so don’t be afraid to make them the night before.

    Do I need to cook the onions first?

    No. The acid from the lime juice does all the work. The onions are raw but the lime “quick-pickles” them, softening their sharp bite while keeping a satisfying crunch.

    Can I use lemon juice instead of lime?

    Yes, though lime is traditional for Mexican-style pickled onions. Lemon gives a slightly different flavor — less floral, more straightforward sour. A combination of both works well too.

    Why keep pickled red onions on hand?

    They add a ton of flavour for very little: just red onion, jalapeños, lime juice and salt, so they’re one of the best condiments you can keep on hand.

    How do I make them less spicy?

    Remove the jalapeño seeds before slicing — most of the heat lives in the seeds and white membrane. Or swap jalapeños for a milder pepper like serrano (used sparingly) or skip the chili entirely for a purely tangy version.

    Can I add other ingredients?

    Absolutely. Fresh oregano, a pinch of cumin, or a bay leaf are popular additions. Some recipes add a splash of apple cider vinegar alongside the lime for extra preservation and complexity.

    Thinly sliced pickled red onion and green chile beside a dish of rice

    Mexican pickled red onion with green chiles in a white bowl

    Mexican Pickled Red Onion

    Crisp, tangy, and with just the right amount of heat, these Mexican pickled red onion brings a refreshing punch of flavour to any dish. You can use this on anything like pull pork, enchiladas, tacos, and so much more!
    Prep Time 10 minutes
    Cook Time 5 minutes
    Total Time 15 minutes
    Course: Condiment
    Cuisine: Mexican
    Calories: 25

    Ingredients
      

    • 1 large red onion
    • 2 jalapenos
    • 3-5 limes
    • 1 tsp sea salt

    Method
     

    1. Slice the red onions and jalapeños thinly.
    2. In a small bowl, juice a few limes until you have enough liquid to cover the onions and jalapeños.
    3. Add the sea salt to the lime juice, stirring until dissolved.
    4. Combine the onions, jalapeños, and any optional add-ins in a jar or bowl.
    5. Pour the lime juice mixture over the onions until fully submerged.
    6. Let the mixture sit at room temperature for about 30 minutes to an hour before serving, or refrigerate for longer marination.

    Love pickled and fermented flavors? Try our Best Bread and Butter Pickled Cucumbers or our Preserved Salty Lemons — both are pantry staples you’ll reach for again and again. These pickled onions are also the perfect topping for our 4 Ingredients Chicken Sandwich Deli.

  • Chicken Milanesa

    Chicken Milanesa

    Chicken Milanesa is one of those rare dishes that manages to be both deeply comforting and genuinely impressive — a golden, crispy-edged cutlet with a juicy interior that comes together in under 30 minutes. This version takes the traditional Mexican approach and upgrades the coating with panko breadcrumbs for an airier, crunchier crust that standard breadcrumbs simply can’t match. Whether you’re serving it to picky kids or guests who claim they don’t love chicken, this recipe consistently converts them.

    This post may contain affiliate links. If you purchase through these links, I may earn a small commission at no extra cost to you. Thank you for supporting Love & Harvest!

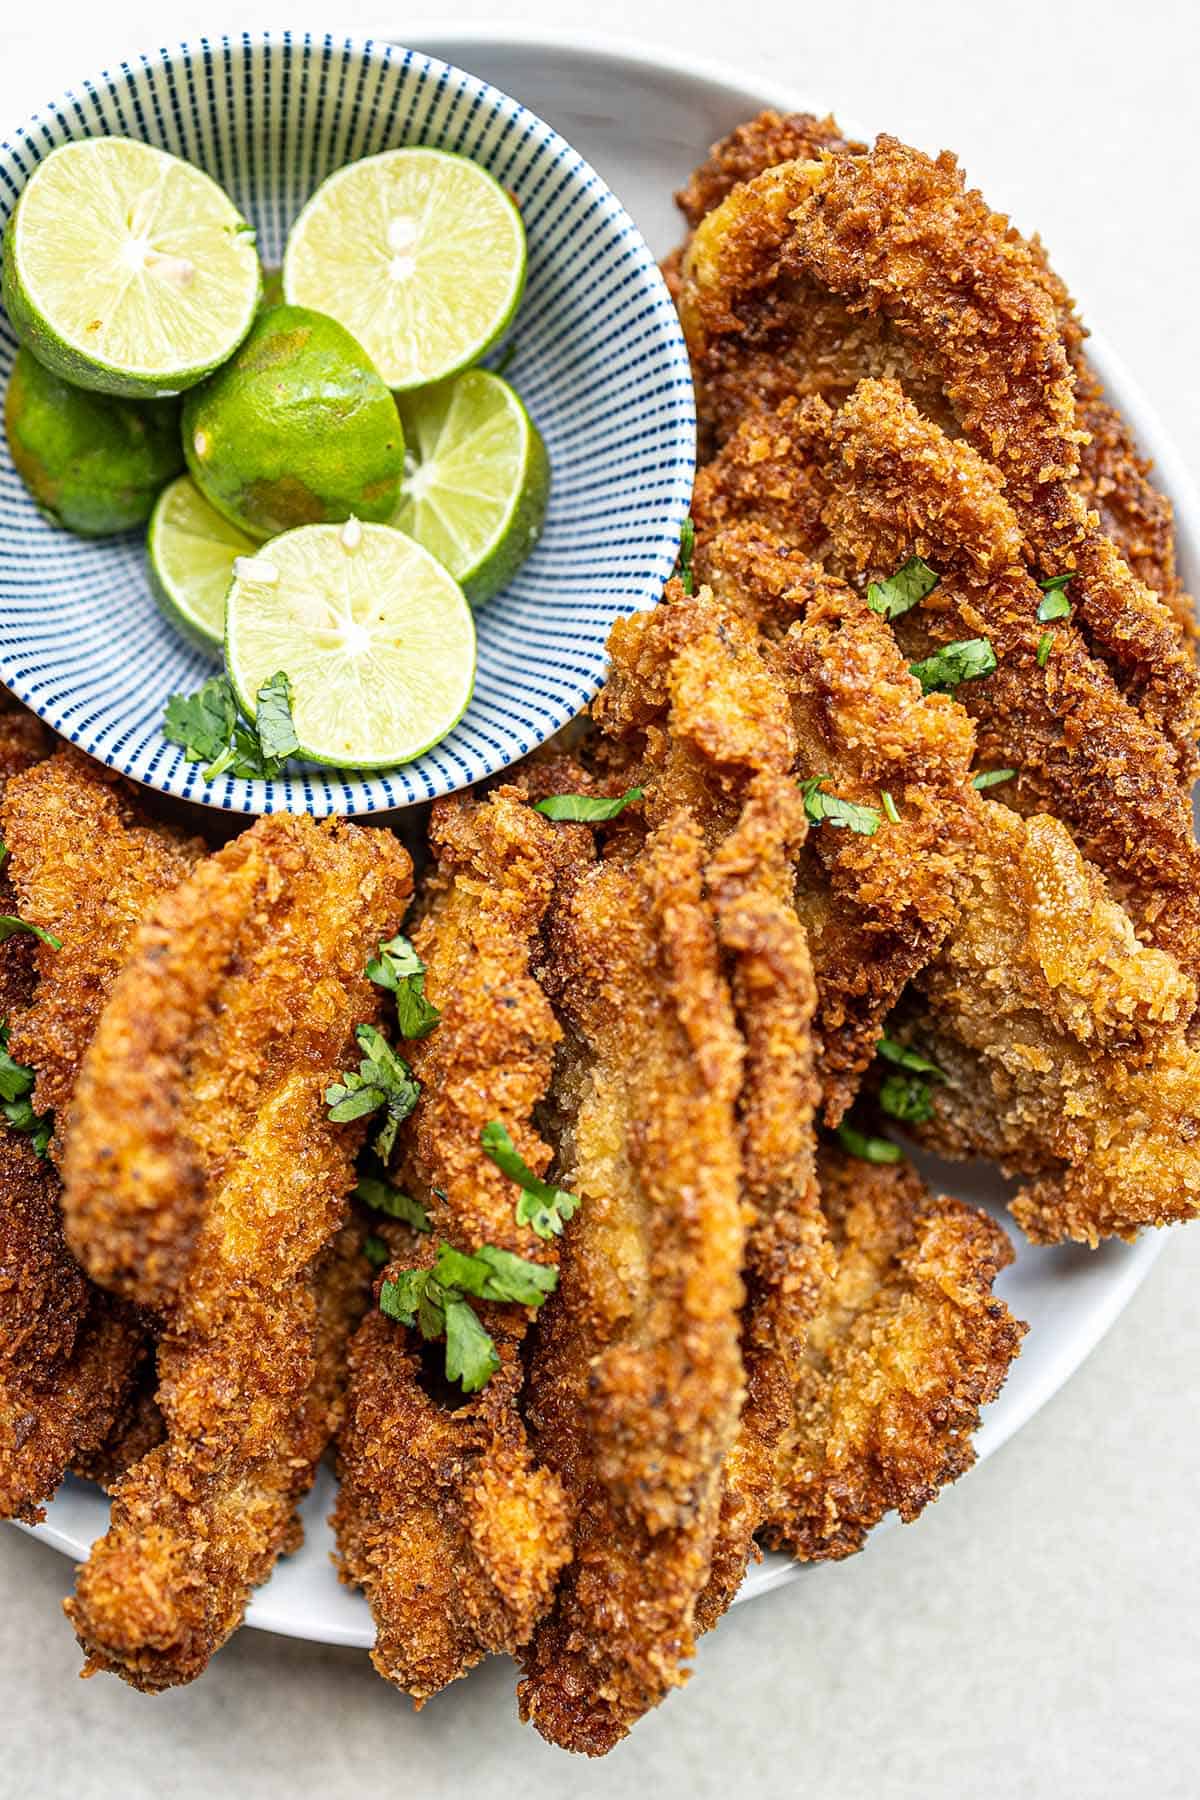
    Chicken milanesa cutlets on a plate with a bowl of lime halves

    What is Chicken Milanesa?

    Chicken Milanesa is a dish that holds a special place in Mexican home cooking. Its roots trace back to Italian immigrants who brought the cotoletta alla Milanese to Latin America, and over generations it was adopted, adapted, and made entirely its own. In Mexico, it shows up at family tables, street food stalls, and inside hearty tortas (Mexican sandwiches) alongside refried beans and rice.

    Traditionally, the coating is simple breadcrumbs. This version adds panko — a Japanese-style breadcrumb that’s coarser and lighter — for a significantly crispier result without making the dish heavy.

    Platter of golden breaded chicken milanesa with limes

    Ingredients Deep Dive

    Ingredients

    Chicken (Whole or Boneless Thighs/Breasts)

    • Why it matters: Whole chicken lets you use different cuts — thighs for maximum juiciness, breasts for even-sized pieces. Thighs are harder to overcook and stay tender in the pan. Whichever you choose, pounding the cutlets to an even thickness ensures they cook through at the same rate.

    Panko + Regular Breadcrumbs (Dual Coating)

    • Why it matters: Regular breadcrumbs seal in moisture; panko creates the airy, ultra-crispy outer layer. Using both gives you the best of each. A dedicated quality panko makes a noticeable difference — it stays crispier longer than generic store-brand versions.

    Flour

    • Why it matters: The flour dusting creates a dry surface for the egg to adhere to. Skip it and the coating slides off. It’s a small step that makes the difference between a patchy crust and a solid, even one.

    Eggs

    • Why it matters: Beaten egg is the glue between the flour and the breadcrumb coating. It also adds moisture and richness to the finished crust. Use large eggs at room temperature for best adhesion.

    Montreal Steak Spice

    • Why it matters: A pre-mixed blend of coarse salt, black pepper, garlic, coriander, and paprika. It seasons all three layers of the coating — flour, egg wash, and breadcrumbs — giving the finished Milanesa consistent flavour from the first bite to the last. The Costco McCormick version is excellent value and keeps for months.

    Canola Oil (for frying)

    • Why it matters: Canola has a high smoke point (~400°F/204°C) and a neutral flavour that won’t compete with the seasoning. Any neutral vegetable oil works. Avoid olive oil — its lower smoke point will cause it to burn before the coating crisps.

    A chicken cutlet pounder is the single most useful tool for this recipe — it ensures even thickness so every piece cooks through at the same time without dry edges.

    Close-up of crispy panko-breaded chicken milanesa

    Why This Recipe Works for the Whole Family

    Kids are the ultimate test for a recipe. My daughter loves this one and asks for it regularly — and she’s hard to please. The panko crust has just enough crunch to be exciting without being too intense, and the Montreal Steak Spice is flavourful without being spicy. It also reheats well in the oven or air fryer, which makes it a great meal-prep option for weekday lunches.

    Pair it with garlic mashed potatoes, a simple salad, or stuff it inside a torta with avocado, jalapeños, and crema for an incredible Mexican-style sandwich.

    Stack of crispy chicken milanesa cutlets on a white plate

    Fun Facts About Milanesa in Mexico

    • Ubiquitous: Milanesa is one of Mexico’s most common weeknight dinners. You’ll find it in every region, made with chicken, beef, or pork.
    • Regional Variations: Some regions top it with avocado slices, fresh salsa, or pickled jalapeños. Others pile it into a torta with all the fixings.
    • Cultural Fusion: It’s a perfect example of how Mexican cuisine takes a foreign influence and makes it something entirely its own over generations.

    More Crispy Chicken Recipes

    Chicken milanesa cutlets with lime halves on a white plate

    Frequently Asked Questions

    Can I bake Chicken Milanesa instead of frying it?

    Yes. Brush or spray the breaded cutlets with oil and bake at 425°F (220°C) for 18–22 minutes, flipping halfway. The result is slightly less crispy than pan-fried but significantly lighter. For a crispier baked version, use a wire rack on a baking sheet so air circulates underneath.

    Can I use an air fryer?

    Absolutely. Air fry at 400°F (200°C) for 12–15 minutes, flipping once halfway. Spray generously with oil before cooking. This produces excellent crispiness with much less fat than pan-frying.

    Why is my coating falling off during frying?

    Most likely cause: skipping the flour stage or not letting the coated cutlets rest before frying. After breading, let the cutlets sit on a rack for 5–10 minutes — this helps the coating set. Also make sure the oil is hot enough before adding the chicken; if it’s too cool, the coating absorbs oil and loosens.

    How thin should I pound the chicken?

    About 1/4 inch (6mm) is ideal. Thinner cooks faster but risks drying out at the edges before the center is done. Thicker means longer frying time and risks an underdone center with an overbrowning crust.

    Can I make Chicken Milanesa ahead of time?

    You can bread the cutlets and refrigerate them uncovered for up to 4 hours before frying. Refrigerating them uncovered lets the surface dry slightly, which actually improves the crust. Fry straight from the fridge — no need to bring to room temperature.

    What’s the best way to reheat leftovers?

    Oven at 375°F (190°C) for 8–10 minutes on a rack, or air fryer at 360°F for 5–6 minutes. Avoid the microwave — it steams the crust and turns it soggy. Properly reheated Milanesa stays remarkably crispy.

  • Chicharron Salad “Ensalada de Chicharrón Placero”

    Chicharron Salad “Ensalada de Chicharrón Placero”

    Ensalada de Chicharron Placero is one of those Mexican dishes that stops you mid-bite — the contrast of crunchy pork rind, creamy avocado, fresh tomato, and bright lime is completely addictive. This is my version, made with the flavors and ingredients of Central Mexico where I live.

    This post may contain affiliate links. If you purchase through these links, I may earn a small commission at no extra cost to you. Thank you for supporting Love & Harvest!

    Jump to Recipe

    Bowl of chicharrón salad with tomato, onion and green pepper next to a nasturtium flower

    This post is a recipe for chicharron salad, also known as pork rind salad. In Spanish it is called “Ensalada de Chicharron Placero.” It has pork rind, avocado, tomatoes, and lime juice.

    What is Chicharron Salad?

    Chicharron Salad is a flavorful dish that brings together the crispy, savory goodness of fried pork rind with fresh vegetables and a bright lime dressing. This dish is a celebration of textures — crunchy chicharron against creamy avocado and juicy tomatoes, unified by a simple olive oil and lime vinaigrette.

    The version I make here is common in Central Mexico and includes diced tomatoes, sliced red onions, cubed avocados, chopped cilantro, jalapeños for heat, and a dressing made with lime juice and extra virgin olive oil.

    The Superhero Ingredient: Pork Rind (Chicharron)

    In Mexican cuisine, every bite tells a story, and chicharron is one of the most iconic chapters. Pork skin frying in a pot of golden lard is culinary alchemy — transforming a humble ingredient into crispy, golden nuggets of pure satisfaction. The sizzle and pop of pork skin meeting hot lard is a melody that resonates through the bustling markets of Mexico City and Puebla, enticing everyone nearby with its irresistible aroma.

    A hand holding up a large sheet of crispy pork rind (chicharrón)

    Ingredients

    Pork Rind (Chicharron)

    Crispy, deep-fried pork skin is the star and this is where the dish begins and ends. If you cannot find fresh-fried chicharron locally, the bagged variety works well. This Tito’s Choice Chicharrones is the most similar to what we use here in Mexico, though a lighter chicharron chip style also works.

    • Why it matters: The crunch is the entire point of this salad. Use it immediately after tossing with the dressing — it softens fast, and you want that satisfying snap in every bite.

    Avocados

    Ripe, cubed avocado adds creaminess that counters the crunch and heat of the chicharron. It also makes the salad filling enough to serve as a light meal.

    • Why it matters: The fat in avocado coats each ingredient lightly, helping the lime dressing cling to everything and creating a more cohesive dish.

    Cilantro

    There is no salad in Mexico without cilantro. It is aromatic, fresh, and gives the dish a depth that flat-leaf parsley cannot replicate. Use it generously — do not be shy.

    • Why it matters: Cilantro lifts the entire flavor profile, cutting through the richness of avocado and pork rind with bright, herbal freshness.

    Purple Onion

    Purple onion is preferred over white or yellow for this salad because it is visually striking and noticeably sweeter — a better balance for a fresh salad than the sharper bite of white onion.

    • Why it matters: The sweetness of purple onion plays off the acidity of the lime without overpowering the other ingredients.

    Extra Virgin Olive Oil

    A drizzle of extra virgin olive oil creates a simple vinaigrette with the lime juice. It coats the salad, adds a glossy finish, and ties all the flavors together.

    • Why it matters: Oil prevents the lime from making the avocado brown as quickly and gives the salad a more polished, restaurant-quality look and feel.

    Lime

    The vinaigrette is simply lime juice and olive oil — minimal, clean, and explosive. The acidity cuts through the richness of both avocado and pork rind, keeping every bite bright and refreshing.

    • Why it matters: Without acid, this salad would feel heavy. Lime is what makes it feel light despite the richness of its main ingredients.

    Tomatoes

    Fresh diced tomatoes add color, juiciness, and a gentle acidity that balances the savory and fatty components. In Mexico, tomato is a non-negotiable base for most fresh salads.

    • Why it matters: Tomatoes add water content and freshness that prevents the salad from feeling dry or monotone in texture.

    Jalapeño or Serrano Pepper

    Optional but highly recommended. Serrano is hotter than jalapeño — choose based on your heat tolerance. Finely dice it so the heat distributes evenly throughout the salad rather than hitting you in one concentrated bite.

    • Why it matters: A touch of heat creates contrast that makes every other flavor in the salad more vivid and interesting.

    Make It into a Taco

    One of the most popular ways to eat this salad in Central Mexico is as a taco filling. Load it into a soft tortilla and add red or green salsa on top. Try our green nopales tortilla recipe — it pairs beautifully with this salad.

    Green nopales tortilla recipe: a stack of green corn tortillas

    Frequently Asked Questions

    When should I add the chicharron to the salad?

    Add the chicharron right before serving — within 5 minutes of plating. Pork rind absorbs moisture rapidly and goes from perfectly crunchy to soggy in about 10 minutes once it contacts the lime dressing. If making the salad ahead, keep the chicharron separate and combine just before eating.

    Can I make the dressing ahead of time?

    Yes. Mix the olive oil and lime juice up to 2 days in advance and store in a small jar in the refrigerator. Shake well before using. The dressing actually improves slightly as it sits, as the lime mellows and the flavors integrate.

    What type of chicharron is best for this salad?

    Thick-cut, fresh-fried chicharron from a Mexican market is the ideal. The puffed, airy kind has the best crunch and texture for salad. Thin, chip-style pork rinds can also work but soften faster. Avoid overly seasoned flavored varieties as they can compete with the fresh ingredients.

    Is Ensalada de Chicharron Placero spicy?

    The heat is completely adjustable. Without jalapeño or serrano it is mild. With jalapeño it has a gentle, lingering warmth. With serrano it has a proper kick. Deseed the chili for a milder version that keeps the flavor without the heat.

    What can I serve this salad with?

    It works beautifully as an appetizer, a side dish alongside grilled meats, or as a taco filling. It also pairs well with tostadas, garnachas, and as a topping for nachos. In Central Mexico it is often served at room temperature as a botana (snack) with cold drinks.

    How do I keep the avocado from browning?

    The lime juice in the dressing helps significantly. Toss the avocado in lime juice immediately after cutting and keep it in contact with the dressing. If making ahead, cut the avocado last and add it right before serving. Do not store assembled salad overnight — avocado browns regardless.

    Love authentic Mexican flavors? Also try our vegetarian mango soy ceviche, our Mexican fava bean salad, and our easy hummus for more vibrant, fresh dishes.

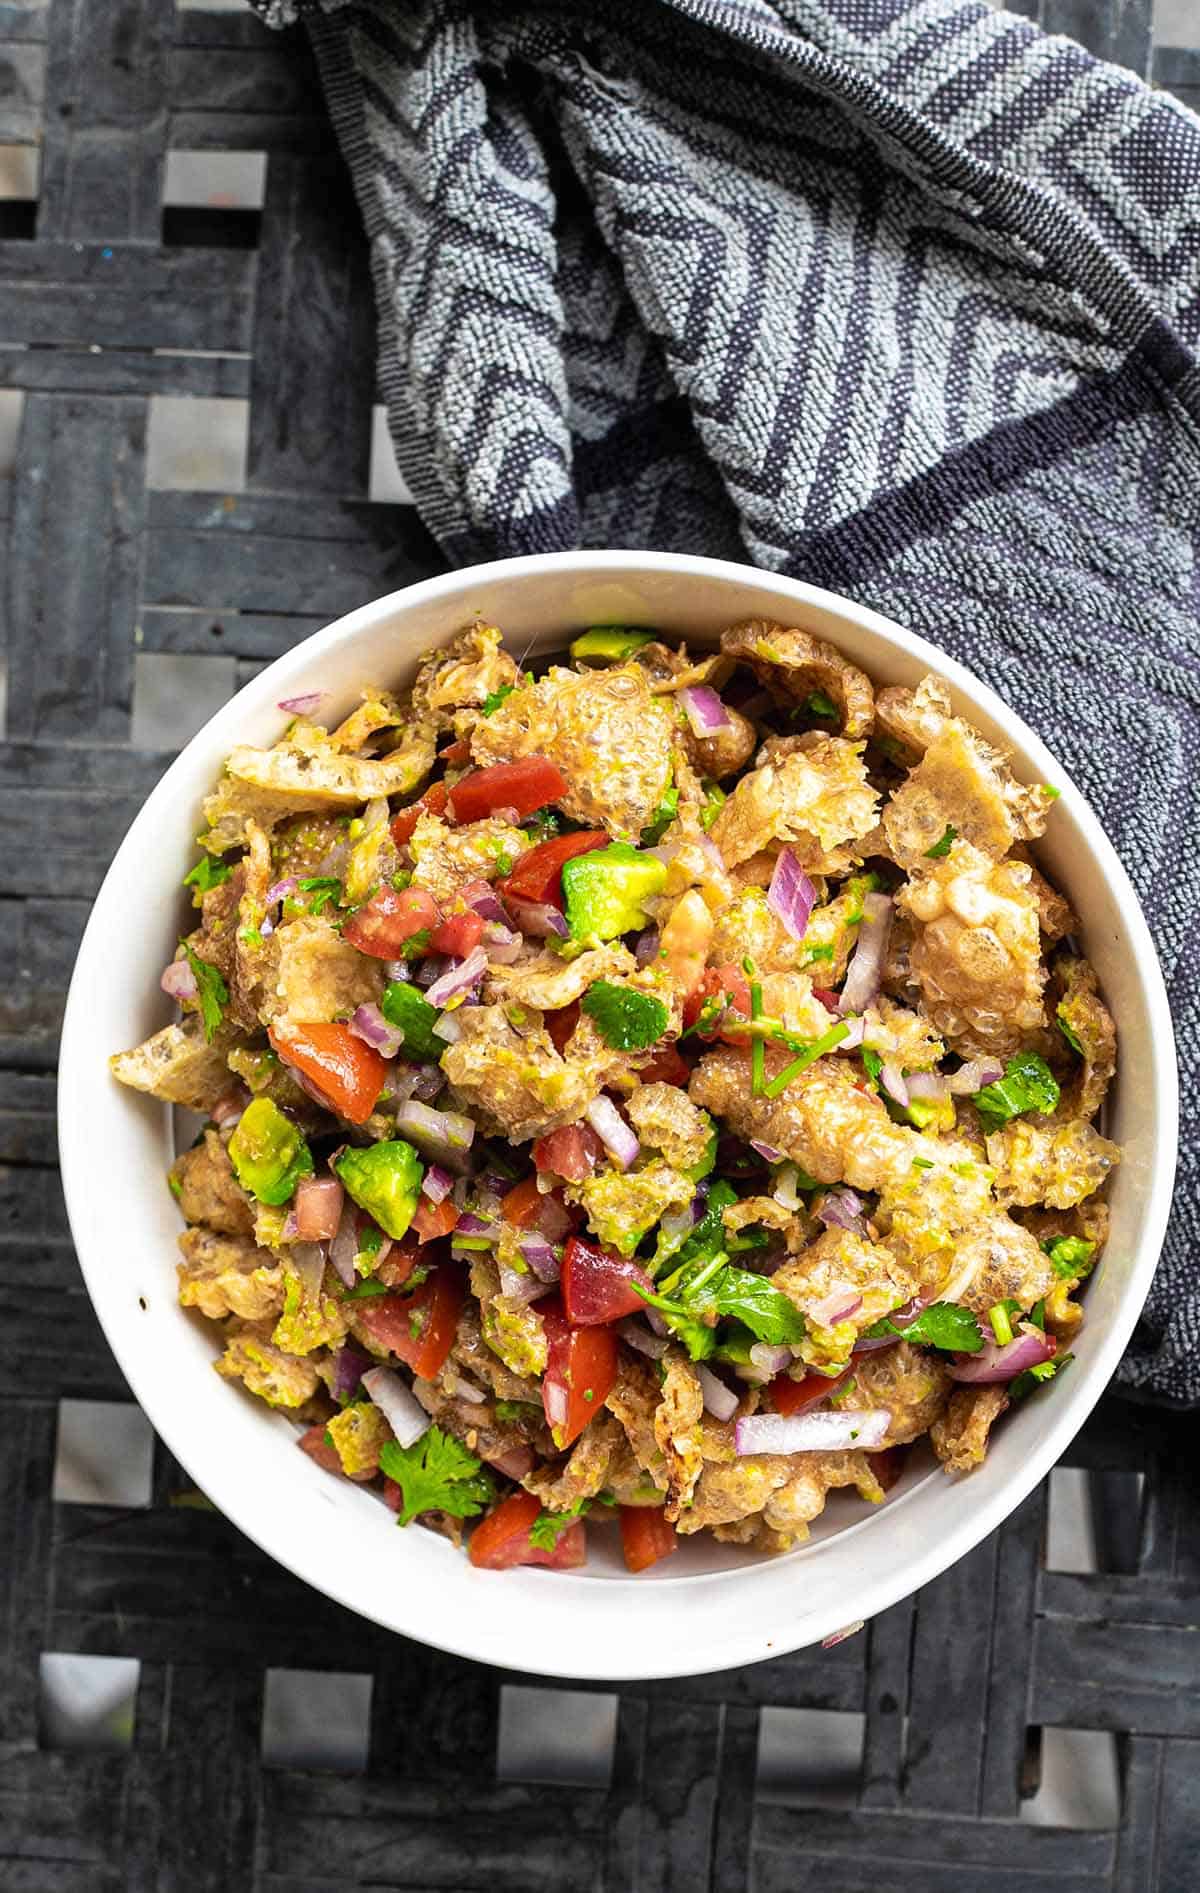
    Overhead view of chicharrón salad in a white bowl on a dark cloth

    Chicharron Salad “Ensalada de Chicharrón Placero”

    This homemade dish is a well-known favorite in Mexico. It is savory, tangy, and crunchy all at the same time! Every household puts its unique spin on it, and today, I'll share my version infused with the flavors and ingredients inspired by Central Mexico.
    Prep Time 30 minutes
    Total Time 30 minutes
    Servings: 4
    Course: Appetizer
    Cuisine: Mexican
    Calories: 310

    Ingredients
      

    • 220 g crispy chicharrón, broken into bite-sized pieces or 5 cups of chicharron chips
    • 1 cup diced fresh tomatoes
    • 2 avocados cubed
    • ½ cup thinly sliced red onions
    • ¼ cup chopped fresh cilantro
    • 1-2 jalapeños, finely diced (adjust to taste)
    • 2 tbsp extra virgin olive oil
    • 2 limes juiced
    • salt and pepper

    Method
     

    Dressing
    1. In a small bowl, whisk together the extra virgin olive oil and lime juice. This zesty dressing will infuse a refreshing citrusy note into our salad.
    Salad
    1. In a large mixing bowl, combine the chicharrón pieces with the diced tomatoes, avocados, sliced red onions, chopped cilantro, and jalapeños. Drizzle the lime and olive oil dressing over the mixture and toss gently to coat all ingredients evenly.
    2. Add salt and pepper to taste, ensuring a harmonious balance that enhances the natural flavors of each element.

    Notes

    Serving Suggestions:
    • Enjoy the Chicharrón Salad as a standalone appetizer or side dish.
    • Serve it alongside tacos, tostadas, or even as a topping for nachos for an added layer of crunch and flavor.

  • Mexican Fava Bean Salad

    Mexican Fava Bean Salad

    This Mexican fava bean salad is one of those dishes that surprises people — hearty enough to stand on its own as a meal, yet light and bright enough to serve alongside anything on the table. Fava beans, grilled cactus paddles, fresh tomatoes, cilantro, and jalapeños come together in a zesty lime dressing. It tastes like Mexico in a bowl.

    This post may contain affiliate links. If you purchase through these links, I may earn a small commission at no extra cost to you. Thank you for supporting Love & Harvest!

    Jump to Recipe

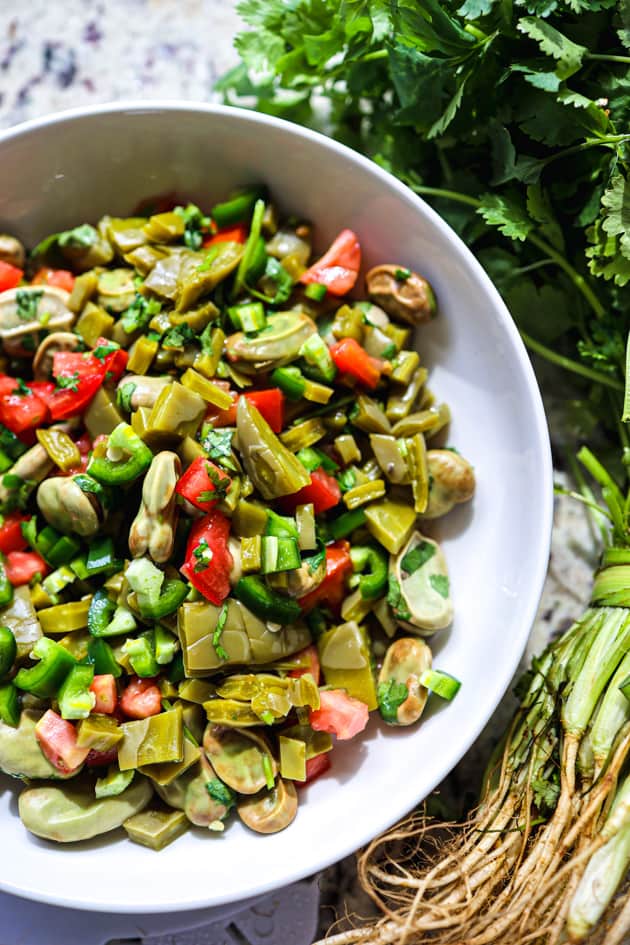
    Mexican fava bean salad with nopales, tomato and green onion in a white bowl

    What Makes This Salad Special?

    This salad stands out for its unique blend of flavors and textures. The fava beans give the salad its creamy, hearty base, the nopales add a slightly acidic green note that balances everything out, and the lime dressing pulls it all together with brightness and heat. Whether you use fresh or canned fava beans, this is a reliable, versatile, and deeply satisfying dish.

    Why Try This Salad?

    • Hearty and filling: about 8 g protein and 7 g fiber per serving, per the recipe card.
    • Offers a burst of authentic Mexican flavors that will surprise your palate.
    • An easy addition to any meal plan, dressed with just lime juice, olive oil and oregano.
    • Accessible year-round thanks to canned fava beans.

    Spoonful of fava bean and nopal salad lifted from the bowl

    Ingredients

    Key Ingredients

    Fava Beans

    You can use fresh or dried fava beans — both work beautifully. Canned fava beans are the most convenient option and require only a rinse before use.

    • Why they matter: Fava beans are the protein backbone of the salad. Their creamy, slightly earthy flavor pairs perfectly with the bright acidity of lime and the freshness of cactus.

    Cactus Paddles (Nopales)

    Nopales are a staple of Mexican cooking — slightly acidic, green, and succulent. Look for them fresh at Mexican grocery stores, or use jarred nopales as a convenient alternative.

    • Why they matter: Their mild acidity and firm texture balance the creaminess of the fava beans and keep the salad from feeling heavy.

    Tomatoes

    Use fresh, ripe tomatoes. Remove the seeds and use only the flesh to prevent the salad from becoming watery.

    • Why they matter: They add juiciness and a touch of sweetness that rounds out the acidity of the lime dressing.

    Cilantro

    Fresh cilantro is non-negotiable here. Its robust, herbal taste is one of the defining flavors of the Mexican profile in this dish.

    • Why it matters: Cilantro brings a refreshing herbaceousness that lightens every bite and adds that unmistakable Mexican identity.

    Jalapenos

    One to two jalapeños, roughly chopped, adds just the right level of heat without overpowering the other flavors. Remove the seeds for a milder kick.

    • Why they matter: Heat activates the other flavors in the salad and makes every bite more dynamic.

    Lime

    Generous lime juice forms the base of the dressing. Do not be shy — this salad needs real citrus brightness.

    • Why it matters: Lime acid brightens every ingredient, makes the beans taste fresher, and ties the dressing together.

    Mexican Oregano

    Mexican oregano has an earthy, slightly citrusy flavor that is distinct from Mediterranean oregano. It is worth seeking out for this recipe.

    • Why it matters: It adds depth and authenticity to the dressing — the flavor note that makes this taste unmistakably Mexican.

    Mexican fava bean salad with tomato and cilantro beside fresh green onions

    How to Cook Fresh Fava Beans

    Cooking fresh fava beans only takes 5–7 minutes depending on pod size. Remove the beans from their shells and boil them in salted water for 5–7 minutes. Meanwhile, prepare a bowl of ice water. Once the beans turn a vibrant moss green, transfer them to the ice bath immediately. Once cool, use your fingers to peel off the pale outer skin — the bright green inner bean is what you want.

    How to Cook Dried Fava Beans

    Dried fava beans require soaking and simmering before use.

    1. Place beans in a large bowl and cover with water. Soak overnight or for at least 8 hours.
    2. Drain, rinse, and place in a pot. Cover with fresh water at least 2 inches above the beans.
    3. Bring to a boil, then reduce to a simmer. Cook for 1 to 1.5 hours until tender, adding water as needed.

    For another hearty Mexican salad, try the original pico de gallo or the warm lentil and sweet potato salad.

    Fava bean and nopal salad on a white plate next to roast chicken and rice

    Frequently Asked Questions

    Can I use canned fava beans instead of fresh?

    Yes — canned fava beans are the easiest option. Simply drain, rinse thoroughly under cold water, and they are ready to use. The texture is slightly softer than fresh but the flavor is excellent, especially once dressed.

    What can I substitute for nopales?

    If you cannot find cactus paddles, you can substitute with blanched green beans, sliced zucchini, or cucumber for a similar crunchy, fresh element. The flavor profile will shift slightly but the salad will still be delicious.

    How long does fava bean salad keep?

    Store undressed salad in the refrigerator for up to 3 days. If already dressed, it is best consumed within 24 hours as the acid in the lime juice will continue to soften the vegetables.

    Is this salad served warm or cold?

    It is typically served at room temperature or slightly chilled. If using freshly cooked beans or nopales, allow them to cool before dressing and combining.

    Can I make the dressing ahead of time?

    Absolutely. Whisk all dressing ingredients together and store in a sealed jar in the refrigerator for up to 5 days. Give it a good shake before using.

    Mexican fava bean salad with tomato and cilantro beside fresh green onions

    Mexican Fava Bean Salad

     Try the amazing flavours of Mexico with our delicious fava bean salad! This dish features fresh cactus paddles, juicy tomatoes, and zesty onions. 
    Prep Time 30 minutes
    Cook Time 10 minutes
    Total Time 40 minutes
    Course: Salad
    Cuisine: Mexican
    Calories: 195

    Ingredients
      

    • 1 can (15pz) fava beans, drained and rinsed 2.5 cups of shelled and peeled fresh fava beans
    • 1 cup diced fresh tomatoes
    • 1 cup diced fresh cactus paddles "nopales"
    • ½ cup red onion, finely chopped
    • ¼ cup cilantro, finely chopped
    • 1-2 jalapeños, roughly chopped
    Salad Dressing
    • 2 limes, juiced
    • 1 tsp dried oregano
    • ¼ cup olive oil
    • 1 tsp sugar
    • 1 tsp salt to taste
    • black pepper to taste

    Method
     

    1. FRESH FAVA BEANS: bring a large pot of water to a boil. Remove the bean from the shell, and boil them for 5-7 minutes. 
       Once the pods have turned into a moss colour green, remove them and quickly place them in the ice bath. Now use your fingers to peel off the tough outer skin of each bean. The vibrant green inner bean is what you want to keep.
    2. CANNED FAVA BEANS: Remove the beans from the can and strain out the liquid. Give them a good rinse in water. Strain.
    3. DRESSING: Put all the ingredients together and give it a good stir with a whisk.
    4. PUTTING IT TOGETHER: Add all the fava beans tomato, cactus paddles, red onion, cilantro, and jalapeños together in a large bowl. Give it a good toss, and top it off with the dressing and give it another good toss. Serve immediately.

  • Green Pozole ‘Pozole Verde’

    Green Pozole ‘Pozole Verde’

    Green pozole is Mexico’s cozy, emerald-green bowl of comfort — tender pork simmered with tomatillos, poblano, epazote, and pepitas, then served with a spread of garnishes that make every bite your own. It is beloved in the southern states of Guerrero and Oaxaca, but once you make it at home you will understand why every region in Mexico has claimed it as their own.

    This post may contain affiliate links. If you purchase through these links, I may earn a small commission at no extra cost to you. Thank you for supporting Love & Harvest!

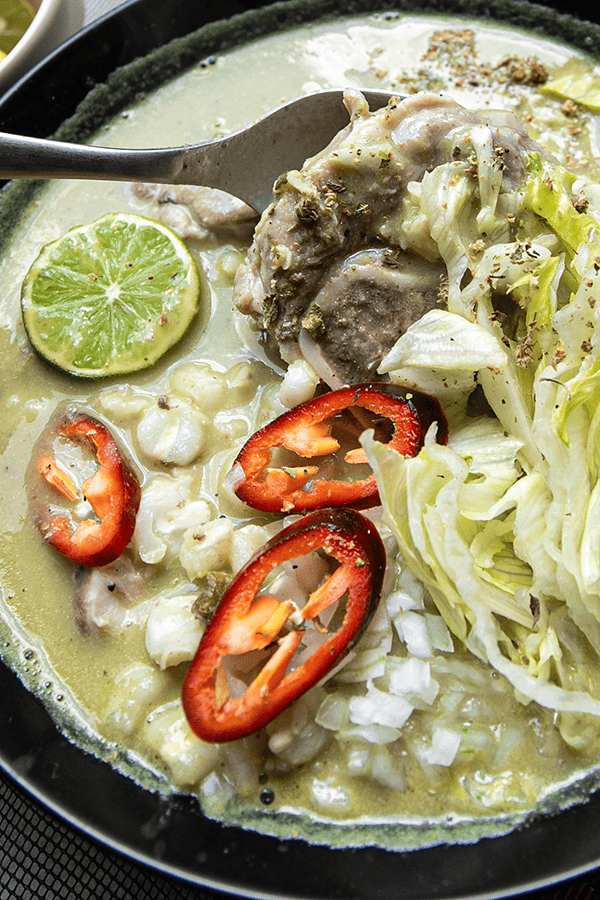
    Bowl of green pozole with radish, chile slices, cabbage and lime

    What Is Pozole?

    Pozole is a traditional Mexican soup made with hominy (dried maize treated with lime), meat (usually pork), and a deeply seasoned broth. It is a celebration dish — found at birthdays, national holidays, and family gatherings — and in many Mexican cities you will find dedicated pozolerias that serve nothing else. Three varieties exist: red (rojo), green (verde), and white (blanco), each tied to a different region and flavor profile.

    pozole verde bowls

    Red vs. Green vs. White Pozole

    Red Pozole (Pozole Rojo)

    • Region: Central and western Mexico — Jalisco, Guanajuato, Michoacán. Guadalajara is famous for its red pozole.
    • Flavor: Deep, earthy, slightly spicy. Built on dried guajillo and ancho chiles.

    Green Pozole (Pozole Verde)

    • Region: Southern Mexico — Guerrero and Oaxaca, with strong presence in central Mexico.
    • Flavor: Fresh, tangy, herbaceous. Tomatillos and green chiles give the broth its color and acidity.

    White Pozole (Pozole Blanco)

    • Region: Northern and central Mexico — Sonora, Sinaloa.
    • Flavor: Neutral, mild broth. The garnishes do the heavy lifting.

    ingredients for green pozole

    History of Pozole

    Pozole is deeply rooted in pre-Columbian Mesoamerica, where hominy held sacred significance. It was used in religious ceremonies, and historical accounts describe it as a ritual dish during certain sacrificial rites. When the Spanish conquistadors arrived in the 16th century, they introduced pork, beef, and European spices, transforming pozole into the dish we recognize today — a fusion of indigenous and colonial culinary traditions. Today it is one of Mexico’s most beloved and iconic dishes, celebrated in homes and restaurants from Tijuana to Oaxaca.

    Ingredients for Green Pozole

    Ingredients

    Tomatillos

    • Why they matter: Tomatillos are what turn the broth green and give it its signature tang. My mother-in-law insists on smaller tomatillos — they are more acidic and aromatic than large ones. Canned tomatillos (B07B17ZDQZ) work in a pinch, but fresh are far superior for this dish.

    Hominy

    • Why it matters: Hominy is the soul of pozole. These are dried maize kernels treated with lime water (nixtamalization), which transforms them into large, chewy, spongy pieces that absorb the green broth beautifully. Do not substitute regular corn — the texture will not be the same. Use dried hominy (B0008J3I9U) for the best result, or drained canned hominy if short on time.

    Poblano Peppers

    • Why they matter: Charring the poblano directly on a flame is essential — it adds a smoky depth and softens the pepper so it blends smoothly into the sauce. When dried, poblanos are called ancho chiles (B00TQVHXNO) — worth keeping in your pantry for red pozole or mole.

    Epazote

    • Why it matters: Epazote is an aromatic Mexican herb with a bold, slightly resinous flavor — described as a mix of mint, citrus, and earthiness. It is a staple in southern Mexican cooking and completely transforms the broth. If you cannot find it fresh, dried works but use less (it intensifies when dried).

    Mexican Oregano

    • Why it matters: Mexican oregano (B07D62QY2F) is botanically different from Mediterranean oregano — it has a more citrusy, robust profile that holds up to the rich green broth. Do not substitute Mediterranean oregano if you can avoid it.

    green pozole with garnishes

    Professional Tips

    1. Pressure-Cook the Meat First

    Pork knuckle and other tough cuts contain collagen and connective tissue that require prolonged cooking to become tender. Pressure cooking converts tough fibers into gelatin in 40 minutes instead of 3+ hours on the stovetop. It also infuses the meat with the aromatics in the pot (bay leaf, garlic, onion) and keeps it moist. We love our Instant Pot Duo 7-in-1 for this — it also makes rice, stews, and slow-cooked dishes.

    2. Pan-Char All the Salsa Ingredients

    Do not blend raw tomatillos, onion, and garlic into the sauce. Charring in a dry hot skillet caramelizes the natural sugars, removes excess moisture, and adds a smoky complexity that distinguishes a restaurant-quality pozole from a flat one. The Maillard reaction at work — same principle as searing meat. See also our Instant Pot Mexican menudo for another recipe that uses this charring technique.

    3. Garnish Generously

    The garnishes are not optional — they complete the dish. Standard pozole verde accompaniments: thinly sliced radish, shredded lettuce or cabbage, diced white onion, sliced serrano, avocado, lime wedges, tostadas with sour cream, and a sprinkle of Mexican oregano. For crunch, add chicharron (pork cracklings).

    finished bowl of green pozole

    Frequently Asked Questions

    Can I use chicken instead of pork for green pozole?

    Yes — chicken thighs are the most common substitute. Skip the pressure cooker and simmer bone-in thighs directly in the green sauce for 30–40 minutes until tender. The result is lighter but equally delicious.

    Where do I find hominy?

    Most Latin grocery stores carry both canned and dried hominy. In the US, you can order dried hominy (B0008J3I9U) on Amazon. If using dried, soak overnight and simmer for 2–3 hours before adding to the pozole.

    How thick should the green sauce be?

    After blending, the sauce should be thick enough to coat a spoon but still pourable. If it is too thick after cooking, add reserved pork cooking water — I recommend starting with 2 cups and adjusting. The final pozole should be a rich, coating broth rather than a thin soup.

    Can I make green pozole ahead of time?

    Absolutely. In fact it tastes better the next day as the flavors deepen. Store broth and meat separately in the refrigerator for up to 4 days. The garnishes must always be prepared fresh.

    What is the difference between pozole verde and menudo?

    Both are Mexican hominy soups, but menudo uses beef tripe rather than pork and has a completely different flavor profile. See our Instant Pot Mexican menudo if you want to explore both.

    Pozole verde topped with shredded cabbage, red chile and lime

    Green Pozole “Pozole Verde”

    A hearty stew, a celebration of hominy, tender chunks of pork, and fresh green herbs – that's green pozole. It's a rich, lush creation, teeming with the earthy essence of tomatillos, cilantro, and jalapeños, all meticulously pureed into a velvety, emerald-green elixir that clings to your spoon like a cherished secret.
    Print Recipe
    Pin Recipe
    Prep Time:20 minutes
    Cook Time:30 minutes
    Pressure Cook:40 minutes
    Course: Soup
    Cuisine: Mexican
    Keyword: green pozole, northern pozole, pozole verde

    Equipment

    • pressure cooker
    • blender

    Ingredients

    Pressure Cook Meat

    • 1½ kg pork knuckle, 1 inch sliced, frozen or fresh
    • 2 cloves
    • 3 bay leaves
    • ½ white onion, sliced in half
    • 3 garlic cloves
    • 2 quarts water (or 8 cups)

    Pozole Soup

    • 1 poblano pepper
    • 1 kg tomatillos, sliced ½ inch
    • 4 tbsp pumpkin seeds (pepitas)
    • 2–3 serrano peppers, deseeded and cut in half
    • 1 white onion, sliced in half
    • 2 garlic cloves
    • 1 cup epazote
    • 1 tsp dried Mexican oregano
    • 2 allspice (pimento gorda), crushed, or 1 tsp ground allspice
    • sea salt to taste
    • 3 cups hominy, drained

    Instructions

    Pressure Cook Pork

    • Take the pork knuckles and place them in a large bowl. Rinse several times in cold water, then soak in cold water with 2 tsp of salt for 15–30 minutes.
    • Rinse the pork in cold water again and place in your pressure cooker with the remaining ingredients. Pressure cook on high for 40 minutes.
    • Once done, release the valve. Open the lid when safe, remove the spices, and reserve both the meat and the cooking liquid.

    Green Pozole

    • Gas stove: In a large frying pan, heat 2 tsp of oil over medium-high. Add tomatillos, pumpkin seeds, serrano, onion, and garlic. Char each ingredient until browned (pumpkin seeds toast first — watch carefully). Add more oil as needed to brown the tomatillos. On a separate burner, char the poblano pepper directly on the flame, turning with tongs until all sides are completely blackened. Set aside to cool, then peel off the skin and remove seeds.
    • Electric stove: In a large frying pan, heat 2 tsp of oil over high. Add all ingredients including the poblano pepper. Char each until browned, pumpkin seeds first. For the poblano, keep flipping with tongs until completely charred on all sides. Set aside, peel, and deseed.
    • Once everything is charred, add all ingredients to a blender with epazote, oregano, and allspice. Blend on high until smooth.
    • Heat a large pot with 2 tbsp of oil over medium-high. Add the green sauce and cook for 10 minutes. Add the pork and hominy, then cook for 30 minutes. Add reserved pork cooking water (2–4 cups) to reach your preferred consistency. Salt to taste.
    • Serve with radish, shredded lettuce, diced onion, serrano slices, avocado, lime wedges, tostadas with sour cream, oregano, and chicharron on the side.
  • Vegetarian Mango Soy Ceviche

    Vegetarian Mango Soy Ceviche

    This Vegetarian Mango Soy Ceviche is proof that plant-based food can be just as vibrant and satisfying as anything from the sea. Juicy mango, tangy lime, jalapeño heat, and tender soy protein come together in a refreshing dish that is perfect for warm summer days — and ready in under 40 minutes.

    Vegetarian Mango Soy Ceviche plated with red salsa

    This post may contain affiliate links. If you purchase through these links, I may earn a small commission at no extra cost to you. Thank you for supporting Love & Harvest!

    What Is Ceviche?

    Ceviche is a vibrant and refreshing dish that hails from the coastal regions of Latin America. Traditionally it is made by marinating raw fish or shellfish in citrus juice — the acid “cooks” the seafood, denaturing the proteins and giving it a firm texture. The result is a zesty and flavourful dish enjoyed as an appetizer or a light meal.

    Here in Mexico, ceviche is a celebration of fresh ingredients and bold flavours. It features an array of complementary components such as onions, tomatoes, herbs like cilantro, and a touch of heat from jalapeños. The beauty of ceviche lies in its versatility — vegetarian versions like this Mango Soy Ceviche use vegetables and fruits as the base, marinated in citrusy goodness to create a refreshing and tangy medley of flavours.

    Vegetarian Mango Soy Ceviche ingredients laid out

    My Vegetarian Journey in Mexico

    In my culinary journey through Mexico, I noticed the abundance of fresh vegetables and fruits in the markets, and also that vegetarian dishes did not always take the spotlight in traditional Mexican cuisine. As someone passionate about vegetarian food, I was inspired to create a dish that proves vegetarian cuisine is anything but mundane.

    With each bite of the Mango Soy Vegetarian Ceviche, I am transported to the bustling streets of Mexico, where the lively atmosphere and rich culinary heritage come alive. The succulent mangoes bring a burst of sweetness, the tangy lime juice adds a refreshing kick, and the dried soy protein creates a satisfying hearty texture that makes this dish a complete meal.

    Ingredients for Vegetarian Mango Soy Ceviche

    Dried Soy Protein

    • Why it matters: Dried soy protein (also called textured vegetable protein or TVP) is the meat substitute that gives this ceviche its hearty, chewy texture. Once boiled and cooled, it absorbs the lime, Maggie sauce, and spices beautifully, mimicking the texture of seafood without any fish. Look for it in health food stores or order it online.

    Ripe Mango

    • Why it matters: The mango delivers natural sweetness and tropical flavour that balances the acidity of the lime and the savoury depth of the sauces. Choose a mango that yields slightly to pressure — too firm and it won’t have enough flavour, too soft and it turns mushy in the dish.

    Fresh Lime Juice

    • Why it matters: Lime is the soul of any ceviche. The citric acid brightens every ingredient and ties the flavours together. Use freshly squeezed lime juice — two small limes — for the best results.

    Maggie Sauce

    • Why it matters: Maggie sauce adds a savoury, umami depth that makes this vegetarian ceviche taste complex and restaurant-worthy. It is a beloved Mexican condiment found in almost every kitchen in Mexico. A little goes a long way.

    Jalapeño

    • Why it matters: The jalapeño brings the heat that makes ceviche addictive. Finely chop it for even distribution. Remove the seeds for a milder version or keep them for full heat.

    Plated mango soy ceviche with red salsa base

    Why Try This Mango Soy Vegetarian Ceviche?

    1. Bursting with vibrant flavours: The combination of ripe mangoes, zesty lime juice, and the umami richness of Maggie sauce creates a harmonious balance that dances on your palate.
    2. Refreshing and light: The citrusy marinade paired with juicy mangoes provides a delightful burst of freshness, making it perfect for warm weather indulgence.
    3. Vegetarian delight: This ceviche showcases the beauty and versatility of vegetarian cuisine — you can enjoy the essence of a traditional ceviche while staying fully plant-based.
    4. Texture experience: The soy protein, juicy mango, and crisp jalapeño add layers of texture to every bite.
    5. Easy and quick: With straightforward instructions, you can have this on the table in under 40 minutes.
    6. Sustainable choice: Overfishing and unsustainable fishing practices have depleted marine resources worldwide. Choosing plant-based alternatives like this ceviche lets you enjoy a delicious meal with a lighter impact on the planet.

    Vegetarian ceviche close-up showing texture

    Vegetarian Ceviche Flavour Profile

    The flavour of Mango Soy Vegetarian Ceviche can be described as a tantalizing combination of sweet, tangy, savoury, and refreshing notes in perfect harmony. The ripe mangoes bring natural sweetness, the lime juice provides a bright citrusy kick that balances that sweetness, and the Maggie sauce and vegan fish sauce layer in a complex, savoury depth that makes this dish genuinely surprising for first-time tasters.

    Love fresh and vibrant Mexican-inspired dishes? Try these others from Love & Harvest:

    Frequently Asked Questions

    What is dried soy protein and where do I find it?

    Dried soy protein (also called TVP — textured vegetable protein) is a high-protein meat substitute made from defatted soy flour. It comes in small granules or chunks, is shelf-stable, and doubles in size when rehydrated. Find it at health food stores, Latin markets, or order a bag of dried soy protein on Amazon.

    Can I make this ceviche ahead of time?

    Yes. The red salsa and the soy protein can be prepared up to a day in advance and stored separately in the refrigerator. Combine everything and add the fresh mango just before serving to keep the texture and colour at their best.

    How do I make this dish spicier or milder?

    For more heat, keep the jalapeño seeds and add a second jalapeño. For a milder version, remove all seeds and membrane from the jalapeño before chopping, or substitute a milder pepper like poblano.

    Can I use fresh soy protein instead of dried?

    The recipe calls for dried soy protein specifically because its texture after rehydration mimics seafood. Fresh tofu can be substituted — press it dry, cube it, and use it directly without boiling. The flavour absorption will be different but still delicious.

    What can I serve this ceviche with?

    Serve with tostadas, corn tortilla chips, or slices of avocado. The red salsa base is also wonderful on its own as a dip. A squeeze of extra lime over the top just before serving brings out all the flavours.

    Is this ceviche gluten-free?

    The base ingredients are naturally gluten-free, but check your brand of dried soy protein and Maggie sauce — some brands add wheat-based ingredients. Substitute coconut aminos for the Maggie sauce if you need a certified gluten-free alternative.

    Vegetarian Mango Soy Ceviche

    Vegetarian Mango Soy Ceviche

    A delightful twist on the traditional seafood-based ceviche. Our Mango Soy Ceviche is bursting with vibrant colours and flavours, which offer a refreshing and tangy taste, perfect for warm summer days. Print Recipe Pin RecipePrep Time:20 minutes Cook Time:15 minutes Course: AppetizerCuisine: MexicanKeyword: ceviche, soy, vegetarianServings: 6 people

    Equipment

    • high speed blender
    • colander

    Ingredients

    • 2 cups dried soy protein
    • 1 ripe mango cubed
    • 1 jalapeno finely chopped
    • 1 tbsp red onion finely chopped
    • 2 small lime juiced
    • 1 tsp Maggie sauce
    • 2 tsp vegan fish sauce
    • 1 tsp salt
    • 1 tbsp olive oil garnish

    Red Salsa

    • 1-2 tsp olive oil
    • 4 small roman tomatoes
    • 3 branches of cilantro
    • 1 tsp apple cider vinegar
    • pinch of salt

    Instructions

    Red Sauce

    • In a saucepan, turn the heat to medium-high. Slice the tomatoes into quarter-inch slices. Add the oil to the pan and sear the sides of all the tomatoes until slightly browned. Remove from heat.
    • In a high-speed blender, add the grilled tomatoes, cilantro, vinegar, and salt. Blend until smooth. Set aside.

    Mango Soy Ceviche

    • Add the dried soy proteins to a colander. Rinse under the faucet to remove any dust particles. Set aside.
    • Bring 1 litre of water to a boil, then add the rinsed soy protein. Cook on medium heat for about 10 to 15 minutes. Watch the pot carefully as it can foam up. Drain through a colander and let the cooked soy protein cool to room temperature.
    • In a large bowl, combine the cubed mango, jalapeño, red onion, lime juice, Maggie sauce, vegan fish sauce, and salt. Add the cooled soy proteins and mix well.
    • On the serving dish, spread the red salsa as the base. Place the mango soy ceviche on top in the centre. Drizzle the olive oil evenly over the top. Serve cold.
  • Easy Mexican Salsa Verde

    Easy Mexican Salsa Verde

    If you have ever tasted a truly fresh salsa verde made with raw tomatillos, you already know nothing from a jar comes close. This easy Mexican salsa verde recipe comes together in under 10 minutes with zero cooking required — just drop everything in a blender, pulse, and you have a bright, tangy green sauce that makes tacos, eggs, and grilled meats come alive.

    This post may contain affiliate links. If you purchase through these links, I may earn a small commission at no extra cost to you. Thank you for supporting Love & Harvest!

    Bowl of tomatillo salsa verde with a spoon surrounded by fresh tomatillos

    Mexican cuisine is known for its vibrant flavours and rich history. One of the most popular condiments used in Mexican cuisine is salsa verde. 

    In this blog post, we’ll dive into the history and ingredients of salsa verde, as well as some delicious ways to use it in your cooking.

    What You Need to Know about Salsa Verde

    Salsa verde, which translates to “green sauce,” has been a staple of Mexican cuisine for centuries. The sauce is made from a combination of tomatillos, chilies, garlic, cilantro, and vinegar, giving it a tangy, slightly spicy flavor.

    When dining in Mexico, you will find that all restaurants offer both red and green salsa. However, each establishment prepares their own version of these salsas, resulting in a unique flavor profile for each one. Some may be rawer, thicker, spicier, or even tangier than others.

    Although there are numerous versions of salsa verde, with each person believing their recipe is the best, the real standout ingredient is the tomatillo. Tomatillos are small, green fruits that originate from Mexico, and they are responsible for giving the sauce its distinctive vibrant green hue.

    Fresh tomatillos, garlic, green chiles and cilantro on a wooden board

    How It Is Made

    Making salsa verde is easy and can be done in just a few minutes. Some people like to roast or boil the tomatillos, but I love it raw! I will be sharing the easy raw salsa verde version.

    Start by removing the husks from the tomatillos and rinsing them under cold water. Next, add the tomatillos, garlic, cilantro, and chili peppers in a blender. Blend on high for 30 seconds until smooth, and ta-da, you’re done! Salt the salsa and vinegar to your liking.

    I use a Vitamix, but any high-speed blender works. I use it to make everything from sauces to soup!

    Green and purple tomatillos, some still in their husks, in a steel bowl

    What You Can Use Salsa Verde For

    One of the great things about salsa verde is its versatility. It can be used as a dip for chips, a topping for tacos, or a marinade for meat. Here are a few of our favourite ways to use salsa verde in the kitchen:

    1. Tacos: Salsa verde is a perfect topping for tacos, adding a tangy, slightly spicy flavour to your favourite protein. Try it on steak, chicken, or even fish tacos for a burst of flavour.
    2. Enchiladas: Instead of using traditional red enchilada sauce, try using salsa verde. It pairs perfectly with shredded chicken and cheese and gives the dish a bright flavour.
    3. Grilled meats: Use salsa verde as a marinade for grilled meats like chicken or pork. The acid in the tomatillos will help tenderize the meat while adding a delicious flavour.
    4. Eggs: Salsa verde is a great addition to breakfast dishes like scrambled eggs or omelets. It pairs well with cheese and adds a bit of zing to your morning meal.

    Love Mexican salsas? Try our fresh and easy Pico de Gallo or the smoky, addictive Salsa Macha from Veracruz.

    Salsa verde on a platter of grilled steak, sausages, chicken and stuffed peppers

    What’s in Salsa Verde

    In addition to its delicious flavour, salsa verde is made with simple, fresh ingredients. Tomatillos give it its bright, tangy flavour.

    So the next time you’re looking to add a bit of flavour to your meal, consider reaching for a jar of salsa verde.

    Why You Should Make Salsa Verde

    In conclusion, salsa verde is a staple condiment in Mexican cuisine that’s easy to make and adds a burst of flavour to any dish. With just a few simple ingredients, you can make a batch of salsa verde to keep on hand for all your cooking needs.

    Whether you’re using it as a dip for chips, a topping for tacos, or a marinade for meat, salsa verde is sure to add a delicious zing to your meal. Give it a try and taste the flavour of Mexico in your own kitchen.

    Bowl of bright salsa verde beside grilled steak and roasted peppers

    Ingredients

    Key Ingredients

    Tomatillos

    • Why they matter: The backbone of every authentic salsa verde. Raw tomatillos deliver a bright, tangy, slightly citrusy flavour that no substitution can replicate. Look for firm ones with their papery husks still intact. You can find canned tomatillos as a convenient alternative when fresh are unavailable.

    Jalapeños

    • Why they matter: Fresh jalapeños bring clean, grassy heat. Remove the seeds and ribs for mild heat, leave them in for full fire. For a smokier profile, you can substitute a serrano or use a roasted Hatch green chile.

    Cilantro

    • Why they matter: Fresh cilantro is non-negotiable. Two full bunches give you that herbaceous depth that makes this salsa taste unmistakably Mexican. Do not use dried cilantro — it will not work.

    Professional Tips for Salsa Verde

    Pro Tip #1 – Raw Tomatillos Taste Best

    There are many versions of salsa verde out there. Some people roast or toast the tomatillos before throwing them in the blender. And there are some that will boil the tomatillos until it turns a slight yellow. For me, I like it raw! Raw gives out a vibrant green colour and I find the taste to be more to my liking. If you have plans to cook it, don’t overcook the tomatillos or it will give out a slight bitterness to it.

    A hand holding a single fresh tomatillo with its husk

    Pro Tip #2 – Acid Is Your Friend

    This recipe calls for white vinegar, but you can substitute for any acid! Some other substitutes that will work are apple cider vinegar or fresh lime juice.

    Pro Tip #3 – Storage

    This fresh salsa can be stored for days! Because we add vinegar to the salsa, it can be kept fresh for a long time. This salsa verde can last for around 5 to 7 days when stored properly in the refrigerator.

    Frequently Asked Questions

    What is salsa verde made of?

    Authentic Mexican salsa verde is made from raw tomatillos, fresh jalapeños, garlic, cilantro, white vinegar, and salt. No cooking required for this version.

    Can I make salsa verde without a blender?

    Yes. A food processor or even a molcajete (traditional stone mortar) works well. The molcajete gives a slightly chunkier, more rustic texture that many people prefer.

    How long does homemade salsa verde last?

    Stored in an airtight container in the refrigerator, it stays fresh for 5 to 7 days. The vinegar acts as a natural preservative. You can also freeze it for up to 3 months.

    Is salsa verde spicy?

    It depends on your jalapeños. Remove the seeds and membranes for a mild, tangy salsa. Leave them in for a spicier kick. You can also substitute with serrano peppers for more heat.

    What is the difference between salsa verde and salsa roja?

    Salsa verde uses tomatillos and green chiles for a bright, tangy flavour. Salsa roja uses ripe red tomatoes and dried red chiles for a deeper, earthier taste. Both are staples on every Mexican table.

    Can I use canned tomatillos instead of fresh?

    Yes, canned tomatillos work well when fresh ones are hard to find. Drain them first before blending. The flavour will be slightly milder than fresh, but still delicious.

    Salsa verde in a white bowl surrounded by tomatillos and green chiles

    Authentic Mexican Salsa Verde

    Say hello to your new favourite condiment! This easy Mexican salsa verde recipe is fresh and flavourful – it will brighten up any food! Print Recipe Pin RecipePrep Time:10 minutes Course: condimentCuisine: MexicanKeyword: no-cook, salsa verdeServings: 8 people

    Equipment

    • blender

    Ingredients

    • 1 kg tomatillos husked and rinsed
    • 2 cilantro bunches
    • 1 garlic clove
    • 2-3 jalapeños seeded (leave the seeds if you want it spicier)
    • 1 tsp white vinegar
    • salt

    Instructions

    • In a blender or food processor, combine the tomatillos, cilantro, garlic, jalapeño pepper, vinegar, and salt.
    • Pulse until smooth.
    • Taste and adjust seasoning as needed. Serve immediately or store in the refrigerator for up to a week.