Category: dinner ideas

  • Cured Salmon Gravlax

    Cured Salmon Gravlax

    Cured salmon gravlax is one of the most impressive things you can put on a table, and one of the easiest. Salt, sugar, dill, and two days in the fridge — that is the entire process. No special equipment, no cooking, no smoke. Just chemistry doing its quiet work. Once you try it, smoked salmon from a package will never feel the same.

    This post may contain affiliate links. If you purchase through these links, I may earn a small commission at no extra cost to you. Thank you for supporting Love & Harvest!

    cured salmon

    How Salt and Sugar Cure Salmon

    Salt and sugar preserve food through osmosis: they draw moisture out of the fish cells, raising the concentration of dissolved solids inside the flesh to a level where most harmful microorganisms cannot survive. Salt works by dehydrating bacterial cells. Sugar works by binding free water molecules, reducing the water activity of the fish to levels that inhibit spoilage. Together, they create an environment that is hostile to bacteria while simultaneously seasoning and firming the salmon into the silky, translucent product you know as gravlax.

    Ingredients Deep-Dive

    Salmon — Quality and Safety

    • Why farmed over wild: Farmed salmon is pellet-fed, which eliminates the risk of parasite-infected prey that wild salmon can carry. For raw preparations like gravlax, this matters. If using farmed salmon that is not labelled sashimi-grade, freeze it at -10°F / -23°C for at least one week before curing to eliminate any remaining parasite risk.

    A great choice: Pink Curing Salt can optionally be added in very small amounts for longer cures, though it is not required for a standard 36-hour gravlax.

    Coarse Sea Salt

    • Why coarse, not fine: Coarse salt crystals release salt more slowly as they dissolve, giving you a more controlled, even cure. Fine salt draws moisture too aggressively and can over-cure the outer layer while the interior is still under-cured.

    Sugar

    • Why sugar in a savoury cure: Sugar balances the salt’s harshness, contributes a subtle sweetness to the flesh, and accelerates the dehydration process by competing with salt for free water molecules. Most of the sugar washes off with the liquid after curing, so the final flavour is not sweet.

    Fresh Dill

    • Why dill is traditional: In Scandinavian curing tradition, dill is the signature herb for gravlax — its anise-like, grassy flavour pairs naturally with the richness of fatty salmon. Fresh dill delivers far more aromatic oil than dried.

    cured salmon gravlax

    Cure Time Options

    • 24 hours — light cure: softer texture, milder salt flavour, closer to sashimi
    • 36 hours — medium cure (recommended): balanced salt and sweetness, silky yet firm texture
    • 48 hours — hard cure: firmer, saltier, more concentrated flavour

    Why Use a Food Scale

    Because you are working with raw fish, precision in the salt-to-fish ratio matters for both safety and flavour. Measuring by volume cups is unreliable — coarse salt has very different density than fine salt. A food scale removes the guesswork. Use a flat-bottomed curing board or dish to catch the liquid the salt draws out during the cure.

    What to Serve With Cured Salmon Gravlax

    Gravlax is endlessly versatile. Serve it on toasted bread with cream cheese and capers, layer it in a bagel with red onion and lemon, toss it into a cold pasta salad, or use it as a topping on rice bowls. Try it alongside homemade sashimi for a full Japanese-inspired spread, or serve it with crispy panko-crusted baked salmon for a salmon-focused dinner party platter.

    Frequently Asked Questions

    Is homemade cured salmon gravlax safe to eat?

    Yes, when done correctly. The combination of salt and sugar inhibits microbial growth effectively. The critical safety steps are: use farmed salmon (not wild), freeze it for at least one week at -10°F / -23°C before curing if not sashimi-grade, use precise measurements, keep it refrigerated throughout the cure, and consume within 5–7 days of curing.

    What is the difference between gravlax and smoked salmon?

    Smoked salmon is cured and then cold-smoked to add a distinctive smoky flavour and firmer texture. Gravlax is cured only — no heat or smoke involved. The texture of gravlax is silkier and more raw-like, and the flavour is cleaner and more delicate. Gravlax is also significantly cheaper to make at home than the equivalent weight of smoked salmon from a store.

    Can I use regular table salt instead of coarse sea salt?

    Technically yes, but reduce the amount by about 20–25% because fine salt is denser and more compact than coarse. Over-salting with fine salt will produce an unpleasantly salty result. Coarse sea salt is strongly preferred for its slower, more controlled release.

    Can I cure salmon without dill?

    Yes. Dill is traditional but not structurally required. You can substitute other herbs — lemon zest with thyme, or a citrus cure with orange and fennel seeds are common variations. The salt and sugar remain the functional curing agents regardless of herbs.

    How long does cured salmon gravlax last in the fridge?

    After curing is complete and the salmon is rinsed and dried, it will keep in the refrigerator for 5–7 days tightly wrapped. Slice only what you need and keep the remainder wrapped to minimise oxidation of the cut surface.

    Can I freeze cured salmon gravlax after curing?

    Yes. Slice thinly, layer between parchment paper, and freeze in an airtight container for up to 2 months. Thaw in the refrigerator overnight before serving.

    Side of cured salmon gravlax in a dark baking tray

    Cured Salmon Gravlax

    Homemade Cured Salmon Gravlax that is easy and delicious. Using only a handful ingredients to make cured salmon that goes well with anything like a bagel with cream cheese or a poke bowl with all your favourite sides on top of rice. The options are endless!
    Course: Appetizer
    Cuisine: Scandinavian
    Calories: 195

    Ingredients
      

    • 1 kg fresh farmed salmon
    • 250 g course sea salt
    • 250 g sugar
    • ½ cup chopped fresh dill
    • black pepper (to taste)

    Equipment

    • food scale

    Method
     

    1. Rinse the salmon and pat dry with a paper towel. set aside.
    2. Combine the sugar, salt, and pepper
      together in a bowl and mix well.
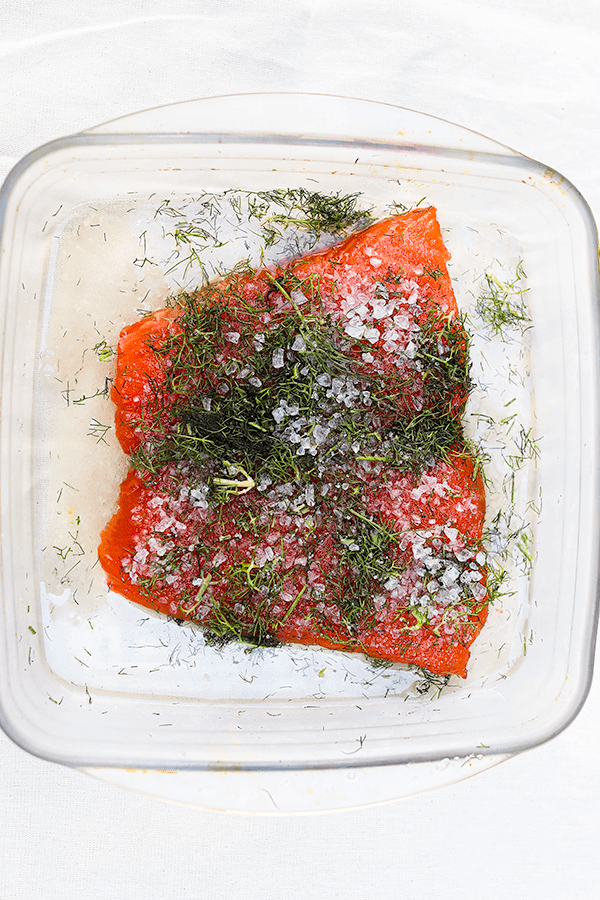
    3. Using a sizeable non-reactive plate, place cling wraps on top and extra to cover the fish ( I normally use my large 2 quartz oblong baking dish, see example).
      However, for this example, I used my square non-reactive brownie pan to cure the salmon and to catch the water the salt and sugar will extract from the salmon.
    4. Lay half the bowl of salt and sugar on top of the plastic wrap and ¼ cup of the fresh dill. Spread it out so it touches all the surface area of the fish. It's okay to spread the surface area larger than the fish.
    5. Place the fish on top and add the remains, salt, sugar, pepper and dill on top. Carefully fold the plastic wrap around the fish and close off any open areas.Place a small plate or cutting board on top of the fish, and place a heavy can on top of the board.
    6. Place it in the fridge for 12 hours. Half way through the curing time (6 hours), flip the fish over. You will notice there's a lot of liquid that came out and its fine.
    7. Remember:
      24 hours for a light cure
      36 hours for a medium cure (we will be doing this one)
      48 hours for a hard cure
    8. After 12 hours, remove the fish from the fridge and rinse off all liquid and remaining crystals in the dish. Pat dry and return the fish back in the fridge for another 3-12 hours uncovered to dry out the surface a bit.
    9. (optional) Sprinkle another ¼ cup of dill on top for taste.
    10. Thinly slice the fish on an angle and serve on toasted bread. Squeeze some lemon on top.

    More Salmon and Seafood Recipes

  • Easy Spring Octopus Salad With Mint & Lemon

    Easy Spring Octopus Salad With Mint & Lemon

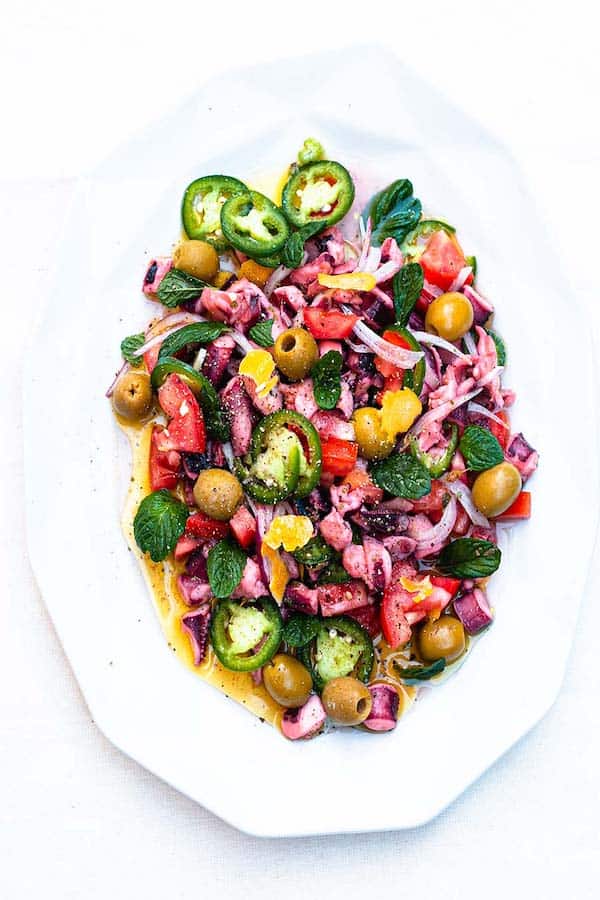
    There is something quietly magical about this salad. The first bite of tender octopus tossed in bright lemon juice, fruity olive oil, and fresh mint leaves is the kind of dish that makes you pause mid-chew. It is Mediterranean in spirit but rooted right here in Mexico, and it is the perfect way to celebrate the warmth of spring.

    This post may contain affiliate links. If you purchase through these links, I may earn a small commission at no extra cost to you. Thank you for supporting Love & Harvest!

    Picking the Right Octopus

    Buying a whole raw octopus can feel intimidating. I prefer to buy octopus already washed and cut in the frozen department of the grocery store. This helps me avoid messy clean-ups — especially as a mother of three young cubs. Kitchen shortcuts are my favourite thing to hear these days.

    If you are an enthusiastic cook who wants to tackle a whole raw octopus, instructions are included in the recipe card below.

    My first real love for octopus came on a family vacation in Cancun, when my father-in-law ordered a whole grilled octopus by the sea. I could not believe how delicious it was. Now every time I see it on a menu in Mexico, it takes real restraint not to order it.

    Ingredients

    Octopus

    • Why frozen is better: A frozen-then-thawed octopus comes out significantly more tender than fresh. The ice crystals break down the tough muscle fibres during freezing, resulting in a silkier, more bouncy texture after cooking. If you find a fresh one, put it in the freezer overnight first.

    Meat Tenderizer Mallet

    Meyer Lemons

    • Why Meyer lemons: They are sweeter and less acidic than regular lemons, with a floral quality that complements octopus without overpowering it. The zest adds aromatic oils that brighten the entire dish.

    Fresh Mint

    • Why fresh, not dried: Dried mint turns bitter and dusty in a cold salad. Fresh mint leaves deliver a clean, cooling contrast to the brininess of the octopus and the richness of the olive oil.

    Greek Olives

    • Why Kalamata or Greek olives: They carry a deep, fruity, slightly tangy flavour that ties the Mediterranean profile together. Pre-pitted and roughly chopped, they distribute evenly through every bite.

    Salad Spinner

    Why You’ll Love This Octopus Salad

    • Lightly tossed with olive oil and fresh ingredients — exceptional flavour and texture
    • Lemon and sea salt bring a bright, savoury sea-like flavour
    • Perfect cold dish for both lunch and dinner
    • Easy to make and stores well in a container all day
    • Easy to pack for a picnic or outdoor gathering

    Can You Give This an Asian Flair?

    Absolutely. I added soy sauce once instead of salt and it was delicious. You can turn this into an Asian octopus salad by adding soy sauce, sesame oil, and a splash of rice vinegar. The result is completely different but equally irresistible.

    Is This a Pickled Octopus Salad?

    Somewhat. The lemon juice gently cures the tentacles over time, so leftovers taste even better the next day. The texture becomes more springy and bouncy as the acid works its magic overnight. Involuntarily pickled — and better for it.

    How to Make Octopus Salad

    Look for frozen octopus: Whenever frozen octopus is cooked, the meat comes out tender, juicy, and soft. If you find a fresh one, freeze it first.

    For each 1 kg (2 lbs) of octopus, cook for 30 minutes. Dip the octopus in boiling water a couple of times first. Add spice to the water and cook with the lid on at a gentle simmer.

    Let the octopus cool completely. Peel, chop, marinate, and serve cold.

    Try this alongside our Thai Chicken Salad or our Vegetarian Mango Soy Ceviche for a light and fresh spread.

    Frequently Asked Questions

    How do I know when the octopus is fully cooked?

    Insert a fork into the thickest part of a tentacle. If it slides in effortlessly with no resistance, the octopus is done. The skin should also be easy to peel away. If there is any chewiness, give it another 10 minutes on the simmer.

    Can I use canned or pre-cooked octopus?

    Yes. Pre-cooked octopus from a can or vacuum pack works well for a quick version. Simply drain, rinse, chop, and toss directly with the dressing. The texture will be slightly softer than freshly cooked, but the flavour is still excellent.

    What can I serve with octopus salad?

    This pairs beautifully with a lightly tossed garlic and olive oil pasta, crusty bread, or alongside grilled vegetables. A cold glass of rosé wine makes it feel like a Mediterranean afternoon.

    How long does octopus salad keep in the refrigerator?

    Store in a sealed container for up to 2 days. The lemon juice continues to marinate the octopus and the flavour actually improves overnight. Do not freeze once dressed — the texture of the salad will deteriorate.

    Can I make this dish without olives?

    Yes. The olives add a briny depth but the salad is delicious without them. You can substitute with capers for a similar salty punch, or leave them out entirely for a cleaner, more straightforward lemon and mint profile.

    How much protein is in this octopus salad?

    About 28 g per serving, according to the recipe card. Octopus also contains vitamin B12, iron and selenium.

    octopus salad

    Easy Spring Octopus Salad with Mint and Lemon

    Prep Time 15 minutes
    Cook Time 45 minutes
    Total Time 1 hour
    Servings: 4 people
    Course: Salad
    Calories: 210

    Ingredients
      

    • 1kg raw octopus tentacles frozen
    • 2 litre water
    • 2 bay leaf
    • 1 tsp peppercorn
    • ¼ small white onion
    • ½ lemon
    • 1 tsp salt
    Dressing
    • 2 tbsp organic olive oil
    • splash of apple cider vinegar
    • ½ lemon juice
    • 1 whole lemon zest
    • 1 celery stalk chopped
    • ¼ red onion thinly sliced
    • 2 tomato cut in small cubes, seeded
    • 1 tsp dried oregano
    • 1 jalapeno washed and seeded
    • ½ cup greek olives roughly chopped
    • sea salt
    Garnish
    • 2-3 tbsp fresh mint whole leafs

    Method
     

    Cooking the Octopus
    1. Cook: Fill a large stock pot with 2L of water (make sure it is at least half full). Bring it to a boil and using metal tongs to hold the octopus, dip the octopus in the water 3 times (submerge it at least 5 seconds for each dip). Wait for the water to reboil and carefully place the whole octopus inside. Add the spice: bay leaf, peppercorn, onion, lemon, and salt. Cover the stock pot with a lid and cook the octopus in a simmer heat. Each 1kg or 2 pounds octopus is 30 minutes of cooking. Average it will take 45-60 minutes depending on the size. It is done when you can effortlessly stick a fork into the meat.
    2. Cool: When it is done cooking, turn off the heat and let the octopus cool off in the pot of its own water and juice. At least 2 hours or can be overnight. Take the octopus out onto a large bowl and peel and chop the octopus.
    Cooking Frozen Prepared Octopus Tentacles
    1. Cook: Fill a pot with hot water and bring it to a boil. Put the frozen tentacles into a strainer and dip it into the boiling water 3 times, 5 seconds each dip. Wait for the water to reboil and carefully place all the tentacles inside. Add the spice: bay leaf, peppercorn, onion, lemon, and salt. Cover the stock pot with a lid and cook the octopus in a simmer heat. for 1kg of octopus cooking time is 30 minutes. It is done when you can effortlessly stick a fork into the meat.
    Octopus Salad
    1. Add all the dressings together in a large bowl. Stir in olives and jalapeños.
    2. Pour the dressing over cooled octopus, stir to combine, and serve cold. Garnish the top with mint leafs.
  • AMAZING Canadian Smoked Bacon Ham

    AMAZING Canadian Smoked Bacon Ham

    The moment this Canadian Smoked Bacon Ham comes out of the smoker, the entire house fills with that deep, rich, wood-smoke aroma that makes everyone gravitate to the kitchen. It is a project with a proud payoff — tender, beautifully pink, intensely flavourful meat that costs a fraction of the store-bought version and tastes better in every way.

    This post may contain affiliate links. If you purchase through these links, I may earn a small commission at no extra cost to you. Thank you for supporting Love & Harvest!

    This recipe is easy and hands-off. If you can boil water and turn on an oven, you are fully capable of making this. And once you do, you will never buy Canadian Smoked Bacon Ham again — but you will definitely keep buying pork loins to make your own.

    A patriotic remembrance of the vast and beautiful land of Canada. A polite recipe to recollect fond memories there, and a surrender to the experience where the past and present live beautifully together.

    Important safety note: Curing meats using sodium nitrite is very different from any other recipe. It is essential to read and thoroughly understand the process before attempting to cure meat. Please follow the measurements exactly.

    My Inspiration

    I miss walking into Superstore in North Vancouver. The deli section next to the meat counter at the back of the store always smelled like smoked meat. Buying ham in Canada was one of those memorable moments filled with fondness, like Mexican people buying tacos on crowded streets in Mexico.

    My first love is smoked salmon — still the best-tasting food in the whole world, in my opinion. That love for cold-smoked salmon is what eventually led me toward this love affair with smoked bacon ham.

    Ingredients

    Pink Curing Salt (Prague Powder #1)

    • Why it is essential and NOT optional: Pink Curing Salt is 94% table salt and 6% sodium nitrite. It preserves the meat, prevents dangerous bacterial growth (including botulism), and keeps the ham its beautiful pink colour. Without it, the meat would turn an unappetising grey. Do not confuse it with Pink Himalayan Salt — they are completely different products. Store it clearly labelled and out of reach of children.

    Smoker Wood Chips

    Pork Loin (or Pork Butt / Pork Leg)

    • Why pork loin for Canadian bacon: Canadian bacon is always made from pork loin — it is lean, boneless, and cuts cleanly into thick discs after curing. It is fundamentally different from American bacon, which uses fatty pork belly. Pork loin is leaner and produces a firmer, more ham-like result. If your cut is more flat than round, simply tie it with butcher’s twine before smoking.

    The Brine

    • Why a wet brine: The brine — brown sugar, sea salt, bay leaves, garlic powder, water, and curing salt — penetrates deep into the meat during the 24-hour refrigeration period. Sugar balances the salt and adds a subtle sweetness. Always brine in a non-reactive container (no metal — not even a metal spoon). The meat will float, so weigh it down with a ceramic dish.

    Instant-Read Meat Thermometer

    Why You Will Love This Recipe

    The full Canadian experience is here. Easy to follow, ingredients are not hard to find. If smoking sounds too intimidating, I have included oven baking instructions — both methods produce delicious results.

    The uses for this Canadian smoked bacon ham are endless: a sandwich with ham and cheddar, pasta with ham and cream sauce, cured ham with pineapples on toothpicks, or the perfect Eggs Benedict. Canadian bacon is also leaner than American bacon, since it’s made from pork loin, not belly.

    Pro Tips

    How Much Smoke Is Enough?

    My rule of thumb: if you can smell the smoke, the meat is absorbing it. Poor ventilation causes creosote — a thick, bitter, oily coat that forms when smoke sits on meat too long. Ensure the smoke can escape the chamber. Do not pile on wood or fuel. A gentle, consistent wisp of smoke is all you need.

    How Do You Know When It Is Done?

    Use a meat thermometer. When the internal temperature in the deepest part of the centre reaches 150°F (65°C), it is done. Do not go by time alone — cooking and smoking times vary with the size and shape of the meat.

    Meat Storage

    Refrigerate for up to two weeks or freeze for longer. Vacuum-sealed portions keep even longer still and slice perfectly from frozen.

    Once you have made this, it pairs beautifully with our Easy Camping Shrimp Pasta for a smoky, satisfying meal. You can also check out our Easy Ribs Recipe with Homemade BBQ Sauce for more smoked and cured meat inspiration.

    Frequently Asked Questions

    Is pink curing salt the same as pink Himalayan salt?

    No — they are completely different products. Pink Himalayan salt is a mineral salt from Pakistan used for cooking and seasoning. Pink Curing Salt (Prague Powder #1) is 94% table salt and 6% sodium nitrite, specifically formulated for curing meat. Using Himalayan salt in place of curing salt will not preserve the meat and could result in unsafe, grey-coloured ham.

    Can I make this without a smoker?

    Yes. Baking the cured ham in the oven produces equally delicious results, minus the smoke flavour. Preheat to 350°F, wrap the ham in foil, bake for 20 minutes, then remove the foil, increase temperature to 425°F, and roast for 12–15 more minutes until golden and the internal temperature reads 150°F.

    How long should I brine the ham?

    Brine for at least 24 hours in the refrigerator. You can extend the time by up to 20% for a saltier result with better nitrite penetration. Do not go shorter than 24 hours — the curing salt needs adequate time to work through the meat safely.

    What wood chips work best for smoking ham?

    Apple, cherry, and maple wood chips are classic choices for pork. They produce a sweet, mild smoke that complements the ham without overwhelming it. Hickory gives a stronger, more assertive smoke flavour if you prefer something bolder. Avoid resinous woods like pine — they produce bitter, acrid smoke.

    Why does my ham need to rest before slicing?

    Cutting into hot smoked or baked meat causes the juices to run out immediately, drying the meat. Resting allows the juices to redistribute evenly. Let the ham cool on the counter uncovered until the internal temperature drops to around 100°F before slicing into discs and searing.

    homemade Canadian smoked ham

    Amazing Canadian Smoked Back Bacon Ham

    Prep Time 10 minutes
    Cook Time 2 hours 30 minutes
    Total Time 2 hours 40 minutes
    Servings: 8 servings
    Cuisine: Canadian
    Calories: 210

    Ingredients
      

    • 1.3 kg pork leg / pork butt
    • ¾ cup brown sugar
    • ¾ cup sea salt
    • 3 bay leaf
    • 1 tbsp garlic powder
    • 4 litre water
    • 1 tbsp Prague Powder #1

    Equipment

    • meat thermometer
    • grill / smoker

    Method
     

    1. In a non reactive pot, put all the ingredients inside (except the meat). Bring it to a boil until the sugar and salt has melted. Let it cool and transfer to the curing container.
    2. Clean and rinse the meat thoroughly. Pat dry with paper towel.
    3. When the brine is at room temperature submerge the meat into the water and place a dish on top or anything heavy to hold the meat under the brine. Refrigerate for 1 day. ***You can add 20% longer time if you want to. The meat will be saltier and absorb more nitrite if safety is a concern***
    4. After the cure, rinse the ham with clean water to wash off access salt. Dump the brine water out, and bring fresh water back to the bowl. Fully submerge the ham in clean water for 30 minutes to let de-salt the ham. Pat dry.
    5. Now the ham needs to be smoked or baked. Below are your options.
    To Smoke
    1. Smoke the ham at 325°F for 2.5 hours until the internal temperature is 150°F in the deepest part of the center.
    2. Serve. Unfortunately, you can’t cut into your Canadian Bacon just yet, if you do, it will dry it out and won’t be as fantastic as it should be!  Its very important to let it rest on the counter uncovered until the internal temperature gets down to 100 degrees. Afterwards you can slice into discs and sear it on the grill or in a medium hot frying pan with a little bit of oil.
    To Bake
    1. preheat oven to 350°F.
    2. Take ham out of the brine, and rinse the meat with water to take the access salt out of the ham. Pat dry.
    3. ***OPTIONAL*** To add more flavour to the baked ham, you can roll your ham in some freshly grind peppers, chili powder, garlic powder, and onion powder.
    4. Wrap ham with aluminum foil and place on baking sheet. Bake for 20 minutes.
    5. Remove from the oven, remove the foil and increase oven temperature to 425°F. Return pan to the oven and roast for 12-15 minutes or until roast is golden brown. Check internal temperature with a meat thermometer that it has reached 150°F in the deepest part of the center.
    6. Let rest for 10 minutes before slicing and serving.
    7. Serve. Unfortunately, you can’t cut into your Canadian Bacon just yet, if you do, it will dry it out and won’t be as fantastic as it should be!  Its very important to let it rest on the counter uncovered until the internal temperature gets down to 100 degrees. Afterwards you can slice into discs and sear it on the grill or in a medium hot frying pan with a little bit of oil.

    Notes

    CURING TIME: The cure time depends on the thickness of your meat. You can go longer by as much as 20%, but do not go less.
    AMOUNT OF SALT: The recipe uses Morton Coarse Kosher Salt. If you use table salt, use about 3/4 as much by volume, or better, weigh it (the same weight works). I don’t recommend table salt in the brine.
  • Authentic Mapo Tofu Recipe: Generational Family Recipe

    Authentic Mapo Tofu Recipe: Generational Family Recipe

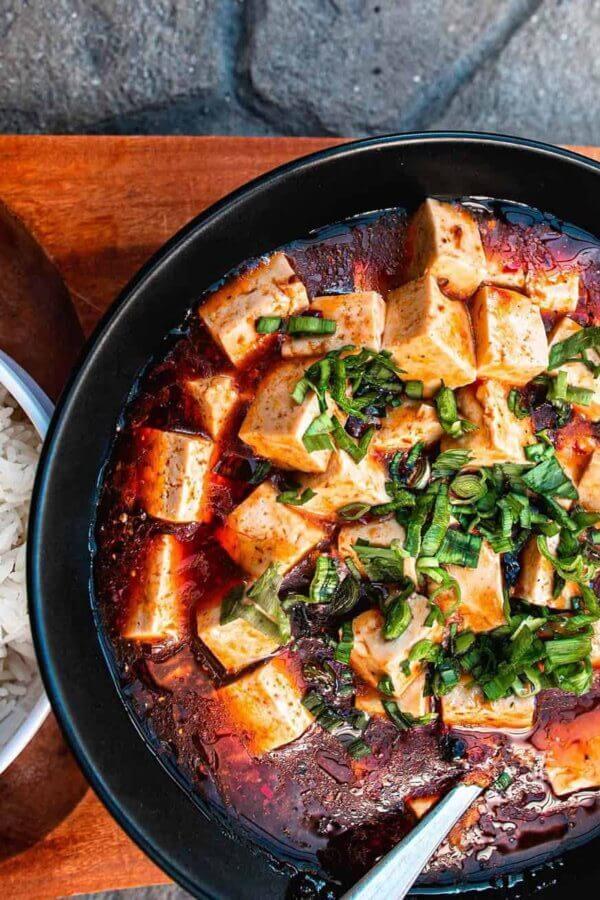
    Mapo tofu is the smell of home. One whiff of doubanjiang frying in hot oil with garlic and black beans and I am instantly transported back to a small cafeteria in Vancouver, eating a hot bowl of spicy tofu over steamed rice while wearing a white and orange ski jacket, completely broke, and completely happy. This is that recipe — the one my mom confirmed, the one a Chinese fast-food chef taught me, and the one that still makes bad days feel better.

    This post may contain affiliate links. If you purchase through these links, I may earn a small commission at no extra cost to you. Thank you for supporting Love & Harvest!

    Vegetarian Mapo Tofu

    This recipe is super versatile. It is already vegetarian as written. For a gluten-free version, use tamari instead of soy sauce, and a doubanjiang, cooking wine and black vinegar labelled gluten-free. You can make it soupier or starchier by adjusting the slurry, and you can dial the spice level up or down by using more or less doubanjiang and chili oil.

    This pairs beautifully with our Steam Preserved Vegetables with Pork or our Traditional Hong Kong Curry Chicken for a full Cantonese-style dinner spread.

    Why You Will Love This Mapo Tofu Recipe

    • Simple with easy instructions — there is a reason mapo tofu appears on every Chinese fast-food menu. It is fast, it is easy, and the results are authentic with only a few key sauces.
    • Reheat-friendly — the flavour is still exceptional after a day in the fridge. It reheats perfectly in the microwave — ideal for days when you need to be out the door quickly.
    • Authentic Cantonese home cooking — if you are looking for genuine Cantonese home-style cooking, mapo tofu is one of the most iconic and comforting recipes in that tradition.

    Ingredients

    Doubanjiang (Chili Bean Paste)

    • Why it is non-negotiable: Doubanjiang is the soul of this dish. It is a fermented paste made from broad beans, chili, and salt — deeply savoury, spicy, and complex. No other ingredient replicates its umami depth. There are spicy and non-spicy varieties; spicy is traditional. The Juan Cheng brand in the red plastic jar is the gold standard for home cooks.

    Doubanjiang Chili Bean Paste

    Dried Fermented Black Beans

    • Why they matter: These small preserved beans add a deeply savoury, earthy, slightly funky flavour that amplifies the doubanjiang without competing with it. They dissolve partially into the sauce and create an irreplaceable base note. Do not skip them or substitute with regular black beans — the fermented flavour is essential.

    Szechuan Peppercorns (optional)

    • Why they create the authentic numbing heat: The legendary “ma la” (numbing-spicy) profile of Mapo Tofu comes from Szechuan peppercorns. They create a unique tingling, almost electric sensation on the tongue that is completely different from regular chili heat. Grind them fresh and sprinkle on top just before serving.

    Szechuan Peppercorns

    Silken or Soft Tofu

    • Why texture matters here: Silken or soft tofu has a creamy, delicate texture that absorbs the sauce beautifully. Medium-firm tofu is the maximum firmness to use — anything firmer will not have the characteristic melt-in-your-mouth quality. Cut into 3/4-inch cubes and handle gently throughout cooking.

    Pro Tips

    Do Not Over-Stir

    Over-stirring will break the tofu and turn a beautiful cubed tofu stew into a murky mash. Use a slotted spoon and do slow, gentle circular stirs. Never use a fork or anything sharp.

    The Slurry Is Your Friend

    The cornstarch slurry (1 tsp cornstarch dissolved in 1/2 cup room-temperature water) thickens the sauce and coats every cube of tofu. Add it after the tofu and stir gently only once or twice — the sauce will tighten beautifully as it simmers.

    Also note: step 3 in the instructions should read “In a hot wok or pan” — “I’m a hot wok” in the original is a typo.

    Frequently Asked Questions

    Is this recipe actually Cantonese or Sichuan?

    Mapo Tofu originates from Sichuan province and is traditionally made with ground pork and Sichuan peppercorns. This version is a Cantonese adaptation — the way it has been cooked in Hong Kong-style homes and restaurants for generations. It is vegetarian, slightly less numbing, and uses a thicker sauce. Both are delicious and authentic within their respective traditions.

    Can I add ground pork to this recipe?

    Yes. Brown 100–150g of ground pork in the wok before adding the doubanjiang and black beans. The pork adds richness and protein and is how the traditional Sichuan version is made. Cook the pork until no longer pink, then proceed with the sauce as written.

    Why is my sauce not thickening?

    The slurry needs to reach boiling temperature to activate the cornstarch. Make sure the heat is turned up high enough for the pan to bubble after you add the slurry. If the sauce is still thin after 2 minutes of gentle simmering, mix another 1/2 tsp cornstarch with a tablespoon of cold water and add it to the pan.

    Can I make mapo tofu ahead of time?

    Yes. The sauce can be made up to 2 days ahead and stored in the refrigerator. Add freshly cut tofu when you reheat, as previously cooked tofu tends to become spongy. Reheat over medium-low heat and stir very gently.

    What is a good substitute for Chinese cooking wine?

    Dry sherry is the closest substitute and works very well. Mirin (Japanese rice wine) can also work but is sweeter — use a little less. If you want a non-alcoholic option, replace with chicken broth or vegetable stock plus a few drops of rice vinegar for acidity.

    How do I know when the tofu is heated through?

    When the sauce begins to bubble gently around the edges of the tofu, the tofu is heated through. At this point, turn the heat to low, cover with a lid, and cook for 10 minutes. The tofu will absorb the sauce and the flavours will deepen significantly.

    Authentic Mapo Tofu: The Way My Mom Made It

    Ma Po tofu is probably the easiest introduction to Chinese home cooking. It’s a delicious dish that will tickle all your taste buds, and my version is meat-free (the traditional one uses pork). It’s a warm, cozy dish for those colder days, like a warm tofu blanket that wraps your soul. Always served with a warm bowl of jasmine rice, it’s the kind of dish that makes you feel like you’re winning again in life, even on a bad day.
    Prep Time 10 minutes
    Cook Time 25 minutes
    Total Time 35 minutes
    Servings: 4 people
    Calories: 220

    Ingredients
      

    SLURRY
    • 1 TSP cornstarch
    • ½ cup room temperature water
    SAUCE
    • 3 TBSP canola or vegetable oil
    • 2-2.5 TBSP tablespoons doubanjiang link
    • 1 TBSP dried fermented black bean link
    • 2 TBSP garlic minced
    • 1 TBSP favourite chili oil (optional)
    • 1.5 TBSP soy sauce link
    • 1 TBSP Chinese cooking wine link
    • 2 TSP black vinegar link
    • ½ TSP brown sugar
    • 1 pound soft tofu 1 package
    • 1 stalk of green onions chopped
    • ½ TSP sesame oil link

    Method
     

    1. Prepare your tofu by slicing them into small cubes – 3/4-inch cubes. Set aside. 
    2. Prepare your slurry by mixing all the ingredients together. Set aside. 
    3. I’m a hot wok or pan, add oil. Fry the doubanjiang, black beans, garlic and ginger together until fragrant – 3 minutes.
    4. Slowly add the chili oil, soy sauce,  honest wine, black vinegar and sugar. Let it cook for another 5 minutes.
    5. Turn the heat to medium low and carefully add the tofu. Stir in the slurry and slowly with a spoon and try not to break the tofu.
    6. When the pan starts to bubble, turn the heat to low and put a lid on it and cook for 10 minutes.
    7. Serve with scallion on top and drizzle sesame oil on top. Serve with warm steamed rice. 
  • Cantonese Steamed Chicken with Goji Berries

    Cantonese Steamed Chicken with Goji Berries

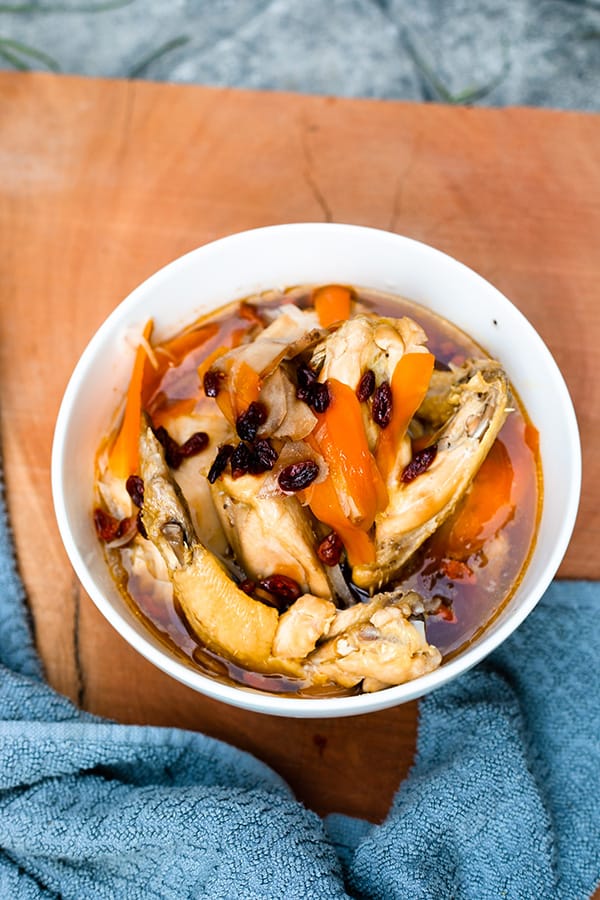
    Three simple ingredients — chicken, goji berries, and black fungus — steamed together until the flavors meld. It is a classical Cantonese dish that has been in Chinese families for generations, and once you taste it you will understand why. Clean and genuinely delicious.

    This post may contain affiliate links. If you purchase through these links, I may earn a small commission at no extra cost to you. Thank you for supporting Love & Harvest!

    Steamed chicken with goji berries, carrot and onion in a white bowl

    Goji berries have been in my kitchen for as long as I can remember. I grew up in a Chinese household.

    Goji Berries and Black Fungus

    Goji berries are sweet and mild. When autumn comes, goji berries go straight into the chicken noodle soup.

    The black fungus in this recipe has a satisfying chewy texture that my kids somehow love more than the chicken itself.

    Ingredients

    Goji Berries

    • Why they are essential: In this dish they soften during steaming into tender, subtly sweet morsels that absorb the savory chicken juices — the combination is genuinely beautiful.

    Buy dried goji berries at any Asian supermarket. Online, organic dried goji berries are reliable and easy to keep on hand.

    Chicken Breast (or Any Cut)

    • Why breast works well: It steams quickly, stays moist with the goji berry juices, and keeps this dish clean and light. You can substitute legs, drumsticks, or a mix of cuts — they all work and all come out delicious. The longer cook time for bone-in pieces (around 30–35 minutes) actually intensifies the flavor.

    steamed chicken goji berries with black fungus

    Professional Tips for a No-Fail Dish

    Pro Tip 1 — Steam in a Pot or Instant Pot

    You can use a stovetop bamboo steamer or a steamer basket over a pot of boiling water. A bamboo steamer is the traditional tool and imparts a very subtle woody fragrance. For modern convenience, an Instant Pot works equally well: fill with water, place the steamer basket inside, set the dish on top, seal, and steam for 25 minutes on the Steam setting. I have the Instant Pot Duo 7-in-1 and use it for this dish regularly.

    Pro Tip 2 — Keep the Marinade Simple

    The marinade is just salt and sesame oil. That is all you need. The simplicity is intentional — this dish is about the natural flavors of the chicken and goji berries, not masking them. Sesame oil adds a nutty depth that anchors the whole dish. Toss, let sit 10 minutes, then steam.

    Pro Tip 3 — Skim the Fat

    After steaming you will see a thin layer of chicken fat floating on the surface of the cooking liquid. Skim it off with a slotted spoon before serving. Removing it lets the goji berry sweetness shine through more clearly.

    Pro Tip 4 — Serve Warm, Always

    In Chinese tradition, everything is served warm — not hot, not cold. Serve this with a bowl of plain steamed rice and a cup of hot tea.

    Frequently Asked Questions

    How do I know when the chicken is fully cooked?

    Chicken breast steamed for 20–25 minutes at medium-high heat will be cooked through. Use a meat thermometer — the internal temperature should reach 165°F (74°C). Bone-in pieces may need 30–35 minutes. The flesh should be opaque white throughout with no pink near the bone.

    Can I use fresh goji berries instead of dried?

    Dried goji berries are preferred in this recipe. They rehydrate during steaming and release their flavor into the cooking liquid. Fresh goji berries are rarely available outside of China, but if you find them, use the same quantity.

    What is black fungus and where do I find it?

    Black fungus (wood ear mushroom / Auricularia auricula) is a dried edible mushroom used widely in Chinese cooking. It has a satisfying chewy texture and mild flavor. Find it dried at any Asian supermarket. Soak in warm water for 20 minutes before use.

    Can I make this dish for children?

    Yes. The flavor is gentle, and the goji berries are sweet enough for kids to enjoy. My children love the black fungus in particular.

    Can I add other herbs to the steam?

    Yes. Common additions include Chinese red dates (2–3 pieces), dried longan fruit, and wolfberries. These are the same herbs used in the goji berry, red date and Chinese yam tea.

    Steam Chicken Goji Berries

    Steamed Chicken with Goji Berries

    Easy steamed chicken with goji berries. A classical Cantonese dish.
    Prep Time 15 minutes
    Cook Time 25 minutes
    Total Time 40 minutes
    Course: Main Course
    Cuisine: Chinese
    Calories: 240

    Ingredients
      

    Chicken Marinate
    • 2 organic chicken breast skinned and cubbed
    • 1 tbsp canola oil
    • 1 tsp sea salt
    • 2 tsp corn starch
    The rest
    • 1 carrot sliced thinly
    • ½ white onion sliced thinly
    • 7-10 dried goji berries
    • 1 tsp sea salt
    • 1 tsp sesame oil
    • 1 tbsp soya sauce

    Equipment

    • steamer / Instant Pot

    Method
     

    To Marinate the Chicken
    1. Combine all the ingredients together well, and set aside to marinate on the counter top for 10-15 minutes.
    Putting Everything Together
    1. Sliced the carrots and onions, and add it with the chicken in the vessel you want to steam the dish in. I suggest a bowl that can hold liquid. After steaming, you'll notice the steam water has dropped some in the bowl and makes a delicious sauce on top.
    2. Add the remaining seasoning: salt and sesame oil. Add the goji berries on top. Mix and combine everything well.
    3. Using a regular steam:
      Wait until the steamer is ready and the water is boiling. Put the dish in and the lid on top. Steam on medium heat for 30-35 minutes.
    4. Using an Instant Pot:
      Set machine to 'Steam' on high heat for 25 minutes. Place the steamer basket and add the dish in. Make sure you use a round high bowl as the regular flat round plates don't fit. You want to have gaps between the bowls so the steam can come up and easy access for you to lift the plate out when it is done. Put the lid on and set to 'Seal'.
    5. When the time is up, you can release the vale. Lift the plate up, and drizzle the soy sauce on top. Serve with white rice.

    If you enjoy Chinese-inspired recipes, explore the Goji Berry, Red Date and Chinese Yam Tea and Steam Preserved Vegetables with Pork.

  • Traditional Hong Kong Curry Chicken

    Traditional Hong Kong Curry Chicken

    If you have ever craved a curry that is creamy, lightly spiced, and packed with the comforting flavours of lemongrass and coconut, this Traditional Hong Kong Curry Chicken is exactly what your table needs. Passed down through Cantonese kitchens and perfected in Hong Kong cafes, this is the dish that turns a regular weeknight into something memorable.

    This post may contain affiliate links. If you purchase through these links, I may earn a small commission at no extra cost to you. Thank you for supporting Love & Harvest!

    Hong Kong curry chicken

    Hong Kong Style

    In Hong Kong, curry is called 港式咖喱雞 (Cantonese: gong sik ga lay gai). From all the different versions of curry I’ve tasted, Hong Kong curry is on the mild side.

    Though Hong Kong curry is mild, it is still super tasty with hints of lemongrass and coconut cream. I would say it’s the tropical getaway in the curry world. The lemongrass gives a citrus lift, and the island flavour of the coconut cream adds a tropical creaminess to the crowd of flavour. It’s no wonder curry plays a strong role in Cantonese cuisine.

    Even though you’ve never visited Hong Kong or lived there, you can still find Hong Kong style curry anywhere with a large Chinese community — at Asian cafeterias, fast food stores, restaurants, and especially at Hong Kong cafe restaurants. Besides the variety of curry you can find, you can also find a variety of meats like chicken or beef (called 港式咖哩牛腩). Vegetarian is also an option.

    Like all the different versions of curry you can find in the world, the difference is in the spice blend. If you’re in the Hong Kong area, I’ve heard Choi Hop Lee 財合利 in Hong Kong (Wanchai) is the place to find authentic Hong Kong flavour — they make their own Hong Kong curry powder and paste.

    History of Hong Kong and Curry

    When you travel to Hong Kong, you will find people from all parts of the world. Once upon a time, Hong Kong was renowned as the financial hub of Asia. During the colonial years, the British government mobilized many Indian and Nepalese soldiers to Hong Kong. They brought over their food and spices and began the curry expansion in the city. It became popular to serve curry in restaurants to cater to the new community of people.

    Though the traditional curry brought over by Indians was strong in flavour, Hong Kong mellowed it down and made it sweeter to fit the local palate. They used coconut cream to help cut the spice, and incorporated Malaysian curry paste — more adaptable and favoured by the local population.

    Why You’ll Love This Recipe

    • Irresistibly delicious — this curry has lemongrass, turmeric, onion, and coconut milk. It has all the tropical sweet and savoury taste that is mouthwatering. The smell of the curry is not strong, but soft and tropical.
    • Easy to make — sauté the onion, add the marinated chicken, and let it simmer in chicken stock. The last 5 minutes of cooking, add in the coconut milk. Sounds easy? Because it is!
    • Still tastes great the next day — some food is best served fresh, but this curry is great the next day. Reheat and serve.

    Ingredients

    Curry Powder

    There are many different kinds of curry powder out there. Each country in Asia has their own flavour and heat level. For this recipe, I like to use Madras Curry Powder — the flavour leans more Chinese than Indian and it’s perfect for this dish.

    • Why it matters: Curry powder is the backbone of the entire dish. Using a quality powder with turmeric, cumin, and coriander makes all the difference in depth of flavour.

    Lemongrass

    Using lemongrass in curry is a Malaysian style that Hong Kongers love. Lemongrass gives off a tropical, vibrant taste and really brightens the entire dish.

    • Why it matters: Lemongrass is what separates Hong Kong curry from other regional curries. It adds a citrus, almost floral lift that balances the richness of the coconut cream.

    Coconut Milk

    The thickness of coconut cream makes the sauce less watery. The flavour of coconut adds sweetness that counteracts the strong spices in the curry, creating a balanced palate. Always add coconut cream when the dish is almost done — never boil it.

    • Why it matters: Coconut milk is the finishing touch. It rounds out the spice, adds body, and delivers that creamy tropical colour. Use a quality brand like Chaokoh Coconut Milk for best results.

    Evaporated Milk

    This is a secret weapon ingredient. Many Cantonese cooks (my grandfather included) add evaporated milk into the curry for a subtle dairy sweetness. Not too much — just enough to balance the spice and salt and give the curry more depth.

    • Why it matters: This is the ingredient that distinguishes Hong Kong curry from other Asian curries. It adds a creamy richness that is different from coconut milk alone.

    Professional Tips to Get Your Curry Tasting Like a Real Hong Kong Style Cafe

    Pro Tip #1 — Fry the Potatoes First

    I love frying the potatoes before adding them to the curry. All Hong Kong curry has potatoes — it’s a must. Frying the potatoes helps them hold together in the stew and prevents them from breaking up into starchy clumps.

    Pro Tip #2 — Make the Roux

    Roux is a cooked mixture of flour and fat. It is how we thicken the soup base. In classic French cooking the fat is butter, but in Hong Kong cooking oil is typically used. Do not walk away from this step — the roux burns fast.

    Pro Tip #3 — Do Not Boil the Evaporated Milk and Coconut Cream

    Evaporated milk and coconut cream should never reach boiling point. That is why these two ingredients are added at the very end. They are meant to offset the strong spice flavour and balance the dish.

    If you love Cantonese chicken recipes, also check out my Classic Hainanese Chicken and Soy Sauce Chicken (Cantonese Style) — two dishes that pair beautifully alongside this curry.

    Hong Kong curry chicken

    Frequently Asked Questions

    What makes Hong Kong curry different from Indian or Thai curry?

    Hong Kong curry is much milder than Indian or Thai curry. It uses a blend of Madras-style curry powder, lemongrass (borrowed from Malaysian cooking), and coconut cream or evaporated milk to create a sweeter, creamier result. The heat is gentle enough for children, making it a true family dish.

    Can I use boneless chicken thighs instead of a whole chicken?

    Yes. Boneless thighs work very well and cut down on cooking time. Bone-in pieces are traditional and add more flavour to the sauce, but boneless thighs are a great weeknight shortcut. Cook until the internal temperature reaches 165°F (74°C).

    Can I make this recipe without potatoes?

    You can, but potatoes are a defining feature of Hong Kong curry. They absorb the sauce and add body to the dish. If you leave them out, the sauce will be thinner. You could substitute with sweet potato, taro, or butternut squash for a similar effect.

    What should I serve with Hong Kong curry chicken?

    Jasmine rice is the classic pairing — it soaks up the sauce beautifully. You can also serve it over rice noodles, or with a side of steamed bok choy or Chinese broccoli to round out the meal.

    Can I make this curry ahead of time?

    Yes — this curry is even better the next day once the flavours have had time to meld. Store in an airtight container in the refrigerator for up to 3 days. Reheat gently on the stovetop and do not let it boil once you reheat, to preserve the coconut cream.

    Can I freeze Hong Kong curry chicken?

    Yes, though the potatoes can become slightly mealy after freezing. Freeze the curry without the potatoes if you plan to make a large batch, then add freshly cooked potatoes when reheating. The curry base freezes well for up to 2 months.

    Hong Kong Style Curry

    Delicious traditional Hong Kong style cafe curry chicken. Subtle flavour in spice, but still tons of flavour to leave an impactful meal. Also light and citrusy from lemongrass to fit any picky eater. It the perfect family meal option that keeps the dinner table warm and cozy. Print Recipe Pin RecipePrep Time:20 minsCook Time:30 minsCourse: Main CourseCuisine: ChineseKeyword: Cantonese CuisineServings: 4 people

    Ingredients

    Chicken Marinate

    • 1 whole chicken organic, free ranged
    • 2 tbsp turmeric powder
    • 1 tbsp salt

    Curry

    • ½ cup oil
    • 4-5 medium sized potatoes cut into medium size knobs
    • ½ white onion diced
    • 3 garlic cloves grated
    • 5 shallots chopped
    • 1 thumb-sized ginger sliced into thick slices
    • 3 red eye chili / red chili sliced
    • 2 tbsp Hong Kong curry powder / curry powder
    • 3 tbsp reserved oil
    • 2 tbsp flour
    • 2 lemongrass stalks
    • ½ cup water / chicken stock
    • ½ cup coconut cream
    • ½ cup evaporated milk
    • 2 TSP sea salt

    Instructions

    • Clean the inside and outside of the chicken. Pat dry. Cut the chicken into pieces. Separate the wings, legs, and breast. I like to debone the chicken and freeze the carcass for chicken soup later. Marinate the chicken in salt. Let it sit in the fridge.
    • In a large wok, add the 1/2 cup oil. When the wok is hot, add the potatoes and fry for about 5-8 minutes, or until you see the edges slightly brown. Place them on a plate with a paper towel.
    • With the same oil in the wok, use only 3 tbsp of oil and reserve the rest. Add the onion, garlic and shallots. When the onion is softened, add the ginger, chili, curry powder and turmeric. Fry until aromatic (3-5 minutes).
    • Add the chicken pieces and fry until the skin has color. Remember to stir constantly so it doesn’t stick to the bottom.
    • Once all the chicken is slightly browned, remove everything to a plate.
    • On the same pan, add in 3 tbsp of the reserved oil. Add the flour into the pan and fry until fragrant. Do not walk away from this step.
    • Once the flour is brown, take out your whisk and start to stir the flour around. Add the chicken stock while whisking the flour. Try to break up the flour in the chicken stock. You should not see any flour clumps at this point.
    • Add the chicken back to the pan, along with the lemongrass. Simmer on medium heat for 20-25 minutes.
    • For the last 5 minutes, add the evaporated milk, coconut cream, and salt to taste. Let it simmer on low for 5 minutes. Do not let it boil.
    • Serve with warm jasmine rice.
  • Delicious Beer Gravy Honey Mustard Chicken 🍺

    Delicious Beer Gravy Honey Mustard Chicken 🍺

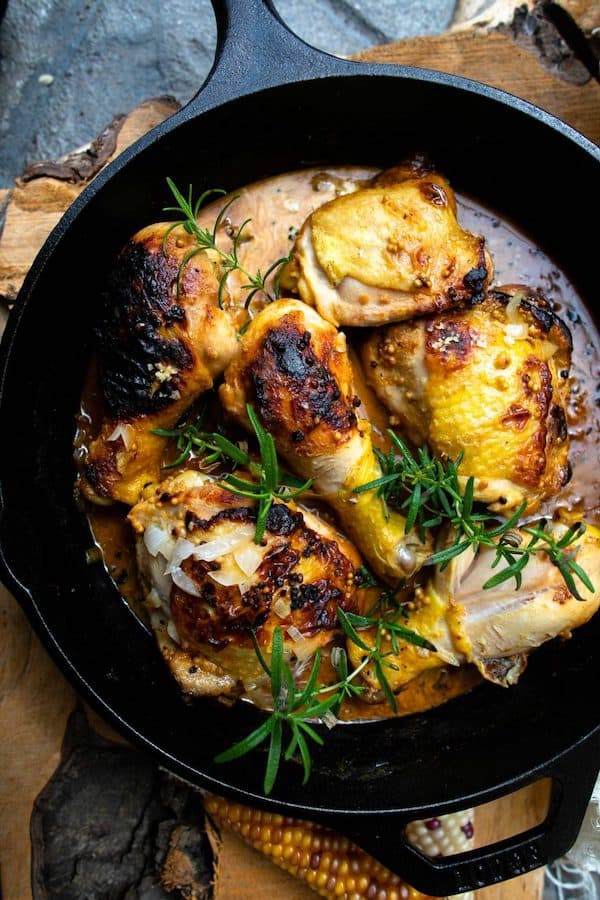
    When the weather turns cool and the family is hungry, this Beer Gravy Honey Mustard Chicken is the recipe I reach for every time. It is one of those dishes that fills the kitchen with an irresistible aroma before it even hits the table — and with a total cook time of 40 minutes, it is weeknight-ready without sacrificing an ounce of flavour.

    This post may contain affiliate links. If you purchase through these links, I may earn a small commission at no extra cost to you. Thank you for supporting Love & Harvest!

    Honey mustard chicken thighs with rosemary in a cast iron panHoney mustard chicken thighs with rosemary in a cast iron pan

    Why You Will Love This Recipe

    • Everyone loves it, including kids — when I have chicken in the fridge that needs to be used quickly, this is the recipe I always reach for. The kids love this dish, and they always ask for more sauce on their rice.
    • So delicious — there is something magical about beer and chicken cooked together. The aroma is intoxicating and will draw people into the kitchen asking what you are making.
    • Easy recipe — marinate the chicken, lay it on the skillet, and deglaze the pan with beer. In 40 minutes your meal is ready to be served and devoured.

    Beer in the Gravy — Is It Safe for Children?

    Short answer: yes. Because we are cooking the beer with the chicken, the alcohol burns off while the chicken cooks. All that remains is the beer flavour, which is mild. We are only adding half a can so it is not overpowering. You can always use a quarter of the can, or skip it entirely — the gravy is still delicious and thick without the beer.

    Ingredients

    Chicken

    This recipe calls for chicken legs and thighs. Any part of the chicken works, but bone-in thighs and drumsticks are ideal because they stay moist and flavourful even with extended cooking. I buy the whole chicken leg and separate the thighs and drumsticks at home before marinating.

    • Why bone-in matters: The bone adds flavour to the gravy and protects the meat from drying out. The skin also crisps beautifully in the cast iron skillet.

    Honey and Mustard

    We use salt and honey to marinate the chicken and mustard (both regular and mustard seed) in the gravy. Give the salt, honey, and mustard time to work into the chicken — a minimum of 15 minutes guarantees more flavour penetration. If you don’t have regular mustard, Dijon works equally well.

    • Why honey: Honey breaks down when it contacts salt and chicken, turning from thick to a watery consistency that coats every surface. It caramelises beautifully in the hot pan and adds a sticky sweetness to the crust.

    Beer

    Beer tenderises the chicken and creates the base for the gravy. Use whatever beer you enjoy drinking. A light lager — like Modelo — gives a crisp, clean flavour that works well for children. Darker beers add more complexity but can be intense for kids.

    • Why beer in the gravy: The beer deglazes all the caramelised bits from the bottom of the pan, which is where all the flavour is. It also keeps the chicken moist throughout the entire cook time.

    Cast Iron Skillet

    A cast iron skillet is the ideal pan for this recipe. It distributes heat evenly across the entire surface, which is critical for bone-in chicken that needs thorough cooking from all angles. Use a quality Lodge Pre-Seasoned Cast Iron Skillet — it browns the chicken perfectly and gets better with every use.

    • Why cast iron: Even heat distribution means the chicken cooks consistently. The skillet retains heat well, so the temperature stays stable when you add the cold chicken to the pan.

    If you love chicken recipes with bold flavours, try my Traditional Hong Kong Curry Chicken or Lemongrass Chicken Drumsticks for more weeknight-friendly options.

    Frequently Asked Questions

    What kind of beer works best in this recipe?

    A light lager is the best choice — it adds flavour without being overpowering, and the alcohol burns off during cooking, leaving behind only the subtle beer taste. Modelo, Heineken, or any standard light lager works great. If you want a richer, more complex gravy, try a pale ale. Avoid very dark stouts for this recipe unless you enjoy a bitter, roasted note in the sauce.

    Can I make this recipe without beer?

    Yes. Replace the beer with chicken broth or apple cider for a similarly rich gravy. The flavour will be different — slightly less complex — but still delicious. The key is to deglaze the pan with a liquid that has some body and flavour.

    How do I know when the chicken is fully cooked?

    The internal temperature of the thickest part of the thigh should reach 165°F (74°C). Visually, the juices should run clear when you pierce the meat near the bone. The chicken should feel firm rather than rubbery when pressed. Drumsticks and thighs typically need 25-30 minutes total in the pan.

    Can I use chicken breast instead of thighs and drumsticks?

    Yes, though chicken breast tends to dry out more quickly. The beer in the sauce helps prevent this significantly. If using breast, reduce the covered cooking time to 15-18 minutes and check for doneness early. Keeping the lid on during cooking traps moisture and helps prevent drying.

    How do I store leftovers?

    Store in an airtight container in the refrigerator for up to 3 days. Reheat gently on the stovetop with a splash of water or broth to loosen the gravy. The chicken reheats beautifully and the gravy thickens further, making leftovers arguably better than the original.

    Honey Mustard Chicken with Beer Gravy

    This honey mustard chicken is a warm autumn dish perfect for your family. Delicious beer gravy swimming in the sweetness of honey and savoury flavour of the chicken.
    Print Recipe
    Prep Time:15 minsCook Time:25 mins

    Ingredients

    Chicken Marinate

    • ½ kg chicken drumstick and thighs cleaned and pat dry, skin on
    • 2 tsp sea salt
    • 1½ tbsp honey
    • 2 tbsp mustard
    • ½ can light lager beer

    Gravy Sauce

    • 2 tbsp butter
    • ½ white onion chopped
    • 2 garlic clove minced
    • 1½ cups water
    • 3 tbsp mustard seed
    • ¼ cup cream
    • rosemary garnish

    Instructions

    Chicken Marinate

    • In a large mixing bowl, add the chicken, salt, honey, and beer together. Mix evenly. Let it sit on the counter for at least 15 minutes.

    To cook the chicken

    • Put the skillet on medium high heat. Melt the butter and sauté the onion and garlic until softened, about 2 minutes.
    • Carefully take the chicken with tongs and place it on the skillet. Reserve the beer marinate.
    • Sear the surface of the chicken for 5 minutes each side until slightly brown.
    • Once both sides are browned, add the reserved beer marinate along with the mustard and water. Put a lid on top and let it cook on medium for 25 minutes.
    • For the last 5 minutes of cooking, take the lid off and add the cream.
    • Place the chicken on a deep dish and pour the sauce over it. Garnish with fresh rosemary.
  • Tasty Soy Sauce Chicken Recipe – Cantonese Style

    Tasty Soy Sauce Chicken Recipe – Cantonese Style

    If there is one dish that instantly transports me back to childhood, it is Cantonese Soy Sauce Chicken. The moment those aromatics hit the oil — cinnamon, star anise, garlic — the entire kitchen fills with a fragrance that feels like home. And the best part? Once you build the braising liquid, you can reuse it two more times.

    This post may contain affiliate links. If you purchase through these links, I may earn a small commission at no extra cost to you. Thank you for supporting Love & Harvest!

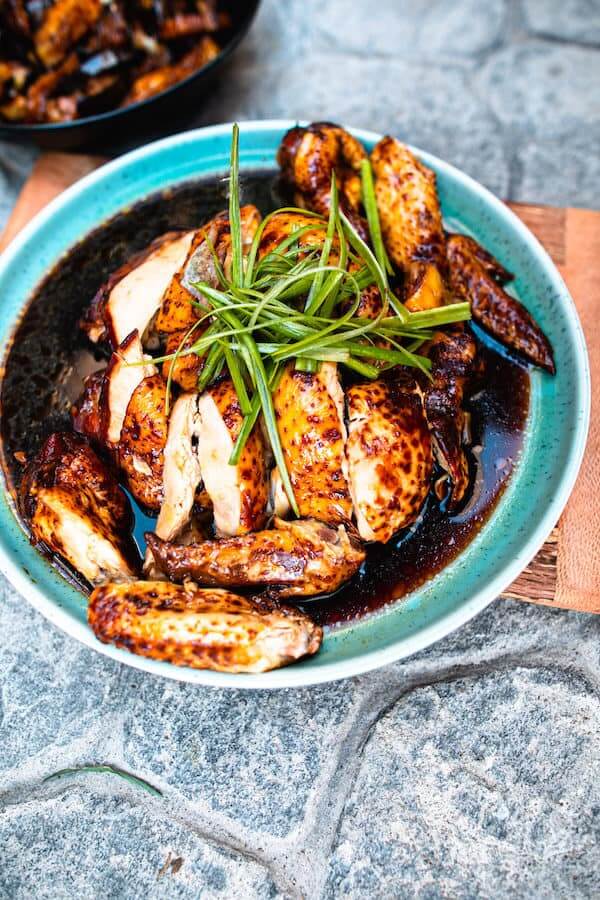
    soy sauce chicken recipe

    What is Soy Sauce Chicken?

    Also known as “See Yao Gai,” soy sauce chicken is a whole chicken braised in a bath of soy sauce, garlic, cinnamon, and star anise. The aroma of making this in the kitchen is mouthwatering. It is not labour-intensive, and after the first time making it, it gets easier. Once you establish the gravy, it can be frozen and reused twice more — freeze it and make another batch in the future.

    Everyone Knows What Soy Sauce Chicken Is

    This recipe is very popular in Asian food courts — there are usually at least two vendors selling soy sauce chicken at any Asian mall food court. It is home-style comfort food you can find everywhere. For Cantonese families, the aroma is deeply comforting and reminds us of childhood. Soy sauce chicken is best served with steamed white rice — and do not forget to spoon some of that gravy on top of the rice.

    Why You Will Love Soy Sauce Chicken

    • Easy to make — the recipe is straightforward. If you have basic Asian spices, you can make this. No specialised skills required.
    • Irresistible and delicious taste — the pungent smell of soy sauce and star anise makes any mouth water. Even people who have never tasted soy sauce chicken will immediately say it smells amazing.
    • Versatile — serve it with white rice and a vegetable side. You can also shred the meat and stir-fry it with noodles for soy sauce chicken noodles, or slice it cold over a salad.

    Ingredients

    Spices

    Star anise is non-negotiable for this recipe. The other spices — cinnamon stick, bay leaf, and ginger — build the aromatic backbone of the braising liquid. If you want a stronger ginger note closer to soy-ginger chicken, simply double the amount of ginger.

    • Why star anise matters: Star anise gives Cantonese braised dishes their signature warm, slightly sweet anise flavour. Without it, the dish loses its authentic character. Use fresh star anise for the most impact. You can find quality five spice powder or whole star anise on Amazon.

    Cinnamon Sticks

    Cinnamon adds warmth and a gentle sweetness that balances the saltiness of the soy sauce. It is subtle but makes a noticeable difference. Use whole cinnamon sticks rather than ground cinnamon — ground cinnamon will make the liquid cloudy and the flavour too strong.

    • Why whole sticks: Whole sticks release flavour gradually during the long braise without overpowering the sauce.

    Soy Sauce and Dark Soy Sauce

    There is an important difference between soy sauce and dark soy sauce. Regular soy sauce is where the umami flavour comes from. Dark soy sauce is primarily about colour — it is thicker, slightly less salty, and gives the chicken its beautiful mahogany finish.

    • Why both: Using only regular soy sauce will give you flavour without colour. Using only dark soy sauce will be too bitter. The combination is what creates the signature appearance and taste of authentic soy sauce chicken. Use a quality soy sauce for the braising liquid.

    Can I Use Chicken Wings, Thighs, and Drumsticks?

    Yes. For chicken wings, thighs, and drumsticks, cook for 10 minutes in the Instant Pot instead of 20. The same braising liquid and technique applies.

    Soy Sauce Chicken in an Instant Pot

    Set the Instant Pot on SAUTE and add the oil and spices. Sauté for 5 minutes. Add the water, dark soy sauce, spring onion, and sugar and bring to a boil. Add the chicken and set to HIGH PRESSURE for 20 minutes. Release the valve, take out the chicken, let it cool for 5 minutes, then brush with Chinese wine and maltose or honey.

    To clean the Instant Pot after: add vinegar and water to the pot and pressure cook for 10 minutes. The smell vanishes completely.

    Love Cantonese chicken? Also try my Classic Hainanese Chicken or the fragrant Lemongrass Chicken Drumsticks — both pair beautifully with the same steamed rice.

    soy sauce chicken recipe easy

    soy sauce chicken recipe

    Frequently Asked Questions

    Why does my soy sauce chicken look pale instead of the dark glossy colour I see in restaurants?

    The dark mahogany colour comes primarily from dark soy sauce, not regular soy sauce. Make sure you are using both types. Also, the step of brushing the cooked chicken with maltose or honey mixed with hot water right after it comes out of the pot creates that beautiful shiny glaze. Do not skip this step.

    Can I reuse the braising liquid?

    Yes — this is one of the best things about soy sauce chicken. After cooking, strain the braising liquid, let it cool completely, then freeze it. You can reuse it up to two more times, adding a little water and soy sauce each time to top it up. The flavour deepens with each use.

    How do I keep the chicken skin from tearing when I take it out of the pot?

    Use a combination of tongs and chopsticks to lift the chicken gently without breaking the skin. Avoid using a fork, which punctures the skin and lets juices escape. Let the chicken rest on a plate for 5 minutes before cutting — the skin firms up slightly as it cools and is much easier to handle.

    How long should I cook the chicken on low heat?

    20 minutes on the lowest setting with a gentle simmer, rotating every 10 minutes. The water should never bubble aggressively — only a very gentle, slow simmer. Then turn the heat to high for 10 minutes, turn it off completely, and let the chicken sit in the covered pot for another 15 minutes. This residual heat finishes cooking it through.

    What is maltose and can I substitute it?

    Maltose is a thick, sticky sweetener made from grain starch. It is used in the glaze because it creates a beautifully shiny, lacquered finish that honey alone cannot quite replicate. You can substitute with honey — it will work, but the glaze will be slightly less glossy. Mix with hot water to thin it before brushing.

    Soy Sauce Chicken

    Easy Cantonese soy braised chicken that will leave you stunned how simple it is to make restaurant-quality soy sauce chicken in your own kitchen. A soft and gentle process with warm aromatics like cinnamon and star anise. A beloved Cantonese dish and a favourite among families. Best served with warm rice on the side.
    Print Recipe Pin Recipe

    Ingredients

    • 1.4 kg Whole Chicken
    • 1 TBSP oil
    • 100 g sugar
    • 1 cinnamon stick
    • 1-2 star anise
    • 2-3 dried bay leaves
    • 5 cloves garlic
    • 2 bunches spring onions
    • 3-4 slices ginger
    • 1.5 cups dark soy sauce
    • 1 litre water
    • 1 TBSP Chinese rice wine

    Marinate for Chicken

    • 2 TSP sea salt
    • 1 TBSP dark soy sauce

    Chicken Glaze

    • 2 TBSP maltose / honey
    • 1 TBSP hot water

    Garnish

    • 1 green onion thinly sliced the green parts

    Instructions

    • In a large stock pot, heat 1 tbsp of oil on medium heat. Fry the garlic, ginger, cinnamon stick, star anise, and bay leaf until aromatic — about 3 minutes.
    • Immediately add the water, 1.5 cups of dark soy sauce, spring onion, and sugar. Bring everything to a boil.
    • When the water is boiling, carefully lower the whole chicken in. Give it at least 5-7 gentle rotations in the soy sauce water. Do not splash.
    • Place the chicken breast-side down and cover the pot on the lowest heat setting. You want only a very gentle simmer — not a rolling boil. Cook for 20 minutes, rotating every 10 minutes.
    • After 20 minutes, turn the heat back to high for 10 minutes, then turn off the heat with the lid on. Let the chicken sit in the water for 15 minutes.
    • Carefully remove the chicken without breaking the skin — use tongs and chopsticks. Set on a large plate and let it cool for 5 minutes. Brush with Chinese wine and maltose or honey.
    • Once completely cooled, chop into pieces and garnish with thinly sliced green onion. Serve with warm rice and some of the soy sauce gravy.