Category: dinner ideas

  • Beer Batter Fish and Chips

    Beer Batter Fish and Chips

    Our beer batter fish and chips is so crispy and golden you will wonder why you have never tried it before — restaurant-quality crunch with tender, flaky fish inside, all made right in your own kitchen with ingredients you likely already have on hand.

    This post may contain affiliate links. If you purchase through these links, I may earn a small commission at no extra cost to you. Thank you for supporting Love & Harvest!

    Golden crispy beer batter fish and chips on a plate.

    Why Beer Batter Makes the Best Fish and Chips

    Beer batter fish and chips takes this traditional dish to the next level, providing a crispy, golden crust that encases tender, flaky fish. The beer in the batter serves multiple purposes:

    1. Crispiness: The carbonation in the beer creates tiny bubbles in the batter, resulting in a light, airy, and exceptionally crispy coating.
    2. Flavour: Beer imparts a subtle malty flavour that enhances the overall taste without overpowering the fish.
    3. Moisture: The beer helps keep the fish moist and tender during frying, ensuring a perfect bite every time.

    Beer Batter vs. Regular Batter

    Traditional fish and chips are typically coated in a simple flour and water batter or seasoned flour. While delicious, they often lack the same level of crunch and depth of flavour that beer batter provides.

    • Effervescence: The bubbles in the beer expand during frying, creating a light and crispy crust.
    • Complexity: The beer adds subtle complexity to the batter, enhancing flavour without being overwhelming.

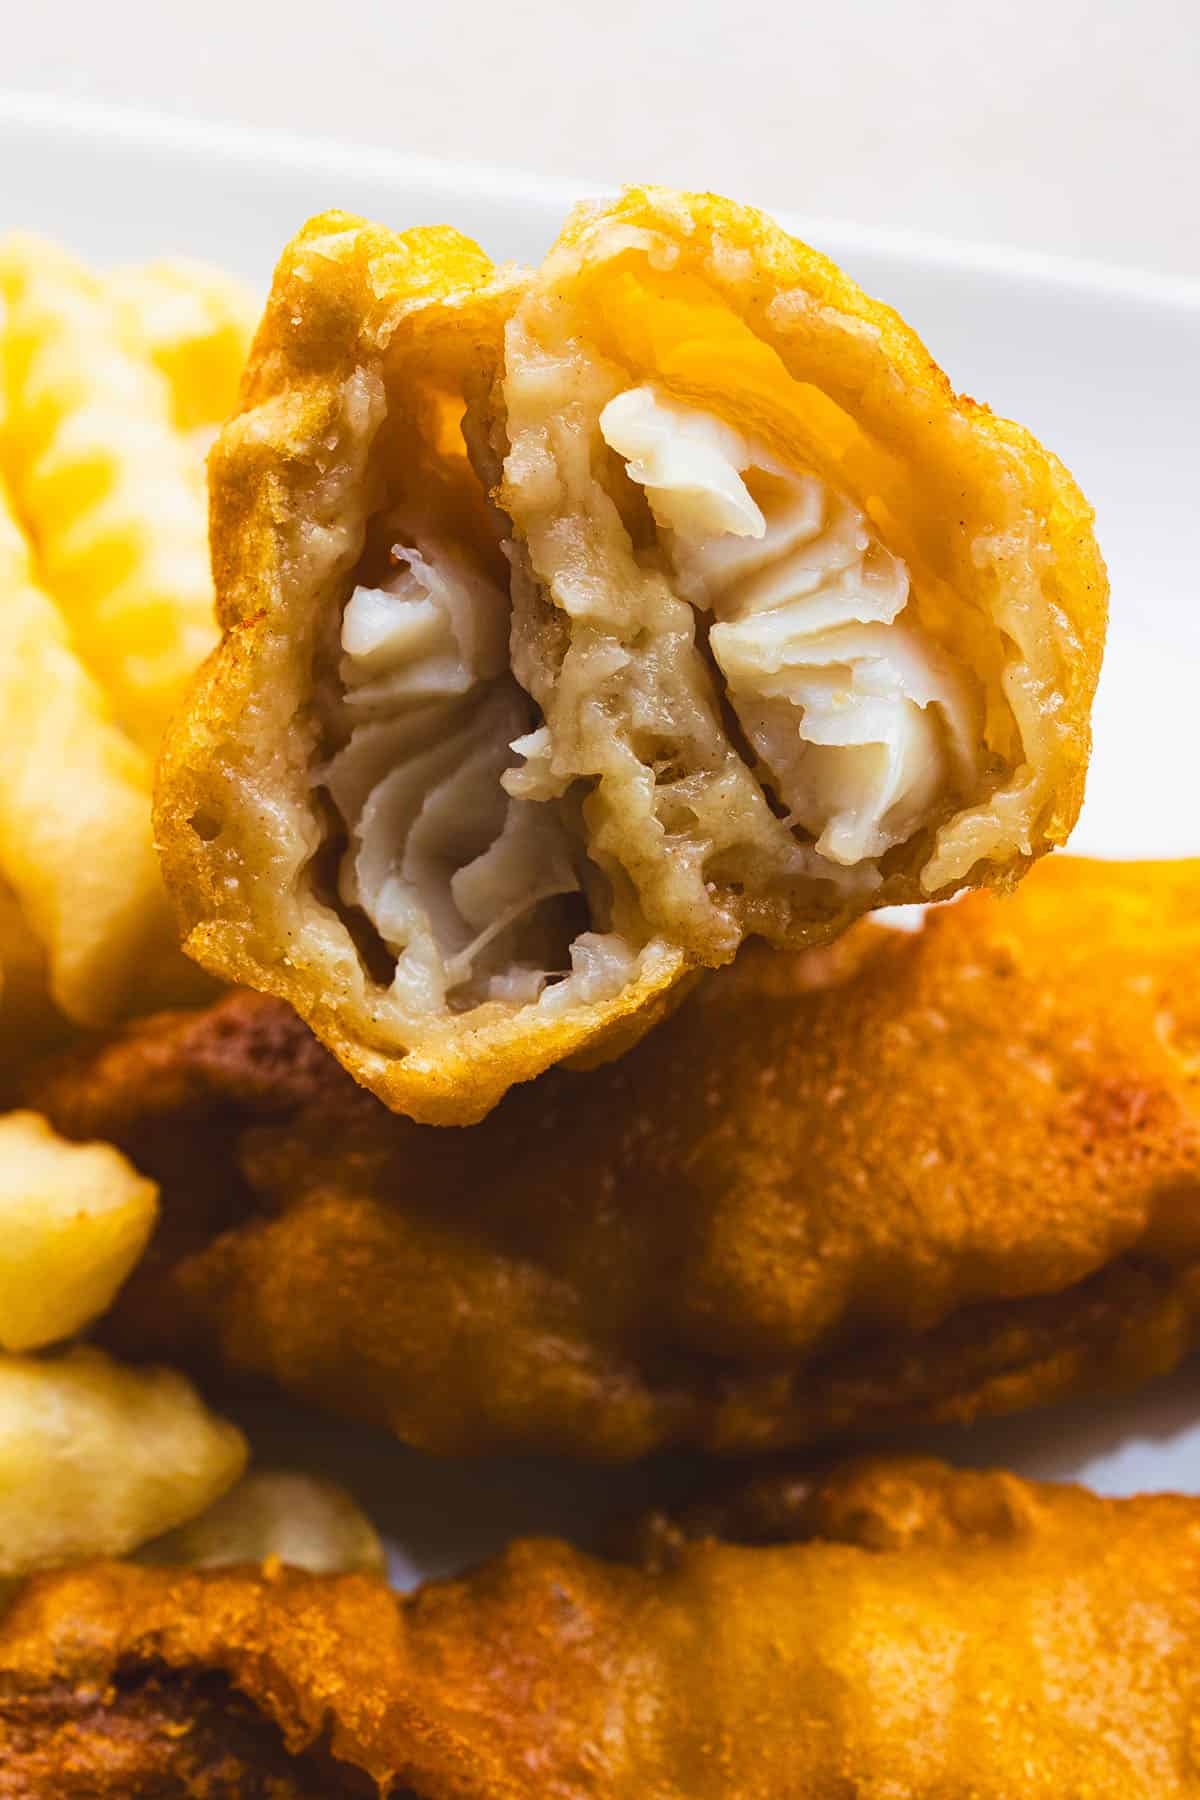
    Golden fried fish fillet with flaky white fish inside and crispy breading.

    Key Ingredients

    Ingredients

    The Fish

    Traditionally halibut was the go-to fish for fish and chips. With the rise in halibut prices, many other options have become popular. We always use tilapia based on availability, but the following all work beautifully:

    • Why it matters: A firm, flaky white fish holds up to frying without falling apart. Avoid thin or delicate fillets that will overcook before the batter turns golden.
    • Best choices: halibut, cod, haddock, tilapia, pollock, or catfish.

    Beer

    A light lager or pale ale works best for fish and chips batter. Let it sit open for a few minutes before using to slightly reduce the carbonation so it does not bubble over when mixed.

    • Why it matters: The carbonation is what creates that signature light, airy, crispy crust that makes this recipe special.

    Rice Flour Blend

    Using a combination of all-purpose flour and rice flour gives the batter an extra-crispy texture that stays crunchy longer.

    • Why it matters: Rice flour has less gluten than wheat flour, which means the batter fries up crispier and lighter without toughening.

    Dutch Oven

    For stovetop deep frying, a Lodge cast iron Dutch oven is ideal. Cast iron holds heat evenly and maintains the oil temperature far better than a regular saucepan.

    • Why it matters: Consistent oil temperature at 375°F (190°C) is the secret to a non-greasy, perfectly golden crust.

    Fresh white fish fillets on a wire rack ready for beer batter frying.

    How to Make Beer Batter Fish and Chips

    Open a can of beer and let it sit for a few minutes to slightly reduce the carbonation. Meanwhile, cut the fish into long strips and season with salt and pepper. Set aside.

    Combine all the dry ingredients in a bowl and stir well to ensure they are thoroughly mixed. Gradually whisk in the beer until the batter is thick and smooth. Set aside.

    Heat oil in a Dutch oven to 375°F (190°C). Use a deep frying thermometer to monitor the temperature throughout cooking. Dip each fillet into the beer batter, making sure it is well coated. Carefully lower the battered fish into the hot oil and fry until golden brown and crispy, about 4–6 minutes per fillet. Remove and drain on paper towels.

    Serve the fish and chips hot, sprinkled with a little extra salt. Accompany with lemon wedges, tartar sauce, or malt vinegar, and French fries.

    Crispy fried fish fillets with crinkle-cut fries on a white plate.

    Tips for the Crispiest Beer Batter Fish

    • Cold batter: Keep the batter cold until the moment of frying. Cold batter hitting hot oil creates the crispiest coating.
    • Don’t crowd the pan: Fry 2–3 pieces at a time. Crowding drops the oil temperature and leads to greasy, soggy fish.
    • Pat the fish dry: Before dipping in batter, pat the fish fillets dry with paper towels. Excess moisture prevents the batter from adhering properly.
    • Monitor oil temperature: Use a thermometer and maintain 375°F throughout cooking. Too low = greasy; too high = burnt outside, raw inside.

    Love seafood dinners? Try our Crispy Panko Crusted Baked Salmon for a lighter weeknight option, or our Easy Camping Shrimp Pasta for something quick and flavourful. For a beautiful salmon dish, the Ricotta Cheese Salmon Roll is always a crowd-pleaser.

    Crispy beer batter fish and chips served with dipping sauce.

    Frequently Asked Questions

    What is the best beer for beer batter fish?

    A light lager or pale ale gives the best results — something crisp and not too bitter. Avoid dark stouts or heavily hopped IPAs as they can make the batter too heavy and bitter. If you prefer not to use alcohol, sparkling water or club soda works as a non-alcoholic substitute and still provides the carbonation needed for a crispy crust.

    Why is my batter not sticking to the fish?

    The most common reason is excess moisture on the fish. Always pat the fillets completely dry with paper towels before dipping in batter. Also make sure the batter is thick enough — it should coat the back of a spoon. If the batter is too thin, add a tablespoon of flour and stir.

    What oil is best for frying fish?

    Use a neutral high-smoke-point oil such as canola, vegetable, or sunflower oil. Avoid olive oil or butter as they burn at high frying temperatures. You need at least 2–3 inches of oil in the pot so the fish can float freely while frying.

    Can I make this in an air fryer?

    Beer batter does not work well in an air fryer because the batter is too wet and liquid — it drips off before it can set. For an air fryer version, use a dry breadcrumb coating instead. For the authentic crispy beer batter crust, deep frying in a Dutch oven is the only way to achieve the right result.

    What type of fish works best if halibut is not available?

    Cod and haddock are the most traditional substitutes and give the best texture. Tilapia is widely available and mild in flavour, making it very family-friendly. Pollock is a budget-friendly option with great texture. Avoid very thin fillets or fatty fish like salmon for this recipe as they behave differently in hot oil.

    How do I keep the fish crispy while frying in batches?

    Place fried pieces on a wire rack set over a baking sheet in a 225°F (110°C) oven while you finish frying the remaining batches. Never stack hot fried fish on paper towels alone — the steam traps moisture underneath and makes the bottom soggy. A wire rack lets air circulate all around each piece.

    Golden fried fish fillet with flaky white fish inside and crispy breading. Perfect for seafood lovers and date night dinners.

    Beer Batter Fish and Chips

    Restaurant quality fish and chip batter that guarantees a crispy, golden crust that encases tender, flaky fish using beer in the batter.
    Prep Time 10 minutes
    Cook Time 30 minutes
    Total Time 40 minutes
    Servings: 5 people
    Course: Main Course
    Cuisine: American
    Calories: 580

    Ingredients
      

    • 1½ pounds white fish fillets (such as cod, haddock, or pollock)
    • 1 cup all-purpose flour + extra for coating the fish
    • 1 tsp ground paprika
    • 1 tsp baking powder
    • 1 tsp salt
    • 1 cup beer open and sit on counter for 20 minutes
    • 1 tsp salt
    • vegetable oil
    • 3 pounds frozen fresh fries

    Method
     

    1. Heat vegetable oil in a deep fryer or large pot to 325°F (165°C).
    2. Fry the potatoes in batches for about 3-4 minutes until they are pale and soft but not browned. Remove and drain on paper towels.
    3. Increase the oil temperature to 375°F (190°C). Fry the potatoes again in batches for 2-3 minutes until golden and crispy. Remove and drain on paper towels, then season with salt.
    Preparing the Fish
    1. Pat the fish fillets dry with paper towels and season both sides with salt and pepper.
    2. In a large bowl, mix together the flour, paprika, baking powder, and salt.
    3. Gradually pour the beer into the flour mixture, whisking until smooth.
    4. Dip each fish fillet into some flour until well coated, then submerge the fillet into the batter, allowing any excess to drip off.
    5. Carefully lower the fish into the hot oil and fry for about 4-5 minutes, or until the batter is golden brown and the fish is cooked through. Fry in batches if necessary to avoid overcrowding the fryer.
    6. Remove the fish from the oil and drain on paper towels.
    7. To Serve: the hot, crispy fish with the freshly fried chips. Optionally, serve with lemon wedges, tartar sauce, and malt vinegar.

  • One Pot Lemon Garlic Chicken

    One Pot Lemon Garlic Chicken

    One pot, 30 minutes, and ingredients you already have in the fridge — this Lemon Garlic Chicken with rice pilaf is the weeknight dinner that earns compliments every single time. My kids fight over the leftovers, and yours probably will too.

    One pot lemon garlic chicken and rice topped with lemon slices, with pickled red onion on the side

    This post may contain affiliate links. If you purchase through these links, I may earn a small commission at no extra cost to you. Thank you for supporting Love & Harvest!

    Why This Recipe Works

    The secret to this dish is layering flavor in one pot. You marinate the chicken first, then sear it skin-side down to render the fat and build a golden crust. That same pot then becomes the base for your rice — deglazing with red wine picks up all the browned bits, and the chicken stock cooks the rice to fluffy perfection. Everything that would have gone into multiple pans concentrates into one incredible dish.

    Skillet of lemon garlic chicken with rice pilaf and lemon slices

    Ingredient Deep-Dive

    Ingredients

    Chicken Legs (Skin-On)

    • Why it matters: Skin-on chicken legs are essential. When they hit the hot pan, the natural fat renders out and creates a deeply caramelized crust that flavors the entire dish. You can remove the skin if you prefer, but you’ll miss that golden layer. Dark meat also stays juicier over the 20–25 minute cooking time than breast meat would.

    White Rice

    • Why it matters: I use regular jasmine or Chinese short-grain rice. It absorbs the garlic-lemon-wine stock beautifully. Brown rice or quinoa can substitute, but will need more liquid and longer cooking time.

    Chicken Stock

    • Why it matters: Good chicken stock is the backbone of the rice. Homemade is best, but any quality store-bought stock works. It carries the garlic and lemon into every grain of rice.

    Fresh Lemon

    • Why it matters: Lemon serves double duty — it marinates the chicken (tenderizes, adds brightness) and finishes the dish as a wedge on the side for a fresh citrus burst right before eating. Do not use bottled lemon juice; fresh is non-negotiable here.

    Fresh Garlic

    • Why it matters: Minced fresh garlic cloves in the marinade infuse the chicken deeply. Always fresh — jarred garlic lacks the aromatic punch needed to flavor the entire dish.

    Old Red Wine

    • Why it matters: I always have an open bottle of red wine that was forgotten from a party or a quiet evening. Old wine is more acidic, and that acidity is perfect for deglazing the pan — it lifts all the caramelized chicken bits that would otherwise be lost, adding enormous depth to the rice. Don’t use cooking wine; real wine is the difference.

    How to Make One Pot Lemon Garlic Chicken

    1. Marinate the Chicken: Combine chicken legs with lemon juice, minced garlic, olive oil, salt, pepper, and herbs. Let sit while you prep the rest.
    2. Prepare the Rice: Wash rice until the water runs clear — this removes excess starch and prevents a gummy result.
    3. Sear the Chicken: Heat olive oil in a large pot over medium-high heat. Sear chicken skin-side down until golden and crispy. Remove and set aside.
    4. Deglaze: Pour red wine into the hot pot and scrape up all the browned bits. Those bits are pure flavor.
    5. Sauté the Rice: Add washed rice and stir for a couple of minutes to coat it in the deglazed sauce.
    6. Cook Together: Pour in chicken stock, bring to a simmer, nestle chicken legs on top, cover, and cook 20–25 minutes until stock is fully absorbed and chicken is cooked through.
    7. Serve: Garnish with lemon wedges for a fresh citrus finish.

    Close-up of chicken thighs, carrots and rice in the pan with lemon slices

    A Family Favorite

    As a busy mom, I’m always hunting for meals that are fast, nutritious, and don’t create a mountain of dishes. This One Pot Lemon Garlic Chicken has become a lifesaver for countless weeknight dinners. My kids are always excited to open their school lunchbox when they spot the leftovers — especially with that extra lemon wedge tucked in on the side.

    Lemon garlic chicken with rice pilaf, carrots and fresh herbs in the pan

    Close-up of the rice pilaf with herbs and a lemon slice in the pan

    Lemon garlic chicken and rice plated with pickled red onion and a lemon wedge

    Frequently Asked Questions

    Can I use chicken breast instead of chicken legs?

    You can, but chicken legs are strongly recommended. The dark meat stays juicy during the 20–25 minute cooking time. Chicken breasts tend to dry out when cooked this long at these temperatures. If using breasts, reduce cooking time and check for doneness at 15 minutes.

    What if I don’t have red wine?

    Deglaze with chicken stock or white wine instead. The red wine adds a deeper, slightly tannic flavor, but the dish still works beautifully without it. Avoid skipping the deglazing step entirely — those browned bits are essential flavor.

    Can I make this ahead of time?

    Yes. It reheats excellently. Store leftovers in an airtight container for up to 3 days. Add a splash of water or chicken stock when reheating to prevent the rice from drying out. Serve with a fresh lemon wedge.

    How do I know when the chicken is cooked through?

    The internal temperature should reach 165°F (74°C). The juices run clear when you pierce the thickest part of the thigh. The rice being fully cooked and stock fully absorbed is also a reliable indicator.

    Can I add vegetables?

    Absolutely. Carrots, onions, and peas all work well. Add sturdy vegetables (carrots, onion) when you sauté the rice, and tender ones (peas, spinach) in the last 5 minutes. The original recipe includes carrots and onion as traditional additions.

    What type of pot works best?

    A wide, heavy-bottomed pot with a tight-fitting lid is ideal. A Lodge Dutch Oven or any heavy enameled pot distributes heat evenly and traps steam perfectly for cooking the rice.

    Baked chicken and rice skillet with lemon slices and fresh herbs, delicious comfort food recipe.

    One Pot Lemon Garlic Chicken

    A 30-minute meal with minimal cleanup and ingredients you can easily find in your fridge and pantry. This dish has become a household favourite because it is easy and delicious.
    Prep Time 5 minutes
    Cook Time 25 minutes
    Total Time 30 minutes
    Servings: 6 people
    Course: Main Course
    Calories: 520

    Ingredients
      

    Chicken Legs Marinate
    • 6 whole chicken legs separate the thigh and drumstick, skin on
    • 2 tbsp red wine
    • ½ lemon juice
    • 1 tsp Maggie Sauce
    • 1 tsp paprika
    • 2 garlic cloves grated
    • ½ white onion grated
    • 2 tsp sea salt
    • black pepper
    One Pot Lemon Garlic Chicken
    • 3 cups white rice wash and rinsed
    • 2 carrots diced
    • ½ cup green beans diced
    • 2 garlic cloves smashed and diced
    • 1 white onion diced
    • ½ cup red wine
    • 4 cups chicken stock
    • ½ lemon juice
    • salt
    • cilantro

    Method
     

    Chicken Marinate
    1. Wash and clean the chicken. Trim out any extra fat but keep the skin on.
    2. In a bowl, combine the chicken legs with red wine, lemon juice, Maggie sauce, paprika, grated garlic, grated onion, salt, and black pepper. Let it sit while you prepare the rest.
    One pot lemon garlic chicken
    1. Wash your rice in a separate bowl until the water runs clear. Set the strained rice aside.
    2. Heat a large pot over medium heat. Make sure the pan is very hot. Add the marinated chicken legs skin-side down and sear until the skin is golden and crispy. I like the pot really hot so the oil from the skin bubbles out. If you find the chickens are sticking to the pot, add 1 tsp of oil. Remove the chicken and set it aside.
    3. Pour the red wine into the pot, scraping up all the crispy bits left behind from the chicken. Add the diced carrots, onion and garlic. Saute until soft.
    4. Add the washed rice to the pot and stir it around in the deglazed sauce for a couple of minutes to let it soak up all the flavors.
    5. Pour in the chicken stock and bring it to a simmer. Nestle the chicken legs on top of the rice, cover, and cook for 20-25 minutes, or until the stock is fully absorbed and the chicken is cooked through. Squeeze lemon juice on top.
    6. Once the stock has disappeared, your one-pot meal is ready to serve! Garnish with lemon wedges for an extra citrusy kick and sprinkle with cilantro.

    Love one-pot chicken meals? Try our Thanksgiving Roasted Lemon Garlic Chicken for a showstopper centerpiece, or our Mexican Fire Roast Chicken for bold smoky flavor. For an easy weeknight side, our Best Garlic Mashed Potatoes pairs perfectly with this dish.

  • Apple Tart with Cardamom Crust and Caramel Drizzle

    Apple Tart with Cardamom Crust and Caramel Drizzle

    This apple tart has an unexpected secret: cardamom in the crust. A single teaspoon transforms a standard pastry into something aromatic and memorable — the spice’s citrusy, floral warmth bridges the gap between the tart apples and the sweet caramel drizzle. Served warm with a scoop of homemade blueberry ice cream, this is fall baking at its best.

    This post may contain affiliate links. If you purchase through these links, I may earn a small commission at no extra cost to you. Thank you for supporting Love & Harvest!

    apple tart with cardamom crust

    Fall is synonymous with apple picking, and what better way to celebrate the season than incorporating freshly harvested apples into a beautiful dessert? The tartness of the apples complements the sweetness of the caramel drizzle, while the homemade blueberry ice cream adds a refreshing contrast. This dessert showcases the variety that fall flavors have to offer, making it a genuine crowd-pleaser.

    apple tart sliced showing cardamom crust

    This Apple Tart with Cardamom Crust not only celebrates the essence of fall but also provides a practical use for surplus apples from orchard visits. As the leaves turn and the air cools, this dessert brings the warmth and comfort of the season to your table. For the crust recipe, see our dedicated how-to-make-flakey-pie-crust guide.

    apple tart from above

    Ingredients

    Ingredients

    Cardamom

    • Why it matters: Ground cardamom (B07YKZ8NMR) has a distinct flavor that combines citrusy, spicy, and herbal notes. This complexity elevates the apple tart crust, providing depth that pairs exceptionally well with the sweetness and tartness of the apples. Start with 1 teaspoon — it is potent, and a little goes a long way.

    Apples

    • Why they matter: My favorite apple varieties for baking are Granny Smiths (firm and tart, hold their shape beautifully) and Honeycrisp (sweeter, slightly softer). The best advice: use what is local and in season. An apple corer (B00004OCMH) saves significant prep time when working with multiple apples.

    Tart Pan with Removable Bottom

    Cinnamon and Cloves

    • Why they matter: A touch of cinnamon in the apple filling adds warmth and familiar comfort. Cloves, used sparingly, add a cozy depth with their sweet, aromatic punch. Together with cardamom in the crust, these three spices create a layered flavor profile that rewards every bite.

    apple tart caramel drizzle close up

    Professional Tips

    Pro Tip 1 — Cut Butter in Pea-Sized Pieces

    Pea-sized pieces of cold butter are what create a flaky crust. When the tart goes into the oven, the butter pieces melt and create steam pockets that push the layers of dough apart. If the butter is fully incorporated or too warm, you lose those pockets and end up with a dense, crumbly crust instead of a flaky one. Keep everything cold.

    how to make flakey pie crust

    Pro Tip 2 — Let the Dough Rest Cold Before Rolling

    Refrigerating the dough for at least 30 minutes (ideally 1 hour) after mixing lets the butter firm back up and the gluten relax. Cold butter in the dough creates those steam pockets. Gluten that has rested rolls out without snapping back. Use a rolling pin (B00004OCKF) on a lightly floured surface and work quickly.

    Pro Tip 3 — Arrange Apple Slices in a Pattern

    Arranging apple slices in overlapping sequences does more than look beautiful — it ensures even heat distribution across the tart, preventing some areas from overcooking while others remain underdone. Use a pastry brush (B00012CF72) to apply the caramel drizzle and an egg wash evenly over the arranged slices before baking.

    apple tart ready to serve with blueberry ice cream

    Frequently Asked Questions

    Can I make the crust ahead of time?

    Yes. The cardamom crust dough keeps in the refrigerator for up to 3 days, or in the freezer for up to 3 months (thaw overnight in the fridge before rolling). Having the crust ready in advance makes this tart an easy same-day dessert.

    How do I prevent the apple slices from browning before baking?

    Toss sliced apples in a mixture of lemon juice and a pinch of salt as soon as you cut them. This slows oxidation and keeps the slices bright and fresh-looking until you are ready to arrange them in the tart shell.

    What is the best way to make the caramel drizzle?

    Melt ¼ cup of sugar in a dry pan over medium heat without stirring. Once golden amber, remove from heat and carefully add 2 tablespoons of warm heavy cream — it will bubble vigorously. Stir in a pinch of salt and let cool slightly before drizzling. For a richer tart, try our full apple tart caramel recipe.

    Which desserts pair well with this apple tart?

    The cardamom and apple flavors also go beautifully alongside our best spiced pumpkin pie with flakey crust and our cherry clafoutis pie for a full fall dessert spread.

    Can I substitute the blueberry ice cream?

    Absolutely. Vanilla bean ice cream or crème fraîche are the most classic pairings. For contrast, the tartness of a good crème fraîche actually highlights the cardamom notes in the crust even more than vanilla does.

  • Succulent Sunday Pot Roast

    Succulent Sunday Pot Roast

    The most succulent pot roast you can make on a Sunday — hassle-free, inexpensive, and packed with deep beefy flavour. Slow-roasted at 300°F with a garlic red-wine braise, then finished with a rich drippings gravy that will go on everything at your table.

    This post may contain affiliate links. If you purchase through these links, I may earn a small commission at no extra cost to you. Thank you for supporting Love & Harvest!

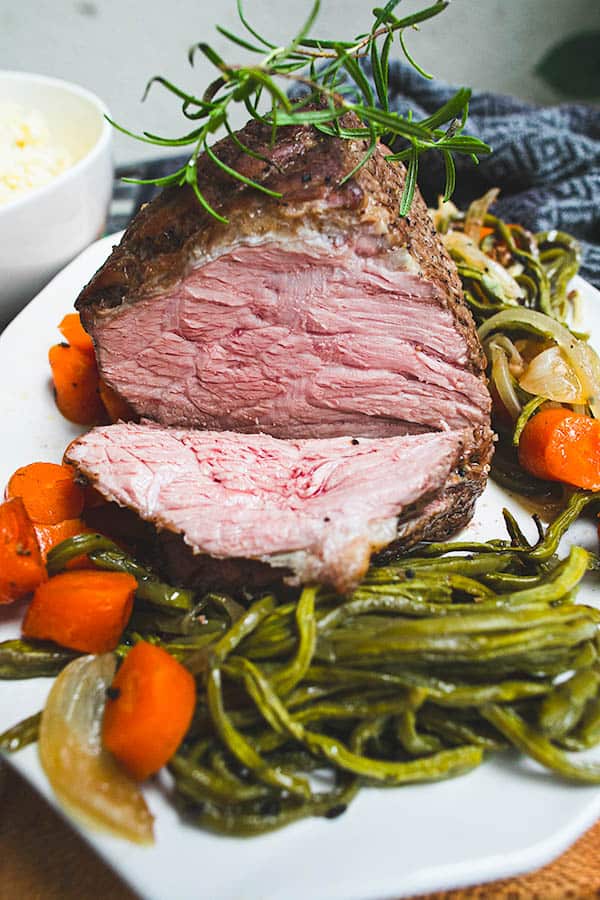
    succulent Sunday pot roast on a platter

    Using the most affordable cut, pot roast can still deliver super juicy, fork-tender results — as long as you know how to cook it.

    Economically, being smart about money is essential. This beefy pot roast is the perfect Sunday dinner for your family because, for the price per pound, it is a bargain. Top sirloin roast costs far more, yet with the right technique we get a similar depth of flavour at a fraction of the cost.

    raw beef roast ready to marinate

    Fancy Recession Dinner

    When fall arrives, a few recipes always make me giddy — and this succulent pot roast is one of them. There is a reason why pot roast shows up as the Sunday dinner to make for families across every food publication. This inexpensive cut has a strong beefy taste and follows a beautiful “set it and forget it” method of cooking.

    My family absolutely adores this recipe. I make it for rare and special moments: the night before the kids go back to school in September, for someone’s birthday, for any celebratory occasion that deserves a slow-cooked love letter at the dinner table.

    Pot Roast Gravy

    An easy gravy made from the drippings of the pot roast. Every drop of juice from the roast is packed with concentrated beefy flavour, and we are using every bit of it. It is thick, glossy, and delicious, and I guarantee you will put it on everything.

    pot roast gravy in pan

    Why Make This Recipe

    • “Set it and forget it” recipe: A simple and effortless recipe that requires very little of your time. Just marinate the beef, let it sit, and cook it in the oven.
    • Tastes amazing: Get a great beefy taste for a fraction of the cost of premium cuts.
    • Inexpensive cut: Compared to other cuts of beef, pot roast is the most affordable. Great for both your wallet and your table.
    • Amazing Gravy: The beefy juice this roast produces is incredible, and we are not letting a drop go to waste.

    pot roast before oven

    Which Cut of Beef Do I Use?

    I prefer the round eye roast cut. It is affordable and delicious when cooked the right way. The round eye has a strong beefy flavour and is inexpensive because it tends to be chewier compared to other cuts — slow roasting at low heat solves that completely.

    Ingredients

    Key Ingredients

    Beef Chuck or Round Eye Roast

    The beef chunk roast or round eye cut is known to be inexpensive mainly because the meat is tougher. Do not let the price fool you — it has one of the best flavours when slow-roasted.

    • Why it matters: Tough cuts have more collagen and connective tissue. When cooked low and slow, that collagen breaks down into gelatin, giving you incredibly moist, fork-tender meat and a rich, silky braising liquid for the gravy.

    For this recipe, we use 1.5 kg — perfect for a family of 5-6 with leftovers. Leftover pot roast makes incredible sandwich fillings, beef stew, or a topping for mac and cheese.

    Nopales (Cactus Paddle)

    Because I live in Mexico, nopales are a regular green I can always find. Green beans are an excellent substitute.

    • Why they matter: Roasting the greens alongside the beef adds colour contrast, fibre, and a subtle earthy flavour that complements the rich meat. Other substitutes: cauliflower, broccoli, or cabbage.

    Carrots

    I love adding carrots to my pot roast because they give it that subtle sweetness that is missing in a fully savoury meal.

    • Why they matter: Carrots caramelize slightly during the long braise, adding a natural sweetness that balances the deep savoury beef flavours.

    Montreal Steak Seasoning

    To marinate the beef, I use a good Dutch oven and the Costco-brand Montreal Steak Seasoning. It is one of my favourite beef seasonings. I use it for roasts, burger patties, and even mac and cheese.

    • Why it matters: Montreal seasoning is a bold blend of coarse pepper, garlic, coriander, and dill that creates a flavourful crust when seared. That crust seals in juices and adds complexity to the gravy.

    pot roast ingredients

    No-Fail Professional Tips

    Pro Tip 1 — Marinate at Least 2 Hours or Overnight

    Because we are using a larger cut, it needs to be marinated for a longer period. A longer marinate guarantees the flavour will penetrate into the meat. I like to marinate the meat at night and use it the next day. Rubbing the marinade only requires 5-10 minutes of your time.

    Pro Tip 2 — Low Oven Temperature: 300 degrees F

    Keeping a steady low temperature is essential for a perfect pot roast. I always have an oven thermometer on hand to track the actual temperature inside. Slow and low heat is your friend here — it breaks down the tough connective tissue without drying out the meat.

    pot roast in cast iron skillet

    Pro Tip 3 — Use a Cast Iron Skillet or Dutch Oven

    I use a Lodge 5qt Dutch Oven for this recipe. Cast iron gives even heat distribution to brown the pot roast properly, and it goes straight from stovetop to oven. Make sure your vessel is oven-proof safe.

    Pro Tip 4 — Let It Rest 30 Minutes Before Serving

    I learned this from a Gordon Ramsay Holiday special. For any meat roasted in the oven, let it rest outside for at least 30 minutes before cutting. When you cut immediately, the moisture escapes as steam, leaving a drier slice. Let it rest and every cut will be succulent and juicy.

    sliced pot roast with vegetables

    Frequently Asked Questions

    How long do I cook pot roast in the oven?

    3 hours total at 300°F. The first 2 hours are covered with tin foil or a lid to trap steam. The last hour is uncovered, which helps develop a deeper colour on the meat. The roast is done when it reaches an internal temperature of 202°F and shreds easily with a fork.

    Can I make this without red wine?

    Yes. You can substitute the red wine with beef broth, grape juice, or pomegranate juice. The red wine adds depth and slight acidity that helps tenderize the meat, but broth works beautifully as a substitute.

    What if I do not have a cast iron skillet?

    Any heavy, oven-proof pan or Dutch oven will work. The most important thing is that the vessel can go from stovetop (for searing) to oven (for slow roasting) without issues. Avoid non-stick pans for high-heat searing.

    How do I prevent the pot roast from drying out?

    Three things prevent a dry pot roast: (1) marinating overnight to season deep into the meat, (2) cooking covered for the first 2 hours to keep moisture in, and (3) letting the meat rest for 30 minutes after cooking before slicing.

    What can I do with leftover pot roast?

    Leftover pot roast is a gift. Use it for beef sandwiches, beef tacos, beef stew, or as a topping for baked potatoes or mac and cheese. The cold leftover meat re-heats beautifully with a spoonful of the leftover gravy.

    Can I make the gravy ahead of time?

    The gravy uses the pot roast drippings, so it must be made after the roast is done. However, you can make extra gravy and refrigerate it for up to 3 days. It reheats perfectly over low heat with a splash of water or broth to loosen it.

    succulent Sunday pot roast

    Succulent Sunday Pot Roast

    The most succulent pot roast beef you can make that is hassle free and tastes amazing! We also have the best tasting gravy to go along with this pot roast!
    Print Recipe
    Pin Recipe
    Prep Time:30 mins
    Cook Time:3 hrs
    Course: Main Course
    Cuisine: American
    Keyword: pot roast
    Servings: 6 people

    Equipment

    • 1 cast iron skillet
    • tin foil
    • 1 dutch oven optional

    Ingredients

    Pot Roast Marinade

    • 1.5 kg beef chunk roast or any beef roast you choose
    • 3 tbsp canola oil
    • 2 tbsp Montreal Steak Seasoning
    • 2 tsp sea salt
    • black pepper optional

    Skillet Greens

    • 2 tbsp butter
    • 1 medium white onion sliced
    • 5 nopales or cactus paddle ½kg green beans as substitute
    • 3 large carrots roughly chopped
    • 2 cloves garlic crushed
    • 2 cups red wine

    Pot Roast Gravy

    • 1 tbsp butter
    • 2 cloves garlic grated
    • 2 tbsp flour
    • juice of pot roast
    • 1 tsp sea salt

    Instructions

    Pot Roast Marinade

    • Wash your pot roast with cold tap water. Pat dry with paper towel.
    • Combine the oil, seasoning, salt, and pepper (optional) in a bowl. Using your hands, rub vigorously the seasoning all around the pot roast. Wrap the roast up with plastic and let it sit in the fridge for 2 hours or preferably, overnight.

    Pot Roast

    • Preheat oven to 300°F.
    • Using your cast iron skillet, heat it on high. Alternatively, you can use a Dutch Oven. Add the butter until fully melted and sear the roast until brown, 3-4 minutes each side. Take the pot roast out and set it aside.
    • On medium-high heat, saute the onion for 2 minutes. Add the sliced nopales (or green beans) with the carrots for 5 minutes. Lastly add the crushed garlic and cook for 1 minute.
    • Place the pot roast on top of the vegetables and add the red wine. Add enough tin foil to cover the top of the skillet. If you are using a Dutch Oven, just put the lid on top.
    • Put the pot roast in the oven for 2 hours covered.
    • For the remaining last 1 hour, remove the tin foil or lid. To know it is done, the meat needs to reach an internal temperature of 202°F and/or shreds easily with a fork.
    • After 3 hours, let the pot roast sit on the counter for 30 minutes. Meanwhile, take the juice out of the pan with the garlic cloves. Using a fork, mash the garlic clove in its juice and set it aside.

    Pot Roast Gravy

    • In a pan, heat on medium-high and melt the butter. Add in the minced garlic and saute for 2 minutes. Add the flour and continuously move it around with a whisk. Do not walk away. Move the flour until it is fragrant and has a slight brown colour. Quickly pour the pot roast juice into the pan and whisk vigorously until the flour is well blended with no lumps. Salt the gravy. Cook on the stovetop for 10 minutes on medium-low heat.

    Assemble the Pot Roast

    • On a large plate, carefully place the pot roast in the center. Mix the vegetables well with tongs (add a little more salt if desired), and place the vegetables around the roast beef. Serve the gravy on top or on the side. Serve warm.

    If you love this hearty Sunday dinner, try our Instant Pot Taiwanese Beef Noodle Soup for another beef recipe that delivers serious depth of flavour. Or warm up with our Easy Instant Pot Chili on a cold weeknight.

  • Instant Pot Taiwanese Beef Noodle Soup

    Instant Pot Taiwanese Beef Noodle Soup

    Spicy, soulful, and packed with beef that melts right off the bone — this Instant Pot Taiwanese Beef Noodle Soup is the most comforting bowl you can make at home. Chewy wheat noodles, aromatic Asian spices, tender braised beef chunks, and a deeply savory broth come together in under 2 hours with almost no effort.

    This post may contain affiliate links. If you purchase through these links, I may earn a small commission at no extra cost to you. Thank you for supporting Love & Harvest!

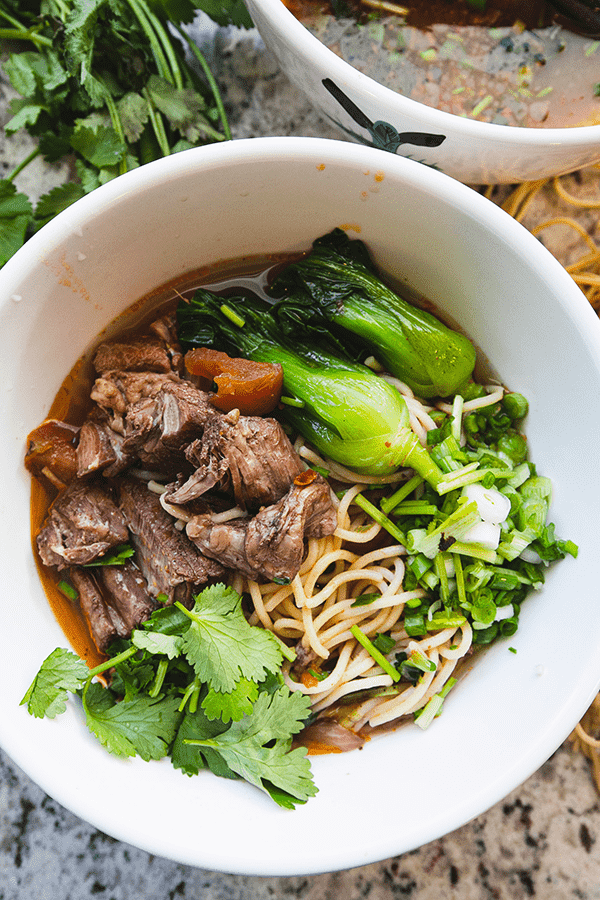
    Taiwanese beef noodle soup in bowl

    An easy and effortless recipe that guarantees a meat-melting experience. Literally a throw-in-everything recipe that only requires an Instant Pot. The perfect Taiwanese beef noodle soup that is soul-comforting and ridiculously delicious!

    beef noodle soup with bok choy

    What Is Taiwanese Beef Noodle Soup?

    A rich soup filled with beef flavour and assorted Asian spices, served over fresh chewy wheat noodles. It is topped with bok choy, tender chunks of beef, cilantro, green onions, and spicy Sichuan oil.

    This Taiwanese beef noodle soup has flavours of spicy, savoury, fresh, beefy, and salty. It is the best comfort food when it is cold outside and an utterly slurp-worthy experience.

    beef shank for Taiwanese soup

    Ingredients

    Key Ingredients

    Beef Shank or Chuck Cut

    The kind of meat I like to use is the shank or the chuck cut. In Mexico, it is called “pierna” or “agujas.” It is packed with flavour and can tolerate long stewing time without drying out.

    • Why it matters: Beef shank is full of collagen and connective tissue. Under pressure cooking, that collagen converts to silky gelatin that enriches the broth and gives the beef a luxuriously tender, fall-apart texture.

    Doubanjiang (Chili Bean Paste)

    Doubanjiang is the backbone of the broth — a fermented broad bean and chili paste from Sichuan cuisine that adds depth, umami, and a pleasant heat that builds with each sip.

    • Why it matters: It is the single most important flavour component in this soup. Without it, you have a good beef broth. With it, you have something truly extraordinary. Find Doubanjiang Chili Paste at any Asian grocery or online.

    Chinese Spice Package

    The spice package is made up of star anise, cinnamon stick, fennel seeds, bay leaves, cumin seeds, coriander seeds, Sichuan peppercorns, and dried chili peppers. These spices give the broth its distinctive aromatic complexity.

    • Why they matter: This spice combination is what makes Taiwanese beef noodle soup taste unmistakably different from any other beef soup in the world. The Sichuan peppercorns add a subtle numbing tingle, while star anise and fennel give it a slightly sweet, anise-forward warmth.

    Light Soy Sauce

    Provides the salty, umami backbone of the broth alongside the doubanjiang.

    • Why it matters: Light soy sauce is thinner and saltier than dark soy sauce. It seasons without darkening the broth excessively, keeping the colour a beautiful amber-red rather than jet black.

    The Instant Pot

    The Instant Pot Duo 7-in-1 is the best-selling pressure cooker on Amazon and the machine I rely on for this recipe. It cuts the cooking time from 3-4 hours on the stovetop down to 100 minutes, without sacrificing any depth of flavour.

    • Why it matters: The sealed pressure environment raises the boiling point of the liquid, allowing the beef and spices to develop in ways that standard simmering cannot achieve in the same timeframe. My husband also appreciates that the sealed vent means no strong cooking smells throughout the house while it cooks.

    Instant Pot with beef noodle soup ingredients

    Fresh Noodles or Packaged Noodles?

    Both are completely fine. If you have Chinese wheat noodles you prefer, use those. Here in Mexico, my options are limited to spaghetti pasta, so I make fresh noodles with my Philips Pasta and Noodle Maker.

    For a chewier and bouncier bite, make your noodles with bread flour. The high protein content creates stronger, chewier noodles that stand up to the rich broth without going soggy.

    Check out my 3-minute Homemade Ramen Noodles post to learn how to make them at home!

    fresh wheat noodles

    Professional Tips

    Pro Tip 1 — Marinate Your Meat

    By simply adding salt and pepper to your beef chunks, you can elevate the final flavour significantly. Toss the meat in a bowl with salt and pepper. Leave it in the fridge for 30 minutes while you prep everything else for the recipe.

    Pro Tip 2 — Strain Fat for a Cleaner Broth

    For a cleaner-tasting soup, skim the top layer of fat off the broth with a spoon before serving. That fat will make the soup richer and tastier, but removing it produces a lighter result. Your call.

    Pro Tip 3 — Serve Immediately

    Nothing is more disappointing than letting noodle soup sit while the noodles soak up all the broth. Pour the hot soup over the noodles only when it is time to eat. Noodles left sitting in broth for too long lose their texture. Serve only when people are seated and ready.

    Taiwanese beef noodle soup served in bowls

    Frequently Asked Questions

    Can I make Taiwanese beef noodle soup without an Instant Pot?

    Yes. Follow all the same steps but use a heavy-bottomed pot on the stove. Cook the soup on low/simmer for 3-4 hours until the beef is tender and shreds easily with a fork. The flavour may be even deeper with the longer simmer time.

    What is doubanjiang and where do I find it?

    Doubanjiang is a fermented broad bean and chili paste from Sichuan, China. It is the defining flavour of this soup. You can find it at any Asian grocery store in the condiments or fermented foods section, or order it online here. Do not substitute it — there is no real equivalent.

    What noodles work best for this soup?

    Fresh or dried Chinese wheat noodles are ideal. Look for thick, chewy wheat noodles at an Asian grocery store. In a pinch, dried udon noodles or even thick spaghetti work. Avoid rice noodles — they are too delicate for this broth.

    How do I store and reheat the leftovers?

    Store the broth and beef separately from the noodles. The broth and beef keep in the refrigerator for up to 3 days or freeze for 3 months. Reheat the broth on the stovetop, cook fresh noodles, and assemble each bowl fresh. Never store noodles in the broth — they will absorb all the liquid and become mushy.

    Can I make this less spicy?

    Yes. Reduce or eliminate the dried chili peppers from the spice package and use less doubanjiang. The soup will still be deeply flavourful but with less heat. Start with 1 tablespoon of doubanjiang and taste before adding more.

    Instant Pot Taiwanese beef noodle soup

    Instant Pot Taiwanese Beef Noodle Soup

    Easy and delicious Taiwanese Beef Noodle Soup using an Instant Pot! Spicy and savoury soup with beef chunks that melts in your mouth!
    Print Recipe
    Pin Recipe
    Prep Time:15 minutes
    Cook Time:1 hour 40 minutes
    Course: Main Course
    Cuisine: Taiwanese
    Keyword: Beef Noodle Soup
    Servings: 6 people

    Equipment

    • Instant Pot

    Ingredients

    Meat

    • 1 kg beef shank cut into 2 inch chunks
    • 2 tsp vegetable oil
    • 1 tsp salt
    • pepper

    Beef Noodle Soup

    • 1 white onion thinly sliced
    • 6 cloves garlic crushed, back of the knife
    • 2 inch ginger roughly sliced
    • ¼ cup red wine or shaoxing wine
    • 2 tbsp doubanjiang
    • 1 tomato diced
    • 2 tbsp tomato paste
    • 2 tsp sugar
    • ½ cup light soy sauce
    • 8 cups water
    • 1 Chinese Spice Package make your own with below recipe
    • 35 oz fresh wheat noodles

    Chinese Spice Package

    • 4 star anise
    • 1 cinnamon stick
    • 1 tsp fennel seeds
    • 6 bay leaves
    • 1 tbsp cumin seeds
    • 1 tsp coriander seeds
    • 2 tbsp sichuan peppercorns
    • 2 tsp dried chili peppers

    Garnish

    • cilantro
    • green onion
    • bok choy
    • doubanjiang optional
    • chili oil optional

    Instructions

    • To marinate the meat, add everything together, give it a good toss, and set aside for 15-30 minutes.
    • Use the “Saute” option on the Instant Pot and add 2 tsp of oil. Add the onion, garlic, and ginger. Saute for 3 minutes.
    • Add the marinated beef chunks and cook each side until lightly browned.
    • Deglaze the pot by adding shaoxing wine or red wine. Once the liquid starts to boil, cancel the “Saute” option. Select “Meat/Stew” and set the timer to 100 minutes (1 hour and 40 minutes).
    • Add everything: doubanjiang, tomato, tomato paste, sugar, light soy sauce, water, and the Chinese spice package.
    • Close the lid and turn the vent knob to the sealed (not venting) position.

    Cooking WITHOUT an Instant Pot

    • Follow the instructions above, but use a regular heavy pot on the stove. Cook the soup on low/simmer for 3-4 hours until the beef is tender and shreds easily.

    Setting Up the Bowl

    • Cook your noodles as instructed on the package. If you are interested in making fresh wheat noodles, try my 3 minute easy ramen noodles made at home.
    • Blanch bok choy until tender, about 2 minutes in boiling water.
    • Put your freshly cooked noodles in a large bowl and add your bok choy on top. Pour the hot beef soup over the noodles and add 3-4 beef chunks to each bowl. Serve with chopped cilantro and green onions.

    If you love bold Asian flavours, try our Succulent Sunday Pot Roast for a Western take on slow-braised beef, or warm up with our Green Pozole for a Mexican soul-warming soup experience.

  • Simple Rack of Lamb with Mango Mint Sauce

    Simple Rack of Lamb with Mango Mint Sauce

    Rack of lamb looks intimidating, but this recipe proves it is actually one of the most impressive — and effortless — dinners you can put on the table. A simple rosemary-garlic marinade, 25 minutes in the oven, and a blender-quick mango mint sauce turn a restaurant-level cut into a weeknight celebration.

    Roasted rack of lamb with foil-wrapped bones on a white plate

    Lamb chops are a personal favourite, and this roasted version is no exception. The tenderness of the meat, combined with the bold flavours, creates an unforgettable dining experience. Every time the lamb is sliced, a burst of juicy goodness pours out, making each bite irresistible.

    When the lamb and garlic hit the high heat of the oven, a heavenly aroma fills the kitchen — reminiscent of a five-star restaurant. It’s the perfect dish to serve to guests, impressing them with both the presentation and the flavours.

    Besides the marinade, the secret to a tender and juicy rack of lamb is temperature. High heat ensures the lamb is cooked to a perfect medium-rare finish.

    Roasted rack of lamb with mango mint sauce

    To complement the rich flavours of the lamb, the mango and mint sauce provides a refreshing balance. The sweetness of the mango paired with the freshness of the mint creates a symphony of flavours that brings out the best in the dish.

    This post may contain affiliate links. If you purchase through these links, I may earn a small commission at no extra cost to you. Thank you for supporting Love & Harvest!

    Ingredients for Rack of Lamb

    Rack of Lamb

    • Why it matters: Choose a French-cut rack (bones exposed and cleaned) so the presentation is clean and the meat cooks evenly. Look for a rosy-pink colour with good marbling — the fat bastes the meat as it roasts.

    Rosemary and Garlic

    • Why it matters: These two aromatics are classic companions for lamb. Rosemary’s pine-like fragrance penetrates the meat overnight, while grated garlic caramelises into a golden crust in the oven. Together they define the flavour of the dish.

    Fresh Mango

    • Why it matters: Ripe mango adds tropical sweetness that cuts through the richness of the lamb. It balances the sauce without any added sugar and makes the colour stunning.

    Fresh Mint

    • Why it matters: Mint is the traditional partner to lamb across Middle Eastern and British cuisines. Here it keeps the sauce bright and refreshing instead of heavy.

    Mango mint sauce ingredients - mint, parsley, garlic

    Mint, parsley and garlic — key ingredients for the mango mint sauce.

    The Mango Mint Sauce

    The mango mint sauce is the perfect accompaniment to the rack of lamb. The refreshing taste of mint, the brightness of lemon juice, and the sweetness of mango chunks blend together to create a sauce that is both delicious and satisfying. With the addition of garlic and parsley, the sauce is elevated to a new level of flavour, adding a pleasant depth to the dish.

    Mango mint sauce ingredients close up

    Easy Rack of Lamb Marinade

    When it comes to marinating a lamb rack, simplicity is key. With just a handful of ingredients, you can elevate the flavour of the meat to a whole new level. The combination of garlic, rosemary, olive oil, salt, and pepper work together to create a mouthwatering taste that is sure to impress.

    Try marinating your lamb rack overnight and see for yourself! As the flavours meld together, the meat becomes tender and juicy, making for an absolutely delicious meal that is perfect for any occasion.

    Rack of lamb marinating with rosemary and garlic
    Marinated rack of lamb ready to roast

    How to Shop for Rack of Lamb

    At the butcher shop, inquire about a rack of lamb. Before making the purchase, check that the meat is fresh — it makes all the difference in taste.

    Look for a pink or rosy-red colour, which indicates freshness. Dark red or brown meat has been out too long. Also look for good marbling — fat surrounding the meat — which creates a tender and juicy experience when cooked. Consider asking for the “French” cut, where the ribs are cleaned and exposed. This cut is perfect for showcasing the succulent meat and makes it easier to carve and serve.

    Shopping for fresh rack of lamb at the butcher
    Frenched rack of lamb ready to prepare

    Side Dishes to Serve with Rack of Lamb

    1. Roasted Root Vegetables: Cut up carrots, parsnips, and sweet potatoes, toss with olive oil and seasonings, and roast alongside the lamb.
    2. Grilled Asparagus: Brush fresh asparagus spears with olive oil and grill or roast until tender and slightly charred.
    3. Couscous Salad: Mix cooked couscous with chopped fresh herbs, diced vegetables, and a simple vinaigrette.
    4. Creamy Polenta: Cook polenta according to package directions, then stir in butter and grated Parmesan for a rich and creamy side dish.
    5. Sauteed Mushrooms: Saute sliced mushrooms in butter with garlic and fresh thyme until golden brown.
    6. Roasted Brussels Sprouts: Halve the sprouts, toss with olive oil and seasonings, and roast until tender and slightly crispy.

    Rack of lamb plated with sides

    Professional Tips

    Pro Tip #1 — Use a Meat Thermometer

    A meat thermometer is the best way to determine doneness, especially for an expensive cut like rack of lamb. Insert the probe into the thickest part of the meat: 125°F for rare, 135°F for medium-rare. No guesswork, no overcooked lamb.

    Using a meat thermometer on rack of lamb

    Pro Tip #2 — Make Ahead for Easy Entertaining

    My favourite part of this recipe is that you can marinate the rack of lamb 1 to 2 days before roasting — and the longer you marinate it, the tastier it becomes! Take it out of the refrigerator 1 hour before roasting so it comes to room temperature. This ensures even cooking throughout.

    Marinated rack of lamb resting before roasting

    Pro Tip #3 — Let the Roast Rest Before Carving

    When the rack of lamb comes out of the oven, the internal temperature continues to rise due to residual heat. Resting the meat allows the juices to redistribute throughout, keeping the lamb moist and tender. Cover loosely with foil and rest for at least 15 to 20 minutes — this is the time to prepare your sides and sauce. For a general rule, allow 10 minutes of rest per pound.

    Love this lamb recipe? Try these other dinner favourites on Love & Harvest:

    You’ll also want a good roasting rack and a sturdy roasting pan to get that perfect elevated roast every time.

    Frequently Asked Questions

    What temperature should rack of lamb be cooked to?

    For medium-rare, which is the recommended doneness for rack of lamb, the internal temperature should read 135°F (57°C). Use a meat thermometer inserted into the thickest part of the meat to check. For rare, pull it at 125°F (52°C).

    How long should I marinate the rack of lamb?

    A minimum of 2 hours works well, but overnight is ideal. The longer the lamb sits in the rosemary-garlic marinade, the more deeply the flavours penetrate the meat. You can safely marinate it up to 2 days in the refrigerator.

    Can I make the mango mint sauce ahead of time?

    Yes. Blend the mint, parsley, garlic, and lemon juice up to a day ahead and store covered in the refrigerator. Stir in the fresh mango chunks just before serving to keep the texture vibrant and the colour bright.

    Do I need to score the meat before marinating?

    It is not necessary, but lightly scoring the fat cap with a sharp knife helps the marinade penetrate deeper and allows the fat to render more evenly during roasting. Make shallow cuts — do not cut through to the meat.

    What does “French cut” mean for rack of lamb?

    French cut (or “frenched”) means the rib bones have been trimmed and cleaned of meat and fat, exposing the bones for an elegant presentation. Most butchers offer this service — just ask when you buy.

    Can I cook rack of lamb on a cast iron skillet instead of a roasting pan?

    Absolutely. A preheated Lodge 12-inch cast iron skillet works beautifully. Sear the lamb fat-side down for 2 to 3 minutes before transferring to the oven — this creates an extra-crispy crust that a roasting pan alone will not achieve.

    Rack of lamb topped with mango mint sauce

    Simple Rack of Lamb with Mango Mint Sauce

    Delicious and juicy rack of lamb made with only a few ingredients! This is an easy recipe for entertaining that requires only 25 minutes of cooking time, served with a refreshing mango and mint sauce. Print Recipe Pin RecipePrep Time:2 hours Cook Time:25 minutes Course: Main CourseKeyword: mango mint sauce, rack of lambServings: 6 people

    Ingredients

    Rack of Lamb Marinate

    • 1.7 kg rack of lamb French cut
    • 3 tbsp olive oil
    • 1 spring of rosemary chopped finely
    • 4 garlic cloves grated
    • 2 tsp salt
    • pepper

    Mango Mint Sauce

    • 1 cup mint
    • ¼ cup parsley
    • ½ lemon juice
    • 2 garlic cloves
    • 1 mango
    • 1 tsp sea salt
    • pepper

    Instructions

    Marinating Rack of Lamb

    • Take the lamb out and give it a good rinse under running tap water. Pat dry with paper towel.
    • Meanwhile, combine the olive oil, rosemary, garlic, salt and pepper in a bowl. Mix well.
    • Rub the marinade all over the rack of lamb. Give it a good rub and massage. The more time you rub, the better the flavour penetrates into the meat. Wrap the rack of lamb with plastic and let it sit in the fridge for at least two hours. For best flavour, leave it in the fridge overnight.

    Cooking the Rack of Lamb

    • Take the rack out 1 hour before putting it in the oven. Have the plastic wrap still intact while it rests to room temperature.
    • Preheat oven to 375°F. Place a rack at the bottom third of the oven.
    • Once the lamb has rested for 1 hour on the countertop, take out a roasting pan with a rack. Unwrap the plastic around the lamb, and place the rack with the exposed bones up and the meatiest part of the lamb sitting on the roasting pan.
    • Bake the rack of lamb for 25 minutes. To know if the lamb is ready, insert a thermometer into the center or thickest part of the meat. The temperature should read 125°F for rare or 135°F for medium-rare.
    • While the lamb is roasting, make the mango mint sauce. Using a food processor, add the mint, parsley, lemon juice, and garlic. Pulse about 15 times. If you like it smoother, process continuously for 15 seconds. Scrape the sauce out and stir in the mango chunks, salt, and pepper. Set aside.
    • Take the lamb out and let it rest for 15 to 30 minutes before carving. Serve the mango mint sauce on top or on the side.
    • Optional: place small aluminum foil strips on the exposed bones to protect them from burning in the high heat. This is purely for aesthetics.
  • Loco Mango Popsicles

    Loco Mango Popsicles

    Three ingredients, one blender, and six hours in the freezer — that is all it takes to make these Loco Mango Popsicles. Creamy coconut milk and pure mango puree come together in a tropical frozen treat that is so incredibly good, “loco” is the only word that fits.

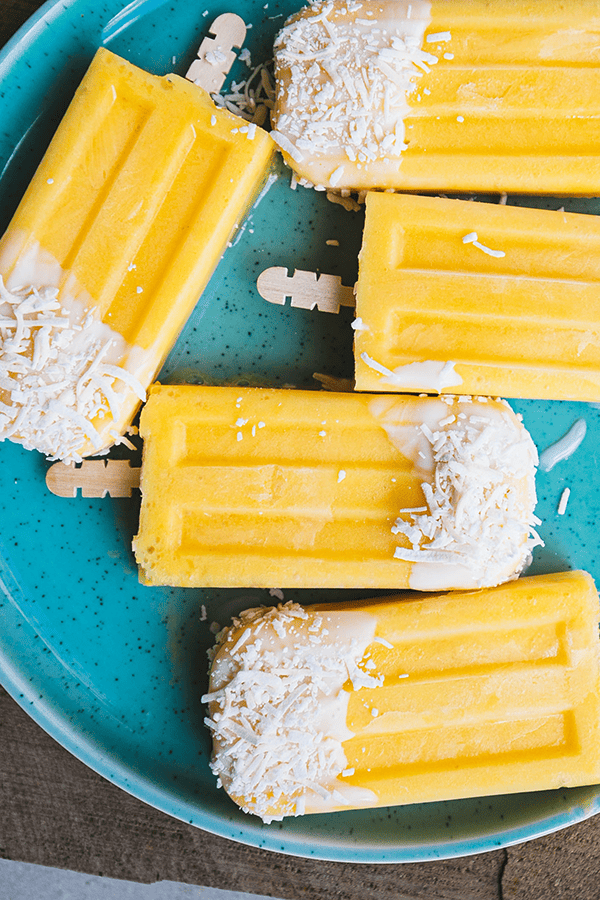
    Loco Mango Popsicles with coconut flakes on a plate

    As the sun blankets the world in its warm embrace, there is no better way to embrace the season than with the tantalizing combination of thick, juicy mango and creamy coconut. This frozen delight transports your taste buds to a tropical paradise, where the sweetness of ripe mangoes mingles harmoniously with the luscious creaminess of coconut milk. With each lick, you will be swept away on a gustatory journey of pure bliss.

    This post may contain affiliate links. If you purchase through these links, I may earn a small commission at no extra cost to you. Thank you for supporting Love & Harvest!

    What I Love About Homemade Popsicles

    • Control the sugar content in each lick
    • Great way to use seasonal summer fruits
    • Easy recipe for kids to follow and tons of fun!
    • A great way of making homemade frozen treats
    • An infinite avenue for creativity

    Loco Mango Popsicles close-up showing creamy texture

    Ingredients for Loco Mango Popsicles

    Manila Mango (Fresh or Frozen)

    • Why it matters: Manila mango is the star of this recipe. It is known for its exceptionally sweet, aromatic, and creamy flavour — far less fibrous and more intensely sweet than other mango varieties. Its naturally smooth texture blends into a velvety puree without any lumps. Frozen mango works perfectly well and is available year-round, making this a recipe you can enjoy every season.

    Full-Fat Coconut Milk

    • Why it matters: Full-fat coconut cream is what gives these popsicles their incredibly rich and creamy texture. Low-fat coconut milk will produce a thinner, icier result. The fat content in full-fat coconut milk coats the palate beautifully and carries the mango flavour throughout every lick.

    Cane Sugar or Agave Syrup

    • Why it matters: Manila mangoes are naturally very sweet, so only a small amount of sweetener is needed. Cane sugar blends in smoothly. Agave syrup also works and dissolves easily in the cold mixture without any heating; use 1 tablespoon agave in place of the cane sugar.

    Unsweetened Coconut Flakes

    • Why they matter: The coconut flakes add a subtle crunch and a second layer of coconut flavour that makes these popsicles feel complete. Stir them into the blended mixture before pouring into the molds so they distribute throughout each popsicle.

    How to Make Coconut Mango Popsicles

    You only need 3 ingredients to make it — mango, full-fat coconut milk, and a sweetener. That is it. Blend until smooth, pour into your silicone popsicle mold, freeze overnight, and you have a tropical dessert that looks and tastes like it came from a beach resort.

    Why Use Manila Mango for Mango Popsicles?

    1. Flavour: Manila mango is loved for its rich, tropical sweetness. It produces popsicles that burst with deliciousness in every lick.
    2. Texture: Manila mango has a smooth and creamy texture. When blended and frozen, it creates a velvety treat that melts on your tongue.
    3. Natural sweetness: This variety is naturally so sweet that you only need 1/3 cup of cane sugar for the whole batch.
    4. Vibrant colour: Manila mango has a beautiful orange-yellow colour that makes these popsicles visually stunning.
    5. Availability: Manila mango is widely available in markets across Mexico and in the US, especially from May through August at peak season.

    Manila mangoes for mango popsicles

    What You Need to Make Homemade Popsicles

    You will need a silicone popsicle mold — silicone is the best choice because you can stretch and pull to release the popsicles easily without needing to run them under water for long. It stores flat in a cabinet too. Another advantage: silicone molds work with wooden sticks, so you never lose a plastic stick again.

    If you have kids and want a smaller size, look for a 6-cavity silicone mold that makes 3.3 oz popsicles — perfect for little hands. You will also need a high-speed blender to get the mango and coconut milk completely smooth.

    If you have a preferred mold, use it. In essence, they are all the same — so long as you have a popsicle at the end of the day.

    Create a Memorable Family Moment

    This recipe is so simple and delicious that asking the kids to join in can create a fantastic summer memory. When the kids see me laying out the mangoes on the kitchen counter with a big bowl beside it, they always know it is popsicle-making time!

    Children in the kitchen can learn about:

    • flavours and textures
    • the importance of balance in creating delicious combinations
    • measuring ingredients to foster their mathematical abilities
    • reading comprehension and sequencing skills

    Beyond the kitchen, making popsicles as a family fosters teamwork, communication, and bonding. It is a delightful way for kids to explore their creativity and take pride in what they made together.

    A hand holding a coconut-dipped mango popsicle

    Love frozen treats? Try these other ice cream and popsicle recipes from Love & Harvest:

    Frequently Asked Questions

    Can I use regular canned coconut milk instead of full-fat?

    Full-fat coconut milk is strongly recommended. Low-fat coconut milk has significantly less fat content, which produces a thinner, icier popsicle that lacks the creamy mouthfeel that makes these “loco.” If full-fat coconut milk is not available, look for coconut cream — it produces an even richer result.

    How long do the popsicles need to freeze?

    Freeze for a minimum of 6 hours, or overnight for the best results. An overnight freeze ensures the popsicles are completely solid throughout and hold their shape when unmolded.

    Can I use frozen mango instead of fresh?

    Yes — frozen mango works perfectly and is actually preferred because it is already at a cold temperature, which shortens the freezing time slightly. Blend it directly from frozen for a thicker, creamier base. Manila mango is the best variety but any sweet mango will work.

    How do I remove the popsicles from the mold without breaking them?

    Let the mold sit on the counter for 2 to 3 minutes first. Then run the outside of the mold briefly under lukewarm water. If using a silicone mold, gently pull and stretch the sides away from each popsicle to release them. Do not pull from the stick — hold the mold and push from below.

    How should I store leftover popsicles?

    Wrap each popsicle individually in plastic wrap or place them in a zip-lock bag and return to the freezer. This prevents freezer burn and ice crystal formation, keeping the texture and flavour fresh for up to 4 weeks.

    Can I make these popsicles without added sugar?

    Yes. Manila mango is naturally so sweet that the added sugar is minimal to begin with. If your mangoes are very ripe and sweet, you can skip the added sugar. The mango still brings its own natural sugar. Taste the blended mixture before pouring into the molds and adjust sweetness to your preference.

    Loco Mango Popsicles

    Loco Mango Popsicles

    Indulge in the tropical frenzy of our "Loco Mango Popsicle" made with coconut milk and pure mango puree. A delicious recipe that lets your taste buds go on a wild, fruit-filled adventure. Print Recipe Pin RecipePrep Time:10 minutes Course: DessertKeyword: mango, popsiclesServings: 8 people

    Equipment

    • high speed blender

    Ingredients

    • 3 cups frozen mango or 2-3 large manila mangos
    • 1 can full-fat coconut milk (13.65 oz)
    • ⅓ cup cane sugar or 1 tbsp agave syrup
    • ¼ cup unsweetened coconut flakes shredded or flakes

    Instructions

    • In a high-speed blender, add the mango. Blend until crumbly.
    • Add coconut milk and sugar (or agave syrup), and blend until smooth. Scrape down the sides and blend again. Stir in the coconut flakes.
    • Pour the mixture into a popsicle mould. Leave about a quarter inch of space at the top of each mould to allow the popsicle to expand in the freezer. Slide the lid on and insert the popsicle sticks into the mould.
    • Freeze for 6 hours or overnight.
    • To remove popsicles: Let the mould stand on the counter for a few minutes. Run the popsicle mould under lukewarm water to help loosen. If you have a silicone mould, pull and stretch the sides to release the popsicles.
    • Place the popsicle mould on a flat plate surface and wiggle the popsicles out.
    • Wrap the popsicles in plastic when you place them back into the freezer. This helps prevent them from being exposed to air and moisture, maintaining the quality and texture of the popsicles and preventing freezer burn and ice crystal formation.
  • Thanksgiving Roasted Lemon Garlic Chicken

    Thanksgiving Roasted Lemon Garlic Chicken

    Every Thanksgiving the debate starts the same way — turkey or chicken? Here is the honest truth: this Thanksgiving roasted lemon garlic chicken is easier to prepare, cheaper, more forgiving to cook, and equally impressive on the table. The moment it comes out of the oven with its crispy golden skin and the smell of lemon, rosemary, and garlic filling the house, the debate is over.

    This post may contain affiliate links. If you purchase through these links, I may earn a small commission at no extra cost to you. Thank you for supporting Love & Harvest!

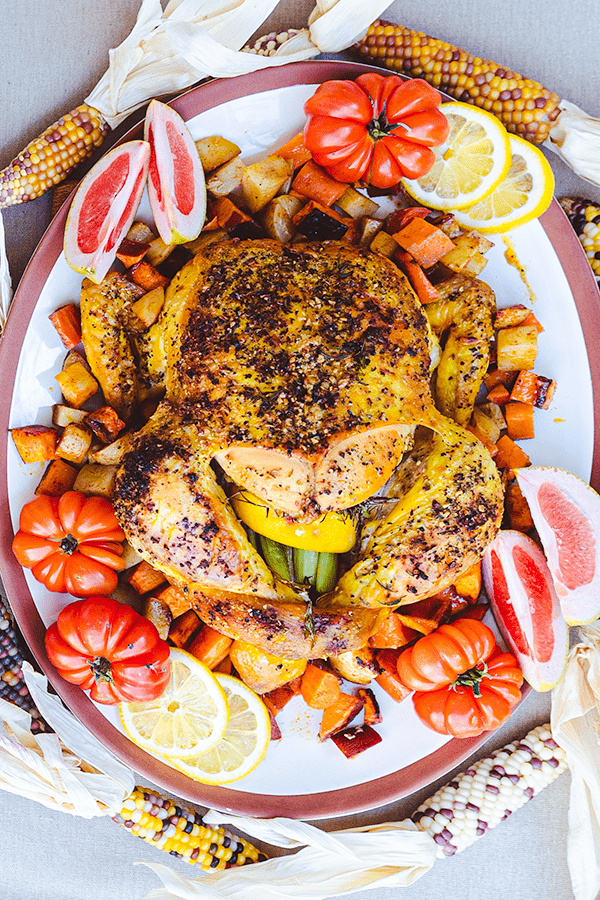
    thanksgiving chicken

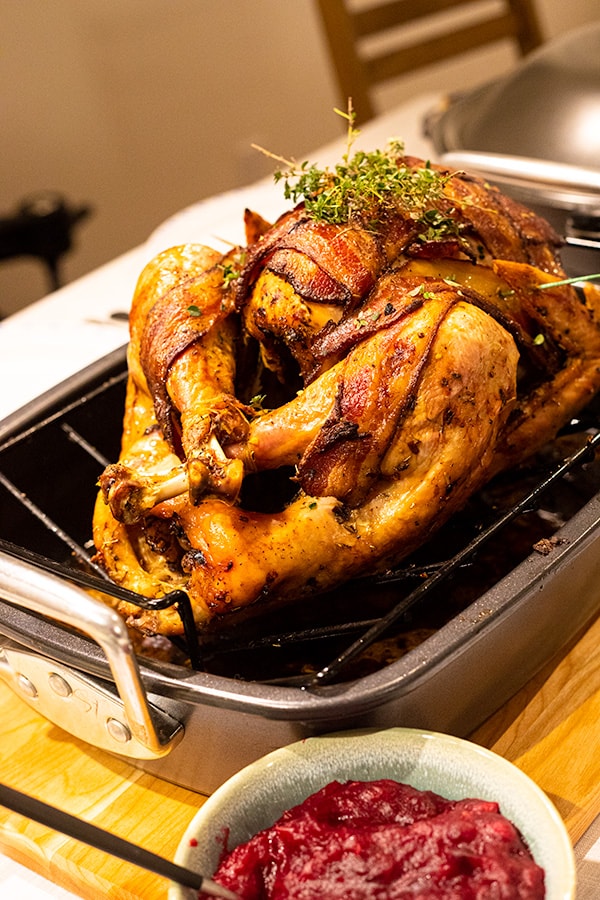
    I know making turkey for Thanksgiving is the classic approach. My Best Thanksgiving Turkey with Bacon Strips has been a family favourite for over 10 years and it is genuinely hard to compete with. But if you want to switch things up, or your dinner group prefers chicken, this is the recipe you want.

    We make this chicken at least twice a month during fall and winter. The juice is so flavourful we put it on everything — rice, mashed potatoes, even salads. For another great roasted option, see our One Pot Lemon Garlic Chicken.

    thanksgiving chicken breast

    Why You Should Make This Recipe

    • Easy set-it-and-bake-it recipe — Marinate for an hour, put it in the oven, walk away. That is genuinely all there is to it.
    • Cheaper than a turkey — Chicken prices are still manageable. If you are looking for a budget-friendly Thanksgiving, this is it.
    • Fantastic taste — Lemon, garlic, and rosemary roasting together is one of the great smells of fall. The flavour is equally unforgettable.
    • The wow factor — A properly decorated roast chicken on the center of the table has impressive presence. Nobody feels short-changed.
    • Delicious fall sides — We also roast potato, yam, and carrots in the same pan. One dish, full meal.

    thanksgiving chicken gravy

    Why Chicken Over Turkey This Year?

    • Much less prep time — No days of defrosting. No clearing half the fridge. No brining a 20-pound bird.
    • More affordable — Turkey is expensive. Chicken is not. Same wow factor, fraction of the cost.
    • Works in a small oven — Many modern apartments have small electric ovens. A 2kg chicken fits comfortably where a large turkey never would.
    • Consistently juicy — Chicken is far more forgiving than turkey. Dry Thanksgiving turkey is a risk. Dry Thanksgiving chicken is nearly impossible if you follow this recipe.

    thanksgiving chicken seasoning

    Ingredients

    Key Ingredients

    Organic Free-Range Chicken

    • Why it matters: We are roasting the whole bird, skin and all, so the quality of the chicken matters here. An organic free-range chicken has better flavour and a more forgiving texture when roasted. I typically use a 2kg bird which feeds a family of five comfortably. Use a proper roasting pan with a roasting rack so the chicken roasts evenly above the vegetables.

    Lemon

    • Why it matters: Meyer lemon or eureka lemon both work beautifully. The lemon does two jobs — it goes into the marinade brush and gets squeezed over the bird right before roasting. Roll the lemon hard on the counter first to burst the juice inside and make squeezing easier. The leftover half goes into the cavity.

    Fresh Rosemary

    • Why it matters: Rosemary has a strong, earthy, pine-like scent that defines the fall and winter vibe of this recipe. Finely chopped into the garlic oil marinade, plus two whole sprigs inside the cavity — it adds layers of subtle flavour throughout the entire bird.

    Meat Thermometer

    • Why it matters: The difference between juicy chicken and dry chicken is often just a few degrees. Use an instant-read meat thermometer to check that the thigh reaches 165°F before pulling from the oven. The juice should run clear when pierced.

    how to cook a whole chicken like a turkey

    Professional Tips

    Pro Tip #1 – Marinate for at Least 1 Hour

    For the salt and seasoning to fully penetrate the skin, the chicken needs at least one hour of marinating. Overnight is even better. Do not wrap it in plastic — leave it uncovered in the fridge so the air dries out the skin slightly. That is what gives you the crispy skin when it comes out of the oven.

    thanksgiving chicken thighs

    Pro Tip #2 – Use a Meat Thermometer

    An instant-read meat thermometer takes the guesswork out of roasting chicken. You are looking for an internal temperature of 165°F at the thickest part of the thigh. Roast at 375°F. Do not rely only on visual cues — the thermometer is the definitive answer.

    Pro Tip #3 – Let the Chicken Rest 30 Minutes Before Carving

    Gordon Ramsay’s Holiday special taught me this one. Any large roasted meat needs to rest outside the oven for at least 30 minutes before cutting. If you cut into it immediately, the moisture escapes and vents out, leaving drier meat. Let it rest and every slice will be succulent and juicy.

    roast chicken

    Frequently Asked Questions

    What temperature do I roast the chicken at?

    Roast at 375°F (190°C) for 1 hour and 15 minutes for a 2kg chicken. The chicken is done when the skin is crispy and golden brown and an instant-read thermometer inserted into the thigh reads 165°F.

    How long should I marinate the chicken?

    At minimum, 1 hour. Overnight is ideal. The longer the marinade sits, the more the lemon, garlic, and rosemary flavour penetrates into the meat. Leave it uncovered in the fridge overnight for the crispiest skin.

    Can I use a different chicken size?

    Yes. A smaller 1.5kg chicken will be done in about 55 to 60 minutes. A larger 2.5kg bird may need up to 90 minutes. Always use a meat thermometer rather than relying on time alone.

    What vegetables can I roast alongside the chicken?

    Potatoes, yam, and carrots are classic fall choices and they go in the same pan under the chicken rack. The juices drip down and baste the vegetables. You can also add parsnips, turnips, or fennel.

    How do I get crispy skin?

    Three things: dry the skin thoroughly with paper towel after washing, leave the marinated chicken uncovered in the fridge so the surface dries out, and roast on a rack so hot air circulates under the bird. Do not cover it with foil.

    Can I make this recipe ahead of time?

    Yes. Marinate the chicken the night before. The vegetables can be prepped and tossed in oil the morning of. When ready to cook, bring the chicken to room temperature for 30 minutes before roasting for more even cooking.

    Roasted lemon garlic chicken on a platter with tomatoes, squash and lemon

    Thanksgiving Roasted Lemon Garlic Chicken

    This Roasted Lemon Garlic Chicken has hints of lemon, garlic, and rosemary and is perfectly roasted with juicy tender meat inside. Print Recipe Pin RecipePrep Time:30 minsCook Time:1 hr 15 minsCourse: Main CourseCuisine: AmericanKeyword: roasted lemon garlic chickenServings: 5 people

    Equipment

    • roasting pan or large cooking sheet with rack

    Ingredients

    Lemon Garlic Chicken Marinade

    • 1 2kg whole organic free-range chicken
    • 2 cloves garlic grated
    • 1 sprig of rosemary finely chopped
    • 2½ tbsp canola oil
    • 1 tbsp Bruschetta Seasoning
    • 1 tbsp lemon pepper seasoning
    • ½ lemon

    Vegetables

    • 2 medium potato
    • 1 large yam
    • 3 large carrots
    • 2 tsp paprika
    • 2 tbsp canola oil

    Cavity Stuffing

    • 2 sprigs of rosemary
    • 2 celery stalks
    • ½ lemon the leftover lemon after juicing the chicken on top

    Instructions

    Chicken Marinade

    • Wash the chicken inside and outside. Pluck any feathers still attached to the skin. Pat dry with paper towel and set aside.
    • Combine the garlic, rosemary, and oil. Add a pinch of salt. Using a brush, brush the bird inside and outside. Make sure you also brush under the skin as well.
    • Combine the bruschetta and lemon pepper seasoning together. Rub the seasoning all over the bird including the wings. Place the chicken in the fridge for 1 hour before roasting, or preferably overnight. You do not need to wrap the chicken in plastic. Let the air of the fridge dry the skin so the chicken comes out with crispier skin.
    • Meanwhile, cut the potato, yam and carrots into small cubes. Toss in a large bowl with paprika, salt, and canola oil.

    Cooking the Chicken

    • Preheat oven to 375°F.
    • Take a roasting pan and place the winter roots at the bottom.
    • Place the chicken on top of the potato, carrot, and yam. Squeeze half a lemon over the top of the chicken (discard any seeds), then put the remaining lemon into the cavity along with the celery and rosemary sprigs.
    • Roast in the oven for 1 hour and 15 minutes. The chicken is done when the skin is crispy and golden brown and the juices run clear when the thigh is pierced.
    • Let the chicken rest for 30 minutes before carving.
  • Delicious Meatless Spicy Peanut Noodle

    Delicious Meatless Spicy Peanut Noodle

    This vegetarian peanut noodle is so easy to make and RIDICULOUSLY delicious. The perfect umami slurp that’s meatless.

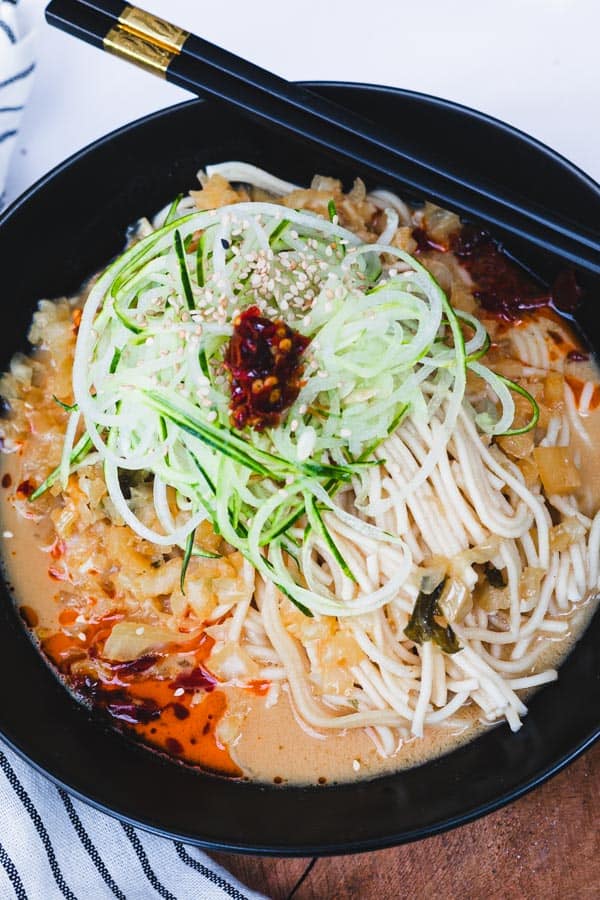
    veggie peanut butter noodles

    This post may contain affiliate links. If you purchase through these links, I may earn a small commission at no extra cost to you. Thank you for supporting Love & Harvest!

    My summer is never complete without making this vegetarian spicy peanut noodle with cooling cucumber. Imagine a nutty and tangy peanut noodle pasta served with a refreshing cucumber and sesame oil salad on top. This dish is the epiphany of what life is all about!

    Back a few years ago when I was teaching cooking classes in Mexico, this vegetarian Spicy Peanut Noodle with cooling cucumber recipe was one of my students’ favourite recipes. Till this day I have past students of mine messaging me and telling me this recipe had stuck with them for a long time and they are now feeding their children with the exact same recipe.

    It’s a humble experience knowing I’ve gifted them something that is now being passed down as a family meal. And now I want everyone to have the same experience as all my students once had.

    This recipe is easy and very good for a fast-paced family who are always on the go. It’s also a kid-friendly meal, minus the spice. My kids love this a lot and occasionally request it. If you know a child who loves peanut butter sandwiches and you can’t get them to eat anything else, this is what they need in their life. You will not struggle with time using this recipe!

    peanut noodles

    How Does It Taste?

    It is spicy, tangy, nutty, and thick. You can serve it hot or cold — the options are yours. In the summer I make it with less sauce so it just lightly coats the noodle. I bring it to picnic trips and road trips. Then I top it off with some cold cucumber sesame oil salad.

    In the winter I like it more hot and with more of the sauce to warm around the noodle, almost like a noodle soup. Sometimes I ladle a hot cup of chicken stock into the sauce so it thins out and turns it into a noodle soup. The recipe is super versatile.

    What Noodles Should I Use?

    Original Chinese noodles will do. DragonMall Wu Mu Noodles are a good option. They cook very easily and coat the peanut sauce well. They remind me a lot of how Shandong noodles are made and taste.

    If you don’t have access to these noodles you can make your own! I have my 3 minute homemade ramen noodle recipe here if you’re interested in going the extra mile. Regular spaghetti noodles also work if neither option is available — not the authentic style, but we do what we have to do. You could also try pairing this sauce with a simple noodle base like this spinach pasta for a creative variation.

    peanut noodle recipe

    Why You Will Love This Meatless Recipe

    • Easy Meal – it takes only 30 minutes to make this meal! You make your sauce all in the blender, toss it with some hot noodles, and lay the cucumber sesame oil salad on top.
    • Vegetarian and Vegan – Looking for a meatless meal that’s still delicious and cooling for summer and into fall? This recipe is perfect for something cooling to eat in the summer.
    • Have it hot or cold – yes, you can make it cold for summer days or hot for colder weather. There is no season preference.
    • It’s super tasty – in the sauce there’s soy sauce, garlic, peanut butter, and black vinegar. It has a super umami taste and a slurp of this bad boy is unreal.
    • The best slurp experience – who doesn’t love noodles? You’re going to get the best slurp experience with these noodles because they’re packed with flavour and spiciness you’ll truly enjoy. Then we add the cucumber salad to cool your tongue.

    vegan spicy peanut noodles

    How to Make the Spicy Peanut Noodle Sauce

    The sauce is made purposefully easy because we want to make it hassle free. Here are the simple steps:

    • In your blender add: soy sauce, peanut butter, garlic, ginger, sesame oil, peppers, vinegar, dark soy sauce, and chicken stock.
    • Cook the noodles as instructed. You do not need to rinse the noodles in water. The starch from the cooked noodles will help make the sauce thicker and coat it better.
    • Toss the sauce and noodle together.

    vegan thai peanut noodles

    How to Make the Cucumber Salad

    Easy and delicious cucumber salad. I use it to garnish the top of the noodles. Once you make it make sure to serve it immediately.

    • Wash the cucumbers, and slice off the ends. Using a vegetable peeler, start to slice it lengthwise to get these thin beautiful slices. Put them in a strainer to let the excess water run off.
    • Give them a good pat with a paper towel and soak up any excess water.
    • Toss the cucumber ribbons with sesame oil, salt, and sesame seeds.
    • Garnish on top of the noodles and try to build and fluff it up as high as possible on the noodle.

    To thinly cut the cucumber I am using the Vegetable Spiralizer to cut my cucumber perfectly.

    vegan peanut noodle bowl

    Ingredients

    Your Favourite Chili Oil

    If you have a favourite Asian chilli oil and don’t have much opportunity to use it, this is the time! This meatless peanut noodle goes well with any Asian chilli oil. Slather it in the soup or just add a small spoon on top. Whatever portion is perfect here.

    Peanut Butter

    I like to use smooth peanut butter. Chunky peanut butter is fine too. We are adding everything to the blender so the texture of peanut butter doesn’t matter here. For a sesame-forward variation, try tahini as a substitute — it gives the sauce a slightly nuttier depth.

    Salted Mustard

    This is a must for this dish. Do not skip it. Lots of the unknown umami flavour is from here. Pickled mustard is a bit strange in flavour on its own, but when added to other things like soup, it adds lots of dimensions of flavour!

    cold thai peanut noodles

    Soy Sauce

    To give this sauce the umami flavour, we are adding soy sauce. Uncooked soy sauce has a strong and special umami flavour that’s going to lift this sauce into its glorious taste.

    Ginger

    A small finger-tip size ginger helps round out the flavour of the sauce. We are using fresh ginger, not the dry powder form.

    Garlic

    Adding a couple cloves of garlic makes this sauce very tasty. If two is too much for your taste, just add one.

    Sesame Oil

    The toasty taste of sesame oil tells you right away this is an Asian dish! You have the option to add it in the blender or when you toss the noodle and sauce together.

    Vegetable Stock / Chicken Stock

    I give these two options because we all have different dietary restrictions. I love the taste of vegetable stock whether it is store-bought or homemade — I’d much prefer homemade if you ask me. When it is winter and I need to add more protein or bone-brothy goodness for the kids, I will add my homemade chicken stock. Store-bought chicken stock or chicken powder also works.

    Chinese Black Vinegar

    This is a common ingredient in Chinese cooking. We are adding a little bit of vinegar to get that tangy flavour. Black vinegar is a good option here.

    Cabbage

    To thicken and add texture to the sauce, we are adding some pre-boiled chopped cabbage. A pure liquid sauce to coat the noodles is not enough. To add some elegance and texture, we are adding cabbage and salted mustard.

    thai peanut noodles recipe

    Love noodle dishes? Try our homemade pesto gnocchi for another satisfying pasta night.

    Frequently Asked Questions

    Can I make this peanut noodle gluten-free?

    Yes! Swap regular soy sauce for tamari or a certified gluten-free soy sauce, and use rice noodles instead of wheat noodles. The flavour profile stays the same.

    Can I add protein to this meatless noodle?

    Absolutely. Tofu, edamame, or a soft-boiled egg all work beautifully. For non-vegetarians, shredded rotisserie chicken or sauteed shrimp are great additions.

    How long does the peanut sauce keep?

    Store leftover peanut sauce in a sealed jar in the refrigerator for up to 5 days. It will thicken as it chills — thin it back out with a splash of warm water or vegetable stock before using.

    Can I make this dish ahead of time?

    Make the peanut sauce and cucumber salad up to one day ahead and store them separately. Cook the noodles fresh when ready to serve for the best texture.

    What is Chinese black vinegar and can I substitute it?

    Chinese black vinegar (Chinkiang vinegar) has a deep, malty-sweet tang. The closest substitute is a mix of balsamic vinegar and a splash of rice vinegar. Regular rice vinegar on its own also works but the flavour will be lighter.

    Is this recipe suitable for kids?

    Yes, with adjustments. Simply omit or reduce the chilli oil and peppers for the kids’ portion. The base peanut sauce is kid-friendly and many children love the nutty noodle flavour.

    Spicy peanut noodles topped with cucumber ribbons and chili oil

    Meatless Spicy Peanut Noodle

    This Meatless Spicy Peanut Noodle recipe is a delicious bowl of slurp! Spicy, nutty, and tangy. A favourite among kids and adults. Print Recipe Pin RecipePrep Time:25 minsCook Time:15 minsCourse: Main CourseCuisine: ChineseKeyword: Spicy Meatless Peanut NoodleServings: 5 people

    Ingredients

    Peanut Sauce

    • 3 tbsp smooth peanut butter or tahini
    • ½ cup soy sauce
    • 2 cups vegetable stock
    • 2 garlic clove
    • ¼ inch fresh ginger
    • 1 tbsp chinese black vinegar
    • 500g Dried Asian noodles
    • 2 tbsp minced pickled mustard do not blend with the sauce
    • 1 tsp sesame oil
    • 1 tsp chilli oil

    Cucumber Salad

    • 2 medium size cucumber
    • 1 tsp sesame oil
    • 1 tsp sesame seed
    • ½ tsp sea salt add only when you're ready to serve

    Cabbage Side

    • ¼ small cabbage
    • 1 tsp salt
    • ½ litre water

    Instructions

    To Make Peanut Sauce

    • In a blender add the peanut sauce, soy sauce, vegetable stock, garlic, ginger, and black vinegar. Blend until smooth.
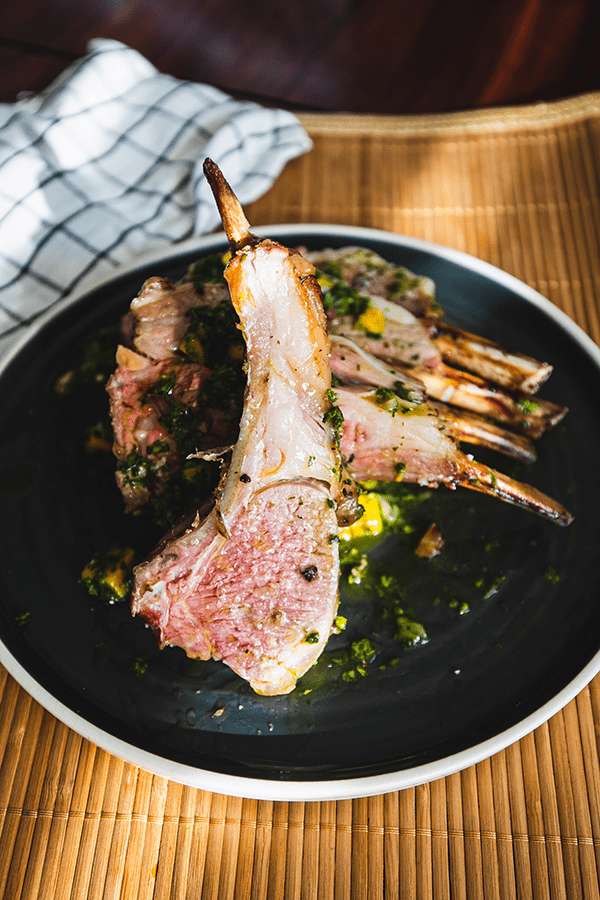
    To Make Cucumber Salad

    • Using the vegetable spiralizer, attach the cucumber and spiralize the cucumber into ribbons. Toss it with some sesame oil. Salt: do not add the salt until you're ready to serve. Salt will quickly turn the cucumber into mush.

    To Make the Cabbage Side

    • Take the food processor and add roughly cut cabbage into the machine. Pulse it a few times and turn it completely "on" to finely chop the cabbage. Add the chopped cabbage to boiling water with salt for 5 minutes. Strain the water and set it aside.

    Assemble the Noodle Soup

    • Meanwhile, cook the asian noodles you like. See package for instructions. Set the noodle aside in the bowl.
    • In a pot, add the peanut sauce and bring it to a boil. Add the minced pickled mustard, and cabbage. Cook for about 5 minutes. Test the soup for saltiness. If you think it's too salty, add some water to dilute it. Alternatively you can add non-salted vegetable broth as well.
    • Ladle the hot soup on to the noodles and add the cucumber salad on top.
    • Garnish with some salt on top of the cucumber salad (if desired), sesame seeds, sesame oil, and chili oil. Serve immediately.
  • Crispy Panko Crusted Baked Salmon

    Crispy Panko Crusted Baked Salmon

    Panko crusted salmon with dill, mayonnaise, and lemons — this is the best baked salmon you will ever taste, and it requires only a handful of simple ingredients that probably already live in your kitchen.

    Crispy panko crusted baked salmon on a blue plate with hydrangea flowers

    This post may contain affiliate links. If you purchase through these links, I may earn a small commission at no extra cost to you. Thank you for supporting Love & Harvest!

    Hard to imagine that the best tasting baked salmon you’ll ever have only requires a few ingredients. Mediterranean inspired, you’ll absolutely love this salmon because it is fresh tasting, and no ingredient overpowers the natural great taste of salmon!

    I’ve been using this recipe for a very long time. I’ve done teriyaki chicken, salmon with a butter creamy mushroom sauce, and even a fish and chip version with salmon! They were all amazing, but our family still comes back to this Panko Crusted Baked Salmon because it tastes great and it’s so simple.

    Panko crusted salmon fillet topped with lemon slices and dill on parchment

    There’s something special about dill and salmon. These two ingredients pair so well together. My kids rarely like the taste of dill on its own, but they absolutely adore this recipe!

    You have to try this recipe! Easy ingredients to find and even easier cooking once it’s baked in the oven. You can quickly make a gourmet salmon within a few minutes!

    It’s crunchy, savoury, and citrusy. Great for the summer since salmon is more widely available and the citrus flavour really brings out summer vibes. Serve it alongside our fresh beet pasta for a vibrant dinner spread.

    Panko baked salmon served with rice and a lemon slice on a blue plate

    What is Panko?

    Panko is a Japanese type of breadcrumb made only with dried white bread and no crust. It is not fried, but baked with an electric current. They are super crunchy and a staple in Japanese deep frying cuisine. They use it a lot as the final ingredient to roll food into before it goes into the deep fryer.

    Whenever I can, I always choose panko over breadcrumbs. They have a cracker-like crispiness that breadcrumbs can’t mimic, and the taste is similar to fried food.

    A hand sprinkling panko breadcrumbs over a mayonnaise-coated salmon fillet

    Why You Will Love This Recipe

    • Delicious! It’s smooth, silky, and flakey on the inside with hints of lemon and dill flavour, and the outside is super crunchy and moist from the panko and mayonnaise.
    • Summer dish: summer flavours are here! Fresh lemon with salmon is my favourite smell and taste of summer!
    • Easy to make: whip the sauce together, marinate it on top of the fish, and put it in the oven. It’s really that simple!
    • Minimal clean-up: that’s right, you’re not stuck with piles of dishes or spoons to wash!

    Golden panko crusted salmon with lemon slices on a parchment-lined tray

    Ingredients

    Salmon Fillet

    I tend to buy my fresh salmon from Costco. The type I normally buy is salmon with the skin on. When the fish bakes in the oven, the skin at the bottom of the pan gets crispy and chewy — it’s one of the best parts.

    Dill

    Both fresh and dried dill work for this recipe. For dried dill use only 2 tsp. For fresh, use 1/4 cup. Dried dill is stronger in taste than fresh. Fresh dill gives you a brighter, more vibrant flavour, while dried dill delivers a more concentrated herby punch.

    A hand holding fresh dill over a bowl of mayonnaise

    Panko Breadcrumbs

    Panko breadcrumbs are the secret to the incredible crunch in this recipe. They create a light, airy crust that regular breadcrumbs cannot replicate. Make sure to drizzle a little oil over the panko before baking for the best golden colour.

    Lemon

    You will need both lemon juice and lemon zest for this recipe. Lemon juice adds the acidity while zest carries the bright citrus essential oils. A microplane zester makes this quick and easy.

    Mayonnaise

    The mayonnaise acts as the binding layer between the fish and the panko crust. It keeps the salmon moist during baking and creates that beautiful golden top. If you want to reduce calories, swap mayonnaise for plain Greek yogurt — it still comes out unbelievably crunchy.

    Pro Tips for the Perfect Panko Salmon

    Pro Tip 1: Run a Finger Along the Spine of the Salmon

    Sometimes not all fish mongers are perfect at filleting fish. Running a finger along the spine of the fillet can help detect if there’s a bone stuck in the flesh. Trust me, you’ll feel it if you run across one.

    Pro Tip 2: Salt the Fish First

    Before you gather the marinade and slather it on the salmon, marinate the fillet with some salt first. This way the fish will absorb some of the salt and penetrate flavours into the flesh before the mayonnaise sauce.

    Pro Tip 3: Trade Mayo for Natural Yogurt

    You can lower the calories of this dish by trading mayonnaise with yogurt. It will still come out tasty and unbelievably crunchy.

    Stirring a creamy dill and yogurt mixture in a white bowl

    Pro Tip 4: Steam Veggies Alongside the Salmon

    Before you put the salmon in the oven, boil some vegetables for 5 minutes. Drain them and toss them on the side of the baking sheet with the salmon. Once the juice and sauce start to melt in the oven, the vegetables will soak up the sauce while they get crunchy in the oven. Use a quality rimmed baking sheet pan so none of those juices spill.

    What Goes Well With This Panko Crusted Baked Salmon

    • Baked potatoes: I love baked potato with this baked salmon. I especially love adding butter and extra sauce on top of the baked potato.
    • Pesto salad: complete this Mediterranean dish with some pesto pasta salad. Best summer dish combo! Try our homemade pesto gnocchi as a side.
    • White rice: sometimes plain white rice is the best way to taste the salmon. We love serving it with plain rice so we can later drizzle the burnt mayonnaise sauce on the rice.
    • Salad: a green salad on the side.

    Baked panko salmon cut open to show the pink center

    Frequently Asked Questions

    What temperature should I bake panko salmon at?

    Bake at 375°F (190°C) with the rack in the middle of the oven. This temperature gives you a golden panko crust while keeping the salmon moist and flakey inside. Check at the 25-minute mark — the fish should flake easily with a fork when done.

    Can I make this recipe ahead of time?

    You can mix the mayonnaise sauce and store it in the fridge up to one day ahead. Spread it on the salmon and add the panko just before baking for the crispiest result.

    Can I use frozen salmon for this recipe?

    Yes! Thaw the salmon completely in the refrigerator overnight before using. Pat it very dry with paper towels before adding the marinade — excess moisture will prevent the panko from crisping up.

    How do I know when the salmon is cooked through?

    The salmon is done when it flakes easily with a fork and the internal temperature reads 145°F (63°C). The flesh should be opaque throughout and the panko crust should be golden brown.

    Can I use breadcrumbs instead of panko?

    You can, but the result won’t be as crunchy. Panko creates a lighter, crispier crust because the crumbs are coarser and drier than regular breadcrumbs. If panko is unavailable, lightly toasted regular breadcrumbs are the best substitute.

    Can I make this dairy-free?

    This recipe is naturally dairy-free since it uses mayonnaise rather than butter or cream. Simply ensure your mayonnaise brand is dairy-free and you’re good to go.

    Close-up of panko crusted baked salmon with lemon and parsley

    Crispy Panko Crusted Baked Salmon

    Panko crusted salmon with dill, mayonnaise, and lemons. The best baked salmon you will ever taste with a few simple ingredients. Print Recipe Pin RecipePrep Time:15 minsCook Time:25 minsCourse: Main CourseCuisine: AmericanKeyword: baked salmon, pankoServings: 6 people

    Ingredients

    • ½ kg fresh salmon fillet optional: with skin
    • 1 tsp sea salt
    • ½ cup mayonnaise
    • 1 lemon on juice
    • 1 lemon zest
    • 1 tsp sea salt
    • 2 tsp dried dill or ¼ cup fresh ¾ chopped dill
    • black pepper
    • ½-¾ cup panko
    • oil
    • ½ lemon sliced
    • parsley chopped

    Instructions

    • Wash the salmon fillet and pat dry with paper towels.
    • Run your finger along the spine of the fillet to check if there are any bones stuck in the fillet. If you feel a small bone with your fingers, use a tweezer to pull it out.
    • Sprinkle salt both sides of the fish and let it sit for 10 minutes.
    • Meanwhile combine mayonnaise, lemon juice, lemon zest, salt, dill, and pepper in a bowl. Mix well.
    • Preheat oven to 375°F with the rack in the middle.
    • Take a baking sheet out and lay a parchment paper on top that fits the fish fillet.
    • Lay the salmon on top with the skin down.
    • Generously spread the mayonnaise mixture on top of the fillet. Cover all areas.
    • Sprinkle the panko over the mayonnaise. Give a quick drizzle of oil on top.
    • Bake the fish for 25-30 minutes in the oven. Serve with lemon slices and parsley on top.
  • Easy Salmon Pot Pie with Thyme Crust

    Easy Salmon Pot Pie with Thyme Crust

    Cozy fall evenings call for something extraordinary — and this easy salmon pot pie delivers every time. Picture golden, flakey thyme crust shattering to reveal a creamy, steaming filling of tender salmon, winter vegetables, and melted gouda cheese. It smells incredible while it bakes, and it tastes even better.

    This post may contain affiliate links. If you purchase through these links, I may earn a small commission at no extra cost to you. Thank you for supporting Love & Harvest!

    Salmon pot pie with a golden thyme crust and a slice served on a plate

    This post is all about salmon pot pie — a favourite fall dish stuffed with salmon, winter vegetables, and cheese, then wrapped and baked in a flakey pie crust made with thyme.

    Salmon pot pie cut open to show the salmon and vegetable filling

    Fall is here and comfort food is calling. This salmon pot pie is the answer — salmon and vegetable stuffing, manchego cheese, and a thyme pie crust. Sounds amazing right? The crust alone is worth making. Besides its delicious flavour, it is also a super easy recipe that can be made ahead of time. I make all my pie crusts with a food processor for minimal clean-up.

    Slice of salmon pot pie on a white plate next to the pie

    Salmon Pot Pie Flavour

    Salmon is first marinated with soy sauce and sesame oil. This adds incredible depth of umami flavour to the salmon before it even hits the pan.

    The seasonal fall vegetables are potato, leek, garlic, onion, tomato, and carrot — readily available and perfect for the colder season. Once you combine this with the thyme pie crust, uufff! You have got yourself a marvellous pot pie.

    A hand holding a plate with a slice of salmon pot pie

    Why You Will Love This Recipe

    • Easy: Pie dough is made with a food processor and the salmon stuffing is made on the stovetop. Then combined and baked.
    • Incredible flavour: Salmon steamed with milk, cheese, and vegetables wrapped in a flakey thyme crust — the hardest part is waiting while the aroma fills your house.
    • Filling: Great for cold winter days when you want something substantial.
    • Make-ahead friendly: Pot pies can be made ahead or frozen. Great for busy nights.
    • Economical ingredients: Besides the salmon, everything else is budget-friendly produce you can find anywhere.

    Salmon pot pie filling, rolled crust and grated cheese ready to assemble

    Key Ingredients

    Ingredients

    Salmon

    Fresh or frozen salmon both work here, cut into cubes.

    • Why it matters: Salmon is marinated in soy sauce and sesame oil before cooking, which locks in umami flavour even through the baking process. The cubes absorb the creamy milk-and-cheese filling beautifully.

    Thyme Pie Crust

    Fresh thyme leaves are pulsed directly into the dough using a Lodge Cast Iron Skillet-friendly pastry method — lard, cold water, and apple cider vinegar for maximum flake. For a full deep-dive, see our guide on How to Make a Flakey Pie Crust.

    • Why it matters: Cold fat hits hot oven air and creates steam pockets — that is what makes the crust flakey. Thyme adds an herbal note that pairs perfectly with seafood.

    Gouda Cheese

    Two cups of grated gouda melt into the filling and sit on top before the lid crust goes on.

    • Why it matters: Gouda melts smoothly and has a mild nuttiness that complements the soy-marinated salmon without overpowering it. Use a deep Pyrex pie dish to hold all that cheesy goodness.

    Dill

    Fresh or dried dill sprinkled between the cheese and top crust.

    • Why it matters: Dill and salmon are a classic pairing. While the pot pie bakes, the dill perfumes the steam inside, infusing every bite. If you love this combo, try our Crispy Panko Crusted Baked Salmon next.

    Pot of cubed salmon and vegetable filling for pot pie

    Frozen or Fresh Salmon?

    Fresh salmon is always best for unbeatable flavour, but frozen works well here too. Since we marinate the salmon with soy sauce — a strong flavouring agent — both options produce excellent results. The salmon cubes steam in a glorious pot of cheese, milk, and vegetables and come out flakey and soaked in flavour.

    Food processor bowl of flour topped with fresh thyme sprigs

    Seasonal Vegetables

    Winter vegetables that are economical and easy to find: potato, leek, garlic, onion, tomato, and carrot. Nothing exotic — just your typical corner grocery store staples.

    Thyme Pie Crust

    From the base flakey pie crust recipe, we simply add fresh thyme to the dough. Thyme is a great herb to accompany seafood, especially salmon. Use a rolling pin to roll the dough evenly, and a pastry brush for the egg wash. Not to mention it looks absolutely gorgeous!

    Rolled thyme pie crust draped over a fluted pie pan

    We Love Dill with Our Salmon

    This comes with no surprise — we love adding fresh dill to salmon. Fresh or dried dill works. If you love salmon and dill together, do not miss our Crispy Panko Crusted Baked Salmon — another baked salmon recipe with dill, lemon, mayonnaise. And for something different with salmon, try our Ricotta Cheese Salmon Roll.

    Salmon and vegetable filling topped with cheese and dill inside the pie crust

    Fool-Proof Professional Tips

    Pro Tip #1 — Cool Everything Before Assembling

    Do not put hot salmon stuffing onto cold dough — it melts the butter and ruins the flakey structure. Let everything cool to room temperature first. We also need to freeze the assembled pie before baking, and you should never put hot food in the freezer.

    A hand spreading soft cheese over the salmon pot pie filling

    Pro Tip #2 — Freeze the Pie 20 Minutes Before Baking

    Pie crusts love to be cold. When cold dough hits hot oven air, it creates airy, flakey layers. Give the assembled pie at least 20 minutes in the freezer before it goes into a 400°F oven.

    Whole salmon pot pie with a golden top crust and a thyme sprig

    Pro Tip #3 — Crimp the Pie Crust Edge

    Crimping the edges not only looks beautiful but helps the pastry and filling stay in place while cooking. Use the index finger of one hand to push the inner edge out while pinching the outer edge in with the thumb and index finger of the other hand. Repeat around the entire edge for a classic scalloped finish.

    Hands crimping the edge of a pie crust
    Fingers pinching a scalloped edge around a pot pie crust

    Pro Tip #4 — Let It Cool Before Cutting

    The hardest part is waiting. Do not cut into a freshly baked pie — it is still cooking inside. Cutting too early dries the pie out by releasing all the steam. Rest it at least 10–15 minutes.

    Pro Tip #5 — Cut Holes in the Top Crust for Ventilation

    Always cut a hole in the centre of the crust for steam to escape. You can also poke a few holes around the crust with a fork before baking.

    Knife cutting a steam vent in the center of the top pie crust

    Frequently Asked Questions

    Can I use canned salmon instead of fresh or frozen?

    Yes. Drain the canned salmon well and break it into chunks before adding it to the filling. The texture will be slightly different but still delicious, and the soy-sesame marinade will compensate for the milder flavour.

    Can I make this pot pie ahead of time?

    Absolutely. Assemble the entire pot pie, wrap it tightly, and freeze it unbaked for up to one month. When ready to bake, go straight from freezer to oven — add 10–15 minutes to the bake time. Alternatively, fully bake it, cool it, and refrigerate for up to 3 days.

    Can I use butter instead of lard in the pie crust?

    Yes. Substitute an equal amount of cold unsalted butter. The crust will be just as flakey — lard produces a slightly more tender texture, but butter adds a richer flavour. Make sure both are very cold when you pulse them.

    What can I substitute for gouda cheese?

    Manchego, gruyere, or sharp cheddar all work well. Avoid fresh cheeses like mozzarella as they release too much liquid into the filling.

    Why does my pie crust shrink when baking?

    The dough was not rested long enough. Always refrigerate the dough disk for at least 30 minutes (or overnight) before rolling. Also, do not stretch the dough when placing it in the pan — let it fall into place naturally.

    What size pie dish should I use?

    A standard 9-inch deep-dish pie pan works best. A Pyrex deep dish pie plate is ideal because you can see the bottom crust browning through the glass.

    Salmon pot pie with a golden thyme crust and a slice served on a plate

    Easy Salmon Pot Pie with Thyme Flakey Crust

    Easy salmon pot pie that is the perfect comfort food for fall. Dig into this steamy pot pie filled with salmon, winter vegetables, and cheese all wrapped and topped with a delicious flakey thyme crust!
    Prep Time 45 minutes
    Cook Time 30 minutes
    Total Time 1 hour 15 minutes
    Servings: 6 people
    Course: Main Course
    Calories: 560

    Ingredients
      

    salmon marinate
    • 200 g fresh or frozen salmon cubed
    • 1 tbsp soy sauce
    • 1 tsp sesame oil
    pot pie filling
    • 2 tbsp butter
    • ½ large leek
    • 2 garlic cloved diced
    • ½ white onion chopped
    • 3 carrots chopped
    • 3 medium sized potato cubed
    • 2 small tomato chopped
    • 1 tsp chicken boulenise powder
    • 1½ cup whole milk
    • 1 cup cream
    • 1 tsp sea salt
    • black pepper
    • 2 cups gouda cheese grated
    • 2 tbsp fresh dill or 1 tsp dried dill
    • 1 tbsp butter, cold sliced thinly
    thyme pie crust
    • 3 fresh springs of thyme
    • 1 tsp sea salt
    • 3.5 cups all-purpose flour
    • 1.5 cups lard
    • ¾ cup cold water
    • 2 tsp apple cider vinegar
    • 1 egg

    Method
     

    Salmon Marinate
    1. Combine the salmon, soy sauce and sesame oil together. Mix well and let it marinate for 10 minutes.
    Pot Pie Filling
    1. On medium heat in a large pot or pan, melt butter and sauté the chopped leeks, garlic, and white onions. 3 minutes.
    2. Add the carrot and potatoes. cook for 5 minutes.
    3. Toss the tomatoe in along with the chicken bouillon powder, milk, cream, salt, and pepper. Turn the heat to low and cook for 10 minutes with a lid. Turn off the heat with the lid off and let the mixture cool to room temperature.
    4. Meanwhile, put the thyme leafs, flour, and salt in the food processor. Pulse the flour mixture so it is well combined. Open the lid and ddd small chunk of lard into the food processor. Close the lid.
    5. Combine the cold water and vinegar together.
    6. Add half the cold water mixture in the food processor and pulse it 7 times. Slowly drizzle the rest of the water in to the food processor while you do quick pulses. Keep pulsing the mixture when the cold water runs out. When the dough starts to form and pull away. Take the lid off and divide the dough into two parts. Flatten the dough into a flat disk and put it in the fridge for at least 30 minutes or overnight.
    Putting everything together
    1. On a floured surface, pie dough, and sprinkle it with a little flour. Roll out any creases and roll it out just big enough to cover your pan.
    2. Add the salmon filling into the pie. Place thinly sliced cold butter on top of the filling. Then top it off with grated cheese and dill. Place the other rolled out pie dough over the top of the pan, folding up the corners. Cut a hole in the middle for venting.
    3. Place the pie in the freezer for 20 minutes.
    4. Preheat oven to 400°F
    5. Before you put the pie in the oven, brush the top of the pie with egg wash.
    6. Bake at 400°F for 20 minutes, then lower heat to 350°F, and bake 10 more minutes.
    7. Let it cool for at least 10-15 minutes before cutting into the pie.
  • Best Thanksgiving Turkey with Bacon Strips

    Best Thanksgiving Turkey with Bacon Strips

    Every Thanksgiving table deserves one truly legendary turkey — one that is impossibly juicy, wrapped in crispy woven bacon, and finished with a rich dripping gravy that has everyone scraping the pan. This is that recipe, and it has been the same one for over 10 years.

    This post may contain affiliate links. If you purchase through these links, I may earn a small commission at no extra cost to you. Thank you for supporting Love & Harvest!

    best thanksgiving turkey with bacon recipe

    This post is all about the best Thanksgiving turkey with bacon strips recipe. Turkey is moist and juicy from woven bacon along with a delicious gravy on the side.

    Thanksgiving turkeys have a reputation for being dry and flavourless. That reputation exists because most recipes miss a few critical steps. This recipe does not miss them. The result: the moistest turkey you have ever served — with crispy bacon on top and a gravy made from every last drop of those incredible drippings.

    My Chinese side of the family used to dread turkey. After trying this recipe, they now look forward to Thanksgiving every year. That is the best endorsement I can give.

    Why Try This Recipe?

    • Proven for 10 years — made this every Thanksgiving and Christmas, always comes out perfect
    • Woven bacon technique — locks in moisture, crisps evenly, and makes the presentation stunning
    • 90% hands-off cooking — long oven time, but you are mostly just basting every 30 minutes
    • Built-in gravy recipe — the drippings become the most flavourful gravy you have tasted
    • Works for any size turkey — use the sizing table below to scale cooking time

    The Best Turkey Gravy

    The gravy is made entirely from the turkey marinade and the drippings left in the pan. It is made in the 30 minutes the turkey rests before carving — no wasted time. The neck of the turkey (tucked inside the cavity when you buy it) goes into a pot with water and turkey juice to build the stock. Then you brown flour, whisk in the liquid, and reduce to a velvety, umami-packed gravy. This is the kind of gravy people pour on everything on the plate.

    Use the Turkey Carcass to Make Another Meal

    After the feast, boil down the carcass with the remaining marinade to extract every drop of flavour. Use the resulting turkey stock for:

    • Congee — add rice, ginger, and green onion for a warming bowl
    • Turkey noodle soup — exactly like chicken noodle soup, but richer
    • Chinese noodle soup — boil vegetables and noodles in the stock, top with chilli oil
    • Turkey chilli bean stew — turkey stock, red beans, tomato paste, and your favourite spices

    unique turkey recipes

    Ingredients

    Turkey (7kg / ~15 lbs)

    Use a fully defrosted turkey — never cook from frozen. A 7kg bird serves about 15 people generously. See the sizing table below if you are cooking for a different group size.

    • Why it matters: Defrosting completely is non-negotiable. Partially frozen meat cooks unevenly and risks undercooking near the bone.

    Smoked Bacon Strips

    One full package of smoked bacon strips is woven across the breast and legs. Smoked bacon adds a depth of flavour that regular bacon cannot match.

    • Why it matters: Bacon acts as a self-basting fat layer for the driest parts of the bird (breast and legs). The weave keeps the bacon in place as it shrinks during cooking.

    Seasonings (rosemary, thyme, oregano, basil, paprika, kosher salt)

    These six aromatics form the backbone of the marinade. They are combined with hot oil poured over finely chopped onion and garlic to create a fragrant, oil-based rub.

    • Why they matter: Hot oil “blooms” the dried herbs and drives the flavour deeper into the meat when rubbed into the fork-poked holes.

    Meat Thermometer

    A reliable instant-read meat thermometer is non-negotiable. Turkey is done at 170°F in the thickest part of the thigh.

    • Why it matters: Guessing doneness is how turkeys end up either raw or bone dry. A thermometer removes all uncertainty.

    Large Roasting Pan

    You need a large roasting pan that fits the turkey with room for the drippings to pool — those drippings become your gravy.

    • Why it matters: A too-small pan causes drippings to burn instead of collect. The collected juices are the entire foundation of the gravy.

    How Much Turkey per Person

    A general rule: 1 pound (0.45kg) per regular eater, 1.5 pounds (0.65kg) per heavy eater.

    Weight in kg

    Weight in lbs

    Time at 325°F

    Serves

    1.9 – 2.7 kg

    4 – 6 lbs

    2 – 2.5 hours

    4 people

    3.6 – 5.4 kg

    8 – 12 lbs

    2.5 – 3 hours

    8 people

    5.4 – 8.2 kg

    12 – 18 lbs

    3 – 4 hours

    12 people

    7.3 – 11 kg

    16 – 24 lbs

    4 – 6 hours

    16 people

    11 – 13 kg

    25 – 28 lbs

    5 – 7 hours

    25 people

    Defrosting the Turkey

    If buying frozen, start defrosting 2–3 days ahead. Defrost overnight on the counter in a deep dish (there will be drips), then finish in the fridge. Never rush this step — a partially frozen turkey will cook unevenly no matter how good the recipe is.

    Know the Anatomy of the Turkey

    Turkey has dark meat (legs — more active muscle, needs more oxygen) and white meat (breast — less active, drier). The breast is the part most likely to dry out, which is exactly why the bacon weave focuses heaviest coverage there. Knowing this anatomy means you baste smarter — more attention to the breast every 30 minutes.

    Woven Bacon Strips

    The weave is not just for aesthetics. When bacon strips shrink and curl during cooking, a flat-laid arrangement slides and bunches. The weave holds everything in position, providing consistent coverage across the entire breast and legs throughout the full cook time. Toothpicks at each end secure the perimeter — just count them going in so you remove every single one before serving.

    how to cook a turkey in the oven to be moist

    Seasoning

    The marinade is onion, garlic, rosemary, thyme, oregano, basil, paprika, and kosher salt — all finely chopped and combined, then hit with hot canola oil poured over the top. The hot oil extracts the full flavour from the aromatics on contact. Rub this all over the bird and into the fork-poked holes. Marinate overnight in the fridge for the deepest flavour.

    Fool-Proof Professional Tips

    Pro Tip 1: Use toothpicks to attach the bacon

    Secure the ends of the woven bacon strips with toothpicks. Do not push them too deep — you need to remove every one before serving. Count them as you go in, so you can confirm they are all out when the turkey rests.

    Pro Tip 2: Poke holes along the leg and breast

    Use a fork to vigorously poke deep holes across the legs and breast with even spacing. Do this only when the turkey is completely defrosted. The holes let the marinade penetrate deeply rather than sitting on the surface.

    Pro Tip 3: Weave the bacon strips

    Not just for looks — weaving keeps bacon in position as it shrinks and ensures even fat coverage across every inch of the breast. Flat-laid strips slide. Woven strips stay put.

    Pro Tip 4: Baste every 30 minutes

    Every 30–45 minutes, open the oven, slide the rack out slightly (not all the way), and baste the turkey with the drippings from the bottom of the pan. Focus on the breast and legs. Replace the foil and continue cooking.

    Pro Tip 5: Rest 30 minutes before carving

    Cutting a hot turkey leaks all the moisture out immediately. Resting 30 minutes lets the juices redistribute throughout the meat. This is what separates a good turkey from a great one.

    turkey recipes for dinner

    More Holiday Main Recipes

    Looking for more showstopper mains? Try the Thanksgiving Roasted Lemon Garlic Chicken as a smaller-crowd alternative, and the Succulent Sunday Pot Roast for a hearty weekend centrepiece.

    Frequently Asked Questions

    How do I know when the turkey is done?

    Insert a meat thermometer into the thickest part of the thigh, avoiding the bone. The turkey is done when it reads 170°F. If any part of the thigh reads below that, return to the oven and check every 15 minutes.

    Why does my turkey always come out dry?

    Usually because it was either over-cooked, not basted frequently enough, or the bacon was not covering the breast. Follow the 30-minute basting intervals, keep the foil on for most of the cook time, and only remove it for the final hour to crisp the bacon.

    Can I skip marinating overnight?

    You can marinate for a minimum of 6 hours, but overnight gives significantly deeper flavour. If you are short on time, at least poke holes and rub the marinade generously into every part of the bird, including inside the cavity.

    How long do I need to defrost the turkey?

    Plan for 2–3 full days. Start on the counter overnight, then move to the fridge for the remaining time. A 7kg turkey needs at least 48 hours in the fridge to fully defrost after the initial counter thaw.

    Can I make the gravy ahead of time?

    The gravy relies on the turkey drippings which are only available after cooking, so it cannot be made fully ahead. However, you can simmer the turkey neck in water 30 minutes before the turkey finishes to have the stock ready, then combine with drippings when the bird comes out.

    How should I store leftover turkey?

    Store leftover turkey in an airtight container in the fridge for up to 4 days. Slice the meat off the carcass before storing — it stays more moist than storing it on the bone. The carcass should be used for stock within 2 days.

    Best Thanksgiving Turkey With Bacon

    Best Thanksgiving Turkey with Woven Bacon Strips

    It's a meal that promises huge flavours and a happy full belly. The perfect Thanksgiving turkey recipe that promises the juiciest meat, crispy bacon, and umami gravy. The turkey is flavourful and luscious! Print Recipe Pin RecipePrep Time:30 minsCook Time:4 hrsCourse: Main CourseCuisine: AmericanKeyword: thanksgiving turkey, turkey baconServings: 15 people

    Equipment

    • food processor
    • turkey baster
    • large roasting pan

    Ingredients

    • 7 kg defrosted turkey
    • 1 cup canola oil
    • 1 tsp dried rosemary
    • 1 tsp dried thyme
    • 1 tsp dried oregano
    • 1 tsp dried basil
    • 2 tsp smoked paprika
    • 2 tbsp kosher salt
    • 1 whole garlic
    • 1 large white onion
    • 1 package smoked bacon strips

    Gravy

    • neck of the turkey
    • 2 cups water
    • 2 tbsp flour
    • salt and pepper to your taste

    Instructions

    Turkey Preparation

    • Wash the defrosted turkey and dry with paper towel.
    • Using a fork, poke holes along all parts of the turkey legs and breasts. Space them out evenly and not so close together or the skin might break. Use 1 tbsp of kosher salt and rub all over the turkey. Set aside.

    Marinate Preparation

    • Use a frying pan and add the canola oil. Heat until it smokes.
    • In the meantime, combine all the spice together: rosemary, thyme, oregano, basil, paprika and salt.
    • In a food processor, chop finely the whole bulb of garlic and onion. Combine well with the spices. Put in a heat proof glass bowl.
    • Pour the hot oil on top of the bowl of spices, and stir well to combine everything.
    • To marinate the turkey, wear gloves first. Place the turkey in a dish that is deep and that will also fit inside your fridge. Take a handful of the marinate and start to rub the turkey all over it. Be vigorous and rub hard. Rub the cavity of the turkey as well. If you have extra marinate, put it on top of the turkey and inside the cavity.
    • Plastic wrap the turkey and place it in the fridge. Marinate at least 6 hours or overnight.

    Cooking the Turkey

    • Preheat oven to 325°F. Place rack in the middle of the oven, and take out the other racks.
    • Take the turkey out, move the turkey to the large roasting pan, and discard the plastic wraps.
    • Start to weave the bacon strips on top of the turkey. Make sure it overlaps the legs and breasts.
    • For each end of the bacon strips, secure it on to the turkey by poking it with toothpicks. Count the number of toothpicks used, so when you take it out, you have removed them all.
    • Lay a sheet of tinfoil on top of the turkey securely.
    • Place the turkey inside and set the timer for 3.5 hours (15-20 minutes per pound).

    30-Minute Interval Basting

    • Open the oven door and remove the tin foil, move the rack out slightly and baste the turkey with the juice at the bottom of the pan. Give it a good baste across the legs and breast. Replace the tinfoil and close the oven door.

    Final Stages of Cooking

    • Use a meat thermometer and insert it to the thigh of the turkey. Turkey is done when it reads 170°F in the thickest part of the thigh.
    • For the last one hour of your cooking time, remove the tin foil and let bacon get crispy.
    • When it is time to remove the turkey, allow it to sit outside for 30 minutes before carving.

    Turkey Gravy

    • Once the turkey is moved from the large roasting pan, take the juice out of the pan. Defat the oil from the juice.
    • Take the neck of the turkey and put it in a pot along with 2 cups of water. Boil on medium low heat for 20 minutes along with the juice of the cooked turkey. Discard the neck.
    • In a large cooking pan, fry the flour until brown and fragrant, about 2 minutes. Whisk continuously as you pour the juice into the pan. Keep whisking until the gravy is well blended with no flour lumps. Cook for 5-10 minutes on low.
    • OPTIONAL: Blend the gravy for a smooth puree consistency.
    • Season with salt and pepper to taste.