Category: dinner ideas

  • Hearty Shepherd’s Pie

    Hearty Shepherd’s Pie

    This hearty shepherd’s pie is ground beef simmered with carrots, green beans, bell pepper, oregano and a handful of raisins, topped with nutmeg mashed potatoes and baked at 375°F (190°C) until golden. It makes about 6 servings. Plan about 1 hour 45 minutes. These times are estimates and vary with your stove, oven and dish. Cook the beef to 160°F (71°C).

    This post contains affiliate links. As an Amazon Associate I earn from qualifying purchases.

    Fall may be all about pumpkin spice and sweet treats (hello, spiced pumpkin pie), but when autumn hits, my mind is completely consumed by one thing: potatoes. Should I mash it? Roast it? Fill it? Smash it? Boil it? I constantly think about it!

    This is one of those recipes our whole family loves. If your kids have been going to Bible classes, be ready to stand corrected, because in our house this dish is never called shepherd’s pie. Get ready to be gently lectured on why it obviously has to be called David’s Pie!

    Besides the usual filling of ground beef, carrots and green beans, we add raisins. That’s right! They give a subtle sweetness against the savoury sauce. Once the dish goes into the oven, the kids come running down the stairs because they know EXACTLY what’s inside. So here’s my trick: write a list of chores before dinner. They are so eager to eat that they will do almost anything.

    One honest note on the name. Shepherd’s pie is traditionally made with lamb, and the ground beef version is often called cottage pie. We make ours with beef, so if you’re looking for another cozy ground beef dinner, try my ground beef chili too.

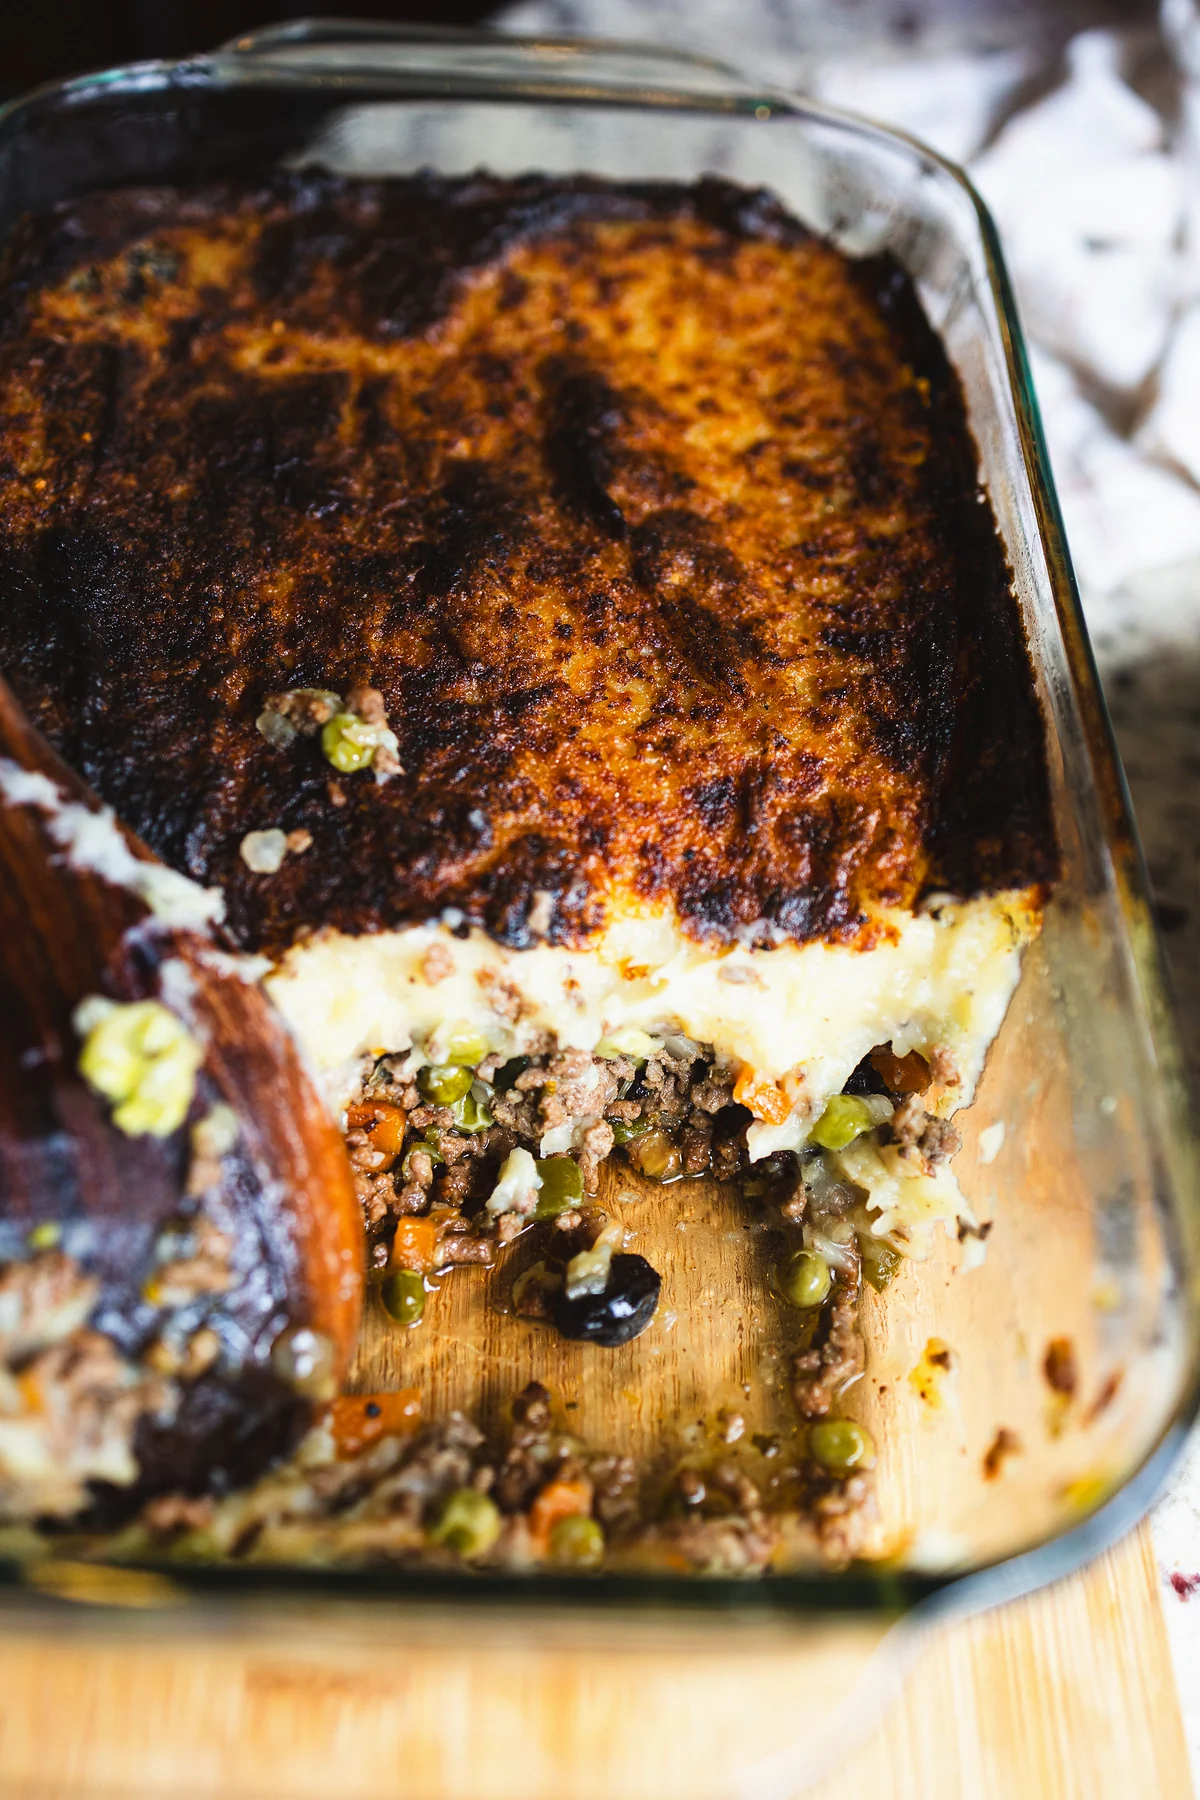
    Glass baking dish of shepherd's pie with a dark golden mashed potato top, a corner scooped out to show the ground beef and vegetable filling.

    Want a week of dinners planned for you? Get my free dinners

    Ingredients

    Here’s what goes into it. Exact amounts are in the recipe card below.

    • Mashed potatoes: 2 lb (about 900 g) russet potatoes, water and salt for boiling, butter, sour cream, freshly grated nutmeg, a pinch of dried thyme, salt and pepper.
    • Beef filling: 1.5 lb (about 680 g) lean ground beef, garlic, white onion, carrots, green beans (fresh or frozen), green bell pepper, oregano, beef flavour powder, raisins, salt and pepper.
    • To deglaze: 1 cup red wine. For an alcohol-free version, use 1 cup beef broth instead. Some alcohol stays in the dish after simmering and baking, so use the beef broth if you’re serving kids or anyone avoiding alcohol.
    • Topping: a few thin slices of butter and a little extra grated nutmeg.

    Equipment you’ll need

    These are Amazon affiliate links. As an Amazon Associate I earn from qualifying purchases.

    How to make hearty shepherd’s pie

    Step 1: Boil the potatoes. Peel and quarter 2 lb of russet potatoes and put them in a large pot. Cover them with cold water and salt the water generously. Bring to a boil and cook about 15 to 20 minutes, until fork-tender. Drain them well in a colander, pouring away from you so the steam doesn’t catch your face.

    Step 2: Mash the potatoes. Put the potatoes back in the pot and mash them with 2 tablespoons butter, 1/4 cup sour cream, 1 teaspoon grated nutmeg, a pinch of dried thyme, salt and pepper until smooth and creamy. Set aside.

    Step 3: Brown the beef. Heat a large skillet over medium-high heat and add 1.5 lb lean ground beef. Wash your hands, and anything that touched the raw beef, with hot soapy water. Cook the beef, breaking it up, about 8 to 10 minutes, until browned with no pink left. Check it with an instant-read thermometer: it needs 160°F (71°C). Carefully spoon off any extra fat into a heatproof container. Let the fat cool, then put it in the trash. Never pour it down the drain.

    Step 4: Make the filling. Add 3 minced garlic cloves, 1/2 diced white onion, 2 chopped carrots, 1 cup green beans and 1/2 diced green bell pepper. Sauté about 5 to 7 minutes, until the vegetables soften. Stir in 2 teaspoons dried oregano and 1 teaspoon beef flavour powder (beef bouillon powder, any brand). Pour in 1 cup red wine (or 1 cup beef broth) and scrape up the browned bits from the bottom of the pan. Toss in 1/4 cup raisins. Simmer about 10 minutes, until the liquid reduces into a rich, glossy sauce. Season with salt and pepper to taste.

    Step 5: Assemble and bake. Preheat your oven to 375°F (190°C). Spread the beef filling in an even layer in a glass oven-safe square dish (8-inch square, 2 quart). Set it on a baking sheet to catch any drips. Spoon or pipe the mashed potatoes generously over the top. Scatter a few thin slices of butter over the potatoes and grate a little extra nutmeg right over the surface. Bake about 25 to 30 minutes, until the filling is bubbling at the edges and the potato top is golden and crisp. The centre should reach 165°F (74°C).

    Close-up of baked shepherd's pie showing a dark golden potato crust, a creamy mashed potato layer and the ground beef filling with carrots and green vegetables.

    Step 6: Rest and serve. Set the hot dish on a dry trivet or wire rack and let it rest about 10 minutes, so the filling settles before you scoop it.

    A serving of shepherd's pie in a white scalloped bowl, with browned potato topping next to the ground beef and vegetable filling.

    Tips for a better shepherd’s pie

    • Use a thermometer for the beef. Colour alone can fool you. Ground beef is safe at 160°F (71°C), the USDA safe minimum, so check it before the vegetables go in.
    • Drain the potatoes well. Wet potatoes usually give you a runny mash that sinks into the filling. Let them steam in the colander for a minute before mashing.
    • Let the sauce reduce. If the filling is still soupy when it goes into the dish, the bottom layer can turn watery. Simmer until the liquid reduces into a rich, glossy sauce.
    • Don’t skip the butter slices on top. They help the potato top brown in the oven.
    • Love mashed potatoes? My garlic mashed potatoes are another way to get your fix this fall.

    How to store and reheat leftover shepherd’s pie

    Shepherd's pie in a glass baking dish with a slice removed, showing the potato layer over the beef filling.

    Refrigerate leftovers within 2 hours of baking (1 hour if the room is above 90°F / 32°C), in shallow airtight containers. Eat them within 3 to 4 days. Reheat until steaming hot and 165°F (74°C) in the centre. A covered dish in the oven can work well, since it keeps the potato top from drying out.

    Shepherd’s pie FAQ

    Is shepherd’s pie made with beef or lamb?

    Traditionally, shepherd’s pie is made with lamb, and the ground beef version is often called cottage pie. This recipe uses lean ground beef, the way we make it at home. If you use ground lamb instead, cook it to 160°F (71°C) too.

    Why put raisins in shepherd’s pie?

    They add a surprising, subtle sweetness that plays off the savoury sauce.

    Can I make it without wine?

    Yes. Use 1 cup beef broth instead of the red wine and deglaze the pan the same way. Some alcohol stays in the dish after simmering and baking, so use the beef broth if you’re serving kids or anyone avoiding alcohol. If you use broth, taste before adding salt, since the broth and beef flavour powder can be salty.

    How long do you bake shepherd’s pie at 375°F?

    About 25 to 30 minutes here, because the filling and potatoes are already cooked when they go into the oven. Bake until the filling bubbles at the edges, the top is golden and the centre reaches 165°F (74°C).

    What temperature should shepherd’s pie be cooked to?

    Cook the ground beef to 160°F (71°C) in the skillet. The baked pie should reach 165°F (74°C) in the centre, and leftovers should be reheated to 165°F (74°C) too.

    Can you make shepherd’s pie ahead of time?

    You can make it ahead. Let the filling cool in a shallow layer first, then assemble it, cover it and refrigerate it within 2 hours of mashing the potatoes. Bake it the next day. A cold pie usually needs extra time in the oven, so go by the thermometer: 165°F (74°C) in the centre. If you use a glass dish, follow its maker’s instructions on going from the fridge into a hot oven.

    More recipes you’ll love

    Make it your own, and write that chore list before it comes out of the oven!

    Need more dinner ideas? Grab my free dinners

    Shepherd's pie in a glass baking dish with a golden potato top and a scoop removed to show the beef filling.

    Hearty Shepherd’s Pie

    Lean ground beef simmered with carrots, green beans, bell pepper, oregano and raisins, topped with nutmeg mashed potatoes and baked at 375°F until golden. Cook the beef to 160°F.
    Prep Time 25 minutes
    Cook Time 1 hour 10 minutes
    Rest 10 minutes
    Total Time 1 hour 45 minutes
    Servings: 6 servings
    Course: Main Course

    Ingredients
      

    Mashed potatoes
    • 2 lb russet potatoes about 900 g; peeled and quartered
    • water and salt for boiling
    • 2 tbsp butter plus a few thin slices for the topping
    • ¼ cup sour cream
    • 1 tsp freshly grated nutmeg plus extra for the topping
    • 1 pinch dried thyme
    • salt and pepper to taste
    Beef filling
    • 1.5 lb lean ground beef about 680 g
    • 3 cloves garlic minced
    • ½ white onion diced
    • 2 carrots chopped
    • 1 cup green beans fresh or frozen, chopped
    • ½ green bell pepper diced
    • 2 tsp dried oregano
    • 1 tsp beef flavour powder beef bouillon powder, any brand
    • 1 cup red wine or 1 cup beef broth for an alcohol-free version
    • ¼ cup raisins
    • salt and pepper to taste

    Equipment

    • Large pot and colander for the potatoes
    • potato masher
    • Fine grater for the nutmeg
    • Large skillet for the filling
    • Heatproof container for the drained fat
    • Instant-read thermometer for 160°F / 71°C and 165°F / 74°C
    • glass oven-safe square dish (8-inch square, 2 quart)
    • Baking sheet to catch any drips
    • Piping bag optional, for the potato topping
    • Trivet or wire rack for resting the hot dish

    Method
     

    1. Peel and quarter the russet potatoes and put them in a large pot. Cover with cold water and salt the water generously. Bring to a boil and cook about 15 to 20 minutes, until fork-tender. Drain well in a colander, pouring away from you so the steam doesn’t catch your face.
    2. Return the potatoes to the pot and mash with the 2 tablespoons butter, sour cream, 1 teaspoon grated nutmeg, dried thyme, salt and pepper until smooth and creamy. Set aside.
    3. Heat a large skillet over medium-high heat and add the ground beef. Wash your hands, and anything that touched the raw beef, with hot soapy water. Cook the beef, breaking it up, about 8 to 10 minutes, until browned with no pink left. Check it with an instant-read thermometer: it needs 160°F (71°C). Carefully spoon off any extra fat into a heatproof container. Let the fat cool, then put it in the trash. Never pour it down the drain.
    4. Add the garlic, onion, carrots, green beans and bell pepper. Sauté about 5 to 7 minutes, until the vegetables soften. Stir in the oregano and beef flavour powder. Pour in the red wine (or beef broth) and scrape up the browned bits from the bottom of the pan. Toss in the raisins. Simmer about 10 minutes, until the liquid reduces into a rich, glossy sauce. Season with salt and pepper to taste.
    5. Preheat your oven to 375°F (190°C). Spread the beef filling in an even layer in a glass oven-safe square dish (8-inch square, 2 quart). Set it on a baking sheet to catch any drips. Spoon or pipe the mashed potatoes generously over the top. Scatter a few thin slices of butter over the potatoes and grate a little extra nutmeg over the surface. Bake about 25 to 30 minutes, until the filling is bubbling at the edges and the potato top is golden and crisp. The centre should reach 165°F (74°C).
      Close-up of baked shepherd's pie showing a dark golden potato crust, a creamy mashed potato layer and the ground beef filling with carrots and green vegetables.
    6. Set the hot dish on a dry trivet or wire rack and let it rest about 10 minutes, so the filling settles before you scoop it.
    Notes

    Cook the ground beef to 160°F (71°C). Wash your hands, and anything that touched the raw beef, with hot soapy water. Let the drained fat cool, then put it in the trash. Never pour it down the drain.
    For an alcohol-free version, use 1 cup beef broth instead of the red wine. Some alcohol stays in the dish after simmering and baking, so use the beef broth if you’re serving kids or anyone avoiding alcohol. If you use broth, taste before adding salt, since the broth and beef flavour powder can be salty.
    Shepherd’s pie is traditionally made with lamb, and the ground beef version is often called cottage pie. This recipe uses ground beef.
    Servings, prep, cooking, baking and resting times are estimates and vary with your stove, oven and dish.
    Refrigerate leftovers within 2 hours of baking (1 hour if the room is above 90°F / 32°C), in shallow airtight containers. Eat within 3 to 4 days, and reheat until steaming hot and 165°F (74°C) in the centre.
    Make ahead: let the filling cool in a shallow layer first, then assemble, cover and refrigerate within 2 hours of mashing the potatoes. Bake the next day. A cold pie usually needs extra time in the oven, so bake until 165°F (74°C) in the centre. If you use a glass dish, follow its maker’s instructions on going from the fridge into a hot oven.
  • Ground Beef Chili with Chorizo (Stovetop)

    Ground Beef Chili with Chorizo (Stovetop)

    This stovetop ground beef chili is thick and beefy, with Mexican chorizo, kidney beans and finely diced vegetables simmered uncovered until rich. Brown the meat to 160°F, simmer 35–50 minutes, then finish with sour cream and cheddar — in a bowl, over buttered pasta or on hot dogs.

    Jump to Recipe

    This post may contain affiliate links. As an Amazon Associate I earn from qualifying purchases.

    When the weather starts getting cooler and winter is just around the corner, there is nothing quite like a big pot of homemade chili simmering on the stove. This ground beef chili is thick, packed with flavour, and full of beef, chorizo and vegetables cooked right into the pot. To make it extra creamy, we love adding a generous spoonful of sour cream when serving!

    In our family, colder months usually mean more beef on the table. This beefy chili is one of our favourite ways to enjoy that — and everyone can eat it their own way. We have it straight from a bowl, spoon it over buttered pasta, or pile it onto hot dogs with extra cheddar cheese. The hot dog version is especially popular with the kids!

    I make this recipe at least twice a month, and somehow we keep finding new ways to serve it. Prefer a pressure-cooker version? Try my Instant Pot easy chili — this one stays on the stovetop for a thicker, longer simmer.

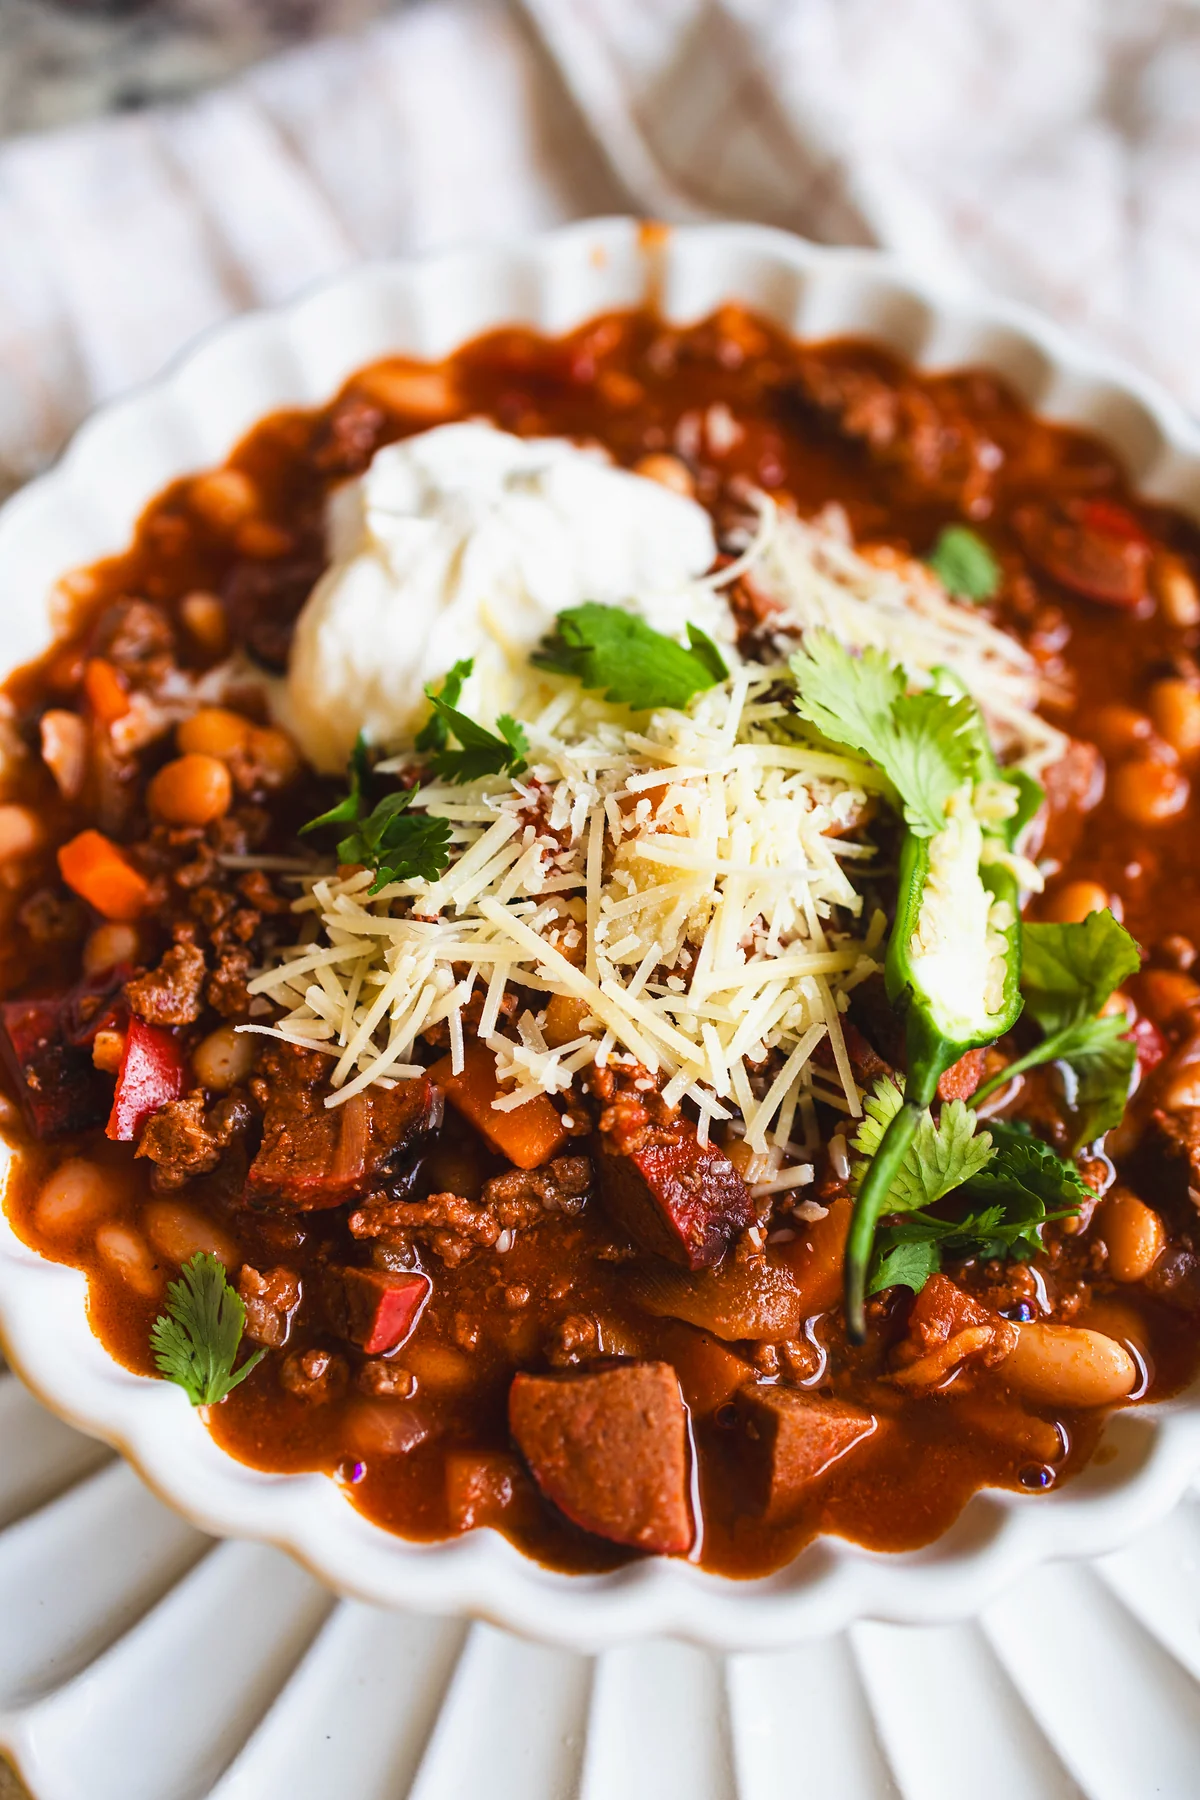
    Bowl of thick ground beef chili with beans, carrots and chorizo, topped with sour cream and shredded cheese.

    Want a week of dinners planned for you? Get my free dinners

    Why we love this ground beef chili

    The combination of ground beef and Mexican chorizo gives the chili a rich, savoury taste, while the spices add just enough warmth without making it overwhelming. This is not a thin, watery chili — it is a substantial, beefy meal that feels especially satisfying when the weather gets chilly.

    One of my favourite things about this recipe is how many vegetables go into the pot. Finely diced onion, red pepper, carrots and celery soften into the sauce, so they become part of every spoonful. As a parent, I appreciate finding ways to make vegetables a natural part of our family dinners without turning every meal into a negotiation.

    I also love that everyone can customize their bowl with sour cream, cheddar, or their favourite way of serving it. That little bit of choice makes dinner more fun for the kids.

    Ingredients you will need

    Everyday ingredients build a deeply savoury pot: ground beef for the base, Mexican chorizo for seasoning and richness, then vegetables, beans, tomatoes and spices.

    • Ground beef: 1 kg (about 2.2 lb).
    • Mexican chorizo: 250 g (about 9 oz), casings removed if needed.
    • Vegetables: 1 large onion, 1 red bell pepper, 2 carrots and 2 celery stalks, all diced (carrots and celery finely), plus 3 cloves garlic, minced.
    • Tomato paste, chopped tomatoes, maple syrup, kidney beans and beef broth to round out the pot.
    • Seasoning: chili powder, cumin, smoked paprika, bay leaves, oregano, black pepper and salt to taste.
    • For serving: sour cream, shredded cheddar, and optional buttered pasta or hot dogs and buns.

    A little note about the spice: we like enough seasoning for a lovely warmth without making it overwhelming for the kids. Chili powders and chorizo vary in heat, so start moderate and adjust.

    Recommended tools

    Equipment

    • Large heavy-bottomed pot or Dutch oven
    • Wooden spoon
    • Instant-read meat thermometer (for 160°F / 71°C on ground meat)
    • Measuring cups and spoons

    How to make stovetop ground beef chili

    Step 1: Brown the chorizo. Heat a large, heavy-bottomed pot over medium heat. Add the chorizo and cook until browned, breaking it into small pieces with a wooden spoon. The chorizo releases flavourful fat that helps build the base of the chili.

    Step 2: Cook the ground beef. Add the ground beef. Break it apart and cook until browned and no longer pink. Check with an instant-read thermometer that the meat reaches 160°F (71°C) — the USDA safe minimum for ground meats. If there is excessive fat, carefully spoon some out, leaving enough behind to flavour the vegetables.

    Step 3: Add the vegetables. If the pot looks dry after browning the meats, add up to 2 tablespoons olive oil. Stir in the diced onion, red bell pepper, carrots and celery. Cook about 5–8 minutes, stirring occasionally, until they begin to soften. Add the minced garlic and cook another minute. This is one of my favourite parts — the carrots add a subtle sweetness, while the onion, pepper and celery build layers of flavour.

    Step 4: Add the tomato paste and spices. Stir in the tomato paste, chili powder, cumin, smoked paprika, oregano and black pepper. Cook 1–2 minutes, stirring so the spices coat the meat and vegetables.

    Step 5: Add the tomatoes, beans and broth. Pour in the chopped tomatoes, maple syrup and beef broth, then add the drained kidney beans and bay leaves. Stir and bring to a gentle simmer.

    Step 6: Let the chili simmer. Reduce the heat to low and simmer uncovered for about 35–50 minutes, stirring occasionally, until thick. If it becomes thicker than you like, add a small splash of broth or water. Taste and adjust salt and spices. Remove the bay leaves before serving.

    Close-up of ground beef chili showing beans, diced carrots, red pepper and chorizo under sour cream and shredded cheese.

    Step 7: Serve with your favourite toppings. Ladle into bowls with a generous spoonful of sour cream and shredded cheddar. For a little extra comfort, spoon it over buttered pasta or onto a hot dog with plenty of cheese.

    Overhead view of a bowl of ground beef chili with sour cream and shredded cheese on a granite counter.

    Ways to serve this chili

    Although we usually think of chili as dinner, a big pot makes family meals more flexible. Some days we enjoy it just as it is, with sour cream melting into the warm sauce. Other times we spoon it over pasta tossed with butter. And then there is the hot dog version — chili spooned over a hot dog and finished with extra cheddar — which is especially handy when everyone wants something familiar.

    The chili also works well for meal prep. Make a big batch, refrigerate leftovers promptly, and reheat individual portions for quick lunches or dinners during the week.

    How to store homemade ground beef chili

    White bowl of ground beef chili topped with sour cream and shredded cheese on a striped kitchen towel.

    Divide the chili into shallow containers about 2 inches (5 cm) deep or less so it cools quickly — don’t leave a full pot sitting out on the stove. Refrigerate within 2 hours of cooking (1 hour if the room is above 90°F / 32°C). Enjoy refrigerated leftovers within 3–4 days, or freeze in meal-sized portions for 2–3 months for best quality. Thaw overnight in the fridge, or reheat from frozen until steaming hot.

    Reheat on the stovetop over medium-low heat, stirring occasionally, until it reaches 165°F (74°C). You can also reheat individual portions in the microwave: cover, stir halfway, let stand about 1 minute, and check that several spots reach 165°F (74°C). Add sour cream and cheddar after reheating rather than freezing them in the chili.

    Tips

    • 160°F for ground meat (beef and chorizo). Don’t rely on colour alone — use an instant-read thermometer on the crumbled meat (USDA safe minimum for ground meats). Brown the meats through before adding tomatoes and broth so you can probe the crumbles, not the liquid.
    • Uncovered simmer is what thickens this chili; keep an eye on the bottom of the pot so it does not stick.
    • Spice level: start moderate; chili powder and chorizo heat levels vary.
    • Prefer Instant Pot? See my Instant Pot easy chili recipe for a pressure-cooker version.

    Other recipes you may like

    It is easy to make, full of flavour, and the kind of family dinner you will find yourself returning to again and again.

    Need more weeknight ideas? Grab my free dinners

    Overhead view of ground beef chili with chorizo and beans topped with sour cream, shredded cheese and cilantro.

    Ground Beef Chili with Chorizo

    Thick stovetop chili with ground beef, Mexican chorizo, kidney beans and finely diced vegetables. Brown the meat to 160°F, simmer uncovered until thick, then finish with sour cream and cheddar.
    Prep Time 20 minutes
    Cook Time 1 hour 10 minutes
    Total Time 1 hour 30 minutes
    Servings: 8 servings
    Course: Main Course
    Cuisine: Mexican

    Ingredients
      

    For the chili
    • 1 kg ground beef about 2.2 lb
    • 250 g Mexican chorizo sausage casings removed if needed; about 9 oz
    • 1 large onion diced
    • 3 cloves garlic minced
    • 1 red bell pepper diced
    • 2 carrots finely diced
    • 2 stalks celery finely diced
    • 2 tbsp tomato paste
    • 1 can chopped tomatoes (about 14.5 oz / 400 g), undrained
    • 1 tbsp maple syrup
    • 2 cans (about 400 g each) kidney beans drained and rinsed
    • 1 cup beef broth plus more if needed
    • 2 tbsp olive oil if needed
    For the seasoning
    • 2 tbsp chili powder adjusted to taste
    • 3 tsp ground cumin
    • 2 tsp smoked paprika
    • 3 bay leaves
    • 1 tsp dried oregano
    • ½ tsp ground black pepper
    • salt to taste
    For serving
    • sour cream
    • shredded cheddar cheese
    • buttered cooked pasta optional
    • hot dogs and buns optional

    Equipment

    • Large heavy-bottomed pot or Dutch oven
    • Wooden spoon
    • Instant-read meat thermometer for 160°F / 71°C on ground meat
    • Measuring cups and spoons

    Method
     

    1. Heat a large, heavy-bottomed pot over medium heat. Add the chorizo and cook until browned, breaking it into small pieces with a wooden spoon. The chorizo releases flavourful fat that builds the base of the chili.
    2. Add the ground beef. Break it apart and cook until browned and no longer pink. Check with an instant-read thermometer that the meat reaches 160°F (71°C) (USDA safe minimum for ground meats). If there is excessive fat, spoon some out, leaving enough to flavour the vegetables.
    3. If the pot looks dry after browning the meats, add up to 2 tablespoons olive oil. Stir in the diced onion, red bell pepper, carrots and celery. Cook 5–8 minutes, stirring occasionally, until the vegetables begin to soften. Add the minced garlic and cook 1 minute more.
    4. Stir in the tomato paste, chili powder, cumin, smoked paprika, oregano and black pepper. Cook 1–2 minutes, stirring so the spices coat the meat and vegetables.
    5. Pour in the chopped tomatoes, maple syrup and beef broth, then add the drained kidney beans and bay leaves. Stir and bring to a gentle simmer.
    6. Reduce heat to low and simmer uncovered 35–50 minutes, stirring occasionally, until thick. Add a splash of broth or water if it gets thicker than you like. Taste and adjust salt and spices. Remove bay leaves before serving.
      Close-up of ground beef chili showing beans, diced carrots, red pepper and chorizo under sour cream and shredded cheese.
    7. Ladle into bowls and finish with sour cream and shredded cheddar. Or spoon over buttered pasta, or pile onto hot dogs with extra cheese.
      Overhead view of a bowl of ground beef chili with sour cream and shredded cheese on a granite counter.

    Notes

    Chili powders and chorizo vary in heat — start moderate and adjust. This recipe uses a mild US/Canadian chili powder blend (typically ground mild chile peppers with cumin, garlic and oregano) — not pure cayenne. UK/AU readers: if your “chilli powder” is a hot pure ground chilli, do not use a full 2 tablespoons one-for-one — start with far less, taste, and build (untested substitution; adjust carefully). Mexican chorizo here typically means fresh/raw (uncured) pork chorizo that crumbles when browned — not cured Spanish-style slicing chorizo; remove casings if needed. Confirm brand/heat with your package. Refrigerate leftovers within 2 hours of cooking (1 hour if the room is above 90°F / 32°C); use within 3–4 days, or freeze 2–3 months for best quality. Reheat to 165°F (74°C). In the microwave, cover, stir halfway, let stand about 1 minute, then check several spots reach 165°F (74°C).
  • Easy Mexican Green Rice

    Easy Mexican Green Rice

    Mexican green rice (arroz verde) is long-grain rice cooked in a blended sauce of cilantro, jalapeño, garlic, onion, lime and broth until fluffy and fragrant. Blend the sauce, simmer covered for 20 minutes, then rest 10 minutes before fluffing. Ready in about 40 minutes.

    Jump to Recipe

    This post may contain affiliate links. As an Amazon Associate I earn from qualifying purchases.

    You have heard of Mexican red rice, but have you ever heard of Mexican green rice? Probably not! This is a recipe I put together after gathering inspiration from the ingredients and flavours I came across at a local mercado. I took the same idea behind traditional Mexican red rice, but instead of tomatoes I went with fresh herbs, garlic, lime and a little jalapeño.

    The cilantro turns the rice that bright green colour, the lime keeps it fresh, and the jalapeño brings just enough warmth to keep every bite interesting.

    In our family we love this Mexican green rice alongside just about anything: meat, chicken, seafood, even a vegetarian plate. One of our absolute favourite combinations is serving it with Mexican fire-roasted chicken. Honestly, though, there are so many other delicious ways to eat it.

    The best part? It is super easy. You blend the green sauce, cook the rice in it, and let everything steam until fluffy. A simple side that makes an ordinary dinner feel a little more special!

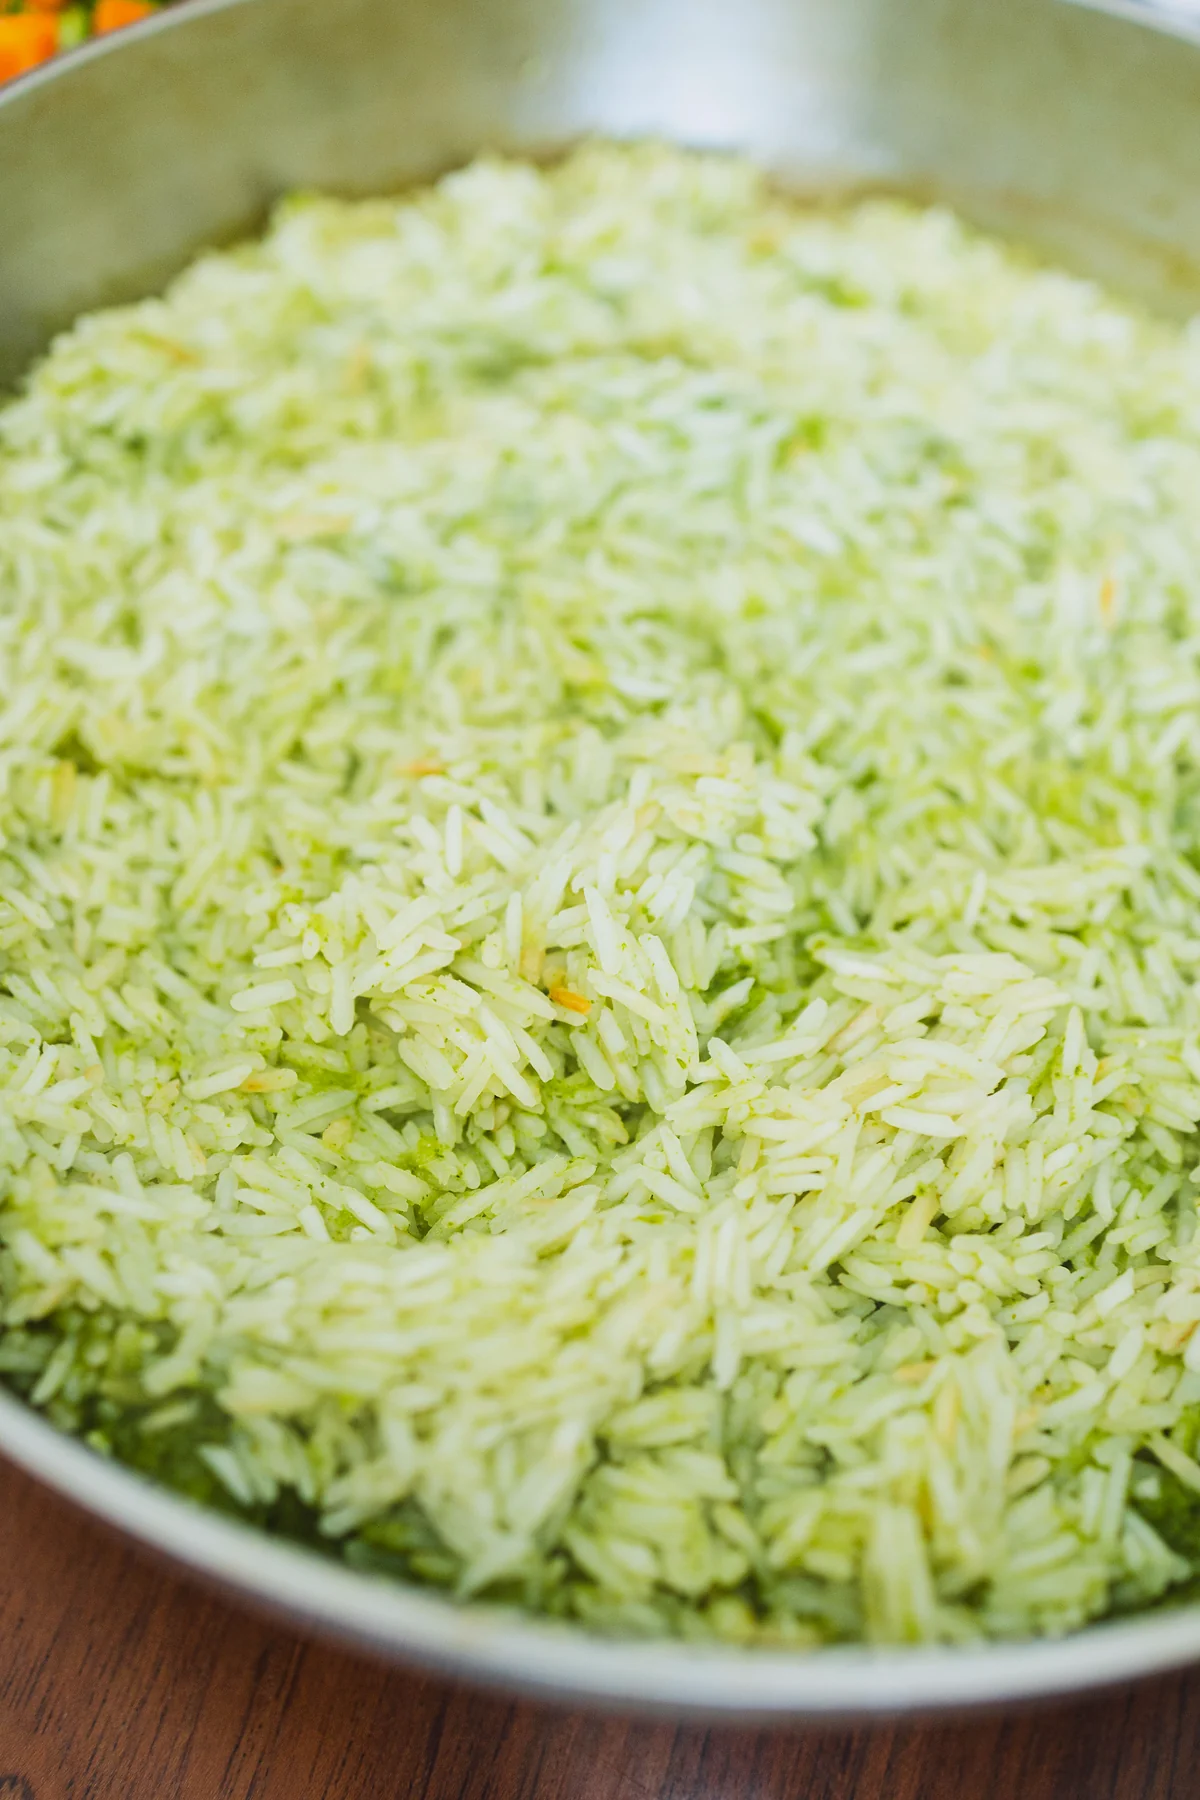
    Fluffy Mexican green rice (arroz verde) filling a stainless steel skillet on a wooden table.

    Want a week of dinners planned for you? Get my free dinners

    Why we love this Mexican green rice

    There is something fun about taking a familiar dish and giving it a completely new twist. We all know Mexican red rice. This green version brings something different to the table.

    Instead of tomatoes for colour and flavour, this recipe uses fresh cilantro, jalapeño, garlic, onion and lime. Everything gets blended into a green sauce that the rice soaks up as it cooks. You get herby rice with a little citrus, and it tastes as good as it looks.

    I also love how simple the cooking is. Just like red rice, you cook the grains in a flavourful liquid instead of plain water. Here that liquid is our homemade green sauce, so all those fresh ingredients go straight into the rice.

    And can we talk about the colour? It looks so good next to golden roasted chicken, grilled meat or a pile of roasted vegetables!

    Sometimes we want a simple side next to our protein. Other times we build a whole meal around a few different flavours and textures. This rice works for both.

    Ingredients you’ll need

    You only need a handful of simple ingredients. Most of the flavour comes from blending fresh herbs and aromatics into the green sauce.

    • Garlic, onion and jalapeño: the base of the sauce. Seed the jalapeño for a milder pot, or leave the seeds in if you like a little extra heat!
    • Fresh cilantro: a whole bunch, with a few leaves saved for garnish. This is what turns the rice green.
    • Lime juice: juice of 1 small lime for that citrusy kick.
    • Low-sodium chicken broth: 2 cups. Water also works.
    • Ground cumin, salt and black pepper.
    • White basmati or jasmine rice: 1 cup. I like these because they stay fluffy with the green sauce. Stick to one type and follow the method so the grains do not go mushy.

    Want it spicier? Leave the jalapeño seeds in. Serving kids or anyone sensitive to spice? Take the seeds and membranes out for a milder flavour.

    Recommended tools

    How to make easy Mexican green rice

    Step 1: Blend the green sauce. Add the garlic, onion, jalapeño, cilantro, lime juice, chicken broth, cumin, salt and black pepper to a high-powered blender or food processor. Blend until completely smooth. It should look bright green and smell wonderfully fresh.

    This green sauce is the heart of the recipe, so blend it well before you move on.

    Step 2: Toast the rice, then add the green sauce. Do not rinse the rice. Place a medium pot over medium heat. Add the dry rice and toast, stirring, until the grains look lightly browned. Then pour in the green sauce, stir gently so the grains sit evenly in the liquid, and bring it to a simmer.

    White rice simmering in a bright green cilantro sauce in a stainless steel pan on the stove.

    Step 3: Cover and cook. Once it is simmering, reduce the heat to low and immediately cover with a tight-fitting lid. Cook for 20 minutes without lifting the lid. Keeping it covered lets the rice absorb the liquid and cook evenly.

    Close-up of Mexican green rice bubbling in green herb sauce on the stovetop.

    Step 4: Let the rice steam. After 20 minutes, take the pot off the heat, but keep the lid on. Do not open it just yet! Let it rest and steam for another 10 minutes. That resting time finishes the grains and gives you that fluffy texture.

    Step 5: Fluff and serve. Remove the lid and gently fluff the rice with a fork. Garnish with extra cilantro leaves or a few jalapeño slices if you like a little kick. Serve warm.

    Close-up of fluffy long-grain Mexican green rice showing herb flecks.

    And that’s it! TA-DA, you got yourself a pot of fluffy Mexican green rice.

    Tips and common mistakes

    • Do not rinse the rice. Use it dry straight from the bag or canister.
    • Toast until lightly browned. Dry-toast the rice in the pot over medium heat before you add the green sauce — that light colour on the grains is what you want.
    • Do not lift the lid during the 20 minutes. Steam is doing the work. Peeking lets it out.
    • Use a tight-fitting lid. If yours is loose, the liquid evaporates too fast and the rice stays underdone.
    • Rest the full 10 minutes. I know it is hard to wait. That rest is what keeps the grains fluffy instead of wet.
    • Stick to basmati or jasmine. Mixing rice types or swapping in a short-grain rice changes the liquid ratio and can turn mushy.
    • Taste the sauce before it hits the pot. Salt levels vary by broth brand. Adjust before you pour.

    How to store homemade Mexican green rice

    A skillet of Mexican green rice on a wooden table next to a garden salad and broccoli.

    One of the best things about making rice at home is having leftovers ready for another meal. Cooked rice does need careful storage.

    • Refrigerator: transfer leftovers into shallow containers and refrigerate within 2 hours (sooner is better for rice; aim for within 1 hour). Keep at 40°F (4°C) or below. As a cautious food-safety guideline for cooked rice, use it within 24 hours.
    • Freezer: divide into individual portions and freeze promptly in airtight containers. For best texture, use within 1 to 2 months.
    • Reheating: reheat until steaming hot throughout, ideally 165°F (74°C). Add a small splash of water or broth, and avoid reheating the same portion more than once.
    • A helpful tip: never leave cooked rice sitting at room temperature for several hours. Rice can contain spores of Bacillus cereus, which can survive cooking and produce toxins if the rice is stored improperly.

    FAQ

    What is Mexican green rice (arroz verde)?

    It is rice cooked in a blended green sauce, usually cilantro with onion, garlic and green chile, instead of the tomato base used for Mexican red rice. This version uses cilantro, jalapeño, garlic, onion, lime and broth.

    Does this green rice use spinach?

    This recipe’s colour comes from cilantro (and jalapeño), not spinach.

    Is Mexican green rice spicy?

    It depends on the jalapeño. Seeded, it stays mild with a little warmth. Leave the seeds in for more heat, or take them out when you are cooking for kids or anyone sensitive to spice.

    Can I use water instead of broth?

    Yes. Broth adds more flavour; water still works.

    How do I keep the rice fluffy, not mushy?

    Do not rinse the rice. Toast the dry grains until lightly browned, then add the green sauce. Use one type of long-grain rice (basmati or jasmine — both work), keep the lid on for the full 20 minutes, then rest 10 minutes before fluffing with a fork.

    How long do leftovers keep?

    Refrigerate promptly and, as a cautious guideline for cooked rice, use within 24 hours. Freeze portions for 1 to 2 months. Always reheat until steaming hot.

    More recipes you’ll love

    Of course, you do not need a special main dish. This rice is just as good next to grilled vegetables, sautéed mushrooms or whatever protein you already have going.

    That is what makes this Mexican green rice so special to us. Familiar ingredients, a straightforward method, and a pot of something colourful and full of flavour.

    So the next time you are planning dinner, skip the usual rice for a change and give this green version a try. You might just discover a new family favourite!

    Get my free dinners

    Mexican green rice in a skillet.

    Easy Mexican Green Rice

    White rice simmered in a blended cilantro, jalapeño, garlic, onion, lime and broth sauce, a fresh green take on Mexican rice (arroz verde).
    Prep Time 10 minutes
    Cook Time 20 minutes
    Rest 10 minutes
    Total Time 40 minutes
    Servings: 4 servings
    Course: Side Dish
    Cuisine: Mexican

    Ingredients
      

    • 3 cloves garlic
    • ½ white or yellow onion roughly chopped
    • 1 jalapeño seeded (leave seeds for more heat)
    • 1 bunch fresh cilantro reserve a few leaves for garnish
    • 1 small lime juiced
    • 2 cups low-sodium chicken broth or water
    • ½ tsp ground cumin
    • ½ tsp salt
    • freshly ground black pepper to taste
    • 1 cup white basmati or jasmine rice

    Equipment

    • High-speed blender or food processor any comparable blender works
    • Medium pot with a tight-fitting lid
    • Measuring cups and spoons
    • Fork for fluffing

    Method
     

    1. Add the garlic, onion, jalapeño, cilantro, lime juice, chicken broth, cumin, salt and black pepper to a high-powered blender or food processor. Blend until completely smooth and vibrant green.
    2. Do not rinse the rice. Place a medium pot over medium heat. Add the dry rice and toast, stirring, until the grains look lightly browned. Pour in the green sauce, stir gently, and bring to a simmer.
    3. Reduce heat to low, immediately cover with a tight-fitting lid, and cook for 20 minutes without lifting the lid.
    4. Remove from heat and keep covered. Let the rice rest and steam for 10 minutes.
    5. Fluff with a fork. Garnish with cilantro or jalapeño slices. Serve warm.
      Fluffy Mexican green rice (arroz verde) filling a stainless steel skillet on a wooden table.

    Notes

    For milder rice, remove jalapeño seeds and membranes. For more heat, leave them in. Water can replace broth. Store leftovers promptly in the fridge and reheat until steaming hot (see post storage section).
  • Mexican Fire Roast Chicken

    Mexican Fire Roast Chicken

    If you have ever walked past a pollo asado shop in Mexico and smelled that charcoal smoke, you already know why this chicken shows up on our table. It’s juicy, a little smoky, and the kind of dinner the whole family cleans up without a fight.

    Mexican fire roast chicken on a platter with limes and fresh herbs

    This is my homemade take on the charcoal-grilled chicken made famous by Mexican chains like Pollo Feliz. Love & Harvest is not affiliated with or endorsed by Pollo Feliz; Pollo Feliz® is a trademark of its owner.

    The chicken sits in an overnight marinade so the flavour has time to sink in. Charcoal is my favourite way to cook it. The oven works too when we don’t feel like lighting the grill.

    Let me show you how we make it!

    Want a week of dinners planned for you? Get my free dinners

    Mexican Charcoal Roast Chicken at Home

    Sure, you can roast it in the oven. If you have the chance, go for charcoal. It makes all the difference.

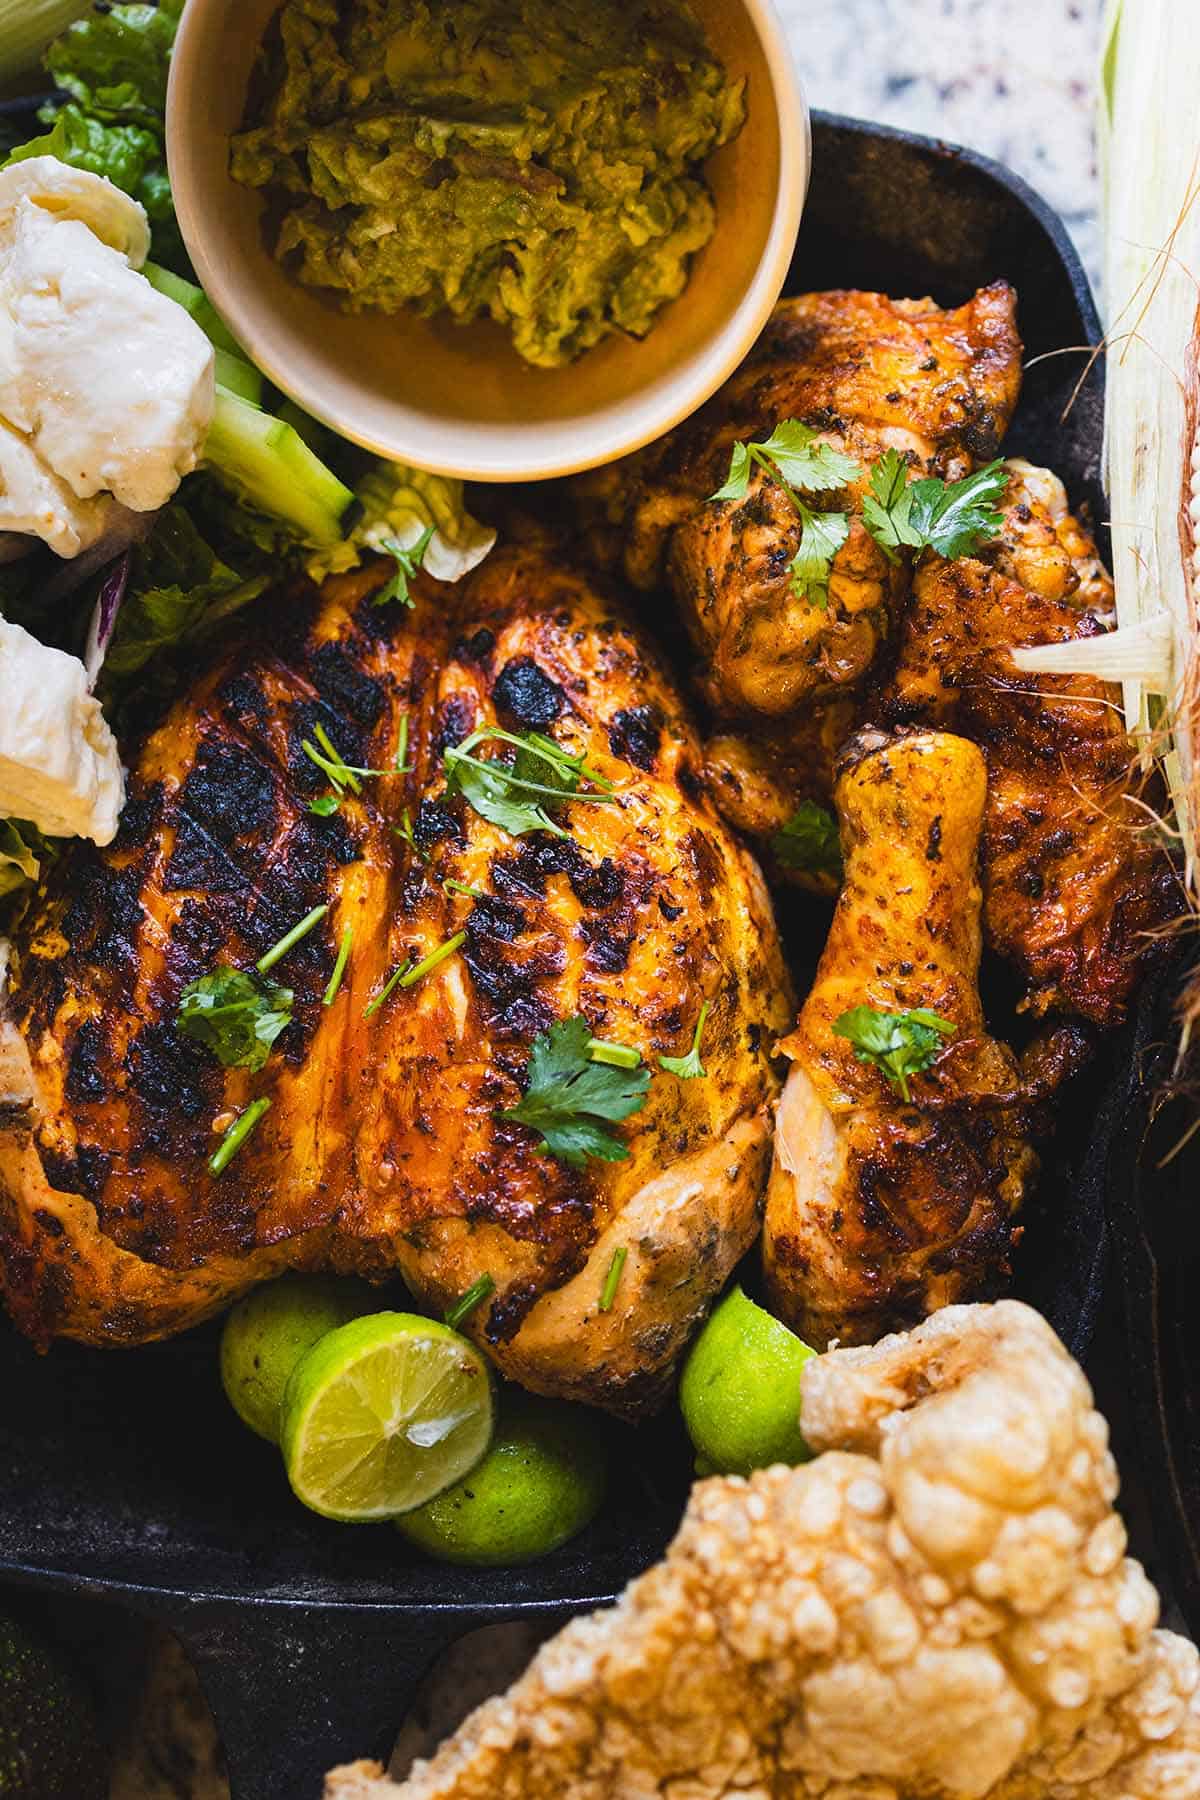
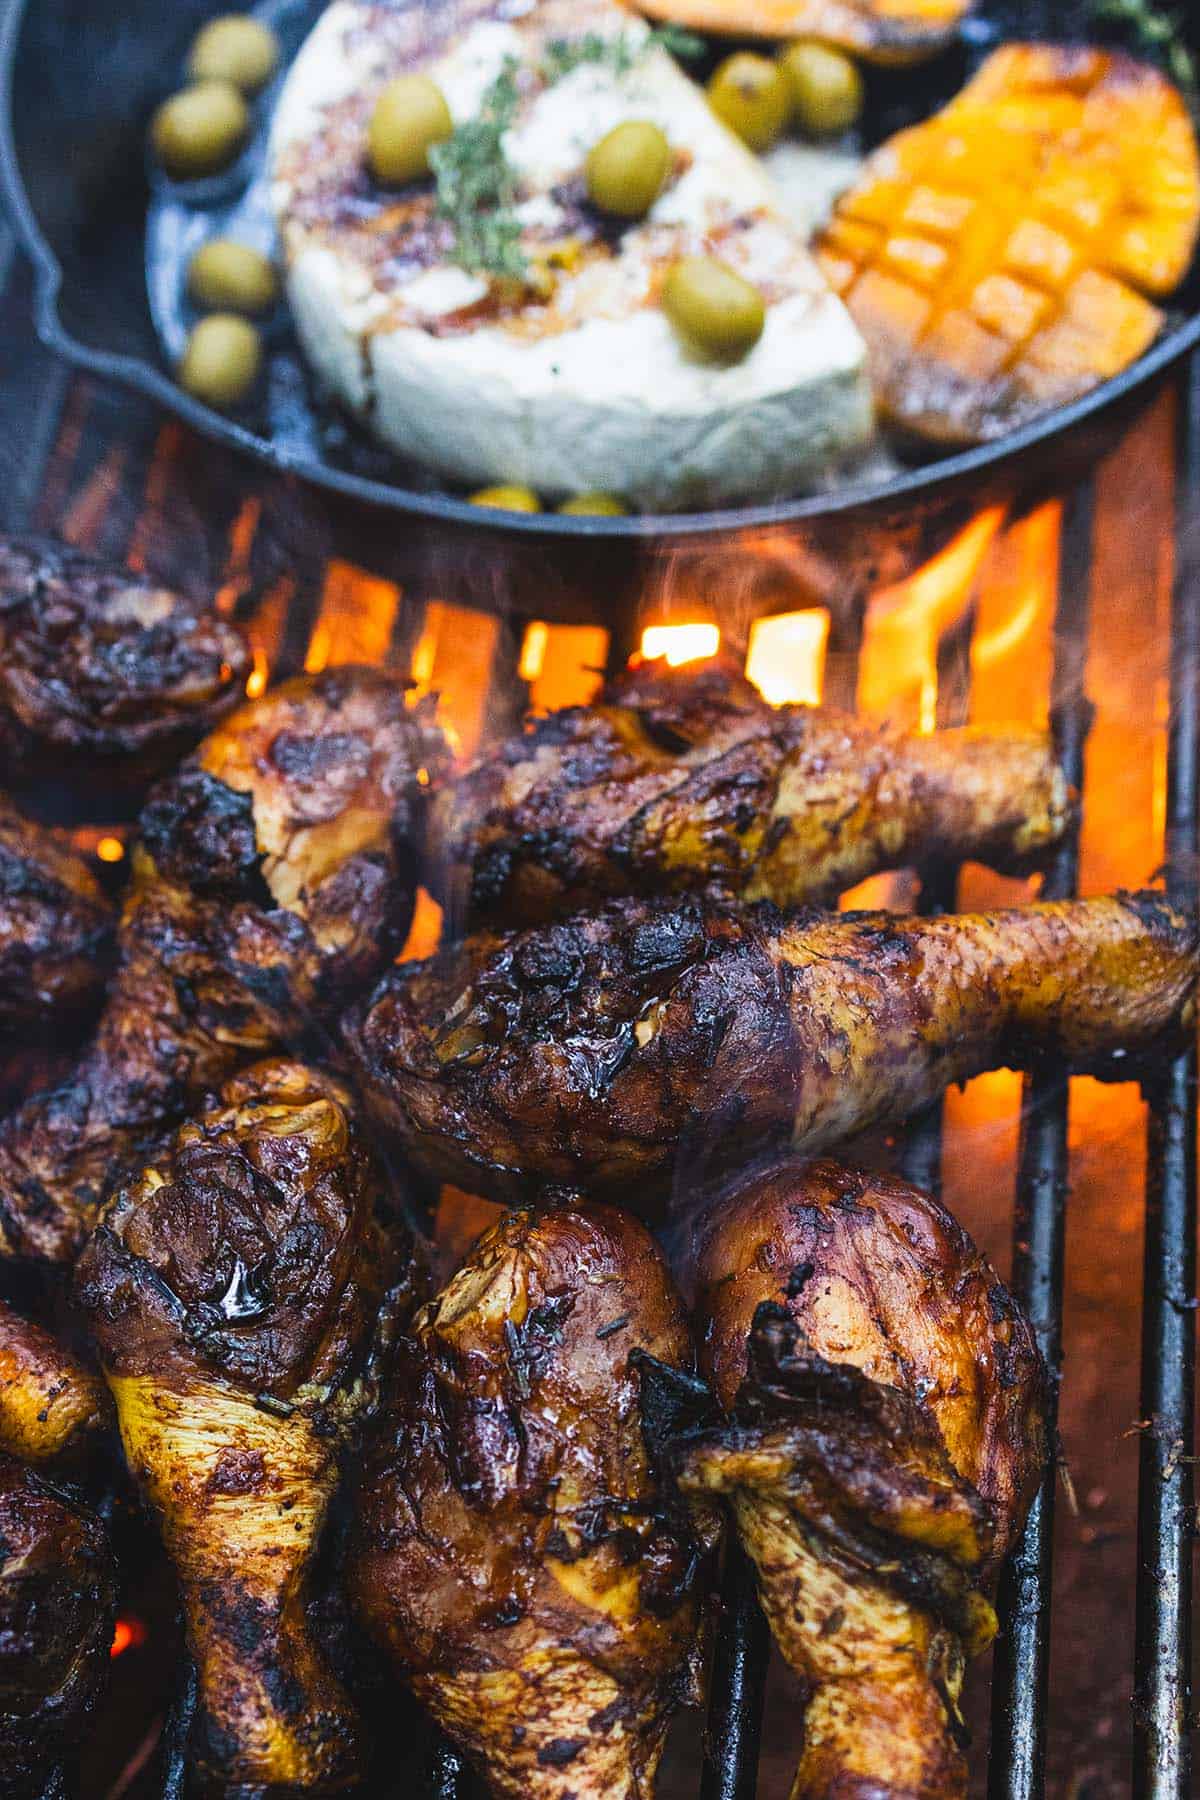
    Charcoal-grilled chicken halves and drumsticks in a cast iron pan

    Flavour

    This chicken is anything but ordinary. Achiote and annatto powder give it that reddish-golden colour, while garlic, oregano, and a touch of chili bring the bold bits. Milk and vinegar help tenderize the meat, so every bite comes out juicy.

    You get smoky, tangy, garlicky chicken with just a hint of spice. That is what we want.

    Why We Love This Recipe

    • That charcoal-shop vibe – the same style of pollo asado you find all over Mexico, made at home.
    • Juicy and tender – thanks to the milk and lemon in the marinade.
    • Flexible cooking – charcoal for smokiness, or oven roasting when it’s Tuesday and nobody wants to deal with coals.
    • Family favourite – rice, tortillas, or a simple salad all work next to it.

    Close-up of the charred, marinated skin of grilled chicken

    Charcoal for the Win

    Yes, you can roast it in the oven. Grilling over charcoal is the way to go if you want that street-food style flavour. Charcoal adds a layer of smokiness that no oven can copy.

    Tip: make sure the coals are hot but not flaming. Cook the chicken low and slow for the juiciest results.

    The links below are Amazon affiliate links. As an Amazon Associate I earn from qualifying purchases, at no extra cost to you.

    Recommended tools

    Any comparable thermometer and roasting pan work.

    Ingredients That Matter

    Achiote Powder (or Annatto / Paprika)

    Why I use it: Achiote is the heart of a lot of Mexican grilled chicken. It gives the chicken its reddish-golden colour and a slightly earthy, peppery flavour. Without it, you miss that classic pollo asado look.

    Mexican Oregano

    Why I use it: Different from Mediterranean oregano. Mexican oregano has citrusy, floral notes that brighten the marinade and balance the garlic and chili.

    Garlic (Fresh + Powder)

    Why I use it: Garlic is doing a lot of work here. Fresh garlic gives a sharp punch. The powder adds depth that clings to the chicken.

    Milk

    Why I use it: Milk works as a natural tenderizer. It softens the chicken so it stays juicy after roasting or grilling, and it mellows the sharper flavours in the marinade.

    Vinegar + Lemon Juice

    Why I use it: These acids help the marinade soak deeper, and they brighten the flavour so the chicken doesn’t taste flat. Toss the squeezed lemon half into the bowl for extra citrus aroma.

    Grilled chicken with limes, salsa and chicharrón on a serving platter

    Inspired by Mexican Charcoal Chicken Chains

    This is my homemade take on the pollo asado you buy by the whole bird at roast-chicken shops all over Mexico. Nothing beats grabbing one straight off the grill when you’re out, but this version gets us pretty close at home.

    The overnight marinade is the key. Give it at least 8 to 12 hours so the flavours fully penetrate the chicken. Then roast or grill until golden, and serve with warm tortillas, salsa, and maybe grilled onions and peppers.

    Mexican charcoal chicken spread with salad, corn, salsa and chicharrón

    Frequently Asked Questions

    What is Mexican charcoal chicken (pollo asado)?

    Pollo asado is whole chicken seasoned and cooked over charcoal, the kind you buy by the bird at roast-chicken shops across Mexico. This recipe is my homemade version of that style: an overnight achiote marinade, then charcoal (or the oven) until the chicken is juicy and golden.

    Can I use chicken pieces instead of a whole chicken?

    Absolutely! Chicken thighs, drumsticks, or a spatchcocked (butterflied) chicken all work with this marinade. Bone-in, skin-on pieces are best for flavour. Reduce cook time a little. Bone-in pieces usually take 35 to 45 minutes on the grill.

    What is achiote powder and where can I find it?

    Achiote (also called annatto) is a red-orange spice made from the seeds of the annatto tree. It’s widely used in Mexican and Latin American cooking and gives this chicken its golden-red colour. You can find it in most Latin grocery stores, or substitute with a mix of paprika and a pinch of turmeric if needed.

    How long should I marinate the chicken?

    For best results, marinate overnight, at least 8 to 12 hours. If you’re short on time, a minimum of 2 hours still works, though the flavour won’t be as deep.

    Can I freeze this chicken?

    Yes. You can freeze the marinated (uncooked) chicken in the marinade for up to 3 months. You can also freeze leftover cooked chicken for up to 2 months. Reheat in the oven at 350°F until warmed through to keep it juicy.

    What should I serve with Mexican fire roast chicken?

    Serve it the charcoal-shop way: warm corn tortillas, smoky tomato salsa, grilled green onions, and Mexican rice on the side. Avocado or guacamole, refried beans, or a fresh cabbage slaw also pair well.

    Charcoal-grilled chicken halves and drumsticks in a cast iron pan

    Mexican Fire Roast Chicken

    Whole chicken marinated overnight with achiote, Mexican oregano, garlic, chili flakes, vinegar and lemon, then cooked on a charcoal grill over indirect heat (or in the oven). Serves 6.
    Prep Time 10 minutes
    Cook Time 1 hour
    Marinate 8 hours
    Total Time 9 hours 10 minutes
    Servings: 6 people
    Calories: 340

    Ingredients
      

    Chicken Marinate
    • 2 kg whole chicken
    • 1 tbsp ground achiote powder
    • 1 tbsp annatto powder / paprika powder
    • 1 tbsp Mexican oregano
    • 1½ tbsp minced garlic
    • 1 tbsp dried garlic powder
    • 1 tsp sugar
    • 1 tsp chili flake
    • 2 tbsp distilled white vinegar
    • ½ fresh lemon
    • 2 tbsp soy sauce
    • 1 cup milk
    • ½ tsp salt and pepper

    Equipment

    • charcoal grill

    Method
     

    Marinate Chicken Overnight
    1. In a large mixing bowl, combine achiote powder, annatto (or paprika), oregano, minced garlic, garlic powder, sugar, chili flakes, vinegar, soy sauce, milk, salt, pepper, and the juice of half a lemon.
    2. Toss the squeezed lemon half into the bowl as well to infuse extra citrus flavour. Mix everything until well combined.
    3. Place your cleaned whole chicken (or chicken pieces) into a large zip-top bag or deep dish.
      Pour the marinade over the chicken, making sure it is fully coated.
      Cover and refrigerate overnight (8–12 hours) for best results. This step ensures the flavours soak deep into the meat.
    To Grill the Chicken over Charcoal
    1. Remove the chicken from the fridge about 30 minutes before cooking so it comes closer to room temperature. Discard the lemon half from the marinade. And reserve half the marinade to baste the chicken with its juices while cooking to keep it moist and flavourful.
    2. Preheat your charcoal grill until hot and glowing.
      Place the chicken on the grill over indirect heat (not directly above the flames) and cover.
      Cook, turning occasionally, until the chicken is golden brown and reaches an internal temperature of 165°F (74°C) at the thickest part of the meat. Remember half way through cooking, baste the chicken with the juice and marinade.
      This usually takes 45–60 minutes, depending on the size of your chicken.
    To Oven Roast Chicken
    1. Preheat your oven to 375°F (190°C).
      Place the chicken on a roasting rack in a baking dish.
      Roast for about 60–75 minutes, or until the chicken reaches an internal temperature of 165°F (74°C). Remember half way through cooking, baste the chicken with the juice and marinade.
      For extra crispy skin, broil on high for the last 3–5 minutes.
    Rest the Chicken
    1. Let the chicken rest for 10 minutes before carving to allow the juices to redistribute.
      Serve with warm tortillas, salsa, or your favorite Mexican sides.

    Cooking this one this week? Get my free PDF with seven easy family dinners, so the rest of the week is planned too. Get the free dinners

  • Steam Preserved Vegetables (Zha Choy) and Pork

    Steam Preserved Vegetables (Zha Choy) and Pork

    One dish that never fails to comfort me is Steam Preserved Vegetables (Zha Choy) and Pork — it’s salty, savory, crunchy, and deeply satisfying. This traditional Cantonese recipe comes together in under 30 minutes with just a handful of humble ingredients, yet delivers bold, layered flavor that tastes like it took all day.

    This post may contain affiliate links. If you purchase through these links, I may earn a small commission at no extra cost to you. Thank you for supporting Love & Harvest!

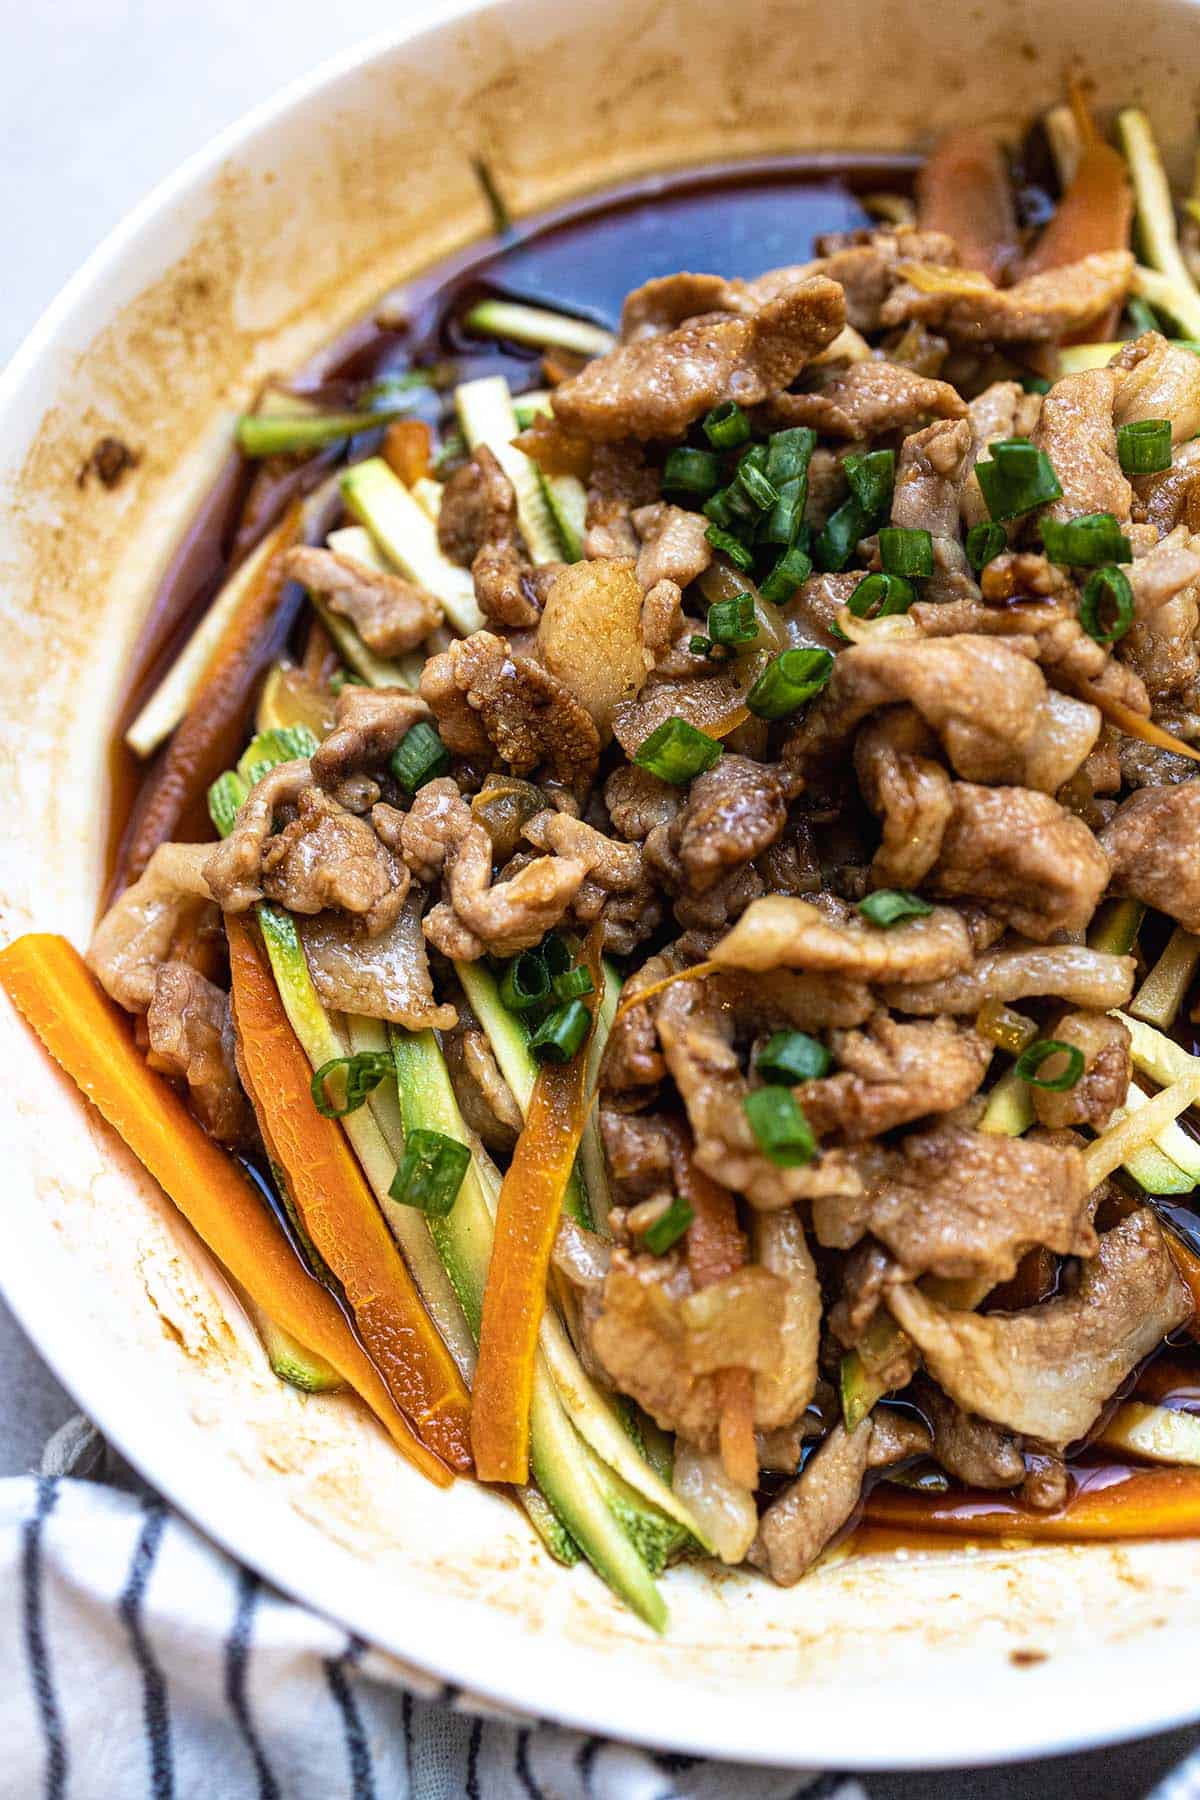
    Steam preserved vegetables zha choy and pork served over rice

    Steam Preserved Vegetables Zha Choy (替菜) and pork is a quintessential Cantonese comfort dish — made with just a few simple ingredients: zha choy, pork, soy sauce, and sesame oil. Steamed to perfection, it’s flavorful and comes together in very little time, making it perfect for busy weeknights and family dinners alike.

    Steam Preserved Vegetables (Zha Choy) and Pork

    When the crispness of fall creeps into the air, I always find myself craving the flavors of home. This is a very traditional Cantonese dish that my mom always made for us — salty, savory, crunchy, and deeply satisfying. Best of all, it’s one of those meals that feels like a hug in a bowl, especially when paired with white rice, some steamed vegetables, and a warm soup on the side.

    What is Zha Choy?

    Zha Choy (替菜) is a type of preserved mustard stem that has a unique salty, crunchy bite. It’s popular in Cantonese kitchens and beyond, often used to add depth of flavor to simple dishes. You can steam it, pan-fry it, or even stuff it — it’s incredibly versatile. For me, steaming it with pork is the most comforting and nostalgic way to enjoy it.

    Zha choy preserved mustard stem up close

    Flavour

    The flavour profile is what makes this dish shine. The pork turns tender and juicy as it steams, while the Zha Choy infuses everything with its salty, savoury notes. The preserved vegetable has just the right amount of crunch, creating a contrast that makes every bite exciting. It’s a dish that balances simplicity with bold, comforting flavours.

    A Cantonese Family Favourite

    This recipe is more than food — it’s family tradition. My mom always made it when autumn rolled in, the days got shorter, and the skies a little grayer. While some families might simmer a stew or roast meat, ours always turned to Zha Choy and pork. It’s a meal that doesn’t need to impress — it just feels like home.

    Steamed pork and zha choy in a heatproof dish

    The Ideal Autumn Meal

    There’s something about cold, rainy days that makes this dish the perfect choice. It’s hearty without being heavy, simple without being bland, and quick to prepare when you don’t want to overthink dinner. A hot bowl of rice, a bite of pork with zha choy, a sip of soup — that’s comfort.

    Key Ingredients

    Ingredients

    Zha Choy (Preserved Mustard Stem)

    • The soul of this dish. Zha Choy is preserved in salt and chili, giving it a distinctive salty, slightly spicy crunch that flavors everything it touches. Always rinse it well before using to reduce excess saltiness — a 1-minute cold water rinse is all it takes. You can find Zha Choy preserved mustard stem at most Asian grocery stores or online.

    Pork Loin

    • Cut into thin matchstick-style strips so it marinates quickly and steams evenly. Pork belly works if you prefer richer, fattier meat. The key is marinating in soy sauce, cornstarch, and sesame oil before steaming — this ensures the pork stays tender and juicy, not dry. Use a bamboo steamer for the most authentic result and even heat distribution.

    Sesame Oil

    • A small drizzle goes a long way. Sesame oil adds a rich, nutty aroma that is quintessentially Chinese home cooking. Use toasted sesame oil (not raw) for the best flavour — add it to the marinade and optionally a few drops on top just before serving.

    Soy Sauce & Dark Soy Sauce

    • Light soy sauce seasons the pork and provides umami depth. A touch of dark soy sauce (optional) deepens the color and adds a slight caramel note. Together they balance the saltiness of the zha choy without overpowering the dish.

    Fresh Ginger

    • Grated ginger is mixed into the marinade to brighten the flavour and cut through the richness of the pork. It adds a classic Cantonese aromatic note. Don’t skip it — even a small amount makes a noticeable difference.

    Why We Love This Recipe

    It’s everything a family meal should be: simple and ridiculously delicious. The combination of tender pork and crunchy preserved vegetables is addictive, and it comes together with minimal fuss. My favourite part? How everyone in the family reaches for a little more rice just to soak up all the flavours.

    If you love Asian comfort food, try our Sticky Honey Garlic Spareribs for another Chinese family classic, or our Lemongrass Chicken Drumsticks for a fragrant Southeast Asian option. For a hearty bowl meal, our Instant Pot Taiwanese Beef Noodle Soup is deeply satisfying.

    Frequently Asked Questions

    Where can I buy Zha Choy?

    Zha Choy (preserved mustard stem) is available at most Chinese or Asian grocery stores, usually in the canned goods or pickled vegetable section. It’s also readily available online. Look for whole stems or pre-sliced versions — both work well. Always rinse it under cold water before using to remove excess salt.

    Can I use a different cut of pork?

    Absolutely. While pork loin cut into thin strips is the most common choice, you can use pork belly for a richer, fattier result, or ground pork for an even quicker preparation. The key is to cut or press the meat thin enough to cook through fully in 10–12 minutes of steaming.

    Do I need a bamboo steamer for this recipe?

    No, but a bamboo steamer does give the most even, gentle heat. You can also use a metal steamer insert, a heatproof plate set over a wok or pot with a lid, or even a rice cooker with a steaming tray. The method matters less than making sure the lid creates a seal and the steam is consistent.

    Can I make this ahead of time?

    You can marinate the pork up to 24 hours in advance and store it covered in the refrigerator. The zha choy can also be rinsed and sliced ahead of time. When ready to eat, simply combine and steam fresh — the whole cooking process is only about 12 minutes, so it’s fastest to assemble and steam right before serving.

    What should I serve this with?

    Steamed jasmine rice is the classic pairing — the savory, salty juices from the pork and zha choy soak beautifully into the rice. Add a simple vegetable like stir-fried bok choy or a light clear broth soup on the side for a complete Cantonese meal. A drizzle of chili oil on top is excellent too if you like heat.

    Steam Preserved Vegetables Zha Choy Pork

    One dish that never fails to comfort me is Steam Preserved Vegetables (Zha Choy) and Pork — a very traditional Cantonese dish that my mom always made for us. It’s salty, savory, crunchy, and deeply satisfying.
    Prep Time 8 minutes
    Cook Time 20 minutes
    Total Time 28 minutes
    Servings: 4 people
    Course: Main Course
    Cuisine: Cantonese
    Calories: 195

    Ingredients
      

    • 300 g pork loin cut into thin strips (like matchsticks)
    • 50 g preserved mustard stem (zha choy / 榨菜) finely chopped
    • 1 tbsp light soy sauce
    • ½ tsp dark soy sauce (optional, for color)
    • 1 tsp sesame oil
    • ½ tsp sugar
    • 1 tsp cornstarch
    • 2 tbsp water
    • 1 tsp grated fresh ginger
    • ½ tsp white pepper

    Equipment

    • large steamer

    Method
     

    1. Rinse under cold water to reduce excess saltiness. Pat dry and finely chop.
    2. In a bowl, combine pork loin strips with light soy sauce, dark soy sauce, sesame oil, sugar, cornstarch, water, ginger, and white pepper. Mix well and let marinate for 15–20 minutes.
    3. Add chopped zha choy to the pork and mix evenly.
    4. Place the mixture into a shallow, heatproof dish. Spread it evenly so it cooks through.
      Steam over high heat for 10–12 minutes, until pork is tender and fully cooked.
    5. Garnish with chopped scallions if desired. Serve hot with steamed jasmine rice or brown rice.

    Notes

    Tips for the lean cut:
    • Slicing the pork into thin strips helps keep it tender when steamed.
    • If you want even more softness, add ½ tsp neutral oil (like canola) to the marinade.
    • This lighter version is just as savory and satisfying but much lower in fat than the classic ground pork style.

  • Homemade Pesto Gnocchi

    Homemade Pesto Gnocchi

    Making gnocchi and pesto from scratch isn’t just cooking — it’s a meal the whole family gathers around. This homemade pesto gnocchi comes together in about 30 minutes, uses simple pantry ingredients, and delivers restaurant-quality flavor at a fraction of the cost. Pillowy potato gnocchi tossed in a vibrant walnut-basil pesto: pure comfort food that feels special every single time.

    This post may contain affiliate links. If you purchase through these links, I may earn a small commission at no extra cost to you. Thank you for supporting Love & Harvest!

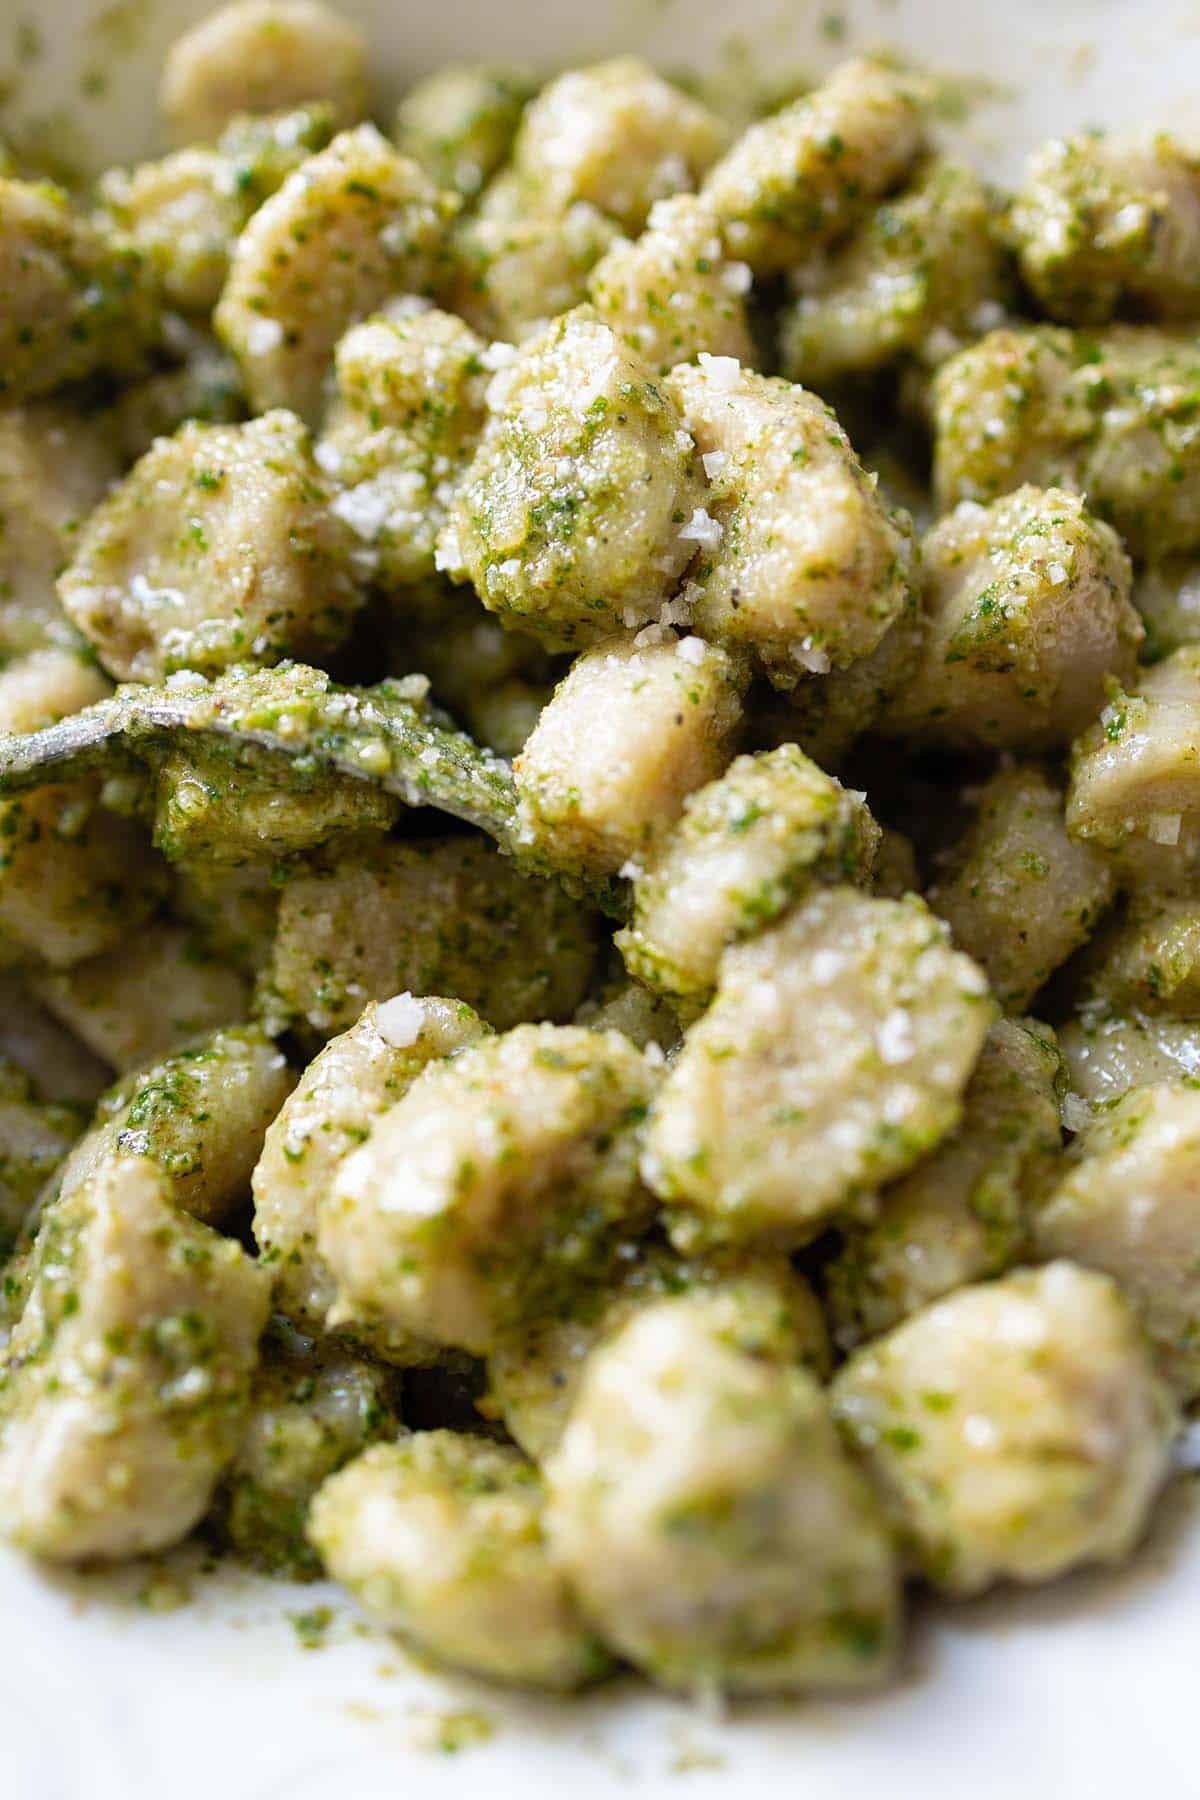
    Homemade gnocchi tossed in green pesto on a white plate

    Easy Pesto Gnocchi Recipe

    What might sound like a labor-intensive dinner is, in fact, a 30-minute miracle. Gnocchi dough is made with just a few simple ingredients — cooked potatoes, flour, egg — and requires nothing more than your hands to shape into perfect pillowy bites. The pesto is a quick blend of fresh herbs, nuts, and olive oil, ready in minutes.

    Even better? You can make both the gnocchi and the pesto ahead of time. Pack them up and take them on a picnic, or bring them to a family gathering — you’ll wow your guests with the taste and simplicity.

    Delicious and Simple

    Homemade gnocchi gives you total control over the ingredients. And the pesto? Loaded with fresh basil, parsley, walnuts and olive oil. No heavy creams or hidden fillers — just fresh, bright flavor.

    For families who love comfort food but want it homemade, this dish is gold. You can swap in spinach or kale for part of the basil, or use walnuts or sunflower seeds instead of pine nuts — making it allergy-friendly and affordable. A speedy, rewarding, from-scratch recipe your family will love.

    Why We Love This Recipe

    There’s something magical about cooking from scratch — especially when it takes place on a floured countertop, with your hands in the dough, your kids watching, and a warm kitchen filled with fresh basil and garlic aromas. This homemade pesto gnocchi recipe isn’t just a meal — it’s a moment.

    It’s fast (yes, really), affordable, and so satisfying to make. You don’t need a pasta machine or fancy tools — just a fork, a counter, and the will to try. Once you make homemade gnocchi, you’ll wonder why you ever bought the store-bought version.

    Key Ingredients

    Ingredients

    Russet Potatoes

    • The base of the gnocchi — light, starchy, and perfect for creating that soft, pillowy texture. Boiled and mashed while warm, they hold the dough together with minimal flour. Always use russet (not waxy) potatoes for the lightest result. A food processor can help make the pesto smooth and effortless.

    Fresh Basil

    • The star of the pesto. Fragrant, peppery, and vibrant green — it gives the sauce its unmistakable Italian soul. Use loosely packed leaves and avoid any stems that are thick and bitter. Fresh basil cannot be substituted with dried for pesto.

    Walnuts

    • Traditional pesto uses pine nuts, but walnuts are an affordable and equally delicious substitute. They add creaminess and a hint of sweetness. Lightly toast them for a few minutes in a dry pan to deepen the flavour before blending.

    Egg Yolk

    • Just one egg yolk adds richness to the gnocchi dough and binds it gently without making it heavy. The key is not to over-knead the dough once the egg is added — overworking it activates the gluten in the flour and makes gnocchi tough.

    Extra Virgin Olive Oil

    • Silky and flavourful, olive oil brings the pesto together and is the key to its glossy, smooth texture. Choose a good-quality extra virgin olive oil for the best taste — it’s one of only a few ingredients, so quality shows. A KitchenAid immersion blender is also a great tool if you prefer to blend right in the jar.

    Parmesan Cheese

    • Adds a salty, nutty depth to the pesto. Use freshly grated parmesan rather than pre-packaged grated cheese — the texture and flavour are noticeably better. Leave it out for a dairy-free version; the pesto is still delicious.

    Family Favourite

    Whether you’re cooking with your kids or for them, this is a recipe that brings everyone together. Let the little ones help roll and shape the gnocchi (expect floury giggles). The pesto is kid-approved too — smooth, creamy, and a vibrant green that makes dinner feel special.

    Serve it warm, or pack it into a jar for a cold pasta salad-style lunch at the park. It keeps well, tastes even better the next day, and never fails to bring out the “Wow, you made this?!” from friends and family.

    Homemade pesto gnocchi tossed in walnut-basil pesto

    If you love pasta night, our Easy Camping Shrimp Pasta is another quick crowd-pleaser, or try our Fluffy Naan Bread to serve alongside this gnocchi as a complete Italian-inspired spread. For a protein-packed main to serve with the pesto, our Lemongrass Chicken Drumsticks pair beautifully.

    Frequently Asked Questions

    Can I make gnocchi ahead of time?

    Yes! You can make gnocchi dough up to a day ahead and store it covered in the refrigerator. Alternatively, shape the gnocchi, dust with flour, spread on a baking sheet, and freeze until solid — then transfer to a zip-lock bag. Cook from frozen, adding 1–2 minutes to the boiling time. The pesto keeps refrigerated for up to 5 days with a thin layer of olive oil on top.

    Why is my gnocchi dense or rubbery?

    The most common culprit is too much flour or over-kneading the dough. Add flour sparingly — just enough so the dough isn’t sticky. Mix gently and stop as soon as the dough comes together. The other common issue is using waxy potatoes like Yukon Gold; stick to starchy russet potatoes for the lightest result.

    Can I use store-bought pesto?

    Absolutely, and it will still be delicious. However, the homemade walnut-basil pesto takes only 5 minutes and tastes significantly fresher. If you’re short on time, jarred pesto works in a pinch — just add a squeeze of lemon juice and a little extra parmesan to brighten it up.

    How do I know when gnocchi is cooked?

    Gnocchi is done when it floats to the surface of the boiling water, which takes about 2–3 minutes. Once they float, give them another 30 seconds then scoop them out with a slotted spoon rather than draining — this prevents them from getting waterlogged and keeps them light.

    Can I pan-fry the gnocchi after boiling?

    Yes, and it’s highly recommended for extra texture! After boiling and draining, heat a knob of butter or a splash of olive oil in a pan over medium-high heat. Add the gnocchi in a single layer and let them crisp up for 2–3 minutes per side without moving them. Toss with pesto just before serving. The crispy edges with the creamy pesto is an upgrade worth trying.

    Homemade Pesto Gnocchi

    Homemade gnocchi gives you total control over the ingredients. And the pesto? Loaded with fresh basil, parsley, walnuts and olive oil. No heavy creams or hidden fillers—just fresh, bright flavor.
    Prep Time 20 minutes
    Cook Time 10 minutes
    Total Time 30 minutes
    Servings: 4 people
    Course: Main Course
    Cuisine: Italian
    Calories: 520

    Ingredients
      

    Gnocchi
    • 2 medium russet potatoes (about 500g)
    • 1 egg yolk
    • 1 cup all-purpose flour (plus more for dusting)
    • pinch sea salt
    Pesto
    • 1½ cup fresh basil leaves loosely packed
    • ½ cup parsley leaves loosely packed
    • ¼ cup chopped walnuts or other preferred nuts
    • 1 garlic clove
    • ½ tsp sugar
    • 1 tsp balsamic vinegar
    • ½ cup extra virgin olive oil
    • ½ freshly squeezed lemon juice
    • ¼ cup freshly grated parmesan cheese
    • sea salt
    • black pepper

    Method
     

    Gnocchi
    1. Boil the potatoes whole, with skins on, until fork-tender (about 20 minutes).
    2. Let cool slightly, then peel and mash while still warm.
    3. Add the egg yolk, salt, and flour. Gently knead on a floured surface until just combined—don’t overwork it.
    4. Divide dough into 4 pieces. Roll each into a rope about ½-inch thick. Cut into 1-inch pieces and press lightly with a fork for texture (optional).
    5. Bring a large pot of salted water to a boil. Drop in gnocchi; once they float (about 2–3 minutes), they’re ready.
    Pesto
    1. Blend all the ingredients together in a food processor (except olive oil). I usually use the pulse button to get a chunkier texture, but you can run it continuously for a smoother texture.
    2. Slowly drizzle in olive oil while blending until smooth. Season with salt and pepper.
    3. Toss and Serve: Drain the gnocchi and toss with the pesto while still warm. Garnish with more cheese or fresh herbs.

  • Ricotta Cheese Salmon Roll

    Ricotta Cheese Salmon Roll

    When we’re not craving our usual panko-crusted baked salmon, this Ricotta Cheese Salmon Roll takes the spotlight. It’s soft, juicy, and packed with fresh flavors—perfect for when you want something elegant but easy. Rolled with creamy ricotta, wilted spinach, and a splash of lemon juice, this dish feels like a quiet celebration on a plate.

    This post may contain affiliate links. If you purchase through these links, I may earn a small commission at no extra cost to you. Thank you for supporting Love & Harvest!

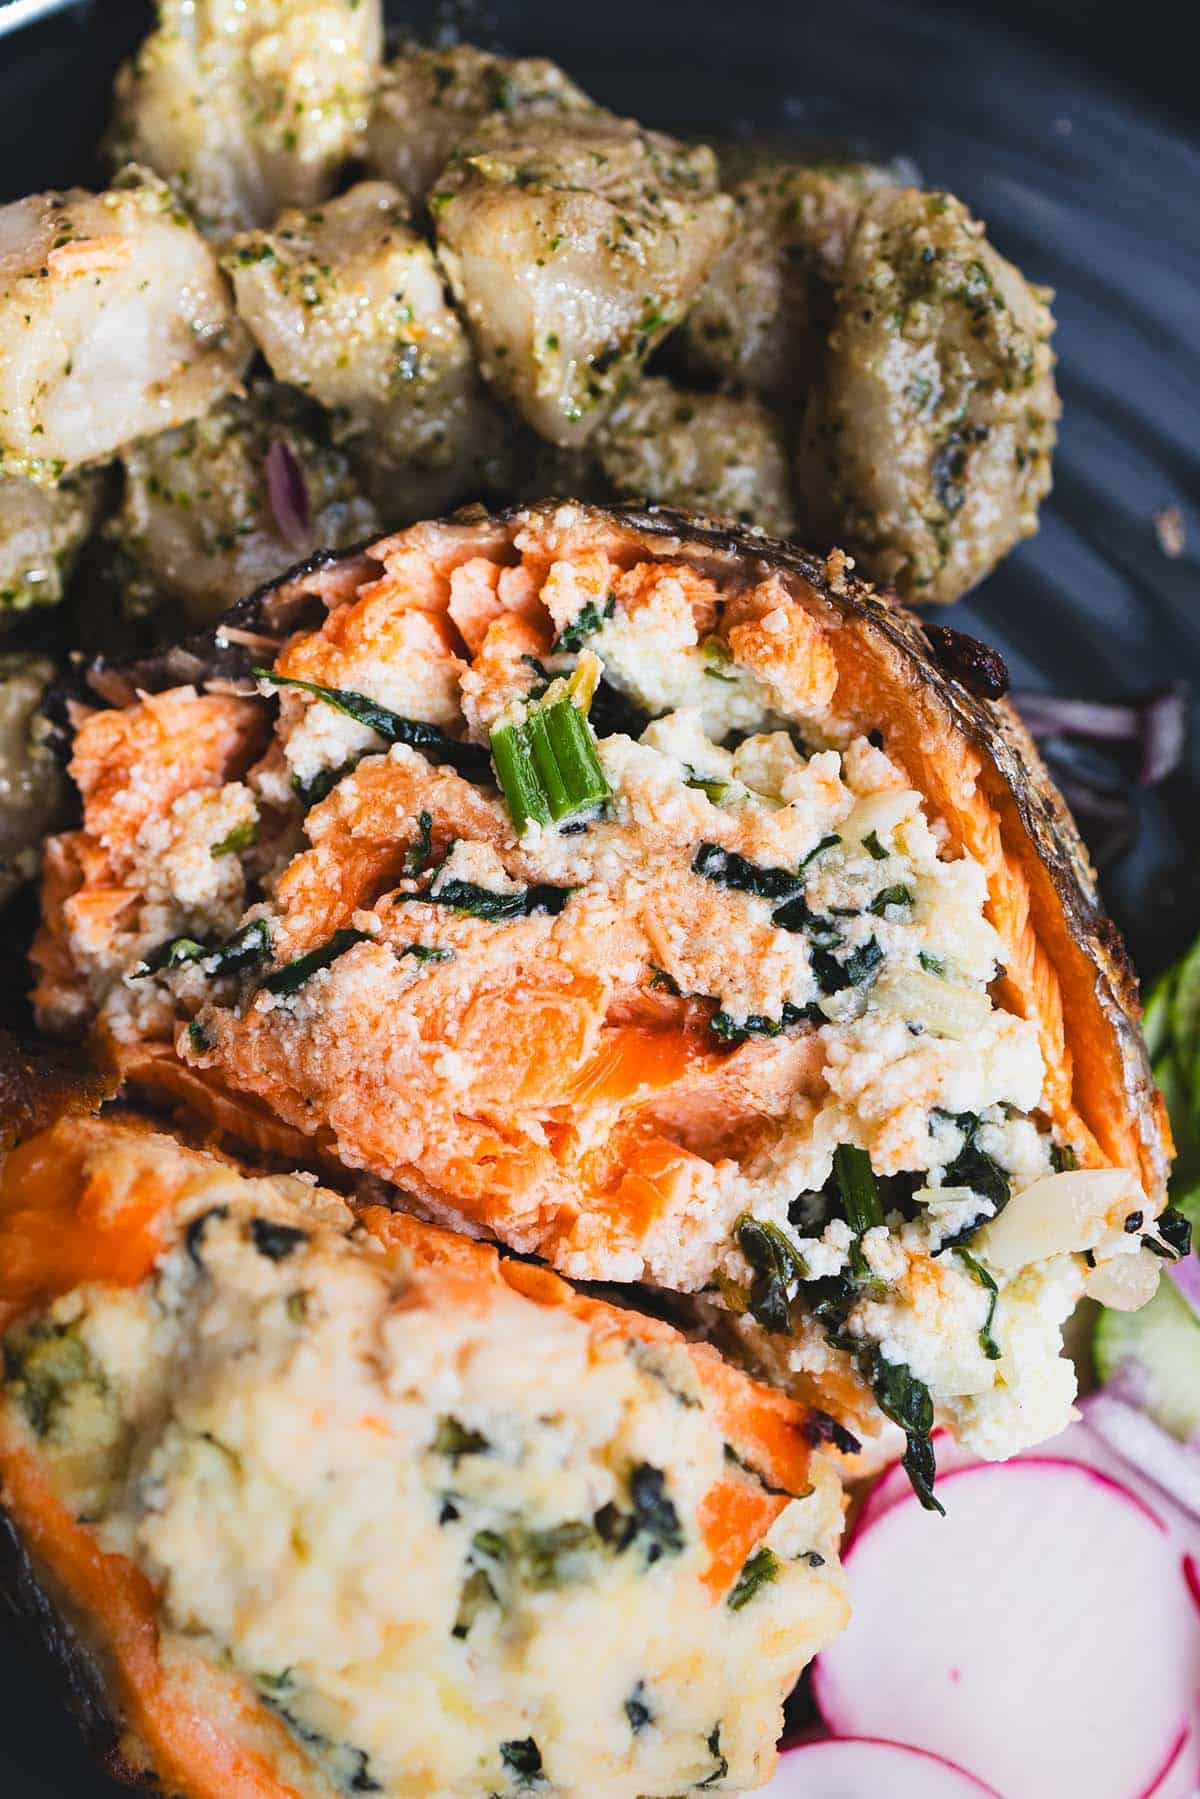
    Ricotta salmon roll cut open to show the spinach and cheese filling

    Flavour

    This salmon roll is tender and fragrant. As it bakes, the ricotta melts into the fish, keeping it moist and buttery, while the spinach and lemon cut through with a light, green brightness. The aroma? It’ll fill your kitchen with something that smells halfway between comfort food and a fine dining entrée.

    It’s that perfect balance—creamy, citrusy, savoury, and soft—all in one satisfying bite.

    Easy Salmon Meal

    What we love most: it’s not complicated.

    All you do is lay out a salmon fillet, spread a layer of seasoned ricotta, top with sautéed spinach, and finish with a little lemon juice. Roll it up, secure with toothpicks or twine, and bake. That’s it.

    You don’t need breadcrumbs, crusts, or a million steps—just clean ingredients and a hot oven.

    This is a go-to on busy nights or when we want to impress without working too hard. Even better: it feels light, so you don’t end dinner feeling weighed down.

    Baked salmon roll with crisp skin and a ricotta and spinach filling

    Favourite Summer Meal

    We especially love this recipe during the warmer months. It’s fresh, light, and doesn’t require standing over the stove for too long. Paired with a crisp white wine or sparkling water with lemon, this salmon roll becomes a breezy summer dinner that feels special without the extra effort.

    It’s one of those meals that works just as well for a quiet dinner on the patio as it does for hosting friends—and it always disappears fast.

    Slices of ricotta salmon roll served with a side on a black plate

    Main Ingredients

    Ingredients

    Salmon Fillet

    • Skin on and wide enough to roll — this is your canvas. Fresh, wild-caught salmon gives the best flavor and the most omega-3s. The fillet needs to be thin enough to roll without breaking; ask your fishmonger to butterfly it if needed.

    Ricotta Cheese

    • Preferably full-fat for creaminess — it’s what keeps the salmon moist as it bakes and creates that lush, creamy filling. Whole milk ricotta is the gold standard here; low-fat versions can make the filling watery.

    Fresh Spinach

    • Sautéed or wilted slightly before adding. Raw spinach contains too much water — wilting it first prevents the filling from becoming soggy. Season with a tiny pinch of nutmeg for an Italian-inspired touch.

    Lemon Juice

    • For brightness and balance. The acidity cuts through the richness of the ricotta and salmon, lifting the whole dish. Zest a little lemon into the ricotta filling for even more citrus impact.

    Fresh Herbs (Optional)

    • Dill or flat-leaf parsley work beautifully. Dill has a natural affinity with salmon and amplifies the Nordic-meets-Italian vibe of this dish. Add to the ricotta filling or scatter on top before serving. You’ll also want a silicone spatula for spreading the ricotta evenly across the fillet.

    Why We Love This Recipe

    • It’s juicy, flavorful, and wholesome

    • You only need a few fresh ingredients

    • It has no gluten-containing ingredients, and it’s versatile

    • It’s one of those meals that looks fancy but is actually simple

    • It gives our salmon rotation a nice little upgrade—especially when we’re not in the mood for crunchier crusts like panko. Speaking of which, if you’re in a crunchier mood, our crispy panko-crusted baked salmon or our delicate homemade sashimi are both worth exploring.

    Ricotta salmon roll sliced open on a dark plate with radishes

    Frequently Asked Questions

    What cut of salmon is best for rolling?

    A wide, thin salmon fillet works best — ideally at least 6 inches wide so it can be rolled without cracking. Ask your fishmonger for a side fillet and have them skin and butterfly it. Atlantic or sockeye salmon both work well, though sockeye has a more vibrant color and slightly firmer texture.

    Can I make this in the air fryer?

    Yes! We actually love making this in our air fryer oven. Cook at 375°F (190°C) for about 18–22 minutes, checking at 18 minutes. The outside gets a lovely light golden color while the inside stays juicy. Just make sure the roll is secured well with toothpicks before placing in the air fryer basket.

    How do I keep the salmon roll from falling apart?

    Two tips: first, pat the salmon very dry before adding the filling — moisture is the enemy of a tight roll. Second, secure the roll with wooden toothpicks or kitchen twine at 1-inch intervals before baking. Remove all toothpicks before serving.

    Can I prepare this recipe ahead of time?

    You can assemble the roll up to 4 hours ahead and refrigerate it covered. Just bring it to room temperature for 10 minutes before baking for even cooking. Don’t add the lemon juice until just before baking to avoid breaking down the fish texture.

    What sides pair well with ricotta salmon roll?

    We love it with roasted baby potatoes, a simple arugula salad with lemon vinaigrette, or steamed asparagus. For a lighter option, a cucumber and dill salad keeps everything fresh and bright. A glass of chilled white wine — Pinot Grigio or Sauvignon Blanc — is the perfect accompaniment.

    Fresh seafood stuffed salmon with herbs and vegetables, served with roasted baby potatoes and a side of radishes.

    Ricotta Cheese Salmon Roll

    This salmon roll is tender and fragrant. As it bakes, the ricotta melts into the fish, keeping it moist and buttery, while the spinach and lemon cut through with a light, green brightness. The aroma? It’ll fill your kitchen with something that smells halfway between comfort food and a fine dining entrée.
    It’s that perfect balance—creamy, citrusy, savoury, and soft—all in one satisfying bite.
    Prep Time 20 minutes
    Cook Time 35 minutes
    Total Time 55 minutes
    Course: Main Course
    Cuisine: Greek, Mediterranean
    Calories: 310

    Ingredients
      

    • 1 large skin on salmon fillet (about 1 to 1.5 lbs) – wide and even thickness skinless fillet is a good option too
    • 1 cup ricotta cheese (preferably full-fat)
    • 1 cup fresh spinach, wilted or lightly sautéed
    • 1 tbsp lemon juice
    • 1 garlic clove, finely minced (optional)
    • salt and pepper to taste

    Method
     

    1. Preheat oven to 375°F (190°C).
    2. Lay the salmon fillet flat on a cutting board. If it's thick, you can butterfly it slightly or pound it gently with a meat mallet to even out the thickness for easier rolling.
    3. In a small bowl, combine the ricotta, wilted spinach, lemon juice, optional zest, garlic, salt, and pepper.
    4. Spoon and gently spread the ricotta mixture evenly over the salmon, leaving about ½ inch around the edges.
    5. Starting from one of the shorter sides, carefully roll the salmon into a log. Use toothpicks or kitchen twine to hold it together. I used twine to hold everything together.
    6. Lightly brush the outside of the roll with olive oil. Sprinkle with a little more salt and pepper.
    7. Place the salmon roll seam-side down in a baking dish lined with parchment paper. Bake for 20–25 minutes, or until salmon is cooked through and flakes easily with a fork.
    8. Let it rest for 5 minutes before removing toothpicks or twine. Slice into 1-inch rounds and serve warm.

    Notes

    • Serve with roasted vegetables, a fresh salad, or garlic mashed potatoes. We like to eat it with a light salad and pesto gnocchi.
    • Drizzle with a little extra lemon juice or a light herb sauce if you want to dress it up.

  • Instant Pot Easy Chili Recipe

    Instant Pot Easy Chili Recipe

    There’s something timeless about a big pot of chili — rich, hearty, and packed with flavour. Thanks to the Instant Pot, making this classic dish has never been easier. No more juggling multiple pots and pans or waiting hours for everything to simmer down just right. One pot, 30 minutes of pressure cooking, and you’ve got a bowl of deeply spiced, stick-to-your-ribs chili that works at home and at the campsite.

    Looking for a thick stovetop version with Mexican chorizo? Try my ground beef chili with chorizo (simmered uncovered on the stove).

    This post may contain affiliate links. If you purchase through these links, I may earn a small commission at no extra cost to you. Thank you for supporting Love & Harvest!

    Pot of bean chili with a wooden spoon next to grilled meat on a large green leaf

    This post shows you how to make a quick and flavourful chili using an Instant Pot. It’s a favourite in our home — and so easy, we even bring our Instant Pot camping! The recipe includes ground beef, chorizo, beans, tomato paste, and more hearty ingredients for a rich, satisfying meal with minimal effort.

    This Easy Instant Pot Chili has become a must-have on all our camping trips. We bring the Instant Pot right along with us (yes, even when camping!), because nothing beats the comfort of a hearty bowl of chili after a long day outdoors. Whether we’re spooning it over grilled potatoes, tossing it with pasta, or squishing it between fresh bread, it’s always dense, hearty, and absolutely delicious.

    Why We Love This Easy Instant Pot Chili

    One word: simplicity. This recipe is straightforward, no-fuss, and makes cleanup a breeze — everything cooks in one pot! Plus, it’s versatile enough to enjoy in different ways: ladled over baked potatoes, stirred into pasta, or served sandwich-style for a rustic campfire meal. Better yet, it’s a recipe we keep coming back to because it’s reliable, hearty, and so satisfying that it keeps us full well into the night — essential when camping days are packed with hiking, swimming, and exploring.

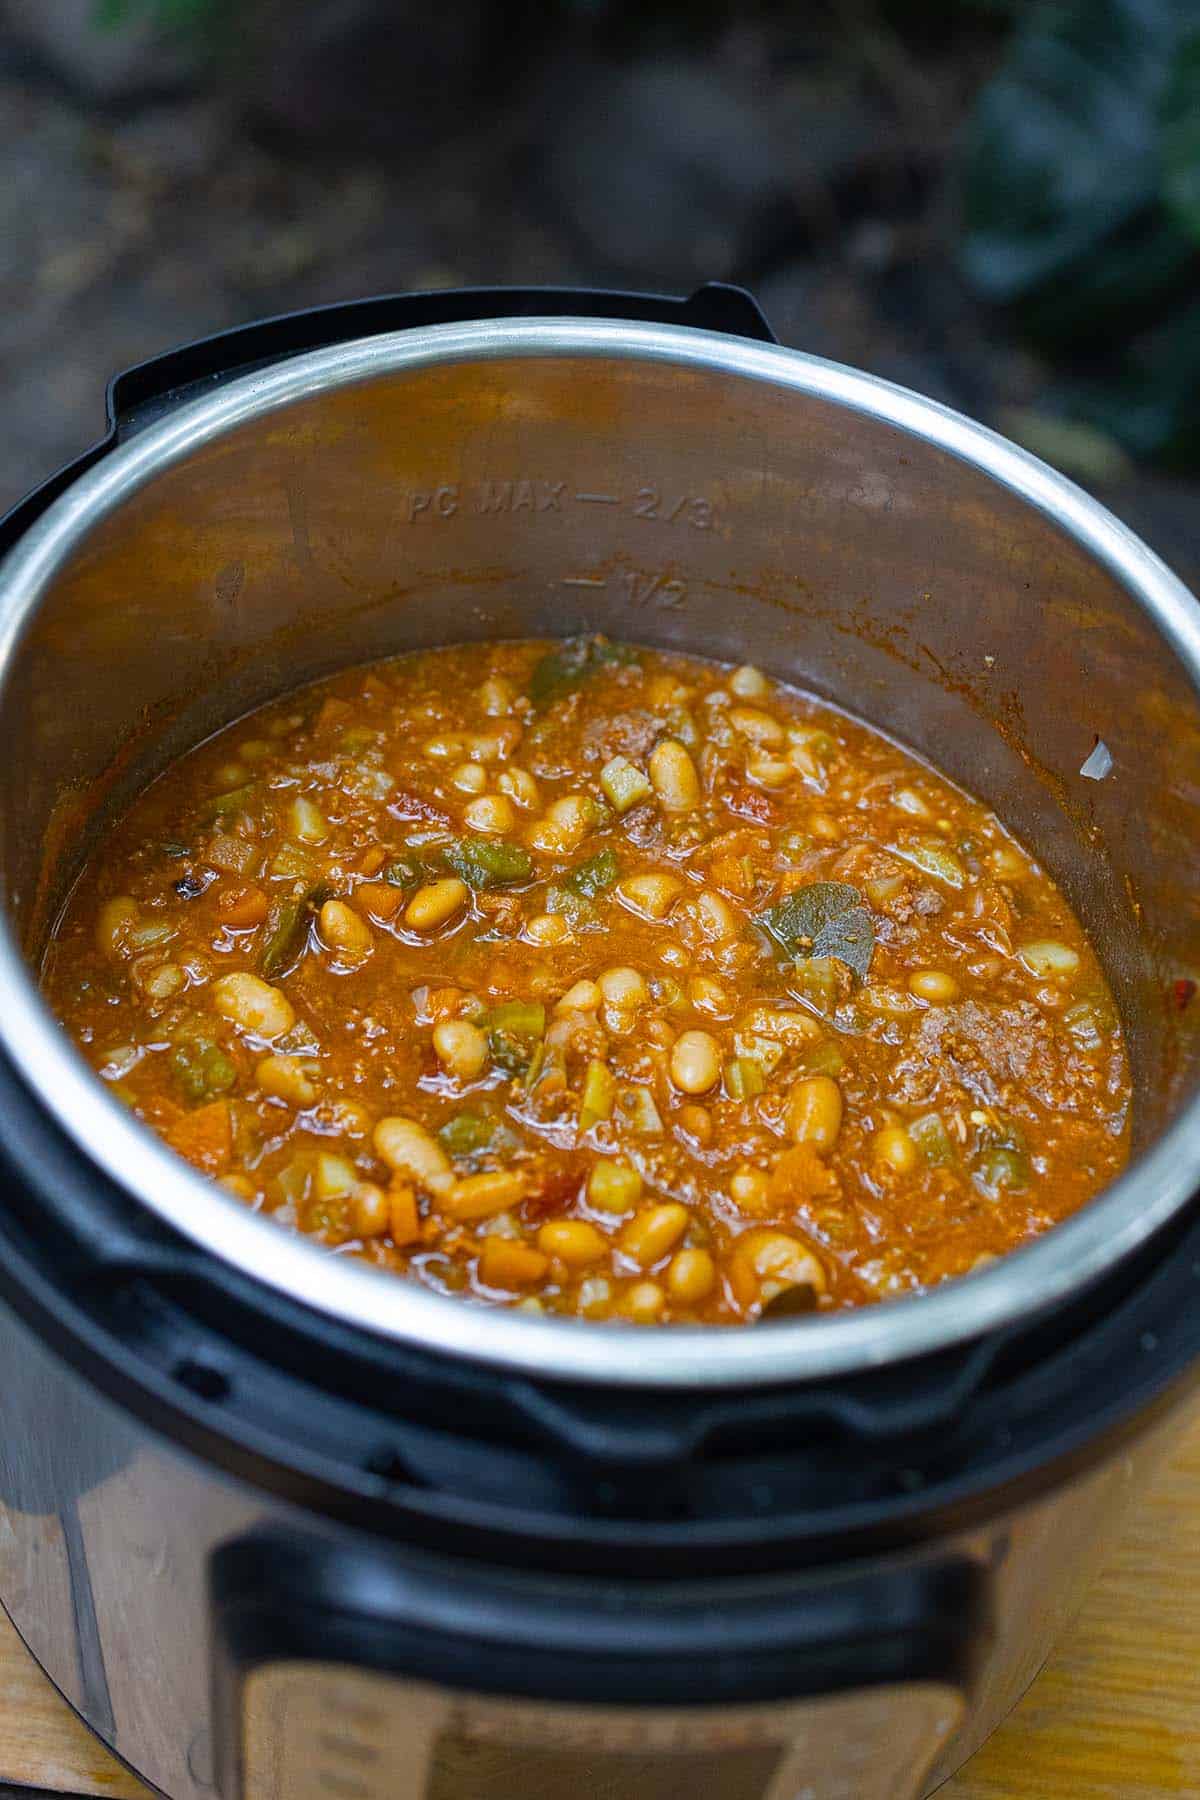
    Bean chili cooked in the Instant Pot inner pot

    Key Ingredients

    Ingredients

    Ground Beef

    • Rich, hearty, and satisfying — the backbone of a great chili. Look for 80/20 blend for best flavour.

    Chorizo

    • Adds a smoky, slightly spicy kick that sets this chili apart. Mexican-style fresh chorizo works best here.

    Smoked Paprika & Cumin

    • These two spices are what make this chili sing. Get your smoked paprika fresh for maximum impact — it makes a huge difference over regular paprika.

    Kidney Beans & Diced Tomatoes

    • Essential for bulk, protein, and fibre. The canned tomatoes add acidity that balances the rich meat perfectly.

    Tomato Paste

    • Deepens the flavour and ties everything together with a concentrated, slightly sweet tomato richness.

    For the best results, use a quality Instant Pot 6qt Duo — it’s what we use in this recipe and it makes the process completely hands-free. A wooden spoon set is also handy for breaking up the meat during the sauté step.

    Instant Pot chili with beans in a steel pot beside grilled chicken on a large green leaf

    Chili and Camping

    Camping is full of activities — and let’s be honest, who wants to spend hours cooking after a full day of adventures? This Instant Pot Chili solves that problem beautifully. It’s quick to prep, cooks hands-free, and one big pot feeds a crowd. Even better, it tastes even better the next day, which means leftovers are a bonus you’ll actually look forward to. Plus, when you cook it in the Instant Pot, you don’t have to babysit the pot over the fire — you can set it, forget it, and get back to enjoying the outdoors.

    If you love camping recipes, check out our Easy Camping Shrimp Pasta and Lemongrass Chicken Drumsticks — both are campfire favourites in our family.

    A man and three children eating at an outdoor picnic table while camping

    Frequently Asked Questions

    Can I make this chili without an Instant Pot?

    Yes! If you don’t have an Instant Pot, you can make this chili on the stovetop in a large Dutch oven. Simply follow the same sauté steps, then add all the remaining ingredients and simmer covered on low heat for 45–60 minutes, stirring occasionally until the flavours meld and the chili thickens to your liking.

    Can I freeze Instant Pot chili?

    Absolutely. This chili freezes beautifully. Let it cool completely, then portion it into freezer-safe containers or bags. It keeps well for up to 3 months. Thaw overnight in the fridge and reheat on the stovetop or in the microwave. The flavour actually deepens after freezing!

    What can I serve with Instant Pot chili?

    The options are endless. Serve it over steamed rice, baked potatoes, or corn chips for nachos. It’s also fantastic stuffed into tacos or burritos. For camping, we love serving it with crusty bread or spooned over grilled potatoes cooked in the embers.

    How do I thicken chili that’s too watery?

    If your chili is thinner than you’d like after pressure cooking, simply switch the Instant Pot back to Sauté mode and let it simmer uncovered for 5–10 minutes, stirring occasionally, until it reaches your desired consistency. You can also mash a handful of the beans against the side of the pot to add body.

    Can I make this chili spicier?

    Definitely. Add a chopped jalapeño with the onion during the sauté step, or stir in a teaspoon of cayenne pepper with the spices. Chipotle peppers in adobo are another great option — try one or two chipotle peppers in adobo sauce for a deep, smoky heat.

    Pot of bean chili with a wooden spoon next to grilled meat on a large green leaf

    Instant Pot Easy Chili Recipe

    Easy Instant Pot Recipe that you can bring it to go camping. Packed with ground beef, chorizo, bean, and so much more! A classic but a goodie.
    Prep Time 10 minutes
    Cook Time 30 minutes
    Total Time 40 minutes
    Servings: 6 servings
    Course: Main Course
    Cuisine: American
    Calories: 380

    Ingredients
      

    • 1 tbsp olive oil
    • ½ kg ground beef
    • 3 garlic cloves minced
    • 1 white onion minced
    • 3 chorizo sausages roughly chopped
    • 1 tsp dried oregano
    • 2 tbsp tomato paste
    • 1 can (540ml) kidney beans
    • 1 can diced tomatoes
    • 1 water or chicken stock
    • 1 tbsp Old Bay Seasoning
    • 1 tsp smoked paprika
    • 1 tsp ground cumin
    • salt and pepper

    Equipment

    • Instant Pot

    Method
     

    1. Sauté the base Turn the Instant Pot to Sauté mode. Add olive oil, then sauté ground beef with the garlic and onions for 2–3 minutes until fragrant.
    2. Add chorizo. Cook for 5–7 minutes until browned, breaking it up with a spoon. Drain excess fat if needed. Then add oregano and fry the tomato paste until fragrant.
    3. Add remaining ingredients Stir in the beans, diced tomatoes, broth, and all spices. Mix well.
    4. Pressure cook Cancel Sauté mode. Secure the lid and set the valve to Sealing. Cook on Manual / Pressure Cook for 15 minutes.
    5. Natural release Let the pressure release naturally for 10 minutes, then do a quick release for any remaining pressure.
    6. Stir and serve Open the lid, stir well, and taste. Adjust seasoning if needed. Let it sit on Keep Warm for 10–15 minutes to thicken.

  • Lemongrass Chicken Drumsticks

    Lemongrass Chicken Drumsticks

    After a long day on the trail, nothing hits quite like the scent of lemongrass drifting over a campfire. These Lemongrass Chicken Drumsticks have become our family’s most-requested camping meal — marinated overnight in a bold blend of fish sauce, dark soy, brown sugar, and fragrant lemongrass, then grilled until the skin is gloriously crispy and caramelized. The best part: all the work happens at home. At the campsite, you just fire up the grill.

    This post may contain affiliate links. If you purchase through these links, I may earn a small commission at no extra cost to you. Thank you for supporting Love & Harvest!

    Lemongrass chicken drumsticks charring on a grill over open flame

    This post features a lemongrass chicken recipe using the drumstick cut that’s perfect for summer grilling or family camping trips. A flavourful lemongrass marinade with fish sauce, brown sugar, soy sauce, and grated onion makes every bite irresistible.

    Why Try This Lemongrass Chicken Drumstick Recipe?

    Cooking at home means you can take the time to let flavours develop, and this recipe benefits from an overnight marinade that ensures every bite is packed with savoury, aromatic goodness.

    The combination of lemongrass, soy sauce, and fish sauce creates a balance of umami, sweetness, and depth, making this dish a household favourite. Minimal work, maximum flavour — this lemongrass chicken drumstick is the definition of gourmet campfire food without the effort. I’ve shared this recipe countless times, even with neighbouring tents at the campground!

    Lemongrass chicken drumsticks on a large green leaf beside a pot and skillet on a picnic table

    Juicy grilled chicken drumsticks cooking on barbecue grill with flames, side of baked cheese and green olives in a cast iron skillet.

    Key Ingredients

    Ingredients

    Lemongrass

    • The star of this marinade. Finely chop or grind the tender inner stalks for maximum fragrance. If fresh lemongrass isn’t available, lemongrass paste is a convenient substitute that works beautifully.

    Fish Sauce

    • Brings an authentic umami depth that is essential to Southeast Asian marinades. Use a good-quality fish sauce — Red Boat fish sauce is our preferred brand for its clean, pure flavour.

    Dark Soy Sauce

    • Provides deep colour and rich umami. It’s what gives the chicken skin that beautiful dark, caramelized finish on the grill.

    Brown Sugar

    • Helps caramelize the skin beautifully when grilled and balances the saltiness of the fish sauce and soy. Don’t substitute with white sugar — the molasses in brown sugar adds a richer depth.

    Grated Onion

    • Adds moisture and sweetness to the marinade, and the enzymes in the onion help tenderize the chicken. Grate it finely so it integrates fully into the marinade rather than sitting in chunks.

    Why the Drumstick Cut?

    Drumsticks are the perfect cut for this lemongrass chicken recipe because they are juicy, flavourful, and ideal for grilling over an open fire. The bone helps retain moisture, preventing the meat from drying out, while the skin crisps up beautifully, creating a delicious caramelized crust. Plus, drumsticks are easy to handle — no forks and knives, just grab and enjoy!

    Mexican pickled red onion recipe: grilled drumsticks topped with pickled onions

    We love to add pickled red onions on top of the chicken — get the recipe for Mexican Pickled Red Onion here. The brightness of the pickled onions cuts through the richness of the glaze perfectly.

    A Must-Try Recipe for Camping

    This recipe is perfect for camping because it takes the stress out of outdoor cooking. Simply marinate the chicken overnight, freeze it, and by the time it thaws at the campsite, it’s ready for the grill or fire. The open flame adds a beautiful caramelization, creating a crispy, smoky skin that’s absolutely irresistible.

    Pair these with our Easy Camping Shrimp Pasta for a full campfire feast the whole family will love.

    Succulent grilled chicken and roasted vegetables on a barbecue grill, perfect for outdoor dining.

    Frequently Asked Questions

    How long should I marinate the chicken?

    For the best results, marinate the chicken for at least 4 hours, but overnight is ideal. The longer the chicken sits in the marinade, the deeper the flavours penetrate the meat. For camping, we marinate the night before, freeze the chicken in the marinade bag, and it thaws perfectly by dinner time at the campsite.

    Can I bake these instead of grilling?

    Yes! Preheat your oven to 200°C (400°F). Arrange the drumsticks on a wire rack over a baking sheet and roast for 35–40 minutes, flipping halfway, until the skin is dark and caramelized and the internal temperature reaches 74°C (165°F). You can finish under the broiler for 2–3 minutes for extra crispiness.

    What if I can’t find fresh lemongrass?

    Lemongrass paste is a great substitute and is much easier to find in most grocery stores. Use about 1 tablespoon of paste for every stalk of fresh lemongrass. You can also find it online — we recommend this lemongrass paste which works beautifully in this marinade.

    Can I use chicken thighs or breasts instead of drumsticks?

    Absolutely. Bone-in thighs are the closest substitute and will give a similar juicy result. Boneless thighs will cook faster — check at 25 minutes. Chicken breasts work too but are more prone to drying out; marinate them for the full overnight period and keep a close eye on the internal temperature.

    Succulent grilled chicken and roasted vegetables on a barbecue grill, perfect for outdoor dining.

    Lemongrass Chicken Drumsticks

    A delicious, aromatic lemongrass chicken recipe that guarantees juicy, bouncy texture and deep flavor. Perfect for home cooking and an excellent choice for camping, as the marinade does all the work while you enjoy the outdoors!
    Prep Time 10 minutes
    Cook Time 35 minutes
    Total Time 45 minutes
    Servings: 5 people
    Course: Main Course
    Cuisine: Vietnamese
    Calories: 290

    Ingredients
      

    • 8-10 chicken drumsticks, with skin
    • ¼ cup lemongrass, finely grounded or chopped
    • 1 onion, grated
    • 6 garlic cloves, grated
    • 3 tbsp light soy sauce
    • 1 tbsp dark soy sauce
    • 2 tbsp maggi sauce
    • ¼ cup brown sugar
    • 2 tsp paprika
    • 2 tbsp fish sauce

    Method
     

    1. In a large bowl or ziplock bag, combine all the ingredients and coat the chicken well. Let it marinate overnight in the fridge for maximum flavor.
    2. Freeze for Camping – If taking it camping, freeze the marinated chicken. It will slowly defrost in your cooler, and by the time you need to cook it, it’s ready to go.
    3. Grill to Perfection – Cook the chicken over a hot grill or campfire, turning occasionally, until the skin is caramelized and crispy, and the inside is cooked through (internal temp 165°F). Approximately 35 minutes, depending on the intensity of the open fire.
    4. Serve and Enjoy – Let it rest for a few minutes before serving with rice, fresh herbs, or grilled vegetables.

  • Easy Camping Shrimp Pasta

    Easy Camping Shrimp Pasta

    Some of our best family memories are made around a campfire with a cast iron pan and a bag of frozen shrimp. This Easy Camping Shrimp Pasta is proof that you don’t need a full kitchen to make something that feels restaurant-quality. Garlicky shrimp, nutty Manchego cheese, a bright hit of lemon, and the subtle warmth of Old Bay — all tossed with pasta in under 30 minutes. It’s become the most-requested dinner of every camping trip we take.

    This post may contain affiliate links. If you purchase through these links, I may earn a small commission at no extra cost to you. Thank you for supporting Love & Harvest!

    Shrimp rigatoni with red onion and herbs in a cast iron skillet on the grill

    Why This Shrimp Pasta Is Perfect for Camping

    When it comes to cooking while camping, I always look for recipes that are simple, delicious, and require minimal ingredients. This shrimp pasta has become a go-to for my family of five because it checks all the boxes.

    With frozen shrimp that naturally thaw by the time you’re ready to cook, a handful of bold flavours, and a quick assembly over the fire, this meal makes campsite cooking effortless. Plus, nothing beats enjoying a warm, garlicky, lemony pasta under the open sky!

    Creamy pasta with shrimp, herbs, and vegetables in a skillet, featuring pasta, seafood, and fresh garnish.

    Key Ingredients

    Ingredients

    Frozen Shrimp

    • Frozen shrimp (shell-off for convenience) are easy to store and naturally thaw by the time you’re ready to cook. They’re the ultimate camping protein — no cooler stress, no spoilage risk.

    Old Bay Seasoning

    • A mix of warm spices that complements the shrimp and brings out a slightly smoky depth. It’s the secret weapon in this dish. Keep a tin of Old Bay Seasoning in your camping kit at all times.

    Manchego Cheese

    • This cheese melts beautifully and adds a nutty, creamy finish to the pasta. It’s a slightly unusual choice for a camping pasta, but the nutty character pairs incredibly well with shrimp and lemon. Grated mozzarella works as a substitute if Manchego isn’t available.

    Garlic

    • Garlic infuses the dish with deep, savoury flavour that elevates the shrimp. Use freshly minced for the best result — pre-minced jarred garlic works in a pinch at the campsite.

    Lemon

    • The fresh acidity brightens the entire dish and balances the richness of the butter and cheese. Don’t skip it — it’s what makes this pasta feel light and fresh despite being hearty.

    We cook this in a quality Lodge 12″ Cast Iron Skillet which goes straight over the campfire. A set of silicone tongs makes handling the shrimp much easier over an open flame.

    Sweet shrimp pasta with fresh herbs in a cast iron skillet.

    Not Just for Camping — Make It at Home Too

    While this recipe shines as an easy camping meal, it’s just as fantastic for a quick weeknight dinner at home. Swap the campfire for your stovetop, and in under 30 minutes, you’ll have a restaurant-quality pasta that the whole family will love. The simplicity of ingredients and the bold, fresh flavours make this dish a staple, no matter where you cook it!

    Love camping recipes? Try our Lemongrass Chicken Drumsticks and Instant Pot Easy Chili for more campfire-ready meals the whole family will love.

    Sweet shrimp pasta salad with green olives and fresh herbs in a black skillet, perfect for summer meals.

    Frequently Asked Questions

    Can I use fresh shrimp instead of frozen?

    Yes! Fresh shrimp work perfectly in this recipe. If using fresh shrimp at a campsite, keep them in your cooler and use them on the first night of your trip. Fresh shrimp cook slightly faster than thawed frozen shrimp, so watch for them to turn pink and curl — usually 2–3 minutes per side.

    What pasta shape works best?

    Rigatoni or penne are ideal because their ridges and tubes hold onto the sauce beautifully. In a pinch, any short pasta works well — farfalle, rotini, or fusilli are all great camping choices because they pack easily and cook consistently. Avoid delicate long pasta shapes like spaghetti at a campsite as they’re harder to manage over a fire.

    Can I substitute the Manchego cheese?

    Absolutely. Grated Parmesan or Pecorino Romano are the closest substitutes in terms of flavour profile — both add a salty, nutty depth. Mozzarella melts more smoothly if you prefer a creamier texture. For camping convenience, pack pre-grated cheese in a ziplock bag.

    How do I keep the shrimp from getting rubbery?

    The key is not to overcook them. Shrimp are done the moment they turn fully pink and curl into a C-shape — usually just 2–3 minutes over medium-high heat. If they curl tightly into an O-shape, they are overcooked. Add them last and remove the pan from heat as soon as they are done.

    Pink pasta tossed in a creamy spinach and sour cream sauce

    Sweet shrimp pasta with fresh herbs in a cast iron skillet.

    Easy Camping Shrimp Pasta

    A quick and flavorful shrimp pasta that comes together in just 30 minutes, perfect for cooking over a campfire or on the stovetop. With frozen shrimp, Manchego cheese, and a touch of lemon, this dish is simple, delicious, and great for both camping and home cooking
    Prep Time 25 minutes
    Cook Time 30 minutes
    Total Time 55 minutes
    Servings: 5 servings
    Course: Main Course
    Calories: 440

    Ingredients
      

    • ½ kg frozen shrimp (shell-off for convenience)
    • 450 g pasta of choice rigatoni or penne
    • 3 tbsp butter
    • 1 small onion, diced
    • 1 tsp Old Bay Seasoning see blog note
    • 3 cloves garlic, minced
    • 1 lemon, juiced
    • 1 cup manchego cheese, grate or grated mozzarella cheese
    • ¼ red onion, diced
    • ¼ cup olives

    Method
     

    1. Thaw the Shrimp – Take frozen shrimp out of the freezer 30-40 minutes before cooking.
    2. Cook the Pasta – Boil a pot of water over the fire or camp stove and cook the pasta until al dente (slightly undercooked is fine). Reserve 1 cup of pasta water, drain the rest, and set aside.
    3. In a cast iron pan over the fire, melt butter and sauté the diced onion until soft and fragrant.
    4. Add the shrimp to the pan, then season with bay spice blend, garlic, salt, and pepper. Cook until pink and slightly crispy on the edges.
    5. Add the cooked pasta, manchego cheese, and reserved cup of pasta water to the pan and toss everything together.
    6. Remove from heat and top with red onions and olives for a fresh, briny finish.

  • Crispy Vegan Mango Tamarind Broccoli Wings

    Crispy Vegan Mango Tamarind Broccoli Wings

    If you’ve ever wanted to recreate the sticky, caramelized magic of Chinese sweet and sour pork without the meat, this is your recipe. These Crispy Vegan Mango Tamarind Broccoli Wings deliver everything you love about that takeout classic — the golden crunch, the glossy sauce, the addictive sweet-sour balance — but with broccoli as the hero. The mango-tamarind sauce is a genuine revelation: tropical, tangy, and deeply complex.

    This post may contain affiliate links. If you purchase through these links, I may earn a small commission at no extra cost to you. Thank you for supporting Love & Harvest!

    Crispy vegan mango tamarind broccoli wings with sesame in a white bowl

    This post is about vegan broccoli wings paired with a delicious mango-tamarind sauce. The ingredients include broccoli, mango, tamarind, soy sauce, ginger, and brown sugar — creating a flavourful, crispy dish that’s perfect for meatless meals.

    Why We Love This Recipe

    A true dedication to summer. It’s light yet satisfying, crispy yet tender, and bursting with bold flavours. The combination of sweet mango, tangy tamarind, and warm curry spice gives the crispy broccoli a depth of taste that makes it hard to resist. It’s a fantastic alternative to traditional sweet and sour pork, delivering all the same sticky, caramelized goodness without the meat.

    Glazed broccoli wings topped with sesame seeds and green onion

    Key Ingredients

    Ingredients

    Broccoli Florets

    • The perfect vegetable for frying — the florets turn crispy and golden on the outside while staying tender inside. Cut them into consistent medium-sized pieces so they cook evenly. Don’t cut too small or they’ll disappear in the batter.

    Tamarind Paste

    • The soul of the sauce. It provides a tangy, slightly sour depth that balances the mango’s sweetness perfectly. Use a quality tamarind concentrate for the most consistent results — the flavour is more concentrated and reliable than block tamarind.

    Mango Puree

    • Brings natural sweetness and a smooth, tropical texture to the sauce. Fresh mango blended into a puree is ideal when in season, but canned or jarred mango puree works perfectly year-round.

    Curry Powder

    • Adds a warm, spiced undertone to the batter that complements the sweetness of the mango sauce. It’s a subtle but important layer that elevates the dish from good to extraordinary.

    Mango Powder (Amchur)

    • For even more mango depth, add a pinch of mango powder (amchur) to the sauce. It adds a sour, fruity complexity that takes the sauce to the next level.

    For frying, use a deep heavy-bottomed pot or a carbon steel wok which heats quickly and maintains consistent high temperature — essential for crispy results.

    Close-up of sticky mango tamarind glaze on crispy broccoli bites

    Vegan and Vegetarian Friendly

    This dish is perfect for plant-based eaters and omnivores alike. The broccoli florets take on an irresistibly crunchy texture when fried, and the sauce brings everything together in a way that is both comforting and excitingly different. Whether you’re a longtime vegan or just trying to incorporate more vegetables into your diet, this recipe is a must-try.

    If you love plant-based recipes, try our Easy Hummus Recipe as a side, or explore our Sticky Honey Garlic Spareribs if you want the classic version with meat.

    Frequently Asked Questions

    Can I use an air fryer instead of deep frying?

    Yes! Spray the battered broccoli with a light coating of oil and air fry at 200°C (400°F) for 12–15 minutes, flipping halfway through. The result won’t be quite as crispy as deep frying but it’s a lighter option that still works well. Make sure the pieces aren’t touching so the air can circulate properly.

    Why is my battered broccoli not staying crispy?

    There are two common reasons: the oil wasn’t hot enough (should be 175°C/350°F), or you added too many pieces at once which drops the oil temperature. Fry in small batches and let the oil come back up to temperature between batches. Also, toss the broccoli in the sauce just before serving to maintain maximum crunch.

    Can I make the mango-tamarind sauce ahead of time?

    Yes — the sauce actually improves after resting overnight in the fridge as the flavours meld. Store it in an airtight jar for up to one week. When ready to use, gently reheat in a pan and toss with freshly fried broccoli. Do not toss the broccoli in the sauce until you’re ready to serve.

    What can I serve with broccoli wings?

    These wings are incredible over steamed jasmine rice or with fried rice. They also work beautifully as an appetizer served on their own. For a complete meal, pair with a simple cucumber salad or our Easy Hummus and flatbread for a fusion-style spread.

    Crispy honey garlic chicken bites with sesame seeds, served in a white bowl, close-up image.

    Crispy Vegan Mango Tamarind Broccoli Wings

    This vegan-friendly recipe brings together curry-spiced fried broccoli florets and a luscious mango-tamarind sauce, making it a perfect summer indulgence. Pair it with an iced lemon tea and enjoy the vibrant flavours of sunshine on a plate!
    Prep Time 25 minutes
    Cook Time 35 minutes
    Total Time 1 hour
    Servings: 5 people
    Course: Main Course
    Calories: 310

    Ingredients
      

    Fried Brocolli Foret
    • 1 brocolli head
    • 2 cups all-purpose flour
    • 1 tsp curry powder
    • ½ tsp salt
    • ½ tsp baking powder
    • 1½ cup beer Choose one labelled vegan; some beers are clarified with isinglass, which comes from fish.
    • 2 cups neutral oil
    Mango Tamarind Sauce
    • 1 cup mango puree
    • 2 tbsp tamarind paste
    • 2 tbsp apple cider vinegar
    • ½ cup brown sugar
    • 2 tsp ginger, grated
    • 1 tbsp neutral oil
    • 1½ tbsp soy sauce
    • sesame seed, garnish

    Method
     

    1. Prepare the Broccoli – Cut the head of broccoli into small to medium bite-sized florets. Rinse thoroughly and set aside.
    2. Make the Batter – In a large bowl, whisk together the flour, curry powder, baking powder, and salt. Slowly add the beer while whisking until a smooth, thick batter forms. It should coat the broccoli florets evenly without being too runny.
    3. Coat the Broccoli – Add the broccoli florets into the batter and toss until fully coated.
    4. Heat the Oil – In a deep skillet or heavy-bottomed pot, heat the neutral oil to 350°F (175°C).
    5. Fry the Broccoli – Using tongs, carefully lower the coated broccoli florets into the hot oil. Fry in batches for about 3-4 minutes, turning occasionally, until golden brown and crispy. Remove with a slotted spoon and place on a paper towel-lined plate to drain excess oil.
    6. Prepare the Sauce – In a saucepan over medium heat, add the mango puree, tamarind paste, brown sugar, ginger, oil, soy sauce, and vinegar. Whisk to combine and let it simmer for 3-5 minutes until it thickens slightly.
    7. Coat the Fried Broccoli – Add the crispy broccoli florets to the saucepan and toss until they are evenly coated with the mango-tamarind sauce.
    8. Garnish and Serve – Transfer to a serving platter and garnish with sesame seeds and chopped scallions. Enjoy immediately!

  • 30-Minute Thai Basil Chicken

    30-Minute Thai Basil Chicken

    Bold, aromatic, and on the table in 30 minutes — this Thai Basil Chicken (Pad Kra Pao) is our family’s most-cooked weeknight dinner. A handful of pantry staples, one wok, and dinner is done.

    This post may contain affiliate links. If you purchase through these links, I may earn a small commission at no extra cost to you. Thank you for supporting Love & Harvest!

    Thai basil chicken stir-fry in a white bowl on a granite counter

    Why We Love This Easy Thai Basil Chicken

    This recipe is one of those rare gems that checks all the boxes: it’s quick, uses simple ingredients, and delivers bold, authentic flavours. In our household, it’s a staple. The kids love it because of its tangy kick from the lime juice — they always squeeze extra on top. We love it because it’s a wholesome meal that doesn’t take all evening to prepare. Any leftovers make fantastic lunchbox additions for the next day.

    Why You Should Try It

    If you’re new to Thai-inspired cooking, this dish is the perfect introduction. It’s simple enough for beginners and requires no fancy equipment — just a skillet or wok. The flavours are bold yet approachable, with a balance of sweet, salty, tangy, and aromatic notes that’ll make you feel like a pro chef. You can easily add bell peppers or green beans if you want to sneak in more vegetables.

    Close-up of Thai basil chicken with wilted basil leaves

    Ingredients

    Thai Basil

    • The star of the dish — its slightly peppery, licorice-like flavour is what separates this from any regular stir-fry. Thai basil holds up to high heat far better than Italian basil, wilting into the sauce without losing its character. Add it right at the end and toss just 30 seconds. If your family finds basil too intense, start with half a cup and adjust.

    Fish Sauce

    • The secret behind the umami depth. Fish sauce adds a savoury complexity that soy sauce alone can’t replicate — it’s funky, salty, and absolutely essential for authentic Thai flavour. Use a high-quality brand like Red Boat Fish Sauce for the cleanest flavour. Start with less and add more to taste.

    Oyster Sauce

    • Adds a sticky, slightly sweet, and deeply savoury coating to the chicken. It’s the binding element of the sauce that gives this dish its characteristic glossy finish. Use a good oyster sauce — it makes a real difference.

    Chicken Thigh vs. Breast

    • Chicken thigh stays juicier at high stir-fry heat and absorbs sauce better than breast. Either works — thigh for flavour, breast for leaner preference. Cut into uniform small pieces so everything cooks evenly in under 10 minutes.

    Garlic and Thai Chili

    • Pound them together in a mortar and pestle for the most flavourful base, or mince finely. This aromatic foundation hits the hot wok first, perfuming the oil before anything else is added. Skip the chili or reduce to one pepper for family-friendly heat levels.

    Bowl of Thai basil chicken with fresh basil leaves on the side

    Why It’s a Family Favourite

    This dish hits the sweet spot between fast and flavourful. It’s the kind of meal that comes together faster than you can decide what to order for takeout. Cooking it fills the house with an irresistible aroma that draws everyone to the table.

    Use a Carbon Steel Wok for authentic high-heat stir-frying — the carbon steel develops a natural seasoning over time and distributes heat perfectly for this style of cooking.

    Serve alongside our Instant Pot Taiwanese Beef Noodle Soup for a full Thai-inspired feast, try the Lemongrass Chicken Drumsticks for another Southeast Asian weeknight favourite, or check out our Thai Chicken Salad for a lighter meal using similar flavours.

    “This dish is proof that the simplest ingredients, cooked with love, create the most incredible flavours.”

    Sammi Chow — Love and Harvest

    Thai basil chicken in a white bowl with chopsticks

    Frequently Asked Questions

    Can I substitute regular Italian basil for Thai basil?

    You can in a pinch, but the flavour will be noticeably different. Italian basil is sweeter and more delicate; Thai basil has a peppery, anise-like quality that is central to the dish’s identity. If you can’t find Thai basil, adding a tiny pinch of anise or fennel with Italian basil gets you closer.

    What rice goes best with Thai Basil Chicken?

    Jasmine rice is the classic pairing — its fragrant, slightly sticky texture soaks up the sauce beautifully. Cook it slightly wet so the grains are soft and clingy. Brown jasmine rice also works well if you prefer a whole grain option, though the texture is slightly chewier.

    Can I make this dish vegetarian?

    Yes. Replace chicken with firm tofu (pressed and cubed) or mushrooms. Substitute fish sauce with soy sauce or coconut aminos and replace oyster sauce with a vegan mushroom oyster sauce. The cooking time is the same — just watch the tofu as it browns faster than chicken.

    How do I prevent the basil from turning black?

    Add the basil off the heat or in the final 30 seconds of cooking. High direct heat for too long will blacken and bitter the leaves. Toss quickly and serve immediately. The basil should be wilted but still vibrant green.

    Is this recipe good for meal prep?

    Absolutely. It reheats beautifully in a pan with a tiny splash of water. Pack with rice in containers — it keeps in the refrigerator for 3 days and makes excellent lunches. The basil will darken slightly upon reheating but the flavour stays great.

    Can I use frozen chicken?

    Always thaw chicken completely before stir-frying. Frozen or partially frozen chicken releases excess water in the wok, which prevents proper browning and turns the dish steamed rather than stir-fried. Thaw overnight in the refrigerator for best results.

    Thai basil chicken stir-fry in a white bowl on a granite counter

    30-Minute Meal Thai Basil Chicken

    Prep Time 10 minutes
    Cook Time 20 minutes
    Total Time 30 minutes
    Servings: 4
    Course: Main Course
    Cuisine: Thai
    Calories: 340

    Ingredients
      

    • 1 whole chicken deboned and cut into small chunks
    • 2 tbsp soy sauce
    • 1 tsp hoisin sauce
    • 2 tbsp brown sugar
    • 1 tbsp fish sauce
    • 2 tbsp cooking oil
    • 1 tsp chicken stock powder
    • ½ cup water
    • 1 cup fresh basil leaves divided (reserve some for garnish)
    • black pepper garnish
    • lime juice optional

    Method
     

    1. In a bowl, mix the chicken chunks with soy sauce, hoisin sauce, brown sugar, and fish sauce. Let it marinate for at least 15 minutes, or up to 1 hour for deeper flavor.
    2. Heat the cooking oil in a large skillet or wok over medium-high heat.
    3. Add the marinated chicken and sauté until the chicken is cooked through and starts to brown slightly, about 5–7 minutes.
    4. Sprinkle the chicken stock powder over the chicken and pour in the water. Stir well.
    5. Let the mixture simmer until the liquid reduces down to a thick sauce, about 3–5 minutes.
    6. Add most of the Thai basil leaves to the pan and stir until they wilt and become fragrant, about 1 minute.
    7. Transfer the chicken to a serving plate. Garnish with the reserved Thai basil leaves and a generous sprinkle of freshly cracked black pepper. Additionally, you can add some lime juice on top of the basil chicken.

    Notes

    Serving Suggestion

    Serve hot over steamed jasmine rice or alongside stir-fried vegetables for a complete meal.