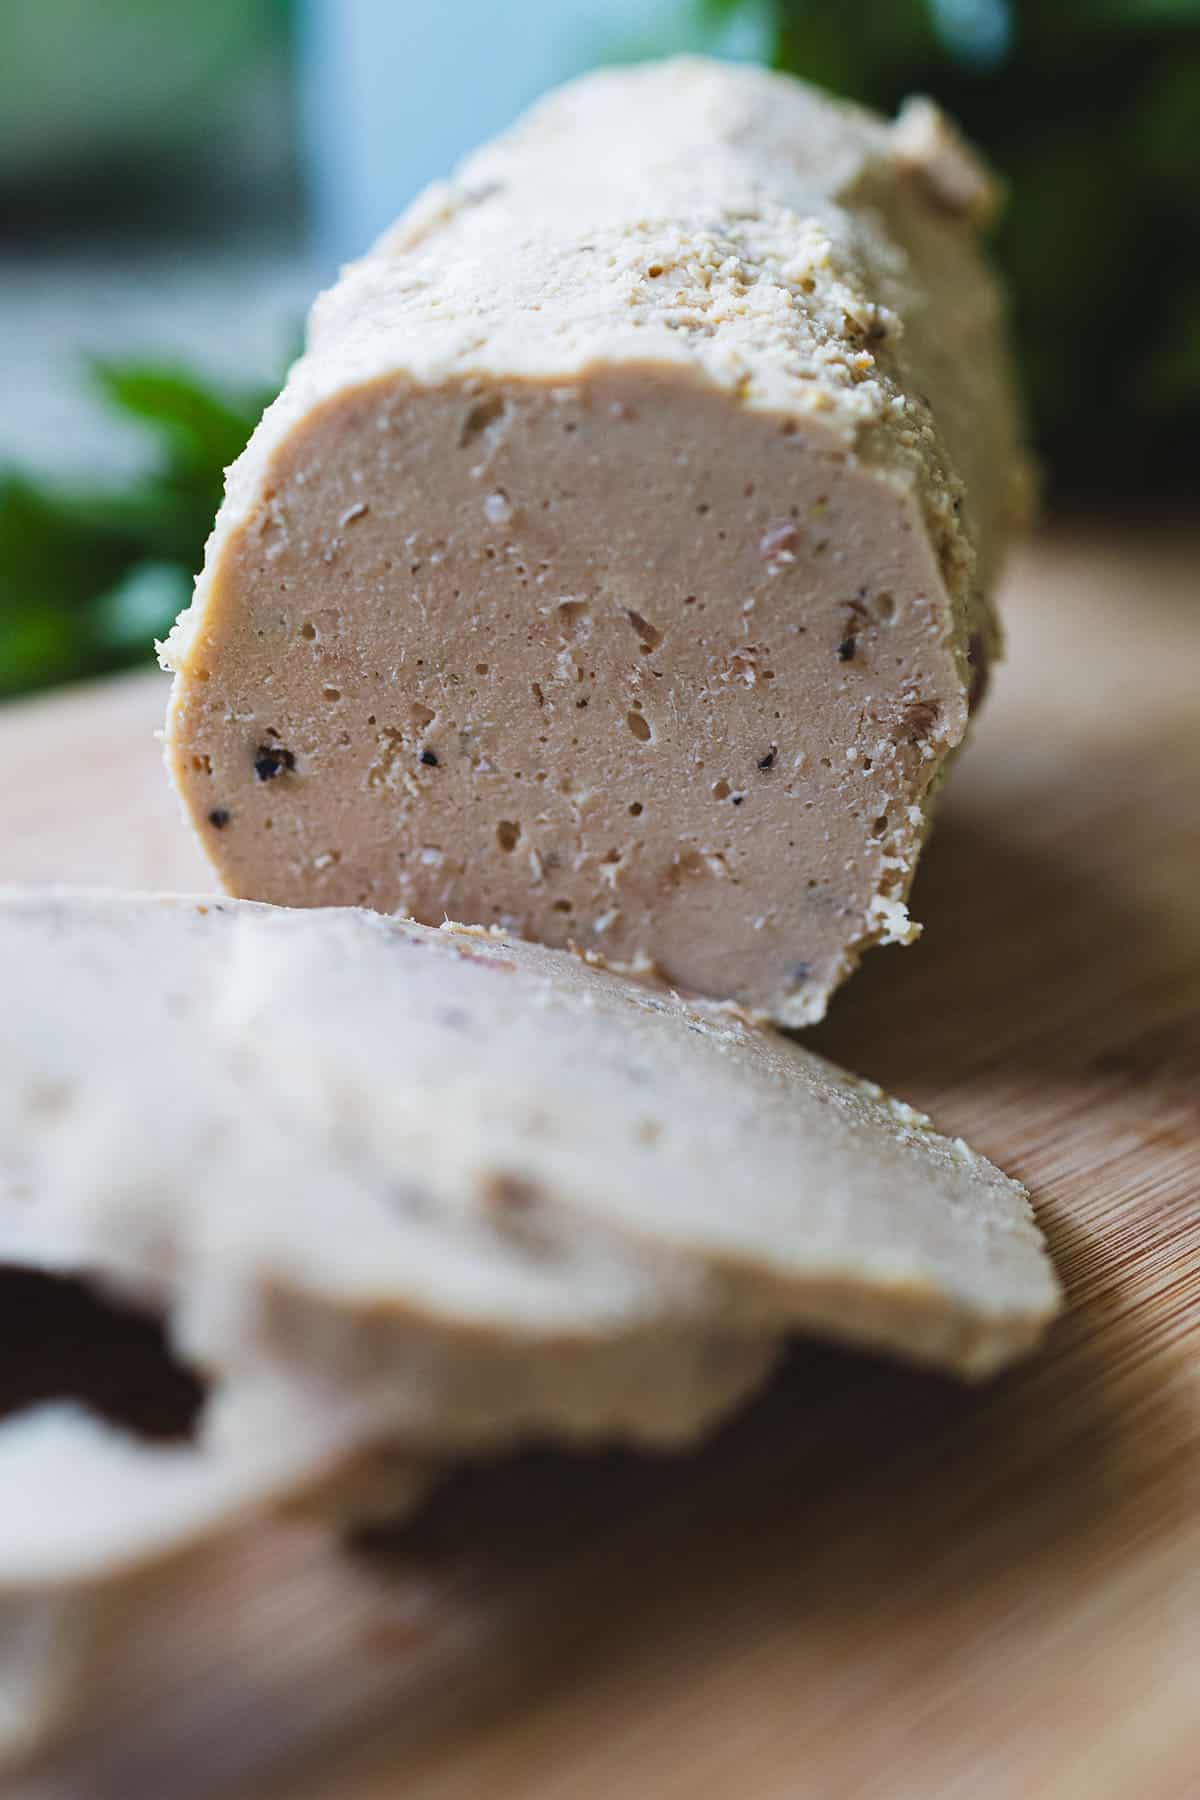
Store-bought deli meat adds up fast, and the ingredient list is often longer than you’d expect. This 4-ingredient homemade chicken deli sandwich meat needs very little hands-on prep and delivers juicy, tender slices that hold up in any sandwich, wrap, or grain bowl.

This post may contain affiliate links. If you purchase through these links, I may earn a small commission at no extra cost to you. Thank you for supporting Love & Harvest!
Making this for lunches? My free PDF has seven easy family dinners to go with it. Send me the free dinners
Why This Recipe is Perfect for Families
This homemade chicken deli recipe is an excellent option for families for several reasons:
- Know What’s in It: Unlike a lot of store-bought deli meat, this recipe gives you full control over every ingredient, including the salt. It’s just chicken breast, smoked salt, Montreal steak spice and cornstarch.
- Budget-Friendly: Making your own chicken deli costs a fraction of packaged options and scales easily. Batch-cook and freeze portions for future use.
- Customizable: Adjust spices to suit picky eaters — milder for kids, bolder for adults. One recipe, infinite variations.
- Great for Meal Prep: Make ahead and use in lunches, quick dinners, and snack plates all week long.
Ingredient Deep-Dive
Ingredients
Chicken Breast
- Why it matters: Chicken breast gives a lean, firm texture that slices cleanly — essential for deli-style cuts. I sometimes add a small amount of chicken gizzard for extra texture and to honor the whole animal (a Chinese cooking philosophy I grew up with). Optional, but worth trying.
Smoked Salt
- Why it matters: Smoked salt adds depth and mimics the flavor of traditionally smoked deli meats without a smoker. There are many varieties — hickory, birch, applewood — all delicious. Try them all and find your favorite.
Montreal Steak Spice
- Why it matters: Montreal steak spice is a bold blend of garlic, black pepper, coriander, and dill that gives the chicken rich, savory depth. I buy mine at Costco, but it’s readily available on Amazon or at any grocery store.
Cornstarch
- Why it matters: Cornstarch creates a firm, sliceable texture. Without it, the chicken mixture stays too soft to cut into clean deli-style slices. It also locks in moisture so each slice stays juicy.

How to Make Your Own Chicken Deli Meat
The links below are Amazon affiliate links. If you buy through them, I may earn a small commission at no extra cost to you.
Recommended tools
- Ceramic pie weights to keep the chicken pressed down while it cooks: Mrs. Anderson’s Baking Ceramic Pie Weights
- Food processor for a smooth chicken paste: KitchenAid 7-Cup Food Processor
Any comparable pie weights or food processor work, and any clean, heatproof glass jar or container does the job.
Step 1: Prepare the Chicken. Trim any excess fat from the chicken breasts. In a small bowl, combine smoked salt, Montreal steak spice, and cornstarch. Mix the dry ingredients.
Step 2: Food Processor. Add the chicken to a food processor with the dry ingredients. Blend until a thick, uniform mixture forms with no visible chunks of meat.
Step 3: Cook and Slice. I line a glass or steel container with a BPA-free plastic bag so the deli meat slips out more easily after cooking. If you do the same, use a bag that is rated for cooking in simmering water (such as a sous vide bag), and skip rigid plastic containers. The container diameter should match the lid opening so the meat can be easily removed. Fill the bag-lined container with the meat mixture, pressing to remove air bubbles. Add ceramic pie weights on top to prevent the meat from expanding unevenly. Set it in a pot of water at a gentle simmer and cook for 40 minutes (the recipe card below has the full setup). Then check the center with an instant-read thermometer, keeping the probe off the container walls. It should read 165°F (74°C), the USDA minimum for poultry. If it doesn’t, keep simmering for 10 more minutes and check again. Let it cool on the counter, get it into the refrigerator within 2 hours of cooking (USDA guideline; 1 hour if your kitchen is above 90°F), and chill at least 2 to 3 hours or overnight. Slice and enjoy!

Customize Your Deli Chicken
While smoked salt and Montreal steak spice provide a great base, don’t be afraid to experiment. Try a garlic and herb rub, paprika for a smokier kick, or a honey-mustard variation for a slightly sweet profile.
Food Ideas with Homemade Chicken Deli
- Classic Chicken Sandwich: Layer on whole grain bread with lettuce, tomato, and mayo or mustard.
- Chicken Wraps: Roll in a wrap with hummus, fresh spinach, and avocado.
- Protein-Packed Salads: Top any salad with thin slices for an easy protein boost.
- Chicken and Cheese Panini: Grill between sourdough slices with your favorite cheese.
- Snack Plate: Pair with crackers, cheese, and veggies.
- Noodle Soup: Slice thinly over a hot bowl of soup for a satisfying weeknight meal.

Frequently Asked Questions
Can I use chicken thighs instead of chicken breast?
Chicken thighs work but produce a softer, fattier result that’s harder to slice cleanly. Breast is strongly recommended for that classic deli texture. If you prefer thighs for flavor, use a 50/50 blend.
Why cook it in water instead of an oven?
The water bath cooks the chicken gently and evenly without drying it out. It also allows the cornstarch to set properly, creating that firm, sliceable texture. Oven cooking tends to dry out the exterior before the inside is cooked through.
How long does homemade chicken deli last in the fridge?
Up to 4–5 days tightly wrapped in the refrigerator. For longer storage, slice and freeze in portions for up to 2 months.
What if I don’t have a food processor?
You can mince the chicken very finely by hand or use a blender (in short pulses). The texture won’t be as uniform, but it will still work. The food processor produces the smoothest, most consistent result.
Can I add vegetables or herbs to the mixture?
Yes. Finely minced herbs like parsley, dill, or chives fold in beautifully. Avoid chunky vegetables as they’ll prevent the meat from slicing cleanly.
Is this gluten-free?
Yes — chicken, smoked salt, Montreal steak spice, and cornstarch are all naturally gluten-free. Always check your spice blend label to ensure no wheat is added as a filler.

4 Ingredients Chicken Deli
Ingredients
Equipment
Method
- Blend the Ingredients:Place the cubed chicken breasts, cornstarch, smoked salt, and Montreal steak spice in a food processor. Pulse the mixture until it forms a smooth, thick paste. Make sure all the ingredients are well-combined.
- Prepare the Jar:If you like, line a clean, heatproof glass jar (like a wide-mouth Mason jar) with a food bag rated for cooking in simmering water, such as a sous vide bag, so the chicken slips out more easily later. Transfer the blended chicken mixture into the jar (or the bag-lined jar). Pack the mixture tightly, pressing it down to remove any air pockets. Leave about 2 inches of space at the top of the jar.
- Add the Weight:To ensure the chicken stays compact while cooking, place something heavy on top of the chicken mixture inside the jar. You can use ceramic pie weights, or a small, heatproof glass jar filled with water that fits inside the opening. This will help keep the mixture pressed down during cooking.
- Cook the Chicken:Screw the lid on loosely, or cover the jar with foil if using a lid is not an option. Place the jar in a pot with enough water to reach about halfway up the sides of the jar. Bring the water to a gentle simmer over low heat, making sure it does not boil vigorously. Keep the fire at the lowest setting to maintain a low simmer. Cook for 40 minutes, occasionally checking that the water remains at a gentle simmer. When the time is up, check the center with an instant-read thermometer, keeping the probe off the jar: it should reach 165°F (74°C), the USDA minimum for poultry. If it hasn’t, keep simmering for 10 more minutes and check again.
- Cool, Chill, and Slice:Carefully remove the jar from the pot and let it cool on the counter, and get it into the refrigerator within 2 hours of cooking (USDA guideline; 1 hour if your kitchen is above 90°F). Place the jar in the refrigerator for at least 2-3 hours (or overnight) to allow the chicken to firm up completely. Once chilled, remove the weighted object and ease the chicken loaf out of the jar. If you used a bag, leave the loaf in the bag until it is out, then peel the bag away and discard it. Slice thinly for deli-style chicken slices.
Notes
Serving Suggestions:
- Perfect for sandwiches and wraps.
- Adds protein to salads or snack plates with cheese and crackers.
Storage:
Store the chicken deli slices in an airtight container in the refrigerator for up to 4 days. This pressing method gives the chicken a compact texture, making it easier to slice thinly. The seasoning infuses throughout the meat during the gentle cooking, resulting in a flavorful, homemade deli-style chicken that rivals store-bought options.Pair this chicken deli with our Mexican Pickled Red Onions for a flavor-packed sandwich topping, or slice it over our Easy Mexican Salsa Verde for a bold protein plate. Looking for more chicken inspiration? Try our Chicken Milanesa.
Need dinners for the rest of the week? Get my free PDF with seven easy family dinners. Get the free dinners
Leave a Reply