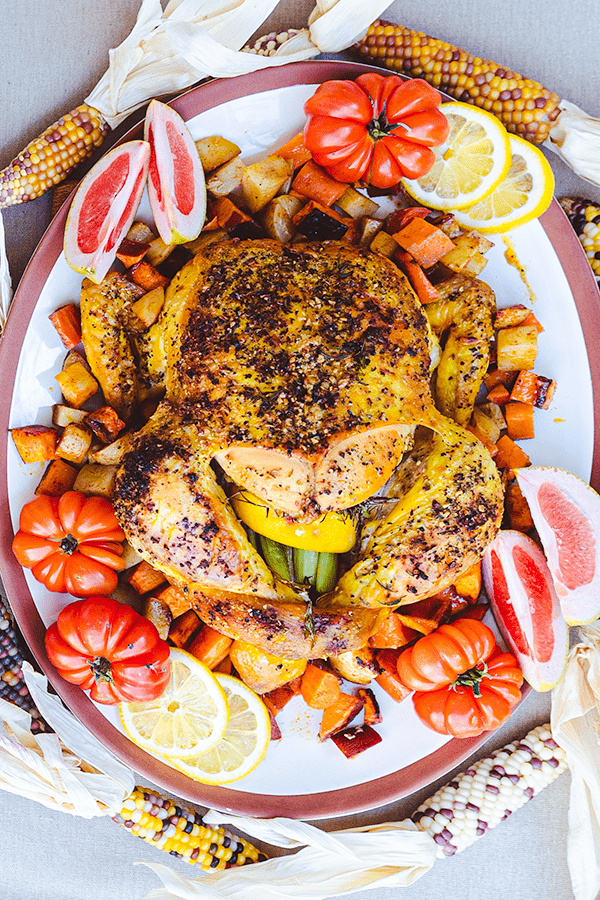
Category: chicken recipes

  • Salt and Pepper Chicken Wings with Crispy Lemongrass

    Salt and Pepper Chicken Wings with Crispy Lemongrass

    These salt and pepper chicken wings are marinated for at least 2 hours, double-fried until deep golden, then tossed in a hot wok with crispy lemongrass, garlic, jalapeño and a homemade toasted-rice flavour powder. Plan about 3 hours start to finish, with most of that hands-off marinating. Cook the chicken to 165°F (74°C).

    This post contains affiliate links. As an Amazon Associate I earn from qualifying purchases.

    Fall is all about pumpkin spice and sweet treats, so I’m going the other way today! My husband’s favourite snack, when he is stuffed full of cinnamon rolls, Thanksgiving roasted lemon garlic chicken and warm lentil and sweet potato salad, is something totally different: salty, spicy and crunchy. Enter these wings!

    They are fried twice, then tossed in a hot wok with fried lemongrass, garlic and fresh jalapeño. The toasted rice flavour powder is the secret. It’s nutty, salty and so good. Put the NFL, hockey or any weekend game on and you will laugh right through the burger and pizza commercials.

    There is no heavy batter here, just a light cornstarch and flour coating. If you’d rather go tangy than toasty, my crispy pickle brine chicken wings are the other direction.

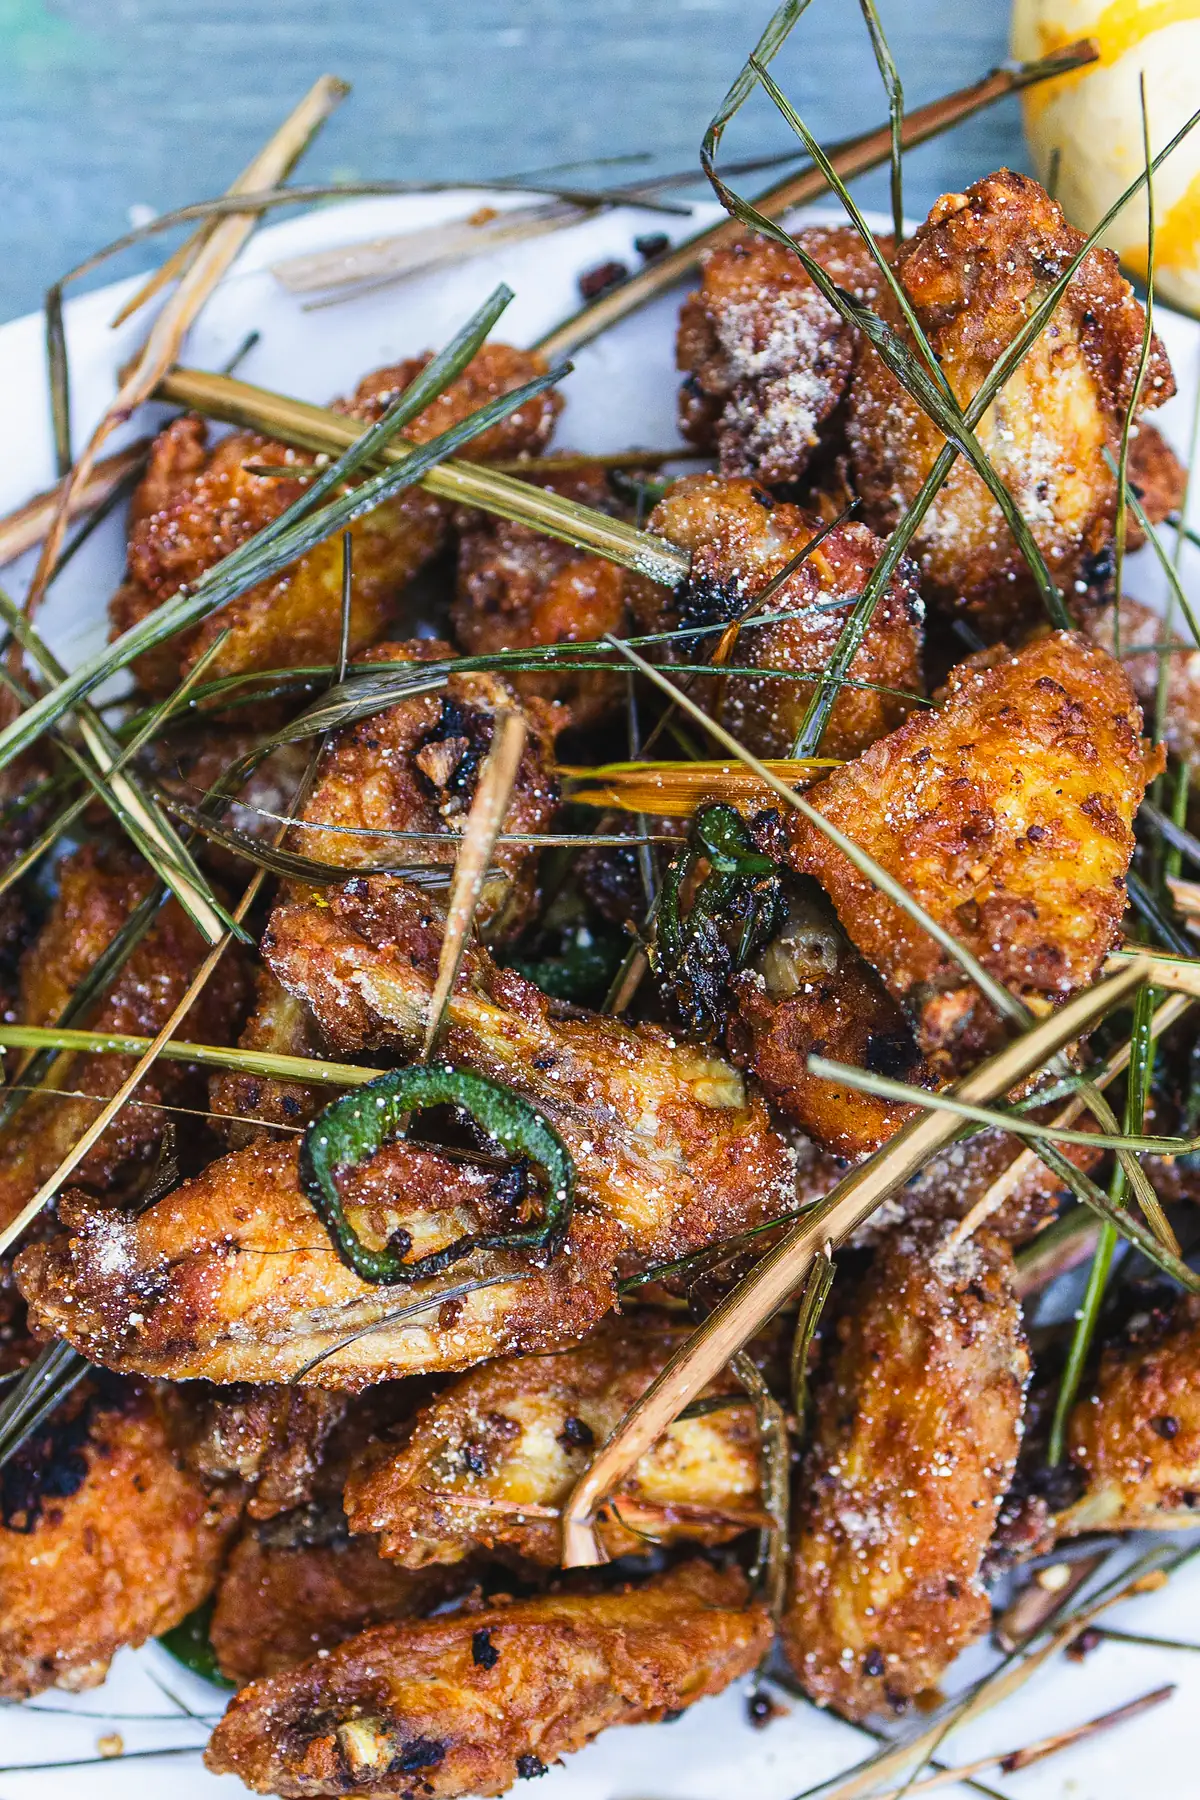
    Plate of crispy salt and pepper chicken wings piled with fried lemongrass strands and a green jalapeño slice, with a small striped gourd on the table.

    Want a week of dinners planned for you? Get my free dinners

    Ingredients

    Most of this is easy to find. The flavour powder is the part to plan ahead for: it uses glutinous sweet rice, vinegar powder and Hat Nem seasoning (or Old Bay).

    • Chicken marinade: 1.5 lb (680 g) chicken wings, split into flats and drumettes (about 16 pieces), plus cornstarch, all-purpose flour, soy sauce, salt, sugar and white pepper.
    • Flavour powder: 50 g glutinous sweet rice, salt, MSG, vinegar powder, sugar, white pepper and Hat Nem seasoning (or Old Bay).
    • For frying: 5 cups neutral cooking oil for the double fry, plus 3 tablespoons of fresh neutral oil for the final toss in a second clean, dry pan.
    • Aromatics: 3 stalks lemongrass sliced very thinly, 3 garlic cloves and 1 jalapeño.

    The flavour powder makes more than you need. You only use 2 teaspoons on the wings, so there is TONS left for next time. Exact amounts are in the recipe card below.

    Equipment you’ll need

    These are Amazon affiliate links. As an Amazon Associate I earn from qualifying purchases.

    How to make salt and pepper chicken wings

    Step 1: Marinate the wings. If your wings are frozen, thaw them completely in the fridge first. Pat the wings dry. In a large bowl, toss them with 2 tablespoons cornstarch, 1/4 cup all-purpose flour, 1 tablespoon soy sauce, 1 teaspoon salt, 1 teaspoon sugar and 2 teaspoons white pepper until every wing is lightly coated. Cover and refrigerate for at least 2 hours. Wash your hands, the cutting board and any tools that touched the raw chicken with hot soapy water, and keep the raw wings away from the finished ones. Don’t rinse the chicken. Use separate tongs or strainers for raw and cooked wings.

    Step 2: Make the flavour powder. Toast 50 g glutinous sweet rice in a dry pan over medium heat, stirring constantly, until golden brown and nutty. Let it cool for a few minutes, then tip it into a high-speed blender with 2 tablespoons salt, 1 teaspoon MSG, 1 teaspoon vinegar powder, 1 teaspoon sugar, 2 teaspoons white pepper and 1 teaspoon Hat Nem seasoning. Blend until fine, then measure out 2 teaspoons for the wings.

    Step 3: Fry the wings twice. Heat 5 cups oil in a wok or deep pot over medium-high heat to 375°F (190°C). The pot should be no more than half full. Working in small batches, lift each wing from the bowl, shake off the loose coating and lower it slowly into the oil, away from you. Fry the wings for about 5 to 7 minutes until pale gold and cooked through. Times vary with wing size and oil temperature. The oil temperature will dip when the wings go in, so adjust the heat to keep it around 350 to 375°F. Check the largest wing of each batch at the thickest part, away from the bone, with an instant-read thermometer: it needs 165°F (74°C). Keep frying any wing that is under 165°F. Move the wings to a wire rack and let them rest about 10 minutes. Turn the heat to low during the rest, then bring the oil back up to 375°F and fry them a second time, a few at a time, for about 2 to 3 minutes until deeply golden and crisp. Drain on the rack.

    Step 4: Crisp the lemongrass. Pat the sliced lemongrass dry and add it to the same hot oil in small handfuls, standing back, because it will bubble up. Fry until golden and crispy. Fish it out with a strainer or slotted spoon, drain, and set it aside in a small bowl. Turn off the heat and leave the pot where it is, away from kids and pets. Never move hot oil. Let it cool while you finish Step 5.

    Step 5: Toss and serve. Heat 3 tablespoons of fresh oil in a second clean, dry wok or pan over high heat until shimmering. Add the minced garlic and sliced jalapeño, give them 2 to 3 quick stirs, then tip in the double-fried wings. Toss hard, scatter in the crispy lemongrass and 2 teaspoons of the flavour powder, and keep tossing until every wing is coated. Plate right away and eat them hot!

    Close-up of golden double-fried chicken wings dusted with flavour powder, with crispy lemongrass and a jalapeño slice.

    Step 6: Clean up after dinner. Once the frying oil is completely cold, which takes a couple of hours, strain it into a sealable container and put it in the trash, or take it to a local oil recycling drop-off. Check your local rules. Never pour it down the drain.

    Tips for crispy wings and mistakes to skip

    • Use a thermometer, not your eyes. Pale gold wings can still be raw inside. Probe the thickest part of the largest wing in each batch, away from the bone, until it reads 165°F (74°C), and keep frying any wing that is under it. This is the USDA safe minimum for chicken.
    • Don’t crowd the pot. Too many wings at once drops the oil temperature and gives you greasy, pale wings. Small batches, trust me.
    • Rest between fries. A short rest on a wire rack lets steam escape so the second fry can really crisp the skin.
    • Have everything ready for the final toss. Garlic goes from fragrant to bitter in seconds. Measure the powder and set out the lemongrass before the wok gets hot.
    • Respect the hot oil. Never leave heating oil unattended and keep a lid nearby. Shake off loose coating, then lower the wings in slowly with a spider strainer or tongs, away from you, so the oil doesn’t spit. Do the final toss in a second clean, dry wok or pan with fresh oil so you never move hot oil. Keep kids and pets away from the pot while the oil cools, and clean it up as described in Step 6. Never pour it down the drain.
    • If oil catches fire: slide a lid over the pot, turn off the heat, and never use water.

    How to store and reheat leftover wings

    Salt and pepper chicken wings with crisp lemongrass strands and a jalapeño slice on a white plate.

    Refrigerate leftover wings within 2 hours of cooking (1 hour if the room is above 90°F / 32°C), in a shallow airtight container. Eat them within 3 to 4 days. Reheat until steaming hot and 165°F (74°C) in the middle. A hot oven with the wings on a wire rack can work, since the rack lets air circulate around them.

    Keep the leftover flavour powder in an airtight container, away from heat and moisture.

    Salt and pepper chicken wings FAQ

    Do you have to double-fry salt and pepper wings?

    The first fry cooks the wings through. The second fry is what makes the skin extra crunchy. If you skip it, you’ll get a softer wing.

    What temperature should chicken wings be cooked to?

    The USDA says chicken is safe at an internal temperature of 165°F (74°C). Check the largest wing in each batch, at the thickest part and away from the bone, and keep frying any wing that is under 165°F.

    What is in salt and pepper seasoning?

    Here it’s a flavour powder made from toasted glutinous sweet rice blended with salt, white pepper, a little sugar, MSG, vinegar powder and Hat Nem seasoning. You only use 2 teaspoons on the wings.

    What temperature do you fry chicken wings at?

    Heat the oil to 375°F (190°C) before the wings go in. It drops as the chicken goes in, so fry in small batches and adjust the heat to keep it from falling too far.

    What oil is best for frying wings?

    Use a neutral cooking oil, so it doesn’t compete with the lemongrass, garlic and jalapeño. Heat it in a wok or deep pot and don’t fill the pot more than halfway.

    How do you keep fried wings crispy?

    Drain them on a wire rack instead of a flat plate, and do the final toss right before serving. Wings left to sit in a covered dish lose their crunch.

    More recipes you’ll love

    Make it your own, and make the extra powder. You’ll find a use for it!

    Need more dinner ideas? Grab my free dinners

    Overhead view of salt and pepper chicken wings with fried lemongrass, a jalapeño slice and a small striped gourd.

    Salt and Pepper Chicken Wings

    Chicken wings coated in a light cornstarch and flour marinade, double-fried, then tossed in a hot wok with crispy lemongrass, garlic, jalapeño and a homemade toasted-rice flavour powder. Cook the chicken to 165°F.
    Prep Time 25 minutes
    Cook Time 45 minutes
    Marinate 2 hours
    Total Time 3 hours 10 minutes
    Servings: 4 appetizer portions
    Course: Appetizer, Snack
    Cuisine: Asian

    Ingredients
      

    Chicken marinade
    • 1.5 lb chicken wings about 680 g; split into flats and drumettes (about 16 pieces), patted dry
    • 2 tbsp cornstarch
    • ¼ cup all-purpose flour
    • 1 tbsp soy sauce
    • 1 tsp salt
    • 1 tsp sugar
    • 2 tsp white pepper
    Flavour powder
    • 50 g glutinous sweet rice
    • 2 tbsp salt
    • 1 tsp MSG
    • 1 tsp vinegar powder
    • 1 tsp sugar
    • 2 tsp white pepper
    • 1 tsp Hat Nem seasoning or Old Bay; this makes more powder than you need, you only use 2 teaspoons
    For frying
    • 5 cups neutral cooking oil for the double fry
    • 3 tbsp fresh neutral cooking oil for the final toss in a second clean, dry wok or pan
    Aromatics
    • 3 stalks lemongrass sliced very thinly
    • 3 cloves garlic minced
    • 1 jalapeño sliced thinly

    Equipment

    • Wok or deep pot for the double fry
    • Second clean, dry wok or large pan for the final toss with fresh oil
    • Lid that fits your wok or pot keep it nearby for oil safety
    • Tongs use separate tongs for raw and cooked wings
    • Deep-fry thermometer to hold the oil near 375°F / 190°C
    • Instant-read thermometer for 165°F / 74°C
    • Wire rack for resting and draining
    • Spider strainer or slotted spoon for the lemongrass
    • high speed blender for the flavour powder
    • Dry skillet or pan for toasting the rice

    Method
     

    1. If your wings are frozen, thaw them completely in the fridge first. Pat the wings dry. In a large bowl, toss the wings with the cornstarch, flour, soy sauce, 1 teaspoon salt, 1 teaspoon sugar and 2 teaspoons white pepper until every wing is lightly coated. Cover and refrigerate for at least 2 hours. Wash your hands, the cutting board and any tools that touched the raw chicken with hot soapy water, and keep the raw wings away from the finished ones. Don’t rinse the chicken. Use separate tongs or strainers for raw and cooked wings.
    2. Toast the glutinous sweet rice in a dry pan over medium heat, stirring constantly, until golden brown and nutty. Let it cool for a few minutes, then tip it into a high-speed blender with the 2 tablespoons salt, MSG, vinegar powder, 1 teaspoon sugar, 2 teaspoons white pepper and Hat Nem seasoning. Blend until fine. Measure out 2 teaspoons for the wings and keep the rest in an airtight container.
    3. Heat the 5 cups oil in a wok or deep pot (no more than half full) over medium-high heat to 375°F (190°C). In small batches, lift each wing from the bowl, shake off the loose coating and lower it slowly into the oil, away from you. Fry the wings about 5 to 7 minutes until pale gold and cooked through. Times vary with wing size and oil temperature. The oil temperature dips when the wings go in, so adjust the heat to keep it around 350 to 375°F. Check the largest wing of each batch at the thickest part, away from the bone, with an instant-read thermometer: it must reach 165°F (74°C). Keep frying any wing that is under 165°F. Rest the wings on a wire rack about 10 minutes and turn the heat to low during the rest.
    4. Bring the oil back to 375°F (190°C) and fry the wings a second time, a few at a time, about 2 to 3 minutes until deeply golden and crisp. Drain on the wire rack.
    5. Pat the sliced lemongrass dry and add it to the same hot oil in small handfuls, standing back, because it will bubble up. Fry until golden and crispy. Fish it out with a strainer, drain and set aside. Turn off the heat and leave the pot where it is, away from kids and pets. Never move hot oil. Let it cool while you finish the next step.
    6. Heat 3 tablespoons of fresh oil in a second clean, dry wok or pan over high heat until shimmering. Add the garlic and jalapeño and stir 2 to 3 times. Tip in the double-fried wings, add the crispy lemongrass and 2 teaspoons flavour powder, and toss until every wing is coated. Plate right away and serve hot.
      Close-up of golden double-fried chicken wings dusted with flavour powder, with crispy lemongrass and a jalapeño slice.
    7. Once the frying oil is completely cold, which takes a couple of hours, strain it into a sealable container and put it in the trash, or take it to a local oil recycling drop-off. Check your local rules. Never pour it down the drain.
    Notes

    Hot oil safety: never leave heating oil unattended and keep a lid nearby. If oil catches fire, slide a lid over the pot, turn off the heat, and never use water. Lower wings in slowly with a spider strainer or tongs, away from you. Never move hot oil: do the final toss in a second clean, dry wok or pan with fresh oil. Keep kids and pets away from the pot while the oil cools. Once it is completely cold (a couple of hours), strain it into a sealable container and put it in the trash, or take it to a local oil recycling drop-off. Check your local rules. Do not pour it down the drain.
    Thaw frozen wings completely in the fridge first. Wash your hands, the cutting board and any tools that touched raw chicken with hot soapy water, and use separate tongs or strainers for raw and cooked wings.
    The marinade is at least 2 hours. Prep, cooking and resting times are estimates and vary with wing size and oil temperature.
    The flavour powder makes more than you need. Store the leftover in an airtight container, away from heat and moisture.
    Refrigerate leftovers within 2 hours of cooking (1 hour if the room is above 90°F / 32°C), eat within 3 to 4 days, and reheat until steaming hot and 165°F (74°C) in the middle.
  • Crunchy Amaranto & Cereal Milanesa

    Crunchy Amaranto & Cereal Milanesa

    There are days when dinner isn’t planned — it’s improvised. The pantry has random odds and ends, the clock is ticking, and hungry kids are already pulling at your sleeve. One of those days gave us this recipe. Instead of reaching for breadcrumbs, I spotted a bag of amaranto and a box of crunchy cereal sitting on the shelf — and something clicked.

    This post may contain affiliate links. If you purchase through these links, I may earn a small commission at no extra cost to you. Thank you for supporting Love & Harvest!

    The result? The crispiest, most golden milanesa we’d ever made. It came together in 30 minutes, and every single piece disappeared before I even sat down. This Crunchy Amaranto & Cereal Milanesa is different from our classic chicken milanesa — lighter, crunchier, and packed with flavour. It’s now a permanent fixture in our dinner rotation.

    Why You’ll Love This Recipe

    • Ready in 30 minutes with simple pantry staples
    • Extra-crispy texture from the amaranth and cereal coating — unlike anything breadcrumbs can achieve
    • Works in a pan or the air fryer for a lighter option
    • Kid-friendly and endlessly customisable with toppings
    • Naturally dairy-free

    Ingredient Notes

    Amaranto (Amaranth)

    Amaranth is a tiny, ancient seed with a mild, nutty flavour. When used raw as a coating, it creates a delicate, poppable crunch — lighter than breadcrumbs but far crispier. Look for it at health food stores or Mexican grocery shops. This artisanal amaranth is our favourite for its texture and quality.

    Crunchy Cereal

    Cornflakes are our go-to — lightly crushed, not powdered. You want small, jagged flakes that create pockets of crunch. Any similar cereal works beautifully. Crush them in a zip-lock bag with your hands or gently with a meat mallet.

    Chicken

    Slice your breasts thin or pound them flat — even thickness ensures the chicken cooks through before the coating over-browns. Don’t skip the flour dredge; it anchors everything else to the surface.

    Seasoning

    Garlic powder, onion powder, salt, and pepper — nothing fancy. The crunch does the talking here. Add smoked paprika or a pinch of cumin if you want a little extra warmth.

    Crunchy Amaranto & Cereal Milanesa

    Golden, extra-crispy milanesa coated in amaranth and crunchy cereal — a pantry discovery that became a family favourite.

    Prep Time 10 minutes
    Cook Time 20 minutes
    Total Time 30 minutes
    Servings: 4 servings
    Calories: 420

    Ingredients


    • 2 large chicken breasts sliced thin or pounded flat
    • 2 eggs beaten
    • ½ cup flour
    • ¾ cup amaranto (amaranth)
    • 1 to 1½ cups crunchy cereal cornflakes or similar, lightly crushed
    • 1 tsp garlic powder
    • 1 tsp onion powder
    • ½ tsp salt
    • ½ tsp black pepper
    • oil for frying or spray oil for air fryer

    Method


    Prepare the breading
    1. In a shallow bowl, combine the crushed cereal, amaranto, garlic powder, onion powder, salt, and pepper. Mix well.
    Set up coating stations
    1. Set up three shallow bowls: one with flour, one with the beaten eggs, and one with the amaranto–cereal mixture.
    Coat the chicken
    1. For each chicken piece: dredge in flour and shake off the excess, then dip into the beaten eggs. Press firmly into the cereal and amaranto mixture until fully coated on both sides.
    Cook the milanesa
    1. Pan fry: Heat about 1 cm of oil in a skillet over medium heat. Cook chicken 3–4 minutes per side until golden brown and cooked through. Place on a rack or paper towel to drain.
    2. Air fryer: Spray both sides lightly with oil. Cook at 200°C / 400°F for 10–12 minutes, flipping halfway.

    Notes

    Don’t crush the cereal too fine — small flakes give the best crunch. Let breaded chicken rest 5 minutes before cooking so the coating sticks. For extra flavour, add smoked paprika or cumin to the coating mixture.

    Step-by-Step Tips

    1. Don’t crush the cereal too fine. Small, irregular flakes give the best crunch. Think rough and jagged — not fine crumbs.
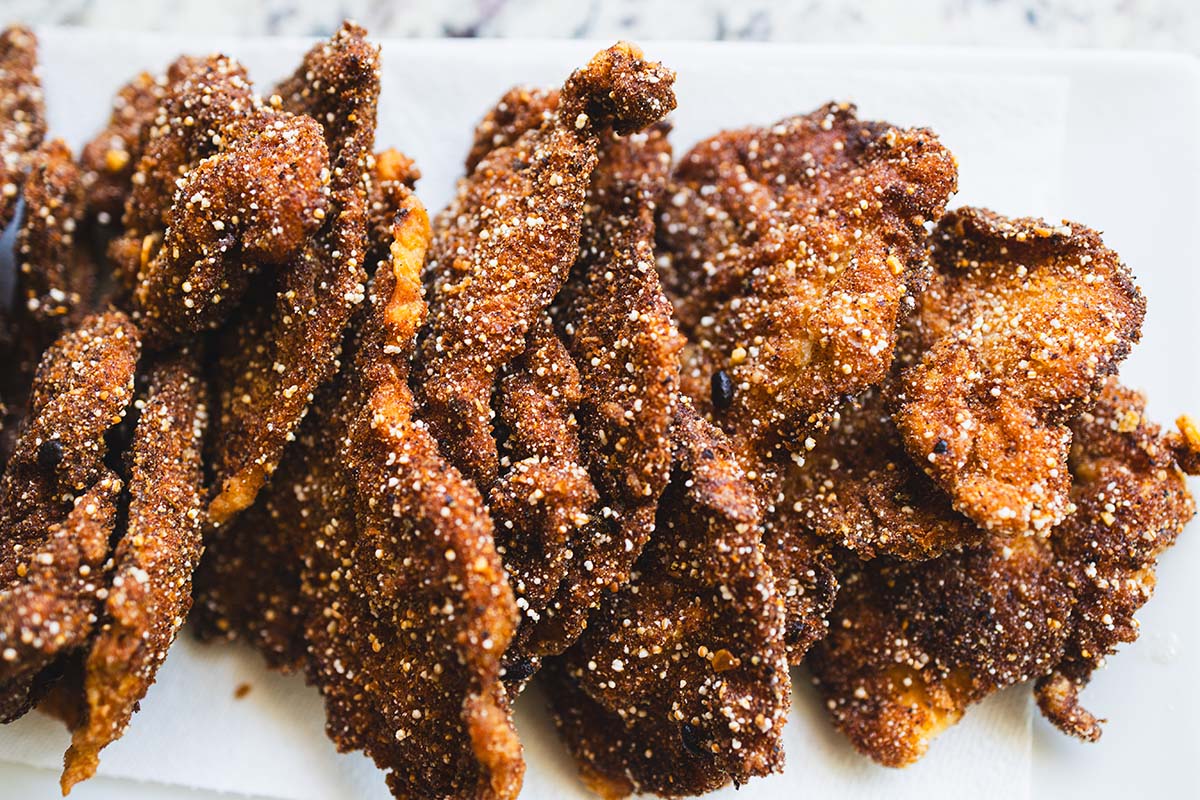
    Stack of crunchy amaranth and cereal-crusted milanesa cutlets
    1. Let the breaded chicken rest for 5 minutes before cooking. This helps the coating bond and reduces the chance of it falling off in the pan.
    2. Press firmly. When coating, use your palm to press the amaranto–cereal mixture into the chicken. The harder you press, the better it sticks.
    Close-up of the crisp amaranth and cornflake coating on fried milanesa
    1. Don’t overcrowd the pan. Cook in batches if frying. Overcrowding drops the oil temperature and leads to a soggy coating instead of a crispy one.
    Golden crunchy amaranto cereal milanesa — pan-fried to perfection, crispy on the outside, juicy inside
    1. Air fryer tip: A generous spray of oil on both sides is the key to getting that golden colour without deep frying. Don’t skip it.

    Storage & Reheating

    Store leftovers in an airtight container in the fridge for up to 3 days. To reheat, use the oven at 180°C / 350°F for 8–10 minutes, or pop them back in the air fryer for 4–5 minutes at 180°C — this keeps the coating crispy. Avoid the microwave if you can; it softens the crust quickly. These also freeze well for up to 2 months, before or after cooking.

    Frequently Asked Questions

    Can I make this gluten-free?

    Yes! Simply swap the regular flour for a gluten-free all-purpose blend, and make sure your cereal is certified gluten-free — many cornflakes contain barley malt. Amaranth is naturally gluten-free, so the rest of the coating stays exactly the same. The result is just as crispy.

    Can I use a different protein?

    Absolutely. Thin pork loin or turkey breast work just as well as chicken. You can even use firm fish fillets — just reduce the cook time slightly and be gentle when flipping so the coating stays intact.

    What other cereals work besides cornflakes?

    Yes to several options! Rice puffs, bran flakes, or any lightly crunchy cereal works well. Avoid anything too sweet or heavily flavoured — you want the seasoning in the coating to come through. Whatever you use, keep the pieces chunky rather than powdery for maximum crunch.

    Can I bake these instead of frying?

    Yes! Place the coated chicken on a wire rack over a baking sheet, spray generously with oil, and bake at 200°C / 400°F for 20–22 minutes, flipping once halfway through. The crust won’t be quite as crispy as pan-fried or air-fried, but it’s still delicious — and completely hands-off.

  • Mexican Fire Roast Chicken

    Mexican Fire Roast Chicken

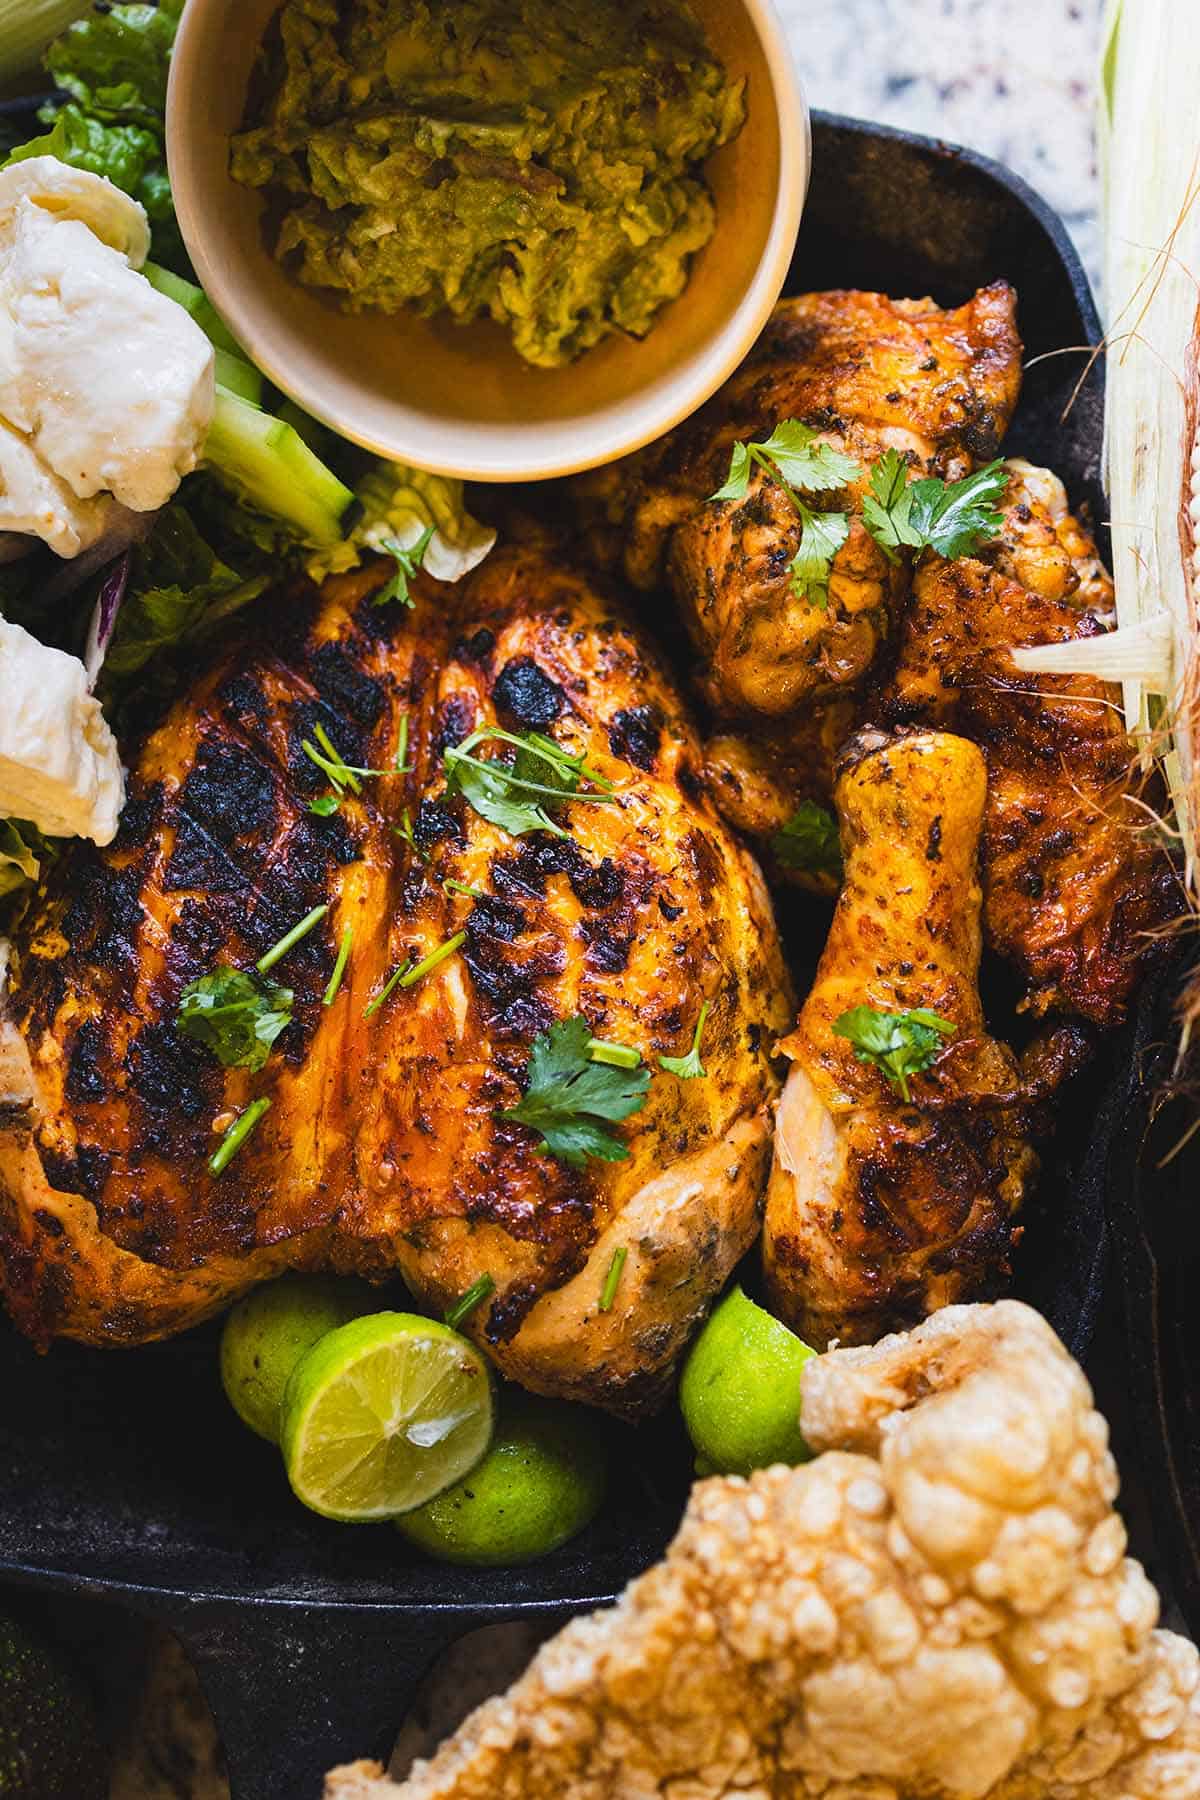
    If you have ever walked past a pollo asado shop in Mexico and smelled that charcoal smoke, you already know why this chicken shows up on our table. It’s juicy, a little smoky, and the kind of dinner the whole family cleans up without a fight.

    Mexican fire roast chicken on a platter with limes and fresh herbs

    This is my homemade take on the charcoal-grilled chicken made famous by Mexican chains like Pollo Feliz. Love & Harvest is not affiliated with or endorsed by Pollo Feliz; Pollo Feliz® is a trademark of its owner.

    The chicken sits in an overnight marinade so the flavour has time to sink in. Charcoal is my favourite way to cook it. The oven works too when we don’t feel like lighting the grill.

    Let me show you how we make it!

    Want a week of dinners planned for you? Get my free dinners

    Mexican Charcoal Roast Chicken at Home

    Sure, you can roast it in the oven. If you have the chance, go for charcoal. It makes all the difference.

    Charcoal-grilled chicken halves and drumsticks in a cast iron pan

    Flavour

    This chicken is anything but ordinary. Achiote and annatto powder give it that reddish-golden colour, while garlic, oregano, and a touch of chili bring the bold bits. Milk and vinegar help tenderize the meat, so every bite comes out juicy.

    You get smoky, tangy, garlicky chicken with just a hint of spice. That is what we want.

    Why We Love This Recipe

    • That charcoal-shop vibe – the same style of pollo asado you find all over Mexico, made at home.
    • Juicy and tender – thanks to the milk and lemon in the marinade.
    • Flexible cooking – charcoal for smokiness, or oven roasting when it’s Tuesday and nobody wants to deal with coals.
    • Family favourite – rice, tortillas, or a simple salad all work next to it.

    Close-up of the charred, marinated skin of grilled chicken

    Charcoal for the Win

    Yes, you can roast it in the oven. Grilling over charcoal is the way to go if you want that street-food style flavour. Charcoal adds a layer of smokiness that no oven can copy.

    Tip: make sure the coals are hot but not flaming. Cook the chicken low and slow for the juiciest results.

    The links below are Amazon affiliate links. As an Amazon Associate I earn from qualifying purchases, at no extra cost to you.

    Recommended tools

    Any comparable thermometer and roasting pan work.

    Ingredients That Matter

    Achiote Powder (or Annatto / Paprika)

    Why I use it: Achiote is the heart of a lot of Mexican grilled chicken. It gives the chicken its reddish-golden colour and a slightly earthy, peppery flavour. Without it, you miss that classic pollo asado look.

    Mexican Oregano

    Why I use it: Different from Mediterranean oregano. Mexican oregano has citrusy, floral notes that brighten the marinade and balance the garlic and chili.

    Garlic (Fresh + Powder)

    Why I use it: Garlic is doing a lot of work here. Fresh garlic gives a sharp punch. The powder adds depth that clings to the chicken.

    Milk

    Why I use it: Milk works as a natural tenderizer. It softens the chicken so it stays juicy after roasting or grilling, and it mellows the sharper flavours in the marinade.

    Vinegar + Lemon Juice

    Why I use it: These acids help the marinade soak deeper, and they brighten the flavour so the chicken doesn’t taste flat. Toss the squeezed lemon half into the bowl for extra citrus aroma.

    Grilled chicken with limes, salsa and chicharrón on a serving platter

    Inspired by Mexican Charcoal Chicken Chains

    This is my homemade take on the pollo asado you buy by the whole bird at roast-chicken shops all over Mexico. Nothing beats grabbing one straight off the grill when you’re out, but this version gets us pretty close at home.

    The overnight marinade is the key. Give it at least 8 to 12 hours so the flavours fully penetrate the chicken. Then roast or grill until golden, and serve with warm tortillas, salsa, and maybe grilled onions and peppers.

    Mexican charcoal chicken spread with salad, corn, salsa and chicharrón

    Frequently Asked Questions

    What is Mexican charcoal chicken (pollo asado)?

    Pollo asado is whole chicken seasoned and cooked over charcoal, the kind you buy by the bird at roast-chicken shops across Mexico. This recipe is my homemade version of that style: an overnight achiote marinade, then charcoal (or the oven) until the chicken is juicy and golden.

    Can I use chicken pieces instead of a whole chicken?

    Absolutely! Chicken thighs, drumsticks, or a spatchcocked (butterflied) chicken all work with this marinade. Bone-in, skin-on pieces are best for flavour. Reduce cook time a little. Bone-in pieces usually take 35 to 45 minutes on the grill.

    What is achiote powder and where can I find it?

    Achiote (also called annatto) is a red-orange spice made from the seeds of the annatto tree. It’s widely used in Mexican and Latin American cooking and gives this chicken its golden-red colour. You can find it in most Latin grocery stores, or substitute with a mix of paprika and a pinch of turmeric if needed.

    How long should I marinate the chicken?

    For best results, marinate overnight, at least 8 to 12 hours. If you’re short on time, a minimum of 2 hours still works, though the flavour won’t be as deep.

    Can I freeze this chicken?

    Yes. You can freeze the marinated (uncooked) chicken in the marinade for up to 3 months. You can also freeze leftover cooked chicken for up to 2 months. Reheat in the oven at 350°F until warmed through to keep it juicy.

    What should I serve with Mexican fire roast chicken?

    Serve it the charcoal-shop way: warm corn tortillas, smoky tomato salsa, grilled green onions, and Mexican rice on the side. Avocado or guacamole, refried beans, or a fresh cabbage slaw also pair well.

    Charcoal-grilled chicken halves and drumsticks in a cast iron pan

    Mexican Fire Roast Chicken

    Whole chicken marinated overnight with achiote, Mexican oregano, garlic, chili flakes, vinegar and lemon, then cooked on a charcoal grill over indirect heat (or in the oven). Serves 6.
    Prep Time 10 minutes
    Cook Time 1 hour
    Marinate 8 hours
    Total Time 9 hours 10 minutes
    Servings: 6 people
    Calories: 340

    Ingredients
      

    Chicken Marinate
    • 2 kg whole chicken
    • 1 tbsp ground achiote powder
    • 1 tbsp annatto powder / paprika powder
    • 1 tbsp Mexican oregano
    • 1½ tbsp minced garlic
    • 1 tbsp dried garlic powder
    • 1 tsp sugar
    • 1 tsp chili flake
    • 2 tbsp distilled white vinegar
    • ½ fresh lemon
    • 2 tbsp soy sauce
    • 1 cup milk
    • ½ tsp salt and pepper

    Equipment

    • charcoal grill

    Method
     

    Marinate Chicken Overnight
    1. In a large mixing bowl, combine achiote powder, annatto (or paprika), oregano, minced garlic, garlic powder, sugar, chili flakes, vinegar, soy sauce, milk, salt, pepper, and the juice of half a lemon.
    2. Toss the squeezed lemon half into the bowl as well to infuse extra citrus flavour. Mix everything until well combined.
    3. Place your cleaned whole chicken (or chicken pieces) into a large zip-top bag or deep dish.
      Pour the marinade over the chicken, making sure it is fully coated.
      Cover and refrigerate overnight (8–12 hours) for best results. This step ensures the flavours soak deep into the meat.
    To Grill the Chicken over Charcoal
    1. Remove the chicken from the fridge about 30 minutes before cooking so it comes closer to room temperature. Discard the lemon half from the marinade. And reserve half the marinade to baste the chicken with its juices while cooking to keep it moist and flavourful.
    2. Preheat your charcoal grill until hot and glowing.
      Place the chicken on the grill over indirect heat (not directly above the flames) and cover.
      Cook, turning occasionally, until the chicken is golden brown and reaches an internal temperature of 165°F (74°C) at the thickest part of the meat. Remember half way through cooking, baste the chicken with the juice and marinade.
      This usually takes 45–60 minutes, depending on the size of your chicken.
    To Oven Roast Chicken
    1. Preheat your oven to 375°F (190°C).
      Place the chicken on a roasting rack in a baking dish.
      Roast for about 60–75 minutes, or until the chicken reaches an internal temperature of 165°F (74°C). Remember half way through cooking, baste the chicken with the juice and marinade.
      For extra crispy skin, broil on high for the last 3–5 minutes.
    Rest the Chicken
    1. Let the chicken rest for 10 minutes before carving to allow the juices to redistribute.
      Serve with warm tortillas, salsa, or your favorite Mexican sides.

    Cooking this one this week? Get my free PDF with seven easy family dinners, so the rest of the week is planned too. Get the free dinners

  • Thai Chicken Salad

    Thai Chicken Salad

    This Thai Chicken Salad is a fresh, vibrant dish with shredded chicken, crunchy veggies, and a tangy dressing. It’s light, easy to make, and perfect for hot days when you want something fresh without turning on the stove.

    This post may contain affiliate links. If you purchase through these links, I may earn a small commission at no extra cost to you. Thank you for supporting Love & Harvest!

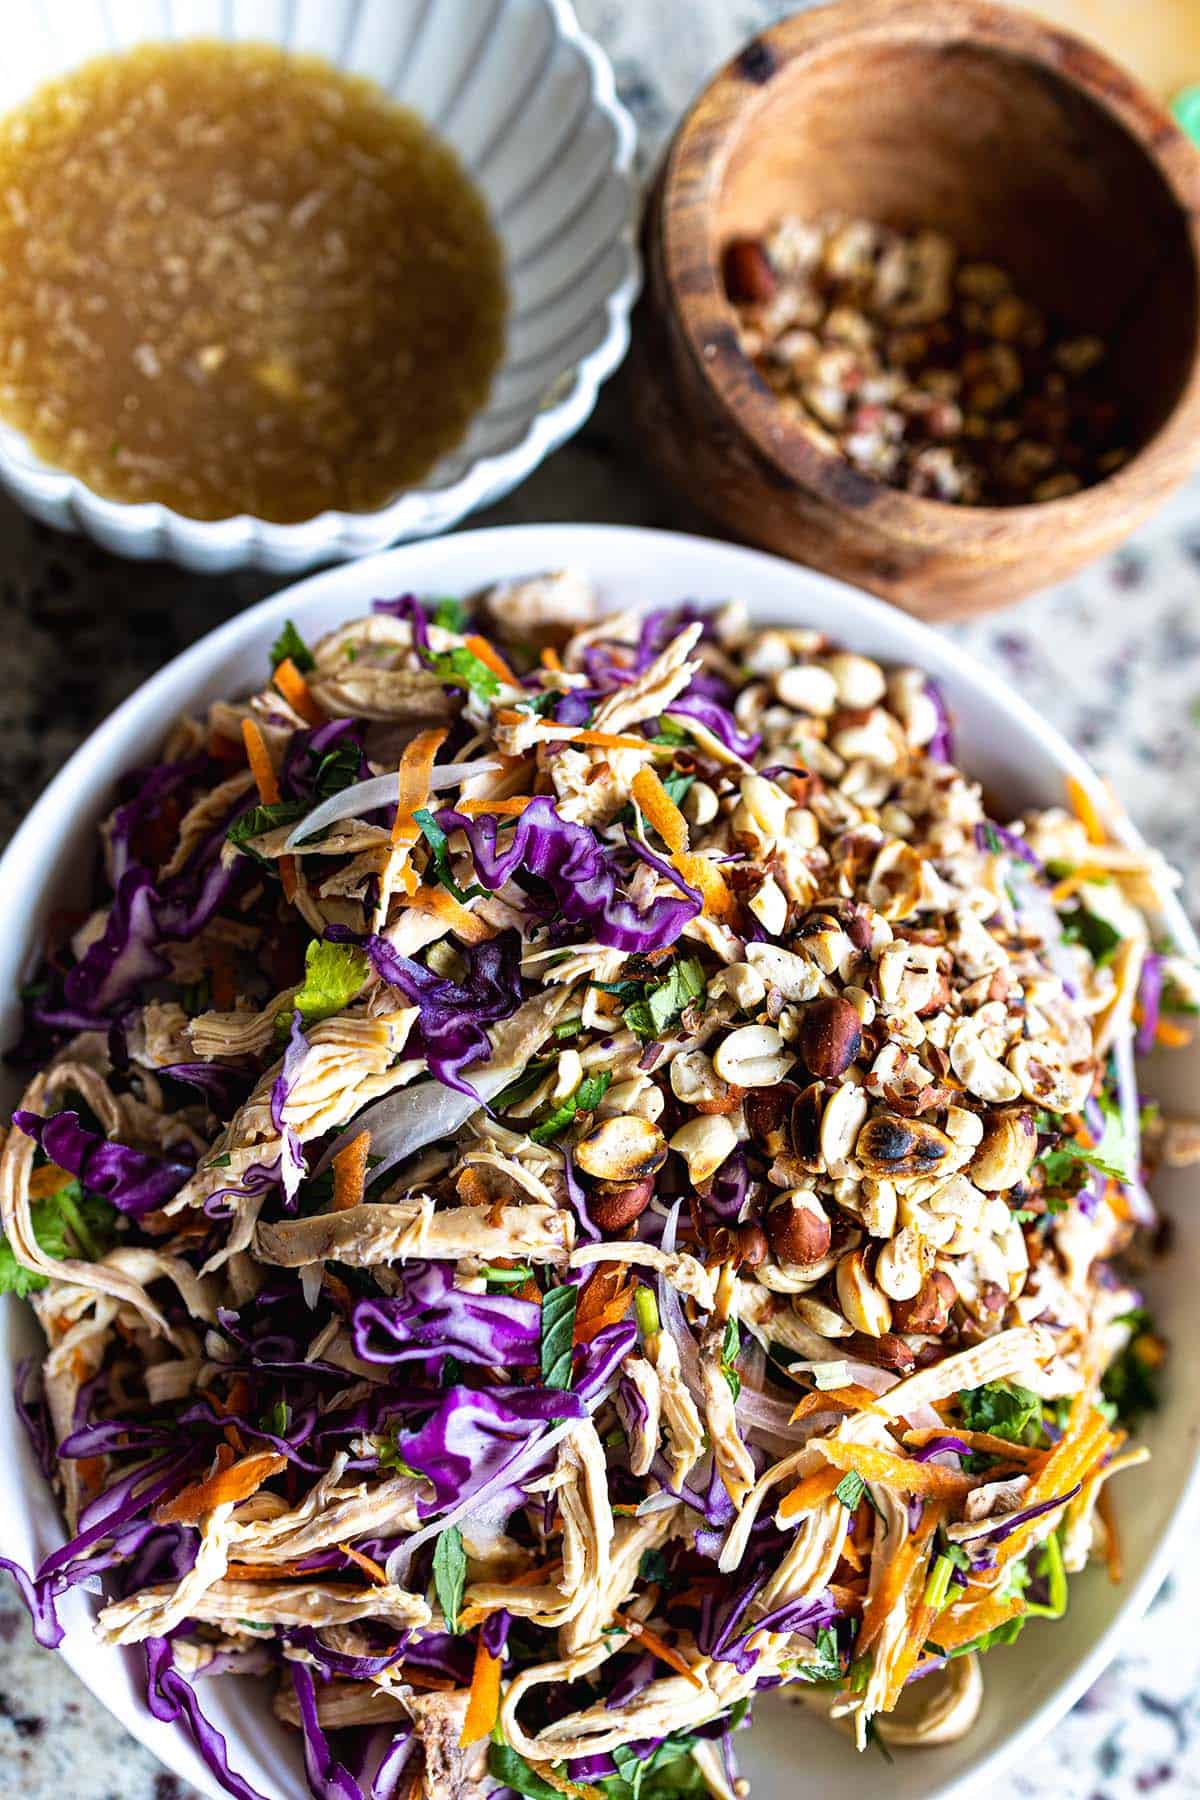
    Fresh shredded chicken and vibrant vegetables in a colorful salad.

    Why We Love This Recipe

    When the weather heats up and the last thing you want is to turn on the stove, this Thai Chicken Salad is the answer. It’s bright, refreshing, and loaded with crunchy vegetables, tender chicken, and a zesty, tangy dressing that pulls it all together.

    We love how quick and easy it is to throw together — especially if you use pre-cooked or leftover chicken. You get a full, satisfying meal without heating up your kitchen. It’s the kind of salad that is light but filling, and packed with flavor.

    And let’s not forget the peanuts — they add the perfect crunch and a nutty finish that makes every bite exciting.

    Thai chicken salad with purple cabbage, carrots and herbs in a white bowl

    One of Our Picnic Favourite Recipes

    This salad travels so well, which makes it a top pick for picnics, potlucks, and even lunch on the go. The veggies stay crisp, and the flavours actually get better as they sit and marinate a bit in the dressing.

    You can keep the dressing on the side until you’re ready to serve, or toss everything together right before heading out — it holds up beautifully either way.

    Why we love it as a family is that it’s dairy-free, and gluten-free if your fish sauce is labelled gluten-free, so it works for almost everyone at the table.

    Thai Chicken Salad Ingredients

    Here’s what you’ll need to make it:

    Ingredients

    Cooked Chicken

    • Shredded or sliced — grilled, poached, or rotisserie all work. Using leftover chicken makes this a genuinely no-cook meal. The chicken provides that filling protein base that turns this from a side salad into a complete meal.

    Shredded Cabbage or Lettuce

    • The crunchy, fresh base of the salad. Napa cabbage gives the most authentic Thai crunch, but any crisp variety works. Shred it thin for the best texture.

    Fresh Cilantro and Mint

    • These herbs give the salad its unmistakable Thai freshness. Don’t skip them — they’re what make this salad taste alive and aromatic. Use both generously.

    Fish Sauce

    • The secret weapon in the dressing. I use Three Crabs fish sauce — the brand I actually keep in the kitchen. A little goes a long way in building that deep umami base.

    Chopped Peanuts

    • For crunch and a nutty contrast. Toast them lightly in a dry pan for even more depth of flavor.

    The Dressing

    • A tangy blend of lime juice, a touch of honey or sugar, fish sauce or soy sauce, garlic, and a little chili for heat. Balance is key — it should be sour, salty, sweet, and just a little spicy all at once.

    Cabbage and carrot slaw with chopped peanuts and a bowl of dressing on the side

    Other Food to Pair with This Salad

    This Thai Chicken Salad is a meal on its own, but here are some delicious sides or extras to serve with it:

    • Sticky rice or jasmine rice – A great way to turn it into a heartier dinner.

    • Fresh spring rolls – Another no-cook favourite with rice paper and veggies or boiled shrimps (optional).

    • Grilled corn or skewers – If you’re firing up the BBQ, a few grilled additions pair perfectly.

    • Thai iced tea or cucumber water – Something cool and refreshing to drink alongside it.

    A Summer Meal

    Whether you’re hosting a backyard lunch, prepping meals for the week, or just trying to avoid heating up the stove, this Thai Chicken Salad checks all the boxes: easy, fresh, and seriously delicious. If you love Asian-inspired flavors, you’ll also enjoy our 30-minute Thai basil chicken or the bold flavors in our lemongrass chicken drumsticks.

    Frequently Asked Questions

    Can I make Thai Chicken Salad ahead of time?

    Yes — prepare all the components separately and store in the fridge for up to 2 days. Keep the dressing in a separate container and toss just before serving to maintain maximum crunch.

    What can I use instead of fish sauce?

    Soy sauce or tamari are great substitutes for a vegetarian version. You can also use coconut aminos for a soy-free alternative. The dressing will have a slightly different flavor but will still be delicious.

    How do I cook the chicken for this salad?

    Poaching is our favorite method — place chicken breasts in simmering salted water for 15–18 minutes, then shred with two forks. Rotisserie chicken is an even quicker shortcut. Grilled chicken also adds a lovely smoky dimension.

    Is Thai Chicken Salad gluten-free?

    It can be, when your fish sauce (and any soy sauce swap) is gluten-free. Just double-check the label — some fish sauce brands add wheat. I use Three Crabs; always verify the bottle you buy if gluten is a concern.

    Can I add noodles to this salad?

    Absolutely! Rice noodles or glass noodles cooked according to package directions and tossed with the dressing make a more substantial noodle salad. It’s essentially a Thai noodle bowl at that point — just as delicious.

    Thai chicken salad with shredded chicken, purple cabbage, carrots and chopped peanuts, with a bowl of lime dressing on the side.

    Thai Chicken Salad

    We love how quick and easy it is to throw together — especially if you use pre-cooked or leftover chicken. You get a full, satisfying meal without heating up your kitchen. It’s the kind of salad that is light but filling, and packed with flavor.
    Prep Time 20 minutes
    Cook Time 25 minutes
    Total Time 45 minutes
    Servings: 6 people
    Course: Appetizer, Salad
    Cuisine: Thai
    Calories: 280

    Ingredients
      

    Salad
    • 3 cups poached chicken breast or rotisserie chicken
    • 3 cups shredded white cabbage
    • 3 cups shredded purple cabbage
    • 1 cups shredded carrots
    • ½ cup shredded red onion
    • ¼ cup chopped mint leaves
    • 1 cup chopped cilantro
    • ½ cup roasted peanuts, chopped
    Lime and Fish Sauce Dressing (Nuoc Cham)
    • ¼ cup fresh lime juice
    • 2 tbsp fish sauce
    • 2 tbsp rice vinegar
    • 1 tbsp honey
    • 1 garlic clove
    • 1 red chili, finely minced (optional)

    Method
     

    Salad
    1. In a large bowl, combine the shredded chicken, cabbage, carrots, red onion, mint, and cilantro. Toss well to mix.
    Dressing
    1. In a small bowl, whisk together the lime juice, fish sauce, rice vinegar, honey or sugar, garlic, and chili (if using) until the sugar dissolves.
    2. When ready to serve, pour the dressing over the salad and toss well to coat everything evenly.
    3. Transfer to a serving platter or individual bowls. Top with the chopped peanuts. Serve immediately and enjoy!

  • Lemongrass Chicken Drumsticks

    Lemongrass Chicken Drumsticks

    After a long day on the trail, nothing hits quite like the scent of lemongrass drifting over a campfire. These Lemongrass Chicken Drumsticks have become our family’s most-requested camping meal — marinated overnight in a bold blend of fish sauce, dark soy, brown sugar, and fragrant lemongrass, then grilled until the skin is gloriously crispy and caramelized. The best part: all the work happens at home. At the campsite, you just fire up the grill.

    This post may contain affiliate links. If you purchase through these links, I may earn a small commission at no extra cost to you. Thank you for supporting Love & Harvest!

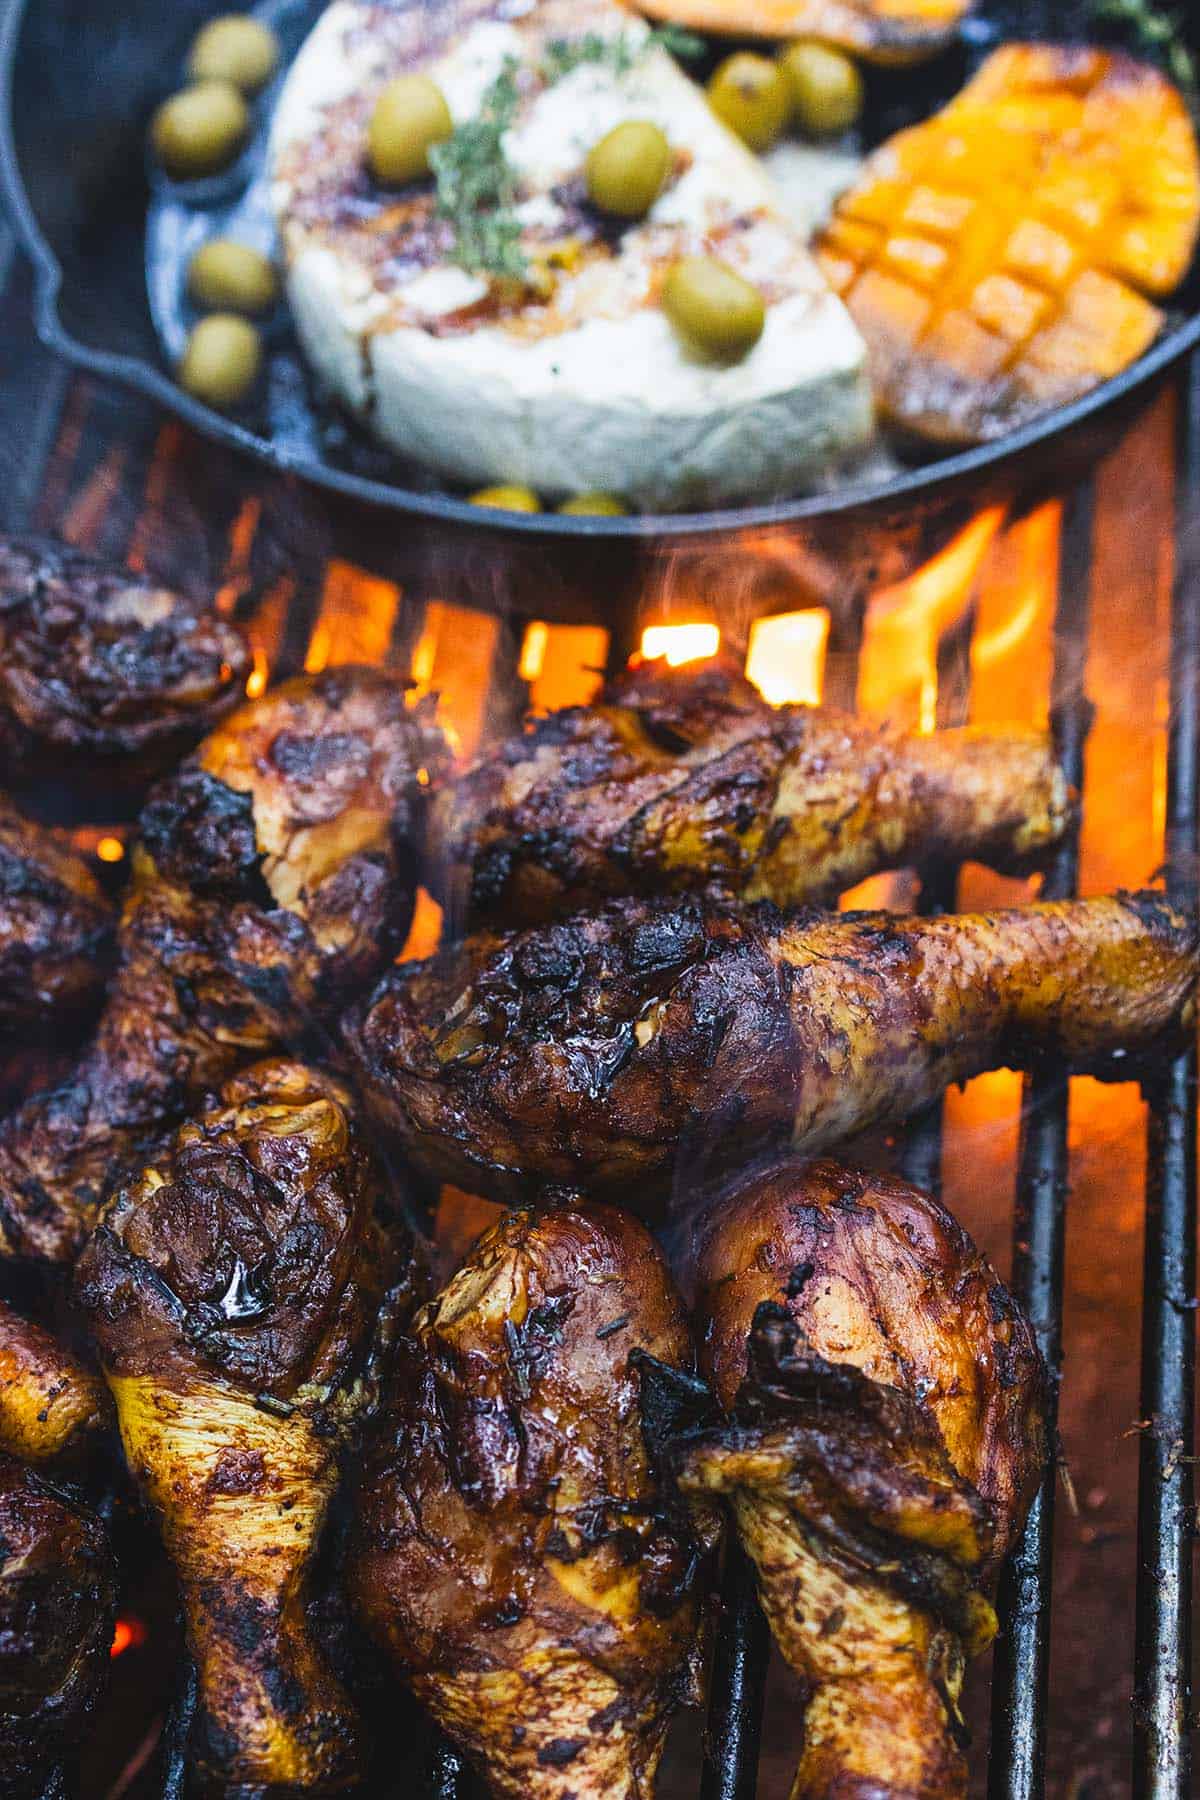
    Lemongrass chicken drumsticks charring on a grill over open flame

    This post features a lemongrass chicken recipe using the drumstick cut that’s perfect for summer grilling or family camping trips. A flavourful lemongrass marinade with fish sauce, brown sugar, soy sauce, and grated onion makes every bite irresistible.

    Why Try This Lemongrass Chicken Drumstick Recipe?

    Cooking at home means you can take the time to let flavours develop, and this recipe benefits from an overnight marinade that ensures every bite is packed with savoury, aromatic goodness.

    The combination of lemongrass, soy sauce, and fish sauce creates a balance of umami, sweetness, and depth, making this dish a household favourite. Minimal work, maximum flavour — this lemongrass chicken drumstick is the definition of gourmet campfire food without the effort. I’ve shared this recipe countless times, even with neighbouring tents at the campground!

    Lemongrass chicken drumsticks on a large green leaf beside a pot and skillet on a picnic table

    Juicy grilled chicken drumsticks cooking on barbecue grill with flames, side of baked cheese and green olives in a cast iron skillet.

    Key Ingredients

    Ingredients

    Lemongrass

    • The star of this marinade. Finely chop or grind the tender inner stalks for maximum fragrance. If fresh lemongrass isn’t available, lemongrass paste is a convenient substitute that works beautifully.

    Fish Sauce

    • Brings an authentic umami depth that is essential to Southeast Asian marinades. Use a good-quality fish sauce — Red Boat fish sauce is our preferred brand for its clean, pure flavour.

    Dark Soy Sauce

    • Provides deep colour and rich umami. It’s what gives the chicken skin that beautiful dark, caramelized finish on the grill.

    Brown Sugar

    • Helps caramelize the skin beautifully when grilled and balances the saltiness of the fish sauce and soy. Don’t substitute with white sugar — the molasses in brown sugar adds a richer depth.

    Grated Onion

    • Adds moisture and sweetness to the marinade, and the enzymes in the onion help tenderize the chicken. Grate it finely so it integrates fully into the marinade rather than sitting in chunks.

    Why the Drumstick Cut?

    Drumsticks are the perfect cut for this lemongrass chicken recipe because they are juicy, flavourful, and ideal for grilling over an open fire. The bone helps retain moisture, preventing the meat from drying out, while the skin crisps up beautifully, creating a delicious caramelized crust. Plus, drumsticks are easy to handle — no forks and knives, just grab and enjoy!

    Mexican pickled red onion recipe: grilled drumsticks topped with pickled onions

    We love to add pickled red onions on top of the chicken — get the recipe for Mexican Pickled Red Onion here. The brightness of the pickled onions cuts through the richness of the glaze perfectly.

    A Must-Try Recipe for Camping

    This recipe is perfect for camping because it takes the stress out of outdoor cooking. Simply marinate the chicken overnight, freeze it, and by the time it thaws at the campsite, it’s ready for the grill or fire. The open flame adds a beautiful caramelization, creating a crispy, smoky skin that’s absolutely irresistible.

    Pair these with our Easy Camping Shrimp Pasta for a full campfire feast the whole family will love.

    Succulent grilled chicken and roasted vegetables on a barbecue grill, perfect for outdoor dining.

    Frequently Asked Questions

    How long should I marinate the chicken?

    For the best results, marinate the chicken for at least 4 hours, but overnight is ideal. The longer the chicken sits in the marinade, the deeper the flavours penetrate the meat. For camping, we marinate the night before, freeze the chicken in the marinade bag, and it thaws perfectly by dinner time at the campsite.

    Can I bake these instead of grilling?

    Yes! Preheat your oven to 200°C (400°F). Arrange the drumsticks on a wire rack over a baking sheet and roast for 35–40 minutes, flipping halfway, until the skin is dark and caramelized and the internal temperature reaches 74°C (165°F). You can finish under the broiler for 2–3 minutes for extra crispiness.

    What if I can’t find fresh lemongrass?

    Lemongrass paste is a great substitute and is much easier to find in most grocery stores. Use about 1 tablespoon of paste for every stalk of fresh lemongrass. You can also find it online — we recommend this lemongrass paste which works beautifully in this marinade.

    Can I use chicken thighs or breasts instead of drumsticks?

    Absolutely. Bone-in thighs are the closest substitute and will give a similar juicy result. Boneless thighs will cook faster — check at 25 minutes. Chicken breasts work too but are more prone to drying out; marinate them for the full overnight period and keep a close eye on the internal temperature.

    Succulent grilled chicken and roasted vegetables on a barbecue grill, perfect for outdoor dining.

    Lemongrass Chicken Drumsticks

    A delicious, aromatic lemongrass chicken recipe that guarantees juicy, bouncy texture and deep flavor. Perfect for home cooking and an excellent choice for camping, as the marinade does all the work while you enjoy the outdoors!
    Prep Time 10 minutes
    Cook Time 35 minutes
    Total Time 45 minutes
    Servings: 5 people
    Course: Main Course
    Cuisine: Vietnamese
    Calories: 290

    Ingredients
      

    • 8-10 chicken drumsticks, with skin
    • ¼ cup lemongrass, finely grounded or chopped
    • 1 onion, grated
    • 6 garlic cloves, grated
    • 3 tbsp light soy sauce
    • 1 tbsp dark soy sauce
    • 2 tbsp maggi sauce
    • ¼ cup brown sugar
    • 2 tsp paprika
    • 2 tbsp fish sauce

    Method
     

    1. In a large bowl or ziplock bag, combine all the ingredients and coat the chicken well. Let it marinate overnight in the fridge for maximum flavor.
    2. Freeze for Camping – If taking it camping, freeze the marinated chicken. It will slowly defrost in your cooler, and by the time you need to cook it, it’s ready to go.
    3. Grill to Perfection – Cook the chicken over a hot grill or campfire, turning occasionally, until the skin is caramelized and crispy, and the inside is cooked through (internal temp 165°F). Approximately 35 minutes, depending on the intensity of the open fire.
    4. Serve and Enjoy – Let it rest for a few minutes before serving with rice, fresh herbs, or grilled vegetables.

  • 30-Minute Thai Basil Chicken

    30-Minute Thai Basil Chicken

    Bold, aromatic, and on the table in 30 minutes — this Thai Basil Chicken (Pad Kra Pao) is our family’s most-cooked weeknight dinner. A handful of pantry staples, one wok, and dinner is done.

    This post may contain affiliate links. If you purchase through these links, I may earn a small commission at no extra cost to you. Thank you for supporting Love & Harvest!

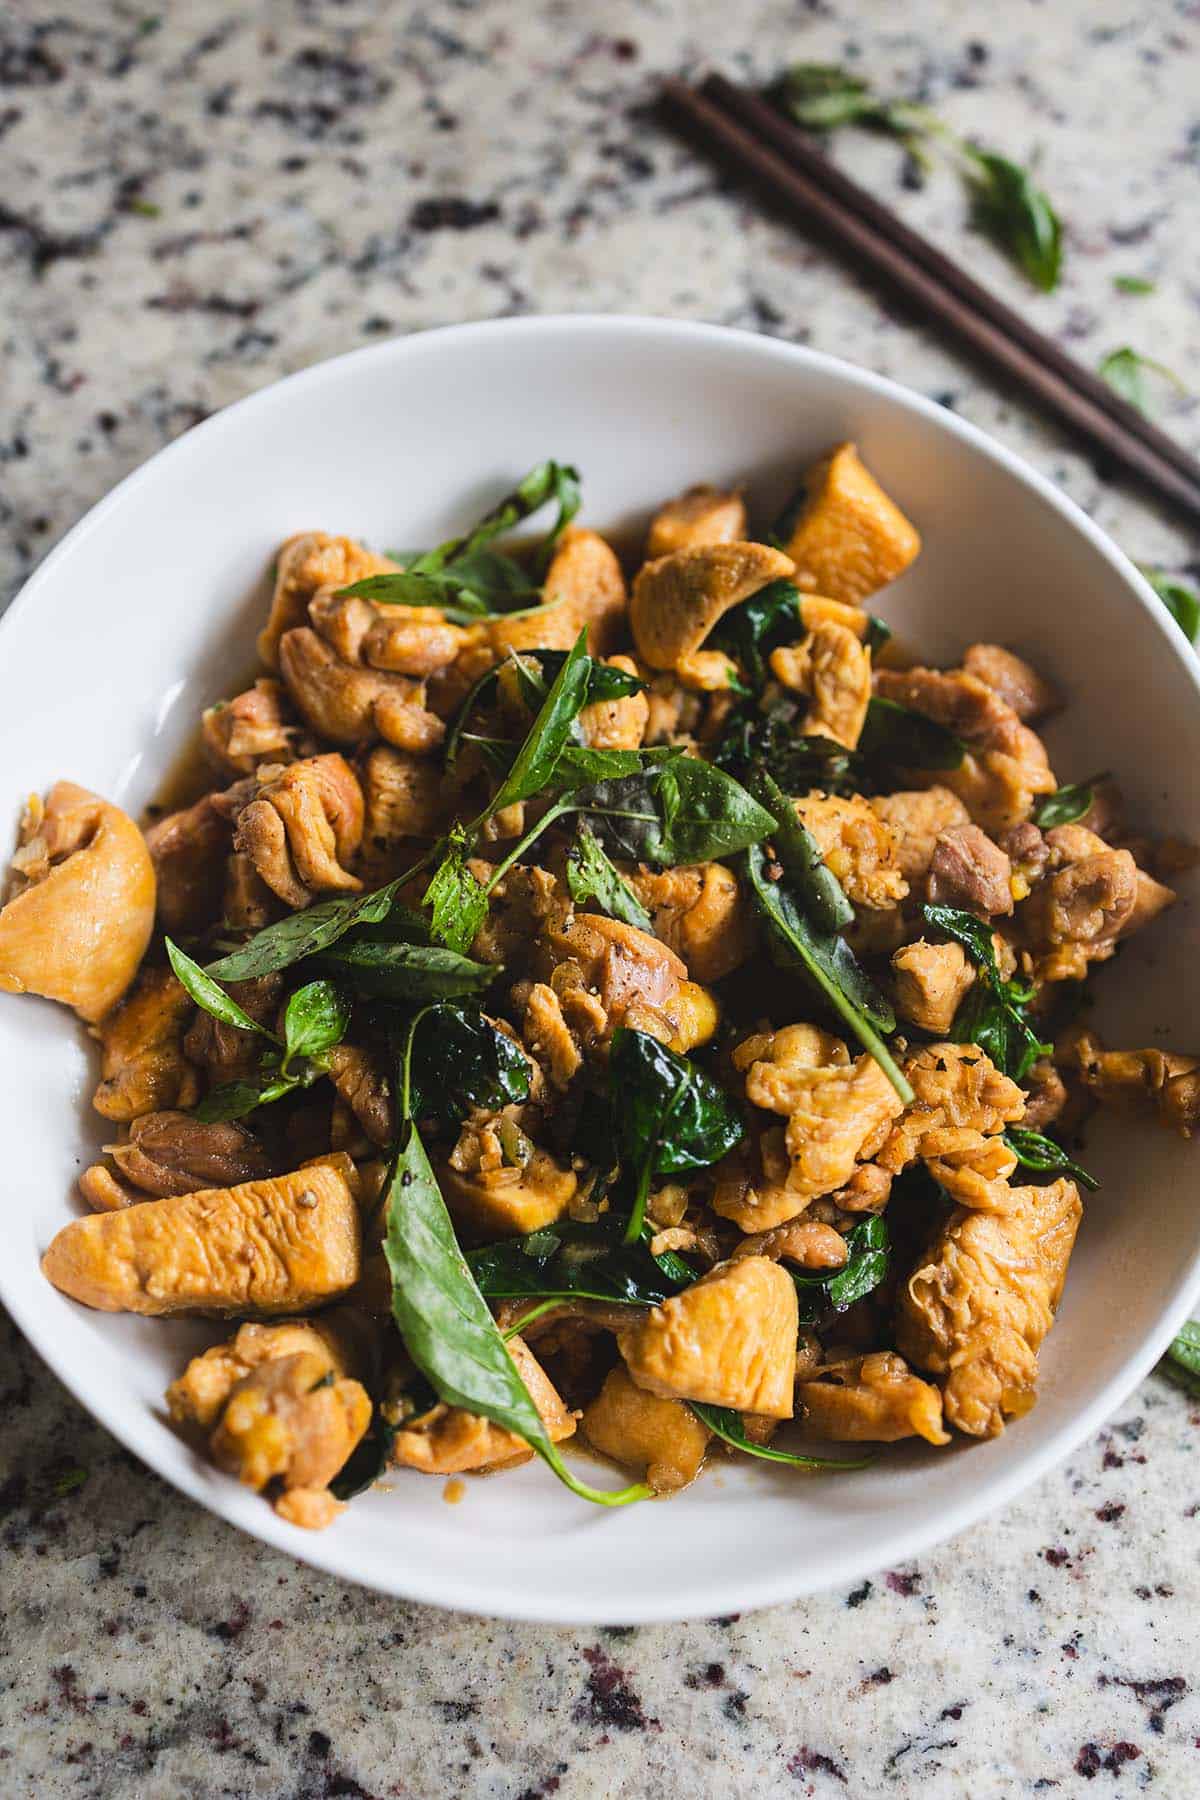
    Thai basil chicken stir-fry in a white bowl on a granite counter

    Why We Love This Easy Thai Basil Chicken

    This recipe is one of those rare gems that checks all the boxes: it’s quick, uses simple ingredients, and delivers bold, authentic flavours. In our household, it’s a staple. The kids love it because of its tangy kick from the lime juice — they always squeeze extra on top. We love it because it’s a wholesome meal that doesn’t take all evening to prepare. Any leftovers make fantastic lunchbox additions for the next day.

    Why You Should Try It

    If you’re new to Thai-inspired cooking, this dish is the perfect introduction. It’s simple enough for beginners and requires no fancy equipment — just a skillet or wok. The flavours are bold yet approachable, with a balance of sweet, salty, tangy, and aromatic notes that’ll make you feel like a pro chef. You can easily add bell peppers or green beans if you want to sneak in more vegetables.

    Close-up of Thai basil chicken with wilted basil leaves

    Ingredients

    Thai Basil

    • The star of the dish — its slightly peppery, licorice-like flavour is what separates this from any regular stir-fry. Thai basil holds up to high heat far better than Italian basil, wilting into the sauce without losing its character. Add it right at the end and toss just 30 seconds. If your family finds basil too intense, start with half a cup and adjust.

    Fish Sauce

    • The secret behind the umami depth. Fish sauce adds a savoury complexity that soy sauce alone can’t replicate — it’s funky, salty, and absolutely essential for authentic Thai flavour. Use a high-quality brand like Red Boat Fish Sauce for the cleanest flavour. Start with less and add more to taste.

    Oyster Sauce

    • Adds a sticky, slightly sweet, and deeply savoury coating to the chicken. It’s the binding element of the sauce that gives this dish its characteristic glossy finish. Use a good oyster sauce — it makes a real difference.

    Chicken Thigh vs. Breast

    • Chicken thigh stays juicier at high stir-fry heat and absorbs sauce better than breast. Either works — thigh for flavour, breast for leaner preference. Cut into uniform small pieces so everything cooks evenly in under 10 minutes.

    Garlic and Thai Chili

    • Pound them together in a mortar and pestle for the most flavourful base, or mince finely. This aromatic foundation hits the hot wok first, perfuming the oil before anything else is added. Skip the chili or reduce to one pepper for family-friendly heat levels.

    Bowl of Thai basil chicken with fresh basil leaves on the side

    Why It’s a Family Favourite

    This dish hits the sweet spot between fast and flavourful. It’s the kind of meal that comes together faster than you can decide what to order for takeout. Cooking it fills the house with an irresistible aroma that draws everyone to the table.

    Use a Carbon Steel Wok for authentic high-heat stir-frying — the carbon steel develops a natural seasoning over time and distributes heat perfectly for this style of cooking.

    Serve alongside our Instant Pot Taiwanese Beef Noodle Soup for a full Thai-inspired feast, try the Lemongrass Chicken Drumsticks for another Southeast Asian weeknight favourite, or check out our Thai Chicken Salad for a lighter meal using similar flavours.

    “This dish is proof that the simplest ingredients, cooked with love, create the most incredible flavours.”

    Sammi Chow — Love and Harvest

    Thai basil chicken in a white bowl with chopsticks

    Frequently Asked Questions

    Can I substitute regular Italian basil for Thai basil?

    You can in a pinch, but the flavour will be noticeably different. Italian basil is sweeter and more delicate; Thai basil has a peppery, anise-like quality that is central to the dish’s identity. If you can’t find Thai basil, adding a tiny pinch of anise or fennel with Italian basil gets you closer.

    What rice goes best with Thai Basil Chicken?

    Jasmine rice is the classic pairing — its fragrant, slightly sticky texture soaks up the sauce beautifully. Cook it slightly wet so the grains are soft and clingy. Brown jasmine rice also works well if you prefer a whole grain option, though the texture is slightly chewier.

    Can I make this dish vegetarian?

    Yes. Replace chicken with firm tofu (pressed and cubed) or mushrooms. Substitute fish sauce with soy sauce or coconut aminos and replace oyster sauce with a vegan mushroom oyster sauce. The cooking time is the same — just watch the tofu as it browns faster than chicken.

    How do I prevent the basil from turning black?

    Add the basil off the heat or in the final 30 seconds of cooking. High direct heat for too long will blacken and bitter the leaves. Toss quickly and serve immediately. The basil should be wilted but still vibrant green.

    Is this recipe good for meal prep?

    Absolutely. It reheats beautifully in a pan with a tiny splash of water. Pack with rice in containers — it keeps in the refrigerator for 3 days and makes excellent lunches. The basil will darken slightly upon reheating but the flavour stays great.

    Can I use frozen chicken?

    Always thaw chicken completely before stir-frying. Frozen or partially frozen chicken releases excess water in the wok, which prevents proper browning and turns the dish steamed rather than stir-fried. Thaw overnight in the refrigerator for best results.

    Thai basil chicken stir-fry in a white bowl on a granite counter

    30-Minute Meal Thai Basil Chicken

    Prep Time 10 minutes
    Cook Time 20 minutes
    Total Time 30 minutes
    Servings: 4
    Course: Main Course
    Cuisine: Thai
    Calories: 340

    Ingredients
      

    • 1 whole chicken deboned and cut into small chunks
    • 2 tbsp soy sauce
    • 1 tsp hoisin sauce
    • 2 tbsp brown sugar
    • 1 tbsp fish sauce
    • 2 tbsp cooking oil
    • 1 tsp chicken stock powder
    • ½ cup water
    • 1 cup fresh basil leaves divided (reserve some for garnish)
    • black pepper garnish
    • lime juice optional

    Method
     

    1. In a bowl, mix the chicken chunks with soy sauce, hoisin sauce, brown sugar, and fish sauce. Let it marinate for at least 15 minutes, or up to 1 hour for deeper flavor.
    2. Heat the cooking oil in a large skillet or wok over medium-high heat.
    3. Add the marinated chicken and sauté until the chicken is cooked through and starts to brown slightly, about 5–7 minutes.
    4. Sprinkle the chicken stock powder over the chicken and pour in the water. Stir well.
    5. Let the mixture simmer until the liquid reduces down to a thick sauce, about 3–5 minutes.
    6. Add most of the Thai basil leaves to the pan and stir until they wilt and become fragrant, about 1 minute.
    7. Transfer the chicken to a serving plate. Garnish with the reserved Thai basil leaves and a generous sprinkle of freshly cracked black pepper. Additionally, you can add some lime juice on top of the basil chicken.

    Notes

    Serving Suggestion

    Serve hot over steamed jasmine rice or alongside stir-fried vegetables for a complete meal.

  • 4 Ingredients Chicken Sandwich Deli

    4 Ingredients Chicken Sandwich Deli

    Store-bought deli meat adds up fast, and the ingredient list is often longer than you’d expect. This 4-ingredient homemade chicken deli sandwich meat needs very little hands-on prep and delivers juicy, tender slices that hold up in any sandwich, wrap, or grain bowl.

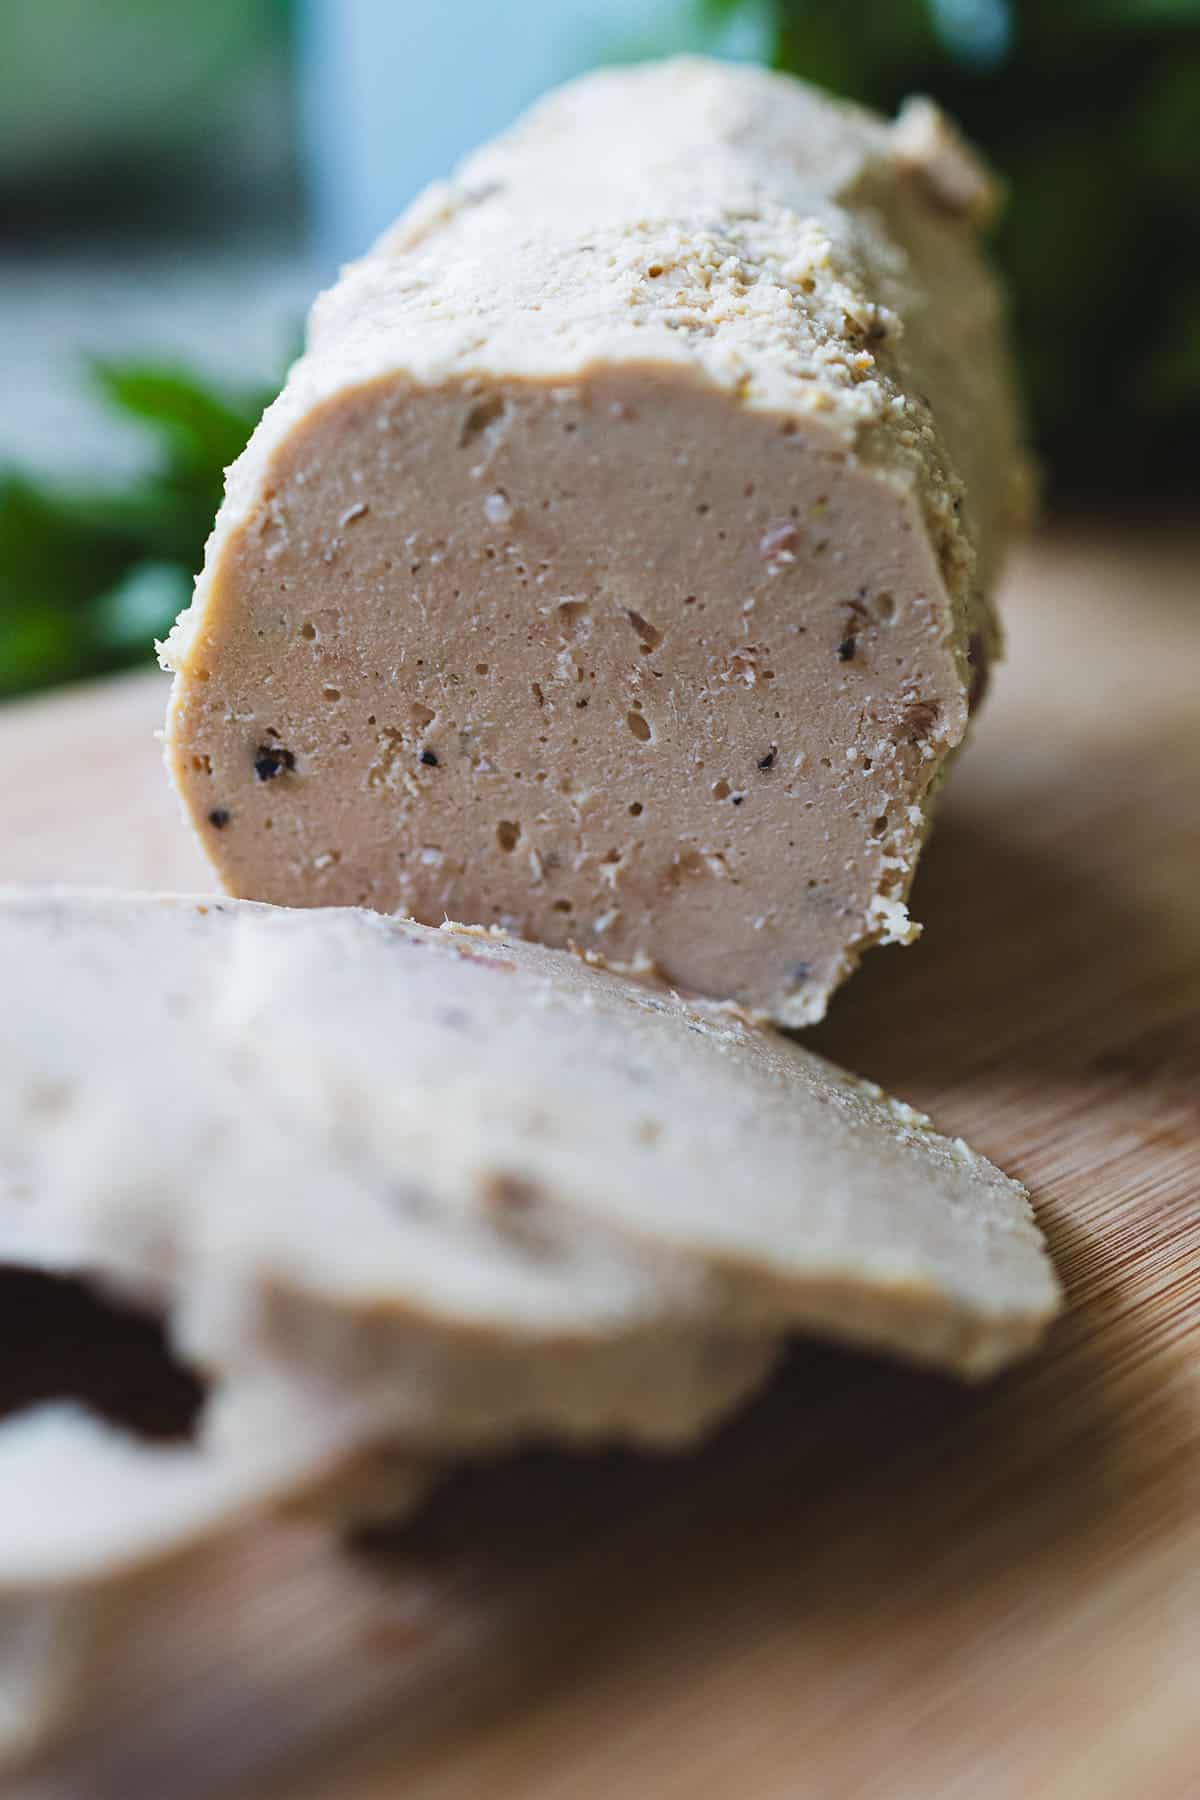
    Thin slices of homemade chicken deli meat on a wooden board

    This post may contain affiliate links. If you purchase through these links, I may earn a small commission at no extra cost to you. Thank you for supporting Love & Harvest!

    Making this for lunches? My free PDF has seven easy family dinners to go with it. Send me the free dinners

    Why This Recipe is Perfect for Families

    This homemade chicken deli recipe is an excellent option for families for several reasons:

    1. Know What’s in It: Unlike a lot of store-bought deli meat, this recipe gives you full control over every ingredient, including the salt. It’s just chicken breast, smoked salt, Montreal steak spice and cornstarch.
    2. Budget-Friendly: Making your own chicken deli costs a fraction of packaged options and scales easily. Batch-cook and freeze portions for future use.
    3. Customizable: Adjust spices to suit picky eaters — milder for kids, bolder for adults. One recipe, infinite variations.
    4. Great for Meal Prep: Make ahead and use in lunches, quick dinners, and snack plates all week long.

    Ingredient Deep-Dive

    Ingredients

    Chicken Breast

    • Why it matters: Chicken breast gives a lean, firm texture that slices cleanly — essential for deli-style cuts. I sometimes add a small amount of chicken gizzard for extra texture and to honor the whole animal (a Chinese cooking philosophy I grew up with). Optional, but worth trying.

    Smoked Salt

    • Why it matters: Smoked salt adds depth and mimics the flavor of traditionally smoked deli meats without a smoker. There are many varieties — hickory, birch, applewood — all delicious. Try them all and find your favorite.

    Montreal Steak Spice

    • Why it matters: Montreal steak spice is a bold blend of garlic, black pepper, coriander, and dill that gives the chicken rich, savory depth. I buy mine at Costco, but it’s readily available on Amazon or at any grocery store.

    Cornstarch

    • Why it matters: Cornstarch creates a firm, sliceable texture. Without it, the chicken mixture stays too soft to cut into clean deli-style slices. It also locks in moisture so each slice stays juicy.

    Homemade chicken deli roll sliced on a wooden cutting board

    How to Make Your Own Chicken Deli Meat

    The links below are Amazon affiliate links. If you buy through them, I may earn a small commission at no extra cost to you.

    Recommended tools

    Any comparable pie weights or food processor work, and any clean, heatproof glass jar or container does the job.

    Step 1: Prepare the Chicken. Trim any excess fat from the chicken breasts. In a small bowl, combine smoked salt, Montreal steak spice, and cornstarch. Mix the dry ingredients.

    Step 2: Food Processor. Add the chicken to a food processor with the dry ingredients. Blend until a thick, uniform mixture forms with no visible chunks of meat.

    Step 3: Cook and Slice. I line a glass or steel container with a BPA-free plastic bag so the deli meat slips out more easily after cooking. If you do the same, use a bag that is rated for cooking in simmering water (such as a sous vide bag), and skip rigid plastic containers. The container diameter should match the lid opening so the meat can be easily removed. Fill the bag-lined container with the meat mixture, pressing to remove air bubbles. Add ceramic pie weights on top to prevent the meat from expanding unevenly. Set it in a pot of water at a gentle simmer and cook for 40 minutes (the recipe card below has the full setup). Then check the center with an instant-read thermometer, keeping the probe off the container walls. It should read 165°F (74°C), the USDA minimum for poultry. If it doesn’t, keep simmering for 10 more minutes and check again. Let it cool on the counter, get it into the refrigerator within 2 hours of cooking (USDA guideline; 1 hour if your kitchen is above 90°F), and chill at least 2 to 3 hours or overnight. Slice and enjoy!
    Homemade chicken deli meat roll with a few thin slices cut

    Customize Your Deli Chicken

    While smoked salt and Montreal steak spice provide a great base, don’t be afraid to experiment. Try a garlic and herb rub, paprika for a smokier kick, or a honey-mustard variation for a slightly sweet profile.

    Food Ideas with Homemade Chicken Deli

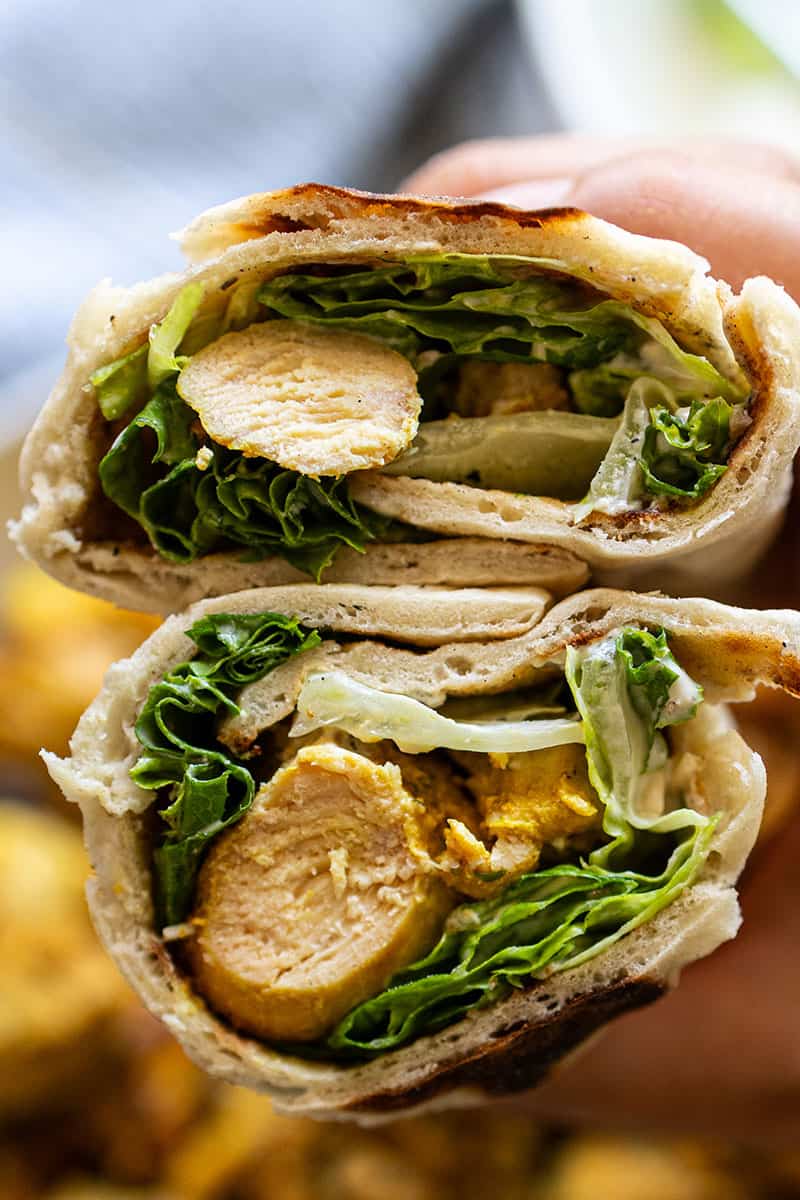
    • Classic Chicken Sandwich: Layer on whole grain bread with lettuce, tomato, and mayo or mustard.
    • Chicken Wraps: Roll in a wrap with hummus, fresh spinach, and avocado.
    • Protein-Packed Salads: Top any salad with thin slices for an easy protein boost.
    • Chicken and Cheese Panini: Grill between sourdough slices with your favorite cheese.
    • Snack Plate: Pair with crackers, cheese, and veggies.
    • Noodle Soup: Slice thinly over a hot bowl of soup for a satisfying weeknight meal.

    Sliced homemade chicken deli meat on a board with fresh celery and parsley

    Frequently Asked Questions

    Can I use chicken thighs instead of chicken breast?

    Chicken thighs work but produce a softer, fattier result that’s harder to slice cleanly. Breast is strongly recommended for that classic deli texture. If you prefer thighs for flavor, use a 50/50 blend.

    Why cook it in water instead of an oven?

    The water bath cooks the chicken gently and evenly without drying it out. It also allows the cornstarch to set properly, creating that firm, sliceable texture. Oven cooking tends to dry out the exterior before the inside is cooked through.

    How long does homemade chicken deli last in the fridge?

    Up to 4–5 days tightly wrapped in the refrigerator. For longer storage, slice and freeze in portions for up to 2 months.

    What if I don’t have a food processor?

    You can mince the chicken very finely by hand or use a blender (in short pulses). The texture won’t be as uniform, but it will still work. The food processor produces the smoothest, most consistent result.

    Can I add vegetables or herbs to the mixture?

    Yes. Finely minced herbs like parsley, dill, or chives fold in beautifully. Avoid chunky vegetables as they’ll prevent the meat from slicing cleanly.

    Is this gluten-free?

    Yes — chicken, smoked salt, Montreal steak spice, and cornstarch are all naturally gluten-free. Always check your spice blend label to ensure no wheat is added as a filler.

    Creamy homemade chicken liver mousse on wooden board with natural light.

    4 Ingredients Chicken Deli

    This homemade chicken deli recipe is all about simplicity and bold flavour. The chicken breast, seasoned with smoked salt and Montreal steak spice, delivers a rich, savoury aroma with a hint of smokiness, perfectly balanced by the robust blend of spices.
    Prep Time 10 minutes
    Cook Time 40 minutes
    Chill Time (minimum) 2 hours
    Total Time 2 hours 50 minutes
    Calories: 175

    Ingredients
      

    • 2 large chicken breast
    • 1 tsp smoked salt
    • 2 tsp Montreal Steak Spice
    • 1 tbsp cornstarch

    Equipment

    • 1 glass jar

    Method
     

    1. Blend the Ingredients:
      Place the cubed chicken breasts, cornstarch, smoked salt, and Montreal steak spice in a food processor. Pulse the mixture until it forms a smooth, thick paste. Make sure all the ingredients are well-combined.
    2. Prepare the Jar:
      If you like, line a clean, heatproof glass jar (like a wide-mouth Mason jar) with a food bag rated for cooking in simmering water, such as a sous vide bag, so the chicken slips out more easily later. Transfer the blended chicken mixture into the jar (or the bag-lined jar). Pack the mixture tightly, pressing it down to remove any air pockets. Leave about 2 inches of space at the top of the jar.
    3. Add the Weight:
      To ensure the chicken stays compact while cooking, place something heavy on top of the chicken mixture inside the jar. You can use ceramic pie weights, or a small, heatproof glass jar filled with water that fits inside the opening. This will help keep the mixture pressed down during cooking.
    4. Cook the Chicken:
      Screw the lid on loosely, or cover the jar with foil if using a lid is not an option. Place the jar in a pot with enough water to reach about halfway up the sides of the jar. Bring the water to a gentle simmer over low heat, making sure it does not boil vigorously. Keep the fire at the lowest setting to maintain a low simmer. Cook for 40 minutes, occasionally checking that the water remains at a gentle simmer. When the time is up, check the center with an instant-read thermometer, keeping the probe off the jar: it should reach 165°F (74°C), the USDA minimum for poultry. If it hasn’t, keep simmering for 10 more minutes and check again.
    5. Cool, Chill, and Slice:
      Carefully remove the jar from the pot and let it cool on the counter, and get it into the refrigerator within 2 hours of cooking (USDA guideline; 1 hour if your kitchen is above 90°F). Place the jar in the refrigerator for at least 2-3 hours (or overnight) to allow the chicken to firm up completely. Once chilled, remove the weighted object and ease the chicken loaf out of the jar. If you used a bag, leave the loaf in the bag until it is out, then peel the bag away and discard it. Slice thinly for deli-style chicken slices.

    Notes

    Serving Suggestions:

    • Perfect for sandwiches and wraps.
    • Adds protein to salads or snack plates with cheese and crackers.

    Storage:

    Store the chicken deli slices in an airtight container in the refrigerator for up to 4 days.
    This pressing method gives the chicken a compact texture, making it easier to slice thinly. The seasoning infuses throughout the meat during the gentle cooking, resulting in a flavorful, homemade deli-style chicken that rivals store-bought options.

    Pair this chicken deli with our Mexican Pickled Red Onions for a flavor-packed sandwich topping, or slice it over our Easy Mexican Salsa Verde for a bold protein plate. Looking for more chicken inspiration? Try our Chicken Milanesa.

    Need dinners for the rest of the week? Get my free PDF with seven easy family dinners. Get the free dinners

  • One Pot Lemon Garlic Chicken

    One Pot Lemon Garlic Chicken

    One pot, 30 minutes, and ingredients you already have in the fridge — this Lemon Garlic Chicken with rice pilaf is the weeknight dinner that earns compliments every single time. My kids fight over the leftovers, and yours probably will too.

    One pot lemon garlic chicken and rice topped with lemon slices, with pickled red onion on the side

    This post may contain affiliate links. If you purchase through these links, I may earn a small commission at no extra cost to you. Thank you for supporting Love & Harvest!

    Why This Recipe Works

    The secret to this dish is layering flavor in one pot. You marinate the chicken first, then sear it skin-side down to render the fat and build a golden crust. That same pot then becomes the base for your rice — deglazing with red wine picks up all the browned bits, and the chicken stock cooks the rice to fluffy perfection. Everything that would have gone into multiple pans concentrates into one incredible dish.

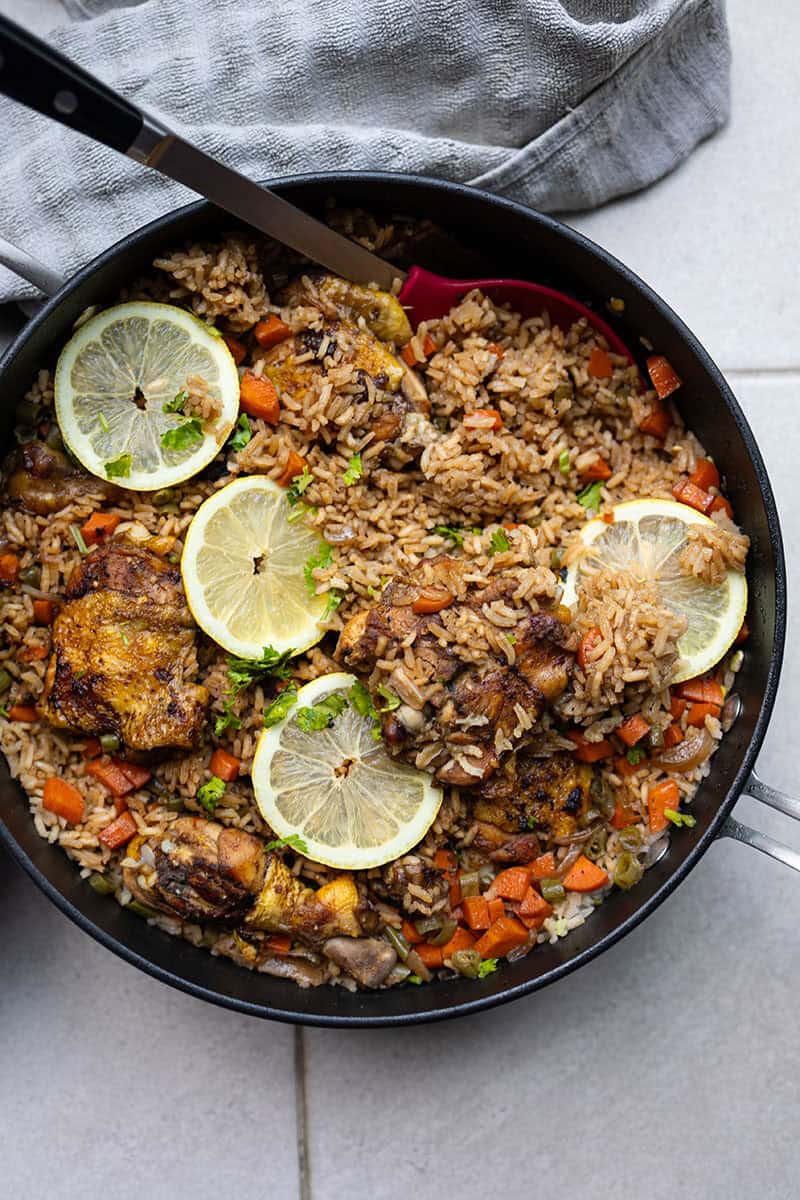
    Skillet of lemon garlic chicken with rice pilaf and lemon slices

    Ingredient Deep-Dive

    Ingredients

    Chicken Legs (Skin-On)

    • Why it matters: Skin-on chicken legs are essential. When they hit the hot pan, the natural fat renders out and creates a deeply caramelized crust that flavors the entire dish. You can remove the skin if you prefer, but you’ll miss that golden layer. Dark meat also stays juicier over the 20–25 minute cooking time than breast meat would.

    White Rice

    • Why it matters: I use regular jasmine or Chinese short-grain rice. It absorbs the garlic-lemon-wine stock beautifully. Brown rice or quinoa can substitute, but will need more liquid and longer cooking time.

    Chicken Stock

    • Why it matters: Good chicken stock is the backbone of the rice. Homemade is best, but any quality store-bought stock works. It carries the garlic and lemon into every grain of rice.

    Fresh Lemon

    • Why it matters: Lemon serves double duty — it marinates the chicken (tenderizes, adds brightness) and finishes the dish as a wedge on the side for a fresh citrus burst right before eating. Do not use bottled lemon juice; fresh is non-negotiable here.

    Fresh Garlic

    • Why it matters: Minced fresh garlic cloves in the marinade infuse the chicken deeply. Always fresh — jarred garlic lacks the aromatic punch needed to flavor the entire dish.

    Old Red Wine

    • Why it matters: I always have an open bottle of red wine that was forgotten from a party or a quiet evening. Old wine is more acidic, and that acidity is perfect for deglazing the pan — it lifts all the caramelized chicken bits that would otherwise be lost, adding enormous depth to the rice. Don’t use cooking wine; real wine is the difference.

    How to Make One Pot Lemon Garlic Chicken

    1. Marinate the Chicken: Combine chicken legs with lemon juice, minced garlic, olive oil, salt, pepper, and herbs. Let sit while you prep the rest.
    2. Prepare the Rice: Wash rice until the water runs clear — this removes excess starch and prevents a gummy result.
    3. Sear the Chicken: Heat olive oil in a large pot over medium-high heat. Sear chicken skin-side down until golden and crispy. Remove and set aside.
    4. Deglaze: Pour red wine into the hot pot and scrape up all the browned bits. Those bits are pure flavor.
    5. Sauté the Rice: Add washed rice and stir for a couple of minutes to coat it in the deglazed sauce.
    6. Cook Together: Pour in chicken stock, bring to a simmer, nestle chicken legs on top, cover, and cook 20–25 minutes until stock is fully absorbed and chicken is cooked through.
    7. Serve: Garnish with lemon wedges for a fresh citrus finish.

    Close-up of chicken thighs, carrots and rice in the pan with lemon slices

    A Family Favorite

    As a busy mom, I’m always hunting for meals that are fast, nutritious, and don’t create a mountain of dishes. This One Pot Lemon Garlic Chicken has become a lifesaver for countless weeknight dinners. My kids are always excited to open their school lunchbox when they spot the leftovers — especially with that extra lemon wedge tucked in on the side.

    Lemon garlic chicken with rice pilaf, carrots and fresh herbs in the pan

    Close-up of the rice pilaf with herbs and a lemon slice in the pan

    Lemon garlic chicken and rice plated with pickled red onion and a lemon wedge

    Frequently Asked Questions

    Can I use chicken breast instead of chicken legs?

    You can, but chicken legs are strongly recommended. The dark meat stays juicy during the 20–25 minute cooking time. Chicken breasts tend to dry out when cooked this long at these temperatures. If using breasts, reduce cooking time and check for doneness at 15 minutes.

    What if I don’t have red wine?

    Deglaze with chicken stock or white wine instead. The red wine adds a deeper, slightly tannic flavor, but the dish still works beautifully without it. Avoid skipping the deglazing step entirely — those browned bits are essential flavor.

    Can I make this ahead of time?

    Yes. It reheats excellently. Store leftovers in an airtight container for up to 3 days. Add a splash of water or chicken stock when reheating to prevent the rice from drying out. Serve with a fresh lemon wedge.

    How do I know when the chicken is cooked through?

    The internal temperature should reach 165°F (74°C). The juices run clear when you pierce the thickest part of the thigh. The rice being fully cooked and stock fully absorbed is also a reliable indicator.

    Can I add vegetables?

    Absolutely. Carrots, onions, and peas all work well. Add sturdy vegetables (carrots, onion) when you sauté the rice, and tender ones (peas, spinach) in the last 5 minutes. The original recipe includes carrots and onion as traditional additions.

    What type of pot works best?

    A wide, heavy-bottomed pot with a tight-fitting lid is ideal. A Lodge Dutch Oven or any heavy enameled pot distributes heat evenly and traps steam perfectly for cooking the rice.

    Baked chicken and rice skillet with lemon slices and fresh herbs, delicious comfort food recipe.

    One Pot Lemon Garlic Chicken

    A 30-minute meal with minimal cleanup and ingredients you can easily find in your fridge and pantry. This dish has become a household favourite because it is easy and delicious.
    Prep Time 5 minutes
    Cook Time 25 minutes
    Total Time 30 minutes
    Servings: 6 people
    Course: Main Course
    Calories: 520

    Ingredients
      

    Chicken Legs Marinate
    • 6 whole chicken legs separate the thigh and drumstick, skin on
    • 2 tbsp red wine
    • ½ lemon juice
    • 1 tsp Maggie Sauce
    • 1 tsp paprika
    • 2 garlic cloves grated
    • ½ white onion grated
    • 2 tsp sea salt
    • black pepper
    One Pot Lemon Garlic Chicken
    • 3 cups white rice wash and rinsed
    • 2 carrots diced
    • ½ cup green beans diced
    • 2 garlic cloves smashed and diced
    • 1 white onion diced
    • ½ cup red wine
    • 4 cups chicken stock
    • ½ lemon juice
    • salt
    • cilantro

    Method
     

    Chicken Marinate
    1. Wash and clean the chicken. Trim out any extra fat but keep the skin on.
    2. In a bowl, combine the chicken legs with red wine, lemon juice, Maggie sauce, paprika, grated garlic, grated onion, salt, and black pepper. Let it sit while you prepare the rest.
    One pot lemon garlic chicken
    1. Wash your rice in a separate bowl until the water runs clear. Set the strained rice aside.
    2. Heat a large pot over medium heat. Make sure the pan is very hot. Add the marinated chicken legs skin-side down and sear until the skin is golden and crispy. I like the pot really hot so the oil from the skin bubbles out. If you find the chickens are sticking to the pot, add 1 tsp of oil. Remove the chicken and set it aside.
    3. Pour the red wine into the pot, scraping up all the crispy bits left behind from the chicken. Add the diced carrots, onion and garlic. Saute until soft.
    4. Add the washed rice to the pot and stir it around in the deglazed sauce for a couple of minutes to let it soak up all the flavors.
    5. Pour in the chicken stock and bring it to a simmer. Nestle the chicken legs on top of the rice, cover, and cook for 20-25 minutes, or until the stock is fully absorbed and the chicken is cooked through. Squeeze lemon juice on top.
    6. Once the stock has disappeared, your one-pot meal is ready to serve! Garnish with lemon wedges for an extra citrusy kick and sprinkle with cilantro.

    Love one-pot chicken meals? Try our Thanksgiving Roasted Lemon Garlic Chicken for a showstopper centerpiece, or our Mexican Fire Roast Chicken for bold smoky flavor. For an easy weeknight side, our Best Garlic Mashed Potatoes pairs perfectly with this dish.

  • Chicken Milanesa

    Chicken Milanesa

    Chicken Milanesa is one of those rare dishes that manages to be both deeply comforting and genuinely impressive — a golden, crispy-edged cutlet with a juicy interior that comes together in under 30 minutes. This version takes the traditional Mexican approach and upgrades the coating with panko breadcrumbs for an airier, crunchier crust that standard breadcrumbs simply can’t match. Whether you’re serving it to picky kids or guests who claim they don’t love chicken, this recipe consistently converts them.

    This post may contain affiliate links. If you purchase through these links, I may earn a small commission at no extra cost to you. Thank you for supporting Love & Harvest!

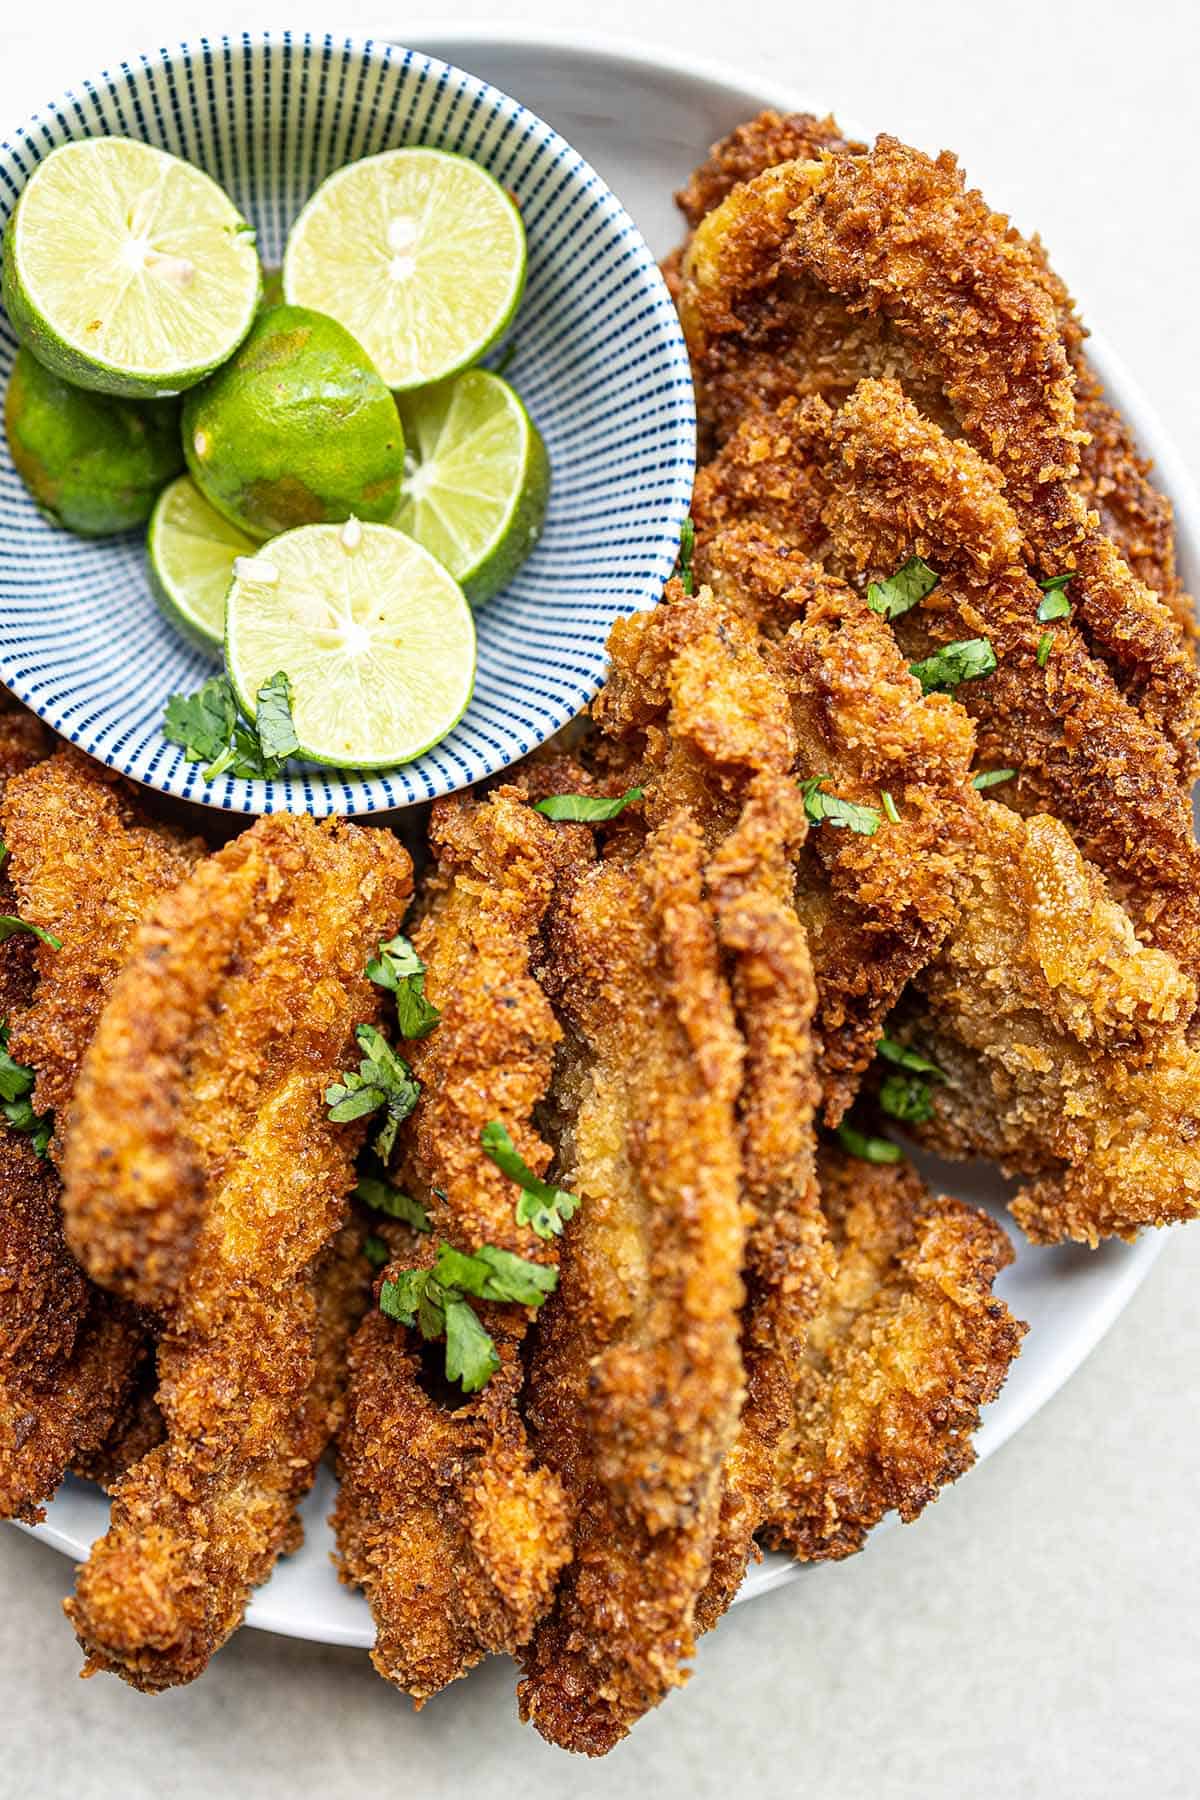
    Chicken milanesa cutlets on a plate with a bowl of lime halves

    What is Chicken Milanesa?

    Chicken Milanesa is a dish that holds a special place in Mexican home cooking. Its roots trace back to Italian immigrants who brought the cotoletta alla Milanese to Latin America, and over generations it was adopted, adapted, and made entirely its own. In Mexico, it shows up at family tables, street food stalls, and inside hearty tortas (Mexican sandwiches) alongside refried beans and rice.

    Traditionally, the coating is simple breadcrumbs. This version adds panko — a Japanese-style breadcrumb that’s coarser and lighter — for a significantly crispier result without making the dish heavy.

    Platter of golden breaded chicken milanesa with limes

    Ingredients Deep Dive

    Ingredients

    Chicken (Whole or Boneless Thighs/Breasts)

    • Why it matters: Whole chicken lets you use different cuts — thighs for maximum juiciness, breasts for even-sized pieces. Thighs are harder to overcook and stay tender in the pan. Whichever you choose, pounding the cutlets to an even thickness ensures they cook through at the same rate.

    Panko + Regular Breadcrumbs (Dual Coating)

    • Why it matters: Regular breadcrumbs seal in moisture; panko creates the airy, ultra-crispy outer layer. Using both gives you the best of each. A dedicated quality panko makes a noticeable difference — it stays crispier longer than generic store-brand versions.

    Flour

    • Why it matters: The flour dusting creates a dry surface for the egg to adhere to. Skip it and the coating slides off. It’s a small step that makes the difference between a patchy crust and a solid, even one.

    Eggs

    • Why it matters: Beaten egg is the glue between the flour and the breadcrumb coating. It also adds moisture and richness to the finished crust. Use large eggs at room temperature for best adhesion.

    Montreal Steak Spice

    • Why it matters: A pre-mixed blend of coarse salt, black pepper, garlic, coriander, and paprika. It seasons all three layers of the coating — flour, egg wash, and breadcrumbs — giving the finished Milanesa consistent flavour from the first bite to the last. The Costco McCormick version is excellent value and keeps for months.

    Canola Oil (for frying)

    • Why it matters: Canola has a high smoke point (~400°F/204°C) and a neutral flavour that won’t compete with the seasoning. Any neutral vegetable oil works. Avoid olive oil — its lower smoke point will cause it to burn before the coating crisps.

    A chicken cutlet pounder is the single most useful tool for this recipe — it ensures even thickness so every piece cooks through at the same time without dry edges.

    Close-up of crispy panko-breaded chicken milanesa

    Why This Recipe Works for the Whole Family

    Kids are the ultimate test for a recipe. My daughter loves this one and asks for it regularly — and she’s hard to please. The panko crust has just enough crunch to be exciting without being too intense, and the Montreal Steak Spice is flavourful without being spicy. It also reheats well in the oven or air fryer, which makes it a great meal-prep option for weekday lunches.

    Pair it with garlic mashed potatoes, a simple salad, or stuff it inside a torta with avocado, jalapeños, and crema for an incredible Mexican-style sandwich.

    Stack of crispy chicken milanesa cutlets on a white plate

    Fun Facts About Milanesa in Mexico

    • Ubiquitous: Milanesa is one of Mexico’s most common weeknight dinners. You’ll find it in every region, made with chicken, beef, or pork.
    • Regional Variations: Some regions top it with avocado slices, fresh salsa, or pickled jalapeños. Others pile it into a torta with all the fixings.
    • Cultural Fusion: It’s a perfect example of how Mexican cuisine takes a foreign influence and makes it something entirely its own over generations.

    More Crispy Chicken Recipes

    Chicken milanesa cutlets with lime halves on a white plate

    Frequently Asked Questions

    Can I bake Chicken Milanesa instead of frying it?

    Yes. Brush or spray the breaded cutlets with oil and bake at 425°F (220°C) for 18–22 minutes, flipping halfway. The result is slightly less crispy than pan-fried but significantly lighter. For a crispier baked version, use a wire rack on a baking sheet so air circulates underneath.

    Can I use an air fryer?

    Absolutely. Air fry at 400°F (200°C) for 12–15 minutes, flipping once halfway. Spray generously with oil before cooking. This produces excellent crispiness with much less fat than pan-frying.

    Why is my coating falling off during frying?

    Most likely cause: skipping the flour stage or not letting the coated cutlets rest before frying. After breading, let the cutlets sit on a rack for 5–10 minutes — this helps the coating set. Also make sure the oil is hot enough before adding the chicken; if it’s too cool, the coating absorbs oil and loosens.

    How thin should I pound the chicken?

    About 1/4 inch (6mm) is ideal. Thinner cooks faster but risks drying out at the edges before the center is done. Thicker means longer frying time and risks an underdone center with an overbrowning crust.

    Can I make Chicken Milanesa ahead of time?

    You can bread the cutlets and refrigerate them uncovered for up to 4 hours before frying. Refrigerating them uncovered lets the surface dry slightly, which actually improves the crust. Fry straight from the fridge — no need to bring to room temperature.

    What’s the best way to reheat leftovers?

    Oven at 375°F (190°C) for 8–10 minutes on a rack, or air fryer at 360°F for 5–6 minutes. Avoid the microwave — it steams the crust and turns it soggy. Properly reheated Milanesa stays remarkably crispy.

  • Crispy Pickle Brine Chicken Wings

    Crispy Pickle Brine Chicken Wings

    Do you have leftover pickle brine and wonder if there’s more to its fate than the drain? Hold off — because these crispy pickle brine chicken wings are the perfect blend of tangy, juicy, and crunchy and they will change the way you think about brining forever.

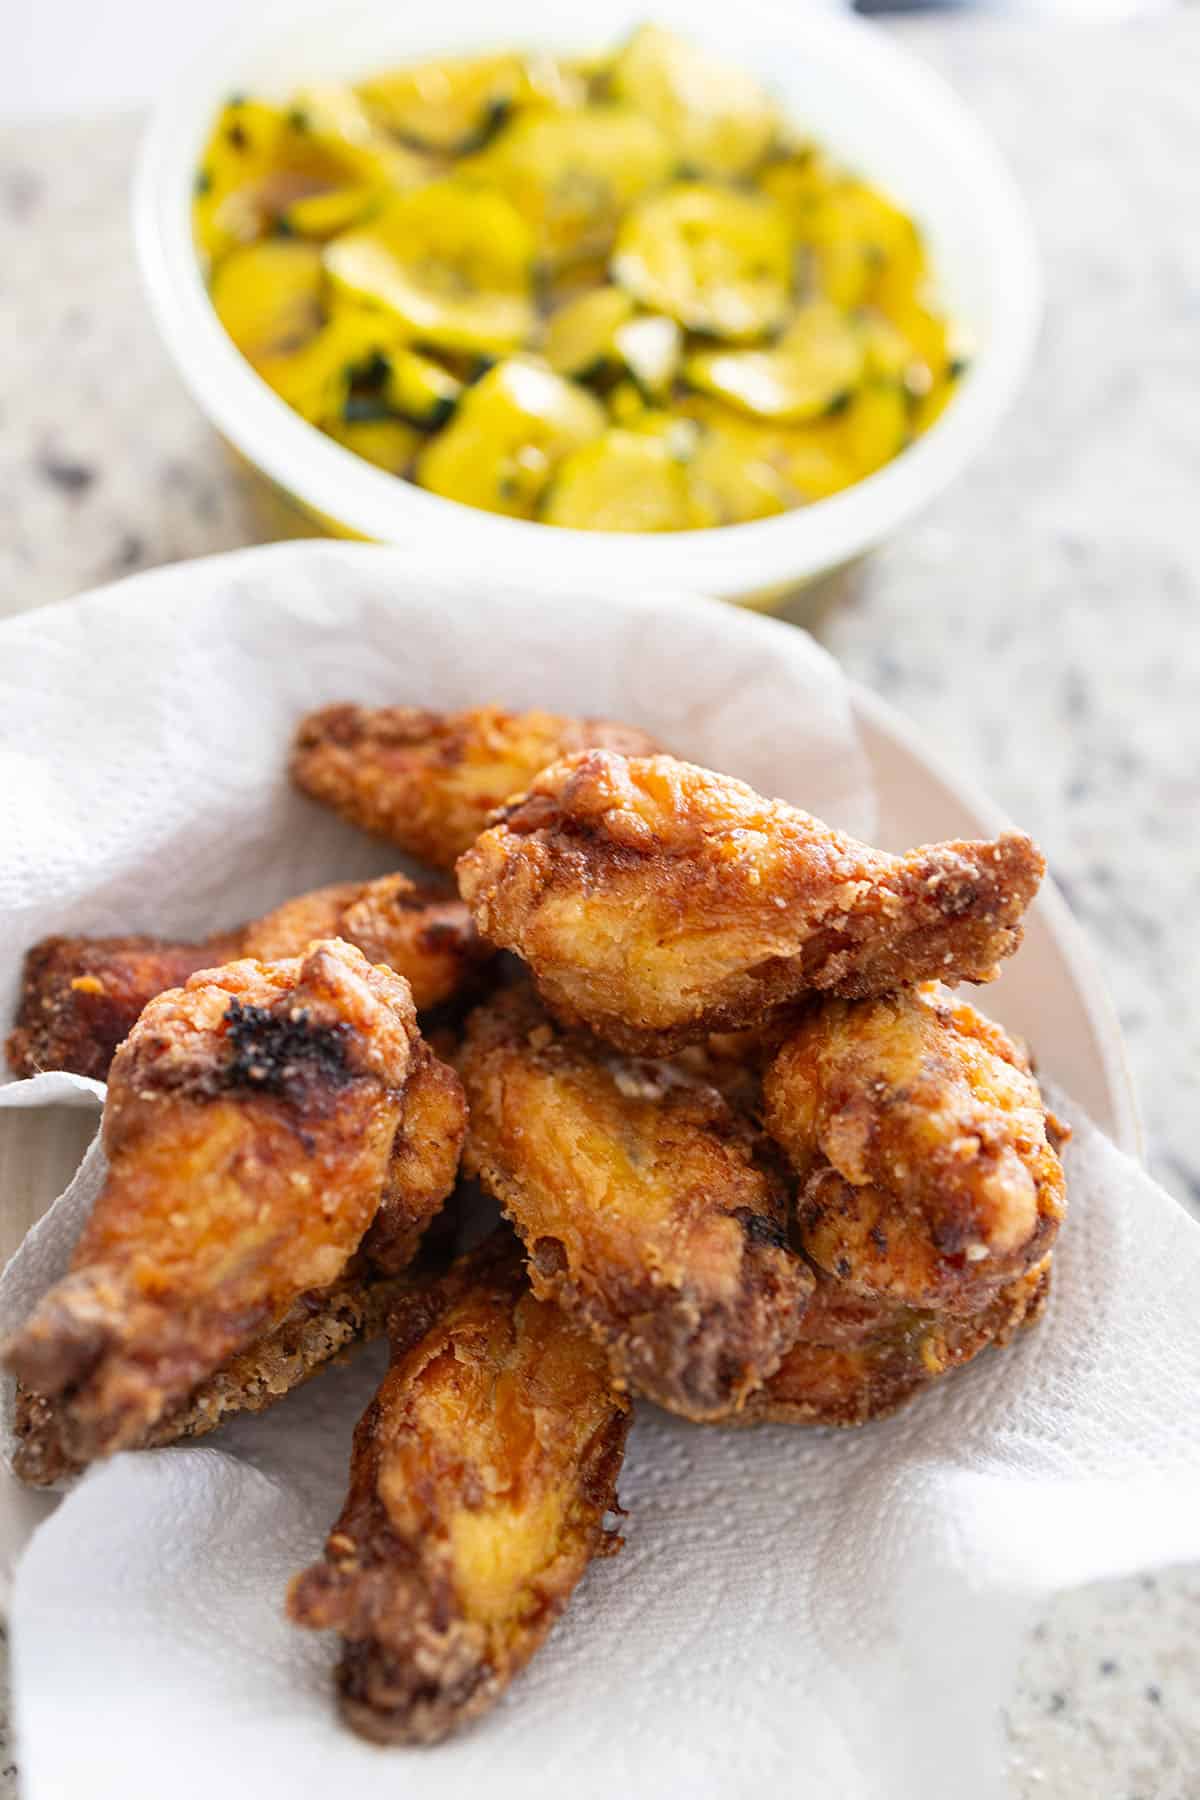
    Platter of crispy pickle brine chicken wings around a bowl of dipping sauce

    This post may contain affiliate links. If you purchase through these links, I may earn a small commission at no extra cost to you. Thank you for supporting Love & Harvest!

    In this post, you’ll find the recipe for making crispy, juicy, flavourful chicken wings using leftover pickle juice to brine the wings.

    This little-known secret can transform your homemade chicken wings into a culinary delight that rivals your favourite restaurant.

    Discover the Secret to Juicy Chicken Wings: Pickle Brine Magic!

    Many restaurants use pickle brine to soak their chicken parts overnight — it’s the secret behind wings that stay juicy every single time they hit the fryer. Pickle brine is tangy, sweet, and packed with flavours that enhance the taste of the chicken, lock in moisture during frying, and penetrate deep into the meat.

    Learn how we make our juicy wings, and you’ll never think twice about throwing away that precious liquid again. We also provide our recipe for our BEST Bread and Butter Pickled Cucumbers — so delicious and crunchy that we’ve turned many pickle-haters into pickle lovers.

    Bowl of bread and butter pickles in their brine with chopsticks

    Why Pickle Brine?

    The acidity of the brine tenderises the meat, allowing the flavours to penetrate deep into the chicken. When you fry the brined chicken, the brine locks in moisture, resulting in wings that are incredibly juicy on the inside and perfectly crispy on the outside. No other marinade achieves this dual effect with such simplicity.

    What Makes Them So Special?

    1. Pickle Brine Magic: These wings are marinated in pickle brine, infusing them with a unique tangy flavour and ensuring they stay incredibly moist and tender.
    2. Perfectly Crispy: After marinating, the wings are fried to perfection, achieving a golden, crispy exterior that contrasts beautifully with the succulent interior.
    3. Unmatched Flavor: The combination of tangy pickle brine with savoury spices in the breading creates a flavour explosion that will leave you craving more.

    Bowl of crispy fried chicken wings on paper

    Ingredients

    Ingredients

    Pickle Brine

    • Why it matters: The star of this recipe. Use brine from your homemade bread and butter pickles for the best flavour. The salt, vinegar, sugar, and spices in the brine work together to tenderise the meat while infusing it with tangy depth. Refrigerate the wings in brine for at least 4 hours, ideally overnight.

    Chicken Wings

    • Why it matters: Fresh or thawed wings work equally well. Pat them completely dry after brining — this is the single most important step for achieving a truly crispy crust. Moisture is the enemy of crunch.

    Cornstarch Coating

    • Why it matters: A mixture of cornstarch, salt, pepper, garlic powder, and paprika creates a light, shatteringly crispy crust. Cornstarch absorbs surface moisture and fries up crispier than flour alone. Coat the wings immediately before frying for the best texture.

    Frying Oil

    • Why it matters: Use a neutral high-smoke-point oil — vegetable, canola, or peanut. Heat to 350°F (175°C) and use a deep-fry thermometer to maintain the temperature. Oil that is too cool produces greasy wings; oil that is too hot burns the outside before the inside cooks through.

    How to Make Them

    1. Marinate: Place the chicken wings in a bowl or glass jar and cover with pickle brine. Refrigerate for at least 4 hours, preferably overnight.
    2. Dry and Coat: Remove the wings from the brine and pat them completely dry with paper towels. Coat in a mixture of cornstarch, salt, pepper, and your favourite spices.
    3. Fry: Fry in hot oil at 350°F (175°C) until golden brown and crispy, about 8–10 minutes. Drain on paper towels.
    4. Enjoy: Serve hot with your favourite dipping sauces.

    Flour-coated chicken wings resting on a wire rack before frying

    Frequently Asked Questions

    How long should I brine the chicken wings in pickle juice?

    A minimum of 4 hours produces noticeable results, but overnight (8–12 hours) is the sweet spot. Beyond 24 hours the texture can become slightly mushy as the acid breaks down the meat fibres too aggressively. Plan ahead and brine the night before you want to cook them.

    Can I use store-bought pickle brine instead of homemade?

    Yes, absolutely. Any pickle brine works — dill, bread and butter, or spicy. Each variety will impart a slightly different flavour profile. Bread and butter brine gives a sweeter, more complex result. Dill brine produces a sharper, more classic wing flavour similar to what fast-food chicken chains use.

    Should I bake or air-fry instead of deep-frying?

    Yes. For air-frying: pat the wings dry, coat lightly in oil and cornstarch, then air-fry at 400°F (200°C) for 20–25 minutes, flipping halfway. For baking: place on a wire rack over a sheet pan and bake at 425°F (220°C) for 40–45 minutes, flipping once. Deep-frying gives the crispiest result, but both alternatives are delicious and lower in fat.

    Why do I need to dry the wings after brining?

    Surface moisture creates steam when the wing hits the hot oil, which prevents the crust from crisping properly. Pat each wing firmly with paper towels until the surface feels dry to the touch. Some cooks leave the wings uncovered in the refrigerator for 1 hour after drying to achieve an even drier surface before frying.

    What dipping sauces pair best with pickle brine wings?

    Ranch dressing is the classic pairing — the creamy tang complements the pickle flavour beautifully. Blue cheese dip, honey mustard, and sriracha mayo are all excellent alternatives. For a Vietnamese-inspired twist, a nuoc cham dipping sauce adds a bright citrusy contrast.

    Can I use the same brine again after marinating the chicken?

    No. Once raw chicken has marinated in the brine, discard it. Do not reuse it for more chicken or for anything else. Cross-contamination is a serious food safety risk. Always use fresh brine for a second batch.

    Crispy chicken drumette resting on a bowl of bread and butter pickles

    Crispy Pickle Brine Chicken Wings

    Our crispy pickle brine chicken wings are the perfect blend of tangy, juicy, and crunchy. This little-known secret can transform your homemade chicken wings into a culinary delight that rivals your favorite restaurant.
    Prep Time 5 minutes
    Cook Time 10 minutes
    Resting Time 8 hours
    Total Time 8 hours 15 minutes
    Servings: 6 people
    Course: Appetizer
    Cuisine: American
    Calories: 340

    Ingredients
      

    Chicken Wings Marinate
    • 2 cups pickle brine (from a jar of pickles)
    • 1kg chicken wings separated into drumettes and flats
    For the coating
    • 1 cup cornstarch
    • 2 tsp garlic powder
    • 1 tsp onion powder
    • 1 tsp salt
    • 2 cups vegetable oil
    Lime Dipping Sauce
    • 1 tbsp fish sauce
    • ¼ cup warm water
    • 1 tbsp sugar
    • 3 tbsp lime juice freshly squeezed
    • 1 lime slice thinly sliced

    Method
     

    Marinate
    1. Combine all the ingredients together, and put it in a large non-reactive bowl. Cover the top and let it marinate overnight in the fridge.
    Fying
    1. Give the chicken wings good stir in the juice, and strain the liquid out. Let it sit out and dry on a drying rack.
    2. Meanwhile, combine all the dry ingredients together. Whisk well.
    3. Get a large frying pot (like a dutch oven), add the oil, and heat the oil to 375℉.
    4. Dredge each chicken wing in the dry mixture, ensuring an even coating. Shake off any excess.
    5. Carefully add the coated wings to the hot oil in batches, avoiding overcrowding.
    6. Fry the wings for about 8-10 minutes, turning occasionally, until they are golden brown and crispy.
    7. Use a slotted spoon or tongs to remove the wings from the oil and place them on a paper towel-lined plate to drain any excess oil.
    Dipping Sauce
    1. Combine all the ingredients together. Make sure the sugar is completely dissolved. Add the slice of lime as garnish
    Platting
    1. Arrange the crispy pickle brined chicken wings on a serving platter. Also place a small bowl with the dipping sauce.

    These wings are even better when you make your own brine — check out our BEST Bread and Butter Pickled Cucumbers for the full recipe. If you love crispy fried chicken, our Beer Batter Fish and Chips uses the same deep-fry method with equally spectacular results. And for another brine-forward recipe, try our Mexican Pickled Red Onion — a 10-minute condiment that elevates everything.

  • Chicken Shawarma Wrap with Caesar Salad

    Chicken Shawarma Wrap with Caesar Salad

    Picture this: warm, pillowy naan bread wrapped around juicy yogurt-marinated chicken, crisp romaine Caesar salad, and a shower of freshly grated Parmesan — all held together by one gloriously messy squeeze. This Chicken Shawarma Wrap with Caesar Salad is the meal I make on repeat for road trips, school lunches, and dinner parties alike. It takes 30 minutes to assemble once the chicken has marinated overnight, and it never fails to impress.

    This post may contain affiliate links. If you purchase through these links, I may earn a small commission at no extra cost to you. Thank you for supporting Love & Harvest!

    Chicken shawarma wrap with Caesar salad on naan bread

    Succulent chicken marinated overnight in yogurt, dill, turmeric, and lime juice — wrapped up with crisp Caesar salad inside warm, fluffy naan. One squeeze and the juices spill from every corner.

    Why You Should Try This Chicken Shawarma Recipe

    1. It is totally different: Combining two classic recipes into one — shawarma and Caesar salad — is the most original twist on a weeknight wrap.
    2. Bursting with flavor: The overnight marinade of yogurt, dill, turmeric, and lime juice ensures every bite is bold and aromatic.
    3. Perfectly juicy chicken: Marinating overnight guarantees plump, tender chicken pieces that don’t dry out on the grill.
    4. Crisp Caesar salad: Crunchy romaine, tangy dressing, and salty Parmesan add a fresh, savory contrast inside the wrap.

    Chicken shawarma ingredients laid out

    My Favorite On-the-Go Meal

    I’m not exaggerating when I say this is my favorite go-to meal when I need something quick and delicious. With the chicken marinating overnight, all I have to do is grill it and toss the Caesar salad. It takes 30 minutes and works for picnics, road trips, school lunches, and camping, basically anywhere you need a satisfying meal that travels well.

    Chicken shawarma wrap ready to eat

    What Makes This Recipe Different

    1. Naan bread: Soft, fluffy homemade naan instead of standard pita adds a chewy, slightly sweet element that makes every bite better.
    2. Caesar salad inside: Most shawarma wraps use plain lettuce and tomato. We go full Caesar — romaine, tangy dressing, Parmesan — for a restaurant-quality finish.
    3. Easy to make: A few simple ingredients, overnight marinating, and 30 minutes of assembly. That’s it.

    Ingredients

    Key Ingredients

    Natural Yogurt

    Yogurt tenderizes the chicken by breaking down proteins with its acidity, resulting in a juicy texture. It also acts as a carrier for the spices, ensuring they penetrate deeply into the meat. During grilling, yogurt keeps the chicken moist and prevents it from drying out.

    • Why it matters: Without yogurt in the marinade, the chicken loses its characteristic tenderness and the flavors stay surface-level.

    Dill

    Dill adds a fresh, slightly tangy flavor that lifts the entire marinade. It complements the warm spices and contributes to the Mediterranean character of this dish. You can use a quality dried dill if fresh is not available.

    • Why it matters: Dill is what distinguishes this shawarma from generic chicken marinades. Don’t skip it.

    Turmeric

    Turmeric gives the chicken its golden color and adds a warm, earthy flavor to the marinade. A good organic turmeric powder makes a real difference in both color and taste.

    • Why it matters: That vibrant yellow color is the visual hallmark of shawarma — and it signals depth of flavor.

    Lemon Juice

    The acidity in lemon juice tenderizes the chicken further, adds brightness, and balances the warm spices in the marinade. Use freshly squeezed for the cleanest flavor.

    • Why it matters: Lemon juice prevents the marinade from becoming heavy or one-dimensional. It is the flavor activator.

    Garlic

    Garlic amplifies every other flavor in the marinade. It brings out the chicken and makes all the herbs and spices taste more pronounced. Crush it fresh for maximum potency.

    Caesar Salad Dressing

    You can use any quality store-bought Caesar dressing. The secret upgrade: stir in a squeeze of fresh lemon juice and some freshly grated Parmesan. It takes a standard dressing to another level.

    • Why it matters: The Caesar dressing is the bridge between the hot, spiced chicken and the cool, crisp lettuce. It holds the whole wrap together.

    Grilled chicken shawarma plated
    Assembling the chicken shawarma wrap

    This wrap pairs beautifully with our fluffy naan bread recipe — they were made for each other. For a lighter side, try our homemade Caesar salad dressing or the Thai chicken salad for an Asian-inspired variation on the same flavor profile.

    Frequently Asked Questions

    Can I use chicken breast instead of thighs?

    Yes, but chicken thighs are strongly recommended. They stay juicier on the grill and hold up better in the wrap. If using breast, reduce grill time by 2–3 minutes per side and watch closely to avoid drying out.

    How long should I marinate the chicken?

    Overnight is ideal — 8 to 12 hours in the refrigerator. The minimum is 4 hours. Anything less and the flavors won’t fully penetrate the meat.

    Can I make this ahead of time?

    Yes. Grill the chicken and store it separately from the Caesar salad and naan. Assemble the wraps just before serving to keep the naan from getting soggy.

    What can I substitute for naan bread?

    Pita, flatbread, or large flour tortillas all work. Naan gives the best result because of its softness and chew, but the recipe is flexible.

    Is this recipe kid-friendly?

    Very much so. Kids love the mild flavors and the handheld format. You can reduce the turmeric slightly for younger kids and pack extra Caesar dressing on the side for dipping.

    Can I cook the chicken in a pan instead of grilling?

    Absolutely. A cast iron skillet on medium-high heat gives you a great sear. Cook 4–5 minutes per side depending on thickness. A Lodge 12-inch cast iron skillet is perfect for this.

    Two halves of a chicken shawarma wrap with Caesar salad filling

    Chicken Shawarma Wrap

    Incredibly juicy, tender chunks of chicken marinated overnight with yogurt, dill, lemon juice, and turmeric, all wrapped up with Caesar salad. It's an easy meal perfect for dinner or for taking on road trips.
    Prep Time 20 minutes
    Cook Time 15 minutes
    Total Time 35 minutes
    Servings: 6 people
    Course: Main Course
    Cuisine: Indian
    Calories: 420

    Ingredients
      

    Chicken Shawarma
    • ½ kg chicken meat (can be chicken breast, chicken leg, or assorted) 1.1 pounds of chicken meat
    • 1 cup natural yogurt no sugar
    • 3 garlic cloves grated
    • 2 tsp dried dill
    • 1 tsp cumin powder
    • 1 tsp turmeric powder
    • 1 tbsp paprika
    • 1 tsp lemon juice
    • 2 tsp sea salt
    • ½ tsp black pepper
    • 6-8 large naan bread or tortilla wraps
    Caesar Salad
    • 4 cups chopped romaine lettuce
    • ¼ cup grated Parmesan cheese
    • ¼ cup Caesar salad dressing
    • 1 tbsp lemon juice
    • salt and pepper to taste

    Method
     

    1. With a clean chopping board, slice the chicken into medium size cubes. They need to be large enough to be on skewers. About 1 inch cubes.
    2. In a large bowl, combine the yogurt, grated garlic, dill, cumin, turmeric, paprika, lemon juice, salt, and pepper. Add the sliced chicken thighs and toss until well coated. Cover and refrigerate for at least 2 hours, preferably overnight.
    3. Preheat a grill or grill pan over medium-high heat. Remove the chicken from the marinade and thread onto skewers. Grill for 5-6 minutes on each side, or until the chicken is cooked through and slightly charred. Remove from the grill and place it on a plate.
    4. In a large mixing bowl, combine the chopped romaine lettuce, grated Parmesan cheese, Caesar salad dressing, lemon juice, salt, and pepper. Toss until the lettuce is evenly coated with the dressing.
    5. To assemble the wraps, warm the pita bread or tortilla wraps according to package instructions. Place a generous amount of Caesar salad on each wrap, then top with the grilled chicken shawarma slices.
    6. Roll up the wraps tightly, folding in the sides as you go. Cut in half diagonally and serve immediately.

  • Thanksgiving Roasted Lemon Garlic Chicken

    Thanksgiving Roasted Lemon Garlic Chicken

    Every Thanksgiving the debate starts the same way — turkey or chicken? Here is the honest truth: this Thanksgiving roasted lemon garlic chicken is easier to prepare, cheaper, more forgiving to cook, and equally impressive on the table. The moment it comes out of the oven with its crispy golden skin and the smell of lemon, rosemary, and garlic filling the house, the debate is over.

    This post may contain affiliate links. If you purchase through these links, I may earn a small commission at no extra cost to you. Thank you for supporting Love & Harvest!

    thanksgiving chicken

    I know making turkey for Thanksgiving is the classic approach. My Best Thanksgiving Turkey with Bacon Strips has been a family favourite for over 10 years and it is genuinely hard to compete with. But if you want to switch things up, or your dinner group prefers chicken, this is the recipe you want.

    We make this chicken at least twice a month during fall and winter. The juice is so flavourful we put it on everything — rice, mashed potatoes, even salads. For another great roasted option, see our One Pot Lemon Garlic Chicken.

    thanksgiving chicken breast

    Why You Should Make This Recipe

    • Easy set-it-and-bake-it recipe — Marinate for an hour, put it in the oven, walk away. That is genuinely all there is to it.
    • Cheaper than a turkey — Chicken prices are still manageable. If you are looking for a budget-friendly Thanksgiving, this is it.
    • Fantastic taste — Lemon, garlic, and rosemary roasting together is one of the great smells of fall. The flavour is equally unforgettable.
    • The wow factor — A properly decorated roast chicken on the center of the table has impressive presence. Nobody feels short-changed.
    • Delicious fall sides — We also roast potato, yam, and carrots in the same pan. One dish, full meal.

    thanksgiving chicken gravy

    Why Chicken Over Turkey This Year?

    • Much less prep time — No days of defrosting. No clearing half the fridge. No brining a 20-pound bird.
    • More affordable — Turkey is expensive. Chicken is not. Same wow factor, fraction of the cost.
    • Works in a small oven — Many modern apartments have small electric ovens. A 2kg chicken fits comfortably where a large turkey never would.
    • Consistently juicy — Chicken is far more forgiving than turkey. Dry Thanksgiving turkey is a risk. Dry Thanksgiving chicken is nearly impossible if you follow this recipe.

    thanksgiving chicken seasoning

    Ingredients

    Key Ingredients

    Organic Free-Range Chicken

    • Why it matters: We are roasting the whole bird, skin and all, so the quality of the chicken matters here. An organic free-range chicken has better flavour and a more forgiving texture when roasted. I typically use a 2kg bird which feeds a family of five comfortably. Use a proper roasting pan with a roasting rack so the chicken roasts evenly above the vegetables.

    Lemon

    • Why it matters: Meyer lemon or eureka lemon both work beautifully. The lemon does two jobs — it goes into the marinade brush and gets squeezed over the bird right before roasting. Roll the lemon hard on the counter first to burst the juice inside and make squeezing easier. The leftover half goes into the cavity.

    Fresh Rosemary

    • Why it matters: Rosemary has a strong, earthy, pine-like scent that defines the fall and winter vibe of this recipe. Finely chopped into the garlic oil marinade, plus two whole sprigs inside the cavity — it adds layers of subtle flavour throughout the entire bird.

    Meat Thermometer

    • Why it matters: The difference between juicy chicken and dry chicken is often just a few degrees. Use an instant-read meat thermometer to check that the thigh reaches 165°F before pulling from the oven. The juice should run clear when pierced.

    how to cook a whole chicken like a turkey

    Professional Tips

    Pro Tip #1 – Marinate for at Least 1 Hour

    For the salt and seasoning to fully penetrate the skin, the chicken needs at least one hour of marinating. Overnight is even better. Do not wrap it in plastic — leave it uncovered in the fridge so the air dries out the skin slightly. That is what gives you the crispy skin when it comes out of the oven.

    thanksgiving chicken thighs

    Pro Tip #2 – Use a Meat Thermometer

    An instant-read meat thermometer takes the guesswork out of roasting chicken. You are looking for an internal temperature of 165°F at the thickest part of the thigh. Roast at 375°F. Do not rely only on visual cues — the thermometer is the definitive answer.

    Pro Tip #3 – Let the Chicken Rest 30 Minutes Before Carving

    Gordon Ramsay’s Holiday special taught me this one. Any large roasted meat needs to rest outside the oven for at least 30 minutes before cutting. If you cut into it immediately, the moisture escapes and vents out, leaving drier meat. Let it rest and every slice will be succulent and juicy.

    roast chicken

    Frequently Asked Questions

    What temperature do I roast the chicken at?

    Roast at 375°F (190°C) for 1 hour and 15 minutes for a 2kg chicken. The chicken is done when the skin is crispy and golden brown and an instant-read thermometer inserted into the thigh reads 165°F.

    How long should I marinate the chicken?

    At minimum, 1 hour. Overnight is ideal. The longer the marinade sits, the more the lemon, garlic, and rosemary flavour penetrates into the meat. Leave it uncovered in the fridge overnight for the crispiest skin.

    Can I use a different chicken size?

    Yes. A smaller 1.5kg chicken will be done in about 55 to 60 minutes. A larger 2.5kg bird may need up to 90 minutes. Always use a meat thermometer rather than relying on time alone.

    What vegetables can I roast alongside the chicken?

    Potatoes, yam, and carrots are classic fall choices and they go in the same pan under the chicken rack. The juices drip down and baste the vegetables. You can also add parsnips, turnips, or fennel.

    How do I get crispy skin?

    Three things: dry the skin thoroughly with paper towel after washing, leave the marinated chicken uncovered in the fridge so the surface dries out, and roast on a rack so hot air circulates under the bird. Do not cover it with foil.

    Can I make this recipe ahead of time?

    Yes. Marinate the chicken the night before. The vegetables can be prepped and tossed in oil the morning of. When ready to cook, bring the chicken to room temperature for 30 minutes before roasting for more even cooking.

    Roasted lemon garlic chicken on a platter with tomatoes, squash and lemon

    Thanksgiving Roasted Lemon Garlic Chicken

    This Roasted Lemon Garlic Chicken has hints of lemon, garlic, and rosemary and is perfectly roasted with juicy tender meat inside. Print Recipe Pin RecipePrep Time:30 minsCook Time:1 hr 15 minsCourse: Main CourseCuisine: AmericanKeyword: roasted lemon garlic chickenServings: 5 people

    Equipment

    • roasting pan or large cooking sheet with rack

    Ingredients

    Lemon Garlic Chicken Marinade

    • 1 2kg whole organic free-range chicken
    • 2 cloves garlic grated
    • 1 sprig of rosemary finely chopped
    • 2½ tbsp canola oil
    • 1 tbsp Bruschetta Seasoning
    • 1 tbsp lemon pepper seasoning
    • ½ lemon

    Vegetables

    • 2 medium potato
    • 1 large yam
    • 3 large carrots
    • 2 tsp paprika
    • 2 tbsp canola oil

    Cavity Stuffing

    • 2 sprigs of rosemary
    • 2 celery stalks
    • ½ lemon the leftover lemon after juicing the chicken on top

    Instructions

    Chicken Marinade

    • Wash the chicken inside and outside. Pluck any feathers still attached to the skin. Pat dry with paper towel and set aside.
    • Combine the garlic, rosemary, and oil. Add a pinch of salt. Using a brush, brush the bird inside and outside. Make sure you also brush under the skin as well.
    • Combine the bruschetta and lemon pepper seasoning together. Rub the seasoning all over the bird including the wings. Place the chicken in the fridge for 1 hour before roasting, or preferably overnight. You do not need to wrap the chicken in plastic. Let the air of the fridge dry the skin so the chicken comes out with crispier skin.
    • Meanwhile, cut the potato, yam and carrots into small cubes. Toss in a large bowl with paprika, salt, and canola oil.

    Cooking the Chicken

    • Preheat oven to 375°F.
    • Take a roasting pan and place the winter roots at the bottom.
    • Place the chicken on top of the potato, carrot, and yam. Squeeze half a lemon over the top of the chicken (discard any seeds), then put the remaining lemon into the cavity along with the celery and rosemary sprigs.
    • Roast in the oven for 1 hour and 15 minutes. The chicken is done when the skin is crispy and golden brown and the juices run clear when the thigh is pierced.
    • Let the chicken rest for 30 minutes before carving.