Tag: appetizer

  • The BEST Bread and Butter Pickled Cucumbers

    The BEST Bread and Butter Pickled Cucumbers

    These are the best-tasting pickles you’ll ever have on your burgers, hot dogs, or eaten straight from the jar. After trying them, you won’t go back to store-bought pickles ever again.

    Bowl of homemade bread and butter pickle slices in brine

    This post may contain affiliate links. If you purchase through these links, I may earn a small commission at no extra cost to you. Thank you for supporting Love & Harvest!

    This post is a recipe for the best bread and butter pickled cucumbers — a simple recipe with cucumbers, turmeric, coriander seeds, bay leaf, apple cider vinegar, sugar, and more.

    These are truly the BEST Bread and Butter Pickled Cucumbers. This recipe, a breeze to prepare, offers simplicity and delight. The most challenging part? A bit of waiting — but I assure you, the patience is richly rewarded.

    These pickles are perfect companions to any dish and stand unrivalled in flavour. Once you savour this recipe, no other will ever compare. It will carve a cherished place in your heart.

    Why You Only Need This Pickle Recipe

    With each batch, I find myself drawn back to its simplicity and perfection. This recipe consistently delivers on taste and quality — it has become my go-to, my tried-and-true, my culinary comfort zone. And the bonus? The leftover brine becomes the secret ingredient for the crispiest chicken wings you have ever made.

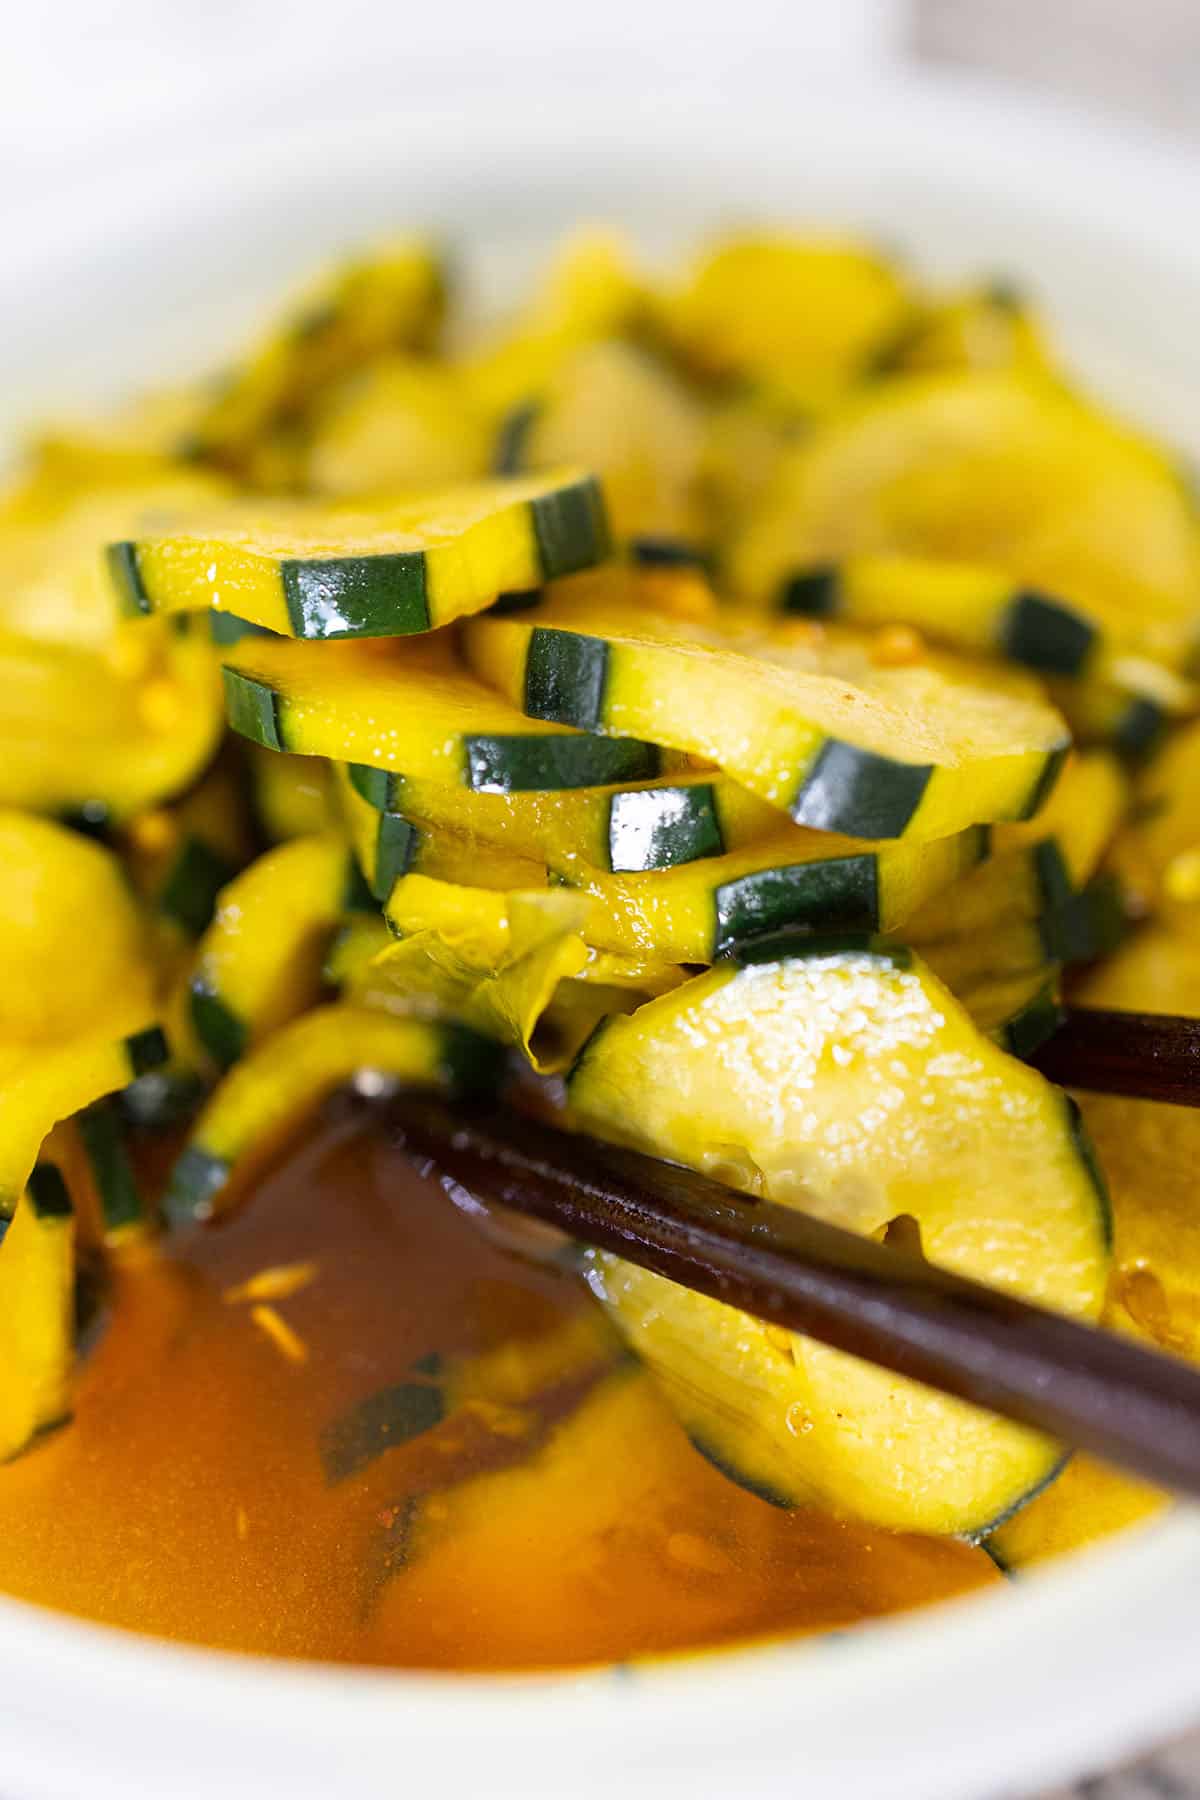
    Bread and butter pickled cucumber slices in a white bowl with chopsticks

    Don’t Throw Away the Brine!

    Do you have some pickle brine left after finishing the jar? Learn how to make our Crispy Pickle Brine Chicken Wings — the brine marinates the chicken overnight, infusing it with a unique tangy flavour and keeping it incredibly moist and tender.

    How to Get a Crunchy Texture

    To enhance crispiness, slice the cucumbers into a bowl and add a dash of sea salt. Include the sliced onions, then cover the mixture with crushed ice and press it down with a plate to keep the cucumbers submerged as the ice melts. Cover and refrigerate overnight. This process draws out excess moisture and guarantees an optimal crunchiness that elevates the pickles to perfection.

    Ingredients

    Ingredients

    Cucumbers

    • Why it matters: Kirby cucumbers or Persian cucumbers are ideal — they have thinner skin, fewer seeds, and stay crunchier in the jar than regular cucumbers. I peel half the skin off in alternating strips so the finished pickle looks beautiful in the jar. A mandoline slicer produces perfectly even slices for consistent pickling.

    Turmeric

    • Why it matters: Turmeric is what makes these pickles truly distinctive. It adds a warm, slightly peppery depth that no one can quite identify — they just know the pickles taste exceptional. It also gives the brine that gorgeous golden hue that makes these pickles stand out on any table.

    Apple Cider Vinegar

    • Why it matters: Apple cider vinegar adds a rounder, more complex tang compared to plain white vinegar. It also brings subtle fruity notes that complement the sweetness of the bread and butter style. I increase the vinegar-to-water ratio slightly for a more pronounced pickle flavour.

    Spices

    • Why it matters: The brine includes celery powder, coriander seeds, bay leaf, and clove. None of them is overpowering individually, but together they create a layered, aromatic brine that tastes like something your grandmother spent hours perfecting.

    Mason Jars

    • Why it matters: Use wide-mouth mason jars with a canning funnel for easy filling. Wide-mouth jars make it far easier to pack in the cucumbers tightly and retrieve the pickles without a mess.

    Frequently Asked Questions

    How long do homemade bread and butter pickles last?

    Stored in a sealed jar in the refrigerator, these pickles keep beautifully for up to 3 months. The flavour actually improves after the first 48 hours as the cucumbers absorb the brine. For the absolute best taste, wait at least 24 hours before opening the jar.

    Do I need to process these jars in a water bath?

    For refrigerator pickles (the method in this recipe), no water bath canning is needed. These are quick pickles intended to be stored in the fridge and consumed within 3 months. If you want shelf-stable pickles that can be stored in the pantry for up to 1 year, you will need to process the sealed jars in a boiling water bath for 10 minutes. Follow a tested canning recipe for safety.

    Why do my pickles turn soft instead of staying crunchy?

    The most common culprits are: not soaking in salt and ice overnight, using regular slicing cucumbers instead of Kirby or Persian varieties, or packing them too loosely. The ice-and-salt method is key — it firms the flesh and draws out the moisture that would otherwise make the pickles go limp. Do not skip this step.

    Can I use white vinegar instead of apple cider vinegar?

    Yes, but the flavour will be sharper and less complex. Apple cider vinegar adds a natural sweetness and depth that works particularly well with the bread and butter style. If you use white vinegar, consider reducing the amount slightly to avoid an overly acidic brine.

    What is the difference between bread and butter pickles and dill pickles?

    Bread and butter pickles use a sweet-tangy brine with sugar and warm spices like turmeric, coriander, and celery seed. Dill pickles use a sharp vinegar brine with fresh or dried dill and garlic, with little to no sugar. Bread and butter pickles are sweeter, milder, and more aromatic. They are the classic choice for burgers and sandwiches.

    Can I pickle other vegetables with this brine?

    Absolutely. This brine works wonderfully with thinly sliced red onions, banana peppers, cauliflower florets, and green beans. Adjust the brining time based on the vegetable — denser vegetables like cauliflower benefit from a slightly longer soak of 48–72 hours.

    Chopsticks lifting bread and butter pickle slices from a bowl of brine

    The BEST Bread and Butter Pickled Cucumbers

    Prep Time 20 minutes
    Total Time 20 minutes
    Servings: 8
    Course: Condiment
    Cuisine: American
    Calories: 120

    Ingredients
      

    • 1 kg Kirby Cucumbers or 2 pounds
    • 2 cups small diced sweet white onions
    • ¼ cup kosher salt
    • ½ kg crushed ice or 1 pound
    • 2 cups sugar
    • 1 tbsp yellow mustard seeds
    • 1 tsp celery seeds
    • 2 cups apple cider vinegar
    • 1 fresh bay leaf torn into pieces
    • 3 whole cloves
    • ½ jalapeno sliced paper thin with seeds

    Method
     

    1. Slice cucumbers into ⅛ inch thick slices. To draw out the liquid for extra crunch: layer the cucumber slice with onions, salt and ice in a glass or stainless steel container and weight with a plate large enough to cover the cucumbers and keep them submerged when the ice melts.
      Cover and refrigerate overnight.
    2. Next day, sterilize three 1L canning jars, along with their rings nd lids, and put them on a clean dish towel or wire rack.
    3. Drain the cucumbers and onions, put them in a large non reactive pot, and add the sugar, mustard seeds, turmeric, celery seeds, vinegar, bay leaf, cloves, and jalapeño. Bring to a simmer over high heat, stirring to completely dissolve the sugar. About 5 minutes. Skim off any foam that has formed at the top.
    4. Divide the batch in three parts for the jars. Ladle the hot vinegar liquid over the cucumbers leaving a ¼ inch headspace. White the rims and threads clean, put the lids and rings on the jars, and tighten the rings. Cool the jars to room temperature.
    5. Refrigerate the jars and let the pickle cure for at least 1 week before eating. Unopened, the pickles will keep for up to 2 months in the fridge.

    Once you have a jar of these pickles, the natural next step is our Crispy Pickle Brine Chicken Wings — where the leftover brine does the heavy lifting. For more fermented and preserved favourites, explore our Traditional Kimchi and Mexican Pickled Red Onion.
  • Vegetarian Mango Soy Ceviche

    Vegetarian Mango Soy Ceviche

    This Vegetarian Mango Soy Ceviche is proof that plant-based food can be just as vibrant and satisfying as anything from the sea. Juicy mango, tangy lime, jalapeño heat, and tender soy protein come together in a refreshing dish that is perfect for warm summer days — and ready in under 40 minutes.

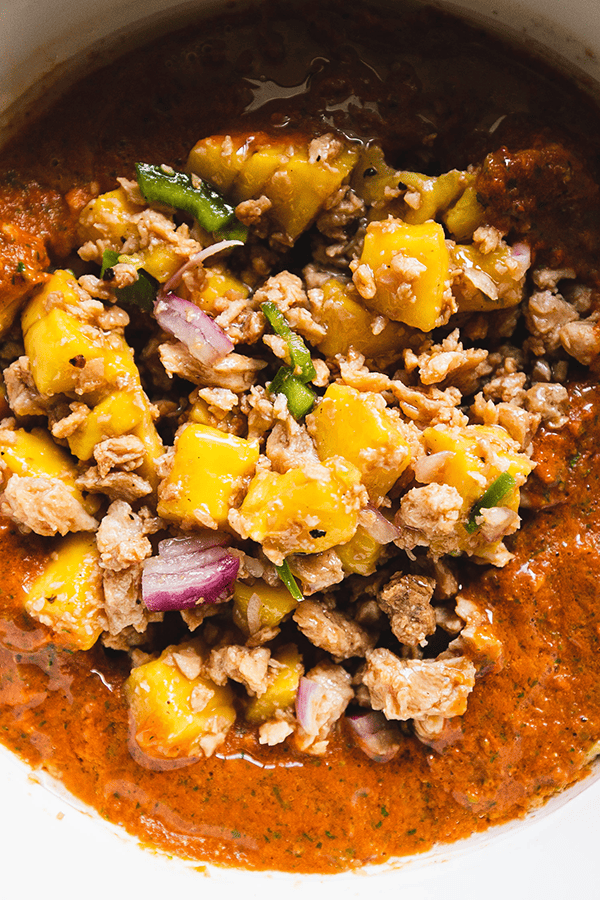
    Vegetarian Mango Soy Ceviche plated with red salsa

    This post may contain affiliate links. If you purchase through these links, I may earn a small commission at no extra cost to you. Thank you for supporting Love & Harvest!

    What Is Ceviche?

    Ceviche is a vibrant and refreshing dish that hails from the coastal regions of Latin America. Traditionally it is made by marinating raw fish or shellfish in citrus juice — the acid “cooks” the seafood, denaturing the proteins and giving it a firm texture. The result is a zesty and flavourful dish enjoyed as an appetizer or a light meal.

    Here in Mexico, ceviche is a celebration of fresh ingredients and bold flavours. It features an array of complementary components such as onions, tomatoes, herbs like cilantro, and a touch of heat from jalapeños. The beauty of ceviche lies in its versatility — vegetarian versions like this Mango Soy Ceviche use vegetables and fruits as the base, marinated in citrusy goodness to create a refreshing and tangy medley of flavours.

    Vegetarian Mango Soy Ceviche ingredients laid out

    My Vegetarian Journey in Mexico

    In my culinary journey through Mexico, I noticed the abundance of fresh vegetables and fruits in the markets, and also that vegetarian dishes did not always take the spotlight in traditional Mexican cuisine. As someone passionate about vegetarian food, I was inspired to create a dish that proves vegetarian cuisine is anything but mundane.

    With each bite of the Mango Soy Vegetarian Ceviche, I am transported to the bustling streets of Mexico, where the lively atmosphere and rich culinary heritage come alive. The succulent mangoes bring a burst of sweetness, the tangy lime juice adds a refreshing kick, and the dried soy protein creates a satisfying hearty texture that makes this dish a complete meal.

    Ingredients for Vegetarian Mango Soy Ceviche

    Dried Soy Protein

    • Why it matters: Dried soy protein (also called textured vegetable protein or TVP) is the meat substitute that gives this ceviche its hearty, chewy texture. Once boiled and cooled, it absorbs the lime, Maggie sauce, and spices beautifully, mimicking the texture of seafood without any fish. Look for it in health food stores or order it online.

    Ripe Mango

    • Why it matters: The mango delivers natural sweetness and tropical flavour that balances the acidity of the lime and the savoury depth of the sauces. Choose a mango that yields slightly to pressure — too firm and it won’t have enough flavour, too soft and it turns mushy in the dish.

    Fresh Lime Juice

    • Why it matters: Lime is the soul of any ceviche. The citric acid brightens every ingredient and ties the flavours together. Use freshly squeezed lime juice — two small limes — for the best results.

    Maggie Sauce

    • Why it matters: Maggie sauce adds a savoury, umami depth that makes this vegetarian ceviche taste complex and restaurant-worthy. It is a beloved Mexican condiment found in almost every kitchen in Mexico. A little goes a long way.

    Jalapeño

    • Why it matters: The jalapeño brings the heat that makes ceviche addictive. Finely chop it for even distribution. Remove the seeds for a milder version or keep them for full heat.

    Plated mango soy ceviche with red salsa base

    Why Try This Mango Soy Vegetarian Ceviche?

    1. Bursting with vibrant flavours: The combination of ripe mangoes, zesty lime juice, and the umami richness of Maggie sauce creates a harmonious balance that dances on your palate.
    2. Refreshing and light: The citrusy marinade paired with juicy mangoes provides a delightful burst of freshness, making it perfect for warm weather indulgence.
    3. Vegetarian delight: This ceviche showcases the beauty and versatility of vegetarian cuisine — you can enjoy the essence of a traditional ceviche while staying fully plant-based.
    4. Texture experience: The soy protein, juicy mango, and crisp jalapeño add layers of texture to every bite.
    5. Easy and quick: With straightforward instructions, you can have this on the table in under 40 minutes.
    6. Sustainable choice: Overfishing and unsustainable fishing practices have depleted marine resources worldwide. Choosing plant-based alternatives like this ceviche lets you enjoy a delicious meal with a lighter impact on the planet.

    Vegetarian ceviche close-up showing texture

    Vegetarian Ceviche Flavour Profile

    The flavour of Mango Soy Vegetarian Ceviche can be described as a tantalizing combination of sweet, tangy, savoury, and refreshing notes in perfect harmony. The ripe mangoes bring natural sweetness, the lime juice provides a bright citrusy kick that balances that sweetness, and the Maggie sauce and vegan fish sauce layer in a complex, savoury depth that makes this dish genuinely surprising for first-time tasters.

    Love fresh and vibrant Mexican-inspired dishes? Try these others from Love & Harvest:

    Frequently Asked Questions

    What is dried soy protein and where do I find it?

    Dried soy protein (also called TVP — textured vegetable protein) is a high-protein meat substitute made from defatted soy flour. It comes in small granules or chunks, is shelf-stable, and doubles in size when rehydrated. Find it at health food stores, Latin markets, or order a bag of dried soy protein on Amazon.

    Can I make this ceviche ahead of time?

    Yes. The red salsa and the soy protein can be prepared up to a day in advance and stored separately in the refrigerator. Combine everything and add the fresh mango just before serving to keep the texture and colour at their best.

    How do I make this dish spicier or milder?

    For more heat, keep the jalapeño seeds and add a second jalapeño. For a milder version, remove all seeds and membrane from the jalapeño before chopping, or substitute a milder pepper like poblano.

    Can I use fresh soy protein instead of dried?

    The recipe calls for dried soy protein specifically because its texture after rehydration mimics seafood. Fresh tofu can be substituted — press it dry, cube it, and use it directly without boiling. The flavour absorption will be different but still delicious.

    What can I serve this ceviche with?

    Serve with tostadas, corn tortilla chips, or slices of avocado. The red salsa base is also wonderful on its own as a dip. A squeeze of extra lime over the top just before serving brings out all the flavours.

    Is this ceviche gluten-free?

    The base ingredients are naturally gluten-free, but check your brand of dried soy protein and Maggie sauce — some brands add wheat-based ingredients. Substitute coconut aminos for the Maggie sauce if you need a certified gluten-free alternative.

    Vegetarian Mango Soy Ceviche

    Vegetarian Mango Soy Ceviche

    A delightful twist on the traditional seafood-based ceviche. Our Mango Soy Ceviche is bursting with vibrant colours and flavours, which offer a refreshing and tangy taste, perfect for warm summer days. Print Recipe Pin RecipePrep Time:20 minutes Cook Time:15 minutes Course: AppetizerCuisine: MexicanKeyword: ceviche, soy, vegetarianServings: 6 people

    Equipment

    • high speed blender
    • colander

    Ingredients

    • 2 cups dried soy protein
    • 1 ripe mango cubed
    • 1 jalapeno finely chopped
    • 1 tbsp red onion finely chopped
    • 2 small lime juiced
    • 1 tsp Maggie sauce
    • 2 tsp vegan fish sauce
    • 1 tsp salt
    • 1 tbsp olive oil garnish

    Red Salsa

    • 1-2 tsp olive oil
    • 4 small roman tomatoes
    • 3 branches of cilantro
    • 1 tsp apple cider vinegar
    • pinch of salt

    Instructions

    Red Sauce

    • In a saucepan, turn the heat to medium-high. Slice the tomatoes into quarter-inch slices. Add the oil to the pan and sear the sides of all the tomatoes until slightly browned. Remove from heat.
    • In a high-speed blender, add the grilled tomatoes, cilantro, vinegar, and salt. Blend until smooth. Set aside.

    Mango Soy Ceviche

    • Add the dried soy proteins to a colander. Rinse under the faucet to remove any dust particles. Set aside.
    • Bring 1 litre of water to a boil, then add the rinsed soy protein. Cook on medium heat for about 10 to 15 minutes. Watch the pot carefully as it can foam up. Drain through a colander and let the cooked soy protein cool to room temperature.
    • In a large bowl, combine the cubed mango, jalapeño, red onion, lime juice, Maggie sauce, vegan fish sauce, and salt. Add the cooled soy proteins and mix well.
    • On the serving dish, spread the red salsa as the base. Place the mango soy ceviche on top in the centre. Drizzle the olive oil evenly over the top. Serve cold.
  • Mole Ayocote – Purple Camp Bean Recipe

    Mole Ayocote – Purple Camp Bean Recipe

    I discovered this recipe in a small rural town outside Puebla while learning to grow oyster mushrooms with a government agricultural program. The workshop owner, Doña Mari, quietly invited us to brunch and set down a bowl of deep purple beans swimming in a rich red chile sauce she called Mole Ayocote. I fell in love on the first spoonful. This authentic, little-known Mexican camp bean recipe is now one of my most requested at the campsite.

    This post may contain affiliate links. If you purchase through these links, I may earn a small commission at no extra cost to you. Thank you for supporting Love & Harvest!

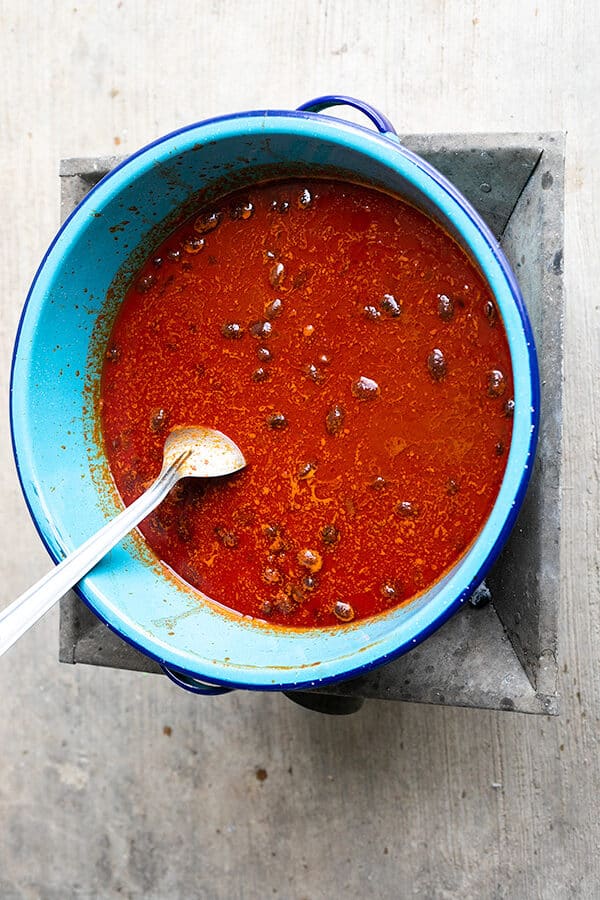
    Pot of purple ayocote beans simmering in red mole sauce

    Why This Is the Ultimate Camp Bean Recipe

    Beans are always an easy camping food — high in protein and filling. But flavorless canned beans are a letdown. Mole Ayocote is different: it is a purple broad bean stew built on a chilli puree of ancho peppers, guajillo peppers, cumin, garlic, and oregano. Make the red chile puree at home, bring it to the campsite, and the rest comes together in one pot over the fire.

    Why You Will Love This Recipe

    • Great vegetarian option — no meat needed. The combination of spice, peppers, and beans is hearty and deeply satisfying.
    • Authentic Mexican flavour — with these peppers and spices, you get the full Mexican experience from a single dish.
    • Delicious — the flavour is layered and complex, and the colour of the purple ayocote beans in brilliant red sauce is stunning.
    • Easy campsite cooking — minimal gear required. If the chile puree is made ahead, all you need is a pot and a fire.

    trail camp beans recipe

    Ingredients Deep-Dive

    Ayocote Beans (Purple Broad Beans)

    Ayocote is a type of Mexican purple runner bean — large, meaty, and with a savoury, nutty flavour that is almost meat-like. The creamy, starchy texture makes it an outstanding meat substitute for vegetarians. If you cannot find purple broad beans, any other broad beans work well. Avoid fava beans — they have a strong distinctive taste that clashes with the chile sauce.

    • Why it matters: The density and earthiness of ayocote beans stand up to the bold chile puree in a way that smaller beans simply cannot. The colour turning deep purple-red in the sauce is part of what makes this dish so visually spectacular.

    Ancho Peppers

    Ancho pepper is the dried version of the poblano. It is not spicy — it is used almost entirely as a colouring and flavouring agent, giving Mexican dishes like pozole and red enchilada sauce their deep warm red colour. It brings a mild smoky sweetness to the stew.

    • Why it matters: Without ancho, the stew turns pale and loses its rich visual appeal. A bag of dried mulato or ancho chiles lasts for months in your pantry.

    Guajillo Peppers

    Slightly spicy, but manageable. When using dried guajillo, always discard the seeds and stem — the flesh gives you the flavour and colour while removing most of the heat. Using both long and short guajillo (as Dona Mari taught) adds complexity without any extra effort.

    • Why it matters: Guajillo is the backbone of the stew’s flavour. Toasting it lightly before soaking unlocks a smoky dimension that transforms the sauce.

    Cumin

    This recipe has a strong cumin presence. In Mexico it is called comino and it is foundational to Mexican cooking — earthy, warm, and slightly bitter.

    • Why it matters: Cumin ties together all the other spice notes. Do not skip it or reduce the quantity.

    Oregano

    Use Mexican oregano if you can find it. It has a stronger, more earthy tone than Mediterranean oregano and a hint of citrus. The aroma is noticeably more complex.

    • Why it matters: Mexican oregano completes the authentic small-town Puebla flavour profile that makes this recipe so special.

    Manteca (Animal Lard)

    In small towns across Mexico, manteca is cheaper than cooking oil and adds a richness and depth that vegetable oil cannot replicate. For a vegan version, substitute with canola or sunflower oil — the dish still works beautifully.

    • Why it matters: Frying the onion and garlic in manteca before adding the chile sauce creates a flavour base (sofrito) that gives the stew its round, satisfying finish.

    cowboy bean recipe

    How to Cook Ayocote Beans

    Instant Pot Method

    Rinse the dried beans and fill the pot with 1/2 litre of water. Set to “Pressure Cook” for 40 minutes with the valve on. After the timer, let the valve release naturally. Reserve the bean water.

    Stovetop Method

    Rinse dried beans and fill a pot with 1 litre of water. Boil until tender — up to 80 minutes. Test after 80 minutes; if not soft, add 10 more minutes and more water. Reserve the bean water.

    How to Cook Beans While Camping

    A campfire Dutch oven is the best investment for camp cooking — heavy and bulky, but you can make anything in it, including these beans over an open fire. Fill with water, hang over the campfire or lay on a campfire grate, and cook for 45 minutes. Manage heat by adjusting the fuel and monitor water levels to prevent burning.

    Professional Tips for No-Fail Mole Ayocote

    Pro Tip 1: Soak the Beans Overnight

    Soaked beans in the Instant Pot cook in 15–25 minutes instead of 40. Unsoaked dried beans need 37–42 minutes. If you know you are making this the next day, soak overnight every time.

    Pro Tip 2: Use a Pressure Cooker

    Beans cook perfectly in a pressure cooker and in a fraction of the time. Unsoaked: 37–42 minutes. Well-soaked: 15–25 minutes.

    Pro Tip 3: Keep the Bean Water

    After the beans finish cooking, reserve that starchy water. When the sauce and beans simmer together for 30 minutes, the bean water adds depth and enriches the final stew.

    Pro Tip 4: Lightly Toast the Chile Peppers

    Toast the guajillo and ancho peppers in a dry pan until slightly browned and fragrant — the smoky flavour really comes through. After toasting, soak them in hot water for 10 minutes to rehydrate before blending.

    How to Serve Mole Ayocote

    • Bread — dip bread into the sauce to soak it all up while eating the beans with a spoon.
    • Rice — lay the purple camp beans over rice for the best and most simple supper.
    • Mashed potato — serve with mashed potato and vegetables, drizzled with the red sauce.
    • Vegetables — pair with rice and roasted vegetables for a complete vegetarian meal.

    More Mexican Bean and Stew Recipes

    If you love this Mole Ayocote, you will enjoy our green pozole (pozole verde) — another bold Mexican stew with equally deep flavour. For a warming bean-based soup with spice, check out instant pot Mexican menudo.

    Frequently Asked Questions

    What can I substitute for ayocote beans?

    Any large purple broad bean or runner bean works well. Black beans or pinto beans can work in a pinch for a different texture. Avoid fava beans — their distinctive strong flavour does not complement the chile sauce.

    Is this recipe spicy?

    No. Ancho peppers are mild and used mostly for colour. Guajillo adds a gentle warmth, but removing the seeds keeps the heat very low. This is suitable for children and those sensitive to spice.

    Can I make this vegan?

    Yes. Simply substitute the manteca (animal lard) with canola or sunflower oil. The rest of the recipe is fully plant-based.

    Can I make the chile puree ahead of time?

    Absolutely — this is the recommended approach for camping. Make the red chile puree at home, store it in a sealed container in the fridge or cooler, and at the campsite you only need to cook the beans and assemble.

    Where can I find ayocote or guajillo peppers?

    Mexican grocery stores carry both. Online, you can find dried mulato chiles that work similarly. For guajillo, most Latin food sections in larger supermarkets carry them dried.

    How long does this stew keep?

    Stored in an airtight container in the refrigerator, Mole Ayocote keeps well for up to 4 days. The flavours actually deepen overnight. It also freezes well for up to 3 months.

    Ladle in a blue pot of mole ayocote bean stew

    Mole Ayocote – Purple Camp Bean Recipe

    Delicious Mexican camp bean recipe to make on your next camping trip! Packed with the delicious flavour of ancho and guajillo peppers, cumin, thyme, oregano, and garlic This surely will be your favourite camping bean recipe! Print Recipe Pin RecipeServings: 6 people

    Equipment

    • blender

    Ingredients

    • 300 g ayocote beans or purple broad beans
    • 2 guajillo pepper
    • 1 ancho pepper
    • 1 tsp cumin powder
    • ¼ tsp clove powder
    • ¼ tsp black pepper
    • 1 tsp oregano dried
    • 1 tsp thyme dried
    • 3 bay leaf
    • ¼ cup manteca or cooking oil
    • ½ white onion
    • 3 clove of garlic
    • ½ L water
    • sea salt to taste

    Instructions

    Cooking ayocote beans with an Instant Pot

    • Rinse the dried beans in tap water and refill it with ½ litre of water.
    • Set the mode to “Pressure Cook” and set the timer to 40 minutes. Close the lid with the valve on.
    • After the timer sets off, let the beans sit until the valve naturally unlocks itself.
    • Take the beans out, but reserve the bean water. Set aside.

    Cooking ayocote beans with a pot on the stove

    • Rinse the dried beans in tap water and refill with ½L of water.
    • Boil the beans until tender. It can take up to 80 minutes depending on size.
    • After 80 minutes test the bean to see if the inside is soft. If needed, give it an extra 10 minutes and add more water.
    • Take the beans out once soft and tender, but reserve the bean water. Set aside.

    Cooking the Mole Ayocote

    • In a dry pan, place the guajillo and ancho peppers. Heat on high. Toast until browned and fragrant on the outside. Let cool.
    • Discard the seeds and stem. Pour hot water over the peppers until completely submerged. Soak for 10 minutes.
    • Place the soaked peppers in a blender with 1 cup of water. Add cumin, clove, oregano, thyme, and black pepper. Blend until smooth. Set aside.
    • In a large pot, place the manteca or cooking oil. Heat on medium-high.
    • Add onion and garlic. Fry until fragrant, about 2 minutes.
    • Add the red chilli puree, beans, bay leaf, and reserved bean water. Cook on medium-low heat for 20 minutes. Season with salt to taste. Serve.
  • Spicy Corn Dip With Manzano Pepper

    Spicy Corn Dip With Manzano Pepper

    Sweet, crunchy corn kernels coated in a creamy lime-spiked mayonnaise, studded with charred onion and the distinctive fruity heat of Manzano peppers — this dip disappears from the table faster than you can set it down. It is bold, fresh, and takes less than 30 minutes to make with only five ingredients.

    This post may contain affiliate links. If you purchase through these links, I may earn a small commission at no extra cost to you. Thank you for supporting Love & Harvest!

    Spicy Corn Dip with Manzano Pepper Recipe

    It is corn season and there are more ways to eat corn than BBQ corn on the cob with butter. This delicious spicy corn dip is so easy to make it will take you less than 30 minutes to prepare — and it only asks for five ingredients.

    This is a must-make for your next party or family gathering. Anyone who loves spicy food will fall in love with this recipe. After making it, corn just might become your new favourite seasonal vegetable.

    If you love spicy food, try our Easy Hummus Recipe or our Vegetarian Mango Soy Ceviche for more crowd-pleasing dips and sides.

    Ingredients

    Corn

    • Why use fresh seasonal corn: Summer corn is at peak sweetness and starch content. The kernels have a satisfying crunch and natural juiciness that frozen or canned corn cannot replicate. Any variety works — sweet corn, rainbow corn, or the starchy white corn common in Mexico. Whatever is local and fresh is the right choice.

    Manzano Peppers

    • Why Manzano over jalapeño: Manzano peppers have a unique fruity citrus character with a moderate-to-hot heat level — roughly twice as hot as jalapeños. Their black seeds and thick flesh hold up perfectly in a cooked dip. The flavour does not overwhelm the corn; it accents it. If you cannot find Manzano, jalapeño is an excellent substitute.

    White Onion

    • Why cook it first: Raw onion has a sharp, aggressive flavour that competes with the other ingredients. Sautéing the onion in oil first softens its bite, releases its natural sweetness, and creates a gentle fragrance that blends into the dip instead of fighting it.

    Mayonnaise

    • Why mayo works here: Mayonnaise binds all the flavours together with a creamy, slightly tangy base. For a lower-calorie option, swap it for full-fat or low-fat plain yogurt — the result is tangier and lighter but still delicious.

    Lime

    • Why fresh lime: Lime adds brightness and acidity that cuts through the richness of the mayo. For a stronger lime flavour, zest the skin directly into the dip. Bottled lime juice will work in a pinch but lacks the aromatic oils of fresh.

    Why You Will Love This Recipe

    • Easy recipe — cook the corn, cut the kernels off the cob, mix everything together. Done in under 30 minutes.
    • Crowd-pleaser — sweet corn is universally loved. Skip the Manzano peppers for a kid-friendly version.
    • Goes with everything — a great side dish for backyard BBQs, summer parties, and family gatherings. The best potluck food to bring.
    • Low cost — most ingredients are already in your fridge. Only the corn and Manzano peppers require a special trip.

    Frequently Asked Questions

    Can I use frozen or canned corn instead of fresh?

    Yes. Frozen corn works well — thaw it first and pat it dry so it does not water down the dip. Canned corn also works in a pinch; drain and rinse it thoroughly. Neither will have the same natural sweetness or texture as fresh peak-season corn, but both are perfectly acceptable shortcut options.

    How spicy is this dip?

    With Manzano peppers it has a genuine kick — moderate to hot. Manzano peppers are roughly twice as hot as jalapeños. For a milder dip, use only half a pepper, remove all the seeds carefully, or substitute with a small amount of jalapeño. For a non-spicy version, skip the peppers entirely and add a pinch of sweet smoked paprika for colour instead.

    Can I make this dip ahead of time?

    Yes. You can prepare the corn and the sautéed onion and peppers up to a day ahead and store them separately in the refrigerator. Mix everything together with the mayonnaise and lime just before serving for the freshest result. Once fully assembled, it keeps well for up to two days covered in the fridge.

    Can I serve this dip warm or cold?

    Both work. Served warm right after cooking, the dip is comforting and rich. Served cold after an hour in the refrigerator, it is refreshing and bright. For a summer outdoor party, cold is the way to go. For a cosy winter side dish, serve it warm.

    What is a good substitute for Manzano peppers?

    Jalapeño is the closest in texture and heat profile. For something fruitier and hotter, habanero works but use much less — habaneros are three to five times hotter than Manzano. Serrano peppers are also a good middle-ground option: hotter than jalapeño with a crisp, green flavour.

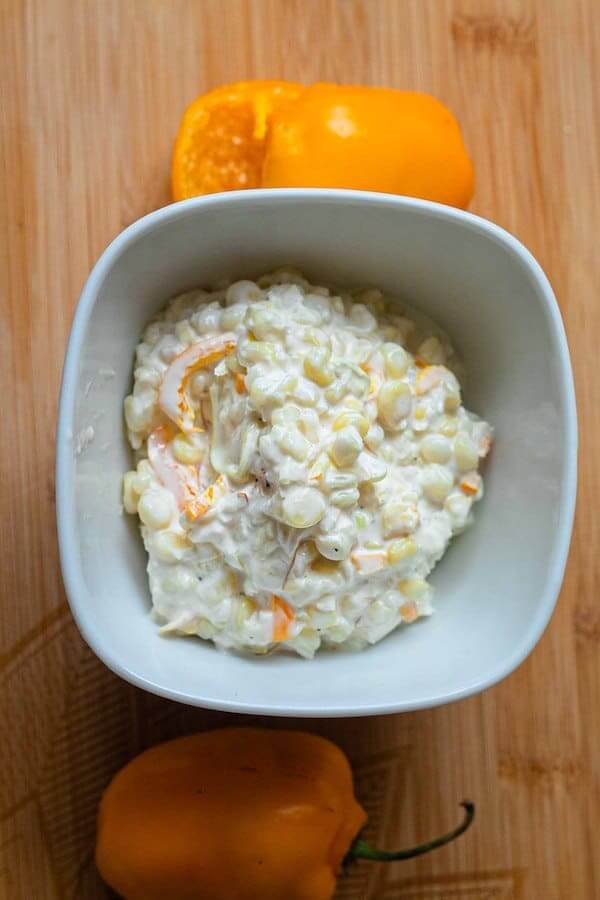
    spicy corn and Manzana Pepper Dip

    Spicy Corn and Manzano Pepper Dip

    Prep Time 15 minutes
    Cook Time 15 minutes
    Total Time 30 minutes
    Servings: 6 people
    Course: Side Dish
    Calories: 170

    Ingredients
      

    • 6 corn or sweet corn
    • 1-2 manzano peppers or jalapeno peppers
    • ¼ white onion
    • ½ cup mayonnaise or yogurt (fat free option)
    • 1 large lime juiced
    • 1 tsp salt to taste
    • black pepper to taste

    Method
     

    1. Wash and tear off the leaf of the corn if it has any. Cook the corn in their hot boiling water or steam it in an Instant Pot.
      Boiling water: Boil the corn for 10 minutes.
      Steam with Instant Pot: 10 minutes.
    2. Meanwhile, sliced the onions in thick slices, and thinly sliced the manzano peppers. In a pan, heat 2 tsp of oil and fry the onion and manzano peppers until soft and fragrance. Place them in a heat proof medium size bowl.
    3. Take out the corn and let it cool until it is ready to be handled. Use a sharp knife and cut the kernel off the corn. Place them in the same bowl with the onion and peppers.
    4. Mix the rest of the ingredient together: mayonnaise, lime juice, salt and pepper. Can be serve hot or cold.