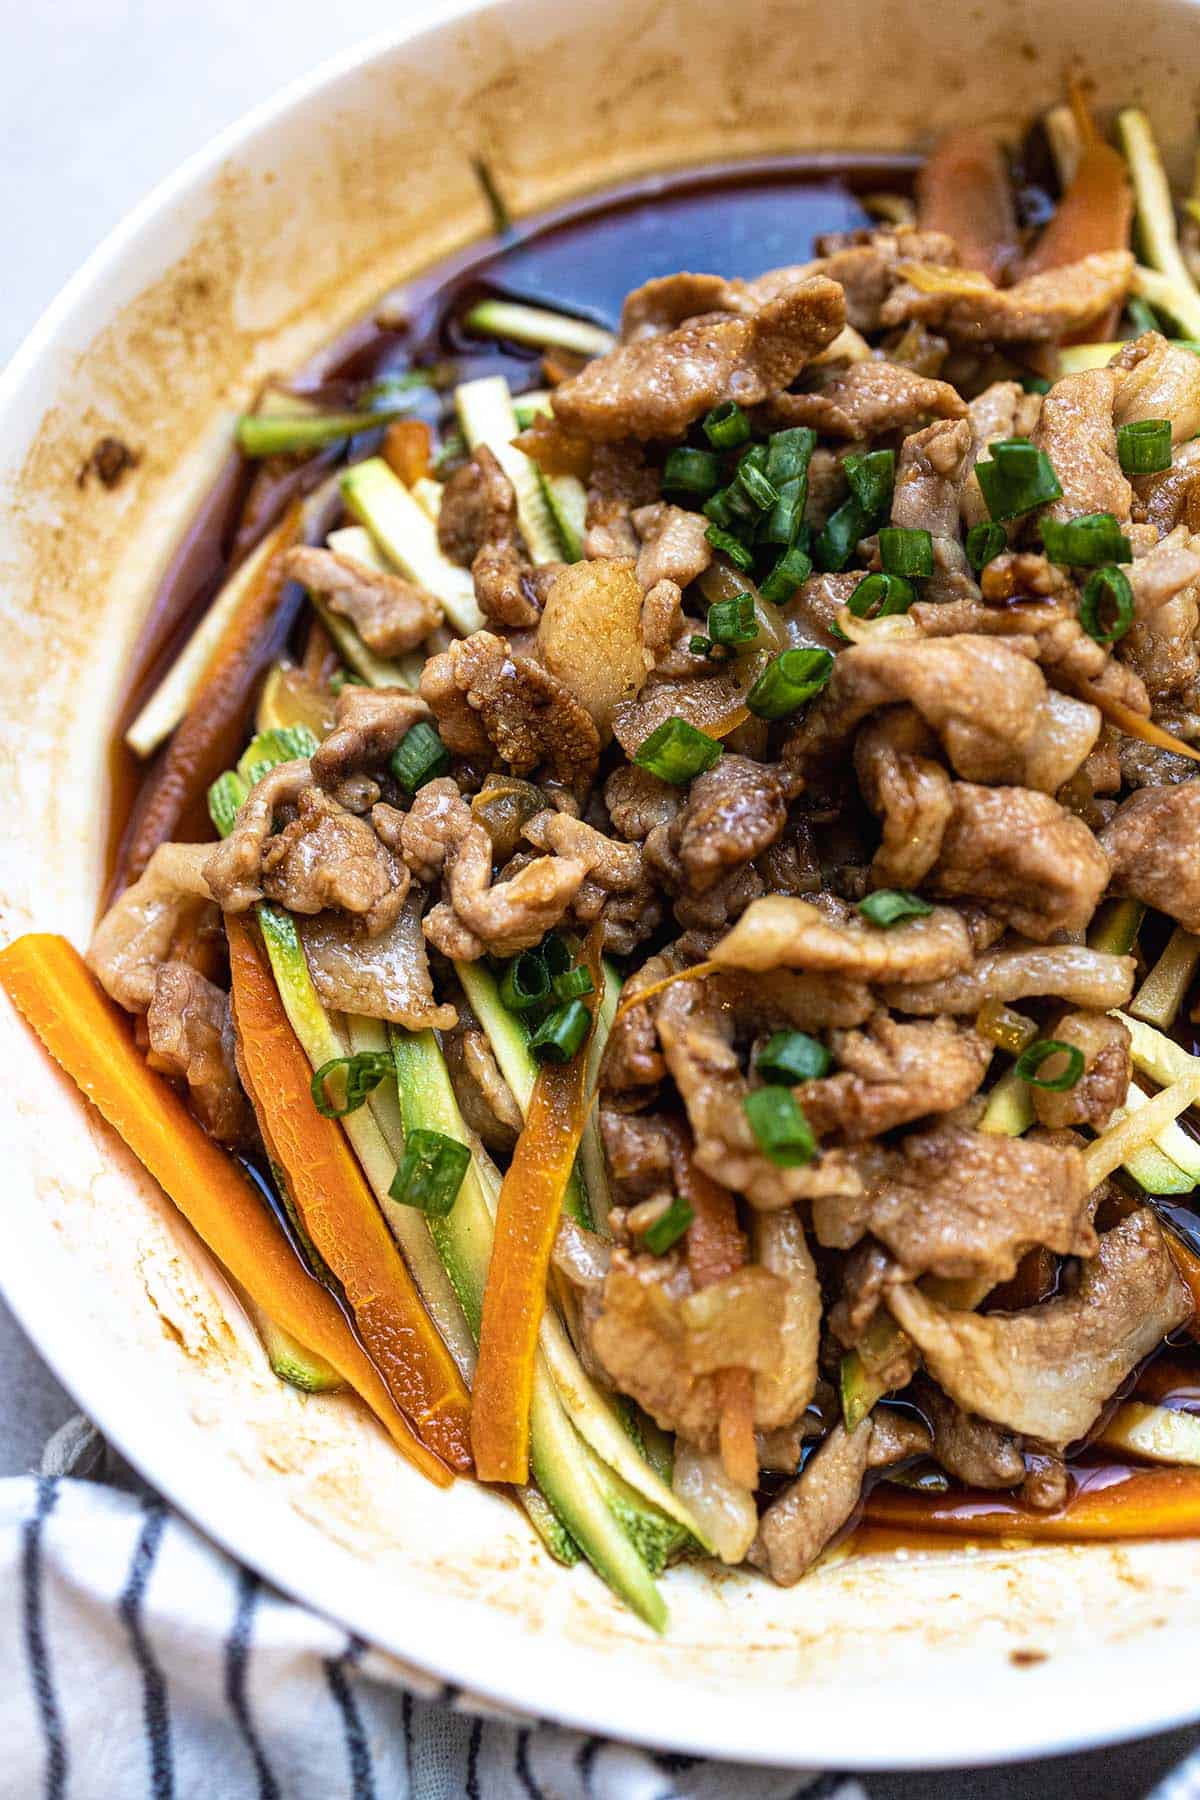
Category: pork recipes

  • Steam Preserved Vegetables (Zha Choy) and Pork

    Steam Preserved Vegetables (Zha Choy) and Pork

    One dish that never fails to comfort me is Steam Preserved Vegetables (Zha Choy) and Pork — it’s salty, savory, crunchy, and deeply satisfying. This traditional Cantonese recipe comes together in under 30 minutes with just a handful of humble ingredients, yet delivers bold, layered flavor that tastes like it took all day.

    This post may contain affiliate links. If you purchase through these links, I may earn a small commission at no extra cost to you. Thank you for supporting Love & Harvest!

    Steam preserved vegetables zha choy and pork served over rice

    Steam Preserved Vegetables Zha Choy (替菜) and pork is a quintessential Cantonese comfort dish — made with just a few simple ingredients: zha choy, pork, soy sauce, and sesame oil. Steamed to perfection, it’s flavorful and comes together in very little time, making it perfect for busy weeknights and family dinners alike.

    Steam Preserved Vegetables (Zha Choy) and Pork

    When the crispness of fall creeps into the air, I always find myself craving the flavors of home. This is a very traditional Cantonese dish that my mom always made for us — salty, savory, crunchy, and deeply satisfying. Best of all, it’s one of those meals that feels like a hug in a bowl, especially when paired with white rice, some steamed vegetables, and a warm soup on the side.

    What is Zha Choy?

    Zha Choy (替菜) is a type of preserved mustard stem that has a unique salty, crunchy bite. It’s popular in Cantonese kitchens and beyond, often used to add depth of flavor to simple dishes. You can steam it, pan-fry it, or even stuff it — it’s incredibly versatile. For me, steaming it with pork is the most comforting and nostalgic way to enjoy it.

    Zha choy preserved mustard stem up close

    Flavour

    The flavour profile is what makes this dish shine. The pork turns tender and juicy as it steams, while the Zha Choy infuses everything with its salty, savoury notes. The preserved vegetable has just the right amount of crunch, creating a contrast that makes every bite exciting. It’s a dish that balances simplicity with bold, comforting flavours.

    A Cantonese Family Favourite

    This recipe is more than food — it’s family tradition. My mom always made it when autumn rolled in, the days got shorter, and the skies a little grayer. While some families might simmer a stew or roast meat, ours always turned to Zha Choy and pork. It’s a meal that doesn’t need to impress — it just feels like home.

    Steamed pork and zha choy in a heatproof dish

    The Ideal Autumn Meal

    There’s something about cold, rainy days that makes this dish the perfect choice. It’s hearty without being heavy, simple without being bland, and quick to prepare when you don’t want to overthink dinner. A hot bowl of rice, a bite of pork with zha choy, a sip of soup — that’s comfort.

    Key Ingredients

    Ingredients

    Zha Choy (Preserved Mustard Stem)

    • The soul of this dish. Zha Choy is preserved in salt and chili, giving it a distinctive salty, slightly spicy crunch that flavors everything it touches. Always rinse it well before using to reduce excess saltiness — a 1-minute cold water rinse is all it takes. You can find Zha Choy preserved mustard stem at most Asian grocery stores or online.

    Pork Loin

    • Cut into thin matchstick-style strips so it marinates quickly and steams evenly. Pork belly works if you prefer richer, fattier meat. The key is marinating in soy sauce, cornstarch, and sesame oil before steaming — this ensures the pork stays tender and juicy, not dry. Use a bamboo steamer for the most authentic result and even heat distribution.

    Sesame Oil

    • A small drizzle goes a long way. Sesame oil adds a rich, nutty aroma that is quintessentially Chinese home cooking. Use toasted sesame oil (not raw) for the best flavour — add it to the marinade and optionally a few drops on top just before serving.

    Soy Sauce & Dark Soy Sauce

    • Light soy sauce seasons the pork and provides umami depth. A touch of dark soy sauce (optional) deepens the color and adds a slight caramel note. Together they balance the saltiness of the zha choy without overpowering the dish.

    Fresh Ginger

    • Grated ginger is mixed into the marinade to brighten the flavour and cut through the richness of the pork. It adds a classic Cantonese aromatic note. Don’t skip it — even a small amount makes a noticeable difference.

    Why We Love This Recipe

    It’s everything a family meal should be: simple and ridiculously delicious. The combination of tender pork and crunchy preserved vegetables is addictive, and it comes together with minimal fuss. My favourite part? How everyone in the family reaches for a little more rice just to soak up all the flavours.

    If you love Asian comfort food, try our Sticky Honey Garlic Spareribs for another Chinese family classic, or our Lemongrass Chicken Drumsticks for a fragrant Southeast Asian option. For a hearty bowl meal, our Instant Pot Taiwanese Beef Noodle Soup is deeply satisfying.

    Frequently Asked Questions

    Where can I buy Zha Choy?

    Zha Choy (preserved mustard stem) is available at most Chinese or Asian grocery stores, usually in the canned goods or pickled vegetable section. It’s also readily available online. Look for whole stems or pre-sliced versions — both work well. Always rinse it under cold water before using to remove excess salt.

    Can I use a different cut of pork?

    Absolutely. While pork loin cut into thin strips is the most common choice, you can use pork belly for a richer, fattier result, or ground pork for an even quicker preparation. The key is to cut or press the meat thin enough to cook through fully in 10–12 minutes of steaming.

    Do I need a bamboo steamer for this recipe?

    No, but a bamboo steamer does give the most even, gentle heat. You can also use a metal steamer insert, a heatproof plate set over a wok or pot with a lid, or even a rice cooker with a steaming tray. The method matters less than making sure the lid creates a seal and the steam is consistent.

    Can I make this ahead of time?

    You can marinate the pork up to 24 hours in advance and store it covered in the refrigerator. The zha choy can also be rinsed and sliced ahead of time. When ready to eat, simply combine and steam fresh — the whole cooking process is only about 12 minutes, so it’s fastest to assemble and steam right before serving.

    What should I serve this with?

    Steamed jasmine rice is the classic pairing — the savory, salty juices from the pork and zha choy soak beautifully into the rice. Add a simple vegetable like stir-fried bok choy or a light clear broth soup on the side for a complete Cantonese meal. A drizzle of chili oil on top is excellent too if you like heat.

    Steam Preserved Vegetables Zha Choy Pork

    One dish that never fails to comfort me is Steam Preserved Vegetables (Zha Choy) and Pork — a very traditional Cantonese dish that my mom always made for us. It’s salty, savory, crunchy, and deeply satisfying.
    Prep Time 8 minutes
    Cook Time 20 minutes
    Total Time 28 minutes
    Servings: 4 people
    Course: Main Course
    Cuisine: Cantonese
    Calories: 195

    Ingredients
      

    • 300 g pork loin cut into thin strips (like matchsticks)
    • 50 g preserved mustard stem (zha choy / 榨菜) finely chopped
    • 1 tbsp light soy sauce
    • ½ tsp dark soy sauce (optional, for color)
    • 1 tsp sesame oil
    • ½ tsp sugar
    • 1 tsp cornstarch
    • 2 tbsp water
    • 1 tsp grated fresh ginger
    • ½ tsp white pepper

    Equipment

    • large steamer

    Method
     

    1. Rinse under cold water to reduce excess saltiness. Pat dry and finely chop.
    2. In a bowl, combine pork loin strips with light soy sauce, dark soy sauce, sesame oil, sugar, cornstarch, water, ginger, and white pepper. Mix well and let marinate for 15–20 minutes.
    3. Add chopped zha choy to the pork and mix evenly.
    4. Place the mixture into a shallow, heatproof dish. Spread it evenly so it cooks through.
      Steam over high heat for 10–12 minutes, until pork is tender and fully cooked.
    5. Garnish with chopped scallions if desired. Serve hot with steamed jasmine rice or brown rice.

    Notes

    Tips for the lean cut:
    • Slicing the pork into thin strips helps keep it tender when steamed.
    • If you want even more softness, add ½ tsp neutral oil (like canola) to the marinade.
    • This lighter version is just as savory and satisfying but much lower in fat than the classic ground pork style.
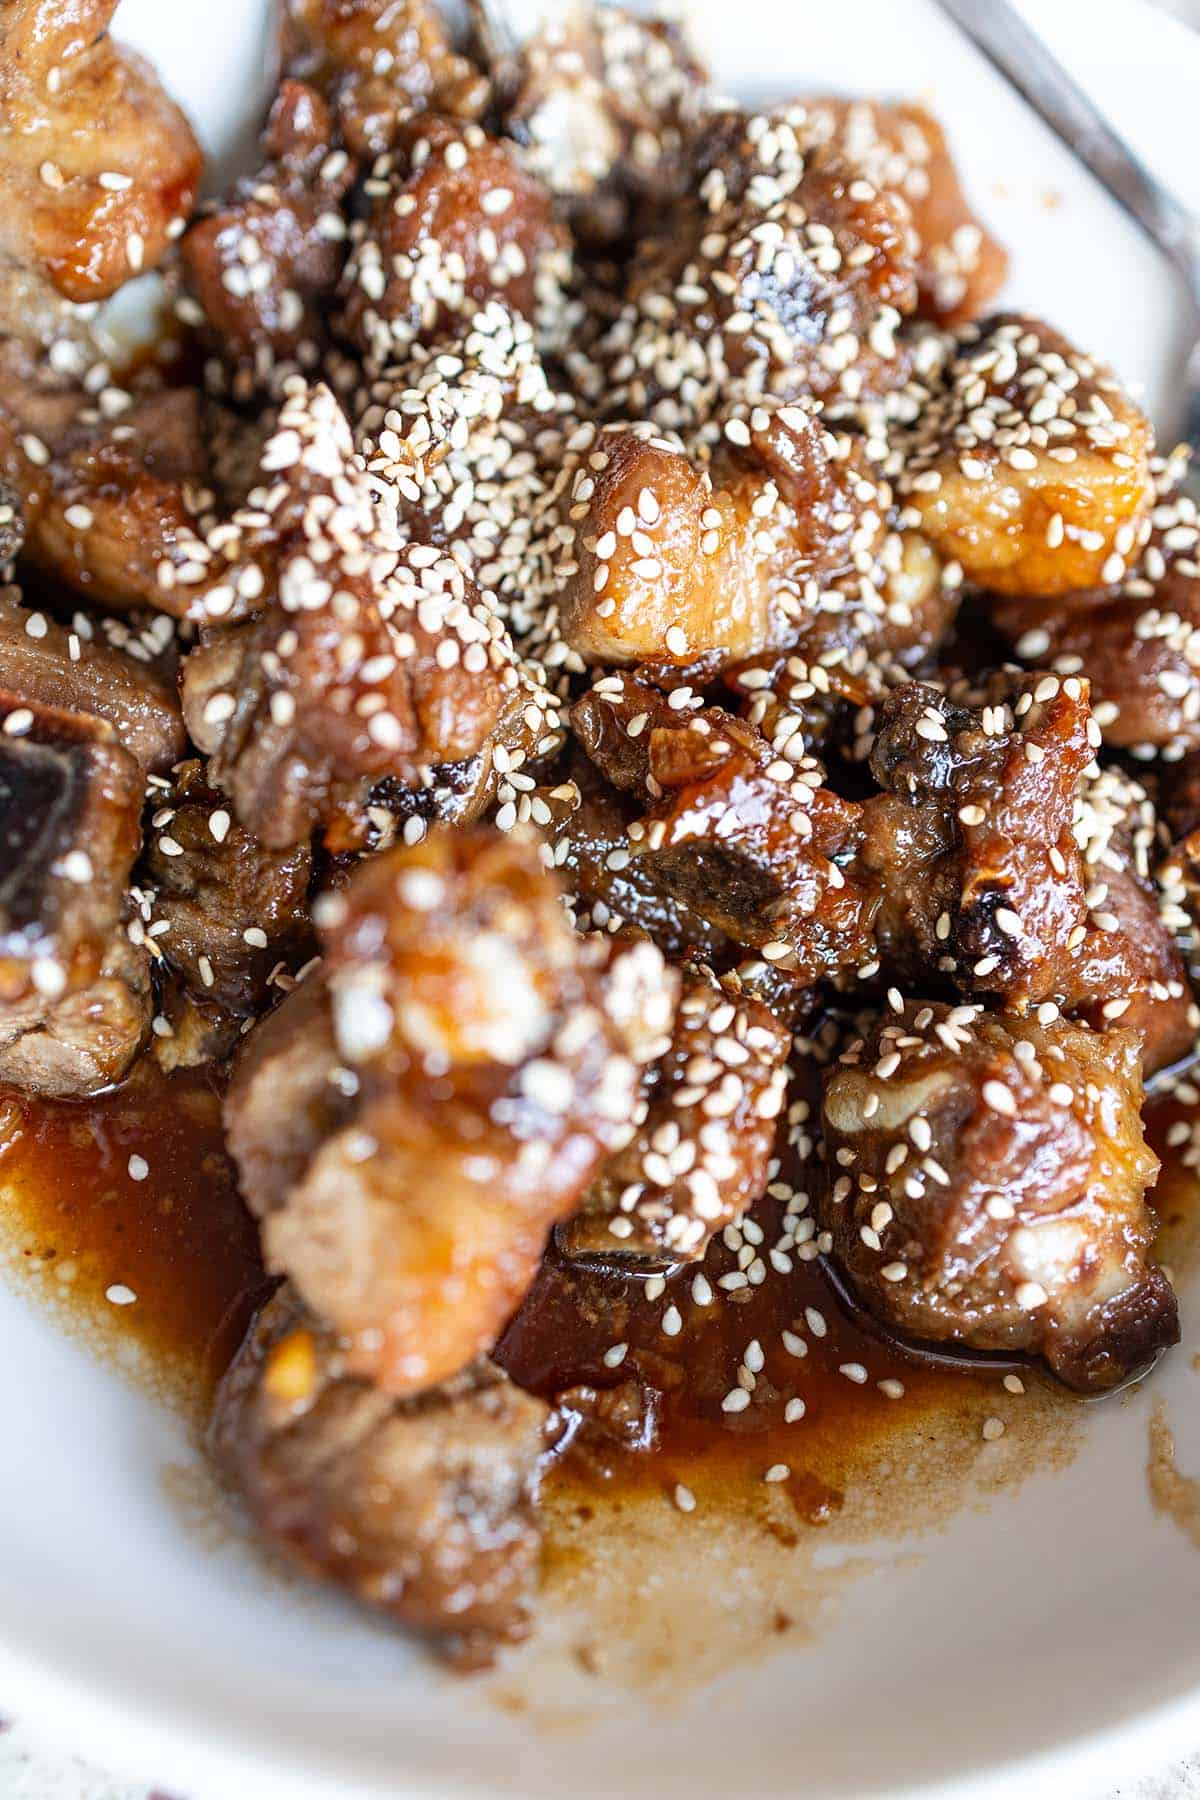
  • Sticky Honey Garlic Spareribs

    Sticky Honey Garlic Spareribs

    In our house, the moment a plate of sticky honey garlic spareribs lands on the table, every conversation stops. The sweet caramelized glaze, the tender fall-off-the-bone pork, the irresistible fragrance of garlic — this Cantonese classic is pure comfort food that disappears within minutes. And the best part? It comes together in under 30 minutes.

    This post may contain affiliate links. If you purchase through these links, I may earn a small commission at no extra cost to you. Thank you for supporting Love & Harvest!

    Sticky honey garlic spareribs with sesame seeds in a white bowl

    This post features a classic Cantonese favourite — sticky honey garlic spareribs. An easy-to-follow recipe that comes together in under 30 minutes, making it a perfect choice for both appetizers and dinner. A simple yet flavourful dish made with just a few essential Chinese ingredients: soy sauce, dark soy sauce, honey, garlic, and a sprinkle of sesame seeds.

    Why You Will Love This Recipe

    Sticky, caramelized, and packed with bold flavour, these spareribs are an instant hit at any gathering. The combination of honey and garlic creates a perfect glaze that coats the ribs beautifully, making them irresistible. Plus, they require minimal effort but deliver maximum flavour, making them ideal for both weeknight meals and special occasions.

    In a Cantonese family, a plate of sticky honey garlic spareribs means more than just food — it’s warmth, laughter, and a reminder that the best moments are shared around the table.

    Key Ingredients

    Ingredients

    Pork Spareribs

    • Tender and flavourful, they absorb the sauce beautifully. Ask your butcher to cut them into individual pieces, or do it yourself at home.
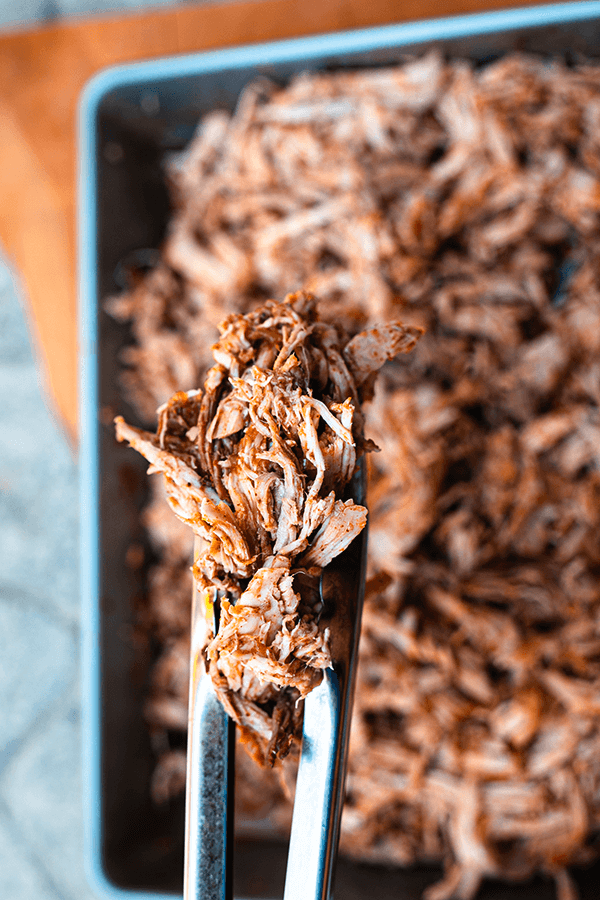
    Honey

    • Adds a rich sweetness that caramelizes into the perfect sticky glaze. Raw or clover honey both work well here.

    Garlic

    • The star ingredient that brings an aromatic depth to the dish. Use freshly minced — not jarred — for the best flavour.

    Soy Sauce & Dark Soy Sauce

    • Soy sauce provides umami and a savoury backbone to balance the sweetness. Dark soy sauce adds colour and a slightly caramel depth. Use a quality hoisin sauce alongside if you want an extra layer of flavour.

    Rice Vinegar

    • A hint of acidity cuts through the richness and enhances the overall flavour balance. Fish sauce Red Boat is another excellent addition for deeper umami if you want to experiment.

    Close-up of honey garlic spareribs glazed and topped with sesame seeds

    The Perfect Balance of Flavours

    This dish is all about balance. The rich, meaty spareribs absorb the sweet, garlicky sauce, while soy sauce and a touch of vinegar add depth and contrast. The result? A sticky, savoury dish with just the right amount of sweetness — one that keeps you reaching for more.

    Why Cantonese Cooks Love Honey Garlic Spareribs

    In Cantonese cuisine, simplicity and flavour go hand in hand, and this recipe is a perfect example. The key to great honey garlic spareribs lies in the method: slow simmering to tenderize the meat, followed by a quick glaze that locks in flavour. This technique ensures the ribs are succulent, juicy, and coated in an addictive sticky sauce that clings to every bite. It’s no surprise that this dish is a staple at dim sum restaurants and home kitchens alike!

    If you love Asian-inspired recipes like this one, try our 30-Minute Thai Basil Chicken or the flavour-packed Lemongrass Chicken Drumsticks next.

    A spoon lifting sticky honey garlic spareribs from the bowl

    Frequently Asked Questions

    Do I have to blanch the ribs first?

    Yes, blanching is the Cantonese technique that removes impurities and blood from the pork, resulting in a cleaner-tasting, more tender rib. It only takes 3–5 minutes and makes a noticeable difference in the final flavour. Don’t skip this step!

    Can I use baby back ribs instead of spareribs?

    Yes! Baby back ribs work well in this recipe and tend to be slightly more tender. Reduce the simmering time by about 10 minutes since they are smaller. Spareribs give a more traditional Cantonese result with more connective tissue that breaks down into the sauce.

    How do I know when the ribs are done?

    The ribs are ready when they are tender and the meat pulls away easily from the bone. The sauce should be thick and glossy, coating every piece. If the sauce is still thin, remove the lid and turn up the heat for a few minutes to reduce it down to a sticky glaze.

    Can I make these spareribs ahead of time?

    Absolutely. These ribs taste even better the next day as the flavours deepen. Store them in an airtight container in the fridge for up to 3 days. Reheat gently on the stovetop with a splash of water to loosen the sauce, or microwave covered until heated through.

    Tender pork ribs glazed with savory sauce and sprinkled with sesame seeds. Perfect for cozy family meals and flavorful dinners.

    Tender pork ribs glazed with savory sauce and sprinkled with sesame seeds. Perfect for cozy family meals and flavorful dinners.

    Sticky Honey Garlic Spareribs

    A quick and effortless appetizer that always impresses! These sticky honey garlic spareribs are the ultimate crowd-pleaser, balancing sweet, savory, and umami flavors in every bite. Whether served as a starter or a main dish, they disappear fast—so make sure to cook more than you think you’ll need!
    Prep Time 15 minutes
    Cook Time 45 minutes
    Total Time 1 hour
    Servings: 6 people
    Course: Main Course
    Cuisine: Cantonese
    Calories: 320

    Ingredients
      

    • 1 kg pork spareribs 1cut into individual pieces
    • 1 tbsp canola oil
    • 4 garlic cloves smashed and minced
    • 2 tbsp soy sauce
    • 3 tbsp honey
    • ½ cup water
    • 1 tsp sesame oil
    • toasted sesame seeds garnish

    Method
     

    Blanched the ribs
    1. Place ribs in a pot of boiling water and cook for 3–5 minutes to remove impurities.
    2. Drain and rinse under cold water. Pat dry with paper towels.
    Sear the Ribs
    1. Heat oil in a pan or wok over medium-high heat.
    2. Add the ribs and sear until lightly browned on all sides.
    3. Push the ribs to one side. Add minced garlic and sauté until fragrant (don’t burn it!).
    4. Mix in soy sauce, dark soy sauce, honey, and water.
    Simmer
    1. Stir everything together and bring to a simmer.
    2. Cover and simmer on low heat for 30–40 minutes, stirring occasionally, until ribs are tender and the sauce has reduced.
    To Finish
    1. Drizzle in sesame oil and toss to coat. Sprinkle with toasted sesame seeds. Serve hot with steamed white rice or noodles.
  • Cha Gio Fried Spring Rolls with Shiso Leaves

    Cha Gio Fried Spring Rolls with Shiso Leaves

    Golden, shatteringly crisp on the outside, juicy and aromatic on the inside — these Cha Gio Vietnamese Fried Spring Rolls with Shiso Leaves are a next-level twist on a beloved classic that will have everyone at the table reaching for seconds.

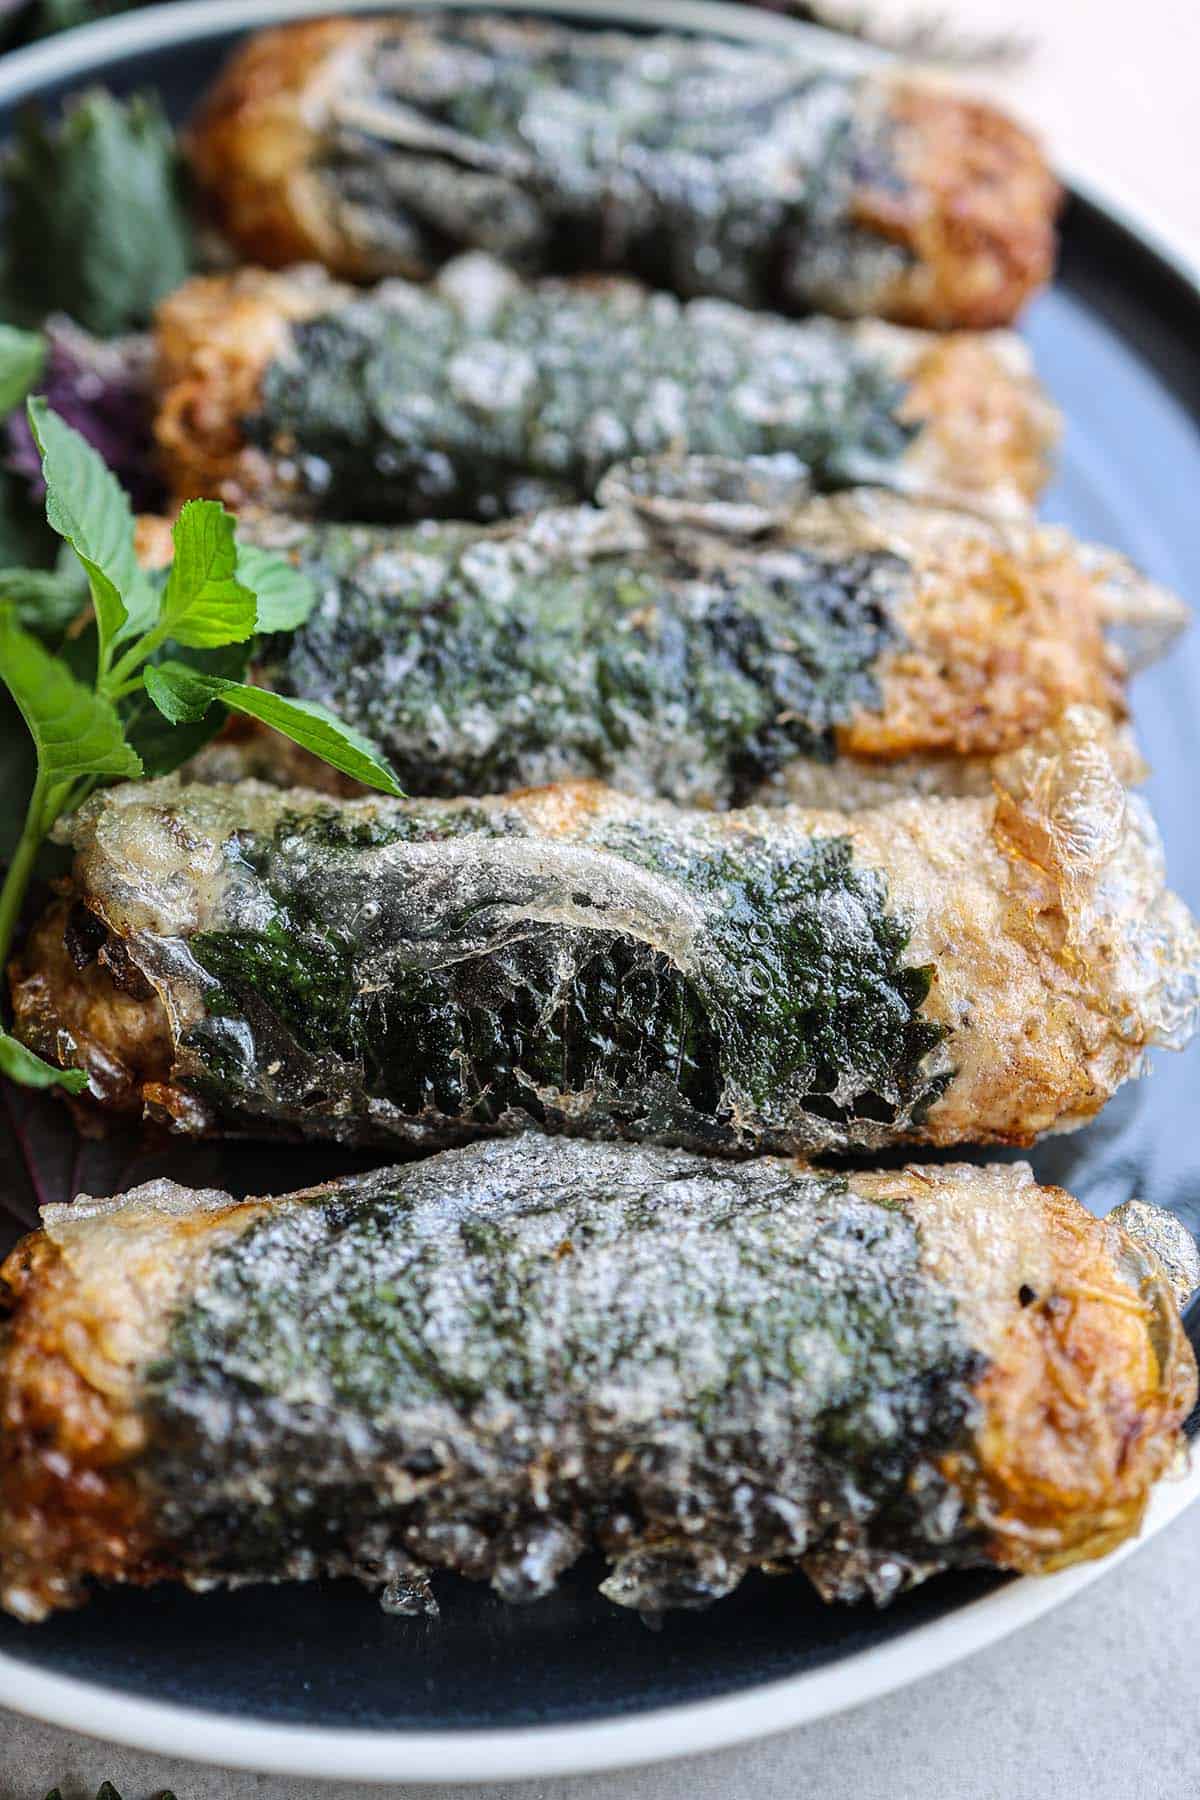
    Cha gio fried spring rolls wrapped in shiso leaves with fresh herbs on a platter

    This post may contain affiliate links. If you purchase through these links, I may earn a small commission at no extra cost to you. Thank you for supporting Love & Harvest!

    This post features a cha gio Vietnamese fried spring roll recipe with shiso leaves — a fun, beautiful, and tasty twist on the traditional spring rolls.

    Why Try This Recipe?

    Cha Gio, or Vietnamese fried spring rolls, are a beloved dish known for their crispy texture and flavorful filling. By incorporating shiso leaves, this recipe elevates the traditional spring rolls to a whole new level. Shiso leaves add a unique citrusy flavour, enhancing the overall taste and providing a refreshing balance to the rich pork filling. Whether you’re a seasoned chef or a home cook looking for a new challenge, this recipe is sure to impress.

    Row of golden cha gio spring rolls with shiso leaves and herbs

    What’s Special About This Recipe?

    What sets this Cha Gio recipe apart is the addition of shiso leaves. Shiso, also known as perilla, is a popular herb in Asian cuisine, known for its distinctive flavour that combines hints of mint, basil, and citrus. When wrapped around the spring rolls, shiso leaves not only add a burst of freshness but also create a beautiful presentation. The combination of textures — crispy on the outside and juicy on the inside — along with the unique flavor profile makes this dish truly special.

    Occasions to Make This Recipe

    Cha Gio with shiso leaves is a versatile dish that suits a variety of occasions:

    • Family Gatherings: Impress your loved ones with these flavorful spring rolls at your next family dinner.
    • Dinner Parties: Serve them as an appetizer or main course. Their unique flavor and presentation will be a hit.
    • Special Celebrations: Whether it’s a birthday, anniversary, or holiday, Cha Gio makes a delightful addition to any celebratory meal.
    • Casual Get-Togethers: Perfect for a weekend lunch or a casual gathering with friends.

    Close-up of crispy cha gio spring rolls wrapped in shiso leaves

    How to Make Cha Gio Rolls

    Prepare the Filling

    In a large bowl, combine ground pork, cooked vermicelli noodles, grated carrots, chopped onion, minced garlic, fish sauce, soy sauce, sugar, and pepper. Mix well until all ingredients are evenly distributed.

    Wrap the Rolls

    Lay a rice flour spring roll wrapper on a flat surface. Place a shiso leaf on top of the wrapper. Add a spoonful of the pork mixture onto the shiso leaf. Fold the sides of the wrapper over the filling, then roll tightly. Seal the edge with a bit of beaten egg.

    Fry the Rolls

    Heat oil in a deep pan or carbon steel wok to 350°F (175°C). Use a deep-fry thermometer to maintain the correct temperature. Carefully add the spring rolls to the hot oil, a few at a time, and fry until golden brown and crispy, about 5–7 minutes. Remove and drain on paper towels.

    Serve

    Serve hot with your favourite dipping sauce, such as nuoc cham (Vietnamese dipping sauce) or a simple soy sauce and vinegar mix.

    Crispy fried cha gio spring rolls wrapped with shiso leaves on a dark plate

    Ingredients

    To make these delicious Cha Gio Vietnamese fried spring rolls with shiso leaves, you’ll need the following ingredients:

    Ingredients

    Rice Paper Wrappers

    • Why it matters: These form the crispy shell. Look for thin spring roll wrappers (not the thick egg roll kind) — they fry up shattery and light. Rice flour wrappers are ideal for an authentic result.

    Ground Pork

    • Why it matters: Lean pork is the base of the filling. A small amount of fat keeps the rolls juicy and adds flavour — don’t trim it all away.

    Shiso Leaves

    • Why it matters: Shiso (perilla) adds a citrusy, minty, basil-like aroma that transforms the rolls from good to unforgettable. Use the two-toned variety — green on one side, dark mahogany on the other — for the best flavour and visual contrast.

    Vermicelli Noodles

    • Why it matters: Cooked rice vermicelli binds the filling, adds a soft chewy bite, and helps the rolls hold their shape. They also bulk up the filling without overpowering the other flavours.

    Jicama

    • Why it matters: Jicama absorbs excess moisture from the meat and vegetables. Too much moisture in the filling causes dangerous oil splatter when frying — jicama is your insurance policy.

    Black Ear Fungus

    • Why it matters: Also called wood ear mushroom, it adds a satisfying crunch and visual contrast inside the roll, plus a subtle earthy flavour that rounds out the filling.

    Fish Sauce

    • Why it matters: Fish sauce is the umami backbone of the filling. Even a tablespoon adds that unmistakably Vietnamese depth of flavour that makes cha gio taste authentic.

    Frequently Asked Questions

    Can I use egg roll wrappers instead of rice paper?

    Yes, but the texture will be different. Egg roll wrappers produce a thicker, chewier shell. Rice paper wrappers give you the traditional thin, shatteringly crispy result. For the most authentic cha gio, stick with rice paper or thin spring roll wrappers.

    What oil is best for frying cha gio?

    Use a neutral oil with a high smoke point — vegetable, canola, or peanut oil all work well. Avoid olive oil; its low smoke point makes it unsuitable for deep frying. Heat to exactly 350°F (175°C) for the crispiest results without burning.

    Why do my spring rolls burst open when frying?

    The most common cause is too much moisture in the filling. Make sure you squeeze excess water out of any vegetables and include jicama to absorb moisture. Also seal the edges of the wrapper firmly with beaten egg before frying.

    Can I make cha gio ahead of time?

    Yes. You can roll the spring rolls up to 24 hours in advance and refrigerate them on a tray, uncovered. Fry them directly from the fridge — no need to bring to room temperature. You can also freeze uncooked rolls and fry from frozen, adding 2–3 extra minutes to the frying time.

    What dipping sauce goes best with cha gio?

    Nuoc cham is the classic pairing: fish sauce, lime juice, sugar, water, garlic, and chili. A simple mixture of soy sauce and rice vinegar also works beautifully. Hoisin sauce with crushed peanuts is a popular alternative for those who prefer a sweeter, richer sauce.

    Can I bake or air-fry cha gio instead of deep-frying?

    Yes. Brush or spray the rolls lightly with oil, then air-fry at 400°F (200°C) for 12–15 minutes, turning halfway through. Bake at 425°F (220°C) for 18–22 minutes. The texture won’t be quite as crispy as deep-fried, but both methods produce delicious results.

    Cha Gio Fried Spring Rolls With Shiso Leaves

    Try our delicious cha gio Vietnamese spring rolls with a citrusy twist from shiso leaves, perfectly balancing the savory pork.
    Prep Time 30 minutes
    Cook Time 30 minutes
    Total Time 1 hour
    Servings: 6 people
    Course: Appetizer
    Cuisine: Vietnamese
    Calories: 280

    Ingredients
      

    Filling
    • 200 g ground pork
    • 100 g shrimp finely chopped
    • 1 medium carrot grated
    • 1 small jicama grated
    • 50 g black ear fungus soaked and finely chopped
    • 100g rice vermicelli noodles soaked and chopped
    • 2 garlic cloves minced
    • 1 tbsp fish sauce
    • 1 tsp sugar
    • ½ tsp ground white pepper
    • 1 egg lightly beaten
    Wrapping
    • Rice papers
    • 10-12 fresh shiso leaves
    Dipping Sauce
    • 4 tbsp fish sauce
    • 2 tbsp lime juice
    • 2 tbsp sugar
    • ½ cup water
    • 1 garlic clove grated
    • 1 small chili finely chopped
    • 2 tbsp carrots grated

    Method
     

    Prepare the filling
    1. In a large bowl, combine ground pork, chopped shrimp, carrot, jicama, black ear fungus, rice vermicelli noodles, garlic, fish sauce, sugar, and white pepper.
    2. Mix well until all ingredients are thoroughly combined.
    3. Add the beaten egg to the mixture and mix again to ensure everything is well bound together.
    Wrap the cha gio
    1. Prepare a large plate of warm water to soften the rice paper wrappers.
    2. Dip one rice paper wrapper in the warm water for a few seconds until it becomes pliable. Lay it flat on a clean surface.
    3. Place a shiso leaf on the softened rice paper. I like to alternate the double side if you're fortunate enough to have the shiso leaves with two different colours of each side.
    4. Add about 1-2 tablespoons of the filling mixture onto the center of the wrapper.
    5. Fold the bottom of the wrapper up over the filling, then fold in the sides, and roll tightly to form a compact roll.
    6. Repeat the process with the remaining wrappers and filling.
    Fry the cha gio
    1. Heat oil in a deep frying pan or pot over medium-high heat.
    2. Once the oil is hot, carefully add the spring rolls in batches, making sure not to overcrowd the pan.
    3. Fry until the spring rolls are golden brown and crispy, about 5-7 minutes per batch.
    4. Remove the spring rolls and drain on paper towels to remove excess oil.
    Dipping sauce
    1. In a small bowl, combine fish sauce, lime juice, sugar, water, garlic, and chili.
    2. Stir until the sugar is completely dissolved. Add grated carrot for garnish.

    If you loved these crispy rolls, try our Homemade Sashimi, a classic Vietnamese favourite to round out the meal. For more pickling and fermented flavours, check out our Traditional Kimchi. And if you’re looking for another crowd-pleasing appetizer, our 30-Minute Thai Basil Chicken is always a hit.

  • Chicharron Salad “Ensalada de Chicharrón Placero”

    Chicharron Salad “Ensalada de Chicharrón Placero”

    Ensalada de Chicharron Placero is one of those Mexican dishes that stops you mid-bite — the contrast of crunchy pork rind, creamy avocado, fresh tomato, and bright lime is completely addictive. This is my version, made with the flavors and ingredients of Central Mexico where I live.

    This post may contain affiliate links. If you purchase through these links, I may earn a small commission at no extra cost to you. Thank you for supporting Love & Harvest!

    Jump to Recipe

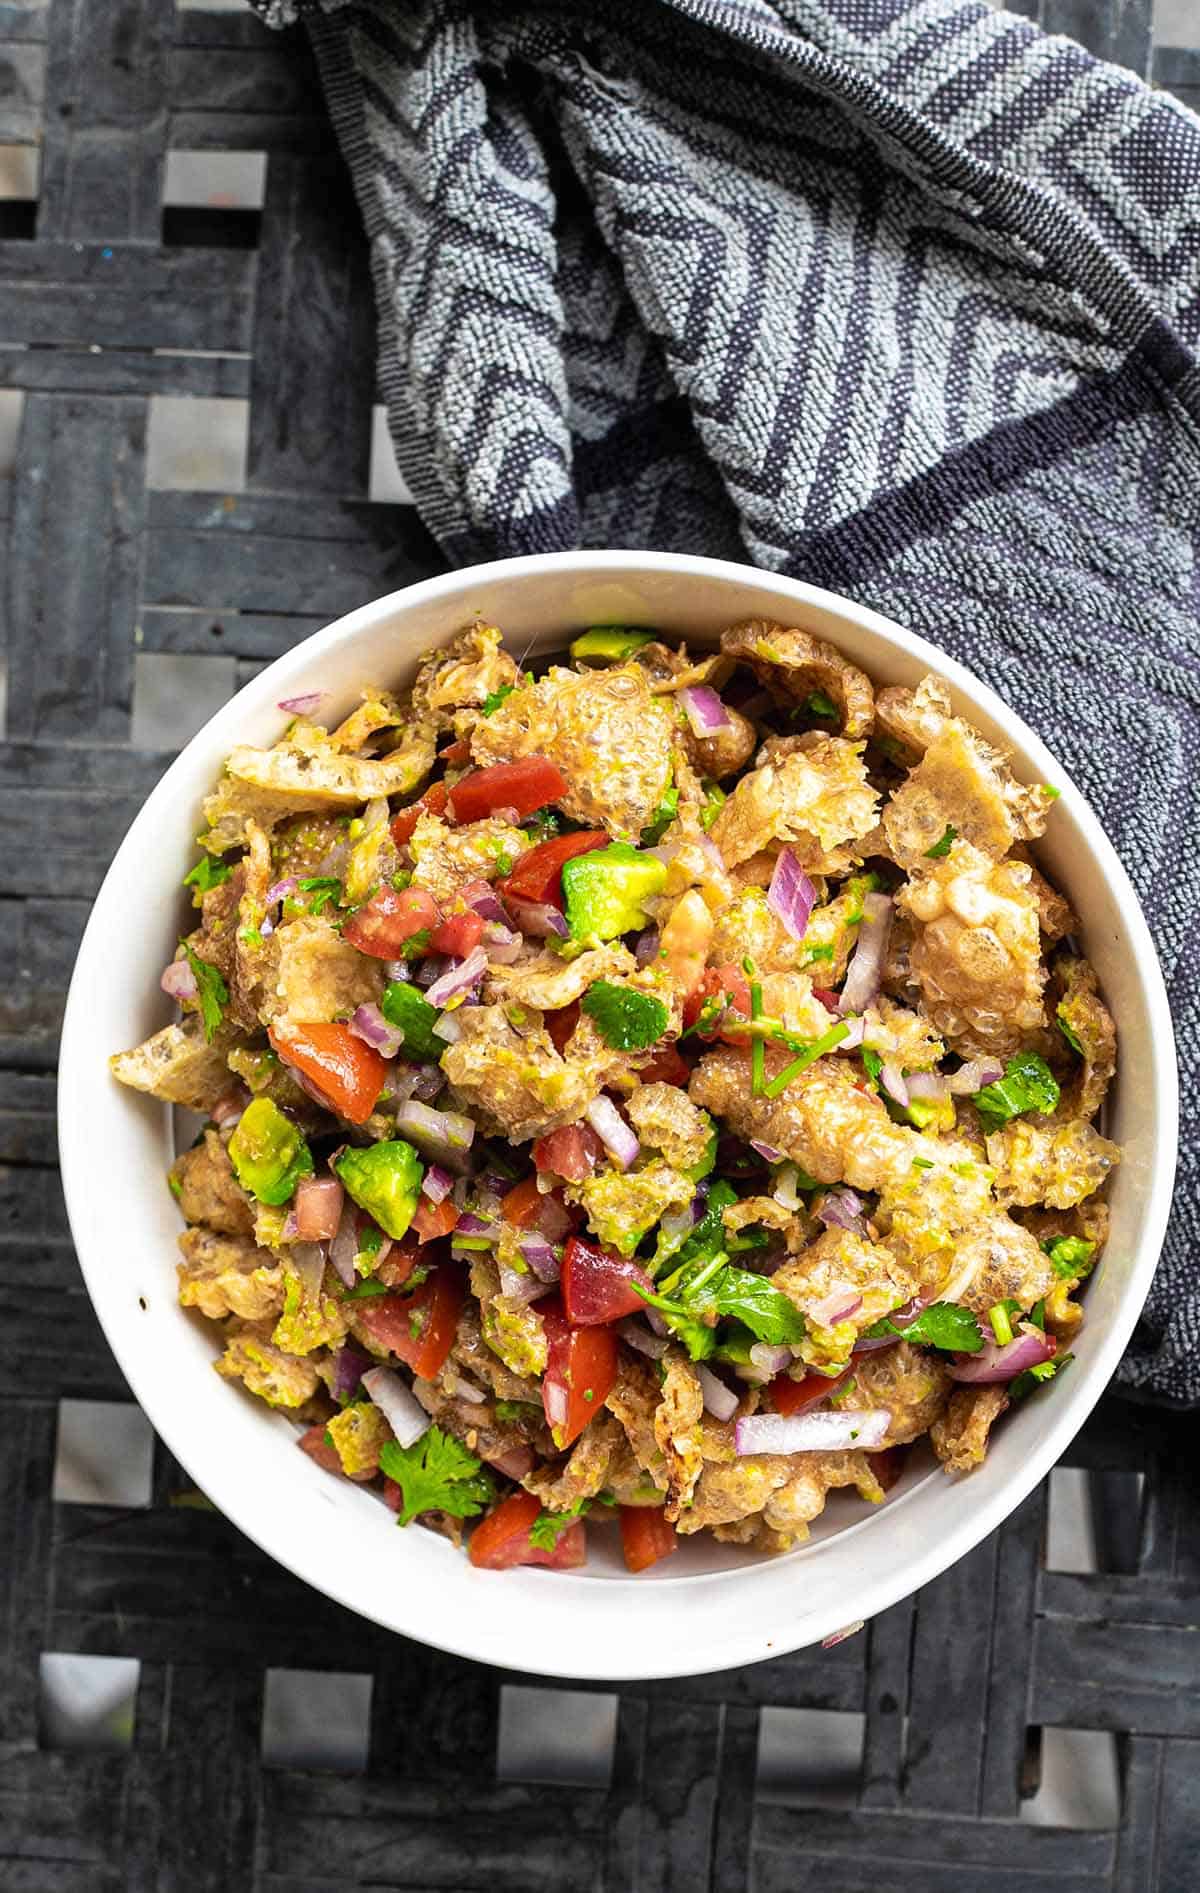
    Bowl of chicharrón salad with tomato, onion and green pepper next to a nasturtium flower

    This post is a recipe for chicharron salad, also known as pork rind salad. In Spanish it is called “Ensalada de Chicharron Placero.” It has pork rind, avocado, tomatoes, and lime juice.

    What is Chicharron Salad?

    Chicharron Salad is a flavorful dish that brings together the crispy, savory goodness of fried pork rind with fresh vegetables and a bright lime dressing. This dish is a celebration of textures — crunchy chicharron against creamy avocado and juicy tomatoes, unified by a simple olive oil and lime vinaigrette.

    The version I make here is common in Central Mexico and includes diced tomatoes, sliced red onions, cubed avocados, chopped cilantro, jalapeños for heat, and a dressing made with lime juice and extra virgin olive oil.

    The Superhero Ingredient: Pork Rind (Chicharron)

    In Mexican cuisine, every bite tells a story, and chicharron is one of the most iconic chapters. Pork skin frying in a pot of golden lard is culinary alchemy — transforming a humble ingredient into crispy, golden nuggets of pure satisfaction. The sizzle and pop of pork skin meeting hot lard is a melody that resonates through the bustling markets of Mexico City and Puebla, enticing everyone nearby with its irresistible aroma.

    A hand holding up a large sheet of crispy pork rind (chicharrón)

    Ingredients

    Pork Rind (Chicharron)

    Crispy, deep-fried pork skin is the star and this is where the dish begins and ends. If you cannot find fresh-fried chicharron locally, the bagged variety works well. This Tito’s Choice Chicharrones is the most similar to what we use here in Mexico, though a lighter chicharron chip style also works.

    • Why it matters: The crunch is the entire point of this salad. Use it immediately after tossing with the dressing — it softens fast, and you want that satisfying snap in every bite.

    Avocados

    Ripe, cubed avocado adds creaminess that counters the crunch and heat of the chicharron. It also makes the salad filling enough to serve as a light meal.

    • Why it matters: The fat in avocado coats each ingredient lightly, helping the lime dressing cling to everything and creating a more cohesive dish.

    Cilantro

    There is no salad in Mexico without cilantro. It is aromatic, fresh, and gives the dish a depth that flat-leaf parsley cannot replicate. Use it generously — do not be shy.

    • Why it matters: Cilantro lifts the entire flavor profile, cutting through the richness of avocado and pork rind with bright, herbal freshness.

    Purple Onion

    Purple onion is preferred over white or yellow for this salad because it is visually striking and noticeably sweeter — a better balance for a fresh salad than the sharper bite of white onion.

    • Why it matters: The sweetness of purple onion plays off the acidity of the lime without overpowering the other ingredients.

    Extra Virgin Olive Oil

    A drizzle of extra virgin olive oil creates a simple vinaigrette with the lime juice. It coats the salad, adds a glossy finish, and ties all the flavors together.

    • Why it matters: Oil prevents the lime from making the avocado brown as quickly and gives the salad a more polished, restaurant-quality look and feel.

    Lime

    The vinaigrette is simply lime juice and olive oil — minimal, clean, and explosive. The acidity cuts through the richness of both avocado and pork rind, keeping every bite bright and refreshing.

    • Why it matters: Without acid, this salad would feel heavy. Lime is what makes it feel light despite the richness of its main ingredients.

    Tomatoes

    Fresh diced tomatoes add color, juiciness, and a gentle acidity that balances the savory and fatty components. In Mexico, tomato is a non-negotiable base for most fresh salads.

    • Why it matters: Tomatoes add water content and freshness that prevents the salad from feeling dry or monotone in texture.

    Jalapeño or Serrano Pepper

    Optional but highly recommended. Serrano is hotter than jalapeño — choose based on your heat tolerance. Finely dice it so the heat distributes evenly throughout the salad rather than hitting you in one concentrated bite.

    • Why it matters: A touch of heat creates contrast that makes every other flavor in the salad more vivid and interesting.

    Make It into a Taco

    One of the most popular ways to eat this salad in Central Mexico is as a taco filling. Load it into a soft tortilla and add red or green salsa on top. Try our green nopales tortilla recipe — it pairs beautifully with this salad.

    Green nopales tortilla recipe: a stack of green corn tortillas

    Frequently Asked Questions

    When should I add the chicharron to the salad?

    Add the chicharron right before serving — within 5 minutes of plating. Pork rind absorbs moisture rapidly and goes from perfectly crunchy to soggy in about 10 minutes once it contacts the lime dressing. If making the salad ahead, keep the chicharron separate and combine just before eating.

    Can I make the dressing ahead of time?

    Yes. Mix the olive oil and lime juice up to 2 days in advance and store in a small jar in the refrigerator. Shake well before using. The dressing actually improves slightly as it sits, as the lime mellows and the flavors integrate.

    What type of chicharron is best for this salad?

    Thick-cut, fresh-fried chicharron from a Mexican market is the ideal. The puffed, airy kind has the best crunch and texture for salad. Thin, chip-style pork rinds can also work but soften faster. Avoid overly seasoned flavored varieties as they can compete with the fresh ingredients.

    Is Ensalada de Chicharron Placero spicy?

    The heat is completely adjustable. Without jalapeño or serrano it is mild. With jalapeño it has a gentle, lingering warmth. With serrano it has a proper kick. Deseed the chili for a milder version that keeps the flavor without the heat.

    What can I serve this salad with?

    It works beautifully as an appetizer, a side dish alongside grilled meats, or as a taco filling. It also pairs well with tostadas, garnachas, and as a topping for nachos. In Central Mexico it is often served at room temperature as a botana (snack) with cold drinks.

    How do I keep the avocado from browning?

    The lime juice in the dressing helps significantly. Toss the avocado in lime juice immediately after cutting and keep it in contact with the dressing. If making ahead, cut the avocado last and add it right before serving. Do not store assembled salad overnight — avocado browns regardless.

    Love authentic Mexican flavors? Also try our vegetarian mango soy ceviche, our Mexican fava bean salad, and our easy hummus for more vibrant, fresh dishes.

    Overhead view of chicharrón salad in a white bowl on a dark cloth

    Chicharron Salad “Ensalada de Chicharrón Placero”

    This homemade dish is a well-known favorite in Mexico. It is savory, tangy, and crunchy all at the same time! Every household puts its unique spin on it, and today, I'll share my version infused with the flavors and ingredients inspired by Central Mexico.
    Prep Time 30 minutes
    Total Time 30 minutes
    Servings: 4
    Course: Appetizer
    Cuisine: Mexican
    Calories: 310

    Ingredients
      

    • 220 g crispy chicharrón, broken into bite-sized pieces or 5 cups of chicharron chips
    • 1 cup diced fresh tomatoes
    • 2 avocados cubed
    • ½ cup thinly sliced red onions
    • ¼ cup chopped fresh cilantro
    • 1-2 jalapeños, finely diced (adjust to taste)
    • 2 tbsp extra virgin olive oil
    • 2 limes juiced
    • salt and pepper

    Method
     

    Dressing
    1. In a small bowl, whisk together the extra virgin olive oil and lime juice. This zesty dressing will infuse a refreshing citrusy note into our salad.
    Salad
    1. In a large mixing bowl, combine the chicharrón pieces with the diced tomatoes, avocados, sliced red onions, chopped cilantro, and jalapeños. Drizzle the lime and olive oil dressing over the mixture and toss gently to coat all ingredients evenly.
    2. Add salt and pepper to taste, ensuring a harmonious balance that enhances the natural flavors of each element.

    Notes

    Serving Suggestions:
    • Enjoy the Chicharrón Salad as a standalone appetizer or side dish.
    • Serve it alongside tacos, tostadas, or even as a topping for nachos for an added layer of crunch and flavor.
  • Green Pozole ‘Pozole Verde’

    Green Pozole ‘Pozole Verde’

    Green pozole is Mexico’s cozy, emerald-green bowl of comfort — tender pork simmered with tomatillos, poblano, epazote, and pepitas, then served with a spread of garnishes that make every bite your own. It is beloved in the southern states of Guerrero and Oaxaca, but once you make it at home you will understand why every region in Mexico has claimed it as their own.

    This post may contain affiliate links. If you purchase through these links, I may earn a small commission at no extra cost to you. Thank you for supporting Love & Harvest!

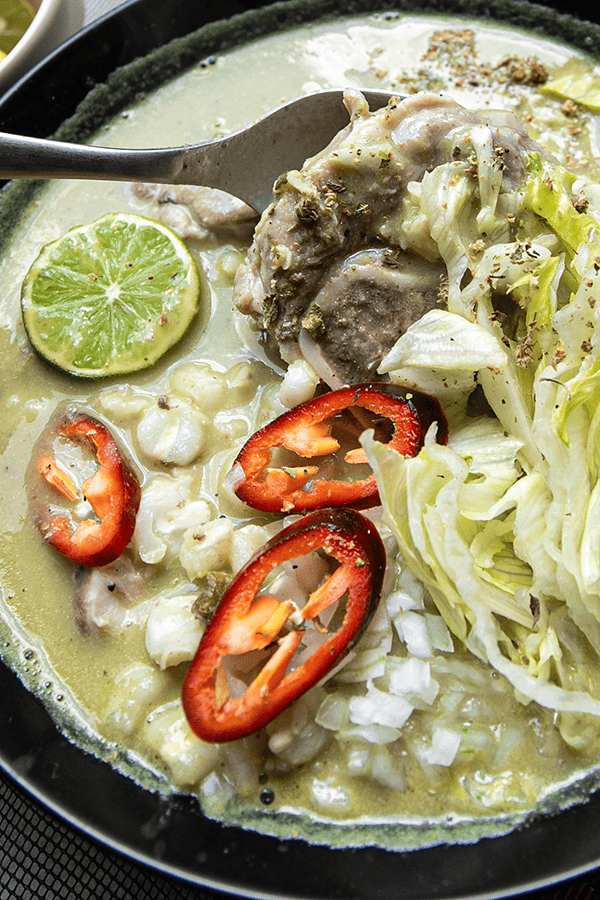
    Bowl of green pozole with radish, chile slices, cabbage and lime

    What Is Pozole?

    Pozole is a traditional Mexican soup made with hominy (dried maize treated with lime), meat (usually pork), and a deeply seasoned broth. It is a celebration dish — found at birthdays, national holidays, and family gatherings — and in many Mexican cities you will find dedicated pozolerias that serve nothing else. Three varieties exist: red (rojo), green (verde), and white (blanco), each tied to a different region and flavor profile.

    pozole verde bowls

    Red vs. Green vs. White Pozole

    Red Pozole (Pozole Rojo)

    • Region: Central and western Mexico — Jalisco, Guanajuato, Michoacán. Guadalajara is famous for its red pozole.
    • Flavor: Deep, earthy, slightly spicy. Built on dried guajillo and ancho chiles.

    Green Pozole (Pozole Verde)

    • Region: Southern Mexico — Guerrero and Oaxaca, with strong presence in central Mexico.
    • Flavor: Fresh, tangy, herbaceous. Tomatillos and green chiles give the broth its color and acidity.

    White Pozole (Pozole Blanco)

    • Region: Northern and central Mexico — Sonora, Sinaloa.
    • Flavor: Neutral, mild broth. The garnishes do the heavy lifting.

    ingredients for green pozole

    History of Pozole

    Pozole is deeply rooted in pre-Columbian Mesoamerica, where hominy held sacred significance. It was used in religious ceremonies, and historical accounts describe it as a ritual dish during certain sacrificial rites. When the Spanish conquistadors arrived in the 16th century, they introduced pork, beef, and European spices, transforming pozole into the dish we recognize today — a fusion of indigenous and colonial culinary traditions. Today it is one of Mexico’s most beloved and iconic dishes, celebrated in homes and restaurants from Tijuana to Oaxaca.

    Ingredients for Green Pozole

    Ingredients

    Tomatillos

    • Why they matter: Tomatillos are what turn the broth green and give it its signature tang. My mother-in-law insists on smaller tomatillos — they are more acidic and aromatic than large ones. Canned tomatillos (B07B17ZDQZ) work in a pinch, but fresh are far superior for this dish.

    Hominy

    • Why it matters: Hominy is the soul of pozole. These are dried maize kernels treated with lime water (nixtamalization), which transforms them into large, chewy, spongy pieces that absorb the green broth beautifully. Do not substitute regular corn — the texture will not be the same. Use dried hominy (B0008J3I9U) for the best result, or drained canned hominy if short on time.

    Poblano Peppers

    • Why they matter: Charring the poblano directly on a flame is essential — it adds a smoky depth and softens the pepper so it blends smoothly into the sauce. When dried, poblanos are called ancho chiles (B00TQVHXNO) — worth keeping in your pantry for red pozole or mole.

    Epazote

    • Why it matters: Epazote is an aromatic Mexican herb with a bold, slightly resinous flavor — described as a mix of mint, citrus, and earthiness. It is a staple in southern Mexican cooking and completely transforms the broth. If you cannot find it fresh, dried works but use less (it intensifies when dried).

    Mexican Oregano

    • Why it matters: Mexican oregano (B07D62QY2F) is botanically different from Mediterranean oregano — it has a more citrusy, robust profile that holds up to the rich green broth. Do not substitute Mediterranean oregano if you can avoid it.

    green pozole with garnishes

    Professional Tips

    1. Pressure-Cook the Meat First

    Pork knuckle and other tough cuts contain collagen and connective tissue that require prolonged cooking to become tender. Pressure cooking converts tough fibers into gelatin in 40 minutes instead of 3+ hours on the stovetop. It also infuses the meat with the aromatics in the pot (bay leaf, garlic, onion) and keeps it moist. We love our Instant Pot Duo 7-in-1 for this — it also makes rice, stews, and slow-cooked dishes.

    2. Pan-Char All the Salsa Ingredients

    Do not blend raw tomatillos, onion, and garlic into the sauce. Charring in a dry hot skillet caramelizes the natural sugars, removes excess moisture, and adds a smoky complexity that distinguishes a restaurant-quality pozole from a flat one. The Maillard reaction at work — same principle as searing meat. See also our Instant Pot Mexican menudo for another recipe that uses this charring technique.

    3. Garnish Generously

    The garnishes are not optional — they complete the dish. Standard pozole verde accompaniments: thinly sliced radish, shredded lettuce or cabbage, diced white onion, sliced serrano, avocado, lime wedges, tostadas with sour cream, and a sprinkle of Mexican oregano. For crunch, add chicharron (pork cracklings).

    finished bowl of green pozole

    Frequently Asked Questions

    Can I use chicken instead of pork for green pozole?

    Yes — chicken thighs are the most common substitute. Skip the pressure cooker and simmer bone-in thighs directly in the green sauce for 30–40 minutes until tender. The result is lighter but equally delicious.

    Where do I find hominy?

    Most Latin grocery stores carry both canned and dried hominy. In the US, you can order dried hominy (B0008J3I9U) on Amazon. If using dried, soak overnight and simmer for 2–3 hours before adding to the pozole.

    How thick should the green sauce be?

    After blending, the sauce should be thick enough to coat a spoon but still pourable. If it is too thick after cooking, add reserved pork cooking water — I recommend starting with 2 cups and adjusting. The final pozole should be a rich, coating broth rather than a thin soup.

    Can I make green pozole ahead of time?

    Absolutely. In fact it tastes better the next day as the flavors deepen. Store broth and meat separately in the refrigerator for up to 4 days. The garnishes must always be prepared fresh.

    What is the difference between pozole verde and menudo?

    Both are Mexican hominy soups, but menudo uses beef tripe rather than pork and has a completely different flavor profile. See our Instant Pot Mexican menudo if you want to explore both.

    Pozole verde topped with shredded cabbage, red chile and lime

    Green Pozole “Pozole Verde”

    A hearty stew, a celebration of hominy, tender chunks of pork, and fresh green herbs – that's green pozole. It's a rich, lush creation, teeming with the earthy essence of tomatillos, cilantro, and jalapeños, all meticulously pureed into a velvety, emerald-green elixir that clings to your spoon like a cherished secret.
    Print Recipe
    Pin Recipe
    Prep Time:20 minutes
    Cook Time:30 minutes
    Pressure Cook:40 minutes
    Course: Soup
    Cuisine: Mexican
    Keyword: green pozole, northern pozole, pozole verde

    Equipment

    • pressure cooker
    • blender

    Ingredients

    Pressure Cook Meat

    • 1½ kg pork knuckle, 1 inch sliced, frozen or fresh
    • 2 cloves
    • 3 bay leaves
    • ½ white onion, sliced in half
    • 3 garlic cloves
    • 2 quarts water (or 8 cups)

    Pozole Soup

    • 1 poblano pepper
    • 1 kg tomatillos, sliced ½ inch
    • 4 tbsp pumpkin seeds (pepitas)
    • 2–3 serrano peppers, deseeded and cut in half
    • 1 white onion, sliced in half
    • 2 garlic cloves
    • 1 cup epazote
    • 1 tsp dried Mexican oregano
    • 2 allspice (pimento gorda), crushed, or 1 tsp ground allspice
    • sea salt to taste
    • 3 cups hominy, drained

    Instructions

    Pressure Cook Pork

    • Take the pork knuckles and place them in a large bowl. Rinse several times in cold water, then soak in cold water with 2 tsp of salt for 15–30 minutes.
    • Rinse the pork in cold water again and place in your pressure cooker with the remaining ingredients. Pressure cook on high for 40 minutes.
    • Once done, release the valve. Open the lid when safe, remove the spices, and reserve both the meat and the cooking liquid.

    Green Pozole

    • Gas stove: In a large frying pan, heat 2 tsp of oil over medium-high. Add tomatillos, pumpkin seeds, serrano, onion, and garlic. Char each ingredient until browned (pumpkin seeds toast first — watch carefully). Add more oil as needed to brown the tomatillos. On a separate burner, char the poblano pepper directly on the flame, turning with tongs until all sides are completely blackened. Set aside to cool, then peel off the skin and remove seeds.
    • Electric stove: In a large frying pan, heat 2 tsp of oil over high. Add all ingredients including the poblano pepper. Char each until browned, pumpkin seeds first. For the poblano, keep flipping with tongs until completely charred on all sides. Set aside, peel, and deseed.
    • Once everything is charred, add all ingredients to a blender with epazote, oregano, and allspice. Blend on high until smooth.
    • Heat a large pot with 2 tbsp of oil over medium-high. Add the green sauce and cook for 10 minutes. Add the pork and hominy, then cook for 30 minutes. Add reserved pork cooking water (2–4 cups) to reach your preferred consistency. Salt to taste.
    • Serve with radish, shredded lettuce, diced onion, serrano slices, avocado, lime wedges, tostadas with sour cream, oregano, and chicharron on the side.
  • Easy Ribs Recipe with Homemade BBQ Sauce

    Easy Ribs Recipe with Homemade BBQ Sauce

    This post may contain affiliate links. If you purchase through these links, I may earn a small commission at no extra cost to you. Thank you for supporting Love & Harvest!

    The biggest mistake people make with ribs at home is trying to grill them raw. That’s how you end up with a chewy, undercooked rack that nobody’s proud of. This recipe flips the script: slow-bake the ribs in the oven first until they’re impossibly tender, then finish them over charcoal for that caramelised, smoky crust. The result is fall-off-the-bone ribs that look like a grill master pulled them off — even if you’ve never grilled before.

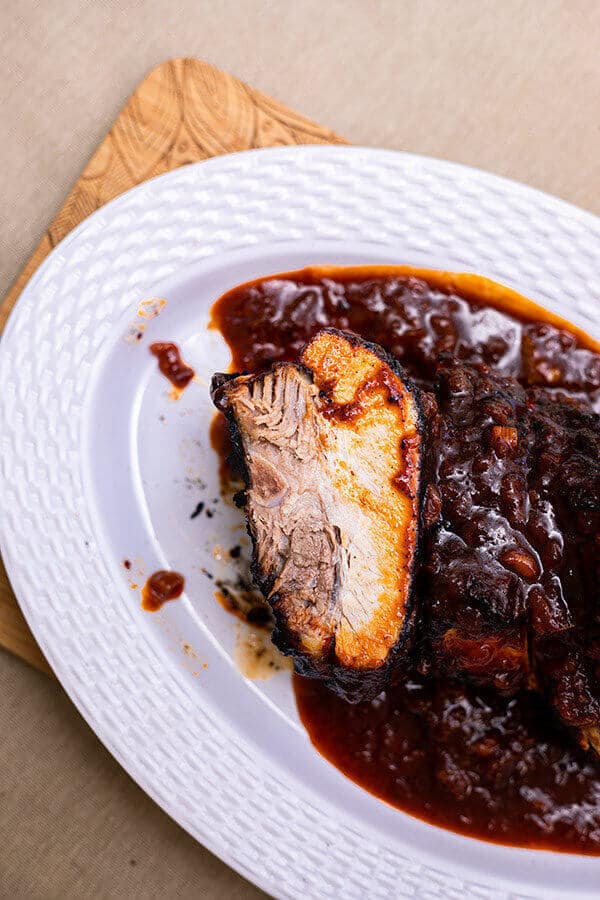
    Glazed BBQ ribs on a white platter with homemade sauce

    Why This Ribs Recipe Works

    Reason 1: Bake Ahead, Grill with Confidence

    My husband loves this recipe because it removes all the pressure from grilling. The ribs are already fully cooked before they touch the grill — there’s no stress about raw meat, no thermometers required for doneness. All the grill needs to do is add caramelisation and char. He can focus on the performance and let the oven do the real work.

    bbq ribs recipe grill

    Reason 2: The Flavour Is Extraordinary

    The dry rub and homemade BBQ sauce use pantry staples, but together they produce something that tastes restaurant-calibre. The sugar in the rub caramelises on the grill. The liquid smoke, tamarind vodka, and molasses in the sauce create layers of smoky, tangy, deep flavour that store-bought BBQ sauce simply cannot mimic.

    Reason 3: Truly Hands-Off

    95% of the cooking time requires nothing from you. The ribs bake in foil for 2.5 hours, and then you grill them for 7–10 minutes. It’s dummy-proof. Once those ribs finish the slow bake, they will taste good no matter what happens on the grill. A great recipe for beginners and pros alike.

    Rack of ribs searing on a charcoal grill

    Ingredients Deep-Dive

    Ingredients

    The Dry Rub

    The rub is where the ribs’ flavour foundation is built. Kosher salt draws moisture to the surface and seasons the meat deeply. Brown sugar creates the caramelised crust on the grill and balances the savoury spices. Smoked paprika adds colour and a subtle smokiness even before the grill. Cumin adds an earthy warmth that makes the flavour complex without being identifiable as a single spice. Grind the rub fresh if you can — the difference is notable.

    Liquid Smoke

    This is what gives indoor or charcoal-light BBQ that authentic smoked-meat flavour. The concentrate I use is all-natural hickory liquid smoke — a few drops go a long way. I also use it on my Cured Salmon Gravlax recipe. Hickory and mesquite combined gives a complex, campfire-style depth that no dry spice can replicate.

    Molasses and Brown Sugar

    Together these two are the backbone of the BBQ sauce. They don’t make it sweet in a candy way — they create the deep, jammy thickness that makes a great BBQ sauce cling to the ribs. The molasses also adds a slight bitterness that balances the honey and vinegar.

    Smirnoff Spicy Tamarind Vodka

    This is the ingredient that sets this BBQ sauce apart from everything else. In Mexico it’s easy to find; elsewhere, substitute with dark rum. The tamarind adds a fruity tartness and the spice builds quietly in the background. It’s the unexpected ingredient that makes people ask “what is in this sauce?”

    Smoker Chips

    If you’re using charcoal, add wood chips to the coals. Apple or hickory smoker chips added to the coals give the ribs a real smoke character that liquid smoke alone can’t fully replicate. Soak the chips in water for 30 minutes before adding so they smoulder rather than burn.

    pork ribs recipe

    Charcoal, Propane, or Smoker?

    All three work. For the grilling step we just need high heat to caramelise the exterior — the ribs are already fully cooked. Personally, I prefer charcoal with a handful of wood for the smoke it generates. But if all you have is a propane grill set to high, these ribs will still be outstanding.

    Small blue kettle charcoal grill on a stone patio

    What to Serve with the Ribs

    Here are my favourite sides with these fall-off-the-bone ribs:

    • Tortillas — a favourite around here in Mexico. A warm tortilla is perfect for wrapping the meat with the BBQ sauce.
    • Potatoes — mashed, baked, or potato salad. All work beautifully as a starchy companion.
    • Salads — greens help cut through the richness. Try our Cold Beet and Avocado Sashimi — it’s elegant and goes perfectly with BBQ.
    • Bread — the best way to soak up extra sauce. Our Best Fried Chicken also makes an incredible pairing for a full feast.

    bbq pork ribs recipe

    Frequently Asked Questions

    Can I make these ribs ahead of time?

    Yes — and in fact they’re better that way. Bake the ribs up to 3 days ahead. The flavour develops more fully and the cold, firm ribs hold together better on the grill. Refrigerate wrapped in foil and grill straight from the fridge, adding a few extra minutes for the heat to penetrate.

    What if I burnt the ribs on the grill?

    Honestly? The burnt edges taste great. Because of the sugar in the rub, the meat chars quickly — and that slightly burnt, caramelised exterior with the homemade BBQ sauce is absolutely delicious. Don’t panic if parts get darker than expected.

    Can I make these for camping?

    These are arguably the perfect camping food. Bake them at home, transport them wrapped in foil. At the campsite, all you need is a grill and 10 minutes. They’re fast, impressive, and make you look like you cooked all day.

    How spicy is the BBQ sauce?

    Mildly spicy. The red chili pepper and tamarind vodka add a background warmth, not heat. If you want more kick, double the chili pepper or add a few drops of hot sauce to the finished sauce. Kids in our house eat this without complaint.

    Can I use spareribs instead of baby back ribs?

    Yes. Spareribs are larger and take longer to bake — allow 3.5 hours instead of 2.5 hours. Everything else in the recipe stays the same. Baby back ribs are leaner and more tender; spareribs have more fat and flavour.

    What’s the best way to reheat leftovers?

    Wrap leftover ribs in foil and reheat in a 300°F oven for 20–25 minutes. Unwrap for the last 5 minutes to re-crisp the exterior. Avoid microwaving — it makes the crust soggy and toughens the meat.

    Sliced BBQ ribs covered in homemade sauce on a white platter

    Easy Fall-Off-The-Bone Ribs with Homemade BBQ Sauce

    Easy and delicious slow-baked ribs in the oven for that juicy tender interior, and grilled over charcoal for that crispy caramalized exterior. Super addicting and adored by many! Print Recipe Pin RecipePrep Time:10 minsCook Time:3 hrsCourse: Main CourseCuisine: AmericanKeyword: BBQ, BBQ Sauce, Grill, Grilled Ribs, oven-baked ribs, Ribs, Ribs RecipeServings: 8 people

    Equipment

    • charcoal grill

    Ingredients

    Ribs Dry Rub

    • 2½ tbsp kosher salt
    • 1 tbsp garlic powder
    • 1 tbsp onion powder
    • 1 tbsp ground cumin
    • 3 tbsp brown sugar
    • 1 tbsp smoked paprika
    • ½ tsp Mexican spice
    • ½ tsp ground black pepper
    • 4 kg baby back pork ribs roughly about 8 racks

    BBQ Sauce

    • 2¼ tbsp vegetable oil
    • ½ white onion finely chopped
    • 1½ cup water
    • ½ cup tomato paste
    • ½ cup white vinegar
    • ⅓ cup brown sugar
    • 2½ tbsp honey
    • 2 tbsp worcestershire sauce
    • 2 tsp salt
    • ¼ tsp black pepper
    • 1¼ tsp liquid smoke flavouring
    • 2 tsp Smirnoff Tamarind Vodka
    • 3 garlic clove grated
    • ¼ tsp smoked paprika
    • 1 tbsp dark molasses
    • ½ tsp red Chili pepper
    • rib juice reserved

    Instructions

    Ribs Marinate

    • Preheat oven to 300°F.
    • Combine salt, garlic powder, onion powder, cumin, brown sugar, smoked paprika, mexican spice, and black pepper in a small bowl.
    • Place each rack of ribs on a double layer of foil; sprinkle rub all over ribs. Wrap racks individually and divide between 2 baking sheets.Bake ribs until very tender but not falling apart, about 2.5 hours for baby backs and 3.5 hours for spareribs.

    Best BBQ Sauce

    • Heat oil in a medium saucepan over medium heat. Cook and stir the onions in oil for 5 minutes. Stir in water, tomato paste, vinegar, brown sugar, honey, and Worcestershire sauce.
    • Season with 2 teaspoons salt, 1/4 teaspoon black pepper, liquid smoke, tamarind liquor / rum, garlic, smoked paprika, dark molasses, rib juice, and 1/2 tablespoon ground chile pepper. Bring mixture to a boil, then reduce heat. Simmer for 45 minutes, uncovered, or until sauce thickens. Remove from heat, and set sauce aside.
    • Carefully unwrap ribs; pour any juices from foil into a 4-cup heatproof measuring cup; reserve juices. Let ribs cool completely. Cover and chill juices. Rewrap ribs in foil and chill. Build a medium-hot fire in a charcoal grill, or heat a gas grill to high. If youre using charcoal, add some wood chips so there's a slight smoke to smoke the ribs to give it more flavour.
    • Add bbq sauce.
    • ***DO AHEAD: Ribs can be baked up to 3 days ahead (the flavor will be more developed, and the cold ribs will hold together better on the grill as they heat through).***

    Grilling

    • Grill ribs, basting with barbecue sauce mixture and turning frequently, until lacquered and charred in places and heated through, 7-10 minutes. Transfer to a cutting board; cut between ribs to separate. Transfer to a platter and serve with additional barbecue sauce.

    Notes

    ***DO AHEAD: Ribs can be baked up to 3 days ahead (the flavour will be more developed, and the cold ribs will hold together better on the grill as they heat through).***

  • How To Make Gourmet Homemade Sausages: Chorizo & Apple Sage

    How To Make Gourmet Homemade Sausages: Chorizo & Apple Sage

    This post may contain affiliate links. If you purchase through these links, I may earn a small commission at no extra cost to you. Thank you for supporting Love & Harvest!

    Once you make sausages from scratch, it’s very hard to go back to the grocery store kind. Not because it’s faster or cheaper — it isn’t — but because the taste of fresh, nitrate-free sausage made with real herbs and your own choice of spices is in a different league entirely. This guide walks you through two gourmet recipes: a vibrant, chilli-red Classic Chorizo and a sweet, aromatic Apple Sage Maple Syrup breakfast sausage. Both are easier than you think.

    homemade sausages

    Why Make Your Own Sausages?

    Commercial sausages contain nitrates — preservatives that help give them their pink colour and extended shelf life. At low levels they’re considered safe, but they’re still there. When you make sausages at home, you control every ingredient: the quality of the pork, the salt type, the herbs. You know exactly what’s inside. The taste reflects that.

    This is also a surprisingly fun family project. Kids love the stuffing process, and the moment the first batch hits a hot cast iron skillet, the smell alone makes everyone appear in the kitchen.

    homemade sausage seasoning

    Ingredients Deep-Dive

    Ingredients

    The Meat Ratio: Pork + Pork Fat

    The standard ratio is 80% lean ground pork to 20% back fat. The fat is not optional — it’s what gives the sausage its juicy, succulent texture and prevents it from drying out during cooking. Ask your butcher to grind both the lean and fat together twice through the machine. Two passes through a fine grinder creates the smooth, emulsified texture that commercial sausages achieve with machinery. If you want to invest in your own machine, a KitchenAid meat grinder attachment is excellent for home use.

    Classic Chorizo: Ancho and Guajillo Chillies

    These two dried Mexican chillies are the soul of the chorizo. Ancho is the dried version of a poblano — it’s fruity, mild, and adds deep colour. Guajillo is slightly more tannic with a berry-like flavour. Neither is hot. Together, they produce the brick-red colour and complex flavour that makes Mexican chorizo unmistakable. Combined with white vinegar (which tenderises the meat and brightens the flavour), Mexican oregano, and a pinch of clove and cinnamon, this is a chorizo that tastes authentic and homemade in the best possible way.

    Apple Sage Maple Syrup: Sweetness with Depth

    This sausage is an homage to the breakfast sausages I grew up eating in Vancouver — sweet, fat-rich, and deeply comforting. Grated apple adds natural sweetness and moisture. Fresh sage provides an herbal backbone. Maple syrup creates the sticky-sweet glaze when the sausages hit a hot pan. A splash of sweet red wine rounds everything out. These are remarkable on their own, but also extraordinary crumbled into pasta or egg dishes.

    The Casing

    Natural hog casings are available at most butchers and specialty meat shops. They give the sausages that classic snap when you bite in, and they hold up beautifully on a cast iron skillet. Submerge them in lukewarm water and rinse the insides by running water through the tubes before use. If you can’t source natural casings locally, sausage stuffers and casing kits are available online.

    Salt Choice Matters

    Skip curing salt (sodium nitrate) — it’s unnecessary for fresh sausages you’ll cook within a few days. Use high-quality sea salt. We use Sal Faro Verde from Colima, Mexico — a western state famous for its natural sea salt. The mineral content affects flavour in a noticeable way. Good sea salt is an investment that pays off in every dish you make.

    gourmet sausage recipes

    Tools You Need

    This recipe is designed to require minimal equipment. All you need:

    • A butcher who will grind your pork and fat (twice)
    • A large funnel (wider mouth is easier)
    • Natural hog casings (from your butcher or online)
    • A toothpick for air bubbles

    That’s it. No sausage stuffer machine required, though you’re welcome to upgrade. The funnel method is slower but completely achievable for home batches. If you cook sausages often, a dedicated vertical sausage stuffer will save you significant time on larger batches.

    unique homemade sausage recipes

    How to Stuff the Sausages

    Tie one end of the casing tightly. Feed the casing onto the funnel accordion-style, leaving about 4 inches hanging off the end. Fill the funnel with meat and use your thumb to push it through. Work slowly — you want firm, evenly filled sausages without air pockets. Poke any air bubbles with a toothpick as they appear.

    Don’t overstuff. Leave room in the casing for expansion during cooking. An overstuffed sausage will split open on the heat. A split sausage still tastes good, but it reveals all the filling and loses its shape. When all the casing is filled, twist into links at 5-inch intervals, alternating the direction of each twist.

    The 12-Hour Fridge Rest

    After stuffing, lay the sausage links uncovered on a rack over a baking sheet and refrigerate for at least 12 hours. This step is essential for two reasons: it lets the meat absorb the seasoning fully, and it dries the outer casing slightly so it doesn’t burst from excess moisture during cooking.

    Serving Suggestions

    The Chorizo is spectacular in scrambled eggs, crumbled over fresh homemade pasta, or simply pan-fried and served with crusty bread. The Apple Sage sausages are outstanding as a breakfast plate alongside eggs and toast, or paired with a bright salad like our Beet and Avocado Sashimi for a brunch board.

    Frequently Asked Questions

    How long do homemade sausages keep?

    Fresh sausage links keep in the refrigerator for up to 2 days after the drying stage. For longer storage, freeze them for up to 3 months. Freeze individually or separated by parchment paper so they don’t stick together. Thaw overnight in the refrigerator before cooking — never on the counter.

    Do I need a sausage machine?

    No. A large funnel and your hands are sufficient for home batches. The process is slower than a dedicated stuffer, but entirely achievable. If you plan to make sausages regularly, a vertical sausage stuffer is a worthwhile upgrade — they fill casings much faster and with more even pressure.

    What if the casing breaks during stuffing?

    It happens to everyone, especially on the first batch. If the casing tears, stop, tie off what you have, and start a new section. A casing tear doesn’t affect the taste — the sausage just won’t hold its shape as neatly. Those broken ones become the cook’s snack.

    Can I skip the casings and make sausage patties instead?

    Absolutely. Shape the seasoned meat into patties and cook directly in a cast iron skillet over medium heat. You lose the snap of the casing but the flavour is identical. This is also a great way to test your seasoning before investing in casing materials.

    Can I freeze the sausage meat before stuffing?

    Yes. Season the meat, mix thoroughly, then freeze in portions before the stuffing step. Thaw overnight in the fridge, then stuff and proceed with the drying step. This is helpful if you want to prep the meat one weekend and stuff the following weekend.

    What’s a good sausage flavour variation to try next?

    Some excellent combinations to experiment with: rosemary with cayenne and sea salt; habanero with garlic and onion powder; blueberry with ginger, nutmeg, and maple syrup; cheddar cheese cubed into the pork with paprika; or a Cajun blend of cumin, cayenne, and paprika. The template is always the same — 1kg pork, 200g fat, 2 tbsp sea salt — and everything else is creative freedom.

    homemade fresh chorizo

    Gourmet Fresh Sausages: Classic Chorizo & Apple Sage

    Learn how to make fresh gourmet Sausages right at home. Two simple recipes, Classic Chorizo and Apple Sage Maple Syrup sausages. You'll fall in love with these two popular choices that is bursting with flavour and colour. Print Recipe Pin RecipePrep Time:30 minsCook Time:12 mins

    Equipment

    • funnel

    Ingredients

    Classic Chorizo

    • 1 kg ground pork grounded twice in the machine of your butcher
    • 200 g pork back fat, grounded
    • 5 tbsp white vinegar
    • 1 ancho chili
    • 2 guajillo chili
    • 1.5 tsp paprika
    • 1 tsp vegetable oil
    • 2 tbsp sea salt
    • ½ tsp ground cumin
    • ¼ tsp ground black pepper
    • 1 tbsp mexican oregano
    • a pinch of clove
    • ¼ tsp cinnamon
    • 1 garlic, grated
    • 6 feet small hog casings

    Apple Sage Maple Syrup Breakfast Sausages

    • 1 kg ground pork grounded twice in the machine of your butcher
    • 200 g ground pork back fat
    • 2 tbsp sea salt
    • 2 tsp ground fresh black peppers
    • 3 tbsp brown sugar
    • 2 small apple, peeled and grated
    • 2 garlic clove, grated
    • 10 fresh sage leaf, chopped
    • ½ cup maple syrup
    • ¼ cup sweet red wine
    • 6 feet small hog casings

    Instructions

    Classic Chorizo

    • Combine all ingredients in a large bowl. Wear gloves in this process and mix, push, knead and squeeze the mixture until well blended.
    • Wrap well and chill overnight or around 8 hours before using.
    • To taste for seasoning, make a small patty of the sausage mixture and cook it in a small skillet over medium-low heat. Taste and adjust the seasoning to your liking. If not shaping the sausages immediately, refrigerate until you’re ready to proceed.
    • To make sausage links, put the casings in a medium bowl and set it in the sink. Rinse the casings under cool running water: Hold one end of each piece of casing open under the tap and flush it out by gently running cool water through it. (Once you fill part of the casing, use your hands to push the water through to other end.) Fill the bowl with fresh, cool water and let the casings soak for 10 minutes.
    • Take out your large funnel. Splash cool water onto the end to moisten it. Open an end of one piece of casing and pull it over the end of the tube. Push the rest of the casing onto the tube accordion-style, leaving 3 or 4 inches hanging off the end.
    • Fill the funnel with the sausage mixture and feed it through with your thumb or fingers just until it reaches the end of the tub. Tie the end of the attached casing into a knot, and slide it up over the tube until the knot hits the tip of the tube.
    • Continue to feed the meat mixture through the tube to fill the casing, pressing your thumb and forefinger against the tip of the tube to control the rate and tightness of the filling. Go slowly, don’t overstuff (but do stuff firmly), and watch for air holes. When there are only 3 to 4 inches of empty casing left, stop the feed, slip the casing off the tube and tie it in a knot about 1/2 inch from the end of the sausage filling—this extra space will fill in as you make links
    • Use a skewer or toothpick to prick any air holes that have formed during stuffing. Repeat with the remaining casings and sausage mixture.
    • To make links, lay one sausage at a time on a clean work surface, with the front end of the sausage (the end where you began filling) in front of you and the rest of the sausage lying to the right. Measure 5 inches from left to right and pinch the casing at that spot between your thumb and forefinger. Twist the unlinked portion away from you at least 4 or 5 turns to bind off the link on the left. Measure another 5 inches and pinch and twist away from you to form another link. Repeat until you reach the end of the casing, always twisting in the same direction. Prick any remaining air holes.
    • Lay the links, uncovered, on a rack set over a rimmed baking sheet. Dry in the refrigerator for 12 hours to allow the flavors to meld and to give the casings a good bite when cooked. Drying will also reduce the amount of moisture in the meat, too much of which can steam and lead to bursting.
    • To cook the sausage links, heat the oil in a large, preferably cast-iron, skillet over medium heat. Cook, turning as needed, until browned and cooked through, about 12 minutes.

    Apple Sage Maple Syrup Sausages

    • In a small bowl, mix the salt, pepper, garlic, and sage. Add the seasonings and the wine to the ground meat and mix briefly but thoroughly with your hands. Don’t overmix, or the fat could begin to melt.
    • To taste for seasoning, make a small patty of the sausage mixture and cook it in a small skillet over medium-low heat. Taste and adjust the seasoning to your liking. If not shaping the sausages immediately, refrigerate until you’re ready to proceed.
    • To make sausage links, put the casings in a medium bowl and set it in the sink. Rinse the casings under cool running water: Hold one end of each piece of casing open under the tap and flush it out by gently running cool water through it. (Once you fill part of the casing, use your hands to push the water through to other end.) Fill the bowl with fresh, cool water and let the casings soak for 10 minutes.
    • Take out your large funnel. Splash cool water onto the end to moisten it. Open an end of one piece of casing and pull it over the end of the tube. Push the rest of the casing onto the tube accordion-style, leaving 3 or 4 inches hanging off the end.
    • Fill the funnel with the sausage mixture and feed it through with your thumb or fingers just until it reaches the end of the tub. Tie the end of the attached casing into a knot, and slide it up over the tube until the knot hits the tip of the tube.
    • Continue to feed the meat mixture through the tube to fill the casing, pressing your thumb and forefinger against the tip of the tube to control the rate and tightness of the filling. Go slowly, don’t overstuff (but do stuff firmly), and watch for air holes. When there are only 3 to 4 inches of empty casing left, stop the feed, slip the casing off the tube and tie it in a knot about 1/2 inch from the end of the sausage filling—this extra space will fill in as you make links
    • Use a skewer or toothpick to prick any air holes that have formed during stuffing. Repeat with the remaining casings and sausage mixture.
    • To make links, lay one sausage at a time on a clean work surface, with the front end of the sausage (the end where you began filling) in front of you and the rest of the sausage lying to the right. Measure 5 inches from left to right and pinch the casing at that spot between your thumb and forefinger. Twist the unlinked portion away from you at least 4 or 5 turns to bind off the link on the left. Measure another 5 inches and pinch and twist away from you to form another link. Repeat until you reach the end of the casing, always twisting in the same direction. Prick any remaining air holes.
    • Lay the links, uncovered, on a rack set over a rimmed baking sheet. Dry in the refrigerator for 12 hours to allow the flavors to meld and to give the casings a good bite when cooked. Drying will also reduce the amount of moisture in the meat, too much of which can steam and lead to bursting.
    • To cook the sausage links, heat the oil in a large, preferably cast-iron, skillet over medium heat. Cook, turning as needed, until browned and cooked through, about 12 minutes.
  • Super Tasty Mexican Slow Cooker Pulled Pork

    Super Tasty Mexican Slow Cooker Pulled Pork

    This Mexican Slow Cooker Pulled Pork is the definition of a set-it-and-forget-it meal that still manages to blow everyone away. Smoky guajillo and ancho peppers, red wine, apple, and cumin slow-cook together with a pork shoulder for 5 hours until the meat falls apart and drinks up every drop of that incredible sauce. It is one of our most-made dinner recipes — at least twice a month on the rotation.

    This post may contain affiliate links. If you purchase through these links, I may earn a small commission at no extra cost to you. Thank you for supporting Love & Harvest!

    slow cooker pulled pork

    This post is all about slow cooker Mexican pulled pork.

    Ingredients for This Mexican Slow Cooker Pulled Pork Recipe

    Ingredients

    Pork Shoulder

    The cut we are looking for in this recipe is the pork shoulder. The shoulder has enough meat and fat mixed in together — it is not the tough part of the pork and using the slow cook method, the meal always comes out juicy, tender, and incredibly delicious.

    • Why it matters: Fat content in the shoulder bastes the meat from the inside as it slow-cooks, creating that signature pull-apart texture you cannot get from leaner cuts like loin.

    Guajillo Peppers

    The Guajillo dried peppers are not spicy when the seeds are removed. They give the sauce a nice thick texture and a distinct citrus-smoke flavour.

    • Why it matters: Guajillos are the backbone of many Mexican red sauces. Their fruity, slightly tannic flavour is what makes this sauce taste authentically Mexican rather than generic chili pork.

    Ancho Peppers

    Ancho peppers give the sauce its deep red color. They are not spicy and don’t have a sharp taste — they are dried poblanos with a mild, chocolatey undertone.

    • Why it matters: Anchors are responsible for the sauce’s gorgeous color and the earthy depth that rounds out the guajillo’s brightness. Together they are a classic Mexican pairing.

    Cumin

    Always a great partner with pork. Use powder form, not seeds — it marinates into the meat more evenly and the flavour is more evenly distributed throughout the roast.

    • Why it matters: Cumin is the warm spice foundation of the rub. Without it the pork tastes flat. Don’t be shy with it — this recipe leans into the cumin intentionally.

    Red Wine

    A great way to tenderize the pork — it penetrates into the meat and adds a fall-and-winter depth of flavour. A Malbec or any full-bodied red wine works perfectly here.

    • Why it matters: The alcohol in the wine breaks down muscle fibers during the long cook, resulting in a more tender final product. It also adds complexity to the sauce that water or stock alone cannot achieve.

    Apple

    Three apples, peeled and shredded. Adding apples is a great way to include fibre and natural sweetness that offsets the wine’s acidity and tartness.

    • Why it matters: The natural sugars in the apple caramelize during cooking and help balance the smokiness of the peppers. The apple also adds another layer of tenderization — the malic acid breaks down protein similarly to how a citrus marinade works.

    Slow Cooker

    I use an Crock-Pot Slow Cooker or the slow cook setting on my Instant Pot 7-in-1. Both work perfectly. The slow cook method is what makes this recipe so hands-off — 90% of the time you’re just waiting for the cooker to do its magic.

    • Why it matters: Slow cooking at low temperature for a long time breaks down the tough collagen in the pork shoulder into gelatin, which gives the sauce its body and the meat its silky, fall-apart texture.

    How to Serve Pulled Pork

    There are many ways to serve this slow cooker pulled pork:

    • Bread — any bread works. Make a pulled pork burger, a torta, or sliders with small buns.
    • Burrito — wrap in a large flour tortilla.
    • Taco — serve on top of a corn tortilla for a pulled pork taco.
    • Mash potato — serve with mashed potato and veggies, drizzled with the sauce.
    • Poutine — deep fry fries, add pulled pork, black beans, cheese, and sour cream.
    • Appetizer — bake thin baguette slices and serve the pulled pork with pickled onions.

    For more Mexican-inspired recipes, try our Green Pozole (Pozole Verde) or our Easy Mexican Salsa Verde — both pair beautifully with this pulled pork.

    easy slow cooker pulled pork

    Mexican pulled pork being shredded with forks in a dark sauce

    Mexican Slow Cooker Pulled Pork

    Easy tender and delicious pork with a Mexican sauce soaked and slow-cooked in an Instant Pot. I love serving this with tortilla, rice, or over mashed potatoes.
    Print Recipe
    Pin Recipe
    Prep Time:10 minsCook Time:5 hrsServings: 6 people

    Equipment

    • Instant Pot or Slow Cooker

    Ingredients

    Pork Marinate

    • 1 kg pork shoulder whole
    • 3 tsp sea salt
    • 1 tbsp paprika
    • 1 tbsp cumin powder
    • 1 tsp black pepper
    • 3 tbsp canola oil

    Mexican Peppers

    • 2 guajillo peppers
    • 3 ancho peppers

    Liquid

    • 1 cup red wine
    • 3 apples peeled and shredded
    • 1 white onion shredded
    • 1 cup orange juice
    • 2 tbsp vinegar
    • 3 bay leaf
    • salt to taste

    Instructions

    • Rinse and pat dry the pork shoulder with a paper towel.
    • Mix the spices and salt together for the pork marinade. Rub the spice all over the meat. Let it sit for 15–30 minutes.
    • Soak the Mexican peppers in hot boiling water. Place a plate or something heavy on top to keep the peppers fully submerged for 10 minutes.
    • Break the top off the peppers and scrape the inside clean. Add all the peppers to a blender with 1/2 cup of water. Blend until smooth.
    • Heat a pan with oil on medium-high heat. Place the pork shoulder in the pan and brown all sides.
    • Set your slow cooker or Instant Pot to the slow cook setting on high for 5 hours. Place the browned pork shoulder inside and add all the liquids and Mexican pepper puree on top.
    • Close the lid and open the valve (if using Instant Pot).
    • After 5 hours, open the lid and use two forks to shred the meat apart. This allows the sides to soak up all the juices. Add salt to taste.

    Frequently Asked Questions

    Can I make this pulled pork without a slow cooker?

    Yes. You can braise it in a Dutch oven in the oven at 300°F (150°C) for 4–5 hours with the lid on. The result is essentially the same — low heat for a long time is what does the work, regardless of the vessel. A Lodge Dutch Oven works beautifully for this.

    What cut of pork is best for pulled pork?

    Pork shoulder (also called pork butt or Boston butt) is the best cut for pulled pork. It has the right fat-to-meat ratio so the meat stays moist during the long cook. Avoid pork loin — it is too lean and will dry out.

    How spicy is this Mexican pulled pork?

    Not spicy at all, as long as you remove the seeds from the guajillo and ancho peppers before blending. Both peppers are mild when deseeded. The sauce is smoky, earthy, and slightly sweet from the apple and orange juice — not hot.

    Can I use an Instant Pot instead of a Crock-Pot?

    Yes. Use the slow cook function on your Instant Pot, set to high for 5 hours with the lid closed and the valve open. Alternatively, use the pressure cook function for 60–75 minutes on high pressure followed by a natural release — the texture will be slightly different but equally tender.

    How do I store and reheat leftover pulled pork?

    Store pulled pork in an airtight container with its juices in the refrigerator for up to 4 days, or freeze for up to 3 months. Reheat gently in a pan on low heat with a splash of water or orange juice to revive the sauce. Avoid microwaving on high as it can dry the meat out.

    What do I do if the sauce is too thin after cooking?

    Remove the pork from the slow cooker after shredding and pour the remaining liquid into a saucepan. Simmer on medium-high heat for 10–15 minutes until the sauce reduces and thickens. Pour it back over the shredded pork before serving.

  • AMAZING Canadian Smoked Bacon Ham

    AMAZING Canadian Smoked Bacon Ham

    The moment this Canadian Smoked Bacon Ham comes out of the smoker, the entire house fills with that deep, rich, wood-smoke aroma that makes everyone gravitate to the kitchen. It is a project with a proud payoff — tender, beautifully pink, intensely flavourful meat that costs a fraction of the store-bought version and tastes better in every way.

    This post may contain affiliate links. If you purchase through these links, I may earn a small commission at no extra cost to you. Thank you for supporting Love & Harvest!

    This recipe is easy and hands-off. If you can boil water and turn on an oven, you are fully capable of making this. And once you do, you will never buy Canadian Smoked Bacon Ham again — but you will definitely keep buying pork loins to make your own.

    A patriotic remembrance of the vast and beautiful land of Canada. A polite recipe to recollect fond memories there, and a surrender to the experience where the past and present live beautifully together.

    Important safety note: Curing meats using sodium nitrite is very different from any other recipe. It is essential to read and thoroughly understand the process before attempting to cure meat. Please follow the measurements exactly.

    My Inspiration

    I miss walking into Superstore in North Vancouver. The deli section next to the meat counter at the back of the store always smelled like smoked meat. Buying ham in Canada was one of those memorable moments filled with fondness, like Mexican people buying tacos on crowded streets in Mexico.

    My first love is smoked salmon — still the best-tasting food in the whole world, in my opinion. That love for cold-smoked salmon is what eventually led me toward this love affair with smoked bacon ham.

    Ingredients

    Pink Curing Salt (Prague Powder #1)

    • Why it is essential and NOT optional: Pink Curing Salt is 94% table salt and 6% sodium nitrite. It preserves the meat, prevents dangerous bacterial growth (including botulism), and keeps the ham its beautiful pink colour. Without it, the meat would turn an unappetising grey. Do not confuse it with Pink Himalayan Salt — they are completely different products. Store it clearly labelled and out of reach of children.

    Smoker Wood Chips

    Pork Loin (or Pork Butt / Pork Leg)

    • Why pork loin for Canadian bacon: Canadian bacon is always made from pork loin — it is lean, boneless, and cuts cleanly into thick discs after curing. It is fundamentally different from American bacon, which uses fatty pork belly. Pork loin is leaner and produces a firmer, more ham-like result. If your cut is more flat than round, simply tie it with butcher’s twine before smoking.

    The Brine

    • Why a wet brine: The brine — brown sugar, sea salt, bay leaves, garlic powder, water, and curing salt — penetrates deep into the meat during the 24-hour refrigeration period. Sugar balances the salt and adds a subtle sweetness. Always brine in a non-reactive container (no metal — not even a metal spoon). The meat will float, so weigh it down with a ceramic dish.

    Instant-Read Meat Thermometer

    Why You Will Love This Recipe

    The full Canadian experience is here. Easy to follow, ingredients are not hard to find. If smoking sounds too intimidating, I have included oven baking instructions — both methods produce delicious results.

    The uses for this Canadian smoked bacon ham are endless: a sandwich with ham and cheddar, pasta with ham and cream sauce, cured ham with pineapples on toothpicks, or the perfect Eggs Benedict. Canadian bacon is also leaner than American bacon, since it’s made from pork loin, not belly.

    Pro Tips

    How Much Smoke Is Enough?

    My rule of thumb: if you can smell the smoke, the meat is absorbing it. Poor ventilation causes creosote — a thick, bitter, oily coat that forms when smoke sits on meat too long. Ensure the smoke can escape the chamber. Do not pile on wood or fuel. A gentle, consistent wisp of smoke is all you need.

    How Do You Know When It Is Done?

    Use a meat thermometer. When the internal temperature in the deepest part of the centre reaches 150°F (65°C), it is done. Do not go by time alone — cooking and smoking times vary with the size and shape of the meat.

    Meat Storage

    Refrigerate for up to two weeks or freeze for longer. Vacuum-sealed portions keep even longer still and slice perfectly from frozen.

    Once you have made this, it pairs beautifully with our Easy Camping Shrimp Pasta for a smoky, satisfying meal. You can also check out our Easy Ribs Recipe with Homemade BBQ Sauce for more smoked and cured meat inspiration.

    Frequently Asked Questions

    Is pink curing salt the same as pink Himalayan salt?

    No — they are completely different products. Pink Himalayan salt is a mineral salt from Pakistan used for cooking and seasoning. Pink Curing Salt (Prague Powder #1) is 94% table salt and 6% sodium nitrite, specifically formulated for curing meat. Using Himalayan salt in place of curing salt will not preserve the meat and could result in unsafe, grey-coloured ham.

    Can I make this without a smoker?

    Yes. Baking the cured ham in the oven produces equally delicious results, minus the smoke flavour. Preheat to 350°F, wrap the ham in foil, bake for 20 minutes, then remove the foil, increase temperature to 425°F, and roast for 12–15 more minutes until golden and the internal temperature reads 150°F.

    How long should I brine the ham?

    Brine for at least 24 hours in the refrigerator. You can extend the time by up to 20% for a saltier result with better nitrite penetration. Do not go shorter than 24 hours — the curing salt needs adequate time to work through the meat safely.

    What wood chips work best for smoking ham?

    Apple, cherry, and maple wood chips are classic choices for pork. They produce a sweet, mild smoke that complements the ham without overwhelming it. Hickory gives a stronger, more assertive smoke flavour if you prefer something bolder. Avoid resinous woods like pine — they produce bitter, acrid smoke.

    Why does my ham need to rest before slicing?

    Cutting into hot smoked or baked meat causes the juices to run out immediately, drying the meat. Resting allows the juices to redistribute evenly. Let the ham cool on the counter uncovered until the internal temperature drops to around 100°F before slicing into discs and searing.

    homemade Canadian smoked ham

    Amazing Canadian Smoked Back Bacon Ham

    Prep Time 10 minutes
    Cook Time 2 hours 30 minutes
    Total Time 2 hours 40 minutes
    Servings: 8 servings
    Cuisine: Canadian
    Calories: 210

    Ingredients
      

    • 1.3 kg pork leg / pork butt
    • ¾ cup brown sugar
    • ¾ cup sea salt
    • 3 bay leaf
    • 1 tbsp garlic powder
    • 4 litre water
    • 1 tbsp Prague Powder #1

    Equipment

    • meat thermometer
    • grill / smoker

    Method
     

    1. In a non reactive pot, put all the ingredients inside (except the meat). Bring it to a boil until the sugar and salt has melted. Let it cool and transfer to the curing container.
    2. Clean and rinse the meat thoroughly. Pat dry with paper towel.
    3. When the brine is at room temperature submerge the meat into the water and place a dish on top or anything heavy to hold the meat under the brine. Refrigerate for 1 day. ***You can add 20% longer time if you want to. The meat will be saltier and absorb more nitrite if safety is a concern***
    4. After the cure, rinse the ham with clean water to wash off access salt. Dump the brine water out, and bring fresh water back to the bowl. Fully submerge the ham in clean water for 30 minutes to let de-salt the ham. Pat dry.
    5. Now the ham needs to be smoked or baked. Below are your options.
    To Smoke
    1. Smoke the ham at 325°F for 2.5 hours until the internal temperature is 150°F in the deepest part of the center.
    2. Serve. Unfortunately, you can’t cut into your Canadian Bacon just yet, if you do, it will dry it out and won’t be as fantastic as it should be!  Its very important to let it rest on the counter uncovered until the internal temperature gets down to 100 degrees. Afterwards you can slice into discs and sear it on the grill or in a medium hot frying pan with a little bit of oil.
    To Bake
    1. preheat oven to 350°F.
    2. Take ham out of the brine, and rinse the meat with water to take the access salt out of the ham. Pat dry.
    3. ***OPTIONAL*** To add more flavour to the baked ham, you can roll your ham in some freshly grind peppers, chili powder, garlic powder, and onion powder.
    4. Wrap ham with aluminum foil and place on baking sheet. Bake for 20 minutes.
    5. Remove from the oven, remove the foil and increase oven temperature to 425°F. Return pan to the oven and roast for 12-15 minutes or until roast is golden brown. Check internal temperature with a meat thermometer that it has reached 150°F in the deepest part of the center.
    6. Let rest for 10 minutes before slicing and serving.
    7. Serve. Unfortunately, you can’t cut into your Canadian Bacon just yet, if you do, it will dry it out and won’t be as fantastic as it should be!  Its very important to let it rest on the counter uncovered until the internal temperature gets down to 100 degrees. Afterwards you can slice into discs and sear it on the grill or in a medium hot frying pan with a little bit of oil.

    Notes

    CURING TIME: The cure time depends on the thickness of your meat. You can go longer by as much as 20%, but do not go less.
    AMOUNT OF SALT: The recipe uses Morton Coarse Kosher Salt. If you use table salt, use about 3/4 as much by volume, or better, weigh it (the same weight works). I don’t recommend table salt in the brine.