Category: fermented foods

  • Mexican Pickled Red Onion

    Mexican Pickled Red Onion

    Crisp, tangy, and with just the right kick of heat — Mexican pickled red onions are the condiment that quietly makes every meal better. Once you try them on tacos, they become non-negotiable.

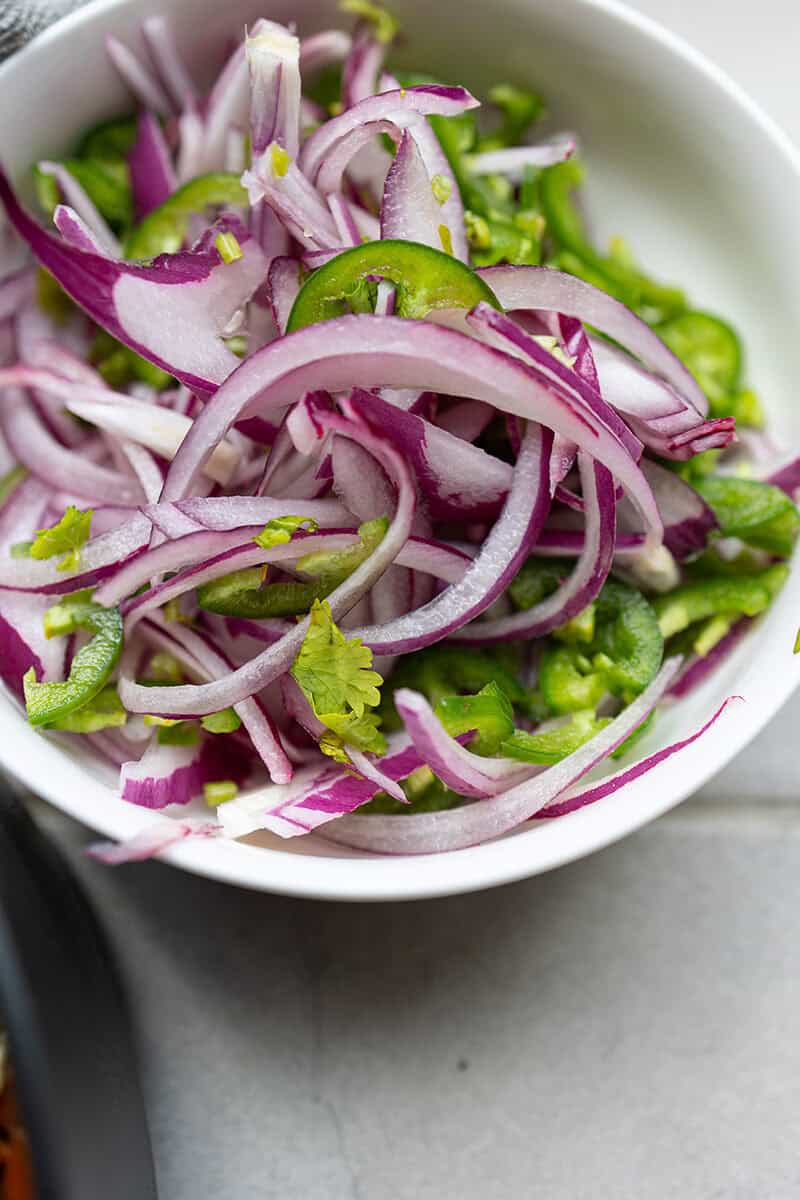
    Mexican pickled red onion with green chiles in a white bowl

    This post may contain affiliate links. If you purchase through these links, I may earn a small commission at no extra cost to you. Thank you for supporting Love & Harvest!

    Why You’ll Love This Recipe

    Made with just four ingredients — red onion, lime juice, jalapeño, and sea salt — this recipe takes less than 10 minutes to prepare and transforms anything it touches. The onions soak up the acidity of the lime while the blistered jalapeños lend a smoky heat that makes this side dish truly irresistible.

    Ingredient Deep-Dive

    Ingredients

    Red Onion

    • Why it matters: One large or two medium red onions, sliced thin. Red onion has natural sugars that balance the acid perfectly and turn a gorgeous magenta color in the lime juice. Thin slices pickle faster and have better texture. These store well in the fridge for 3–4 days.

    Fresh Lime Juice

    • Why it matters: The acid is the “pickling” agent here — no vinegar needed. Fresh lime juice (not bottled) gives a bright, clean tanginess that bottled juice simply can’t replicate. Squeeze just before using.

    Jalapeños

    • Why it matters: Thinly sliced, blistered jalapeños add smoky heat. Blister them in a dry cast iron pan for 2–3 minutes before slicing to bring out their depth. Use one jalapeño for mild heat, two for a proper kick.

    Sea Salt

    • Why it matters: Salt draws moisture from the onion, softens its raw bite, and enhances all the flavors. Use fine sea salt for even distribution — coarse salt can leave salty pockets.

    How to Pair This Dish

    Mexican pickled red onions are perfect on tacos, tostadas, or pulled pork. Their tangy flavor pairs especially well with rich meats like carnitas, barbacoa, or grilled steak. Try them in salads, sandwiches, grain bowls, or even on top of guacamole and nachos.

    Slow cooker Mexican pulled pork recipe: pork being shredded in a baking dish

    Super tasty Mexican Slow Cooked Pulled Pork

    One pot lemon garlic chicken and rice topped with lemon slices, with pickled red onion on the side

    Easy One Pot Lemon Garlic Chicken with Rice Pilaf

    Mexican pickled red onion with sliced green chiles in a white bowl

    Frequently Asked Questions

    How long do Mexican pickled red onions last in the fridge?

    Stored in an airtight jar or container, they keep well for 3–4 days in the refrigerator. The flavor actually deepens on day 2, so don’t be afraid to make them the night before.

    Do I need to cook the onions first?

    No. The acid from the lime juice does all the work. The onions are raw but the lime “quick-pickles” them, softening their sharp bite while keeping a satisfying crunch.

    Can I use lemon juice instead of lime?

    Yes, though lime is traditional for Mexican-style pickled onions. Lemon gives a slightly different flavor — less floral, more straightforward sour. A combination of both works well too.

    Why keep pickled red onions on hand?

    They add a ton of flavour for very little: just red onion, jalapeños, lime juice and salt, so they’re one of the best condiments you can keep on hand.

    How do I make them less spicy?

    Remove the jalapeño seeds before slicing — most of the heat lives in the seeds and white membrane. Or swap jalapeños for a milder pepper like serrano (used sparingly) or skip the chili entirely for a purely tangy version.

    Can I add other ingredients?

    Absolutely. Fresh oregano, a pinch of cumin, or a bay leaf are popular additions. Some recipes add a splash of apple cider vinegar alongside the lime for extra preservation and complexity.

    Thinly sliced pickled red onion and green chile beside a dish of rice

    Mexican pickled red onion with green chiles in a white bowl

    Mexican Pickled Red Onion

    Crisp, tangy, and with just the right amount of heat, these Mexican pickled red onion brings a refreshing punch of flavour to any dish. You can use this on anything like pull pork, enchiladas, tacos, and so much more!
    Prep Time 10 minutes
    Cook Time 5 minutes
    Total Time 15 minutes
    Course: Condiment
    Cuisine: Mexican
    Calories: 25

    Ingredients
      

    • 1 large red onion
    • 2 jalapenos
    • 3-5 limes
    • 1 tsp sea salt

    Method
     

    1. Slice the red onions and jalapeños thinly.
    2. In a small bowl, juice a few limes until you have enough liquid to cover the onions and jalapeños.
    3. Add the sea salt to the lime juice, stirring until dissolved.
    4. Combine the onions, jalapeños, and any optional add-ins in a jar or bowl.
    5. Pour the lime juice mixture over the onions until fully submerged.
    6. Let the mixture sit at room temperature for about 30 minutes to an hour before serving, or refrigerate for longer marination.

    Love pickled and fermented flavors? Try our Best Bread and Butter Pickled Cucumbers or our Preserved Salty Lemons — both are pantry staples you’ll reach for again and again. These pickled onions are also the perfect topping for our 4 Ingredients Chicken Sandwich Deli.

  • Instant Pot Black Garlic

    Instant Pot Black Garlic

    Black garlic is one of those rare ingredients that genuinely transforms dishes. Sweet, earthy, slightly tangy, with none of raw garlic’s sharpness — and you can make it at home using just your Instant Pot and three weeks of patience.

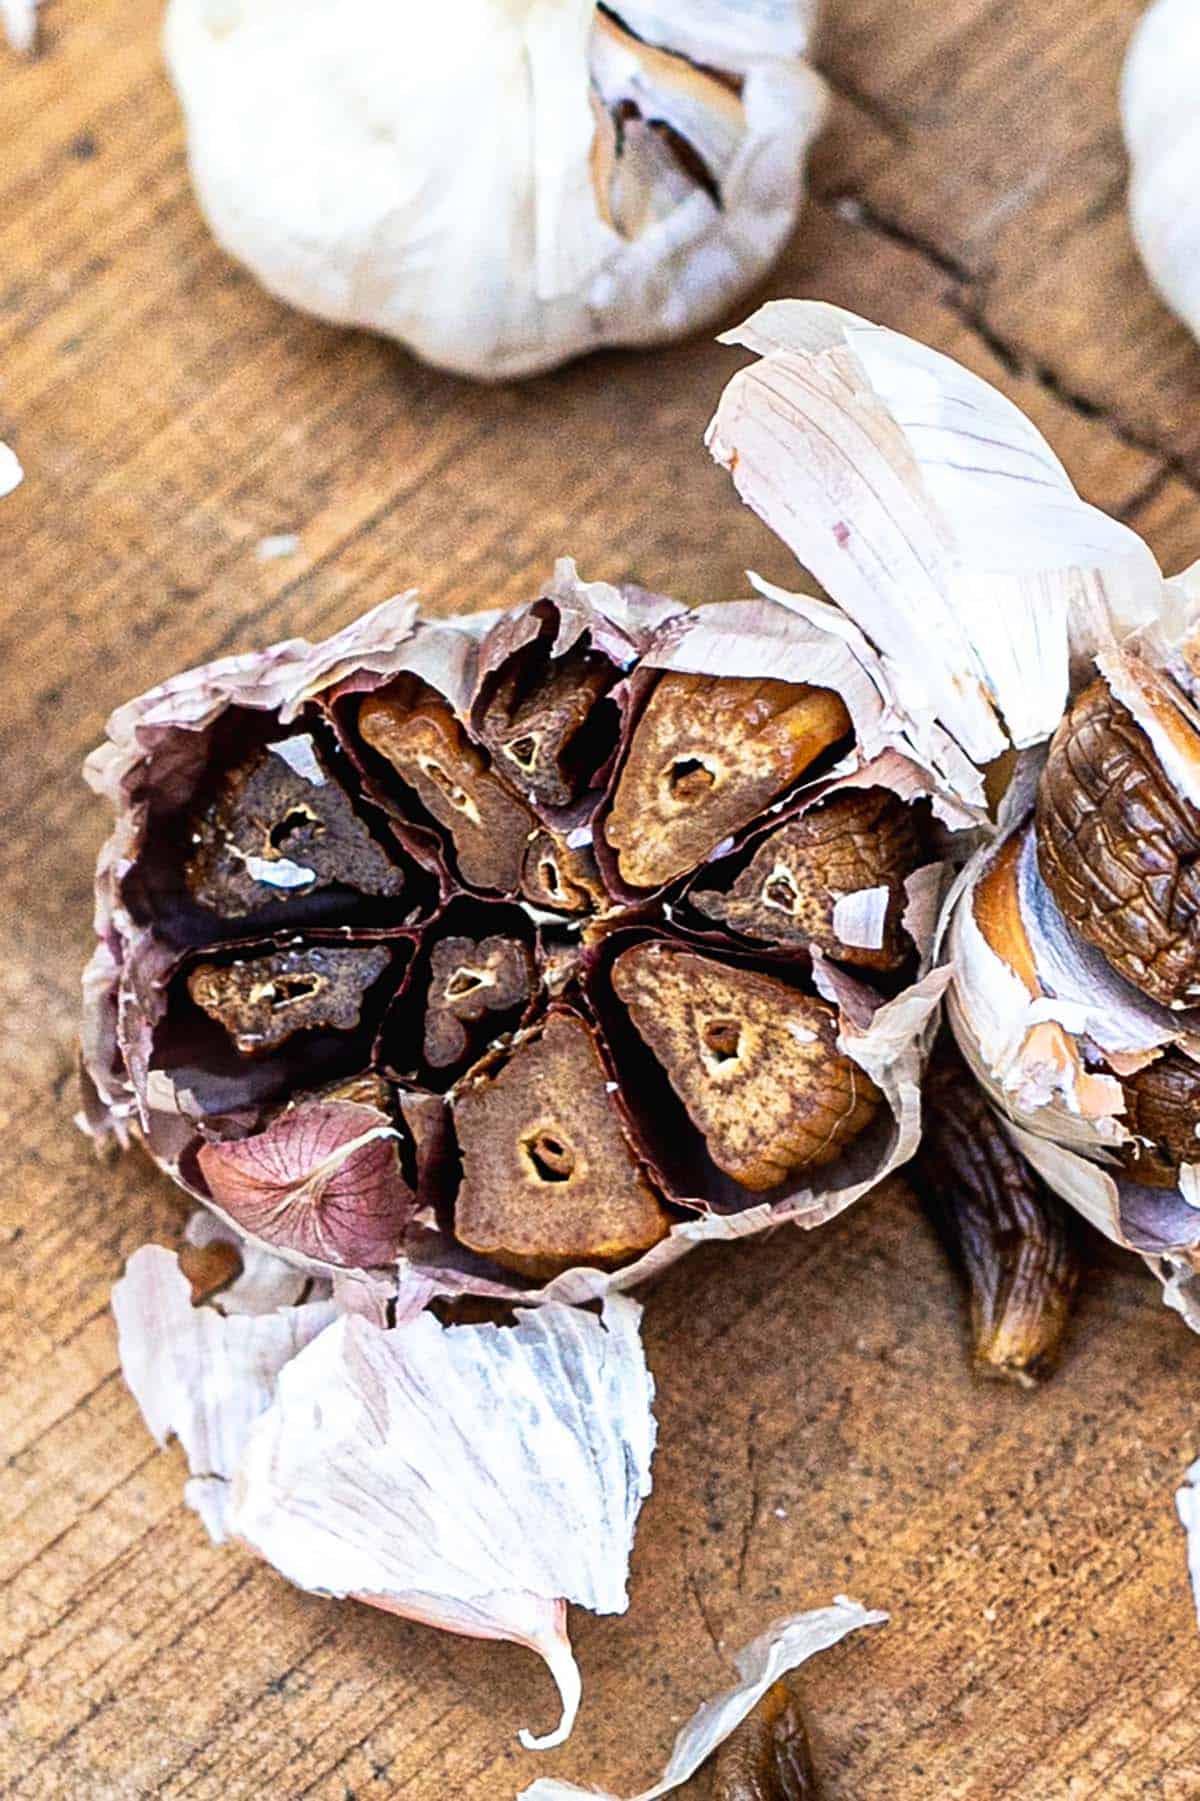
    Halved heads of homemade black garlic among whole garlic bulbs

    This post may contain affiliate links. If you purchase through these links, I may earn a small commission at no extra cost to you. Thank you for supporting Love & Harvest!

    Why Black Garlic?

    Black garlic is simply fermented garlic aged over time at controlled temperature and humidity, resulting in a deep black color and a complex, almost balsamic flavor profile.

    Head of black garlic cut open to show the dark, soft cloves

    Ingredient Deep-Dive

    Ingredients

    Whole Garlic Bulbs

    • Why it matters: Use medium-sized whole bulbs — they ferment more evenly than very large bulbs. Remove only the loose outer papery layers but keep most of the skin intact. The skin protects the cloves, regulates moisture, and ensures even fermentation. I typically use 7 bulbs per batch.

    Aluminum Foil

    • Why it matters: Wrapping each bulb individually in foil traps moisture and creates a consistent microenvironment for fermentation. Without the foil, the outer layers dry out unevenly and the cloves can harden rather than turn soft and sticky.

    Instant Pot (Yogurt Setting)

    • Why it matters: The Instant Pot’s Yogurt function on its lowest setting maintains the precise low temperature (around 140°F / 60°C) needed for the Maillard reaction that transforms garlic into black garlic. This eliminates the need for specialized black garlic fermenters. Any brand with a yogurt or keep-warm function works.

    Making Black Garlic with an Instant Pot: Step by Step

    1. Prepare the Garlic: Remove loose outer papery layers from the garlic bulbs, keeping the inner skin intact to protect the cloves.
    2. Wrap the Garlic: Individually wrap each bulb in aluminum foil. This traps moisture and ensures even fermentation.
    3. Set Up the Instant Pot: Place a trivet or steamer rack inside the Instant Pot to prevent the garlic from touching the bottom where it could burn.
    4. Cook on Yogurt Setting: Place the wrapped garlic on the trivet. Set the Instant Pot to “Yogurt” on the lowest setting. Leave for about 3 weeks. Do not use the pressure lid — use a glass lid or cover loosely with foil. Keep the valve open so moisture can escape.
    5. Place Outside: Fair warning — the aroma is overwhelming. For the first 2 weeks especially, the garlic smell intensifies daily. Place the Instant Pot outside in a covered spot protected from sun and rain. Include the power cord. This is not optional if you want to keep peace in your home.
    6. Check and Store: After 3 weeks, unwrap and check. Cloves should be jet black, soft, and sticky. If they need more time, rewrap and check again every few days. Let cool completely, then store in an airtight container in the refrigerator.

    A single peeled black garlic clove on a wooden board

    Enhancing Your Meals with Black Garlic

    1. Black Garlic Butter: Mash cloves into softened butter. Spread on toast, top steaks, or melt over roasted vegetables.
    2. Black Garlic Aioli: Blend into mayo for a creamy, umami-rich dipping sauce perfect for fries, burgers, or sandwiches.
    3. Salad Dressings: Mince into vinaigrettes or creamy dressings for added depth.
    4. Pasta Sauce: Stir into tomato sauce, Alfredo, or pesto for complex sweetness.
    5. Soups and Stews: Toss whole cloves into soups or broths — they dissolve and impart rich, savory flavor.
    6. Roasted Meats and Vegetables: Rub directly onto proteins or vegetables before roasting.

    Vegetarian Caesar dressing recipe: dressing mixed with grated cheese in a bowl

    Try our Vegetarian Caesar Salad dressing. Grating a clove of black garlic in is a game changer!

    Black garlic bulbs with their papery skins on a dark stone surface

    Peeled black garlic clove next to a whole garlic bulb on a wooden board

    Frequently Asked Questions

    What does black garlic taste like?

    Black garlic has a complex, sweet-savory flavor with notes of balsamic vinegar, molasses, and tamarind. None of the sharp, pungent bite of raw garlic. The texture is soft and slightly sticky — almost like a dried fig. It is genuinely unlike any other ingredient.

    Why does it take 3 weeks?

    The transformation happens through the Maillard reaction, the same browning chemistry that gives roasted coffee and seared steak their complex flavors. At the low temperature maintained by the Yogurt setting, this reaction happens slowly over weeks rather than minutes. You cannot rush it without compromising flavor and texture.

    Is the smell really that bad?

    Yes. Week 1 is manageable. By week 2, it is intense enough to permeate your home if kept indoors. Place it outside in a sheltered, covered spot. The finished product is completely odor-neutral when refrigerated.

    How long does homemade black garlic keep?

    Stored in an airtight container in the refrigerator, it keeps for 2–3 months. You can also freeze individual cloves on a baking sheet, then transfer to a freezer bag for up to 6 months.

    Can I use a rice cooker or slow cooker instead of an Instant Pot?

    Yes, if it has a keep-warm or low-heat function that maintains approximately 140°F (60°C). A rice cooker’s keep-warm setting works well. The key is consistent low temperature over 3 weeks — too hot and the garlic will burn; too cool and the Maillard reaction won’t occur.

    Can I make black garlic with individual cloves instead of whole bulbs?

    Technically yes, but whole bulbs are strongly recommended. The outer skin regulates moisture retention during the long process. Individual cloves tend to dry out and harden rather than becoming that soft, sticky consistency.

    Instant Pot Black Garlic

    This sweet, earthy, and slightly tangy delicacy transforms ordinary dishes into gourmet creations. The best part? You can make it easily at home using an Instant Pot.
    Prep Time 10 minutes
    Cook Time 30 minutes
    Gentle Aging 21 days
    Total Time 21 days 40 minutes
    Servings: 1 large jar
    Course: Condiment
    Cuisine: Asian
    Calories: 30

    Ingredients
      

    • 7 medium sized garlic bulbs

    Equipment

    • Instant Pot or any other similar devices
    • Aluminum foil

    Method
     

    1. Prepare the Garlic: Start by removing any loose outer layers of the garlic bulbs, but keep the skin intact to protect the cloves.
    2. Wrap the Garlic: Individually wrap each bulb of garlic in aluminum foil. This helps to keep the moisture in and ensures even fermentation.
    3. Set Up the Instant Pot: Place a trivet or steamer rack inside the Instant Pot. This will prevent the garlic from directly touching the bottom of the pot, where it could burn.
    4. Cook on the Yogurt Setting: Place the wrapped garlic bulbs on the trivet inside the Instant Pot. Set the Instant Pot to the "Yogurt" function on the lowest setting. Make sure the valve is on so the whole time it can expel moisture from the pot.
      You’ll need to leave the garlic in the Instant Pot for about 3 weeks.
    5. Check and Store: After 3 weeks, unseal the garlic and check its colour and texture. The cloves should be jet black, soft, and sticky. Let them cool completely before storing them in an airtight container in the refrigerator.

    Love fermented and preserved flavors? Try our Preserved Salty Lemons — another pantry staple that transforms everything it touches. For more garlic-forward recipes, our One Pot Lemon Garlic Chicken is the perfect showcase. And for a bold garlic side dish, our Best Garlic Mashed Potatoes uses a full head of roasted garlic.

  • The BEST Bread and Butter Pickled Cucumbers

    The BEST Bread and Butter Pickled Cucumbers

    These are the best-tasting pickles you’ll ever have on your burgers, hot dogs, or eaten straight from the jar. After trying them, you won’t go back to store-bought pickles ever again.

    Bowl of homemade bread and butter pickle slices in brine

    This post may contain affiliate links. If you purchase through these links, I may earn a small commission at no extra cost to you. Thank you for supporting Love & Harvest!

    This post is a recipe for the best bread and butter pickled cucumbers — a simple recipe with cucumbers, turmeric, coriander seeds, bay leaf, apple cider vinegar, sugar, and more.

    These are truly the BEST Bread and Butter Pickled Cucumbers. This recipe, a breeze to prepare, offers simplicity and delight. The most challenging part? A bit of waiting — but I assure you, the patience is richly rewarded.

    These pickles are perfect companions to any dish and stand unrivalled in flavour. Once you savour this recipe, no other will ever compare. It will carve a cherished place in your heart.

    Why You Only Need This Pickle Recipe

    With each batch, I find myself drawn back to its simplicity and perfection. This recipe consistently delivers on taste and quality — it has become my go-to, my tried-and-true, my culinary comfort zone. And the bonus? The leftover brine becomes the secret ingredient for the crispiest chicken wings you have ever made.

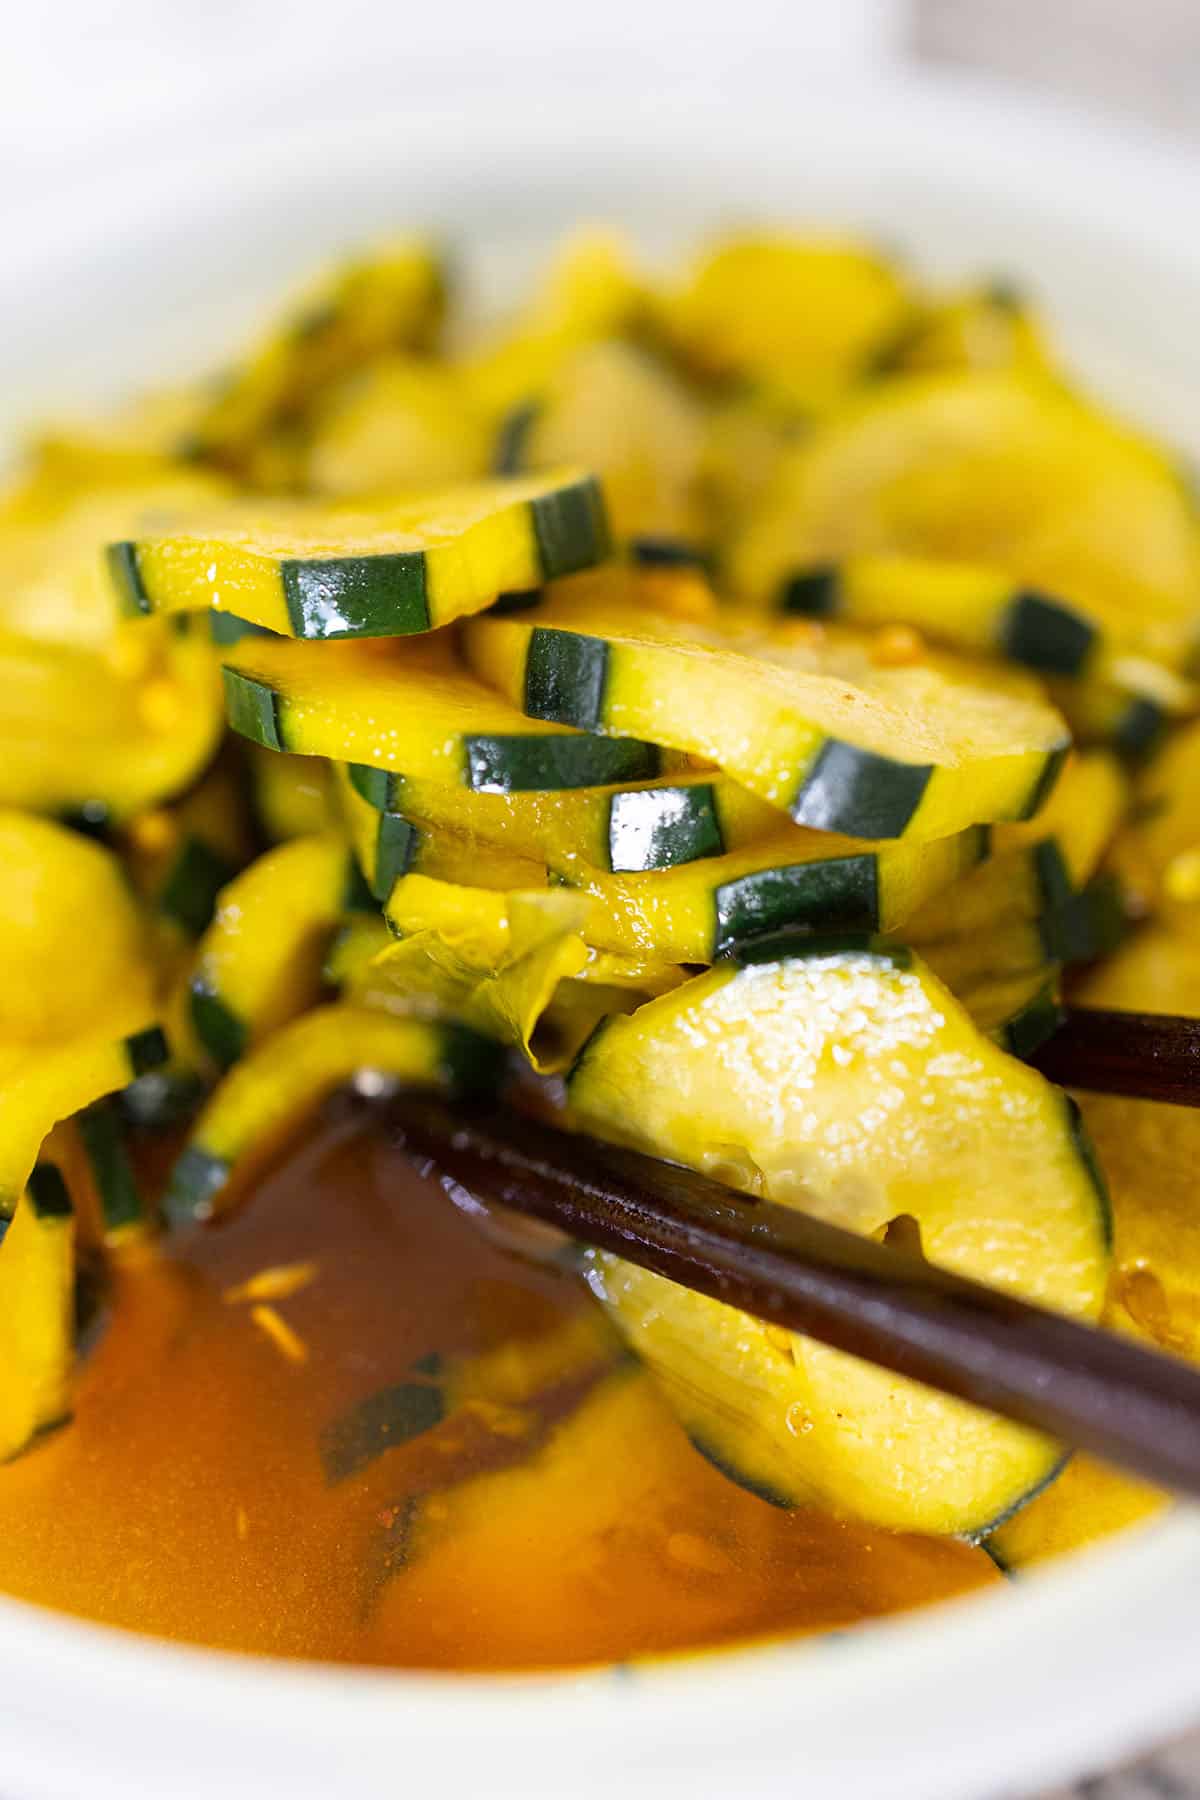
    Bread and butter pickled cucumber slices in a white bowl with chopsticks

    Don’t Throw Away the Brine!

    Do you have some pickle brine left after finishing the jar? Learn how to make our Crispy Pickle Brine Chicken Wings — the brine marinates the chicken overnight, infusing it with a unique tangy flavour and keeping it incredibly moist and tender.

    How to Get a Crunchy Texture

    To enhance crispiness, slice the cucumbers into a bowl and add a dash of sea salt. Include the sliced onions, then cover the mixture with crushed ice and press it down with a plate to keep the cucumbers submerged as the ice melts. Cover and refrigerate overnight. This process draws out excess moisture and guarantees an optimal crunchiness that elevates the pickles to perfection.

    Ingredients

    Ingredients

    Cucumbers

    • Why it matters: Kirby cucumbers or Persian cucumbers are ideal — they have thinner skin, fewer seeds, and stay crunchier in the jar than regular cucumbers. I peel half the skin off in alternating strips so the finished pickle looks beautiful in the jar. A mandoline slicer produces perfectly even slices for consistent pickling.

    Turmeric

    • Why it matters: Turmeric is what makes these pickles truly distinctive. It adds a warm, slightly peppery depth that no one can quite identify — they just know the pickles taste exceptional. It also gives the brine that gorgeous golden hue that makes these pickles stand out on any table.

    Apple Cider Vinegar

    • Why it matters: Apple cider vinegar adds a rounder, more complex tang compared to plain white vinegar. It also brings subtle fruity notes that complement the sweetness of the bread and butter style. I increase the vinegar-to-water ratio slightly for a more pronounced pickle flavour.

    Spices

    • Why it matters: The brine includes celery powder, coriander seeds, bay leaf, and clove. None of them is overpowering individually, but together they create a layered, aromatic brine that tastes like something your grandmother spent hours perfecting.

    Mason Jars

    • Why it matters: Use wide-mouth mason jars with a canning funnel for easy filling. Wide-mouth jars make it far easier to pack in the cucumbers tightly and retrieve the pickles without a mess.

    Frequently Asked Questions

    How long do homemade bread and butter pickles last?

    Stored in a sealed jar in the refrigerator, these pickles keep beautifully for up to 3 months. The flavour actually improves after the first 48 hours as the cucumbers absorb the brine. For the absolute best taste, wait at least 24 hours before opening the jar.

    Do I need to process these jars in a water bath?

    For refrigerator pickles (the method in this recipe), no water bath canning is needed. These are quick pickles intended to be stored in the fridge and consumed within 3 months. If you want shelf-stable pickles that can be stored in the pantry for up to 1 year, you will need to process the sealed jars in a boiling water bath for 10 minutes. Follow a tested canning recipe for safety.

    Why do my pickles turn soft instead of staying crunchy?

    The most common culprits are: not soaking in salt and ice overnight, using regular slicing cucumbers instead of Kirby or Persian varieties, or packing them too loosely. The ice-and-salt method is key — it firms the flesh and draws out the moisture that would otherwise make the pickles go limp. Do not skip this step.

    Can I use white vinegar instead of apple cider vinegar?

    Yes, but the flavour will be sharper and less complex. Apple cider vinegar adds a natural sweetness and depth that works particularly well with the bread and butter style. If you use white vinegar, consider reducing the amount slightly to avoid an overly acidic brine.

    What is the difference between bread and butter pickles and dill pickles?

    Bread and butter pickles use a sweet-tangy brine with sugar and warm spices like turmeric, coriander, and celery seed. Dill pickles use a sharp vinegar brine with fresh or dried dill and garlic, with little to no sugar. Bread and butter pickles are sweeter, milder, and more aromatic. They are the classic choice for burgers and sandwiches.

    Can I pickle other vegetables with this brine?

    Absolutely. This brine works wonderfully with thinly sliced red onions, banana peppers, cauliflower florets, and green beans. Adjust the brining time based on the vegetable — denser vegetables like cauliflower benefit from a slightly longer soak of 48–72 hours.

    Chopsticks lifting bread and butter pickle slices from a bowl of brine

    The BEST Bread and Butter Pickled Cucumbers

    Prep Time 20 minutes
    Total Time 20 minutes
    Servings: 8
    Course: Condiment
    Cuisine: American
    Calories: 120

    Ingredients
      

    • 1 kg Kirby Cucumbers or 2 pounds
    • 2 cups small diced sweet white onions
    • ¼ cup kosher salt
    • ½ kg crushed ice or 1 pound
    • 2 cups sugar
    • 1 tbsp yellow mustard seeds
    • 1 tsp celery seeds
    • 2 cups apple cider vinegar
    • 1 fresh bay leaf torn into pieces
    • 3 whole cloves
    • ½ jalapeno sliced paper thin with seeds

    Method
     

    1. Slice cucumbers into ⅛ inch thick slices. To draw out the liquid for extra crunch: layer the cucumber slice with onions, salt and ice in a glass or stainless steel container and weight with a plate large enough to cover the cucumbers and keep them submerged when the ice melts.
      Cover and refrigerate overnight.
    2. Next day, sterilize three 1L canning jars, along with their rings nd lids, and put them on a clean dish towel or wire rack.
    3. Drain the cucumbers and onions, put them in a large non reactive pot, and add the sugar, mustard seeds, turmeric, celery seeds, vinegar, bay leaf, cloves, and jalapeño. Bring to a simmer over high heat, stirring to completely dissolve the sugar. About 5 minutes. Skim off any foam that has formed at the top.
    4. Divide the batch in three parts for the jars. Ladle the hot vinegar liquid over the cucumbers leaving a ¼ inch headspace. White the rims and threads clean, put the lids and rings on the jars, and tighten the rings. Cool the jars to room temperature.
    5. Refrigerate the jars and let the pickle cure for at least 1 week before eating. Unopened, the pickles will keep for up to 2 months in the fridge.

    Once you have a jar of these pickles, the natural next step is our Crispy Pickle Brine Chicken Wings — where the leftover brine does the heavy lifting. For more fermented and preserved favourites, explore our Traditional Kimchi and Mexican Pickled Red Onion.

  • Traditional Kimchi

    Traditional Kimchi

    This is the traditional kimchi recipe I have been making for years — the one I use to produce batches from 1 pound all the way up to 5 kilograms for family, friends, and neighbors here in Puebla, Mexico. It is basic, approachable, and genuinely delicious every single time.

    This post may contain affiliate links. If you purchase through these links, I may earn a small commission at no extra cost to you. Thank you for supporting Love & Harvest!

    Jump to Recipe

    Bowl of freshly mixed traditional kimchi with red chili paste

    This post is about a traditional kimchi recipe — one I have used for many years to make for family and friends from 1 lb to 5 kg. It is a beloved recipe I keep coming back to.

    I adore my kimchi, and it holds a special place in the fridge. While some, like my husband, find the aroma off-putting, the rest of us relish the flavor and delight in the crunch of the Napa as it absorbs the marinade.

    The recipe I am about to share is not an heirloom passed down to me — I am Chinese, not Korean — but that does not hinder my deep appreciation for this Korean culinary treasure. Much like dedicated Korean homemakers, I prepare massive batches of kimchi, enjoy it on its own, incorporate it into fried rice, add it to soups, and share it generously with everyone around me.

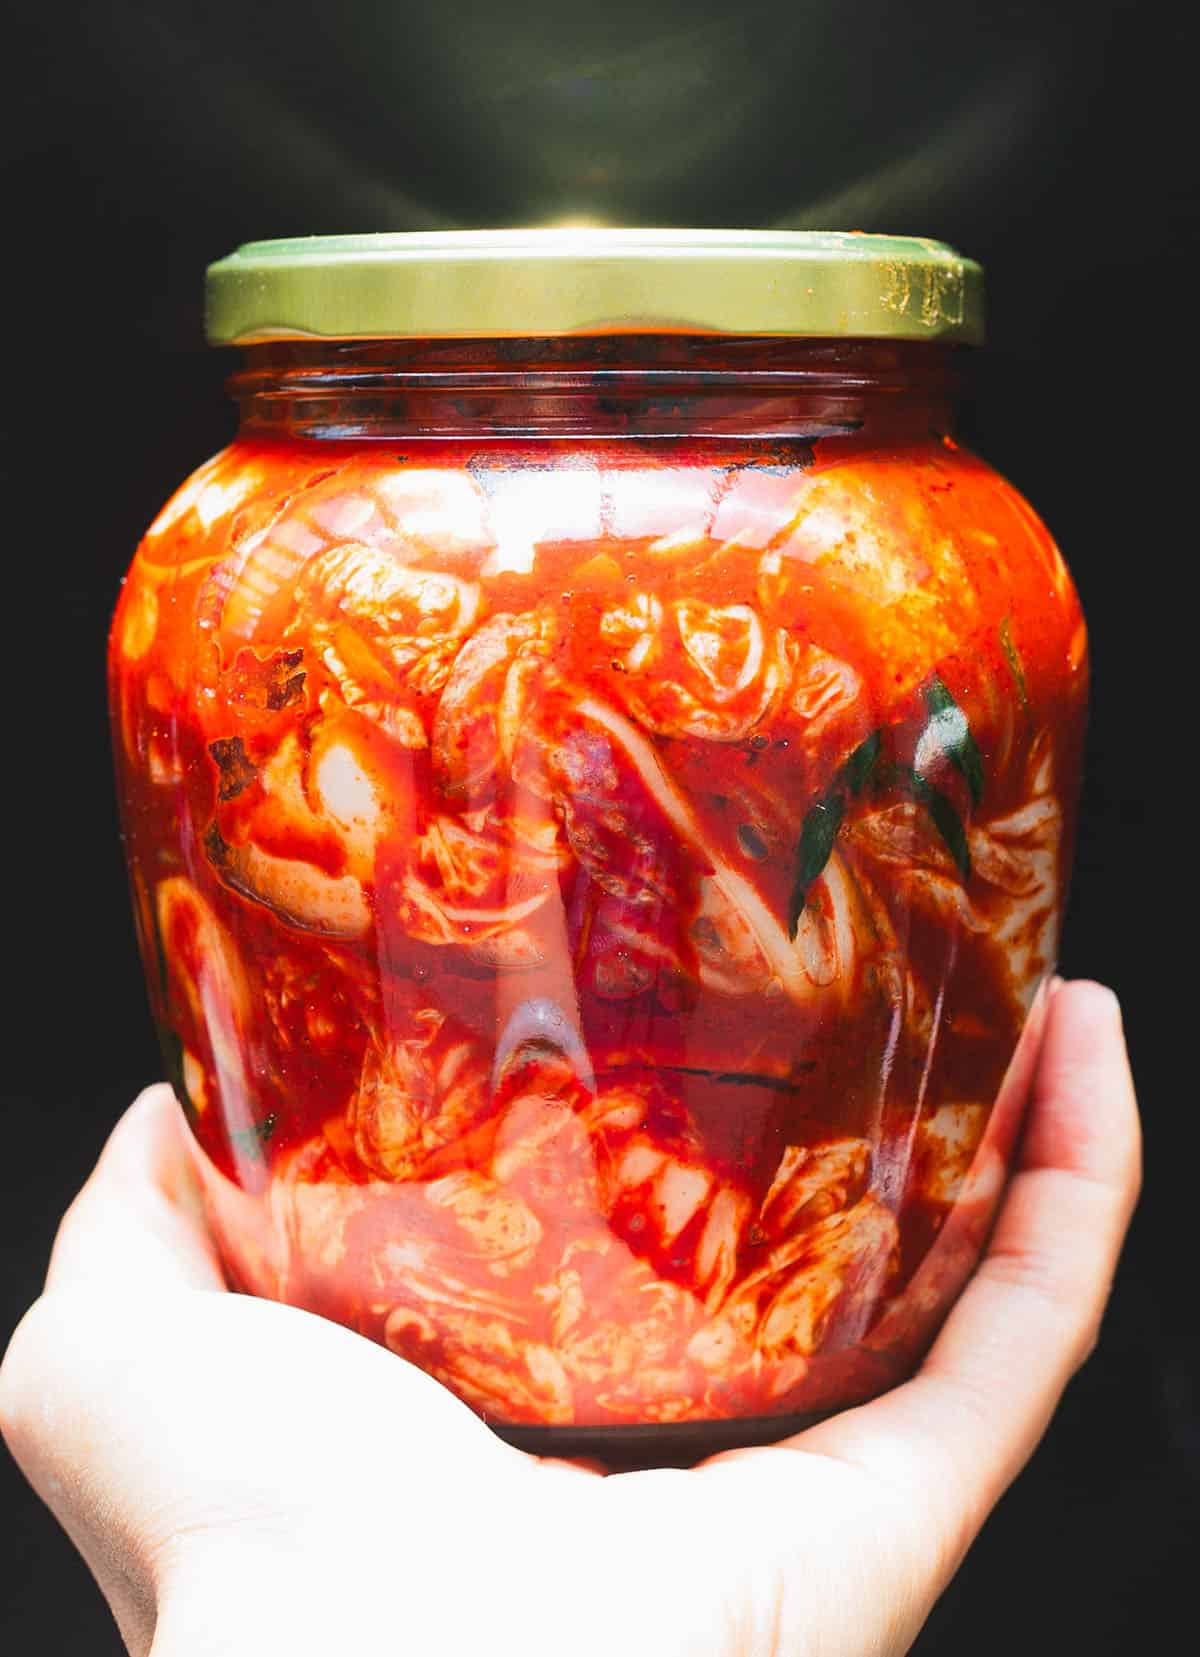
    Hands holding a glass jar packed with homemade kimchi

    In the vast landscape of kimchi recipes, this one stands out for three reasons:

    1. Authenticity First: This recipe honors the time-honored techniques and authentic ingredients that define traditional kimchi. From the spice blend to the layering of flavors, it captures the true essence of the original.

    2. Perfect Balance of Flavors: The marriage of heat, tanginess, and umami is carefully calibrated. Nothing overpowers — everything harmonizes.

    3. Clear Instructions for Any Level: I give this recipe to local Mexicans here in Puebla and they absolutely love it. If someone with zero kimchi background can nail it, so can you.

    Two glass jars of fermenting traditional kimchi

    Ingredients

    Napa Cabbage

    The non-negotiable base of any kimchi. Always choose the freshest Napa cabbage available — no brown spots, leaves that are crisp and slightly green and yellow at the tips.

    • Why it matters: Fresh cabbage retains the crunch that makes kimchi satisfying. Wilted cabbage produces a mushy result no amount of seasoning can fix.

    Pear

    Pear contributes natural sweetness, aids fermentation by feeding beneficial bacteria, and enhances the overall flavor depth of the paste.

    • Why it matters: The enzymes in pear help tenderize the cabbage and balance the heat of the gochugaru, producing a rounder, less aggressive spice.

    Apple

    Blended into the porridge, apple enhances flavor and improves the consistency of the paste — it makes it smoother and more spreadable.

    • Why it matters: Apple adds a subtle sweetness and body to the paste that pear alone does not quite achieve.

    Radish

    The more vegetables the better. I grow my own radish, which is why you see a variety of colors in my bowl. Any radish works. Traditionally Korean kimchi uses large white Korean radish (mu). I often use Red Meat or Purple Daikon varieties.

    • Why it matters: Radish adds crunch, slight bitterness, and a peppery note that contrasts beautifully with the savory paste.

    Carrots

    Carrots add crunch and a gentle sweetness to the kimchi. I like to add them generously, but adjust to your preference.

    • Why it matters: They balance the heat and provide a visually appealing color contrast in the jar.

    Sea Salt

    I highly recommend natural sea salt over table salt. Table salt contains anti-caking additives that can interfere with fermentation and produce an off taste. If you are investing this much effort, use better salt.

    • Why it matters: Salt draws moisture out of the cabbage through osmosis. That extracted liquid is what creates the brine. Without the right salt, fermentation is compromised.

    Gochugaru (Korean Red Pepper Flakes)

    The defining ingredient. Gochugaru is a Korean red pepper powder with a coarse texture that contributes both heat and a distinctive fruity, smoky flavor unique to kimchi. Regular chili powder or cayenne are not substitutes.

    • Why it matters: No other chili produces the same color, heat profile, or flavor. Gochugaru is what makes kimchi taste like kimchi.

    Fish Sauce

    Fish sauce elevates the kimchi’s umami depth dramatically. Brand matters — not every bottle smells or tastes the same. I use Three Crabs fish sauce. My mom always said “buy the three crabs!” — and she was right.

    • Why it matters: Fish sauce provides the savory backbone that keeps the kimchi’s flavor complex and addictive even as it ferments over weeks.

    Fish Paste

    Traditional Korean kimchi uses dried anchovies soaked and blended in. My shortcut is LEE KUM KEE Fish Paste — it delivers that same rich depth in far less time.

    • Why it matters: Fish paste adds layers of umami that you cannot achieve with fish sauce alone. It is the flavor insurance policy in this recipe.

    Julienned scallions, radish, carrot and chives in a green bowl for kimchi

    Professional Tips for Perfect Kimchi

    These five tips will elevate your kimchi from good to extraordinary.

    Pro Tip #1: Be Generous with the Salt

    Use coarse or natural sea salt rather than fine table salt. Coarse salt adheres better to the cabbage, drawing out moisture more effectively and ensuring a controlled salting process. I recommend this Natural Sea Salt.

    Pro Tip #2: Press Down on the Cabbage

    When pressing salted Napa, apply even pressure to ensure uniform salting. Use your hands or a flat kitchen tool to press gently but firmly. I normally flip a large glass dish and weight it down with a jar of water or canned food.

    Pro Tip #3: Get the Porridge Right

    • Ensure the porridge has a smooth, lump-free consistency. Use a whisk or sieve to achieve a velvety texture — this helps the seasoning distribute evenly throughout every leaf of cabbage.

    • Most importantly: allow the porridge to cool completely before adding it to the kimchi mixture. Hot porridge wilts the vegetables and destroys the crunch you are working hard to preserve.

    Pot of red chili paste made with rice porridge for kimchi

    Pro Tip #4: Wear Gloves

    Essential — not optional. Gochugaru stains everything and the garlic-fish paste combination will linger on your fingertips for the rest of the day regardless of how much soap you use. Use disposable nitrile gloves.

    A gloved hand mixing vegetables with chili paste in a green bowl

    Pro Tip #5: Store in Glass Containers

    Glass containers have clear advantages. The red marinade will permanently stain plastic containers. Glass also does not absorb BPA or other plasticizers — even BPA-free plastics can leach over time. A dedicated kimchi container is a good option for storage. It keeps fermentation controlled and makes a huge difference in shelf life and flavor consistency.

    Hands holding a large glass jar filled with kimchi

    Frequently Asked Questions

    How long does kimchi last in the fridge?

    Fresh kimchi (just made, minimal fermentation) lasts 2–3 weeks in the refrigerator. Moderately fermented kimchi — after a few weeks — keeps for another 2–3 months. Fully fermented kimchi can last 6 months or more. Fermentation itself acts as a natural preservative. Always use clean utensils when serving to avoid introducing contaminants.

    Does kimchi need to ferment before eating?

    No. You can eat kimchi immediately after making it — fresh kimchi has a bright, lightly spicy, crunchy quality that many people love. As it ferments it becomes tangier, softer, and more complex. Both stages are delicious; they are just different experiences.

    Can I make kimchi without fish sauce to keep it vegan?

    Yes. Substitute the fish sauce with soy sauce or coconut aminos, and omit the fish paste. Add a bit more gochugaru and garlic to compensate for the lost depth. The kimchi will taste slightly less complex but is still excellent and fully vegan.

    Why is my kimchi too salty?

    Insufficient rinsing after the salting step is the most common cause. After the 2-hour salt press, rinse the cabbage thoroughly under cold running water at least 2–3 times and taste a small piece before proceeding. It should taste pleasantly salty — not aggressively so.

    Can I use regular cabbage instead of Napa?

    Traditional kimchi requires Napa cabbage — its wide, tender leaves hold the paste and allow proper fermentation. Regular green cabbage is too tough and does not ferment the same way. Napa cabbage is widely available in most Asian grocery stores and increasingly in mainstream supermarkets.

    How do I know if my kimchi has gone bad?

    Trust your senses. Signs of spoilage include unusually foul odors beyond the typical fermented smell, slimy texture, unusual discoloration like gray or black patches, or visible mold. Properly fermented kimchi has a tangy, slightly funky smell but should never smell putrid. When in doubt, discard it.

    Love fermented and preserved foods? Also try our steam preserved vegetables with Zha Choy and pork, our homemade sashimi guide, and our vegetarian mango soy ceviche.

    Bowl of freshly mixed traditional kimchi with red chili paste

    Traditional Kimchi

    Our traditional kimchi recipe is basic, easy, and super delicious. From 1lb to 10lbs, we make it all the time for family and friends. We have all the details on how to make it, and some professional tips to get you started almost guaranteeing a delicious results!
    Prep Time 45 minutes
    Total Time 2 hours 45 minutes
    Servings: 20 servings
    Course: Side Dish
    Cuisine: Korean
    Calories: 45

    Ingredients
      

    Salting Cabbage
    • 2.7 kg napa cabbage
    • ½ cup natural sea salt
    Porridge
    • 2 cups water
    • 2 tbsp sweet rice flour
    • 2 tbsp sugar
    Vegetables
    • 2 cups radish matchsticks
    • 1 cup carrots matchsticks
    • 7-8 green onion chopped into quarters
    • 3 pears core taken out and thinly sliced
    Seasoning
    • 12 cloves garlic
    • 2 tsp ginger grated
    • 1 white onion, medium minced
    • ½ cup fish sauce
    • 3 tbsp shrimp paste
    • 1 apple peeled and core taken out
    • 1¼ cups hot pepper flakes

    Equipment

    • 3-4 non-reactive large metal or plastic bowls
    • gloves
    • glass jars

    Method
     

    1. Split the cabbages in half and give it a good rinse especially close the bottom of the cabbage and the out layers.
    2. Put the cabbage in a large container/basin and rub salt all over the between the leafs. Arrange all the cabbage in a large basic and place a large plate on top. The plate needs to cover the whole basin. Add some cans or jugs of water on top. Let that sit for 2 hours. Remember to flip occasionally – every 30 minutes.
    3. While the cabbage is salting, make the porridge.
      Combine the water and flour and cook on medium heat for 10 minutes. Stir frequently with a balloon whisk. Slowly add the sugar and cook for 1 minute. Remove from the heat and let it sit on the counter until it is cool completely. Pour the porridge in a blender and add all the seasoning ingredients. The texture should be similar to a thin paste.
    4. After wash all the salt out of the cabbage. Split the cabbage half again and cut the core out. Let the cabbage sit in the strainer. You can test the cabbage if it's ready by tearing a piece to eat. the texture should be crunchy and salty at the same time.
    5. In another bowl, combine all the vegetables together. While wearing gloves, pour the spicy marinate into vegetables and mix well. Set aside.
    6. In a large basin that you used to salt the cabbage, spread the kimchi paste on each cabbage leaf. Open up the leafs between the cabbage and generously spread the marinate. Make sure each leaf is coated and even distribution.
    7. Once all the leaves are coated with the marinate, you can start to individually jar the kimchi separately. Pack the kimchi intoa clean, airtight container. Press hard and seal it. This can be eaten right after it is marinated.

    Notes

    SHELF LIFE
    The shelf life of kimchi in the fridge can vary based on factors such as the level of fermentation, storage conditions, and personal preferences for taste. Generally, kimchi can last for different durations depending on its stage of fermentation:
    1. Fresh Kimchi: If you’ve just made the kimchi and it hasn’t undergone significant fermentation, it can last for about 2-3 weeks in the refrigerator. During this period, the flavors are still mild, and the texture remains relatively crisp.
    2. Moderately Fermented Kimchi: As kimchi ferments further, it develops a stronger flavor and the texture may become softer. At this stage, which usually occurs after a few weeks in the fridge, it can last for an additional 2-3 months. The taste will continue to evolve during this time.
    3. Well-Fermented Kimchi: Fully fermented kimchi, with a tangy and complex flavor, can last for several months, sometimes even up to 6 months or more. While the texture may continue to soften, the fermentation process acts as a natural preservative, allowing the kimchi to maintain its quality for an extended period.
    It’s important to store kimchi properly to maximize its shelf life. Keep it in an airtight container to prevent exposure to air, which can lead to faster deterioration. Additionally, use clean utensils when serving kimchi to avoid introducing contaminants.
    Always trust your senses. If you notice any signs of spoilage, such as off odors, unusual colors, or a slimy texture, it’s best to discard the kimchi. While kimchi is known for its long shelf life, individual preferences for taste and texture play a significant role in determining when it is most enjoyable.
  • Preserved Salty Lemons

    Preserved Salty Lemons

    One jar of preserved salty lemons sitting in the back of your pantry quietly becomes one of the most powerful flavour tools in your kitchen. After one month of fermentation, these lemons transform into something bold, complex, and irreplaceable — a bright citrus-salt punch that makes steamed fish, roast chicken, and salad dressings taste like they were made by someone who knows a secret you do not.

    This post may contain affiliate links. If you purchase through these links, I may earn a small commission at no extra cost to you. Thank you for supporting Love & Harvest!

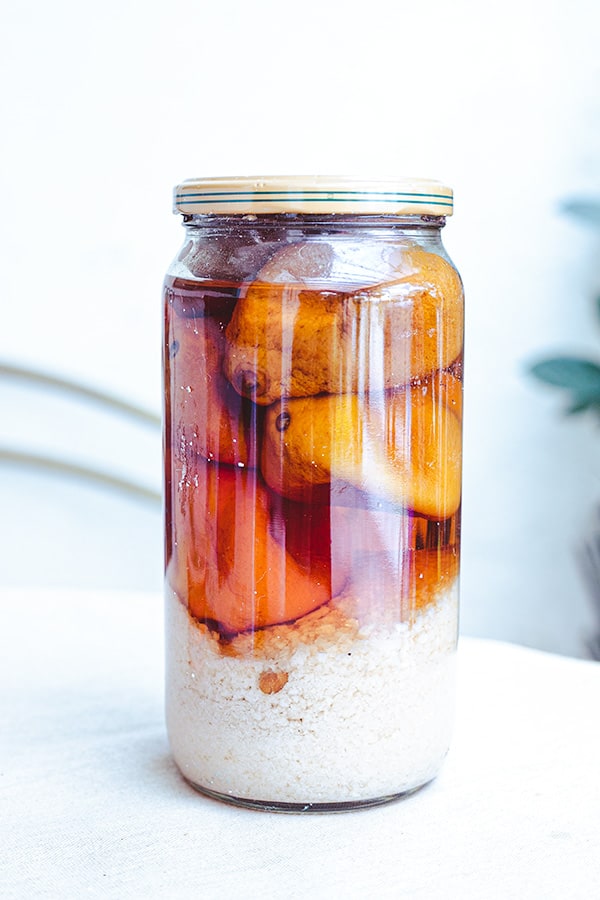
    Glass jar of preserved salty lemons in brine with salt settled at the bottom

    This post is all about making preserved salty lemons — a popular Cantonese seasoning agent for seafood, salad dressings, and roasted meats. Two ingredients, one jar, one month of patience.

    Once preserved, lemons take on a completely different character. Fresh lemon brightness gives way to a pleasantly tart, salty, floral intensity. The rind softens and becomes edible. The juice ferments into something more complex than any fresh citrus can offer. My mother has had a jar in the fridge for over 10 years. The older the better.

    Close-up of whole lemons preserved in salt inside a tall glass jar

    What Are Preserved Lemons?

    In a nutshell, preserved lemons are lemons packed in salt and left to ferment in a sealed jar over time. The slow fermentation breaks down the rind and transforms the flesh and juice into a bright, salty, floral ingredient unlike anything else. After one month, you have a seasoning agent with the power to completely elevate steamed fish, roast chicken, and seafood salads.

    Why You Will Love This Recipe

    • Only two ingredients — lemons and salt, nothing else needed
    • Virtually endless shelf life — properly fermented lemons keep indefinitely in the fridge
    • Flavour that cannot be replicated — fresh lemon juice is not a substitute for preserved lemon flavour
    • Great use for surplus lemons — if you have a lemon tree or a bumper harvest, this recipe is perfect

    Ingredients

    Lemons (Eureka or Meyer)

    Choose lemons that are high in both acid and sugar. Eureka lemons are the standard variety found in most grocery stores and work well. Meyer lemons are sweeter and thinner-skinned, making them ideal for eating the rind once preserved. If you can find organic lemons with no pesticides, use them — since we eat the preserved rind, organic matters more here than almost anywhere else in the kitchen.

    • Why they matter: The quality of the lemon directly determines the quality of the preserve. Under-ripe lemons produce flat, harsh results. Fully ripe, fragrant lemons produce a complex, layered flavour after fermentation.

    Sea Salt (coarse)

    Use coarse sea salt or kosher salt. Never use table salt with iodine — it is too harsh, overly salty, and the iodine can interfere with beneficial fermentation bacteria. Sea salt has natural minerals that complement the slow fermentation process.

    • Why it matters: Salt is both the preservative and the flavour base. Coarse sea salt dissolves slowly and creates the ideal brine concentration. Too little salt and you risk mould; too much and the lemons are inedibly salty.

    Recommended options: Celtic Sea Salt or Diamond Crystal Kosher Salt.

    Wide-Mouth Glass Jar (1L)

    Glass is non-negotiable for two reasons. First, the salt brine will corrode metal containers over time and transfer a metallic taste to the lemons. Second, glass allows you to see through the jar to check for any gaps in salt coverage — a critical step in preventing mould.

    • Why it matters: The jar is where the fermentation happens. A clean, dry, wide-mouth glass jar gives you visibility, prevents contamination, and does not interact with the brine.

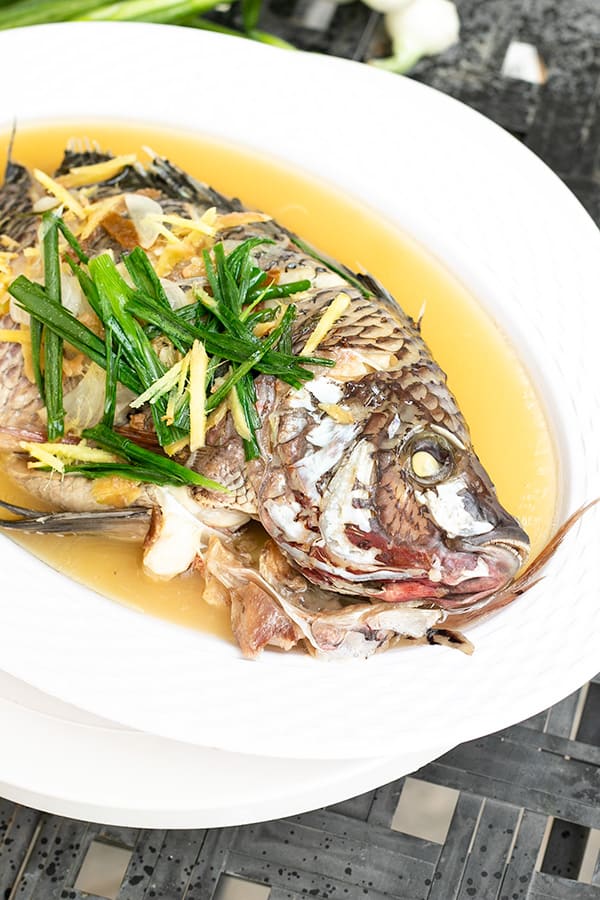
    Cantonese steamed fish with green onions in a soy broth

    Types of Lemons for Preservation

    Eureka or Meyer lemons are best. Eureka lemons are the most widely available and produce a classic preserved lemon flavour. Meyer lemons are sweeter and produce a more floral, complex result. Avoid thin-skinned decorative lemons — they do not have enough flesh and juice to preserve well.

    How Long to Wait Before Eating

    A minimum of 1 month. After one month the lemons are ready but will continue to improve with age. After 6 months to a year, the lemons turn brown inside the jar — this is normal and desirable. Brown preserved lemons are older, more pungent, and more complex than yellow ones. My mother’s 10-year-old jar is the proof.

    How to Use Preserved Lemons

    Scoop out a small piece with a clean spoon and chop it finely. It is very salty, so a little goes a long way. You can rinse the piece first if you want to reduce the salt intensity. The rind, flesh, and juice are all edible and usable. Try them in:

    • Steamed fish — the classic Cantonese application. See the Cantonese Steamed Soy Sauce Fish with Preserved Lemon recipe
    • Salad dressings — a preserved lemon allioli is below
    • Roast chicken or turkey — tuck pieces under the skin before roasting
    • Marinades — finely chopped into any citrus-based marinade

    Salad Dressing with Preserved Lemon

    Preserved Lemon Allioli:

    • 1 tbsp preserved lemon (with its salt), finely chopped
    • 2 garlic cloves, finely grated
    • 2 tbsp finely chopped mint
    • 1 cup olive oil

    Combine everything in a food processor or blender. Serve over salad.

    More Fermentation and Preservation Recipes

    If you love the process of fermentation and preservation, the Best Bread and Butter Pickled Cucumbers use a similar principle with cucumbers and brine. And for another great use of your preserved lemons, the Steamed Soy Sauce Fish with Preserved Lemon is the definitive showcase for this ingredient.

    Frequently Asked Questions

    Do I have to use whole lemons or can I cut them?

    Whole lemons are strongly recommended. When lemons are cut, the juice leaks into the salt brine immediately rather than slowly fermenting inside the lemon over time. The whole-lemon method produces a richer, more complex flavour and a better texture in the rind.

    What happens if I see white liquid or bubbling in the jar?

    Bubbling in the first two weeks is completely normal and expected — it is a sign the fermentation is working. If liquid spills out, simply clean the outside of the jar and the surrounding surface, open the lid, check that the salt still covers the lemons, and push them down if needed. Add more salt to the top if any lemon skin is exposed.

    How do I know if the lemons have gone bad?

    Pink or black mould on the lemons themselves (not the brine) is a sign of contamination, usually caused by insufficient salt coverage or introducing moisture with a dirty spoon. The brine itself may look cloudy — that is fine and normal. If you always use a clean, dry spoon and keep the lemons fully submerged under salt, spoilage is very rare.

    Why do the lemons turn brown after 6 months?

    The oxidation and continued fermentation process naturally darkens the lemon flesh and rind over time. Brown lemons are fully safe to eat and are actually considered more flavourful and complex than the younger yellow lemons. Do not discard them.

    Can I use the brine/salt liquid in the jar?

    Yes. The salty lemon brine that accumulates in the jar is incredibly flavourful. Use it in place of regular salt in salad dressings, marinades, or sauces. It is concentrated, so start with a small amount and adjust.

    Why do I need to cover the metal lid with plastic wrap?

    Salt brine is highly corrosive to metal. Direct contact with a metal lid will slowly erode it, transferring a metallic off-flavour to your lemons. A simple layer of plastic wrap between the jar and lid prevents this entirely.

    Jar of preserved lemons in brine on a white table

    Preserved Salty Lemons

    These preserved lemons with salt are the best seasoning agent for seafood. Strong in flavour and adds complex robustness to your cooking. Print Recipe Pin Recipe

    Equipment

    • 1L glass jar

    Ingredients

    • 4-6 lemons eureka or Meyer lemons
    • 1-1½ cup sea salt

    Instructions

    • Wash a clean glass jar with soapy warm water. Air dry or towel dry the jar and lid completely before using.
    • Wash the lemons with hot soapy water. Rinse and towel dry.
    • Squish, squeeze, and pack as many whole lemons as possible into the jar. Once full, pour salt into the jar, filling all gaps between the lemons.
    • Leave no gaps of air between the lemons — all gaps must be filled with salt. Turn the glass around and look through the sides to find any remaining air gaps. Pack them with salt. As the lemons ferment, liquid will release and dissolve the salt — this is expected as long as the lemons remain covered.
    • Cover the metal lid with a layer of plastic wrap before sealing. The plastic prevents the salt brine from corroding the metal and transferring a metallic taste to the lemons.
    • Store in a dark, cool area for a minimum of 1 month before using.
  • Steamed Soy Sauce Fish with Preserved Lemon

    Steamed Soy Sauce Fish with Preserved Lemon

    There are fish recipes, and then there is this fish recipe. Cantonese steamed soy sauce fish with preserved lemon is the dish my family in Hong Kong has made for generations — fall-off-the-bone tender, swimming in a golden ginger broth, with the preserved lemon cutting every trace of fishiness so cleanly your kids will ask for seconds before you sit down.

    This post may contain affiliate links. If you purchase through these links, I may earn a small commission at no extra cost to you. Thank you for supporting Love & Harvest!

    Steamed Soy Sauce Fish

    What Makes This Cantonese Steamed Soy Sauce Fish Special

    This steamed soy sauce fish is simple, quick, and lets the fish be the star. What sets it apart from every other steamed fish recipe is the preserved lemon.

    A widely popular seafood dish among Chinese families and restaurants, fresh fish is steamed with ginger and preserved lemon, then finished with a sizzle of hot oil before serving. The preserved lemon helps cut out that strong fishy taste so you get the clean, fresh fish flavour without the pungent smell — making it one of the most kid-friendly fish recipes you will ever make.

    steamed fish

    Why You Will Love This Recipe

    • Moist, soft, and fluffy texture — steaming guarantees a soft and flakey texture with tons of moisture and flavour.
    • Straightforward recipe — a relatively easy recipe with just a few things to keep in mind. Step-by-step photos guide you to a no-fail result.
    • No strong fishy taste — the preserved lemon cuts the oily fish taste and softens the strong fish smell. Suitable for children.
    • Addictingly delicious — steaming creates a beautiful thick lemon soup that is incredible on rice.

    steamed whole fish

    Hong Kong Cantonese Fish: A Cultural Staple

    Fish in Chinese culture represents abundance and increased prosperity. It is an essential dish for New Year, birthdays, and anniversaries. Hong Kong is a coastal city rich in seafood resources — back when it was a large fishing port and world exporter, fish became an easy everyday staple. This recipe comes from my family, who still use it today.
    We love this steamed soy sauce fish so much in our family. Kids are rarely excited about fish unless it is a fish stick — but this recipe is so good my kids constantly ask for it. They get genuinely excited when they know I am making Cantonese steamed soy sauce fish with preserved lemon.

    Ingredients Deep-Dive

    Tilapia Fish

    The best fish to use for this recipe is tilapia or halibut (if you are willing to splurge). Tilapia steams perfectly — it is firm enough to hold its shape yet soft enough to fall off the bone. Your fishmonger will descale and gut it for you. Always make sure the belly is cleaned well under the fins.

    • Why it matters: The right fish gives you that silky, fall-off-the-bone texture that defines this dish. Too thin a fish overcooks quickly; too thick and the center stays raw.

    Preserved Lemon

    This is the secret weapon. Preserved lemon provides salt, umami, and a citrus sharpness that no fresh lemon can replicate. Rub it inside the cavity and along the cuts — it penetrates the flesh as it steams and eliminates that pungent fishy smell entirely. You can make your own preserved salty lemons at home with just lemons and salt.

    • Why it matters: Without preserved lemon, you have steamed fish. With it, you have a Cantonese classic your family will request every week.

    Pick up a jar of preserved lemon if you do not have any on hand yet.

    Ginger

    Thinly slice fresh ginger — as thin as you can manage. Half goes inside the cavity of the fish, half rests on top during steaming. Ginger adds warmth and its own aromatic quality that pairs perfectly with soy sauce and lemon.

    • Why it matters: Ginger neutralises fishy odours during cooking while adding a gentle heat and fragrance that makes every bite interesting.

    Soy Sauce

    Added at the very end — never cooked into the fish. This preserves the fresh, bright soy taste. Cooked soy sauce takes on a bitter, heavier flavour that would overpower the delicate fish.

    • Why it matters: Timing the soy sauce correctly is what separates home cooks from Cantonese masters. Get a quality soy sauce — the flavour difference is real.

    Essential Steps for Restaurant-Quality Steamed Fish

    cantonese steamed fish

    1. Wash the Fish Inside and Outside

    Descale the fish — your fishmonger will do this for you. Once home, open the belly. You will see a grey residue: this is what causes strong fishy smell and taste. Use your fingers and fingernails to rub it all off. Then find the second pocket along the back of the spine, cut it open with a knife, and clean that out too.

    chinese steamed fish recipe

    2. Rub Preserved Lemon Inside and Outside

    Take 1 tbsp of preserved lemon to the chopping board. Chop it finely and rub with your finger to release the brine. Rub the lemon and salt inside the cavity and outside the fish, working it into all the cuts.

    steamed fish in light soy sauce

    3. Add Ginger to the Cavity

    Scrape the skin off a 1-inch piece of ginger with a knife. Slice it as thinly as possible. Place half inside the cavity; the other half rests on top of the fish while steaming. A quality fish sauce can be added as an optional finishing touch alongside the soy sauce.

    4. Steam the Fish

    Place the fish in a heat-proof bowl or deep dish that will catch the golden juice as it steams. Use a bamboo steamer or your Instant Pot — whichever fits the fish comfortably.

    calories in steamed fish with soy sauce

    Instant Pot Steaming Instructions

    1. Add about 2 cups of water to the pot and place the steaming basket inside. Place the fish in a bowl that fits inside the Instant Pot with enough room for steam to rise around it.

    2. Set the mode to “Steam” for 20 minutes. Place the fish in the bowl with ginger on top. Close the lid and turn the valve OFF.

    3. Once the timer goes off, release the valve.

    steamed fish fillet soy sauce ginger

    5. Quick Oil Fry Finish

    Take the fish out and place thinly sliced scallion (green parts only) on top. Heat 1/4 cup of canola oil in a pan until it just starts to smoke. Bring the fish to the sink or outside. Pour the hot oil directly over the scallion — the oil will sizzle loudly and smoke. Add 2 tsp of soy sauce and a dash of white pepper. Serve immediately.

    Professional Tips for No-Fail Steamed Soy Sauce Fish

    Tip 1: Add Soy Sauce at the Very End

    Cooked soy sauce develops a heavier, more bitter taste. Adding it fresh at the end keeps the soy sauce tasting bright and original — that is what gives this dish its clean, restaurant-quality finish.

    Tip 2: Serve Immediately

    Steamed soy sauce fish should always be eaten hot or warm. The gelatin-rich broth at the bottom turns solid at room temperature and loses its appeal. Eat it warm over a bowl of rice.

    Tip 3: Tilapia Is the Best Choice

    Tilapia is ideal for this recipe. Halibut works beautifully if you want to splurge. My economical mom sometimes uses a fish head for the same recipe — equally delicious.

    Related Cantonese Recipes

    If you love this steamed fish, you will also enjoy steamed preserved vegetables with pork — another family favourite that uses the same steaming technique. For a completely different take on fresh seafood flavours, try our homemade sashimi.

    Frequently Asked Questions

    What fish is best for Cantonese steamed fish?

    Tilapia is the most economical and forgiving choice — firm enough to hold up in the steamer yet soft enough to become fall-off-the-bone tender. Halibut is the premium option. Avoid very thin fish fillets as they overcook too quickly.

    Can I use fresh lemon instead of preserved lemon?

    You can, but you will lose the umami depth that preserved lemon brings. Preserved lemon adds salt and fermented flavour that fresh lemon simply cannot replicate. It is worth making a batch of your own preserved salty lemons — they last months in the fridge.

    How long do I steam the fish?

    Steam on high for 20 minutes for a whole tilapia around 1 kg. The fish is ready when the flesh flakes easily away from the bone with a fork. Do not overcook — even a few extra minutes will dry it out.

    Can I make this without an Instant Pot?

    Absolutely. A traditional bamboo steamer over a wok works beautifully and is what most Cantonese families use. Any steamer setup that fits the fish and allows steam to circulate around it will give you the same result.

    Why do I pour hot oil over the fish at the end?

    The hot oil sizzle is the signature Cantonese finishing technique. It cooks the raw scallion instantly, creating a fragrant aromatic oil that infuses into the fish. It also gives the skin a slightly crisp texture on the surface while the flesh stays tender.

    How do I store and reheat leftovers?

    Store leftovers covered in the refrigerator for up to 2 days. Reheat gently in the microwave or in the steamer for 3–4 minutes. The broth will re-liquefy as it warms. Avoid the oven — it will dry out the fish.

    Whole steamed fish with ginger and green onions in soy sauce broth

    Steamed Soy Sauce Fish with Preserved Lemon

    This Cantonese Steamed Fish with Preserved lemon is the best fall-off-the-bone fish recipe! It’s flakey soft and oh.em.gee. tasty. Print Recipe Pin RecipePrep Time:10 minsCook Time:20 minsCourse: Main CourseCuisine: ChineseKeyword: fish, preserved salty lemon, seafood, steamed fishServings: 4 people

    Equipment

    • steamer

    Ingredients

    • 1 kg tilapia fish descaled, gutted, and cleaned
    • 1 inch ginger thinly sliced
    • 1 tbsp preserved lemon
    • ¼ cup canola oil
    • 1 inch scallion thinly sliced (green parts only)
    • 2 tsp soy sauce
    • dash of grounded white pepper

    Instructions

    Clean the fish

    • Rinse the fish with cold tap water. Touch around the fish and descale any scales still stuck on the fish.
    • Open the belly. You will see a grey residue — this is what causes the strong fishy smell and taste. Rub it all off with your fingers and fingernails.
    • Find the second pocket along the back of the spine. Use a knife to cut it open. Clean it out and you will be able to touch the spine of the fish.
    • Take 1 tbsp of preserved lemon to the chopping board. Chop finely and rub with your finger. Rub inside the cavity and outside the fish along all the cuts.
    • Scrape the skin off a 1-inch piece of ginger. Slice as thinly as possible. Place half inside the cavity; the other half rests on top of the fish while steaming.

    Steaming the fish

    • Place the fish in a heat-proof bowl or deep plate that will catch the golden juice while steaming.Use the steamer you are comfortable with that also fits the fish. Steam on high for 20 minutes.

    Instant Pot Steaming Instructions

    • Add about 2 cups of water to the pot and place the steaming basket inside. Place the fish bowl inside the Instant Pot with enough room for steam to rise.Set the mode to “Steam” for 20 minutes. Place the fish with ginger on top. Close the lid and turn the valve OFF.Once the timer goes off, release the valve.

    Final Steps

    • Take the fish out and place thinly sliced scallion (green parts only) on top.Heat 1/4 cup of canola oil in a pan until it just starts to smoke. Place the fish near the sink or outside. Pour the hot oil directly over the scallion — it will sizzle loudly.
    • Add 2 tsp of soy sauce on top of the fish and a dash of white pepper. Serve immediately.
  • Cured Salmon Gravlax

    Cured Salmon Gravlax

    Cured salmon gravlax is one of the most impressive things you can put on a table, and one of the easiest. Salt, sugar, dill, and two days in the fridge — that is the entire process. No special equipment, no cooking, no smoke. Just chemistry doing its quiet work. Once you try it, smoked salmon from a package will never feel the same.

    This post may contain affiliate links. If you purchase through these links, I may earn a small commission at no extra cost to you. Thank you for supporting Love & Harvest!

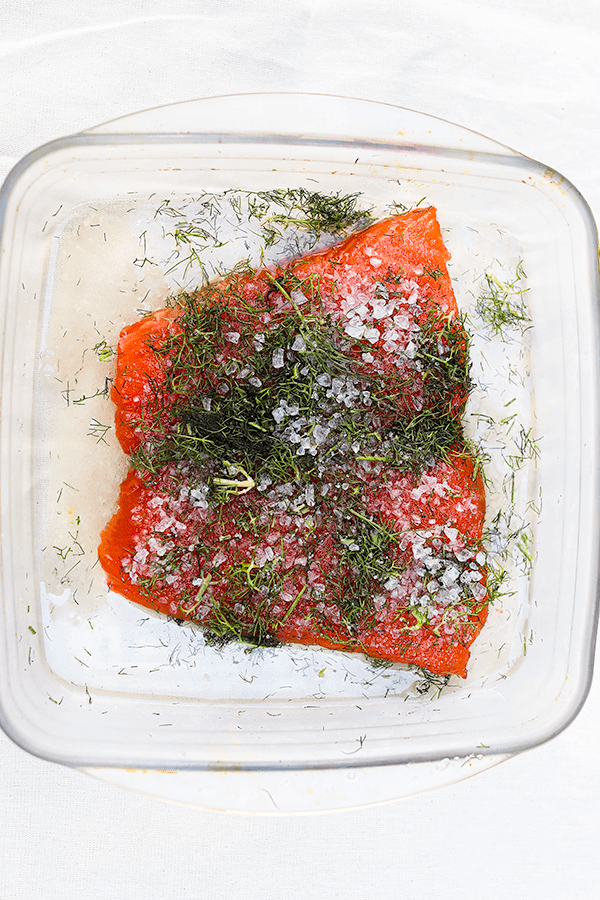
    cured salmon

    How Salt and Sugar Cure Salmon

    Salt and sugar preserve food through osmosis: they draw moisture out of the fish cells, raising the concentration of dissolved solids inside the flesh to a level where most harmful microorganisms cannot survive. Salt works by dehydrating bacterial cells. Sugar works by binding free water molecules, reducing the water activity of the fish to levels that inhibit spoilage. Together, they create an environment that is hostile to bacteria while simultaneously seasoning and firming the salmon into the silky, translucent product you know as gravlax.

    Ingredients Deep-Dive

    Salmon — Quality and Safety

    • Why farmed over wild: Farmed salmon is pellet-fed, which eliminates the risk of parasite-infected prey that wild salmon can carry. For raw preparations like gravlax, this matters. If using farmed salmon that is not labelled sashimi-grade, freeze it at -10°F / -23°C for at least one week before curing to eliminate any remaining parasite risk.

    A great choice: Pink Curing Salt can optionally be added in very small amounts for longer cures, though it is not required for a standard 36-hour gravlax.

    Coarse Sea Salt

    • Why coarse, not fine: Coarse salt crystals release salt more slowly as they dissolve, giving you a more controlled, even cure. Fine salt draws moisture too aggressively and can over-cure the outer layer while the interior is still under-cured.

    Sugar

    • Why sugar in a savoury cure: Sugar balances the salt’s harshness, contributes a subtle sweetness to the flesh, and accelerates the dehydration process by competing with salt for free water molecules. Most of the sugar washes off with the liquid after curing, so the final flavour is not sweet.

    Fresh Dill

    • Why dill is traditional: In Scandinavian curing tradition, dill is the signature herb for gravlax — its anise-like, grassy flavour pairs naturally with the richness of fatty salmon. Fresh dill delivers far more aromatic oil than dried.

    cured salmon gravlax

    Cure Time Options

    • 24 hours — light cure: softer texture, milder salt flavour, closer to sashimi
    • 36 hours — medium cure (recommended): balanced salt and sweetness, silky yet firm texture
    • 48 hours — hard cure: firmer, saltier, more concentrated flavour

    Why Use a Food Scale

    Because you are working with raw fish, precision in the salt-to-fish ratio matters for both safety and flavour. Measuring by volume cups is unreliable — coarse salt has very different density than fine salt. A food scale removes the guesswork. Use a flat-bottomed curing board or dish to catch the liquid the salt draws out during the cure.

    What to Serve With Cured Salmon Gravlax

    Gravlax is endlessly versatile. Serve it on toasted bread with cream cheese and capers, layer it in a bagel with red onion and lemon, toss it into a cold pasta salad, or use it as a topping on rice bowls. Try it alongside homemade sashimi for a full Japanese-inspired spread, or serve it with crispy panko-crusted baked salmon for a salmon-focused dinner party platter.

    Frequently Asked Questions

    Is homemade cured salmon gravlax safe to eat?

    Yes, when done correctly. The combination of salt and sugar inhibits microbial growth effectively. The critical safety steps are: use farmed salmon (not wild), freeze it for at least one week at -10°F / -23°C before curing if not sashimi-grade, use precise measurements, keep it refrigerated throughout the cure, and consume within 5–7 days of curing.

    What is the difference between gravlax and smoked salmon?

    Smoked salmon is cured and then cold-smoked to add a distinctive smoky flavour and firmer texture. Gravlax is cured only — no heat or smoke involved. The texture of gravlax is silkier and more raw-like, and the flavour is cleaner and more delicate. Gravlax is also significantly cheaper to make at home than the equivalent weight of smoked salmon from a store.

    Can I use regular table salt instead of coarse sea salt?

    Technically yes, but reduce the amount by about 20–25% because fine salt is denser and more compact than coarse. Over-salting with fine salt will produce an unpleasantly salty result. Coarse sea salt is strongly preferred for its slower, more controlled release.

    Can I cure salmon without dill?

    Yes. Dill is traditional but not structurally required. You can substitute other herbs — lemon zest with thyme, or a citrus cure with orange and fennel seeds are common variations. The salt and sugar remain the functional curing agents regardless of herbs.

    How long does cured salmon gravlax last in the fridge?

    After curing is complete and the salmon is rinsed and dried, it will keep in the refrigerator for 5–7 days tightly wrapped. Slice only what you need and keep the remainder wrapped to minimise oxidation of the cut surface.

    Can I freeze cured salmon gravlax after curing?

    Yes. Slice thinly, layer between parchment paper, and freeze in an airtight container for up to 2 months. Thaw in the refrigerator overnight before serving.

    Side of cured salmon gravlax in a dark baking tray

    Cured Salmon Gravlax

    Homemade Cured Salmon Gravlax that is easy and delicious. Using only a handful ingredients to make cured salmon that goes well with anything like a bagel with cream cheese or a poke bowl with all your favourite sides on top of rice. The options are endless!
    Course: Appetizer
    Cuisine: Scandinavian
    Calories: 195

    Ingredients
      

    • 1 kg fresh farmed salmon
    • 250 g course sea salt
    • 250 g sugar
    • ½ cup chopped fresh dill
    • black pepper (to taste)

    Equipment

    • food scale

    Method
     

    1. Rinse the salmon and pat dry with a paper towel. set aside.
    2. Combine the sugar, salt, and pepper
      together in a bowl and mix well.
    3. Using a sizeable non-reactive plate, place cling wraps on top and extra to cover the fish ( I normally use my large 2 quartz oblong baking dish, see example).
      However, for this example, I used my square non-reactive brownie pan to cure the salmon and to catch the water the salt and sugar will extract from the salmon.
    4. Lay half the bowl of salt and sugar on top of the plastic wrap and ¼ cup of the fresh dill. Spread it out so it touches all the surface area of the fish. It's okay to spread the surface area larger than the fish.
    5. Place the fish on top and add the remains, salt, sugar, pepper and dill on top. Carefully fold the plastic wrap around the fish and close off any open areas.Place a small plate or cutting board on top of the fish, and place a heavy can on top of the board.
    6. Place it in the fridge for 12 hours. Half way through the curing time (6 hours), flip the fish over. You will notice there's a lot of liquid that came out and its fine.
    7. Remember:
      24 hours for a light cure
      36 hours for a medium cure (we will be doing this one)
      48 hours for a hard cure
    8. After 12 hours, remove the fish from the fridge and rinse off all liquid and remaining crystals in the dish. Pat dry and return the fish back in the fridge for another 3-12 hours uncovered to dry out the surface a bit.
    9. (optional) Sprinkle another ¼ cup of dill on top for taste.
    10. Thinly slice the fish on an angle and serve on toasted bread. Squeeze some lemon on top.

    More Salmon and Seafood Recipes

  • Spicy Fermented Jalapeno Hot Sauce 🔥🔥🔥

    Spicy Fermented Jalapeno Hot Sauce 🔥🔥🔥

    If you have ever wanted to make your own hot sauce from scratch, this fermented jalapeño hot sauce is the place to start. It is tangy, sharp, and spicy — far better than anything you will find at the store — and the entire process is mostly hands-off. Your pantry will smell incredible while it works its magic over three months.

    This post may contain affiliate links. If you purchase through these links, I may earn a small commission at no extra cost to you. Thank you for supporting Love & Harvest!

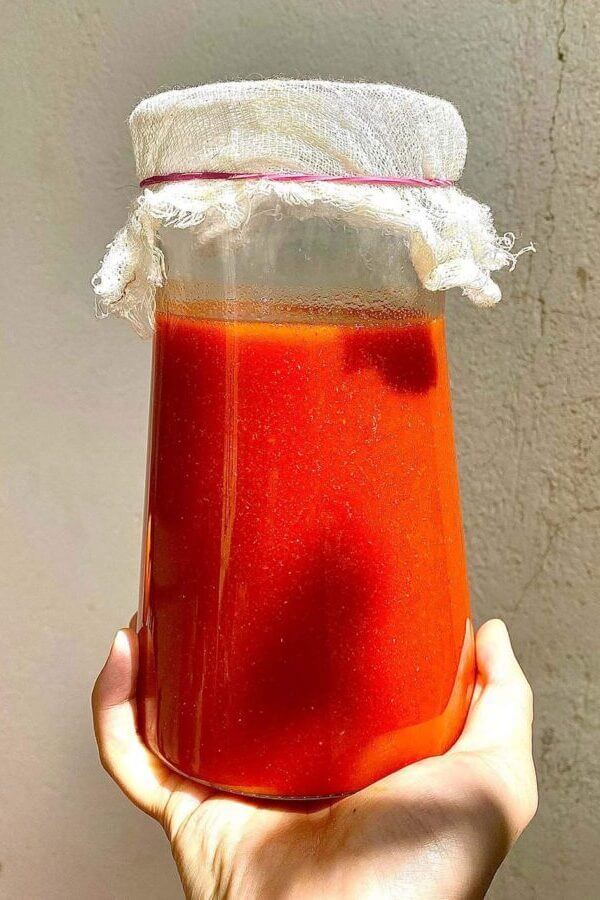
    fermented jalapeno hot sauce

    This fermented jalapeño hot sauce is the base for many other recipes on this site. My BEST Juicy Fried Chicken uses it as a brine — it tenderizes the chicken while layering in incredible flavor. Once you have a jar in your fridge, you will find yourself reaching for it constantly.

    Essentially hot sauces like Tabasco use tabasco peppers fermented in vinegar for three years. We are doing something similar but accelerating the process with a rice koji ball, which adds depth of flavor and shortens the wait.

    What Does This Fermented Jalapeño Hot Sauce Taste Like?

    The flavor is tangy, sharp, and spicy with a complexity that vinegar-only sauces simply cannot match. The texture is naturally thick without any cornstarch or xanthan gum, and the color is a deep, vibrant red. After three months of fermentation, the heat mellows into something everyone at the table can enjoy.

    How to Pick Your Chili Peppers

    Red jalapeños are milder and sweeter than many other Mexican chilies, making this hot sauce accessible even to those who do not normally eat spicy food. Green jalapeños produce a grassier flavor profile while red ones lean sweeter and fruitier. The chart below shows a range of options from mild to very hot — experiment and find your preference.

    Chart of chilies from hottest to mildest: Moruga scorpion, ghost, habanero, bird's eye, cayenne, manzano, serrano, jalapeño

    What Is Fermentation?

    Fermentation is a process where microorganisms — bacteria, yeast, or fungi — convert sugars and starches into alcohol or acids. In vegetables and fruits, those sugars convert to lactic acid, which acts as a natural preservative and creates complex, slightly sour flavors. Historically, fermentation was used to preserve foods long before refrigeration.

    Many everyday foods are fermented: kimchi, miso, beer, bread, cheese, and much more. Lacto-fermentation specifically transforms raw spicy flavor through time, adding sour pungency and eventually fruity organic compounds. It also takes the harsh edge off aggressive heat.

    Why Ferment the Hot Sauce?

    We use a rice koji ball to quicken fermentation and add more flavor depth. The three stages are: one month (first fermentation), then two more months with vinegar, then blending and straining to finish. It takes time for hot sauce to bloom into a full palette of flavors — the slow process is what gives it that unmistakable umami depth.

    fermented jalapeno hot sauce vinegar stages

    Why You Will Love This Recipe

    • Tangy, sharp, and spicy — a flavor profile no store-bought sauce can replicate.
    • Mostly hands-off — a few minutes of prep, then time does the work for you.
    • Versatile marinade and condiment — works on everything from fried chicken to eggs to tacos.

    Ingredients

    Jalapeño Chilies

    • Why they work: Red jalapeños are less aggressive than other Mexican chilies. After fermentation the heat mellows further, making this accessible to most palates. Their natural sugars ferment into fruity acid notes that give the sauce its signature tang.

    You can find fresh red jalapeños at any Mexican or Latin grocery store. If you cannot find them fresh, look for them canned: wide-mouth mason jars are ideal for storing and fermenting your batch.

    Koji Rice Ball

    • Why it matters: Koji (Aspergillus oryzae) is the same culture used to make miso, sake, and amazake. It produces enzymes that break down proteins and starches, creating umami depth and speeding up the fermentation timeline compared to a plain salt brine.

    A recommended koji ball is the Hang Tai Marine Shanghai Yeast Ball. It smells sweet and yeasty with hints of chestnut and citrus. Find it online or at any Asian supermarket.

    Distilled White Vinegar

    • Why it works: Added after the first month, vinegar lowers the pH and stabilizes the sauce for longer shelf life. It also contributes the sharp tang that makes this hot sauce so addictive on everything.

    Coarse Sea Salt

    • Why it matters: Salt draws moisture from the peppers, creates the brine that enables lacto-fermentation, and inhibits harmful bacteria while letting the good lactobacillus cultures thrive. Do not substitute table salt — the iodine can interfere with fermentation.

    A good set of wide-mouth mason jars and fermentation weights will keep your peppers submerged and your ferment safe.

    jalapeno hot sauce recipe finished

    Frequently Asked Questions

    How long does the fermented jalapeño hot sauce last?

    Once bottled and refrigerated after the final blend and strain, this hot sauce keeps for up to 6 months in the fridge. The acidity from fermentation and the vinegar keeps it shelf stable once refrigerated.

    Can I use green jalapeños instead of red?

    Yes. Green jalapeños produce a grassier, more vegetal flavor profile. Red jalapeños ferment into a sweeter, fruitier sauce. Both work — the choice comes down to the flavor you prefer.

    Do I have to use a koji rice ball?

    The koji ball is optional but highly recommended. Without it the fermentation is slower and the umami depth is less pronounced. If you cannot find one, a plain salt brine fermentation for an additional two to four weeks will compensate somewhat.

    Why does my hot sauce smell so strong while fermenting?

    Active lacto-fermentation produces CO2 and aromatic compounds — that is the fermentation doing its job. A pungent, slightly sour, savory smell is completely normal. If you see pink or fuzzy mold (not white surface kahm yeast, which is harmless), discard and start over.

    Can I use fermentation lids instead of cheesecloth?

    Absolutely. Fermentation lids with airlocks make the process even more hands-off by automatically venting CO2 without letting oxygen in. This reduces the chance of surface mold and is a great upgrade if you ferment often.

    Is this hot sauce good for people who cannot eat very spicy food?

    Yes. Red jalapeños are mild to moderate on the Scoville scale, and fermentation mellows the heat further. Most people who find Tabasco too aggressive report this sauce to be very manageable and far more flavorful.

    fermented jalapeno hot sauce

    Spicy Jalapeño Hot Sauce

    Tangy fermented hot sauce that is great on everything. Fermented with rice goji ball giving it a subtler and often more interesting taste than other hot sauce. Texture that is naturally thicker without the use of cornstarch or xanthan gum. This 3 month long fermented hot sauce also takes some of the edge off harsh, aggressive spiciness, which can be a good thing.
    Prep Time 20 minutes
    Total Time 90 days 20 minutes
    Course: Condiment
    Calories: 10

    Ingredients
      

    • 1 kg fresh red jalapeños
    • 5.5 TBSP course sea salt
    • 1 TBSP dried rice koji ball (link) or half a dried rice koji ball
    • 8 cups distilled white vinegar

    Equipment

    • 3.5L fermenting jar / glass jar
    • cheesecloth
    • nylon mesh

    Method
     

    1. Wash and cut the stems from the jalapeños. I suggest for this process to wear gloves to protect your fingers from the chili.
    2. Roughly chop the peppers. Put them in a large bowl and those them with 3.5 TBSP course sea salt.
    3. In small amounts, put the peppers to a food processor and pulse until they are finely chopped but not in liquid pureed form (roughly about 10 pulses). Transfer all the chopped peppers to your fermenting vessel and fold in the rice goji. If you're using the fermented rice ball, just cut half the ball, and using your hands, crush it with your fingers, and sprinkle the crumbs at the top of the chopped peppers. Fold it in.
    4. Place a square cheesecloth on top and sprinkle the remaining 2 TBSP sea salt at the top evenly at the top of the cheesecloth. Cover the vessel with nylon mesh or a double layer of cheesecloth and secure with elastic band.
    5. Place the vessel away from sun, in a dark and cool place. Ferment for one month.
    After One Month
    1. Remove mesh and lift away and discard cheesecloth. The peppers should be a bright red at this time. Pour the vinegar over the mash. Replace the mesh, and secure it again with an elastic band. Place the hot sauce in a cool place and ferment for two months.
    After Two Months
    1. In small batches, transfer the hot sauce to a high speed blender and blend on high until smooth, 2 minutes. In a large bowl, put a strainer on top, and strain the liquid through. Discard the solids.
    2. Ladle the hot sauce into two clean 1 quart canning jars. Wipe the rims and thread clean, place the lids and rings on the jars, and tighten the rings then refrigerate. It will last in the fridge up to 6 months in the fridge.

    Notes

    This hot sauce goes well with everything.

    If you enjoyed this recipe, try these next: Salsa Macha from Veracruz, Easy Mexican Salsa Verde, or Bread and Butter Pickled Cucumbers — all recipes that use fermentation or preservation to build deep, complex flavor.

  • Crusty Artisan Purple Yam Bread Recipe

    Crusty Artisan Purple Yam Bread Recipe

    There is something almost magical about pulling a purple loaf out of the oven — the color alone stops people in their tracks. This no-knead artisan purple yam bread is strikingly beautiful, but the flavor is what keeps you coming back: a subtle floral sweetness from the yam, a shattering crispy crust, and a cloud-soft interior. And the whole thing comes together with five ingredients and zero elbow grease.

    This post may contain affiliate links. If you purchase through these links, I may earn a small commission at no extra cost to you. Thank you for supporting Love & Harvest!

    fresh baked purple yam bread

    In its most essential form, bread is just flour, water, salt, and yeast. But why go basic when you can jazz it up? This purple yam bread recipe is a perfect beginner project. The results are so impressive you will want to make it again and again.

    A Note to First-Time Bakers

    Have you been browsing Pinterest dreaming about no-knead artisan loaves? That day is today. This recipe is so easy that no one will believe it is your first time. The technique requires almost no active work — just some stretch-and-fold, an overnight fridge rest, and a hot Dutch oven. When you break this loaf open, the colors and textures will genuinely delight you.

    Why You Will Love This Recipe

    • No-knead, easy technique — simple stretch and fold, then the fridge does the rest overnight.
    • Only 5 ingredients — you likely have most of them in your pantry right now.
    • Gorgeous to look at — the natural purple color makes this the most impressive bread at any table.
    • Unique flavor — the yam adds a subtle floral taste you have to experience to understand.
    • Soft and chewy texture — crispy crust, moist interior — the dream loaf.

    purple yam bread sliced

    Ingredients

    All-Purpose Flour

    • Why it works: All-purpose flour is accessible and forgiving — proof that you do not need specialty ingredients for outstanding results. If you have bread flour, use it; the higher protein content produces a chewier, slightly more structured crumb. King Arthur’s organic bread flour is a good option. The quality difference is noticeable.

    Purple Yam (Ube)

    • Why it works: Purple yam is a starchy root vegetable with a subtle floral, vanilla-like flavor. It adds moisture that clings to the gluten network, so the crumb stays soft long after baking. It also provides the stunning violet color — no food coloring needed. Find it fresh at Asian grocery stores or as purple yam powder (ube) online for convenience.

    Steam the yam for 15–20 minutes, let it cool on a plate to release extra moisture, then peel and mash smooth with a fork before adding to the dough.

    Instant Yeast

    • Why it works: Instant yeast activates without pre-dissolving and works reliably even in slightly cooler water. It is what gives the dough its lift and those beautiful air bubbles in the crumb. Anthony’s instant dry yeast packets come in 42 individual pouches — perfect for keeping freshness across multiple bakes.

    Sea Salt

    • Why it matters: Salt controls fermentation speed, strengthens gluten, and is the single biggest contributor to flavor in a lean dough. Use sea salt, not table salt — iodized table salt can slightly inhibit yeast activity. Celtic Sea Salt’s gourmet kosher grain is a great choice for both inside the dough and as a finishing sprinkle.

    Lukewarm Water

    • Why temperature matters: Warmer water (around 80–90°F / 27–32°C) activates yeast faster and speeds the initial rise. Too hot and you kill the yeast; too cold and the dough takes much longer to develop. Slightly warmer than your wrist is the right feel.

    purple yam bread dough fermented

    Professional Tips for a No-Fail Loaf

    Pro Tip 1 — Read the Full Recipe Before You Begin

    This bread is a two-day affair. Prepare the dough before bed, let it ferment in the fridge overnight, then bake the next morning. It requires very little active time but rewards readers who plan ahead.

    Pro Tip 2 — Use a Stand Mixer

    The stand mixer does all the mixing work so you truly do not need to knead. Use the dough hook at medium-low for 20 minutes. A KitchenAid stand mixer is a long-term kitchen investment that pays for itself across hundreds of bakes.

    Pro Tip 3 — Measure by Weight, Not Volume

    Bread baking is precise. Cup measurements vary widely depending on how loosely or tightly you pack the flour. A kitchen scale eliminates guesswork and guarantees consistent results every time. All measurements in this recipe are given in grams — follow them.

    Pro Tip 4 — Use a Dutch Oven

    A home oven cannot inject steam the way a professional bread oven can. A Dutch oven solves this by trapping the moisture released from the dough during the first 20 minutes of baking, which is what creates that shattering crust. The Lodge 5 qt cast iron Dutch oven is the one I recommend — it holds heat evenly and lasts a lifetime.

    Pro Tip 5 — Bake at Full Temperature

    Preheat to 475°F (245°C) with the Dutch oven inside. Bake covered for 20 minutes, then uncover for 30 minutes. The high heat is non-negotiable for a proper crust. Do not lower the temperature.

    Pro Tip 6 — Master the Stretch and Fold

    After the 3-hour bulk rise, gently deflate the dough and fold it: pull the two sides out and fold to center (like folding a letter), then pull the top and bottom and fold to center. Flip seam-side down and rotate the ball on the counter under your palms to build surface tension. Repeat three times total. This is what creates structure and the open crumb.

    purple yam artisan bread baked

    Frequently Asked Questions

    Can I use purple yam powder instead of fresh yam?

    Yes. Use about 2–3 tablespoons of ube powder mixed into the water before adding to the dough. The flavor will be slightly more intense and the color equally vivid.

    What if I do not have a Dutch oven?

    You can bake in a deep oven-safe pot with a lid, or place a metal bowl over the loaf for the first 20 minutes to trap steam. The crust will not be quite as dramatic but the bread will still be delicious.

    How do I know when the dough has proofed enough?

    After the 3-hour bulk rise at room temperature, the dough should have tripled in size and look bubbly. After the overnight fridge proof, it should have grown noticeably and feel cold and slightly domed in the container.

    Can I add seeds or grains to this loaf?

    Absolutely. Sprinkle seeds (sesame, poppy, sunflower) into the proofing basket before adding the dough. They will adhere to the crust during baking and add texture and flavor.

    Why did my bread come out flat?

    The most common causes are dead yeast (check the expiry date and water temperature), insufficient proofing time, or over-handling the dough during shaping (which pops the gas bubbles). Weigh your ingredients and follow the timing carefully.

    Can I make this with sourdough starter instead of instant yeast?

    Yes — this recipe adapts well to a sourdough approach. Check the how to make sourdough bread and how to make sourdough starter guides for reference. You will need to extend the fermentation time and adjust hydration slightly.

    Purple yam bread loaf cut in half to show the purple crumb

    Rustic Purple Bread

    Easy and beautiful loaf of bread made with purple yam. Crunchy and chewy on the outside and super moist on the inside. An fairly easy bread to make to impress anyone at the dinner table, and the best bread to wipe and clean off any sauces on the plates.
    Prep Time 30 minutes
    Cook Time 50 minutes
    Total Time 13 hours 20 minutes
    Course: Bread
    Calories: 175

    Ingredients
      

    • 400 g all purpose flour (3 cups of all purpose flour)
    • 310 g Luke warm water (307ml of Luke warm water)
    • 160 g steamed and cooked purple yam (3/4 cup of cooked purple yam)
    • 10 g sea salt (1 1/2 tsp sea salt)
    • 2 g instant yeast (1/2 tsp instant yeast)

    Equipment

    • stand mixer

    Method
     

    1. Wash and peel the purple yam. Put it in your steamer and steam for about 20 minutes until soft. Test it by poking it with a fork. If it goes in without effort it is done. If it requires force, then give it another 5-10 minutes.
    2. In a stand mixer, attach the dough hook. Add the flour and water together and combine until a light crumble appears. Put a towel or plastic wrap over the top and let it rest for 30 minutes. This allow the flour to fully hydrate.
    3. Meanwhile, put the fork in another bowl and mash it. Make sure all the big clumps are broken into smaller pieces. Don't worry if its not smooth, once it is in the stand mixer, it will break and smooth everything together. I sometimes like small chunks showing and are in the dough, so when it is baked, you can also see the purple yam pieces in the bread.
    4. Remove the towel or plastic wrap from the bowl, and add the mashed purple yam, sea salt, and instant yeast. Adjust speed to medium low for 20 minutes. The dough afterwards will look sticky and very elastic like. Let it sit for 3 hours until it has tripled in size.
    5. Dust the clean counter top with some flour, and carefully remove the dough on to the table. Gently deflate the dough, and give the dough the fold and stretch method. You're going to take the sides of the dough (imagine the dough is a face and you're going to pull the two ears of the face) stretch it out, and fold it where the nose is (the centre of the dough). Don't over stretch where you see the dough is tearing. Now you're going to take the top and bottom (top of the head and the chin of the face) and fold it again to the centre of the dough (the nose). Do this 3 times. Now flip it outside down (now the face is slapped onto the counter top) seaside down, and roll the dough around. You need to put some pressure at the bottom of the dough and pull the dough at the centre. You're going to feel some pressure and stretching of the dough (its honestly the best feeling when I do this part), and you're going to do this a few times until the dough becomes a beautiful ball. Do this 3 times.
    6. Now you need to find a vessel to put the dough in the fridge. If you have a bread proofing basket – use it. If not, just a regular bowl but find one that fits the dough but also some space for it to grow slightly. Add a piece of parchment paper and pat it down to the shape of the bowl. Gently flour the bowl and place the dough seaside down (wrinkly face down). Put plastic wrap at the top of the bowl and let it sit in the fridge overnight: at least 12 hours.
    7. When you're ready to bake, preheat oven to 475F/245C with the rack at the lower third. Insert the dutch oven with the lid on while it preheats. When the oven reaches the desire temperature, let the dutch oven sit there for an additional 20 minutes.
    8. Gently lift the dough out of the bowl by lifting on the sides of the parchment paper, and place it on the counter top. Place another new parchment paper beside the dough, and gently flip the dough on to the new parchment paper. The seaside should be facing up now.
      The goal here is to preserve and not disturb the air gas that can been developing in the fridge for 12 hours. the Less movement we can create when we place the dough into the oven, the better gas bubbles you'll get when you bake the bread. When the dough has been sitting in the fridge, all the gas built up is at the bottom of the dough which is the seaside is located. When we flip the bread upside down, the gas is invertiley at the top, so when we bake it at a high temperature, it will expand and get the beautiful air bubbles in the bread.
    9. Carefully take the dutch oven out, and carefully by lifting the parchment paper place the dough inside the oven with the lid on top. Bake for 20 minutes.
    10. After the first 20 minutes finished, lift the lid off and bake for an additional 30 minutes.
    11. Lift the bread out and let it cool completely on a drying rack. You need complete air circulation around the bread, including the bottom. Let the bread cool off completely before indulging.

    Notes

    You can easily add seeds and grains to the top of the bread easily by placing the desire seed and grain to the proofing basket before you add the dough inside.

    Love baking with fermentation? Try the Easy Homemade Focaccia Bread or the Savoury Rosemary Beer Bread next.

  • Easy Homemade Focaccia Bread

    Easy Homemade Focaccia Bread

    There is something deeply satisfying about making your own focaccia. The moment you poke those dimples in the dough, drizzle on the olive oil, and pull that golden, crackling sheet from the oven — it is an experience that no store-bought bread can replicate. This easy focaccia recipe is soft, airy, gloriously fluffy, and requires almost no skill. If you have a stand mixer and a little patience, you can make this tonight.

    This post may contain affiliate links. If you purchase through these links, I may earn a small commission at no extra cost to you. Thank you for supporting Love & Harvest!

    easy homemade focaccia bread golden crust

    Bread making has been part of human civilization for thousands of years. There is a reason it feels so deeply satisfying to bake your own loaf — it connects you to something ancestral and primal. I find real solace in baking bread for my family. The aroma fills the house, the kids want to help poke the dough, and the act of breaking into a fresh loaf together is a small ritual worth protecting.

    Why You Will Love This Focaccia

    • Easiest bread recipe — soft, easy to cut, with a crunchy salt-and-rosemary top that delivers incredible texture and flavor.
    • Flexible schedule — prepare the dough in the morning and bake at night, or let it ferment overnight and bake fresh the next day.
    • Fully customizable toppings — the sea salt blend is my favorite, but you can go savory with olives and sun-dried tomatoes, or keep it simple with just olive oil and herbs.
    • Kids love making it — poking the dimples in the dough before it bakes is genuinely fun for children of any age.

    focaccia bread dimples olive oil

    Topping Options

    The standard sea salt blend (salt, black pepper, rosemary, chili flakes) is my go-to and the base recipe below. But focaccia is one of the most creative-friendly breads you can make. Other options that work beautifully:

    • Olives, sun-dried tomatoes, rosemary, and olive oil
    • Capers, red onions, and olive oil
    • Oregano, thyme, cherry tomatoes, and olive oil
    • Fresh rosemary and flaky sea salt only (classic and elegant)

    focaccia bread topping options

    Ingredients

    Flour (All-Purpose and Whole Wheat Blend)

    • Why the blend works: All-purpose flour creates the open, airy structure while whole wheat adds fiber, density, and a nutty flavor complexity that plain white focaccia lacks. The higher protein in whole wheat also contributes to a slightly chewier, more satisfying bite. The ratio (815g white to 160g whole wheat) keeps the bread accessible without making it heavy.

    A kitchen scale is essential for this recipe — weighing your flour removes all the variability from cup measurements and ensures a consistent dough every time.

    Olive Oil

    • Why only olive oil: Focaccia is an Italian bread built on olive oil — both inside the dough and generously drizzled on top before baking. Olive oil contributes a distinctive fruity, slightly peppery flavor that is irreplaceable. Do not substitute canola, sunflower, or any neutral oil. The olive oil on top also creates the crispy, golden crust that defines great focaccia.

    Sea Salt

    • Why quality matters: The salt inside the dough controls fermentation and develops gluten. The salt on top — preferably a flaky, crunchy sea salt — creates the addictive textural contrast that makes you tear off just one more piece. The Celtic Sea Salt ground variety is excellent inside the dough; use a flaky finishing salt on top if you have one.

    Instant Yeast

    • Why instant yeast: Instant yeast activates immediately when it contacts the water and flour — no pre-dissolving required. It works reliably across a wide temperature range and gives you a predictable, consistent rise. The small amount (7g) in this recipe is intentional — less yeast means a slower, longer fermentation that builds far more complex flavor.

    focaccia bread sandwich made at home

    Professional Tips for a No-Fail Focaccia

    Pro Tip 1 — Patience Is Everything

    This recipe rewards patience above all else. There is almost no active work — the stand mixer kneads, the yeast rises, time does the fermentation. The more time you give the dough (especially the overnight fridge fermentation), the more complex and flavorful the final bread will be.

    Pro Tip 2 — Use a Stand Mixer

    The dough hook does all the kneading. This is what makes the recipe truly hands-off. Use the hook attachment only — not the paddle, not the whisk. Mix on medium speed: first 10 minutes with water and yeast, then 5 minutes after adding salt, then 5 more minutes after adding olive oil. A KitchenAid 7 Qt Pro Line stand mixer is a good option.

    Pro Tip 3 — Fermentation Container

    For the full-day counter fermentation, leave the dough in the stand mixer bowl covered with plastic wrap. For overnight fridge fermentation, transfer to a large clear container with a lid so you can monitor the rise without disturbing the dough. A 6 qt clear storage container works perfectly.

    Frequently Asked Questions

    Can I make this focaccia without a stand mixer?

    Yes, but be prepared for a workout. The dough is quite wet and sticky — that high hydration is what makes the bread so airy. If mixing by hand, work the dough for at least 15–20 minutes until smooth and elastic. Wet hands help prevent sticking.

    How do I know the focaccia is fully baked?

    The top should be deep golden brown and the edges should be pulling away from the pan slightly. The bottom (lift a corner with a spatula) should also be golden, not pale. The internal temperature should reach 200–210°F (93–99°C).

    Why does my focaccia come out dense instead of airy?

    The most common causes are: not giving the dough enough time to rise, using water that is too hot (kills the yeast), not measuring ingredients precisely (use a scale), or pressing the dough too hard when dimpling (be gentle — you want to preserve the gas bubbles).

    Can I freeze focaccia?

    Yes. Cool completely, slice, wrap individual pieces in parchment, then freeze in a zip-lock bag for up to 2 months. Reheat directly from frozen in a 375°F oven for 8–10 minutes.

    What is the best way to serve focaccia?

    Tear it and dip it into extra virgin olive oil mixed with balsamic vinegar. Use it as sandwich bread for picnics. Serve alongside soups and stews for dipping. It is also excellent with fresh mozzarella and roasted tomatoes.

    Can I make this recipe with sourdough starter?

    Absolutely. Replace the instant yeast with 150g active sourdough starter, reduce water slightly, and extend the bulk fermentation to 6–8 hours at room temperature or 12–16 hours in the fridge. See the sourdough bread guide for reference on starter ratios and timing.

    Golden homemade focaccia bread with herbs on a baking tray

    Easy Focaccia Bread

    Easy homemade focaccia bread that is soft, airy, and delicious with every bite. Great to use as a dipping bread with your favourite sauce or to make your favourite sandwich. It’s perfectly soft and fluffy and satisfyingly chewy. It’s sprinkled with lots of flaky sea salt herbs, and spice. Drizzled with extra olive oil, and soaks perfectly into all of those little classic holes that you have poked in the bread.
    Prep Time 15 minutes
    Cook Time 25 minutes
    Total Time 5 hours 40 minutes
    Course: Bread
    Cuisine: Italian
    Calories: 210

    Ingredients
      

    • 815 g white flour
    • 160 g whole wheat flour
    • 830 g warm water
    • 5 g sugar
    • 7 g instant dry yeast
    • 20 g sea salt blend (see below)
    • 20 g olive oil
    Sea Salt Blend (1 serving)
    • 1 tbsp sea salt
    • 1 tsp black pepper
    • 1 tbsp dried rosemary
    • 1 tbsp dried chili flakes
    Sea Salt Blend (small jar)
    • ¼ cup sea salt
    • 1 tbsp black pepper
    • 3 tbsp dried rosemary
    • 3 tbsp dried chili flakes

    Equipment

    • stand mixer
    • large 13 x 18" baking sheet

    Method
     

    1. in a stand mixer, add the flour and whole wheat flour together.
    2. Using a dough hook attachment, slowly add the warm water, yeast, and sugar together with the flour. Mix on medium speed for 10 minutes. Occasionally use a scraper and scrape down the sides so all the flour is well incorporated in the dough.
    3. Add the salt and mix for another 5 minutes.
    4. Add the olive oil and mix for another 5 minutes.
    5. In a large container, put the dough inside and drizzle some oil on top and on the side. Close the lid or wrap the top with plastic.
    To bake at night on the same day
    1. Start your process at 10am. Leave the dough on the counter top and let it rise for 3 hours. After punch the gas out of the dough and fold the dough. Let it rise again for another 2 hours.
    2. After the last rise, spray the baking sheet with oil, and fold the dough inside. stretch the dough until it is even and has stretch to all sides of the baking sheet. Wrap it in plastic and let it ferment on it's last rise for 2 hours.
    To bake in the morning for the next day
    1. Start your process anytime at night: In a 3-4qt container, generously spray with oil along with a drizzle of olive oil. Toss the dough and cover with a greased lid.
    2. Place in the fridge for 8-12 hours
    3. Spray oil in the large baking tray and fold the dough into the baking sheet. Stretch the dough until its even at the top and stretch the dough to all sides of the baking sheet. Wrap it in plastic and let it ferment on it's last rise for 3 hours.
    Baking
    1. Once the dough has finished the last rise. Preheat oven 500-550F.
    2. Once ready to go in the oven, drizzle generously with 20g of olive oil at the top and sprinkle the sea salt blend. Poke some holes using your fingers on the top of the bread evenly.
    3. Bake for 20-25 minutes.

    If you love baking your own bread, try the Crusty Artisan Purple Yam Bread or the Savoury Rosemary Beer Bread — two more recipes where simple ingredients and a little patience produce extraordinary results.

  • Smoked Sun Dried Tomatoes: Sun and Smoke in a Bottle.

    Smoked Sun Dried Tomatoes: Sun and Smoke in a Bottle.

    There is something deeply satisfying about turning a garden surplus into something preserved, smoky, and utterly unique. These Smoked Sun Dried Tomatoes capture the best of summer and the magic of fire — and once you make a jar, you will understand why they disappear so quickly.

    This post may contain affiliate links. If you purchase through these links, I may earn a small commission at no extra cost to you. Thank you for supporting Love & Harvest!

    sun dried tomatoes

    Why You Need This

    This is not your ordinary sun dried tomatoes recipe. We are adding another level of umami by smoking them — and the result is something that belongs on a cheese board, stirred into pasta, or given away as a gift.

    After making a batch, mine usually end up on my neighbour’s doorstep. If you’re not a gardener, no problem — this recipe works just as beautifully with Roma tomatoes from the store. Smoked sun dried tomatoes make a fantastic sauce especially with sausages and olives. There is a light hint of smoky flavour with subtle notes of sweet and savoury. And once preserved in olive oil and garlic, the texture becomes something truly special.

    Smoked sun dried tomatoes make a fantastic sauce especially with sausages and olives.

    Propagating Tomato Seeds Indoor

    By the end of winter, I usually start growing seeds indoors. Use potting soil in small containers and leave them by a south-facing window so the sun helps sprout the seeds faster. Once they have 3-5 leaves, it’s time to transplant them into a bigger area. Adding baking soda to the planting hole helps tomatoes develop a sweeter taste.

    Sun Drying the Tomatoes

    Pick the tomatoes when they are red, ripe, and plump. Wash them with a little soapy water and slice them as thin as possible — the thinner the slice, the faster they dry. Place them on a rack in the sun. Give the slices a few turns every few hours so they dry on both sides. Two days of full hot sun will completely dry the slices.

    If birds or animals are a concern, place another drying rack on top to protect them. Once dry, we can start the smoker.

    Sun Dried Tomatoes in a Dehydrator

    Yes, you can dry your tomatoes in a dehydrator. Give the tomatoes a good rinse and thinly slice them — the thicker the cut, the longer it takes. Set the food dehydrator to 150°F for up to 10 hours. You will know it is done when it has a leathery texture.

    sun dried tomatoes uses

    Ingredients

    Tomatoes

    Heirloom tomatoes are ideal because of their complex flavour and variety of colours. However, Roma tomatoes work just as well and are easier to find year-round.

    • Why they matter: The tomato is the star. The more flavourful and ripe your tomato, the better the end product. Thin slices are non-negotiable for even drying.

    Smoker Chips

    Choose hard wood that generates lots of smoke. Oak, hickory, pecan, cherry, and maple are all excellent choices. Use quality mesquite smoker chips for a bold, earthy smoke. Avoid soft woods like pine, spruce, or cedar — they produce acrid smoke that ruins the flavour.

    • Why it matters: The type of wood directly determines the smoke flavour that gets absorbed into the tomatoes. Hard woods burn clean and slow.

    Sea Salt

    Place natural sea salt at the bottom of the pan under the tomatoes during smoking. The salt naturally imparts saltiness into the tomatoes from below, and you also end up with a batch of smoked sea salt as a bonus.

    • Why it matters: The salt-and-tomato combination is a secret weapon. The tomatoes need seasoning and the salt gets infused with smoke — two results from one step.

    Smoking Tomatoes

    You do not need a professional smoker. A small portable charcoal grill works perfectly well. If you have a smoking device, simply follow the device instructions and skip to the preservation section below.

    How to Smoke on a Portable Grill

    Equipment Needed

    • Hard wood pieces or smoker chips
    • Small portable charcoal grill
    • Tongs, fire starter, fan, non-reactive pan

    Fire Setup

    Set up the fire and get the wood smoking. Start small with thin pieces of wood and cardboard (no tape or prints) or egg cartons to catch the flame. Build up larger pieces gradually until you have a steady heat. Once the fire slows down and the wood is glowing without large flames — similar to when charcoal is ready for BBQ — you are ready to smoke.

    Air Flow

    Airflow is the fine line between success and failure. Open the vents and occasionally fan air into the bottom of the grill. If you can place your hand near the pan comfortably, you have the right heat. If you need to jerk your hand away, it is too hot. Check every 20 minutes to feed the fire or adjust airflow.

    How to Preserve Sun Dried Tomatoes

    Once your tomatoes are smoked and cooled, preserve them in a clean glass jar (a reused jam jar works well). At the bottom, add 2 smashed garlic cloves. Pack the tomatoes in tightly. Add a pinch of smoked sea salt on top and fill to the brim with olive oil — every tomato must be submerged. Store in a dark place for 1 month. The longer they sit, the deeper the flavour.

    Sun Dried Tomatoes Uses

    Sun dried tomatoes are intense in flavour, so a little goes a long way. My favourite uses: pasta with olives, shrimp, and olive oil; finely diced into salad; or tossed with chicken. They are also spectacular on a charcuterie board.

    For more ideas on preserving and fermenting ingredients, check out my guide to Preserved Salty Lemons and my step-by-step Steam Preserved Vegetables with Pork.

    A hand holding a jar of smoked sun-dried tomatoes in oil

    Frequently Asked Questions

    How long do smoked sun dried tomatoes last?

    When properly preserved under olive oil in a sealed glass jar, smoked sun dried tomatoes last up to 3-4 weeks at room temperature in a cool dark place, or up to 3 months in the refrigerator. Always make sure the tomatoes remain fully submerged in olive oil and use a clean spoon each time you reach into the jar.

    Do I need a professional smoker to make this recipe?

    No. A small portable charcoal grill works perfectly well, as described in the instructions. The key is managing airflow and heat. If you have access to a dedicated smoker, even better — just follow its instructions and smoke the tomatoes for 1-2 hours at low heat.

    What type of wood is best for smoking tomatoes?

    Hard woods like oak, hickory, cherry, pecan, or maple all work beautifully. Mesquite adds a bold earthy flavour. Avoid soft woods (pine, cedar, spruce) which produce acrid-tasting smoke. If you want to add a citrus note, include a strip of dried orange or grapefruit peel — a technique common in Chinese smoking.

    Can I use a food dehydrator instead of sun drying?

    Yes. Set the dehydrator to 150°F (65°C) and dry the tomatoes for up to 10 hours. The result is the same leathery texture ideal for smoking and preserving. Thin slices dry much faster than thick ones.

    What can I do with the smoked sea salt left over from the process?

    It is extraordinary. Use it as a finishing salt on eggs, steak, roasted vegetables, popcorn, or anything that benefits from a smoky-salty note. Store it in a small sealed jar — it keeps indefinitely.

    Smoked Sun Dried Tomatoes

    Learn how to make and preserve your own bottle of unique sun dried tomatoes that is smokey and savoury. Goes well with pasta and toast. It is also easy to jazz it up by adding your desired herbs and flavouring to make it your own signature taste. Print Recipe Pin RecipePrep Time:20 hrsCook Time:1 hrKeyword: smokingAuthor: Love and Harvest

    Equipment

    • smoker / smoker device / small portable charcoal grill
    • hard wood pieces or smoker chips

    Ingredients

    • 1 pound organic heirloom tomatoes

    Smoking

    • 2 TBSP natural sea salt no table salt, find the good salt

    Preserving

    • 1 cup virgin olive oil
    • 1 TSP smoked sea salt
    • 2 clove garlic smashed

    Instructions

    • Hull and wash the tomatoes. Rinse with soapy water and dry them well.
    • Using a sharp knife, carefully cut the tomatoes in thin slices. Discard the seeds and place them on a cooling rack. Give them enough space where they are not touching each other. Place a baking sheet under to catch the juices.
    • Place them on a table in a spot that gets the most sun and is away from insects. If animals may get to them, place another cooling rack on top. Flip and check every few hours. Depending on your climate, it may take 1-2 days for the tomatoes to fully dry.

    Smoking with a small portable charcoal grill

    • Assemble the grill in an area away from anything flammable and have all essential items ready: wood pieces, tongs, fire starter, fan, and a fire extinguisher if possible.
    • Start your fire with small pieces of wood first, then add larger pieces. I sometimes add plain cardboard (no tape or prints) or egg cartons made from paper. Then add liquid fire starter or oil. Build up until you have a steady heat.
    • Once the fire slows down and the wood is exerting heat without large flames — similar to how charcoal is ready for BBQ — you’re ready to begin smoking. Using a non-reactive pan, spread the sea salt evenly at the bottom.
    • Place the sun dried tomatoes on top of the salt. Add some extra smoking wood chips to the fire and close the lid.
    • Open the vents and occasionally fan air into the grill. If you can place your hand near the pan comfortably, the temperature is right. If you need to jerk your hand away, it is too hot. Check every 20 minutes.
    • Smoke with the lid on for 1-2 hours. Remember to check every 20 minutes to see if you need to feed the smoke or adjust heat.
    • Once ready, the sea salt will be a mixture of black and brown. The tomatoes will be slightly brown and carry a noticeable smoky aroma.
    • Let it cool, and immediately jar it in a clean glass jar or mason jar.
    • Add the smashed garlic and 1 tsp smoked sea salt on top. Pack the tomatoes in tightly and fill to the top with olive oil. Make sure all tomatoes are fully submerged under the oil.
    • Store in a dark place away from sunlight for 1 month. The longer you wait, the more flavour develops.
    • Transfer the extra smoked sea salt to a separate jar — use it as a finishing salt on any dish.

    Smoking with a device

    • Follow the device instructions on how to activate smoke.
    • Using a non-reactive pan, place sea salt at the bottom and spread evenly. Add the sun dried tomatoes on top, then release the smoke into the compartment. Close the lid and trap the smoke inside.
    • Smoke the salt and tomatoes for 1-2 hours. For more smoke flavour, simply add more time.