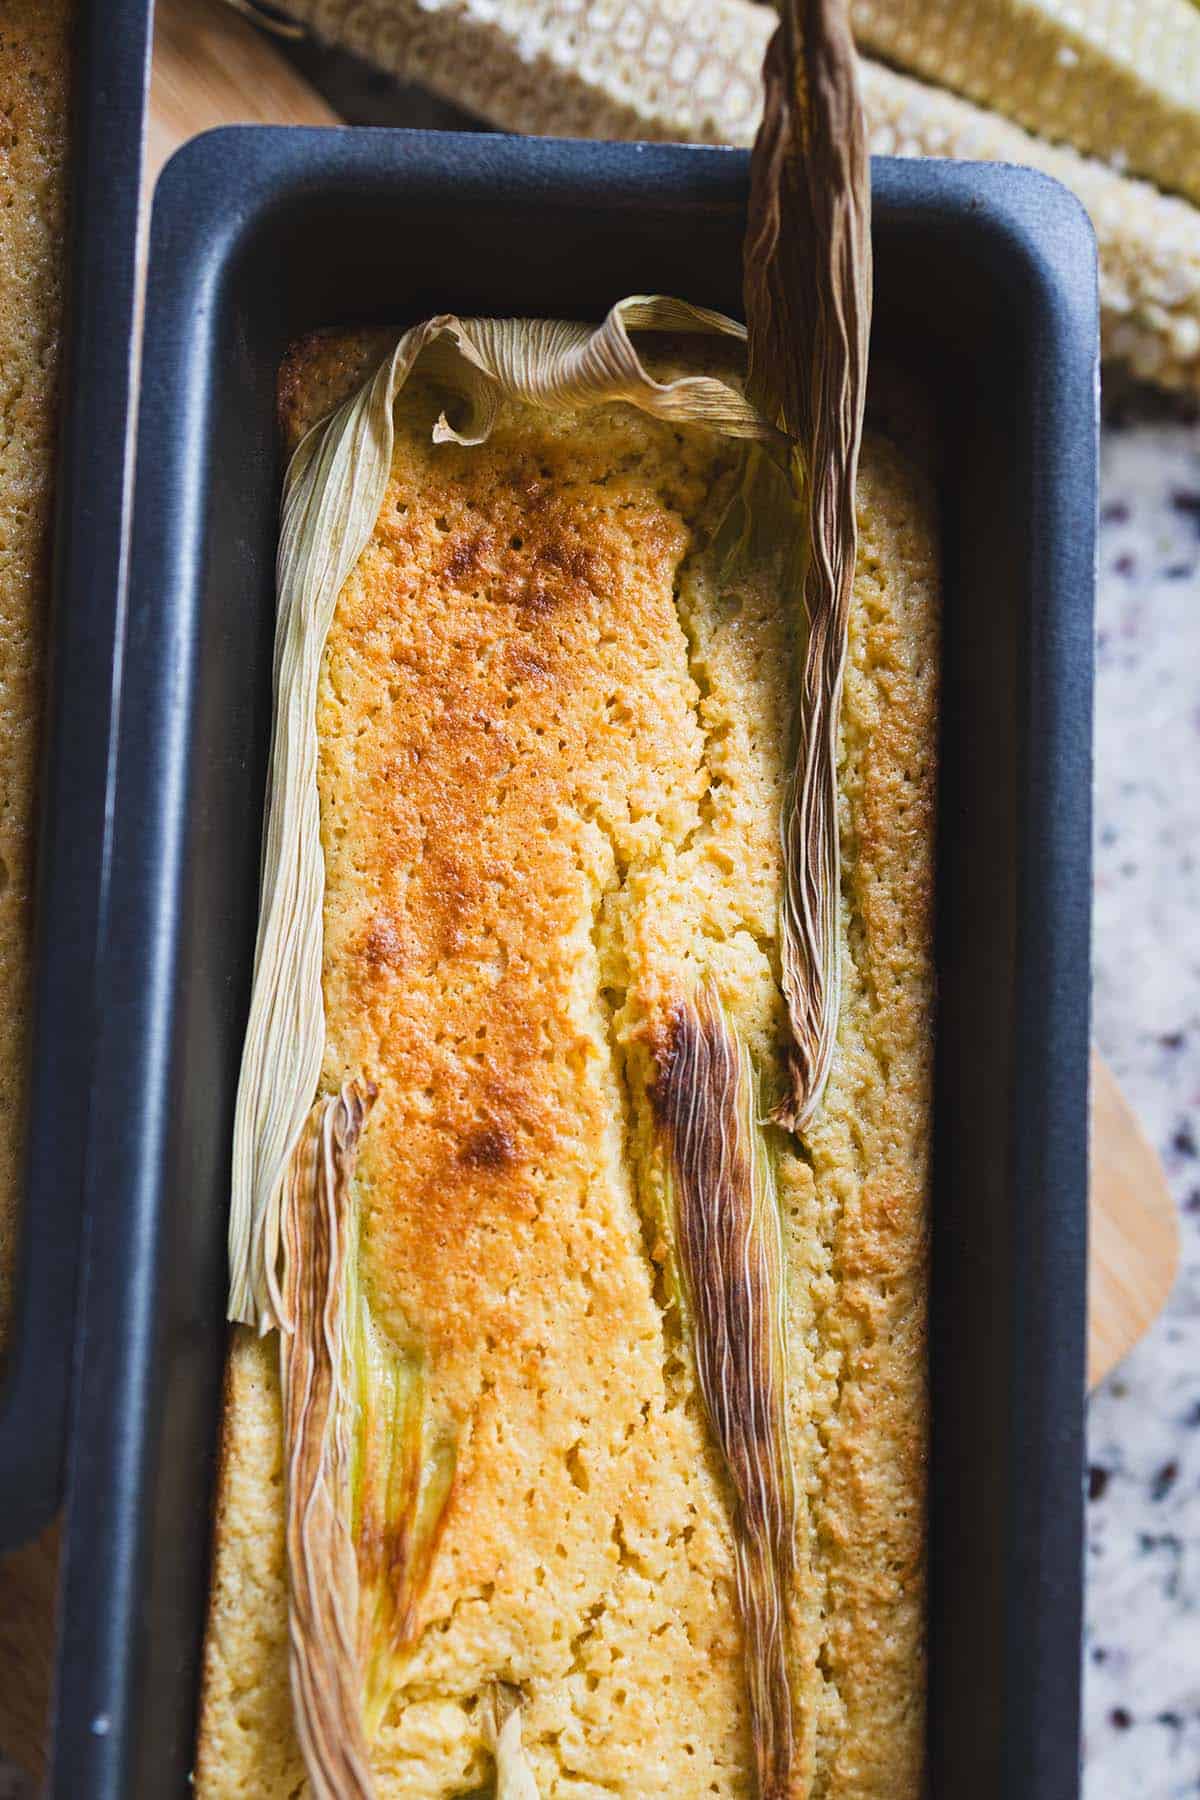
Category: dessert recipes

  • Mexican Corn Cake with Cream Cheese

    Mexican Corn Cake with Cream Cheese

    If you’ve ever tasted Pastel de Elote, you know it’s more than just a cake—it’s a story baked into every slice. Sweet, moist, and rich with the flavor of fresh corn, this 8-ingredient Mexican Corn Cake with Cream Cheese is one of those recipes that will transport you straight to a Mexican kitchen. Whether you serve it warm at a Sunday gathering or packed for a picnic, it never fails to impress.

    This post may contain affiliate links. If you purchase through these links, I may earn a small commission at no extra cost to you. Thank you for supporting Love & Harvest!

    Mexican corn cake sliced on a wooden board

    This easy corn cake recipe uses just 8 ingredients. Also known as pastel de elote, it’s made with fresh corn, eggs, condensed milk, vanilla extract, cream cheese, flour, baking powder, and a splash of milk. No mixer needed — just a blender.

    For a little twist, I added cream cheese to my version. It’s not traditional — the original recipe does not include it — but it gives the cake a richer flavour and smoother texture. Consider it my “jazzed up” pastel de elote.

    Mexican corn cake batter being poured into a pan

    Pastel de Elote: Mexico’s Beloved Corn Cake

    Pastel de Elote is more than a dessert — it’s a piece of Mexican culinary history. This cake beautifully blends indigenous corn traditions with Spanish colonial influence, resulting in something truly unique: semi-sweet, moist, and unlike any other cake you’ve tried.

    Fun Facts About Corn in Mexico

    In Mexico, there are more ways to prepare corn than kernels on a cob. That’s no surprise considering the country is the birthplace of maize, believed to have been domesticated in Mesoamerica thousands of years ago.

    • In Mayan mythology, people were said to be created from corn.

    • The region of Oaxaca still has one of the world’s highest diversities of native corn species.

    • Corn is the base of much of the Mexican diet — including desserts like Pastel de Elote.

    This corn cake is also an example of the historic merging of Spanish colonial and indigenous cuisines. Corn was plentiful, and villagers often gifted it to monks and nuns, who had access to sugar and eggs. It’s even suspected that a nun may have invented Pastel de Elote, using ingredients readily available at the time.

    Overhead view of Mexican corn cake

    Why We Love This Corn Cake Recipe

    There’s something magical about how Pastel de Elote balances sweet and savoury. It’s semi-sweet, never overpowering, with a moist, slightly sticky texture that feels like comfort in every bite.

    Depending on how it’s prepared, the cake can range from:

    • Moist and dense (especially when using canned corn), to

    • Light and fluffy (when made with fresh kernels).

    The colour can also vary depending on the type of corn used, making every cake a little bit unique.

    Mexican corn cake with cream cheese layer

    Ingredients for Mexican Corn Cake

    Ingredients

    Fresh Corn Kernels

    • The star of the dish — fresh corn brings natural sweetness and that unmistakable corn flavour. For a lighter, fluffier cake use fresh kernels from the cob; for a denser, moister result, canned (well-drained) corn works beautifully.

    Cream Cheese

    • The secret twist that makes this version extra special. Sliced cream cheese is layered in the middle of the batter before baking, creating a rich, luscious pocket that melts into the cake. Use a block-style cream cheese, not whipped. A 9-inch springform pan makes unmolding a breeze.

    Sweetened Condensed Milk

    • Adds a creamy richness and balanced sweetness that defines the classic pastel de elote flavour. Half a can (about 7 oz) is all you need — don’t substitute with regular milk or sugar.

    Eggs

    • Give the cake structure and help create a tender crumb. Use room-temperature eggs for a smoother batter that blends evenly.

    Vanilla Extract

    • Enhances the corn’s natural sweetness with a warm, aromatic note. Don’t skip it — it rounds out the flavour perfectly.

    All-Purpose Flour & Baking Powder

    • Flour provides body while baking powder gives the cake its gentle rise and soft, fluffy texture. Make sure your baking powder is fresh for the best results. A digital kitchen scale ensures your measurements are spot-on every time.

    Ingredients for Mexican corn cake laid out

    How to Make Mexican Corn Cake

    This recipe couldn’t be simpler — you just need a blender and a baking pan. Blend everything, pour half the batter, layer the cream cheese, pour the rest, and bake. The hardest part is waiting for it to cool! If you’re planning a full Mexican dessert spread, pair this with our Instant Pot Mexican Menudo for a complete feast, or try our Mexican Slow Cooker Pulled Pork for a savory main. And if you love easy blender cakes, our Dairy-Free Chocolate Cake is another crowd-pleaser.

    To make sure your cake bakes evenly, use a good blender to get a silky-smooth batter, and always grease your pan generously.

    Frequently Asked Questions

    Can I use canned corn instead of fresh?

    Yes, absolutely! Canned corn works well in this recipe — just make sure to drain it thoroughly. Fresh corn from the cob will give you a lighter, slightly sweeter result, while canned corn makes the cake a bit denser and moister. Both versions are delicious.

    Do I have to include the cream cheese?

    The cream cheese is optional but highly recommended! It’s not part of the traditional pastel de elote recipe, but it adds a rich, creamy layer inside the cake that makes it feel extra special. If you prefer the classic version, simply omit it.

    How do I know when the cake is done?

    Bake at 350°F (175°C) for 50–60 minutes. Insert a toothpick near the edge of the cake (not the center) — it should come out mostly clean. The center, where the cream cheese sits, will stay softer and that’s perfectly normal. The top should be golden brown.

    How should I store Mexican Corn Cake?

    Store leftovers in an airtight container in the refrigerator for up to 4 days. The cake tastes wonderful served slightly warm — just microwave individual slices for 20–30 seconds. You can also freeze slices (wrapped individually) for up to 2 months.

    Can I make this cake gluten-free?

    Yes! Substitute the all-purpose flour with a 1:1 gluten-free flour blend. Since corn is naturally gluten-free, this swap works very well in this recipe and the texture stays moist and tender.

    Slice of Mexican corn cake with cream cheese on a corn husk and a white plate

    Mexican Corn Cake with Cream Cheese

    This easy corn cake recipe only uses 8 ingredients. Corn cake, also known as pastel de elote, is made with ingredients such as fresh corn, eggs, flour, vanilla extract, cream cheese, baking powder, and a bit more.
    Prep Time 7 minutes
    Cook Time 40 minutes
    Total Time 1 hour 7 minutes
    Servings: 8 people
    Course: Dessert
    Cuisine: Mexican
    Calories: 230

    Ingredients
      

    • 2 cups fresh corn kernels  from about 3–4 cobs, or use canned/drained
    • 3 large eggs room temperature
    • ½ can sweetened condensed milk 7 oz / 200 g
    • 2 tsp vanilla extract
    • ½ cup all-purpose flour
    • 1½ tsp baking powder
    • ¼ cup whole milk
    • 100 g cream cheese  cut into thin slices for layering

    Equipment

    • highspeed blender

    Method
     

    1. Heat oven to 350°F (175°C). Grease and flour a 9×9 inch pan or loaf pan.
    2. In a blender, add corn kernels, eggs, condensed milk, vanilla, flour, baking powder, and milk.
      Blend until smooth and creamy (some small corn bits are fine for texture).
    3. Pour half the batter into the prepared pan. Arrange the cream cheese slices evenly on top of this first layer. Pour the remaining batter on top, covering the cream cheese completely.
    4. Bake for 50–60 minutes, or until golden brown and a toothpick inserted near the edge comes out mostly clean.
      (Note: The center where the cream cheese sits will remain softer.)
    5. Let the cake cool for at least 20 minutes before slicing, so the cream cheese filling sets slightly.
      Serve warm or at room temperature, with optional extra condensed milk drizzled on top.
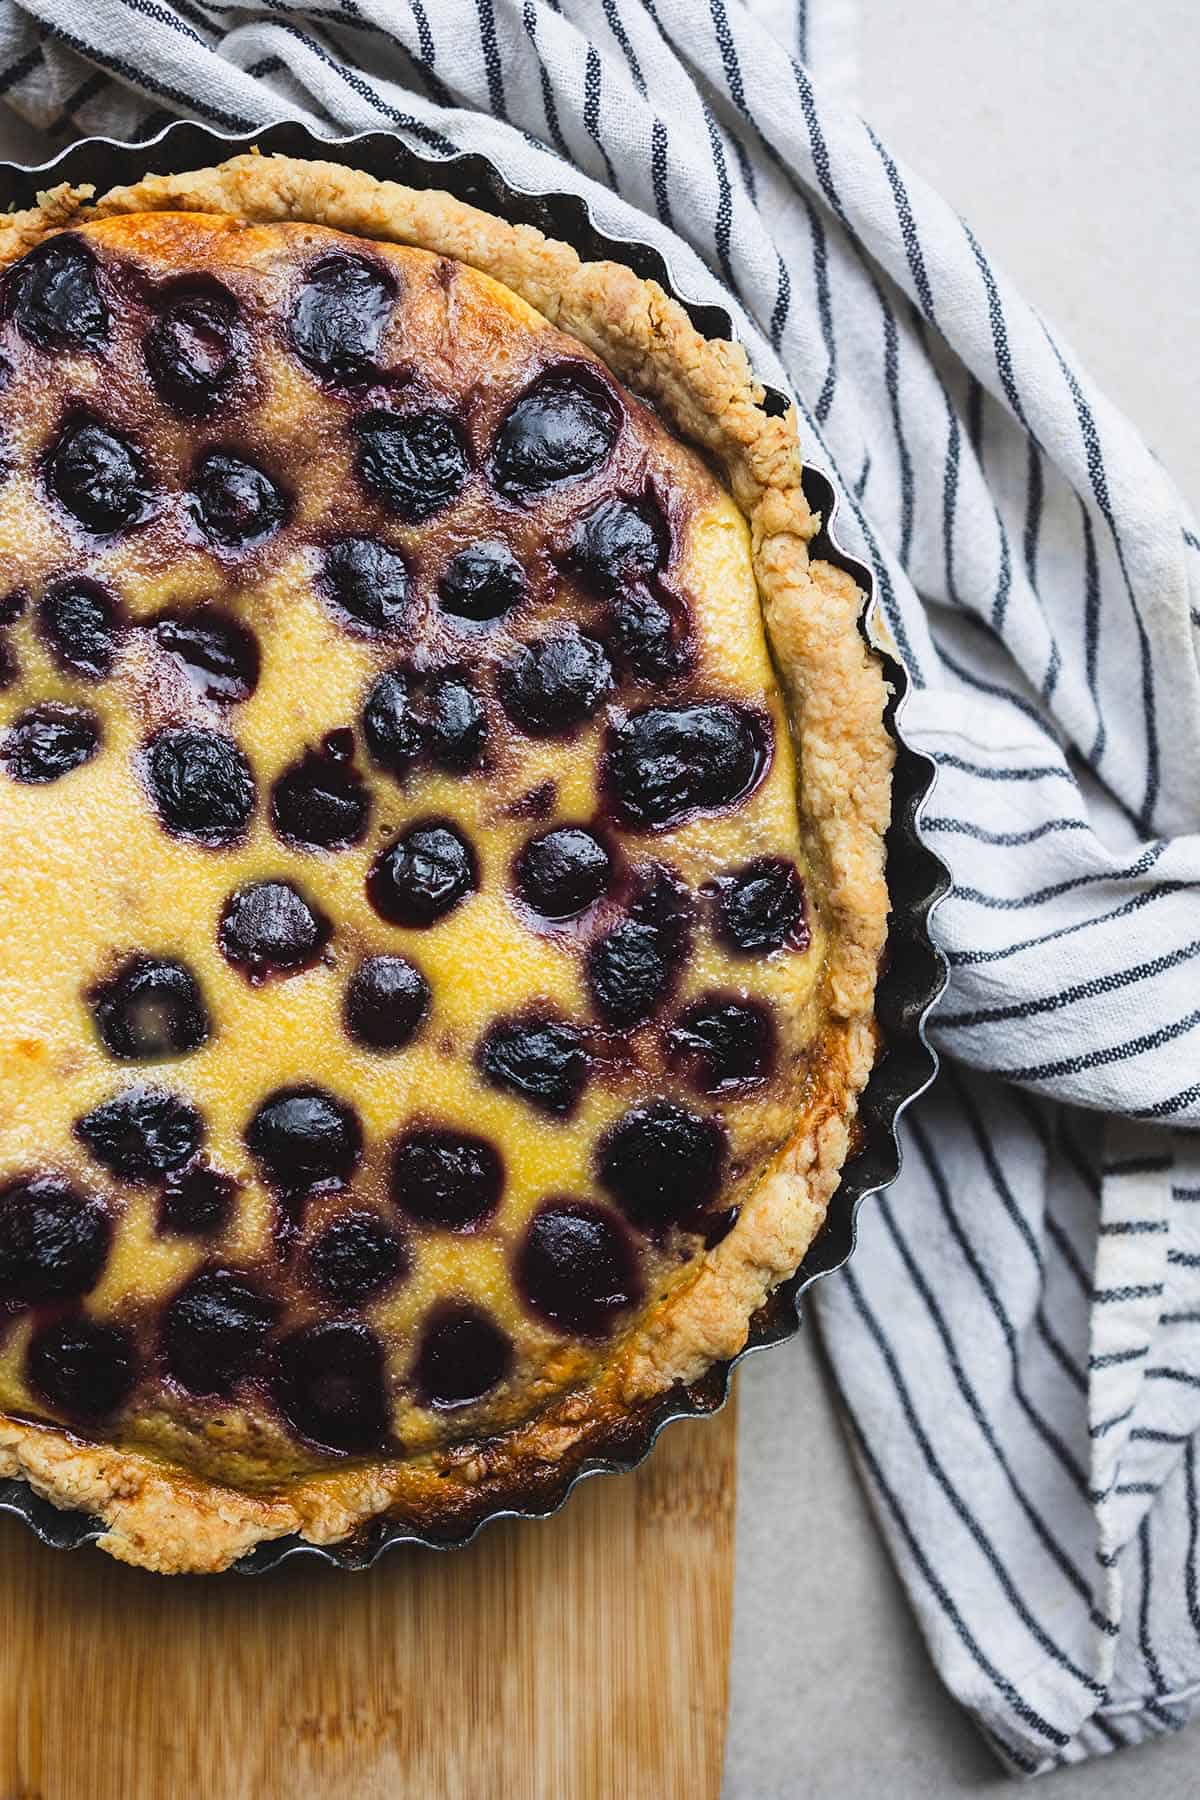
  • Cherry Clafoutis Pie

    Cherry Clafoutis Pie

    Whether you make it for a special brunch or a simple family dessert, this cherry clafoutis pie brings that wow-factor with very little fuss. And the way those cherries peek through the custard? Just beautiful.

    This post may contain affiliate links. If you purchase through these links, I may earn a small commission at no extra cost to you. Thank you for supporting Love & Harvest!

    Cherry clafoutis pie studded with dark cherries in a fluted tart pan

    Why We Love This Cherry Pie

    Cherry clafoutis pie is one of those desserts that feels both elegant and homey. If you’ve never had clafoutis before, it’s a classic French custard-style dish traditionally baked with whole cherries.

    Creatively, we’ve taken that idea and turned it into something even more special: a pie that combines the delicate richness of egg custard with the juicy sweetness of cherries — all held together in a golden, flaky pie shell.

    It’s the kind of dessert that looks like it came from a French countryside bakery, but is surprisingly simple to make at home.

    Cherry clafoutis pie with a slice removed, next to a plated slice

    Cherry Clafoutis Pie Ingredients

    Ingredients

    Large Eggs

    • The base of the custard, giving it that rich, velvety texture. The more eggs, the firmer and silkier the set. Three large eggs is the sweet spot for a creamy but sliceable result.

    Whole Milk

    • Adds body and smoothness without making the custard too heavy. You can substitute with oat milk for a dairy-light version, though the custard will be slightly less rich.

    Heavy Cream

    • For a touch of indulgence and extra creaminess. The fat content in heavy cream is what gives clafoutis its signature lusciousness — don’t skimp here.

    Ground Cinnamon

    • A warm, subtle spice that complements the cherries beautifully. Just a pinch is enough — it should whisper in the background, not shout.

    Fresh or Frozen Pitted Cherries

    • Juicy, sweet, and tart — they burst with flavor in every bite. Use fresh when in season; frozen works wonderfully year-round. We recommend using a Pyrex pie dish or a springform pan for easy slicing and presentation.

    Buttery blueberry cheesecake slice on white plate.

    How to Make It

    When I say it is easy — I meant it! Here is a quick glimpse of how to make the pie. The complete and full details are in the recipe below.

    1. Preheat your oven to 350°F (175°C).

    2. Whisk together eggs, milk, cream, and cinnamon until smooth.

    3. Pour the mixture into a prepared pie crust.

    4. Add cherries evenly over the top.

    5. Bake for 35–45 minutes, or until the custard is set in the center.

    6. Cool completely before slicing.

    Are you interested in making your own pie crust? Learn How to Make a Flaky Pie Crust here.

    A Delicious Summer Pie

    This cherry clafoutis pie is summer in every bite — rustic, comforting, and just sweet enough. We love serving it slightly chilled with a dollop of whipped cream or even a spoonful of crème fraîche for a more European flair. For more cherry inspiration, try our cherry syrup recipe or our super moist cherry loaf — both celebrate this gorgeous fruit in different ways.

    Slice of cherry clafoutis pie on a white scalloped plate

    Frequently Asked Questions

    What is the difference between clafoutis and a regular custard pie?

    Classic clafoutis is baked without a crust — it’s a flan-like batter poured directly over fruit in a baking dish. Our version adds a buttery pie crust for extra texture and a more familiar pie format, making it easier to slice and serve.

    Can I use other fruits instead of cherries?

    Absolutely! Clafoutis works beautifully with blueberries, raspberries, sliced peaches, plums, or even pears. The custard batter is very forgiving — just make sure your fruit isn’t too wet, as excess moisture can prevent the custard from setting.

    Should I pit the cherries?

    For this recipe, yes — pitted cherries make for a much more pleasant eating experience. Traditionally, French clafoutis uses whole unpitted cherries (the pits were said to add almond-like flavor), but for a family-friendly pie, pitted is always the safer choice.

    How do I know when the custard is set?

    The edges should be firmly set while the very center has just a slight jiggle — like a just-set cheesecake. It will continue to firm up as it cools. Overbaking leads to a rubbery custard, so pull it out when there’s still that gentle wobble in the center.

    Can I make this pie the day before?

    Yes — it actually slices better the next day once fully chilled and set. Store covered in the refrigerator and bring to room temperature for 20 minutes before serving. Add your crème fraîche or whipped cream just before serving.

    Cherry clafoutis pie studded with dark cherries in a fluted tart pan

    Cherry Clafoutis Pie

    Cherry clafoutis pie is our go-to when we want something that looks impressive but doesn’t require a ton of effort. The filling is creamy and delicate, almost like flan or a soft pudding, with bursts of sweet cherries in every bite. The cherries rise and peek through the custard like little ruby gems — it's beautiful, rustic, and homey all at once.
    Prep Time 20 minutes
    Cook Time 45 minutes
    Total Time 1 hour 5 minutes
    Servings: 9 inch pie
    Course: Dessert
    Cuisine: French
    Calories: 380

    Ingredients
      

    Pie Dough
    • 2 cups all-purpose flour
    • pinch salt
    • 1 tbsp sugar
    • 1 stick cold butter cut into small cubes
    • ½ tsp red vinegar
    • ⅓ cup + 1 tbsp cold water
    Cherry Clafoutis Filling
    • 350 g fresh or frozen cherries
    • 1 tsp vanilla extract
    • ½ tsp almond extract
    • ½ cup sugar
    • ¼ cup all-purpose flour
    • 1 cup full fat milk
    • ½ cup full-fat cream
    • 3 large eggs
    • ½ tsp sea salt
    • pinch of ground cinnamon

    Method
     

    Make the Dough
    1. In a large bowl:
      Mix the flour, salt, and sugar.
      Add cold butter cubes and cut them into the flour using a pastry cutter or your fingers until the mixture looks like coarse crumbs.
      Slowly add ice water, 1 tablespoon at a time, mixing gently until the dough just comes together. Don’t overwork it.
    2. Chill the Dough
      Form dough into a flat disc.
      Wrap in plastic and chill in the fridge for at least 30 minutes (can be made a day ahead).
    3. Roll Out & Shape
      On a lightly floured surface, roll the dough out into a 12-inch circle.
      Gently transfer to your 9-inch pie dish. Press it into the edges and trim or crimp the sides as desired.
      Prick the bottom with a fork to prevent bubbling.
    4. Blind Bake the Crust
      Line the crust with parchment paper and fill with pie weights or dried beans.
      Bake at 375°F (190°C) for 15–17 minutes until edges start to turn golden.
      Remove weights and parchment, and bake for another 8–10 minutes or until the bottom is light golden and dry to the touch.
      Let the crust cool completely before filling with your cherry mixture.
    Cherry Clafoutis Filling
    1. preheat the oven to 350℉/175℃ with a rack at the lower third )preferably with a Baking Steel or stone on it).
    2. Place the parbaked crust on a ment lined baking sheet and arrange the cherries in an even layer in it.
    3. In a medium bowl, mix the vanilla and almond extract into the sugar. Add the flour and whisk to combine. Add the milk, cream, and eggs and whisk well to combine. Whisk in the salt and cinnamon.
    4. Gently pour the custard into the prepared pie crust. Bake until the custard appears set at the edges but is still slightly jiggly in the center, 45-55 minutes. Let it cool for 15 minutes, then serve warm, or cool to room temperature and refrigerate until ready to serve.
  • Dairy-free Chocolate Cake

    Dairy-free Chocolate Cake

    Moist, fudgy, and completely dairy-free and egg-free. This chocolate cake is so good you’ll forget it’s vegan.

    This post may contain affiliate links. If you purchase through these links, I may earn a small commission at no extra cost to you. Thank you for supporting Love & Harvest!

    Tall slices of dairy-free chocolate cake with fresh strawberries

    The Ultimate Dairy-Free Chocolate Cake: A Vegan Delight

    Whether you have food allergies or love experimenting with dairy-free baking, this recipe is one you’ll keep coming back to.

    Why You Will Love This Dairy-free Chocolate Cake

    • Super Moist Texture: This cake stays moist and tender, just like any classic chocolate cake.
    • No Fancy Ingredients: Uses simple pantry staples that are easy to find.
    • Allergy-Friendly: Perfect for anyone avoiding dairy, eggs, or animal products.
    • Kid-Approved: Tested and loved by even the pickiest eaters.
    • Versatile: Great for birthdays, celebrations, or an everyday treat.

    Delicious chocolate cake being eaten by a child with a fork.

    What is a Chia Egg?

    A chia egg is a fantastic plant-based substitute for traditional eggs in baking. Made from just chia seeds and water, it works as a binder to hold the cake together while keeping it moist and fluffy. It’s perfect for recipes like this one, where eggs need to be replaced without compromising texture.

    How to Make a Chia Egg

    1. Measure: Add one tablespoon of ground chia seeds to a small bowl.
    2. Add Water: Pour three tablespoons of water over the seeds.
    3. Stir: Mix well and let it sit for 5–10 minutes until it forms a gel-like consistency. Replace one chia egg for one regular egg in your baking recipes.

    Ingredients

    Cocoa Powder

    • Use unsweetened Dutch-process cocoa for the deepest chocolate flavour and darkest colour. It reacts differently than natural cocoa — deeper, smoother, less acidic. Sift it to prevent lumps. A 9-inch round cake pan gives you the ideal lift and texture for this batter.

    Chia Seeds (as egg replacer)

    • Ground chia seeds mixed with water create a gel that binds the cake exactly the way an egg would. They’re virtually tasteless in this recipe. Buy ground chia or grind whole seeds in a spice grinder for best results.

    Plant-Based Milk (Oat or Almond)

    • The recipe uses 1 cup of almond milk or oat milk. Oat milk gives a slightly richer, more neutral flavour; almond milk is lighter. Either works perfectly. Look for unsweetened versions to keep control over the sweetness level.

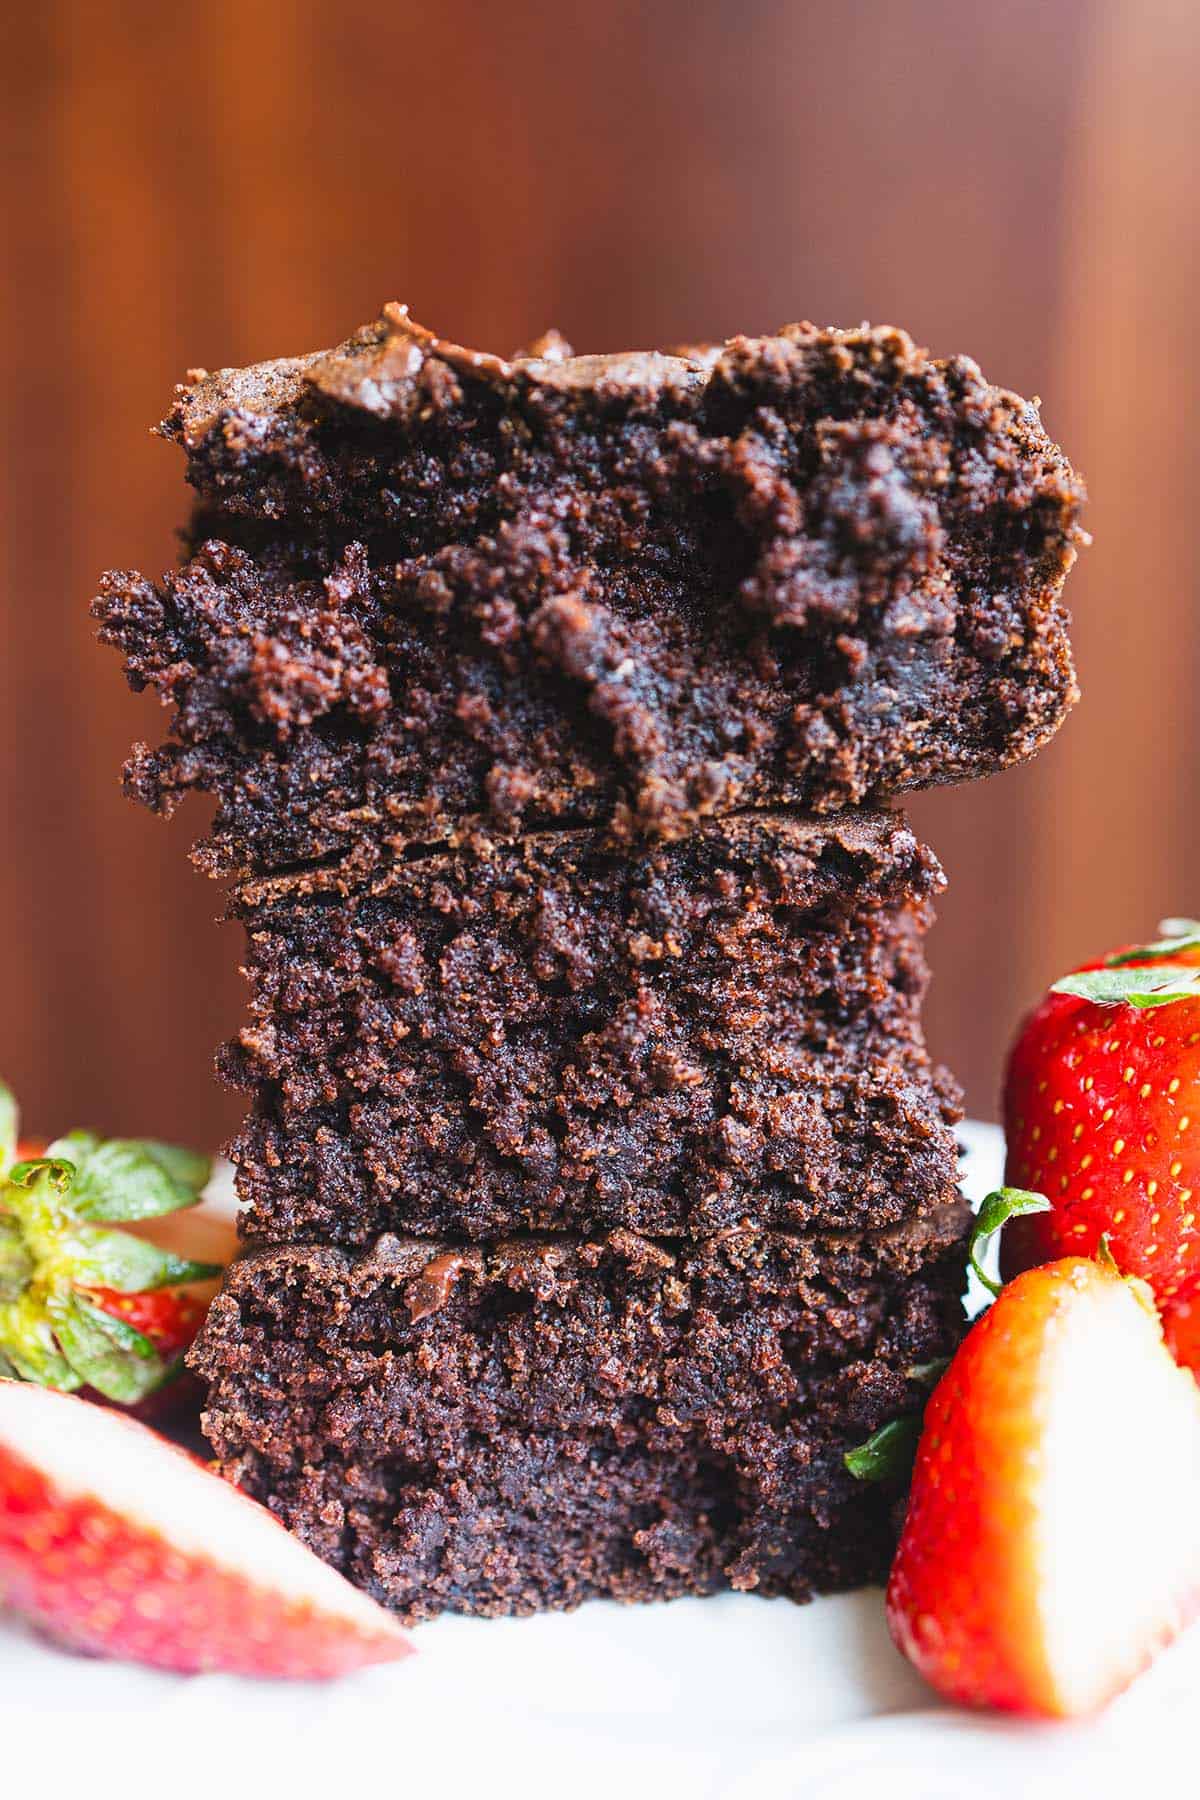
    Stack of dairy-free chocolate cake squares with strawberries

    Love baking without dairy? Try our Lightly Sweet Black Forest Cake for another allergy-friendly showstopper, or explore the Pumpkin Chocolate Chip Cake with Biscoff Frosting for autumn celebrations. For a simpler chocolate fix, our Pumpkin Chocolate Streusel Loaf is another family favourite.

    Use a springform pan if you want clean, professional-looking layers, or a standard 9-inch round cake pan for everyday baking.

    Frequently Asked Questions

    Can I use regular milk instead of plant-based milk?

    Yes — if dairy isn’t a concern for your household, any milk works in a 1:1 swap. The texture will be virtually identical. For a vegan or dairy-free version, stick with oat milk, almond milk, or coconut milk.

    Can I make this cake ahead of time?

    Absolutely. Bake the layers up to 2 days ahead and wrap tightly in plastic wrap at room temperature. Frost the day you plan to serve for the freshest presentation. Frosted cake keeps well in the refrigerator for up to 5 days.

    What dairy-free frosting works best?

    A simple chocolate ganache made with full-fat coconut milk and dairy-free chocolate chips is unbeatable. Whipped coconut cream with cocoa powder is also excellent. For a quick option, many store-bought frostings (like Pillsbury chocolate) are accidentally vegan — check the label.

    Can I substitute the chia egg with a flax egg?

    Yes. A flax egg (1 tbsp ground flaxseed + 3 tbsp water, rested 5 minutes) works identically. Flax gives a slightly earthier, nuttier flavour note but it’s undetectable in a chocolate cake with this much cocoa.

    Is this cake suitable for nut allergies too?

    The rest of the recipe is nut-free. Just use oat milk or rice milk instead of almond milk, and double-check that your cocoa powder and chocolate are processed in nut-free facilities if this is a concern.

    Tall slices of dairy-free chocolate cake with fresh strawberries

    Dairy-free Moist Chocolate Cake

    Decadent dark chocolate cake that’s completely dairy-free and egg-free. No dairy and no eggs. Oven and air fryer recipe.
    Prep Time 10 minutes
    Cook Time 35 minutes
    Total Time 45 minutes
    Servings: 6 people
    Course: Dessert
    Calories: 390

    Ingredients
      

    • 1¾ cups all-purpose flour
    • 1½ cups sugar
    • ¾ cup dutch-process cocoa
    • 1 tsp instant coffee powder
    • 1½ tsp baking soda
    • 1½ tsp baking powder
    • 1 tsp salt
    • ½ cup canola oil
    • 1 cup almond milk or oat milk
    • 1¾ cups hot water
    • ¼ cup prepared chia eggs see blog on how to make it
    • 2 tsp vanilla extract

    Equipment

    • air fryer optional

    Method
     

    1. oven baking: preheat oven to 350℉. Grease a 9inch square pan. Set aside.
    2. air fryer baking: preheat oven to 340℉. Grease a 9inch square pan. Set aside.
    3. In a large bowl, whisk together the flour, sugar, cocoa powder, instant coffee, baking soda, baking powder, and salt.
    4. In another bowl (or measuring jug), combine the oil, almond or oat milk, hot water, prepared chia eggs, and vanilla extract. Pour the wet mixture into the dry ingredients and whisk until smooth.
    5. Scrape the batter into the square pan and bake for 30-35 minutes, or until an inserted toothpick comes out clean. Remove from the oven and let it cool completely.
  • Pumpkin Chocolate Chip Cake with Biscoff Frosting

    Pumpkin Chocolate Chip Cake with Biscoff Frosting

    This Pumpkin Chocolate Chip Cake with Biscoff Frosting is the perfect dessert to celebrate the festive spirit of Christmas — a warm, moist cake bursting with earthy pumpkin sweetness, pockets of melted chocolate, and topped with the most irresistible buttery Biscoff cream cheese frosting you will ever taste.

    This post may contain affiliate links. If you purchase through these links, I may earn a small commission at no extra cost to you. Thank you for supporting Love & Harvest!

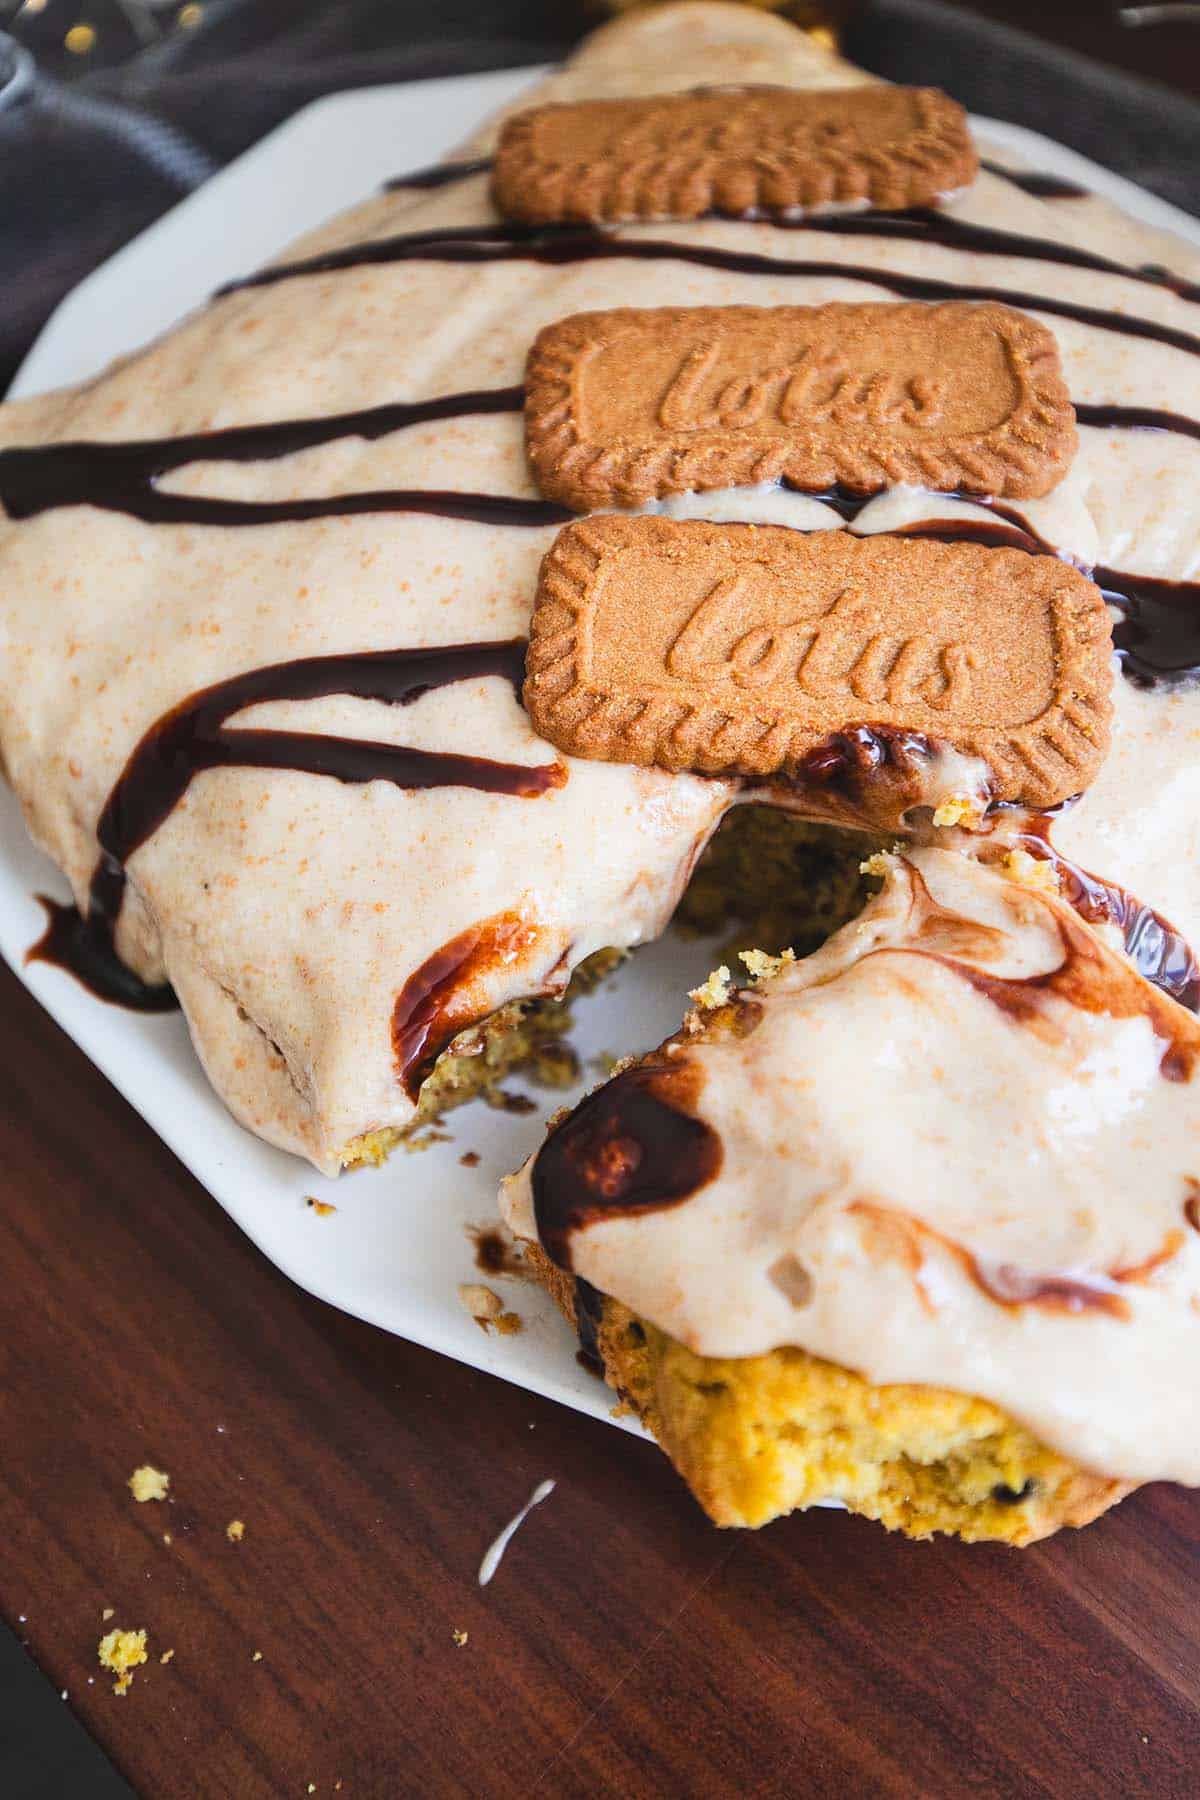
    Delicious dessert with cookies and chocolate drizzle, perfect for Christmas celebrations.

    Why You Should Make This Pumpkin Chocolate Biscoff Cake

    We love recipes that combine the best of fall and winter flavours, making this the ideal dessert for Thanksgiving, Christmas, or any cozy family gathering. The pumpkin keeps the cake moist, while the chocolate chips add a burst of decadence in every bite. And then there’s the frosting: sweet, slightly spiced, and utterly irresistible. Whether you’re hosting a holiday dinner or looking for a treat to enjoy by the fireplace, this cake delivers both flavour and festivity.

    In our family, this cake has become a tradition. The kids love the surprise of chocolate chips in every slice, and the adults rave about the Biscoff frosting’s unique flavour. It is easy to make, special enough to steal the show, and feels like a cozy hug on a crisp winter day.

    Rich homemade pumpkin cake with Biscoff cream cheese frosting and cookie topping.

    Key Ingredients

    Ingredients

    Pumpkin Puree

    Pumpkin puree is the heart of this cake. It gives the dessert its signature fall flavour, a subtle earthy sweetness that pairs perfectly with warm spices like cinnamon and nutmeg.

    • Why it matters: Keeps the cake incredibly moist and naturally sweetens the batter so you can use less added sugar.
    • Fresh vs. canned: I love steaming a fresh pumpkin for the best flavour, but Libby’s canned pumpkin puree works beautifully and saves time on busy holiday schedules.

    Chocolate Chips

    Semi-sweet chocolate chips add a burst of indulgence to the cake. The slight bitterness of the chocolate balances the sweetness of the pumpkin and frosting perfectly.

    • Why it matters: Creates pockets of gooey, melted chocolate in every bite — the surprise everyone loves.

    Biscoff Spread

    Biscoff spread (also known as cookie butter) is the secret ingredient that takes this frosting to the next level. Its warm, spiced, caramel-like flavour makes the frosting uniquely rich and irresistible, elevating this cake from delicious to unforgettable.

    • Why it matters: Adds depth, warmth, and a caramelised cookie flavour that no other ingredient can replicate.

    Cream Cheese

    Cream cheese is the unsung hero that adds tangy richness to the frosting. Paired with the Biscoff spread, it creates a silky, balanced frosting that is not overly sweet.

    • Why it matters: Balances the sweetness of the cookie butter and gives the frosting a luscious, spreadable texture.

    Warm pumpkin chocolate chip cake with Biscoff frosting on a white plate.

    How to Make This Pumpkin Chocolate Chip Cake

    Step 1: Prepare the Cake

    1. Preheat your oven to 350°F (175°C) and grease a 9×13-inch baking pan.
    2. If using fresh pumpkin: break into small pieces and steam with the skin for 15 minutes on high. Poke the skin with a fork — if it inserts with ease, it is ready. Spoon out the flesh, discard the skin, and let cool completely. Puree in a food processor. Add the eggs, vanilla, salt, coconut oil, and sugar. Process until smooth with no lumps. Move the mixture to a large mixing bowl.
    3. Add the flour, baking powder, baking soda, cinnamon, clove, nutmeg, and ginger into the mixture. Mix until just combined. Fold in the chocolate chips.
    4. Transfer to the prepared pan and bake for 30 minutes, or until the center springs back with no batter on your finger.
    5. Remove the cake and let cool for at least 30 minutes before adding the frosting.

    Step 2: Make the Biscoff Frosting

    1. In a large mixing bowl with a hand mixer or stand mixer, combine the cream cheese, heavy cream, powdered sugar, vanilla extract, and crushed Biscoff cookies until smooth and fluffy. Set aside until the cake has fully cooled.
    2. Starting from the center of the cooled cake, use a spatula to scoop the frosting down and slowly spread toward the edges. Allow gravity to pull the frosting down the sides. Generously drizzle with chocolate syrup and place whole Biscoff cookies on top as garnish.

    Step 3: Assemble and Serve

    1. Spread the frosting evenly over the cooled cake and place Biscoff cookies on top.
    2. Slice, serve, and enjoy the warm smiles from your loved ones!

    Pumpkin chocolate chip cake with Biscoff frosting slice showing moist texture.

    Tips for the Best Pumpkin Chocolate Biscoff Cake

    • Don’t overmix: Stir the batter only until combined for a tender, moist crumb.
    • Cool completely: Frost only when the cake is fully cooled to prevent the frosting from melting.
    • Make ahead: The cake keeps well covered in the fridge for up to 4 days — the flavours deepen overnight.
    • Room temperature cream cheese: Softened cream cheese blends into a lump-free frosting much more easily.

    Looking for more festive bakes? Try our Pumpkin Chocolate Streusel Loaf or the classic Best Spiced Pumpkin Pie with Flakey Crust — both perfect for the holiday season. And if you love chocolate desserts, our Dairy-Free Chocolate Cake is another crowd-pleaser.

    Frequently Asked Questions

    Can I make this cake ahead of time?

    Yes! Bake the cake up to 2 days in advance and store unfrosted at room temperature wrapped tightly in plastic wrap. Make the frosting fresh and apply on the day of serving for the best presentation. Frosted cake keeps well in the fridge for up to 4 days.

    Can I use store-bought Biscoff cookies instead of Biscoff spread?

    The frosting uses both Biscoff spread (cookie butter) for flavour and crushed Biscoff cookies for texture. You can find Biscoff cookies and spread on Amazon if they are not available locally. In a pinch, speculoos cookies make a good substitute.

    Can I substitute the pumpkin puree?

    You can use butternut squash puree as a close substitute — it has a similar texture and mild sweetness. Sweet potato puree also works well and gives the cake a slightly richer flavour. Avoid watery squash varieties as they can make the batter too loose.

    Why is my cake dense instead of fluffy?

    Overmixing is the most common culprit — once the flour is added, fold gently until just combined. Also check that your baking powder and baking soda are fresh (they lose potency after 6 months). And make sure the pumpkin puree is well-drained if using homemade.

    Can I make cupcakes instead of a sheet cake?

    Absolutely! Pour the batter into lined muffin tins (fill each about two-thirds full) and bake at 350°F for 18–22 minutes. This recipe makes about 18–20 cupcakes. Apply the Biscoff frosting once fully cooled and top each one with half a Biscoff cookie.

    How do I store leftovers?

    Store the frosted cake covered in the refrigerator for up to 4 days. Bring individual slices to room temperature for 15 minutes before serving for the best texture and flavour. You can also freeze individual slices (unfrosted) for up to 2 months.

    Pumpkin chocolate chip cake with Biscoff frosting, cookies and chocolate drizzle

    Pumpkin Chocolate Cake with Biscoff Frosting

    Prep Time 10 minutes
    Cook Time 30 minutes
    Cooling Time 30 minutes
    Total Time 1 hour 10 minutes
    Servings: 8 people
    Course: Dessert
    Cuisine: American
    Calories: 440

    Ingredients
      

    Cake
    • 1 cup pumpkin puree
    • 2 large eggs
    • 1 tsp vanilla extract
    • pinch sea salt
    • ½ cup melted coconut oil or butter
    • ½ cup sugar or maple syrup
    • 2 cups all-purpose flour
    • 2 tsp baking powder
    • 1 tsp baking soda
    • 2 tsp ground cinnamon
    • ½ tsp ground clove
    • ½ tsp ground nutmeg
    • 1 tsp ground ginger
    • ½ cup chocolate chips
    Biscoff Frosting
    • 8 oz cream cheese, room temperature
    • 2 tbsp heavy cream
    • 1 cup powder sugar
    • 4 crushed biscoff cookies or 3 tbsp Biscoff Cookie Butter
    • 1 tsp vanilla extract
    • Hershey's Chocolate Syrup (garnish)
    • 3-4 Biscoff Cookies (garnish)

    Method
     

    Pumpkin Chocolate Cake
    1. Preheat the oven to 350° F. Grease a (9×9 inch) bread pan.
    2. Fresh Pumpkin: Break the pumpkin into small pieces and steam with the skin for 15 minutes on high. The test: poke the skin with a fork, if it can be inserted with ease, it is ready. Spoon out the flesh and discard the outer skin. Set aside to completely cool. Puree steamed pumpkin flesh in a food processor. Add the eggs, vanilla, salt, coconut oil, and sugar. Process until the liquid is smooth with no lumps. Move the mixture to a large mixing bowl.
    3. Canned pumpkin: Puree canned pumpkin flesh in a food processor. Add the eggs, vanilla, salt, coconut oil, and sugar. Process until the liquid is smooth with no lumps. Move the mixture to a large mixing bowl.
    4. Add the flour, baking powder, baking soda, cinnamon, clove, nutmeg, and ginger into the mixture, mix until just combined. Fold in the chocolate chips
    5. Transfer to the oven and bake for 30 minutes, or until the center is just set. I usually touch the centre of the cake, if it springs back with no batter glued to my fingers, it is ready.
    6. Remove the bread and let cool for at least 30 minutes before you place the frosting.
    Biscoff Frosting
    1. In a large mixing bowl with a handheld mixer, or a standup mixer, combine all the ingredients together: cream cheese, cream, powder sugar, vanilla extract, crushed Biscoff cookies. Set aside and wait for the cake to cool.
    2. Starting from the center, use a spatula and scoop the frosting down and slowly move to the side of the cake. Allow gravity to pull some of the frosting down. Generously drizzle the Hershey's Chocolate Syrup, and lastly place the Biscoff Cookies on top as garnish.
  • Pumpkin Chocolate Streusel Loaf

    Pumpkin Chocolate Streusel Loaf

    With molten chocolate oozing from the center and a crunchy oatmeal pecan streusel topping, this Pumpkin Chocolate Streusel Loaf is the perfect balance of indulgence and wholesomeness — a cozy fall bake that fills the whole house with the most incredible spiced aroma.

    This post may contain affiliate links. If you purchase through these links, I may earn a small commission at no extra cost to you. Thank you for supporting Love & Harvest!

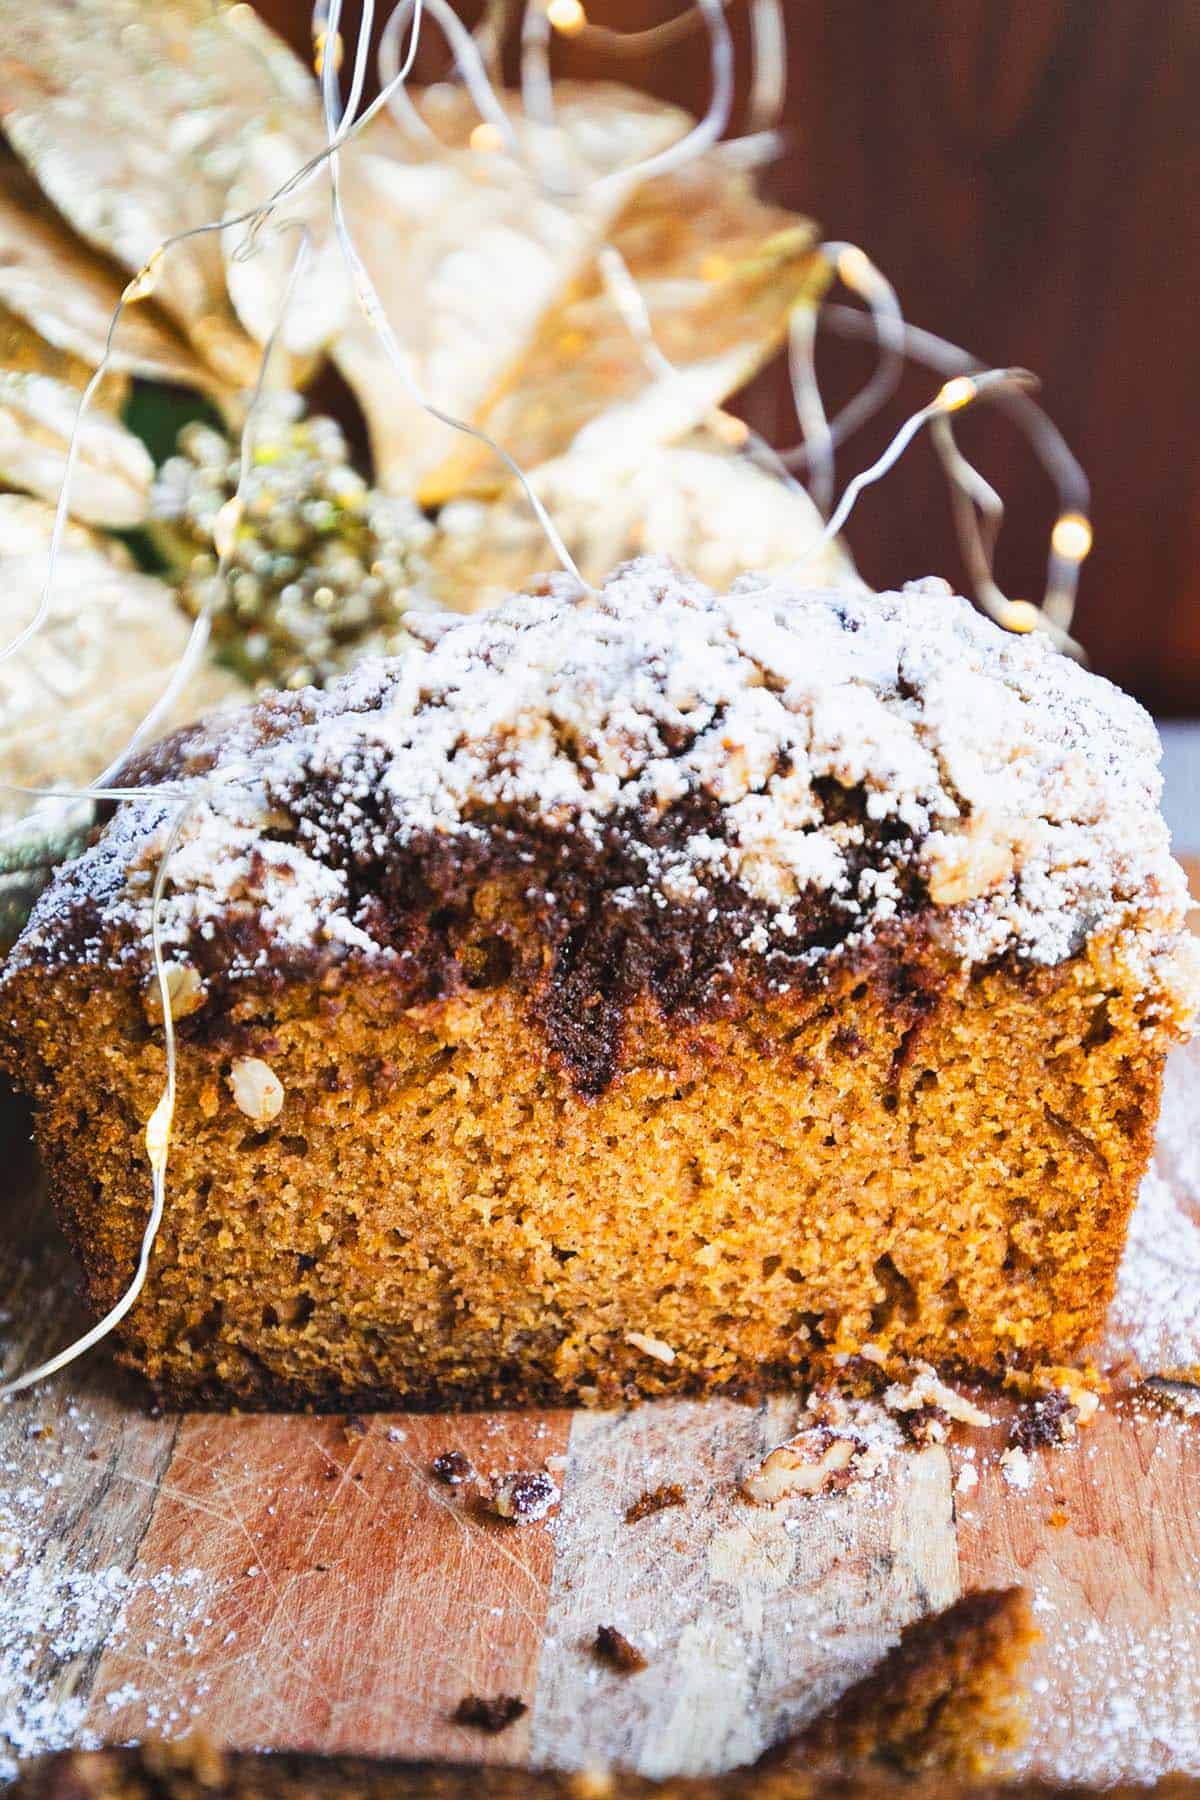
    Moist pumpkin bread with chocolate chips and powdered sugar topping for a cozy fall treat.

    Why We Love This Pumpkin Chocolate Streusel Loaf

    When autumn rolls in with its crisp air and cozy vibes, it brings a bounty of pumpkins. For our family, the season is not complete without baking this loaf. It is not overly sweet, so you can enjoy a slice (or two) without guilt — packed with essential fall flavours: cinnamon, nutmeg, and pumpkin.

    This loaf is more than just food — it is a tradition. We pack it into the kids’ lunches for a mid-day treat or bring it along to share with friends during holiday visits. It is easy to make, always a hit, and feels like a little gift of homemade happiness. The kids love whisking the dry ingredients while sneaking chocolate chips, and everyone enjoys sprinkling the streusel topping over the batter — it feels like adding a crown to something already special.

    Pumpkin chocolate streusel loaf dusted with powdered sugar on a cutting board

    Key Ingredients

    Ingredients

    Pumpkin Puree

    Pumpkin puree is the soul of this loaf, giving it its signature earthy sweetness and incredible moisture.

    • Why it matters: Keeps every slice springy and moist for days without drying out.
    • Fresh vs. canned: Fresh steamed pumpkin delivers the best flavour, but a quality canned puree works beautifully when you are short on time.

    Molten Chocolate Center

    Melted butter and chocolate chips are combined and tucked into the center of the batter before baking, creating a rich gooey core that surprises you with every slice.

    • Why it matters: The chocolate center is what makes this loaf memorable — that molten surprise in every bite is what guests rave about.

    Oatmeal Streusel Topping

    A mixture of butter, brown sugar, chopped pecans, oats, flour, and cinnamon creates the perfect crunchy contrast to the soft, bouncy loaf below.

    • Why it matters: Adds texture, crunch, and a caramelised sweetness that elevates this from a simple bread to a proper show-stopper.

    Black Coffee and Molasses

    A small amount of black coffee and molasses deepens the flavour of the pumpkin and spices, adding complexity without any coffee taste.

    • Why it matters: These two ingredients are the secret to a deeply flavoured, rich loaf that tastes bakery-quality.

    Pumpkin chocolate streusel loaf with gold holiday decorations behind it

    How to Make This Pumpkin Chocolate Streusel Loaf

    1. Preheat and Prep: Preheat your oven to 350°F (175°C) and grease a 9×5-inch loaf pan. You can also line it with parchment paper for easy removal.
    2. Prepare the Chocolate: In a microwave, melt the butter and chocolate chips using 30-second intervals. Once soft and gooey, whisk together with a pinch of salt until fully combined. Set aside in the fridge while you prepare the rest of the recipe.
    3. Prepare the Streusel Topping: In a small bowl, mix together the butter, brown sugar, chopped pecan, oatmeal, flour, and cinnamon. Stir until the mixture is crumbly, then set aside.
    4. Mix the Wet Ingredients: In a large bowl, whisk together the pumpkin puree, oil, brown sugar, eggs, molasses, vanilla extract, and black coffee until smooth.
    5. Combine the Dry Ingredients: In another bowl, whisk the flour, baking soda, salt, cinnamon, clove, ginger, and nutmeg. Gradually add to the wet ingredients, stirring just until combined. Do not overmix — it can affect the loaf’s bouncy texture.
    6. Assemble and Bake: Pour the batter into the prepared loaf pan and smooth the top. Using a spoon, create a well in the centre and add the chocolate filling. Evenly sprinkle the streusel mixture over the top. Bake for 50–60 minutes, or until a toothpick inserted into the centre comes out clean (except for the melted chocolate!).
    7. Cool and Serve: Let the loaf cool in the pan for 10 minutes before transferring to a wire rack to cool completely. Slice and enjoy warm or at room temperature.

    Sliced pumpkin chocolate streusel loaf showing its moist crumb

    Baking Tips

    • Do not overmix: Once the flour is added, fold gently until just combined for a tender, bouncy crumb.
    • Check doneness carefully: The chocolate center will look wet on the toothpick — insert the toothpick near the edge of the loaf rather than dead center.
    • Make ahead: This loaf actually tastes better the next day as the spices deepen. Store wrapped at room temperature for up to 3 days.
    • Silicone spatula tip: Use a silicone spatula to fold in the dry ingredients without overworking the batter.

    Love pumpkin bakes? Try our Pumpkin Chocolate Chip Cake with Biscoff Frosting for a show-stopping holiday cake, or the Best Spiced Pumpkin Pie with Flakey Crust for the ultimate Thanksgiving dessert. For a beautiful autumn tart, our Apple Tart with Cardamom Crust is a seasonal favourite.

    Frequently Asked Questions

    Can I make this loaf without the chocolate center?

    Yes, absolutely. Simply skip the chocolate filling step and sprinkle the streusel directly over the batter. The loaf will still be wonderfully moist and flavourful from the pumpkin, spices, and streusel topping — it just won’t have the molten surprise inside.

    Can I substitute the pecans in the streusel?

    Walnuts work just as well as pecans in the streusel topping. If you need a nut-free version, simply omit them and increase the oats slightly to keep the same crumbly texture. Sunflower seeds can also add a nice crunch.

    How do I know when the loaf is done?

    Insert a toothpick near the edge of the loaf (not the chocolate center). It should come out clean. The loaf will also spring back gently when pressed on top. The internal temperature should reach about 200°F (93°C). Baking time can vary by oven — check at 50 minutes.

    Can I freeze this loaf?

    Yes! Let the loaf cool completely, then wrap tightly in plastic wrap and place in a freezer bag. It keeps well for up to 2 months. Thaw overnight at room temperature. The streusel topping may soften slightly after freezing, but the flavour remains excellent.

    Can I use regular coffee instead of black coffee?

    Yes — a small amount of strong black coffee (or espresso) works best. The coffee does not make the loaf taste like coffee; it simply deepens the chocolate and spice flavours. If you prefer to avoid coffee entirely, you can substitute with an equal amount of milk or water.

    Why does my loaf sink in the middle?

    A sunken center is usually caused by underbaking or opening the oven door too early. Make sure your oven is fully preheated, do not open the door during the first 40 minutes of baking, and always test with a toothpick before removing. Overmixing can also cause sinking by developing too much gluten.

    Pumpkin chocolate streusel loaf dusted with powdered sugar on a cutting board

    Pumpkin Chocolate Streusel Loaf

    The molten chocolate inside surprises you with every bite, while the oatmeal streusel topping provides the perfect crunchy contrast. Plus, it’s kid-approved, crowd-friendly, and made with simple ingredients.
    Prep Time 15 minutes
    Cook Time 50 minutes
    Total Time 1 hour 5 minutes
    Servings: 6 people
    Course: Dessert
    Calories: 480

    Ingredients
      

    MELTED CHOCOLATE
    • 3 oz semi-sweet chocolate chips
    • 2 tbsp butter
    • pinch salt
    LOAF
    • 1 cup pumpkin puree
    • ½ cup canola oil
    • 2 large eggs room temperature
    • 1 tbsp molasse
    • 2s tsp vanilla extract
    • ¼ cup black coffee
    • 1½ cup all-purpose flour
    • ¾ cup brown sugar
    • 1 tsp baking soda
    • 1 tsp ground cinnamon
    • ½ tsp ground clove
    • ½ tsp ground ginger
    • ¼ tsp ground nutmeg
    • pinch salt
    STREUSEL
    • 4 tbsp butter room temperature
    • ¾ cup brown sugar
    • ½ cup chopped pecan
    • ½ cup oatmeal
    • ⅓ cup all-purpose flour
    • 1 tsp cinnamon

    Method
     

    MELTED CHOCOLATE:
    1. In a microwave, melt the butter and chocolate chips using 30 seconds intervals. Once it is soft and gooey, whisk together until it is combined completely. Set aside in the fridge while you prepare the rest of the recipe.
    STREUSEL
    1. Preheat your oven to 350°F (175°C) and grease a 9×5-inch loaf pan. You can also line it with parchment paper for easy removal.
    2. In a small bowl, mix together the rolled oats, brown sugar, melted butter, flour, and cinnamon. Stir until the mixture is crumbly, then set it aside.
    LOAF
    1. In a large bowl, whisk together the pumpkin puree, oil, brown sugar, eggs, molasse, vanilla extract, and black coffee until smooth.
    2. In another bowl, whisk the flour, brown sugar, baking soda, salt, cinnamon, clove, ginger, and nutmeg. Gradually add this to the wet ingredients, stirring just until combined. Be careful not to overmix, as this can affect the loaf’s bouncy texture.
    3. Pour the batter into the prepared loaf pan and smooth the top. Using a spoon, create a dwell in the centre, and add the chocolate filling on top. Evenly sprinkle the streusel mixture over the batter. Bake for 50–60 minutes, or until a toothpick inserted into the center comes out clean (except for the melted chocolate!).
    4. Let the loaf cool in the pan for 10 minutes before transferring it to a wire rack to cool completely. Slice and enjoy warm or at room temperature.
  • Best Spiced Pumpkin Pie with Flakey Crust

    Best Spiced Pumpkin Pie with Flakey Crust

    The best homemade pumpkin pie! Smooth, silky pumpkin filling perfectly balanced with cinnamon, clove, nutmeg, and ginger — all nestled in a buttery, shattering-crisp flakey crust. This is the pie that converts people who think they don’t like pumpkin pie, and the one guests always ask for the recipe.

    This post may contain affiliate links. If you purchase through these links, I may earn a small commission at no extra cost to you. Thank you for supporting Love & Harvest!

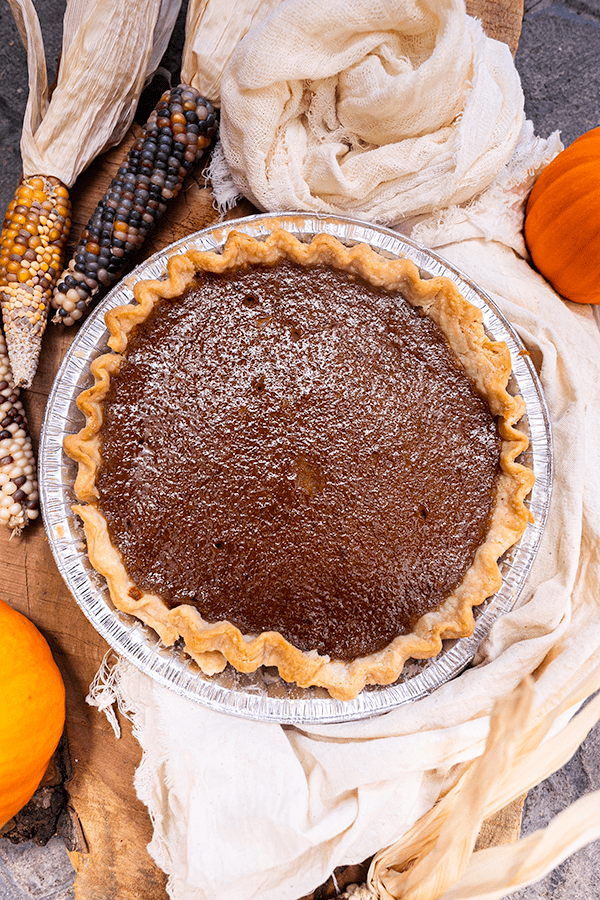
    Spiced pumpkin pie with a fluted flaky crust and dried corn on a linen cloth

    Why This Pumpkin Pie Stands Out

    If you love pumpkin flavour (and not the artificial kind), this is the pie for you. Blended through the food processor for a super silky, almost custard-like texture, with warm fall spices that complement rather than overpower the pumpkin. It is not strong in spice flavour — it is a well-balanced pie where you can still taste the pumpkin beautifully.

    I once worked at a famous pie shop in West Vancouver and this flakey crust is the exact recipe they used. I have since made this pie for countless house parties, sold it here in Mexico, and watched people who claim not to like pumpkin pie come back for seconds. It speaks for itself.

    Thanksgiving is never complete without a slice of this pie — and once you make it yourself, you will never go back to store-bought. Take a look at How to Make Super Flakey Pie Crust to master the crust before you begin.

    Fresh Pumpkin vs. Canned Pumpkin

    If you have the time, fresh pumpkin delivers unbeatable flavour. But canned pumpkin works perfectly in this recipe and the result is still incredible. No matter which you choose, you will have a silky filling and a very flakey crust.

    Side view of a pumpkin pie slice showing the smooth filling and flaky crust

    Key Ingredients

    Ingredients

    Pumpkin

    Whether canned or fresh, pumpkin is the star. Libby’s 100% pure pumpkin is a reliable canned option that many bakers swear by. If you have access to a favourite brand you trust, use it.

    • Why it matters: The pumpkin puree creates the silky custard-like filling. Its natural moisture content and starch structure are essential to the final texture — too watery and the filling won’t set.

    Pumpkin Spice: Cinnamon, Clove, Nutmeg, and Ginger

    These four spices together create the classic fall flavour profile. The balance is key — not too heavy on any single spice.

    • Why it matters: Freshly ground spices give a more vivid, aromatic result. A quality spice grater set makes a noticeable difference, especially for nutmeg.

    Eggs

    Two eggs are what give the filling its smooth, silky, custard-like texture as it bakes.

    • Why it matters: Eggs provide the structure that allows the filling to set firm enough to slice cleanly while staying creamy and soft inside.

    Condensed Milk

    Condensed milk provides the perfect amount of sweetness and contributes to the smooth, rich texture — no extra sugar needed.

    • Why it matters: The milk proteins and sugar in condensed milk help the custard filling set beautifully and add a subtle caramelised richness that cannot be replicated with regular milk and sugar alone.

    Pumpkin Variety Guide

    Not every pumpkin tastes the same. Some are strictly for carving, others for cooking and baking. All pumpkins are edible, but some are more fibrous or sweeter than others. Some recommendations:

    • Sugar pumpkin
    • Cherokee Bush
    • Cinderella
    • Muscade de Provence
    • Calabaza grande (Mexico)

    In Mexico we use the calabaza grande — medium-sized with a hard green exterior and sweet, flavourful flesh inside. This is my personal favourite for pumpkin pie and the variety I use when making it to sell locally.

    A child standing beside a pile of green-striped pumpkins at a market

    Fool-Proof Professional Tips

    Pro Tip 1: Bake at 425°F

    Flakey doughs love high temperatures. When the cold fat in the dough hits the heat of the oven, the moisture in the fat evaporates, creating pockets of steam. This steam pushes up the dough, creating lightness and flakiness. If your pie crusts are not crisp enough, your oven is likely not hot enough.

    Pro Tip 2: Use a High-Speed Blender or Food Processor

    To get the silky smooth texture, blend everything together in a food processor or high-speed blender. The machine aerates the eggs and creates a custard-like consistency that is impossible to achieve by hand. A quality immersion blender also works well for smaller batches.

    Pro Tip 3: Let the Pie Cool Completely

    Allow the pie to cool completely before cutting — at least 2 hours at room temperature, then refrigerate. When the pie comes out of the oven it is still slowly cooking. Cut into it too soon and the moisture escapes, the filling dries out, or worse — it spills out unset. Best served cold with a generous dollop of whipped cream.

    Love pumpkin season baking? Try our Pumpkin Chocolate Chip Cake with Biscoff Frosting for a showstopping holiday cake, or the Pumpkin Chocolate Streusel Loaf for a cozy weekend bake. For a beautiful autumn tart, our Apple Tart with Cardamom Crust and Caramel Drizzle is always a seasonal favourite.

    Frequently Asked Questions

    Can I make this pie a day ahead?

    Yes — in fact this pie is better the next day. Bake the pie and let it cool completely, then cover loosely and refrigerate overnight. The filling firms up further and the flavours deepen. Remove from the fridge 30 minutes before serving. This makes it ideal for Thanksgiving where oven space is precious on the day itself.

    How do I prevent the crust edges from burning?

    If the crust edges are browning too quickly during baking, cover them loosely with strips of aluminium foil or use a pie shield ring. Remove the foil or shield for the last 10–15 minutes of baking so the edges can achieve a deep golden colour. You can also lower the oven temperature by 25°F after the first 15 minutes if your oven runs hot.

    Why did my pumpkin pie crack on top?

    Cracking usually means the pie was overbaked or cooled too quickly. The filling is done when the edges are set but the center still has a slight jiggle (it will firm up as it cools). Remove it from the oven at that stage and let it cool slowly at room temperature before refrigerating. Avoid putting a hot pie directly into the fridge.

    Can I use sweet potato instead of pumpkin?

    Yes! Sweet potato makes an excellent substitute and gives a slightly sweeter, richer flavour. The texture is very similar to pumpkin pie filling. Use the same quantity of sweet potato puree and keep all other ingredients the same. This is a popular variation in the American South and is equally delicious.

    How do I know when the pumpkin pie is done?

    The pie is done when the edges are set and puffed slightly and the center still has a gentle wobble — like Jell-O, not a liquid slosh. It will continue to set as it cools. If the top is cracking or the center looks dry, it has been overbaked. Internal temperature should reach about 175°F (79°C) in the center.

    Can I freeze this pumpkin pie?

    Yes. Let the pie cool completely, then wrap tightly in plastic wrap and aluminium foil and freeze for up to 1 month. Thaw overnight in the refrigerator before serving. The texture remains excellent after freezing. The crust may soften very slightly but a few minutes uncovered at room temperature will help it crisp back up.

    Spiced pumpkin pie with a fluted flaky crust and dried corn on a linen cloth

    Best Spiced Pumpkin Pie with Flakey Crust

    Prep Time 15 minutes
    Cook Time 35 minutes
    Total Time 50 minutes
    Servings: 8 people
    Course: Dessert
    Cuisine: American
    Calories: 320

    Ingredients
      

    • 2 cups pumpkin puree homemade or canned
    • 1 (14oz) condensed milk
    • 2 large eggs room temperature
    • 1 tsp ground cinnamon
    • ½ tsp ground ginger
    • ¼ tsp ground clove
    • ½ tsp ground nutmeg
    • ½ tsp salt
    • 1 unbaked pie crust

    Method
     

    1. Preheat the oven to 425°F (220°C)
    2. In a food processor, add the pumpkin puree, condensed milk, eggs, cinnamon, ginger, clove, nutmeg, and salt until smooth. Pour into the unbaked pie crust.
    3. Bake in the preheated oven for 15 minutes.
    4. Dial the temperature down to 350°F and continue to bake for 35-40 minutes. Watch the edge of the crust. When it is golden brown or until a knife inserted into the centre of the pie comes out clean.
    5. Allow the pie to cool completely before serving. About 2 hours.

    Notes

     
    Top with a generous dollop of whipped cream. I like pumpkin pie to be well chilled, so I make pies a day ahead of time and keep them in the refrigerator overnight with a film on top. However, it’s perfectly acceptable to serve room temperature pie too – just be sure to pop the leftovers in the fridge. 
  • How to Make Flakey Pie Crust

    How to Make Flakey Pie Crust

    This post may contain affiliate links. If you purchase through these links, I may earn a small commission at no extra cost to you. Thank you for supporting Love & Harvest!

    After years of failed pie crusts, I finally cracked the code. This all-butter flakey pie crust recipe comes together in a food processor in minutes and delivers that shatteringly crisp, melt-in-your-mouth texture every single time — whether you’re making a classic apple pie or a savory pot pie.

    Slice of fruit pie with a flaky golden crust on a white plate

    Why This Recipe Works

    I’ve made a gazillion bad pie crusts over the years. From sticky disasters to crumbly messes that fell apart before they hit the pie plate, I’ve lived through every pie failure imaginable. Now I have the recipe, the tips, and the confidence to share it with you.

    Rolled pie dough draped over a fluted tart pan

    I started making pie at a young age to impress my dad, who loves desserts — especially pies. We used to visit a pie shop in West Vancouver, and as prices climbed year after year, I decided to challenge myself: make him the same (or better) pie at home. Little did I know, perfecting that crust was harder than I expected without the right tips!

    A hand holding a plate with a slice of salmon pot pie

    Ingredient Deep-Dive

    Ingredients

    All-Purpose Flour

    • Why it matters: Provides structure without too much gluten. Measure by weight (150g) for consistent results — cup measurements vary too much.

    Cold Unsalted Butter

    • Why it matters: All-butter crusts deliver unbeatable flavor. The cold butter creates steam pockets in the oven, producing those beautiful flaky layers. Cut into ½-inch cubes and freeze for 15 minutes before using.

    Ice Water + Apple Cider Vinegar

    • Why it matters: The vinegar inhibits gluten development, keeping the crust tender. Always use ice-cold water — warm water melts the butter before it hits the oven, destroying flakiness.

    Fine Sea Salt

    • Why it matters: Enhances all the buttery flavors. Use fine sea salt so it distributes evenly without leaving salty pockets.

    What is Parbaking?

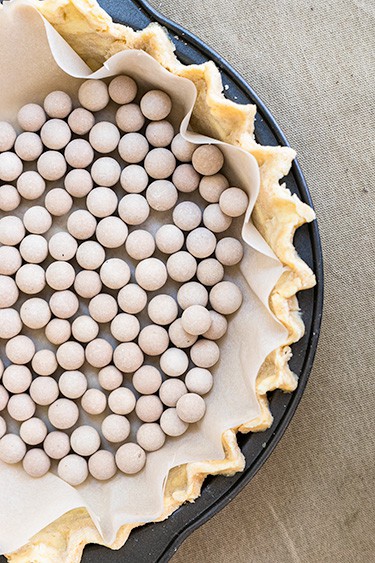
    Parbaking refers to partially baking a bottom crust before filling it and continuing to bake. It is also known as blind baking. It is typically used with single-crusted pies to ensure the crust bakes fully. Pie shells can be parbaked up to 24 hours in advance because they refresh during their second trip to the oven.

    To parbake: shape the pie crust into the pie plate. Place parchment paper on top of the crust and put weights on it. I like to use a Pyrex pie dish and ceramic weights to hold the shape. If you don’t have ceramic pearls, dry beans work perfectly — just use them within a week after parbaking.

    Pie crust lined with parchment and filled with ceramic pie weights for parbaking

    Remember to lift the opposite edges of the parchment paper to remove all the ceramic pearls. The dough is buttery and slippery underneath — dumping instead of lifting will send pearls everywhere.

    Pieces of pie dough in a baking pan next to dried beans used as pie weights

    Butter or Lard?

    The right choice is to go all in with butter. The flavor is unbeatable. However, for a more economical option, half butter and half lard also works beautifully — you still get that hint of butter with an extremely flakey, crispy texture.

    Vinegar or Vodka?

    Both vinegar and vodka prevent gluten from developing in the dough — gluten is the enemy of flakiness. For a single-crust recipe, add 1 teaspoon of white or apple cider vinegar to the ice water. Alternatively, add 1 tablespoon of vodka. I always go with apple cider vinegar — it adds a slight tang that works beautifully in both sweet and savory pies.

    Mixing the Dough with a Food Processor

    Using the Cuisinart Food Processor is the quickest method for cutting butter and mixing dough. Start by cutting the butter into 1-inch pieces. Toss the butter in the flour and salt to coat, then add everything to the food processor. Pulse in 3-second bursts until the butter pieces are walnut-half sized. Slowly add your ice water, no more than 10–15 short pulses total. Visible pea-sized butter chunks in the dough are a good sign — that promises a super flakey crust.

    Crumbly pie dough with pea-sized butter pieces after pulsing in a food processor

    Troubleshooting Common Errors

    Pie Error: Dough is Too Wet or Too Dry

    Too Wet: Sticky dough means too much water. Dust generously with flour when rolling out. Over-wet dough bakes up tough and hard.

    Too Dry: Flatten the dough to half an inch, dip your hands in ice water, and flick drops of water onto the surface. Fold (don’t knead) a few times until incorporated. Chill for 30 minutes before using.

    Pie Error: Edges of the Rolled-Out Dough Break

    This happens to everyone. Patch tears with a scrap piece of dough. Brush away excess flour from the patch area, dip your finger in cold water, and press the scrap onto the problem spot.

    Pie Error: Dough Breaks Before Landing on Pie Plate

    Once rolled out to the right size for your pie dish, drape the dough over your rolling pin to transfer it. Hanging it on the pin is far easier to move and much less likely to break.

    Fool-Proof Professional Tips

    Pro Tip #1: Bake at 425°F

    Flakey doughs love high temperatures. When cold fat hits the oven heat, the moisture evaporates creating pockets of steam. Those steam pockets push up the dough, creating lightness and flakiness. If your crust isn’t crisp enough, your oven likely isn’t hot enough.

    Pro Tip #2: Chill the Dough

    Chilling is the most important step. Cold dough is easier to work with, holds its shape better, and bakes up flakier. Chill at three key moments: after the dough comes together, before crimping, and before baking.

    Square block of pie dough ready to chill in the fridge

    Pro Tip #3: Use the Freezer

    Give your assembled pie a 15–30 minute freeze before it goes into the oven. This ensures the crust is ice-cold when it hits that blast of heat, giving you maximum flakiness.

    Pro Tip #4: Use Minimal Flour When Rolling

    Too much flour dries out the dough. Roll it out on parchment paper instead — no sticking to the counter and you use far less flour. Peel the parchment off once you have your ideal shape.

    Pro Tip #5: Use a Kitchen Scale

    Accuracy matters for pie crust. Use a kitchen scale to measure ingredients by weight rather than cups. Cup measurements vary depending on how flour is packed — weight is always precise.

    Frequently Asked Questions

    Can I make this pie crust without a food processor?

    Yes. Cut the cold butter into the flour mixture using a pastry cutter or two forks until you reach pea-sized pieces. Work quickly so the butter stays cold. A food processor is faster, but hand-mixing works perfectly.

    How far in advance can I make the dough?

    The dough disk can be refrigerated tightly wrapped for up to 3 days, or frozen (wrapped in plastic then foil) for up to 3 months. Thaw overnight in the fridge before rolling.

    Why is my pie crust shrinking in the oven?

    Shrinkage happens when the dough hasn’t rested and chilled enough, or when it was stretched rather than laid gently into the pie plate. Always chill before baking and let the dough settle into the pan without pulling it.

    Can I use salted butter instead of unsalted?

    Yes, but omit the added salt in the recipe. Unsalted is preferred because it gives you control over the saltiness and typically has less water content.

    How do I get a golden brown top crust?

    Brush the top crust with an egg wash (1 egg + 1 tablespoon water) or a milk wash just before baking. This gives a beautiful golden color and slight shine.

    Can I use this crust for savory pies?

    Absolutely. This is a neutral, all-butter crust that works for both sweet pies (apple, cherry, pumpkin) and savory pies (pot pie, quiche). For savory applications, you can add a pinch of herbs to the dough.

    Crimped, unbaked flaky pie crust in a dark pie pan

    Super Flakey Crust

    Make the best flakey crust. Pie shop recipe that guarantees you the best tasting buttery pie crust you can make! Makes one 9-inch / 23cm crust.
    Prep Time 15 minutes
    Cook Time 30 minutes
    Total Time 45 minutes
    Course: Dessert
    Cuisine: American
    Calories: 195

    Ingredients
      

    • 150 g all-purpose flour (1¼ cups)
    • 1 g fine sea salt (¼ tsp)
    • 113 g cold unsalted butter cut into ½ inch (8 tbsp)
    • 60 g ice water + 2 tsp apple cider vinegar (¼ cup)

    Equipment

    • food processor

    Method
     

    1. Add the flour and sea salt into the food processor. Pulse it 5 times so it is well incorporated.
    2. Add the cold cubed butter. Close the lid. While you pulse the machine, add the ice vinegar water on top. Never let the machine run. Always fast pulses.
    3. Once the dough starts to come together and pull away from the sides. Stop and roll it into a flat disk together. Wrap it up with plastic wraps and put it in the fridge for at least 30 minutes to overnight.
      If there are still some flours at the bottom it is okay, just pat the flour onto the dough. Do not knead the dough.
      If you see little pea size of butter in the dough, that promises you the crust is going to be super flakey.
    4. This dough is best baked at 425°F (220°C).
      You can partake, blind-bake, or fill and bake as directed in the recipe of your choice.

    Notes

    Make Ahead and Store
    This tightly wrapped disk of dough can be refrigerated for up to 3 days. Wrapped in plastic wrap and then in aluminum foil, the dough can be frozen for up to 3 months. Thaw overnight in the fridge before using. 

    Love this recipe? Try our Best Spiced Pumpkin Pie with Flakey Crust for the perfect filling to go with it, or explore our Instant Pot Black Garlic for a unique savory pie flavor addition. For more baking essentials, check out our Preserved Salty Lemons — a pantry staple that pairs beautifully with fruit pies.

  • Strawberry Ice Cream

    Strawberry Ice Cream

    When strawberries are at peak ripeness — deep red, fragrant, and almost bursting — there’s only one thing worth doing with them: turning them into this homemade strawberry ice cream. Made with a chunky cooked strawberry syrup folded into a rich cream base and churned to a velvety perfection, this recipe captures everything summer is supposed to taste like. No artificial flavoring, no food coloring — just real fruit, whole cream, and a touch of vanilla. If you have an ice cream machine, this takes less than an hour of active time.

    This post may contain affiliate links. If you purchase through these links, I may earn a small commission at no extra cost to you. Thank you for supporting Love & Harvest!

    Homemade fresh strawberry ice cream in a scoop

    Fresh or frozen strawberries cooked into a chunky syrup, folded into a rich cream base, and churned in an ice cream machine. Simple, real, and nothing like store-bought.

    Why Try This Recipe

    What makes homemade strawberry ice cream irresistible is the combination of real fruit and real cream — no shortcuts. With an ice cream machine, the process is nearly effortless. A handful of pantry ingredients, some patience while it churns and firms, and you have a batch that rivals any premium brand.

    Strawberry ice cream scooped in a waffle cone

    How to Make Strawberry Ice Cream

    Start with the strawberry syrup: wash, hull, and halve fresh strawberries (frozen work straight from the bag). In a saucepan, combine with sugar or honey on medium heat. Stir every 2 minutes. Once soft, mash to a chunky syrup with a potato masher. Squeeze in lemon juice, stir, and cool to room temperature.

    For the base: combine heavy cream, whole milk, and sugar in a saucepan. Heat gently until the sugar dissolves — do not boil. Whisk in vanilla extract, remove from heat, and let cool slightly. Stir in the chunky strawberry syrup until fully incorporated. Churn in your ice cream machine per the manufacturer’s instructions (typically 20–30 minutes). Transfer to a freezer-safe container and freeze for 4+ hours or overnight.

    Strawberry ice cream churning in ice cream machine

    Ingredients

    Key Ingredients

    Fresh or Frozen Strawberries

    Fresh ripe strawberries give the most vibrant flavor and natural sweetness. Frozen strawberries work perfectly well and are often more convenient — add them to the saucepan straight from frozen. The cooking process extracts the same deep, concentrated flavor either way.

    • Why it matters: Cooked strawberry syrup gives a more intense, complex flavor than raw strawberries blended in. The heat concentrates and deepens the fruit’s natural flavor.

    Heavy Cream

    Heavy cream is what gives ice cream its signature rich, velvety mouthfeel. The high fat content prevents large ice crystals from forming during freezing, creating a smoother texture. A heavy cream frother can help incorporate air for a lighter result before churning.

    • Why it matters: Low-fat substitutes produce icy, grainy ice cream. Heavy cream is non-negotiable for the right texture.

    Whole Milk

    Whole milk balances the richness of the heavy cream without over-thickening the base. It provides enough fat to maintain creaminess while keeping the ice cream scoopable rather than dense. Do not substitute with skim or low-fat milk.

    • Why it matters: Milk affects the ratio of fat to water in the base, which directly controls texture and scoopability after freezing.

    Vanilla Extract (or Vanilla Bean Paste)

    Vanilla acts as a flavor bridge between the dairy base and the strawberries, rounding out the overall taste. For a more intense, speckled result, use vanilla bean paste instead of extract.

    • Why it matters: Without vanilla, the cream base tastes flat. Vanilla is what makes the strawberry flavor pop rather than sit on its own.

    Egg Yolks

    Egg yolks act as a natural emulsifier, binding the fat and water molecules together for a silkier, creamier texture. They also add a subtle richness to the base. Whisk the yolks with a small portion of the warm cream base (tempering) before adding to the full mixture to prevent scrambling.

    • Why it matters: Yolks are the difference between a basic ice cream and a custard-style ice cream — significantly smoother and more stable.

    Sugar or Honey

    Both sweeteners dissolve evenly into the mixture and lower the freezing point slightly, keeping the ice cream from becoming rock-hard. Honey adds a subtle floral note that pairs beautifully with strawberries. Use whichever you prefer — the ratio is the same.

    • Why it matters: Sugar also controls texture. Too little and the ice cream freezes too hard; too much and it stays soft and icy. The recipe is calibrated for the right balance.

    Lemon Juice

    A squeeze of lemon juice brightens the strawberry flavor and enhances its natural sweetness. The acidity balances the richness of the cream base and makes the fruit flavor more vivid.

    • Why it matters: Without lemon, the strawberry flavor can taste dull or hidden under the cream. Lemon is the flavor activator here.

    Strawberry ice cream ingredients laid flat

    If you love homemade frozen desserts, try our vanilla bean ice cream or the easy blueberry ice cream next — both use this same base technique. For a no-churn option, check out our fresh mango sorbet.

    Frequently Asked Questions

    Can I make strawberry ice cream without an ice cream machine?

    Yes, but it requires more effort. Pour the prepared mixture into a shallow freezer-safe container. Every 45 minutes for the first 3–4 hours, remove it from the freezer and stir vigorously (or blend briefly) to break up ice crystals. The texture will be slightly less smooth than machine-churned but still very good.

    Can I use frozen strawberries instead of fresh?

    Absolutely. Add frozen strawberries directly to the saucepan — no need to thaw first. The result is nearly identical to using fresh strawberries since the cooking process concentrates the flavor in both cases.

    Why is my ice cream icy instead of creamy?

    The most common causes are: not enough fat in the base (use heavy cream, not light cream), insufficient churning time, or freezing in a container that is too deep. A shallow, wide container allows more even freezing and fewer large ice crystals.

    How long should I churn the ice cream?

    Most machines take 20–30 minutes to reach soft-serve consistency. Do not over-churn — once the ice cream pulls away from the bowl sides and is thick and creamy, stop. A quality ice cream maker makes this process foolproof.

    How long does homemade strawberry ice cream keep?

    Up to 2 weeks in the freezer in an airtight container. Press a piece of plastic wrap directly against the surface before putting the lid on to prevent ice crystal formation on top.

    Can I make this dairy-free?

    Yes. Substitute full-fat coconut cream for the heavy cream and full-fat coconut milk for the whole milk. Omit the egg yolks. The texture will be slightly different but still creamy and delicious.

    Two scoops of homemade strawberry ice cream in a waffle cone

    Strawberry Ice Cream

    There's nothing quite like the taste of summer encapsulated in a scoop of homemade fresh strawberry ice cream. Bursting with the vibrant flavours of ripe strawberries, this creamy delight is the epitome of a seasonal treat.
    Prep Time 10 minutes
    Cook Time 15 minutes
    Churning Time 25 minutes
    Total Time 50 minutes
    Servings: 6
    Course: Dessert
    Calories: 280

    Ingredients
      

    • ½ pound fresh strawberries or 1 cup frozen strawberries wash and hauled
    • ¾ cup sugar or 5 tbsp honey
    • 1 tsp fresh lemon juice
    • 1½ cups heavy cream
    • 2 cups whole milk
    • 1 tsp vanilla extract

    Equipment

    • ice cream maker machine

    Method
     

    1. Put the strawberries and sugar into the saucepan on medium heat. Whisk everything together until the sugar has melted and the strawberries can be easily mashed with a fork (5-7 mins). Using a handheld potato masher, mash the strawberries until the syrup is thick and chunky. Squeeze the lemon juice inside, give it a good stir, and set it aside.
    2. In a large sauce pan, add in the heavy cream and whole milk. Heat over medium-low heat until hot, but not bubbling.
    3. In a large bowl, whisk together the egg yolks until light in colour. Now, while whisking the eggs, slowly pour in ½ cup of the hot cream mixture to temper the eggs.
    4. Pour the tempered egg yolks into the saucepan with the rest of the custard base and stir gently with a wooden spoon for 2-4 minutes, or until the temperature is between 170-175 and the mixture is just thick enough to coat the back of the spoon. Remove from heat and stir in the vanilla.
    5. Combine the custard base and strawberry syrup together. Mix well. Refrigerate for 4 hours, until thoroughly chilled, or set into an ice water bath, stirring frequently until cold.
    6. Pour the strawberry custard base into your ice cream maker and churn according to manufacturer's instructions. After churning, transfer ice cream to a freezer safe container and place in a freezer to cure for at least 4 hours.
  • Easy Chocolate Fudge Ice Cream

    Easy Chocolate Fudge Ice Cream

    This homemade chocolate fudge ice cream is so rich and velvety that one scoop is never enough. Made with Dutch-process cocoa, real chocolate chips, and heavy cream, it comes together in under 30 minutes of active work — and it beats anything you will find in the freezer aisle.

    This post may contain affiliate links. If you purchase through these links, I may earn a small commission at no extra cost to you. Thank you for supporting Love & Harvest!

    A hand holding a bowl of chocolate fudge ice cream with sprinkles

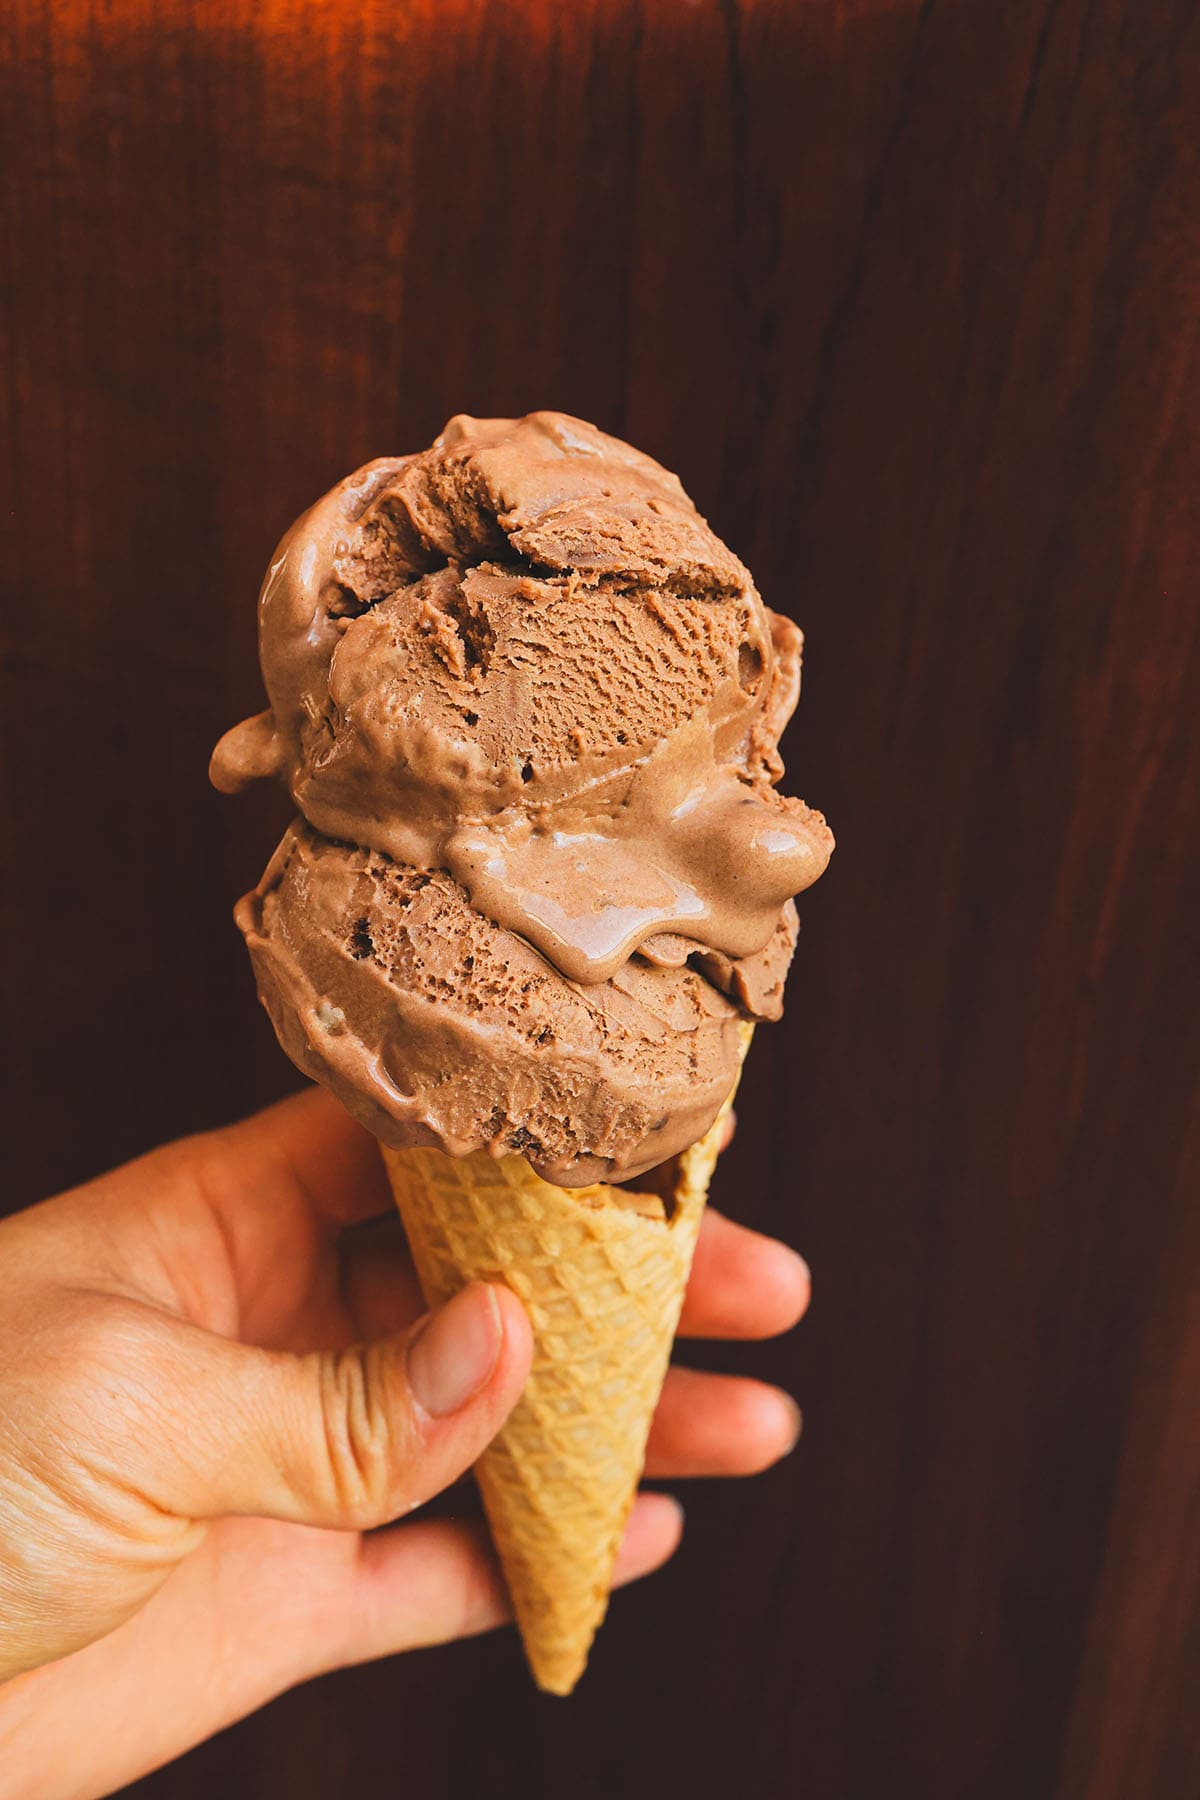
    This is a recipe for easy homemade chocolate ice cream using an ice cream machine. In 25 minutes of churning, you will have velvety, fudgy chocolate ice cream made with cocoa, cream, chocolate chips, and vanilla extract.

    Why Try This Recipe?

    With thousands of chocolate ice cream recipes online, here is what makes this one worth your time:

    1. Irresistible Fudgy Texture: This recipe delivers dense, velvety consistency — not just chocolatey, but genuinely fudgy in every spoonful.

    2. Simple Ingredients, Extraordinary Flavor: High-quality cocoa powder, cream, and real chocolate create a depth of flavor that powdered mixes simply cannot replicate.

    3. Easy to Make: Mix, chill, churn. No complex techniques. Accessible to home cooks of any skill level.

    4. Customizable: The base recipe is perfect on its own, but it also welcomes mix-ins like nuts, caramel swirls, or extra chocolate chips.
    5. Made from Scratch: Full control over ingredients means no artificial flavors, no mystery stabilizers — just real food.

    A hand holding a waffle cone with scoops of chocolate fudge ice cream

    Easy as 1, 2, 3

    This homemade fudgy chocolate ice cream is a breeze to make. With just a few simple steps you will be scooping creamy, velvety indulgence in no time. No fancy techniques, no hard-to-find ingredients — just pure chocolatey bliss with every scoop.

    Bowl of chocolate fudge ice cream topped with chocolate sauce and sesame seeds

    You Will Need an Ice Cream Machine

    Yes, you will need one if you do not already own one. The machine I use is the Cuisinart Ice Cream Maker. I have used it for over 15 years and it remains my first choice. It is compact enough to store easily, simple to set up, and the only prep required is freezing the bowl overnight. The next day you are making ice cream in 25 minutes.

    If you do not have one yet, this ice cream maker is the one I recommend — reliable, compact, and under $100.

    Freshly churned chocolate ice cream in a container

    Why Use an Ice Cream Machine?

    There are real reasons to invest in a machine over just using a high-speed blender:

    • Consistent Churning: Continuous motion during freezing prevents large ice crystals from forming, producing a smoother, creamier texture.

    • Faster Freezing: Rapid churning locks in flavor while freezing quickly, producing better texture than still-freeze methods.

    • Customizable Texture: Control churn time to hit anywhere from soft-serve consistency to firm, scoopable ice cream.

    • Hands-Free Operation: Pour in the base and walk away. The machine handles everything.

    • Versatility: The same machine makes sorbets, gelatos, frozen yogurt, and more.

    Ingredients

    Cocoa Powder

    The key ingredient for deep chocolate flavor. Use Dutch-process cocoa powder for the richest, smoothest taste — Dutch-process cocoa is less acidic, which makes the chocolate flavor rounder and more intense.

    • Why it matters: Natural cocoa can taste sharp and bitter. Dutch-process cocoa gives you that dark, fudgy depth that makes this recipe special.

    Heavy Cream

    Heavy cream adds the luxurious creaminess that defines great ice cream. The high fat content is not optional — it is what creates a smooth, velvet-like texture and prevents the ice cream from freezing rock-solid.

    • Why it matters: Lower-fat cream produces icier, less satisfying results. Do not substitute half-and-half here.

    Whole Milk

    Milk provides the liquid base, moisture, and helps achieve the right balance between richness and scoopability.

    • Why it matters: It lightens the base just enough so the ice cream is creamy rather than overly dense.

    Sugar

    Sugar balances the bitterness of the cocoa and plays a structural role — it keeps the ice cream soft and scoopable even when fully frozen.

    • Why it matters: Too little sugar and the ice cream freezes too hard. The right amount keeps it perfect right out of the freezer.

    Chocolate Chips

    Optional but highly recommended. I buy bittersweet chocolate chips in bulk — they add pockets of intense chocolate throughout the creamy base.

    • Why it matters: They create a satisfying textural contrast and double down on the chocolate flavor in every bite.

    Vanilla Extract

    A subtle but important addition. Vanilla bean paste adds depth and rounds out the chocolate, softening any harsh edges in the flavor.

    • Why it matters: Real vanilla adds complexity. Without it, the chocolate can taste one-dimensional.

    A hand holding a bowl of chocolate fudge ice cream with chocolate drizzle

    How to Make This Easy Chocolate Ice Cream

    Begin by whisking together cocoa powder and sugar, then gently heat with whole milk until a smooth mixture forms. Add warm heavy cream and vanilla extract to enrich the base. Optionally fold in chocolate chips for extra decadence. Chill the mixture thoroughly, then churn in your ice cream maker until luxuriously thick. Freeze until firm, then scoop and serve.

    Scoops of chocolate fudge ice cream with chocolate sauce in a white bowl

    Why You Should Make This Chocolate Ice Cream

    • Each bite offers a velvety texture that is soft and slightly sticky, delivering pure, dense chocolate satisfaction.
    • There is something special about making ice cream from scratch — the kitchen smells incredible, and the process itself is genuinely fun.
    • The memories shared with loved ones over a bowl of homemade ice cream are worth every minute of preparation.

    Frequently Asked Questions

    Do I have to use an ice cream machine?

    Technically no, but the results differ significantly. Without a machine, ice crystals form during freezing and produce a grainier texture. If you do not own a machine, stir the mixture vigorously every 30–45 minutes during the first 3 hours of freezing to partially replicate the churning effect.

    Can I use natural cocoa powder instead of Dutch-process?

    Yes, but the flavor will be sharper and slightly more acidic. Dutch-process cocoa is preferred here because it produces a rounder, deeper chocolate taste without bitterness. If you only have natural cocoa, add a tiny pinch of baking soda to neutralize the acidity.

    How long does homemade ice cream keep?

    Store in an airtight container with plastic wrap pressed directly onto the surface of the ice cream to prevent freezer burn. It keeps well for up to 2 weeks, though texture is best in the first 5–7 days.

    Can I make this dairy-free?

    Yes. Substitute full-fat coconut cream for the heavy cream and oat milk or almond milk for the whole milk. The texture will be slightly different but still delicious. Reduce the sugar slightly since coconut cream can add its own sweetness.

    Why did my ice cream turn out icy instead of creamy?

    The most common causes are: the ice cream bowl was not frozen long enough before churning (needs at least 12–15 hours), the base was not chilled enough before adding to the machine, or the fat content was too low. Make sure to start with cold custard and a properly frozen bowl.

    Can I add mix-ins like nuts or caramel?

    Absolutely. Add any mix-ins during the last 2–3 minutes of churning when the ice cream has thickened to a soft-serve consistency. Chopped pecans, caramel ribbons, and crushed cookies all work beautifully.

    Love frozen desserts? Try our strawberry ice cream, our vanilla bean ice cream, and our fresh mango sorbet for more homemade frozen treat inspiration.

    A hand holding a waffle cone with scoops of chocolate fudge ice cream

    Easy Chocolate Fudge Ice Cream

    Our homemade fudgy chocolate ice cream is easy and delicious. If you've ever dreamed of scooping up velvety clouds of pure cocoa bliss, this recipe is your ticket to paradise.
    Prep Time 20 minutes
    Cook Time 20 minutes
    Total Time 4 hours
    Servings: 6 servings
    Course: Dessert
    Calories: 350

    Ingredients
      

    • 1½ cups cups whole milk
    • 1½ cups cups heavy cream
    • ¾ cups (150 grams) granulated sugar divided
    • ¼ cup (25 grams) unsweetened cocoa powder preferably Dutch-process, sifted
    • pinch of sea salt
    • ½ tsp vanilla extract
    • 8 oz bittersweet chocolate chips
    • 4 large egg yolks

    Equipment

    • ice cream machine

    Method
     

    1. Prepare for making your ice cream by placing the ice container in the freezer the day before. Allow it to freeze overnight or for a minimum of 12 hours.
    2. In a medium saucepan, combine the milk, cream, 1/2 cup sugar, cocoa powder, salt, and vanilla. Set over medium heat, stirring occasionally, until the mixture is warm and begins to steam, about 5 minutes. Stir in the melted chocolate.
    3. Combine the egg yolks and the remaining 1/4 cup of sugar in a bowl and whisk until smooth. Gradually incorporate half of the warm milk mixture into the egg yolks, adding one ladleful at a time, until the mixture is warmed. Then, pour the egg-milk mixture back into the saucepan. Cook over medium heat, stirring continuously with a wooden spoon, until the mixture thickens enough to coat the back of the spoon and reaches around 175°F on an instant-read thermometer, typically taking about 5 to 7 minutes. Ensure not to let the mixture boil.
    4. Strain the mixture immediately through a fine strainer into the prepared ice bath. Allow the custard to cool in the ice bath, stirring frequently until it reaches room temperature. Cover the surface of the custard with plastic wrap, then refrigerate until chilled, typically taking about 4 hours or up to 1 day.
  • Matcha Avocado Popsicles

    Matcha Avocado Popsicles

    If you are looking for a frozen treat that is stunning to look at, these matcha avocado popsicles deliver on every front. Velvety, creamy, vibrantly green, and made with just a handful of real ingredients, they’re a frozen treat worth making again and again.

    This post may contain affiliate links. If you purchase through these links, I may earn a small commission at no extra cost to you. Thank you for supporting Love & Harvest!

    Jump to Recipe

    Matcha avocado popsicles on a dark plate on a granite counter

    This post is all about a matcha avocado popsicles recipe. It has matcha powder, coconut cream, non-dairy milk, and avocado. Dairy-free and gluten-free.

    These Matcha Avocado Popsicles are your frosty summer treat. Avocado brings creamy texture, coconut cream adds richness, and matcha provides that earthy kick. Each lick is a step into a frozen paradise.

    Stack of pale green matcha avocado popsicles beside a halved avocado

    Matcha avocado popsicles piled on a tray with avocado halves

    Why Try This Recipe?

    As you savor each lick, feel the cool creaminess dance on your taste buds. These Matcha Avocado Popsicles are not just frozen treats — they are a thrilling escape from the heat and the perfect companion for summer afternoons.

    DAIRY-FREE   GLUTEN-FREE

    Matcha avocado popsicle standing in front of a stack of popsicles and an avocado

    Matcha avocado popsicles on a dark plate with halved avocados

    Ingredients

    Matcha Tea Powder

    Always opt for premium ceremonial-grade matcha. The taste is more luxurious and stronger. Ceremonial-grade matcha powder is a good option. The vibrant green color alone tells you it is the real thing.

    • Why it matters: Culinary-grade matcha can taste bitter and dull. Ceremonial-grade matcha produces a smooth, slightly sweet, earthy flavor that makes these popsicles genuinely special.

    Coconut Cream

    Full-fat coconut cream is the backbone of creaminess in this recipe. We choose a can with more cream than liquid — the cream is what gives the popsicles their rich, dense texture.

    • Why it matters: Low-fat coconut milk produces icy, watery popsicles. Full-fat coconut cream creates the smooth, almost gelato-like mouthfeel that sets these apart.

    Non-Dairy Milk

    Use your favorite non-dairy milk — almond, cashew, oat, or macadamia all work. We love almond milk for its light, neutral flavor that lets the matcha shine. Look for unsweetened varieties so you can control the sweetness yourself.

    • Why it matters: Non-dairy milk adjusts the consistency of the blend, making it pourable without diluting the creaminess of the coconut cream.

    Xanthan Gum

    A small but critical ingredient. Xanthan gum improves texture and prevents the separation of heavier ingredients (like avocado) from sinking to the bottom during freezing.

    • Why it matters: Without it, dairy-free popsicles can have an uneven, grainy texture with ingredient separation. A tiny amount keeps everything uniform from the first lick to the last.

    Avocado

    Avocado contributes silky smoothness and fats that prevent ice crystals from forming during freezing. This is the secret to a creamy popsicle without dairy.

    • Why it matters: The fat content in avocado mimics the role of cream in traditional ice cream — it gives body, smoothness, and a satisfying mouthfeel. Use fully ripe avocados only.

    A hand holding a matcha avocado popsicle in front of a large green leaf

    Frequently Asked Questions

    How do I know if my avocado is ripe enough?

    A ripe avocado yields slightly to gentle pressure when squeezed — it should feel like a ripe peach, not rock-hard and not mushy. The skin will be dark green to black. For blending into popsicles, fully ripe is essential; an underripe avocado produces a bitter, starchy flavor that no amount of matcha will mask.

    Can I skip the xanthan gum?

    You can, but the texture will be slightly icier and the mixture may separate during freezing — you may see darker avocado sinking to the bottom. If you skip it, blend thoroughly and freeze immediately. The popsicles will still taste good, just with a less uniform texture.

    What popsicle molds should I use?

    Silicone molds are the easiest to work with — just flex the mold and the popsicle releases cleanly. Standard plastic molds work well too. We use popsicle molds that hold about 3 oz each, which produces a perfect single-serve size.

    Can I use culinary-grade matcha instead of ceremonial?

    Yes, but adjust expectations. Culinary matcha is more bitter and less vibrant green. If using culinary grade, reduce the amount by 25% and add an extra teaspoon of honey or agave to compensate for the bitterness.

    How long do these popsicles keep in the freezer?

    Up to 3 weeks when stored properly. Once unmolded, wrap each popsicle individually in parchment paper and store in a sealed freezer bag to prevent freezer burn and flavor absorption from other foods.

    Are these popsicles suitable for kids?

    Matcha contains caffeine, so keep that in mind before serving these to children.

    Love frozen treats? Also check out our matcha green tea popsicles, our cucumber crush popsicles, and our loco mango popsicles for more creative frozen dessert ideas.

    Matcha avocado popsicles piled on a tray with avocado halves

    Matcha Avocado Popsicles

    These Matcha Avocado Popsicles are your frosty summer treat. Each lick is a step into a frozen paradise.
    Prep Time 10 minutes
    freeze time 4 hours
    Total Time 6 hours 10 minutes
    Servings: 10 popsicles
    Course: Dessert
    Calories: 130

    Ingredients
      

    • 1 avocado
    • 2 tsp matcha tea powder
    • 1 can full fat coconut cream
    • ¼ cup honey or agave nectar
    • ½ L almond milk or any other non-diary milk
    • ¼ tsp Xanthan gum

    Equipment

    • high speed blender

    Method
     

    1. In a blender, combine peeled and pitted avocados, matcha powder, coconut cream, honey or agave nectar, almond milk, and xanthan gum.
    2. Blend the ingredients on high speed until the mixture is smooth and well combined. Ensure there are no avocado lumps and the matcha is evenly distributed.
    3. Pour the matcha avocado mixture into popsicle molds, leaving a small space at the top for expansion during freezing
    4. Insert popsicle sticks into the molds. If your molds come with a lid, secure them to keep the sticks in place. If not, cover the molds with aluminum foil and insert the sticks through the foil.
    5. Place the popsicle molds in the freezer and let them freeze for at least 4-6 hours or until fully set.
    6. Once the popsicles are completely frozen, remove them from the molds. To release the popsicles easily, briefly run the molds under warm water or dip them in a bowl of warm water.
  • Oatmeal Chai Breakfast Cookies

    Oatmeal Chai Breakfast Cookies

    What if a breakfast cookie could taste like a warm chai latte, come packed with chewy rolled oats, and be ready in 30 minutes? These Oatmeal Chai Breakfast Cookies do exactly that — chewy rolled oats, warming spices, and sweet-tart dried cranberries in every bite. They are the fall treat your family will ask for twice a month.

    This post may contain affiliate links. If you purchase through these links, I may earn a small commission at no extra cost to you. Thank you for supporting Love & Harvest!

    oatmeal chai cookies on a cooling rack

    The Chai-Spiced Magic

    Chai spices have long been associated with autumn, with their rich, warming flavours that seem tailor-made for this season. Cinnamon, cardamom, ginger, and cloves come together in a harmonious blend that captures the essence of fall. When these spices are incorporated into the oatmeal chai cookie recipe, the result is pure magic.

    oatmeal chai cookies spice mix

    Ingredients

    Key Ingredients

    Rolled Oats

    Rolled oats lend a delightful chewiness and a hearty texture to these cookies.

    • Why they matter: Oats provide structure, fiber, and that signature chewy bite that makes these cookies satisfying as a breakfast or snack.

    We love using Bob’s Red Mill Oat Flour for a gluten-free variation, or classic rolled oats for full texture.

    Chai Spice Blend

    Cinnamon, cardamom, ginger, and cloves are the star of the show. They provide the unmistakable chai flavour that makes these cookies perfect for autumn.

    • Why they matter: Chai spices are warming and create the aroma that fills your kitchen and your heart.

    Grab a quality pre-made Chai Spice Blend if you want to skip making your own.

    Coconut Sugar or Brown Sugar

    Adds depth of flavour and helps keep the cookies moist and tender.

    • Why it matters: It contributes a subtle caramel-molasses note that plays beautifully with the spices.

    Try Coconut Sugar for a more natural sweetener option.

    Dried Cranberries

    The chewy and slightly tart dried cranberries complement the spiced chai flavors beautifully and add a pop of colour.

    • Why they matter: They balance the warm sweetness of the spices with a fruity brightness that keeps every bite interesting.

    Alternative Ways to Enjoy Your Oatmeal Chai Breakfast Cookies

    We love these oatmeal chai cookies not just because they taste great, but because they are very versatile! Here are some ways we eat them.

    1. Crumble on top of porridge

    oatmeal chai cookie crumbled on porridge

    Add a crumbled cookie with some bee pollen, brown sugar, and blueberries on top of a matcha porridge for a cozy morning bowl.

    2. Great side snack to pack for school

    Sometimes I run out of ideas on what to bring for the kids’ lunchbox. I avoid processed food and anything with plastic wrap. These cookies are my favourite thing to pack for the kids. They keep them full and happy. There is a reason why I make them at least twice a month!

    oatmeal chai cookies packed for school

    3. Decorate them for any event

    These cookies are a lot of fun to decorate. Chai flavour is great for fall, and they are even better for Halloween decoration. Because the texture is bumpy, we love making funny scary faces on them!

    4. Add mix-ins

    Toss in mix-ins like chopped nuts, seeds, or dried fruits. They add texture and flavour.

    oatmeal chai cookies batch

    Frequently Asked Questions

    Can I make these oatmeal chai cookies gluten-free?

    Yes. Swap the all-purpose flour for a 1:1 gluten-free flour blend and use certified gluten-free rolled oats. The texture will be slightly more crumbly but still delicious.

    How do I store oatmeal chai breakfast cookies?

    Store in an airtight container at room temperature for up to 5 days. They also freeze well for up to 3 months — just thaw at room temperature for 20 minutes.

    Can I substitute the dried cranberries?

    Absolutely. Dried blueberries, raisins, chopped dried apricots, or even chocolate chips all work wonderfully. Use whatever dried fruit you love or have on hand.

    Do I need a stand mixer?

    No. A hand mixer or even a wooden spoon works fine. A KitchenAid Stand Mixer makes the process faster and easier, especially when creaming the butter and sugar, but it is not required.

    Why are my cookies spreading too much?

    Butter that is too soft or too warm is the most common culprit. Make sure your butter is at room temperature — soft but not melted. You can also chill the shaped dough balls for 15 minutes before baking to reduce spreading.

    Can I make the chai spice mix ahead of time?

    Yes, and we recommend it. Mix a double or triple batch and store it in a sealed jar. It keeps well for 6 months and works great in lattes, oatmeal, and pancakes too.

    oatmeal chai breakfast cookies

    Oatmeal Chai Breakfast Cookies

    These delightful treats are not only a delicious taste of fall but also a perfect way to bring the family together during this cozy time of year. Cinnamon, cardamom, ginger, and cloves come together in a harmonious blend of oatmeal and cranberries that captures the essence of fall.
    Print Recipe
    Pin Recipe
    Prep Time:15 minutes
    Cook Time:15 minutes
    Course: Cookie
    Keyword: chai, cookies, halloween breakfast, oatmeal

    Ingredients

    Chai Spice

    • 3 tbsp ground cinnamon
    • 1 tbsp ground cardamom
    • 1 tbsp ground ginger
    • ½ tbsp ground allspice
    • ½ tbsp ground clove
    • ½ tbsp ground nutmeg

    Oatmeal Chai Cookies

    • ½ cup butter room temperature
    • ½ cup brown sugar
    • ½ cup granulated sugar
    • 1 large egg room temperature
    • ½ tsp vanilla extract
    • ½ tsp baking soda
    • ½ tsp salt
    • 3 tsp chai spice (see 'Chai Spice' Recipe above)
    • ¾ cup all-purpose flour
    • 1½ cups rolled oats
    • 1 cup dried berries (ex: cranberry, blueberries, strawberries, etc)

    Instructions

    Chai Spice

    • In a bowl, combine all the ingredients together. Whisk it very well. Store it in a tight plastic container and label the container.

    Oatmeal Chai Cookies

    • Preheat your oven to 350°F (175°C) and line two baking sheets with parchment paper.
    • In a large mixing bowl or in a stand mixer, place the butter inside. Cream until the colour is more light, and texture is fluffy.
    • Add the brown sugar and granulated sugar. Combine at medium-high speed for 1 minute. Add the egg and vanilla, and mix well.
    • In another bowl, add all your dry ingredients together: baking soda, salt, chai spice, flour, and oats.
    • Combine the dry ingredients with your wet by adding the dry into the wet ingredients. Start the speed slowly so the flour does not come out of the bowl. Once everything looks moist, speed it up to medium speed, and mix for 1-2 minutes. Fold in the berries.
    • Drop rounded tablespoons of cookie dough onto the prepared baking sheets, spacing them about 2 inches apart.
    • Bake in the preheated oven for 10-12 minutes, or until the edges of the cookies are golden brown and the centers are set.
    • Allow the cookies to cool on the baking sheets for a few minutes before transferring them to wire racks to cool completely.

    Love these chai cookies? Try our Homemade Vanilla Extract to make the most flavourful batch possible, or check out our Birthday Rainbow Sugar Cookies for another festive bake the whole family will love.

  • Birthday Rainbow Sugar Cookies

    Birthday Rainbow Sugar Cookies

    These Birthday Rainbow Sugar Cookies are as fun to make as they are to eat. Crisp yet tender, beautifully decorated with vibrant royal icing, and completely gender neutral for any birthday party or celebration. Whether you place them on the dessert table or wrap them as gifts, they will steal the show every single time.

    This post may contain affiliate links. If you purchase through these links, I may earn a small commission at no extra cost to you. Thank you for supporting Love & Harvest!

    birthday rainbow sugar cookies on display

    This post covers recipes for both the cookies and the royal icing.

    These bright rainbow sugar cookies will bring joy to any birthday party. Red, yellow, orange, and blue are the primary colours used here — completely gender neutral for any girl or boy’s birthday. They are fun to make and delicious to eat. Whether you place them as a centrepiece on the dessert table or as a gift in a clear bag, people will love them.

    Why You Will Love These Rainbow Sugar Cookies

    • No plastic gifts: These beautiful cookies are great as gifts. If you are a plastic-conscious parent and want to cut plastic usage at your party, these sugar cookies are a perfect alternative.
    • Tastes amazing: Crunchy on the edge, soft in the centre. We use real butter and vanilla extract to get bold, delicious flavour.
    • Easy to decorate: We have great tips on how to decorate them like a pro, even if it is your first time.
    • Beautiful: These cookies are gorgeous and the bright colours make them very celebration-worthy.

    rainbow sugar cookies decorated with royal icing

    Why Make Them?

    I want to say that we are losing our creative selves to the convenience of buying things. Giving people handmade desserts is a habit we should not lose. These cookies are great gifts that showcase your creativity, craft, and thoughtfulness.

    And the recipe I am sharing is the best-tasting sugar cookie I have been making for over 10 years. The flavour is on point, the texture holds design beautifully, and they store well too.

    Ingredients

    Key Ingredients

    Unsalted Butter

    Cold, cubed unsalted butter is the foundation of this sugar cookie recipe. It creates a tender crumb and gives every bite a rich, buttery flavour.

    • Why it matters: Using cold butter (not softened) gives the dough more structure and prevents the cookies from spreading too much while baking. This is what allows you to cut clean, sharp-edged shapes that hold their form through decorating.

    A KitchenAid Stand Mixer makes creaming the butter much easier, though a hand mixer works perfectly fine too.

    Vanilla Extract

    Real vanilla extract is what separates a good sugar cookie from a great one. Use your Homemade Vanilla Extract if you have it — the depth of flavour makes a noticeable difference.

    • Why it matters: Vanilla adds warmth, depth, and a subtle floral aroma that makes these cookies taste bakery-quality. For royal icing, use a clear vanilla extract to keep the icing bright white.

    Food Colouring Gel

    We use Gel Food Colouring for the royal icing. Gel colouring is highly concentrated, so a small drop goes a very long way and produces vivid, true colours without affecting the icing consistency.

    • Why it matters: Liquid food colouring adds water to your icing, which throws off the consistency. Gel colouring gives you intense, beautiful colour without changing the texture.

    Piping Bags

    Having the right piping bags makes all the difference for clean, controlled decoration.

    • Why they matter: Piping bags give you precise control when outlining and flooding the cookies. In a pinch, you can use resealable freezer bags with the corner snipped off.

    How I Organize My Days

    I start preparing my dough 2 days before the event. If the party is on Sunday: Friday night I make the dough and chill it overnight. Saturday afternoon I bake the cookies. Saturday night, when the house is quiet and the kids are asleep, I decorate. By Sunday, I am just packaging them.

    Decorating Sugar Cookies Is Therapeutic

    Decorating sugar cookies is my mental therapy. If you like adult colouring books, sewing, or beading, you will love this. Decorating sugar cookies activates the same relaxation response as meditation — it quiets the restless mind and generates a state of mindful focus and peace.

    I decorate my cookies when the kids are asleep and the house is quiet. I burn a nice candle, make a cup of tea, and off I go into my creative meditation state. It is deeply restful.

    decorated rainbow sugar cookies close up

    Royal Icing vs. Flood Icing: What Is the Difference?

    Royal icing is the outline. It is thick and concentrated, so wherever you pipe it on the cookie, it stays exactly there.

    Flood icing is thinned royal icing. It is more liquid and will spread across the cookie surface. You always apply the royal icing outline first to trap the flood icing inside the perimeter. The benefit of flood icing is that it covers large areas quickly and produces a smooth, professional finish.

    royal icing consistency demonstration

    Professional Tips

    Pro Tip 1 — Bake Until Slightly Brown at the Edges

    Once the cookies show a slight brown rim, they are done. Do not let the entire surface go brown — the cookies will be too hard. Since they sit out for a long time while decorating, we do not want to over-bake them.

    Pro Tip 2 — Flip the Cookies Upside Down Out of the Oven

    Flip the cookies as soon as they come out of the oven while they are still warm and adjustable. Flipping them upside down guarantees a flatter top surface, which is critical for clean, even icing. A domed surface causes the icing to slide and run.

    Pro Tip 3 — Always Chill the Dough as a Flat Disk

    When the cookie dough is cold, it holds sharp edges during cutting and baking. Chilling a round ball is less effective — always flatten the dough into a disk before refrigerating. This also makes rolling out the dough much easier with fewer cracked edges.

    Pro Tip 4 — Cut the Piping Bag Tip Small

    Start with a smaller opening and work your way up if needed. Thinner tips give you more control over details and fine lines. You can always cut more off, but you cannot put it back.

    Pro Tip 5 — Mix and Colour Icing in Separate Bowls

    Once you know which colours you need, divide the icing into separate small bowls. Colour each bowl individually and mix with a spatula until the colour is consistent and smooth.

    Pro Tip 6 — Decorate Only When Completely Cooled

    This is the most important tip. Only start decorating once the cookie is completely cool. If you apply icing to a semi-warm cookie, the icing will melt and spread uncontrollably. Patience here is everything.

    Frequently Asked Questions

    How far in advance can I bake sugar cookies?

    You can bake the undecorated cookies up to 3 days in advance and store them in an airtight container at room temperature. The dough also freezes well for up to 3 months — roll it out, cut the shapes, and freeze the unbaked cutouts on a sheet pan.

    Why is my royal icing too thick or too thin?

    Thick icing: add water one drop at a time and stir. Thin icing: add sifted powdered sugar a teaspoon at a time. The “15-second test” is your guide — drag a knife through the icing and count. If it smooths over in 15 seconds, the consistency is right for flooding.

    Can I use regular food colouring instead of gel?

    You can, but the colours will be less vibrant and the added liquid may thin your icing. Gel colouring is strongly recommended for the best results without affecting texture.

    How long does royal icing take to dry?

    The surface will be dry to the touch within 1-2 hours. For fully hardened icing that you can stack and package, allow 6-8 hours or overnight. Never stack cookies until the icing is completely hardened.

    Can I freeze decorated sugar cookies?

    Yes. Freeze decorated cookies in a single layer until the icing is solid, then transfer to an airtight container with parchment between layers. They freeze well for up to 1 month. Thaw at room temperature for 1-2 hours before serving.

    What is the best way to give these as gifts?

    Place each cookie in a clear cellophane bag, tie with a ribbon that matches the party colours, and add a small tag with the flavour. For a birthday gift set, stack 3-4 cookies in a box lined with tissue paper. They look absolutely stunning and make a very personal, memorable gift.

    birthday rainbow sugar cookies

    Decorate Sugar Cookies

    An all-purpose sugar cookie recipe for cookie designers! Great in both flavour and texture, perfect for any celebration or special occasion.
    Print Recipe
    Pin Recipe
    Course: Cookie
    Cuisine: American
    Keyword: creative food, design, sugar cookie

    Equipment

    • stand mixer
    • large bowl
    • spatula
    • small spoons
    • freezer quality ziplock bags
    • elastic bands

    Ingredients

    Sugar Cookies

    • 1 cup unsalted butter (2 sticks) cubed cold
    • 1 cup granulated sugar
    • 2 eggs
    • 1 tsp vanilla extract
    • 3 cups all purpose flour you might need 4 cups
    • 1 tsp baking powder
    • 2 tsp salt

    Royal Icing

    • 4 cups powdered sugar
    • 4 tbsp meringue powder
    • 4 tbsp water warm
    • 2 tsp vanilla extract clear colour extract
    • 1 tsp almond extract clear colour extract

    Instructions

    Sugar Cookies

    • In a large bowl, cream together butter and sugar until smooth. Beat in eggs and vanilla. Stir in the flour, baking powder, and salt.
    • Flatten the dough into a 2-inch disk. Do not chill the dough in a ball. Cover, and chill dough for at least one hour (or overnight).
    • Preheat oven to 400°F (200°C).
    • Roll out dough on a floured surface to 1/4 to 1/2 inch thick. Cut into shapes with any cookie cutter. Place cookies 1 inch apart on ungreased cookie sheets.
    • Bake 6 to 8 minutes in the preheated oven, or until the rims of the cookie show a slight brown colour. Flip upside down immediately and cool completely.

    Royal Icing

    • In a large bowl, add the powdered sugar and meringue powder and mix together. Using an electric mixer on low speed, add the extracts and water (1 tablespoon at a time) and mix until smooth.
    • If you are planning to colour the icing, this is the stage to mix that in. If making multiple colours, divide the icing into smaller bowls and place a damp paper towel over the bowls you do not plan to use first.
    • The goal with royal icing is that it is thick enough that it will not run off the side of the cookie, but thin enough to meld together smoothly. Use the “15 second icing” test: drag a knife through the icing and it should smooth back over within 15 seconds.
    • Keep any icing that is not being used covered with plastic wrap as it dries out quickly. Transfer to piping bags and decorate cookies.

    Flood Icing

    • Take the desired colour of royal icing in a bowl. Add a few drops of water to the bowl and mix vigorously until smooth. Transfer to a piping bag and carefully flood the cookies along the perimeter outlined with the royal icing.

    Notes

    • If your icing has started to harden, add a drop or two of water to bring it back to your desired consistency.
    • When using royal icing to decorate cookies, pipe the outline first, then flood it. Outlining keeps the icing from sliding off the cookies.
    • Add a few drops of water and stir with a spatula for a flooding consistency. Continue adding water until you achieve the desired consistency.

    Love cookie decorating? Try our Homemade Halloween Sugar Cookies using this same recipe dressed up for Halloween. Or use your freshly made Homemade Vanilla Extract to take the flavour to the next level.