Category: chinese food recipes

  • Asian Smashed Cucumber Salad

    Asian Smashed Cucumber Salad

    This Asian smashed cucumber salad is cucumbers smashed, salted and drained, then tossed in a garlicky dressing of rice vinegar, soy sauce, sesame oil and a little sugar. It’s a no-cook side that makes about 5 servings in about 20 minutes, including the salting time.

    This post contains affiliate links. As an Amazon Associate I earn from qualifying purchases.

    This is the side dish we lean on during hectic, crazy days, when I still want to pack something special for the family, even for lunch. It takes a few basic ingredients and no cooking at all, unless you add the optional hot oil finish.

    When the lunchboxes open, the nutty smell of sesame oil and the tangy scent of rice vinegar float into the air, and the other kids always come over to check my kids’ lunchboxes to see what that smell is! It’s a huge kid-favourite in our house. For the adult version, we add some extra dried chili flakes on top.

    If you only know cucumbers from my bread and butter pickled cucumbers, this one is the opposite: no jars and no waiting. You smash, salt, drain and toss, and it’s ready to eat. It sits nicely next to Hainanese chicken or a plate of noodles.

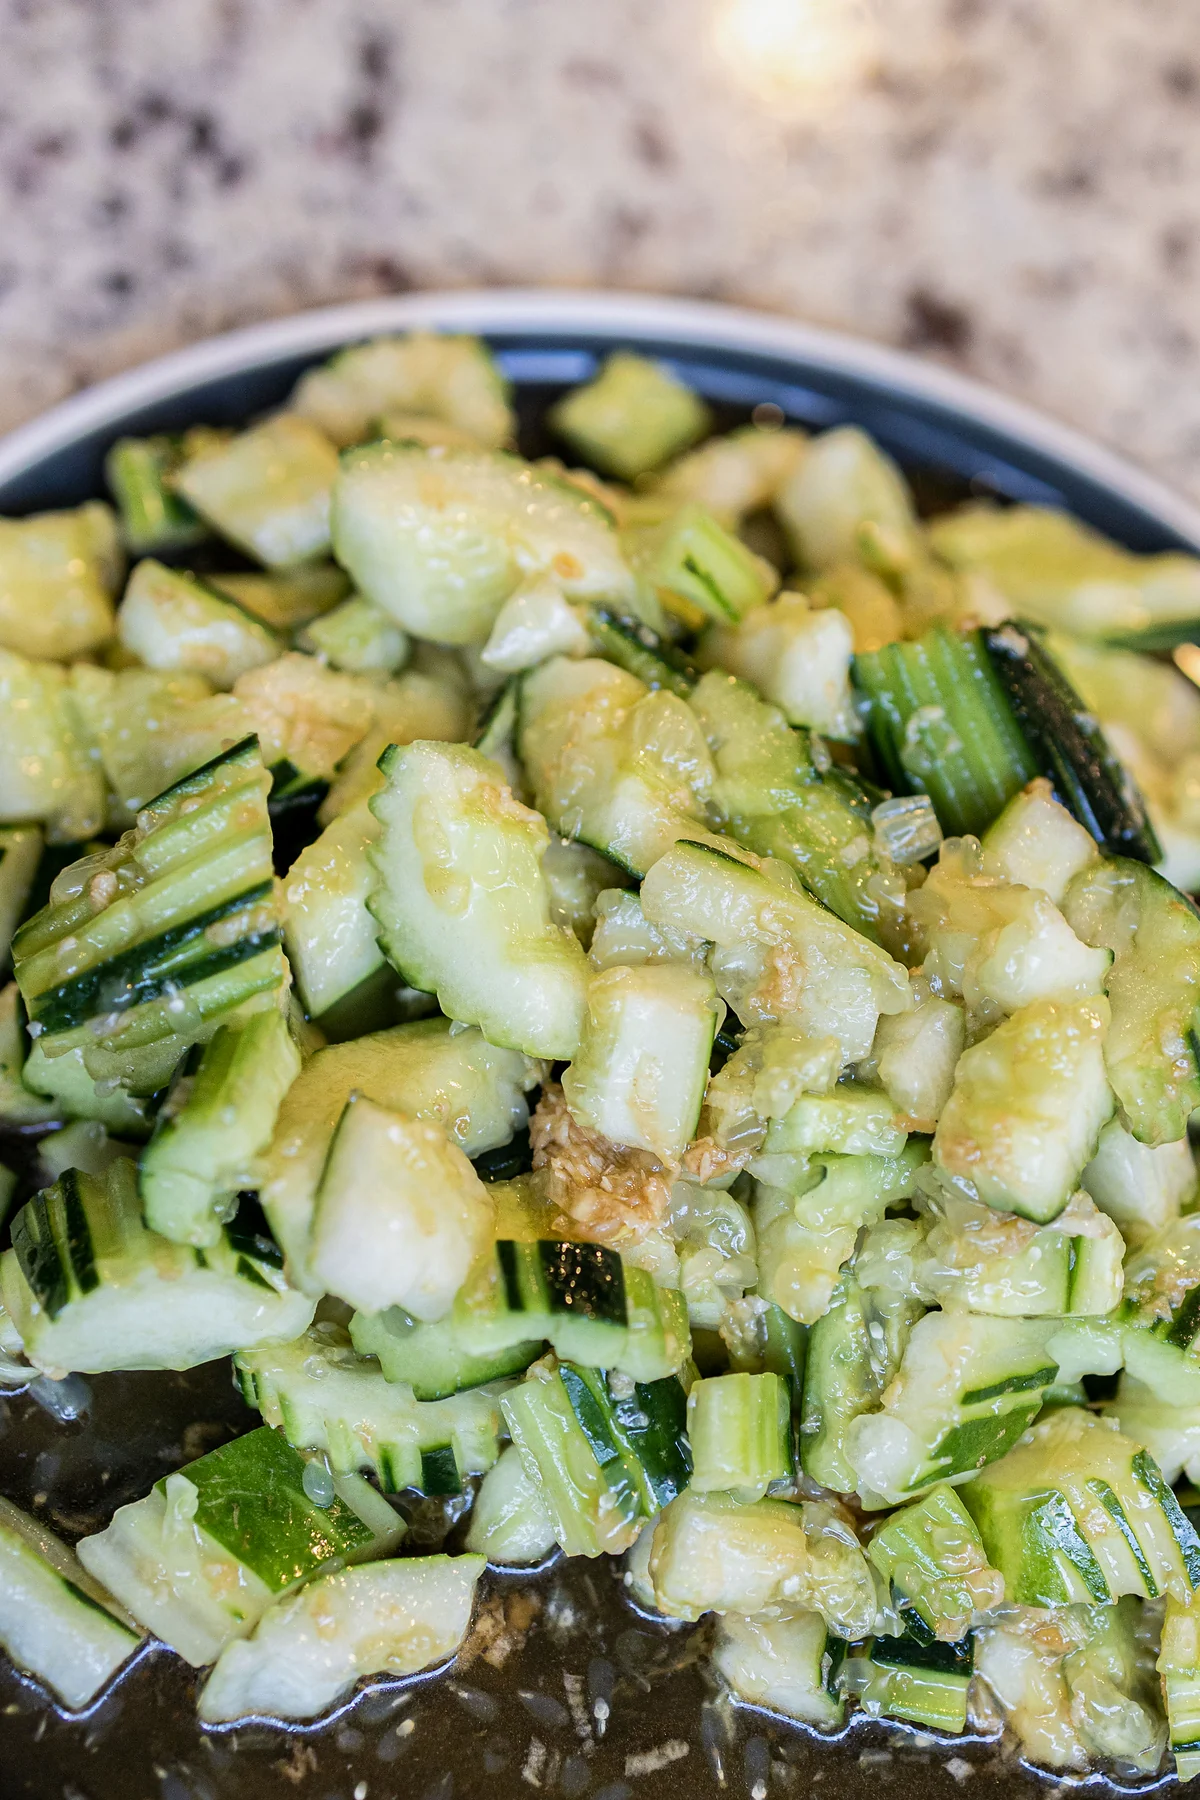
    A dark plate heaped with smashed cucumber pieces, partly peeled in stripes and glossy with sesame dressing.

    Want a week of dinners planned for you? Get my free dinners

    Ingredients

    • Cucumbers: 4 medium cucumbers.
    • Salt: 1 teaspoon, to draw out some of the water.
    • Dressing: 1 garlic clove (minced), 3 teaspoons sugar, 2 teaspoons sesame oil, 3 teaspoons soy sauce and 2 tablespoons rice vinegar.
    • Optional toppings: 1 teaspoon dried chili flakes or chili oil, and 2 teaspoons sesame seeds. No chili oil? 1 tablespoon of a neutral oil like canola for the optional hot oil finish (see Tips).

    Allergens: contains sesame and soy, and most soy sauce also contains wheat. If you need to avoid wheat, use a soy sauce or tamari labelled wheat-free. For a sesame-free version, skip the sesame seeds and use a neutral oil instead of sesame oil.

    Equipment you’ll need

    These are Amazon affiliate links. As an Amazon Associate I earn from qualifying purchases.

    How to make Asian smashed cucumber salad

    Step 1: Wash the cucumbers. Rinse the cucumbers under cool running water, rubbing them with your hands or a clean produce brush (no soap). Dry them with a clean towel and trim off the ends.

    Step 2: Smash and cut. Lay a cucumber on a cutting board, put the flat side of a cleaver or large knife on top, with the sharp edge facing away from you, and press down firmly with the heel of your hand, keeping your fingers clear of the edge (or give it a few firm whacks with a rolling pin) until it cracks open. Break it into about 4 long sections, then cut them into bite-size pieces on a 45 degree angle. Repeat with the rest.

    Step 3: Salt and drain. Put the cucumbers in a large bowl and toss them with 1 teaspoon salt. Let them sit 5 to 10 minutes, then pour off the water they release.

    Step 4: Mix the dressing. In a small bowl, stir together the minced garlic, 3 teaspoons sugar, 2 teaspoons sesame oil, 3 teaspoons soy sauce and 2 tablespoons rice vinegar until the sugar dissolves.

    Step 5: Toss and top. Pour the dressing over the cucumbers and toss well. Top with chili flakes or chili oil, if using, and the sesame seeds. For the optional hot oil finish, see Tips below. Serve right away, or cover and refrigerate within 2 hours.

    Close-up of smashed cucumber chunks coated in dressing with bits of minced garlic.

    Tips for the best smashed cucumber salad

    • Smash, don’t slice. The cracked, rough edges hold on to more dressing than neat slices do.
    • Don’t skip the draining. Pouring off the salty water keeps the dressing from getting thin.
    • No chili oil? In Chinese cooking, uncooked and cooked oil taste different. Make sure the cucumbers are well drained and the salad is in a metal or other heatproof bowl at room temperature (not a cold glass bowl straight from the fridge). Heat 1 tablespoon of a neutral oil like canola in a small pan over medium heat just until it shimmers, and stay with the pan the whole time. If it starts to smoke, turn off the heat, let the oil cool completely and start over with fresh oil. As soon as it shimmers, take the pan off the heat and, as the very last step after the salad is tossed and topped, slowly drizzle the oil over the top. Hold the pan low and close to the bowl, pour away from yourself and keep your face back. The oil is very hot and will sizzle and may spatter, so keep kids away from the stove and the bowl.
    • Make it two ways. Toss it mild for the kids, then scoop out a portion for the grown-ups and add extra chili flakes.
    • Packing it for lunch? Pack it straight from the fridge in an insulated lunchbox with two cold sources, like two frozen ice packs, and throw out anything that comes home uneaten.

    What to serve with it

    In the photos it’s served with noodles and a browned patty. It also goes well with salt and pepper chicken wings.

    A white scalloped plate with smashed cucumber salad, noodles and a browned patty, with a dish of cucumber salad behind it.

    How to store Asian cucumber salad

    Smashed cucumber salad next to noodles and a browned patty on a white plate.

    Refrigerate leftovers within 2 hours (1 hour if the room is above 90°F / 32°C) in an airtight container. It usually keeps 1 to 3 days, but it’s best the day you make it. If you keep it overnight, the cucumbers release extra water and get softer, so simply drain it off before serving. Because the dressing has raw garlic in oil, keep the salad cold and don’t leave it out at room temperature for more than 2 hours.

    FAQ

    Why smash the cucumbers?

    Smashing cracks the cucumber open, so the rough edges soak up more of the dressing than clean slices would.

    Do I have to salt the cucumbers first?

    It helps. The salt pulls out some of the water, which you pour off, so the salad stays crunchier and the dressing doesn’t get watered down as fast.

    Can I make Asian cucumber salad ahead of time?

    Yes. Mix the dressing and keep it covered in the fridge, then smash, salt and drain the cucumbers and toss everything just before serving. Since the dressing has raw garlic in oil, keep it covered in the fridge and use it within 3 days. Don’t leave it out at room temperature for more than 2 hours.

    How long does cucumber salad last in the fridge?

    It usually keeps 1 to 3 days in an airtight container in the fridge. The cucumbers keep releasing water and soften as it sits, so drain it before serving.

    Is this cucumber salad spicy?

    Not unless you add chili. The base salad is garlicky and tangy, so you can keep it mild for the kids and add dried chili flakes or chili oil for the adults.

    More recipes you’ll love

    Pack it once, and see who comes over to check the lunchbox!

    Need more dinner ideas? Grab my free dinners

    Smashed cucumber salad on a dark plate, glossy with sesame and rice vinegar dressing.

    Asian Smashed Cucumber Salad

    Cucumbers smashed, salted and drained, then tossed with a garlicky dressing of rice vinegar, soy sauce, sesame oil and a little sugar. A no-cook side with optional chili on top.
    Prep Time 10 minutes
    Salt and drain 10 minutes
    Total Time 20 minutes
    Servings: 5 servings
    Course: Salad, Side Dish
    Cuisine: Asian, Chinese

    Ingredients
      

    Salad
    • 4 medium cucumbers
    • 1 tsp salt
    Dressing
    • 1 clove garlic minced
    • 3 tsp sugar 1 tablespoon
    • 2 tsp sesame oil
    • 3 tsp soy sauce 1 tablespoon; regular soy sauce
    • 2 tbsp rice vinegar
    Optional toppings
    • 1 tsp dried chili flakes or chili oil plus extra flakes for the adults
    • 2 tsp sesame seeds
    • 1 tbsp neutral oil like canola optional hot oil finish

    Equipment

    • Cutting board
    • Cleaver or large knife the flat side is for smashing
    • Rolling Pin optional, for smashing
    • Large mixing bowl (use a metal one for the hot oil finish)
    • Small bowl for the dressing
    • Airtight container for leftovers

    Method
     

    1. Rinse the cucumbers under cool running water, rubbing them with your hands or a clean produce brush (no soap). Dry them with a clean towel and trim off the ends.
    2. Lay a cucumber on a cutting board, put the flat side of a cleaver or large knife on top, with the sharp edge facing away from you, and press down firmly with the heel of your hand, keeping your fingers clear of the edge (or give it a few firm whacks with a rolling pin) until it cracks open. Break it into about 4 long sections, then cut them into bite-size pieces on a 45 degree angle. Repeat with the rest.
    3. Put the cucumbers in a large bowl and toss them with 1 teaspoon salt. Let them sit 5 to 10 minutes, then pour off the water they release.
    4. In a small bowl, stir together the minced garlic, 3 teaspoons sugar, 2 teaspoons sesame oil, 3 teaspoons soy sauce and 2 tablespoons rice vinegar until the sugar dissolves.
    5. Pour the dressing over the cucumbers and toss well. Top with chili flakes or chili oil, if using, and the sesame seeds. For the optional hot oil finish, see the notes. Serve right away, or cover and refrigerate within 2 hours.
      Close-up of smashed cucumber chunks coated in dressing with bits of minced garlic.

    Notes

    Rinse the cucumbers under running water before cutting, even if you plan to peel them. Skip the soap.
    No chili oil? Make sure the cucumbers are well drained and the salad is in a metal or other heatproof bowl at room temperature (not a cold glass bowl straight from the fridge). Heat 1 tablespoon of a neutral oil like canola in a small pan over medium heat just until it shimmers, and stay with the pan the whole time. If it starts to smoke, turn off the heat, let the oil cool completely and start over with fresh oil. As soon as it shimmers, take the pan off the heat and, as the very last step after the salad is tossed and topped, slowly drizzle the oil over the top. Hold the pan low and close to the bowl, pour away from yourself and keep your face back. The oil is very hot and will sizzle and may spatter, so keep kids away from the stove and the bowl.
    Servings, prep and salting times are estimates and vary with the size of your cucumbers.
    Refrigerate within 2 hours (1 hour if the room is above 90°F / 32°C) in an airtight container. It usually keeps 1 to 3 days, but the cucumbers keep releasing water and soften, so it’s best the day you make it. Drain off the extra water before serving. Because the dressing has raw garlic in oil, keep it cold and don’t leave it out at room temperature for more than 2 hours.
    For a lunchbox, pack it straight from the fridge in an insulated lunchbox with two cold sources, like two frozen ice packs, and throw out anything that comes home uneaten.
    Allergens: contains sesame and soy, and most soy sauce also contains wheat. If you need to avoid wheat, use a soy sauce or tamari labelled wheat-free. For a sesame-free version, skip the sesame seeds and use a neutral oil instead of sesame oil.
  • Steam Preserved Vegetables (Zha Choy) and Pork

    Steam Preserved Vegetables (Zha Choy) and Pork

    One dish that never fails to comfort me is Steam Preserved Vegetables (Zha Choy) and Pork — it’s salty, savory, crunchy, and deeply satisfying. This traditional Cantonese recipe comes together in under 30 minutes with just a handful of humble ingredients, yet delivers bold, layered flavor that tastes like it took all day.

    This post may contain affiliate links. If you purchase through these links, I may earn a small commission at no extra cost to you. Thank you for supporting Love & Harvest!

    Steam preserved vegetables zha choy and pork served over rice

    Steam Preserved Vegetables Zha Choy (替菜) and pork is a quintessential Cantonese comfort dish — made with just a few simple ingredients: zha choy, pork, soy sauce, and sesame oil. Steamed to perfection, it’s flavorful and comes together in very little time, making it perfect for busy weeknights and family dinners alike.

    Steam Preserved Vegetables (Zha Choy) and Pork

    When the crispness of fall creeps into the air, I always find myself craving the flavors of home. This is a very traditional Cantonese dish that my mom always made for us — salty, savory, crunchy, and deeply satisfying. Best of all, it’s one of those meals that feels like a hug in a bowl, especially when paired with white rice, some steamed vegetables, and a warm soup on the side.

    What is Zha Choy?

    Zha Choy (替菜) is a type of preserved mustard stem that has a unique salty, crunchy bite. It’s popular in Cantonese kitchens and beyond, often used to add depth of flavor to simple dishes. You can steam it, pan-fry it, or even stuff it — it’s incredibly versatile. For me, steaming it with pork is the most comforting and nostalgic way to enjoy it.

    Zha choy preserved mustard stem up close

    Flavour

    The flavour profile is what makes this dish shine. The pork turns tender and juicy as it steams, while the Zha Choy infuses everything with its salty, savoury notes. The preserved vegetable has just the right amount of crunch, creating a contrast that makes every bite exciting. It’s a dish that balances simplicity with bold, comforting flavours.

    A Cantonese Family Favourite

    This recipe is more than food — it’s family tradition. My mom always made it when autumn rolled in, the days got shorter, and the skies a little grayer. While some families might simmer a stew or roast meat, ours always turned to Zha Choy and pork. It’s a meal that doesn’t need to impress — it just feels like home.

    Steamed pork and zha choy in a heatproof dish

    The Ideal Autumn Meal

    There’s something about cold, rainy days that makes this dish the perfect choice. It’s hearty without being heavy, simple without being bland, and quick to prepare when you don’t want to overthink dinner. A hot bowl of rice, a bite of pork with zha choy, a sip of soup — that’s comfort.

    Key Ingredients

    Ingredients

    Zha Choy (Preserved Mustard Stem)

    • The soul of this dish. Zha Choy is preserved in salt and chili, giving it a distinctive salty, slightly spicy crunch that flavors everything it touches. Always rinse it well before using to reduce excess saltiness — a 1-minute cold water rinse is all it takes. You can find Zha Choy preserved mustard stem at most Asian grocery stores or online.

    Pork Loin

    • Cut into thin matchstick-style strips so it marinates quickly and steams evenly. Pork belly works if you prefer richer, fattier meat. The key is marinating in soy sauce, cornstarch, and sesame oil before steaming — this ensures the pork stays tender and juicy, not dry. Use a bamboo steamer for the most authentic result and even heat distribution.

    Sesame Oil

    • A small drizzle goes a long way. Sesame oil adds a rich, nutty aroma that is quintessentially Chinese home cooking. Use toasted sesame oil (not raw) for the best flavour — add it to the marinade and optionally a few drops on top just before serving.

    Soy Sauce & Dark Soy Sauce

    • Light soy sauce seasons the pork and provides umami depth. A touch of dark soy sauce (optional) deepens the color and adds a slight caramel note. Together they balance the saltiness of the zha choy without overpowering the dish.

    Fresh Ginger

    • Grated ginger is mixed into the marinade to brighten the flavour and cut through the richness of the pork. It adds a classic Cantonese aromatic note. Don’t skip it — even a small amount makes a noticeable difference.

    Why We Love This Recipe

    It’s everything a family meal should be: simple and ridiculously delicious. The combination of tender pork and crunchy preserved vegetables is addictive, and it comes together with minimal fuss. My favourite part? How everyone in the family reaches for a little more rice just to soak up all the flavours.

    If you love Asian comfort food, try our Sticky Honey Garlic Spareribs for another Chinese family classic, or our Lemongrass Chicken Drumsticks for a fragrant Southeast Asian option. For a hearty bowl meal, our Instant Pot Taiwanese Beef Noodle Soup is deeply satisfying.

    Frequently Asked Questions

    Where can I buy Zha Choy?

    Zha Choy (preserved mustard stem) is available at most Chinese or Asian grocery stores, usually in the canned goods or pickled vegetable section. It’s also readily available online. Look for whole stems or pre-sliced versions — both work well. Always rinse it under cold water before using to remove excess salt.

    Can I use a different cut of pork?

    Absolutely. While pork loin cut into thin strips is the most common choice, you can use pork belly for a richer, fattier result, or ground pork for an even quicker preparation. The key is to cut or press the meat thin enough to cook through fully in 10–12 minutes of steaming.

    Do I need a bamboo steamer for this recipe?

    No, but a bamboo steamer does give the most even, gentle heat. You can also use a metal steamer insert, a heatproof plate set over a wok or pot with a lid, or even a rice cooker with a steaming tray. The method matters less than making sure the lid creates a seal and the steam is consistent.

    Can I make this ahead of time?

    You can marinate the pork up to 24 hours in advance and store it covered in the refrigerator. The zha choy can also be rinsed and sliced ahead of time. When ready to eat, simply combine and steam fresh — the whole cooking process is only about 12 minutes, so it’s fastest to assemble and steam right before serving.

    What should I serve this with?

    Steamed jasmine rice is the classic pairing — the savory, salty juices from the pork and zha choy soak beautifully into the rice. Add a simple vegetable like stir-fried bok choy or a light clear broth soup on the side for a complete Cantonese meal. A drizzle of chili oil on top is excellent too if you like heat.

    Steam Preserved Vegetables Zha Choy Pork

    One dish that never fails to comfort me is Steam Preserved Vegetables (Zha Choy) and Pork — a very traditional Cantonese dish that my mom always made for us. It’s salty, savory, crunchy, and deeply satisfying.
    Prep Time 8 minutes
    Cook Time 20 minutes
    Total Time 28 minutes
    Servings: 4 people
    Course: Main Course
    Cuisine: Cantonese
    Calories: 195

    Ingredients
      

    • 300 g pork loin cut into thin strips (like matchsticks)
    • 50 g preserved mustard stem (zha choy / 榨菜) finely chopped
    • 1 tbsp light soy sauce
    • ½ tsp dark soy sauce (optional, for color)
    • 1 tsp sesame oil
    • ½ tsp sugar
    • 1 tsp cornstarch
    • 2 tbsp water
    • 1 tsp grated fresh ginger
    • ½ tsp white pepper

    Equipment

    • large steamer

    Method
     

    1. Rinse under cold water to reduce excess saltiness. Pat dry and finely chop.
    2. In a bowl, combine pork loin strips with light soy sauce, dark soy sauce, sesame oil, sugar, cornstarch, water, ginger, and white pepper. Mix well and let marinate for 15–20 minutes.
    3. Add chopped zha choy to the pork and mix evenly.
    4. Place the mixture into a shallow, heatproof dish. Spread it evenly so it cooks through.
      Steam over high heat for 10–12 minutes, until pork is tender and fully cooked.
    5. Garnish with chopped scallions if desired. Serve hot with steamed jasmine rice or brown rice.

    Notes

    Tips for the lean cut:
    • Slicing the pork into thin strips helps keep it tender when steamed.
    • If you want even more softness, add ½ tsp neutral oil (like canola) to the marinade.
    • This lighter version is just as savory and satisfying but much lower in fat than the classic ground pork style.

  • Chinese Fish Noodle Soup with Mexican Verduloga

    Chinese Fish Noodle Soup with Mexican Verduloga

    My mom’s traditional Cantonese fish noodle soup gets a surprising upgrade with Mexican verdolaga — a purslane green that adds a fresh, slightly tangy note to the umami-rich milky broth. It is an unlikely fusion, but once you taste the combination, it makes complete sense. Two culinary traditions meeting in a single bowl.

    This post may contain affiliate links. If you purchase through these links, I may earn a small commission at no extra cost to you. Thank you for supporting Love & Harvest!

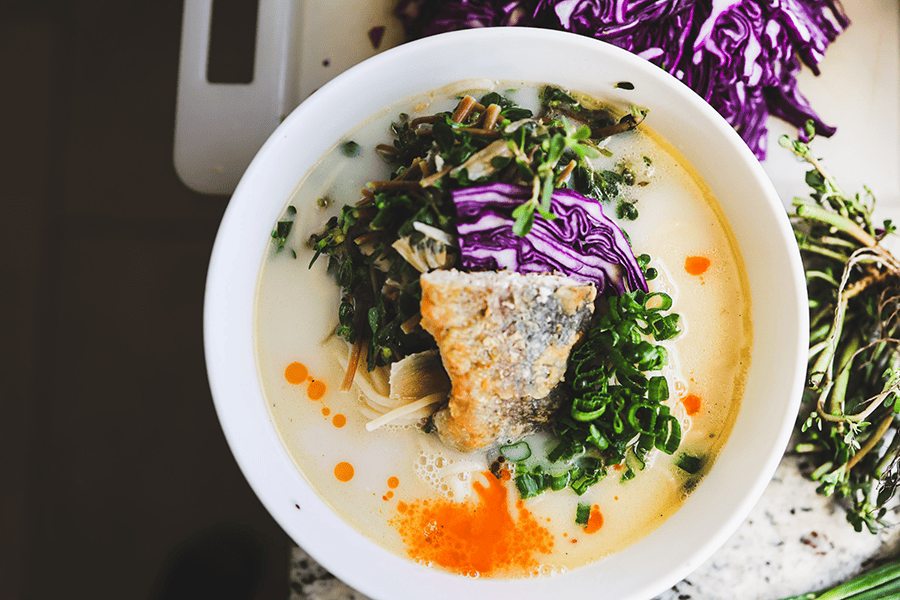
    fish noodle soup with verdolaga

    How Does It Taste?

    The fish soup broth is rich, fragrant, and milky white — achieved by frying the fish and bones in a hot wok before adding boiling water. The umami notes from the Tianjin preserved vegetable meld seamlessly with verdolaga’s fresh, slightly tangy flavor, creating a harmonious balance. It is unlike anything you have had before: comforting like congee but brighter, and deeply savory without being heavy.

    milky white cantonese fish broth

    Why Try This Fish Noodle Soup Recipe

    This fusion showcases the versatility of two distinct culinary traditions and embodies the beauty of cultural exchange through food. My mom grew up making this soup in Hong Kong; I grew up finding verdolaga in every Mexican market. Putting them together felt natural. Whether you are an adventurous food enthusiast or simply looking for something new, this is a culinary journey worth taking.

    Ingredients for This Fusion Fish Noodle Soup

    Ingredients

    Verdolaga (Purslane)

    • Why it matters: Verdolagas bring a slightly sour, refreshing quality that cuts through the rich fish broth — similar to the role watercress plays in traditional Cantonese fish soup (my mom used to use watercress; verdolaga is the natural Mexican substitute). It is also one of the most omega-3-rich leafy greens you can find.

    Fresh Fish

    • Why it matters: Fresh, firm-fleshed fish is essential for a milky white broth. I use trout caught locally in Metepec, Puebla, but bass, sea bass, mackerel, or snapper all work well. On a budget? Fish heads work perfectly — back in Hong Kong, when food was scarce, my parents’ family made this soup with fish heads only, and it was outstanding.

    Tianjin Preserved Vegetable

    • Why it matters: This is the secret weapon of Cantonese fish soup. Tianjin preserved vegetable (salted napa cabbage) adds a savory, slightly funky depth that brings the broth alive. Find it at any Chinese grocery store — loose, pre-packed, or in a brown claypot. Amazon carries a similar preserved vegetable (B07MTZ8W5M) if you cannot find it locally.

    Large Stock Pot

    • Why it matters: This recipe makes enough broth for 4 generous servings. A large stock pot (B07MRQ3HN5) gives you the room to simmer bones and skim foam without crowding.

    trout fishing metepec puebla

    Professional Tips

    1. FRY THE FISH FIRST WITH GINGER

    My mother, along with many skilled Cantonese cooks, swears by this rule: fry the fish and bones in a hot wok with oil and fresh ginger before adding water. This removes the fishy undertones and transforms them into a richer umami profile. The ginger further neutralizes any fishiness. Skipping this step gives you a thinner, fishier broth — do not skip it.

    2. ADD BOILING WATER (NOT COLD) TO THE WOK

    Adding boiling water to a still-hot wok is how you get the iconic milky white color. The thermal shock emulsifies the fish fats into the water, creating that creamy, opaque broth. Cold water simply will not achieve the same effect — the fat separates rather than emulsifies.

    3. TIANJIN PRESERVED VEGETABLE IS ESSENTIAL

    Do not substitute this if you can avoid it. The salted, slightly fermented cabbage adds a depth that plain salt cannot replicate. A little goes a long way — start with 2 teaspoons and adjust. Related: pair this soup with our steam preserved vegetables (zha choy and pork) recipe for a full Cantonese-inspired spread.

    Frequently Asked Questions

    Can I use frozen fish for this recipe?

    Yes, though fresh fish gives a cleaner flavor. If using frozen, thaw completely and pat very dry before frying — excess moisture will cause splattering and prevent the fish from browning properly.

    What can I substitute for verdolaga?

    Watercress is the most traditional substitute (it is what my mom originally used). Baby spinach or arugula also work in a pinch. If you want to stay Mexican, quelites (wild greens) are a good match flavor-wise.

    What noodles should I use?

    Thin dried wheat noodles or rice noodles are both excellent. Avoid fresh egg noodles from the package — they tend to break apart in the broth. Cook noodles separately, rinse with cold water, and add to bowls just before serving to prevent them from absorbing all the broth.

    How do I get the milky white broth color?

    Two keys: fry the fish and bones first in hot oil, then add boiling (not cold) water directly to the hot wok. The combination of high heat, fat, and rapidly introduced water creates the emulsification that makes the broth milky. Simmering on low for 30+ minutes maintains the color.

    Can I make the fish stock ahead of time?

    Yes. The stock keeps in the refrigerator for up to 3 days, or you can freeze it for up to 2 months. Reheat on the stovetop and add fresh verdolaga when ready to serve — do not re-cook the greens in pre-made stock until just before serving.

    Chinese Fish Noodle Soup with Mexican Verdolaga

    This exotic marriage of flavours introduces you to the combination of Chinese fish noodle soup and Mexican verdolaga. A fish noodle soup that surprises and delights the palate.
    Print Recipe
    Prep Time:15 minutes
    Cook Time:30 minutes
    Cuisine: fusion
    Keyword: chinese, fish noodle soup, mexican, noodle soup, verdolaga

    Ingredients

    Fried Fish

    • 4 pieces trout fillet or any white-fleshed fish
    • 1 tsp salt
    • ½ tsp white pepper
    • ½ cup canola oil
    • 1 egg
    • ¼ cup flour or cornstarch

    Fish Stock

    • 1 tbsp canola oil
    • 1 lb fish bones and trimmings (heads, tails, and bones from white-fleshed fish like trout, snapper, or cod)
    • 2 slices of ginger
    • 1 litre hot water
    • 2 tsp Tianjin preserved vegetable
    • salt to your taste
    • dashi (optional)

    Chinese Fish Noodle Soup with Mexican Verdolaga

    • 3 cups verdolaga, chopped, rinsed and cleaned
    • 1 package dried wheat noodles for 4 people
    • 4 purple cabbage leaves, thinly sliced
    • green onions
    • chili oil

    Instructions

    Fish Stock

    • Rinse the fish bones and trimmings under cold water to remove any impurities. Cut the fish bones into smaller pieces to expose more flavor.
    • In a large wok or frying pan that can hold 1 litre of water, heat the oil on high temperature. Carefully place the fish bones and ginger into the wok until ginger is fragrant and the fish bones are browned on both sides.
    • While the wok is still hot, add BOILING water to the wok (this is how you get the milky color and texture for the stock). Add in the Tianjin preserved vegetable.
    • Bring the stock to a boil, then reduce the heat to low and let it simmer gently. Skim off any foam or impurities that rise to the surface. Simmer for 30–40 minutes. Salt the stock to your taste and add dashi if using.

    Fried Fish

    • Meanwhile the stock simmers, rinse the fish fillet and pat dry with a paper towel. Season with salt and white pepper. Set aside.
    • In a frying pan, add the canola oil on high heat until it reaches 350℉. To test: insert a clean dry chopstick into the oil. If the tip starts bubbling, the oil is ready.
    • In a separate flat bowl, beat the egg well.
    • Coat the fish fillet in beaten egg, then dip it into flour. Fry each side for approximately 5 minutes or until both sides are golden brown. Set aside on a paper towel to cool.

    Putting It All Together

    • WASH VERDOLAGA: Place the leaves in a colander or large bowl and rinse thoroughly under cold running water. Snap off the bottom roots if still attached. Gently rub the leaves with your fingers to remove any dirt. Soak in a bowl of cold water, swish to dislodge remaining dirt, then lift out gently and set aside.
    • Place a colander over a clean pot and strain the fish stock. Discard the bones and debris. Bring the strained soup to a boil.
    • Cook the dried wheat noodles according to package instructions. Rinse with cold water, strain, and set aside.
    • Once the soup is boiling, roughly chop the verdolaga and toss it into the fish stock. Boil until tender, approximately 5 minutes.
    • Divide the noodles into 4 bowls. Divide the verdolaga and pour the hot soup into each bowl. Top with a fried fish fillet, sliced purple cabbage, green onions, and a drizzle of chili oil. Serve immediately.
  • Instant Pot Taiwanese Beef Noodle Soup

    Instant Pot Taiwanese Beef Noodle Soup

    Spicy, soulful, and packed with beef that melts right off the bone — this Instant Pot Taiwanese Beef Noodle Soup is the most comforting bowl you can make at home. Chewy wheat noodles, aromatic Asian spices, tender braised beef chunks, and a deeply savory broth come together in under 2 hours with almost no effort.

    This post may contain affiliate links. If you purchase through these links, I may earn a small commission at no extra cost to you. Thank you for supporting Love & Harvest!

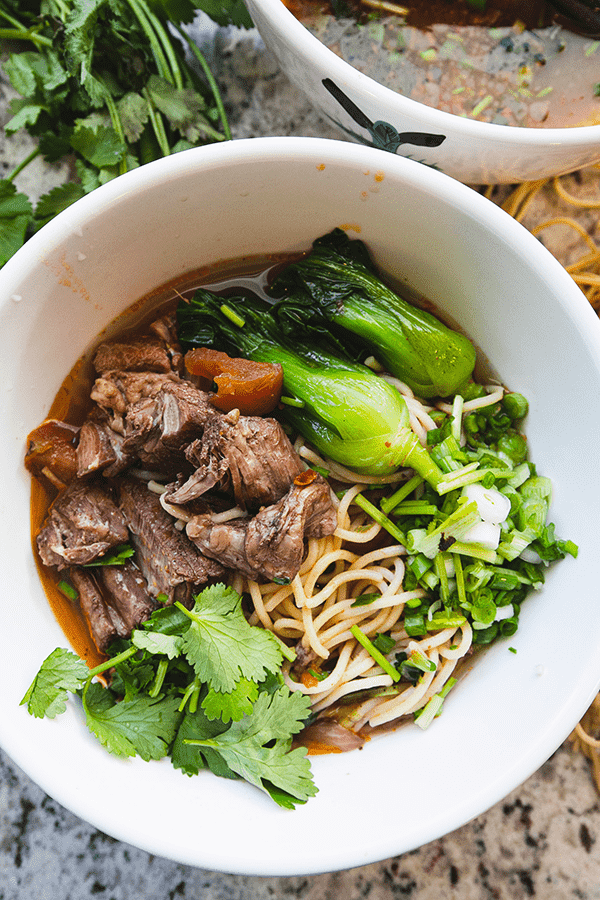
    Taiwanese beef noodle soup in bowl

    An easy and effortless recipe that guarantees a meat-melting experience. Literally a throw-in-everything recipe that only requires an Instant Pot. The perfect Taiwanese beef noodle soup that is soul-comforting and ridiculously delicious!

    beef noodle soup with bok choy

    What Is Taiwanese Beef Noodle Soup?

    A rich soup filled with beef flavour and assorted Asian spices, served over fresh chewy wheat noodles. It is topped with bok choy, tender chunks of beef, cilantro, green onions, and spicy Sichuan oil.

    This Taiwanese beef noodle soup has flavours of spicy, savoury, fresh, beefy, and salty. It is the best comfort food when it is cold outside and an utterly slurp-worthy experience.

    beef shank for Taiwanese soup

    Ingredients

    Key Ingredients

    Beef Shank or Chuck Cut

    The kind of meat I like to use is the shank or the chuck cut. In Mexico, it is called “pierna” or “agujas.” It is packed with flavour and can tolerate long stewing time without drying out.

    • Why it matters: Beef shank is full of collagen and connective tissue. Under pressure cooking, that collagen converts to silky gelatin that enriches the broth and gives the beef a luxuriously tender, fall-apart texture.

    Doubanjiang (Chili Bean Paste)

    Doubanjiang is the backbone of the broth — a fermented broad bean and chili paste from Sichuan cuisine that adds depth, umami, and a pleasant heat that builds with each sip.

    • Why it matters: It is the single most important flavour component in this soup. Without it, you have a good beef broth. With it, you have something truly extraordinary. Find Doubanjiang Chili Paste at any Asian grocery or online.

    Chinese Spice Package

    The spice package is made up of star anise, cinnamon stick, fennel seeds, bay leaves, cumin seeds, coriander seeds, Sichuan peppercorns, and dried chili peppers. These spices give the broth its distinctive aromatic complexity.

    • Why they matter: This spice combination is what makes Taiwanese beef noodle soup taste unmistakably different from any other beef soup in the world. The Sichuan peppercorns add a subtle numbing tingle, while star anise and fennel give it a slightly sweet, anise-forward warmth.

    Light Soy Sauce

    Provides the salty, umami backbone of the broth alongside the doubanjiang.

    • Why it matters: Light soy sauce is thinner and saltier than dark soy sauce. It seasons without darkening the broth excessively, keeping the colour a beautiful amber-red rather than jet black.

    The Instant Pot

    The Instant Pot Duo 7-in-1 is the best-selling pressure cooker on Amazon and the machine I rely on for this recipe. It cuts the cooking time from 3-4 hours on the stovetop down to 100 minutes, without sacrificing any depth of flavour.

    • Why it matters: The sealed pressure environment raises the boiling point of the liquid, allowing the beef and spices to develop in ways that standard simmering cannot achieve in the same timeframe. My husband also appreciates that the sealed vent means no strong cooking smells throughout the house while it cooks.

    Instant Pot with beef noodle soup ingredients

    Fresh Noodles or Packaged Noodles?

    Both are completely fine. If you have Chinese wheat noodles you prefer, use those. Here in Mexico, my options are limited to spaghetti pasta, so I make fresh noodles with my Philips Pasta and Noodle Maker.
    For a chewier and bouncier bite, make your noodles with bread flour. The high protein content creates stronger, chewier noodles that stand up to the rich broth without going soggy.

    Check out my 3-minute Homemade Ramen Noodles post to learn how to make them at home!

    fresh wheat noodles

    Professional Tips

    Pro Tip 1 — Marinate Your Meat

    By simply adding salt and pepper to your beef chunks, you can elevate the final flavour significantly. Toss the meat in a bowl with salt and pepper. Leave it in the fridge for 30 minutes while you prep everything else for the recipe.

    Pro Tip 2 — Strain Fat for a Cleaner Broth

    For a cleaner-tasting soup, skim the top layer of fat off the broth with a spoon before serving. That fat will make the soup richer and tastier, but removing it produces a lighter result. Your call.

    Pro Tip 3 — Serve Immediately

    Nothing is more disappointing than letting noodle soup sit while the noodles soak up all the broth. Pour the hot soup over the noodles only when it is time to eat. Noodles left sitting in broth for too long lose their texture. Serve only when people are seated and ready.

    Taiwanese beef noodle soup served in bowls

    Frequently Asked Questions

    Can I make Taiwanese beef noodle soup without an Instant Pot?

    Yes. Follow all the same steps but use a heavy-bottomed pot on the stove. Cook the soup on low/simmer for 3-4 hours until the beef is tender and shreds easily with a fork. The flavour may be even deeper with the longer simmer time.

    What is doubanjiang and where do I find it?

    Doubanjiang is a fermented broad bean and chili paste from Sichuan, China. It is the defining flavour of this soup. You can find it at any Asian grocery store in the condiments or fermented foods section, or order it online here. Do not substitute it — there is no real equivalent.

    What noodles work best for this soup?

    Fresh or dried Chinese wheat noodles are ideal. Look for thick, chewy wheat noodles at an Asian grocery store. In a pinch, dried udon noodles or even thick spaghetti work. Avoid rice noodles — they are too delicate for this broth.

    How do I store and reheat the leftovers?

    Store the broth and beef separately from the noodles. The broth and beef keep in the refrigerator for up to 3 days or freeze for 3 months. Reheat the broth on the stovetop, cook fresh noodles, and assemble each bowl fresh. Never store noodles in the broth — they will absorb all the liquid and become mushy.

    Can I make this less spicy?

    Yes. Reduce or eliminate the dried chili peppers from the spice package and use less doubanjiang. The soup will still be deeply flavourful but with less heat. Start with 1 tablespoon of doubanjiang and taste before adding more.

    Instant Pot Taiwanese beef noodle soup

    Instant Pot Taiwanese Beef Noodle Soup

    Easy and delicious Taiwanese Beef Noodle Soup using an Instant Pot! Spicy and savoury soup with beef chunks that melts in your mouth!
    Print Recipe
    Pin Recipe
    Prep Time:15 minutes
    Cook Time:1 hour 40 minutes
    Course: Main Course
    Cuisine: Taiwanese
    Keyword: Beef Noodle Soup
    Servings: 6 people

    Equipment

    • Instant Pot

    Ingredients

    Meat

    • 1 kg beef shank cut into 2 inch chunks
    • 2 tsp vegetable oil
    • 1 tsp salt
    • pepper

    Beef Noodle Soup

    • 1 white onion thinly sliced
    • 6 cloves garlic crushed, back of the knife
    • 2 inch ginger roughly sliced
    • ¼ cup red wine or shaoxing wine
    • 2 tbsp doubanjiang
    • 1 tomato diced
    • 2 tbsp tomato paste
    • 2 tsp sugar
    • ½ cup light soy sauce
    • 8 cups water
    • 1 Chinese Spice Package make your own with below recipe
    • 35 oz fresh wheat noodles

    Chinese Spice Package

    • 4 star anise
    • 1 cinnamon stick
    • 1 tsp fennel seeds
    • 6 bay leaves
    • 1 tbsp cumin seeds
    • 1 tsp coriander seeds
    • 2 tbsp sichuan peppercorns
    • 2 tsp dried chili peppers

    Garnish

    • cilantro
    • green onion
    • bok choy
    • doubanjiang optional
    • chili oil optional

    Instructions

    • To marinate the meat, add everything together, give it a good toss, and set aside for 15-30 minutes.
    • Use the “Saute” option on the Instant Pot and add 2 tsp of oil. Add the onion, garlic, and ginger. Saute for 3 minutes.
    • Add the marinated beef chunks and cook each side until lightly browned.
    • Deglaze the pot by adding shaoxing wine or red wine. Once the liquid starts to boil, cancel the “Saute” option. Select “Meat/Stew” and set the timer to 100 minutes (1 hour and 40 minutes).
    • Add everything: doubanjiang, tomato, tomato paste, sugar, light soy sauce, water, and the Chinese spice package.
    • Close the lid and turn the vent knob to the sealed (not venting) position.

    Cooking WITHOUT an Instant Pot

    • Follow the instructions above, but use a regular heavy pot on the stove. Cook the soup on low/simmer for 3-4 hours until the beef is tender and shreds easily.

    Setting Up the Bowl

    • Cook your noodles as instructed on the package. If you are interested in making fresh wheat noodles, try my 3 minute easy ramen noodles made at home.
    • Blanch bok choy until tender, about 2 minutes in boiling water.
    • Put your freshly cooked noodles in a large bowl and add your bok choy on top. Pour the hot beef soup over the noodles and add 3-4 beef chunks to each bowl. Serve with chopped cilantro and green onions.

    If you love bold Asian flavours, try our Succulent Sunday Pot Roast for a Western take on slow-braised beef, or warm up with our Green Pozole for a Mexican soul-warming soup experience.

  • Delicious Meatless Spicy Peanut Noodle

    Delicious Meatless Spicy Peanut Noodle

    This vegetarian peanut noodle is so easy to make and RIDICULOUSLY delicious. The perfect umami slurp that’s meatless.

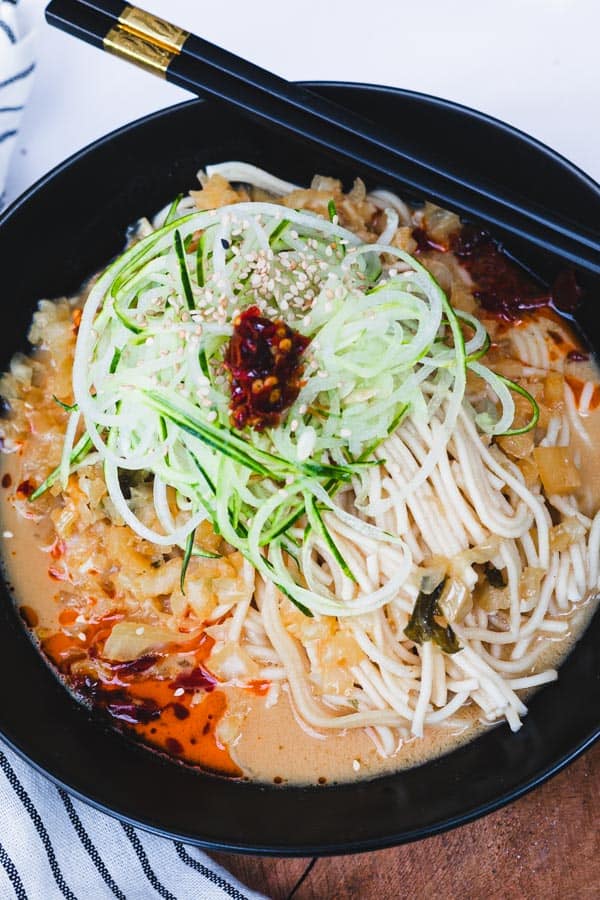
    veggie peanut butter noodles

    This post may contain affiliate links. If you purchase through these links, I may earn a small commission at no extra cost to you. Thank you for supporting Love & Harvest!

    My summer is never complete without making this vegetarian spicy peanut noodle with cooling cucumber. Imagine a nutty and tangy peanut noodle pasta served with a refreshing cucumber and sesame oil salad on top. This dish is the epiphany of what life is all about!

    Back a few years ago when I was teaching cooking classes in Mexico, this vegetarian Spicy Peanut Noodle with cooling cucumber recipe was one of my students’ favourite recipes. Till this day I have past students of mine messaging me and telling me this recipe had stuck with them for a long time and they are now feeding their children with the exact same recipe.

    It’s a humble experience knowing I’ve gifted them something that is now being passed down as a family meal. And now I want everyone to have the same experience as all my students once had.

    This recipe is easy and very good for a fast-paced family who are always on the go. It’s also a kid-friendly meal, minus the spice. My kids love this a lot and occasionally request it. If you know a child who loves peanut butter sandwiches and you can’t get them to eat anything else, this is what they need in their life. You will not struggle with time using this recipe!

    peanut noodles

    How Does It Taste?

    It is spicy, tangy, nutty, and thick. You can serve it hot or cold — the options are yours. In the summer I make it with less sauce so it just lightly coats the noodle. I bring it to picnic trips and road trips. Then I top it off with some cold cucumber sesame oil salad.

    In the winter I like it more hot and with more of the sauce to warm around the noodle, almost like a noodle soup. Sometimes I ladle a hot cup of chicken stock into the sauce so it thins out and turns it into a noodle soup. The recipe is super versatile.

    What Noodles Should I Use?

    Original Chinese noodles will do. DragonMall Wu Mu Noodles are a good option. They cook very easily and coat the peanut sauce well. They remind me a lot of how Shandong noodles are made and taste.

    If you don’t have access to these noodles you can make your own! I have my 3 minute homemade ramen noodle recipe here if you’re interested in going the extra mile. Regular spaghetti noodles also work if neither option is available — not the authentic style, but we do what we have to do. You could also try pairing this sauce with a simple noodle base like this spinach pasta for a creative variation.

    peanut noodle recipe

    Why You Will Love This Meatless Recipe

    • Easy Meal – it takes only 30 minutes to make this meal! You make your sauce all in the blender, toss it with some hot noodles, and lay the cucumber sesame oil salad on top.
    • Vegetarian and Vegan – Looking for a meatless meal that’s still delicious and cooling for summer and into fall? This recipe is perfect for something cooling to eat in the summer.
    • Have it hot or cold – yes, you can make it cold for summer days or hot for colder weather. There is no season preference.
    • It’s super tasty – in the sauce there’s soy sauce, garlic, peanut butter, and black vinegar. It has a super umami taste and a slurp of this bad boy is unreal.
    • The best slurp experience – who doesn’t love noodles? You’re going to get the best slurp experience with these noodles because they’re packed with flavour and spiciness you’ll truly enjoy. Then we add the cucumber salad to cool your tongue.

    vegan spicy peanut noodles

    How to Make the Spicy Peanut Noodle Sauce

    The sauce is made purposefully easy because we want to make it hassle free. Here are the simple steps:

    • In your blender add: soy sauce, peanut butter, garlic, ginger, sesame oil, peppers, vinegar, dark soy sauce, and chicken stock.
    • Cook the noodles as instructed. You do not need to rinse the noodles in water. The starch from the cooked noodles will help make the sauce thicker and coat it better.
    • Toss the sauce and noodle together.

    vegan thai peanut noodles

    How to Make the Cucumber Salad

    Easy and delicious cucumber salad. I use it to garnish the top of the noodles. Once you make it make sure to serve it immediately.

    • Wash the cucumbers, and slice off the ends. Using a vegetable peeler, start to slice it lengthwise to get these thin beautiful slices. Put them in a strainer to let the excess water run off.
    • Give them a good pat with a paper towel and soak up any excess water.
    • Toss the cucumber ribbons with sesame oil, salt, and sesame seeds.
    • Garnish on top of the noodles and try to build and fluff it up as high as possible on the noodle.

    To thinly cut the cucumber I am using the Vegetable Spiralizer to cut my cucumber perfectly.

    vegan peanut noodle bowl

    Ingredients

    Your Favourite Chili Oil

    If you have a favourite Asian chilli oil and don’t have much opportunity to use it, this is the time! This meatless peanut noodle goes well with any Asian chilli oil. Slather it in the soup or just add a small spoon on top. Whatever portion is perfect here.

    Peanut Butter

    I like to use smooth peanut butter. Chunky peanut butter is fine too. We are adding everything to the blender so the texture of peanut butter doesn’t matter here. For a sesame-forward variation, try tahini as a substitute — it gives the sauce a slightly nuttier depth.

    Salted Mustard

    This is a must for this dish. Do not skip it. Lots of the unknown umami flavour is from here. Pickled mustard is a bit strange in flavour on its own, but when added to other things like soup, it adds lots of dimensions of flavour!

    cold thai peanut noodles

    Soy Sauce

    To give this sauce the umami flavour, we are adding soy sauce. Uncooked soy sauce has a strong and special umami flavour that’s going to lift this sauce into its glorious taste.

    Ginger

    A small finger-tip size ginger helps round out the flavour of the sauce. We are using fresh ginger, not the dry powder form.

    Garlic

    Adding a couple cloves of garlic makes this sauce very tasty. If two is too much for your taste, just add one.

    Sesame Oil

    The toasty taste of sesame oil tells you right away this is an Asian dish! You have the option to add it in the blender or when you toss the noodle and sauce together.

    Vegetable Stock / Chicken Stock

    I give these two options because we all have different dietary restrictions. I love the taste of vegetable stock whether it is store-bought or homemade — I’d much prefer homemade if you ask me. When it is winter and I need to add more protein or bone-brothy goodness for the kids, I will add my homemade chicken stock. Store-bought chicken stock or chicken powder also works.

    Chinese Black Vinegar

    This is a common ingredient in Chinese cooking. We are adding a little bit of vinegar to get that tangy flavour. Black vinegar is a good option here.

    Cabbage

    To thicken and add texture to the sauce, we are adding some pre-boiled chopped cabbage. A pure liquid sauce to coat the noodles is not enough. To add some elegance and texture, we are adding cabbage and salted mustard.

    thai peanut noodles recipe

    Love noodle dishes? Try our homemade pesto gnocchi for another satisfying pasta night.

    Frequently Asked Questions

    Can I make this peanut noodle gluten-free?

    Yes! Swap regular soy sauce for tamari or a certified gluten-free soy sauce, and use rice noodles instead of wheat noodles. The flavour profile stays the same.

    Can I add protein to this meatless noodle?

    Absolutely. Tofu, edamame, or a soft-boiled egg all work beautifully. For non-vegetarians, shredded rotisserie chicken or sauteed shrimp are great additions.

    How long does the peanut sauce keep?

    Store leftover peanut sauce in a sealed jar in the refrigerator for up to 5 days. It will thicken as it chills — thin it back out with a splash of warm water or vegetable stock before using.

    Can I make this dish ahead of time?

    Make the peanut sauce and cucumber salad up to one day ahead and store them separately. Cook the noodles fresh when ready to serve for the best texture.

    What is Chinese black vinegar and can I substitute it?

    Chinese black vinegar (Chinkiang vinegar) has a deep, malty-sweet tang. The closest substitute is a mix of balsamic vinegar and a splash of rice vinegar. Regular rice vinegar on its own also works but the flavour will be lighter.

    Is this recipe suitable for kids?

    Yes, with adjustments. Simply omit or reduce the chilli oil and peppers for the kids’ portion. The base peanut sauce is kid-friendly and many children love the nutty noodle flavour.

    Spicy peanut noodles topped with cucumber ribbons and chili oil

    Meatless Spicy Peanut Noodle

    This Meatless Spicy Peanut Noodle recipe is a delicious bowl of slurp! Spicy, nutty, and tangy. A favourite among kids and adults. Print Recipe Pin RecipePrep Time:25 minsCook Time:15 minsCourse: Main CourseCuisine: ChineseKeyword: Spicy Meatless Peanut NoodleServings: 5 people

    Ingredients

    Peanut Sauce

    • 3 tbsp smooth peanut butter or tahini
    • ½ cup soy sauce
    • 2 cups vegetable stock
    • 2 garlic clove
    • ¼ inch fresh ginger
    • 1 tbsp chinese black vinegar
    • 500g Dried Asian noodles
    • 2 tbsp minced pickled mustard do not blend with the sauce
    • 1 tsp sesame oil
    • 1 tsp chilli oil

    Cucumber Salad

    • 2 medium size cucumber
    • 1 tsp sesame oil
    • 1 tsp sesame seed
    • ½ tsp sea salt add only when you're ready to serve

    Cabbage Side

    • ¼ small cabbage
    • 1 tsp salt
    • ½ litre water

    Instructions

    To Make Peanut Sauce

    • In a blender add the peanut sauce, soy sauce, vegetable stock, garlic, ginger, and black vinegar. Blend until smooth.

    To Make Cucumber Salad

    • Using the vegetable spiralizer, attach the cucumber and spiralize the cucumber into ribbons. Toss it with some sesame oil. Salt: do not add the salt until you're ready to serve. Salt will quickly turn the cucumber into mush.

    To Make the Cabbage Side

    • Take the food processor and add roughly cut cabbage into the machine. Pulse it a few times and turn it completely "on" to finely chop the cabbage. Add the chopped cabbage to boiling water with salt for 5 minutes. Strain the water and set it aside.

    Assemble the Noodle Soup

    • Meanwhile, cook the asian noodles you like. See package for instructions. Set the noodle aside in the bowl.
    • In a pot, add the peanut sauce and bring it to a boil. Add the minced pickled mustard, and cabbage. Cook for about 5 minutes. Test the soup for saltiness. If you think it's too salty, add some water to dilute it. Alternatively you can add non-salted vegetable broth as well.
    • Ladle the hot soup on to the noodles and add the cucumber salad on top.
    • Garnish with some salt on top of the cucumber salad (if desired), sesame seeds, sesame oil, and chili oil. Serve immediately.
  • Steamed Soy Sauce Fish with Preserved Lemon

    Steamed Soy Sauce Fish with Preserved Lemon

    There are fish recipes, and then there is this fish recipe. Cantonese steamed soy sauce fish with preserved lemon is the dish my family in Hong Kong has made for generations — fall-off-the-bone tender, swimming in a golden ginger broth, with the preserved lemon cutting every trace of fishiness so cleanly your kids will ask for seconds before you sit down.

    This post may contain affiliate links. If you purchase through these links, I may earn a small commission at no extra cost to you. Thank you for supporting Love & Harvest!

    Steamed Soy Sauce Fish

    What Makes This Cantonese Steamed Soy Sauce Fish Special

    This steamed soy sauce fish is simple, quick, and lets the fish be the star. What sets it apart from every other steamed fish recipe is the preserved lemon.

    A widely popular seafood dish among Chinese families and restaurants, fresh fish is steamed with ginger and preserved lemon, then finished with a sizzle of hot oil before serving. The preserved lemon helps cut out that strong fishy taste so you get the clean, fresh fish flavour without the pungent smell — making it one of the most kid-friendly fish recipes you will ever make.

    steamed fish

    Why You Will Love This Recipe

    • Moist, soft, and fluffy texture — steaming guarantees a soft and flakey texture with tons of moisture and flavour.
    • Straightforward recipe — a relatively easy recipe with just a few things to keep in mind. Step-by-step photos guide you to a no-fail result.
    • No strong fishy taste — the preserved lemon cuts the oily fish taste and softens the strong fish smell. Suitable for children.
    • Addictingly delicious — steaming creates a beautiful thick lemon soup that is incredible on rice.

    steamed whole fish

    Hong Kong Cantonese Fish: A Cultural Staple

    Fish in Chinese culture represents abundance and increased prosperity. It is an essential dish for New Year, birthdays, and anniversaries. Hong Kong is a coastal city rich in seafood resources — back when it was a large fishing port and world exporter, fish became an easy everyday staple. This recipe comes from my family, who still use it today.

    We love this steamed soy sauce fish so much in our family. Kids are rarely excited about fish unless it is a fish stick — but this recipe is so good my kids constantly ask for it. They get genuinely excited when they know I am making Cantonese steamed soy sauce fish with preserved lemon.

    Ingredients Deep-Dive

    Tilapia Fish

    The best fish to use for this recipe is tilapia or halibut (if you are willing to splurge). Tilapia steams perfectly — it is firm enough to hold its shape yet soft enough to fall off the bone. Your fishmonger will descale and gut it for you. Always make sure the belly is cleaned well under the fins.

    • Why it matters: The right fish gives you that silky, fall-off-the-bone texture that defines this dish. Too thin a fish overcooks quickly; too thick and the center stays raw.

    Preserved Lemon

    This is the secret weapon. Preserved lemon provides salt, umami, and a citrus sharpness that no fresh lemon can replicate. Rub it inside the cavity and along the cuts — it penetrates the flesh as it steams and eliminates that pungent fishy smell entirely. You can make your own preserved salty lemons at home with just lemons and salt.

    • Why it matters: Without preserved lemon, you have steamed fish. With it, you have a Cantonese classic your family will request every week.

    Pick up a jar of preserved lemon if you do not have any on hand yet.

    Ginger

    Thinly slice fresh ginger — as thin as you can manage. Half goes inside the cavity of the fish, half rests on top during steaming. Ginger adds warmth and its own aromatic quality that pairs perfectly with soy sauce and lemon.

    • Why it matters: Ginger neutralises fishy odours during cooking while adding a gentle heat and fragrance that makes every bite interesting.

    Soy Sauce

    Added at the very end — never cooked into the fish. This preserves the fresh, bright soy taste. Cooked soy sauce takes on a bitter, heavier flavour that would overpower the delicate fish.

    • Why it matters: Timing the soy sauce correctly is what separates home cooks from Cantonese masters. Get a quality soy sauce — the flavour difference is real.

    Essential Steps for Restaurant-Quality Steamed Fish

    cantonese steamed fish

    1. Wash the Fish Inside and Outside

    Descale the fish — your fishmonger will do this for you. Once home, open the belly. You will see a grey residue: this is what causes strong fishy smell and taste. Use your fingers and fingernails to rub it all off. Then find the second pocket along the back of the spine, cut it open with a knife, and clean that out too.

    chinese steamed fish recipe

    2. Rub Preserved Lemon Inside and Outside

    Take 1 tbsp of preserved lemon to the chopping board. Chop it finely and rub with your finger to release the brine. Rub the lemon and salt inside the cavity and outside the fish, working it into all the cuts.

    steamed fish in light soy sauce

    3. Add Ginger to the Cavity

    Scrape the skin off a 1-inch piece of ginger with a knife. Slice it as thinly as possible. Place half inside the cavity; the other half rests on top of the fish while steaming. A quality fish sauce can be added as an optional finishing touch alongside the soy sauce.

    4. Steam the Fish

    Place the fish in a heat-proof bowl or deep dish that will catch the golden juice as it steams. Use a bamboo steamer or your Instant Pot — whichever fits the fish comfortably.

    calories in steamed fish with soy sauce

    Instant Pot Steaming Instructions

    1. Add about 2 cups of water to the pot and place the steaming basket inside. Place the fish in a bowl that fits inside the Instant Pot with enough room for steam to rise around it.

    2. Set the mode to “Steam” for 20 minutes. Place the fish in the bowl with ginger on top. Close the lid and turn the valve OFF.

    3. Once the timer goes off, release the valve.

    steamed fish fillet soy sauce ginger

    5. Quick Oil Fry Finish

    Take the fish out and place thinly sliced scallion (green parts only) on top. Heat 1/4 cup of canola oil in a pan until it just starts to smoke. Bring the fish to the sink or outside. Pour the hot oil directly over the scallion — the oil will sizzle loudly and smoke. Add 2 tsp of soy sauce and a dash of white pepper. Serve immediately.

    Professional Tips for No-Fail Steamed Soy Sauce Fish

    Tip 1: Add Soy Sauce at the Very End

    Cooked soy sauce develops a heavier, more bitter taste. Adding it fresh at the end keeps the soy sauce tasting bright and original — that is what gives this dish its clean, restaurant-quality finish.

    Tip 2: Serve Immediately

    Steamed soy sauce fish should always be eaten hot or warm. The gelatin-rich broth at the bottom turns solid at room temperature and loses its appeal. Eat it warm over a bowl of rice.

    Tip 3: Tilapia Is the Best Choice

    Tilapia is ideal for this recipe. Halibut works beautifully if you want to splurge. My economical mom sometimes uses a fish head for the same recipe — equally delicious.

    Related Cantonese Recipes

    If you love this steamed fish, you will also enjoy steamed preserved vegetables with pork — another family favourite that uses the same steaming technique. For a completely different take on fresh seafood flavours, try our homemade sashimi.

    Frequently Asked Questions

    What fish is best for Cantonese steamed fish?

    Tilapia is the most economical and forgiving choice — firm enough to hold up in the steamer yet soft enough to become fall-off-the-bone tender. Halibut is the premium option. Avoid very thin fish fillets as they overcook too quickly.

    Can I use fresh lemon instead of preserved lemon?

    You can, but you will lose the umami depth that preserved lemon brings. Preserved lemon adds salt and fermented flavour that fresh lemon simply cannot replicate. It is worth making a batch of your own preserved salty lemons — they last months in the fridge.

    How long do I steam the fish?

    Steam on high for 20 minutes for a whole tilapia around 1 kg. The fish is ready when the flesh flakes easily away from the bone with a fork. Do not overcook — even a few extra minutes will dry it out.

    Can I make this without an Instant Pot?

    Absolutely. A traditional bamboo steamer over a wok works beautifully and is what most Cantonese families use. Any steamer setup that fits the fish and allows steam to circulate around it will give you the same result.

    Why do I pour hot oil over the fish at the end?

    The hot oil sizzle is the signature Cantonese finishing technique. It cooks the raw scallion instantly, creating a fragrant aromatic oil that infuses into the fish. It also gives the skin a slightly crisp texture on the surface while the flesh stays tender.

    How do I store and reheat leftovers?

    Store leftovers covered in the refrigerator for up to 2 days. Reheat gently in the microwave or in the steamer for 3–4 minutes. The broth will re-liquefy as it warms. Avoid the oven — it will dry out the fish.

    Whole steamed fish with ginger and green onions in soy sauce broth

    Steamed Soy Sauce Fish with Preserved Lemon

    This Cantonese Steamed Fish with Preserved lemon is the best fall-off-the-bone fish recipe! It’s flakey soft and oh.em.gee. tasty. Print Recipe Pin RecipePrep Time:10 minsCook Time:20 minsCourse: Main CourseCuisine: ChineseKeyword: fish, preserved salty lemon, seafood, steamed fishServings: 4 people

    Equipment

    • steamer

    Ingredients

    • 1 kg tilapia fish descaled, gutted, and cleaned
    • 1 inch ginger thinly sliced
    • 1 tbsp preserved lemon
    • ¼ cup canola oil
    • 1 inch scallion thinly sliced (green parts only)
    • 2 tsp soy sauce
    • dash of grounded white pepper

    Instructions

    Clean the fish

    • Rinse the fish with cold tap water. Touch around the fish and descale any scales still stuck on the fish.
    • Open the belly. You will see a grey residue — this is what causes the strong fishy smell and taste. Rub it all off with your fingers and fingernails.
    • Find the second pocket along the back of the spine. Use a knife to cut it open. Clean it out and you will be able to touch the spine of the fish.
    • Take 1 tbsp of preserved lemon to the chopping board. Chop finely and rub with your finger. Rub inside the cavity and outside the fish along all the cuts.
    • Scrape the skin off a 1-inch piece of ginger. Slice as thinly as possible. Place half inside the cavity; the other half rests on top of the fish while steaming.

    Steaming the fish

    • Place the fish in a heat-proof bowl or deep plate that will catch the golden juice while steaming.Use the steamer you are comfortable with that also fits the fish. Steam on high for 20 minutes.

    Instant Pot Steaming Instructions

    • Add about 2 cups of water to the pot and place the steaming basket inside. Place the fish bowl inside the Instant Pot with enough room for steam to rise.Set the mode to “Steam” for 20 minutes. Place the fish with ginger on top. Close the lid and turn the valve OFF.Once the timer goes off, release the valve.

    Final Steps

    • Take the fish out and place thinly sliced scallion (green parts only) on top.Heat 1/4 cup of canola oil in a pan until it just starts to smoke. Place the fish near the sink or outside. Pour the hot oil directly over the scallion — it will sizzle loudly.
    • Add 2 tsp of soy sauce on top of the fish and a dash of white pepper. Serve immediately.
  • Homemade Chinese Food Classic: Hainanese Chicken

    Homemade Chinese Food Classic: Hainanese Chicken

    Hainanese Chicken is one of those dishes that sounds deceptively simple — poached chicken, ginger scallion sauce, rice cooked in the broth — but the result is a deeply comforting bowl that makes you understand immediately why it has been a beloved dish across generations of Cantonese and Southeast Asian families. This is authentic homemade Chinese food at its most honest: few ingredients, careful technique, profound flavour.

    This post may contain affiliate links. If you purchase through these links, I may earn a small commission at no extra cost to you. Thank you for supporting Love & Harvest!

    Hainanese chicken on a platter with a spoon drizzling sauce, next to fresh herbs

    Chicken is always served during Chinese New Year because it is the symbol of unity and family. Usually, steamed or poached chicken with head and feet is served during our traditional dinner to further emphasize the concept of union and rebirth. Although Hainanese Chicken is from the Hainan province in China, it is said to have been popularized in Singapore by Hainanese immigrants, and it is still well-loved among Cantonese families everywhere.

    This post is all about a delicious Homemade Chinese Food Classic: Hainanese Chicken.

    Why You’ll Love This Recipe

    • Easy — it is a slow-poached chicken in a stock pot, lightly seasoned. Mostly hands-off once it is in the pot.
    • Poached, not fried — the chicken cooks gently in water.
    • Delicious — ginger and chicken go hand in hand, and it is a soul-soothing taste. Try it once and you will understand the obsession.
    • Authentic Cantonese dish — if you want a popular homemade Cantonese recipe, this is the one. All Cantonese moms know it.

    Hainanese Chicken Rice

    The same broth used to cook the chicken is also used to make the rice. When it finishes cooking, you open the lid to a luscious and glossy pot of rice that is infused with the chicken’s essence. In restaurants, they often add a lot of oil and chicken fat to make it extra tasty. For a less oily version, skim the soup of its fat by removing the skin and defatting the top layer of oil. If flavour is your priority, pour on all that glory and work a little harder the next day.

    easy chinese food recipes

    Cooking Methods

    There are two known ways of making Hainanese Chicken. First, the chicken and rice are steamed together. Second, the chicken is poached in water, and the rice is cooked separately using the chicken broth. We use the second method — a little more work, but the result is better presentation and more control over each component.

    top 12 easy chinese recipes

    Ingredients Deep-Dive

    Ingredients

    Free-Range Chicken

    The most important ingredient. Try to find a fresh, free-range chicken — it has a far better flavour and texture compared to caged varieties.

    • Why it matters: Free-range chickens have more developed muscles from movement, which means more flavour in the meat and a better-tasting broth. The difference is noticeable in a delicate dish like this where the chicken is the only star.

    Ginger

    Ginger goes into the poaching liquid, the scallion sauce, and the rice. Use fresh ginger — not powder.

    • Why it matters: Ginger neutralizes the gamey notes in chicken and infuses every component with a clean, warming flavour. It is the defining aromatic of this dish. A ginger grater makes it easy to get fine, fibrous shreds perfect for the sauce.

    Sesame Oil

    Used in the chicken marinade — just 1 teaspoon brushed over the bird before and after cooking.

    • Why it matters: Sesame oil adds a toasted, nutty aroma that is unmistakably Chinese. Use it as a finishing touch — it is not a cooking oil and should never be added to high heat.

    Chinese Cooking Wine

    Shaoxing rice wine is used in the marinade. Two great options: Qian Hu Chinese Shaohsing Rice Cooking Wine and Premium Shaoxing Rice Cooking Wine.

    • Why it matters: Shaoxing wine removes any residual odour from raw chicken and adds a subtle complexity to the marinade that cannot be replicated with any substitute.

    Whole chicken poaching in a pot of broth with onion pieces

    Pro Tips for Perfect Hainanese Chicken

    Pro Tip 1 — Choice of Chicken and Exfoliation

    Before cooking, exfoliate your chicken with large sea salt or kosher salt — rub it all over the skin for a good 10 minutes, including under the wings and inside the cavity. Initially the skin is wrinkly, but after 10 minutes of salt rubbing it should appear smooth and glowing. Wear gloves to protect your hands.

    Pro Tip 2 — Cooking Temperature

    It is important to bring the water to a full boil before dipping the chicken in. This causes the skin to contract immediately, helping it adhere to the flesh. Once the chicken is in, reduce to a very low simmer — a hard boil will make the skin tough. A low, steady simmer produces juicy, bouncy flesh.

    secret chinese restaurant recipes

    Pro Tip 3 — Ice Bath

    The ice bath is essential for bouncy chicken meat. When the hot chicken meets instant cold water, the meat contracts immediately so all the juices stay inside. Do not skip this step. Fill a large bowl with 2L water and 1L of ice, and transfer the chicken immediately when it comes out of the pot.

    Pro Tip 4 — Chopping the Chicken

    In Cantonese whole chicken dishes, we always chop through the bones. Two factors matter: knife sharpness and commitment. Sharpen your knife well and use a heavy butcher’s knife. When you raise the knife, do not hesitate — a clean, decisive hit goes through the bone cleanly. A tentative hit shatters the bone into small pieces. Practice makes perfect.

    top 20 chinese dishes

    If you enjoy this recipe, try our Steam Preserved Vegetables with Pork for another classic Cantonese comfort dish.

    Chopped Hainanese poached chicken on a platter with rice and greens

    Hainanese Chicken with Ginger Scallion

    Authentic warm and cozy Hainanese Chicken recipe with ginger scallion sauce. A great family meal to share. Whether you’re preparing for Chinese New Year or a regular family dinner, this traditional Chinese meal will leave everyone full and happy!
    Print Recipe
    Pin Recipe
    Prep Time:1 hrCook Time:60 minTotal Time:2 hrsServings: 6 people

    Ingredients

    Poached Chicken

    • 1.3 kg free range and hormone free chicken
    • 4 Litre water until water slightly covers the chicken in the pot
    • 1.5 tbsp kosher salt or salt rock
    • 2 scallion
    • 7 slices of ginger
    • 2 garlic clove smashed

    Chicken Marinade

    • 1 tsp sesame oil
    • 1 tsp light soy sauce
    • 1 tsp Chinese rice cooking wine

    Ginger Scallion Sauce

    • 4 tbsp ginger grated
    • 2 scallion washed and chopped
    • ¼ cup canola oil
    • 1 tsp sea salt

    Hainanese Rice

    • 2 tbsp canola oil or 2 tbsp chicken rendered fat
    • 2 cm ginger grated
    • 1 garlic clove grated
    • 1 tsp sea salt
    • 2 cups jasmine rice
    • 2 cups chicken broth from the poaching liquid

    Garnish

    • 1 cucumber sliced thinly

    Instructions

    Cleaning the Chicken

    • Take the whole chicken and give it a good wash. Pat dry with a paper towel.
    • Exfoliation: wearing gloves, take 1 tsp of kosher salt and rub the chicken evenly — including under the wings and inside the cavity. Rub for a good 10 minutes. The skin should go from wrinkly to smooth and glowing.
    • Chicken marinade: combine soy sauce, sesame oil, and Chinese cooking wine. Using a pastry brush, brush the chicken with the marinade and let it sit.

    Cooking the Chicken

    • Bring a large stock pot with 4L of water to a boil. Add scallion, ginger, and garlic. Grabbing the chicken by the neck, dip it into the boiling water and pull it back out. Repeat 4 times. On the 4th time, place the whole chicken (breast submerged first) into the pot with the lid on. Reduce to a very low simmer for 35 minutes. After 35 minutes, turn off the heat and let the chicken rest in the broth for an additional 15 minutes.
    • Fill a large bowl with 2L of water and 1L of ice. Once the chicken is done, immediately transfer it to the ice bath.
    • Leave the chicken in the ice bath until the meat is firm and cool, about 10 minutes. Remove and drain excess liquid.

    Ginger Scallion Sauce

    • In a deep heatproof bowl, place the grated ginger, chopped scallion, and salt. Mix well.
    • In a pan, heat the canola oil until it just starts to smoke. Turn off the heat and carefully pour it over the ginger and scallion. Hold the bowl over a sink as it will splatter. Mix well.

    Hainanese Rice

    • In a pan or pot with a lid, heat up the chicken fat or oil. Add ginger and garlic. Cook, stirring, until fragrant. Stir in the rice and fry gently until glossy. Add chicken stock, place the lid on, and cook on low for 17 minutes. Let rest for 10 minutes before serving.

    Serving

    • Using a sturdy knife, chop the chicken into bite-size pieces, chopping through the bones. Lay all pieces on a large plate.
    • Brush the chicken marinade over the chicken pieces again.
    • Fluff up the rice and serve with thinly sliced cucumbers and the ginger scallion sauce on the side.

    Frequently Asked Questions

    What is Hainanese Chicken?

    Hainanese Chicken is a dish of poached whole chicken served with rice cooked in the poaching broth, ginger scallion sauce, and often cucumber slices. While it originates from the Hainan province in China, it was popularized in Singapore by Hainanese immigrants and is deeply beloved across Cantonese and Southeast Asian communities.

    Why do you dip the chicken in and out of boiling water four times?

    This technique, called “dipping,” causes the skin to contract four times in rapid succession. It seals the skin tightly to the flesh so it does not slip off during the long poach. It also helps the skin develop a beautiful, tight texture. Do not skip this step.

    Can I use chicken pieces instead of a whole chicken?

    You can, but the result will not be the same. A whole chicken produces a richer, more complex broth that makes the rice shine. If you do use pieces, choose bone-in skin-on thighs — they are closest to the whole chicken in terms of flavour output.

    What is the correct temperature to poach the chicken?

    You want a very low simmer — just barely bubbling. In temperature terms, around 160–180°F (71–82°C). A hard boil will make the skin tough and the meat dry. A gentle simmer keeps the flesh juicy and the skin supple.

    What can I substitute for Shaoxing cooking wine?

    Dry sherry is the most common substitute and works well. Mirin can also work but it is sweeter, so use half the amount. If you cannot find any of these, simply omit the cooking wine from the marinade — the dish will still be delicious.

    How do I store and reheat Hainanese Chicken?

    Store the chicken and rice separately in the refrigerator. Keep the remaining broth and use it to reheat the rice by adding a splash when reheating in a pan. The chicken is best eaten cold or at room temperature the next day — many Cantonese prefer it this way. Reheat gently to avoid toughening the skin.

  • Goji Berry, Red Date and Chinese Yam Tea

    Goji Berry, Red Date and Chinese Yam Tea

    This simple three-ingredient herbal tea has been part of my own routine for years, including through my pregnancies, with my doctor’s okay. Made with goji berries, Chinese red dates, and Chinese yam, it is warming and naturally sweet, and I drink it most days.

    This post may contain affiliate links. If you purchase through these links, I may earn a small commission at no extra cost to you. Thank you for supporting Love & Harvest!

    tea with goji berries and red dates

    This recipe came to me from my own Chinese medicine doctor. I drank it during and after my pregnancies, and these days I carry a full liter with me and sip it instead of coffee. That’s just my routine and what worked for me, not advice for anyone else.

    goji berry and red date tea

    Why This Tea Is Amazing

    • My coffee swap: When I’d usually reach for a coffee, I make this instead.
    • Not just for me: My husband drinks it too.

    Important: Always consult your doctor or midwife before adding any herbal preparation to your routine during pregnancy or breastfeeding, or if you take any medication, including blood thinners.

    Ingredients

    Goji Berries

    • Why they matter: The flavor is mild and slightly sweet — like a gentle raisin. A small handful is plenty; too many can overpower the tea.

    Buy dried goji berries at any Asian grocery store or online: organic dried goji berries are easy to keep on hand for daily use.

    Chinese Red Dates (Jujube / Hong Zao)

    • Why they matter: They provide natural sweetness to the tea — no added sugar needed.

    Look for them at Chinese medicine shops or Asian grocery stores. You can also find them on Amazon: dried Chinese red dates are available in resealable bags.

    Chinese Yam (Shan Yao / Rhizoma Dioscoreae)

    • Why it matters: The taste is neutral — almost imperceptible — which is exactly what you want in a tea you plan to drink every day.

    Find it dried at Chinese medicine stores or online: dried Chinese yam (Shan Yao Huai Shan) is widely available.

    Rooted in tradition: These ingredients have been used in Chinese home cooking and traditional remedies for centuries.

    goji berry date tea served in glass jar

    How to Serve and Store

    I always recommend drinking this tea warm, never cold. Warm drinks are the tradition in Chinese medicine.

    The longer the herbs steep in the bottle, the more flavor they release. That golden color deepens beautifully over the course of the day. I love using a 1L glass jar — it is large enough to hold a full day’s worth and elegant enough to bring anywhere.

    Sweetener Options

    I do not add sugar — the Chinese red dates provide enough natural sweetness. If you prefer a sweeter tea, add raw honey after brewing (never during boiling). A honey varietal set is a great way to explore different flavor profiles.

    Where to Buy the Ingredients

    Your best source is a Chinese medicine shop or Asian grocery store — the ingredients are common and affordable. If you do not have one nearby, all three herbs are available online. The links above connect you directly to reputable options.

    ***DISCLAIMER: I am not a doctor nor a healthcare provider. The information provided here is for educational purposes only and does not substitute for professional medical advice. Please consult your doctor or midwife before making any changes to your diet during pregnancy.***

    Frequently Asked Questions

    Can I drink this tea while pregnant?

    Every pregnancy is different. Please consult your doctor or midwife before adding any herbal preparation to your routine.

    Can men and non-pregnant women drink this tea?

    Yes. My husband drinks it regularly.

    How long can I store this tea?

    Brewed and stored in a sealed glass jar in the fridge, this tea keeps for 2–3 days. I prefer to brew a fresh liter daily and carry it through the day warm in a thermos.

    Can I add other herbs to this tea?

    Yes. Common additions in Chinese medicine include dried longan fruit, lotus seeds, and wolfberry leaves. Start with the base recipe and experiment from there.

    Does the tea taste bitter?

    Not at all. The red dates provide gentle sweetness, the goji berries add a mild fruity note, and the Chinese yam is essentially tasteless. The overall flavor is light, slightly sweet, and warming — nothing like a bitter herbal medicine.

    Can I use a loose-leaf tea infuser for this?

    You can use a tea infuser to hold the ingredients if you prefer not to strain at the end, though the traditional method is simply to simmer everything loose in the pot and ladle it into your jar — the herbs sink to the bottom on their own.

    A person holding a glass bottle of goji berry and red date tea

    Goji Berry, Red Date and Chinese Yam Tea

    A warm tea of goji berries, Chinese red dates and Chinese yam, simmered for 10 minutes and sipped through the day.
    Prep Time 5 minutes
    Cook Time 10 minutes
    Total Time 15 minutes
    Servings: 1 litre
    Course: Drinks
    Cuisine: Chinese
    Calories: 30

    Ingredients
      

    • 10-15 dried goji berries
    • 2 dried Chinese yam
    • 2-3 dried Chinese red dates
    • 1 litre of filtered water

    Method
     

    1. Give the goji berries, Chinese yam and red dates a rinse in cold water.
    2. Bring a pot and boil the 1 litre of water. Add the ingredients into the water in medium heat. cook for 10 minutes with lid on.
    3. Serve into a heat proof bottle (I recommend glass), and enjoy through out the day. Serve warm.

    Looking for more drinks from my kitchen? Try the Mixed Berry Smoothie with Pomegranate and Nopal or the Celery Juice.

  • Cantonese Steamed Chicken with Goji Berries

    Cantonese Steamed Chicken with Goji Berries

    Three simple ingredients — chicken, goji berries, and black fungus — steamed together until the flavors meld. It is a classical Cantonese dish that has been in Chinese families for generations, and once you taste it you will understand why. Clean and genuinely delicious.

    This post may contain affiliate links. If you purchase through these links, I may earn a small commission at no extra cost to you. Thank you for supporting Love & Harvest!

    Steamed chicken with goji berries, carrot and onion in a white bowl

    Goji berries have been in my kitchen for as long as I can remember. I grew up in a Chinese household.

    Goji Berries and Black Fungus

    Goji berries are sweet and mild. When autumn comes, goji berries go straight into the chicken noodle soup.

    The black fungus in this recipe has a satisfying chewy texture that my kids somehow love more than the chicken itself.

    Ingredients

    Goji Berries

    • Why they are essential: In this dish they soften during steaming into tender, subtly sweet morsels that absorb the savory chicken juices — the combination is genuinely beautiful.

    Buy dried goji berries at any Asian supermarket. Online, organic dried goji berries are reliable and easy to keep on hand.

    Chicken Breast (or Any Cut)

    • Why breast works well: It steams quickly, stays moist with the goji berry juices, and keeps this dish clean and light. You can substitute legs, drumsticks, or a mix of cuts — they all work and all come out delicious. The longer cook time for bone-in pieces (around 30–35 minutes) actually intensifies the flavor.

    steamed chicken goji berries with black fungus

    Professional Tips for a No-Fail Dish

    Pro Tip 1 — Steam in a Pot or Instant Pot

    You can use a stovetop bamboo steamer or a steamer basket over a pot of boiling water. A bamboo steamer is the traditional tool and imparts a very subtle woody fragrance. For modern convenience, an Instant Pot works equally well: fill with water, place the steamer basket inside, set the dish on top, seal, and steam for 25 minutes on the Steam setting. I have the Instant Pot Duo 7-in-1 and use it for this dish regularly.

    Pro Tip 2 — Keep the Marinade Simple

    The marinade is just salt and sesame oil. That is all you need. The simplicity is intentional — this dish is about the natural flavors of the chicken and goji berries, not masking them. Sesame oil adds a nutty depth that anchors the whole dish. Toss, let sit 10 minutes, then steam.

    Pro Tip 3 — Skim the Fat

    After steaming you will see a thin layer of chicken fat floating on the surface of the cooking liquid. Skim it off with a slotted spoon before serving. Removing it lets the goji berry sweetness shine through more clearly.

    Pro Tip 4 — Serve Warm, Always

    In Chinese tradition, everything is served warm — not hot, not cold. Serve this with a bowl of plain steamed rice and a cup of hot tea.

    Frequently Asked Questions

    How do I know when the chicken is fully cooked?

    Chicken breast steamed for 20–25 minutes at medium-high heat will be cooked through. Use a meat thermometer — the internal temperature should reach 165°F (74°C). Bone-in pieces may need 30–35 minutes. The flesh should be opaque white throughout with no pink near the bone.

    Can I use fresh goji berries instead of dried?

    Dried goji berries are preferred in this recipe. They rehydrate during steaming and release their flavor into the cooking liquid. Fresh goji berries are rarely available outside of China, but if you find them, use the same quantity.

    What is black fungus and where do I find it?

    Black fungus (wood ear mushroom / Auricularia auricula) is a dried edible mushroom used widely in Chinese cooking. It has a satisfying chewy texture and mild flavor. Find it dried at any Asian supermarket. Soak in warm water for 20 minutes before use.

    Can I make this dish for children?

    Yes. The flavor is gentle, and the goji berries are sweet enough for kids to enjoy. My children love the black fungus in particular.

    Can I add other herbs to the steam?

    Yes. Common additions include Chinese red dates (2–3 pieces), dried longan fruit, and wolfberries. These are the same herbs used in the goji berry, red date and Chinese yam tea.

    Steam Chicken Goji Berries

    Steamed Chicken with Goji Berries

    Easy steamed chicken with goji berries. A classical Cantonese dish.
    Prep Time 15 minutes
    Cook Time 25 minutes
    Total Time 40 minutes
    Course: Main Course
    Cuisine: Chinese
    Calories: 240

    Ingredients
      

    Chicken Marinate
    • 2 organic chicken breast skinned and cubbed
    • 1 tbsp canola oil
    • 1 tsp sea salt
    • 2 tsp corn starch
    The rest
    • 1 carrot sliced thinly
    • ½ white onion sliced thinly
    • 7-10 dried goji berries
    • 1 tsp sea salt
    • 1 tsp sesame oil
    • 1 tbsp soya sauce

    Equipment

    • steamer / Instant Pot

    Method
     

    To Marinate the Chicken
    1. Combine all the ingredients together well, and set aside to marinate on the counter top for 10-15 minutes.
    Putting Everything Together
    1. Sliced the carrots and onions, and add it with the chicken in the vessel you want to steam the dish in. I suggest a bowl that can hold liquid. After steaming, you'll notice the steam water has dropped some in the bowl and makes a delicious sauce on top.
    2. Add the remaining seasoning: salt and sesame oil. Add the goji berries on top. Mix and combine everything well.
    3. Using a regular steam:
      Wait until the steamer is ready and the water is boiling. Put the dish in and the lid on top. Steam on medium heat for 30-35 minutes.
    4. Using an Instant Pot:
      Set machine to 'Steam' on high heat for 25 minutes. Place the steamer basket and add the dish in. Make sure you use a round high bowl as the regular flat round plates don't fit. You want to have gaps between the bowls so the steam can come up and easy access for you to lift the plate out when it is done. Put the lid on and set to 'Seal'.
    5. When the time is up, you can release the vale. Lift the plate up, and drizzle the soy sauce on top. Serve with white rice.

    If you enjoy Chinese-inspired recipes, explore the Goji Berry, Red Date and Chinese Yam Tea and Steam Preserved Vegetables with Pork.

  • Traditional Hong Kong Curry Chicken

    Traditional Hong Kong Curry Chicken

    If you have ever craved a curry that is creamy, lightly spiced, and packed with the comforting flavours of lemongrass and coconut, this Traditional Hong Kong Curry Chicken is exactly what your table needs. Passed down through Cantonese kitchens and perfected in Hong Kong cafes, this is the dish that turns a regular weeknight into something memorable.

    This post may contain affiliate links. If you purchase through these links, I may earn a small commission at no extra cost to you. Thank you for supporting Love & Harvest!

    Hong Kong curry chicken

    Hong Kong Style

    In Hong Kong, curry is called 港式咖喱雞 (Cantonese: gong sik ga lay gai). From all the different versions of curry I’ve tasted, Hong Kong curry is on the mild side.

    Though Hong Kong curry is mild, it is still super tasty with hints of lemongrass and coconut cream. I would say it’s the tropical getaway in the curry world. The lemongrass gives a citrus lift, and the island flavour of the coconut cream adds a tropical creaminess to the crowd of flavour. It’s no wonder curry plays a strong role in Cantonese cuisine.

    Even though you’ve never visited Hong Kong or lived there, you can still find Hong Kong style curry anywhere with a large Chinese community — at Asian cafeterias, fast food stores, restaurants, and especially at Hong Kong cafe restaurants. Besides the variety of curry you can find, you can also find a variety of meats like chicken or beef (called 港式咖哩牛腩). Vegetarian is also an option.

    Like all the different versions of curry you can find in the world, the difference is in the spice blend. If you’re in the Hong Kong area, I’ve heard Choi Hop Lee 財合利 in Hong Kong (Wanchai) is the place to find authentic Hong Kong flavour — they make their own Hong Kong curry powder and paste.

    History of Hong Kong and Curry

    When you travel to Hong Kong, you will find people from all parts of the world. Once upon a time, Hong Kong was renowned as the financial hub of Asia. During the colonial years, the British government mobilized many Indian and Nepalese soldiers to Hong Kong. They brought over their food and spices and began the curry expansion in the city. It became popular to serve curry in restaurants to cater to the new community of people.

    Though the traditional curry brought over by Indians was strong in flavour, Hong Kong mellowed it down and made it sweeter to fit the local palate. They used coconut cream to help cut the spice, and incorporated Malaysian curry paste — more adaptable and favoured by the local population.

    Why You’ll Love This Recipe

    • Irresistibly delicious — this curry has lemongrass, turmeric, onion, and coconut milk. It has all the tropical sweet and savoury taste that is mouthwatering. The smell of the curry is not strong, but soft and tropical.
    • Easy to make — sauté the onion, add the marinated chicken, and let it simmer in chicken stock. The last 5 minutes of cooking, add in the coconut milk. Sounds easy? Because it is!
    • Still tastes great the next day — some food is best served fresh, but this curry is great the next day. Reheat and serve.

    Ingredients

    Curry Powder

    There are many different kinds of curry powder out there. Each country in Asia has their own flavour and heat level. For this recipe, I like to use Madras Curry Powder — the flavour leans more Chinese than Indian and it’s perfect for this dish.

    • Why it matters: Curry powder is the backbone of the entire dish. Using a quality powder with turmeric, cumin, and coriander makes all the difference in depth of flavour.

    Lemongrass

    Using lemongrass in curry is a Malaysian style that Hong Kongers love. Lemongrass gives off a tropical, vibrant taste and really brightens the entire dish.

    • Why it matters: Lemongrass is what separates Hong Kong curry from other regional curries. It adds a citrus, almost floral lift that balances the richness of the coconut cream.

    Coconut Milk

    The thickness of coconut cream makes the sauce less watery. The flavour of coconut adds sweetness that counteracts the strong spices in the curry, creating a balanced palate. Always add coconut cream when the dish is almost done — never boil it.

    • Why it matters: Coconut milk is the finishing touch. It rounds out the spice, adds body, and delivers that creamy tropical colour. Use a quality brand like Chaokoh Coconut Milk for best results.

    Evaporated Milk

    This is a secret weapon ingredient. Many Cantonese cooks (my grandfather included) add evaporated milk into the curry for a subtle dairy sweetness. Not too much — just enough to balance the spice and salt and give the curry more depth.

    • Why it matters: This is the ingredient that distinguishes Hong Kong curry from other Asian curries. It adds a creamy richness that is different from coconut milk alone.

    Professional Tips to Get Your Curry Tasting Like a Real Hong Kong Style Cafe

    Pro Tip #1 — Fry the Potatoes First

    I love frying the potatoes before adding them to the curry. All Hong Kong curry has potatoes — it’s a must. Frying the potatoes helps them hold together in the stew and prevents them from breaking up into starchy clumps.

    Pro Tip #2 — Make the Roux

    Roux is a cooked mixture of flour and fat. It is how we thicken the soup base. In classic French cooking the fat is butter, but in Hong Kong cooking oil is typically used. Do not walk away from this step — the roux burns fast.

    Pro Tip #3 — Do Not Boil the Evaporated Milk and Coconut Cream

    Evaporated milk and coconut cream should never reach boiling point. That is why these two ingredients are added at the very end. They are meant to offset the strong spice flavour and balance the dish.

    If you love Cantonese chicken recipes, also check out my Classic Hainanese Chicken and Soy Sauce Chicken (Cantonese Style) — two dishes that pair beautifully alongside this curry.

    Hong Kong curry chicken

    Frequently Asked Questions

    What makes Hong Kong curry different from Indian or Thai curry?

    Hong Kong curry is much milder than Indian or Thai curry. It uses a blend of Madras-style curry powder, lemongrass (borrowed from Malaysian cooking), and coconut cream or evaporated milk to create a sweeter, creamier result. The heat is gentle enough for children, making it a true family dish.

    Can I use boneless chicken thighs instead of a whole chicken?

    Yes. Boneless thighs work very well and cut down on cooking time. Bone-in pieces are traditional and add more flavour to the sauce, but boneless thighs are a great weeknight shortcut. Cook until the internal temperature reaches 165°F (74°C).

    Can I make this recipe without potatoes?

    You can, but potatoes are a defining feature of Hong Kong curry. They absorb the sauce and add body to the dish. If you leave them out, the sauce will be thinner. You could substitute with sweet potato, taro, or butternut squash for a similar effect.

    What should I serve with Hong Kong curry chicken?

    Jasmine rice is the classic pairing — it soaks up the sauce beautifully. You can also serve it over rice noodles, or with a side of steamed bok choy or Chinese broccoli to round out the meal.

    Can I make this curry ahead of time?

    Yes — this curry is even better the next day once the flavours have had time to meld. Store in an airtight container in the refrigerator for up to 3 days. Reheat gently on the stovetop and do not let it boil once you reheat, to preserve the coconut cream.

    Can I freeze Hong Kong curry chicken?

    Yes, though the potatoes can become slightly mealy after freezing. Freeze the curry without the potatoes if you plan to make a large batch, then add freshly cooked potatoes when reheating. The curry base freezes well for up to 2 months.

    Hong Kong Style Curry

    Delicious traditional Hong Kong style cafe curry chicken. Subtle flavour in spice, but still tons of flavour to leave an impactful meal. Also light and citrusy from lemongrass to fit any picky eater. It the perfect family meal option that keeps the dinner table warm and cozy. Print Recipe Pin RecipePrep Time:20 minsCook Time:30 minsCourse: Main CourseCuisine: ChineseKeyword: Cantonese CuisineServings: 4 people

    Ingredients

    Chicken Marinate

    • 1 whole chicken organic, free ranged
    • 2 tbsp turmeric powder
    • 1 tbsp salt

    Curry

    • ½ cup oil
    • 4-5 medium sized potatoes cut into medium size knobs
    • ½ white onion diced
    • 3 garlic cloves grated
    • 5 shallots chopped
    • 1 thumb-sized ginger sliced into thick slices
    • 3 red eye chili / red chili sliced
    • 2 tbsp Hong Kong curry powder / curry powder
    • 3 tbsp reserved oil
    • 2 tbsp flour
    • 2 lemongrass stalks
    • ½ cup water / chicken stock
    • ½ cup coconut cream
    • ½ cup evaporated milk
    • 2 TSP sea salt

    Instructions

    • Clean the inside and outside of the chicken. Pat dry. Cut the chicken into pieces. Separate the wings, legs, and breast. I like to debone the chicken and freeze the carcass for chicken soup later. Marinate the chicken in salt. Let it sit in the fridge.
    • In a large wok, add the 1/2 cup oil. When the wok is hot, add the potatoes and fry for about 5-8 minutes, or until you see the edges slightly brown. Place them on a plate with a paper towel.
    • With the same oil in the wok, use only 3 tbsp of oil and reserve the rest. Add the onion, garlic and shallots. When the onion is softened, add the ginger, chili, curry powder and turmeric. Fry until aromatic (3-5 minutes).
    • Add the chicken pieces and fry until the skin has color. Remember to stir constantly so it doesn’t stick to the bottom.
    • Once all the chicken is slightly browned, remove everything to a plate.
    • On the same pan, add in 3 tbsp of the reserved oil. Add the flour into the pan and fry until fragrant. Do not walk away from this step.
    • Once the flour is brown, take out your whisk and start to stir the flour around. Add the chicken stock while whisking the flour. Try to break up the flour in the chicken stock. You should not see any flour clumps at this point.
    • Add the chicken back to the pan, along with the lemongrass. Simmer on medium heat for 20-25 minutes.
    • For the last 5 minutes, add the evaporated milk, coconut cream, and salt to taste. Let it simmer on low for 5 minutes. Do not let it boil.
    • Serve with warm jasmine rice.
  • Tasty Soy Sauce Chicken Recipe – Cantonese Style

    Tasty Soy Sauce Chicken Recipe – Cantonese Style

    If there is one dish that instantly transports me back to childhood, it is Cantonese Soy Sauce Chicken. The moment those aromatics hit the oil — cinnamon, star anise, garlic — the entire kitchen fills with a fragrance that feels like home. And the best part? Once you build the braising liquid, you can reuse it two more times.

    This post may contain affiliate links. If you purchase through these links, I may earn a small commission at no extra cost to you. Thank you for supporting Love & Harvest!

    soy sauce chicken recipe

    What is Soy Sauce Chicken?

    Also known as “See Yao Gai,” soy sauce chicken is a whole chicken braised in a bath of soy sauce, garlic, cinnamon, and star anise. The aroma of making this in the kitchen is mouthwatering. It is not labour-intensive, and after the first time making it, it gets easier. Once you establish the gravy, it can be frozen and reused twice more — freeze it and make another batch in the future.

    Everyone Knows What Soy Sauce Chicken Is

    This recipe is very popular in Asian food courts — there are usually at least two vendors selling soy sauce chicken at any Asian mall food court. It is home-style comfort food you can find everywhere. For Cantonese families, the aroma is deeply comforting and reminds us of childhood. Soy sauce chicken is best served with steamed white rice — and do not forget to spoon some of that gravy on top of the rice.

    Why You Will Love Soy Sauce Chicken

    • Easy to make — the recipe is straightforward. If you have basic Asian spices, you can make this. No specialised skills required.
    • Irresistible and delicious taste — the pungent smell of soy sauce and star anise makes any mouth water. Even people who have never tasted soy sauce chicken will immediately say it smells amazing.
    • Versatile — serve it with white rice and a vegetable side. You can also shred the meat and stir-fry it with noodles for soy sauce chicken noodles, or slice it cold over a salad.

    Ingredients

    Spices

    Star anise is non-negotiable for this recipe. The other spices — cinnamon stick, bay leaf, and ginger — build the aromatic backbone of the braising liquid. If you want a stronger ginger note closer to soy-ginger chicken, simply double the amount of ginger.

    • Why star anise matters: Star anise gives Cantonese braised dishes their signature warm, slightly sweet anise flavour. Without it, the dish loses its authentic character. Use fresh star anise for the most impact. You can find quality five spice powder or whole star anise on Amazon.

    Cinnamon Sticks

    Cinnamon adds warmth and a gentle sweetness that balances the saltiness of the soy sauce. It is subtle but makes a noticeable difference. Use whole cinnamon sticks rather than ground cinnamon — ground cinnamon will make the liquid cloudy and the flavour too strong.

    • Why whole sticks: Whole sticks release flavour gradually during the long braise without overpowering the sauce.

    Soy Sauce and Dark Soy Sauce

    There is an important difference between soy sauce and dark soy sauce. Regular soy sauce is where the umami flavour comes from. Dark soy sauce is primarily about colour — it is thicker, slightly less salty, and gives the chicken its beautiful mahogany finish.

    • Why both: Using only regular soy sauce will give you flavour without colour. Using only dark soy sauce will be too bitter. The combination is what creates the signature appearance and taste of authentic soy sauce chicken. Use a quality soy sauce for the braising liquid.

    Can I Use Chicken Wings, Thighs, and Drumsticks?

    Yes. For chicken wings, thighs, and drumsticks, cook for 10 minutes in the Instant Pot instead of 20. The same braising liquid and technique applies.

    Soy Sauce Chicken in an Instant Pot

    Set the Instant Pot on SAUTE and add the oil and spices. Sauté for 5 minutes. Add the water, dark soy sauce, spring onion, and sugar and bring to a boil. Add the chicken and set to HIGH PRESSURE for 20 minutes. Release the valve, take out the chicken, let it cool for 5 minutes, then brush with Chinese wine and maltose or honey.

    To clean the Instant Pot after: add vinegar and water to the pot and pressure cook for 10 minutes. The smell vanishes completely.

    Love Cantonese chicken? Also try my Classic Hainanese Chicken or the fragrant Lemongrass Chicken Drumsticks — both pair beautifully with the same steamed rice.

    soy sauce chicken recipe easy

    soy sauce chicken recipe

    Frequently Asked Questions

    Why does my soy sauce chicken look pale instead of the dark glossy colour I see in restaurants?

    The dark mahogany colour comes primarily from dark soy sauce, not regular soy sauce. Make sure you are using both types. Also, the step of brushing the cooked chicken with maltose or honey mixed with hot water right after it comes out of the pot creates that beautiful shiny glaze. Do not skip this step.

    Can I reuse the braising liquid?

    Yes — this is one of the best things about soy sauce chicken. After cooking, strain the braising liquid, let it cool completely, then freeze it. You can reuse it up to two more times, adding a little water and soy sauce each time to top it up. The flavour deepens with each use.

    How do I keep the chicken skin from tearing when I take it out of the pot?

    Use a combination of tongs and chopsticks to lift the chicken gently without breaking the skin. Avoid using a fork, which punctures the skin and lets juices escape. Let the chicken rest on a plate for 5 minutes before cutting — the skin firms up slightly as it cools and is much easier to handle.

    How long should I cook the chicken on low heat?

    20 minutes on the lowest setting with a gentle simmer, rotating every 10 minutes. The water should never bubble aggressively — only a very gentle, slow simmer. Then turn the heat to high for 10 minutes, turn it off completely, and let the chicken sit in the covered pot for another 15 minutes. This residual heat finishes cooking it through.

    What is maltose and can I substitute it?

    Maltose is a thick, sticky sweetener made from grain starch. It is used in the glaze because it creates a beautifully shiny, lacquered finish that honey alone cannot quite replicate. You can substitute with honey — it will work, but the glaze will be slightly less glossy. Mix with hot water to thin it before brushing.

    Soy Sauce Chicken

    Easy Cantonese soy braised chicken that will leave you stunned how simple it is to make restaurant-quality soy sauce chicken in your own kitchen. A soft and gentle process with warm aromatics like cinnamon and star anise. A beloved Cantonese dish and a favourite among families. Best served with warm rice on the side.
    Print Recipe Pin Recipe

    Ingredients

    • 1.4 kg Whole Chicken
    • 1 TBSP oil
    • 100 g sugar
    • 1 cinnamon stick
    • 1-2 star anise
    • 2-3 dried bay leaves
    • 5 cloves garlic
    • 2 bunches spring onions
    • 3-4 slices ginger
    • 1.5 cups dark soy sauce
    • 1 litre water
    • 1 TBSP Chinese rice wine

    Marinate for Chicken

    • 2 TSP sea salt
    • 1 TBSP dark soy sauce

    Chicken Glaze

    • 2 TBSP maltose / honey
    • 1 TBSP hot water

    Garnish

    • 1 green onion thinly sliced the green parts

    Instructions

    • In a large stock pot, heat 1 tbsp of oil on medium heat. Fry the garlic, ginger, cinnamon stick, star anise, and bay leaf until aromatic — about 3 minutes.
    • Immediately add the water, 1.5 cups of dark soy sauce, spring onion, and sugar. Bring everything to a boil.
    • When the water is boiling, carefully lower the whole chicken in. Give it at least 5-7 gentle rotations in the soy sauce water. Do not splash.
    • Place the chicken breast-side down and cover the pot on the lowest heat setting. You want only a very gentle simmer — not a rolling boil. Cook for 20 minutes, rotating every 10 minutes.
    • After 20 minutes, turn the heat back to high for 10 minutes, then turn off the heat with the lid on. Let the chicken sit in the water for 15 minutes.
    • Carefully remove the chicken without breaking the skin — use tongs and chopsticks. Set on a large plate and let it cool for 5 minutes. Brush with Chinese wine and maltose or honey.
    • Once completely cooled, chop into pieces and garnish with thinly sliced green onion. Serve with warm rice and some of the soy sauce gravy.