Category: chicken recipes

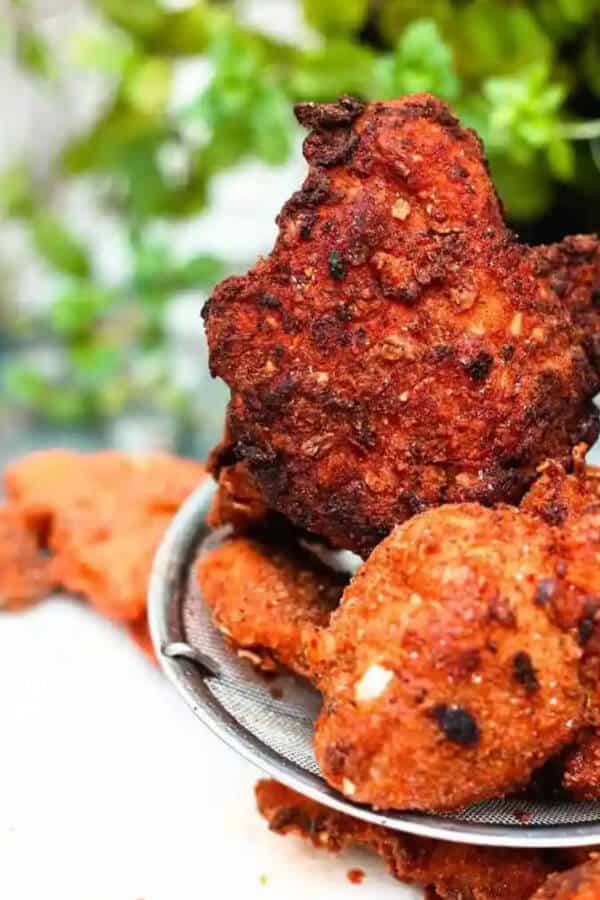
  • Best Homemade Fried Chicken with Ranch Sauce

    Best Homemade Fried Chicken with Ranch Sauce

    This post may contain affiliate links. If you purchase through these links, I may earn a small commission at no extra cost to you. Thank you for supporting Love & Harvest!

    There’s a moment when you bite into a piece of perfectly fried chicken — that ear-splitting crunch, the steam that hits your face, and then the juice that runs — where you realize not all fried chicken is created equal. This recipe was gifted to me by a stranger on a Facebook group who had spent years in restaurant kitchens. He asked nothing in return. I’m passing it on to you the same way.

    Pile of crispy homemade fried chicken on a plate outdoors

    Why This Is the Best Homemade Fried Chicken

    Fried chicken is a social affair. It’s gathering food — the kind that fills a table with noise and happiness. What makes this recipe stand out is a two-part process: a citrus brine overnight and a double-fry method that locks in moisture while building a shattering crust. The result is chicken that’s deeply flavoured all the way to the bone, never dry, never greasy.

    Thank you, Ethan Chavoya, wherever you are.

    Golden fried chicken drumsticks and thighs with a crunchy crust

    Ingredients Deep-Dive

    Ingredients

    The Citrus Brine

    The brine is the heart of this recipe. Lemon juice breaks down the muscle fibres, salt draws moisture in rather than out (counterintuitively), and ginger adds a subtle warmth that doesn’t read as “ginger” in the finished chicken — it just tastes more alive. Sugar balances acidity and encourages browning during frying. Give the chicken a full 12 hours in the brine. Overnight is not optional here — it’s what separates good from unforgettable.

    The Dredge Liquid: Hot Sauce + Buttermilk

    The secret is a sour-base hot sauce mixed into the buttermilk. It tenderises further and leaves a faint tang in the finished crust. In Mexico, Valentina works perfectly. Elsewhere, Frank’s Red Hot Buffalo Sauce is the benchmark. Can’t find buttermilk? Mix 1 cup whole milk with 1 tbsp white vinegar, wait 5 minutes — done.

    The Breading Blend

    The combination of flour, breadcrumbs, and cornmeal creates three different textures in the crust: the flour gives it body, the breadcrumbs add a coarse chew, and the cornmeal produces those irresistible sharp ridges that stay crispy long after the chicken comes out of the oil. The spice blend — paprika, cayenne, garlic and onion powder, poultry seasoning — seasons the crust, not just the meat.

    The Oil and Temperature

    Use a neutral oil with a high smoke point: canola is ideal. The first fry at 275°F sets the crust and partially cooks the meat without burning. A second fry finishes the job and produces the deep amber colour. A deep-fry thermometer is your best tool here — guessing oil temperature is how you get pale, greasy chicken. For air frying, see the section below.

    The Ranch Sauce

    Sour cream base instead of mayonnaise keeps it tangy and light. Fresh chives and parsley are non-negotiable — dried herbs flatten the flavour. A touch of dried dill and white vinegar ties everything together. This ranch keeps for a week in the fridge and will be raided for carrots, celery, and anything else within reach.

    How to Make the Best Fried Chicken (Step-by-Step with Photos)

    Step 1 — Brine the Chicken

    In a large bowl, combine the chicken pieces with all the dry brine ingredients. Add the lemon juice and zest. Toss until everything is evenly coated. Transfer to a sealed bag or covered bowl and refrigerate for 12 hours minimum.

    Step photos: chicken pieces tossed with the brine ingredients in a bowl
    Step photos: chicken pieces lightly coated in buttermilk brine

    Step 2 — Air Dry and Dredge

    The next day, place the chicken on a wire rack over a baking sheet and return to the fridge — uncovered — for 2 hours. This surface drying is critical; wet chicken in hot oil spatters dangerously and produces a soggy crust. While it dries, whisk together the buttermilk, eggs, and hot sauce in one bowl. Combine all the breading ingredients in a second bowl.

    One piece at a time: dip in the wet mixture, then press firmly into the breading on all sides. Place back on the rack. Let the coated pieces rest in the fridge for 1 hour so the breading fully adheres.

    Step photos: hands dredging buttermilk chicken in seasoned flour on all sides

    Step 3 — First Fry (275°F)

    Heat the oil in a large wok or heavy pot to 275°F. Fry 3 pieces at a time — never crowd the pan. Lower each piece in slowly, holding the end for 3 seconds before releasing. Fry for 12–15 minutes until cooked through, then transfer to a paper-towel-lined rack. Repeat with remaining pieces.

    Step photo: tossing a floured chicken piece to shake off excess breading

    Step 4 — Second Fry (375°F) for Extra Crunch

    Raise the oil to 375°F. Fry each piece a second time for 3–5 minutes until deeply golden. The second fry is what produces the signature crunch. Transfer to fresh paper towels. Do not cover — steam will soften the crust.

    Breaded chicken pieces resting on a wire rack before frying
    Tray of flour-coated chicken pieces on a rack next to the dredging bowls

    Air Fryer Method

    Preheat to 400°F for 5 minutes. Cook drumsticks and thighs for 10 minutes, flip, then cook for another 10 minutes. Check doneness with a knife poke at the thickest point — juice should run clear. Internal temperature must reach 165°F. An air-fried version won’t match the deep-fried crunch, but it’s a solid weeknight alternative.

    What to Serve with Fried Chicken

    This chicken pairs beautifully with bright, acidic sides that cut through the richness. Try it alongside our Beet and Avocado Sashimi Appetizer for a party spread, or keep it classic with coleslaw and cornbread. The ranch sauce doubles as a vegetable dip — our kids have it with carrots and celery weekly.

    For a complete feast, the Easy Fall-Off-the-Bone Ribs make an incredible companion for big gatherings. Both can be prepped ahead and served together.

    Frequently Asked Questions

    Can I use chicken wings instead of drumsticks and thighs?

    Yes. Wings work well and make a great appetizer-sized serving. Note that wings cook significantly faster than thighs — reduce the first fry time to around 8 minutes and check doneness before the second fry.

    What if I can’t find buttermilk?

    Make it yourself in 5 minutes: combine 1 cup of whole milk with 1 tablespoon of white vinegar, stir, and let stand for 5 minutes. You’ll see the milk thicken slightly — that’s your buttermilk ready to use.

    How far ahead can I prep this recipe?

    The brine step can be done 24 hours in advance. The fully dredged, uncooked chicken can sit on the rack in the fridge for up to 2 hours before frying. The first fry can be done several hours ahead; just do the second fry right before serving for maximum crunch.

    Can I bake this instead of frying?

    You can, though the crust won’t achieve the same crunch. Bake on a wire rack at 425°F for 35–40 minutes, flipping halfway. Spray lightly with oil before baking to help the breading brown.

    How do I keep the chicken warm for a party?

    After the second fry, place on a wire rack set over a baking sheet in a 200°F oven. This keeps the chicken warm for up to 45 minutes without softening the crust. Do not cover or wrap — trapped steam is the enemy of crispy.

    Is there a Lodge cast iron skillet option?

    Absolutely. A Lodge 12″ cast iron skillet is excellent for shallow-frying this chicken with less oil. Use about 2 inches of oil and maintain temperature carefully — cast iron holds heat well but responds slowly to adjustments.

    best fried chicken love and harvest

    BEST Homemade Fried Chicken with Ranch Sauce

    Incredibley crispy golden brown fried chicken with super juicy flesh inside. The BEST homemade fried chicken you'll taste all made with fresh herbs and spices. A gorgeous bright and fresh brine that will tenderize your chicken for that super moist and juicy texture. All matched with an amazing ranch sauce that will get your guests dipping and crunching away. There is no better way of serving chicken than this. Print Recipe Pin RecipePrep Time:15 minsCook Time:30 minsCourse: Main CourseCuisine: AmericanKeyword: chicken, fried chickenServings: 5 people

    Ingredients

    Chicken Brine

    • 2 kg chicken legs and chicken wings mix
    • 1 TBSP salt
    • 1 TSP pepper
    • 1 spring fresh rosemary chopped
    • ½ TSP fresh thyme chopped
    • 1 TSP fresh ginger grated
    • 1 lemon juice
    • 1 lemon zest
    • 2 TSP sugar
    • 1 TSP chili flakes

    Dredge Liquid

    • 2 eggs
    • 1 cup buttermilk
    • 2 TBSP hot sauce

    Fried Chicken Breading

    • 2 cups flour
    • ½ cup bread crumbs
    • 3 TBSP cornmeal
    • 2 TBSP salt
    • 2 TSP pepper
    • 1 TBSP paprika
    • 2 TSP garlic powder salt
    • 2 TSP onion powder
    • 1 TSP poultry seasoning
    • 1 TSP cayenne powder

    Deep Fry

    • 4 cups canola oil

    Ranch Sauce

    • 1 ½ cups sour cream
    • 5 tsp white vinegar / lemon juice
    • 2 TBSP fresh chives chopped
    • ½ TSP fresh parsley chopped
    • 1 TSP dried dill
    • 1 TSP garlic powder
    • 1 TSP onion powder
    • 2 TSP salt
    • ½ TSP pepper

    Instructions

    Chicken Brine

    • In a large bowl, clean and rinse the chicken. Pat try. Cut the legs into two pieces separating the drumstick and thigh. Add the salt, pepper, rosemary, thyme, ginger, lemon juice, lemon zest, sugar, and chili flakes with the chicken. Toss and rub the chicken with the marinate. Put everything in a plastic bag and marinate overnight (12 hours).

    To Prepare Fried Chicken

    • Next day, take out a baking rack with a fitted baking sheet underneath. Take the bag of chicken out the fridge and give it a light toss to flick out access liquid. Put all the chicken pieces in the rack to air dry in the fridge.
    • Prepare the dredge liquid by combining the egg, buttermilk and hot sauce together with a whisk in a large bowl.
    • In a separate bowl (preferably a smaller bowl with tall wall – like a small pot) put the breading ingredients together. Combine well the flour, bread crumbs, cornmeal, salt, pepper, paprika, garlic salt powder, onion powder, poultry seasoning, and cayenne powder together.
    • Take the chicken out the fridge. Dip each chicken pieces separately in the liquid first. make sure all surface is covered with the liquid, and quickly drop the chicken piece in the breading bowl. Rub and put pressure to make sure all surface area is covered with the breading flour. if you see a gap, add some flour and rub it in. Give it a few taps for access flour, and place it back on the drying rack. Repeat until all the chicken pieces are dredge and breaded. Let them rest in the fridge for 1 hour before deep frying.

    To Make Fried Chicken

    • Heat your vessel to deep fry. I have a wok and I enjoy deep frying everything there. Add 4 cups of fresh canola oil. Preheat oil to 275F.
    • Depending how big the deep fryer you have, add enough chicken pieces where it has room to swim around and not be over crowded. I recommend 3 pieces at the same time.
    • Carefully dip half the chicken in the oil and hold on to the end for 3 seconds, and let it all go in the deep fryer. This is the reason we need the chicken as dry as possible. If there's liquid on the chicken, the oil will explode and burn your hand. Repeat until you have three pieces in the deep fryer. Fry for 12-15 minutes.
    • In a drying rack, add some paper towels. When the chicken is done cooking, take them out and place them on top of the paper towel. Make sure you're not over crowding the chickens. For them to maintain crispy, it needs air circulation to completely dry and not have any moisture. Serve

    Ranch Sauce

    • Whisk together the sour cream, white vinegar / lemon juice, fresh chives, and fresh parsley. Add the spices. Pour into a jar and chill in the refrigerator until ready to serve. This dressing will keep nicely in the refrigerator for up to a week. Enjoy!
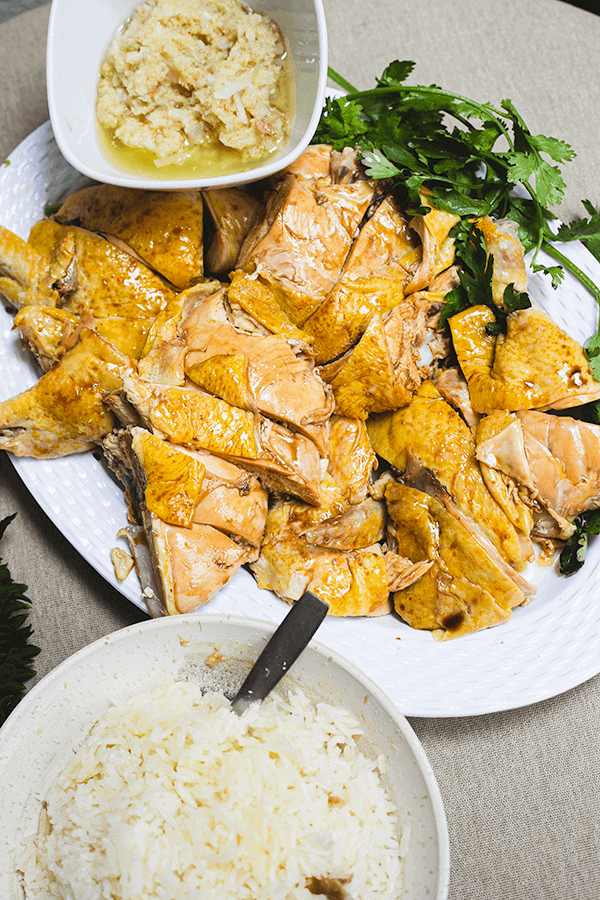
  • Homemade Chinese Food Classic: Hainanese Chicken

    Homemade Chinese Food Classic: Hainanese Chicken

    Hainanese Chicken is one of those dishes that sounds deceptively simple — poached chicken, ginger scallion sauce, rice cooked in the broth — but the result is a deeply comforting bowl that makes you understand immediately why it has been a beloved dish across generations of Cantonese and Southeast Asian families. This is authentic homemade Chinese food at its most honest: few ingredients, careful technique, profound flavour.

    This post may contain affiliate links. If you purchase through these links, I may earn a small commission at no extra cost to you. Thank you for supporting Love & Harvest!

    Hainanese chicken on a platter with a spoon drizzling sauce, next to fresh herbs

    Chicken is always served during Chinese New Year because it is the symbol of unity and family. Usually, steamed or poached chicken with head and feet is served during our traditional dinner to further emphasize the concept of union and rebirth. Although Hainanese Chicken is from the Hainan province in China, it is said to have been popularized in Singapore by Hainanese immigrants, and it is still well-loved among Cantonese families everywhere.

    This post is all about a delicious Homemade Chinese Food Classic: Hainanese Chicken.

    Why You’ll Love This Recipe

    • Easy — it is a slow-poached chicken in a stock pot, lightly seasoned. Mostly hands-off once it is in the pot.
    • Poached, not fried — the chicken cooks gently in water.
    • Delicious — ginger and chicken go hand in hand, and it is a soul-soothing taste. Try it once and you will understand the obsession.
    • Authentic Cantonese dish — if you want a popular homemade Cantonese recipe, this is the one. All Cantonese moms know it.

    Hainanese Chicken Rice

    The same broth used to cook the chicken is also used to make the rice. When it finishes cooking, you open the lid to a luscious and glossy pot of rice that is infused with the chicken’s essence. In restaurants, they often add a lot of oil and chicken fat to make it extra tasty. For a less oily version, skim the soup of its fat by removing the skin and defatting the top layer of oil. If flavour is your priority, pour on all that glory and work a little harder the next day.

    easy chinese food recipes

    Cooking Methods

    There are two known ways of making Hainanese Chicken. First, the chicken and rice are steamed together. Second, the chicken is poached in water, and the rice is cooked separately using the chicken broth. We use the second method — a little more work, but the result is better presentation and more control over each component.

    top 12 easy chinese recipes

    Ingredients Deep-Dive

    Ingredients

    Free-Range Chicken

    The most important ingredient. Try to find a fresh, free-range chicken — it has a far better flavour and texture compared to caged varieties.

    • Why it matters: Free-range chickens have more developed muscles from movement, which means more flavour in the meat and a better-tasting broth. The difference is noticeable in a delicate dish like this where the chicken is the only star.

    Ginger

    Ginger goes into the poaching liquid, the scallion sauce, and the rice. Use fresh ginger — not powder.

    • Why it matters: Ginger neutralizes the gamey notes in chicken and infuses every component with a clean, warming flavour. It is the defining aromatic of this dish. A ginger grater makes it easy to get fine, fibrous shreds perfect for the sauce.

    Sesame Oil

    Used in the chicken marinade — just 1 teaspoon brushed over the bird before and after cooking.

    • Why it matters: Sesame oil adds a toasted, nutty aroma that is unmistakably Chinese. Use it as a finishing touch — it is not a cooking oil and should never be added to high heat.

    Chinese Cooking Wine

    Shaoxing rice wine is used in the marinade. Two great options: Qian Hu Chinese Shaohsing Rice Cooking Wine and Premium Shaoxing Rice Cooking Wine.

    • Why it matters: Shaoxing wine removes any residual odour from raw chicken and adds a subtle complexity to the marinade that cannot be replicated with any substitute.

    Whole chicken poaching in a pot of broth with onion pieces

    Pro Tips for Perfect Hainanese Chicken

    Pro Tip 1 — Choice of Chicken and Exfoliation

    Before cooking, exfoliate your chicken with large sea salt or kosher salt — rub it all over the skin for a good 10 minutes, including under the wings and inside the cavity. Initially the skin is wrinkly, but after 10 minutes of salt rubbing it should appear smooth and glowing. Wear gloves to protect your hands.

    Pro Tip 2 — Cooking Temperature

    It is important to bring the water to a full boil before dipping the chicken in. This causes the skin to contract immediately, helping it adhere to the flesh. Once the chicken is in, reduce to a very low simmer — a hard boil will make the skin tough. A low, steady simmer produces juicy, bouncy flesh.

    secret chinese restaurant recipes

    Pro Tip 3 — Ice Bath

    The ice bath is essential for bouncy chicken meat. When the hot chicken meets instant cold water, the meat contracts immediately so all the juices stay inside. Do not skip this step. Fill a large bowl with 2L water and 1L of ice, and transfer the chicken immediately when it comes out of the pot.

    Pro Tip 4 — Chopping the Chicken

    In Cantonese whole chicken dishes, we always chop through the bones. Two factors matter: knife sharpness and commitment. Sharpen your knife well and use a heavy butcher’s knife. When you raise the knife, do not hesitate — a clean, decisive hit goes through the bone cleanly. A tentative hit shatters the bone into small pieces. Practice makes perfect.

    top 20 chinese dishes

    If you enjoy this recipe, try our Steam Preserved Vegetables with Pork for another classic Cantonese comfort dish.

    Chopped Hainanese poached chicken on a platter with rice and greens

    Hainanese Chicken with Ginger Scallion

    Authentic warm and cozy Hainanese Chicken recipe with ginger scallion sauce. A great family meal to share. Whether you’re preparing for Chinese New Year or a regular family dinner, this traditional Chinese meal will leave everyone full and happy!
    Print Recipe
    Pin Recipe
    Prep Time:1 hrCook Time:60 minTotal Time:2 hrsServings: 6 people

    Ingredients

    Poached Chicken

    • 1.3 kg free range and hormone free chicken
    • 4 Litre water until water slightly covers the chicken in the pot
    • 1.5 tbsp kosher salt or salt rock
    • 2 scallion
    • 7 slices of ginger
    • 2 garlic clove smashed

    Chicken Marinade

    • 1 tsp sesame oil
    • 1 tsp light soy sauce
    • 1 tsp Chinese rice cooking wine

    Ginger Scallion Sauce

    • 4 tbsp ginger grated
    • 2 scallion washed and chopped
    • ¼ cup canola oil
    • 1 tsp sea salt

    Hainanese Rice

    • 2 tbsp canola oil or 2 tbsp chicken rendered fat
    • 2 cm ginger grated
    • 1 garlic clove grated
    • 1 tsp sea salt
    • 2 cups jasmine rice
    • 2 cups chicken broth from the poaching liquid

    Garnish

    • 1 cucumber sliced thinly

    Instructions

    Cleaning the Chicken

    • Take the whole chicken and give it a good wash. Pat dry with a paper towel.
    • Exfoliation: wearing gloves, take 1 tsp of kosher salt and rub the chicken evenly — including under the wings and inside the cavity. Rub for a good 10 minutes. The skin should go from wrinkly to smooth and glowing.
    • Chicken marinade: combine soy sauce, sesame oil, and Chinese cooking wine. Using a pastry brush, brush the chicken with the marinade and let it sit.

    Cooking the Chicken

    • Bring a large stock pot with 4L of water to a boil. Add scallion, ginger, and garlic. Grabbing the chicken by the neck, dip it into the boiling water and pull it back out. Repeat 4 times. On the 4th time, place the whole chicken (breast submerged first) into the pot with the lid on. Reduce to a very low simmer for 35 minutes. After 35 minutes, turn off the heat and let the chicken rest in the broth for an additional 15 minutes.
    • Fill a large bowl with 2L of water and 1L of ice. Once the chicken is done, immediately transfer it to the ice bath.
    • Leave the chicken in the ice bath until the meat is firm and cool, about 10 minutes. Remove and drain excess liquid.

    Ginger Scallion Sauce

    • In a deep heatproof bowl, place the grated ginger, chopped scallion, and salt. Mix well.
    • In a pan, heat the canola oil until it just starts to smoke. Turn off the heat and carefully pour it over the ginger and scallion. Hold the bowl over a sink as it will splatter. Mix well.

    Hainanese Rice

    • In a pan or pot with a lid, heat up the chicken fat or oil. Add ginger and garlic. Cook, stirring, until fragrant. Stir in the rice and fry gently until glossy. Add chicken stock, place the lid on, and cook on low for 17 minutes. Let rest for 10 minutes before serving.

    Serving

    • Using a sturdy knife, chop the chicken into bite-size pieces, chopping through the bones. Lay all pieces on a large plate.
    • Brush the chicken marinade over the chicken pieces again.
    • Fluff up the rice and serve with thinly sliced cucumbers and the ginger scallion sauce on the side.

    Frequently Asked Questions

    What is Hainanese Chicken?

    Hainanese Chicken is a dish of poached whole chicken served with rice cooked in the poaching broth, ginger scallion sauce, and often cucumber slices. While it originates from the Hainan province in China, it was popularized in Singapore by Hainanese immigrants and is deeply beloved across Cantonese and Southeast Asian communities.

    Why do you dip the chicken in and out of boiling water four times?

    This technique, called “dipping,” causes the skin to contract four times in rapid succession. It seals the skin tightly to the flesh so it does not slip off during the long poach. It also helps the skin develop a beautiful, tight texture. Do not skip this step.

    Can I use chicken pieces instead of a whole chicken?

    You can, but the result will not be the same. A whole chicken produces a richer, more complex broth that makes the rice shine. If you do use pieces, choose bone-in skin-on thighs — they are closest to the whole chicken in terms of flavour output.

    What is the correct temperature to poach the chicken?

    You want a very low simmer — just barely bubbling. In temperature terms, around 160–180°F (71–82°C). A hard boil will make the skin tough and the meat dry. A gentle simmer keeps the flesh juicy and the skin supple.

    What can I substitute for Shaoxing cooking wine?

    Dry sherry is the most common substitute and works well. Mirin can also work but it is sweeter, so use half the amount. If you cannot find any of these, simply omit the cooking wine from the marinade — the dish will still be delicious.

    How do I store and reheat Hainanese Chicken?

    Store the chicken and rice separately in the refrigerator. Keep the remaining broth and use it to reheat the rice by adding a splash when reheating in a pan. The chicken is best eaten cold or at room temperature the next day — many Cantonese prefer it this way. Reheat gently to avoid toughening the skin.

  • Cantonese Steamed Chicken with Goji Berries

    Cantonese Steamed Chicken with Goji Berries

    Three simple ingredients — chicken, goji berries, and black fungus — steamed together until the flavors meld. It is a classical Cantonese dish that has been in Chinese families for generations, and once you taste it you will understand why. Clean and genuinely delicious.

    This post may contain affiliate links. If you purchase through these links, I may earn a small commission at no extra cost to you. Thank you for supporting Love & Harvest!

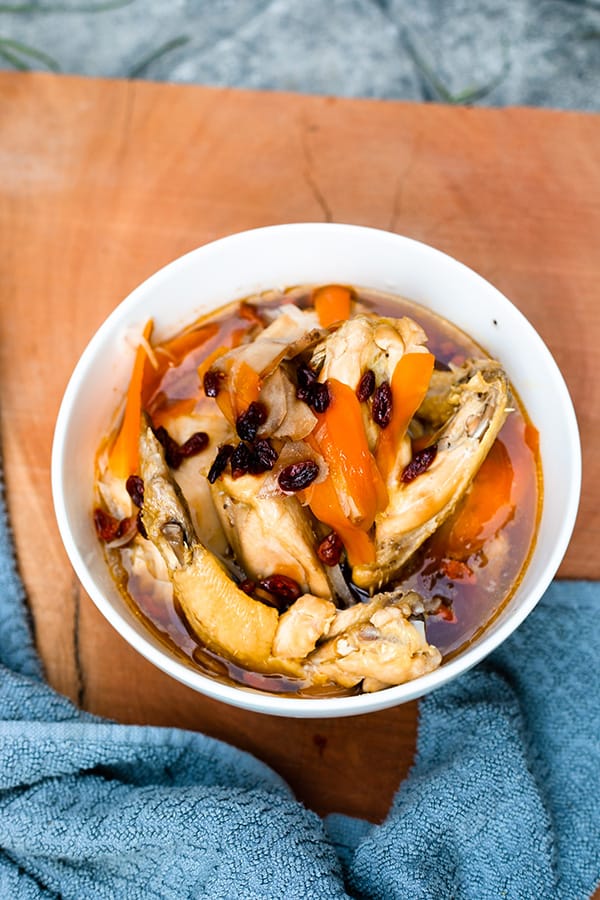
    Steamed chicken with goji berries, carrot and onion in a white bowl

    Goji berries have been in my kitchen for as long as I can remember. I grew up in a Chinese household.

    Goji Berries and Black Fungus

    Goji berries are sweet and mild. When autumn comes, goji berries go straight into the chicken noodle soup.

    The black fungus in this recipe has a satisfying chewy texture that my kids somehow love more than the chicken itself.

    Ingredients

    Goji Berries

    • Why they are essential: In this dish they soften during steaming into tender, subtly sweet morsels that absorb the savory chicken juices — the combination is genuinely beautiful.

    Buy dried goji berries at any Asian supermarket. Online, organic dried goji berries are reliable and easy to keep on hand.

    Chicken Breast (or Any Cut)

    • Why breast works well: It steams quickly, stays moist with the goji berry juices, and keeps this dish clean and light. You can substitute legs, drumsticks, or a mix of cuts — they all work and all come out delicious. The longer cook time for bone-in pieces (around 30–35 minutes) actually intensifies the flavor.

    steamed chicken goji berries with black fungus

    Professional Tips for a No-Fail Dish

    Pro Tip 1 — Steam in a Pot or Instant Pot

    You can use a stovetop bamboo steamer or a steamer basket over a pot of boiling water. A bamboo steamer is the traditional tool and imparts a very subtle woody fragrance. For modern convenience, an Instant Pot works equally well: fill with water, place the steamer basket inside, set the dish on top, seal, and steam for 25 minutes on the Steam setting. I have the Instant Pot Duo 7-in-1 and use it for this dish regularly.

    Pro Tip 2 — Keep the Marinade Simple

    The marinade is just salt and sesame oil. That is all you need. The simplicity is intentional — this dish is about the natural flavors of the chicken and goji berries, not masking them. Sesame oil adds a nutty depth that anchors the whole dish. Toss, let sit 10 minutes, then steam.

    Pro Tip 3 — Skim the Fat

    After steaming you will see a thin layer of chicken fat floating on the surface of the cooking liquid. Skim it off with a slotted spoon before serving. Removing it lets the goji berry sweetness shine through more clearly.

    Pro Tip 4 — Serve Warm, Always

    In Chinese tradition, everything is served warm — not hot, not cold. Serve this with a bowl of plain steamed rice and a cup of hot tea.

    Frequently Asked Questions

    How do I know when the chicken is fully cooked?

    Chicken breast steamed for 20–25 minutes at medium-high heat will be cooked through. Use a meat thermometer — the internal temperature should reach 165°F (74°C). Bone-in pieces may need 30–35 minutes. The flesh should be opaque white throughout with no pink near the bone.

    Can I use fresh goji berries instead of dried?

    Dried goji berries are preferred in this recipe. They rehydrate during steaming and release their flavor into the cooking liquid. Fresh goji berries are rarely available outside of China, but if you find them, use the same quantity.

    What is black fungus and where do I find it?

    Black fungus (wood ear mushroom / Auricularia auricula) is a dried edible mushroom used widely in Chinese cooking. It has a satisfying chewy texture and mild flavor. Find it dried at any Asian supermarket. Soak in warm water for 20 minutes before use.

    Can I make this dish for children?

    Yes. The flavor is gentle, and the goji berries are sweet enough for kids to enjoy. My children love the black fungus in particular.

    Can I add other herbs to the steam?

    Yes. Common additions include Chinese red dates (2–3 pieces), dried longan fruit, and wolfberries. These are the same herbs used in the goji berry, red date and Chinese yam tea.

    Steam Chicken Goji Berries

    Steamed Chicken with Goji Berries

    Easy steamed chicken with goji berries. A classical Cantonese dish.
    Prep Time 15 minutes
    Cook Time 25 minutes
    Total Time 40 minutes
    Course: Main Course
    Cuisine: Chinese
    Calories: 240

    Ingredients
      

    Chicken Marinate
    • 2 organic chicken breast skinned and cubbed
    • 1 tbsp canola oil
    • 1 tsp sea salt
    • 2 tsp corn starch
    The rest
    • 1 carrot sliced thinly
    • ½ white onion sliced thinly
    • 7-10 dried goji berries
    • 1 tsp sea salt
    • 1 tsp sesame oil
    • 1 tbsp soya sauce

    Equipment

    • steamer / Instant Pot

    Method
     

    To Marinate the Chicken
    1. Combine all the ingredients together well, and set aside to marinate on the counter top for 10-15 minutes.
    Putting Everything Together
    1. Sliced the carrots and onions, and add it with the chicken in the vessel you want to steam the dish in. I suggest a bowl that can hold liquid. After steaming, you'll notice the steam water has dropped some in the bowl and makes a delicious sauce on top.
    2. Add the remaining seasoning: salt and sesame oil. Add the goji berries on top. Mix and combine everything well.
    3. Using a regular steam:
      Wait until the steamer is ready and the water is boiling. Put the dish in and the lid on top. Steam on medium heat for 30-35 minutes.
    4. Using an Instant Pot:
      Set machine to 'Steam' on high heat for 25 minutes. Place the steamer basket and add the dish in. Make sure you use a round high bowl as the regular flat round plates don't fit. You want to have gaps between the bowls so the steam can come up and easy access for you to lift the plate out when it is done. Put the lid on and set to 'Seal'.
    5. When the time is up, you can release the vale. Lift the plate up, and drizzle the soy sauce on top. Serve with white rice.

    If you enjoy Chinese-inspired recipes, explore the Goji Berry, Red Date and Chinese Yam Tea and Steam Preserved Vegetables with Pork.

  • Traditional Hong Kong Curry Chicken

    Traditional Hong Kong Curry Chicken

    If you have ever craved a curry that is creamy, lightly spiced, and packed with the comforting flavours of lemongrass and coconut, this Traditional Hong Kong Curry Chicken is exactly what your table needs. Passed down through Cantonese kitchens and perfected in Hong Kong cafes, this is the dish that turns a regular weeknight into something memorable.

    This post may contain affiliate links. If you purchase through these links, I may earn a small commission at no extra cost to you. Thank you for supporting Love & Harvest!

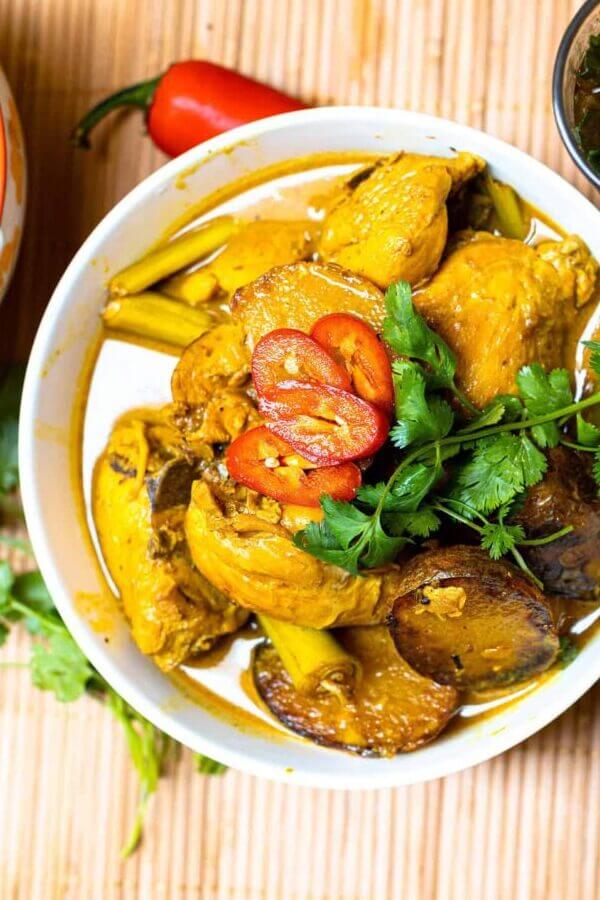
    Hong Kong curry chicken

    Hong Kong Style

    In Hong Kong, curry is called 港式咖喱雞 (Cantonese: gong sik ga lay gai). From all the different versions of curry I’ve tasted, Hong Kong curry is on the mild side.

    Though Hong Kong curry is mild, it is still super tasty with hints of lemongrass and coconut cream. I would say it’s the tropical getaway in the curry world. The lemongrass gives a citrus lift, and the island flavour of the coconut cream adds a tropical creaminess to the crowd of flavour. It’s no wonder curry plays a strong role in Cantonese cuisine.

    Even though you’ve never visited Hong Kong or lived there, you can still find Hong Kong style curry anywhere with a large Chinese community — at Asian cafeterias, fast food stores, restaurants, and especially at Hong Kong cafe restaurants. Besides the variety of curry you can find, you can also find a variety of meats like chicken or beef (called 港式咖哩牛腩). Vegetarian is also an option.

    Like all the different versions of curry you can find in the world, the difference is in the spice blend. If you’re in the Hong Kong area, I’ve heard Choi Hop Lee 財合利 in Hong Kong (Wanchai) is the place to find authentic Hong Kong flavour — they make their own Hong Kong curry powder and paste.

    History of Hong Kong and Curry

    When you travel to Hong Kong, you will find people from all parts of the world. Once upon a time, Hong Kong was renowned as the financial hub of Asia. During the colonial years, the British government mobilized many Indian and Nepalese soldiers to Hong Kong. They brought over their food and spices and began the curry expansion in the city. It became popular to serve curry in restaurants to cater to the new community of people.

    Though the traditional curry brought over by Indians was strong in flavour, Hong Kong mellowed it down and made it sweeter to fit the local palate. They used coconut cream to help cut the spice, and incorporated Malaysian curry paste — more adaptable and favoured by the local population.

    Why You’ll Love This Recipe

    • Irresistibly delicious — this curry has lemongrass, turmeric, onion, and coconut milk. It has all the tropical sweet and savoury taste that is mouthwatering. The smell of the curry is not strong, but soft and tropical.
    • Easy to make — sauté the onion, add the marinated chicken, and let it simmer in chicken stock. The last 5 minutes of cooking, add in the coconut milk. Sounds easy? Because it is!
    • Still tastes great the next day — some food is best served fresh, but this curry is great the next day. Reheat and serve.

    Ingredients

    Curry Powder

    There are many different kinds of curry powder out there. Each country in Asia has their own flavour and heat level. For this recipe, I like to use Madras Curry Powder — the flavour leans more Chinese than Indian and it’s perfect for this dish.

    • Why it matters: Curry powder is the backbone of the entire dish. Using a quality powder with turmeric, cumin, and coriander makes all the difference in depth of flavour.

    Lemongrass

    Using lemongrass in curry is a Malaysian style that Hong Kongers love. Lemongrass gives off a tropical, vibrant taste and really brightens the entire dish.

    • Why it matters: Lemongrass is what separates Hong Kong curry from other regional curries. It adds a citrus, almost floral lift that balances the richness of the coconut cream.

    Coconut Milk

    The thickness of coconut cream makes the sauce less watery. The flavour of coconut adds sweetness that counteracts the strong spices in the curry, creating a balanced palate. Always add coconut cream when the dish is almost done — never boil it.

    • Why it matters: Coconut milk is the finishing touch. It rounds out the spice, adds body, and delivers that creamy tropical colour. Use a quality brand like Chaokoh Coconut Milk for best results.

    Evaporated Milk

    This is a secret weapon ingredient. Many Cantonese cooks (my grandfather included) add evaporated milk into the curry for a subtle dairy sweetness. Not too much — just enough to balance the spice and salt and give the curry more depth.

    • Why it matters: This is the ingredient that distinguishes Hong Kong curry from other Asian curries. It adds a creamy richness that is different from coconut milk alone.

    Professional Tips to Get Your Curry Tasting Like a Real Hong Kong Style Cafe

    Pro Tip #1 — Fry the Potatoes First

    I love frying the potatoes before adding them to the curry. All Hong Kong curry has potatoes — it’s a must. Frying the potatoes helps them hold together in the stew and prevents them from breaking up into starchy clumps.

    Pro Tip #2 — Make the Roux

    Roux is a cooked mixture of flour and fat. It is how we thicken the soup base. In classic French cooking the fat is butter, but in Hong Kong cooking oil is typically used. Do not walk away from this step — the roux burns fast.

    Pro Tip #3 — Do Not Boil the Evaporated Milk and Coconut Cream

    Evaporated milk and coconut cream should never reach boiling point. That is why these two ingredients are added at the very end. They are meant to offset the strong spice flavour and balance the dish.

    If you love Cantonese chicken recipes, also check out my Classic Hainanese Chicken and Soy Sauce Chicken (Cantonese Style) — two dishes that pair beautifully alongside this curry.

    Hong Kong curry chicken

    Frequently Asked Questions

    What makes Hong Kong curry different from Indian or Thai curry?

    Hong Kong curry is much milder than Indian or Thai curry. It uses a blend of Madras-style curry powder, lemongrass (borrowed from Malaysian cooking), and coconut cream or evaporated milk to create a sweeter, creamier result. The heat is gentle enough for children, making it a true family dish.

    Can I use boneless chicken thighs instead of a whole chicken?

    Yes. Boneless thighs work very well and cut down on cooking time. Bone-in pieces are traditional and add more flavour to the sauce, but boneless thighs are a great weeknight shortcut. Cook until the internal temperature reaches 165°F (74°C).

    Can I make this recipe without potatoes?

    You can, but potatoes are a defining feature of Hong Kong curry. They absorb the sauce and add body to the dish. If you leave them out, the sauce will be thinner. You could substitute with sweet potato, taro, or butternut squash for a similar effect.

    What should I serve with Hong Kong curry chicken?

    Jasmine rice is the classic pairing — it soaks up the sauce beautifully. You can also serve it over rice noodles, or with a side of steamed bok choy or Chinese broccoli to round out the meal.

    Can I make this curry ahead of time?

    Yes — this curry is even better the next day once the flavours have had time to meld. Store in an airtight container in the refrigerator for up to 3 days. Reheat gently on the stovetop and do not let it boil once you reheat, to preserve the coconut cream.

    Can I freeze Hong Kong curry chicken?

    Yes, though the potatoes can become slightly mealy after freezing. Freeze the curry without the potatoes if you plan to make a large batch, then add freshly cooked potatoes when reheating. The curry base freezes well for up to 2 months.

    Hong Kong Style Curry

    Delicious traditional Hong Kong style cafe curry chicken. Subtle flavour in spice, but still tons of flavour to leave an impactful meal. Also light and citrusy from lemongrass to fit any picky eater. It the perfect family meal option that keeps the dinner table warm and cozy. Print Recipe Pin RecipePrep Time:20 minsCook Time:30 minsCourse: Main CourseCuisine: ChineseKeyword: Cantonese CuisineServings: 4 people

    Ingredients

    Chicken Marinate

    • 1 whole chicken organic, free ranged
    • 2 tbsp turmeric powder
    • 1 tbsp salt

    Curry

    • ½ cup oil
    • 4-5 medium sized potatoes cut into medium size knobs
    • ½ white onion diced
    • 3 garlic cloves grated
    • 5 shallots chopped
    • 1 thumb-sized ginger sliced into thick slices
    • 3 red eye chili / red chili sliced
    • 2 tbsp Hong Kong curry powder / curry powder
    • 3 tbsp reserved oil
    • 2 tbsp flour
    • 2 lemongrass stalks
    • ½ cup water / chicken stock
    • ½ cup coconut cream
    • ½ cup evaporated milk
    • 2 TSP sea salt

    Instructions

    • Clean the inside and outside of the chicken. Pat dry. Cut the chicken into pieces. Separate the wings, legs, and breast. I like to debone the chicken and freeze the carcass for chicken soup later. Marinate the chicken in salt. Let it sit in the fridge.
    • In a large wok, add the 1/2 cup oil. When the wok is hot, add the potatoes and fry for about 5-8 minutes, or until you see the edges slightly brown. Place them on a plate with a paper towel.
    • With the same oil in the wok, use only 3 tbsp of oil and reserve the rest. Add the onion, garlic and shallots. When the onion is softened, add the ginger, chili, curry powder and turmeric. Fry until aromatic (3-5 minutes).
    • Add the chicken pieces and fry until the skin has color. Remember to stir constantly so it doesn’t stick to the bottom.
    • Once all the chicken is slightly browned, remove everything to a plate.
    • On the same pan, add in 3 tbsp of the reserved oil. Add the flour into the pan and fry until fragrant. Do not walk away from this step.
    • Once the flour is brown, take out your whisk and start to stir the flour around. Add the chicken stock while whisking the flour. Try to break up the flour in the chicken stock. You should not see any flour clumps at this point.
    • Add the chicken back to the pan, along with the lemongrass. Simmer on medium heat for 20-25 minutes.
    • For the last 5 minutes, add the evaporated milk, coconut cream, and salt to taste. Let it simmer on low for 5 minutes. Do not let it boil.
    • Serve with warm jasmine rice.
  • Delicious Beer Gravy Honey Mustard Chicken 🍺

    Delicious Beer Gravy Honey Mustard Chicken 🍺

    When the weather turns cool and the family is hungry, this Beer Gravy Honey Mustard Chicken is the recipe I reach for every time. It is one of those dishes that fills the kitchen with an irresistible aroma before it even hits the table — and with a total cook time of 40 minutes, it is weeknight-ready without sacrificing an ounce of flavour.

    This post may contain affiliate links. If you purchase through these links, I may earn a small commission at no extra cost to you. Thank you for supporting Love & Harvest!

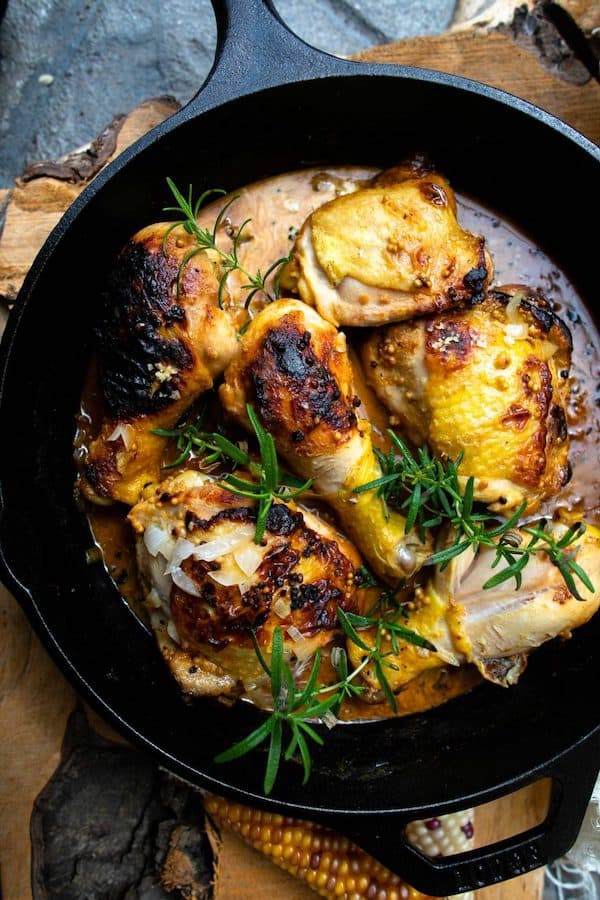
    Honey mustard chicken thighs with rosemary in a cast iron panHoney mustard chicken thighs with rosemary in a cast iron pan

    Why You Will Love This Recipe

    • Everyone loves it, including kids — when I have chicken in the fridge that needs to be used quickly, this is the recipe I always reach for. The kids love this dish, and they always ask for more sauce on their rice.
    • So delicious — there is something magical about beer and chicken cooked together. The aroma is intoxicating and will draw people into the kitchen asking what you are making.
    • Easy recipe — marinate the chicken, lay it on the skillet, and deglaze the pan with beer. In 40 minutes your meal is ready to be served and devoured.

    Beer in the Gravy — Is It Safe for Children?

    Short answer: yes. Because we are cooking the beer with the chicken, the alcohol burns off while the chicken cooks. All that remains is the beer flavour, which is mild. We are only adding half a can so it is not overpowering. You can always use a quarter of the can, or skip it entirely — the gravy is still delicious and thick without the beer.

    Ingredients

    Chicken

    This recipe calls for chicken legs and thighs. Any part of the chicken works, but bone-in thighs and drumsticks are ideal because they stay moist and flavourful even with extended cooking. I buy the whole chicken leg and separate the thighs and drumsticks at home before marinating.

    • Why bone-in matters: The bone adds flavour to the gravy and protects the meat from drying out. The skin also crisps beautifully in the cast iron skillet.

    Honey and Mustard

    We use salt and honey to marinate the chicken and mustard (both regular and mustard seed) in the gravy. Give the salt, honey, and mustard time to work into the chicken — a minimum of 15 minutes guarantees more flavour penetration. If you don’t have regular mustard, Dijon works equally well.

    • Why honey: Honey breaks down when it contacts salt and chicken, turning from thick to a watery consistency that coats every surface. It caramelises beautifully in the hot pan and adds a sticky sweetness to the crust.

    Beer

    Beer tenderises the chicken and creates the base for the gravy. Use whatever beer you enjoy drinking. A light lager — like Modelo — gives a crisp, clean flavour that works well for children. Darker beers add more complexity but can be intense for kids.

    • Why beer in the gravy: The beer deglazes all the caramelised bits from the bottom of the pan, which is where all the flavour is. It also keeps the chicken moist throughout the entire cook time.

    Cast Iron Skillet

    A cast iron skillet is the ideal pan for this recipe. It distributes heat evenly across the entire surface, which is critical for bone-in chicken that needs thorough cooking from all angles. Use a quality Lodge Pre-Seasoned Cast Iron Skillet — it browns the chicken perfectly and gets better with every use.

    • Why cast iron: Even heat distribution means the chicken cooks consistently. The skillet retains heat well, so the temperature stays stable when you add the cold chicken to the pan.

    If you love chicken recipes with bold flavours, try my Traditional Hong Kong Curry Chicken or Lemongrass Chicken Drumsticks for more weeknight-friendly options.

    Frequently Asked Questions

    What kind of beer works best in this recipe?

    A light lager is the best choice — it adds flavour without being overpowering, and the alcohol burns off during cooking, leaving behind only the subtle beer taste. Modelo, Heineken, or any standard light lager works great. If you want a richer, more complex gravy, try a pale ale. Avoid very dark stouts for this recipe unless you enjoy a bitter, roasted note in the sauce.

    Can I make this recipe without beer?

    Yes. Replace the beer with chicken broth or apple cider for a similarly rich gravy. The flavour will be different — slightly less complex — but still delicious. The key is to deglaze the pan with a liquid that has some body and flavour.

    How do I know when the chicken is fully cooked?

    The internal temperature of the thickest part of the thigh should reach 165°F (74°C). Visually, the juices should run clear when you pierce the meat near the bone. The chicken should feel firm rather than rubbery when pressed. Drumsticks and thighs typically need 25-30 minutes total in the pan.

    Can I use chicken breast instead of thighs and drumsticks?

    Yes, though chicken breast tends to dry out more quickly. The beer in the sauce helps prevent this significantly. If using breast, reduce the covered cooking time to 15-18 minutes and check for doneness early. Keeping the lid on during cooking traps moisture and helps prevent drying.

    How do I store leftovers?

    Store in an airtight container in the refrigerator for up to 3 days. Reheat gently on the stovetop with a splash of water or broth to loosen the gravy. The chicken reheats beautifully and the gravy thickens further, making leftovers arguably better than the original.

    Honey Mustard Chicken with Beer Gravy

    This honey mustard chicken is a warm autumn dish perfect for your family. Delicious beer gravy swimming in the sweetness of honey and savoury flavour of the chicken.
    Print Recipe
    Prep Time:15 minsCook Time:25 mins

    Ingredients

    Chicken Marinate

    • ½ kg chicken drumstick and thighs cleaned and pat dry, skin on
    • 2 tsp sea salt
    • 1½ tbsp honey
    • 2 tbsp mustard
    • ½ can light lager beer

    Gravy Sauce

    • 2 tbsp butter
    • ½ white onion chopped
    • 2 garlic clove minced
    • 1½ cups water
    • 3 tbsp mustard seed
    • ¼ cup cream
    • rosemary garnish

    Instructions

    Chicken Marinate

    • In a large mixing bowl, add the chicken, salt, honey, and beer together. Mix evenly. Let it sit on the counter for at least 15 minutes.

    To cook the chicken

    • Put the skillet on medium high heat. Melt the butter and sauté the onion and garlic until softened, about 2 minutes.
    • Carefully take the chicken with tongs and place it on the skillet. Reserve the beer marinate.
    • Sear the surface of the chicken for 5 minutes each side until slightly brown.
    • Once both sides are browned, add the reserved beer marinate along with the mustard and water. Put a lid on top and let it cook on medium for 25 minutes.
    • For the last 5 minutes of cooking, take the lid off and add the cream.
    • Place the chicken on a deep dish and pour the sauce over it. Garnish with fresh rosemary.
  • Tasty Soy Sauce Chicken Recipe – Cantonese Style

    Tasty Soy Sauce Chicken Recipe – Cantonese Style

    If there is one dish that instantly transports me back to childhood, it is Cantonese Soy Sauce Chicken. The moment those aromatics hit the oil — cinnamon, star anise, garlic — the entire kitchen fills with a fragrance that feels like home. And the best part? Once you build the braising liquid, you can reuse it two more times.

    This post may contain affiliate links. If you purchase through these links, I may earn a small commission at no extra cost to you. Thank you for supporting Love & Harvest!

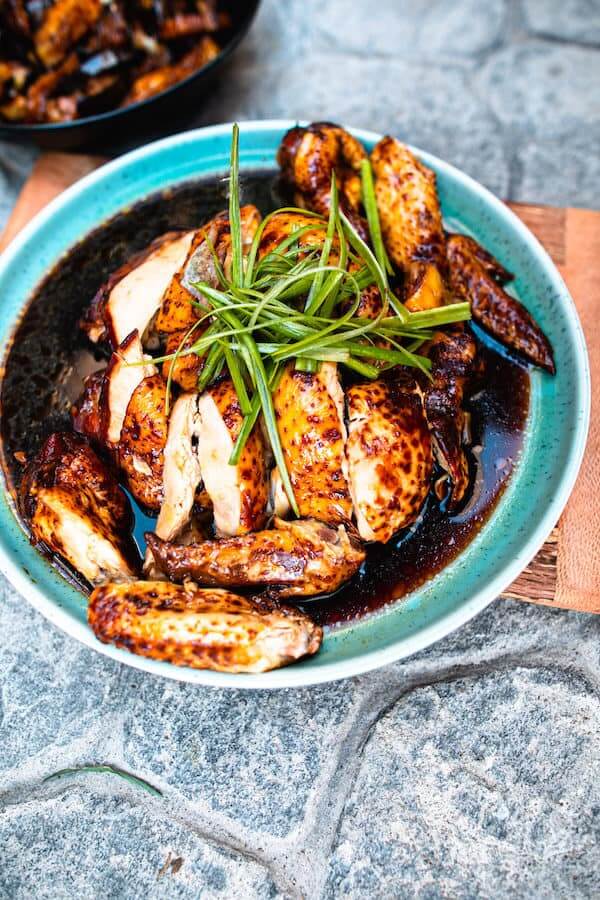
    soy sauce chicken recipe

    What is Soy Sauce Chicken?

    Also known as “See Yao Gai,” soy sauce chicken is a whole chicken braised in a bath of soy sauce, garlic, cinnamon, and star anise. The aroma of making this in the kitchen is mouthwatering. It is not labour-intensive, and after the first time making it, it gets easier. Once you establish the gravy, it can be frozen and reused twice more — freeze it and make another batch in the future.

    Everyone Knows What Soy Sauce Chicken Is

    This recipe is very popular in Asian food courts — there are usually at least two vendors selling soy sauce chicken at any Asian mall food court. It is home-style comfort food you can find everywhere. For Cantonese families, the aroma is deeply comforting and reminds us of childhood. Soy sauce chicken is best served with steamed white rice — and do not forget to spoon some of that gravy on top of the rice.

    Why You Will Love Soy Sauce Chicken

    • Easy to make — the recipe is straightforward. If you have basic Asian spices, you can make this. No specialised skills required.
    • Irresistible and delicious taste — the pungent smell of soy sauce and star anise makes any mouth water. Even people who have never tasted soy sauce chicken will immediately say it smells amazing.
    • Versatile — serve it with white rice and a vegetable side. You can also shred the meat and stir-fry it with noodles for soy sauce chicken noodles, or slice it cold over a salad.

    Ingredients

    Spices

    Star anise is non-negotiable for this recipe. The other spices — cinnamon stick, bay leaf, and ginger — build the aromatic backbone of the braising liquid. If you want a stronger ginger note closer to soy-ginger chicken, simply double the amount of ginger.

    • Why star anise matters: Star anise gives Cantonese braised dishes their signature warm, slightly sweet anise flavour. Without it, the dish loses its authentic character. Use fresh star anise for the most impact. You can find quality five spice powder or whole star anise on Amazon.

    Cinnamon Sticks

    Cinnamon adds warmth and a gentle sweetness that balances the saltiness of the soy sauce. It is subtle but makes a noticeable difference. Use whole cinnamon sticks rather than ground cinnamon — ground cinnamon will make the liquid cloudy and the flavour too strong.

    • Why whole sticks: Whole sticks release flavour gradually during the long braise without overpowering the sauce.

    Soy Sauce and Dark Soy Sauce

    There is an important difference between soy sauce and dark soy sauce. Regular soy sauce is where the umami flavour comes from. Dark soy sauce is primarily about colour — it is thicker, slightly less salty, and gives the chicken its beautiful mahogany finish.

    • Why both: Using only regular soy sauce will give you flavour without colour. Using only dark soy sauce will be too bitter. The combination is what creates the signature appearance and taste of authentic soy sauce chicken. Use a quality soy sauce for the braising liquid.

    Can I Use Chicken Wings, Thighs, and Drumsticks?

    Yes. For chicken wings, thighs, and drumsticks, cook for 10 minutes in the Instant Pot instead of 20. The same braising liquid and technique applies.

    Soy Sauce Chicken in an Instant Pot

    Set the Instant Pot on SAUTE and add the oil and spices. Sauté for 5 minutes. Add the water, dark soy sauce, spring onion, and sugar and bring to a boil. Add the chicken and set to HIGH PRESSURE for 20 minutes. Release the valve, take out the chicken, let it cool for 5 minutes, then brush with Chinese wine and maltose or honey.

    To clean the Instant Pot after: add vinegar and water to the pot and pressure cook for 10 minutes. The smell vanishes completely.

    Love Cantonese chicken? Also try my Classic Hainanese Chicken or the fragrant Lemongrass Chicken Drumsticks — both pair beautifully with the same steamed rice.

    soy sauce chicken recipe easy

    soy sauce chicken recipe

    Frequently Asked Questions

    Why does my soy sauce chicken look pale instead of the dark glossy colour I see in restaurants?

    The dark mahogany colour comes primarily from dark soy sauce, not regular soy sauce. Make sure you are using both types. Also, the step of brushing the cooked chicken with maltose or honey mixed with hot water right after it comes out of the pot creates that beautiful shiny glaze. Do not skip this step.

    Can I reuse the braising liquid?

    Yes — this is one of the best things about soy sauce chicken. After cooking, strain the braising liquid, let it cool completely, then freeze it. You can reuse it up to two more times, adding a little water and soy sauce each time to top it up. The flavour deepens with each use.

    How do I keep the chicken skin from tearing when I take it out of the pot?

    Use a combination of tongs and chopsticks to lift the chicken gently without breaking the skin. Avoid using a fork, which punctures the skin and lets juices escape. Let the chicken rest on a plate for 5 minutes before cutting — the skin firms up slightly as it cools and is much easier to handle.

    How long should I cook the chicken on low heat?

    20 minutes on the lowest setting with a gentle simmer, rotating every 10 minutes. The water should never bubble aggressively — only a very gentle, slow simmer. Then turn the heat to high for 10 minutes, turn it off completely, and let the chicken sit in the covered pot for another 15 minutes. This residual heat finishes cooking it through.

    What is maltose and can I substitute it?

    Maltose is a thick, sticky sweetener made from grain starch. It is used in the glaze because it creates a beautifully shiny, lacquered finish that honey alone cannot quite replicate. You can substitute with honey — it will work, but the glaze will be slightly less glossy. Mix with hot water to thin it before brushing.

    Soy Sauce Chicken

    Easy Cantonese soy braised chicken that will leave you stunned how simple it is to make restaurant-quality soy sauce chicken in your own kitchen. A soft and gentle process with warm aromatics like cinnamon and star anise. A beloved Cantonese dish and a favourite among families. Best served with warm rice on the side.
    Print Recipe Pin Recipe

    Ingredients

    • 1.4 kg Whole Chicken
    • 1 TBSP oil
    • 100 g sugar
    • 1 cinnamon stick
    • 1-2 star anise
    • 2-3 dried bay leaves
    • 5 cloves garlic
    • 2 bunches spring onions
    • 3-4 slices ginger
    • 1.5 cups dark soy sauce
    • 1 litre water
    • 1 TBSP Chinese rice wine

    Marinate for Chicken

    • 2 TSP sea salt
    • 1 TBSP dark soy sauce

    Chicken Glaze

    • 2 TBSP maltose / honey
    • 1 TBSP hot water

    Garnish

    • 1 green onion thinly sliced the green parts

    Instructions

    • In a large stock pot, heat 1 tbsp of oil on medium heat. Fry the garlic, ginger, cinnamon stick, star anise, and bay leaf until aromatic — about 3 minutes.
    • Immediately add the water, 1.5 cups of dark soy sauce, spring onion, and sugar. Bring everything to a boil.
    • When the water is boiling, carefully lower the whole chicken in. Give it at least 5-7 gentle rotations in the soy sauce water. Do not splash.
    • Place the chicken breast-side down and cover the pot on the lowest heat setting. You want only a very gentle simmer — not a rolling boil. Cook for 20 minutes, rotating every 10 minutes.
    • After 20 minutes, turn the heat back to high for 10 minutes, then turn off the heat with the lid on. Let the chicken sit in the water for 15 minutes.
    • Carefully remove the chicken without breaking the skin — use tongs and chopsticks. Set on a large plate and let it cool for 5 minutes. Brush with Chinese wine and maltose or honey.
    • Once completely cooled, chop into pieces and garnish with thinly sliced green onion. Serve with warm rice and some of the soy sauce gravy.