Tag: homemade

  • Easy Homemade Soy Milk – Fresh And Creamy

    Easy Homemade Soy Milk – Fresh And Creamy

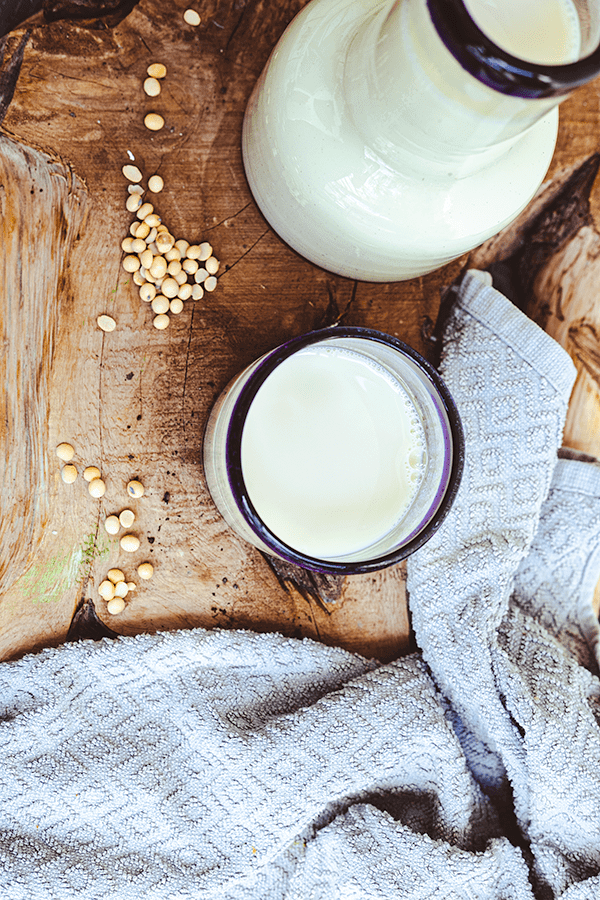
    There is nothing quite like a warm cup of fresh homemade soy milk. The creamy, slightly sweet flavor is worlds apart from anything in a carton at the grocery store — and once you know how easy it is to make at home, you will never go back. This easy homemade soy milk recipe uses just three ingredients and two tools you likely already own.

    This post may contain affiliate links. If you purchase through these links, I may earn a small commission at no extra cost to you. Thank you for supporting Love & Harvest!

    easy homemade soy milk - fresh and creamy

    Why Make Homemade Soy Milk?

    Soybean milk — called dou jiang (豆浆) in Chinese — is a staple beverage across Asia. Unlike dairy milk, which is less commonly consumed in many Asian cultures, soy milk has been part of daily life for centuries. My mom used to say the ingredients are simple but the effort is too much. Now, with two trustworthy kitchen tools, you can have fresh creamy soy milk ready in under an hour. You also control the sugar content entirely — no additives, no preservatives. For more fresh drinks and bowls, try the Mango and Coconut Smoothie Bowl or the Celery Juice.

    Ingredients Deep-Dive

    Dried Soy Beans

    • Why it matters: The quality of your soy beans determines the taste of your milk. Use non-GMO, organic soy beans for the cleanest flavor. I recommend Non-GMO Organic Soybeans — the difference in taste compared to conventional is noticeable.

    Filtered Water

    • Why it matters: Soy milk is mostly water, so water quality matters. Use filtered water rather than tap water to avoid any chlorine or mineral taste competing with the delicate soy flavor.

    Sweetener (Sugar or Dried Dates)

    • Why it matters: Unsweetened soy milk has a subtle beany taste. A small amount of sweetener — cane sugar or 4 to 5 soaked dried dates — rounds it out perfectly. Dates add natural sweetness plus fiber and minerals. Vanilla extract is an optional bonus.

    how to make soy milk at home

    Equipment You Need

    Instant Pot

    An Instant Pot cooks the soaked soy beans perfectly in about 10 minutes at high pressure, with none of the boil-over risk of stovetop cooking. It is one of the most versatile tools in a busy kitchen: soups, beans, rice, easy cleanup, and programmable timers. A recommended model is the Instant Pot Duo 7-in-1.

    High-Speed Blender

    Do not go cheap here. A powerful blender is what gives the soy milk its creamy, smooth texture. The Vitamix high-speed blender is the gold standard — it also handles smoothies, sauces, flours, and more. This will be one of your most-used appliances.

    Nut Milk Bag

    To separate the smooth milk from the soybean pulp (okara), you need a fine-mesh straining bag. The Pro Quality Nut Milk Bag is reusable, easy to squeeze, and cleans up quickly. Squeeze every last drop for maximum yield.

    can i make soy milk at home

    Don’t Have an Instant Pot?

    No problem. Blend the soaked soy beans with filtered water on high for 1 minute, then pour into a large pot and bring to a boil. Keep a very close eye on it — soy milk boils over fast and cleaning up the stove is not fun. Simmer on low for 10 minutes, then strain through a nut milk bag or cheesecloth. The process is slightly longer than the Instant Pot method but produces equally delicious results.

    Soy Milk is Wonderfully Versatile

    Fresh homemade soy milk is just the beginning. From here you can make your own tofu, creamy ramen broth, or traditional tofu fa (豆腐花) — a silky tofu custard drizzled with sweet ginger syrup. Every batch opens a new door in plant-based cooking.

    easy way to make soya milk

    Frequently Asked Questions

    Do I need to soak the soy beans overnight?

    Overnight soaking is ideal — the beans become fully hydrated, which means faster cooking and a creamier milk. However, if you are in a rush, you can skip the soak and pressure cook the dry beans for 37 minutes instead of 10. Both methods work; overnight soaking just saves time overall.

    Why does my soy milk taste beany?

    A strong beany taste usually means the soy beans were not cooked long enough, or the water was not changed after soaking. Rinse the soaked beans thoroughly until the water runs clear. Cooking thoroughly (full 10-minute pressure cycle) neutralizes the compounds that cause a raw, beany flavor.

    How long does homemade soy milk last?

    Store it in a sealed glass jar in the refrigerator for up to 4 to 5 days. It may separate slightly — just give it a good shake before drinking. Do not freeze it, as freezing changes the texture.

    What do I do with the leftover okara?

    Okara, the soybean pulp left after straining, is too good to throw away. Add it to oatmeal, pancake batter, veggie burgers, or stir-fries for extra fiber and protein. It has a mild flavor that absorbs whatever spices or sauces you cook it with.

    Can I use a soy milk maker machine instead?

    Yes, there are dedicated soy milk maker machines that automate the full process. They are convenient but add another single-use appliance to your counter. The Instant Pot plus blender method gives you more flexibility across recipes and is likely already in your kitchen.

    How is homemade soy milk different from store-bought?

    Homemade soy milk has exactly what you put in it: soy beans, filtered water, and sugar or dates if you want them. A lot of store-bought soy milks add oils, thickeners or added sugar, so check the label on yours if you’re comparing.

    Homemade Fresh Creamy Soy Milk

    Easy recipe to make fresh homemade creamy soy milk at home. Recipe instructions includes using both Instant Pot or just a high speed blender. Homemade soy milk is fresher than store bought, and best part you get to decide how much sugar goes in, or none at all.
    Prep Time 10 minutes
    Cook Time 20 minutes
    Total Time 30 minutes
    Calories: 130

    Ingredients
      

    • 2 cups dried soy beans
    • 11 cups filtered water
    • sugar to taste
    • 4-5 dried dates optional
    • 1 TSP vanilla optional

    Method
     

    1. Rinse soy beans and discard the water. In a large bowl, add the soy bean and fill it up with water that is 2 inches above the beans. Soak over night.
    2. Rinse the beans a few times until the water is clear and not with a yellow tint in the water. If some of the skin of the shell sheds, discard them.
    3. Add the soaked beans with the 11 cups of water. Blend on high for 30 seconds. You will need to alternate a couple times to blend everything together.
    Instant Pot Guidelines
    1. Press the "sauce" function and wait for the liquid to warm up. Once it starts to simmer, start to stir and skim off the foam at the top. Keep stirring until it starts to boil. Turn off the "saute" function and give it a good stir and making sure there's nothing stuck at the bottom of the pot.
    2. Close the lid and switch the steam release valve to sealing. Press "pressure cooker" and switch the mode to high pressure. Set time to 10 minutes and when it is done, allow it to be natural release. Once the valve unlock itself carefully unlock the lid.
      Close the lid and turn the steam release valve to sealing. Press "pressure cooker" and make sure it's on high pressure. Set the timer to 10 minutes and then natural release, which may take 15 minutes or a bit longer. The valve will collapse on its own. Carefully unlock the lid
    3. ***If you get a burn alert it is because the soy bean residue is stuck at the bottom of the pot. Release the lid and give the mixture a good stir. Make sure you're releasing the residue at the bottom of the pot. Close the lid and continue with the pressure cooker***
    Using a pot guidelines
    1. Add the mixture to a pot big enough where there's still room at the top and not filled all the way to the top. Find a non stick large pot as well for the soy bean residue (okra) will stick to the bottom once the fire is on.
    2. Heat the pot with the soy milk on medium high. When you see the milk is close to a boil, DO NOT WALK AWAY. It will boil over very quickly and cleaning up soy milk residue from the stove top is not a fun task.
    3. When you you notice the milk is simmering, foam is still to form at the top. Skim the foam out.
    4. When the milk is starting to rise and foam more, turn the heat to low and give it a good stir to slow down the foam from rising too quick. Stir to release some residue from the bottom of the pot. Simmer on low for 10 minutes. You can simmer longer if you want a thicker consistency.
    5. Prepare a large jug and place the strainer or cheesecloth, or a milk bag. Be careful the steam does not burn you. Let the strainer hang and let the okra cool as it slowly drains the last drop of liquid. When it is warm enough for the hands to touch the okara, squeeze the rest of the soymilk out from the soybean pulps inside the cheesecloth or strainer.
    Dried Date as Sweetener
    1. Soak 4-5 dried dates in hot water for 30 minutes. Once it is soft enough for hands to handle, tear the seed inside and discard it.
    2. In a high speed blender, add the dates and 3 cups of soy milk to the blender. Blend on high for 30 seconds.
    3. In the jug of where the rest of the soy milk is, put a strainer at the top and strain the date mixture in. Give the jug a good stir. Optional: add vanilla extract for more flavour.
    Sugar as Sweetner
    1. Once the liquid is strained from the pulp and it is still hot/warm, add the sugar to the mixture. Give it a good stir until the crystals are dissolved. Optional: add vanilla extract for more flavour.

  • Crusty Artisan Purple Yam Bread Recipe

    Crusty Artisan Purple Yam Bread Recipe

    There is something almost magical about pulling a purple loaf out of the oven — the color alone stops people in their tracks. This no-knead artisan purple yam bread is strikingly beautiful, but the flavor is what keeps you coming back: a subtle floral sweetness from the yam, a shattering crispy crust, and a cloud-soft interior. And the whole thing comes together with five ingredients and zero elbow grease.

    This post may contain affiliate links. If you purchase through these links, I may earn a small commission at no extra cost to you. Thank you for supporting Love & Harvest!

    fresh baked purple yam bread

    In its most essential form, bread is just flour, water, salt, and yeast. But why go basic when you can jazz it up? This purple yam bread recipe is a perfect beginner project. The results are so impressive you will want to make it again and again.

    A Note to First-Time Bakers

    Have you been browsing Pinterest dreaming about no-knead artisan loaves? That day is today. This recipe is so easy that no one will believe it is your first time. The technique requires almost no active work — just some stretch-and-fold, an overnight fridge rest, and a hot Dutch oven. When you break this loaf open, the colors and textures will genuinely delight you.

    Why You Will Love This Recipe

    • No-knead, easy technique — simple stretch and fold, then the fridge does the rest overnight.
    • Only 5 ingredients — you likely have most of them in your pantry right now.
    • Gorgeous to look at — the natural purple color makes this the most impressive bread at any table.
    • Unique flavor — the yam adds a subtle floral taste you have to experience to understand.
    • Soft and chewy texture — crispy crust, moist interior — the dream loaf.

    purple yam bread sliced

    Ingredients

    All-Purpose Flour

    • Why it works: All-purpose flour is accessible and forgiving — proof that you do not need specialty ingredients for outstanding results. If you have bread flour, use it; the higher protein content produces a chewier, slightly more structured crumb. King Arthur’s organic bread flour is a good option. The quality difference is noticeable.

    Purple Yam (Ube)

    • Why it works: Purple yam is a starchy root vegetable with a subtle floral, vanilla-like flavor. It adds moisture that clings to the gluten network, so the crumb stays soft long after baking. It also provides the stunning violet color — no food coloring needed. Find it fresh at Asian grocery stores or as purple yam powder (ube) online for convenience.

    Steam the yam for 15–20 minutes, let it cool on a plate to release extra moisture, then peel and mash smooth with a fork before adding to the dough.

    Instant Yeast

    • Why it works: Instant yeast activates without pre-dissolving and works reliably even in slightly cooler water. It is what gives the dough its lift and those beautiful air bubbles in the crumb. Anthony’s instant dry yeast packets come in 42 individual pouches — perfect for keeping freshness across multiple bakes.

    Sea Salt

    • Why it matters: Salt controls fermentation speed, strengthens gluten, and is the single biggest contributor to flavor in a lean dough. Use sea salt, not table salt — iodized table salt can slightly inhibit yeast activity. Celtic Sea Salt’s gourmet kosher grain is a great choice for both inside the dough and as a finishing sprinkle.

    Lukewarm Water

    • Why temperature matters: Warmer water (around 80–90°F / 27–32°C) activates yeast faster and speeds the initial rise. Too hot and you kill the yeast; too cold and the dough takes much longer to develop. Slightly warmer than your wrist is the right feel.

    purple yam bread dough fermented

    Professional Tips for a No-Fail Loaf

    Pro Tip 1 — Read the Full Recipe Before You Begin

    This bread is a two-day affair. Prepare the dough before bed, let it ferment in the fridge overnight, then bake the next morning. It requires very little active time but rewards readers who plan ahead.

    Pro Tip 2 — Use a Stand Mixer

    The stand mixer does all the mixing work so you truly do not need to knead. Use the dough hook at medium-low for 20 minutes. A KitchenAid stand mixer is a long-term kitchen investment that pays for itself across hundreds of bakes.

    Pro Tip 3 — Measure by Weight, Not Volume

    Bread baking is precise. Cup measurements vary widely depending on how loosely or tightly you pack the flour. A kitchen scale eliminates guesswork and guarantees consistent results every time. All measurements in this recipe are given in grams — follow them.

    Pro Tip 4 — Use a Dutch Oven

    A home oven cannot inject steam the way a professional bread oven can. A Dutch oven solves this by trapping the moisture released from the dough during the first 20 minutes of baking, which is what creates that shattering crust. The Lodge 5 qt cast iron Dutch oven is the one I recommend — it holds heat evenly and lasts a lifetime.

    Pro Tip 5 — Bake at Full Temperature

    Preheat to 475°F (245°C) with the Dutch oven inside. Bake covered for 20 minutes, then uncover for 30 minutes. The high heat is non-negotiable for a proper crust. Do not lower the temperature.

    Pro Tip 6 — Master the Stretch and Fold

    After the 3-hour bulk rise, gently deflate the dough and fold it: pull the two sides out and fold to center (like folding a letter), then pull the top and bottom and fold to center. Flip seam-side down and rotate the ball on the counter under your palms to build surface tension. Repeat three times total. This is what creates structure and the open crumb.

    purple yam artisan bread baked

    Frequently Asked Questions

    Can I use purple yam powder instead of fresh yam?

    Yes. Use about 2–3 tablespoons of ube powder mixed into the water before adding to the dough. The flavor will be slightly more intense and the color equally vivid.

    What if I do not have a Dutch oven?

    You can bake in a deep oven-safe pot with a lid, or place a metal bowl over the loaf for the first 20 minutes to trap steam. The crust will not be quite as dramatic but the bread will still be delicious.

    How do I know when the dough has proofed enough?

    After the 3-hour bulk rise at room temperature, the dough should have tripled in size and look bubbly. After the overnight fridge proof, it should have grown noticeably and feel cold and slightly domed in the container.

    Can I add seeds or grains to this loaf?

    Absolutely. Sprinkle seeds (sesame, poppy, sunflower) into the proofing basket before adding the dough. They will adhere to the crust during baking and add texture and flavor.

    Why did my bread come out flat?

    The most common causes are dead yeast (check the expiry date and water temperature), insufficient proofing time, or over-handling the dough during shaping (which pops the gas bubbles). Weigh your ingredients and follow the timing carefully.

    Can I make this with sourdough starter instead of instant yeast?

    Yes — this recipe adapts well to a sourdough approach. Check the how to make sourdough bread and how to make sourdough starter guides for reference. You will need to extend the fermentation time and adjust hydration slightly.

    Purple yam bread loaf cut in half to show the purple crumb

    Rustic Purple Bread

    Easy and beautiful loaf of bread made with purple yam. Crunchy and chewy on the outside and super moist on the inside. An fairly easy bread to make to impress anyone at the dinner table, and the best bread to wipe and clean off any sauces on the plates.
    Prep Time 30 minutes
    Cook Time 50 minutes
    Total Time 13 hours 20 minutes
    Course: Bread
    Calories: 175

    Ingredients
      

    • 400 g all purpose flour (3 cups of all purpose flour)
    • 310 g Luke warm water (307ml of Luke warm water)
    • 160 g steamed and cooked purple yam (3/4 cup of cooked purple yam)
    • 10 g sea salt (1 1/2 tsp sea salt)
    • 2 g instant yeast (1/2 tsp instant yeast)

    Equipment

    • stand mixer

    Method
     

    1. Wash and peel the purple yam. Put it in your steamer and steam for about 20 minutes until soft. Test it by poking it with a fork. If it goes in without effort it is done. If it requires force, then give it another 5-10 minutes.
    2. In a stand mixer, attach the dough hook. Add the flour and water together and combine until a light crumble appears. Put a towel or plastic wrap over the top and let it rest for 30 minutes. This allow the flour to fully hydrate.
    3. Meanwhile, put the fork in another bowl and mash it. Make sure all the big clumps are broken into smaller pieces. Don't worry if its not smooth, once it is in the stand mixer, it will break and smooth everything together. I sometimes like small chunks showing and are in the dough, so when it is baked, you can also see the purple yam pieces in the bread.
    4. Remove the towel or plastic wrap from the bowl, and add the mashed purple yam, sea salt, and instant yeast. Adjust speed to medium low for 20 minutes. The dough afterwards will look sticky and very elastic like. Let it sit for 3 hours until it has tripled in size.
    5. Dust the clean counter top with some flour, and carefully remove the dough on to the table. Gently deflate the dough, and give the dough the fold and stretch method. You're going to take the sides of the dough (imagine the dough is a face and you're going to pull the two ears of the face) stretch it out, and fold it where the nose is (the centre of the dough). Don't over stretch where you see the dough is tearing. Now you're going to take the top and bottom (top of the head and the chin of the face) and fold it again to the centre of the dough (the nose). Do this 3 times. Now flip it outside down (now the face is slapped onto the counter top) seaside down, and roll the dough around. You need to put some pressure at the bottom of the dough and pull the dough at the centre. You're going to feel some pressure and stretching of the dough (its honestly the best feeling when I do this part), and you're going to do this a few times until the dough becomes a beautiful ball. Do this 3 times.
    6. Now you need to find a vessel to put the dough in the fridge. If you have a bread proofing basket – use it. If not, just a regular bowl but find one that fits the dough but also some space for it to grow slightly. Add a piece of parchment paper and pat it down to the shape of the bowl. Gently flour the bowl and place the dough seaside down (wrinkly face down). Put plastic wrap at the top of the bowl and let it sit in the fridge overnight: at least 12 hours.
    7. When you're ready to bake, preheat oven to 475F/245C with the rack at the lower third. Insert the dutch oven with the lid on while it preheats. When the oven reaches the desire temperature, let the dutch oven sit there for an additional 20 minutes.
    8. Gently lift the dough out of the bowl by lifting on the sides of the parchment paper, and place it on the counter top. Place another new parchment paper beside the dough, and gently flip the dough on to the new parchment paper. The seaside should be facing up now.
      The goal here is to preserve and not disturb the air gas that can been developing in the fridge for 12 hours. the Less movement we can create when we place the dough into the oven, the better gas bubbles you'll get when you bake the bread. When the dough has been sitting in the fridge, all the gas built up is at the bottom of the dough which is the seaside is located. When we flip the bread upside down, the gas is invertiley at the top, so when we bake it at a high temperature, it will expand and get the beautiful air bubbles in the bread.
    9. Carefully take the dutch oven out, and carefully by lifting the parchment paper place the dough inside the oven with the lid on top. Bake for 20 minutes.
    10. After the first 20 minutes finished, lift the lid off and bake for an additional 30 minutes.
    11. Lift the bread out and let it cool completely on a drying rack. You need complete air circulation around the bread, including the bottom. Let the bread cool off completely before indulging.

    Notes

    You can easily add seeds and grains to the top of the bread easily by placing the desire seed and grain to the proofing basket before you add the dough inside.

    Love baking with fermentation? Try the Easy Homemade Focaccia Bread or the Savoury Rosemary Beer Bread next.

  • Traditional Hong Kong Curry Chicken

    Traditional Hong Kong Curry Chicken

    If you have ever craved a curry that is creamy, lightly spiced, and packed with the comforting flavours of lemongrass and coconut, this Traditional Hong Kong Curry Chicken is exactly what your table needs. Passed down through Cantonese kitchens and perfected in Hong Kong cafes, this is the dish that turns a regular weeknight into something memorable.

    This post may contain affiliate links. If you purchase through these links, I may earn a small commission at no extra cost to you. Thank you for supporting Love & Harvest!

    Hong Kong curry chicken

    Hong Kong Style

    In Hong Kong, curry is called 港式咖喱雞 (Cantonese: gong sik ga lay gai). From all the different versions of curry I’ve tasted, Hong Kong curry is on the mild side.

    Though Hong Kong curry is mild, it is still super tasty with hints of lemongrass and coconut cream. I would say it’s the tropical getaway in the curry world. The lemongrass gives a citrus lift, and the island flavour of the coconut cream adds a tropical creaminess to the crowd of flavour. It’s no wonder curry plays a strong role in Cantonese cuisine.

    Even though you’ve never visited Hong Kong or lived there, you can still find Hong Kong style curry anywhere with a large Chinese community — at Asian cafeterias, fast food stores, restaurants, and especially at Hong Kong cafe restaurants. Besides the variety of curry you can find, you can also find a variety of meats like chicken or beef (called 港式咖哩牛腩). Vegetarian is also an option.

    Like all the different versions of curry you can find in the world, the difference is in the spice blend. If you’re in the Hong Kong area, I’ve heard Choi Hop Lee 財合利 in Hong Kong (Wanchai) is the place to find authentic Hong Kong flavour — they make their own Hong Kong curry powder and paste.

    History of Hong Kong and Curry

    When you travel to Hong Kong, you will find people from all parts of the world. Once upon a time, Hong Kong was renowned as the financial hub of Asia. During the colonial years, the British government mobilized many Indian and Nepalese soldiers to Hong Kong. They brought over their food and spices and began the curry expansion in the city. It became popular to serve curry in restaurants to cater to the new community of people.

    Though the traditional curry brought over by Indians was strong in flavour, Hong Kong mellowed it down and made it sweeter to fit the local palate. They used coconut cream to help cut the spice, and incorporated Malaysian curry paste — more adaptable and favoured by the local population.

    Why You’ll Love This Recipe

    • Irresistibly delicious — this curry has lemongrass, turmeric, onion, and coconut milk. It has all the tropical sweet and savoury taste that is mouthwatering. The smell of the curry is not strong, but soft and tropical.
    • Easy to make — sauté the onion, add the marinated chicken, and let it simmer in chicken stock. The last 5 minutes of cooking, add in the coconut milk. Sounds easy? Because it is!
    • Still tastes great the next day — some food is best served fresh, but this curry is great the next day. Reheat and serve.

    Ingredients

    Curry Powder

    There are many different kinds of curry powder out there. Each country in Asia has their own flavour and heat level. For this recipe, I like to use Madras Curry Powder — the flavour leans more Chinese than Indian and it’s perfect for this dish.

    • Why it matters: Curry powder is the backbone of the entire dish. Using a quality powder with turmeric, cumin, and coriander makes all the difference in depth of flavour.

    Lemongrass

    Using lemongrass in curry is a Malaysian style that Hong Kongers love. Lemongrass gives off a tropical, vibrant taste and really brightens the entire dish.

    • Why it matters: Lemongrass is what separates Hong Kong curry from other regional curries. It adds a citrus, almost floral lift that balances the richness of the coconut cream.

    Coconut Milk

    The thickness of coconut cream makes the sauce less watery. The flavour of coconut adds sweetness that counteracts the strong spices in the curry, creating a balanced palate. Always add coconut cream when the dish is almost done — never boil it.

    • Why it matters: Coconut milk is the finishing touch. It rounds out the spice, adds body, and delivers that creamy tropical colour. Use a quality brand like Chaokoh Coconut Milk for best results.

    Evaporated Milk

    This is a secret weapon ingredient. Many Cantonese cooks (my grandfather included) add evaporated milk into the curry for a subtle dairy sweetness. Not too much — just enough to balance the spice and salt and give the curry more depth.

    • Why it matters: This is the ingredient that distinguishes Hong Kong curry from other Asian curries. It adds a creamy richness that is different from coconut milk alone.

    Professional Tips to Get Your Curry Tasting Like a Real Hong Kong Style Cafe

    Pro Tip #1 — Fry the Potatoes First

    I love frying the potatoes before adding them to the curry. All Hong Kong curry has potatoes — it’s a must. Frying the potatoes helps them hold together in the stew and prevents them from breaking up into starchy clumps.

    Pro Tip #2 — Make the Roux

    Roux is a cooked mixture of flour and fat. It is how we thicken the soup base. In classic French cooking the fat is butter, but in Hong Kong cooking oil is typically used. Do not walk away from this step — the roux burns fast.

    Pro Tip #3 — Do Not Boil the Evaporated Milk and Coconut Cream

    Evaporated milk and coconut cream should never reach boiling point. That is why these two ingredients are added at the very end. They are meant to offset the strong spice flavour and balance the dish.

    If you love Cantonese chicken recipes, also check out my Classic Hainanese Chicken and Soy Sauce Chicken (Cantonese Style) — two dishes that pair beautifully alongside this curry.

    Hong Kong curry chicken

    Frequently Asked Questions

    What makes Hong Kong curry different from Indian or Thai curry?

    Hong Kong curry is much milder than Indian or Thai curry. It uses a blend of Madras-style curry powder, lemongrass (borrowed from Malaysian cooking), and coconut cream or evaporated milk to create a sweeter, creamier result. The heat is gentle enough for children, making it a true family dish.

    Can I use boneless chicken thighs instead of a whole chicken?

    Yes. Boneless thighs work very well and cut down on cooking time. Bone-in pieces are traditional and add more flavour to the sauce, but boneless thighs are a great weeknight shortcut. Cook until the internal temperature reaches 165°F (74°C).

    Can I make this recipe without potatoes?

    You can, but potatoes are a defining feature of Hong Kong curry. They absorb the sauce and add body to the dish. If you leave them out, the sauce will be thinner. You could substitute with sweet potato, taro, or butternut squash for a similar effect.

    What should I serve with Hong Kong curry chicken?

    Jasmine rice is the classic pairing — it soaks up the sauce beautifully. You can also serve it over rice noodles, or with a side of steamed bok choy or Chinese broccoli to round out the meal.

    Can I make this curry ahead of time?

    Yes — this curry is even better the next day once the flavours have had time to meld. Store in an airtight container in the refrigerator for up to 3 days. Reheat gently on the stovetop and do not let it boil once you reheat, to preserve the coconut cream.

    Can I freeze Hong Kong curry chicken?

    Yes, though the potatoes can become slightly mealy after freezing. Freeze the curry without the potatoes if you plan to make a large batch, then add freshly cooked potatoes when reheating. The curry base freezes well for up to 2 months.

    Hong Kong Style Curry

    Delicious traditional Hong Kong style cafe curry chicken. Subtle flavour in spice, but still tons of flavour to leave an impactful meal. Also light and citrusy from lemongrass to fit any picky eater. It the perfect family meal option that keeps the dinner table warm and cozy. Print Recipe Pin RecipePrep Time:20 minsCook Time:30 minsCourse: Main CourseCuisine: ChineseKeyword: Cantonese CuisineServings: 4 people

    Ingredients

    Chicken Marinate

    • 1 whole chicken organic, free ranged
    • 2 tbsp turmeric powder
    • 1 tbsp salt

    Curry

    • ½ cup oil
    • 4-5 medium sized potatoes cut into medium size knobs
    • ½ white onion diced
    • 3 garlic cloves grated
    • 5 shallots chopped
    • 1 thumb-sized ginger sliced into thick slices
    • 3 red eye chili / red chili sliced
    • 2 tbsp Hong Kong curry powder / curry powder
    • 3 tbsp reserved oil
    • 2 tbsp flour
    • 2 lemongrass stalks
    • ½ cup water / chicken stock
    • ½ cup coconut cream
    • ½ cup evaporated milk
    • 2 TSP sea salt

    Instructions

    • Clean the inside and outside of the chicken. Pat dry. Cut the chicken into pieces. Separate the wings, legs, and breast. I like to debone the chicken and freeze the carcass for chicken soup later. Marinate the chicken in salt. Let it sit in the fridge.
    • In a large wok, add the 1/2 cup oil. When the wok is hot, add the potatoes and fry for about 5-8 minutes, or until you see the edges slightly brown. Place them on a plate with a paper towel.
    • With the same oil in the wok, use only 3 tbsp of oil and reserve the rest. Add the onion, garlic and shallots. When the onion is softened, add the ginger, chili, curry powder and turmeric. Fry until aromatic (3-5 minutes).
    • Add the chicken pieces and fry until the skin has color. Remember to stir constantly so it doesn’t stick to the bottom.
    • Once all the chicken is slightly browned, remove everything to a plate.
    • On the same pan, add in 3 tbsp of the reserved oil. Add the flour into the pan and fry until fragrant. Do not walk away from this step.
    • Once the flour is brown, take out your whisk and start to stir the flour around. Add the chicken stock while whisking the flour. Try to break up the flour in the chicken stock. You should not see any flour clumps at this point.
    • Add the chicken back to the pan, along with the lemongrass. Simmer on medium heat for 20-25 minutes.
    • For the last 5 minutes, add the evaporated milk, coconut cream, and salt to taste. Let it simmer on low for 5 minutes. Do not let it boil.
    • Serve with warm jasmine rice.
  • Smoked Sun Dried Tomatoes: Sun and Smoke in a Bottle.

    Smoked Sun Dried Tomatoes: Sun and Smoke in a Bottle.

    There is something deeply satisfying about turning a garden surplus into something preserved, smoky, and utterly unique. These Smoked Sun Dried Tomatoes capture the best of summer and the magic of fire — and once you make a jar, you will understand why they disappear so quickly.

    This post may contain affiliate links. If you purchase through these links, I may earn a small commission at no extra cost to you. Thank you for supporting Love & Harvest!

    sun dried tomatoes

    Why You Need This

    This is not your ordinary sun dried tomatoes recipe. We are adding another level of umami by smoking them — and the result is something that belongs on a cheese board, stirred into pasta, or given away as a gift.

    After making a batch, mine usually end up on my neighbour’s doorstep. If you’re not a gardener, no problem — this recipe works just as beautifully with Roma tomatoes from the store. Smoked sun dried tomatoes make a fantastic sauce especially with sausages and olives. There is a light hint of smoky flavour with subtle notes of sweet and savoury. And once preserved in olive oil and garlic, the texture becomes something truly special.

    Smoked sun dried tomatoes make a fantastic sauce especially with sausages and olives.

    Propagating Tomato Seeds Indoor

    By the end of winter, I usually start growing seeds indoors. Use potting soil in small containers and leave them by a south-facing window so the sun helps sprout the seeds faster. Once they have 3-5 leaves, it’s time to transplant them into a bigger area. Adding baking soda to the planting hole helps tomatoes develop a sweeter taste.

    Sun Drying the Tomatoes

    Pick the tomatoes when they are red, ripe, and plump. Wash them with a little soapy water and slice them as thin as possible — the thinner the slice, the faster they dry. Place them on a rack in the sun. Give the slices a few turns every few hours so they dry on both sides. Two days of full hot sun will completely dry the slices.

    If birds or animals are a concern, place another drying rack on top to protect them. Once dry, we can start the smoker.

    Sun Dried Tomatoes in a Dehydrator

    Yes, you can dry your tomatoes in a dehydrator. Give the tomatoes a good rinse and thinly slice them — the thicker the cut, the longer it takes. Set the food dehydrator to 150°F for up to 10 hours. You will know it is done when it has a leathery texture.

    sun dried tomatoes uses

    Ingredients

    Tomatoes

    Heirloom tomatoes are ideal because of their complex flavour and variety of colours. However, Roma tomatoes work just as well and are easier to find year-round.

    • Why they matter: The tomato is the star. The more flavourful and ripe your tomato, the better the end product. Thin slices are non-negotiable for even drying.

    Smoker Chips

    Choose hard wood that generates lots of smoke. Oak, hickory, pecan, cherry, and maple are all excellent choices. Use quality mesquite smoker chips for a bold, earthy smoke. Avoid soft woods like pine, spruce, or cedar — they produce acrid smoke that ruins the flavour.

    • Why it matters: The type of wood directly determines the smoke flavour that gets absorbed into the tomatoes. Hard woods burn clean and slow.

    Sea Salt

    Place natural sea salt at the bottom of the pan under the tomatoes during smoking. The salt naturally imparts saltiness into the tomatoes from below, and you also end up with a batch of smoked sea salt as a bonus.

    • Why it matters: The salt-and-tomato combination is a secret weapon. The tomatoes need seasoning and the salt gets infused with smoke — two results from one step.

    Smoking Tomatoes

    You do not need a professional smoker. A small portable charcoal grill works perfectly well. If you have a smoking device, simply follow the device instructions and skip to the preservation section below.

    How to Smoke on a Portable Grill

    Equipment Needed

    • Hard wood pieces or smoker chips
    • Small portable charcoal grill
    • Tongs, fire starter, fan, non-reactive pan

    Fire Setup

    Set up the fire and get the wood smoking. Start small with thin pieces of wood and cardboard (no tape or prints) or egg cartons to catch the flame. Build up larger pieces gradually until you have a steady heat. Once the fire slows down and the wood is glowing without large flames — similar to when charcoal is ready for BBQ — you are ready to smoke.

    Air Flow

    Airflow is the fine line between success and failure. Open the vents and occasionally fan air into the bottom of the grill. If you can place your hand near the pan comfortably, you have the right heat. If you need to jerk your hand away, it is too hot. Check every 20 minutes to feed the fire or adjust airflow.

    How to Preserve Sun Dried Tomatoes

    Once your tomatoes are smoked and cooled, preserve them in a clean glass jar (a reused jam jar works well). At the bottom, add 2 smashed garlic cloves. Pack the tomatoes in tightly. Add a pinch of smoked sea salt on top and fill to the brim with olive oil — every tomato must be submerged. Store in a dark place for 1 month. The longer they sit, the deeper the flavour.

    Sun Dried Tomatoes Uses

    Sun dried tomatoes are intense in flavour, so a little goes a long way. My favourite uses: pasta with olives, shrimp, and olive oil; finely diced into salad; or tossed with chicken. They are also spectacular on a charcuterie board.

    For more ideas on preserving and fermenting ingredients, check out my guide to Preserved Salty Lemons and my step-by-step Steam Preserved Vegetables with Pork.

    A hand holding a jar of smoked sun-dried tomatoes in oil

    Frequently Asked Questions

    How long do smoked sun dried tomatoes last?

    When properly preserved under olive oil in a sealed glass jar, smoked sun dried tomatoes last up to 3-4 weeks at room temperature in a cool dark place, or up to 3 months in the refrigerator. Always make sure the tomatoes remain fully submerged in olive oil and use a clean spoon each time you reach into the jar.

    Do I need a professional smoker to make this recipe?

    No. A small portable charcoal grill works perfectly well, as described in the instructions. The key is managing airflow and heat. If you have access to a dedicated smoker, even better — just follow its instructions and smoke the tomatoes for 1-2 hours at low heat.

    What type of wood is best for smoking tomatoes?

    Hard woods like oak, hickory, cherry, pecan, or maple all work beautifully. Mesquite adds a bold earthy flavour. Avoid soft woods (pine, cedar, spruce) which produce acrid-tasting smoke. If you want to add a citrus note, include a strip of dried orange or grapefruit peel — a technique common in Chinese smoking.

    Can I use a food dehydrator instead of sun drying?

    Yes. Set the dehydrator to 150°F (65°C) and dry the tomatoes for up to 10 hours. The result is the same leathery texture ideal for smoking and preserving. Thin slices dry much faster than thick ones.

    What can I do with the smoked sea salt left over from the process?

    It is extraordinary. Use it as a finishing salt on eggs, steak, roasted vegetables, popcorn, or anything that benefits from a smoky-salty note. Store it in a small sealed jar — it keeps indefinitely.

    Smoked Sun Dried Tomatoes

    Learn how to make and preserve your own bottle of unique sun dried tomatoes that is smokey and savoury. Goes well with pasta and toast. It is also easy to jazz it up by adding your desired herbs and flavouring to make it your own signature taste. Print Recipe Pin RecipePrep Time:20 hrsCook Time:1 hrKeyword: smokingAuthor: Love and Harvest

    Equipment

    • smoker / smoker device / small portable charcoal grill
    • hard wood pieces or smoker chips

    Ingredients

    • 1 pound organic heirloom tomatoes

    Smoking

    • 2 TBSP natural sea salt no table salt, find the good salt

    Preserving

    • 1 cup virgin olive oil
    • 1 TSP smoked sea salt
    • 2 clove garlic smashed

    Instructions

    • Hull and wash the tomatoes. Rinse with soapy water and dry them well.
    • Using a sharp knife, carefully cut the tomatoes in thin slices. Discard the seeds and place them on a cooling rack. Give them enough space where they are not touching each other. Place a baking sheet under to catch the juices.
    • Place them on a table in a spot that gets the most sun and is away from insects. If animals may get to them, place another cooling rack on top. Flip and check every few hours. Depending on your climate, it may take 1-2 days for the tomatoes to fully dry.

    Smoking with a small portable charcoal grill

    • Assemble the grill in an area away from anything flammable and have all essential items ready: wood pieces, tongs, fire starter, fan, and a fire extinguisher if possible.
    • Start your fire with small pieces of wood first, then add larger pieces. I sometimes add plain cardboard (no tape or prints) or egg cartons made from paper. Then add liquid fire starter or oil. Build up until you have a steady heat.
    • Once the fire slows down and the wood is exerting heat without large flames — similar to how charcoal is ready for BBQ — you’re ready to begin smoking. Using a non-reactive pan, spread the sea salt evenly at the bottom.
    • Place the sun dried tomatoes on top of the salt. Add some extra smoking wood chips to the fire and close the lid.
    • Open the vents and occasionally fan air into the grill. If you can place your hand near the pan comfortably, the temperature is right. If you need to jerk your hand away, it is too hot. Check every 20 minutes.
    • Smoke with the lid on for 1-2 hours. Remember to check every 20 minutes to see if you need to feed the smoke or adjust heat.
    • Once ready, the sea salt will be a mixture of black and brown. The tomatoes will be slightly brown and carry a noticeable smoky aroma.
    • Let it cool, and immediately jar it in a clean glass jar or mason jar.
    • Add the smashed garlic and 1 tsp smoked sea salt on top. Pack the tomatoes in tightly and fill to the top with olive oil. Make sure all tomatoes are fully submerged under the oil.
    • Store in a dark place away from sunlight for 1 month. The longer you wait, the more flavour develops.
    • Transfer the extra smoked sea salt to a separate jar — use it as a finishing salt on any dish.

    Smoking with a device

    • Follow the device instructions on how to activate smoke.
    • Using a non-reactive pan, place sea salt at the bottom and spread evenly. Add the sun dried tomatoes on top, then release the smoke into the compartment. Close the lid and trap the smoke inside.
    • Smoke the salt and tomatoes for 1-2 hours. For more smoke flavour, simply add more time.
  • Delicious Beer Gravy Honey Mustard Chicken 🍺

    Delicious Beer Gravy Honey Mustard Chicken 🍺

    When the weather turns cool and the family is hungry, this Beer Gravy Honey Mustard Chicken is the recipe I reach for every time. It is one of those dishes that fills the kitchen with an irresistible aroma before it even hits the table — and with a total cook time of 40 minutes, it is weeknight-ready without sacrificing an ounce of flavour.

    This post may contain affiliate links. If you purchase through these links, I may earn a small commission at no extra cost to you. Thank you for supporting Love & Harvest!

    Honey mustard chicken thighs with rosemary in a cast iron panHoney mustard chicken thighs with rosemary in a cast iron pan

    Why You Will Love This Recipe

    • Everyone loves it, including kids — when I have chicken in the fridge that needs to be used quickly, this is the recipe I always reach for. The kids love this dish, and they always ask for more sauce on their rice.
    • So delicious — there is something magical about beer and chicken cooked together. The aroma is intoxicating and will draw people into the kitchen asking what you are making.
    • Easy recipe — marinate the chicken, lay it on the skillet, and deglaze the pan with beer. In 40 minutes your meal is ready to be served and devoured.

    Beer in the Gravy — Is It Safe for Children?

    Short answer: yes. Because we are cooking the beer with the chicken, the alcohol burns off while the chicken cooks. All that remains is the beer flavour, which is mild. We are only adding half a can so it is not overpowering. You can always use a quarter of the can, or skip it entirely — the gravy is still delicious and thick without the beer.

    Ingredients

    Chicken

    This recipe calls for chicken legs and thighs. Any part of the chicken works, but bone-in thighs and drumsticks are ideal because they stay moist and flavourful even with extended cooking. I buy the whole chicken leg and separate the thighs and drumsticks at home before marinating.

    • Why bone-in matters: The bone adds flavour to the gravy and protects the meat from drying out. The skin also crisps beautifully in the cast iron skillet.

    Honey and Mustard

    We use salt and honey to marinate the chicken and mustard (both regular and mustard seed) in the gravy. Give the salt, honey, and mustard time to work into the chicken — a minimum of 15 minutes guarantees more flavour penetration. If you don’t have regular mustard, Dijon works equally well.

    • Why honey: Honey breaks down when it contacts salt and chicken, turning from thick to a watery consistency that coats every surface. It caramelises beautifully in the hot pan and adds a sticky sweetness to the crust.

    Beer

    Beer tenderises the chicken and creates the base for the gravy. Use whatever beer you enjoy drinking. A light lager — like Modelo — gives a crisp, clean flavour that works well for children. Darker beers add more complexity but can be intense for kids.

    • Why beer in the gravy: The beer deglazes all the caramelised bits from the bottom of the pan, which is where all the flavour is. It also keeps the chicken moist throughout the entire cook time.

    Cast Iron Skillet

    A cast iron skillet is the ideal pan for this recipe. It distributes heat evenly across the entire surface, which is critical for bone-in chicken that needs thorough cooking from all angles. Use a quality Lodge Pre-Seasoned Cast Iron Skillet — it browns the chicken perfectly and gets better with every use.

    • Why cast iron: Even heat distribution means the chicken cooks consistently. The skillet retains heat well, so the temperature stays stable when you add the cold chicken to the pan.

    If you love chicken recipes with bold flavours, try my Traditional Hong Kong Curry Chicken or Lemongrass Chicken Drumsticks for more weeknight-friendly options.

    Frequently Asked Questions

    What kind of beer works best in this recipe?

    A light lager is the best choice — it adds flavour without being overpowering, and the alcohol burns off during cooking, leaving behind only the subtle beer taste. Modelo, Heineken, or any standard light lager works great. If you want a richer, more complex gravy, try a pale ale. Avoid very dark stouts for this recipe unless you enjoy a bitter, roasted note in the sauce.

    Can I make this recipe without beer?

    Yes. Replace the beer with chicken broth or apple cider for a similarly rich gravy. The flavour will be different — slightly less complex — but still delicious. The key is to deglaze the pan with a liquid that has some body and flavour.

    How do I know when the chicken is fully cooked?

    The internal temperature of the thickest part of the thigh should reach 165°F (74°C). Visually, the juices should run clear when you pierce the meat near the bone. The chicken should feel firm rather than rubbery when pressed. Drumsticks and thighs typically need 25-30 minutes total in the pan.

    Can I use chicken breast instead of thighs and drumsticks?

    Yes, though chicken breast tends to dry out more quickly. The beer in the sauce helps prevent this significantly. If using breast, reduce the covered cooking time to 15-18 minutes and check for doneness early. Keeping the lid on during cooking traps moisture and helps prevent drying.

    How do I store leftovers?

    Store in an airtight container in the refrigerator for up to 3 days. Reheat gently on the stovetop with a splash of water or broth to loosen the gravy. The chicken reheats beautifully and the gravy thickens further, making leftovers arguably better than the original.

    Honey Mustard Chicken with Beer Gravy

    This honey mustard chicken is a warm autumn dish perfect for your family. Delicious beer gravy swimming in the sweetness of honey and savoury flavour of the chicken.
    Print Recipe
    Prep Time:15 minsCook Time:25 mins

    Ingredients

    Chicken Marinate

    • ½ kg chicken drumstick and thighs cleaned and pat dry, skin on
    • 2 tsp sea salt
    • 1½ tbsp honey
    • 2 tbsp mustard
    • ½ can light lager beer

    Gravy Sauce

    • 2 tbsp butter
    • ½ white onion chopped
    • 2 garlic clove minced
    • 1½ cups water
    • 3 tbsp mustard seed
    • ¼ cup cream
    • rosemary garnish

    Instructions

    Chicken Marinate

    • In a large mixing bowl, add the chicken, salt, honey, and beer together. Mix evenly. Let it sit on the counter for at least 15 minutes.

    To cook the chicken

    • Put the skillet on medium high heat. Melt the butter and sauté the onion and garlic until softened, about 2 minutes.
    • Carefully take the chicken with tongs and place it on the skillet. Reserve the beer marinate.
    • Sear the surface of the chicken for 5 minutes each side until slightly brown.
    • Once both sides are browned, add the reserved beer marinate along with the mustard and water. Put a lid on top and let it cook on medium for 25 minutes.
    • For the last 5 minutes of cooking, take the lid off and add the cream.
    • Place the chicken on a deep dish and pour the sauce over it. Garnish with fresh rosemary.