Tag: healthy

  • Matcha Green Tea Popsicles

    Matcha Green Tea Popsicles

    Imagine biting into an ice-cold, creamy popsicle that cools you down from the inside out. That is exactly what these Matcha Green Tea Popsicles deliver — a tropical blend of coconut milk and ceremonial matcha that is as creamy as it is refreshing. One batch and you will want a stash in your freezer all summer.

    This post may contain affiliate links. If you purchase through these links, I may earn a small commission at no extra cost to you. Thank you for supporting Love & Harvest!

    A hand holding a matcha green tea popsicle over ice

    Quench your summer cravings with the refreshing delight of Matcha popsicles. These vibrant treats satisfy your sweet tooth with that earthy matcha flavor.

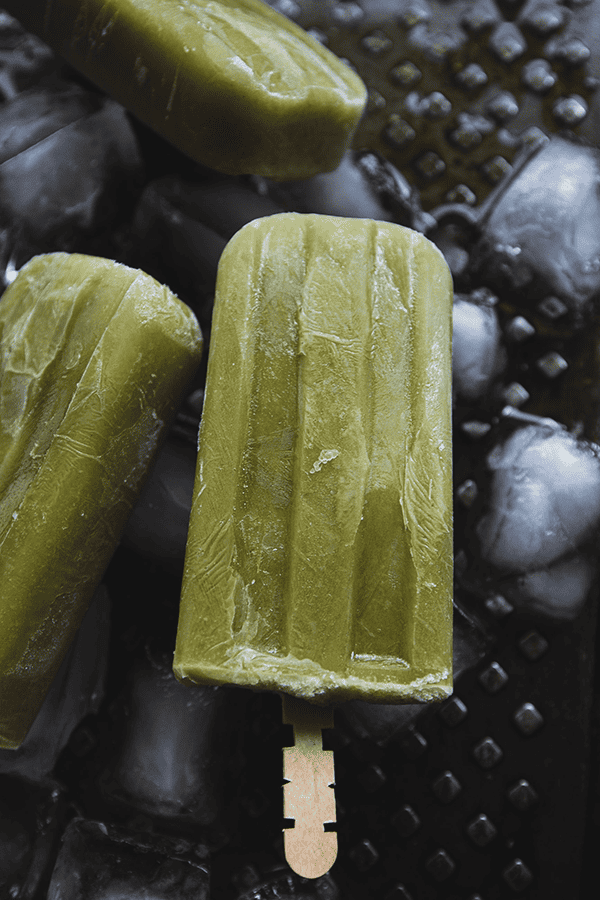
    Matcha green tea popsicles resting on ice cubes

    What is Matcha Green Tea?

    Matcha green tea is a type of powdered green tea that has been a traditional part of Japanese culture for centuries. It is made from the leaves of the Camellia sinensis plant, the same plant used to produce other types of green tea. However, what sets matcha apart is the way it is grown, harvested, and processed.

    The cultivation of matcha involves shading the tea plants for several weeks before harvest, which boosts the chlorophyll content and gives the leaves a vibrant green color. After harvest, the stems and veins are removed, and the leaves are ground into a fine powder using traditional granite stone mills.

    Why Use Xanthan Gum in Matcha Popsicles?

    Xanthan gum is a common ingredient used in the production of matcha popsicles and other frozen desserts. Here are a few reasons why xanthan gum is often included:

    1. Texture and Mouthfeel: Xanthan gum acts as a thickening and stabilizing agent, giving the popsicle mixture a smooth and creamy texture. It helps prevent ice crystals from forming, resulting in a more enjoyable mouthfeel and preventing the popsicles from becoming too icy.
    2. Emulsification: Xanthan gum can help emulsify and bind the ingredients together, ensuring that the matcha and other components in the popsicle mixture are evenly distributed. This contributes to a consistent flavour throughout the popsicle.
    3. Suspension of Ingredients: Matcha powder can sometimes settle at the bottom of the popsicle mixture due to its weight. Xanthan gum helps suspend the matcha particles and other ingredients evenly throughout the mixture, preventing separation and ensuring a consistent distribution of flavour.
    4. Enhanced Stability: Xanthan gum improves the stability of the popsicle mixture, preventing ingredient separation and reducing the chances of the mixture separating or becoming watery during the freezing process.
    5. Reduced Melting: Xanthan gum can help slow down the melting rate of popsicles, allowing them to maintain their shape and texture for a longer period, particularly in warmer temperatures.

    What I Love About Homemade Matcha Popsicles

    • Control the sugar content in each lick
    • Great way to use seasonal summer fruits
    • Easy recipe for kids to follow and tons of fun!
    • A great way of making homemade frozen treats
    • An infinite avenue for creativity

    Ingredients

    You only need 5 ingredients to make these matcha green tea popsicles. Simple, clean, and packed with flavour.

    Coconut Milk

    Full-fat coconut milk is the backbone of this recipe.

    • Why it matters: The high fat content creates that creamy, ice-cream-like texture without any dairy. It also carries the matcha flavour beautifully and prevents an icy, hard bite.

    Matcha Powder

    Use ceremonial-grade matcha powder for the best results.

    • Why it matters: Ceremonial grade matcha is brighter green and less bitter. Culinary grade works but produces a slightly more bitter flavour.

    Plant-Based Milk

    Almond milk, oat milk, or any plant-based milk you prefer.

    • Why it matters: This thins the coconut milk to a pourable consistency and adds volume without adding heaviness. Use unsweetened almond milk so the honey is the only sweetener.

    Honey

    Raw varietal honey or ¼ cup sugar work equally well.

    • Why it matters: Sweetness is essential in frozen desserts because cold temperatures dull flavor perception. Honey adds complexity that plain sugar cannot match.

    How To Make Matcha Popsicles

    In a high speed blender add coconut milk, almond milk, xanthan gum, matcha powder, and honey. Blend on high until the mixture comes together smoothly. Leave it on high for about 30–40 seconds until the top of the liquid gets frothy. The froth at the top of the popsicle mold gives it a beautiful look once frozen.

    Fingers lifting a frothy-topped matcha popsicle from a bed of ice

    What Do You Need to Make Homemade Popsicles?

    Firstly, you will need a popsicle mold. The one I like is silicone because you can stretch and pull to get the popsicles out. It is easier to store in cabinets too. Another thing I like about silicone molds is that I can use wooden sticks.

    I mean, come on, who hates it when a plastic stick goes missing, and you’re running through the kitchen looking for it? I despise playing hide-and-seek with the reusable sticks because I end up looking like a crazy lady searching for them.

    If you have kids and want a smaller size, you can buy a 6-cavity silicone mold — it makes about 3.3oz per popsicle, perfect for children!

    If you have a preferred mould, use it. In essence, they are all the same, so long as you have a popsicle at the end of the day.

    Two matcha green tea popsicles on dark ice cubes

    Create A Memorable Family Moment!

    This matcha popsicle recipe is so simple and delicious that asking the kids to join in can create a fantastic summer memory for them.

    When the kids see me laying out the limes on the kitchen counter with a big bowl beside it, they always know it’s popsicle-making time! Engaging kids in the process of making popsicles can be a wonderfully enjoyable and educational experience. They can learn about flavours, textures, measuring, and the science of freezing — all while having a great time.

    If you love frozen treats, you might also enjoy our Matcha Avocado Popsicles or the fun and fruity Loco Mango Popsicles. And for something completely different, try our Mixed Berry Smoothie with Pomegranate and Nopal, another family favourite.

    Frequently Asked Questions

    Can I use culinary grade matcha instead of ceremonial grade?

    Yes, you can. Culinary grade matcha is less expensive and works well in recipes. However, ceremonial grade produces a more vibrant green colour and a less bitter flavour. If you are sensitive to bitterness, stick with ceremonial grade.

    Can I make these popsicles without xanthan gum?

    Yes, but the texture will be icier. Xanthan gum is what prevents large ice crystals from forming, giving these popsicles their smooth, creamy bite. If you skip it, the popsicles will still be delicious — just slightly less creamy.

    How long do matcha popsicles last in the freezer?

    Stored in an airtight container or individually wrapped in plastic wrap, these matcha popsicles keep well for up to 2 months in the freezer. After that, they may develop freezer burn.

    Can I use a different sweetener?

    Absolutely. Maple syrup, agave nectar, or even coconut sugar all work well. Just note that liquid sweeteners blend more easily than granulated sugars. If using coconut sugar, blend an extra 10 seconds to fully dissolve.

    What popsicle mold size do I need?

    This recipe makes about 10 standard-size popsicles (roughly 3 oz each). If you are using a smaller mold — like a children’s size — you will get more pieces. Just adjust freeze time accordingly; smaller molds may be ready in 4 hours.

    Can I add fruit to this matcha popsicle recipe?

    Yes! Sliced mango, kiwi, or blueberries can be placed inside the mold before pouring the matcha mixture for a beautiful and flavourful twist. Make sure the fruit pieces are small enough to fit without blocking the popsicle stick.

    A hand holding a matcha green tea popsicle over ice

    Matcha Green Tea Popsicles

    After indulging in a hearty BBQ meal, these matcha green tea popsicles make a refreshing, light finish. They provide a refreshing and light option to balance out the richness of the barbecue flavours. The creamy texture, combined with the subtle tropical breeze of coconut milk, creates a harmonious blend that will transport your taste buds to a serene paradise.
    Prep Time 10 minutes
    Freeze Time 6 hours
    Total Time 6 hours 10 minutes
    Servings: 10 people
    Course: Dessert
    Calories: 90

    Ingredients
      

    • 1 15oz can coconut milk
    • 1 cup almond milk or any other vegan milk
    • 1 tsp xanthan gum
    • 1 tbsp matcha green tea powder
    • 3 tbsp honey or ¼ cup sugar

    Equipment

    • silicon popsicle mould

    Method
     

    1. In a high-speed blender, add coconut milk, almond milk, xanthin gum, matcha powder, and honey. Blend on high until the mixture comes together smoothly.
    2. Pour the mixture to fill each popsicle mould. Place lid over moulds, then insert popsicle sticks.
    3. Place it in the freezer for 6 hours or overnight.
    4. When it is ready, leave the popsicles out for 30 minutes so it is easier to squeeze them out.
  • Frozen Yogurt Bark

    Frozen Yogurt Bark

    These yummy frozen yogurt bark treats are so tasty you’ll want seconds and thirds — and they come together in less time than it takes a baby to nap.

    frozen yogurt bark chocolate

    This post may contain affiliate links. If you purchase through these links, I may earn a small commission at no extra cost to you. Thank you for supporting Love & Harvest!

    These gorgeous frozen yogurt barks are so easy to make you’ll only need a few minutes from your busy schedule to prepare them.

    I managed to make this in between my baby’s nap, and also had some time to pour myself a cup of hot fresh coffee. Impressive right?

    Besides their good looks, they are effortless. Once you make them they can be stored easily in your freezer for up to 6 months — but I guarantee you’ll need only a few days before they get cleared out! This recipe is made with assorted fruits and assorted goodies. It’s a great way to pack in all your summer fruits together.

    We also like saving these barks for winter, when fruits are not readily available.

    frozen yogurt bark with berries and coconut

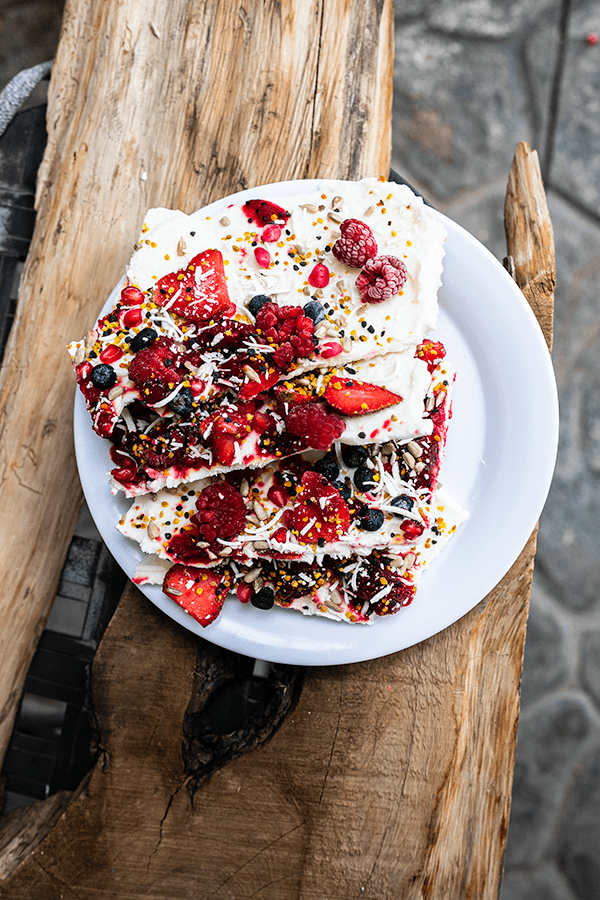
    Frozen yogurt barks are gorgeous! They are made with greek yogurt, sunflower seeds, bee pollens, and coconut strips. We are using fresh summer fruits like red cactus pears, blueberries, pomegranate seeds, strawberries, and raspberries.

    Gorgeous and easy — what more can you ask for, right? If you enjoy frozen treats, you might also love our matcha avocado popsicles or our easy blueberry ice cream for another refreshing option.

    frozen yogurt bark pioneer woman

    Why You Will Love These Frozen Yogurt Barks

    • Easy summer dessert treat: hot summers can feel dreadful, but enjoying these barks on a hot summer day can easily cool you off!

    frozen yogurt bark with fruit toppings

    Why Use Greek Yogurt?

    Greek yogurt is the best yogurt to use compared to others because it is higher in protein (nearly twice the amount). Greek yogurt has a thicker, creamier texture because the liquid whey is strained out.

    It’s also lower in lactose.

    Can I Sweeten My Frozen Yogurt Barks?

    Absolutely! I would recommend using natural maple syrup to sweeten them. After you spread the greek yogurt along the parchment paper, drizzle maple syrup everywhere evenly. You can also add vanilla extract for extra taste!

    Summer Fruits

    In my recipe I made it with the fruits available to me here in Mexico.

    Red cactus pear may be hard or even impossible to find in your area, but locally sourced fruits available in your area can be a great option!

    frozen yogurt bark with cactus pear

    What Else Can You Do With These Barks?

    In the winter time, fruits are not always available. What we also do is save these frozen yogurt barks to make smoothies. We add a few chunks in a blender, toss in some soy milk and banana and we have ourselves a delicious smoothie.

    I love making this smoothie in the morning when we are late. It’s quick and easy for the kids to drink up before they go to school!

    Ingredients

    Greek Yogurt

    One of the best yogurts you can use for this recipe. Chobani whole milk Greek yogurt is a great choice. Other options include all-natural yogurt. The key is using a thick yogurt so your bark sets firmly in the freezer.

    Sunflower Seeds

    Natural sunflower seeds add a great crunch to the barks. If you like, toast the sunflower seeds to give them more flavour.

    Bee Pollen

    I like to add bee pollen because they look like sprinkles once laid on top of the barks — all kids love sprinkles on top of everything! Skip the bee pollen for anyone with pollen or bee allergies.

    Coconut Strips

    I love the coconut strips taste in the bark.

    Pieces of frozen yogurt bark with berries and coconut strips on a white plate

    For my frozen yogurt barks, I use fresh fruits available to me here in Mexico. Some of the fresh summer fruits I am using for this recipe are:

    Red Cactus Pears

    Prickly cactus pear are also known as “tuna” here in Mexico. They range from green (less sweet but more flavour) to red (more sweet but less flavour). They are usually eaten raw with tons of seeds inside which you can bite through and are safe to swallow. The red cactus pear has a beautiful colour.

    Blueberries

    We have to eat the colours of the rainbow which is why we are adding some blue to the frozen yogurt barks. Blueberries add a lovely acidity to the barks.

    Strawberries

    I love the taste of frozen strawberries and that is why they are showing up on these barks! I usually cut one strawberry into 4 to 6 pieces so it is easier to bite into.

    Raspberries

    I love the fuzzy texture of raspberries, and it’s a no-brainer to add raspberries to the barks.

    How to Prepare the Barks

    Cut Up All Your Fruits

    Once you know what fruits you’re using, cut them all up in small cubes. The smaller the better so in one bite you can get a variety of all the ingredients without missing anything. Cutting them small also helps in sprinkling them onto the yogurt evenly.

    Put Everything in Small Cups

    Once you’re ready to sprinkle all your ingredients on to the bark, it’s good to have everything on the side and ready. It will be difficult to have your hands dirty and need to open a bag of sunflower seeds mid-process. Having everything ready makes the process easier and cleaner.

    Frozen yogurt bark with fresh summer fruit and coconut strips

    Parchment Paper

    Line your baking sheet with parchment paper. This will help the bark come off easily once it is frozen. It is much easier to spread the yogurt on top of parchment paper. To make this even easier, use a Greek yogurt strainer to get the thickest, creamiest yogurt for your base.

    Spatula

    Using a spatula helps spread the yogurt easier on the parchment paper. If you have an offset spatula, it will make the process much easier.

    frozen yogurt bark recipe

    Frequently Asked Questions

    How long do frozen yogurt barks last in the freezer?

    Stored in an airtight container in the freezer, they keep well for up to 6 months. Separate layers with parchment paper to prevent them from sticking together.

    Why is my frozen yogurt bark too soft?

    This usually happens if the yogurt layer is too thick or the freezer was not cold enough. Spread the yogurt to about 1/4 inch thickness for the best results. Freeze for at least 2 hours, or overnight for a firmer bark.

    Can I use regular yogurt instead of Greek yogurt?

    You can, but regular yogurt contains more water and will result in a less firm, icier bark. Greek yogurt is recommended because it is thicker, creamier, and higher in protein.

    What fruits work best for frozen yogurt bark?

    Any fruit that freezes well works great — berries, kiwi, mango, peaches, and pomegranate seeds are all excellent choices. Avoid high-water fruits like watermelon as they can make the bark watery.

    Can I add chocolate to frozen yogurt bark?

    Absolutely! Drizzle melted dark chocolate over the top of the fruit before freezing, or sprinkle chocolate chips or cacao nibs for added flavour and crunch.

    Frozen yogurt bark topped with strawberries, blueberries and seeds

    Frozen Yogurt Bark

    These yummy frozen yogurt barks are so tasty you’ll want seconds and thirds. Great summer treats for both kids and adults! Print Recipe Pin RecipePrep Time:10 minsCourse: DessertKeyword: dessert, frozen yogurt barkServings: 6 people

    Equipment

    • large baking sheet
    • spatula
    • parchment paper

    Ingredients

    • 3-4 cups natural greek yogurt
    • ¼ cup natural maple syrup optional
    • 1 red prickly cactus pear
    • ½ cup blueberries
    • ¼ cup pomegranate seeds
    • 5-6 strawberries sliced thinly
    • 10-12 raspberries
    • 2 tsp bee pollen
    • ¼ cup coconut strips
    • 2 tbsp sunflower seeds

    Instructions

    • Take out your large cookie baking sheet and spread parchment paper that covers the whole bottom. Use the spatula and spread the greek yogurt along the edge of the parchment paper.
    • Optional: drizzle maple syrup and vanilla. Use the spatula to spread the syrup and vanilla evenly.
    • Always place the largest fruit cubes on first.
    • Gently and evenly put in your first fruit layer. I normally put it in these sequences: strawberry, raspberry, blueberry, and pomegranate seed.
    • Next I add my other ingredients, which are: coconut strips, sunflower seeds and bee pollens.
    • Freeze until firm, roughly about 2 hours. Break into pieces and store in a covered container in the freezer.
  • Blender Oatmeal Pancakes

    Blender Oatmeal Pancakes

    These blender oatmeal pancakes have become our family’s most-requested breakfast — and they have replaced buttermilk pancakes in our household for good. Made from just bananas, oats, eggs, and baking powder, everything goes straight into the blender and onto the griddle. The cleanup is one blender. The result is a soft, fluffy, naturally sweet pancake that keeps you full until lunch. My IHOP-loving husband is the proof of concept.

    This post may contain affiliate links. If you purchase through these links, I may earn a small commission at no extra cost to you. Thank you for supporting Love & Harvest!

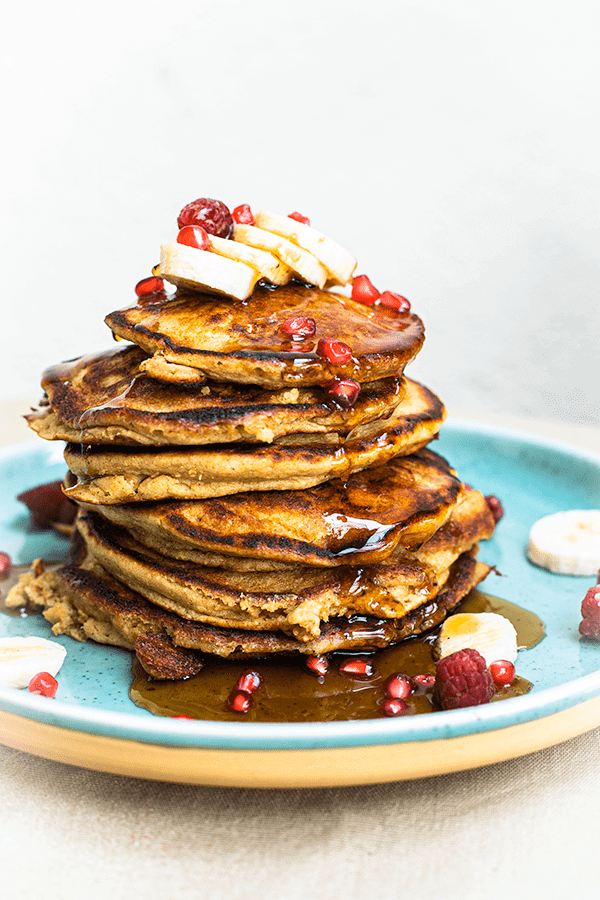
    Stack of oat banana pancakes with syrup, banana slices and pomegranate

    This post features a blender oatmeal pancake recipe using banana, oatmeal, vanilla, and eggs, all blended together.

    Why Make This Recipe?

    Pancakes for breakfast is probably one of the most popular breakfasts around the world. But can you make a version that’s easy and comes together in a blender? Yes. These oatmeal pancakes do. They are packed with whole grains from the oatmeal and natural sweetness from the bananas. Just 2 tablespoons of maple syrup in the whole batch. No flour. No special skills required.

    Mornings can be hectic. This recipe respects that — all the ingredients go into a blender, and cleanup is just the blender. That is it. It has been tested and approved by my IHOP-pancake-loving husband, who is not going back to buttermilk pancakes.

    Tall stack of pancakes topped with banana and pomegranate seeds

    Can These Pancakes Be Gluten-Free?

    I make these with regular oatmeal at home — not certified gluten-free oats — so as written they are not a gluten-free recipe. If you need them gluten-free, use certified gluten-free oats (and know that cross-contact can still happen in some kitchens and facilities). The only added sweetener is 2 tablespoons of maple syrup. They come out soft, fluffy, and full of flavour — perfect with maple syrup or any topping you love.

    Ingredients Deep-Dive

    Ingredients

    Oatmeal

    Either old-fashioned oats or quick-cooked oats both work. The oatmeal is the base of these pancakes — it replaces flour entirely.

    • Why it matters: Oats give these pancakes their hearty texture, no flour needed. I use regular rolled or quick oats. If you need a gluten-free version, choose certified gluten-free rolled oats or oat flour — oats are naturally gluten-free but can pick up wheat in processing, and cross-contact is still possible.

    Bananas

    Use overripe bananas — the riper, the better. The spots on the peel are your best friends here. Riper bananas are sweeter and blend more smoothly.

    • Why it matters: Bananas serve as both the natural sweetener and the binding agent in this recipe. They replace both sugar and part of the fat you would find in a traditional pancake recipe. Overripe bananas have higher natural sugar content and a more intense banana flavour.

    Eggs

    Eggs help the pancake rise and give it a fluffy texture. They are also the primary structural ingredient that binds the oats and banana together.

    • Why it matters: Without eggs, the batter would be too loose to hold together on the griddle. The protein in eggs sets when heated, creating the structure that gives these pancakes their lift.

    Baking Powder

    Baking powder creates the bubbles and air pockets inside the pancake that give it that light and fluffy texture. It is essential in all pancake recipes.

    • Why it matters: Without baking powder, these pancakes will come out flat and dense. The reaction between baking powder and the moisture in the batter produces CO2 bubbles that make the pancakes puff up on the griddle.

    Stack of pancakes with a forkful cut out to show the fluffy inside

    Pro Tips for Perfect Oatmeal Pancakes

    Pro Tip 1 — Use a Griddle

    A cast iron griddle has a larger surface area than regular pans, letting you cook more pancakes at once. It also creates an even surface of heat so every pancake cooks consistently.

    Pro Tip 2 — Cook the Pancakes with Butter

    Always add a thin layer of butter on the griddle before adding the batter. This prevents sticking and adds flavour. Butter tastes better than regular cooking oil for pancakes.

    Pro Tip 3 — When to Flip the Pancakes

    Flip when you see little air pockets forming in the middle of the pancake and the edges stop looking wet — they will have a soft, matte texture. This is the signal that the bottom is set and the pancake is ready to flip without breaking.

    Pancake stack in a pool of syrup with banana slices on a blue plate

    Looking for more breakfast ideas? Try our Mixed Berry Smoothie with Pomegranate and Nopal or our Celery Juice to pair alongside these pancakes for a complete morning meal.

    Tall stack of pancakes topped with banana and pomegranate seeds

    Blender Oatmeal Pancakes

    Delicious pancakes made with oatmeal and banana. All made with just a blender. Gluten-free when made with certified gluten-free oats.
    Prep Time 7 minutes
    Cook Time 15 minutes
    Total Time 22 minutes
    Servings: 4 people
    Course: Breakfast
    Cuisine: American
    Calories: 295

    Ingredients
      

    • 2 cups royal oats or quick oats
    • 1 cup water
    • 1 medium riped banana
    • 2 eggs
    • 2 tbsp melted butter
    • 2 tbsp maple syrup
    • 1 tbsp baking powder
    • ½ tsp baking soda
    • ½ tsp salt
    • ½ tsp ground cinnamon
    • 2 tsp vanilla extract

    Equipment

    • high speed blender

    Method
     

    1. Preheat your griddle on the stovetop and set it on medium low heat.
    2. In the blender put all the ingredients together and blend on high for 30 seconds. Batter should be smooth with no lump.
    3. lightly brush the surface of your griddle with butter.
    4. With your ⅓ measuring cup, scoop the batter with the mesuring cup, and slowly drop the batter on the griddle. Leave enough space between pancakes so they are not touching each other.
    5. Cook until small bubbles start to form in the middle of the pancake the sides have turned into a matte texture. Flip the pancake and cook for another 1-2 minutes.
    6. Serve right away with a small slice of butter on top and maple syrup.

    Frequently Asked Questions

    Do these oatmeal pancakes taste like banana?

    Yes, mildly. The banana flavour is present but not overwhelming. The more overripe your bananas are, the stronger the banana flavour. If you want to reduce it, use one banana instead of two and add a tablespoon of nut butter for binding. The oat flavour balances out the banana very well.

    Can I make this recipe without a blender?

    Yes, but the texture will be coarser. Mash the bananas very well with a fork, then mix in the eggs, and finally stir in the oats and baking powder. For a smoother texture without a blender, use certified gluten-free oat flour instead of whole rolled oats — it blends into the batter without the blender step.

    Are these pancakes suitable for toddlers?

    Yes. They have no refined flour, and the only sweetener is the banana plus 2 tablespoons of maple syrup in the whole batch. They do contain butter and eggs. They are soft, easy to chew, and naturally sweet from the banana. Cut them into small pieces or serve as finger food for younger toddlers. They are also an easy way to serve oats and eggs at a toddler breakfast.

    How do I store leftover oatmeal pancakes?

    Let the pancakes cool completely, then store in an airtight container in the refrigerator for up to 3 days. For longer storage, freeze with parchment paper between each pancake and reheat directly from frozen in a toaster or non-stick pan. They reheat very well and taste just as good the next day.

    Can I add protein powder to this recipe?

    Yes. Add one scoop of plant-based protein powder to the blender along with the other ingredients. The batter may thicken slightly — if it does, add a tablespoon of water to reach the right consistency. A vanilla or unflavored protein powder works best so it does not compete with the banana.

    Why are my pancakes coming out flat?

    The most common reason is old baking powder. Baking powder loses its potency over time — test yours by dropping a teaspoon into hot water. If it bubbles vigorously, it is still good. If not, replace it. Also make sure you are not overmixing the batter after adding the baking powder — stir just until combined to keep the air pockets intact.

  • Cantonese Steamed Chicken with Goji Berries

    Cantonese Steamed Chicken with Goji Berries

    Three simple ingredients — chicken, goji berries, and black fungus — steamed together until the flavors meld. It is a classical Cantonese dish that has been in Chinese families for generations, and once you taste it you will understand why. Clean and genuinely delicious.

    This post may contain affiliate links. If you purchase through these links, I may earn a small commission at no extra cost to you. Thank you for supporting Love & Harvest!

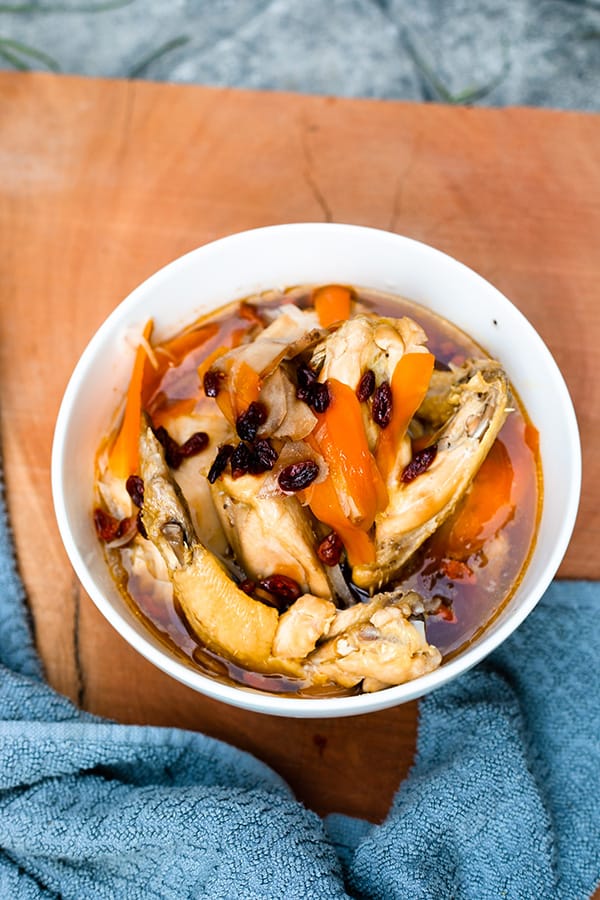
    Steamed chicken with goji berries, carrot and onion in a white bowl

    Goji berries have been in my kitchen for as long as I can remember. I grew up in a Chinese household.

    Goji Berries and Black Fungus

    Goji berries are sweet and mild. When autumn comes, goji berries go straight into the chicken noodle soup.

    The black fungus in this recipe has a satisfying chewy texture that my kids somehow love more than the chicken itself.

    Ingredients

    Goji Berries

    • Why they are essential: In this dish they soften during steaming into tender, subtly sweet morsels that absorb the savory chicken juices — the combination is genuinely beautiful.

    Buy dried goji berries at any Asian supermarket. Online, organic dried goji berries are reliable and easy to keep on hand.

    Chicken Breast (or Any Cut)

    • Why breast works well: It steams quickly, stays moist with the goji berry juices, and keeps this dish clean and light. You can substitute legs, drumsticks, or a mix of cuts — they all work and all come out delicious. The longer cook time for bone-in pieces (around 30–35 minutes) actually intensifies the flavor.

    steamed chicken goji berries with black fungus

    Professional Tips for a No-Fail Dish

    Pro Tip 1 — Steam in a Pot or Instant Pot

    You can use a stovetop bamboo steamer or a steamer basket over a pot of boiling water. A bamboo steamer is the traditional tool and imparts a very subtle woody fragrance. For modern convenience, an Instant Pot works equally well: fill with water, place the steamer basket inside, set the dish on top, seal, and steam for 25 minutes on the Steam setting. I have the Instant Pot Duo 7-in-1 and use it for this dish regularly.

    Pro Tip 2 — Keep the Marinade Simple

    The marinade is just salt and sesame oil. That is all you need. The simplicity is intentional — this dish is about the natural flavors of the chicken and goji berries, not masking them. Sesame oil adds a nutty depth that anchors the whole dish. Toss, let sit 10 minutes, then steam.

    Pro Tip 3 — Skim the Fat

    After steaming you will see a thin layer of chicken fat floating on the surface of the cooking liquid. Skim it off with a slotted spoon before serving. Removing it lets the goji berry sweetness shine through more clearly.

    Pro Tip 4 — Serve Warm, Always

    In Chinese tradition, everything is served warm — not hot, not cold. Serve this with a bowl of plain steamed rice and a cup of hot tea.

    Frequently Asked Questions

    How do I know when the chicken is fully cooked?

    Chicken breast steamed for 20–25 minutes at medium-high heat will be cooked through. Use a meat thermometer — the internal temperature should reach 165°F (74°C). Bone-in pieces may need 30–35 minutes. The flesh should be opaque white throughout with no pink near the bone.

    Can I use fresh goji berries instead of dried?

    Dried goji berries are preferred in this recipe. They rehydrate during steaming and release their flavor into the cooking liquid. Fresh goji berries are rarely available outside of China, but if you find them, use the same quantity.

    What is black fungus and where do I find it?

    Black fungus (wood ear mushroom / Auricularia auricula) is a dried edible mushroom used widely in Chinese cooking. It has a satisfying chewy texture and mild flavor. Find it dried at any Asian supermarket. Soak in warm water for 20 minutes before use.

    Can I make this dish for children?

    Yes. The flavor is gentle, and the goji berries are sweet enough for kids to enjoy. My children love the black fungus in particular.

    Can I add other herbs to the steam?

    Yes. Common additions include Chinese red dates (2–3 pieces), dried longan fruit, and wolfberries. These are the same herbs used in the goji berry, red date and Chinese yam tea.

    Steam Chicken Goji Berries

    Steamed Chicken with Goji Berries

    Easy steamed chicken with goji berries. A classical Cantonese dish.
    Prep Time 15 minutes
    Cook Time 25 minutes
    Total Time 40 minutes
    Course: Main Course
    Cuisine: Chinese
    Calories: 240

    Ingredients
      

    Chicken Marinate
    • 2 organic chicken breast skinned and cubbed
    • 1 tbsp canola oil
    • 1 tsp sea salt
    • 2 tsp corn starch
    The rest
    • 1 carrot sliced thinly
    • ½ white onion sliced thinly
    • 7-10 dried goji berries
    • 1 tsp sea salt
    • 1 tsp sesame oil
    • 1 tbsp soya sauce

    Equipment

    • steamer / Instant Pot

    Method
     

    To Marinate the Chicken
    1. Combine all the ingredients together well, and set aside to marinate on the counter top for 10-15 minutes.
    Putting Everything Together
    1. Sliced the carrots and onions, and add it with the chicken in the vessel you want to steam the dish in. I suggest a bowl that can hold liquid. After steaming, you'll notice the steam water has dropped some in the bowl and makes a delicious sauce on top.
    2. Add the remaining seasoning: salt and sesame oil. Add the goji berries on top. Mix and combine everything well.
    3. Using a regular steam:
      Wait until the steamer is ready and the water is boiling. Put the dish in and the lid on top. Steam on medium heat for 30-35 minutes.
    4. Using an Instant Pot:
      Set machine to 'Steam' on high heat for 25 minutes. Place the steamer basket and add the dish in. Make sure you use a round high bowl as the regular flat round plates don't fit. You want to have gaps between the bowls so the steam can come up and easy access for you to lift the plate out when it is done. Put the lid on and set to 'Seal'.
    5. When the time is up, you can release the vale. Lift the plate up, and drizzle the soy sauce on top. Serve with white rice.

    If you enjoy Chinese-inspired recipes, explore the Goji Berry, Red Date and Chinese Yam Tea and Steam Preserved Vegetables with Pork.

  • Easy Homemade Focaccia Bread

    Easy Homemade Focaccia Bread

    There is something deeply satisfying about making your own focaccia. The moment you poke those dimples in the dough, drizzle on the olive oil, and pull that golden, crackling sheet from the oven — it is an experience that no store-bought bread can replicate. This easy focaccia recipe is soft, airy, gloriously fluffy, and requires almost no skill. If you have a stand mixer and a little patience, you can make this tonight.

    This post may contain affiliate links. If you purchase through these links, I may earn a small commission at no extra cost to you. Thank you for supporting Love & Harvest!

    easy homemade focaccia bread golden crust

    Bread making has been part of human civilization for thousands of years. There is a reason it feels so deeply satisfying to bake your own loaf — it connects you to something ancestral and primal. I find real solace in baking bread for my family. The aroma fills the house, the kids want to help poke the dough, and the act of breaking into a fresh loaf together is a small ritual worth protecting.

    Why You Will Love This Focaccia

    • Easiest bread recipe — soft, easy to cut, with a crunchy salt-and-rosemary top that delivers incredible texture and flavor.
    • Flexible schedule — prepare the dough in the morning and bake at night, or let it ferment overnight and bake fresh the next day.
    • Fully customizable toppings — the sea salt blend is my favorite, but you can go savory with olives and sun-dried tomatoes, or keep it simple with just olive oil and herbs.
    • Kids love making it — poking the dimples in the dough before it bakes is genuinely fun for children of any age.

    focaccia bread dimples olive oil

    Topping Options

    The standard sea salt blend (salt, black pepper, rosemary, chili flakes) is my go-to and the base recipe below. But focaccia is one of the most creative-friendly breads you can make. Other options that work beautifully:

    • Olives, sun-dried tomatoes, rosemary, and olive oil
    • Capers, red onions, and olive oil
    • Oregano, thyme, cherry tomatoes, and olive oil
    • Fresh rosemary and flaky sea salt only (classic and elegant)

    focaccia bread topping options

    Ingredients

    Flour (All-Purpose and Whole Wheat Blend)

    • Why the blend works: All-purpose flour creates the open, airy structure while whole wheat adds fiber, density, and a nutty flavor complexity that plain white focaccia lacks. The higher protein in whole wheat also contributes to a slightly chewier, more satisfying bite. The ratio (815g white to 160g whole wheat) keeps the bread accessible without making it heavy.

    A kitchen scale is essential for this recipe — weighing your flour removes all the variability from cup measurements and ensures a consistent dough every time.

    Olive Oil

    • Why only olive oil: Focaccia is an Italian bread built on olive oil — both inside the dough and generously drizzled on top before baking. Olive oil contributes a distinctive fruity, slightly peppery flavor that is irreplaceable. Do not substitute canola, sunflower, or any neutral oil. The olive oil on top also creates the crispy, golden crust that defines great focaccia.

    Sea Salt

    • Why quality matters: The salt inside the dough controls fermentation and develops gluten. The salt on top — preferably a flaky, crunchy sea salt — creates the addictive textural contrast that makes you tear off just one more piece. The Celtic Sea Salt ground variety is excellent inside the dough; use a flaky finishing salt on top if you have one.

    Instant Yeast

    • Why instant yeast: Instant yeast activates immediately when it contacts the water and flour — no pre-dissolving required. It works reliably across a wide temperature range and gives you a predictable, consistent rise. The small amount (7g) in this recipe is intentional — less yeast means a slower, longer fermentation that builds far more complex flavor.

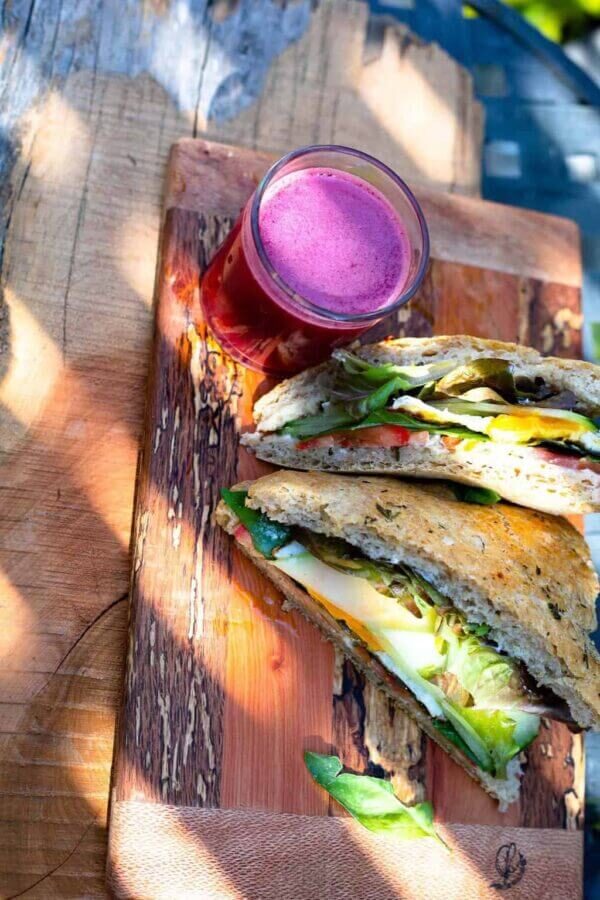
    focaccia bread sandwich made at home

    Professional Tips for a No-Fail Focaccia

    Pro Tip 1 — Patience Is Everything

    This recipe rewards patience above all else. There is almost no active work — the stand mixer kneads, the yeast rises, time does the fermentation. The more time you give the dough (especially the overnight fridge fermentation), the more complex and flavorful the final bread will be.

    Pro Tip 2 — Use a Stand Mixer

    The dough hook does all the kneading. This is what makes the recipe truly hands-off. Use the hook attachment only — not the paddle, not the whisk. Mix on medium speed: first 10 minutes with water and yeast, then 5 minutes after adding salt, then 5 more minutes after adding olive oil. A KitchenAid 7 Qt Pro Line stand mixer is a good option.

    Pro Tip 3 — Fermentation Container

    For the full-day counter fermentation, leave the dough in the stand mixer bowl covered with plastic wrap. For overnight fridge fermentation, transfer to a large clear container with a lid so you can monitor the rise without disturbing the dough. A 6 qt clear storage container works perfectly.

    Frequently Asked Questions

    Can I make this focaccia without a stand mixer?

    Yes, but be prepared for a workout. The dough is quite wet and sticky — that high hydration is what makes the bread so airy. If mixing by hand, work the dough for at least 15–20 minutes until smooth and elastic. Wet hands help prevent sticking.

    How do I know the focaccia is fully baked?

    The top should be deep golden brown and the edges should be pulling away from the pan slightly. The bottom (lift a corner with a spatula) should also be golden, not pale. The internal temperature should reach 200–210°F (93–99°C).

    Why does my focaccia come out dense instead of airy?

    The most common causes are: not giving the dough enough time to rise, using water that is too hot (kills the yeast), not measuring ingredients precisely (use a scale), or pressing the dough too hard when dimpling (be gentle — you want to preserve the gas bubbles).

    Can I freeze focaccia?

    Yes. Cool completely, slice, wrap individual pieces in parchment, then freeze in a zip-lock bag for up to 2 months. Reheat directly from frozen in a 375°F oven for 8–10 minutes.

    What is the best way to serve focaccia?

    Tear it and dip it into extra virgin olive oil mixed with balsamic vinegar. Use it as sandwich bread for picnics. Serve alongside soups and stews for dipping. It is also excellent with fresh mozzarella and roasted tomatoes.

    Can I make this recipe with sourdough starter?

    Absolutely. Replace the instant yeast with 150g active sourdough starter, reduce water slightly, and extend the bulk fermentation to 6–8 hours at room temperature or 12–16 hours in the fridge. See the sourdough bread guide for reference on starter ratios and timing.

    Golden homemade focaccia bread with herbs on a baking tray

    Easy Focaccia Bread

    Easy homemade focaccia bread that is soft, airy, and delicious with every bite. Great to use as a dipping bread with your favourite sauce or to make your favourite sandwich. It’s perfectly soft and fluffy and satisfyingly chewy. It’s sprinkled with lots of flaky sea salt herbs, and spice. Drizzled with extra olive oil, and soaks perfectly into all of those little classic holes that you have poked in the bread.
    Prep Time 15 minutes
    Cook Time 25 minutes
    Total Time 5 hours 40 minutes
    Course: Bread
    Cuisine: Italian
    Calories: 210

    Ingredients
      

    • 815 g white flour
    • 160 g whole wheat flour
    • 830 g warm water
    • 5 g sugar
    • 7 g instant dry yeast
    • 20 g sea salt blend (see below)
    • 20 g olive oil
    Sea Salt Blend (1 serving)
    • 1 tbsp sea salt
    • 1 tsp black pepper
    • 1 tbsp dried rosemary
    • 1 tbsp dried chili flakes
    Sea Salt Blend (small jar)
    • ¼ cup sea salt
    • 1 tbsp black pepper
    • 3 tbsp dried rosemary
    • 3 tbsp dried chili flakes

    Equipment

    • stand mixer
    • large 13 x 18" baking sheet

    Method
     

    1. in a stand mixer, add the flour and whole wheat flour together.
    2. Using a dough hook attachment, slowly add the warm water, yeast, and sugar together with the flour. Mix on medium speed for 10 minutes. Occasionally use a scraper and scrape down the sides so all the flour is well incorporated in the dough.
    3. Add the salt and mix for another 5 minutes.
    4. Add the olive oil and mix for another 5 minutes.
    5. In a large container, put the dough inside and drizzle some oil on top and on the side. Close the lid or wrap the top with plastic.
    To bake at night on the same day
    1. Start your process at 10am. Leave the dough on the counter top and let it rise for 3 hours. After punch the gas out of the dough and fold the dough. Let it rise again for another 2 hours.
    2. After the last rise, spray the baking sheet with oil, and fold the dough inside. stretch the dough until it is even and has stretch to all sides of the baking sheet. Wrap it in plastic and let it ferment on it's last rise for 2 hours.
    To bake in the morning for the next day
    1. Start your process anytime at night: In a 3-4qt container, generously spray with oil along with a drizzle of olive oil. Toss the dough and cover with a greased lid.
    2. Place in the fridge for 8-12 hours
    3. Spray oil in the large baking tray and fold the dough into the baking sheet. Stretch the dough until its even at the top and stretch the dough to all sides of the baking sheet. Wrap it in plastic and let it ferment on it's last rise for 3 hours.
    Baking
    1. Once the dough has finished the last rise. Preheat oven 500-550F.
    2. Once ready to go in the oven, drizzle generously with 20g of olive oil at the top and sprinkle the sea salt blend. Poke some holes using your fingers on the top of the bread evenly.
    3. Bake for 20-25 minutes.

    If you love baking your own bread, try the Crusty Artisan Purple Yam Bread or the Savoury Rosemary Beer Bread — two more recipes where simple ingredients and a little patience produce extraordinary results.