Tag: frozen

  • Blueberry Limeade Popsicles

    Blueberry Limeade Popsicles

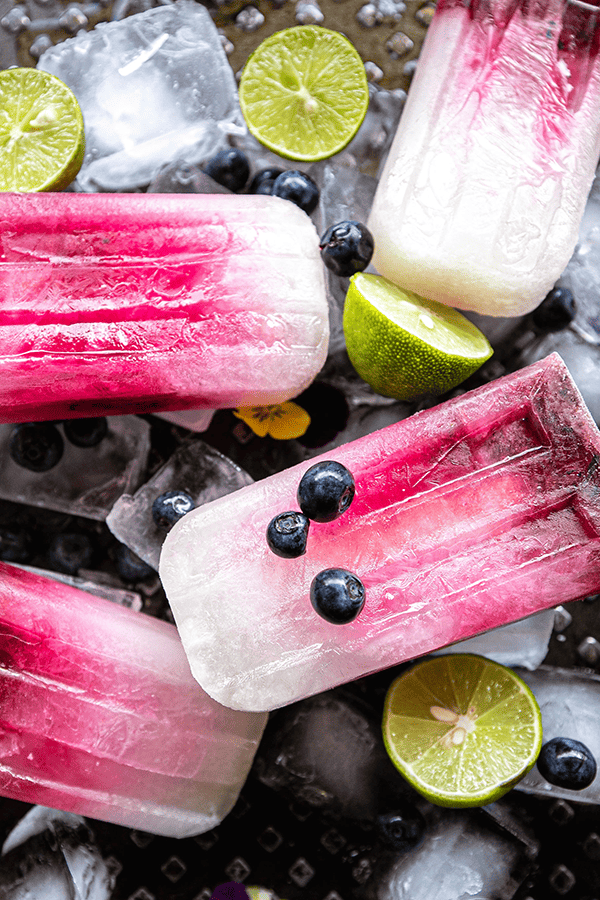
    Four ingredients, one blender, zero freezer regret. These Blueberry Limeade Popsicles are the most refreshing thing you’ll make all summer. The layers go from icy white to bright pink and deep berry red, and the tangy-sweet combination tastes even better than it looks.

    Two Blueberry Limeade Popsicles on ice

    Summer in Mexico is always packed with fresh lime from a local state, and when May comes around, blueberries are in season too. There is no flavour more absurdly satisfying than the combination of zesty lime and succulent blueberries. With each icy bite, the tangy essence of freshly squeezed limes intertwines harmoniously with the sweet blueberries, transporting you to a serene summer day.

    This post may contain affiliate links. If you purchase through these links, I may earn a small commission at no extra cost to you. Thank you for supporting Love & Harvest!

    What I Love About Homemade Popsicles

    • You choose how sweet they are
    • Great way to use seasonal summer fruits
    • Easy recipe for kids to follow and tons of fun!
    • A homemade frozen treat you can make all summer
    • An infinite avenue for creativity

    Close-up of blueberry limeade popsicles

    Ingredients for Blueberry Limeade Popsicles

    Fresh or Frozen Blueberries

    • Blueberries give the bottom layer its deep pink-red colour and a little natural sweetness. Frozen blueberries work just as well as fresh and are available year-round. Blend them chunky, not smooth, so you get beautiful streaks in every popsicle.

    Fresh Lime Juice

    • This is the backbone of the popsicle. Freshly squeezed lime juice (about 6 limes) gives a bright, tangy kick that bottled juice simply cannot replicate. The acidity also keeps the colour of the blueberries vivid.

    Cane Sugar or Agave Syrup

    • A sweetener is necessary to balance the tartness of the lime. Cane sugar dissolves cleanly in the blended lime mixture. Agave syrup works well here too. Use 1 tablespoon agave in place of the cane sugar.

    Water

    • Water dilutes the lime juice to the right intensity and gives the popsicle a clean, icy texture rather than a dense, overly concentrated one.

    What You Need to Make Homemade Popsicles

    You’ll need a silicone popsicle mold. Silicone is best because you can stretch and pull to release the popsicles easily, and it stores flat in a cabinet. Another advantage: silicone molds work with wooden sticks, so you never lose a plastic stick again.

    If you have kids and want a smaller size, look for a 6-cavity mold. Smaller popsicles are perfect for little hands. You’ll also need a high-speed blender to get a smooth lime base and a chunky blueberry mixture.

    Blueberry Limeade Popsicles on ice with lime halves and blueberries

    How to Make Blueberry Limeade Popsicles

    You only need 4 ingredients to make it: fresh or frozen blueberries, lime juice, cane sugar (or agave syrup), and water. That is really all it takes. The two-layer technique is what makes these popsicles look as good as they taste: the lime layer freezes slightly first, then the blueberry mixture is added on top so each colour stays distinct.

    Create a Memorable Family Moment

    This blueberry limeade popsicle recipe is so simple that asking the kids to join in can create a fantastic summer memory. When the kids see me laying out the limes on the kitchen counter with a big bowl beside it, they always guess it’s popsicle time!

    Children in the kitchen can learn about:

    • flavours and textures
    • the importance of balance in creating delicious combinations
    • measuring ingredients to foster their mathematical abilities
    • reading comprehension and sequencing skills

    Beyond the kitchen, making popsicles as a family fosters teamwork, communication, and bonding. It’s a delightful way for kids to explore their creativity and take pride in what they made together.

    Love frozen treats? Try these other ice cream and popsicle recipes from Love & Harvest:

    Blueberry limeade popsicle finished and ready to eat

    Frequently Asked Questions

    Can I use bottled lime juice instead of fresh?

    Fresh is strongly recommended. Bottled lime juice tastes flat and slightly bitter compared to freshly squeezed limes. For a popsicle where lime is the star flavour, it is worth squeezing the real thing. About 6 medium limes give you the half cup you need.

    How long do these popsicles need to freeze?

    The lime layer needs about 2 to 3 hours in the freezer to partially set before you add the blueberry layer. Once the blueberry layer is added, freeze for an additional 5 hours or overnight. A full overnight freeze is the most reliable approach.

    Can I use frozen blueberries instead of fresh?

    Yes, frozen blueberries work perfectly in this recipe. There is no need to thaw them first. Blend them directly from frozen for a slightly chunkier, more textured layer that looks beautiful in the finished popsicle.

    How do I get the popsicles out of the mold without breaking them?

    Let the mold stand on the counter for a few minutes, then run it briefly under lukewarm water to loosen the edges. If you are using a silicone mold, gently pull and stretch the sides to release each popsicle. Avoid warm hands directly on the popsicle or it will melt too quickly.

    How should I store leftover popsicles?

    Wrap each popsicle individually in plastic wrap or place them in a zip-lock bag before returning them to the freezer. This prevents freezer burn and ice crystal formation, keeping the texture and flavour fresh for up to 4 weeks.

    Can I make these popsicles less sweet?

    Yes. Swap the cane sugar for 1 tablespoon of agave syrup for a less sweet version (agave is still a sugar). Or leave the sweetener out entirely if your blueberries are very sweet. The lime keeps them bright and tangy; they’ll just be more tart.
  • Frozen Yogurt Bark

    Frozen Yogurt Bark

    These yummy frozen yogurt bark treats are so tasty you’ll want seconds and thirds — and they come together in less time than it takes a baby to nap.

    frozen yogurt bark chocolate

    This post may contain affiliate links. If you purchase through these links, I may earn a small commission at no extra cost to you. Thank you for supporting Love & Harvest!

    These gorgeous frozen yogurt barks are so easy to make you’ll only need a few minutes from your busy schedule to prepare them.

    I managed to make this in between my baby’s nap, and also had some time to pour myself a cup of hot fresh coffee. Impressive right?

    Besides their good looks, they are effortless. Once you make them they can be stored easily in your freezer for up to 6 months — but I guarantee you’ll need only a few days before they get cleared out! This recipe is made with assorted fruits and assorted goodies. It’s a great way to pack in all your summer fruits together.

    We also like saving these barks for winter, when fruits are not readily available.

    frozen yogurt bark with berries and coconut

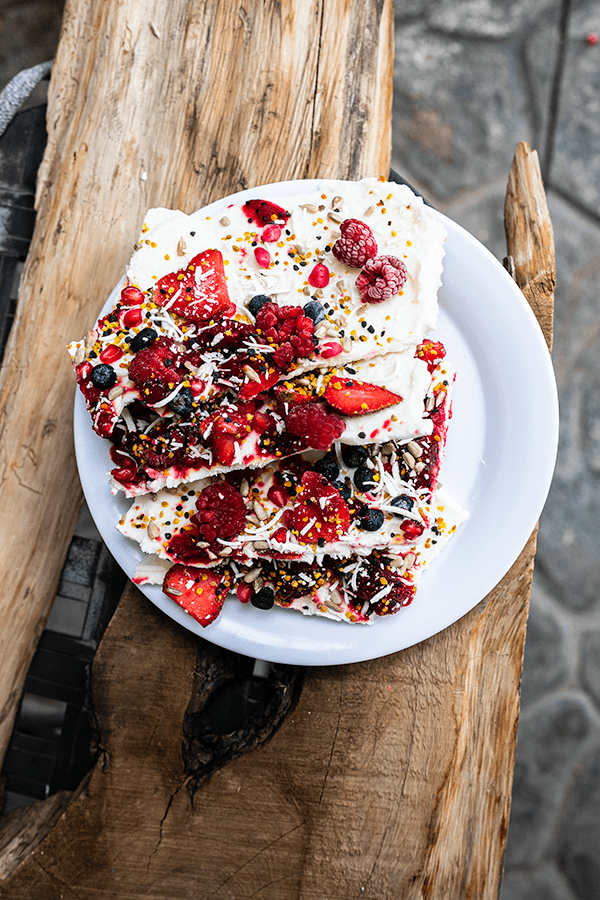
    Frozen yogurt barks are gorgeous! They are made with greek yogurt, sunflower seeds, bee pollens, and coconut strips. We are using fresh summer fruits like red cactus pears, blueberries, pomegranate seeds, strawberries, and raspberries.

    Gorgeous and easy — what more can you ask for, right? If you enjoy frozen treats, you might also love our matcha avocado popsicles or our easy blueberry ice cream for another refreshing option.

    frozen yogurt bark pioneer woman

    Why You Will Love These Frozen Yogurt Barks

    • Easy summer dessert treat: hot summers can feel dreadful, but enjoying these barks on a hot summer day can easily cool you off!

    frozen yogurt bark with fruit toppings

    Why Use Greek Yogurt?

    Greek yogurt is the best yogurt to use compared to others because it is higher in protein (nearly twice the amount). Greek yogurt has a thicker, creamier texture because the liquid whey is strained out.

    It’s also lower in lactose.

    Can I Sweeten My Frozen Yogurt Barks?

    Absolutely! I would recommend using natural maple syrup to sweeten them. After you spread the greek yogurt along the parchment paper, drizzle maple syrup everywhere evenly. You can also add vanilla extract for extra taste!

    Summer Fruits

    In my recipe I made it with the fruits available to me here in Mexico.

    Red cactus pear may be hard or even impossible to find in your area, but locally sourced fruits available in your area can be a great option!

    frozen yogurt bark with cactus pear

    What Else Can You Do With These Barks?

    In the winter time, fruits are not always available. What we also do is save these frozen yogurt barks to make smoothies. We add a few chunks in a blender, toss in some soy milk and banana and we have ourselves a delicious smoothie.

    I love making this smoothie in the morning when we are late. It’s quick and easy for the kids to drink up before they go to school!

    Ingredients

    Greek Yogurt

    One of the best yogurts you can use for this recipe. Chobani whole milk Greek yogurt is a great choice. Other options include all-natural yogurt. The key is using a thick yogurt so your bark sets firmly in the freezer.

    Sunflower Seeds

    Natural sunflower seeds add a great crunch to the barks. If you like, toast the sunflower seeds to give them more flavour.

    Bee Pollen

    I like to add bee pollen because they look like sprinkles once laid on top of the barks — all kids love sprinkles on top of everything! Skip the bee pollen for anyone with pollen or bee allergies.

    Coconut Strips

    I love the coconut strips taste in the bark.

    Pieces of frozen yogurt bark with berries and coconut strips on a white plate

    For my frozen yogurt barks, I use fresh fruits available to me here in Mexico. Some of the fresh summer fruits I am using for this recipe are:

    Red Cactus Pears

    Prickly cactus pear are also known as “tuna” here in Mexico. They range from green (less sweet but more flavour) to red (more sweet but less flavour). They are usually eaten raw with tons of seeds inside which you can bite through and are safe to swallow. The red cactus pear has a beautiful colour.

    Blueberries

    We have to eat the colours of the rainbow which is why we are adding some blue to the frozen yogurt barks. Blueberries add a lovely acidity to the barks.

    Strawberries

    I love the taste of frozen strawberries and that is why they are showing up on these barks! I usually cut one strawberry into 4 to 6 pieces so it is easier to bite into.

    Raspberries

    I love the fuzzy texture of raspberries, and it’s a no-brainer to add raspberries to the barks.

    How to Prepare the Barks

    Cut Up All Your Fruits

    Once you know what fruits you’re using, cut them all up in small cubes. The smaller the better so in one bite you can get a variety of all the ingredients without missing anything. Cutting them small also helps in sprinkling them onto the yogurt evenly.

    Put Everything in Small Cups

    Once you’re ready to sprinkle all your ingredients on to the bark, it’s good to have everything on the side and ready. It will be difficult to have your hands dirty and need to open a bag of sunflower seeds mid-process. Having everything ready makes the process easier and cleaner.

    Frozen yogurt bark with fresh summer fruit and coconut strips

    Parchment Paper

    Line your baking sheet with parchment paper. This will help the bark come off easily once it is frozen. It is much easier to spread the yogurt on top of parchment paper. To make this even easier, use a Greek yogurt strainer to get the thickest, creamiest yogurt for your base.

    Spatula

    Using a spatula helps spread the yogurt easier on the parchment paper. If you have an offset spatula, it will make the process much easier.

    frozen yogurt bark recipe

    Frequently Asked Questions

    How long do frozen yogurt barks last in the freezer?

    Stored in an airtight container in the freezer, they keep well for up to 6 months. Separate layers with parchment paper to prevent them from sticking together.

    Why is my frozen yogurt bark too soft?

    This usually happens if the yogurt layer is too thick or the freezer was not cold enough. Spread the yogurt to about 1/4 inch thickness for the best results. Freeze for at least 2 hours, or overnight for a firmer bark.

    Can I use regular yogurt instead of Greek yogurt?

    You can, but regular yogurt contains more water and will result in a less firm, icier bark. Greek yogurt is recommended because it is thicker, creamier, and higher in protein.

    What fruits work best for frozen yogurt bark?

    Any fruit that freezes well works great — berries, kiwi, mango, peaches, and pomegranate seeds are all excellent choices. Avoid high-water fruits like watermelon as they can make the bark watery.

    Can I add chocolate to frozen yogurt bark?

    Absolutely! Drizzle melted dark chocolate over the top of the fruit before freezing, or sprinkle chocolate chips or cacao nibs for added flavour and crunch.

    Frozen yogurt bark topped with strawberries, blueberries and seeds

    Frozen Yogurt Bark

    These yummy frozen yogurt barks are so tasty you’ll want seconds and thirds. Great summer treats for both kids and adults! Print Recipe Pin RecipePrep Time:10 minsCourse: DessertKeyword: dessert, frozen yogurt barkServings: 6 people

    Equipment

    • large baking sheet
    • spatula
    • parchment paper

    Ingredients

    • 3-4 cups natural greek yogurt
    • ¼ cup natural maple syrup optional
    • 1 red prickly cactus pear
    • ½ cup blueberries
    • ¼ cup pomegranate seeds
    • 5-6 strawberries sliced thinly
    • 10-12 raspberries
    • 2 tsp bee pollen
    • ¼ cup coconut strips
    • 2 tbsp sunflower seeds

    Instructions

    • Take out your large cookie baking sheet and spread parchment paper that covers the whole bottom. Use the spatula and spread the greek yogurt along the edge of the parchment paper.
    • Optional: drizzle maple syrup and vanilla. Use the spatula to spread the syrup and vanilla evenly.
    • Always place the largest fruit cubes on first.
    • Gently and evenly put in your first fruit layer. I normally put it in these sequences: strawberry, raspberry, blueberry, and pomegranate seed.
    • Next I add my other ingredients, which are: coconut strips, sunflower seeds and bee pollens.
    • Freeze until firm, roughly about 2 hours. Break into pieces and store in a covered container in the freezer.
  • Authentic Strawberry and Nutella Mexican Bolis Recipe

    Authentic Strawberry and Nutella Mexican Bolis Recipe

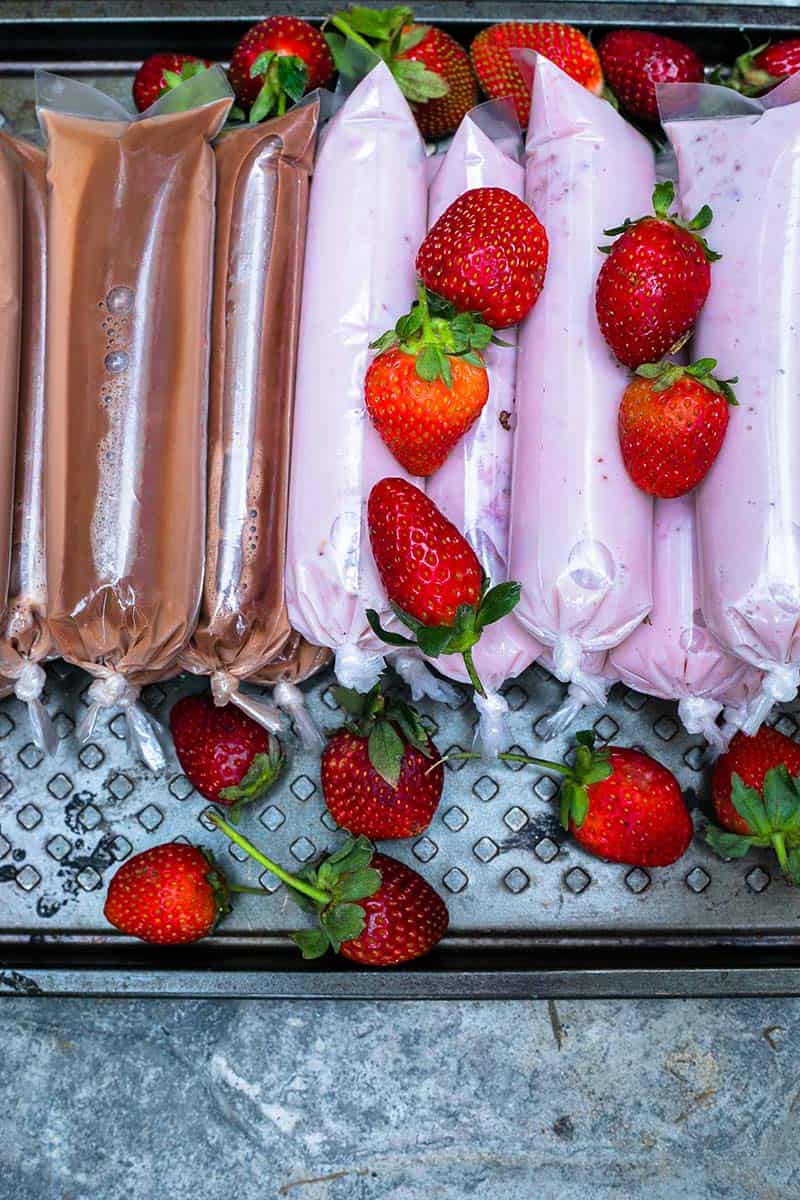
    If you grew up in Mexico or married into a Mexican family, you know bolis. These frozen tubes of creamy, flavoured milk are a summertime ritual — pulled from the freezer at family gatherings, argued over, and eaten before dinner. This recipe comes straight from the hands of a family matriarch who has been making them for decades. Strawberry and Nutella side by side in one batch.

    This post may contain affiliate links. If you purchase through these links, I may earn a small commission at no extra cost to you. Thank you for supporting Love & Harvest!

    mexican bolis recipe

    Planning dinner too? My free PDF has seven easy family dinners for the weeknight table. Send me the free dinners

    What Are Mexican Bolis?

    Bolis are homemade Mexican ice pops frozen inside small plastic bags and tied at the top. Unlike a popsicle on a stick, you bite the corner off the bag and squeeze the frozen treat out as you eat. The base is a creamy milk mixture — dried milk, evaporated milk, and condensed milk — that stays smooth and creamy even fully frozen. They are popular at family gatherings, school events, and weekend markets across Mexico.

    mexican bolis in english

    Ingredients Deep-Dive

    The Triple-Milk Base

    • Why three types of milk: Each milk plays a specific role. Dried milk adds body and richness without adding liquid. Evaporated milk contributes concentrated dairy flavour and a creamy, slightly caramelised note. Condensed milk provides sweetness and a thick, smooth texture that prevents iciness when frozen. Together they create a base that is far creamier than any single-milk version.

    Use Carnation Dried Milk, Carnation Evaporated Milk, and Nestle La Lechera Condensed Milk for the most authentic Mexican flavour profile.

    Strawberry Pulp (Cooked, Not Raw)

    • Why cook the strawberries first: Cooking concentrates the strawberry flavour, breaks down the pectin for a smoother texture after blending, and reduces the water content so the frozen boli does not develop large ice crystals. Raw strawberry puree freezes icier and with a weaker flavour.

    Nesquik Chocolate Milk Powder

    • Why Nesquik for the Nutella version: The Nesquik powder dissolves smoothly into the cold milk base without seizing, giving the chocolate boli a mild, sweet cocoa flavour that complements the Nutella without overpowering it.

    Find it here: Nesquik Chocolate Milk Powder.

    The Boli Bags

    • Why specific bag size: The 8x26cm bags are the traditional size used across Mexico. They give you the right volume per serving and enough room at the top to tie a secure knot. Fill only to 3/4 capacity — the liquid expands slightly as it freezes, and you need room to tie the top without making a mess.

    If you are making bolis in the US, popsicle mold bags are a good alternative if the traditional bags are unavailable.

    The links below are Amazon affiliate links. If you buy through them, I may earn a small commission at no extra cost to you.

    Recommended tools

    Any comparable funnel, strainer and blender work.

    Other Flavour Ideas

    Once you have the base down, the flavour possibilities are unlimited. Some combinations worth trying:

    • Mamey and banana
    • Purple yam and shredded coconut
    • Coconut milk with rice (dairy-free)
    • Mango with sago tapioca
    • Horchata with rice pudding
    • Almond extract with cinnamon

    Frequently Asked Questions

    What is the difference between Mexican bolis and paletas?

    Paletas are Mexican ice pops frozen on a stick, typically made with fruit puree or cream. Bolis are frozen in a plastic bag with no stick — you squeeze the contents up as you eat. Bolis tend to have a creamier, milkier base while paletas can be either fruit or cream-based. Both are beloved, but bolis have a distinctly homemade, family-gathering quality to them.

    How long do bolis take to freeze completely?

    Allow a minimum of 6–8 hours, but overnight is best. The thicker the milk mixture, the longer it takes to freeze solid. Do not rush it — a partially frozen boli is a soggy mess.

    Can I make bolis without popsicle bags?

    Yes — popsicle molds work. Small zip-top bags also work if sealed tightly. The traditional bag format is part of the experience, but the recipe itself works in any freezer-safe container. Silicone ice pop molds will give you a cleaner presentation.

    Can I make dairy-free bolis?

    Yes. Replace the dried milk, evaporated milk, and condensed milk with full-fat coconut milk and coconut condensed milk. The base will be slightly less thick but still creamy and delicious. Coconut milk with mango is a particularly good combination.

    How long do Mexican bolis keep in the freezer?

    Up to 2 months in the freezer. After that, the milk fats can start to separate and the texture becomes less smooth. They are best eaten within the first 2–3 weeks for optimal creaminess.

    Why do my bolis taste icy instead of creamy?

    The most common cause is too much water in the mixture. Make sure your strawberry pulp is fully reduced before adding it to the milk base. Also ensure you are using condensed milk, not regular sweetened milk — the condensed milk’s lower water content is what prevents iciness.

    For more frozen dessert ideas, try the easy blueberry ice cream or homemade strawberry ice cream recipes.

    Frozen Strawberry and Nutella Bolis

    Strawberry and Nutella Frozen Mexican Bolis

    Prep Time 45 minutes
    Servings: 12 bolis (approximately)
    Course: Dessert
    Cuisine: Mexican
    Calories: 280

    Ingredients
      

    • 340g dried milk
    • 2L warm water
    • 1 can evaporated milk
    • 2 can condense milk
    • 4 tbsp Nesquik chocolate milk powder
    • ¼ cup Nutella
    Strawberry Pulp
    • 2.5 cups frozen or fresh strawberries reserve half cup on the side
    • 1 cup sugar
    • 1 tsp vanilla
    • 1 tsp lemon juice
    • 3-5 drops red food colouring optional

    Equipment

    • Basic Food Scale

    Method
     

    Strawberry Pulp
    1. In a pan, add 2 cups of strawberry (reserve ½ cup of strawberries for later), sugar, vanilla, and lemon juice. Bring the pan to a medium boil and reduce the water by half. Approximately 10 minutes.
    2. Let the mixture cool to room temperature. Puree the strawberry mixture in the blender until smooth.
    3. Use a strainer to take out chunks and seed. Reserve the strawberry pulp.
    Bolis Milk Mixture
    1. In a very large plastic bowl, combine the milk powder and warm water. Use a whisk to dissolve the powder into the water.
    2. One can at a time, use the whisk and stir in the evaporated milk and condense milk together in the milk mixture. The. base for the milk mixture is done. After here is where you add in your flavours. Split this mixture into two separate bowls.
    Nutella Bolis
    1. In one bowl of the milk mixture, add the Nutella and Nesquik powder together in the bowl with a whisk. Set aside.
    Strawberry Bolis
    1. In the other bowl, add the strawberry pulp and the milk mixture together with a whisk.
    2. Chop the remaining half cup of fresh or frozen strawberries and stir it into the mixture. Set aside.
    Assembling the Bolis
    1. Place a funnel on top of the bag and pour enough liquid to fill 3/4 of the bag. Remember to stir the liquid before placing it into the bags, for some fillings settle to the bottom.
    2. Tie the top of the bag. Repeat
    3. Place the Bolis in the freezer until completely frozen before eating. Enjoy!

    More Mexican and Frozen Dessert Recipes

    Need dinner ideas for this week? Get my free PDF with seven easy family dinners. Get the free dinners