Tag: dessert

  • Super Moist Cherry Loaf

    Super Moist Cherry Loaf

    There is one loaf you absolutely must bake before summer ends — a super moist cherry loaf bursting with juicy cherries, warm almond extract, and a golden crumb that somehow stays tender for days. This is the loaf that makes you wish summer never ended.

    This post may contain affiliate links. If you purchase through these links, I may earn a small commission at no extra cost to you. Thank you for supporting Love & Harvest!

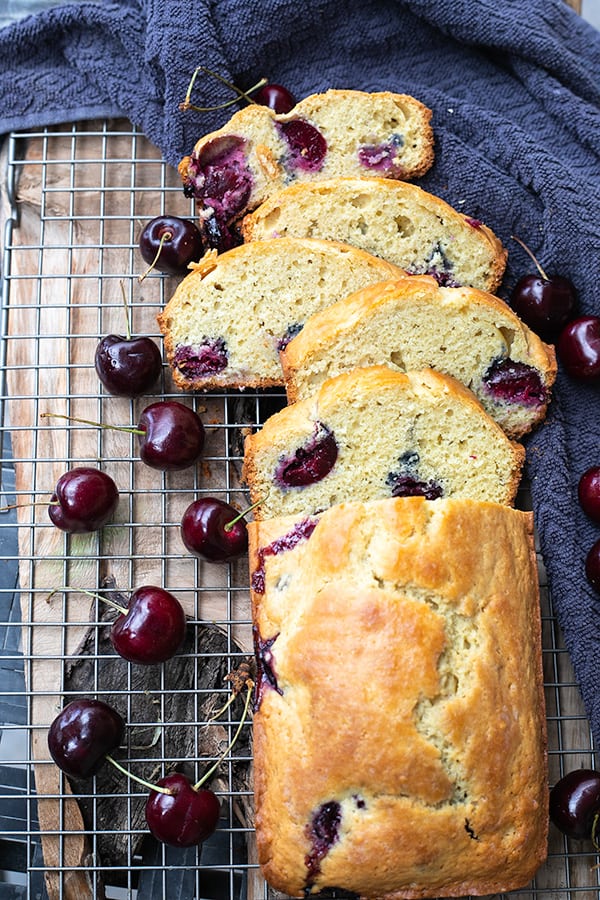
    Slices of super moist cherry loaf with fresh cherries on a wire rack

    This post is all about the best cherry loaf — a moist, crumbly recipe loaded with juicy cherries and a hint of almond. Perfect with your morning coffee or afternoon tea.

    It’s that time of the year when cherries take over the market stands — deep red, plump, and impossibly sweet. Before you let them go to waste, bake them into this simple loaf that celebrates the very best of late summer.

    The recipe comes together in one bowl, requires no stand mixer, and is forgiving enough for beginner bakers. Kids love helping fold in the cherries. And the smell while it bakes? Pure summer.

    Why You Will Love This Recipe

    • Perfect late-summer recipe — use up your cherry harvest before the season ends
    • Works with sweet or sour cherries — both varieties bake beautifully in this loaf
    • One-bowl, no mixer needed — simple enough for kids to help, done in under an hour
    • Butter-free swap — replace butter with apple sauce 1:1
    • Best morning loaf with coffee — pairs perfectly with a hot cup or a pat of butter on top

    Golden cherry loaf baked in a white loaf pan

    Ingredients

    Cherries

    Sweet cherries are best for this recipe. The sweetness really pulls through with the almond extract. Look for cherries that are fully ripe — the skin is soft and plump and easy to split in half. Fresh summer cherries are ideal, but if you can only find frozen, thaw and pat them dry before folding in.

    • Why they matter: Cherries are the star — they provide pockets of juicy fruit in every slice and keep the loaf moist even after a day or two.

    Almond Extract

    Almond and cherry are the best partners in the baking world. You can use coloured or clear almond extract — either works. Half a teaspoon is enough to perfume the entire loaf without overpowering it.

    • Why it matters: Almond extract amplifies the cherry flavour in a way vanilla simply cannot. Do not skip it.

    Eggs

    Two large eggs at room temperature give the loaf structure and lift. Cold eggs can cause the butter to seize, so take them out 20 minutes before you start.

    • Why they matter: Eggs bind the batter and are the key to that moist, tender crumb.

    Sugar

    Half a cup of natural cane sugar is just right. If you want to cut sweetness, a quarter cup works fine — the cherries carry plenty of natural sweetness on their own.

    • Why it matters: Sugar tenderises the crumb and helps the top brown to a golden finish.

    Loaf Pan

    A standard 9×5 loaf pan is all you need. Prep it with baking spray so the loaf releases cleanly after cooling.

    • Why it matters: A well-prepared pan means no sticking and a clean, even crust all the way around.

    Cherry loaf cooling on a wire rack surrounded by fresh cherries

    How to Make It with Apple Sauce Instead of Butter

    Replace butter with apple sauce. It is tried and tested, and it’s a delicious substitute. The loaf comes out even more spongy and is just as flavourful — maybe even better. Use a 1:1 swap.

    Cherry loaf batter studded with cherries in a white loaf pan

    What Goes Well with This Cherry Loaf?

    • A hot black coffee
    • Butter, lightly toasted
    • Nutella spread
    • Peach jam or blackberry jam
    • Iced peach tea

    Baking Time Tips

    Bake at 350°F for 55–60 minutes. For the last 5 minutes, watch closely. Once the top is slightly golden and the loaf has pulled away from the sides, take it out. The centre should still be slightly moist — that is what keeps it juicy. Let it cool in the pan for 5 minutes, then transfer to a rack.

    Slice of cherry loaf showing whole cherries in the crumb

    More Cherry and Baking Recipes

    If you loved this loaf, try these next: Cherry Syrup Recipe for topping pancakes and ice cream, and Cherry Clafoutis Pie for a French-inspired dessert using the same summer cherries. For a chocolate twist, the Dairy-Free Chocolate Cake is a crowd pleaser any time of year.

    Frequently Asked Questions

    Can I use frozen cherries instead of fresh?

    Yes. Thaw the cherries completely and pat them dry with paper towels before folding them into the batter. Excess moisture from frozen cherries can make the loaf gummy.

    How do I keep the cherries from sinking to the bottom?

    Toss the pitted and halved cherries in a tablespoon of flour before folding them into the batter. The light coating helps them stay suspended throughout the loaf.

    Can I replace the butter entirely?

    Yes — apple sauce is a great 1:1 substitute. The loaf comes out slightly more spongy but equally moist and delicious with fewer calories.

    How should I store this cherry loaf?

    Wrap tightly in plastic wrap or store in an airtight container at room temperature for up to 3 days. For longer storage, slice and freeze individual pieces — they thaw in 15 minutes.

    What type of cherries work best?

    Sweet cherries like Bing or Rainier are ideal because their sweetness pairs beautifully with almond extract. Sour cherries also work — just add an extra tablespoon of sugar to balance them.

    Can I add other mix-ins to this loaf?

    Absolutely. Chocolate chips, slivered almonds, or lemon zest all work well. Keep the total add-ins to about one cup so the batter is not overloaded.

    Moist Cherry Loaf

    Delicious cherry loaf that is moist and filled with perfectly cooked juicy cherries. Print RecipePrep Time:10 minsCook Time:50 minsCourse: DessertCuisine: AmericanKeyword: cherry loaf

    Ingredients

    • ¼ cup butter soft
    • ½ tsp almond extract
    • ½ cup sugar
    • 2 large eggs room temperature
    • 2 cup all-purpose flour
    • ¾ tsp baking powder
    • ½ tsp baking soda
    • ½ tsp salt
    • ½ cup milk
    • 1 cup sweet cherries pitted sliced in halves

    Instructions

    • Preheat the oven to 350 degrees F. Prepare a bread pan with baking spray.
    • In a mixing bowl, whisk together the apple sauce, sugar and almond extract until well blended. Add and whisk the eggs one at a time.
    • Sift together the flour, baking powder, baking soda and salt and add to the sugar mixture alternating with the milk. Gently fold in the cherries.
    • Pour the batter into the bread pan and bake for 55-60 minutes or until the bread has pulled away from the sides of the pan and the top is golden brown. Let cool in the pan for 5 minutes then transfer to a cooling rack. Serve warm or at room temperature.
  • Fresh Mango Sorbet

    Fresh Mango Sorbet

    When mango season hits and you have a bag of frozen ripe mango in the freezer, there is no faster or more satisfying frozen dessert to make than this. Three ingredients, a high-speed blender, and 6 hours in the freezer — that is all it takes to make a fresh mango sorbet that tastes like summer in a bowl.

    This post may contain affiliate links. If you purchase through these links, I may earn a small commission at no extra cost to you. Thank you for supporting Love & Harvest!

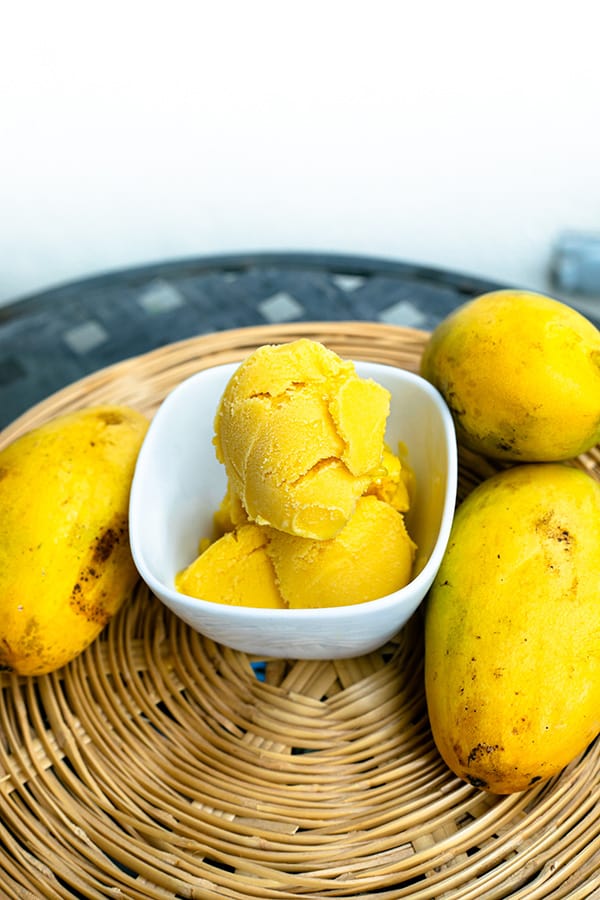
    Bowl of fresh mango sorbet on a woven basket with whole mangoes

    Why This Is the Best Mango Sorbet Recipe

    No ice cream machine needed, no churning, no complicated techniques. This vegan mango sorbet recipe contains no dairy — just water, sugar, lime, and mango. Fresh mango and lime are the best flavour combination: the lime juice lifts the mango and makes every spoonful taste intensely fruity. If you want more lime, simply add it — you can turn this into a mango lime sorbet just like that.

    Store-bought sorbet never tastes this fresh. When you freeze ripe mango at its peak and blend it with a bright hit of lime, the result is incomparable. You can also try our chili mango sorbet for a spicy-sweet variation, or our matcha avocado popsicles for another quick frozen treat.

    Scoops of bright yellow mango sorbet in a white bowl beside ripe mangoes

    Ingredients Deep-Dive

    Frozen Mango

    Use mango that was frozen at its ripest point — this is when the true flavour and sweetness are fully developed. Freezing locks in that peak-season freshness so every spoonful tastes like biting into a ripe mango. Cubed frozen mango is available year-round in most grocery stores.

    • Why it matters: Ripe mango = naturally sweet sorbet. Under-ripe mango produces a flat, slightly sour result even with extra sugar.

    Lime Juice

    Fresh lime juice only — not bottled. The lime acts as a flavour amplifier: a small amount makes the mango taste more intensely like mango. Lime zest on top adds an extra burst of citrus aroma.

    • Why it matters: Lime brightens the entire sorbet. Without it, even the best mango tastes a bit flat and one-dimensional when frozen.

    Sugar Simple Syrup

    Dissolving sugar in water before adding the mango ensures the sugar distributes evenly through the sorbet — no grainy texture, no undissolved crystals. Blend water and sugar first on high for 10 seconds until fully dissolved.

    • Why it matters: Sugar not only sweetens — it controls the hardness of the frozen sorbet. Too little sugar and the sorbet freezes rock solid; the right amount keeps it scoopable.

    High-Speed Blender

    A powerful blender like the Vitamix is what makes this recipe work without an ice cream machine. It blends frozen mango into a silky smooth, thick consistency that goes directly into the freezer. A regular blender may struggle with fully frozen chunks — let the mango soften for 5 minutes at room temperature before blending if needed.

    • Why it matters: The quality of the blend directly affects the texture of the final sorbet. A powerful blender creates a creamier, more uniform consistency.

    How to Make Mango Sorbet in the Blender

    • Add water and sugar together in the blender. Blend on high for 10 seconds until the sugar is completely dissolved with no visible crystals.
    • Add frozen cubed mango and lime juice. Optional: add 1 tsp vodka to keep the sorbet softer.
    • Blend on high until smooth and thick.
    • Pour into a freezer-safe container with a tight lid. Freeze for about 6 hours until firm.

    How to Make Mango Sorbet with an Ice Cream Maker

    • Add water and sugar together in the blender. Blend on high for 10 seconds until fully dissolved.
    • Add fresh or frozen mango and lime juice. Blend until completely smooth.
    • Turn on the ice cream machine and slowly pour the mango mixture in through the top opening.
    • Add vodka (optional).
    • Process according to your machine’s instructions — within 10–20 minutes you will have churned mango sorbet.
    • Transfer to a freezer-safe container with a lid and freeze for about 6 hours until firm.

    Tall container of churned mango sorbet between two mangoes

    Professional Tips for Perfect Mango Sorbet

    Pro Tip 1: Use a Lid in the Freezer

    Every freezer has its own smell. An airtight lid prevents that odour from seeping into your sorbet and altering the flavour. A tight lid also prevents freezer burn on the surface of the sorbet.

    Pro Tip 2: Freeze Mango at Peak Ripeness

    Cut and freeze mango when it is very ripe — the sweetness and flavour are at their maximum. When you use it straight from frozen, you lock in that peak freshness. This is the single most important step for extraordinary sorbet.

    Pro Tip 3: Add a Small Amount of Alcohol

    A teaspoon of vodka or 1 tablespoon of corn syrup in the mix softens the sorbet so it is easier to scoop straight from the freezer. The alcohol does not freeze, which keeps the texture more yielding. You will not taste it at all.

    Mango Sorbet Variations to Try

    • Pineapple mango sorbet — add 1/2 cup frozen pineapple to the blend
    • Coconut mango sorbet — replace 1/2 cup water with full-fat coconut milk
    • Chili mango sorbet — add a pinch of chili powder and Tajin on top

    Frequently Asked Questions

    Can I make mango sorbet without a high-speed blender?

    Yes, but let the frozen mango thaw for 5–10 minutes before blending so a standard blender can handle it. Blend in batches if needed. The result may be slightly less smooth, but still delicious.

    Why is my sorbet too hard to scoop?

    This usually means not enough sugar or no alcohol was added. Sugar and alcohol both lower the freezing point of the mixture, keeping it scoopable. Try adding an extra tablespoon of sugar or a teaspoon of vodka next time. Also let it sit at room temperature for 5 minutes before scooping.

    Can I use fresh mango instead of frozen?

    Yes — add a cup of ice to the blender along with fresh mango to compensate for the frozen element. Frozen mango gives a thicker, creamier result, but fresh mango with ice works well too.

    How long does homemade mango sorbet last in the freezer?

    Up to 2 weeks in an airtight container. After that, freezer burn can affect the flavour. For best results, eat within the first week.

    Is this mango sorbet vegan?

    Yes. This recipe contains no dairy, no eggs, and no animal products — just mango, lime, sugar, and water. It is naturally vegan and gluten-free.

    What kind of mango is best for sorbet?

    Ataulfo (champagne) mangoes are the sweetest and least fibrous — ideal for a smooth sorbet. Tommy Atkins mangoes are widely available frozen and work well. The riper the variety, the better the result.

    Close-up of mango sorbet scoops in a white bowl

    Fresh Mango Sorbet

    Frozen mango sorbet made at home! You can taste the fresh mango and lime – the best summer dessert! We got the recipe for both methods of using a blender and an ice cream maker. Print Recipe Pin Recipe

    Equipment

    • high speed blender or
    • ice cream maker

    Ingredients

    • 1 cup water
    • ¾ cup sugar
    • 2 cups frozen mango cubed
    • 2 tbsp lime
    • 1 tsp vodka optional

    Instructions

    Mango Sorbet Made In a Blender

    • In the blender add the water and sugar together. Blend on high for 10 seconds until the sugar is completely dissolved with no texture of sugar in the water.
    • Add the mango and lime into the water. Optional: Add vodka. Start on medium speed and gradually increase to highest. Blend until icy smooth.
    • Scoop the mango sorbet into a freezer-safe container with a lid and freeze until firm, about 6 hours.

    Mango Sorbet Made in an Ice Cream Maker

    • In the blender add the water and sugar together. Blend on high for 10 seconds until fully dissolved.
    • Add the mango and lime. Start on medium speed and increase to highest. Blend until icy smooth.
    • Turn on your ice cream machine, and while it is running slowly pour in the mango puree.
    • Add the vodka (optional).
    • Process according to the machine’s instructions until the mixture forms ice crystals and firms up, then stop the machine.
    • Scoop into a freezer-safe container with a lid and freeze until firm, about 6 hours.
  • Carlota de Limon – Mexican No-bake Lime Dessert

    Carlota de Limon – Mexican No-bake Lime Dessert

    This simple four-ingredient no-bake cake, known as Carlota de Limón, is one of the most beloved desserts in Mexican households — and once you taste it, you will understand why. Layers of crunchy Maria cookies soaked in condensed milk, evaporated milk, and fresh lime juice come together in the refrigerator into a zesty, creamy, irresistibly refreshing icebox cake. My mother-in-law has made this for years, and now our whole family asks for it every time.

    This post may contain affiliate links. If you purchase through these links, I may earn a small commission at no extra cost to you. Thank you for supporting Love & Harvest!

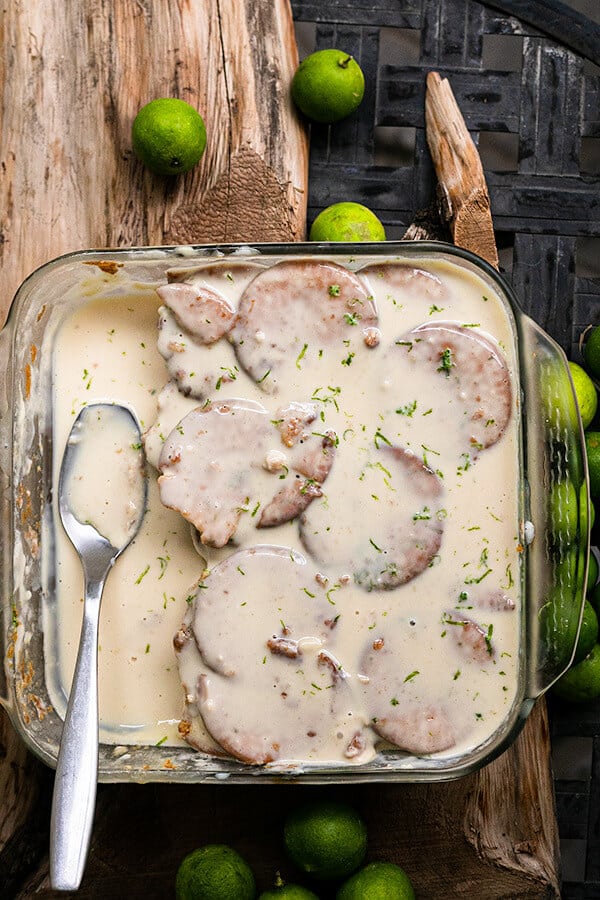
    no bake cake

    Why You Will Love This Recipe

    • Super easy recipe — no baking and no special equipment needed. Only 4 ingredients and a refrigerator.
    • Authentic Mexican flavour — a classic Mexican housewife recipe. Follow the recommended brands and you will taste the real thing.
    • No special grocery store trip — this cake uses pantry staples you likely already have at home.

    A Perfect No-Bake Dessert for Every Occasion

    Kid-Friendly

    There is no hot stove, no electrical equipment, and no complex techniques involved. Just stacking cookies and whisking ingredients. Even a young child can assemble this dessert — try it once and your kids will beg to help every time.

    Picnic-Friendly

    Carlota de Limón stays together firmly and travels well. Made in a glass baking dish, you do not need to worry about it falling apart in the car. The perfect portable dessert for any outdoor event.

    Camping-Friendly

    This is the ideal camping dessert. Bring all 4 ingredients to the campsite, assemble it there, let it sit for at least 2 hours in a cooler, and you will have an impressive cake that nobody will believe you made from scratch at a campsite.

    Potluck-Friendly

    Looking for a crowd-pleasing dessert that requires minimal effort? This is it. At the end of the party, you will be bringing home an empty container.

    no bake desserts

    Ingredients Deep-Dive

    Maria Cookies

    Just as popular as the name suggests, Maria cookies are a beloved everyday cookie across Mexico — a plain, slightly crispy biscuit with gentle hints of vanilla and ginger. Some people in Mexico recommend them when you have an upset stomach, which speaks to how mild and comforting they are. They absorb the milk mixture beautifully, becoming soft like cake on the outside while the center stays slightly crunchy.

    • Why it matters: Maria cookies are the structural base of this dessert. Their absorbency is precisely calibrated for this type of no-bake cake — they soften without falling apart. You can find them at any Latin grocery store or on Amazon.

    Condensed Milk

    This is where the sweetness of the cake comes from. Condensed milk is thick, very sweet, and acts as a natural thickener that helps bind the layers together. The most authentic brand to use in Mexico is La Lechera.

    • Why it matters: The right amount of condensed milk gives the cake its signature rich sweetness. Too much and it becomes cloyingly sweet; too little and the texture turns watery.

    Evaporated Milk

    Evaporated milk adds richness and creaminess without additional sugar. It gives the liquid mixture that fresh milk taste and a lighter, pourable consistency that soaks into the cookies evenly.

    • Why it matters: The combination of condensed milk (sweet and thick) and evaporated milk (fresh and creamy) is what creates the balanced flavour of this dessert. Using only one or the other throws off the texture.

    Fresh Lime

    Lime is where all the flavour lives. Fresh lime juice is essential — a bottled product simply does not deliver the same brightness. The acidity of fresh lime also slightly thickens the milk mixture as it sits, helping the cake set. Add lime zest on top before serving for an extra burst of citrus aroma.

    • Why it matters: This is called Carlota de Limón for a reason. The lime is the star ingredient. A lime juicer makes squeezing multiple limes effortless.

    Professional Tips for No-Fail Carlota de Limón

    Pro Tip 1: Use Fresh Lime Always

    Fresh lime juice and zest make an extraordinary difference in this dessert. All the flavour comes from lime — this is not the place to use bottled juice.

    Pro Tip 2: The Cookies Will Float at First

    When you begin assembling the cake, the cookies will float in the milk mixture. This is normal. As they soak and absorb the liquid, they will settle. Halfway through the sitting phase, gently press the cookies down with a spoon and they will stay in place.

    Pro Tip 3: Refrigerate for At Least 2 Hours

    Do not cut into this cake too early. The cookies need at least 2 hours (preferably 4 or overnight) to fully absorb the milk mixture and transform into a cohesive cake. Cutting it before this time will result in a runny, unset dessert. Patience is the only technique this recipe requires.

    More Mexican Dessert Recipes

    If you love this Carlota de Limón, you will also enjoy our easy Mexican salsa verde for a savoury contrast, or explore more refreshing desserts like our fresh mango sorbet.

    Frequently Asked Questions

    What are Maria cookies and where can I find them?

    Maria cookies (galletas Marias) are a classic Mexican plain biscuit with mild vanilla and ginger flavour. They are available at any Latin or Mexican grocery store, and also online. The Gamesa brand is the most authentic. Graham crackers can work as a substitute but will give a slightly different flavour.

    Can I add cream cheese to this recipe?

    Yes — many Mexican families add cream cheese for a richer, thicker texture. Blend 4 oz of cream cheese into the milk mixture before assembling. It makes the cake denser and more indulgent.

    How long does Carlota de Limón keep in the fridge?

    Covered with plastic wrap, this cake keeps well for up to 3 days in the refrigerator. The texture actually improves after the first few hours as the cookies continue to soften.

    Can I use lemon instead of lime?

    You can, but the result will be different. Mexican limes (Key limes) have a more floral, intense flavour than standard lemons. Lime is the traditional and most recommended choice. If using lemons, you may want to add slightly more juice to achieve the same brightness.

    Why is my Carlota too runny?

    Either it was not refrigerated long enough, or the ratio of condensed to evaporated milk was off. Give it at least 4 hours in the fridge, or ideally overnight. If it is still runny, there may be too much liquid — try reducing the evaporated milk by 1/4 cup next time.

    Can I make this the night before a party?

    Absolutely — and it is actually better when made ahead. The overnight rest in the fridge gives the cookies maximum time to absorb and the cake to fully set. Simply cover and refrigerate, then slice and serve directly from the dish.

    A hand holding a plate with a slice of carlota de limón

    Mexican Lime Icebox Cake “Carlota de Limón”

    Mexican Lime Icebox Cake is an explosion of flavour and texture! You get the big tasty hit of condensed milk and lime. Around the end of the cake, you get a soft cake-like texture, while the inside remains crumbly and crunchy like the cookie. 
    Prep Time 10 minutes
    Total Time 2 hours 10 minutes
    Servings: 8 people
    Course: Dessert
    Cuisine: Mexican
    Calories: 360

    Ingredients
      

    • 2-3 package of Marias Cookies
    • ¾ cup lime juice 6 Mexican Limes
    • 375 g condensed milk 1 can
    • 360 g evaporated milk 1 can
    • lime zest

    Equipment

    • 8 x 8 glass baking dish

    Method
     

    1. Juice the lime and filter it through a strainer.
    2. Add the lime juice to the blender along with the condensed milk and evaporated milk. Give it a good blend for 10 seconds. Alternatively, you can add everything to a large jug and whisk vigerously for 30 seconds.
    3. In a 8×8 glass baking dish, place your first layer of Marias cookies. Pour a small layer of the milk mixture until the cookies are slightly coated. Add another layer of cookie. If you need, use a spoon or a fork to press the cookies down. It might float up a bit.
      Repeat until you've stacked to the top with ¼" of space. By now you should have used up all the milk mixture. Break the cookies up if you like to fill in the gaps between the cookies.
    4. Top layer should be the milk mixture. Use a spoon the smooth out the surface. Tap the dish on the table to get rid of any bubbles that maybe be trapped between the layers. Zest the lime on top of the cake.
    5. Cover the top of the dish with foil or plastic, and let it refrigerate for 2 hours.
      Usually, I prefer to leave my cake overnight so it settles better and more solid.
      Halfway through, you can take it out and gently push the cookies down with a spoon if the cookies are still floating. Giving it one hour in the fridge, the cookies are denser so a quick push to the bottom of the pan will make it settle better.
    6. Serve with lime slices to garnish.

    Notes

    This Carlota de Limón will keep in the fridge for up to a week but preferably consume in 2 days or the cookies become too soft and soggy. 
  • Authentic Strawberry and Nutella Mexican Bolis Recipe

    Authentic Strawberry and Nutella Mexican Bolis Recipe

    If you grew up in Mexico or married into a Mexican family, you know bolis. These frozen tubes of creamy, flavoured milk are a summertime ritual — pulled from the freezer at family gatherings, argued over, and eaten before dinner. This recipe comes straight from the hands of a family matriarch who has been making them for decades. Strawberry and Nutella side by side in one batch.

    This post may contain affiliate links. If you purchase through these links, I may earn a small commission at no extra cost to you. Thank you for supporting Love & Harvest!

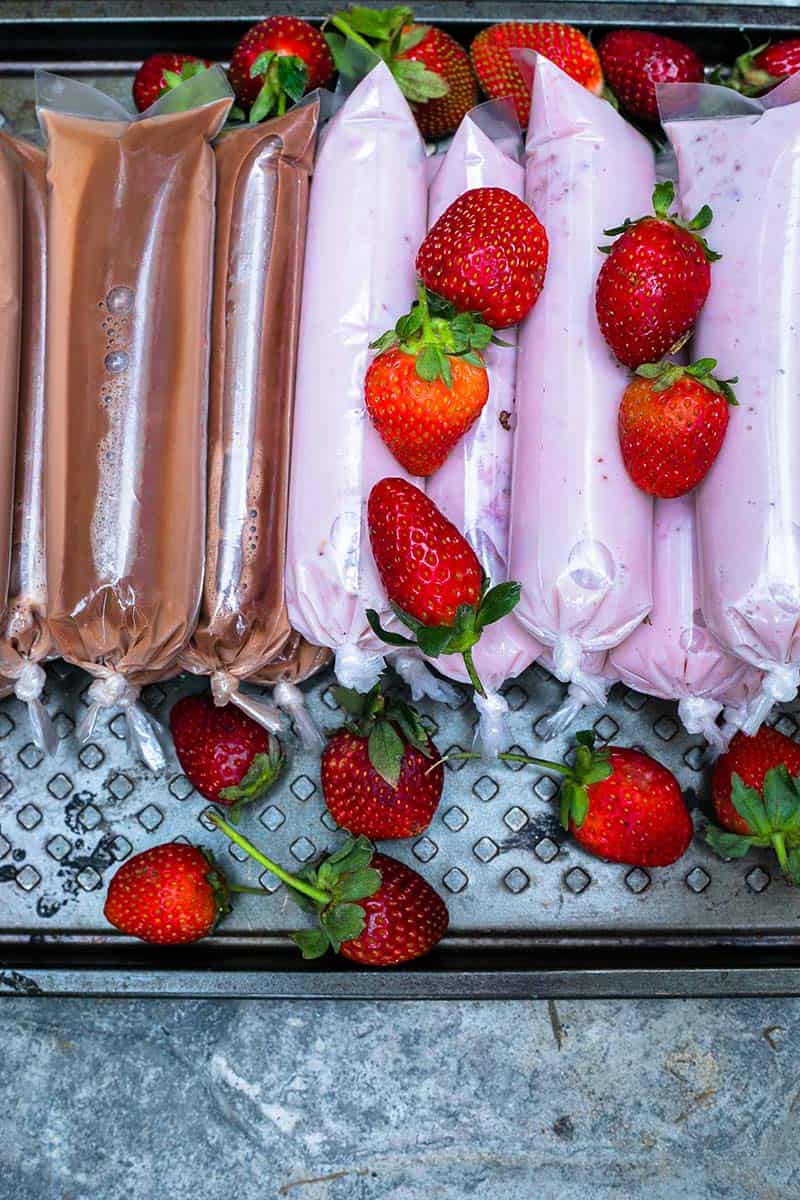
    mexican bolis recipe

    Planning dinner too? My free PDF has seven easy family dinners for the weeknight table. Send me the free dinners

    What Are Mexican Bolis?

    Bolis are homemade Mexican ice pops frozen inside small plastic bags and tied at the top. Unlike a popsicle on a stick, you bite the corner off the bag and squeeze the frozen treat out as you eat. The base is a creamy milk mixture — dried milk, evaporated milk, and condensed milk — that stays smooth and creamy even fully frozen. They are popular at family gatherings, school events, and weekend markets across Mexico.

    mexican bolis in english

    Ingredients Deep-Dive

    The Triple-Milk Base

    • Why three types of milk: Each milk plays a specific role. Dried milk adds body and richness without adding liquid. Evaporated milk contributes concentrated dairy flavour and a creamy, slightly caramelised note. Condensed milk provides sweetness and a thick, smooth texture that prevents iciness when frozen. Together they create a base that is far creamier than any single-milk version.

    Use Carnation Dried Milk, Carnation Evaporated Milk, and Nestle La Lechera Condensed Milk for the most authentic Mexican flavour profile.

    Strawberry Pulp (Cooked, Not Raw)

    • Why cook the strawberries first: Cooking concentrates the strawberry flavour, breaks down the pectin for a smoother texture after blending, and reduces the water content so the frozen boli does not develop large ice crystals. Raw strawberry puree freezes icier and with a weaker flavour.

    Nesquik Chocolate Milk Powder

    • Why Nesquik for the Nutella version: The Nesquik powder dissolves smoothly into the cold milk base without seizing, giving the chocolate boli a mild, sweet cocoa flavour that complements the Nutella without overpowering it.

    Find it here: Nesquik Chocolate Milk Powder.

    The Boli Bags

    • Why specific bag size: The 8x26cm bags are the traditional size used across Mexico. They give you the right volume per serving and enough room at the top to tie a secure knot. Fill only to 3/4 capacity — the liquid expands slightly as it freezes, and you need room to tie the top without making a mess.

    If you are making bolis in the US, popsicle mold bags are a good alternative if the traditional bags are unavailable.

    The links below are Amazon affiliate links. If you buy through them, I may earn a small commission at no extra cost to you.

    Recommended tools

    Any comparable funnel, strainer and blender work.

    Other Flavour Ideas

    Once you have the base down, the flavour possibilities are unlimited. Some combinations worth trying:

    • Mamey and banana
    • Purple yam and shredded coconut
    • Coconut milk with rice (dairy-free)
    • Mango with sago tapioca
    • Horchata with rice pudding
    • Almond extract with cinnamon

    Frequently Asked Questions

    What is the difference between Mexican bolis and paletas?

    Paletas are Mexican ice pops frozen on a stick, typically made with fruit puree or cream. Bolis are frozen in a plastic bag with no stick — you squeeze the contents up as you eat. Bolis tend to have a creamier, milkier base while paletas can be either fruit or cream-based. Both are beloved, but bolis have a distinctly homemade, family-gathering quality to them.

    How long do bolis take to freeze completely?

    Allow a minimum of 6–8 hours, but overnight is best. The thicker the milk mixture, the longer it takes to freeze solid. Do not rush it — a partially frozen boli is a soggy mess.

    Can I make bolis without popsicle bags?

    Yes — popsicle molds work. Small zip-top bags also work if sealed tightly. The traditional bag format is part of the experience, but the recipe itself works in any freezer-safe container. Silicone ice pop molds will give you a cleaner presentation.

    Can I make dairy-free bolis?

    Yes. Replace the dried milk, evaporated milk, and condensed milk with full-fat coconut milk and coconut condensed milk. The base will be slightly less thick but still creamy and delicious. Coconut milk with mango is a particularly good combination.

    How long do Mexican bolis keep in the freezer?

    Up to 2 months in the freezer. After that, the milk fats can start to separate and the texture becomes less smooth. They are best eaten within the first 2–3 weeks for optimal creaminess.

    Why do my bolis taste icy instead of creamy?

    The most common cause is too much water in the mixture. Make sure your strawberry pulp is fully reduced before adding it to the milk base. Also ensure you are using condensed milk, not regular sweetened milk — the condensed milk’s lower water content is what prevents iciness.

    For more frozen dessert ideas, try the easy blueberry ice cream or homemade strawberry ice cream recipes.

    Frozen Strawberry and Nutella Bolis

    Strawberry and Nutella Frozen Mexican Bolis

    Prep Time 45 minutes
    Servings: 12 bolis (approximately)
    Course: Dessert
    Cuisine: Mexican
    Calories: 280

    Ingredients
      

    • 340g dried milk
    • 2L warm water
    • 1 can evaporated milk
    • 2 can condense milk
    • 4 tbsp Nesquik chocolate milk powder
    • ¼ cup Nutella
    Strawberry Pulp
    • 2.5 cups frozen or fresh strawberries reserve half cup on the side
    • 1 cup sugar
    • 1 tsp vanilla
    • 1 tsp lemon juice
    • 3-5 drops red food colouring optional

    Equipment

    • Basic Food Scale

    Method
     

    Strawberry Pulp
    1. In a pan, add 2 cups of strawberry (reserve ½ cup of strawberries for later), sugar, vanilla, and lemon juice. Bring the pan to a medium boil and reduce the water by half. Approximately 10 minutes.
    2. Let the mixture cool to room temperature. Puree the strawberry mixture in the blender until smooth.
    3. Use a strainer to take out chunks and seed. Reserve the strawberry pulp.
    Bolis Milk Mixture
    1. In a very large plastic bowl, combine the milk powder and warm water. Use a whisk to dissolve the powder into the water.
    2. One can at a time, use the whisk and stir in the evaporated milk and condense milk together in the milk mixture. The. base for the milk mixture is done. After here is where you add in your flavours. Split this mixture into two separate bowls.
    Nutella Bolis
    1. In one bowl of the milk mixture, add the Nutella and Nesquik powder together in the bowl with a whisk. Set aside.
    Strawberry Bolis
    1. In the other bowl, add the strawberry pulp and the milk mixture together with a whisk.
    2. Chop the remaining half cup of fresh or frozen strawberries and stir it into the mixture. Set aside.
    Assembling the Bolis
    1. Place a funnel on top of the bag and pour enough liquid to fill 3/4 of the bag. Remember to stir the liquid before placing it into the bags, for some fillings settle to the bottom.
    2. Tie the top of the bag. Repeat
    3. Place the Bolis in the freezer until completely frozen before eating. Enjoy!

    More Mexican and Frozen Dessert Recipes

    Need dinner ideas for this week? Get my free PDF with seven easy family dinners. Get the free dinners