Tag: chorizo

  • Ground Beef Chili with Chorizo (Stovetop)

    Ground Beef Chili with Chorizo (Stovetop)

    This stovetop ground beef chili is thick and beefy, with Mexican chorizo, kidney beans and finely diced vegetables simmered uncovered until rich. Brown the meat to 160°F, simmer 35–50 minutes, then finish with sour cream and cheddar — in a bowl, over buttered pasta or on hot dogs.

    Jump to Recipe

    This post may contain affiliate links. As an Amazon Associate I earn from qualifying purchases.

    When the weather starts getting cooler and winter is just around the corner, there is nothing quite like a big pot of homemade chili simmering on the stove. This ground beef chili is thick, packed with flavour, and full of beef, chorizo and vegetables cooked right into the pot. To make it extra creamy, we love adding a generous spoonful of sour cream when serving!

    In our family, colder months usually mean more beef on the table. This beefy chili is one of our favourite ways to enjoy that — and everyone can eat it their own way. We have it straight from a bowl, spoon it over buttered pasta, or pile it onto hot dogs with extra cheddar cheese. The hot dog version is especially popular with the kids!

    I make this recipe at least twice a month, and somehow we keep finding new ways to serve it. Prefer a pressure-cooker version? Try my Instant Pot easy chili — this one stays on the stovetop for a thicker, longer simmer.

    Bowl of thick ground beef chili with beans, carrots and chorizo, topped with sour cream and shredded cheese.

    Want a week of dinners planned for you? Get my free dinners

    Why we love this ground beef chili

    The combination of ground beef and Mexican chorizo gives the chili a rich, savoury taste, while the spices add just enough warmth without making it overwhelming. This is not a thin, watery chili — it is a substantial, beefy meal that feels especially satisfying when the weather gets chilly.

    One of my favourite things about this recipe is how many vegetables go into the pot. Finely diced onion, red pepper, carrots and celery soften into the sauce, so they become part of every spoonful. As a parent, I appreciate finding ways to make vegetables a natural part of our family dinners without turning every meal into a negotiation.

    I also love that everyone can customize their bowl with sour cream, cheddar, or their favourite way of serving it. That little bit of choice makes dinner more fun for the kids.

    Ingredients you will need

    Everyday ingredients build a deeply savoury pot: ground beef for the base, Mexican chorizo for seasoning and richness, then vegetables, beans, tomatoes and spices.

    • Ground beef: 1 kg (about 2.2 lb).
    • Mexican chorizo: 250 g (about 9 oz), casings removed if needed.
    • Vegetables: 1 large onion, 1 red bell pepper, 2 carrots and 2 celery stalks, all diced (carrots and celery finely), plus 3 cloves garlic, minced.
    • Tomato paste, chopped tomatoes, maple syrup, kidney beans and beef broth to round out the pot.
    • Seasoning: chili powder, cumin, smoked paprika, bay leaves, oregano, black pepper and salt to taste.
    • For serving: sour cream, shredded cheddar, and optional buttered pasta or hot dogs and buns.

    A little note about the spice: we like enough seasoning for a lovely warmth without making it overwhelming for the kids. Chili powders and chorizo vary in heat, so start moderate and adjust.

    Recommended tools

    Equipment

    • Large heavy-bottomed pot or Dutch oven
    • Wooden spoon
    • Instant-read meat thermometer (for 160°F / 71°C on ground meat)
    • Measuring cups and spoons

    How to make stovetop ground beef chili

    Step 1: Brown the chorizo. Heat a large, heavy-bottomed pot over medium heat. Add the chorizo and cook until browned, breaking it into small pieces with a wooden spoon. The chorizo releases flavourful fat that helps build the base of the chili.

    Step 2: Cook the ground beef. Add the ground beef. Break it apart and cook until browned and no longer pink. Check with an instant-read thermometer that the meat reaches 160°F (71°C) — the USDA safe minimum for ground meats. If there is excessive fat, carefully spoon some out, leaving enough behind to flavour the vegetables.

    Step 3: Add the vegetables. If the pot looks dry after browning the meats, add up to 2 tablespoons olive oil. Stir in the diced onion, red bell pepper, carrots and celery. Cook about 5–8 minutes, stirring occasionally, until they begin to soften. Add the minced garlic and cook another minute. This is one of my favourite parts — the carrots add a subtle sweetness, while the onion, pepper and celery build layers of flavour.

    Step 4: Add the tomato paste and spices. Stir in the tomato paste, chili powder, cumin, smoked paprika, oregano and black pepper. Cook 1–2 minutes, stirring so the spices coat the meat and vegetables.

    Step 5: Add the tomatoes, beans and broth. Pour in the chopped tomatoes, maple syrup and beef broth, then add the drained kidney beans and bay leaves. Stir and bring to a gentle simmer.

    Step 6: Let the chili simmer. Reduce the heat to low and simmer uncovered for about 35–50 minutes, stirring occasionally, until thick. If it becomes thicker than you like, add a small splash of broth or water. Taste and adjust salt and spices. Remove the bay leaves before serving.

    Close-up of ground beef chili showing beans, diced carrots, red pepper and chorizo under sour cream and shredded cheese.

    Step 7: Serve with your favourite toppings. Ladle into bowls with a generous spoonful of sour cream and shredded cheddar. For a little extra comfort, spoon it over buttered pasta or onto a hot dog with plenty of cheese.

    Overhead view of a bowl of ground beef chili with sour cream and shredded cheese on a granite counter.

    Ways to serve this chili

    Although we usually think of chili as dinner, a big pot makes family meals more flexible. Some days we enjoy it just as it is, with sour cream melting into the warm sauce. Other times we spoon it over pasta tossed with butter. And then there is the hot dog version — chili spooned over a hot dog and finished with extra cheddar — which is especially handy when everyone wants something familiar.

    The chili also works well for meal prep. Make a big batch, refrigerate leftovers promptly, and reheat individual portions for quick lunches or dinners during the week.

    How to store homemade ground beef chili

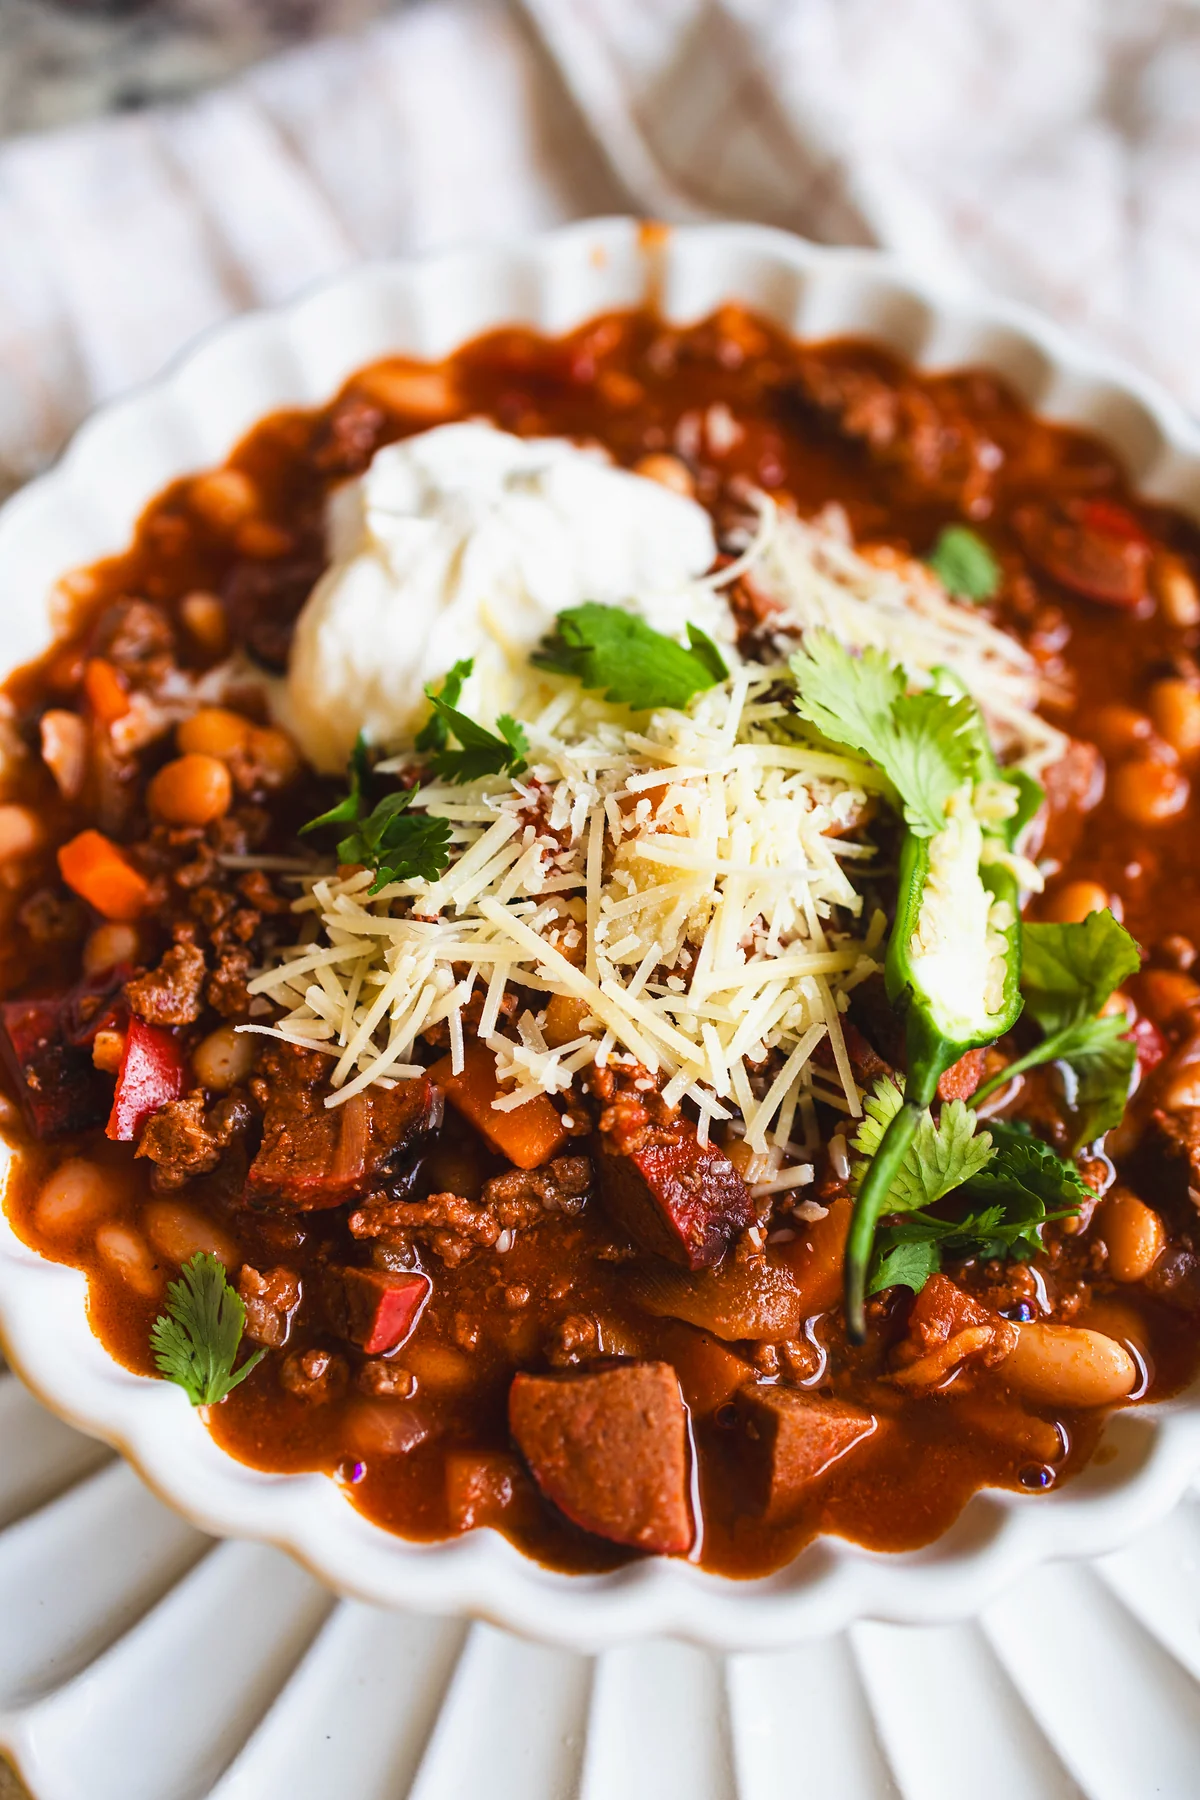
    White bowl of ground beef chili topped with sour cream and shredded cheese on a striped kitchen towel.

    Divide the chili into shallow containers about 2 inches (5 cm) deep or less so it cools quickly — don’t leave a full pot sitting out on the stove. Refrigerate within 2 hours of cooking (1 hour if the room is above 90°F / 32°C). Enjoy refrigerated leftovers within 3–4 days, or freeze in meal-sized portions for 2–3 months for best quality. Thaw overnight in the fridge, or reheat from frozen until steaming hot.

    Reheat on the stovetop over medium-low heat, stirring occasionally, until it reaches 165°F (74°C). You can also reheat individual portions in the microwave: cover, stir halfway, let stand about 1 minute, and check that several spots reach 165°F (74°C). Add sour cream and cheddar after reheating rather than freezing them in the chili.

    Tips

    • 160°F for ground meat (beef and chorizo). Don’t rely on colour alone — use an instant-read thermometer on the crumbled meat (USDA safe minimum for ground meats). Brown the meats through before adding tomatoes and broth so you can probe the crumbles, not the liquid.
    • Uncovered simmer is what thickens this chili; keep an eye on the bottom of the pot so it does not stick.
    • Spice level: start moderate; chili powder and chorizo heat levels vary.
    • Prefer Instant Pot? See my Instant Pot easy chili recipe for a pressure-cooker version.

    Other recipes you may like

    It is easy to make, full of flavour, and the kind of family dinner you will find yourself returning to again and again.

    Need more weeknight ideas? Grab my free dinners

    Overhead view of ground beef chili with chorizo and beans topped with sour cream, shredded cheese and cilantro.

    Ground Beef Chili with Chorizo

    Thick stovetop chili with ground beef, Mexican chorizo, kidney beans and finely diced vegetables. Brown the meat to 160°F, simmer uncovered until thick, then finish with sour cream and cheddar.
    Prep Time 20 minutes
    Cook Time 1 hour 10 minutes
    Total Time 1 hour 30 minutes
    Servings: 8 servings
    Course: Main Course
    Cuisine: Mexican

    Ingredients
      

    For the chili
    • 1 kg ground beef about 2.2 lb
    • 250 g Mexican chorizo sausage casings removed if needed; about 9 oz
    • 1 large onion diced
    • 3 cloves garlic minced
    • 1 red bell pepper diced
    • 2 carrots finely diced
    • 2 stalks celery finely diced
    • 2 tbsp tomato paste
    • 1 can chopped tomatoes (about 14.5 oz / 400 g), undrained
    • 1 tbsp maple syrup
    • 2 cans (about 400 g each) kidney beans drained and rinsed
    • 1 cup beef broth plus more if needed
    • 2 tbsp olive oil if needed
    For the seasoning
    • 2 tbsp chili powder adjusted to taste
    • 3 tsp ground cumin
    • 2 tsp smoked paprika
    • 3 bay leaves
    • 1 tsp dried oregano
    • ½ tsp ground black pepper
    • salt to taste
    For serving
    • sour cream
    • shredded cheddar cheese
    • buttered cooked pasta optional
    • hot dogs and buns optional

    Equipment

    • Large heavy-bottomed pot or Dutch oven
    • Wooden spoon
    • Instant-read meat thermometer for 160°F / 71°C on ground meat
    • Measuring cups and spoons

    Method
     

    1. Heat a large, heavy-bottomed pot over medium heat. Add the chorizo and cook until browned, breaking it into small pieces with a wooden spoon. The chorizo releases flavourful fat that builds the base of the chili.
    2. Add the ground beef. Break it apart and cook until browned and no longer pink. Check with an instant-read thermometer that the meat reaches 160°F (71°C) (USDA safe minimum for ground meats). If there is excessive fat, spoon some out, leaving enough to flavour the vegetables.
    3. If the pot looks dry after browning the meats, add up to 2 tablespoons olive oil. Stir in the diced onion, red bell pepper, carrots and celery. Cook 5–8 minutes, stirring occasionally, until the vegetables begin to soften. Add the minced garlic and cook 1 minute more.
    4. Stir in the tomato paste, chili powder, cumin, smoked paprika, oregano and black pepper. Cook 1–2 minutes, stirring so the spices coat the meat and vegetables.
    5. Pour in the chopped tomatoes, maple syrup and beef broth, then add the drained kidney beans and bay leaves. Stir and bring to a gentle simmer.
    6. Reduce heat to low and simmer uncovered 35–50 minutes, stirring occasionally, until thick. Add a splash of broth or water if it gets thicker than you like. Taste and adjust salt and spices. Remove bay leaves before serving.
      Close-up of ground beef chili showing beans, diced carrots, red pepper and chorizo under sour cream and shredded cheese.
    7. Ladle into bowls and finish with sour cream and shredded cheddar. Or spoon over buttered pasta, or pile onto hot dogs with extra cheese.
      Overhead view of a bowl of ground beef chili with sour cream and shredded cheese on a granite counter.

    Notes

    Chili powders and chorizo vary in heat — start moderate and adjust. This recipe uses a mild US/Canadian chili powder blend (typically ground mild chile peppers with cumin, garlic and oregano) — not pure cayenne. UK/AU readers: if your “chilli powder” is a hot pure ground chilli, do not use a full 2 tablespoons one-for-one — start with far less, taste, and build (untested substitution; adjust carefully). Mexican chorizo here typically means fresh/raw (uncured) pork chorizo that crumbles when browned — not cured Spanish-style slicing chorizo; remove casings if needed. Confirm brand/heat with your package. Refrigerate leftovers within 2 hours of cooking (1 hour if the room is above 90°F / 32°C); use within 3–4 days, or freeze 2–3 months for best quality. Reheat to 165°F (74°C). In the microwave, cover, stir halfway, let stand about 1 minute, then check several spots reach 165°F (74°C).
  • How To Make Gourmet Homemade Sausages: Chorizo & Apple Sage

    How To Make Gourmet Homemade Sausages: Chorizo & Apple Sage

    This post may contain affiliate links. If you purchase through these links, I may earn a small commission at no extra cost to you. Thank you for supporting Love & Harvest!

    Once you make sausages from scratch, it’s very hard to go back to the grocery store kind. Not because it’s faster or cheaper — it isn’t — but because the taste of fresh, nitrate-free sausage made with real herbs and your own choice of spices is in a different league entirely. This guide walks you through two gourmet recipes: a vibrant, chilli-red Classic Chorizo and a sweet, aromatic Apple Sage Maple Syrup breakfast sausage. Both are easier than you think.

    homemade sausages

    Why Make Your Own Sausages?

    Commercial sausages contain nitrates — preservatives that help give them their pink colour and extended shelf life. At low levels they’re considered safe, but they’re still there. When you make sausages at home, you control every ingredient: the quality of the pork, the salt type, the herbs. You know exactly what’s inside. The taste reflects that.

    This is also a surprisingly fun family project. Kids love the stuffing process, and the moment the first batch hits a hot cast iron skillet, the smell alone makes everyone appear in the kitchen.

    homemade sausage seasoning

    Ingredients Deep-Dive

    Ingredients

    The Meat Ratio: Pork + Pork Fat

    The standard ratio is 80% lean ground pork to 20% back fat. The fat is not optional — it’s what gives the sausage its juicy, succulent texture and prevents it from drying out during cooking. Ask your butcher to grind both the lean and fat together twice through the machine. Two passes through a fine grinder creates the smooth, emulsified texture that commercial sausages achieve with machinery. If you want to invest in your own machine, a KitchenAid meat grinder attachment is excellent for home use.

    Classic Chorizo: Ancho and Guajillo Chillies

    These two dried Mexican chillies are the soul of the chorizo. Ancho is the dried version of a poblano — it’s fruity, mild, and adds deep colour. Guajillo is slightly more tannic with a berry-like flavour. Neither is hot. Together, they produce the brick-red colour and complex flavour that makes Mexican chorizo unmistakable. Combined with white vinegar (which tenderises the meat and brightens the flavour), Mexican oregano, and a pinch of clove and cinnamon, this is a chorizo that tastes authentic and homemade in the best possible way.

    Apple Sage Maple Syrup: Sweetness with Depth

    This sausage is an homage to the breakfast sausages I grew up eating in Vancouver — sweet, fat-rich, and deeply comforting. Grated apple adds natural sweetness and moisture. Fresh sage provides an herbal backbone. Maple syrup creates the sticky-sweet glaze when the sausages hit a hot pan. A splash of sweet red wine rounds everything out. These are remarkable on their own, but also extraordinary crumbled into pasta or egg dishes.

    The Casing

    Natural hog casings are available at most butchers and specialty meat shops. They give the sausages that classic snap when you bite in, and they hold up beautifully on a cast iron skillet. Submerge them in lukewarm water and rinse the insides by running water through the tubes before use. If you can’t source natural casings locally, sausage stuffers and casing kits are available online.

    Salt Choice Matters

    Skip curing salt (sodium nitrate) — it’s unnecessary for fresh sausages you’ll cook within a few days. Use high-quality sea salt. We use Sal Faro Verde from Colima, Mexico — a western state famous for its natural sea salt. The mineral content affects flavour in a noticeable way. Good sea salt is an investment that pays off in every dish you make.

    gourmet sausage recipes

    Tools You Need

    This recipe is designed to require minimal equipment. All you need:

    • A butcher who will grind your pork and fat (twice)
    • A large funnel (wider mouth is easier)
    • Natural hog casings (from your butcher or online)
    • A toothpick for air bubbles

    That’s it. No sausage stuffer machine required, though you’re welcome to upgrade. The funnel method is slower but completely achievable for home batches. If you cook sausages often, a dedicated vertical sausage stuffer will save you significant time on larger batches.

    unique homemade sausage recipes

    How to Stuff the Sausages

    Tie one end of the casing tightly. Feed the casing onto the funnel accordion-style, leaving about 4 inches hanging off the end. Fill the funnel with meat and use your thumb to push it through. Work slowly — you want firm, evenly filled sausages without air pockets. Poke any air bubbles with a toothpick as they appear.

    Don’t overstuff. Leave room in the casing for expansion during cooking. An overstuffed sausage will split open on the heat. A split sausage still tastes good, but it reveals all the filling and loses its shape. When all the casing is filled, twist into links at 5-inch intervals, alternating the direction of each twist.

    The 12-Hour Fridge Rest

    After stuffing, lay the sausage links uncovered on a rack over a baking sheet and refrigerate for at least 12 hours. This step is essential for two reasons: it lets the meat absorb the seasoning fully, and it dries the outer casing slightly so it doesn’t burst from excess moisture during cooking.

    Serving Suggestions

    The Chorizo is spectacular in scrambled eggs, crumbled over fresh homemade pasta, or simply pan-fried and served with crusty bread. The Apple Sage sausages are outstanding as a breakfast plate alongside eggs and toast, or paired with a bright salad like our Beet and Avocado Sashimi for a brunch board.

    Frequently Asked Questions

    How long do homemade sausages keep?

    Fresh sausage links keep in the refrigerator for up to 2 days after the drying stage. For longer storage, freeze them for up to 3 months. Freeze individually or separated by parchment paper so they don’t stick together. Thaw overnight in the refrigerator before cooking — never on the counter.

    Do I need a sausage machine?

    No. A large funnel and your hands are sufficient for home batches. The process is slower than a dedicated stuffer, but entirely achievable. If you plan to make sausages regularly, a vertical sausage stuffer is a worthwhile upgrade — they fill casings much faster and with more even pressure.

    What if the casing breaks during stuffing?

    It happens to everyone, especially on the first batch. If the casing tears, stop, tie off what you have, and start a new section. A casing tear doesn’t affect the taste — the sausage just won’t hold its shape as neatly. Those broken ones become the cook’s snack.

    Can I skip the casings and make sausage patties instead?

    Absolutely. Shape the seasoned meat into patties and cook directly in a cast iron skillet over medium heat. You lose the snap of the casing but the flavour is identical. This is also a great way to test your seasoning before investing in casing materials.

    Can I freeze the sausage meat before stuffing?

    Yes. Season the meat, mix thoroughly, then freeze in portions before the stuffing step. Thaw overnight in the fridge, then stuff and proceed with the drying step. This is helpful if you want to prep the meat one weekend and stuff the following weekend.

    What’s a good sausage flavour variation to try next?

    Some excellent combinations to experiment with: rosemary with cayenne and sea salt; habanero with garlic and onion powder; blueberry with ginger, nutmeg, and maple syrup; cheddar cheese cubed into the pork with paprika; or a Cajun blend of cumin, cayenne, and paprika. The template is always the same — 1kg pork, 200g fat, 2 tbsp sea salt — and everything else is creative freedom.

    homemade fresh chorizo

    Gourmet Fresh Sausages: Classic Chorizo & Apple Sage

    Learn how to make fresh gourmet Sausages right at home. Two simple recipes, Classic Chorizo and Apple Sage Maple Syrup sausages. You'll fall in love with these two popular choices that is bursting with flavour and colour. Print Recipe Pin RecipePrep Time:30 minsCook Time:12 mins

    Equipment

    • funnel

    Ingredients

    Classic Chorizo

    • 1 kg ground pork grounded twice in the machine of your butcher
    • 200 g pork back fat, grounded
    • 5 tbsp white vinegar
    • 1 ancho chili
    • 2 guajillo chili
    • 1.5 tsp paprika
    • 1 tsp vegetable oil
    • 2 tbsp sea salt
    • ½ tsp ground cumin
    • ¼ tsp ground black pepper
    • 1 tbsp mexican oregano
    • a pinch of clove
    • ¼ tsp cinnamon
    • 1 garlic, grated
    • 6 feet small hog casings

    Apple Sage Maple Syrup Breakfast Sausages

    • 1 kg ground pork grounded twice in the machine of your butcher
    • 200 g ground pork back fat
    • 2 tbsp sea salt
    • 2 tsp ground fresh black peppers
    • 3 tbsp brown sugar
    • 2 small apple, peeled and grated
    • 2 garlic clove, grated
    • 10 fresh sage leaf, chopped
    • ½ cup maple syrup
    • ¼ cup sweet red wine
    • 6 feet small hog casings

    Instructions

    Classic Chorizo

    • Combine all ingredients in a large bowl. Wear gloves in this process and mix, push, knead and squeeze the mixture until well blended.
    • Wrap well and chill overnight or around 8 hours before using.
    • To taste for seasoning, make a small patty of the sausage mixture and cook it in a small skillet over medium-low heat. Taste and adjust the seasoning to your liking. If not shaping the sausages immediately, refrigerate until you’re ready to proceed.
    • To make sausage links, put the casings in a medium bowl and set it in the sink. Rinse the casings under cool running water: Hold one end of each piece of casing open under the tap and flush it out by gently running cool water through it. (Once you fill part of the casing, use your hands to push the water through to other end.) Fill the bowl with fresh, cool water and let the casings soak for 10 minutes.
    • Take out your large funnel. Splash cool water onto the end to moisten it. Open an end of one piece of casing and pull it over the end of the tube. Push the rest of the casing onto the tube accordion-style, leaving 3 or 4 inches hanging off the end.
    • Fill the funnel with the sausage mixture and feed it through with your thumb or fingers just until it reaches the end of the tub. Tie the end of the attached casing into a knot, and slide it up over the tube until the knot hits the tip of the tube.
    • Continue to feed the meat mixture through the tube to fill the casing, pressing your thumb and forefinger against the tip of the tube to control the rate and tightness of the filling. Go slowly, don’t overstuff (but do stuff firmly), and watch for air holes. When there are only 3 to 4 inches of empty casing left, stop the feed, slip the casing off the tube and tie it in a knot about 1/2 inch from the end of the sausage filling—this extra space will fill in as you make links
    • Use a skewer or toothpick to prick any air holes that have formed during stuffing. Repeat with the remaining casings and sausage mixture.
    • To make links, lay one sausage at a time on a clean work surface, with the front end of the sausage (the end where you began filling) in front of you and the rest of the sausage lying to the right. Measure 5 inches from left to right and pinch the casing at that spot between your thumb and forefinger. Twist the unlinked portion away from you at least 4 or 5 turns to bind off the link on the left. Measure another 5 inches and pinch and twist away from you to form another link. Repeat until you reach the end of the casing, always twisting in the same direction. Prick any remaining air holes.
    • Lay the links, uncovered, on a rack set over a rimmed baking sheet. Dry in the refrigerator for 12 hours to allow the flavors to meld and to give the casings a good bite when cooked. Drying will also reduce the amount of moisture in the meat, too much of which can steam and lead to bursting.
    • To cook the sausage links, heat the oil in a large, preferably cast-iron, skillet over medium heat. Cook, turning as needed, until browned and cooked through, about 12 minutes.

    Apple Sage Maple Syrup Sausages

    • In a small bowl, mix the salt, pepper, garlic, and sage. Add the seasonings and the wine to the ground meat and mix briefly but thoroughly with your hands. Don’t overmix, or the fat could begin to melt.
    • To taste for seasoning, make a small patty of the sausage mixture and cook it in a small skillet over medium-low heat. Taste and adjust the seasoning to your liking. If not shaping the sausages immediately, refrigerate until you’re ready to proceed.
    • To make sausage links, put the casings in a medium bowl and set it in the sink. Rinse the casings under cool running water: Hold one end of each piece of casing open under the tap and flush it out by gently running cool water through it. (Once you fill part of the casing, use your hands to push the water through to other end.) Fill the bowl with fresh, cool water and let the casings soak for 10 minutes.
    • Take out your large funnel. Splash cool water onto the end to moisten it. Open an end of one piece of casing and pull it over the end of the tube. Push the rest of the casing onto the tube accordion-style, leaving 3 or 4 inches hanging off the end.
    • Fill the funnel with the sausage mixture and feed it through with your thumb or fingers just until it reaches the end of the tub. Tie the end of the attached casing into a knot, and slide it up over the tube until the knot hits the tip of the tube.
    • Continue to feed the meat mixture through the tube to fill the casing, pressing your thumb and forefinger against the tip of the tube to control the rate and tightness of the filling. Go slowly, don’t overstuff (but do stuff firmly), and watch for air holes. When there are only 3 to 4 inches of empty casing left, stop the feed, slip the casing off the tube and tie it in a knot about 1/2 inch from the end of the sausage filling—this extra space will fill in as you make links
    • Use a skewer or toothpick to prick any air holes that have formed during stuffing. Repeat with the remaining casings and sausage mixture.
    • To make links, lay one sausage at a time on a clean work surface, with the front end of the sausage (the end where you began filling) in front of you and the rest of the sausage lying to the right. Measure 5 inches from left to right and pinch the casing at that spot between your thumb and forefinger. Twist the unlinked portion away from you at least 4 or 5 turns to bind off the link on the left. Measure another 5 inches and pinch and twist away from you to form another link. Repeat until you reach the end of the casing, always twisting in the same direction. Prick any remaining air holes.
    • Lay the links, uncovered, on a rack set over a rimmed baking sheet. Dry in the refrigerator for 12 hours to allow the flavors to meld and to give the casings a good bite when cooked. Drying will also reduce the amount of moisture in the meat, too much of which can steam and lead to bursting.
    • To cook the sausage links, heat the oil in a large, preferably cast-iron, skillet over medium heat. Cook, turning as needed, until browned and cooked through, about 12 minutes.