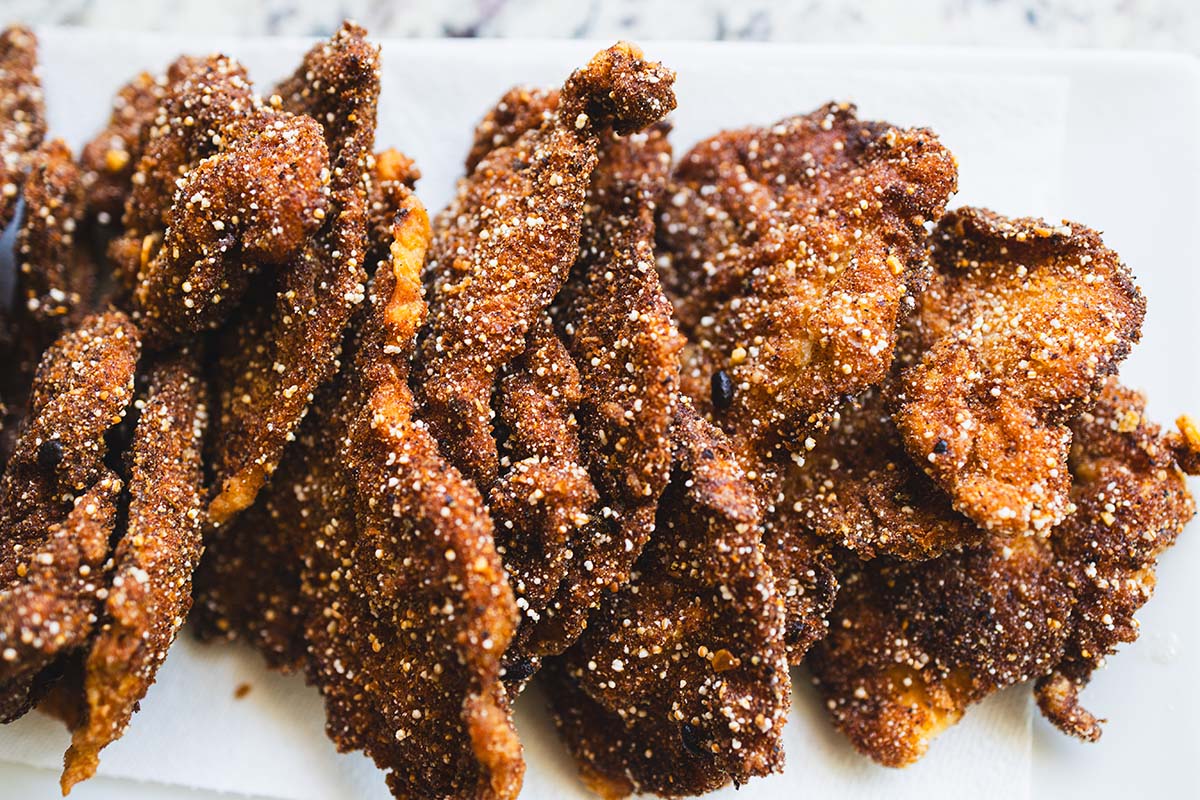
Homemade beef jerky is thin strips of beef marinated in soy sauce, Worcestershire sauce, liquid smoke and spices, heated to 160°F for safety, then dried at 135°F in an air fryer, oven or dehydrator until firm but still bendy. Plan on an overnight marinade and about 8 hours of drying.
This post may contain affiliate links. As an Amazon Associate I earn from qualifying purchases.
There is something so satisfying about having a homemade snack ready whenever hunger strikes. In our house, this homemade beef jerky has become a family favourite. It’s savoury, a little smoky, and so good that my son loves it enough to learn the recipe himself!
We started making jerky because we were looking for snacks to take on our trips. Store-bought beef jerky is expensive, but it was always what we ended up buying at the convenience store instead of chips, packaged cookies or instant ramen. So we started making our own!
Now it’s our snack for trips and for that rush between school and afternoon classes, when there’s no time to sit down and eat. The kids grab it, and honestly, so do the grown-ups.
Living in Mexico, I find that convenience stores are filled with packaged snacks and sweets. There is nothing wrong with a treat, but a jar of homemade jerky is a snack we’d rather pack than chips.
Let me show you how we make it!

Want a week of dinners planned for you? Get my free dinners
Why we love this beef jerky recipe
The first reason is simple: it tastes amazing! Soy sauce, Worcestershire sauce, liquid smoke, garlic, onion and paprika make a savoury, smoky jerky that is hard to stop eating.
My son is one of its biggest fans. He loves these beef jerky sticks so much that he learned the recipe just so he would know how to make them. As a mom, I love seeing my kids get excited about food we make at home!
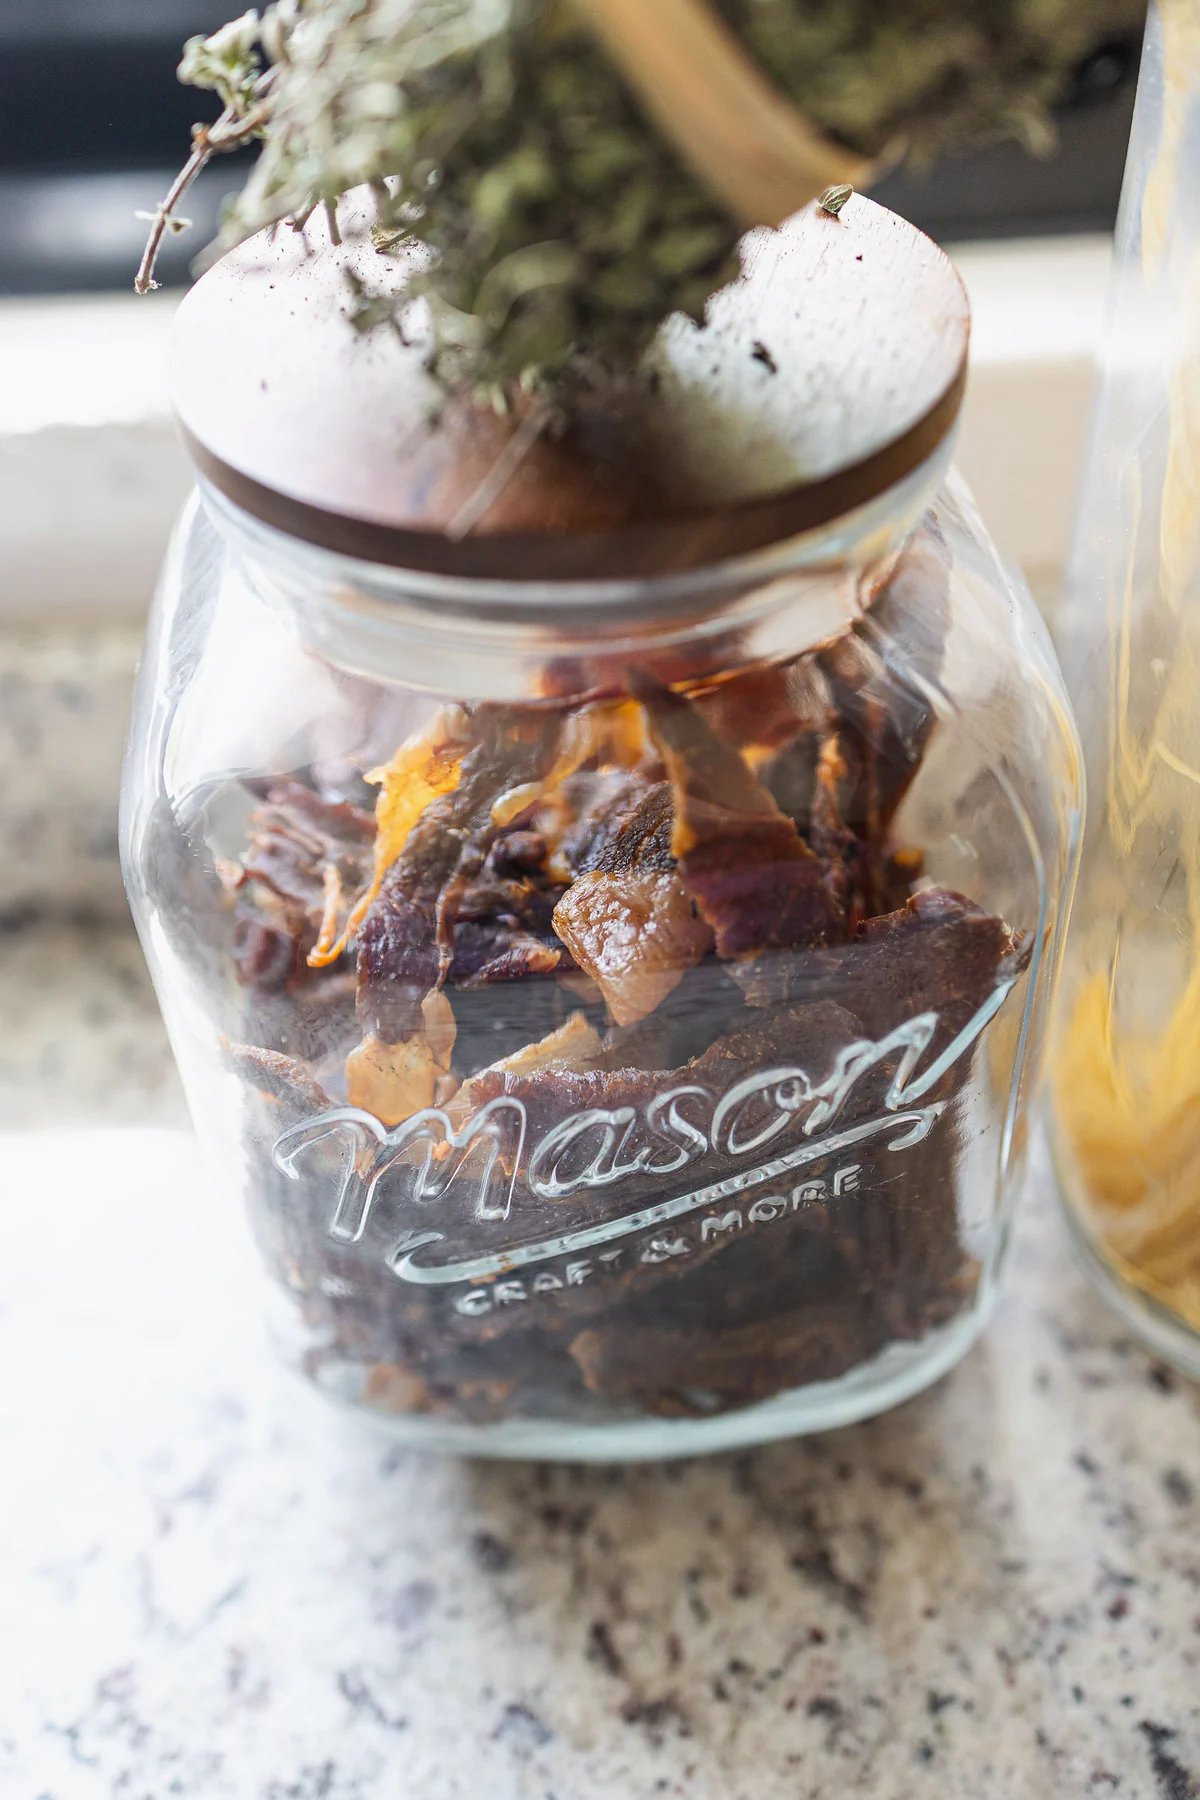
I also love how convenient it is. We keep a jar on the kitchen counter for those moments when the kids or my husband walk by looking for something to eat. Instead of cookies or candy being the easiest thing to grab, there’s homemade jerky. Keep the main batch airtight in the fridge, though (more on storage below).
Of course, jerky is still a salty snack, so we enjoy it as one snack among many. But having another option our whole family genuinely enjoys? That is a win in my book.
Ingredients you’ll need
You only need five things to think about: beef, soy sauce, Worcestershire sauce, liquid smoke and seasonings.
- Beef round steak: a lean cut, which matters because fat goes rancid. Top round or eye of round both work well. I buy my sliced beef from Wild Fork. It comes frozen and cut thin, which makes prep so much easier. If your beef isn’t sliced, freeze it for 1 to 2 hours until firm, then slice it about 1/4 inch (5 mm) thick. Slice against the grain for a more tender chew, or with the grain if you like it chewier.
- Soy sauce: regular soy sauce. Low-sodium soy sauce works too if you want it a little less salty.
- Worcestershire sauce and liquid smoke: these two give it the smoky, “store-bought jerky” flavour.
- Brown sugar: balances the salt.
- Meat tenderizer: use unseasoned meat tenderizer. Most brands already contain salt, so don’t add extra.
- Garlic powder, onion powder, sweet paprika, black pepper, salt.
Substitutions: no liquid smoke? Use smoked paprika instead of regular paprika for a gentler smoky note. Gluten-free: use tamari and a gluten-free Worcestershire sauce.
Recommended tools for homemade jerky
- Recommended air fryer with a dehydrate setting: Ninja Air Fryer Pro AF141, 5 qt
- Recommended food dehydrator, if you’d rather use one: COSORI 6-Tray Stainless Steel Food Dehydrator
- Recommended slicing knife: Victorinox Fibrox Pro 12-Inch Slicing Knife, Granton Blade
- Recommended meat thermometer: TempPro TempSwift TP19H Instant Read Thermometer
- Recommended airtight jars: Ball 16 oz Wide Mouth Jars with Lids, 12 Pack
Equipment
- Air fryer with a dehydrate function (that’s what I use), or an oven that can hold 135°F, or a food dehydrator with an adjustable thermostat
- Instant-read meat thermometer
- Large bowl or zip-top bag for marinating
- Sheet pan with a wire rack (for the 160°F pre-heat step)
- Long, sharp slicing knife and cutting board (if slicing your own beef)
- Clean airtight jars or zip-top bags
How to make homemade beef jerky
Step 1: Make the marinade. In a large bowl, stir together the soy sauce, Worcestershire sauce, liquid smoke, brown sugar, salt, black pepper, meat tenderizer, garlic powder, onion powder and paprika until well combined.
Step 2: Marinate the beef. Add the thin beef strips and toss so every piece is coated. Cover and refrigerate overnight, at least 6 and up to 24 hours. Always marinate in the fridge, never on the counter, and throw out the marinade afterwards.
Step 3: Drain. Take the beef out of the marinade and let the excess drip off. Pat the strips lightly with paper towels so they dry faster.
Step 4: Heat to 160°F first. This is the food safety step. The USDA recommends heating beef to 160°F (71°C) before dehydrating, because drying alone may never get the meat hot enough to kill bacteria. Lay the strips in a single layer on a wire rack set over a sheet pan and roast at 325°F (163°C) until an instant-read thermometer in the thickest strip reads 160°F. Thin strips usually take 10 to 15 minutes, but go by the thermometer, not the clock. You can also steam them.

Step 5: Dry at 135°F for about 8 hours. Once the strips have reached 160°F, arrange them in a single layer with space between pieces so air can move. I use my air fryer’s dehydrate function at 135°F (57°C) for about 8 hours. No air fryer? Use the oven at 135°F for about 8 hours, with the strips on a wire rack over a sheet pan. Check with an oven thermometer that your oven really holds 135°F, because many ovens don’t go that low; if yours doesn’t, use an air fryer or a dehydrator instead. A food dehydrator set to 135°F works the same way. The USDA says to keep the drying temperature steady between 130 and 140°F. Thinner strips can be ready sooner, so start checking around 6 hours.
Step 6: Check the texture. Done jerky is dry and firm but still bends and cracks without snapping in half. No wet or soft spots in the middle. Let it cool completely before storing.

And that’s it! TA-DA, you got yourself a batch of homemade beef jerky for the next snack attack.
Tips and common mistakes
- Don’t skip the 160°F step. Marinating doesn’t make raw meat safe, and 135°F drying is too low to do the job alone.
- Keep the slices even. Thick and thin strips on the same tray dry at different speeds. Pull the thin ones early.
- Trim visible fat. Fat doesn’t dry and makes jerky go off sooner.
- Give it room. Overlapping strips stay wet where they touch.
- Use a thermometer, not a guess. Thin strips heat fast, so check early.
Amazing snacks for the family

One of my favourite things about this recipe is how easily it fits into our everyday routine. Some days the kids are home looking for something to eat between activities. Other days we are rushing from one place to another, and I know we will need something in the car.
That’s when these beef jerky sticks really shine. I pack a few sticks and a bottle of water, and it’s a simple snack for the kids while we’re out. Having something ready in my bag saves me from stopping at a convenience store every time someone gets hungry.
My son especially loves this snack, and it’s an easy one to pack alongside fruit or crackers. Since jerky is dried and salty, I make sure the kids drink plenty of water with it, especially when they’re active or outside.
I’m not saying we never buy packaged snacks. Real life is busy. But I love knowing I have another option ready at home or packed for the road.
How to store homemade beef jerky

In our house it’s gone in two weeks, so the jar on the counter never sits around for long! Honestly, I would have guessed a good airtight jar keeps it about a month, but the National Center for Home Food Preservation says properly dried jerky keeps two weeks at room temperature in a sealed container, so two weeks is our counter limit. Keep the rest airtight in the fridge; the USDA says home-dried jerky can be stored 1 to 2 months. For longer, freeze it in small portions; Cornell Cooperative Extension says up to 1 year in the freezer for best quality. If you ever see moisture or mould in the jar, or it smells off, throw it out.
- Before storing: let it cool completely and blot off any oil, then pack it in a clean, dry, airtight jar or bag.
- On the go: pack a portion in a clean, sealed container and keep it cool. Don’t leave jerky in a hot car.
FAQ
Do you have to cook beef jerky before dehydrating it? Yes, for safety. The USDA recommends steaming or roasting the strips to 160°F before drying, because a dehydrator or low oven may not heat the meat enough to kill bacteria like E. coli and Salmonella.
What is the best cut of beef for jerky? Lean cuts like round steak (top or bottom round) or eye of round work best because there is less fat to go rancid. We use thinly sliced round steak.
How long does homemade beef jerky last? Up to 2 weeks at room temperature in a sealed container (National Center for Home Food Preservation). In the fridge, it keeps 1 to 2 months (the USDA says home-dried jerky can be stored 1 to 2 months). Freeze it for longer storage.
How do I know when beef jerky is done? It should be dry and firm but still bend and crack without breaking in two, with no moist spots inside.
Can I make beef jerky in an air fryer? Yes. If your air fryer has a dehydrate function, heat the strips to 160°F first, then dehydrate at 135°F for about 8 hours. That’s how we make ours.
Can I make beef jerky in the oven? Yes, if your oven can hold a steady 135°F. Heat the strips to 160°F first, then dry them on a wire rack at 135°F for about 8 hours. Check the temperature with an oven thermometer.
How long should I marinate beef jerky? At least 6 hours and up to 24 hours, always in the fridge.
More recipes you’ll love
- Classic Simple Cheeseburgers
- Instant Pot Taiwanese Beef Noodle Soup
- Camp Bean Recipe
- Halloween Monster Apple Snacks
- Smoked Bacon Ham
If there is one thing I have learned as a busy mom, it’s that the snacks we keep within easy reach make everyday life a little easier. This jerky is something we can make ahead, keep ready for hungry family members, and pack when we know we’ll be out for hours.
So make a batch, store it safely, and see how fast your family goes through it. Just be warned: once everyone finds out where you keep the jerky, that jar may need refilling sooner than you think!
Happy snacking!

Homemade Beef Jerky
Ingredients
Equipment
Method
- In a large bowl, stir together the soy sauce, Worcestershire sauce, liquid smoke, brown sugar, salt, pepper, meat tenderizer, garlic powder, onion powder and paprika.
- Add the beef strips and toss to coat every piece. Cover and refrigerate overnight (6 to 24 hours). Discard the marinade afterwards.
- Drain the strips and pat them lightly dry with paper towels.
- Lay the strips in a single layer on a wire rack over a sheet pan and roast at 325°F (163°C) until the thickest strip reads 160°F (71°C) on an instant-read thermometer, usually 10 to 15 minutes. Go by the thermometer, not the clock.

- Arrange the strips in a single layer with space between pieces. Dry at 135°F (57°C) for about 8 hours using the air fryer’s dehydrate function, an oven that holds 135°F, or a dehydrator, until dry and firm but still bendable. Start checking around 6 hours.
- Cool completely. Store in an airtight container in the fridge, or freeze for longer storage.