Category: seasonal recipes

  • Easy Plum Jam

    Easy Plum Jam

    This easy plum jam, made with seasonal Mexican ciruela roja, is a fun and rewarding way to turn fresh fruit into something delicious—with plenty of hands-on help from the kids.

    This post may contain affiliate links. If you purchase through these links, I may earn a small commission at no extra cost to you. Thank you for supporting Love & Harvest!

    Open jar of homemade red plum jam with a spoon

    Jamming at Home

    There’s something magical about making jam at home—especially when your little ones are part of the process. In our kitchen, it’s a full family affair.

    The kids love squishing the fruit, stirring the bubbling pot (maybe a bit too enthusiastically), and watching simple ingredients transform into something sweet and spreadable. Sure, the stove might get a little sticky, and the counters might sparkle with sugar syrup splatters, but I wouldn’t trade it for anything.

    Cooking from scratch teaches my kids a deep appreciation for where food comes from—and that many things we buy at the supermarket can be made right at home, often tasting even better.

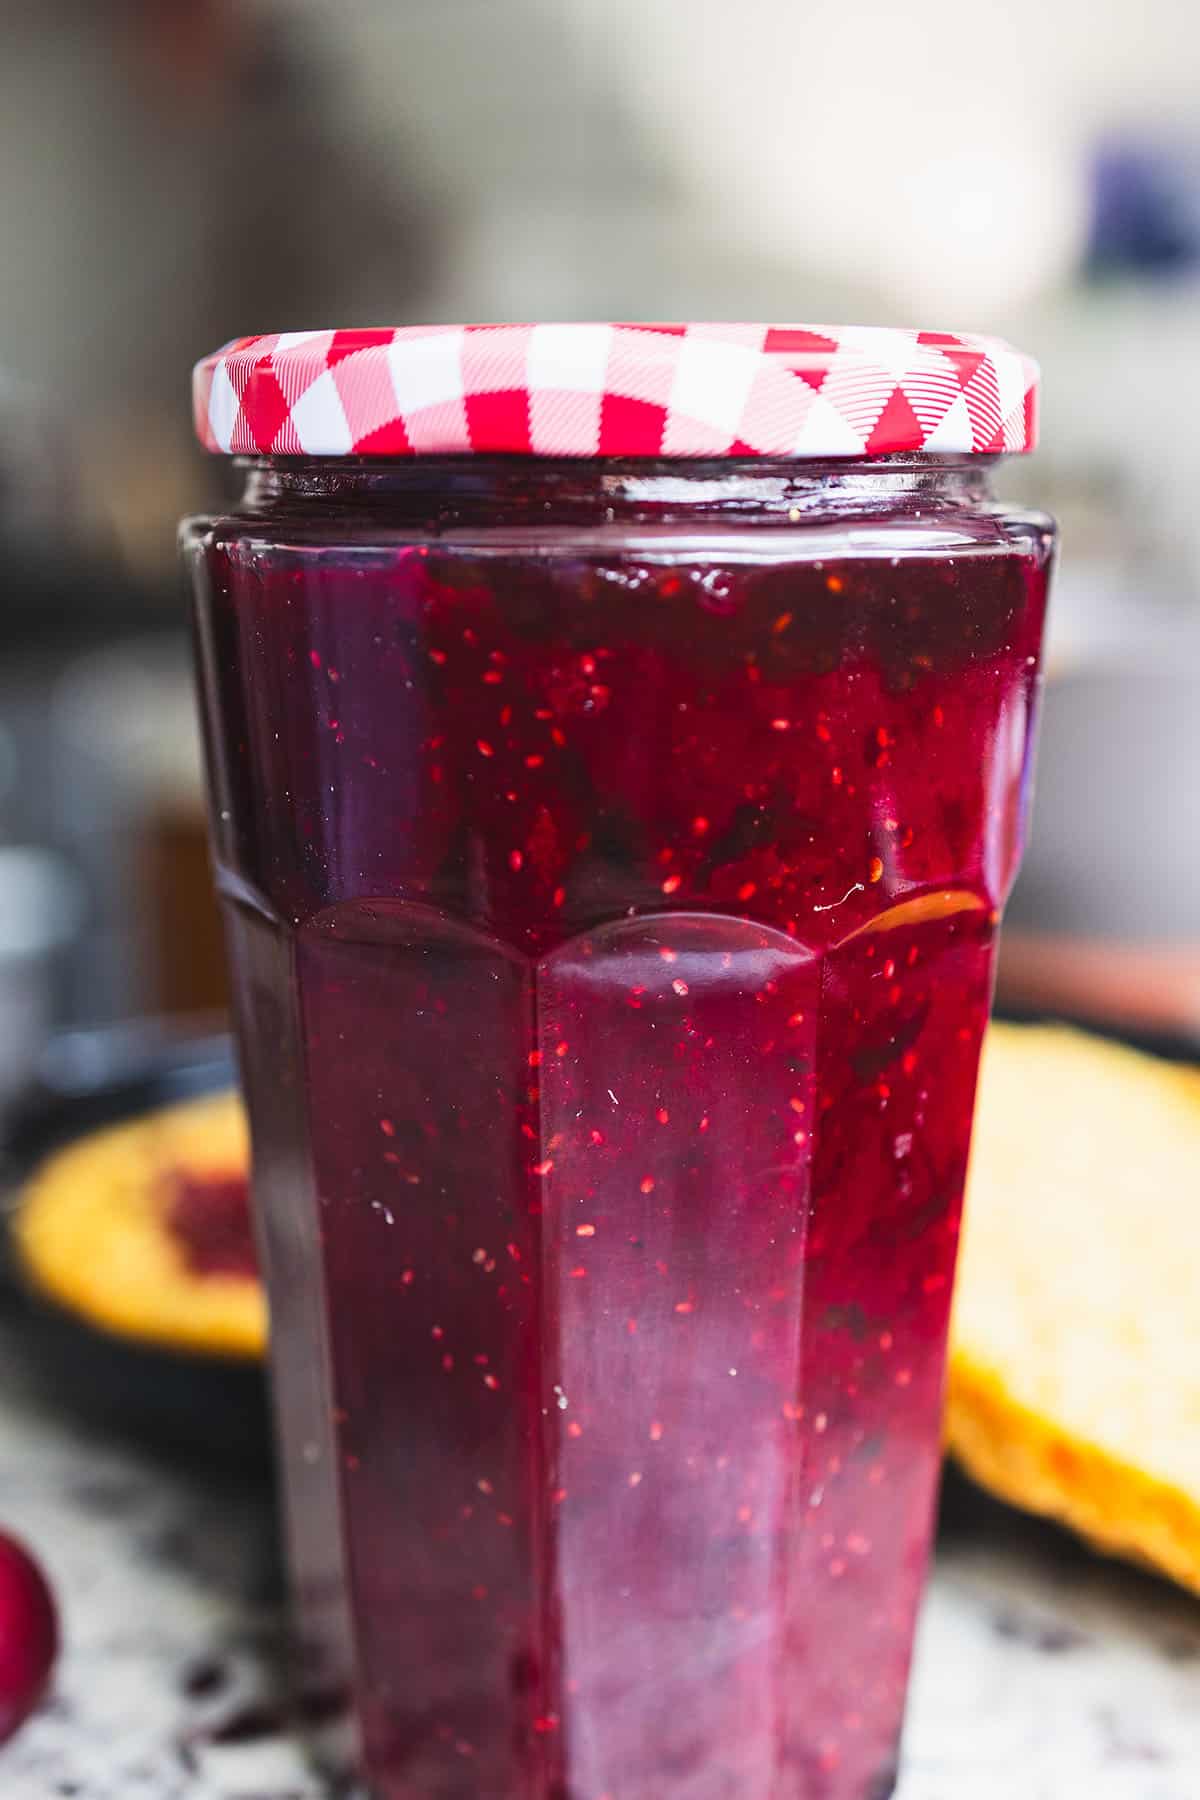
    Tall jar of homemade plum jam with a gingham lid

    Main Ingredients

    This jam is all about simplicity. Here’s all you need:

    Ingredients

    Fresh Red Plums (Ciruela Roja)

    • The star of the show — pitted and chopped. Their natural sweetness and acidity make them ideal for jam-making without needing excessive sugar.

    Granulated Sugar

    • Brings out the fruit’s natural sweetness and helps the jam set and preserve. The ratio matters — too little and it won’t set; too much and it overpowers the fruit.

    Fresh Lemon Juice

    • Brightens the flavour, activates the pectin for a better set, and helps with preservation. Always use fresh — bottled just isn’t the same.

    Fruit Pectin or Gelatine

    • The setting agent that gives your jam that perfect spreadable consistency without endless boiling. We love using a canning funnel and jelly jars to bottle this up cleanly.

    What Is Ciruela Roja?

    Ciruela roja is the Mexican red plum—small, vibrant, and sweet-tart with a deep red skin and juicy flesh. It’s a seasonal fruit that shows up in abundance at local markets during summer, and its natural balance of sweetness and acidity makes it perfect for jam-making. When in season, we grab them by the kilo to preserve their flavor in jars we can enjoy year-round.

    Jar of plum jam next to fresh red plums and basil

    Great Substitutes for Ciruela Roja

    If you can’t find ciruela roja, don’t worry—this jam recipe works beautifully with other types of plums, especially:

    • Black plums – dark, juicy, and rich in flavour

    • Santa Rosa plums – sweet-tart with a fragrant aroma

    • Yellow plums (Mirabelle) – slightly milder, but still great for jam

    • Apricots or peaches – for a softer, sweeter twist

    Spoonful of plum jam over a creamy dessert with a golden crust

    The Magic Tool: Potato Masher

    You don’t need fancy equipment to make great jam. One of our favorite tools? The humble potato masher. The kids love using it to break down the cooked plums into a chunky, rustic texture. It’s safe, satisfying, and lets them feel like real little chefs. No blender needed—just old-school mashing fun.

    Why We Love This Easy Plum Jam Recipe

    • It’s seasonal – We use Mexican ciruela roja when it’s in full swing, usually around summer. When plums are everywhere in the local markets, we grab kilos and turn them into jam jars we enjoy all year.

    • It’s fast – No long hours of boiling needed. This is a quick jam recipe you can make in under an hour.

    • It’s kid-approved – From making to eating, kids are all in.

    • It’s a pantry hero – It keeps well in the fridge and makes a perfect little homemade gift.

    Other Ways of Using Jam

    Sure, plum jam and peanut butter on homemade sourdough is a classic. But don’t stop there! We love layering it between cakes, spooning it into cupcake centers, or swirling it into yogurt for a fruity breakfast. Try glazing roasted meats with it, folding it into thumbprint cookies, or even mixing a spoonful into your vinaigrette for a sweet-savory salad twist. It also pairs beautifully alongside our vanilla bean ice cream for a fruity sundae, or drizzled over our super moist cherry loaf.

    A hand spreading plum jam over golden cornbread in a slow cooker

    Frequently Asked Questions

    Can I make this jam without pectin?

    Yes! Plums are naturally high in pectin, especially when slightly underripe. You can cook the jam a bit longer—about 25–30 minutes total—and it will thicken on its own. Just do the cold plate test to check consistency.

    How long does homemade plum jam last?

    Stored in a clean, sealed jar in the refrigerator, this jam will keep for up to 3 weeks. For longer storage, pour into sterilized jars while hot and freeze for up to 6 months.

    Can I use frozen plums?

    Absolutely. Thaw them first and drain any excess liquid before cooking. Frozen plums work great and often have excellent flavor since they’re picked at peak ripeness.

    My jam didn’t set — what went wrong?

    The most common cause is either not enough pectin or not cooking long enough. You can rescue it by returning to the heat, adding a little more lemon juice, and boiling for another 5–10 minutes. The cold plate wrinkle test is your best friend here.

    What can I do with leftover jam besides spreading on toast?

    So many things! Use it as a cake filling, swirl into yogurt, glaze roasted meats, fill thumbprint cookies, or spoon over vanilla ice cream. Even a spoonful in your salad dressing adds a lovely sweet-tart depth. Also try it alongside our cherry syrup recipe for a fruit preserve duo.

    Tall jar of homemade plum jam with a gingham lid

    Easy Plum Jam Recipe

    An easy plum jam recipe made with just four ingredients—fresh plums, sugar, lemon juice, and pectin or gelatine. A pantry hero that celebrates this delicious seasonal fruit.
    Prep Time 15 minutes
    Cook Time 20 minutes
    Total Time 35 minutes
    Servings: 1 large jar (1L)
    Course: Condiment
    Calories: 55

    Ingredients
      

    • 1 kg (2.2 lbs) fresh plums (ciruela roja or any ripe plums), pitted and chopped
    • 500 g (2 ½ cups) granulated sugar
    • 2 tbsp fresh lemon juice
    • 1 package (about 7 g or 1 tbsp) fruit pectin or 1 tbsp unflavored powdered gelatine

    Equipment

    • potato masher

    Method
     

    1. Wash, pit, and chop the plums. You can leave the skin on—it adds beautiful color and texture.
    2. Place the plums in a large saucepan over medium heat. Add lemon juice and stir occasionally. Cook for about 10–15 minutes until the fruit softens and begins to break down.
    3. Use a potato masher to mash the plums into your desired consistency—chunky or smooth.
    4. Stir in the sugar and bring the mixture to a gentle boil. Once boiling, sprinkle in the pectin or gelatine and stir well to dissolve completely.
    5. Continue to cook for another 10–15 minutes, stirring frequently, until the jam thickens slightly. To test the consistency, place a spoonful on a chilled plate—if it wrinkles when pushed, it's ready.
    6. Remove from heat and let cool for 5–10 minutes. Pour into clean jars and allow to cool fully before sealing. Store in the fridge for up to 3 weeks or freeze for longer storage.
  • Best Spiced Pumpkin Pie with Flakey Crust

    Best Spiced Pumpkin Pie with Flakey Crust

    The best homemade pumpkin pie! Smooth, silky pumpkin filling perfectly balanced with cinnamon, clove, nutmeg, and ginger — all nestled in a buttery, shattering-crisp flakey crust. This is the pie that converts people who think they don’t like pumpkin pie, and the one guests always ask for the recipe.

    This post may contain affiliate links. If you purchase through these links, I may earn a small commission at no extra cost to you. Thank you for supporting Love & Harvest!

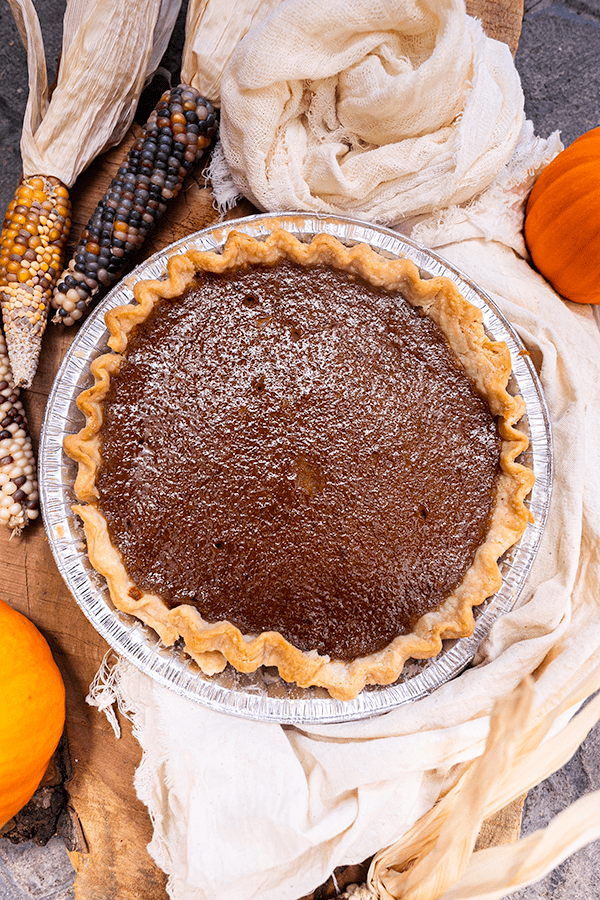
    Spiced pumpkin pie with a fluted flaky crust and dried corn on a linen cloth

    Why This Pumpkin Pie Stands Out

    If you love pumpkin flavour (and not the artificial kind), this is the pie for you. Blended through the food processor for a super silky, almost custard-like texture, with warm fall spices that complement rather than overpower the pumpkin. It is not strong in spice flavour — it is a well-balanced pie where you can still taste the pumpkin beautifully.

    I once worked at a famous pie shop in West Vancouver and this flakey crust is the exact recipe they used. I have since made this pie for countless house parties, sold it here in Mexico, and watched people who claim not to like pumpkin pie come back for seconds. It speaks for itself.

    Thanksgiving is never complete without a slice of this pie — and once you make it yourself, you will never go back to store-bought. Take a look at How to Make Super Flakey Pie Crust to master the crust before you begin.

    Fresh Pumpkin vs. Canned Pumpkin

    If you have the time, fresh pumpkin delivers unbeatable flavour. But canned pumpkin works perfectly in this recipe and the result is still incredible. No matter which you choose, you will have a silky filling and a very flakey crust.

    Side view of a pumpkin pie slice showing the smooth filling and flaky crust

    Key Ingredients

    Ingredients

    Pumpkin

    Whether canned or fresh, pumpkin is the star. Libby’s 100% pure pumpkin is a reliable canned option that many bakers swear by. If you have access to a favourite brand you trust, use it.

    • Why it matters: The pumpkin puree creates the silky custard-like filling. Its natural moisture content and starch structure are essential to the final texture — too watery and the filling won’t set.

    Pumpkin Spice: Cinnamon, Clove, Nutmeg, and Ginger

    These four spices together create the classic fall flavour profile. The balance is key — not too heavy on any single spice.

    • Why it matters: Freshly ground spices give a more vivid, aromatic result. A quality spice grater set makes a noticeable difference, especially for nutmeg.

    Eggs

    Two eggs are what give the filling its smooth, silky, custard-like texture as it bakes.

    • Why it matters: Eggs provide the structure that allows the filling to set firm enough to slice cleanly while staying creamy and soft inside.

    Condensed Milk

    Condensed milk provides the perfect amount of sweetness and contributes to the smooth, rich texture — no extra sugar needed.

    • Why it matters: The milk proteins and sugar in condensed milk help the custard filling set beautifully and add a subtle caramelised richness that cannot be replicated with regular milk and sugar alone.

    Pumpkin Variety Guide

    Not every pumpkin tastes the same. Some are strictly for carving, others for cooking and baking. All pumpkins are edible, but some are more fibrous or sweeter than others. Some recommendations:

    • Sugar pumpkin
    • Cherokee Bush
    • Cinderella
    • Muscade de Provence
    • Calabaza grande (Mexico)

    In Mexico we use the calabaza grande — medium-sized with a hard green exterior and sweet, flavourful flesh inside. This is my personal favourite for pumpkin pie and the variety I use when making it to sell locally.

    A child standing beside a pile of green-striped pumpkins at a market

    Fool-Proof Professional Tips

    Pro Tip 1: Bake at 425°F

    Flakey doughs love high temperatures. When the cold fat in the dough hits the heat of the oven, the moisture in the fat evaporates, creating pockets of steam. This steam pushes up the dough, creating lightness and flakiness. If your pie crusts are not crisp enough, your oven is likely not hot enough.

    Pro Tip 2: Use a High-Speed Blender or Food Processor

    To get the silky smooth texture, blend everything together in a food processor or high-speed blender. The machine aerates the eggs and creates a custard-like consistency that is impossible to achieve by hand. A quality immersion blender also works well for smaller batches.

    Pro Tip 3: Let the Pie Cool Completely

    Allow the pie to cool completely before cutting — at least 2 hours at room temperature, then refrigerate. When the pie comes out of the oven it is still slowly cooking. Cut into it too soon and the moisture escapes, the filling dries out, or worse — it spills out unset. Best served cold with a generous dollop of whipped cream.

    Love pumpkin season baking? Try our Pumpkin Chocolate Chip Cake with Biscoff Frosting for a showstopping holiday cake, or the Pumpkin Chocolate Streusel Loaf for a cozy weekend bake. For a beautiful autumn tart, our Apple Tart with Cardamom Crust and Caramel Drizzle is always a seasonal favourite.

    Frequently Asked Questions

    Can I make this pie a day ahead?

    Yes — in fact this pie is better the next day. Bake the pie and let it cool completely, then cover loosely and refrigerate overnight. The filling firms up further and the flavours deepen. Remove from the fridge 30 minutes before serving. This makes it ideal for Thanksgiving where oven space is precious on the day itself.

    How do I prevent the crust edges from burning?

    If the crust edges are browning too quickly during baking, cover them loosely with strips of aluminium foil or use a pie shield ring. Remove the foil or shield for the last 10–15 minutes of baking so the edges can achieve a deep golden colour. You can also lower the oven temperature by 25°F after the first 15 minutes if your oven runs hot.

    Why did my pumpkin pie crack on top?

    Cracking usually means the pie was overbaked or cooled too quickly. The filling is done when the edges are set but the center still has a slight jiggle (it will firm up as it cools). Remove it from the oven at that stage and let it cool slowly at room temperature before refrigerating. Avoid putting a hot pie directly into the fridge.

    Can I use sweet potato instead of pumpkin?

    Yes! Sweet potato makes an excellent substitute and gives a slightly sweeter, richer flavour. The texture is very similar to pumpkin pie filling. Use the same quantity of sweet potato puree and keep all other ingredients the same. This is a popular variation in the American South and is equally delicious.

    How do I know when the pumpkin pie is done?

    The pie is done when the edges are set and puffed slightly and the center still has a gentle wobble — like Jell-O, not a liquid slosh. It will continue to set as it cools. If the top is cracking or the center looks dry, it has been overbaked. Internal temperature should reach about 175°F (79°C) in the center.

    Can I freeze this pumpkin pie?

    Yes. Let the pie cool completely, then wrap tightly in plastic wrap and aluminium foil and freeze for up to 1 month. Thaw overnight in the refrigerator before serving. The texture remains excellent after freezing. The crust may soften very slightly but a few minutes uncovered at room temperature will help it crisp back up.

    Spiced pumpkin pie with a fluted flaky crust and dried corn on a linen cloth

    Best Spiced Pumpkin Pie with Flakey Crust

    Prep Time 15 minutes
    Cook Time 35 minutes
    Total Time 50 minutes
    Servings: 8 people
    Course: Dessert
    Cuisine: American
    Calories: 320

    Ingredients
      

    • 2 cups pumpkin puree homemade or canned
    • 1 (14oz) condensed milk
    • 2 large eggs room temperature
    • 1 tsp ground cinnamon
    • ½ tsp ground ginger
    • ¼ tsp ground clove
    • ½ tsp ground nutmeg
    • ½ tsp salt
    • 1 unbaked pie crust

    Method
     

    1. Preheat the oven to 425°F (220°C)
    2. In a food processor, add the pumpkin puree, condensed milk, eggs, cinnamon, ginger, clove, nutmeg, and salt until smooth. Pour into the unbaked pie crust.
    3. Bake in the preheated oven for 15 minutes.
    4. Dial the temperature down to 350°F and continue to bake for 35-40 minutes. Watch the edge of the crust. When it is golden brown or until a knife inserted into the centre of the pie comes out clean.
    5. Allow the pie to cool completely before serving. About 2 hours.

    Notes

     
    Top with a generous dollop of whipped cream. I like pumpkin pie to be well chilled, so I make pies a day ahead of time and keep them in the refrigerator overnight with a film on top. However, it’s perfectly acceptable to serve room temperature pie too – just be sure to pop the leftovers in the fridge. 
  • Mexican Fava Bean Salad

    Mexican Fava Bean Salad

    This Mexican fava bean salad is one of those dishes that surprises people — hearty enough to stand on its own as a meal, yet light and bright enough to serve alongside anything on the table. Fava beans, grilled cactus paddles, fresh tomatoes, cilantro, and jalapeños come together in a zesty lime dressing. It tastes like Mexico in a bowl.

    This post may contain affiliate links. If you purchase through these links, I may earn a small commission at no extra cost to you. Thank you for supporting Love & Harvest!

    Jump to Recipe

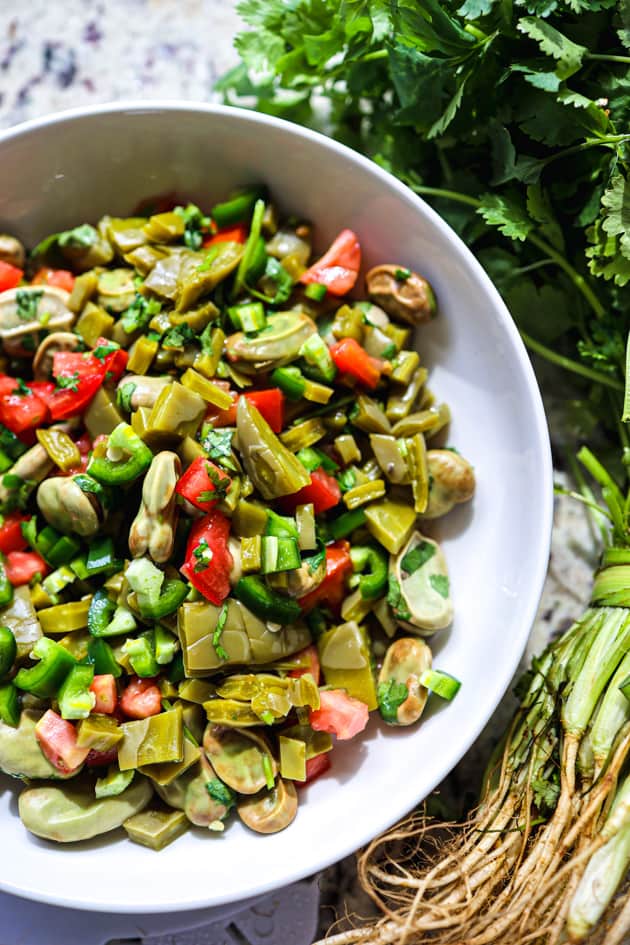
    Mexican fava bean salad with nopales, tomato and green onion in a white bowl

    What Makes This Salad Special?

    This salad stands out for its unique blend of flavors and textures. The fava beans give the salad its creamy, hearty base, the nopales add a slightly acidic green note that balances everything out, and the lime dressing pulls it all together with brightness and heat. Whether you use fresh or canned fava beans, this is a reliable, versatile, and deeply satisfying dish.

    Why Try This Salad?

    • Hearty and filling: about 8 g protein and 7 g fiber per serving, per the recipe card.
    • Offers a burst of authentic Mexican flavors that will surprise your palate.
    • An easy addition to any meal plan, dressed with just lime juice, olive oil and oregano.
    • Accessible year-round thanks to canned fava beans.

    Spoonful of fava bean and nopal salad lifted from the bowl

    Ingredients

    Key Ingredients

    Fava Beans

    You can use fresh or dried fava beans — both work beautifully. Canned fava beans are the most convenient option and require only a rinse before use.

    • Why they matter: Fava beans are the protein backbone of the salad. Their creamy, slightly earthy flavor pairs perfectly with the bright acidity of lime and the freshness of cactus.

    Cactus Paddles (Nopales)

    Nopales are a staple of Mexican cooking — slightly acidic, green, and succulent. Look for them fresh at Mexican grocery stores, or use jarred nopales as a convenient alternative.

    • Why they matter: Their mild acidity and firm texture balance the creaminess of the fava beans and keep the salad from feeling heavy.

    Tomatoes

    Use fresh, ripe tomatoes. Remove the seeds and use only the flesh to prevent the salad from becoming watery.

    • Why they matter: They add juiciness and a touch of sweetness that rounds out the acidity of the lime dressing.

    Cilantro

    Fresh cilantro is non-negotiable here. Its robust, herbal taste is one of the defining flavors of the Mexican profile in this dish.

    • Why it matters: Cilantro brings a refreshing herbaceousness that lightens every bite and adds that unmistakable Mexican identity.

    Jalapenos

    One to two jalapeños, roughly chopped, adds just the right level of heat without overpowering the other flavors. Remove the seeds for a milder kick.

    • Why they matter: Heat activates the other flavors in the salad and makes every bite more dynamic.

    Lime

    Generous lime juice forms the base of the dressing. Do not be shy — this salad needs real citrus brightness.

    • Why it matters: Lime acid brightens every ingredient, makes the beans taste fresher, and ties the dressing together.

    Mexican Oregano

    Mexican oregano has an earthy, slightly citrusy flavor that is distinct from Mediterranean oregano. It is worth seeking out for this recipe.

    • Why it matters: It adds depth and authenticity to the dressing — the flavor note that makes this taste unmistakably Mexican.

    Mexican fava bean salad with tomato and cilantro beside fresh green onions

    How to Cook Fresh Fava Beans

    Cooking fresh fava beans only takes 5–7 minutes depending on pod size. Remove the beans from their shells and boil them in salted water for 5–7 minutes. Meanwhile, prepare a bowl of ice water. Once the beans turn a vibrant moss green, transfer them to the ice bath immediately. Once cool, use your fingers to peel off the pale outer skin — the bright green inner bean is what you want.

    How to Cook Dried Fava Beans

    Dried fava beans require soaking and simmering before use.

    1. Place beans in a large bowl and cover with water. Soak overnight or for at least 8 hours.
    2. Drain, rinse, and place in a pot. Cover with fresh water at least 2 inches above the beans.
    3. Bring to a boil, then reduce to a simmer. Cook for 1 to 1.5 hours until tender, adding water as needed.

    For another hearty Mexican salad, try the original pico de gallo or the warm lentil and sweet potato salad.

    Fava bean and nopal salad on a white plate next to roast chicken and rice

    Frequently Asked Questions

    Can I use canned fava beans instead of fresh?

    Yes — canned fava beans are the easiest option. Simply drain, rinse thoroughly under cold water, and they are ready to use. The texture is slightly softer than fresh but the flavor is excellent, especially once dressed.

    What can I substitute for nopales?

    If you cannot find cactus paddles, you can substitute with blanched green beans, sliced zucchini, or cucumber for a similar crunchy, fresh element. The flavor profile will shift slightly but the salad will still be delicious.

    How long does fava bean salad keep?

    Store undressed salad in the refrigerator for up to 3 days. If already dressed, it is best consumed within 24 hours as the acid in the lime juice will continue to soften the vegetables.

    Is this salad served warm or cold?

    It is typically served at room temperature or slightly chilled. If using freshly cooked beans or nopales, allow them to cool before dressing and combining.

    Can I make the dressing ahead of time?

    Absolutely. Whisk all dressing ingredients together and store in a sealed jar in the refrigerator for up to 5 days. Give it a good shake before using.

    Mexican fava bean salad with tomato and cilantro beside fresh green onions

    Mexican Fava Bean Salad

     Try the amazing flavours of Mexico with our delicious fava bean salad! This dish features fresh cactus paddles, juicy tomatoes, and zesty onions. 
    Prep Time 30 minutes
    Cook Time 10 minutes
    Total Time 40 minutes
    Course: Salad
    Cuisine: Mexican
    Calories: 195

    Ingredients
      

    • 1 can (15pz) fava beans, drained and rinsed 2.5 cups of shelled and peeled fresh fava beans
    • 1 cup diced fresh tomatoes
    • 1 cup diced fresh cactus paddles "nopales"
    • ½ cup red onion, finely chopped
    • ¼ cup cilantro, finely chopped
    • 1-2 jalapeños, roughly chopped
    Salad Dressing
    • 2 limes, juiced
    • 1 tsp dried oregano
    • ¼ cup olive oil
    • 1 tsp sugar
    • 1 tsp salt to taste
    • black pepper to taste

    Method
     

    1. FRESH FAVA BEANS: bring a large pot of water to a boil. Remove the bean from the shell, and boil them for 5-7 minutes. 
       Once the pods have turned into a moss colour green, remove them and quickly place them in the ice bath. Now use your fingers to peel off the tough outer skin of each bean. The vibrant green inner bean is what you want to keep.
    2. CANNED FAVA BEANS: Remove the beans from the can and strain out the liquid. Give them a good rinse in water. Strain.
    3. DRESSING: Put all the ingredients together and give it a good stir with a whisk.
    4. PUTTING IT TOGETHER: Add all the fava beans tomato, cactus paddles, red onion, cilantro, and jalapeños together in a large bowl. Give it a good toss, and top it off with the dressing and give it another good toss. Serve immediately.
  • Hairy Amaranth (Huauzontle) Breakfast Graveyard

    Hairy Amaranth (Huauzontle) Breakfast Graveyard

    Before the Halloween candy starts, this graveyard breakfast hash gets eggs, ham and huauzontle into the kids first. Built around huauzontle (hairy amaranth) — a Mexican green with mild, earthy flavor similar to spinach — this spooky dish has become our family’s annual Halloween morning tradition.

    This post may contain affiliate links. If you purchase through these links, I may earn a small commission at no extra cost to you. Thank you for supporting Love & Harvest!

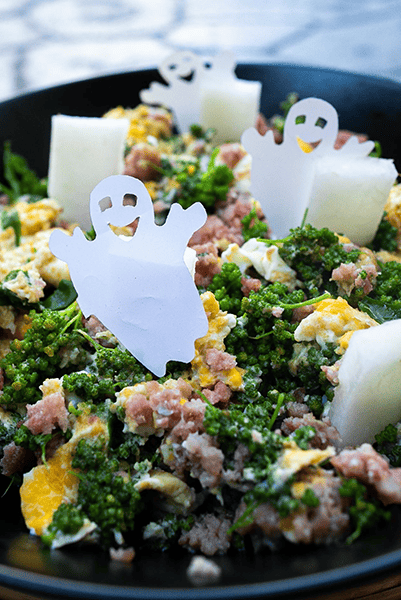
    hairy amaranth huauzontle breakfast graveyard halloween

    A Spooky Graveyard Breakfast for Halloween

    Made with huauzontle florets, eggs, ham, and jicama carved into tiny gravestones, this dish is hauntingly delicious. Our family runs on a good breakfast before embarking on any adventure, and Halloween is no exception. Some other Halloween recipes we adore: the Spooky Breakfast Bowl and our Cute Halloween Screamers.

    Ingredients for This Graveyard Breakfast Hash

    Ingredients

    Huauzontle (Hairy Amaranth)

    • Why it matters: Huauzontle is a Mexican green vegetable from the quinoa family. It is harvested for its flower clusters, which have a mild, earthy flavor similar to spinach or broccoli. The florets hold up well to quick cooking — two minutes in boiling water is all they need before going into the pan. If you cannot find huauzontle at a Mexican market, spinach or broccoli florets are easy substitutes that give you a similar look.

    Eggs

    • Why they matter: Eggs provide the protein backbone of this hash. We give one egg per child and two per adult. Free-range eggs with orange yolks are worth seeking out for the colour they bring to the plate.

    Ham and Sausage

    • Why they matter: Smoked ham and Argentina chorizo (a pale, herb-seasoned sausage without the red pepper coloring of Mexican chorizo) add savory depth. The smoky notes from the ham complement the earthy huauzontle. Substitute with any sausage you prefer — Italian, breakfast links, or even turkey sausage all work. You can order uncured applewood smoked ham (B0923SPBN8) if you prefer an uncured ham.

    Jicama (Mexican Potato)

    • Why it matters: Jicama is the raw, crunchy element that gets carved into mini gravestones — its firm white flesh holds a clean shape perfectly. Fresh starchy taste, mild and slightly sweet. Mexicans typically eat jicama with Tajin and lime. For this recipe, we use it raw as a decorative and textural element. Fresh jicama (B00B6QUFK2) is widely available at Latin markets; always peel before eating.

    hairy amaranth huauzontle plant

    How to Cook Huauzontle

    Take the huauzontle stems and pluck the small florets from the branch tips. Place a handful of florets into a bowl of water and rinse thoroughly. Strain and set aside.

    Bring a large pot of water to a boil. Add the florets and cook for 2 minutes — no longer, or they will turn mushy. Drain immediately and set aside. Your huauzontle is now ready to fold into the hash.

    jicama graveyard tombstones carved

    Frequently Asked Questions

    Where can I find huauzontle?

    In Mexico, huauzontle is widely available at traditional markets (tianguis) from late summer through fall. In the US, look for it at Latin specialty grocery stores. If you cannot find it, broccoli florets or baby spinach are the most reliable substitutes for both texture and nutrition.

    Can I make this dish for kids under age 3?

    Yes, but with one important caveat: the ghost decorations and jicama tombstones are choking hazards for very young children. Always remove all plastic decorations and small carved pieces before the children eat. Never leave the dish unattended with toddlers.

    How long does it take to carve the jicama tombstones?

    About 10 minutes once you get the hang of it. Use a sharp paring knife. Start by cutting ¼-inch slices, then rough-cut a tombstone arch shape from each slice. The jicama does not need to be perfect — slightly irregular shapes actually look more spooky and graveyard-authentic.

    Can I meal-prep this breakfast?

    The huauzontle can be blanched the night before and refrigerated. The jicama tombstones can be carved and stored in water in the fridge overnight. The actual cooking of the hash takes only 10–12 minutes, so morning assembly is quick even with the prep already done.

    What other vegetables can I add to this hash?

    Bell peppers (especially orange or black for Halloween color!) and sautéed mushrooms add volume and nutrition without overpowering the huauzontle. A handful of baby spinach stirred in at the end adds extra iron and wilts beautifully into the eggs.

    hairy amaranth huauzontle breakfast graveyard

    Hairy Amaranth (Huauzontle) Breakfast Graveyard

    Delicious graveyard hash with eggs, ham and sausage. It is made with the Mexican plant “Huauzontle”, jicama, eggs, and sausages. A fun Halloween breakfast dish in the morning!
    Print Recipe
    Pin Recipe
    Prep Time:10 minutes
    Cook Time:7 minutes
    Course: Breakfast
    Cuisine: Mexican
    Keyword: halloween breakfast
    Servings: 4 people

    Ingredients

    • ½ cup huauzontle florets
    • 1 jicama
    • 4 ham slices, thinly cut
    • 1 Argentina sausage or any sausage of your choice
    • 4–5 large eggs
    • salt and pepper
    • ghost decorations (for display only — remove before eating)

    Instructions

    • Prepare huauzontle: take the stems of the huauzontle plant and pick out the florets. Quickly soak in water and drain. Bring a pot of water to a boil and blanch for 2 minutes. Drain and set aside.
    • Prepare jicama tombstones: cut off the ends of the jicama and peel completely with a vegetable peeler. Slice ¼ inch thick. Using a paring knife, carve out mini tombstone shapes from each slice. You will need around 5–7 pieces.
    • In a frying pan, heat 1 tsp of oil over medium-high. Lightly sauté the ham until slightly brown, then add sliced sausage. Cook for 5 minutes.
    • Add the eggs. Scramble until half-cooked, then add the huauzontle florets. Keep stirring and breaking up the eggs. Season with salt and pepper.
    • Place everything in a shallow bowl. Arrange the jicama tombstones evenly around the dish, then add the ghost decorations spaced throughout. Serve immediately. Important: if you have children age 3 or under, remove all plastic ghost decorations and jicama tombstones before the children eat. Small plastics and carved pieces can be a choking hazard.
  • Chili Mango Sorbet

    Chili Mango Sorbet

    Ever been to a Mexican beach and watched someone devour a mango on a stick covered in Tajín? That combination of sweet, tangy, and spicy is exactly what this chili mango sorbet delivers — except you make it at home in your blender and freeze it for 2 to 3 hours. It is vegan, gluten-free, and completely dairy-free, which means everyone at the table gets a scoop.

    This post may contain affiliate links. If you purchase through these links, I may earn a small commission at no extra cost to you. Thank you for supporting Love & Harvest!

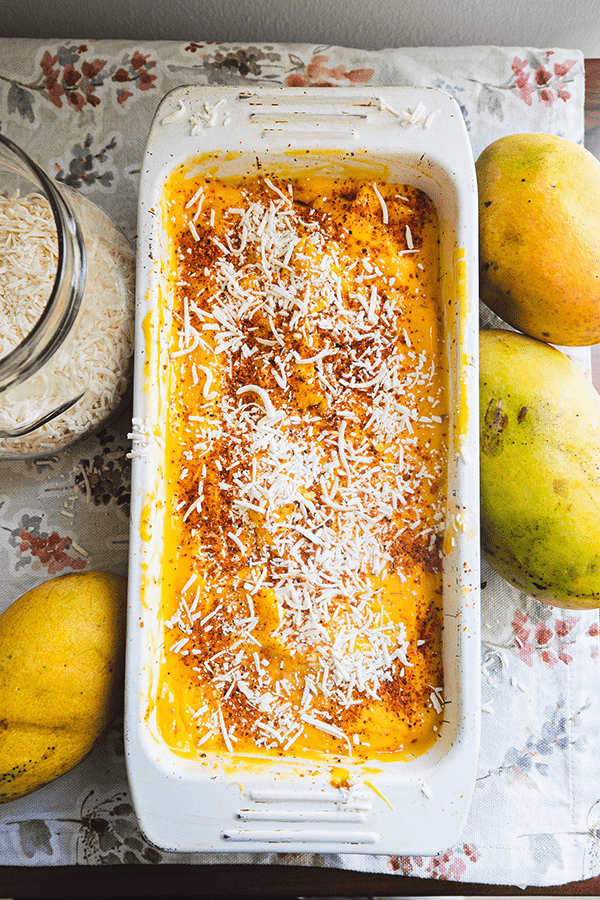
    Chili mango sorbet in a loaf pan topped with shredded coconut and chili powder

    The Flavour

    One of the things that makes chili mango sorbet so special is the combination of sweet and spicy flavours. The sweetness of the mango is perfectly balanced by the heat of the chili powder, creating a flavour experience that is both satisfying and refreshing.

    The coconut cream and maple syrup add a natural sweetness that complements the mango. While the lime juice provides a tangy citrus flavour that rounds out the overall taste.

    Loaf pan of mango sorbet with coconut, next to fresh mangoes

    Vegan Gluten-Free Dessert

    Another great thing about chili mango sorbet is that it is vegan and gluten-free. Mangoes contain vitamins A and C and some fiber. And maple syrup is a natural sweetener that adds depth of flavour beyond simple sweetness.

    How to Serve Chili Mango Sorbet

    When it comes to serving chili mango sorbet, there are many different ways to enjoy it. You could serve it:

    • on its own as a refreshing summer treat
    • pair it with fresh fruit or chopped nuts for added texture and flavour
    • serve it alongside a spicy dish to help balance out the heat

    Looking for more frozen treats? Try our Fresh Mango Sorbet or the tropical Matcha Avocado Popsicles.

    A hand sprinkling chili-lime seasoning over mango sorbet

    Ingredients

    Key Ingredients

    Frozen Mangoes

    • Why they matter: Mangoes are the star of the show. They contain vitamins A and C and some fiber. Frozen mango is required for this recipe — it gives you that cold, creamy sorbet texture without needing an ice cream machine. Cut them into small chunks before freezing for the best results.

    Coconut Cream

    • Why they matter: We are eliminating dairy for this recipe, and full-fat coconut cream gives the same luscious, creamy texture as dairy — but much tastier. Do not substitute with light coconut milk or the sorbet will be icy and thin.

    Tajín Clásico Chili Seasoning

    • Why they matter: In Mexico we love to sprinkle Tajín on mango, and this sorbet is the frozen version of that. Tajín delivers chili, lime, and salt in one hit. You can find it at most grocery stores or pair it with an ice cream maker if you want a churned version.

    Maple Syrup

    • Why they matter: To add natural sweetness with depth of flavour. It pairs beautifully with tropical fruit. Adjust the amount to your taste and the sweetness of your mangoes.

    Bottle of chili-lime seasoning held over a pan of mango sorbet

    Why Make Chili Mango Sorbet?

    • Unique dessert — If you are up for something new, different, and super tasty, this is the perfect dessert for you.
    • Take advantage of mango season — When mango is abundant, freeze it. This recipe is the perfect way to use up freezer-stored mango all year round.
    • So tasty — Ever gone to a Mexican beach and seen people sprinkling chili on a mango on a stick? This is exactly that — no travel required.

    Professional Tips

    Pro Tip #1 – Use a High-Speed Blender

    A high-speed blender will make all the difference for this recipe. The recipe asks you to blend frozen mango chunks, so a heavy-duty blender that can break down frozen ingredients is essential. A regular blender may struggle.

    Pro Tip #2 – Small Mango Chunks

    Smaller mango chunks break down more easily in the blender. If you are freezing your own mangoes, remember to cut them into small pieces before freezing.

    Pro Tip #3 – Rest for 10 Minutes Before Serving

    This sorbet will be difficult to scoop straight from the freezer. Leave it on the countertop for 10 to 15 minutes before trying to scoop. It softens to the perfect consistency.

    Frequently Asked Questions

    Do I need an ice cream machine to make this sorbet?

    No. This recipe requires only a high-speed blender. Blend, transfer to a freezer-safe container, freeze for 2 to 3 hours, and it is ready to scoop.

    Can I use fresh mango instead of frozen?

    Fresh mango will not give you the sorbet texture. You need frozen mango for the cold, creamy consistency. If you only have fresh mango, cut it into chunks and freeze it for at least 4 hours first.

    What can I substitute for Tajín?

    If you cannot find Tajín, use a mix of chili powder, a pinch of salt, and a squeeze of lime. The key is that combination of heat, salt, and citrus that Tajín delivers in one ingredient.

    Is this sorbet really vegan and gluten-free?

    Yes. Every ingredient in this recipe — frozen mango, coconut cream, lime juice, maple syrup, and Tajín Clásico — is naturally vegan and gluten-free.

    How long does chili mango sorbet keep in the freezer?

    Stored in a sealed container, this sorbet keeps well for up to 2 weeks. After that it may develop ice crystals and lose its creamy texture. Always press plastic wrap directly on the surface before sealing.

    Can I make this without coconut cream?

    Yes, but the texture will be less creamy. You can substitute with full-fat coconut milk as a lighter option, or blend in half an avocado for a creamier consistency without a strong avocado flavour.

    Chili mango sorbet with toasted coconut in a white loaf pan

    Chili Mango Sorbet

    Chili mango sorbet is a sweet and spicy treat to cool you down on a hot day! Vegan and GF. Print Recipe Pin RecipePrep Time:10 minsCook Time:25 minsCourse: DessertKeyword: chili mango sorbet, dessert, veganServings: 6 people

    Equipment

    • high speed blender

    Ingredients

    • 3 cups mango chunks frozen and cut into small pieces
    • ½ cup full fat coconut milk or cream
    • 1 lime juice
    • 2 tbsp maple syrup
    • 2 tsp dried coconut strips
    • 1-2 tsp Tajín Clásico chili seasoning salt

    Instructions

    • In a high speed blender, put all the ingredients together.
    • Blend on high for 1 minute until everything comes together smoothly with no lumps. If you find it is not coming together well, add a little bit of water to make it less thick.
    • Transfer the sorbet to a freezer-safe container (I prefer a 9×5 bread pan), cover and freeze for 2-3 hours.
    • When ready to serve, let sit at room temperature for 5-10 minutes to soften before scooping.
  • Halloween Monster Apple Snacks

    Halloween Monster Apple Snacks

    The cutest monster apple snacks for Halloween! Watch your kids light up when they open their lunchbox and see these boo-licious apple snacks. Great as a lunch box idea that is adorably appetizing — and the best part is the kids can help build them too.

    apple monster halloween

    This post may contain affiliate links. If you purchase through these links, I may earn a small commission at no extra cost to you. Thank you for supporting Love & Harvest!

    These super cute Halloween Monster Apple Snacks are Boo-liciously tasty. The perfect Halloween snacks for your kids!

    These cute monsters are made with green apple slices, peanut butter, chocolate chips, strawberries, peanuts, and some leftover cake fondants.

    Making these Halloween monster apple snacks is easy and even the kids can join in on the fun! Making Halloween snacks can be fun, educational, and creative for children!

    Can you imagine the surprise and delight when they open their lunchbox to find these cute monsters waiting for them? I know as parents we always want to surprise our kids with something that is not materialistic, and this is the best intangible surprise you can give your little ones!

    Make these for them, and I’m sure they will feel your effort and love for them! For more fun Halloween food ideas, check out our Halloween Frankenstein guacamole — another crowd-pleaser for kids.

    Let’s get started on how to assemble these cute Halloween Monster Apple Snacks!

    Why You Will Love These Halloween Monster Apple Snacks

    • Creative: let the kids be involved with this process! There’s nothing more creative than letting the kids build their own food! The best part is that all parts of this project are edible — nothing goes to waste.
    • Fun snack for kids: building education through play is the best tactic for getting your kids to learn! They get to recognize forms and shapes!
    • Put a smile on your kid: building these apple snacks with your kids is a great way of bonding. Even if you don’t have the time to work on them with the kids, making these monsters yourself and putting them in their lunchboxes will make them feel loved and treasured. They will feel your effort and amor for them!

    Ingredients

    Apples

    We will need green apples for this project. I use Granny Smith green apples. They taste excellent and all kids love this variety of apples! The tartness of Granny Smith balances perfectly with the sweet peanut butter and chocolate chips.

    Peanut Butter

    Besides the fact that peanut butter is delicious, it serves as the glue for this snack project and helps hold everything together. Use smooth peanut butter for the easiest spreading. A natural smooth peanut butter is the best choice here.

    Peanuts

    There’s something delightfully cute about these crooked teeth made out of peanuts. They stick really well with the peanut butter, and it’s so satisfying sticking these teeth in the monster’s mouths!

    Strawberries

    Monsters can’t be monsters without a funny tongue to showcase! We are thinly slicing the strawberries as the tongue for the monsters. So cute! Make sure to cut each strawberry thinly enough so it fits snugly in the apple mouth slot.

    Chocolate Chips

    I don’t know any kid who doesn’t love chocolate chips, and they are the perfect size for the eyes! I promise you, these eyes are the first to go once the kids see them. Use semi-sweet or dark chocolate chips for the best look.

    Fondants or Dried Fruits

    The fondants go around the rim of the eye. They help enhance the eye and make it pop out more. If you don’t have fondant, you can easily replace it with sliced dried fruits, sliced marshmallow, flat circular candies, or even Cheerios cereal.

    halloween monster apple bites

    To keep these vegan, use dairy-free chocolate chips and a gelatin-free fondant (check the labels), or use sliced dried fruit for the eye rims. Skip the marshmallow and Cheerios options if you need them vegan.

    Frequently Asked Questions

    How do I stop the apples from turning brown?

    Dip or brush lime juice (or lemon juice) onto the flesh of the apple immediately after cutting. The citric acid prevents oxidation and keeps the apple looking fresh and green. Assemble the monsters close to serving time for the best results.

    Can I make these ahead of time?

    You can prep the components the night before — cut the apples and brush with lime juice, portion out the peanut butter, and slice the strawberries. Store everything separately in the fridge and assemble the morning of for the freshest look.

    What can I use instead of peanut butter for nut-free schools?

    Sunflower seed butter (sunbutter) is the best nut-free substitute and has a very similar texture and taste. You can also use tahini, cream cheese, or a soy nut butter.

    How many apple snacks does this recipe make?

    With 4-5 apples, cutting each into quarters, you get about 16-20 apple monster pieces. Plan for about 4 monsters per child as a snack serving.

    Can I use red apples instead of green?

    Yes! Green Granny Smith apples are ideal because their tart flavour balances the sweet peanut butter, but red apples like Fuji or Gala work just as well. The monsters will look just as adorable.

    Are these suitable for toddlers?

    Skip the peanuts as whole peanuts are a choking hazard for young children. You can use finely chopped peanuts or leave the teeth out altogether.

    Halloween monster apple snacks

    Halloween Monster Apple Snacks

    Print Recipe Pin RecipePrep Time:15 minsServings: 4 people

    Ingredients

    • 4-5 Granny Smith's Green Apples
    • 3 tbsp peanut butter smooth
    • 3 strawberries medium or small sizes thinly sliced
    • 15-20 peanuts
    • 1 inch fondant ball or sliced dried fruits or 20 pcs cheerios cereal
    • 20 chocolate chips

    Instructions

    • Wash and dry the apples. Cut the apples in quarters (cut 4 pieces per apple). Also cut out the stem and the core of the apple.
    • Take a slice of the apple, and using a paring knife, cut a hole in the center of the skin of the apple (this is where the mouth will be). Adjust the size of the mouth according to the slice of the strawberries. Each mouth will be a different size depending on the size of the strawberry.
    • Add peanut butter all over the cut hole. Grab a piece of sliced strawberry and firmly press it to the mouth. Add the peanuts to the top of the mouth and firmly press the peanuts into the mouth as well.You can add as many or as few peanuts as you like. Be creative!
    • Lastly, take a small piece of fondant and press it down to a flat circular shape (or whatever food you choose that is flat and circular). Tap some peanut butter to the back and front of the circular object. First glue the fondant to the apple slices and then press the chocolate chips on top.You can add one eye or up to three eyes per monster.

    Notes

    • To keep the apples from going brown, dip or brush lime juice to the flesh of the apples.
  • Floating Halloween Screamer Dessert

    Floating Halloween Screamer Dessert

    What if dessert could be both hauntingly beautiful and genuinely delicious? These Floating Halloween Screamers are inspired by Edvard Munch’s iconic painting and built from a purple yam base swirled with coconut cream, sweet black rice, and chewy tapioca pearls. Kids go absolutely wild for them — mine eat two or three bowls each!

    halloween desserts ideas

    This post is all about a cute Halloween dessert inspired by The Scream by Edvard Munch: purple yam pudding with coconut cream, sweet black rice, and tapioca served in clear cups with a floating banana ghost.

    Food art can be inspired by anywhere — like this Halloween dessert inspired by the famous painting The Scream by Edvard Munch.

    Edvard Munch, The Scream, 1893, National Gallery, Oslo (1) (35658212823)

    Richard Mortel from Riyadh, Saudi Arabia, CC BY 2.0, via Wikimedia Commons

    I’m sure you’ve seen this painting somewhere in your life — and this is the edible Halloween version of it.

    halloween desserts pinterest

    Not only is this dessert adorable, it is also incredibly delicious! The vibrant purple color comes from purple yam, beautifully swirled with coconut cream. Inside you will find sweet black rice and tapioca pearls adding a delightful chew and texture. It is a feast for the eyes and the palate — and it is sure to be a hit at your Halloween party!

    traditional halloween desserts

    The Screaming Flavour

    Coconut cream adds a tropical flavour and enhances the creamy texture of the purple yam. We love pairing coconut cream with purple yam because the combination is simply perfect.

    Purple yam has a naturally sweet, floral taste with a texture similar to sweet potato. If you enjoy rice-based desserts like horchata, you will love this — it features sweet black rice and chewy tapioca for a unique textural experience.

    Key Ingredients

    Ingredients

    Purple Yam (Ube)

    Steamed and pureed into a smooth, vibrant base for the dessert cups.

    • Why it matters: Purple yam gives these cups their signature deep purple color and naturally sweet, floral flavour.

    Coconut Cream

    Poured slowly over the purple yam puree to create beautiful swirls in the glass cups.

    • Why it matters: Coconut cream adds fat and richness that balances the earthy sweetness of the purple yam. The key is to pour it gently and close to the surface — this creates those gorgeous swirl patterns. Do NOT mix it in during cooking.

    Sweet Black Rice and Tapioca

    Cooked separately and layered into the cups with the purple yam.

    • Why it matters: The black rice adds a nutty, slightly chewy element and a dramatic colour contrast. Tapioca pearls add another layer of texture — soft and pillowy. Use clear glass ramekins or dessert cups so the layered colours show through beautifully.

    Banana Ghost

    Sliced banana floated on top with chocolate chip eyes and a sunflower seed (or chocolate chip) mouth.

    • Why it matters: This is the detail that makes the dessert an experience. Wash the banana outside gently with mild soap, rinse thoroughly, then slice at an angle into half-inch pieces. The banana will float for a while — serve promptly as it will start to brown over time. To pipe on the face, a set of small piping bags with melted chocolate works beautifully.

    How to Make the Screamer Cups

    Step 1 — Make the Purple Yam and Black Rice Base

    Find the Purple Yam and Sweet Black Rice recipe in our dedicated post — it uses just a few key ingredients. Steam the purple yam, prepare the sweet black rice and tapioca separately, then combine them. Remember: do not add the coconut cream during cooking. Save it for assembly.

    Step 2 — Fill the Cups

    Use clear 10oz glass cups. Fill each cup with the dessert mixture, leaving about half an inch of space at the top for the coconut cream swirl.

    Step 3 — Add the Coconut Cream Swirl

    Pour the coconut cream slowly and close to the surface. Pouring gently and close to the cup creates beautiful swirls in the purple yam puree.

    classic halloween desserts

    Step 4 — Decorate the Screamer Face

    Gently wash the outside of the banana with mild soap and rinse thoroughly. Slice the banana at an angle into half-inch pieces. For the eyes, use chocolate chips. For the mouth, get creative — sunflower seeds or another chocolate chip work great. Float the banana slice on top and you are done!

    easy halloween desserts for adults

    This Halloween Screamer Dessert Is Perfect for Your Party!

    There is nothing more adorable and mesmerizing than having these mini bowls laid out on your table. Kids are drawn to them and won’t stop eating. What makes this dessert even more special is its unique and delicious flavour. Forget the usual hot dog mummies and Halloween pizza — serve this creative dessert and watch everyone scream for more!

    Looking for more Halloween food ideas? Try our Halloween Spooky Breakfast Bowl to start the spooky day right, or make a batch of Homemade Halloween Sugar Cookies for the whole family.

    Frequently Asked Questions

    Where do I find purple yam?

    Look in Asian grocery stores — it is sold fresh, frozen, or as powdered ube. Filipino and Vietnamese markets almost always carry it. It is sometimes labelled as ube (Filipino) or taro (though taro is different — purple yam is sweeter). You can also find it online.

    Can I make this dessert ahead of time?

    Yes, with one caveat. Prepare the purple yam base, black rice, and tapioca up to 2 days ahead and refrigerate separately. Assemble and add the coconut cream swirl right before serving. The banana ghost should always be placed just before serving to avoid browning.

    Can I use tapioca pearls from boba tea?

    Absolutely! Large boba tapioca pearls work perfectly and add a fun chewiness. Cook according to package instructions before assembling the cups.

    How do I keep the banana from turning brown?

    Serve these cups immediately after placing the banana ghost. If you need a tiny bit of extra time, a squeeze of lemon juice on the cut banana surface will slow browning. Do not prepare the banana slices more than 30 minutes before serving.

    What if I can’t find fresh coconut cream?

    Canned full-fat coconut cream works excellently. Refrigerate the can overnight and use the thick cream that separates to the top — it will pour slowly and create even more dramatic swirls.

    Can this dessert be made vegan and gluten-free?

    It already is! Purple yam, coconut cream, black rice, tapioca, and banana are naturally vegan and gluten-free. Just make sure your chocolate chips are dairy-free if needed.

  • Halloween Spooky Breakfast Bowl

    Halloween Spooky Breakfast Bowl

    Halloween is the best time to showcase your creativity with food! Let your food art do all the talking and have some fun!

    halloween breakfast ideas

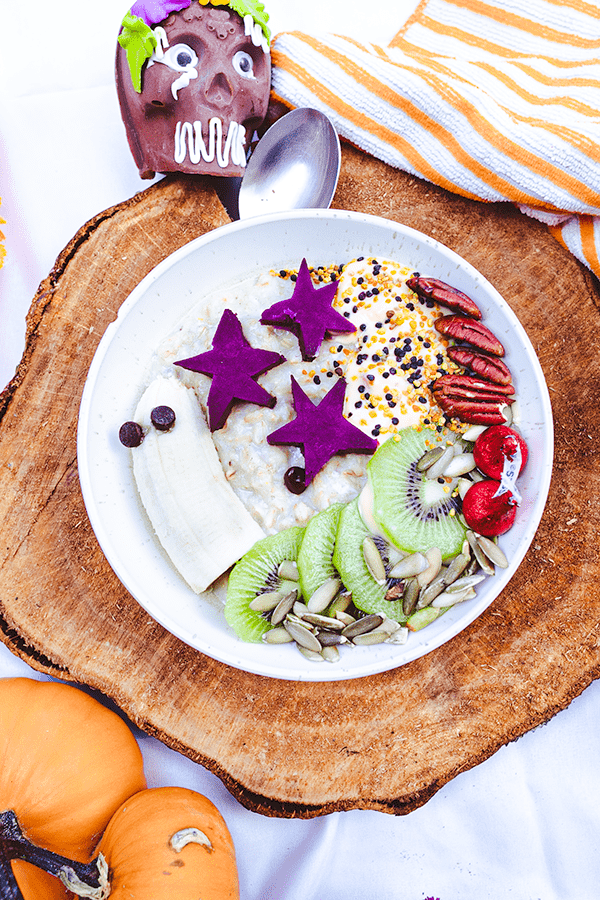
    This post is about a spooky Halloween breakfast bowl — made with purple yam, banana, chocolate, yogurt, kiwi, and bee pollen. Fun, colorful, and ready in under 15 minutes.

    I cast thy away, boring breakfast food!

    And I bring you this fun and adorable Halloween theme oatmeal bowl! This bowl is so yummy your kids will gobble it up in minutes. There is nothing more exciting than waking up to a bowl of Halloween ghosts floating on milk and oatmeal. Kids love fun food art. They love making it and eating it. Halloween is the best time to let them lead!

    Looking for more Halloween ideas? Check out our Floating Halloween Screamer Dessert for a stunning party showpiece, and our Halloween Frankenstein Guacamole for a fun savory option.

    Creative Food Is Good for Kids

    Allowing your kids to be creative is great for their minds and leadership. Here are some benefits of cooking with your kids:

    • Develops an adventurous eater: Kids who cook tend to have a more varied palate. If you want your kids to be open-minded world leaders, start them young in the kitchen.
    • Life skill: We all learn to cook for ourselves one day. Starting them young helps them adapt well to adulthood.

    Key Ingredients

    Ingredients

    Purple Yam

    Steamed, cooled, and cut into star shapes using a cookie cutter or knife.

    • Why it matters: Purple yam provides the hauntingly beautiful deep purple color for the bowl. Its naturally sweet, floral flavour pairs wonderfully with oatmeal. Steam it in a bamboo steamer or a regular steamer pot for 10 minutes.

    Banana Ghost

    Half a banana with chocolate chip eyes makes the iconic floating ghost.

    • Why it matters: The banana ghost is the centrepiece of the whole bowl — it floats on top of the milk-soaked oatmeal. Place it just before serving to prevent browning. Use chocolate chips or food coloring for expressive ghost faces.

    Oatmeal Base

    About 1.5 cups of cooked oatmeal with a pinch of cinnamon and a teaspoon of sugar.

    • Why it matters: Oatmeal is the blank canvas for all the Halloween decoration. For a creamier texture, stir in one egg right before turning off the heat — it cooks through from the residual heat and makes the oatmeal incredibly smooth and protein-rich. Adding half a cup of milk (not stirred in — let it float) creates the spooky foggy effect.

    Toppings and Decoration

    Yogurt, kiwi, bee pollen, pecan nuts, Hersey Kisses, and sunflower seeds.

    • Why it matters: Each topping adds colour and texture. The yogurt creates a contrasting white zone for the pecan nuts. The kiwi adds bright green. The bee pollen dusted on yogurt adds golden colour. It is edible art.

    Prepping the Bowl

    1. Steam the purple yam for 10 minutes. Let it cool and peel the skin off. Using a star cookie cutter or a knife, cut 3 star shapes. They don’t need 5 points — be creative.

    2. Cook your oatmeal as you like it. Add a pinch of cinnamon and 1 tsp sugar. For smoother consistency: just before turning off the heat, stir in one egg and let it cook through from the residual heat.

    3. Slice the kiwi.

    4. Cut half the banana and peel the skin off.

    Arranging the Breakfast Bowl

    1. In a shallow bowl, add about 1.5 cups of oatmeal. Then add half a cup of milk. Do not stir — let it float on top of the oatmeal for the spooky fog effect.

    2. Place the banana on one side of the bowl.

    3. Place yogurt on the other side, opposite the banana.

    4. Arrange the pecan nuts on top of the yogurt and along the side of the bowl.

    5. Sprinkle bee pollen on top of the yogurt.

    6. Place the kiwi at the bottom of the bowl and add some sunflower seeds on top.

    7. Finally add chocolate chips for eyes on the banana, and some Hershey Kisses on the side of the bowl.

    halloween breakfast bowl recipe

    Frequently Asked Questions

    Can I make this Halloween breakfast bowl the night before?

    Partially, yes. Cook the oatmeal, steam the purple yam, and slice the kiwi the night before — store everything separately in the fridge. In the morning, reheat the oatmeal, assemble the bowl, and add the banana ghost right before serving to prevent browning.

    What can I substitute for bee pollen?

    Honey drizzled over the yogurt gives a similar golden colour and sweetness. Granola or hemp seeds also work and add a nice crunch.

    My kids don’t like purple yam — what else can I use for the purple colour?

    Blueberries or acai powder stirred into a small amount of yogurt creates a deep purple-blue colour. You can also use butterfly pea flower tea as a natural food dye — it turns vivid blue-purple and is flavourless.

    What other Halloween breakfast bowls can I make?

    This same base concept works with different characters — try a mummy bowl (white yogurt lines over dark oatmeal), a jack-o-lantern bowl (orange butternut squash puree), or a witch bowl (green matcha oatmeal). See our Halloween Monster Apple Snacks for another quick spooky idea.

    What’s in this breakfast bowl?

    Oatmeal cooked with milk, an egg and a teaspoon of sugar, purple yam stars, a banana ghost, yogurt, kiwi, pecans, sunflower seeds and a sprinkle of bee pollen. The full ingredient list is on the recipe card. The chocolate chips and Hershey Kisses are the treat part, and on Halloween, that is perfectly fine.

    How do I keep the banana from sinking into the oatmeal?

    Add the banana slice last, right after pouring the milk. The milk creates a surface film on the oatmeal that helps the banana float briefly. Serve immediately for the full floating ghost effect.

  • Halloween Frankenstein Guacamole

    Halloween Frankenstein Guacamole

    This Frankenstein guacamole is the most adorable dip you can make, and it will be hard to be the first to dig into his sweet face!

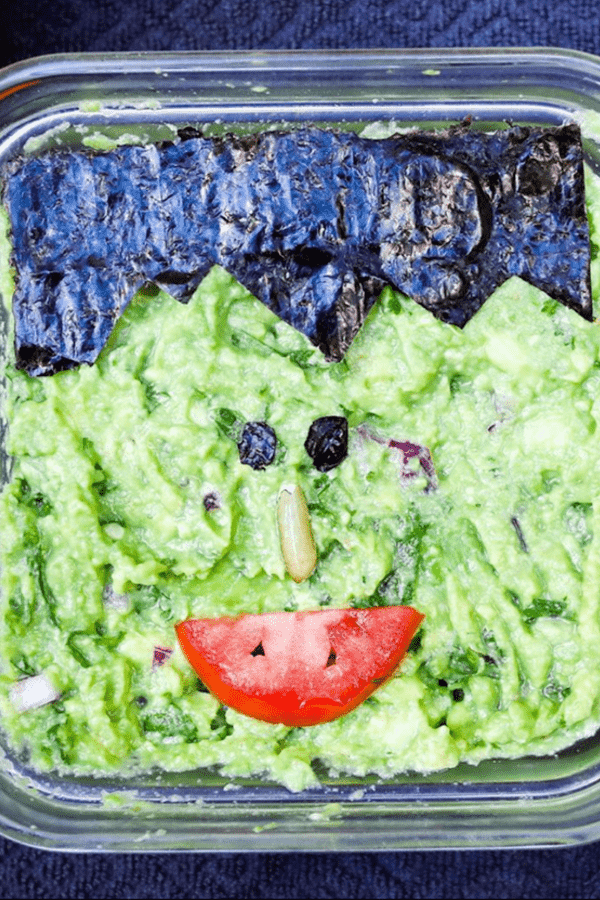
    Guacamole decorated as Frankenstein with nori hair and a tomato mouth

    This post is all about Halloween Frankenstein Guacamole. The food design of this adorable Frankenstein is made with sushi seaweed papers, sunflower seeds, and tomatoes.

    This post may contain affiliate links. If you purchase through these links, I may earn a small commission at no extra cost to you. Thank you for supporting Love & Harvest!

    This delicious guacamole recipe is so refreshing and delicious that we gave him life and turned him Mexican! At least until people start dipping his presence away!

    A cute recipe for food styling to bring to kids’ Halloween parties. It is an easy no-brainer side dish you can whip up in minutes. Halloween is a big week — kids are hammering you about costumes and parties. Don’t overthink the food. Make this easy peasy guacamole for Halloween today!

    The best part is that you can make this any size you want. All you need is to scale the design to fit the serving dish you are bringing.

    Key Ingredients

    Ingredients

    Avocado

    The star of the show — ripe, creamy avocados are the green canvas for Frankie’s face.

    • Why it matters: A ripe avocado should give slightly when pressed. Under-ripe avocados are grainy and hard to mash smoothly. Over-ripe avocados taste off. The lime juice you add prevents browning and adds essential citrus brightness. Traditionally in Mexico, we mash avocados in a mortar and pestle for authentic texture — chunky or smooth, your choice.

    Sushi Nori (Seaweed Paper)

    Nori sheets cut into Frankenstein hair and eyes.

    • Why it matters: Nori is what gives Frankie his iconic flat-top hairstyle and dark eyes. It cuts cleanly with scissors and holds its shape on the guacamole surface for serving time. It does not stay crisp for hours — serve within 30 minutes of decorating for best presentation.

    Lime

    Freshly squeezed lime juice mixed into the guacamole.

    • Why it matters: Lime does two critical jobs: adds citrus acidity that brightens all the flavours, and prevents oxidation (browning). If the guacamole will sit before serving, squeeze in an extra half lime and press plastic wrap directly onto the surface of the dip to exclude air.

    How to Make the Guacamole

    It only requires a few easy ingredients available in any grocery store: avocado, tomato, red onion, cilantro, and lime.

    First, pit the avocado and mash the flesh with a fork in a large bowl. Juice the lime into the avocado and mix well. Chop the tomato, red onion, and cilantro into small pieces. Add to the bowl. Salt to taste. It is that simple and so very delicious!

    How to Cut the Frankie Design

    Use sushi seaweed paper (nori) for the hair and eyes. Measure the length of your serving container, then use a cutting board and scissors to cut the fringe hair design. Be creative — play with the distance between the eyes and create your own version of Frankie. I use a sunflower seed as his nose, but it can be anything!

    Frankie Is Just the Beginning

    A Halloween Frankenstein Guacamole is just the start! How about a three-eye monster guacamole? A silhouette of a haunted house? The options are endless. For more Halloween fun, check out our Halloween Spooky Breakfast Bowl and Homemade Halloween Sugar Cookies.

    Why You Will Love This Halloween Frankenstein Guacamole

    • Easy recipe — just a few ingredients, no cooking required. Fresh and excellent tasting.
    • Fun design — Frankenstein is just the beginning! Design your own monsters at your own skill level.
    • Fun potluck dish — easy to make and bring, and completely captivating at Halloween parties.
    • Halloween food the kids will actually eat — avocado, lime and a few fun toppings.

    Frequently Asked Questions

    How do I keep guacamole from turning brown?

    Two methods work best: add extra lime juice (the acid slows oxidation), and press plastic wrap directly onto the surface of the guacamole, eliminating all air contact. An avocado pit in the bowl is a common tip but less effective than the plastic wrap method. Make the guacamole no more than 2 hours before serving for best color and freshness.

    How do I know if my avocados are ripe enough?

    Gently press the avocado near the stem end — it should give slightly under firm pressure but not feel mushy. The skin should be dark green to black. If the stem pops out easily and the flesh underneath is green (not brown), it is perfectly ripe.

    Can I add spice to this guacamole?

    Absolutely — and we encourage it! Add finely minced jalapeño or serrano pepper for a good kick. Serrano is hotter than jalapeño. Start with half a pepper, taste, and adjust from there. A pinch of cayenne also works if you want even heat distribution.

    Can I make this guacamole ahead for a party?

    Make it up to 2 hours ahead. Press plastic wrap directly onto the surface (no air gaps) and refrigerate. Decorate with the nori Frankenstein design right before serving — nori softens quickly once it contacts moisture.

    What can I serve with this guacamole besides tortilla chips?

    Sliced bell peppers, cucumber rounds, jicama sticks, and mini tostadas all work beautifully. For a Halloween theme, use black sesame crackers or triangle-cut tortilla chips arranged to look like bat wings around Frankie’s face.

    How large a batch should I make for a Halloween party?

    Plan on 1 medium avocado per 2 guests as a rough guideline. For a party of 20, use 10 avocados and scale all other ingredients proportionally. Use a large serving platter and scale up the Frankenstein design to match.

    Authentic Guacamole

    A simple yet delicious guacamole recipe that takes a matter of minutes to whip up!
    Prep Time 15 minutes
    Total Time 15 minutes
    Servings: 4 people
    Course: Appetizer
    Cuisine: Mexican
    Calories: 195

    Ingredients
      

    • 4-5 medium sized avocado
    • 1 – 1½ lime juice
    • 1 medium tomato diced
    • 1 branch cilantro chopped
    • ¼ red onion chopped
    • sea salt

    Method
     

    1. In a large mixing bowl, cut the avocado in half. Pit the centre seed out and scoop the green flesh into the bowl with a spoon.
    2. Use a fork and press the avocado. The more you mash the avocado the smoother the texture will be.
    3. Drizzle the lime on to the avocado and mix well. 1 lime is perfect but if you like to more acidic, you can half half a lime more.
      (Half half a lime more if you know it will not be eaten immediately to help it not turn brown).
    4. Add the chopped cilantro, tomato ,and red onion. Mix well. salt to taste

    Notes

    • Spicy: you’re more than welcome to add jalapeno or serrano peppers to give it a good kick.
  • Super Moist Cherry Loaf

    Super Moist Cherry Loaf

    There is one loaf you absolutely must bake before summer ends — a super moist cherry loaf bursting with juicy cherries, warm almond extract, and a golden crumb that somehow stays tender for days. This is the loaf that makes you wish summer never ended.

    This post may contain affiliate links. If you purchase through these links, I may earn a small commission at no extra cost to you. Thank you for supporting Love & Harvest!

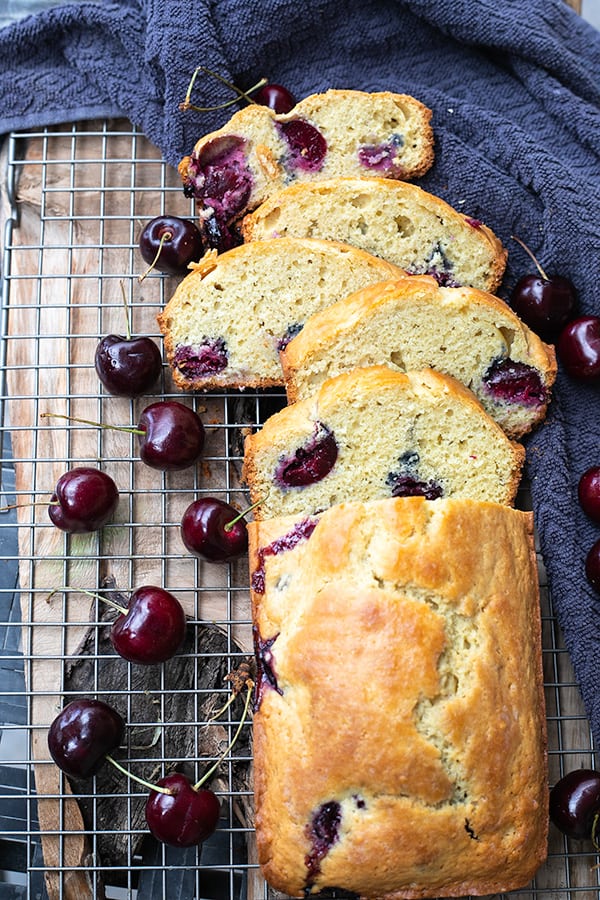
    Slices of super moist cherry loaf with fresh cherries on a wire rack

    This post is all about the best cherry loaf — a moist, crumbly recipe loaded with juicy cherries and a hint of almond. Perfect with your morning coffee or afternoon tea.

    It’s that time of the year when cherries take over the market stands — deep red, plump, and impossibly sweet. Before you let them go to waste, bake them into this simple loaf that celebrates the very best of late summer.

    The recipe comes together in one bowl, requires no stand mixer, and is forgiving enough for beginner bakers. Kids love helping fold in the cherries. And the smell while it bakes? Pure summer.

    Why You Will Love This Recipe

    • Perfect late-summer recipe — use up your cherry harvest before the season ends
    • Works with sweet or sour cherries — both varieties bake beautifully in this loaf
    • One-bowl, no mixer needed — simple enough for kids to help, done in under an hour
    • Butter-free swap — replace butter with apple sauce 1:1
    • Best morning loaf with coffee — pairs perfectly with a hot cup or a pat of butter on top

    Golden cherry loaf baked in a white loaf pan

    Ingredients

    Cherries

    Sweet cherries are best for this recipe. The sweetness really pulls through with the almond extract. Look for cherries that are fully ripe — the skin is soft and plump and easy to split in half. Fresh summer cherries are ideal, but if you can only find frozen, thaw and pat them dry before folding in.

    • Why they matter: Cherries are the star — they provide pockets of juicy fruit in every slice and keep the loaf moist even after a day or two.

    Almond Extract

    Almond and cherry are the best partners in the baking world. You can use coloured or clear almond extract — either works. Half a teaspoon is enough to perfume the entire loaf without overpowering it.

    • Why it matters: Almond extract amplifies the cherry flavour in a way vanilla simply cannot. Do not skip it.

    Eggs

    Two large eggs at room temperature give the loaf structure and lift. Cold eggs can cause the butter to seize, so take them out 20 minutes before you start.

    • Why they matter: Eggs bind the batter and are the key to that moist, tender crumb.

    Sugar

    Half a cup of natural cane sugar is just right. If you want to cut sweetness, a quarter cup works fine — the cherries carry plenty of natural sweetness on their own.

    • Why it matters: Sugar tenderises the crumb and helps the top brown to a golden finish.

    Loaf Pan

    A standard 9×5 loaf pan is all you need. Prep it with baking spray so the loaf releases cleanly after cooling.

    • Why it matters: A well-prepared pan means no sticking and a clean, even crust all the way around.

    Cherry loaf cooling on a wire rack surrounded by fresh cherries

    How to Make It with Apple Sauce Instead of Butter

    Replace butter with apple sauce. It is tried and tested, and it’s a delicious substitute. The loaf comes out even more spongy and is just as flavourful — maybe even better. Use a 1:1 swap.

    Cherry loaf batter studded with cherries in a white loaf pan

    What Goes Well with This Cherry Loaf?

    • A hot black coffee
    • Butter, lightly toasted
    • Nutella spread
    • Peach jam or blackberry jam
    • Iced peach tea

    Baking Time Tips

    Bake at 350°F for 55–60 minutes. For the last 5 minutes, watch closely. Once the top is slightly golden and the loaf has pulled away from the sides, take it out. The centre should still be slightly moist — that is what keeps it juicy. Let it cool in the pan for 5 minutes, then transfer to a rack.

    Slice of cherry loaf showing whole cherries in the crumb

    More Cherry and Baking Recipes

    If you loved this loaf, try these next: Cherry Syrup Recipe for topping pancakes and ice cream, and Cherry Clafoutis Pie for a French-inspired dessert using the same summer cherries. For a chocolate twist, the Dairy-Free Chocolate Cake is a crowd pleaser any time of year.

    Frequently Asked Questions

    Can I use frozen cherries instead of fresh?

    Yes. Thaw the cherries completely and pat them dry with paper towels before folding them into the batter. Excess moisture from frozen cherries can make the loaf gummy.

    How do I keep the cherries from sinking to the bottom?

    Toss the pitted and halved cherries in a tablespoon of flour before folding them into the batter. The light coating helps them stay suspended throughout the loaf.

    Can I replace the butter entirely?

    Yes — apple sauce is a great 1:1 substitute. The loaf comes out slightly more spongy but equally moist and delicious with fewer calories.

    How should I store this cherry loaf?

    Wrap tightly in plastic wrap or store in an airtight container at room temperature for up to 3 days. For longer storage, slice and freeze individual pieces — they thaw in 15 minutes.

    What type of cherries work best?

    Sweet cherries like Bing or Rainier are ideal because their sweetness pairs beautifully with almond extract. Sour cherries also work — just add an extra tablespoon of sugar to balance them.

    Can I add other mix-ins to this loaf?

    Absolutely. Chocolate chips, slivered almonds, or lemon zest all work well. Keep the total add-ins to about one cup so the batter is not overloaded.

    Moist Cherry Loaf

    Delicious cherry loaf that is moist and filled with perfectly cooked juicy cherries. Print RecipePrep Time:10 minsCook Time:50 minsCourse: DessertCuisine: AmericanKeyword: cherry loaf

    Ingredients

    • ¼ cup butter soft
    • ½ tsp almond extract
    • ½ cup sugar
    • 2 large eggs room temperature
    • 2 cup all-purpose flour
    • ¾ tsp baking powder
    • ½ tsp baking soda
    • ½ tsp salt
    • ½ cup milk
    • 1 cup sweet cherries pitted sliced in halves

    Instructions

    • Preheat the oven to 350 degrees F. Prepare a bread pan with baking spray.
    • In a mixing bowl, whisk together the apple sauce, sugar and almond extract until well blended. Add and whisk the eggs one at a time.
    • Sift together the flour, baking powder, baking soda and salt and add to the sugar mixture alternating with the milk. Gently fold in the cherries.
    • Pour the batter into the bread pan and bake for 55-60 minutes or until the bread has pulled away from the sides of the pan and the top is golden brown. Let cool in the pan for 5 minutes then transfer to a cooling rack. Serve warm or at room temperature.
  • Best Thanksgiving Turkey with Bacon Strips

    Best Thanksgiving Turkey with Bacon Strips

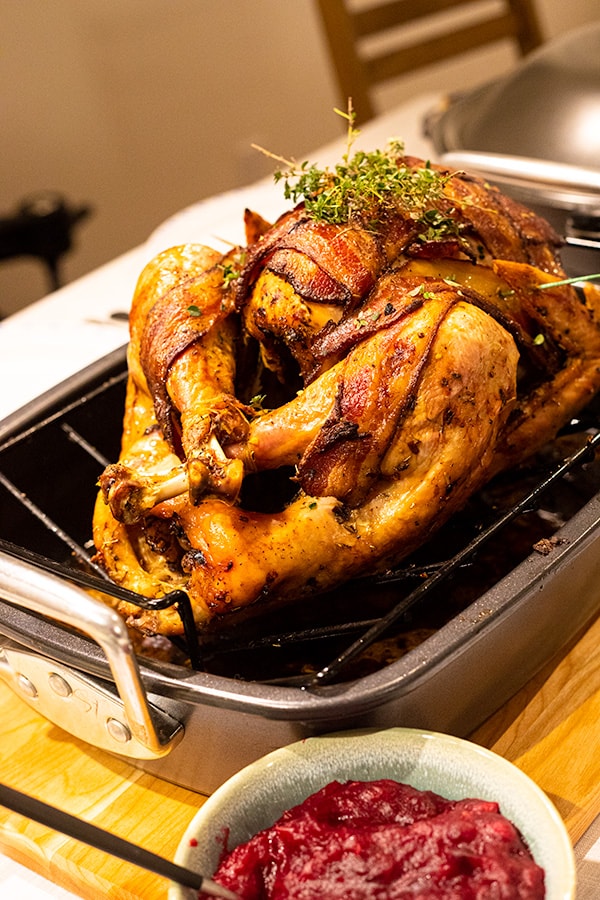
    Every Thanksgiving table deserves one truly legendary turkey — one that is impossibly juicy, wrapped in crispy woven bacon, and finished with a rich dripping gravy that has everyone scraping the pan. This is that recipe, and it has been the same one for over 10 years.

    This post may contain affiliate links. If you purchase through these links, I may earn a small commission at no extra cost to you. Thank you for supporting Love & Harvest!

    best thanksgiving turkey with bacon recipe

    This post is all about the best Thanksgiving turkey with bacon strips recipe. Turkey is moist and juicy from woven bacon along with a delicious gravy on the side.

    Thanksgiving turkeys have a reputation for being dry and flavourless. That reputation exists because most recipes miss a few critical steps. This recipe does not miss them. The result: the moistest turkey you have ever served — with crispy bacon on top and a gravy made from every last drop of those incredible drippings.

    My Chinese side of the family used to dread turkey. After trying this recipe, they now look forward to Thanksgiving every year. That is the best endorsement I can give.

    Why Try This Recipe?

    • Proven for 10 years — made this every Thanksgiving and Christmas, always comes out perfect
    • Woven bacon technique — locks in moisture, crisps evenly, and makes the presentation stunning
    • 90% hands-off cooking — long oven time, but you are mostly just basting every 30 minutes
    • Built-in gravy recipe — the drippings become the most flavourful gravy you have tasted
    • Works for any size turkey — use the sizing table below to scale cooking time

    The Best Turkey Gravy

    The gravy is made entirely from the turkey marinade and the drippings left in the pan. It is made in the 30 minutes the turkey rests before carving — no wasted time. The neck of the turkey (tucked inside the cavity when you buy it) goes into a pot with water and turkey juice to build the stock. Then you brown flour, whisk in the liquid, and reduce to a velvety, umami-packed gravy. This is the kind of gravy people pour on everything on the plate.

    Use the Turkey Carcass to Make Another Meal

    After the feast, boil down the carcass with the remaining marinade to extract every drop of flavour. Use the resulting turkey stock for:

    • Congee — add rice, ginger, and green onion for a warming bowl
    • Turkey noodle soup — exactly like chicken noodle soup, but richer
    • Chinese noodle soup — boil vegetables and noodles in the stock, top with chilli oil
    • Turkey chilli bean stew — turkey stock, red beans, tomato paste, and your favourite spices

    unique turkey recipes

    Ingredients

    Turkey (7kg / ~15 lbs)

    Use a fully defrosted turkey — never cook from frozen. A 7kg bird serves about 15 people generously. See the sizing table below if you are cooking for a different group size.

    • Why it matters: Defrosting completely is non-negotiable. Partially frozen meat cooks unevenly and risks undercooking near the bone.

    Smoked Bacon Strips

    One full package of smoked bacon strips is woven across the breast and legs. Smoked bacon adds a depth of flavour that regular bacon cannot match.

    • Why it matters: Bacon acts as a self-basting fat layer for the driest parts of the bird (breast and legs). The weave keeps the bacon in place as it shrinks during cooking.

    Seasonings (rosemary, thyme, oregano, basil, paprika, kosher salt)

    These six aromatics form the backbone of the marinade. They are combined with hot oil poured over finely chopped onion and garlic to create a fragrant, oil-based rub.

    • Why they matter: Hot oil “blooms” the dried herbs and drives the flavour deeper into the meat when rubbed into the fork-poked holes.

    Meat Thermometer

    A reliable instant-read meat thermometer is non-negotiable. Turkey is done at 170°F in the thickest part of the thigh.

    • Why it matters: Guessing doneness is how turkeys end up either raw or bone dry. A thermometer removes all uncertainty.

    Large Roasting Pan

    You need a large roasting pan that fits the turkey with room for the drippings to pool — those drippings become your gravy.

    • Why it matters: A too-small pan causes drippings to burn instead of collect. The collected juices are the entire foundation of the gravy.

    How Much Turkey per Person

    A general rule: 1 pound (0.45kg) per regular eater, 1.5 pounds (0.65kg) per heavy eater.

    Weight in kg

    Weight in lbs

    Time at 325°F

    Serves

    1.9 – 2.7 kg

    4 – 6 lbs

    2 – 2.5 hours

    4 people

    3.6 – 5.4 kg

    8 – 12 lbs

    2.5 – 3 hours

    8 people

    5.4 – 8.2 kg

    12 – 18 lbs

    3 – 4 hours

    12 people

    7.3 – 11 kg

    16 – 24 lbs

    4 – 6 hours

    16 people

    11 – 13 kg

    25 – 28 lbs

    5 – 7 hours

    25 people

    Defrosting the Turkey

    If buying frozen, start defrosting 2–3 days ahead. Defrost overnight on the counter in a deep dish (there will be drips), then finish in the fridge. Never rush this step — a partially frozen turkey will cook unevenly no matter how good the recipe is.

    Know the Anatomy of the Turkey

    Turkey has dark meat (legs — more active muscle, needs more oxygen) and white meat (breast — less active, drier). The breast is the part most likely to dry out, which is exactly why the bacon weave focuses heaviest coverage there. Knowing this anatomy means you baste smarter — more attention to the breast every 30 minutes.

    Woven Bacon Strips

    The weave is not just for aesthetics. When bacon strips shrink and curl during cooking, a flat-laid arrangement slides and bunches. The weave holds everything in position, providing consistent coverage across the entire breast and legs throughout the full cook time. Toothpicks at each end secure the perimeter — just count them going in so you remove every single one before serving.

    how to cook a turkey in the oven to be moist

    Seasoning

    The marinade is onion, garlic, rosemary, thyme, oregano, basil, paprika, and kosher salt — all finely chopped and combined, then hit with hot canola oil poured over the top. The hot oil extracts the full flavour from the aromatics on contact. Rub this all over the bird and into the fork-poked holes. Marinate overnight in the fridge for the deepest flavour.

    Fool-Proof Professional Tips

    Pro Tip 1: Use toothpicks to attach the bacon

    Secure the ends of the woven bacon strips with toothpicks. Do not push them too deep — you need to remove every one before serving. Count them as you go in, so you can confirm they are all out when the turkey rests.

    Pro Tip 2: Poke holes along the leg and breast

    Use a fork to vigorously poke deep holes across the legs and breast with even spacing. Do this only when the turkey is completely defrosted. The holes let the marinade penetrate deeply rather than sitting on the surface.

    Pro Tip 3: Weave the bacon strips

    Not just for looks — weaving keeps bacon in position as it shrinks and ensures even fat coverage across every inch of the breast. Flat-laid strips slide. Woven strips stay put.

    Pro Tip 4: Baste every 30 minutes

    Every 30–45 minutes, open the oven, slide the rack out slightly (not all the way), and baste the turkey with the drippings from the bottom of the pan. Focus on the breast and legs. Replace the foil and continue cooking.

    Pro Tip 5: Rest 30 minutes before carving

    Cutting a hot turkey leaks all the moisture out immediately. Resting 30 minutes lets the juices redistribute throughout the meat. This is what separates a good turkey from a great one.

    turkey recipes for dinner

    More Holiday Main Recipes

    Looking for more showstopper mains? Try the Thanksgiving Roasted Lemon Garlic Chicken as a smaller-crowd alternative, and the Succulent Sunday Pot Roast for a hearty weekend centrepiece.

    Frequently Asked Questions

    How do I know when the turkey is done?

    Insert a meat thermometer into the thickest part of the thigh, avoiding the bone. The turkey is done when it reads 170°F. If any part of the thigh reads below that, return to the oven and check every 15 minutes.

    Why does my turkey always come out dry?

    Usually because it was either over-cooked, not basted frequently enough, or the bacon was not covering the breast. Follow the 30-minute basting intervals, keep the foil on for most of the cook time, and only remove it for the final hour to crisp the bacon.

    Can I skip marinating overnight?

    You can marinate for a minimum of 6 hours, but overnight gives significantly deeper flavour. If you are short on time, at least poke holes and rub the marinade generously into every part of the bird, including inside the cavity.

    How long do I need to defrost the turkey?

    Plan for 2–3 full days. Start on the counter overnight, then move to the fridge for the remaining time. A 7kg turkey needs at least 48 hours in the fridge to fully defrost after the initial counter thaw.

    Can I make the gravy ahead of time?

    The gravy relies on the turkey drippings which are only available after cooking, so it cannot be made fully ahead. However, you can simmer the turkey neck in water 30 minutes before the turkey finishes to have the stock ready, then combine with drippings when the bird comes out.

    How should I store leftover turkey?

    Store leftover turkey in an airtight container in the fridge for up to 4 days. Slice the meat off the carcass before storing — it stays more moist than storing it on the bone. The carcass should be used for stock within 2 days.

    Best Thanksgiving Turkey With Bacon

    Best Thanksgiving Turkey with Woven Bacon Strips

    It's a meal that promises huge flavours and a happy full belly. The perfect Thanksgiving turkey recipe that promises the juiciest meat, crispy bacon, and umami gravy. The turkey is flavourful and luscious! Print Recipe Pin RecipePrep Time:30 minsCook Time:4 hrsCourse: Main CourseCuisine: AmericanKeyword: thanksgiving turkey, turkey baconServings: 15 people

    Equipment

    • food processor
    • turkey baster
    • large roasting pan

    Ingredients

    • 7 kg defrosted turkey
    • 1 cup canola oil
    • 1 tsp dried rosemary
    • 1 tsp dried thyme
    • 1 tsp dried oregano
    • 1 tsp dried basil
    • 2 tsp smoked paprika
    • 2 tbsp kosher salt
    • 1 whole garlic
    • 1 large white onion
    • 1 package smoked bacon strips

    Gravy

    • neck of the turkey
    • 2 cups water
    • 2 tbsp flour
    • salt and pepper to your taste

    Instructions

    Turkey Preparation

    • Wash the defrosted turkey and dry with paper towel.
    • Using a fork, poke holes along all parts of the turkey legs and breasts. Space them out evenly and not so close together or the skin might break. Use 1 tbsp of kosher salt and rub all over the turkey. Set aside.

    Marinate Preparation

    • Use a frying pan and add the canola oil. Heat until it smokes.
    • In the meantime, combine all the spice together: rosemary, thyme, oregano, basil, paprika and salt.
    • In a food processor, chop finely the whole bulb of garlic and onion. Combine well with the spices. Put in a heat proof glass bowl.
    • Pour the hot oil on top of the bowl of spices, and stir well to combine everything.
    • To marinate the turkey, wear gloves first. Place the turkey in a dish that is deep and that will also fit inside your fridge. Take a handful of the marinate and start to rub the turkey all over it. Be vigorous and rub hard. Rub the cavity of the turkey as well. If you have extra marinate, put it on top of the turkey and inside the cavity.
    • Plastic wrap the turkey and place it in the fridge. Marinate at least 6 hours or overnight.

    Cooking the Turkey

    • Preheat oven to 325°F. Place rack in the middle of the oven, and take out the other racks.
    • Take the turkey out, move the turkey to the large roasting pan, and discard the plastic wraps.
    • Start to weave the bacon strips on top of the turkey. Make sure it overlaps the legs and breasts.
    • For each end of the bacon strips, secure it on to the turkey by poking it with toothpicks. Count the number of toothpicks used, so when you take it out, you have removed them all.
    • Lay a sheet of tinfoil on top of the turkey securely.
    • Place the turkey inside and set the timer for 3.5 hours (15-20 minutes per pound).

    30-Minute Interval Basting

    • Open the oven door and remove the tin foil, move the rack out slightly and baste the turkey with the juice at the bottom of the pan. Give it a good baste across the legs and breast. Replace the tinfoil and close the oven door.

    Final Stages of Cooking

    • Use a meat thermometer and insert it to the thigh of the turkey. Turkey is done when it reads 170°F in the thickest part of the thigh.
    • For the last one hour of your cooking time, remove the tin foil and let bacon get crispy.
    • When it is time to remove the turkey, allow it to sit outside for 30 minutes before carving.

    Turkey Gravy

    • Once the turkey is moved from the large roasting pan, take the juice out of the pan. Defat the oil from the juice.
    • Take the neck of the turkey and put it in a pot along with 2 cups of water. Boil on medium low heat for 20 minutes along with the juice of the cooked turkey. Discard the neck.
    • In a large cooking pan, fry the flour until brown and fragrant, about 2 minutes. Whisk continuously as you pour the juice into the pan. Keep whisking until the gravy is well blended with no flour lumps. Cook for 5-10 minutes on low.
    • OPTIONAL: Blend the gravy for a smooth puree consistency.
    • Season with salt and pepper to taste.
  • BEST Pumpkin Ravioli With Sage Butter

    BEST Pumpkin Ravioli With Sage Butter

    If you have ever wanted to make restaurant-quality pasta at home, this is the recipe. Pumpkin and spinach ravioli wrapped in chewy homemade dough, finished with sage butter sauce and toasted pecans — the flavour is so layered and the texture so luxurious that guests will genuinely think you ordered from an Italian restaurant. The cost is a fraction, and the satisfaction of making it yourself is something no delivery can touch.

    This post may contain affiliate links. If you purchase through these links, I may earn a small commission at no extra cost to you. Thank you for supporting Love & Harvest!

    Pumpkin ravioli

    Why You Will Love This Pumpkin Ravioli

    Pumpkin and spinach are two ingredients that pair beautifully together — kind of like wine and cheese. The taste is autumnal and exquisite in texture. Pureed pumpkin and spinach folded with panela cheese and cream cheese give the filling a velvet consistency. Lightly seasoned with nutmeg is the secret that brings hints of warmth and nuttiness. A mature dish that can be enjoyed by the whole family.

    If you love this pasta, try our homemade pesto gnocchi next — it uses a similar approach of hand-crafted pasta with bold sauce. For a vegetable-forward pasta, our fresh beet pasta is another showstopper worth trying.

    Ingredients Deep-Dive

    Pumpkin

    The pumpkin used in this recipe is the green Mexican variety — sweeter than the orange variety commonly seen in North America. If you have a variety or canned version you prefer, use what you have. The key is that the pumpkin is fully roasted and pureed to a smooth, thick consistency before going into the filling.

    • Why it matters: Wet pumpkin filling will tear the ravioli during sealing and boiling. Roast the pumpkin first and let it cool completely so excess moisture evaporates.

    Panela Cheese

    Panela is a fresh, smooth Mexican cheese made from pasteurized cow’s milk — low in calories and mild in flavour. It works perfectly here because it blends smoothly into the filling without overpowering the pumpkin. If panela is hard to find, substitute with white cheddar or feta.

    • Why it matters: The cheese adds a creamy, slightly salty counterpoint to the sweet pumpkin. Without it, the filling tastes flat.

    Cream Cheese

    Combined with the panela, cream cheese is responsible for that oozy, luxurious quality when you cut the ravioli in half. It also helps bind the filling so it holds its shape inside the pasta.

    • Why it matters: Cream cheese is what makes this filling feel restaurant-quality rather than homemade.

    Spinach

    Pumpkin and spinach are natural partners. Spinach adds colour, texture, and a mild earthiness that balances the sweetness of the pumpkin. Chop it finely so it distributes evenly through every bite.

    • Why it matters: Without spinach, the filling is visually monotone and misses the textural contrast that makes every bite interesting.

    Sage

    Fried sage in butter is one of the best-kept secrets in fall and winter cooking. When sage leaves hit hot butter, they crisp up and release an intense herbal, almost floral aroma. The flavour transforms completely from raw — it becomes deep, nutty, and satisfying.

    • Why it matters: Sage butter is what elevates this from good pasta to extraordinary pasta. A few leaves of fresh sage make a restaurant-quality sauce in minutes.

    Pecans

    Toasted pecans in butter have a magical, warm, autumnal smell that signals fall is here. They add a satisfying crunch to the sauce and amplify the nuttiness of the sage butter. When pecans are mixed into this beautiful butter mixture, everything about the sauce makes perfect sense.

    • Why it matters: Texture contrast is essential in pasta dishes. The crispy pecan against the soft, chewy ravioli is what makes each forkful memorable.

    Pasta Maker

    A pasta maker attachment makes producing consistent, thin pasta sheets effortless. A ravioli cutter stamp ensures perfectly shaped, evenly sealed ravioli every time. A simple rolling pin works too if you prefer to roll by hand.

    • Why it matters: Consistent dough thickness means every ravioli cooks in the same time. Uneven sheets produce some ravioli that are raw and others that are overcooked.

    what goes with pumpkin ravioli

    Making the Ravioli Dough

    The Philips Pasta Maker makes producing consistent ravioli sheets effortless. I attach the lasagna disc, weigh all the ingredients, put the dry ingredients in the hopper, whisk the liquids separately, and let the machine run. Within 3 minutes it extrudes a perfect pasta sheet. The first 6 inches tend to be uneven — cut those off and put them back in the hopper. Then measure alternating sheets of 12 inches (bottom) and 12.5 inches (top) and keep them covered with a towel so they do not dry out.

    savory pumpkin ravioli

    The Secret to the Sage Butter Sauce

    This sauce is simple but its combination of butter, crispy sage, toasted pecans, apple cider vinegar, and heavy cream is genuinely gourmet. The secret: once the thick sauce is ready, pour it over hot ravioli and add a splash of starchy pasta water. The hot pasta water emulsifies with the thick sauce into a silky, creamy coating. This is the same technique used in fine dining kitchens.

    pumpkin ravioli jamie oliver

    This Recipe Is Vegetarian — But It Does Not Have to Stop There

    This pumpkin ravioli recipe is vegetarian as written. If you want to add protein, some delicious options are: seared tuna, grilled steak, poached chicken, or grilled sausages. The richness of the sage butter sauce stands up well to bold proteins.

    pumpkin ravioli with sage butter

    Frequently Asked Questions

    Can I make the ravioli dough without a pasta machine?

    Yes. Roll the dough by hand with a rolling pin to about 1–2mm thickness. A pasta machine produces more consistent results, but hand-rolled dough works perfectly well. The key is getting the sheet thin enough so the dough cooks through in 4 minutes.

    Why does my ravioli fall apart in the water?

    The two most common causes: the filling was too wet, or the edges were not sealed firmly enough. Make sure the pumpkin puree is dry before mixing the filling, and always brush the edges with egg wash before pressing the top sheet down. Press firmly around each pocket of filling.

    Can I freeze homemade ravioli?

    Yes. Lay the uncooked ravioli flat on a parchment-lined baking sheet and freeze until solid, then transfer to a zip-lock bag. Cook directly from frozen in boiling salted water for 6–7 minutes instead of 4.

    What can I substitute for sage?

    Thyme or rosemary can replace sage if needed. The flavour will be different — thyme is more subtle, rosemary is more assertive — but both work with browned butter and pecans.

    Can I make the filling ahead of time?

    Yes. The pumpkin spinach filling can be made 1 day ahead and stored covered in the fridge. This actually helps the flavours meld. Bring it to room temperature before filling the ravioli.

    What pasta shapes can I use this filling for?

    This filling works in any enclosed pasta shape — tortellini, cappelletti, or large stuffed pasta shells baked with extra sage butter sauce on top are all fantastic variations.

    Pumpkin ravioli in sage cream sauce with sausage on a blue plate

    Pumpkin Ravioli with Sage Butter

    Pumpkin ravioli wrapped in a chewy dough drizzled with sage butter is a culinary experience. Rich in flavour and texture, it is like eating in an up-scale restaurant, minus the cost. Print Recipe Pin RecipePrep Time:35 minsCook Time:15 minsServings: 6 people

    Ingredients

    Ravioli Dough

    • 550 g all purpose flour
    • 4 g sea salt
    • 170 g 2 eggs + milk
    • 37 g water

    Pumpkin Spinach Filling

    • 1.5 cups pumpkin puree
    • 2 garlic clove grated
    • ¼ tsp ground cinnamon
    • ½ tsp ground nutmeg
    • ½ cup panela cheese or cheddar cheese
    • 4 oz cream cheese
    • ¼ cup chopped spinach
    • 2 tsp sea salt
    • pepper to taste

    Sage Butter Sauce

    • ½ cup butter
    • 2 garlic clove grated
    • 20 sage leaves
    • ¼ cup chopped pecans
    • 3 tbsp apple cider vinegar
    • ½ cup heavy cream
    • ½ tsp ground nutmeg
    • 1 tsp sea salt
    • ½ tsp ground black pepper

    Instructions

    Ravioli Dough Using Philips Pasta Machine

    • Attach the lasagna disc to the machine and tightly screw it on.
    • Weigh all the ingredients. Add the flour and salt into the pasta machine’s hopper.
    • In a separate bowl, whisk together all the liquids: eggs, milk, and water until fully combined.
    • Turn the machine on and set it for 3 minutes. Put the lid on and let it run.
    • Slowly and gradually add the liquid into the reservoir at the top of the lid.
    • When the machine finishes mixing, it will begin extruding pasta. The first 6 inches will be uneven — cut them off and place back into the hopper.
    • Measure and cut alternating sheets of 12 inches (bottom) and 12.5 inches (top). Cover sheets with a towel so they do not dry out.
    • Place the bottom sheet on a table. Scoop half a tablespoon of filling onto the sheet with 1-inch gaps. Brush beaten egg around each filling mound.
    • Carefully place the top sheet over the filling, leaving space at the top. Press firmly around each filling pocket to seal.
    • Cut the ravioli with a knife or ravioli cutter. Place on a dry baking sheet and repeat until the dough and filling are used up.
    • Fill a large deep pot with water and bring to a boil. Add 2 tsp of salt. Stir the pot 5 times in the same direction until a vortex forms. Slowly add ravioli in batches of about 10 — do not overcrowd. Stir gently to prevent sticking.
    • Cook for 4 minutes, or until the ravioli floats. Drain and set aside. Reserve a splash of pasta water.
    • Meanwhile, make the sauce: melt together butter, garlic, pecans, and sage in a large skillet over medium heat. Cook, stirring occasionally, until the butter browns and the sage is crisp, 4–5 minutes. Remove the sage leaves and set aside.
    • Reduce heat to low. Add the apple cider vinegar, cream, nutmeg, salt, and pepper. Simmer 1 minute. Add the ravioli and a splash of pasta water, gently tossing to combine. Remove from heat.
    • Serve ravioli topped with crispy sage leaves.