Category: salmon recipes

  • Ricotta Cheese Salmon Roll

    Ricotta Cheese Salmon Roll

    When we’re not craving our usual panko-crusted baked salmon, this Ricotta Cheese Salmon Roll takes the spotlight. It’s soft, juicy, and packed with fresh flavors—perfect for when you want something elegant but easy. Rolled with creamy ricotta, wilted spinach, and a splash of lemon juice, this dish feels like a quiet celebration on a plate.

    This post may contain affiliate links. If you purchase through these links, I may earn a small commission at no extra cost to you. Thank you for supporting Love & Harvest!

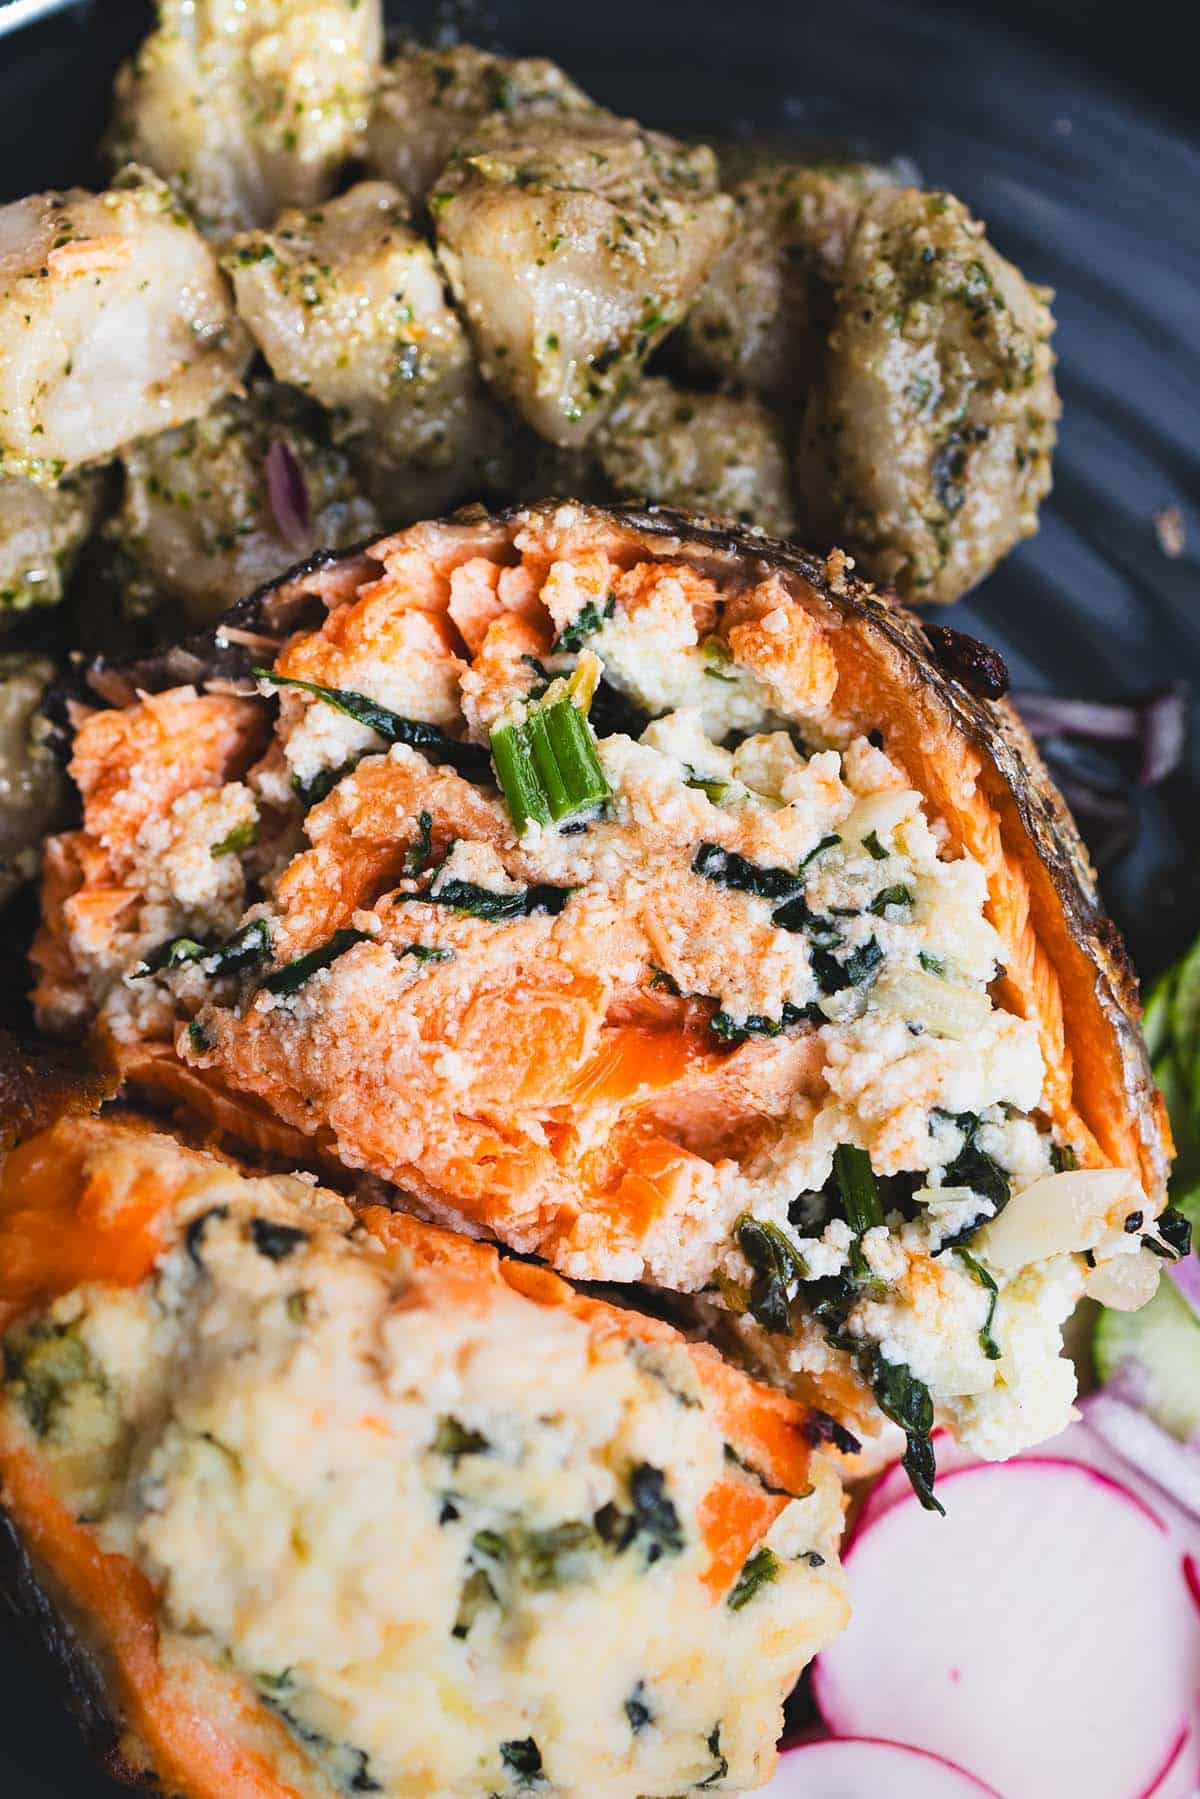
    Ricotta salmon roll cut open to show the spinach and cheese filling

    Flavour

    This salmon roll is tender and fragrant. As it bakes, the ricotta melts into the fish, keeping it moist and buttery, while the spinach and lemon cut through with a light, green brightness. The aroma? It’ll fill your kitchen with something that smells halfway between comfort food and a fine dining entrée.

    It’s that perfect balance—creamy, citrusy, savoury, and soft—all in one satisfying bite.

    Easy Salmon Meal

    What we love most: it’s not complicated.

    All you do is lay out a salmon fillet, spread a layer of seasoned ricotta, top with sautéed spinach, and finish with a little lemon juice. Roll it up, secure with toothpicks or twine, and bake. That’s it.

    You don’t need breadcrumbs, crusts, or a million steps—just clean ingredients and a hot oven.

    This is a go-to on busy nights or when we want to impress without working too hard. Even better: it feels light, so you don’t end dinner feeling weighed down.

    Baked salmon roll with crisp skin and a ricotta and spinach filling

    Favourite Summer Meal

    We especially love this recipe during the warmer months. It’s fresh, light, and doesn’t require standing over the stove for too long. Paired with a crisp white wine or sparkling water with lemon, this salmon roll becomes a breezy summer dinner that feels special without the extra effort.

    It’s one of those meals that works just as well for a quiet dinner on the patio as it does for hosting friends—and it always disappears fast.

    Slices of ricotta salmon roll served with a side on a black plate

    Main Ingredients

    Ingredients

    Salmon Fillet

    • Skin on and wide enough to roll — this is your canvas. Fresh, wild-caught salmon gives the best flavor and the most omega-3s. The fillet needs to be thin enough to roll without breaking; ask your fishmonger to butterfly it if needed.

    Ricotta Cheese

    • Preferably full-fat for creaminess — it’s what keeps the salmon moist as it bakes and creates that lush, creamy filling. Whole milk ricotta is the gold standard here; low-fat versions can make the filling watery.

    Fresh Spinach

    • Sautéed or wilted slightly before adding. Raw spinach contains too much water — wilting it first prevents the filling from becoming soggy. Season with a tiny pinch of nutmeg for an Italian-inspired touch.

    Lemon Juice

    • For brightness and balance. The acidity cuts through the richness of the ricotta and salmon, lifting the whole dish. Zest a little lemon into the ricotta filling for even more citrus impact.

    Fresh Herbs (Optional)

    • Dill or flat-leaf parsley work beautifully. Dill has a natural affinity with salmon and amplifies the Nordic-meets-Italian vibe of this dish. Add to the ricotta filling or scatter on top before serving. You’ll also want a silicone spatula for spreading the ricotta evenly across the fillet.

    Why We Love This Recipe

    • It’s juicy, flavorful, and wholesome

    • You only need a few fresh ingredients

    • It has no gluten-containing ingredients, and it’s versatile

    • It’s one of those meals that looks fancy but is actually simple

    • It gives our salmon rotation a nice little upgrade—especially when we’re not in the mood for crunchier crusts like panko. Speaking of which, if you’re in a crunchier mood, our crispy panko-crusted baked salmon or our delicate homemade sashimi are both worth exploring.

    Ricotta salmon roll sliced open on a dark plate with radishes

    Frequently Asked Questions

    What cut of salmon is best for rolling?

    A wide, thin salmon fillet works best — ideally at least 6 inches wide so it can be rolled without cracking. Ask your fishmonger for a side fillet and have them skin and butterfly it. Atlantic or sockeye salmon both work well, though sockeye has a more vibrant color and slightly firmer texture.

    Can I make this in the air fryer?

    Yes! We actually love making this in our air fryer oven. Cook at 375°F (190°C) for about 18–22 minutes, checking at 18 minutes. The outside gets a lovely light golden color while the inside stays juicy. Just make sure the roll is secured well with toothpicks before placing in the air fryer basket.

    How do I keep the salmon roll from falling apart?

    Two tips: first, pat the salmon very dry before adding the filling — moisture is the enemy of a tight roll. Second, secure the roll with wooden toothpicks or kitchen twine at 1-inch intervals before baking. Remove all toothpicks before serving.

    Can I prepare this recipe ahead of time?

    You can assemble the roll up to 4 hours ahead and refrigerate it covered. Just bring it to room temperature for 10 minutes before baking for even cooking. Don’t add the lemon juice until just before baking to avoid breaking down the fish texture.

    What sides pair well with ricotta salmon roll?

    We love it with roasted baby potatoes, a simple arugula salad with lemon vinaigrette, or steamed asparagus. For a lighter option, a cucumber and dill salad keeps everything fresh and bright. A glass of chilled white wine — Pinot Grigio or Sauvignon Blanc — is the perfect accompaniment.

    Fresh seafood stuffed salmon with herbs and vegetables, served with roasted baby potatoes and a side of radishes.

    Ricotta Cheese Salmon Roll

    This salmon roll is tender and fragrant. As it bakes, the ricotta melts into the fish, keeping it moist and buttery, while the spinach and lemon cut through with a light, green brightness. The aroma? It’ll fill your kitchen with something that smells halfway between comfort food and a fine dining entrée.
    It’s that perfect balance—creamy, citrusy, savoury, and soft—all in one satisfying bite.
    Prep Time 20 minutes
    Cook Time 35 minutes
    Total Time 55 minutes
    Course: Main Course
    Cuisine: Greek, Mediterranean
    Calories: 310

    Ingredients
      

    • 1 large skin on salmon fillet (about 1 to 1.5 lbs) – wide and even thickness skinless fillet is a good option too
    • 1 cup ricotta cheese (preferably full-fat)
    • 1 cup fresh spinach, wilted or lightly sautéed
    • 1 tbsp lemon juice
    • 1 garlic clove, finely minced (optional)
    • salt and pepper to taste

    Method
     

    1. Preheat oven to 375°F (190°C).
    2. Lay the salmon fillet flat on a cutting board. If it's thick, you can butterfly it slightly or pound it gently with a meat mallet to even out the thickness for easier rolling.
    3. In a small bowl, combine the ricotta, wilted spinach, lemon juice, optional zest, garlic, salt, and pepper.
    4. Spoon and gently spread the ricotta mixture evenly over the salmon, leaving about ½ inch around the edges.
    5. Starting from one of the shorter sides, carefully roll the salmon into a log. Use toothpicks or kitchen twine to hold it together. I used twine to hold everything together.
    6. Lightly brush the outside of the roll with olive oil. Sprinkle with a little more salt and pepper.
    7. Place the salmon roll seam-side down in a baking dish lined with parchment paper. Bake for 20–25 minutes, or until salmon is cooked through and flakes easily with a fork.
    8. Let it rest for 5 minutes before removing toothpicks or twine. Slice into 1-inch rounds and serve warm.

    Notes

    • Serve with roasted vegetables, a fresh salad, or garlic mashed potatoes. We like to eat it with a light salad and pesto gnocchi.
    • Drizzle with a little extra lemon juice or a light herb sauce if you want to dress it up.
  • Homemade Sashimi

    Homemade Sashimi

    Making sashimi at home is one of the most rewarding things you can do in the kitchen — and it is far more achievable than most people think. This guide walks you through how to safely source, freeze, and slice salmon so you can enjoy restaurant-quality sashimi without leaving your house.

    This post may contain affiliate links. If you purchase through these links, I may earn a small commission at no extra cost to you. Thank you for supporting Love & Harvest!

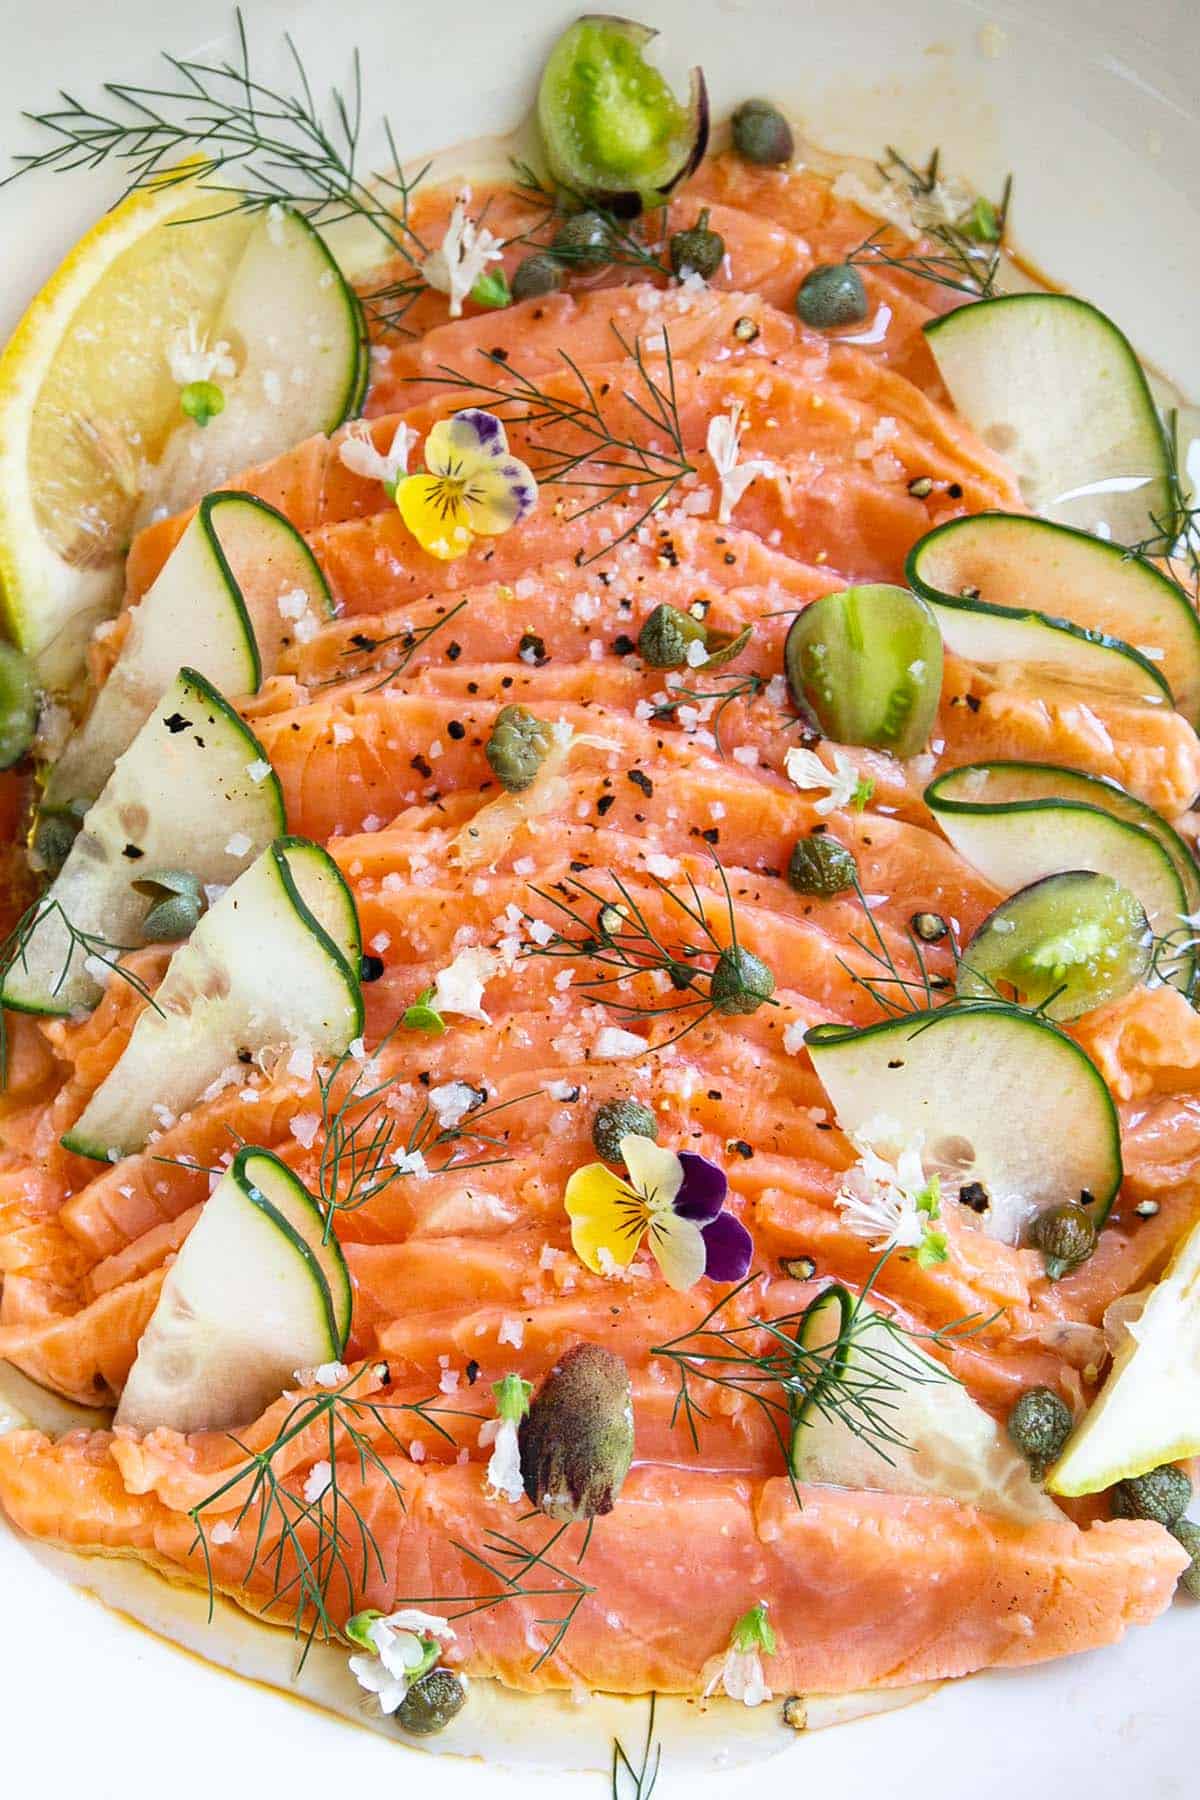
    Close-up of thinly sliced salmon sashimi with cucumber, capers, dill and edible flowers

    How I Started Making Sashimi at Home

    Allow me to share a little secret: crafting homemade sashimi has been quite the adventure for me. Living in Mexico, where authentic sashimi experiences are scarce and restaurants often overcharge for mediocre quality, I seized the opportunity and started experimenting. What followed was years of research, countless batches of salmon, and a method I use every time.

    In this guide I will share exactly how I safely freeze salmon fillets to achieve sashimi-grade quality, the shortcut I discovered for sourcing great fish, my personal experience using Costco salmon, and a simple plating recipe to pull it all together.

    This post shares how I prepare salmon at home. Raw fish always carries some risk; follow the freezing guideline below, and skip raw fish if you are pregnant, immunocompromised, very young or elderly.

    Homemade salmon sashimi fanned out on a white plate with cucumber, lemon, capers and dill

    What Fish Should I Use?

    Contrary to popular belief, you do not need to break the bank to source sashimi-grade fish. With the right knowledge and a keen eye, you can find excellent options at your local fish market or even in the frozen section of your grocery store. Check the labeling and ensure the fish has been frozen at the appropriate temperature to kill any potential parasites.

    Salmon sashimi plated with lemon wedges, cucumber slices, capers and edible flowers

    Wild Salmon vs. Farmed Salmon for Sashimi

    The choice between wild-caught and farmed salmon depends on your personal preferences and priorities. Both can work beautifully for sashimi when handled correctly.

    1. Flavor Preference: Wild-caught salmon tends to have a richer, more intense flavor. Farmed salmon is milder and consistently fatty — often preferred for sashimi.
    2. Nutritional Considerations: Wild salmon generally contains higher omega-3 levels. Both are excellent, nutritious options.
    3. Sustainability: Some prefer wild-caught for environmental reasons, though responsible farmed options exist.
    4. Availability and Price: Farmed salmon is more readily available year-round and typically more affordable.

    Overhead close-up of salmon sashimi slices sprinkled with sea salt, pepper and dill

    How to Safely Freeze Salmon for Sashimi

    To eliminate potential parasites in fresh salmon, the FDA recommends freezing at -4°F (-20°C) or below for at least 7 days. This is the step I never skip.

    Step-by-Step Freezing Guide

    1. Select Fresh Salmon: Begin with high-quality, fresh salmon fillets. Start with fish that is fresh and shows no signs of spoilage.

    2. Inspect and Clean: Check for discoloration or odor. Pat dry with paper towels.

    3. Portion the Salmon: Cut into even portions for uniform freezing.

    4. Wrap Tightly: Wrap each portion in plastic wrap or seal in airtight freezer bags, removing as much air as possible.

    5. Label and Date: Mark each portion with the date and fish type.

    6. Freeze Cold Enough, Long Enough: The FDA standard is -4°F (-20°C) or colder for at least 7 days. Many home freezers sit around 0°F (-18°C), which is not cold enough, so set yours to its coldest setting and leave space between portions for airflow.

    7. Check the Temperature: Use a freezer thermometer to confirm it holds -4°F (-20°C) or colder for the full 7 days.

    8. Thaw Safely: Thaw overnight in the refrigerator, or in a sealed bag under cold running water. Never at room temperature.

    Freezing kills parasites, not bacteria. Pregnant people, young children, older adults and anyone with a weakened immune system should skip raw fish.

    White plate of salmon sashimi with lemon and cucumber on a grey table

    Other Ways to Source Sashimi-Grade Salmon

    From frozen specialty stores: In Mexico I discovered WildFork, a store that sources fresh seafood and freezes it immediately at extremely low temperatures. Ask the store whether it was frozen to the FDA parasite standard; if they can’t confirm, freeze it yourself as above.

    From fresh fish stores: Check the store’s description for high-quality, fresh salmon sourcing. Inspect fillets carefully — no discoloration, no odor, firm to the touch. To prepare our sashimi we also use a sashimi knife set for clean, precise slicing.

    Salmon sashimi slices with dill, cucumber and lemon in a white bowl

    I Have Used Costco Salmon for Sashimi

    I anticipate mixed opinions on this, but I have personally used Costco salmon to make sashimi — many times. Despite what social media says, Costco salmon has worked well for me, always after freezing it myself as described above.

    What About the Cautionary Labels at Costco?

    Take those labels seriously: Costco does not sell this salmon as sashimi-grade, so if you want to eat it raw, freeze it first as shown above. Always check the packaging date on the day of purchase, look for firmness, and verify there are no signs of water leakage, discoloration, or odor.

    While I acknowledge inherent risks, I have prepared gravlax and sashimi from Costco salmon many times, always freezing it first. For presentation, I serve on a bamboo sushi mat with soy sauce and wasabi paste.

    How to Make Sashimi

    Once your salmon is properly thawed, making sashimi is all about technique and a sharp knife.

    1. Thaw the Salmon: Remove from the freezer and thaw in the refrigerator overnight, or in a sealed bag under cold running water for faster results. Fully thaw before slicing.
    2. Prepare the Salmon: Pat fillets dry with paper towels to remove excess moisture. Dry fish slices cleanly and looks better on the plate.
    3. Slice the Salmon: Using a sharp knife, slice thinly and evenly against the grain — approximately 1/4 to 1/2 inch thick. Take your time for uniform, beautiful slices.
    4. Serve and Garnish: Arrange on a platter with thinly sliced cucumber, pickled ginger, and wasabi. Sesame seeds or microgreens add a nice touch.
    5. Serve Immediately: Sashimi is best fresh. Serve right after slicing. A bed of ice helps keep it chilled during presentation.
    6. Enjoy Responsibly: Handle raw fish with care. Proper hygiene throughout the process is non-negotiable.

    Ingredients

    Salmon Fillet

    The star of the dish. Choose a fresh, high-quality salmon — wild or farmed — that has been properly frozen to sashimi-grade standards.

    • Why it matters: The quality of your salmon determines everything. Do not compromise on freshness.

    Soy Sauce

    A classic dipping sauce for sashimi. Look for a good-quality Japanese soy sauce — it should have a clean, rounded umami flavor rather than just saltiness.

    • Why it matters: A quality soy sauce enhances the delicate salmon flavor without overpowering it.

    Wasabi Paste

    Traditional accompaniment. Use real wasabi paste rather than horseradish-based imitations when possible.

    • Why it matters: Wasabi does more than add heat — it provides a sharp, clean flavor contrast that elevates the entire experience.

    Pickled Ginger

    Served between pieces to cleanse the palate. The acidity refreshes your taste buds between bites so each slice of salmon tastes as good as the first.

    • Why it matters: It is not just garnish — it is a functional part of the sashimi ritual.

    Frequently Asked Questions

    Is it safe to eat store-bought frozen salmon as sashimi?

    If the salmon has been frozen at -4°F (-20°C) or below for at least 7 days, it meets the FDA parasite guideline; freezing does not remove bacteria. Always verify the source and freezing practices of your specific store.

    Can I use tuna or other fish for sashimi?

    Yes — tuna (bluefin, yellowfin, bigeye), yellowtail, halibut, and sea bass are all popular choices. The same freezing and freshness standards apply regardless of the fish species.

    What is the difference between sashimi and sushi?

    Sashimi is simply raw fish served on its own, typically with soy sauce, wasabi, and ginger. Sushi refers to vinegared rice combined with other ingredients — it may or may not include raw fish.

    How thin should I slice sashimi?

    For salmon, aim for slices between 1/4 and 1/2 inch (6–12 mm) thick, cut against the grain. Thinner slices work better for leaner fish. A sharp knife and a steady hand make all the difference.

    Does Costco salmon require additional freezing before eating raw?

    Yes. Costco’s fresh Atlantic salmon is not sold as sashimi-grade, so freeze it at -4°F (-20°C) or colder for 7 days before eating it raw. I do this every time.

    Can I make sashimi without a special knife?

    Any sharp, long-bladed knife can work in a pinch, but a dedicated sashimi knife produces far cleaner cuts. A clean cut protects the fish’s delicate muscle fibers and results in better texture.

    If you love Japanese-inspired recipes, also check out our homemade sushi roe guide and our Cha Gio fried spring rolls for more fresh, vibrant dishes from the kitchen.

    Homemade Sashimi

    Restaurant-quality salmon sashimi made at home — properly sourced, frozen to the FDA guideline, then sliced thin and served with soy sauce, wasabi, and pickled ginger.
    Prep Time 15 minutes
    Total Time 15 minutes
    Servings: 2 servings
    Course: Appetizer
    Cuisine: Japanese
    Calories: 210

    Ingredients
      

    • 300 g sashimi-grade salmon fillet previously frozen at -4°F (-20°C) for at least 7 days to eliminate parasites, then thawed overnight in fridge
    • 3 tbsp Japanese soy sauce for dipping
    • 1 tsp wasabi paste real wasabi or horseradish-based, to taste
    • 2 tbsp pickled ginger for palate cleansing between pieces
    • ½ cucumber thinly sliced, for garnish and serving
    • 1 tsp sesame seeds optional garnish
    • microgreens optional garnish

    Method
     

    1. Thaw the frozen salmon overnight in the refrigerator. Never thaw at room temperature.
    2. Pat the thawed salmon fillet dry with paper towels to remove excess moisture — dry fish slices cleanly and looks better on the plate.
    3. Using a sharp knife, slice the salmon thinly and evenly against the grain — approximately 1/4 to 1/2 inch (6–12 mm) thick. Take your time for uniform, beautiful slices.
    4. Arrange slices on a serving platter with thinly sliced cucumber. Add pickled ginger on the side.
    5. Serve immediately with soy sauce and wasabi for dipping. A bed of ice helps keep the sashimi chilled during presentation.

    Notes

    SAFETY NOTE: Always freeze salmon at -4°F (-20°C) or below for at least 7 days before eating raw to eliminate potential parasites (FDA recommendation). Most home freezers sit near 0°F (-18°C), which is not cold enough; check with a freezer thermometer. Thaw overnight in the refrigerator, or in a sealed bag under cold running water. Never at room temperature. Sashimi is best eaten immediately after slicing. A sharp, long-bladed sashimi knife produces the cleanest cuts and best texture.
  • Crispy Panko Crusted Baked Salmon

    Crispy Panko Crusted Baked Salmon

    Panko crusted salmon with dill, mayonnaise, and lemons — this is the best baked salmon you will ever taste, and it requires only a handful of simple ingredients that probably already live in your kitchen.

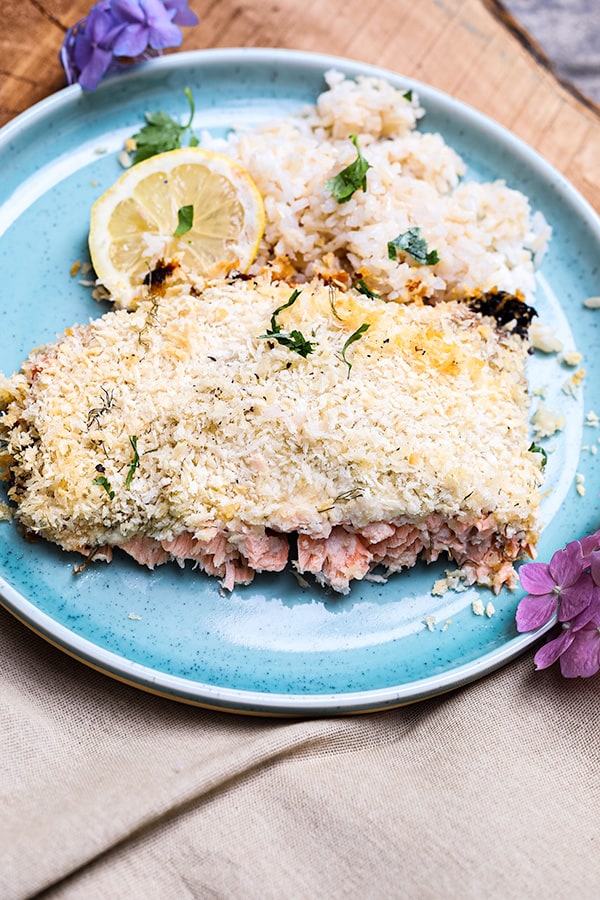
    Crispy panko crusted baked salmon on a blue plate with hydrangea flowers

    This post may contain affiliate links. If you purchase through these links, I may earn a small commission at no extra cost to you. Thank you for supporting Love & Harvest!

    Hard to imagine that the best tasting baked salmon you’ll ever have only requires a few ingredients. Mediterranean inspired, you’ll absolutely love this salmon because it is fresh tasting, and no ingredient overpowers the natural great taste of salmon!

    I’ve been using this recipe for a very long time. I’ve done teriyaki chicken, salmon with a butter creamy mushroom sauce, and even a fish and chip version with salmon! They were all amazing, but our family still comes back to this Panko Crusted Baked Salmon because it tastes great and it’s so simple.

    Panko crusted salmon fillet topped with lemon slices and dill on parchment

    There’s something special about dill and salmon. These two ingredients pair so well together. My kids rarely like the taste of dill on its own, but they absolutely adore this recipe!

    You have to try this recipe! Easy ingredients to find and even easier cooking once it’s baked in the oven. You can quickly make a gourmet salmon within a few minutes!

    It’s crunchy, savoury, and citrusy. Great for the summer since salmon is more widely available and the citrus flavour really brings out summer vibes. Serve it alongside our fresh beet pasta for a vibrant dinner spread.

    Panko baked salmon served with rice and a lemon slice on a blue plate

    What is Panko?

    Panko is a Japanese type of breadcrumb made only with dried white bread and no crust. It is not fried, but baked with an electric current. They are super crunchy and a staple in Japanese deep frying cuisine. They use it a lot as the final ingredient to roll food into before it goes into the deep fryer.

    Whenever I can, I always choose panko over breadcrumbs. They have a cracker-like crispiness that breadcrumbs can’t mimic, and the taste is similar to fried food.

    A hand sprinkling panko breadcrumbs over a mayonnaise-coated salmon fillet

    Why You Will Love This Recipe

    • Delicious! It’s smooth, silky, and flakey on the inside with hints of lemon and dill flavour, and the outside is super crunchy and moist from the panko and mayonnaise.
    • Summer dish: summer flavours are here! Fresh lemon with salmon is my favourite smell and taste of summer!
    • Easy to make: whip the sauce together, marinate it on top of the fish, and put it in the oven. It’s really that simple!
    • Minimal clean-up: that’s right, you’re not stuck with piles of dishes or spoons to wash!

    Golden panko crusted salmon with lemon slices on a parchment-lined tray

    Ingredients

    Salmon Fillet

    I tend to buy my fresh salmon from Costco. The type I normally buy is salmon with the skin on. When the fish bakes in the oven, the skin at the bottom of the pan gets crispy and chewy — it’s one of the best parts.

    Dill

    Both fresh and dried dill work for this recipe. For dried dill use only 2 tsp. For fresh, use 1/4 cup. Dried dill is stronger in taste than fresh. Fresh dill gives you a brighter, more vibrant flavour, while dried dill delivers a more concentrated herby punch.

    A hand holding fresh dill over a bowl of mayonnaise

    Panko Breadcrumbs

    Panko breadcrumbs are the secret to the incredible crunch in this recipe. They create a light, airy crust that regular breadcrumbs cannot replicate. Make sure to drizzle a little oil over the panko before baking for the best golden colour.

    Lemon

    You will need both lemon juice and lemon zest for this recipe. Lemon juice adds the acidity while zest carries the bright citrus essential oils. A microplane zester makes this quick and easy.

    Mayonnaise

    The mayonnaise acts as the binding layer between the fish and the panko crust. It keeps the salmon moist during baking and creates that beautiful golden top. If you want to reduce calories, swap mayonnaise for plain Greek yogurt — it still comes out unbelievably crunchy.

    Pro Tips for the Perfect Panko Salmon

    Pro Tip 1: Run a Finger Along the Spine of the Salmon

    Sometimes not all fish mongers are perfect at filleting fish. Running a finger along the spine of the fillet can help detect if there’s a bone stuck in the flesh. Trust me, you’ll feel it if you run across one.

    Pro Tip 2: Salt the Fish First

    Before you gather the marinade and slather it on the salmon, marinate the fillet with some salt first. This way the fish will absorb some of the salt and penetrate flavours into the flesh before the mayonnaise sauce.

    Pro Tip 3: Trade Mayo for Natural Yogurt

    You can lower the calories of this dish by trading mayonnaise with yogurt. It will still come out tasty and unbelievably crunchy.

    Stirring a creamy dill and yogurt mixture in a white bowl

    Pro Tip 4: Steam Veggies Alongside the Salmon

    Before you put the salmon in the oven, boil some vegetables for 5 minutes. Drain them and toss them on the side of the baking sheet with the salmon. Once the juice and sauce start to melt in the oven, the vegetables will soak up the sauce while they get crunchy in the oven. Use a quality rimmed baking sheet pan so none of those juices spill.

    What Goes Well With This Panko Crusted Baked Salmon

    • Baked potatoes: I love baked potato with this baked salmon. I especially love adding butter and extra sauce on top of the baked potato.
    • Pesto salad: complete this Mediterranean dish with some pesto pasta salad. Best summer dish combo! Try our homemade pesto gnocchi as a side.
    • White rice: sometimes plain white rice is the best way to taste the salmon. We love serving it with plain rice so we can later drizzle the burnt mayonnaise sauce on the rice.
    • Salad: a green salad on the side.

    Baked panko salmon cut open to show the pink center

    Frequently Asked Questions

    What temperature should I bake panko salmon at?

    Bake at 375°F (190°C) with the rack in the middle of the oven. This temperature gives you a golden panko crust while keeping the salmon moist and flakey inside. Check at the 25-minute mark — the fish should flake easily with a fork when done.

    Can I make this recipe ahead of time?

    You can mix the mayonnaise sauce and store it in the fridge up to one day ahead. Spread it on the salmon and add the panko just before baking for the crispiest result.

    Can I use frozen salmon for this recipe?

    Yes! Thaw the salmon completely in the refrigerator overnight before using. Pat it very dry with paper towels before adding the marinade — excess moisture will prevent the panko from crisping up.

    How do I know when the salmon is cooked through?

    The salmon is done when it flakes easily with a fork and the internal temperature reads 145°F (63°C). The flesh should be opaque throughout and the panko crust should be golden brown.

    Can I use breadcrumbs instead of panko?

    You can, but the result won’t be as crunchy. Panko creates a lighter, crispier crust because the crumbs are coarser and drier than regular breadcrumbs. If panko is unavailable, lightly toasted regular breadcrumbs are the best substitute.

    Can I make this dairy-free?

    This recipe is naturally dairy-free since it uses mayonnaise rather than butter or cream. Simply ensure your mayonnaise brand is dairy-free and you’re good to go.

    Close-up of panko crusted baked salmon with lemon and parsley

    Crispy Panko Crusted Baked Salmon

    Panko crusted salmon with dill, mayonnaise, and lemons. The best baked salmon you will ever taste with a few simple ingredients. Print Recipe Pin RecipePrep Time:15 minsCook Time:25 minsCourse: Main CourseCuisine: AmericanKeyword: baked salmon, pankoServings: 6 people

    Ingredients

    • ½ kg fresh salmon fillet optional: with skin
    • 1 tsp sea salt
    • ½ cup mayonnaise
    • 1 lemon on juice
    • 1 lemon zest
    • 1 tsp sea salt
    • 2 tsp dried dill or ¼ cup fresh ¾ chopped dill
    • black pepper
    • ½-¾ cup panko
    • oil
    • ½ lemon sliced
    • parsley chopped

    Instructions

    • Wash the salmon fillet and pat dry with paper towels.
    • Run your finger along the spine of the fillet to check if there are any bones stuck in the fillet. If you feel a small bone with your fingers, use a tweezer to pull it out.
    • Sprinkle salt both sides of the fish and let it sit for 10 minutes.
    • Meanwhile combine mayonnaise, lemon juice, lemon zest, salt, dill, and pepper in a bowl. Mix well.
    • Preheat oven to 375°F with the rack in the middle.
    • Take a baking sheet out and lay a parchment paper on top that fits the fish fillet.
    • Lay the salmon on top with the skin down.
    • Generously spread the mayonnaise mixture on top of the fillet. Cover all areas.
    • Sprinkle the panko over the mayonnaise. Give a quick drizzle of oil on top.
    • Bake the fish for 25-30 minutes in the oven. Serve with lemon slices and parsley on top.
  • Easy Salmon Pot Pie with Thyme Crust

    Easy Salmon Pot Pie with Thyme Crust

    Cozy fall evenings call for something extraordinary — and this easy salmon pot pie delivers every time. Picture golden, flakey thyme crust shattering to reveal a creamy, steaming filling of tender salmon, winter vegetables, and melted gouda cheese. It smells incredible while it bakes, and it tastes even better.

    This post may contain affiliate links. If you purchase through these links, I may earn a small commission at no extra cost to you. Thank you for supporting Love & Harvest!

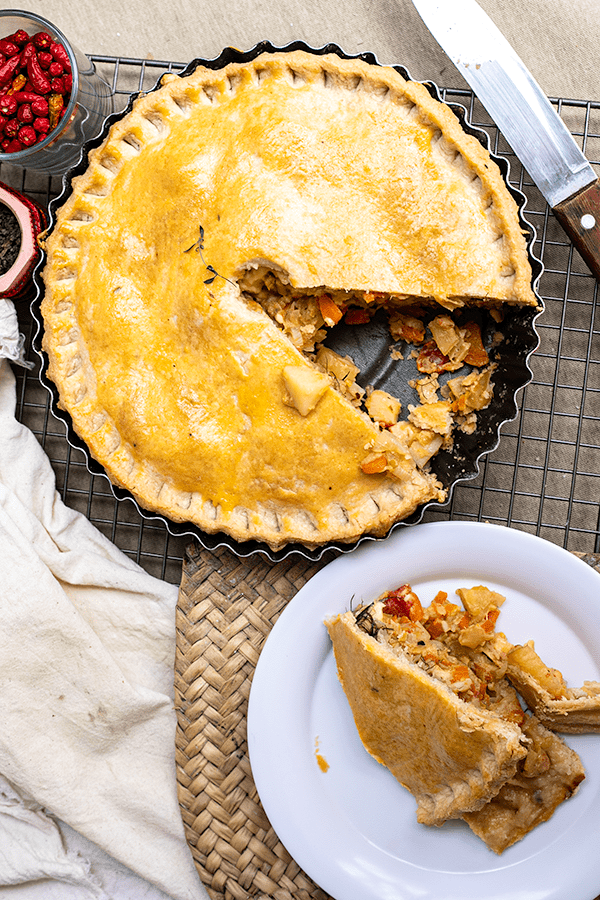
    Salmon pot pie with a golden thyme crust and a slice served on a plate

    This post is all about salmon pot pie — a favourite fall dish stuffed with salmon, winter vegetables, and cheese, then wrapped and baked in a flakey pie crust made with thyme.

    Salmon pot pie cut open to show the salmon and vegetable filling

    Fall is here and comfort food is calling. This salmon pot pie is the answer — salmon and vegetable stuffing, manchego cheese, and a thyme pie crust. Sounds amazing right? The crust alone is worth making. Besides its delicious flavour, it is also a super easy recipe that can be made ahead of time. I make all my pie crusts with a food processor for minimal clean-up.

    Slice of salmon pot pie on a white plate next to the pie

    Salmon Pot Pie Flavour

    Salmon is first marinated with soy sauce and sesame oil. This adds incredible depth of umami flavour to the salmon before it even hits the pan.

    The seasonal fall vegetables are potato, leek, garlic, onion, tomato, and carrot — readily available and perfect for the colder season. Once you combine this with the thyme pie crust, uufff! You have got yourself a marvellous pot pie.

    A hand holding a plate with a slice of salmon pot pie

    Why You Will Love This Recipe

    • Easy: Pie dough is made with a food processor and the salmon stuffing is made on the stovetop. Then combined and baked.
    • Incredible flavour: Salmon steamed with milk, cheese, and vegetables wrapped in a flakey thyme crust — the hardest part is waiting while the aroma fills your house.
    • Filling: Great for cold winter days when you want something substantial.
    • Make-ahead friendly: Pot pies can be made ahead or frozen. Great for busy nights.
    • Economical ingredients: Besides the salmon, everything else is budget-friendly produce you can find anywhere.

    Salmon pot pie filling, rolled crust and grated cheese ready to assemble

    Key Ingredients

    Ingredients

    Salmon

    Fresh or frozen salmon both work here, cut into cubes.

    • Why it matters: Salmon is marinated in soy sauce and sesame oil before cooking, which locks in umami flavour even through the baking process. The cubes absorb the creamy milk-and-cheese filling beautifully.

    Thyme Pie Crust

    Fresh thyme leaves are pulsed directly into the dough using a Lodge Cast Iron Skillet-friendly pastry method — lard, cold water, and apple cider vinegar for maximum flake. For a full deep-dive, see our guide on How to Make a Flakey Pie Crust.

    • Why it matters: Cold fat hits hot oven air and creates steam pockets — that is what makes the crust flakey. Thyme adds an herbal note that pairs perfectly with seafood.

    Gouda Cheese

    Two cups of grated gouda melt into the filling and sit on top before the lid crust goes on.

    • Why it matters: Gouda melts smoothly and has a mild nuttiness that complements the soy-marinated salmon without overpowering it. Use a deep Pyrex pie dish to hold all that cheesy goodness.

    Dill

    Fresh or dried dill sprinkled between the cheese and top crust.

    • Why it matters: Dill and salmon are a classic pairing. While the pot pie bakes, the dill perfumes the steam inside, infusing every bite. If you love this combo, try our Crispy Panko Crusted Baked Salmon next.

    Pot of cubed salmon and vegetable filling for pot pie

    Frozen or Fresh Salmon?

    Fresh salmon is always best for unbeatable flavour, but frozen works well here too. Since we marinate the salmon with soy sauce — a strong flavouring agent — both options produce excellent results. The salmon cubes steam in a glorious pot of cheese, milk, and vegetables and come out flakey and soaked in flavour.

    Food processor bowl of flour topped with fresh thyme sprigs

    Seasonal Vegetables

    Winter vegetables that are economical and easy to find: potato, leek, garlic, onion, tomato, and carrot. Nothing exotic — just your typical corner grocery store staples.

    Thyme Pie Crust

    From the base flakey pie crust recipe, we simply add fresh thyme to the dough. Thyme is a great herb to accompany seafood, especially salmon. Use a rolling pin to roll the dough evenly, and a pastry brush for the egg wash. Not to mention it looks absolutely gorgeous!

    Rolled thyme pie crust draped over a fluted pie pan

    We Love Dill with Our Salmon

    This comes with no surprise — we love adding fresh dill to salmon. Fresh or dried dill works. If you love salmon and dill together, do not miss our Crispy Panko Crusted Baked Salmon — another baked salmon recipe with dill, lemon, mayonnaise. And for something different with salmon, try our Ricotta Cheese Salmon Roll.

    Salmon and vegetable filling topped with cheese and dill inside the pie crust

    Fool-Proof Professional Tips

    Pro Tip #1 — Cool Everything Before Assembling

    Do not put hot salmon stuffing onto cold dough — it melts the butter and ruins the flakey structure. Let everything cool to room temperature first. We also need to freeze the assembled pie before baking, and you should never put hot food in the freezer.

    A hand spreading soft cheese over the salmon pot pie filling

    Pro Tip #2 — Freeze the Pie 20 Minutes Before Baking

    Pie crusts love to be cold. When cold dough hits hot oven air, it creates airy, flakey layers. Give the assembled pie at least 20 minutes in the freezer before it goes into a 400°F oven.

    Whole salmon pot pie with a golden top crust and a thyme sprig

    Pro Tip #3 — Crimp the Pie Crust Edge

    Crimping the edges not only looks beautiful but helps the pastry and filling stay in place while cooking. Use the index finger of one hand to push the inner edge out while pinching the outer edge in with the thumb and index finger of the other hand. Repeat around the entire edge for a classic scalloped finish.

    Hands crimping the edge of a pie crust
    Fingers pinching a scalloped edge around a pot pie crust

    Pro Tip #4 — Let It Cool Before Cutting

    The hardest part is waiting. Do not cut into a freshly baked pie — it is still cooking inside. Cutting too early dries the pie out by releasing all the steam. Rest it at least 10–15 minutes.

    Pro Tip #5 — Cut Holes in the Top Crust for Ventilation

    Always cut a hole in the centre of the crust for steam to escape. You can also poke a few holes around the crust with a fork before baking.

    Knife cutting a steam vent in the center of the top pie crust

    Frequently Asked Questions

    Can I use canned salmon instead of fresh or frozen?

    Yes. Drain the canned salmon well and break it into chunks before adding it to the filling. The texture will be slightly different but still delicious, and the soy-sesame marinade will compensate for the milder flavour.

    Can I make this pot pie ahead of time?

    Absolutely. Assemble the entire pot pie, wrap it tightly, and freeze it unbaked for up to one month. When ready to bake, go straight from freezer to oven — add 10–15 minutes to the bake time. Alternatively, fully bake it, cool it, and refrigerate for up to 3 days.

    Can I use butter instead of lard in the pie crust?

    Yes. Substitute an equal amount of cold unsalted butter. The crust will be just as flakey — lard produces a slightly more tender texture, but butter adds a richer flavour. Make sure both are very cold when you pulse them.

    What can I substitute for gouda cheese?

    Manchego, gruyere, or sharp cheddar all work well. Avoid fresh cheeses like mozzarella as they release too much liquid into the filling.

    Why does my pie crust shrink when baking?

    The dough was not rested long enough. Always refrigerate the dough disk for at least 30 minutes (or overnight) before rolling. Also, do not stretch the dough when placing it in the pan — let it fall into place naturally.

    What size pie dish should I use?

    A standard 9-inch deep-dish pie pan works best. A Pyrex deep dish pie plate is ideal because you can see the bottom crust browning through the glass.

    Salmon pot pie with a golden thyme crust and a slice served on a plate

    Easy Salmon Pot Pie with Thyme Flakey Crust

    Easy salmon pot pie that is the perfect comfort food for fall. Dig into this steamy pot pie filled with salmon, winter vegetables, and cheese all wrapped and topped with a delicious flakey thyme crust!
    Prep Time 45 minutes
    Cook Time 30 minutes
    Total Time 1 hour 15 minutes
    Servings: 6 people
    Course: Main Course
    Calories: 560

    Ingredients
      

    salmon marinate
    • 200 g fresh or frozen salmon cubed
    • 1 tbsp soy sauce
    • 1 tsp sesame oil
    pot pie filling
    • 2 tbsp butter
    • ½ large leek
    • 2 garlic cloved diced
    • ½ white onion chopped
    • 3 carrots chopped
    • 3 medium sized potato cubed
    • 2 small tomato chopped
    • 1 tsp chicken boulenise powder
    • 1½ cup whole milk
    • 1 cup cream
    • 1 tsp sea salt
    • black pepper
    • 2 cups gouda cheese grated
    • 2 tbsp fresh dill or 1 tsp dried dill
    • 1 tbsp butter, cold sliced thinly
    thyme pie crust
    • 3 fresh springs of thyme
    • 1 tsp sea salt
    • 3.5 cups all-purpose flour
    • 1.5 cups lard
    • ¾ cup cold water
    • 2 tsp apple cider vinegar
    • 1 egg

    Method
     

    Salmon Marinate
    1. Combine the salmon, soy sauce and sesame oil together. Mix well and let it marinate for 10 minutes.
    Pot Pie Filling
    1. On medium heat in a large pot or pan, melt butter and sauté the chopped leeks, garlic, and white onions. 3 minutes.
    2. Add the carrot and potatoes. cook for 5 minutes.
    3. Toss the tomatoe in along with the chicken bouillon powder, milk, cream, salt, and pepper. Turn the heat to low and cook for 10 minutes with a lid. Turn off the heat with the lid off and let the mixture cool to room temperature.
    4. Meanwhile, put the thyme leafs, flour, and salt in the food processor. Pulse the flour mixture so it is well combined. Open the lid and ddd small chunk of lard into the food processor. Close the lid.
    5. Combine the cold water and vinegar together.
    6. Add half the cold water mixture in the food processor and pulse it 7 times. Slowly drizzle the rest of the water in to the food processor while you do quick pulses. Keep pulsing the mixture when the cold water runs out. When the dough starts to form and pull away. Take the lid off and divide the dough into two parts. Flatten the dough into a flat disk and put it in the fridge for at least 30 minutes or overnight.
    Putting everything together
    1. On a floured surface, pie dough, and sprinkle it with a little flour. Roll out any creases and roll it out just big enough to cover your pan.
    2. Add the salmon filling into the pie. Place thinly sliced cold butter on top of the filling. Then top it off with grated cheese and dill. Place the other rolled out pie dough over the top of the pan, folding up the corners. Cut a hole in the middle for venting.
    3. Place the pie in the freezer for 20 minutes.
    4. Preheat oven to 400°F
    5. Before you put the pie in the oven, brush the top of the pie with egg wash.
    6. Bake at 400°F for 20 minutes, then lower heat to 350°F, and bake 10 more minutes.
    7. Let it cool for at least 10-15 minutes before cutting into the pie.