Category: pasta recipes

  • Easy Camping Shrimp Pasta

    Easy Camping Shrimp Pasta

    Some of our best family memories are made around a campfire with a cast iron pan and a bag of frozen shrimp. This Easy Camping Shrimp Pasta is proof that you don’t need a full kitchen to make something that feels restaurant-quality. Garlicky shrimp, nutty Manchego cheese, a bright hit of lemon, and the subtle warmth of Old Bay — all tossed with pasta in under 30 minutes. It’s become the most-requested dinner of every camping trip we take.

    This post may contain affiliate links. If you purchase through these links, I may earn a small commission at no extra cost to you. Thank you for supporting Love & Harvest!

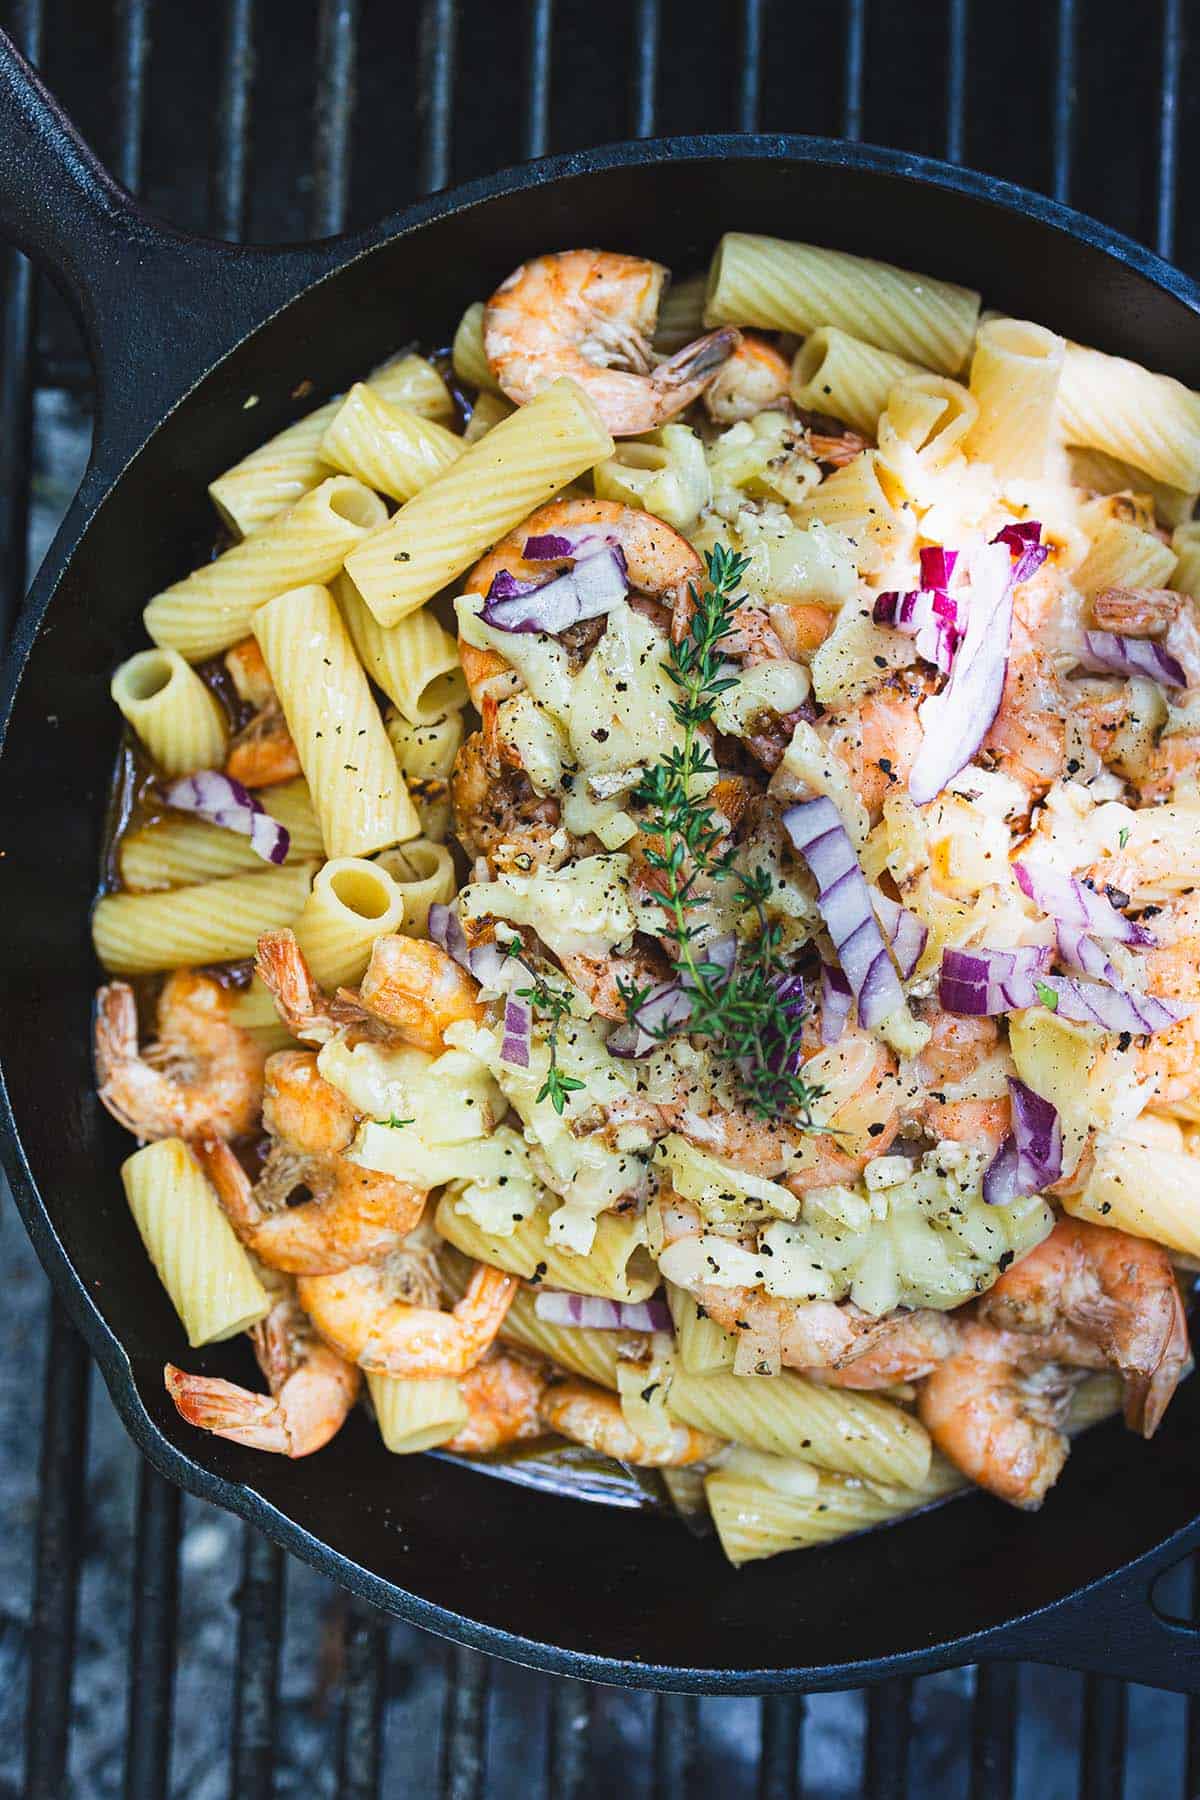
    Shrimp rigatoni with red onion and herbs in a cast iron skillet on the grill

    Why This Shrimp Pasta Is Perfect for Camping

    When it comes to cooking while camping, I always look for recipes that are simple, delicious, and require minimal ingredients. This shrimp pasta has become a go-to for my family of five because it checks all the boxes.

    With frozen shrimp that naturally thaw by the time you’re ready to cook, a handful of bold flavours, and a quick assembly over the fire, this meal makes campsite cooking effortless. Plus, nothing beats enjoying a warm, garlicky, lemony pasta under the open sky!

    Creamy pasta with shrimp, herbs, and vegetables in a skillet, featuring pasta, seafood, and fresh garnish.

    Key Ingredients

    Ingredients

    Frozen Shrimp

    • Frozen shrimp (shell-off for convenience) are easy to store and naturally thaw by the time you’re ready to cook. They’re the ultimate camping protein — no cooler stress, no spoilage risk.

    Old Bay Seasoning

    • A mix of warm spices that complements the shrimp and brings out a slightly smoky depth. It’s the secret weapon in this dish. Keep a tin of Old Bay Seasoning in your camping kit at all times.

    Manchego Cheese

    • This cheese melts beautifully and adds a nutty, creamy finish to the pasta. It’s a slightly unusual choice for a camping pasta, but the nutty character pairs incredibly well with shrimp and lemon. Grated mozzarella works as a substitute if Manchego isn’t available.

    Garlic

    • Garlic infuses the dish with deep, savoury flavour that elevates the shrimp. Use freshly minced for the best result — pre-minced jarred garlic works in a pinch at the campsite.

    Lemon

    • The fresh acidity brightens the entire dish and balances the richness of the butter and cheese. Don’t skip it — it’s what makes this pasta feel light and fresh despite being hearty.

    We cook this in a quality Lodge 12″ Cast Iron Skillet which goes straight over the campfire. A set of silicone tongs makes handling the shrimp much easier over an open flame.

    Sweet shrimp pasta with fresh herbs in a cast iron skillet.

    Not Just for Camping — Make It at Home Too

    While this recipe shines as an easy camping meal, it’s just as fantastic for a quick weeknight dinner at home. Swap the campfire for your stovetop, and in under 30 minutes, you’ll have a restaurant-quality pasta that the whole family will love. The simplicity of ingredients and the bold, fresh flavours make this dish a staple, no matter where you cook it!

    Love camping recipes? Try our Lemongrass Chicken Drumsticks and Instant Pot Easy Chili for more campfire-ready meals the whole family will love.

    Sweet shrimp pasta salad with green olives and fresh herbs in a black skillet, perfect for summer meals.

    Frequently Asked Questions

    Can I use fresh shrimp instead of frozen?

    Yes! Fresh shrimp work perfectly in this recipe. If using fresh shrimp at a campsite, keep them in your cooler and use them on the first night of your trip. Fresh shrimp cook slightly faster than thawed frozen shrimp, so watch for them to turn pink and curl — usually 2–3 minutes per side.

    What pasta shape works best?

    Rigatoni or penne are ideal because their ridges and tubes hold onto the sauce beautifully. In a pinch, any short pasta works well — farfalle, rotini, or fusilli are all great camping choices because they pack easily and cook consistently. Avoid delicate long pasta shapes like spaghetti at a campsite as they’re harder to manage over a fire.

    Can I substitute the Manchego cheese?

    Absolutely. Grated Parmesan or Pecorino Romano are the closest substitutes in terms of flavour profile — both add a salty, nutty depth. Mozzarella melts more smoothly if you prefer a creamier texture. For camping convenience, pack pre-grated cheese in a ziplock bag.

    How do I keep the shrimp from getting rubbery?

    The key is not to overcook them. Shrimp are done the moment they turn fully pink and curl into a C-shape — usually just 2–3 minutes over medium-high heat. If they curl tightly into an O-shape, they are overcooked. Add them last and remove the pan from heat as soon as they are done.

    Pink pasta tossed in a creamy spinach and sour cream sauce

    Sweet shrimp pasta with fresh herbs in a cast iron skillet.

    Easy Camping Shrimp Pasta

    A quick and flavorful shrimp pasta that comes together in just 30 minutes, perfect for cooking over a campfire or on the stovetop. With frozen shrimp, Manchego cheese, and a touch of lemon, this dish is simple, delicious, and great for both camping and home cooking
    Prep Time 25 minutes
    Cook Time 30 minutes
    Total Time 55 minutes
    Servings: 5 servings
    Course: Main Course
    Calories: 440

    Ingredients
      

    • ½ kg frozen shrimp (shell-off for convenience)
    • 450 g pasta of choice rigatoni or penne
    • 3 tbsp butter
    • 1 small onion, diced
    • 1 tsp Old Bay Seasoning see blog note
    • 3 cloves garlic, minced
    • 1 lemon, juiced
    • 1 cup manchego cheese, grate or grated mozzarella cheese
    • ¼ red onion, diced
    • ¼ cup olives

    Method
     

    1. Thaw the Shrimp – Take frozen shrimp out of the freezer 30-40 minutes before cooking.
    2. Cook the Pasta – Boil a pot of water over the fire or camp stove and cook the pasta until al dente (slightly undercooked is fine). Reserve 1 cup of pasta water, drain the rest, and set aside.
    3. In a cast iron pan over the fire, melt butter and sauté the diced onion until soft and fragrant.
    4. Add the shrimp to the pan, then season with bay spice blend, garlic, salt, and pepper. Cook until pink and slightly crispy on the edges.
    5. Add the cooked pasta, manchego cheese, and reserved cup of pasta water to the pan and toss everything together.
    6. Remove from heat and top with red onions and olives for a fresh, briny finish.
  • Spinach Sour Cream Pasta

    Spinach Sour Cream Pasta

    There’s something borderline magic about beet pasta. The color alone — that deep, saturated magenta — stops people mid-conversation when you put it on the table. But this dish isn’t just a visual trick: the earthy sweetness of beet pasta against a tangy, garlicky sour cream sauce is a combination that genuinely works, and the whole thing comes together in 20 minutes. It’s the rare recipe that looks like you spent hours and tastes even better than it looks.

    This post may contain affiliate links. If you purchase through these links, I may earn a small commission at no extra cost to you. Thank you for supporting Love & Harvest!

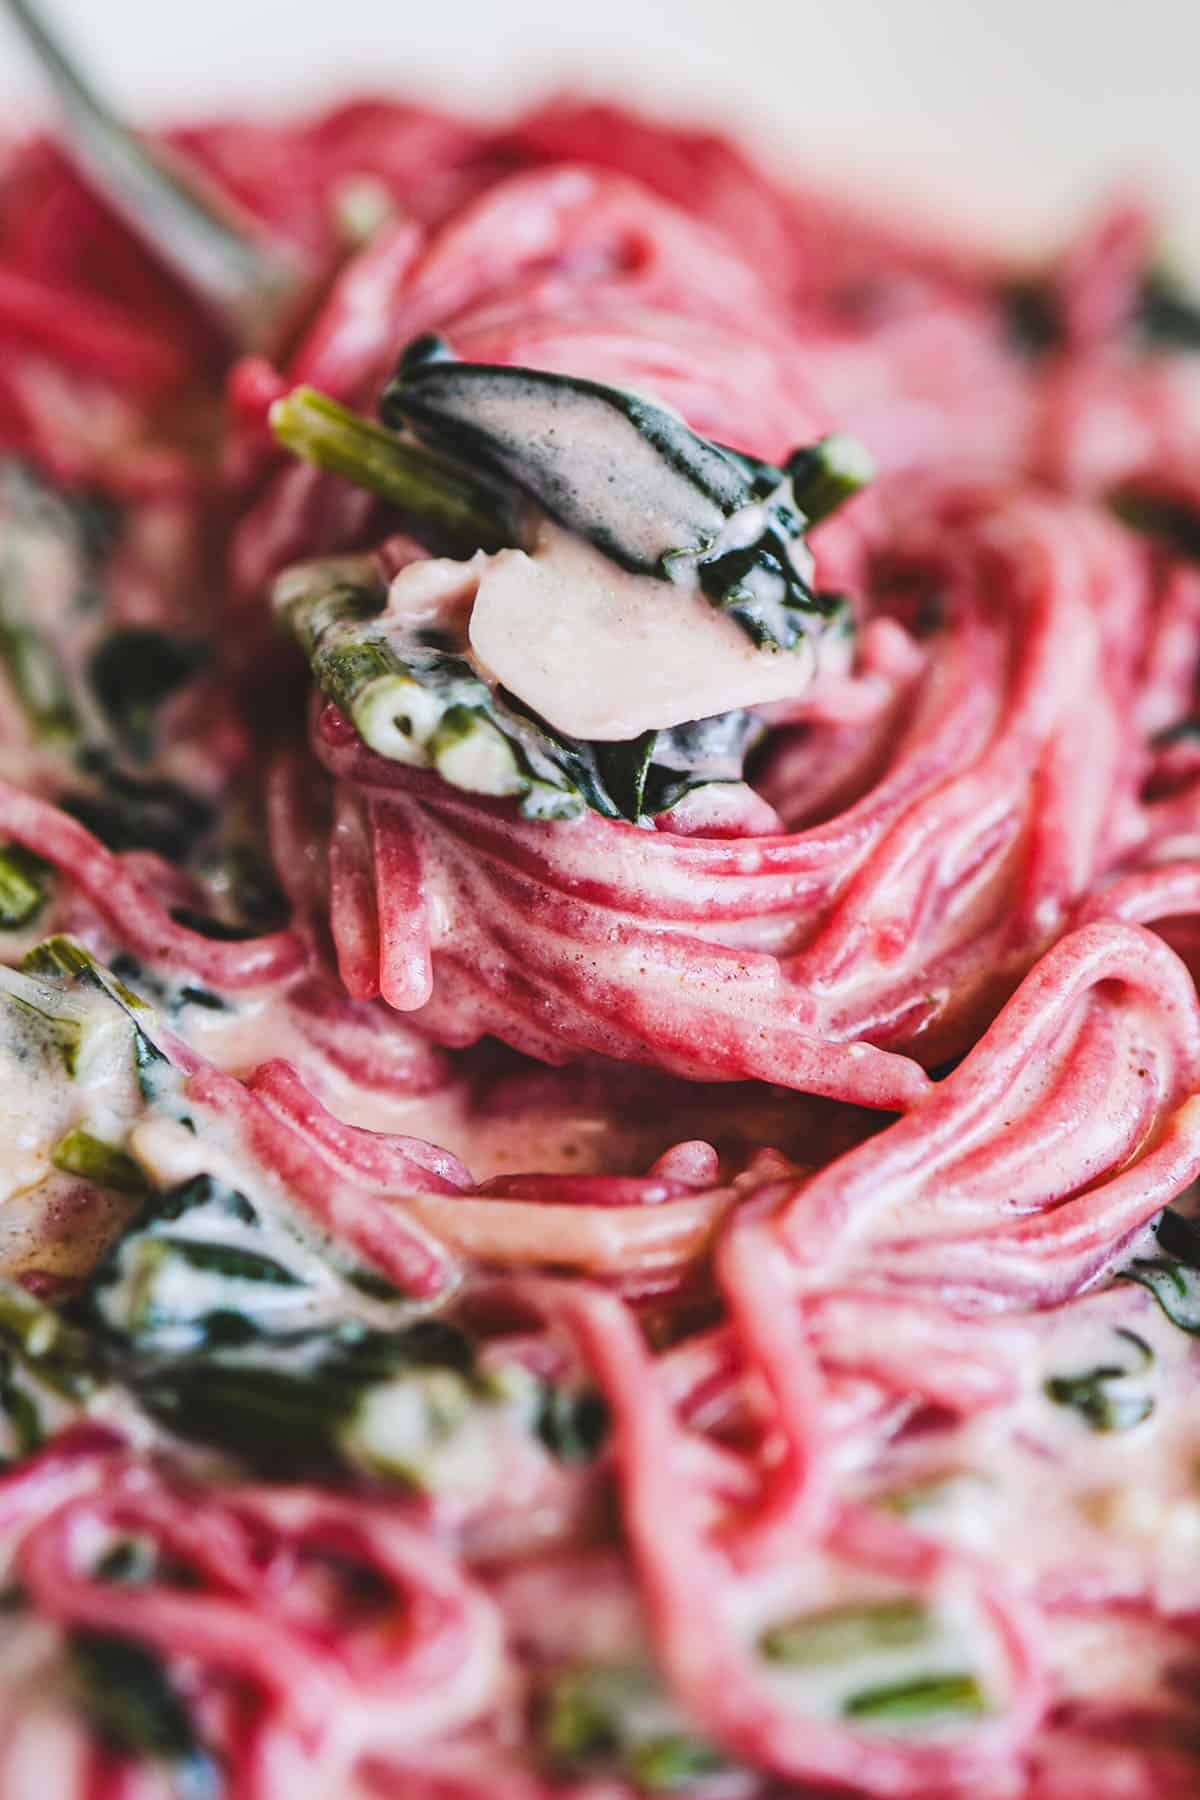
    Pink beet pasta in a creamy spinach and sour cream sauce

    A quick, effortless pasta meal using sour cream, spinach, garlic, and mozzarella cheese — ready in 20 minutes with minimal cleanup.

    Why This Recipe Works

    1. Visual Impact: The magenta hue from beet pasta makes this a showstopper on any table without any extra effort.
    2. Nutritional Value: Beets are packed with fiber, folate, and vitamin C. Sour cream adds calcium and protein.
    3. Unique Flavour: Earthy beet sweetness against tangy sour cream is a combination most people have never tried — and immediately want to make again.
    4. 20-Minute Meal: The sauce takes less time than boiling the pasta. Perfect for weeknights.

    The Beet Pasta

    If you have time, the best version of this dish uses Homemade Fresh Beet Pasta — made by juicing fresh beets and blending with eggs and flour. Nothing compares to it for flavour and color intensity.

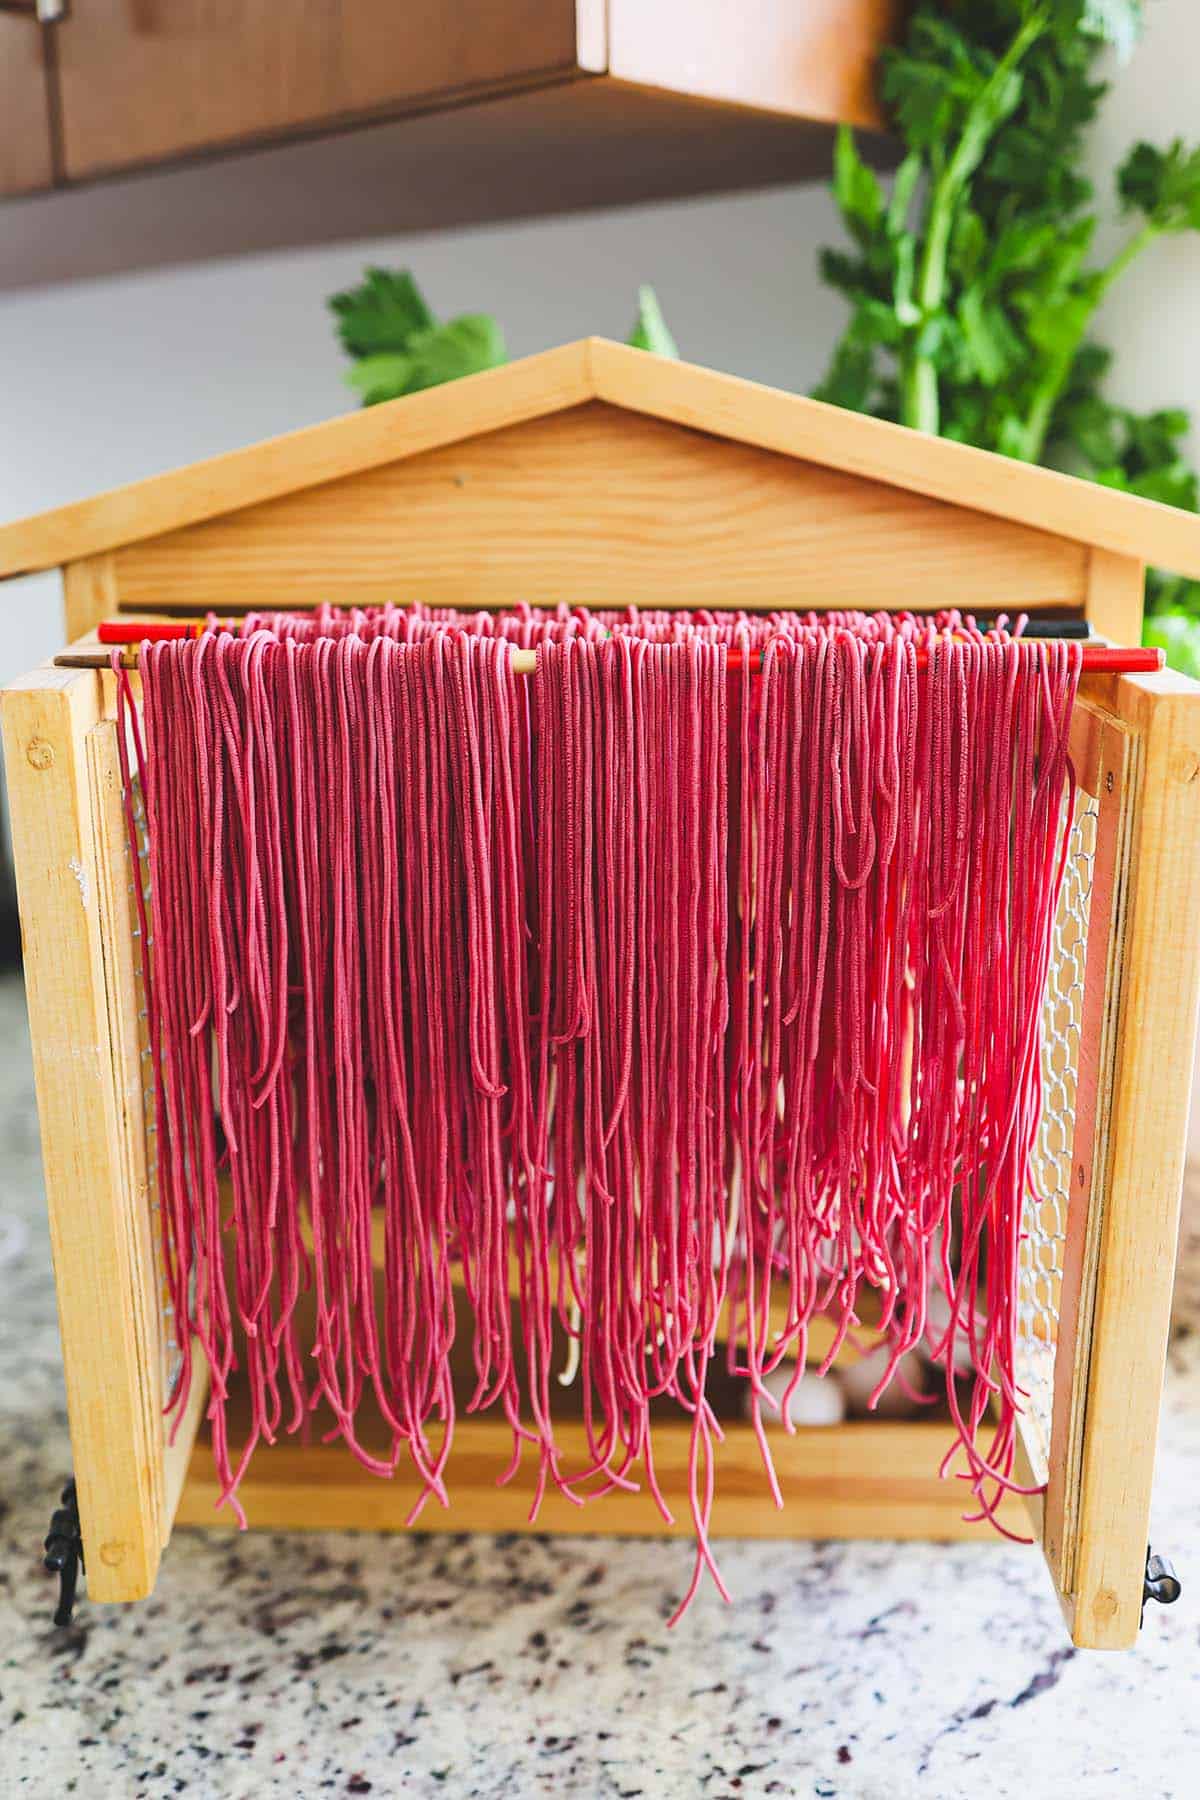
    Fresh beet pasta recipe: pink beet pasta drying on a wooden rack

    No time for homemade? Any dried pasta works perfectly. The sauce is strong enough to carry the dish on its own, so use whatever pasta you have on hand.

    Ingredients Deep Dive

    Ingredients

    Sour Cream

    • Why it matters: Sour cream is the backbone of this sauce — it gives it that thick, tangy creaminess that coats the pasta instead of just sitting in a pool at the bottom. Full-fat is best. If you want it extra creamy (recommended), add an extra 1/4 cup beyond the recipe’s 1 cup base. Don’t substitute Greek yogurt straight — it can break when heated; mix it with a tablespoon of cream first if you need a substitute.

    Spinach

    • Why it matters: Spinach adds nutrition and colour depth to the sauce without overpowering it. Fresh spinach wilts down dramatically — two large handfuls cook to a couple tablespoons. It’s mild enough that kids reliably eat it without objection once it’s incorporated into the sauce.

    Garlic

    • Why it matters: Three cloves, sautéed gently in butter until fragrant — about 1 minute. Don’t rush this step or let it brown; burned garlic turns bitter and ruins the sauce. If garlic is too strong for your household, swap half a small white onion for a gentler flavour.

    Mozzarella Cheese

    • Why it matters: Shredded mozzarella melts smoothly into the sour cream sauce and adds a mild, milky richness. Other options that work well: brie (creamier, more complex), parmesan (sharper, adds more umami), or blue cheese (bold — use sparingly). A fine Parmesan grater is excellent for adding freshly grated cheese to the final dish.

    Butter

    • Why it matters: Used to sauté the garlic at the start. Butter adds a richness and nuttiness that olive oil can’t replicate in this sauce. Either works, but butter is notably better here.

    How to Make the Sour Cream Sauce

    Heat a tablespoon of butter in a large skillet over medium heat. Add three cloves of minced garlic and sauté until fragrant — about 1 minute. Add two cups of fresh spinach and cook until wilted, about 2–3 minutes. Reduce heat to low and stir in 1 cup of sour cream and 1 cup of shredded mozzarella until smooth. Season with salt and pepper to taste. If the sauce is too thick, thin it with a splash of pasta cooking water. Toss the cooked pasta in the sauce until evenly coated. Serve immediately, garnished with fresh parsley or dill if desired.

    A good wooden spoon set is ideal for stirring sour cream sauces — gentle enough not to break the emulsion while you’re incorporating the cheese.

    Pink beet pasta in a creamy spinach and sour cream sauce

    More Pasta Recipes You’ll Love

    Frequently Asked Questions

    Can I use regular pasta instead of beet pasta?

    Absolutely. Any pasta shape works — penne, rigatoni, linguine, or spaghetti. Beet pasta adds visual drama and a subtle earthy flavour, but the sour cream sauce is delicious on its own without it. If you use regular pasta, consider adding a pinch of smoked paprika to the sauce for colour and depth.

    Why does my sour cream sauce break or look grainy?

    Sour cream breaks when it’s added to heat that’s too high. The key is to reduce the heat to low before adding the sour cream, and never let the sauce boil after it’s in. If it starts looking grainy, remove from heat immediately and stir in a tablespoon of cold butter — this often rescues it.

    Can I make this dish ahead of time?

    The sauce can be made ahead and refrigerated for up to 2 days. Reheat gently on low heat with a splash of water or milk to loosen it. However, the pasta is best cooked fresh — pre-cooked pasta absorbs the sauce and can become mushy when reheated.

    How do I keep the beet pasta from fading?

    Don’t overcook it. Beet pasta’s colour comes from betalain pigments that degrade with prolonged heat. Cook to just al dente — test at 1 minute before the package time — and immediately toss in the sauce. The acid in the sour cream also helps preserve the colour.

    Is this recipe suitable for kids?

    Yes — the spinach blends into the creamy sauce and is nearly undetectable to picky eaters. The garlic level is mild. The beet pasta colour is actually a plus with kids; the striking colour makes it fun to eat. Serve it as “magic purple pasta” and watch it disappear.

    Pink pasta tossed in a creamy spinach and sour cream sauce

    Spinach Sour Cream Pasta with Fresh Beet Pasta

    Vibrant beet pasta, coated in a creamy, tangy sour cream sauce. The striking magenta hue is not only visually stunning but also hints at the earthy sweetness of the beets.
    Prep Time 5 minutes
    Cook Time 15 minutes
    Total Time 20 minutes
    Servings: 6 people
    Course: Main Course
    Cuisine: American Italian
    Calories: 420

    Ingredients
      

    • 12 oz dried pasta or my Homemade Fresh Beet Pasta
    • ¼ cup unsalted butter cold
    • 3 garlic cloves
    • 1 cup spinach washed and chopped
    • 1 cup sour cream
    • 1 cup mozzarella cheese
    • ½ tsp chicken stock powder
    • salt and pepper

    Equipment

    • Philips Pasta Maker Machine optional if you want to make fresh beet pasta

    Method
     

    1. First, cook the pasta as instructed on the package. Strain the pasta but reserve the pasta water. Set them both aside.
      ADVANCE COOKING: instead of regular dried pasta, you can try our Homemade Fresh Beet Pasta Recipe.
    2. In a large skillet, heat the cold butter over medium heat. Add the minced garlic and sauté until fragrant, about 1 minute.
    3. Lower the heat and stir in the spinach and cook for another 1 minute. Now stir in the sour cream, mixing until smooth. While it is bubble, sprinkle the mozarella cheese on top and cook for 5 minutes. Ocassionally stir it so it doesn't stick to the skillet.
    4. Add in your pasta to the skillet and toss to coat the pasta evenly with the sauce. If you find the sauce too thick, you can add some pasta water. Continue to cook for 2-3 minutes until the pasta is heated through.
    5. Transfer the pasta to serving plates. Garnish with fresh dill or parsley and grated Parmesan cheese, if desired.
  • Fresh Beet Pasta

    Fresh Beet Pasta

    Fresh beet pasta is one of those recipes that makes you feel like a genuinely good cook the first time you make it. The color is extraordinary — a deep, jewel-toned magenta that comes entirely from beet juice, with no artificial dye or trickery involved. And it’s not just visual: the beets lend a subtle sweetness and a tender bite to the pasta that transforms an ordinary dough into something memorable. Using a pasta maker, the whole process takes about 3 minutes of actual machine time. The hardest part is deciding what sauce to pair it with.

    This post may contain affiliate links. If you purchase through these links, I may earn a small commission at no extra cost to you. Thank you for supporting Love & Harvest!

    Fresh beet pasta strands drying on a wooden rack

    This recipe uses beet juice and a pasta maker machine to produce fresh beet pasta in about 3 minutes of active machine time.

    Why Make Fresh Beet Pasta?

    Store-bought beet pasta exists, but it doesn’t compare. Fresh pasta made with actual beet juice has a vibrant color that stays vivid even after cooking, a delicate texture that dried pasta can’t replicate, and a flavor dimension — subtle earthiness and sweetness — that makes the dish taste genuinely handmade. Once you’ve made it fresh, dried will feel like a compromise.

    Bright pink beet pasta hanging to dry on a pasta rack

    Equipment: The Pasta Maker

    This recipe was developed using the Philips Pasta Maker Machine. You add the ingredients, it mixes and extrudes the pasta automatically. There’s no manual kneading or rolling — it does everything. For anyone who has wanted to make fresh pasta but found the hand-rolling process too involved, this machine is a genuine game-changer.

    If you don’t have a pasta machine, you can still make this recipe by hand: knead the dough for 8–10 minutes, rest it for 30 minutes, then roll and cut with a rolling pin. It takes longer, but the result is the same excellent pasta.

    A pasta drying rack is very useful here — it lets you hang the extruded strands while the rest of the batch processes, preventing them from sticking together before you’re ready to cook.

    Beet pasta strands hanging in a wooden pasta drying cabinet

    Ingredients Deep Dive

    Ingredients

    Beets (Fresh-Juiced)

    • Why it matters: Fresh beet juice is what gives the pasta its signature magenta color and subtle earthy sweetness. Use a juicer if you have one. No juicer? Blend the beets on high and strain through a fine-mesh sieve or cheesecloth. Don’t use pre-packaged beet juice — the color is usually duller and it may contain added sugar or preservatives that affect the pasta dough.

    High-Protein Flour

    • Why it matters: High-protein (bread) flour creates more gluten structure, giving the pasta that satisfying al dente bite. All-purpose flour works but produces a softer, more delicate result. For pasta that holds up to a heavy sauce and retains its texture after cooking, protein content matters. A kitchen food scale ensures precise flour-to-liquid ratios — pasta dough is less forgiving than most recipes when measurements are off.

    Eggs

    • Why it matters: Eggs bind the flour and beet juice together, add richness, and contribute to the pasta’s golden-amber undertone that mixes beautifully with the beet’s red. Room temperature eggs incorporate more smoothly into the dough. Use large eggs.

    Salt

    • Why it matters: Salt in the dough (as opposed to just the cooking water) seasons the pasta from within. A small pinch — about 1/2 teaspoon — is enough to make the difference between pasta that tastes like something and pasta that just tastes like flour.

    Fresh beet pasta drying inside an open wooden cabinet

    The Magic of Beet Juice in Pasta

    Beet juice gets its color from betalain pigments — water-soluble compounds that are relatively heat-stable compared to anthocyanins (the pigment in red cabbage, which turns blue when cooked). The pasta holds most of its color through cooking, especially if you cook it al dente and don’t leave it sitting in water. The acidity in sauces like sour cream actually helps preserve the color.

    Exploring Other Vegetable Pastas

    Once you’re comfortable with beet pasta, the same technique works beautifully with other vegetables. Spinach pasta is a classic — vibrant green with a fresh, grassy flavour. Carrot pasta has a gentle sweetness and a warm orange hue. Butternut squash pasta is golden and rich. Each vegetable brings its own colour and subtle flavour note, making fresh pasta infinitely variable.

    Pink beet pasta in a creamy spinach and sour cream sauce

    This beet pasta is the star ingredient in our Spinach Sour Cream Pasta — a 20-minute weeknight recipe that pairs this pasta with a tangy, garlicky cream sauce. Highly recommended as a first way to use this dough.

    More Recipes to Try

    Frequently Asked Questions

    Can I make beet pasta without a pasta machine?

    Yes. Combine the ingredients and knead by hand for 8–10 minutes until smooth and elastic. Wrap in plastic wrap and rest at room temperature for 30 minutes. Then roll out with a rolling pin to about 1–2mm thickness and cut into your desired shape with a knife or pasta cutter. The dough is slightly stiffer than plain pasta dough because of the beet juice — give it extra kneading time if it feels tight.

    How do I prevent the pasta from sticking together after extrusion?

    Dust extruded strands lightly with flour as soon as they come out of the machine. Use a pasta drying rack or hang them over a clean broom handle placed between two chairs. If cooking immediately, drop them straight into boiling salted water within a few minutes of extrusion.

    How long does fresh beet pasta take to cook?

    Fresh pasta cooks significantly faster than dried — usually 2–4 minutes in heavily salted boiling water. Start testing at 2 minutes. It’s done when it floats to the surface and has a tender but slightly firm bite. Do not walk away from the pot.

    Can I store fresh beet pasta?

    Yes. Dust with flour, nest into small portions, and refrigerate in an airtight container for up to 2 days. For longer storage, let the pasta dry completely on a rack (1–2 hours) and then store in a sealed container at room temperature for up to a week, or freeze for up to 3 months.

    Will the color bleed into the sauce?

    Yes — and this is a feature, not a bug. When you toss beet pasta in a cream-based sauce, the sauce picks up the beautiful magenta and turns an extraordinary pink color. In tomato-based sauces the color is less visible but still adds depth. Expect any light-colored sauce or cheese to be tinted after contact.

    Can I use beet powder instead of fresh beet juice?

    Yes — beet powder is a convenient alternative. Start with 2 tablespoons per 100g flour and adjust as needed. The color won’t be quite as vivid as fresh juice, but the flavour difference is minimal. Dissolve the powder in the liquid component before adding to the flour.

    Bright pink beet pasta hanging to dry on a pasta rack

    Fresh Beet Pasta

    The beets lend their earthy sweetness, transforming ordinary pasta into a feast for the senses. Each bite is a tender embrace of tradition and innovation, a whisper of the earth’s gifts wrapped in the elegance of handmade pasta. 
    Prep Time 5 minutes
    Cook Time 7 minutes
    Total Time 12 minutes
    Servings: 6 people
    Course: Main Course
    Cuisine: Italian
    Calories: 240

    Ingredients
      

    • 250 g semolina flour
    • 250 g all-purpose flour
    • 1 beet juice
    • 2 large eggs
    • sea salt

    Equipment

    • Philips Pasta Maker Machine

    Method
     

    1. Attach the desired pasta shaping disc to the Philips pasta maker. I usually like using the normal spaghetti disk.
    2. Turn on the pasta maker and choose the program for fresh pasta.
    3. Gradually add the flour mixture into the pasta maker's chamber.
    4. Combine the beet juice and egg together until it is well blended together.
    5. Slowly pour in the beet and egg mixture into the pasta maker as it kneads the dough.
    6. Allow the machine to knead the dough for the programmed time.
    7. Once the kneading is complete, the machine will start extruding the pasta.
    8. Cut the pasta to your desired length as it comes out of the machine.
    Cooking the Beet Pasta:
    1. Bring a large pot of salted water to a boil
    2. Add the fresh beet pasta to the boiling water and cook for 2-4 minutes, or until al dente.
    3. Drain the pasta and serve immediately with your favourite sauce.
  • BEST Pumpkin Ravioli With Sage Butter

    BEST Pumpkin Ravioli With Sage Butter

    If you have ever wanted to make restaurant-quality pasta at home, this is the recipe. Pumpkin and spinach ravioli wrapped in chewy homemade dough, finished with sage butter sauce and toasted pecans — the flavour is so layered and the texture so luxurious that guests will genuinely think you ordered from an Italian restaurant. The cost is a fraction, and the satisfaction of making it yourself is something no delivery can touch.

    This post may contain affiliate links. If you purchase through these links, I may earn a small commission at no extra cost to you. Thank you for supporting Love & Harvest!

    Pumpkin ravioli

    Why You Will Love This Pumpkin Ravioli

    Pumpkin and spinach are two ingredients that pair beautifully together — kind of like wine and cheese. The taste is autumnal and exquisite in texture. Pureed pumpkin and spinach folded with panela cheese and cream cheese give the filling a velvet consistency. Lightly seasoned with nutmeg is the secret that brings hints of warmth and nuttiness. A mature dish that can be enjoyed by the whole family.

    If you love this pasta, try our homemade pesto gnocchi next — it uses a similar approach of hand-crafted pasta with bold sauce. For a vegetable-forward pasta, our fresh beet pasta is another showstopper worth trying.

    Ingredients Deep-Dive

    Pumpkin

    The pumpkin used in this recipe is the green Mexican variety — sweeter than the orange variety commonly seen in North America. If you have a variety or canned version you prefer, use what you have. The key is that the pumpkin is fully roasted and pureed to a smooth, thick consistency before going into the filling.

    • Why it matters: Wet pumpkin filling will tear the ravioli during sealing and boiling. Roast the pumpkin first and let it cool completely so excess moisture evaporates.

    Panela Cheese

    Panela is a fresh, smooth Mexican cheese made from pasteurized cow’s milk — low in calories and mild in flavour. It works perfectly here because it blends smoothly into the filling without overpowering the pumpkin. If panela is hard to find, substitute with white cheddar or feta.

    • Why it matters: The cheese adds a creamy, slightly salty counterpoint to the sweet pumpkin. Without it, the filling tastes flat.

    Cream Cheese

    Combined with the panela, cream cheese is responsible for that oozy, luxurious quality when you cut the ravioli in half. It also helps bind the filling so it holds its shape inside the pasta.

    • Why it matters: Cream cheese is what makes this filling feel restaurant-quality rather than homemade.

    Spinach

    Pumpkin and spinach are natural partners. Spinach adds colour, texture, and a mild earthiness that balances the sweetness of the pumpkin. Chop it finely so it distributes evenly through every bite.

    • Why it matters: Without spinach, the filling is visually monotone and misses the textural contrast that makes every bite interesting.

    Sage

    Fried sage in butter is one of the best-kept secrets in fall and winter cooking. When sage leaves hit hot butter, they crisp up and release an intense herbal, almost floral aroma. The flavour transforms completely from raw — it becomes deep, nutty, and satisfying.

    • Why it matters: Sage butter is what elevates this from good pasta to extraordinary pasta. A few leaves of fresh sage make a restaurant-quality sauce in minutes.

    Pecans

    Toasted pecans in butter have a magical, warm, autumnal smell that signals fall is here. They add a satisfying crunch to the sauce and amplify the nuttiness of the sage butter. When pecans are mixed into this beautiful butter mixture, everything about the sauce makes perfect sense.

    • Why it matters: Texture contrast is essential in pasta dishes. The crispy pecan against the soft, chewy ravioli is what makes each forkful memorable.

    Pasta Maker

    A pasta maker attachment makes producing consistent, thin pasta sheets effortless. A ravioli cutter stamp ensures perfectly shaped, evenly sealed ravioli every time. A simple rolling pin works too if you prefer to roll by hand.

    • Why it matters: Consistent dough thickness means every ravioli cooks in the same time. Uneven sheets produce some ravioli that are raw and others that are overcooked.

    what goes with pumpkin ravioli

    Making the Ravioli Dough

    The Philips Pasta Maker makes producing consistent ravioli sheets effortless. I attach the lasagna disc, weigh all the ingredients, put the dry ingredients in the hopper, whisk the liquids separately, and let the machine run. Within 3 minutes it extrudes a perfect pasta sheet. The first 6 inches tend to be uneven — cut those off and put them back in the hopper. Then measure alternating sheets of 12 inches (bottom) and 12.5 inches (top) and keep them covered with a towel so they do not dry out.

    savory pumpkin ravioli

    The Secret to the Sage Butter Sauce

    This sauce is simple but its combination of butter, crispy sage, toasted pecans, apple cider vinegar, and heavy cream is genuinely gourmet. The secret: once the thick sauce is ready, pour it over hot ravioli and add a splash of starchy pasta water. The hot pasta water emulsifies with the thick sauce into a silky, creamy coating. This is the same technique used in fine dining kitchens.

    pumpkin ravioli jamie oliver

    This Recipe Is Vegetarian — But It Does Not Have to Stop There

    This pumpkin ravioli recipe is vegetarian as written. If you want to add protein, some delicious options are: seared tuna, grilled steak, poached chicken, or grilled sausages. The richness of the sage butter sauce stands up well to bold proteins.

    pumpkin ravioli with sage butter

    Frequently Asked Questions

    Can I make the ravioli dough without a pasta machine?

    Yes. Roll the dough by hand with a rolling pin to about 1–2mm thickness. A pasta machine produces more consistent results, but hand-rolled dough works perfectly well. The key is getting the sheet thin enough so the dough cooks through in 4 minutes.

    Why does my ravioli fall apart in the water?

    The two most common causes: the filling was too wet, or the edges were not sealed firmly enough. Make sure the pumpkin puree is dry before mixing the filling, and always brush the edges with egg wash before pressing the top sheet down. Press firmly around each pocket of filling.

    Can I freeze homemade ravioli?

    Yes. Lay the uncooked ravioli flat on a parchment-lined baking sheet and freeze until solid, then transfer to a zip-lock bag. Cook directly from frozen in boiling salted water for 6–7 minutes instead of 4.

    What can I substitute for sage?

    Thyme or rosemary can replace sage if needed. The flavour will be different — thyme is more subtle, rosemary is more assertive — but both work with browned butter and pecans.

    Can I make the filling ahead of time?

    Yes. The pumpkin spinach filling can be made 1 day ahead and stored covered in the fridge. This actually helps the flavours meld. Bring it to room temperature before filling the ravioli.

    What pasta shapes can I use this filling for?

    This filling works in any enclosed pasta shape — tortellini, cappelletti, or large stuffed pasta shells baked with extra sage butter sauce on top are all fantastic variations.

    Pumpkin ravioli in sage cream sauce with sausage on a blue plate

    Pumpkin Ravioli with Sage Butter

    Pumpkin ravioli wrapped in a chewy dough drizzled with sage butter is a culinary experience. Rich in flavour and texture, it is like eating in an up-scale restaurant, minus the cost. Print Recipe Pin RecipePrep Time:35 minsCook Time:15 minsServings: 6 people

    Ingredients

    Ravioli Dough

    • 550 g all purpose flour
    • 4 g sea salt
    • 170 g 2 eggs + milk
    • 37 g water

    Pumpkin Spinach Filling

    • 1.5 cups pumpkin puree
    • 2 garlic clove grated
    • ¼ tsp ground cinnamon
    • ½ tsp ground nutmeg
    • ½ cup panela cheese or cheddar cheese
    • 4 oz cream cheese
    • ¼ cup chopped spinach
    • 2 tsp sea salt
    • pepper to taste

    Sage Butter Sauce

    • ½ cup butter
    • 2 garlic clove grated
    • 20 sage leaves
    • ¼ cup chopped pecans
    • 3 tbsp apple cider vinegar
    • ½ cup heavy cream
    • ½ tsp ground nutmeg
    • 1 tsp sea salt
    • ½ tsp ground black pepper

    Instructions

    Ravioli Dough Using Philips Pasta Machine

    • Attach the lasagna disc to the machine and tightly screw it on.
    • Weigh all the ingredients. Add the flour and salt into the pasta machine’s hopper.
    • In a separate bowl, whisk together all the liquids: eggs, milk, and water until fully combined.
    • Turn the machine on and set it for 3 minutes. Put the lid on and let it run.
    • Slowly and gradually add the liquid into the reservoir at the top of the lid.
    • When the machine finishes mixing, it will begin extruding pasta. The first 6 inches will be uneven — cut them off and place back into the hopper.
    • Measure and cut alternating sheets of 12 inches (bottom) and 12.5 inches (top). Cover sheets with a towel so they do not dry out.
    • Place the bottom sheet on a table. Scoop half a tablespoon of filling onto the sheet with 1-inch gaps. Brush beaten egg around each filling mound.
    • Carefully place the top sheet over the filling, leaving space at the top. Press firmly around each filling pocket to seal.
    • Cut the ravioli with a knife or ravioli cutter. Place on a dry baking sheet and repeat until the dough and filling are used up.
    • Fill a large deep pot with water and bring to a boil. Add 2 tsp of salt. Stir the pot 5 times in the same direction until a vortex forms. Slowly add ravioli in batches of about 10 — do not overcrowd. Stir gently to prevent sticking.
    • Cook for 4 minutes, or until the ravioli floats. Drain and set aside. Reserve a splash of pasta water.
    • Meanwhile, make the sauce: melt together butter, garlic, pecans, and sage in a large skillet over medium heat. Cook, stirring occasionally, until the butter browns and the sage is crisp, 4–5 minutes. Remove the sage leaves and set aside.
    • Reduce heat to low. Add the apple cider vinegar, cream, nutmeg, salt, and pepper. Simmer 1 minute. Add the ravioli and a splash of pasta water, gently tossing to combine. Remove from heat.
    • Serve ravioli topped with crispy sage leaves.
  • Fresh Beet Pasta & Lemon Garlic Alfredo

    Fresh Beet Pasta & Lemon Garlic Alfredo

    This post may contain affiliate links. If you purchase through these links, I may earn a small commission at no extra cost to you. Thank you for supporting Love & Harvest!

    The first time you serve this pasta, people will think you spent hours in the kitchen. You didn’t. The colour comes from beet juice, the creaminess from a simple lemon garlic alfredo, and the pasta itself takes about 3 minutes in a machine. What you get on the plate looks stunning, tastes extraordinary, and is 100% vegetarian. It’s become one of our family’s most requested meals — including by the kids, who love calling it “pink pasta.”

    beet pasta

    Why You’ll Love This Beet Pasta

    • Stunning colour — The beet turns the pasta a vivid magenta. Once it meets the cream sauce it shifts to a deep rose-pink. It’s genuinely beautiful on a plate.
    • Unbeatable fresh pasta flavour — There is no comparison between homemade fresh pasta and store-bought dried. The texture is silky, the bite is tender, and the beet adds a subtle earthiness that’s unlike anything else.
    • Fun family project — Kids love feeding the pasta machine and watching the pink noodles come out. It turns cooking into a small event.
    • Ready in 3 minutes — With the Philips Pasta Maker, the dough kneading and extrusion is automated. You handle the prep and cooking; the machine does the labour.

    beet pasta with lemon garlic Alfredo

    Ingredients Deep-Dive

    Ingredients

    Beet — The Star Ingredient

    Beets are available year-round in most markets in red, purple, yellow, and white varieties — sometimes even striped. For this pasta, use red or purple for the most dramatic colour.

    The earthy, slightly sweet flavour of beet is the reason this pasta needs a bright sauce. The lemon tang in the alfredo brings out the beet’s natural depth and creates a balance that makes the dish feel complete rather than just colourful.

    Flour — All-Purpose or Bread Flour?

    All-purpose flour is the standard choice for homemade pasta — it produces a soft, pliable dough with good stretch. If you want a chewier pasta with more bite, substitute 50% of the all-purpose with bread flour. Bread flour has higher protein content which creates more gluten structure — the pasta cooks firmer and has more resistance when you bite through it. Both versions are excellent; it’s a texture preference.

    The Pasta Machine

    This recipe is built around the Philips Pasta and Noodle Maker. It kneads the dough, extrudes it through a disk, and produces fresh pasta in under 3 minutes. You can change the disk to produce spaghetti, penne, fettuccine, and other shapes. It’s one of the most-used machines in our kitchen. If you want the upgraded version with a built-in scale and more disk options, the Philips Avance Automatic Pasta Maker Plus is worth the investment if you make pasta regularly.

    Cream Cheese — The Alfredo Secret

    The alfredo sauce uses cream cheese instead of heavy cream. This produces a sauce that’s thicker, tangier, and more stable — it doesn’t break or turn greasy when reheated the way cream-based alfredo does. Philadelphia Cream Cheese is the standard choice; its consistent quality makes the sauce reliable every time. The cream cheese melts into the hot milk and butter without needing to be at room temperature.

    Lemon — Juice and Zest

    Both the juice and the zest go into the sauce. The juice provides the acid that cuts through the fat and makes the cream cheese sauce taste bright rather than heavy. The zest adds fragrance — a floral lemon note that elevates the dish without being harsh. Meyer lemons are slightly sweeter; Eureka lemons are more traditional. Either works. Always strain out seeds when squeezing — biting into a lemon seed is memorably unpleasant.

    Parmesan Cheese

    Use a block of real Parmigiano-Reggiano and grate it yourself. The pre-grated powdered version has added anti-caking agents that prevent it from melting properly — it clumps in the sauce rather than incorporating smoothly. A fresh block has a nutty, crystalline richness that makes the difference between a good alfredo and a great one.

    beet pasta recipe

    Pro Tips

    Pro Tip 1: Blend the Beet, Don’t Juice It

    You have two options for adding beet to the pasta dough: juice the beet (concentrated, vibrant colour) or blend the cooked beet into a smooth puree (retains all the fibre). Juicing produces a slightly more electric colour; blending keeps the whole beet in the pasta without any texture difference in the finished noodles. I prefer blending: you use the whole beet and lose nothing in the process. Blend on high until completely smooth with no chunks before adding to the pasta machine.

    Pro Tip 2: The 216g Liquid Measurement

    The Philips Pasta Maker requires a specific liquid-to-flour ratio for optimal results. For this recipe: place a container on a scale, zero it, add 2 eggs, then fill with beet puree until the total reaches exactly 216g. This precision ensures the dough is the right consistency every time — not too dry to extrude, not too wet to hold its shape.

    Pro Tip 3: Add Protein to Make It Hearty

    This is a naturally vegetarian dish. Grilled chicken, sautéed shrimp, or seared beef strips all work beautifully alongside the pasta and sauce. Make a slightly larger batch of the alfredo sauce if you’re adding protein so you have enough to coat everything generously.

    What to Serve Alongside

    For a complete dinner table, this beet pasta pairs magnificently with our Beet and Avocado Sashimi Appetizer — both dishes feature beet and create a visually stunning spread. A crisp green salad or garlic bread rounds out the meal. For a meat option to accompany, our Best Homemade Fried Chicken provides a satisfying contrast to the pasta’s creaminess.

    beetroot pasta

    Frequently Asked Questions

    Do I need a pasta machine for this recipe?

    The Philips Pasta Maker automates the kneading and extrusion and makes the process fast and consistent. That said, you can make beet pasta by hand: mix the flour and beet-egg liquid into a dough, knead for 8–10 minutes until smooth, rest for 30 minutes, then roll thin with a rolling pin and cut into strips. It takes more time and arm strength, but the result is the same.

    Can I make this pasta without eggs (vegan)?

    Yes. Replace the eggs with additional beet puree. You’ll need to adjust the liquid amount slightly — start with the same 216g total and add a tablespoon more puree if the dough seems too dry. The pasta will be slightly less rich but still colourful and delicious. The alfredo sauce can be made vegan with plant-based cream cheese and milk.

    Can I make the pasta ahead of time?

    Fresh beet pasta is best cooked the day it’s made. If you need to make it ahead, lay the extruded pasta flat (not overlapping) on a floured baking sheet, dust lightly with flour, and refrigerate for up to 24 hours. Alternatively, allow the pasta to dry at room temperature for 2 hours, then store loosely in an airtight container for up to 2 days.

    Why does my beet pasta turn pink instead of deep red?

    This is normal. The alkaline proteins in the egg and the heat from boiling water both affect the beet’s pigment. Once you add the cream sauce, the pasta turns a beautiful rose-pink. If you want a deeper colour, use more beet puree and less egg, or use only the beet without egg (vegan version).

    Can I use beet powder instead of fresh beet?

    Yes. Beet powder is a convenient alternative — add 2–3 tablespoons to the flour before mixing. You’ll still get colour and a mild beet flavour, though it’s slightly less vibrant than fresh beet puree. The nutritional profile is also slightly different since processing removes some of the whole beet’s fibre.

    What pasta shapes work best with this sauce?

    Spaghetti and fettuccine are the most visually striking — the long strands show off the colour best. Penne and rigatoni also work well because the alfredo sauce clings inside the tubes. Avoid very thin pasta shapes like angel hair — the sauce is too thick and they tend to clump.

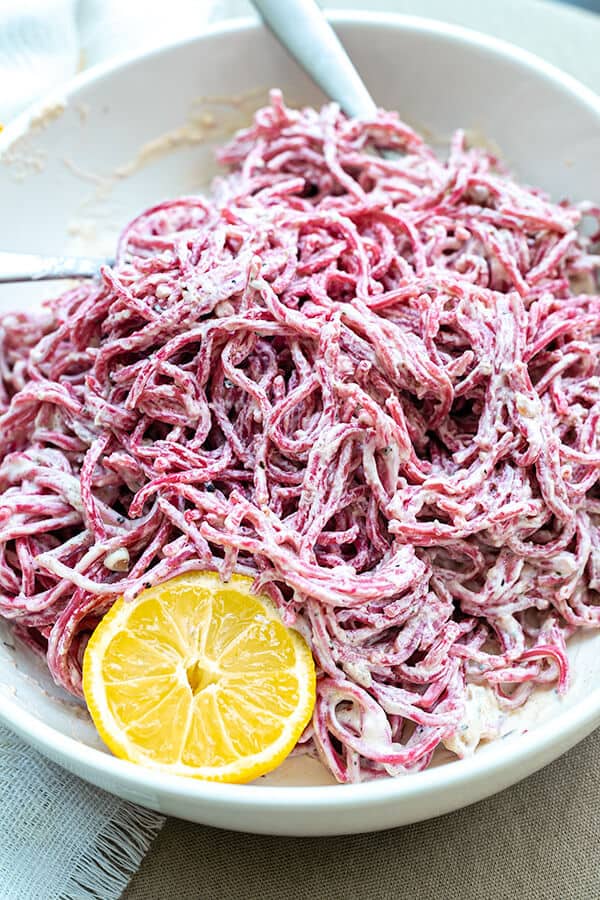
    Pink beet pasta tossed in lemon garlic Alfredo with a lemon half

    Fresh Beet Pasta and Lemon Garlic Alfredo Sauce

    Delicious homemade beet pasta with a lemon garlic alfredo sauce. It's tangy, garlicky, and oh so creamy! Print Recipe Pin RecipePrep Time:20 mins35 minsCourse: Main CourseCuisine: American, MediterraneanKeyword: alfredo, beet, fresh, fresh pasta, garlic, homemade pasta, lemon, pasta, phillips pasta and noodle machineServings: 6 people

    Equipment

    • high speed blender
    • Philips Pasta and Noodle Maker

    Ingredients

    Beet Pasta

    • 1 medium size beet root
    • 2 eggs
    • 550 g all purpose flour
    • 7 g salt

    Lemon Garlic Alfredo Sauce

    • ½ cup butter
    • 3 garlic clove grated
    • 1½ cup whole milk
    • 1 8oz cream cheese
    • 2 tsp sea salt
    • ½ lemon juice
    • lemon zest
    • ¼ cup parmesan cheese grated
    • black pepper

    Instructions

    Beet Pasta

    • Peel the skin off the beet and cut it in half. fill a small pot with water and put the beets in. cover it with a lid and cook it for 10 minutes. Let it cool, but reserve the water.
    • Place the beet within a high-speed blender with ½ cup of its reserved water. Blend on high until it is a smooth smoothie. set aside.
    • On a measuring scale, put a medium size container, and turn it on. Make sure it says 0g. Add 2 eggs to the container and fill the container up with beet juice until it reaches 216g. Set aside.

    Philips Pasta machine

    • take out the Philips pasta and noodle maker. Make sure you have the spaghetti disk attached to the ends. Open the lid, and put in the flour and salt. Close the lid.
    • Turn the machine on and press ‘Start.’ Slowly pour in the beet and egg liquid.
    • Let the machine knead the dough for 3 minutes. It will beep once it is ready to extrude the pasta.
    • Cut the pasta when it is about 20-25cm long.
    • Lay the fresh pasta on a baking sheet, and don’t overlap the pasta on top with more.

    Cooking the Beet Pasta

    • Using a large pot, fill it ¾ full and add 3 tsp of salt (roughly 4L of water). Wait for it to boil.
    • Once the water is rapidly boiling, slowly add the fresh pasta to the water. Immediately stir it with chopsticks or something soft that won’t break the pasta apart. Cook for 2 minutes.
    • Add the cooked pasta to a bowl of water. Move the noodles in the water around. Rinse and repeat at least once. strain the noodles and place them in a large bowl. Again don’t place more noodles on top of the weight will have the noodles stick together.

    Lemon Garlic Alfredo Sauce

    • In a medium-size pot, turn heat to medium-high and place butter inside until melted. Add the garlic and cook for 2 minutes or until soft. Add the milk and cream cheese. Turn the heat to low. Add sea salt.
    • Add the fresh beet pasta to the sauce and give it a few good stirs. Add the lemon juice and parmesan cheese. Softly toss the noodle until the cheese is melted and the alfredo sauce is well coated with the pasta.
    • Garnish pepper on top. Serve immediately.