Category: lunch ideas

  • Asian Smashed Cucumber Salad

    Asian Smashed Cucumber Salad

    This Asian smashed cucumber salad is cucumbers smashed, salted and drained, then tossed in a garlicky dressing of rice vinegar, soy sauce, sesame oil and a little sugar. It’s a no-cook side that makes about 5 servings in about 20 minutes, including the salting time.

    This post contains affiliate links. As an Amazon Associate I earn from qualifying purchases.

    This is the side dish we lean on during hectic, crazy days, when I still want to pack something special for the family, even for lunch. It takes a few basic ingredients and no cooking at all, unless you add the optional hot oil finish.

    When the lunchboxes open, the nutty smell of sesame oil and the tangy scent of rice vinegar float into the air, and the other kids always come over to check my kids’ lunchboxes to see what that smell is! It’s a huge kid-favourite in our house. For the adult version, we add some extra dried chili flakes on top.

    If you only know cucumbers from my bread and butter pickled cucumbers, this one is the opposite: no jars and no waiting. You smash, salt, drain and toss, and it’s ready to eat. It sits nicely next to Hainanese chicken or a plate of noodles.

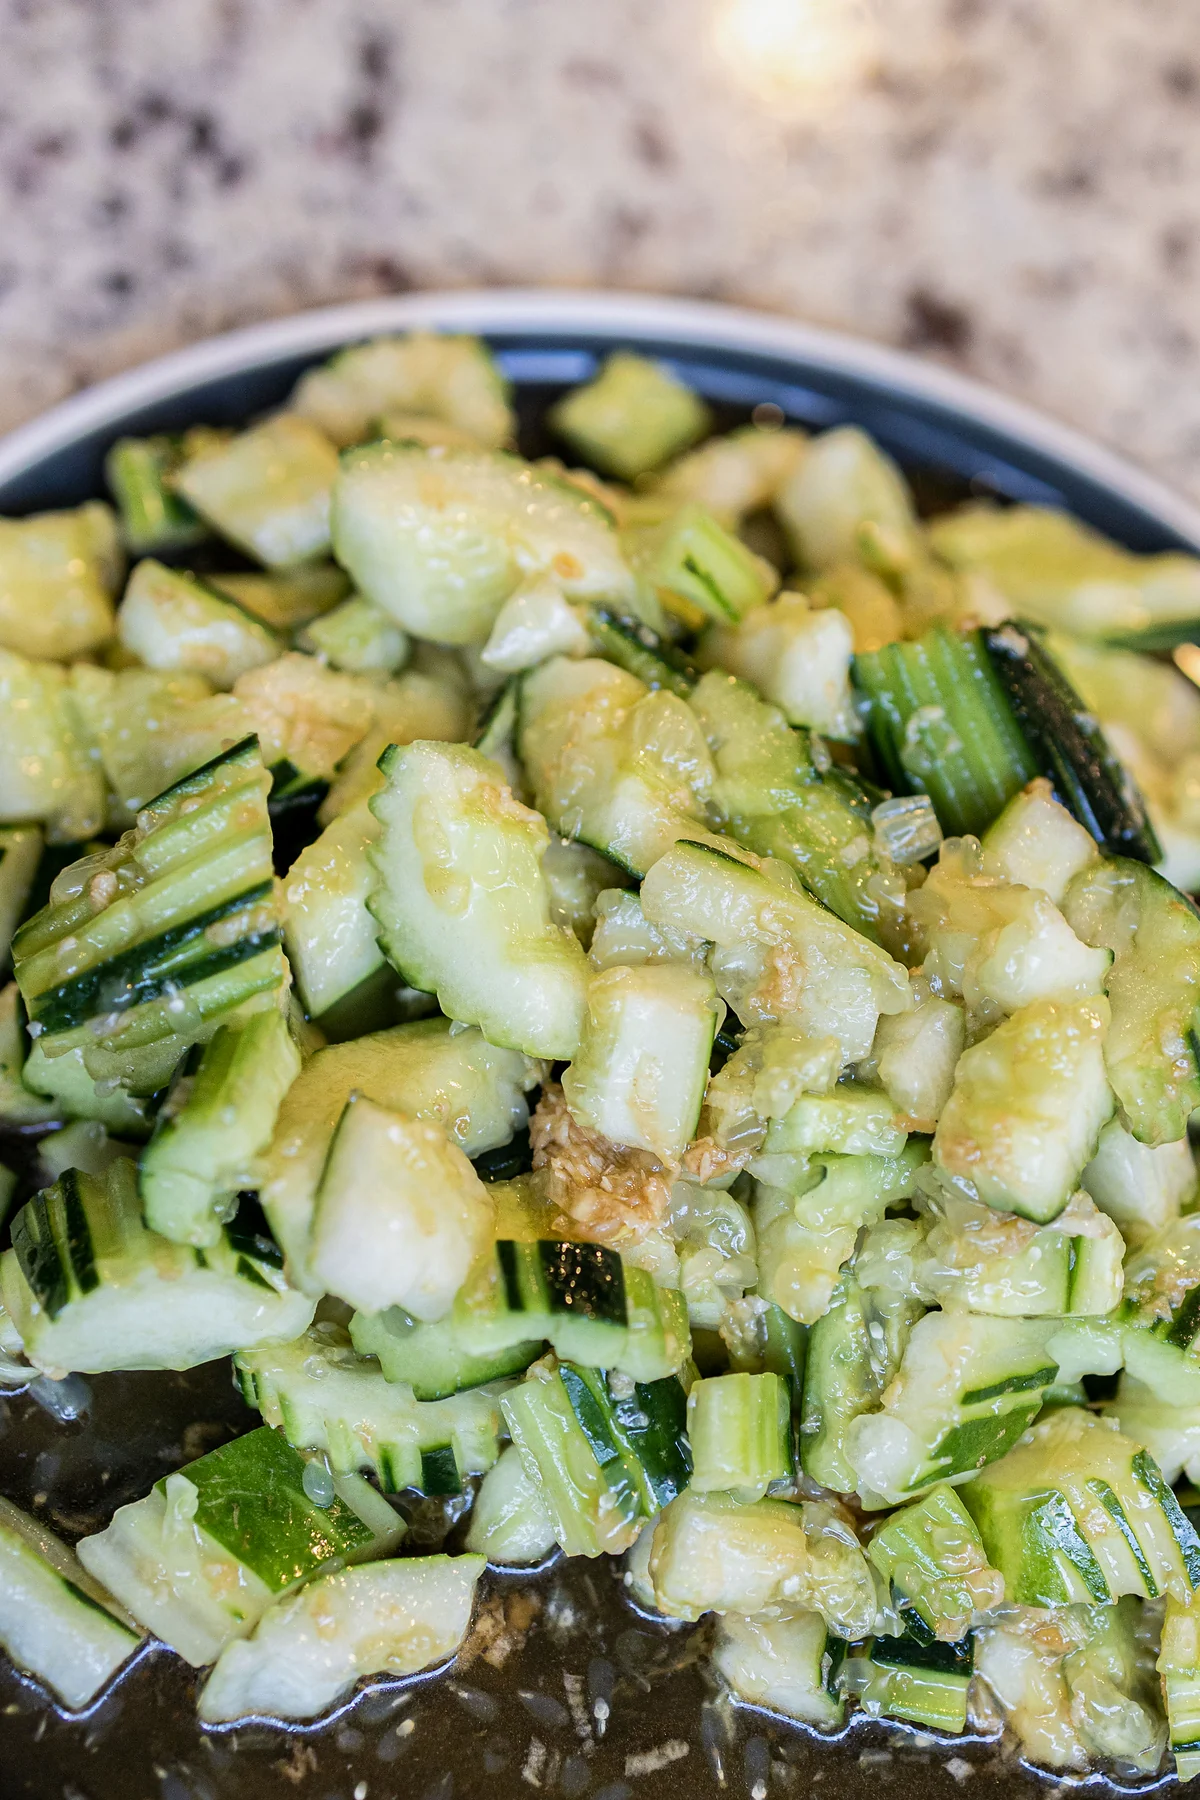
    A dark plate heaped with smashed cucumber pieces, partly peeled in stripes and glossy with sesame dressing.

    Want a week of dinners planned for you? Get my free dinners

    Ingredients

    • Cucumbers: 4 medium cucumbers.
    • Salt: 1 teaspoon, to draw out some of the water.
    • Dressing: 1 garlic clove (minced), 3 teaspoons sugar, 2 teaspoons sesame oil, 3 teaspoons soy sauce and 2 tablespoons rice vinegar.
    • Optional toppings: 1 teaspoon dried chili flakes or chili oil, and 2 teaspoons sesame seeds. No chili oil? 1 tablespoon of a neutral oil like canola for the optional hot oil finish (see Tips).

    Allergens: contains sesame and soy, and most soy sauce also contains wheat. If you need to avoid wheat, use a soy sauce or tamari labelled wheat-free. For a sesame-free version, skip the sesame seeds and use a neutral oil instead of sesame oil.

    Equipment you’ll need

    These are Amazon affiliate links. As an Amazon Associate I earn from qualifying purchases.

    How to make Asian smashed cucumber salad

    Step 1: Wash the cucumbers. Rinse the cucumbers under cool running water, rubbing them with your hands or a clean produce brush (no soap). Dry them with a clean towel and trim off the ends.

    Step 2: Smash and cut. Lay a cucumber on a cutting board, put the flat side of a cleaver or large knife on top, with the sharp edge facing away from you, and press down firmly with the heel of your hand, keeping your fingers clear of the edge (or give it a few firm whacks with a rolling pin) until it cracks open. Break it into about 4 long sections, then cut them into bite-size pieces on a 45 degree angle. Repeat with the rest.

    Step 3: Salt and drain. Put the cucumbers in a large bowl and toss them with 1 teaspoon salt. Let them sit 5 to 10 minutes, then pour off the water they release.

    Step 4: Mix the dressing. In a small bowl, stir together the minced garlic, 3 teaspoons sugar, 2 teaspoons sesame oil, 3 teaspoons soy sauce and 2 tablespoons rice vinegar until the sugar dissolves.

    Step 5: Toss and top. Pour the dressing over the cucumbers and toss well. Top with chili flakes or chili oil, if using, and the sesame seeds. For the optional hot oil finish, see Tips below. Serve right away, or cover and refrigerate within 2 hours.

    Close-up of smashed cucumber chunks coated in dressing with bits of minced garlic.

    Tips for the best smashed cucumber salad

    • Smash, don’t slice. The cracked, rough edges hold on to more dressing than neat slices do.
    • Don’t skip the draining. Pouring off the salty water keeps the dressing from getting thin.
    • No chili oil? In Chinese cooking, uncooked and cooked oil taste different. Make sure the cucumbers are well drained and the salad is in a metal or other heatproof bowl at room temperature (not a cold glass bowl straight from the fridge). Heat 1 tablespoon of a neutral oil like canola in a small pan over medium heat just until it shimmers, and stay with the pan the whole time. If it starts to smoke, turn off the heat, let the oil cool completely and start over with fresh oil. As soon as it shimmers, take the pan off the heat and, as the very last step after the salad is tossed and topped, slowly drizzle the oil over the top. Hold the pan low and close to the bowl, pour away from yourself and keep your face back. The oil is very hot and will sizzle and may spatter, so keep kids away from the stove and the bowl.
    • Make it two ways. Toss it mild for the kids, then scoop out a portion for the grown-ups and add extra chili flakes.
    • Packing it for lunch? Pack it straight from the fridge in an insulated lunchbox with two cold sources, like two frozen ice packs, and throw out anything that comes home uneaten.

    What to serve with it

    In the photos it’s served with noodles and a browned patty. It also goes well with salt and pepper chicken wings.

    A white scalloped plate with smashed cucumber salad, noodles and a browned patty, with a dish of cucumber salad behind it.

    How to store Asian cucumber salad

    Smashed cucumber salad next to noodles and a browned patty on a white plate.

    Refrigerate leftovers within 2 hours (1 hour if the room is above 90°F / 32°C) in an airtight container. It usually keeps 1 to 3 days, but it’s best the day you make it. If you keep it overnight, the cucumbers release extra water and get softer, so simply drain it off before serving. Because the dressing has raw garlic in oil, keep the salad cold and don’t leave it out at room temperature for more than 2 hours.

    FAQ

    Why smash the cucumbers?

    Smashing cracks the cucumber open, so the rough edges soak up more of the dressing than clean slices would.

    Do I have to salt the cucumbers first?

    It helps. The salt pulls out some of the water, which you pour off, so the salad stays crunchier and the dressing doesn’t get watered down as fast.

    Can I make Asian cucumber salad ahead of time?

    Yes. Mix the dressing and keep it covered in the fridge, then smash, salt and drain the cucumbers and toss everything just before serving. Since the dressing has raw garlic in oil, keep it covered in the fridge and use it within 3 days. Don’t leave it out at room temperature for more than 2 hours.

    How long does cucumber salad last in the fridge?

    It usually keeps 1 to 3 days in an airtight container in the fridge. The cucumbers keep releasing water and soften as it sits, so drain it before serving.

    Is this cucumber salad spicy?

    Not unless you add chili. The base salad is garlicky and tangy, so you can keep it mild for the kids and add dried chili flakes or chili oil for the adults.

    More recipes you’ll love

    Pack it once, and see who comes over to check the lunchbox!

    Need more dinner ideas? Grab my free dinners

    Smashed cucumber salad on a dark plate, glossy with sesame and rice vinegar dressing.

    Asian Smashed Cucumber Salad

    Cucumbers smashed, salted and drained, then tossed with a garlicky dressing of rice vinegar, soy sauce, sesame oil and a little sugar. A no-cook side with optional chili on top.
    Prep Time 10 minutes
    Salt and drain 10 minutes
    Total Time 20 minutes
    Servings: 5 servings
    Course: Salad, Side Dish
    Cuisine: Asian, Chinese

    Ingredients
      

    Salad
    • 4 medium cucumbers
    • 1 tsp salt
    Dressing
    • 1 clove garlic minced
    • 3 tsp sugar 1 tablespoon
    • 2 tsp sesame oil
    • 3 tsp soy sauce 1 tablespoon; regular soy sauce
    • 2 tbsp rice vinegar
    Optional toppings
    • 1 tsp dried chili flakes or chili oil plus extra flakes for the adults
    • 2 tsp sesame seeds
    • 1 tbsp neutral oil like canola optional hot oil finish

    Equipment

    • Cutting board
    • Cleaver or large knife the flat side is for smashing
    • Rolling Pin optional, for smashing
    • Large mixing bowl (use a metal one for the hot oil finish)
    • Small bowl for the dressing
    • Airtight container for leftovers

    Method
     

    1. Rinse the cucumbers under cool running water, rubbing them with your hands or a clean produce brush (no soap). Dry them with a clean towel and trim off the ends.
    2. Lay a cucumber on a cutting board, put the flat side of a cleaver or large knife on top, with the sharp edge facing away from you, and press down firmly with the heel of your hand, keeping your fingers clear of the edge (or give it a few firm whacks with a rolling pin) until it cracks open. Break it into about 4 long sections, then cut them into bite-size pieces on a 45 degree angle. Repeat with the rest.
    3. Put the cucumbers in a large bowl and toss them with 1 teaspoon salt. Let them sit 5 to 10 minutes, then pour off the water they release.
    4. In a small bowl, stir together the minced garlic, 3 teaspoons sugar, 2 teaspoons sesame oil, 3 teaspoons soy sauce and 2 tablespoons rice vinegar until the sugar dissolves.
    5. Pour the dressing over the cucumbers and toss well. Top with chili flakes or chili oil, if using, and the sesame seeds. For the optional hot oil finish, see the notes. Serve right away, or cover and refrigerate within 2 hours.
      Close-up of smashed cucumber chunks coated in dressing with bits of minced garlic.

    Notes

    Rinse the cucumbers under running water before cutting, even if you plan to peel them. Skip the soap.
    No chili oil? Make sure the cucumbers are well drained and the salad is in a metal or other heatproof bowl at room temperature (not a cold glass bowl straight from the fridge). Heat 1 tablespoon of a neutral oil like canola in a small pan over medium heat just until it shimmers, and stay with the pan the whole time. If it starts to smoke, turn off the heat, let the oil cool completely and start over with fresh oil. As soon as it shimmers, take the pan off the heat and, as the very last step after the salad is tossed and topped, slowly drizzle the oil over the top. Hold the pan low and close to the bowl, pour away from yourself and keep your face back. The oil is very hot and will sizzle and may spatter, so keep kids away from the stove and the bowl.
    Servings, prep and salting times are estimates and vary with the size of your cucumbers.
    Refrigerate within 2 hours (1 hour if the room is above 90°F / 32°C) in an airtight container. It usually keeps 1 to 3 days, but the cucumbers keep releasing water and soften, so it’s best the day you make it. Drain off the extra water before serving. Because the dressing has raw garlic in oil, keep it cold and don’t leave it out at room temperature for more than 2 hours.
    For a lunchbox, pack it straight from the fridge in an insulated lunchbox with two cold sources, like two frozen ice packs, and throw out anything that comes home uneaten.
    Allergens: contains sesame and soy, and most soy sauce also contains wheat. If you need to avoid wheat, use a soy sauce or tamari labelled wheat-free. For a sesame-free version, skip the sesame seeds and use a neutral oil instead of sesame oil.
  • Easy Picnic Tiramisu Recipe

    Easy Picnic Tiramisu Recipe

    A no-bake dessert that travels well, looks great, and tastes even better than restaurant tiramisu. This Easy Picnic Tiramisu is made right inside a Tupperware container — layer, chill, and go. The longer it sits, the better it gets, making it the ultimate make-ahead treat for picnics, barbecues, or any gathering where you want to impress without the stress.

    This post may contain affiliate links. If you purchase through these links, I may earn a small commission at no extra cost to you. Thank you for supporting Love & Harvest!

    Delicious homemade tiramisu dessert with cocoa powder topping.

    Why We Love This Recipe

    When it comes to picnics, we’re always hunting for that perfect dessert: easy to prepare, travels well, and still tastes (and looks!) delicious after a warm day in the sun. This tiramisu cake checks every single box. It’s no-bake, fuss-free, and made right inside a container with a lid — just layer, chill, and go. The longer it sits, the better it gets, which makes it picnic-perfect.

    Every time we bring this to a gathering, our close friends literally cheer when they hear we’ve packed our “famous picnic tiramisu.” Not a crumb is ever left behind.

    Flavour

    Think: creamy clouds of mascarpone, bold espresso-soaked layers, a whisper of vanilla, and a bitter cocoa finish. It’s soft, rich, comforting, and light all at once. Every bite melts on the tongue. This isn’t just a picnic dessert — it’s a little bit of luxury under the sky.

    Rich layered tiramisu dessert with coffee, mascarpone, and cocoa powder, perfect for special occasions.

    Effortless but Maximum Flavour

    No baking. No fancy tools. You don’t even need a stand mixer. We literally assemble everything in a simple tub or Tupperware — layer ladyfingers dipped in coffee, spread a fluffy mascarpone cream, repeat, and top with cocoa powder. The secret? Let it chill for at least a few hours. The result: a silky, creamy, coffee-kissed dessert that tastes like it took hours to make.

    Key Ingredients

    Ingredients

    Ladyfinger Cookies (Savoiardi)

    • The classic base of tiramisu. Savoiardi are light, dry sponge biscuits that soak up espresso without falling apart — which is exactly what you want. Dip them quickly (1–2 seconds per side), never soak them or they’ll turn mushy. Store-bought Italian ladyfingers work perfectly. A kitchen torch and a 9-inch springform pan are great for fancier presentations if you’re serving at home.

    Mascarpone Cheese

    • The soul of tiramisu. Mascarpone is a rich Italian cream cheese with a velvety, buttery texture that creates the signature creamy layer. Make sure it’s at room temperature before mixing — cold mascarpone can turn grainy when combined with cream. Don’t substitute with regular cream cheese; the flavour and texture are different.

    Espresso or Strong Coffee

    • The flavour backbone of the dish. Use freshly brewed espresso or very strong coffee, cooled to room temperature before dipping. Instant espresso powder dissolved in hot water also works well. Adding a splash of Kahlua, rum, or amaretto to the coffee is optional but adds wonderful depth for an adult crowd.

    Heavy Cream

    • Whipped to stiff peaks and folded into the mascarpone, heavy cream lightens the filling and gives it that cloud-like texture. Use cold cream straight from the fridge for the best whipping results. The ratio of cream to mascarpone is what makes this version light yet rich.

    Cocoa Powder

    • The classic finishing touch. A generous dusting of unsweetened cocoa powder on top adds a slight bitterness that perfectly balances the sweet, rich cream layers underneath. Dust right before serving (not before chilling) for the cleanest, most vibrant cocoa finish.

    Tiramisu and Picnic: A Match Made in Heaven

    You might think tiramisu is too delicate for outdoor fun — but this version is built for it. We make it ahead, and the chill time actually works in its favor. By the time everyone’s had their sandwiches and drinks, your tiramisu has turned into the creamiest, most irresistible treat. It holds up beautifully — even on warm summer evenings — and still scoops out neatly. We’ve served this on hiking trails, beaches, park benches, and patios, and it never disappoints.

    Why You Need to Try It

    My niece once told me, “Your tiramisu doesn’t even taste like the ones at restaurants — it tastes better.” I’ll never forget that. It’s one of those recipes that surprises people with how simple it is and delights them with how luxurious it tastes. Whether it’s a family picnic or a last-minute get-together, this is the dessert that brings smiles all around. Once you try it, you’ll always want to bring it along.

    Decadent tiramisu cake with layers of coffee-soaked sponge and mascarpone cheese. Perfect for dessert lovers and special occasions.

    Crumbled tiramisu dessert with cocoa powder on top, close-up shot.

    If you love no-bake desserts, our Cherry Clafoutis Pie is a crowd-pleasing French classic, and our Mexican Corn Cake with Cream Cheese is another easy, show-stopping treat. For a full Italian-inspired picnic spread, pair this tiramisu with our Homemade Pesto Gnocchi.

    Frequently Asked Questions

    Can I make this tiramisu without alcohol?

    Absolutely. The coffee liqueur (Kahlua, rum, or amaretto) is completely optional. Simply skip it and use just cooled espresso or strong coffee for dipping the ladyfingers. The tiramisu will still be deeply flavourful and delicious — and completely family-friendly.

    How long does picnic tiramisu need to chill?

    At a minimum, 4 hours in the refrigerator. Overnight is even better — the layers meld together, the ladyfingers soften to perfection, and the mascarpone cream sets beautifully. If you’re making it for a picnic, assemble the night before and transport it straight from the fridge in your cooler bag.

    How do I transport tiramisu to a picnic?

    That’s the beauty of this recipe — it’s made right in a lidded Tupperware container! Once chilled, simply seal the lid and pack it in a cooler with ice packs. It holds up well for several hours as long as it stays cold. Dust the cocoa powder on at the picnic just before serving for the freshest look.

    Can I make tiramisu without raw eggs?

    This recipe is already egg-free — no raw egg yolks in the mascarpone cream. The filling is made with whipped heavy cream folded into mascarpone and sweetened with powdered sugar, so it’s safe for everyone, including pregnant women, children, and anyone who prefers to avoid raw eggs.

    How long does homemade tiramisu keep?

    Tiramisu keeps well in the refrigerator for up to 3 days. The flavour actually improves on day 2 as the layers continue to meld. Keep it covered and chilled at all times. We don’t recommend freezing tiramisu as the cream layer can become grainy and watery when thawed.

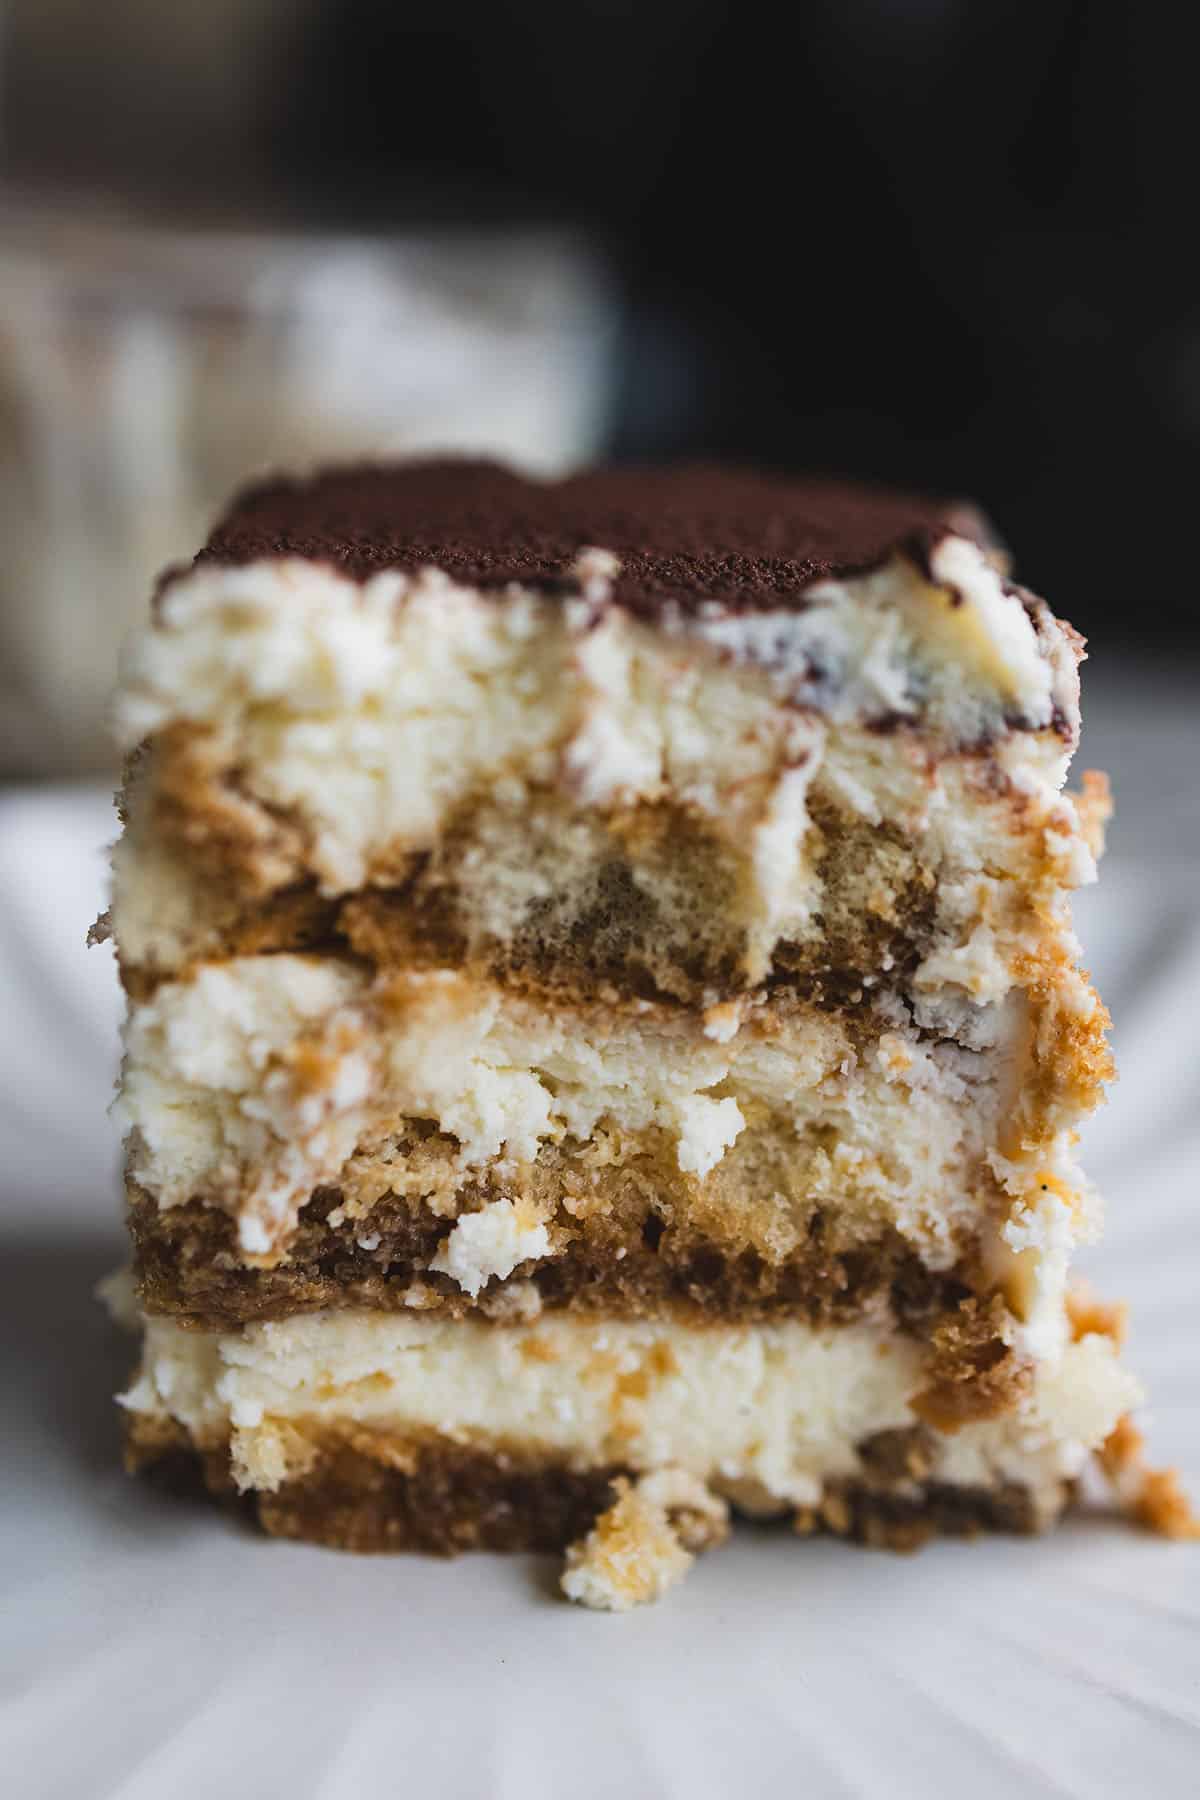
    Slice of layered picnic tiramisu dusted with cocoa powder

    Easy Tiramisu

    A dessert that delivers maximum flavour with minimal effort, all packed into a container that’s ready to travel. It’s the perfect sweet treat kissed with a touch of luxury, even in the heart of the wilderness.
    Prep Time 20 minutes
    Total Time 4 hours 20 minutes
    Servings: 6 people
    Course: Dessert
    Cuisine: Italian
    Calories: 420

    Ingredients
      

    Cream Layer
    • 1 cup heavy cream
    • 250 g mascarpone cheese (room temperature)
    • ⅓ cup granulated sugar
    • 1 tsp vanilla extract
    For the Coffee Dip
    • 1 cup strong brewed espresso or coffee (cooled)
    • 2-3 tbsp sugar optional, to sweeten the coffee
    • 2-3 tbsp coffee liqueur (e.g., Kahlua, rum, Marsala wine, or amaretto) optional
    Assembly
    • 200-250 g ladyfinger biscuits (savoiardi)
    • Unsweetened cocoa powder (for dusting)

    Equipment

    • 1 round glass container (about 8–9 inches wide and 3–4 inches deep) with a tight-fitting lid

    Method
     

    1. Whip the cold heavy cream until stiff peaks form. Set aside.
    2. In another bowl, mix mascarpone, sugar, and vanilla until smooth. Gently fold in the whipped cream until light and fluffy. Chill briefly.
    3. Mix the cooled espresso with sugar and optional liqueur in a shallow bowl. Stir to dissolve. Taste and adjust sweetness.
    Assembly
    1. Quickly dip each ladyfinger into the coffee mixture (1–2 seconds per side).
    2. Place dipped ladyfingers side by side at the base of your round glass container, trimming or breaking as needed to fit the circular shape.
    3. Spread half the mascarpone cream evenly over the first layer of ladyfingers using a spoon or spatula.
    4. Repeat with a second layer of dipped ladyfingers.
    5. Finish with the remaining cream, smoothing the top.
    Chill, Cover, and Dust
    1. Place the lid securely on the container and refrigerate for at least 4 hours (overnight for best results). The dessert will set beautifully and be easy to transport.
    2. Before serving, open the lid and dust generously with cocoa powder. Add chocolate shavings if desired. Scoop to serve, or bring the whole container to a picnic—no mess, just flavour.

  • Fresh Beet Pasta & Lemon Garlic Alfredo

    Fresh Beet Pasta & Lemon Garlic Alfredo

    This post may contain affiliate links. If you purchase through these links, I may earn a small commission at no extra cost to you. Thank you for supporting Love & Harvest!

    The first time you serve this pasta, people will think you spent hours in the kitchen. You didn’t. The colour comes from beet juice, the creaminess from a simple lemon garlic alfredo, and the pasta itself takes about 3 minutes in a machine. What you get on the plate looks stunning, tastes extraordinary, and is 100% vegetarian. It’s become one of our family’s most requested meals — including by the kids, who love calling it “pink pasta.”

    beet pasta

    Why You’ll Love This Beet Pasta

    • Stunning colour — The beet turns the pasta a vivid magenta. Once it meets the cream sauce it shifts to a deep rose-pink. It’s genuinely beautiful on a plate.
    • Unbeatable fresh pasta flavour — There is no comparison between homemade fresh pasta and store-bought dried. The texture is silky, the bite is tender, and the beet adds a subtle earthiness that’s unlike anything else.
    • Fun family project — Kids love feeding the pasta machine and watching the pink noodles come out. It turns cooking into a small event.
    • Ready in 3 minutes — With the Philips Pasta Maker, the dough kneading and extrusion is automated. You handle the prep and cooking; the machine does the labour.

    beet pasta with lemon garlic Alfredo

    Ingredients Deep-Dive

    Ingredients

    Beet — The Star Ingredient

    Beets are available year-round in most markets in red, purple, yellow, and white varieties — sometimes even striped. For this pasta, use red or purple for the most dramatic colour.

    The earthy, slightly sweet flavour of beet is the reason this pasta needs a bright sauce. The lemon tang in the alfredo brings out the beet’s natural depth and creates a balance that makes the dish feel complete rather than just colourful.

    Flour — All-Purpose or Bread Flour?

    All-purpose flour is the standard choice for homemade pasta — it produces a soft, pliable dough with good stretch. If you want a chewier pasta with more bite, substitute 50% of the all-purpose with bread flour. Bread flour has higher protein content which creates more gluten structure — the pasta cooks firmer and has more resistance when you bite through it. Both versions are excellent; it’s a texture preference.

    The Pasta Machine

    This recipe is built around the Philips Pasta and Noodle Maker. It kneads the dough, extrudes it through a disk, and produces fresh pasta in under 3 minutes. You can change the disk to produce spaghetti, penne, fettuccine, and other shapes. It’s one of the most-used machines in our kitchen. If you want the upgraded version with a built-in scale and more disk options, the Philips Avance Automatic Pasta Maker Plus is worth the investment if you make pasta regularly.

    Cream Cheese — The Alfredo Secret

    The alfredo sauce uses cream cheese instead of heavy cream. This produces a sauce that’s thicker, tangier, and more stable — it doesn’t break or turn greasy when reheated the way cream-based alfredo does. Philadelphia Cream Cheese is the standard choice; its consistent quality makes the sauce reliable every time. The cream cheese melts into the hot milk and butter without needing to be at room temperature.

    Lemon — Juice and Zest

    Both the juice and the zest go into the sauce. The juice provides the acid that cuts through the fat and makes the cream cheese sauce taste bright rather than heavy. The zest adds fragrance — a floral lemon note that elevates the dish without being harsh. Meyer lemons are slightly sweeter; Eureka lemons are more traditional. Either works. Always strain out seeds when squeezing — biting into a lemon seed is memorably unpleasant.

    Parmesan Cheese

    Use a block of real Parmigiano-Reggiano and grate it yourself. The pre-grated powdered version has added anti-caking agents that prevent it from melting properly — it clumps in the sauce rather than incorporating smoothly. A fresh block has a nutty, crystalline richness that makes the difference between a good alfredo and a great one.

    beet pasta recipe

    Pro Tips

    Pro Tip 1: Blend the Beet, Don’t Juice It

    You have two options for adding beet to the pasta dough: juice the beet (concentrated, vibrant colour) or blend the cooked beet into a smooth puree (retains all the fibre). Juicing produces a slightly more electric colour; blending keeps the whole beet in the pasta without any texture difference in the finished noodles. I prefer blending: you use the whole beet and lose nothing in the process. Blend on high until completely smooth with no chunks before adding to the pasta machine.

    Pro Tip 2: The 216g Liquid Measurement

    The Philips Pasta Maker requires a specific liquid-to-flour ratio for optimal results. For this recipe: place a container on a scale, zero it, add 2 eggs, then fill with beet puree until the total reaches exactly 216g. This precision ensures the dough is the right consistency every time — not too dry to extrude, not too wet to hold its shape.

    Pro Tip 3: Add Protein to Make It Hearty

    This is a naturally vegetarian dish. Grilled chicken, sautéed shrimp, or seared beef strips all work beautifully alongside the pasta and sauce. Make a slightly larger batch of the alfredo sauce if you’re adding protein so you have enough to coat everything generously.

    What to Serve Alongside

    For a complete dinner table, this beet pasta pairs magnificently with our Beet and Avocado Sashimi Appetizer — both dishes feature beet and create a visually stunning spread. A crisp green salad or garlic bread rounds out the meal. For a meat option to accompany, our Best Homemade Fried Chicken provides a satisfying contrast to the pasta’s creaminess.

    beetroot pasta

    Frequently Asked Questions

    Do I need a pasta machine for this recipe?

    The Philips Pasta Maker automates the kneading and extrusion and makes the process fast and consistent. That said, you can make beet pasta by hand: mix the flour and beet-egg liquid into a dough, knead for 8–10 minutes until smooth, rest for 30 minutes, then roll thin with a rolling pin and cut into strips. It takes more time and arm strength, but the result is the same.

    Can I make this pasta without eggs (vegan)?

    Yes. Replace the eggs with additional beet puree. You’ll need to adjust the liquid amount slightly — start with the same 216g total and add a tablespoon more puree if the dough seems too dry. The pasta will be slightly less rich but still colourful and delicious. The alfredo sauce can be made vegan with plant-based cream cheese and milk.

    Can I make the pasta ahead of time?

    Fresh beet pasta is best cooked the day it’s made. If you need to make it ahead, lay the extruded pasta flat (not overlapping) on a floured baking sheet, dust lightly with flour, and refrigerate for up to 24 hours. Alternatively, allow the pasta to dry at room temperature for 2 hours, then store loosely in an airtight container for up to 2 days.

    Why does my beet pasta turn pink instead of deep red?

    This is normal. The alkaline proteins in the egg and the heat from boiling water both affect the beet’s pigment. Once you add the cream sauce, the pasta turns a beautiful rose-pink. If you want a deeper colour, use more beet puree and less egg, or use only the beet without egg (vegan version).

    Can I use beet powder instead of fresh beet?

    Yes. Beet powder is a convenient alternative — add 2–3 tablespoons to the flour before mixing. You’ll still get colour and a mild beet flavour, though it’s slightly less vibrant than fresh beet puree. The nutritional profile is also slightly different since processing removes some of the whole beet’s fibre.

    What pasta shapes work best with this sauce?

    Spaghetti and fettuccine are the most visually striking — the long strands show off the colour best. Penne and rigatoni also work well because the alfredo sauce clings inside the tubes. Avoid very thin pasta shapes like angel hair — the sauce is too thick and they tend to clump.

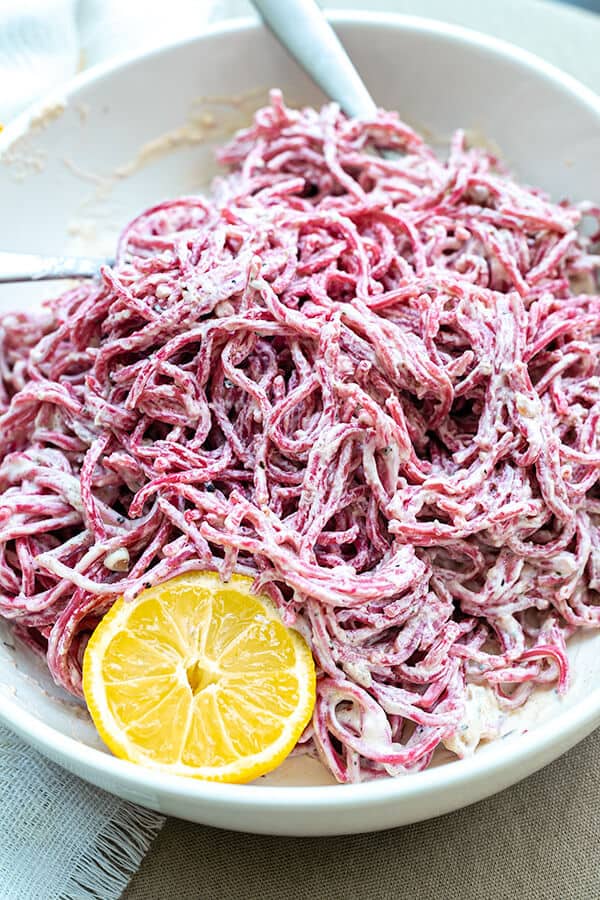
    Pink beet pasta tossed in lemon garlic Alfredo with a lemon half

    Fresh Beet Pasta and Lemon Garlic Alfredo Sauce

    Delicious homemade beet pasta with a lemon garlic alfredo sauce. It's tangy, garlicky, and oh so creamy! Print Recipe Pin RecipePrep Time:20 mins35 minsCourse: Main CourseCuisine: American, MediterraneanKeyword: alfredo, beet, fresh, fresh pasta, garlic, homemade pasta, lemon, pasta, phillips pasta and noodle machineServings: 6 people

    Equipment

    • high speed blender
    • Philips Pasta and Noodle Maker

    Ingredients

    Beet Pasta

    • 1 medium size beet root
    • 2 eggs
    • 550 g all purpose flour
    • 7 g salt

    Lemon Garlic Alfredo Sauce

    • ½ cup butter
    • 3 garlic clove grated
    • 1½ cup whole milk
    • 1 8oz cream cheese
    • 2 tsp sea salt
    • ½ lemon juice
    • lemon zest
    • ¼ cup parmesan cheese grated
    • black pepper

    Instructions

    Beet Pasta

    • Peel the skin off the beet and cut it in half. fill a small pot with water and put the beets in. cover it with a lid and cook it for 10 minutes. Let it cool, but reserve the water.
    • Place the beet within a high-speed blender with ½ cup of its reserved water. Blend on high until it is a smooth smoothie. set aside.
    • On a measuring scale, put a medium size container, and turn it on. Make sure it says 0g. Add 2 eggs to the container and fill the container up with beet juice until it reaches 216g. Set aside.

    Philips Pasta machine

    • take out the Philips pasta and noodle maker. Make sure you have the spaghetti disk attached to the ends. Open the lid, and put in the flour and salt. Close the lid.
    • Turn the machine on and press ‘Start.’ Slowly pour in the beet and egg liquid.
    • Let the machine knead the dough for 3 minutes. It will beep once it is ready to extrude the pasta.
    • Cut the pasta when it is about 20-25cm long.
    • Lay the fresh pasta on a baking sheet, and don’t overlap the pasta on top with more.

    Cooking the Beet Pasta

    • Using a large pot, fill it ¾ full and add 3 tsp of salt (roughly 4L of water). Wait for it to boil.
    • Once the water is rapidly boiling, slowly add the fresh pasta to the water. Immediately stir it with chopsticks or something soft that won’t break the pasta apart. Cook for 2 minutes.
    • Add the cooked pasta to a bowl of water. Move the noodles in the water around. Rinse and repeat at least once. strain the noodles and place them in a large bowl. Again don’t place more noodles on top of the weight will have the noodles stick together.

    Lemon Garlic Alfredo Sauce

    • In a medium-size pot, turn heat to medium-high and place butter inside until melted. Add the garlic and cook for 2 minutes or until soft. Add the milk and cream cheese. Turn the heat to low. Add sea salt.
    • Add the fresh beet pasta to the sauce and give it a few good stirs. Add the lemon juice and parmesan cheese. Softly toss the noodle until the cheese is melted and the alfredo sauce is well coated with the pasta.
    • Garnish pepper on top. Serve immediately.