Category: japanese food

  • Homemade Sashimi

    Homemade Sashimi

    Making sashimi at home is one of the most rewarding things you can do in the kitchen — and it is far more achievable than most people think. This guide walks you through how to safely source, freeze, and slice salmon so you can enjoy restaurant-quality sashimi without leaving your house.

    This post may contain affiliate links. If you purchase through these links, I may earn a small commission at no extra cost to you. Thank you for supporting Love & Harvest!

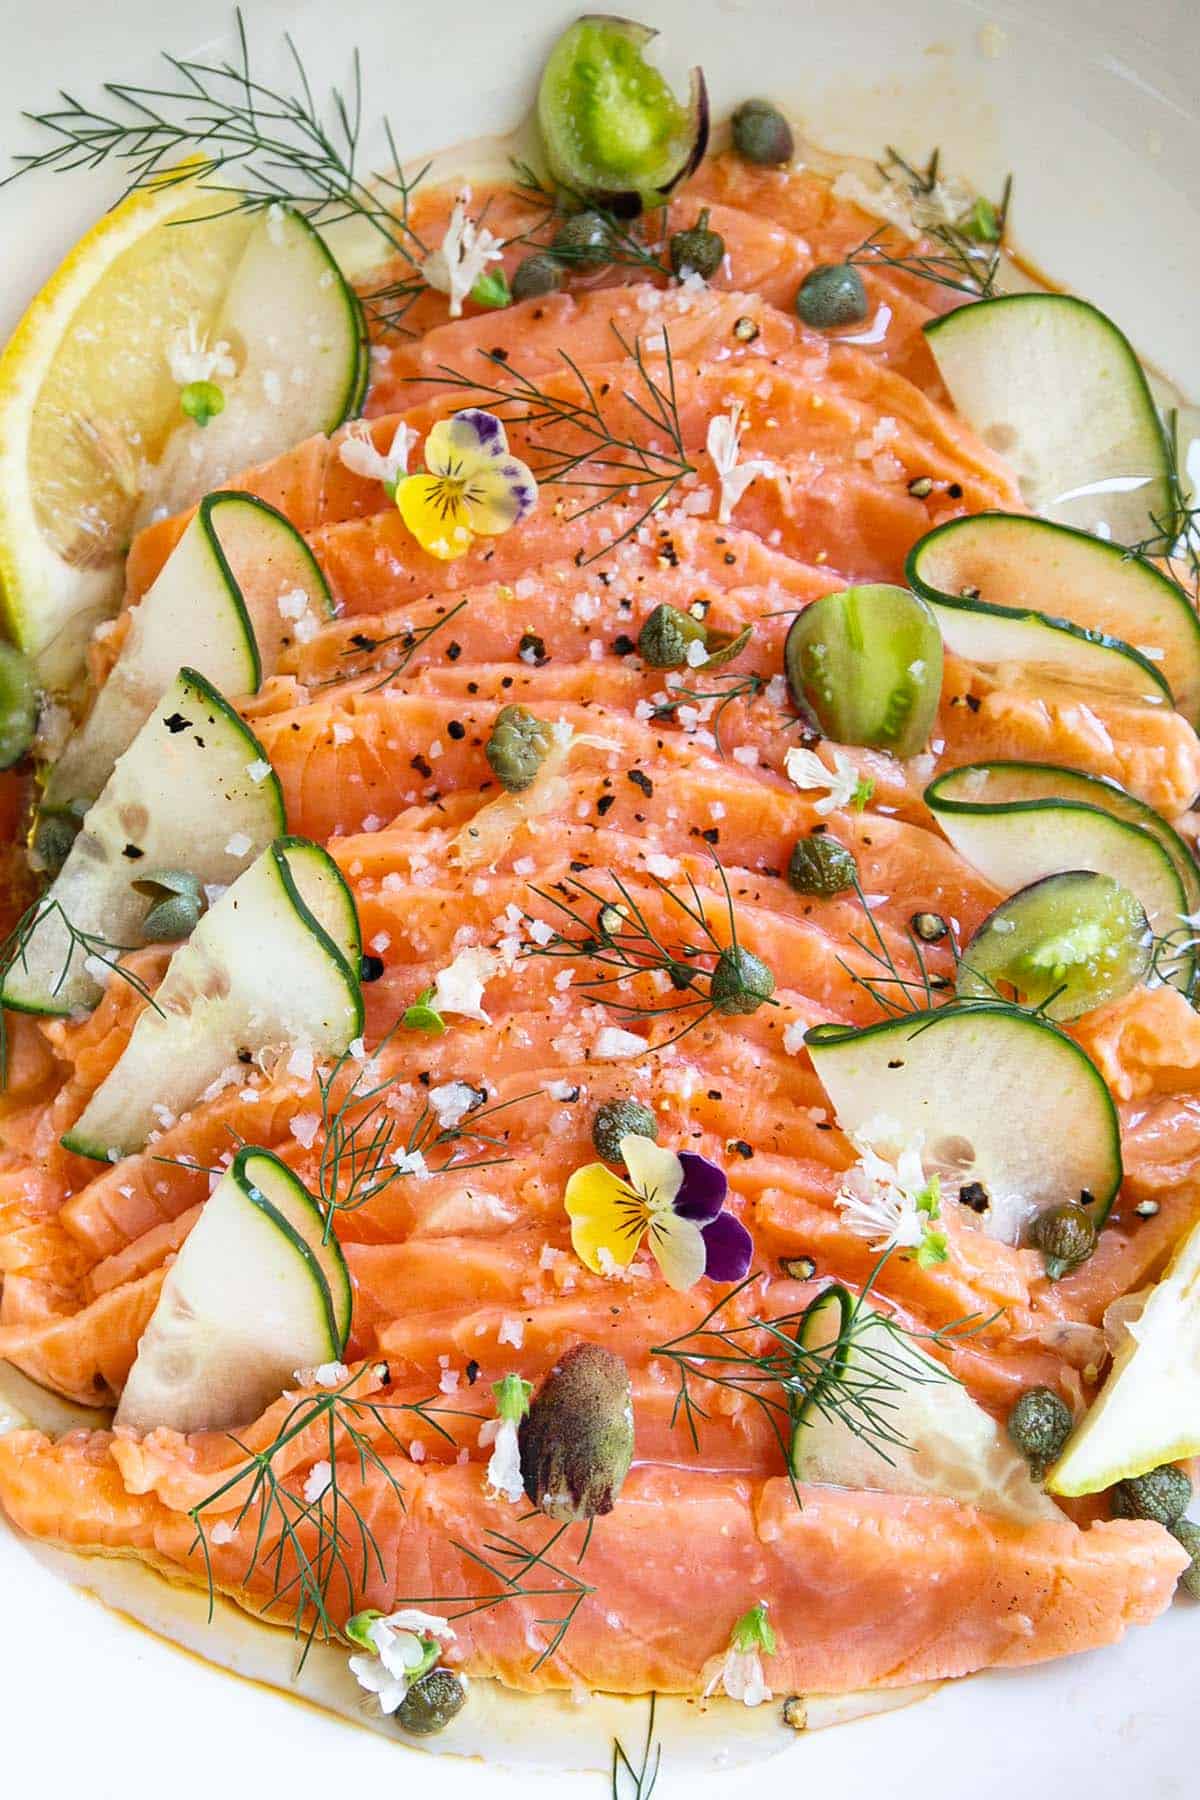
    Close-up of thinly sliced salmon sashimi with cucumber, capers, dill and edible flowers

    How I Started Making Sashimi at Home

    Allow me to share a little secret: crafting homemade sashimi has been quite the adventure for me. Living in Mexico, where authentic sashimi experiences are scarce and restaurants often overcharge for mediocre quality, I seized the opportunity and started experimenting. What followed was years of research, countless batches of salmon, and a method I use every time.

    In this guide I will share exactly how I safely freeze salmon fillets to achieve sashimi-grade quality, the shortcut I discovered for sourcing great fish, my personal experience using Costco salmon, and a simple plating recipe to pull it all together.

    This post shares how I prepare salmon at home. Raw fish always carries some risk; follow the freezing guideline below, and skip raw fish if you are pregnant, immunocompromised, very young or elderly.

    Homemade salmon sashimi fanned out on a white plate with cucumber, lemon, capers and dill

    What Fish Should I Use?

    Contrary to popular belief, you do not need to break the bank to source sashimi-grade fish. With the right knowledge and a keen eye, you can find excellent options at your local fish market or even in the frozen section of your grocery store. Check the labeling and ensure the fish has been frozen at the appropriate temperature to kill any potential parasites.

    Salmon sashimi plated with lemon wedges, cucumber slices, capers and edible flowers

    Wild Salmon vs. Farmed Salmon for Sashimi

    The choice between wild-caught and farmed salmon depends on your personal preferences and priorities. Both can work beautifully for sashimi when handled correctly.

    1. Flavor Preference: Wild-caught salmon tends to have a richer, more intense flavor. Farmed salmon is milder and consistently fatty — often preferred for sashimi.
    2. Nutritional Considerations: Wild salmon generally contains higher omega-3 levels. Both are excellent, nutritious options.
    3. Sustainability: Some prefer wild-caught for environmental reasons, though responsible farmed options exist.
    4. Availability and Price: Farmed salmon is more readily available year-round and typically more affordable.

    Overhead close-up of salmon sashimi slices sprinkled with sea salt, pepper and dill

    How to Safely Freeze Salmon for Sashimi

    To eliminate potential parasites in fresh salmon, the FDA recommends freezing at -4°F (-20°C) or below for at least 7 days. This is the step I never skip.

    Step-by-Step Freezing Guide

    1. Select Fresh Salmon: Begin with high-quality, fresh salmon fillets. Start with fish that is fresh and shows no signs of spoilage.

    2. Inspect and Clean: Check for discoloration or odor. Pat dry with paper towels.

    3. Portion the Salmon: Cut into even portions for uniform freezing.

    4. Wrap Tightly: Wrap each portion in plastic wrap or seal in airtight freezer bags, removing as much air as possible.

    5. Label and Date: Mark each portion with the date and fish type.

    6. Freeze Cold Enough, Long Enough: The FDA standard is -4°F (-20°C) or colder for at least 7 days. Many home freezers sit around 0°F (-18°C), which is not cold enough, so set yours to its coldest setting and leave space between portions for airflow.

    7. Check the Temperature: Use a freezer thermometer to confirm it holds -4°F (-20°C) or colder for the full 7 days.

    8. Thaw Safely: Thaw overnight in the refrigerator, or in a sealed bag under cold running water. Never at room temperature.

    Freezing kills parasites, not bacteria. Pregnant people, young children, older adults and anyone with a weakened immune system should skip raw fish.

    White plate of salmon sashimi with lemon and cucumber on a grey table

    Other Ways to Source Sashimi-Grade Salmon

    From frozen specialty stores: In Mexico I discovered WildFork, a store that sources fresh seafood and freezes it immediately at extremely low temperatures. Ask the store whether it was frozen to the FDA parasite standard; if they can’t confirm, freeze it yourself as above.

    From fresh fish stores: Check the store’s description for high-quality, fresh salmon sourcing. Inspect fillets carefully — no discoloration, no odor, firm to the touch. To prepare our sashimi we also use a sashimi knife set for clean, precise slicing.

    Salmon sashimi slices with dill, cucumber and lemon in a white bowl

    I Have Used Costco Salmon for Sashimi

    I anticipate mixed opinions on this, but I have personally used Costco salmon to make sashimi — many times. Despite what social media says, Costco salmon has worked well for me, always after freezing it myself as described above.

    What About the Cautionary Labels at Costco?

    Take those labels seriously: Costco does not sell this salmon as sashimi-grade, so if you want to eat it raw, freeze it first as shown above. Always check the packaging date on the day of purchase, look for firmness, and verify there are no signs of water leakage, discoloration, or odor.

    While I acknowledge inherent risks, I have prepared gravlax and sashimi from Costco salmon many times, always freezing it first. For presentation, I serve on a bamboo sushi mat with soy sauce and wasabi paste.

    How to Make Sashimi

    Once your salmon is properly thawed, making sashimi is all about technique and a sharp knife.

    1. Thaw the Salmon: Remove from the freezer and thaw in the refrigerator overnight, or in a sealed bag under cold running water for faster results. Fully thaw before slicing.
    2. Prepare the Salmon: Pat fillets dry with paper towels to remove excess moisture. Dry fish slices cleanly and looks better on the plate.
    3. Slice the Salmon: Using a sharp knife, slice thinly and evenly against the grain — approximately 1/4 to 1/2 inch thick. Take your time for uniform, beautiful slices.
    4. Serve and Garnish: Arrange on a platter with thinly sliced cucumber, pickled ginger, and wasabi. Sesame seeds or microgreens add a nice touch.
    5. Serve Immediately: Sashimi is best fresh. Serve right after slicing. A bed of ice helps keep it chilled during presentation.
    6. Enjoy Responsibly: Handle raw fish with care. Proper hygiene throughout the process is non-negotiable.

    Ingredients

    Salmon Fillet

    The star of the dish. Choose a fresh, high-quality salmon — wild or farmed — that has been properly frozen to sashimi-grade standards.

    • Why it matters: The quality of your salmon determines everything. Do not compromise on freshness.

    Soy Sauce

    A classic dipping sauce for sashimi. Look for a good-quality Japanese soy sauce — it should have a clean, rounded umami flavor rather than just saltiness.

    • Why it matters: A quality soy sauce enhances the delicate salmon flavor without overpowering it.

    Wasabi Paste

    Traditional accompaniment. Use real wasabi paste rather than horseradish-based imitations when possible.

    • Why it matters: Wasabi does more than add heat — it provides a sharp, clean flavor contrast that elevates the entire experience.

    Pickled Ginger

    Served between pieces to cleanse the palate. The acidity refreshes your taste buds between bites so each slice of salmon tastes as good as the first.

    • Why it matters: It is not just garnish — it is a functional part of the sashimi ritual.

    Frequently Asked Questions

    Is it safe to eat store-bought frozen salmon as sashimi?

    If the salmon has been frozen at -4°F (-20°C) or below for at least 7 days, it meets the FDA parasite guideline; freezing does not remove bacteria. Always verify the source and freezing practices of your specific store.

    Can I use tuna or other fish for sashimi?

    Yes — tuna (bluefin, yellowfin, bigeye), yellowtail, halibut, and sea bass are all popular choices. The same freezing and freshness standards apply regardless of the fish species.

    What is the difference between sashimi and sushi?

    Sashimi is simply raw fish served on its own, typically with soy sauce, wasabi, and ginger. Sushi refers to vinegared rice combined with other ingredients — it may or may not include raw fish.

    How thin should I slice sashimi?

    For salmon, aim for slices between 1/4 and 1/2 inch (6–12 mm) thick, cut against the grain. Thinner slices work better for leaner fish. A sharp knife and a steady hand make all the difference.

    Does Costco salmon require additional freezing before eating raw?

    Yes. Costco’s fresh Atlantic salmon is not sold as sashimi-grade, so freeze it at -4°F (-20°C) or colder for 7 days before eating it raw. I do this every time.

    Can I make sashimi without a special knife?

    Any sharp, long-bladed knife can work in a pinch, but a dedicated sashimi knife produces far cleaner cuts. A clean cut protects the fish’s delicate muscle fibers and results in better texture.

    If you love Japanese-inspired recipes, also check out our homemade sushi roe guide and our Cha Gio fried spring rolls for more fresh, vibrant dishes from the kitchen.

    Homemade Sashimi

    Restaurant-quality salmon sashimi made at home — properly sourced, frozen to the FDA guideline, then sliced thin and served with soy sauce, wasabi, and pickled ginger.
    Prep Time 15 minutes
    Total Time 15 minutes
    Servings: 2 servings
    Course: Appetizer
    Cuisine: Japanese
    Calories: 210

    Ingredients
      

    • 300 g sashimi-grade salmon fillet previously frozen at -4°F (-20°C) for at least 7 days to eliminate parasites, then thawed overnight in fridge
    • 3 tbsp Japanese soy sauce for dipping
    • 1 tsp wasabi paste real wasabi or horseradish-based, to taste
    • 2 tbsp pickled ginger for palate cleansing between pieces
    • ½ cucumber thinly sliced, for garnish and serving
    • 1 tsp sesame seeds optional garnish
    • microgreens optional garnish

    Method
     

    1. Thaw the frozen salmon overnight in the refrigerator. Never thaw at room temperature.
    2. Pat the thawed salmon fillet dry with paper towels to remove excess moisture — dry fish slices cleanly and looks better on the plate.
    3. Using a sharp knife, slice the salmon thinly and evenly against the grain — approximately 1/4 to 1/2 inch (6–12 mm) thick. Take your time for uniform, beautiful slices.
    4. Arrange slices on a serving platter with thinly sliced cucumber. Add pickled ginger on the side.
    5. Serve immediately with soy sauce and wasabi for dipping. A bed of ice helps keep the sashimi chilled during presentation.
    Notes

    SAFETY NOTE: Always freeze salmon at -4°F (-20°C) or below for at least 7 days before eating raw to eliminate potential parasites (FDA recommendation). Most home freezers sit near 0°F (-18°C), which is not cold enough; check with a freezer thermometer. Thaw overnight in the refrigerator, or in a sealed bag under cold running water. Never at room temperature. Sashimi is best eaten immediately after slicing. A sharp, long-bladed sashimi knife produces the cleanest cuts and best texture.
  • 3 Minutes Easy Ramen Noodles Made At Home

    3 Minutes Easy Ramen Noodles Made At Home

    If you crave restaurant-quality ramen but dread the hour-long boil, you are about to have your world rocked. These homemade ramen noodles come together in 3 minutes flat using the Philips Pasta and Noodle Maker — springy, chewy, and completely preservative-free. Pair them with a rich broth and you have a bowl that puts the instant stuff to shame.

    This post may contain affiliate links. If you purchase through these links, I may earn a small commission at no extra cost to you. Thank you for supporting Love & Harvest!

    easy ramen noodles

    Why Make Homemade Ramen Noodles

    • No preservatives — store-bought dried noodles sit on a shelf for months. Fresh noodles go straight from machine to bowl.
    • Unbeatable chew — the bread flour protein gives you that springy bite no dried packet can replicate.
    • Freezer-friendly — shape into nests, freeze, bag, and pull out on demand.
    • Endlessly customizable — swap water for carrot, spinach, or beet juice and get naturally coloured noodles.

    Ingredients Deep-Dive

    All-Purpose Flour + Bread Flour

    • Why this combo: All-purpose gives structure while bread flour — high in gluten protein — delivers the signature chewy ramen bite. Do not swap the type; you can try different brands, but keep the ratio.

    For an even chewier result, replace the bread flour with Anthony’s Vital Wheat Gluten.

    Baking Soda (in the cooking water)

    • Why it matters: Adding baking soda to the boiling water raises the pH, giving the noodles their characteristic springiness and glossy sheen — the same reaction used in traditional alkaline noodle-making.

    Water Weight vs. Volume

    • Why you must weigh: Flour absorbs water differently depending on humidity and brand. A kitchen scale eliminates guesswork and gives you consistent noodles every single time. For the Philips machine, the newer model weighs automatically; older models need an external scale.

    A reliable option: AmazonBasics Digital Kitchen Scale.

    Equipment

    The real hero here is the Philips Pasta and Noodle Maker. It mixes, kneads, and extrudes in one sealed unit. Set the spaghetti disc and press start — the machine does everything in 3 minutes.

    Some Examples of Easy Ramen Noodles I’ve Made

    ramen noodles recipe
    homemade ramen noodles recipe
    how to make easy ramen noodles
    so yummy easy ramen noodles

    Pro Tips for Perfect Ramen Noodles

    Pro Tip 1 — The Type of Flour Matters

    Do not substitute the flour type for something else. You can try different brands of bread flour, but the protein level must stay high. That protein is what creates the gluten network responsible for the chew.

    Pro Tip 2 — Weigh Every Ingredient

    This is critical. Volume measurements for flour are notoriously inconsistent. A food scale is not optional for this recipe — it is what separates great noodles from dense, unpleasant ones.

    How to Serve Your Homemade Ramen Noodles

    Once you have the noodles ready, the natural next step is building a bowl. The best pairing is this 7-ingredient homemade ramen broth — a creamy, blended chicken and pork base you can pull together in two hours. For a lighter option, try them in Chinese fish noodle soup.

    Frequently Asked Questions

    Do I need a pasta machine to make ramen noodles at home?

    For this 3-minute method, yes — the Philips Pasta and Noodle Maker is integral. Without it, you would need to hand-knead a stiff dough for 15–20 minutes and roll it manually. The machine takes all of that effort out of the equation.

    Can I make ramen noodles without bread flour?

    You can, but the texture will be noticeably less chewy. If you want to increase elasticity without bread flour, add a small amount of vital wheat gluten to all-purpose flour. The goal is high protein content in the dough.

    Why add baking soda to the cooking water?

    Baking soda raises the water’s pH to alkaline, which causes the noodle proteins to firm up differently than in plain water. The result is the springy, slightly yellow noodle you know from ramen shops.

    Can I freeze homemade ramen noodles?

    Yes — freeze them uncooked. Shape the raw noodles into individual-serving nests, freeze on a tray until solid, then transfer to a zip-lock bag. Cook directly from frozen; add 30–60 seconds to the cook time.

    How long do fresh ramen noodles last in the fridge?

    Fresh uncooked noodles will keep for 2–3 days in the refrigerator in an airtight container. Dust lightly with flour to prevent sticking. For longer storage, freeze them.

    What dishes can I use these ramen noodles in besides ramen soup?

    These noodles work well in stir-fries, cold noodle salads, and brothy soups of all kinds. Their firm bite holds up well to high heat in a wok.

    easy ramen noodle made with Phillips pasta and noodle machine

    Easy Ramen Noodle Recipe

    Prep Time 5 minutes
    Cook Time 5 minutes
    Total Time 10 minutes
    Servings: 6 people
    Cuisine: Japanese
    Calories: 195

    Ingredients
      

    • 200 g all purpose flour
    • 350 g bread flour
    • 4 g salt
    • 216 g water
    • 4 g baking soda for cooking the pasta

    Equipment

    • food scale
    • Phillips Pasta and Noodle Maker

    Method
     

    1. Plug in the Philips Pasta and Noodle Machine. Place the spaghetti disk into the machine. Have a baking tray ready to lay the pasta on top.
    2. Weight all the ingredients precisely and in the hopper, add the flours first and the salt. Close the lid. Start the machine and set the timer to 3 minutes.
    3. While the machine is running, add the water at the top of the lid where there are holes. Slowly pour the liquid in and let the machine knead the dough for three minutes.
    4. Meanwhile, bring a large pot of water to boil. add 1 tsp of salt in the water.
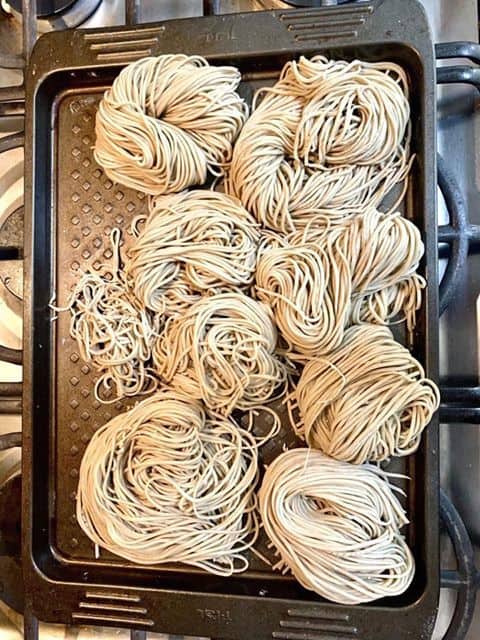
    5. When 3 minutes are up, the machine will start to extrude the pasta out. Cut the noodle at your desire length. Let it rest on the baking tray.
    6. Cook the noodles for 2 minutes and watch the water. It can over boil when there's starch in the water.
    7. Meanwhile, fill up a large bowl with cold tap water.
    8. Place the hot noodles in the bowl of cold water, and use chopsticks to swirl the noodle around to cool it.
    9. Immediately strain the water, and repeat the rinse. Place the noodle on another baking tray. Try not to add or put too much pressure on top of the noodle or it will stick together.

    Notes

    • If you want to freeze the noodles – place UNCOOKED noodles in the freezer. I recommend to swirl it into a small circular shape in the desire proportion. After it completely freezes, I place the circular portion into a zip lock bag and seal it until I need to use it.

    More Noodle Recipes You Will Love

  • 7 Simple Ingredients To Make The Most Flavourful Homemade Ramen

    7 Simple Ingredients To Make The Most Flavourful Homemade Ramen

    Most homemade ramen recipes demand a full day of simmering. This one breaks all the rules: just 7 ingredients, two hours on the stove, and a blender trick that gives you the same creamy, silky broth a ramen shop achieves in 16. Once you taste it, you will never reach for an instant packet again.

    This post may contain affiliate links. If you purchase through these links, I may earn a small commission at no extra cost to you. Thank you for supporting Love & Harvest!

    homemade ramen

    The Secret to Quick Homemade Ramen

    Traditionally, ramen broth takes hours — sometimes days — of slow simmering. The shortcut here is a rapid two-hour hard boil followed by blending a portion of the cooked meat directly into the strained broth. This forces the collagen and fat from the bones into the soup in a fraction of the time, giving you that thick, creamy texture without waiting overnight.

    Ingredients Deep-Dive

    Whole Chicken + Pork Leg

    • Why both meats: Chicken provides a cleaner, lighter broth base while pork adds depth and richness. Using both creates a more layered flavour than either alone. A rotisserie chicken can replace the raw chicken for an even more intense flavour.

    Onion, Garlic, and Ginger

    • Why this aromatic trio: These three form the flavour backbone of most East Asian broths. Onion adds sweetness, garlic adds pungency, and ginger cuts through the richness of the pork fat. Do not char them here — you want a clean, clear-coloured broth.

    Kombu (Dried Kelp)

    • Why kombu: Kombu is loaded with glutamates — the natural compound responsible for umami. Adding it to the broth gives you a rounded, deeply savoury taste without MSG or artificial flavour powders. It is a cornerstone of Japanese and Korean cooking for good reason.

    Sake

    • Why sake matters: Sake adds a subtle sweetness and a layer of complexity that lifts the chicken and pork flavours. It also helps neutralise any remaining gamey odour from the meat. If sake is unavailable, a dry white wine works as a substitute.

    A good option to order online: Gekkeikan Sake.

    The Blending Technique

    • Why blend the meat into the broth: This is the single most important technique in this recipe. Blending 300g of cooked chicken and pork back into the strained soup emulsifies the proteins and fat directly into the liquid, creating the creamy, milky consistency of a tonkotsu-style broth — no 16-hour boil required.

    easy homemade ramen

    Pro Tips for the Best Homemade Ramen

    Pro Tip 1 — Clean the Pot and the Meat

    After the first 10-minute boil, pour out the grey scum-filled water, rinse the pot, and scrub the meat clean under running water. This step removes the residue that clouds and bitters the broth. Do not skip it — the colour and clarity of your final soup depends on it.

    homemade ramen seasoning

    Pro Tip 2 — Boil Hard, Not Low and Slow

    Set the stove to medium-high heat and keep the lid on for the full two hours. A hard boil — not a gentle simmer — is what forces the flavour out of the bones and creates the creamy emulsification in the broth. Do not keep opening the lid; trust the process.

    Pro Tip 3 — Blend the Soup and Meat Together

    After straining, blend 300g of the cooked chicken and pork back into a portion of the hot broth using a high-speed blender. Strain again through a fine mesh. This is the technique that produces the silk-white, creamy broth in the photos below.

    homemade ramen broth
    homemade ramen broth blended

    Noodle Options

    Fresh homemade noodles are ideal — try the 3-minute homemade ramen noodles recipe made with the Philips Pasta Maker. For a quicker option, Hime Japanese Dried Ramen Noodles are a reliable store-bought choice.

    Why make ramen at home?

    Because you control the salt and fat. Here, the kombu and sake provide natural umami depth, and you decide exactly how much salt goes in. You can also skim the fat layer off the top if you prefer a lighter bowl.

    Frequently Asked Questions

    Can I make this ramen broth in an Instant Pot?

    Yes. Use the pressure cooker function on high for 45–60 minutes instead of the stovetop two-hour boil. The result is a slightly different but still very good broth. You will still want to do the blending step afterward to get the creamy texture.

    What can I use instead of sake?

    Dry white wine or dry sherry are the closest substitutes. Both add a similar depth and acidity. If you prefer non-alcoholic, a splash of rice vinegar diluted with water will add brightness, though without the same flavour complexity.

    Can I make this broth ahead of time?

    Absolutely. The broth keeps well in the fridge for up to 5 days and freezes beautifully for up to 3 months. Make a large batch on the weekend and pull portions throughout the week.

    What is kombu and where do I buy it?

    Kombu is dried sea kelp used as a flavour base in East Asian cooking. You can find it at Asian grocery stores or order it online. It looks like dark, thick dried seaweed sheets. A small amount goes a long way.

    Can I make this a spicy homemade ramen?

    Yes — the recipe as written is a clean, mild base. Add a tablespoon of chili oil, gochujang paste, or homemade spicy hot sauce directly into the bowl before pouring the broth for a vibrant red kick.

    What toppings go well with homemade ramen?

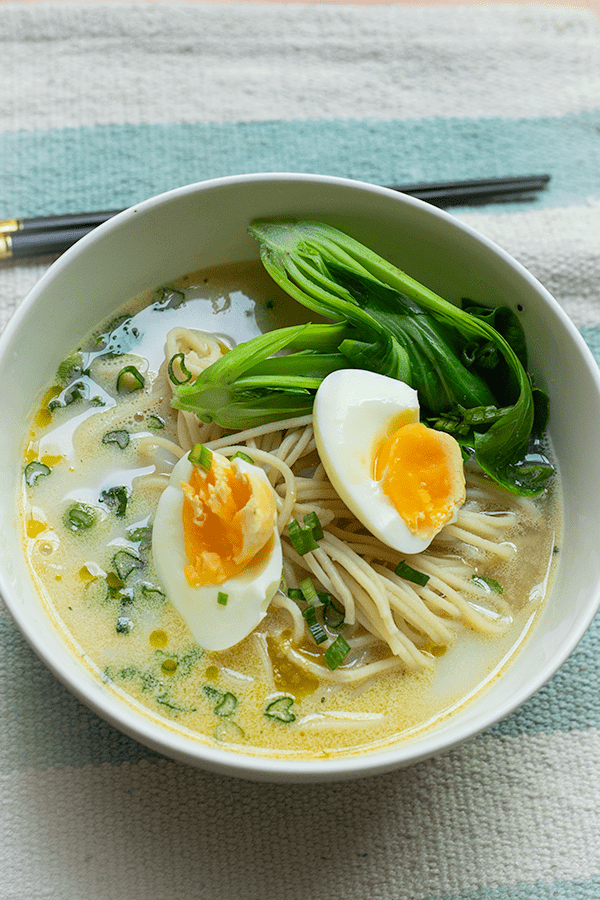
    The classics: soft-boiled egg, green onions, sliced mushrooms, bamboo shoots, nori, and the reserved shredded chicken and pork from the broth. Drizzle a teaspoon of the reserved chicken fat on top for restaurant-level richness.

    homemade ramen

    7 simple ingredients to make the most flavourful homemade ramen

    With just 7 ingredients you can make the most flavourful homemade ramen right at home.
    Prep Time 30 minutes
    Cook Time 2 hours
    Soak 1 hour
    Total Time 3 hours 30 minutes
    Servings: 6 people
    Course: Soup
    Cuisine: Japanese
    Calories: 420

    Ingredients
      

    • 1 whole chicken 1.5 pounds
    • ½ kg pork leg chopped
    • 1½ oz ginger sliced
    • 2 bulbs garlic smashed
    • 1 large white onion halved
    • 1½ oz kombu
    • 1 cup sake
    • 5½ Litre cold water
    • 2 tbsp chicken powder optional
    • 300g chicken and pork meat from broth shredded
    • ½ cup non sweet soy milk optional
    • salt to taste
    Noodles
    • 1 portion fresh / frozen / dried noodles
    Garnish
    • 2 green onion sliced
    • 1 soft boiled egg
    • 1 portion veggies
    • 1 portion chicken and/or pork shredded meat
    • 1 garlic clove minced

    Equipment

    • strainer
    • high speed blender

    Method
     

    1. In a large bowl, put the pork leg in cold water with some salt. Let it sit for 1 hour. Also wash the chicken in cold water, and chop the chicken into smaller pieces: separate the legs, wings, and breasts.
    2. Fill a stock pot with water (doesn't matter how much as long as it covers the chicken and pork legs) and bring it to boil. Add the meat and let it boil for 10 minutes in high heat. Scum will rise to the top, but don't worry about it as long as it doesn't boil over.
    3. Carefully take the stock pot with the meat and pour it in a clean sink. With the tap running, clean the chicken and pork until there's no scum stuck on the meat. Also wash the stock pot as well with no scum to the side.
    4. Refill the stock pot with 5.5 Litres of water, and add the cleaned meat back in. Wait for the water to boil and watch to see if any scum rises to the top. If it does, clear it out with a strainer. Once the water has no more scum or you see it is clear, add in the rest of the ingredients: ginger, garlic, onion, and kombu. Now close the lid and DO NOT open it until one hour pass.
    5. After one hour, take a potato masher and mash the stock up to break the bone and meat. This is how we can extract more flavour from the meat. Close the lid and let it boil for the last one hour.
    6. Turn the heat off and take the lid off to cool. Meanwhile set up a pot and strainer in the sink. Carefully strain the soup. Put the pot of soup back on the stove and stir in the sake. Give it a taste and add the amount of salt suited to your taste.
      OPTIONAL: Add in the chicken stock if you desire.
    7. In a blender, add the strained broth to the blender with the 300g of chicken and pork. Blend until silky smooth. strain again to get the creamy thick soup.
    8. In another pot, cook the noodles to the package instructions.
    9. Once the noodles are finished cooking, add the cooked noodles into a bowl.
    10. First add in the hot broth into the bowl.
      OPTIONAL: add ¼-½ cup of non sweeten soy milk.
    11. Garnish the soup with veggies, boiled eggs, green onion, and finely minced garlic. Serve immediately.

    More Soup and Noodle Recipes