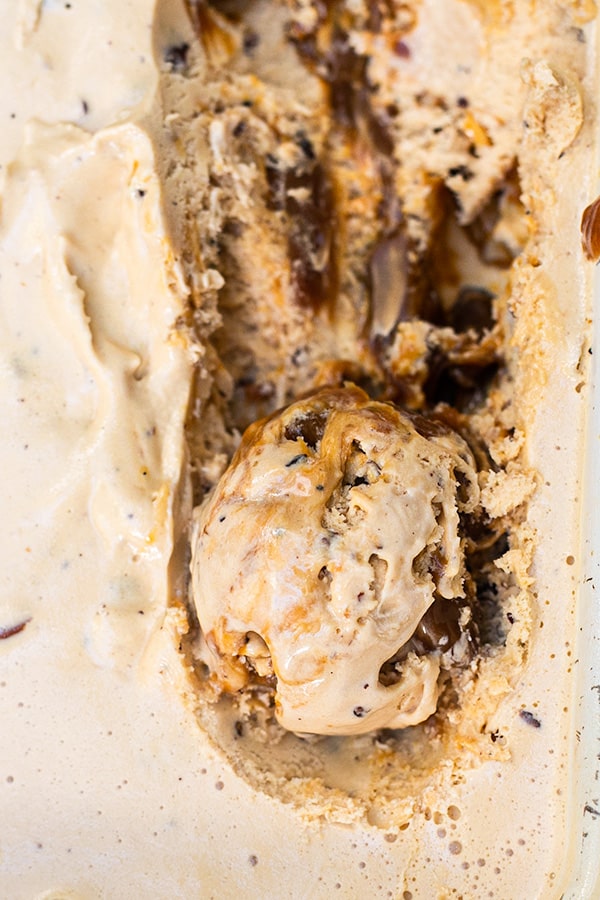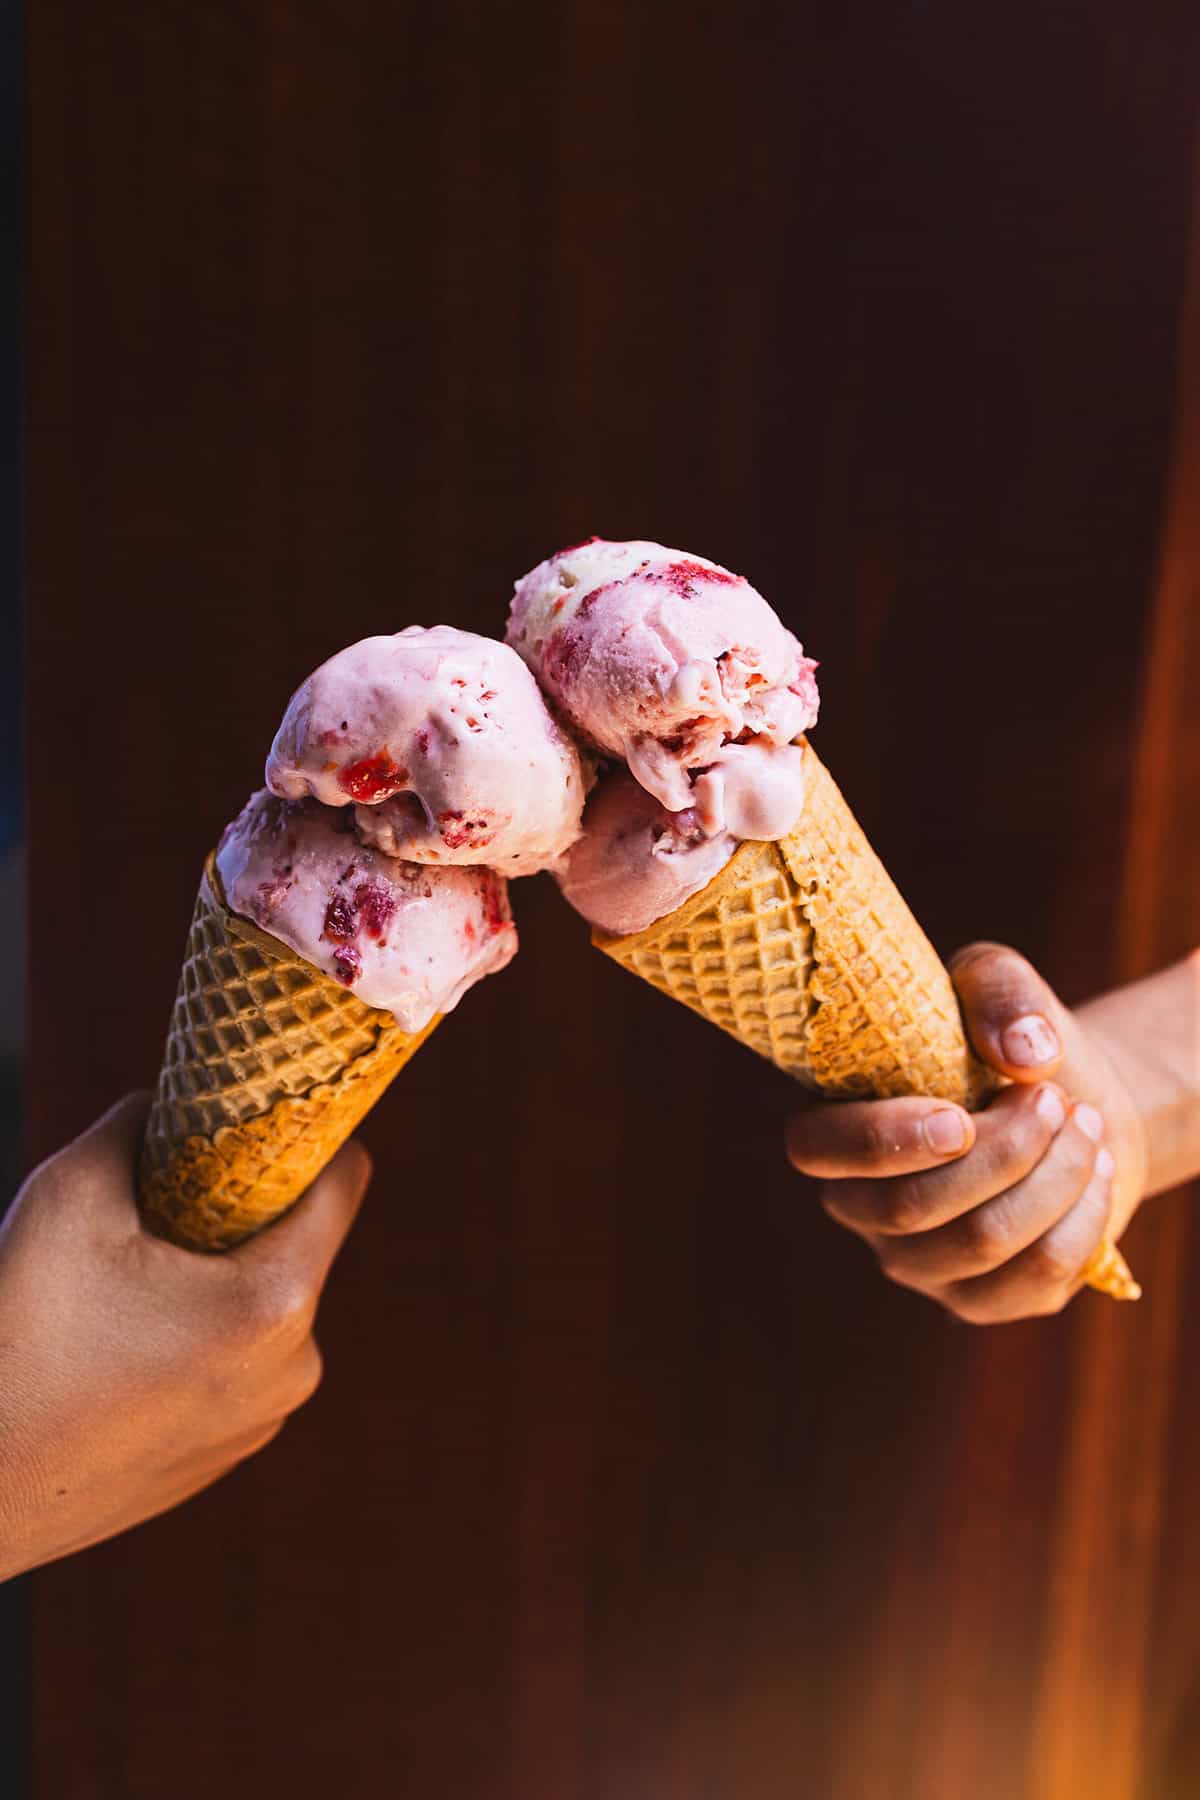
Category: ice cream recipes

  • Strawberry Ice Cream

    Strawberry Ice Cream

    When strawberries are at peak ripeness — deep red, fragrant, and almost bursting — there’s only one thing worth doing with them: turning them into this homemade strawberry ice cream. Made with a chunky cooked strawberry syrup folded into a rich cream base and churned to a velvety perfection, this recipe captures everything summer is supposed to taste like. No artificial flavoring, no food coloring — just real fruit, whole cream, and a touch of vanilla. If you have an ice cream machine, this takes less than an hour of active time.

    This post may contain affiliate links. If you purchase through these links, I may earn a small commission at no extra cost to you. Thank you for supporting Love & Harvest!

    Homemade fresh strawberry ice cream in a scoop

    Fresh or frozen strawberries cooked into a chunky syrup, folded into a rich cream base, and churned in an ice cream machine. Simple, real, and nothing like store-bought.

    Why Try This Recipe

    What makes homemade strawberry ice cream irresistible is the combination of real fruit and real cream — no shortcuts. With an ice cream machine, the process is nearly effortless. A handful of pantry ingredients, some patience while it churns and firms, and you have a batch that rivals any premium brand.

    Strawberry ice cream scooped in a waffle cone

    How to Make Strawberry Ice Cream

    Start with the strawberry syrup: wash, hull, and halve fresh strawberries (frozen work straight from the bag). In a saucepan, combine with sugar or honey on medium heat. Stir every 2 minutes. Once soft, mash to a chunky syrup with a potato masher. Squeeze in lemon juice, stir, and cool to room temperature.

    For the base: combine heavy cream, whole milk, and sugar in a saucepan. Heat gently until the sugar dissolves — do not boil. Whisk in vanilla extract, remove from heat, and let cool slightly. Stir in the chunky strawberry syrup until fully incorporated. Churn in your ice cream machine per the manufacturer’s instructions (typically 20–30 minutes). Transfer to a freezer-safe container and freeze for 4+ hours or overnight.

    Strawberry ice cream churning in ice cream machine

    Ingredients

    Key Ingredients

    Fresh or Frozen Strawberries

    Fresh ripe strawberries give the most vibrant flavor and natural sweetness. Frozen strawberries work perfectly well and are often more convenient — add them to the saucepan straight from frozen. The cooking process extracts the same deep, concentrated flavor either way.

    • Why it matters: Cooked strawberry syrup gives a more intense, complex flavor than raw strawberries blended in. The heat concentrates and deepens the fruit’s natural flavor.

    Heavy Cream

    Heavy cream is what gives ice cream its signature rich, velvety mouthfeel. The high fat content prevents large ice crystals from forming during freezing, creating a smoother texture. A heavy cream frother can help incorporate air for a lighter result before churning.

    • Why it matters: Low-fat substitutes produce icy, grainy ice cream. Heavy cream is non-negotiable for the right texture.

    Whole Milk

    Whole milk balances the richness of the heavy cream without over-thickening the base. It provides enough fat to maintain creaminess while keeping the ice cream scoopable rather than dense. Do not substitute with skim or low-fat milk.

    • Why it matters: Milk affects the ratio of fat to water in the base, which directly controls texture and scoopability after freezing.

    Vanilla Extract (or Vanilla Bean Paste)

    Vanilla acts as a flavor bridge between the dairy base and the strawberries, rounding out the overall taste. For a more intense, speckled result, use vanilla bean paste instead of extract.

    • Why it matters: Without vanilla, the cream base tastes flat. Vanilla is what makes the strawberry flavor pop rather than sit on its own.

    Egg Yolks

    Egg yolks act as a natural emulsifier, binding the fat and water molecules together for a silkier, creamier texture. They also add a subtle richness to the base. Whisk the yolks with a small portion of the warm cream base (tempering) before adding to the full mixture to prevent scrambling.

    • Why it matters: Yolks are the difference between a basic ice cream and a custard-style ice cream — significantly smoother and more stable.

    Sugar or Honey

    Both sweeteners dissolve evenly into the mixture and lower the freezing point slightly, keeping the ice cream from becoming rock-hard. Honey adds a subtle floral note that pairs beautifully with strawberries. Use whichever you prefer — the ratio is the same.

    • Why it matters: Sugar also controls texture. Too little and the ice cream freezes too hard; too much and it stays soft and icy. The recipe is calibrated for the right balance.

    Lemon Juice

    A squeeze of lemon juice brightens the strawberry flavor and enhances its natural sweetness. The acidity balances the richness of the cream base and makes the fruit flavor more vivid.

    • Why it matters: Without lemon, the strawberry flavor can taste dull or hidden under the cream. Lemon is the flavor activator here.

    Strawberry ice cream ingredients laid flat

    If you love homemade frozen desserts, try our vanilla bean ice cream or the easy blueberry ice cream next — both use this same base technique. For a no-churn option, check out our fresh mango sorbet.

    Frequently Asked Questions

    Can I make strawberry ice cream without an ice cream machine?

    Yes, but it requires more effort. Pour the prepared mixture into a shallow freezer-safe container. Every 45 minutes for the first 3–4 hours, remove it from the freezer and stir vigorously (or blend briefly) to break up ice crystals. The texture will be slightly less smooth than machine-churned but still very good.

    Can I use frozen strawberries instead of fresh?

    Absolutely. Add frozen strawberries directly to the saucepan — no need to thaw first. The result is nearly identical to using fresh strawberries since the cooking process concentrates the flavor in both cases.

    Why is my ice cream icy instead of creamy?

    The most common causes are: not enough fat in the base (use heavy cream, not light cream), insufficient churning time, or freezing in a container that is too deep. A shallow, wide container allows more even freezing and fewer large ice crystals.

    How long should I churn the ice cream?

    Most machines take 20–30 minutes to reach soft-serve consistency. Do not over-churn — once the ice cream pulls away from the bowl sides and is thick and creamy, stop. A quality ice cream maker makes this process foolproof.

    How long does homemade strawberry ice cream keep?

    Up to 2 weeks in the freezer in an airtight container. Press a piece of plastic wrap directly against the surface before putting the lid on to prevent ice crystal formation on top.

    Can I make this dairy-free?

    Yes. Substitute full-fat coconut cream for the heavy cream and full-fat coconut milk for the whole milk. Omit the egg yolks. The texture will be slightly different but still creamy and delicious.

    Two scoops of homemade strawberry ice cream in a waffle cone

    Strawberry Ice Cream

    There's nothing quite like the taste of summer encapsulated in a scoop of homemade fresh strawberry ice cream. Bursting with the vibrant flavours of ripe strawberries, this creamy delight is the epitome of a seasonal treat.
    Prep Time 10 minutes
    Cook Time 15 minutes
    Churning Time 25 minutes
    Total Time 50 minutes
    Servings: 6
    Course: Dessert
    Calories: 280

    Ingredients
      

    • ½ pound fresh strawberries or 1 cup frozen strawberries wash and hauled
    • ¾ cup sugar or 5 tbsp honey
    • 1 tsp fresh lemon juice
    • 1½ cups heavy cream
    • 2 cups whole milk
    • 1 tsp vanilla extract

    Equipment

    • ice cream maker machine

    Method
     

    1. Put the strawberries and sugar into the saucepan on medium heat. Whisk everything together until the sugar has melted and the strawberries can be easily mashed with a fork (5-7 mins). Using a handheld potato masher, mash the strawberries until the syrup is thick and chunky. Squeeze the lemon juice inside, give it a good stir, and set it aside.
    2. In a large sauce pan, add in the heavy cream and whole milk. Heat over medium-low heat until hot, but not bubbling.
    3. In a large bowl, whisk together the egg yolks until light in colour. Now, while whisking the eggs, slowly pour in ½ cup of the hot cream mixture to temper the eggs.
    4. Pour the tempered egg yolks into the saucepan with the rest of the custard base and stir gently with a wooden spoon for 2-4 minutes, or until the temperature is between 170-175 and the mixture is just thick enough to coat the back of the spoon. Remove from heat and stir in the vanilla.
    5. Combine the custard base and strawberry syrup together. Mix well. Refrigerate for 4 hours, until thoroughly chilled, or set into an ice water bath, stirring frequently until cold.
    6. Pour the strawberry custard base into your ice cream maker and churn according to manufacturer's instructions. After churning, transfer ice cream to a freezer safe container and place in a freezer to cure for at least 4 hours.
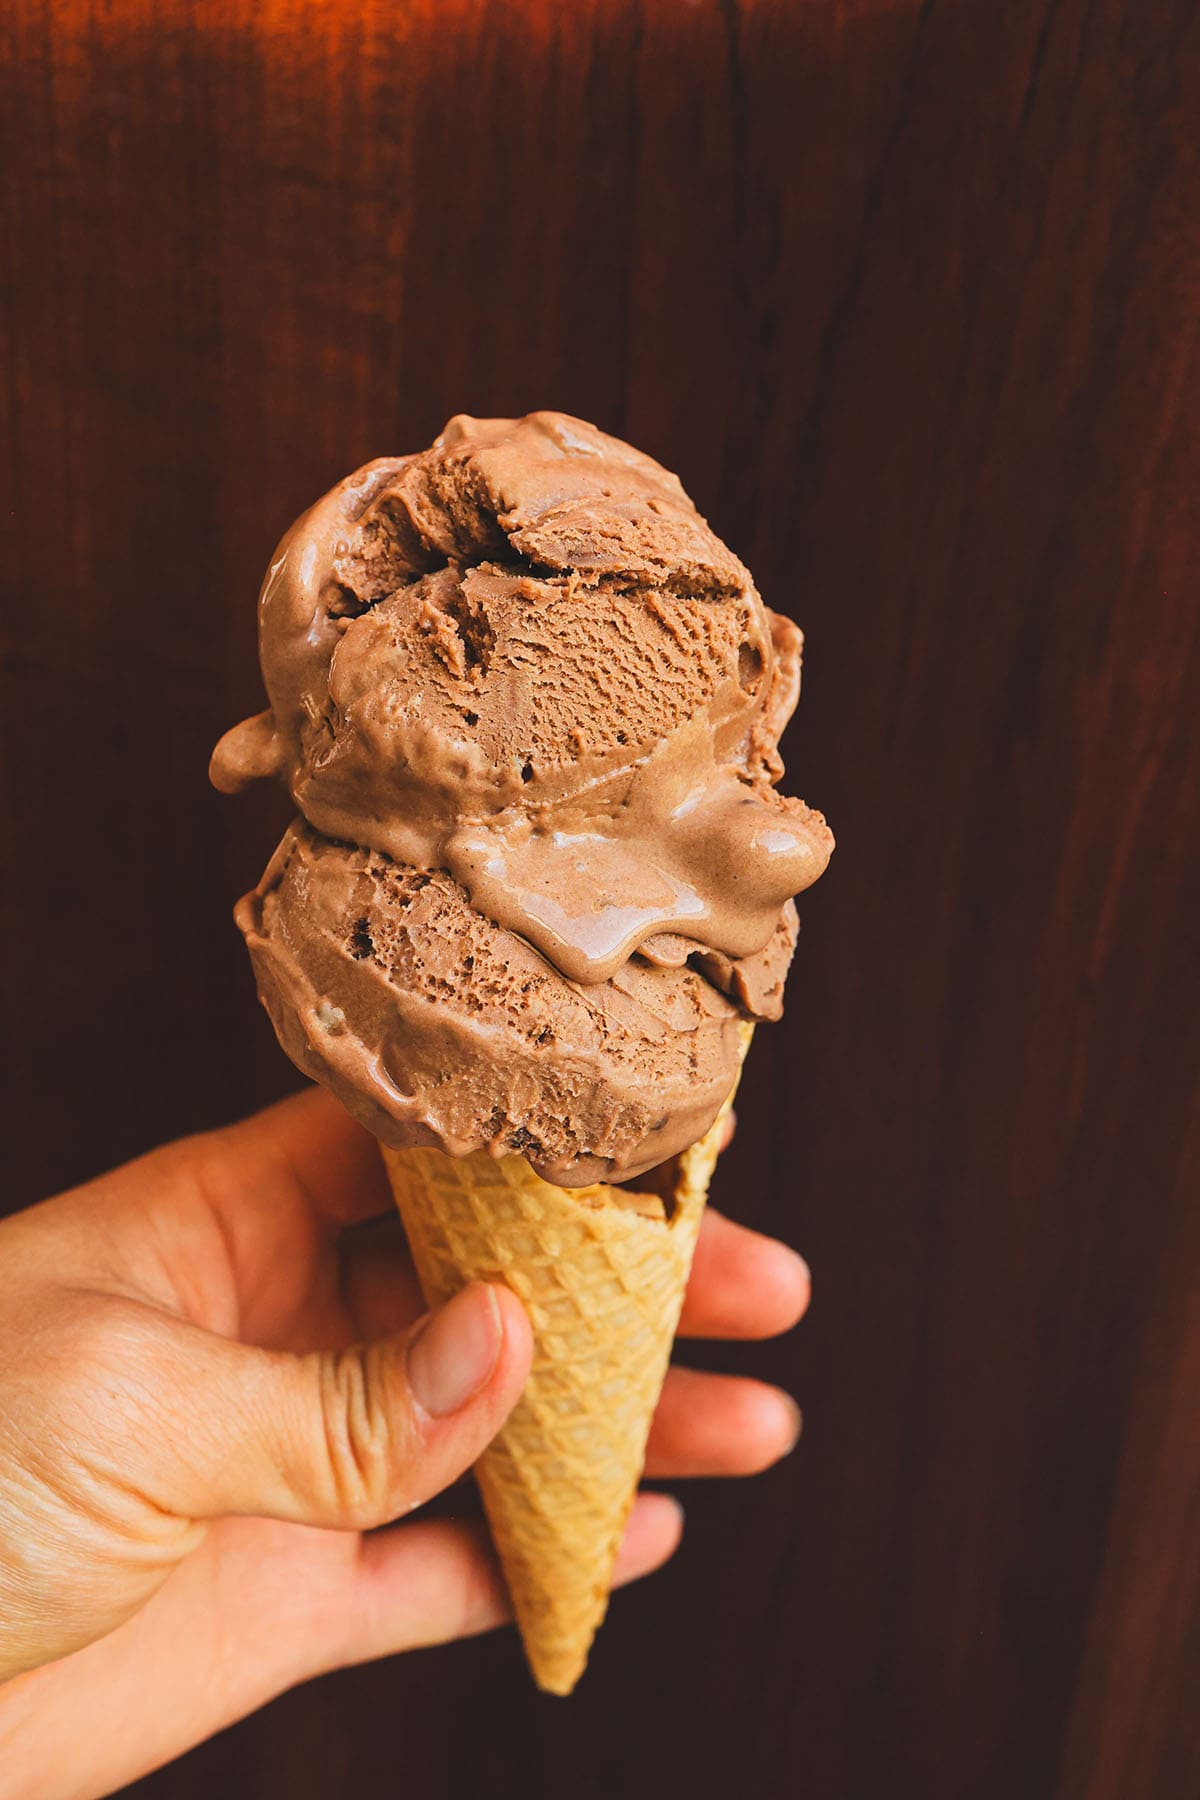
  • Easy Chocolate Fudge Ice Cream

    Easy Chocolate Fudge Ice Cream

    This homemade chocolate fudge ice cream is so rich and velvety that one scoop is never enough. Made with Dutch-process cocoa, real chocolate chips, and heavy cream, it comes together in under 30 minutes of active work — and it beats anything you will find in the freezer aisle.

    This post may contain affiliate links. If you purchase through these links, I may earn a small commission at no extra cost to you. Thank you for supporting Love & Harvest!

    A hand holding a bowl of chocolate fudge ice cream with sprinkles

    This is a recipe for easy homemade chocolate ice cream using an ice cream machine. In 25 minutes of churning, you will have velvety, fudgy chocolate ice cream made with cocoa, cream, chocolate chips, and vanilla extract.

    Why Try This Recipe?

    With thousands of chocolate ice cream recipes online, here is what makes this one worth your time:

    1. Irresistible Fudgy Texture: This recipe delivers dense, velvety consistency — not just chocolatey, but genuinely fudgy in every spoonful.

    2. Simple Ingredients, Extraordinary Flavor: High-quality cocoa powder, cream, and real chocolate create a depth of flavor that powdered mixes simply cannot replicate.

    3. Easy to Make: Mix, chill, churn. No complex techniques. Accessible to home cooks of any skill level.

    4. Customizable: The base recipe is perfect on its own, but it also welcomes mix-ins like nuts, caramel swirls, or extra chocolate chips.
    5. Made from Scratch: Full control over ingredients means no artificial flavors, no mystery stabilizers — just real food.

    A hand holding a waffle cone with scoops of chocolate fudge ice cream

    Easy as 1, 2, 3

    This homemade fudgy chocolate ice cream is a breeze to make. With just a few simple steps you will be scooping creamy, velvety indulgence in no time. No fancy techniques, no hard-to-find ingredients — just pure chocolatey bliss with every scoop.

    Bowl of chocolate fudge ice cream topped with chocolate sauce and sesame seeds

    You Will Need an Ice Cream Machine

    Yes, you will need one if you do not already own one. The machine I use is the Cuisinart Ice Cream Maker. I have used it for over 15 years and it remains my first choice. It is compact enough to store easily, simple to set up, and the only prep required is freezing the bowl overnight. The next day you are making ice cream in 25 minutes.

    If you do not have one yet, this ice cream maker is the one I recommend — reliable, compact, and under $100.

    Freshly churned chocolate ice cream in a container

    Why Use an Ice Cream Machine?

    There are real reasons to invest in a machine over just using a high-speed blender:

    • Consistent Churning: Continuous motion during freezing prevents large ice crystals from forming, producing a smoother, creamier texture.

    • Faster Freezing: Rapid churning locks in flavor while freezing quickly, producing better texture than still-freeze methods.

    • Customizable Texture: Control churn time to hit anywhere from soft-serve consistency to firm, scoopable ice cream.

    • Hands-Free Operation: Pour in the base and walk away. The machine handles everything.

    • Versatility: The same machine makes sorbets, gelatos, frozen yogurt, and more.

    Ingredients

    Cocoa Powder

    The key ingredient for deep chocolate flavor. Use Dutch-process cocoa powder for the richest, smoothest taste — Dutch-process cocoa is less acidic, which makes the chocolate flavor rounder and more intense.

    • Why it matters: Natural cocoa can taste sharp and bitter. Dutch-process cocoa gives you that dark, fudgy depth that makes this recipe special.

    Heavy Cream

    Heavy cream adds the luxurious creaminess that defines great ice cream. The high fat content is not optional — it is what creates a smooth, velvet-like texture and prevents the ice cream from freezing rock-solid.

    • Why it matters: Lower-fat cream produces icier, less satisfying results. Do not substitute half-and-half here.

    Whole Milk

    Milk provides the liquid base, moisture, and helps achieve the right balance between richness and scoopability.

    • Why it matters: It lightens the base just enough so the ice cream is creamy rather than overly dense.

    Sugar

    Sugar balances the bitterness of the cocoa and plays a structural role — it keeps the ice cream soft and scoopable even when fully frozen.

    • Why it matters: Too little sugar and the ice cream freezes too hard. The right amount keeps it perfect right out of the freezer.

    Chocolate Chips

    Optional but highly recommended. I buy bittersweet chocolate chips in bulk — they add pockets of intense chocolate throughout the creamy base.

    • Why it matters: They create a satisfying textural contrast and double down on the chocolate flavor in every bite.

    Vanilla Extract

    A subtle but important addition. Vanilla bean paste adds depth and rounds out the chocolate, softening any harsh edges in the flavor.

    • Why it matters: Real vanilla adds complexity. Without it, the chocolate can taste one-dimensional.

    A hand holding a bowl of chocolate fudge ice cream with chocolate drizzle

    How to Make This Easy Chocolate Ice Cream

    Begin by whisking together cocoa powder and sugar, then gently heat with whole milk until a smooth mixture forms. Add warm heavy cream and vanilla extract to enrich the base. Optionally fold in chocolate chips for extra decadence. Chill the mixture thoroughly, then churn in your ice cream maker until luxuriously thick. Freeze until firm, then scoop and serve.

    Scoops of chocolate fudge ice cream with chocolate sauce in a white bowl

    Why You Should Make This Chocolate Ice Cream

    • Each bite offers a velvety texture that is soft and slightly sticky, delivering pure, dense chocolate satisfaction.
    • There is something special about making ice cream from scratch — the kitchen smells incredible, and the process itself is genuinely fun.
    • The memories shared with loved ones over a bowl of homemade ice cream are worth every minute of preparation.

    Frequently Asked Questions

    Do I have to use an ice cream machine?

    Technically no, but the results differ significantly. Without a machine, ice crystals form during freezing and produce a grainier texture. If you do not own a machine, stir the mixture vigorously every 30–45 minutes during the first 3 hours of freezing to partially replicate the churning effect.

    Can I use natural cocoa powder instead of Dutch-process?

    Yes, but the flavor will be sharper and slightly more acidic. Dutch-process cocoa is preferred here because it produces a rounder, deeper chocolate taste without bitterness. If you only have natural cocoa, add a tiny pinch of baking soda to neutralize the acidity.

    How long does homemade ice cream keep?

    Store in an airtight container with plastic wrap pressed directly onto the surface of the ice cream to prevent freezer burn. It keeps well for up to 2 weeks, though texture is best in the first 5–7 days.

    Can I make this dairy-free?

    Yes. Substitute full-fat coconut cream for the heavy cream and oat milk or almond milk for the whole milk. The texture will be slightly different but still delicious. Reduce the sugar slightly since coconut cream can add its own sweetness.

    Why did my ice cream turn out icy instead of creamy?

    The most common causes are: the ice cream bowl was not frozen long enough before churning (needs at least 12–15 hours), the base was not chilled enough before adding to the machine, or the fat content was too low. Make sure to start with cold custard and a properly frozen bowl.

    Can I add mix-ins like nuts or caramel?

    Absolutely. Add any mix-ins during the last 2–3 minutes of churning when the ice cream has thickened to a soft-serve consistency. Chopped pecans, caramel ribbons, and crushed cookies all work beautifully.

    Love frozen desserts? Try our strawberry ice cream, our vanilla bean ice cream, and our fresh mango sorbet for more homemade frozen treat inspiration.

    A hand holding a waffle cone with scoops of chocolate fudge ice cream

    Easy Chocolate Fudge Ice Cream

    Our homemade fudgy chocolate ice cream is easy and delicious. If you've ever dreamed of scooping up velvety clouds of pure cocoa bliss, this recipe is your ticket to paradise.
    Prep Time 20 minutes
    Cook Time 20 minutes
    Total Time 4 hours
    Servings: 6 servings
    Course: Dessert
    Calories: 350

    Ingredients
      

    • 1½ cups cups whole milk
    • 1½ cups cups heavy cream
    • ¾ cups (150 grams) granulated sugar divided
    • ¼ cup (25 grams) unsweetened cocoa powder preferably Dutch-process, sifted
    • pinch of sea salt
    • ½ tsp vanilla extract
    • 8 oz bittersweet chocolate chips
    • 4 large egg yolks

    Equipment

    • ice cream machine

    Method
     

    1. Prepare for making your ice cream by placing the ice container in the freezer the day before. Allow it to freeze overnight or for a minimum of 12 hours.
    2. In a medium saucepan, combine the milk, cream, 1/2 cup sugar, cocoa powder, salt, and vanilla. Set over medium heat, stirring occasionally, until the mixture is warm and begins to steam, about 5 minutes. Stir in the melted chocolate.
    3. Combine the egg yolks and the remaining 1/4 cup of sugar in a bowl and whisk until smooth. Gradually incorporate half of the warm milk mixture into the egg yolks, adding one ladleful at a time, until the mixture is warmed. Then, pour the egg-milk mixture back into the saucepan. Cook over medium heat, stirring continuously with a wooden spoon, until the mixture thickens enough to coat the back of the spoon and reaches around 175°F on an instant-read thermometer, typically taking about 5 to 7 minutes. Ensure not to let the mixture boil.
    4. Strain the mixture immediately through a fine strainer into the prepared ice bath. Allow the custard to cool in the ice bath, stirring frequently until it reaches room temperature. Cover the surface of the custard with plastic wrap, then refrigerate until chilled, typically taking about 4 hours or up to 1 day.
  • Blueberry Limeade Popsicles

    Blueberry Limeade Popsicles

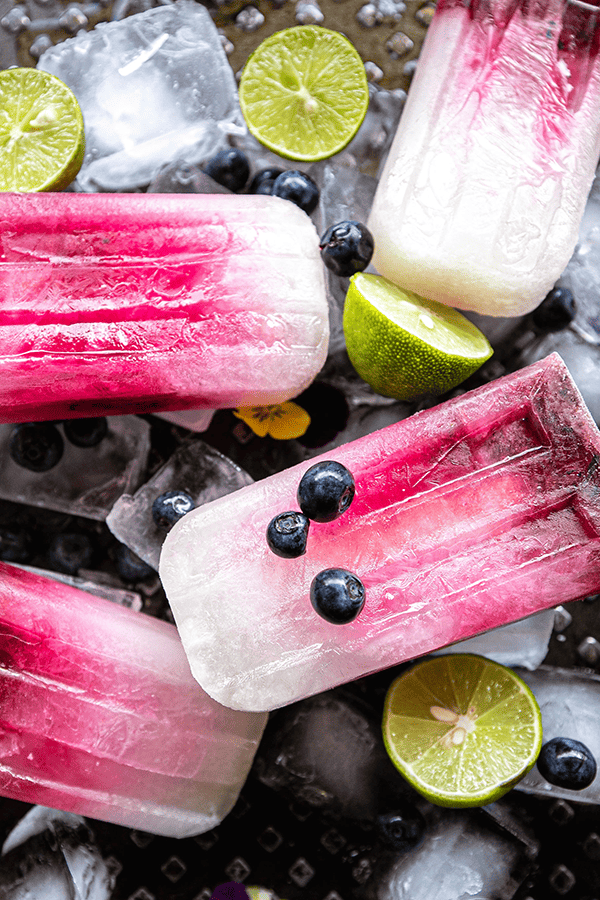
    Four ingredients, one blender, zero freezer regret. These Blueberry Limeade Popsicles are the most refreshing thing you’ll make all summer. The layers go from icy white to bright pink and deep berry red, and the tangy-sweet combination tastes even better than it looks.

    Two Blueberry Limeade Popsicles on ice

    Summer in Mexico is always packed with fresh lime from a local state, and when May comes around, blueberries are in season too. There is no flavour more absurdly satisfying than the combination of zesty lime and succulent blueberries. With each icy bite, the tangy essence of freshly squeezed limes intertwines harmoniously with the sweet blueberries, transporting you to a serene summer day.

    This post may contain affiliate links. If you purchase through these links, I may earn a small commission at no extra cost to you. Thank you for supporting Love & Harvest!

    What I Love About Homemade Popsicles

    • You choose how sweet they are
    • Great way to use seasonal summer fruits
    • Easy recipe for kids to follow and tons of fun!
    • A homemade frozen treat you can make all summer
    • An infinite avenue for creativity

    Close-up of blueberry limeade popsicles

    Ingredients for Blueberry Limeade Popsicles

    Fresh or Frozen Blueberries

    • Blueberries give the bottom layer its deep pink-red colour and a little natural sweetness. Frozen blueberries work just as well as fresh and are available year-round. Blend them chunky, not smooth, so you get beautiful streaks in every popsicle.

    Fresh Lime Juice

    • This is the backbone of the popsicle. Freshly squeezed lime juice (about 6 limes) gives a bright, tangy kick that bottled juice simply cannot replicate. The acidity also keeps the colour of the blueberries vivid.

    Cane Sugar or Agave Syrup

    • A sweetener is necessary to balance the tartness of the lime. Cane sugar dissolves cleanly in the blended lime mixture. Agave syrup works well here too. Use 1 tablespoon agave in place of the cane sugar.

    Water

    • Water dilutes the lime juice to the right intensity and gives the popsicle a clean, icy texture rather than a dense, overly concentrated one.

    What You Need to Make Homemade Popsicles

    You’ll need a silicone popsicle mold. Silicone is best because you can stretch and pull to release the popsicles easily, and it stores flat in a cabinet. Another advantage: silicone molds work with wooden sticks, so you never lose a plastic stick again.

    If you have kids and want a smaller size, look for a 6-cavity mold. Smaller popsicles are perfect for little hands. You’ll also need a high-speed blender to get a smooth lime base and a chunky blueberry mixture.

    Blueberry Limeade Popsicles on ice with lime halves and blueberries

    How to Make Blueberry Limeade Popsicles

    You only need 4 ingredients to make it: fresh or frozen blueberries, lime juice, cane sugar (or agave syrup), and water. That is really all it takes. The two-layer technique is what makes these popsicles look as good as they taste: the lime layer freezes slightly first, then the blueberry mixture is added on top so each colour stays distinct.

    Create a Memorable Family Moment

    This blueberry limeade popsicle recipe is so simple that asking the kids to join in can create a fantastic summer memory. When the kids see me laying out the limes on the kitchen counter with a big bowl beside it, they always guess it’s popsicle time!

    Children in the kitchen can learn about:

    • flavours and textures
    • the importance of balance in creating delicious combinations
    • measuring ingredients to foster their mathematical abilities
    • reading comprehension and sequencing skills

    Beyond the kitchen, making popsicles as a family fosters teamwork, communication, and bonding. It’s a delightful way for kids to explore their creativity and take pride in what they made together.

    Love frozen treats? Try these other ice cream and popsicle recipes from Love & Harvest:

    Blueberry limeade popsicle finished and ready to eat

    Frequently Asked Questions

    Can I use bottled lime juice instead of fresh?

    Fresh is strongly recommended. Bottled lime juice tastes flat and slightly bitter compared to freshly squeezed limes. For a popsicle where lime is the star flavour, it is worth squeezing the real thing. About 6 medium limes give you the half cup you need.

    How long do these popsicles need to freeze?

    The lime layer needs about 2 to 3 hours in the freezer to partially set before you add the blueberry layer. Once the blueberry layer is added, freeze for an additional 5 hours or overnight. A full overnight freeze is the most reliable approach.

    Can I use frozen blueberries instead of fresh?

    Yes, frozen blueberries work perfectly in this recipe. There is no need to thaw them first. Blend them directly from frozen for a slightly chunkier, more textured layer that looks beautiful in the finished popsicle.

    How do I get the popsicles out of the mold without breaking them?

    Let the mold stand on the counter for a few minutes, then run it briefly under lukewarm water to loosen the edges. If you are using a silicone mold, gently pull and stretch the sides to release each popsicle. Avoid warm hands directly on the popsicle or it will melt too quickly.

    How should I store leftover popsicles?

    Wrap each popsicle individually in plastic wrap or place them in a zip-lock bag before returning them to the freezer. This prevents freezer burn and ice crystal formation, keeping the texture and flavour fresh for up to 4 weeks.

    Can I make these popsicles less sweet?

    Yes. Swap the cane sugar for 1 tablespoon of agave syrup for a less sweet version (agave is still a sugar). Or leave the sweetener out entirely if your blueberries are very sweet. The lime keeps them bright and tangy; they’ll just be more tart.

  • Matcha Green Tea Popsicles

    Matcha Green Tea Popsicles

    Imagine biting into an ice-cold, creamy popsicle that cools you down from the inside out. That is exactly what these Matcha Green Tea Popsicles deliver — a tropical blend of coconut milk and ceremonial matcha that is as creamy as it is refreshing. One batch and you will want a stash in your freezer all summer.

    This post may contain affiliate links. If you purchase through these links, I may earn a small commission at no extra cost to you. Thank you for supporting Love & Harvest!

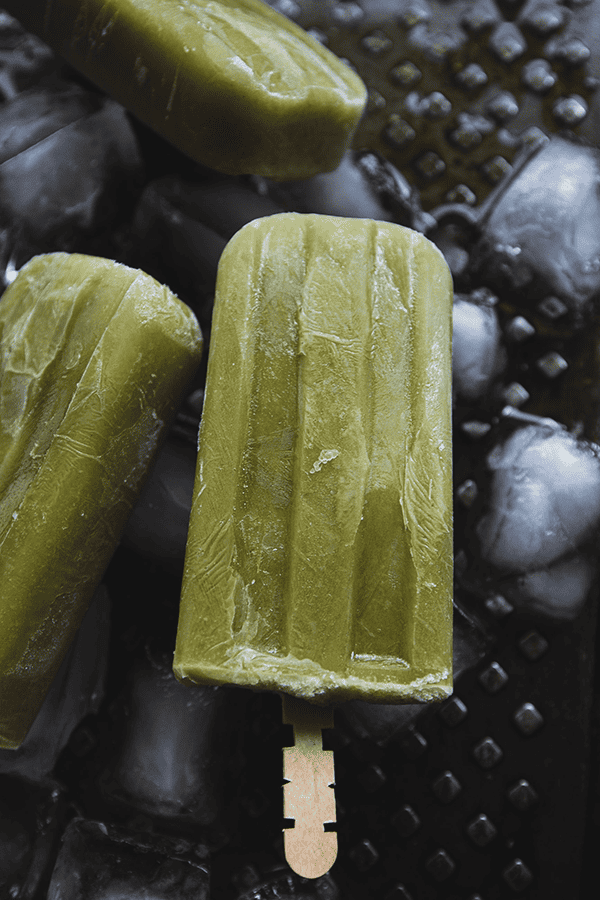
    A hand holding a matcha green tea popsicle over ice

    Quench your summer cravings with the refreshing delight of Matcha popsicles. These vibrant treats satisfy your sweet tooth with that earthy matcha flavor.

    Matcha green tea popsicles resting on ice cubes

    What is Matcha Green Tea?

    Matcha green tea is a type of powdered green tea that has been a traditional part of Japanese culture for centuries. It is made from the leaves of the Camellia sinensis plant, the same plant used to produce other types of green tea. However, what sets matcha apart is the way it is grown, harvested, and processed.

    The cultivation of matcha involves shading the tea plants for several weeks before harvest, which boosts the chlorophyll content and gives the leaves a vibrant green color. After harvest, the stems and veins are removed, and the leaves are ground into a fine powder using traditional granite stone mills.

    Why Use Xanthan Gum in Matcha Popsicles?

    Xanthan gum is a common ingredient used in the production of matcha popsicles and other frozen desserts. Here are a few reasons why xanthan gum is often included:

    1. Texture and Mouthfeel: Xanthan gum acts as a thickening and stabilizing agent, giving the popsicle mixture a smooth and creamy texture. It helps prevent ice crystals from forming, resulting in a more enjoyable mouthfeel and preventing the popsicles from becoming too icy.
    2. Emulsification: Xanthan gum can help emulsify and bind the ingredients together, ensuring that the matcha and other components in the popsicle mixture are evenly distributed. This contributes to a consistent flavour throughout the popsicle.
    3. Suspension of Ingredients: Matcha powder can sometimes settle at the bottom of the popsicle mixture due to its weight. Xanthan gum helps suspend the matcha particles and other ingredients evenly throughout the mixture, preventing separation and ensuring a consistent distribution of flavour.
    4. Enhanced Stability: Xanthan gum improves the stability of the popsicle mixture, preventing ingredient separation and reducing the chances of the mixture separating or becoming watery during the freezing process.
    5. Reduced Melting: Xanthan gum can help slow down the melting rate of popsicles, allowing them to maintain their shape and texture for a longer period, particularly in warmer temperatures.

    What I Love About Homemade Matcha Popsicles

    • Control the sugar content in each lick
    • Great way to use seasonal summer fruits
    • Easy recipe for kids to follow and tons of fun!
    • A great way of making homemade frozen treats
    • An infinite avenue for creativity

    Ingredients

    You only need 5 ingredients to make these matcha green tea popsicles. Simple, clean, and packed with flavour.

    Coconut Milk

    Full-fat coconut milk is the backbone of this recipe.

    • Why it matters: The high fat content creates that creamy, ice-cream-like texture without any dairy. It also carries the matcha flavour beautifully and prevents an icy, hard bite.

    Matcha Powder

    Use ceremonial-grade matcha powder for the best results.

    • Why it matters: Ceremonial grade matcha is brighter green and less bitter. Culinary grade works but produces a slightly more bitter flavour.

    Plant-Based Milk

    Almond milk, oat milk, or any plant-based milk you prefer.

    • Why it matters: This thins the coconut milk to a pourable consistency and adds volume without adding heaviness. Use unsweetened almond milk so the honey is the only sweetener.

    Honey

    Raw varietal honey or ¼ cup sugar work equally well.

    • Why it matters: Sweetness is essential in frozen desserts because cold temperatures dull flavor perception. Honey adds complexity that plain sugar cannot match.

    How To Make Matcha Popsicles

    In a high speed blender add coconut milk, almond milk, xanthan gum, matcha powder, and honey. Blend on high until the mixture comes together smoothly. Leave it on high for about 30–40 seconds until the top of the liquid gets frothy. The froth at the top of the popsicle mold gives it a beautiful look once frozen.

    Fingers lifting a frothy-topped matcha popsicle from a bed of ice

    What Do You Need to Make Homemade Popsicles?

    Firstly, you will need a popsicle mold. The one I like is silicone because you can stretch and pull to get the popsicles out. It is easier to store in cabinets too. Another thing I like about silicone molds is that I can use wooden sticks.

    I mean, come on, who hates it when a plastic stick goes missing, and you’re running through the kitchen looking for it? I despise playing hide-and-seek with the reusable sticks because I end up looking like a crazy lady searching for them.

    If you have kids and want a smaller size, you can buy a 6-cavity silicone mold — it makes about 3.3oz per popsicle, perfect for children!

    If you have a preferred mould, use it. In essence, they are all the same, so long as you have a popsicle at the end of the day.

    Two matcha green tea popsicles on dark ice cubes

    Create A Memorable Family Moment!

    This matcha popsicle recipe is so simple and delicious that asking the kids to join in can create a fantastic summer memory for them.

    When the kids see me laying out the limes on the kitchen counter with a big bowl beside it, they always know it’s popsicle-making time! Engaging kids in the process of making popsicles can be a wonderfully enjoyable and educational experience. They can learn about flavours, textures, measuring, and the science of freezing — all while having a great time.

    If you love frozen treats, you might also enjoy our Matcha Avocado Popsicles or the fun and fruity Loco Mango Popsicles. And for something completely different, try our Mixed Berry Smoothie with Pomegranate and Nopal, another family favourite.

    Frequently Asked Questions

    Can I use culinary grade matcha instead of ceremonial grade?

    Yes, you can. Culinary grade matcha is less expensive and works well in recipes. However, ceremonial grade produces a more vibrant green colour and a less bitter flavour. If you are sensitive to bitterness, stick with ceremonial grade.

    Can I make these popsicles without xanthan gum?

    Yes, but the texture will be icier. Xanthan gum is what prevents large ice crystals from forming, giving these popsicles their smooth, creamy bite. If you skip it, the popsicles will still be delicious — just slightly less creamy.

    How long do matcha popsicles last in the freezer?

    Stored in an airtight container or individually wrapped in plastic wrap, these matcha popsicles keep well for up to 2 months in the freezer. After that, they may develop freezer burn.

    Can I use a different sweetener?

    Absolutely. Maple syrup, agave nectar, or even coconut sugar all work well. Just note that liquid sweeteners blend more easily than granulated sugars. If using coconut sugar, blend an extra 10 seconds to fully dissolve.

    What popsicle mold size do I need?

    This recipe makes about 10 standard-size popsicles (roughly 3 oz each). If you are using a smaller mold — like a children’s size — you will get more pieces. Just adjust freeze time accordingly; smaller molds may be ready in 4 hours.

    Can I add fruit to this matcha popsicle recipe?

    Yes! Sliced mango, kiwi, or blueberries can be placed inside the mold before pouring the matcha mixture for a beautiful and flavourful twist. Make sure the fruit pieces are small enough to fit without blocking the popsicle stick.

    A hand holding a matcha green tea popsicle over ice

    Matcha Green Tea Popsicles

    After indulging in a hearty BBQ meal, these matcha green tea popsicles make a refreshing, light finish. They provide a refreshing and light option to balance out the richness of the barbecue flavours. The creamy texture, combined with the subtle tropical breeze of coconut milk, creates a harmonious blend that will transport your taste buds to a serene paradise.
    Prep Time 10 minutes
    Freeze Time 6 hours
    Total Time 6 hours 10 minutes
    Servings: 10 people
    Course: Dessert
    Calories: 90

    Ingredients
      

    • 1 15oz can coconut milk
    • 1 cup almond milk or any other vegan milk
    • 1 tsp xanthan gum
    • 1 tbsp matcha green tea powder
    • 3 tbsp honey or ¼ cup sugar

    Equipment

    • silicon popsicle mould

    Method
     

    1. In a high-speed blender, add coconut milk, almond milk, xanthin gum, matcha powder, and honey. Blend on high until the mixture comes together smoothly.
    2. Pour the mixture to fill each popsicle mould. Place lid over moulds, then insert popsicle sticks.
    3. Place it in the freezer for 6 hours or overnight.
    4. When it is ready, leave the popsicles out for 30 minutes so it is easier to squeeze them out.
  • Cucumber Crush Popsicles

    Cucumber Crush Popsicles

    Cool, floral, and utterly refreshing — these Cucumber Crush Popsicles are summer in frozen form. Made with fresh cucumbers, lime, mint, sugar, and edible pansy flowers, every bite is as beautiful as it tastes. If you have ever sipped cucumber water on a hot day and thought “I wish this was a popsicle,” this recipe is for you.

    This post may contain affiliate links. If you purchase through these links, I may earn a small commission at no extra cost to you. Thank you for supporting Love & Harvest!

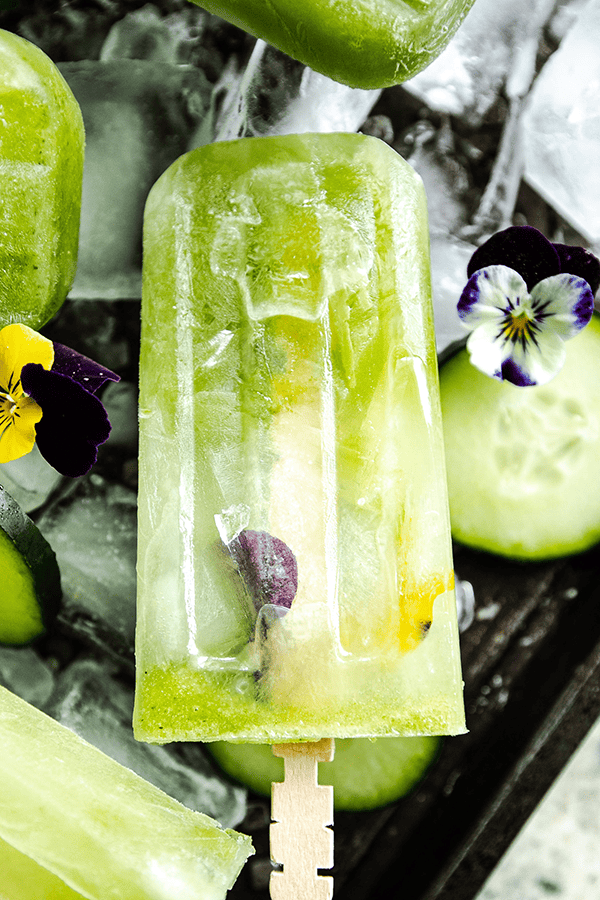
    Cucumber mint popsicle with a pressed pansy flower on ice

    Step into a world of enchantment with our captivating Cucumber Mint Popsicles, inspired by the timeless tale of “The Secret Garden.” Just like the hidden wonders that come alive within the pages of this cherished book, our popsicles hold a magical surprise within their icy embrace.

    Delicate pansy flowers, with their vibrant hues and delicate petals, are nestled inside these frozen delights, adding a touch of natural beauty that will transport you to a whimsical garden. The refreshing combination of cool cucumber and lime, and invigorating mint awakens the senses, while the unexpected presence of pansy flowers adds an element of wonder and joy.

    With each lick, you’ll experience the refreshing taste and behold the visual allure of the hidden flowers, making these popsicles a true feast for the senses.

    Cucumber popsicles with edible pansies and cucumber slices on ice

    What I Love About Homemade Popsicles

    • Control the sugar content in each lick
    • Great way to use seasonal summer fruits
    • Easy recipe for kids to follow and tons of fun!
    • A great way of making homemade frozen treats
    • An infinite avenue for creativity

    About “Agua de Pepino”

    Have you had the pleasure of trying the delightful Mexican beverage known as “Agua de Pepino”? Translating to “cucumber water,” this refreshing drink is super popular in Mexico.

    While cucumber water may not be widely recognized and prepared in many places, its taste is truly delightful. By infusing a few mint leaves, the flavour becomes even more invigorating. In Mexico, you can easily find “Agua de Pepino” at various juice vendors, and sometimes they even add chia seeds for an extra twist. Drawing inspiration from the fresh cucumbers enjoyed on those sweltering days, we proudly present the Cucumber Crush Popsicle.

    Can You Eat Pansy Flowers?

    You see pansy flowers all over the garden during spring and summer. You may wonder if these flowers are edible — the short answer is yes! I’ve used them in popsicles and spring rolls. They are enchanting to look at and completely safe to eat. Flavour-wise, they are very mild with a faint grassy sweetness, so they add visual drama without overpowering the cucumber and mint.

    Clear cucumber popsicle with a purple and yellow pansy frozen inside

    Ingredients

    Five simple ingredients make these popsicles — and each one plays a clear role.

    Cucumber

    Use a fresh, firm English or Persian cucumber for the best results.

    • Why it matters: Cucumber is mostly water, which is exactly what you want in a popsicle base. It blends into a light, pale green liquid that freezes beautifully without becoming too icy or dense. Remove the seeds for a smoother texture.

    Lime Juice

    Freshly squeezed lime juice brightens the entire flavour profile.

    • Why it matters: Without acid, cucumber-flavored anything can taste flat. The lime provides the tartness that wakes up your taste buds and makes each bite pop. Bottled lime juice works in a pinch, but fresh is noticeably better.

    Mint

    Fresh mint leaves, finely chopped.

    • Why it matters: Mint adds a cooling menthol effect that amplifies the refreshing quality of cucumber. The key is to add mint after blending and stir it in by hand — blending mint bruises it and turns the popsicle a murky brown-green.

    Pansy Flowers

    Edible pansy flowers — fresh or from a specialty store — pressed into the mold walls before pouring.

    • Why it matters: These are entirely for beauty. Placing them against the mold walls means they freeze visible through the popsicle, creating a stunning garden-in-ice effect. Make sure to use food-grade, pesticide-free flowers only.

    How To Make Cucumber Crush Popsicles

    First, pick fresh cucumbers and wash and rinse them. According to Mexican folklore, rubbing the cut ends of the cucumber together for a few seconds helps reduce bitterness. Everyone here does it — give it a try!

    Chop the mint leaves into small pieces. Then cut the cucumber in half, deseed it, and chop it into small chunks. Blend the cucumber chunks with lime juice, sugar, and water. Stir in the mint leaves.

    Finally, rinse the pansy flowers to remove dirt. Fill popsicle molds with the cucumber mixture, leaving 1 inch of space at the top. Add 2-3 flowers to each mold and gently submerge them using a chopstick or skewer. Insert popsicle sticks and freeze for 6 hours or overnight.

    What Do You Need to Make Homemade Popsicles?

    Firstly, you will need a silicone popsicle mold. The silicone version is best because you can stretch and pull to get the popsicles out without breaking them. It is also easier to store in cabinets.

    Another thing I like about silicone molds is that I can use wooden sticks — no more playing hide-and-seek with missing plastic sticks around the kitchen!

    If you have kids and want a smaller size, you can buy a 6-cavity silicone mold that makes about 3.3oz each — perfect for children.

    Cucumber crush popsicles laid on ice with mint and cucumber slices

    Create a Memorable Family Moment!

    This recipe is so simple and delicious that asking the kids to join in can create a fantastic summer memory for them. Engaging kids in the process of making popsicles can be a wonderfully enjoyable and educational experience. They can learn about flavours, textures, measuring, and the science of freezing — all while having a great time.

    Looking for more frozen popsicle ideas? Try our Matcha Green Tea Popsicles or the vibrant Blueberry Lemonade Popsicles. Both are just as easy and kid-approved.

    Frequently Asked Questions

    Can I skip the pansy flowers?

    Yes, absolutely. The pansy flowers are purely decorative and do not affect the flavour. These popsicles taste just as delicious without them. If you want to add a floral element, edible violets or lavender buds also work beautifully.

    Why is my cucumber popsicle icy instead of smooth?

    An icy texture usually means there is too much water and not enough dissolved sugar or fat in the mixture. Make sure to measure the sugar accurately and blend thoroughly. Adding a small amount of xanthan gum (1/4 tsp) can also help prevent large ice crystals from forming.

    How do I get the flowers to stay pressed against the side of the mold?

    Fill the mold about halfway with the cucumber mixture first. Press the flowers gently against the inside walls, then slowly fill the rest of the mold. The liquid holds them in place as it freezes. A chopstick or skewer helps position them precisely.

    Can I use a blender instead of a juicer?

    Yes, a blender works perfectly for this recipe. Blend on high for about 15 seconds until completely smooth. If you prefer a pulp-free popsicle, strain the blended mixture through a fine mesh sieve before pouring into the molds.

    How long do cucumber popsicles last?

    Stored in an airtight container or individually wrapped in plastic wrap, these popsicles keep well in the freezer for up to 6 weeks. After that, the flowers may start to discolour and the flavour will begin to fade.

    Can I substitute something for sugar?

    Yes. Agave nectar dissolves easily and works very well in cold preparations like this. Honey also works but adds a slight honey flavour that competes with the cucumber. Use the same quantity as the sugar called for in the recipe.

    Cucumber crush popsicles laid on ice with mint and cucumber slices

    Cucumber Crush Popsicles

    Experience the cool, refreshing Cucumber Crush Popsicles made with fresh cucumbers, lime, mint, sugar, and pansy flowers, it is absolutely gorgeous and refreshing. 
    Prep Time 15 minutes
    6 hours
    Total Time 6 hours 15 minutes
    Servings: 10 popsicles
    Course: Dessert
    Calories: 55

    Ingredients
      

    • 1 cucumber
    • ¼ cup lime juice
    • ⅓ cup sugar
    • 15-20 pedals pansy flower
    • 2 cups water

    Equipment

    • high speed blender

    Method
     

    1. Cut the ends of the cucumber. Split it in half and take the seeds out.
    2. Finely chopped the mint and set aside.
    3. Add the cucumber, lime juice, sugar and water. Blend on high for 15 seconds. Stir the mint leaves into the mixture.
    4. Pour the mixture into your popsicle moulds and freeze until solid for 6 hours or overnight.
  • Easy Blueberry Ice Cream

    Easy Blueberry Ice Cream

    When summer’s heat beckons, what better way to cool down than with a scoop of homemade blueberry ice cream? Bursting with vibrant hues and a delightful blend of sweet and floral flavours, this blueberry ice cream is an exquisite treat that captures the essence of the season. The best part? No artificial colouring, no mystery ingredients — just real blueberries, cream, and a squeeze of lemon.

    This post may contain affiliate links. If you purchase through these links, I may earn a small commission at no extra cost to you. Thank you for supporting Love & Harvest!

    Scoops of purple blueberry ice cream in a loaf pan with fresh blueberries

    An Explosion of Flavour

    The first taste of blueberry ice cream is a revelation — an explosion of flavour that harmonizes the richness of cream with the bright tanginess of blueberries. The subtle tartness of the berries balances perfectly with the creaminess, creating a symphony on your taste buds. Whether enjoyed in a crispy waffle cone or a delicate dish, this frozen creation is a celebration of summer.

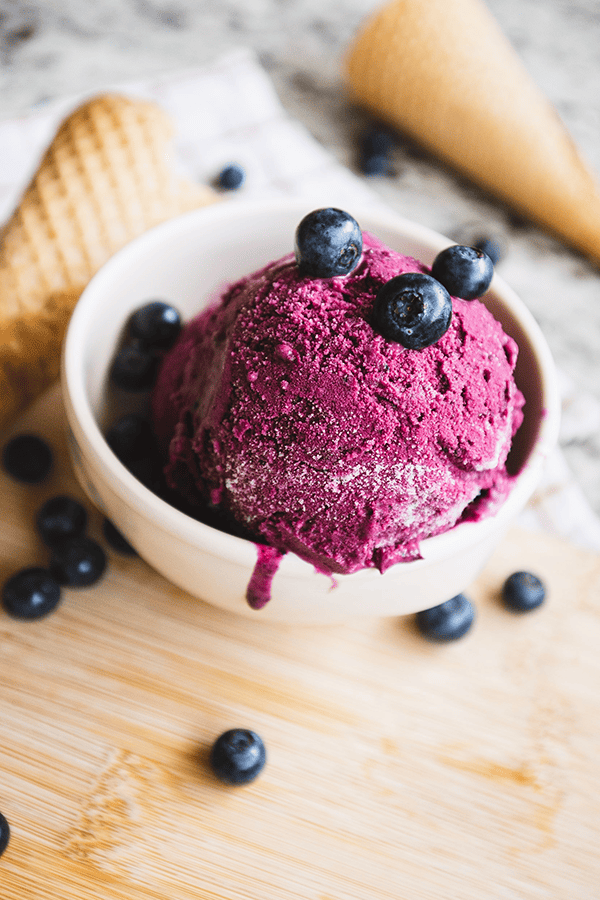
    Bowl of blueberry ice cream topped with fresh blueberries next to waffle cones

    Blueberry Ice Cream Pairing

    This easy blueberry ice cream pairs beautifully with a variety of complementary flavours. Here are some wonderful pairing ideas:

    • Cherry Syrup — drizzle a spoonful of homemade cherry syrup over a scoop of blueberry ice cream for a stunning berry-on-berry contrast.
    • Dark Chocolate — the combination of creamy blueberry ice cream and decadent chocolate creates a luxurious and irresistible dessert. Try it with a triple chocolate brownie!
    • Mango Sorbet — the vibrant tropical flavours of Fresh Mango Sorbet harmonize beautifully with the sweet and tangy blueberry ice cream. We also have a Chili Mango Sorbet if you want something with a kick!

    A hand holding a waffle cone of blueberry ice cream

    Blueberry Flavour

    Blueberry ice cream is a magical symphony of flavours. As you take your first spoonful, the velvety smoothness of the ice cream caresses your palate. Then, the subtle floral notes of the blueberries gradually unfold, complementing the rich creaminess in a way that feels absolutely divine. The balance between sweet and tart creates a harmonious melody that leaves you craving more.

    A hand holding a double scoop of blueberry ice cream in a waffle cone

    Why Churn Instead of High-Speed Blending

    To achieve the perfect texture and flavour, blueberry ice cream undergoes a meticulous churning process. Freshly picked blueberries are gently cooked down to release their natural juices and concentrated flavours.

    The resulting vibrant blueberry puree is then swirled into a creamy base, crafted from a combination of milk, cream, sugar, and a touch of lemon juice. The mixture is churned slowly, allowing air to incorporate, resulting in a light and velvety ice cream that melts effortlessly on the tongue.

    The ice cream maker I’ve been using for the past 10 years is the Cuisinart Ice Cream Maker Machine. I had one in Canada and loved the compact size and reliable performance. Now that we are living in Mexico, I bought the same model and they still haven’t changed the machinery in 20 years!

    Blueberry ice cream churning in an ice cream machine

    Why I Love Homemade Ice Cream

    • Control the sugar content in each scoop
    • Great way to use seasonal summer fruits
    • Easy recipe for kids to follow and tons of fun!
    • A great way of making homemade frozen treats
    • An infinite avenue for creativity

    Saucepan full of fresh blueberries

    Ingredients

    Five simple ingredients. That’s all it takes.

    Fresh or Frozen Blueberries

    Use the freshest blueberries you can find. Frozen blueberries work well too and can actually produce a deeper colour.

    • Why it matters: Blueberries are the star of this recipe. Cooking them down first concentrates their flavour and releases the deep purple pigment that gives this ice cream its beautiful colour. Do not skip the cooking step — raw blueberries blended into cream taste flat by comparison.

    Sugar

    Plain granulated white sugar keeps the flavour clean and lets the blueberry shine.

    • Why it matters: Sugar does more than sweeten — it also lowers the freezing point of the mixture, which keeps the ice cream scoopable at freezer temperature. Reducing the sugar significantly will result in a rock-hard, icy product.

    Cream

    Use heavy whipping cream (35% fat or higher) for the richest result.

    • Why it matters: Fat is what makes ice cream creamy rather than icy. The fat molecules interfere with ice crystal formation during churning, creating a smooth, velvety texture. Substituting with half-and-half or whole milk alone will produce a noticeably icier result.

    Milk

    Whole milk balances the richness of the cream and lightens the texture slightly.

    • Why it matters: A pure cream base would be too heavy and buttery. The milk thins it to the ideal consistency for churning and creates that classic ice cream “scoop” texture that holds its shape without being too dense.

    Fresh Lemon Juice

    Just one teaspoon added while the machine is churning.

    • Why it matters: Lemon juice brightens the blueberry flavour and prevents the colour from turning muddy purple-grey. The acid also balances the sweetness and gives the ice cream a more complex, layered taste.

    How to Make This Easy Blueberry Ice Cream

    Making homemade blueberry ice cream is a delightful and rewarding process. First, we wash the blueberries and coat them with some sugar. We heat a large saucepan over medium heat and slowly cook the blueberries to release the juice and concentrate the flavour. After 5 minutes, I use a potato masher to mash the blueberries and simmer for another 10 minutes. Turn the heat off.

    Let the blueberry mixture cool on the side. Meanwhile, combine the cream and milk together. Once the blueberry mixture is cool to room temperature, blend it in a high-speed blender until smooth. Then pour the blueberry liquid into the cream. Refrigerate until cold, about 3 hours.

    Lastly, set up the ice cream churner. Pour the blueberry mixture into the machine. While the machine is running, add freshly squeezed lemon juice. It should take around 20-25 minutes. Once churned, transfer the blueberry ice cream to a lidded container, smoothing the surface. Place a piece of parchment paper directly on top to prevent ice crystals from forming, then cover with the lid.

    Loaf pan of blueberry ice cream with a scoop, fresh blueberries and a waffle cone

    Why You Should Make This Blueberry Ice Cream

    Picture this: you get to handpick the juiciest, plump blueberries, ensuring the ultimate freshness and quality. Then, you dive into a world of culinary creativity, customizing the recipe to match your unique taste buds. Want an extra burst of blueberry goodness? Toss in more! And the satisfaction you’ll feel when you scoop that creamy, dreamy homemade blueberry ice cream is out of this world.

    It’s not just about the flavour — it’s about the experience. The laughter, the memories made in the kitchen with loved ones, and that moment of pure bliss when you savour each mouthwatering spoonful. So, grab those blueberries, unleash your inner culinary genius, and let’s dive into frozen dessert perfection.

    A child holding up a waffle cone piled with blueberry ice cream

    View this post on Instagram

    A post shared by Sammi C. | love & harvest (@loveandharvest)

    [tcb-script async=”” src=”//www.instagram.com/embed.js”][/tcb-script]

    Looking for more frozen desserts? Try our Vanilla Bean Ice Cream — a classic that pairs perfectly with just about everything.

    Frequently Asked Questions

    Do I need an ice cream maker to make this recipe?

    Yes, this recipe is designed for an ice cream maker. If you don’t own one, you can try a no-churn method: whip the cream to soft peaks separately, fold in the cooled blueberry puree gently, and freeze in a lidded container. Stir vigorously every 30 minutes for the first 3 hours to break up ice crystals. The texture won’t be as smooth, but it will still be delicious.

    Can I use frozen blueberries instead of fresh?

    Yes. Frozen blueberries work very well in this recipe since you are cooking them down anyway. They can actually produce a more intense purple colour than fresh blueberries. There is no need to thaw them first — just add them directly to the saucepan with the sugar.

    Why did my ice cream turn out icy instead of creamy?

    The most common causes are: the mixture was not cold enough before churning (it needs to be thoroughly chilled — at least 3 hours), the cream-to-milk ratio was off, or the churn time was too short. Make sure the ice cream maker bowl is fully frozen (at least 24 hours) before use.

    How long does homemade blueberry ice cream last?

    Stored in an airtight freezer-safe container with parchment pressed directly on the surface, this ice cream keeps well for up to 2 weeks before ice crystals begin to form. After the first week, the texture is best if you let it sit at room temperature for 3-5 minutes before scooping.

    Can I make this ice cream dairy-free?

    Yes. Substitute the milk and cream with full-fat coconut cream (two cans). The result will be a slightly coconutty, tropical blueberry ice cream that is absolutely delicious. Oat cream also works and has a more neutral flavour if you want to keep the pure blueberry taste front and centre.

    How do I prevent freezer burn on homemade ice cream?

    Press a sheet of plastic wrap or parchment paper directly onto the surface of the ice cream before putting the lid on. This eliminates the air gap between the ice cream and the container lid — the air gap is what causes freezer burn. A tight-fitting lid is also essential.

    A hand holding a double scoop of blueberry ice cream in a waffle cone

    Easy Blueberry Ice Cream

    Bursting with vibrant hues and a delightful blend of sweet and floral flavours, blueberry ice cream is an exquisite treat that captures the essence of the season.
    Prep Time 20 minutes
    Cook Time 25 minutes
    Chill & Freeze 11 hours
    Total Time 11 hours 45 minutes
    Servings: 8 people
    Course: Dessert
    Cuisine: American
    Calories: 230

    Ingredients
      

    • 3 cups fresh or frozen blueberries
    • 1 cup sugar
    • 3 cups milk
    • 1 cup cream
    • 1 tsp fresh lemon juice

    Equipment

    • ice cream churner
    • potato masher

    Method
     

    1. Rinse the blueberries from a running facet. Lay the blueberries on a kitchen towel and lightly toss it to dry them. Add the blueberries in a large bowl and toss it with sugar. Heat a large saucepan over medium heat and slowly cook the blueberries to release the juice and concentrate the flavour. After 5 minutes, use a potato mash and mash the blueberries to release their flavour and simmer for another 10 minutes. Turn the heat off.
    2. Let the blueberry mixture cool on the side. Meanwhile, combine the cream and milk together. Once the blueberry mixture is cool to room temperature, blend it in a high-speed blender until smooth. Then pour the blueberry liquid into the cream. Refrigerate until it is cold, about 3 hours. 
    3. Set up the ice cream churner and turn it on according to the manufacturer's instructions. Pour the blueberry mixture into the machine. While the machine is running add a freshly squeezed lemon juice. It should take around 20-25 minutes. 
    4. Transfer ice cream to a freezer-safe container and freeze until solid. About 8 hours.
  • Vanilla Bean Ice Cream

    Vanilla Bean Ice Cream

    There is a reason homemade vanilla bean ice cream tastes nothing like the store-bought version. Those tiny black specks of real vanilla seeds, the richness of a custard base made with fresh egg yolks and heavy cream — this is the real thing. And with an ice cream machine doing most of the work, you only need about 20 minutes of hands-on time before it churns itself into something extraordinary.

    This post may contain affiliate links. If you purchase through these links, I may earn a small commission at no extra cost to you. Thank you for supporting Love & Harvest!

    A hand holding a scoop of vanilla bean ice cream above the container

    It is almost impossible to believe that with just a few key ingredients, you can make such a delicious dessert. The machine I use to churn my ice cream is the Cuisinart Ice Cream Maker. I have been using this for years and it has never failed me. It is the best ice cream machine for home use and the results are consistently perfect.

    If you are looking to make a simple gourmet ice cream at home, this is the recipe for you. All you need is sugar, whole milk, heavy cream, a vanilla bean, and egg yolks.

    Ice cream scoop resting in a loaf pan of vanilla bean ice cream

    We love serving this ice cream with Cinnamon Rolls with Rompope Frosting or Triple Chocolate Fudgy Brownies.

    If vanilla ice cream feels too basic and you want something packed with flavour and texture, try our Salted Caramel Pecan Ice Cream. It is honestly to die for. Or go lighter with our Easy Blueberry Ice Cream.

    Scooping vanilla bean ice cream from a dark loaf pan

    Ingredients

    Key Ingredients

    Vanilla Bean

    • Why it matters: Just one Grade B vanilla bean is enough to bring this ice cream to life. Use the back of a knife to scrape out all the seeds. If you do not have vanilla beans, substitute with 1 tablespoon of pure vanilla extract or vanilla bean paste. The paste is a great middle ground — affordable and loaded with real vanilla seeds.

    Heavy Cream

    • Why it matters: Heavy cream (also called whipping cream) is a must for homemade ice cream. The high fat content creates the smooth, velvety texture that makes this dessert feel luxurious. Do not substitute with light cream or milk — the texture will suffer. You can froth it before adding for extra airiness using a milk frother.

    Egg Yolks

    • Why they matter: Using egg yolks in the ice cream mixture creates a richer and fuller custard base. This is literally the ingredient that takes you from average ice cream to gourmet-level flavour. The yolks must be cooked to 165°F to eliminate bacteria — never skip this step.

    Whole Milk

    • Why it matters: Whole milk contributes to texture and flavour. I recommend full-fat whole milk only. Low-fat or lactose-free milk does not create the same airy ice crystals during churning.

    Foods to Pair with Vanilla Ice Cream

    • Pie (pecan, apple, strawberry, rhubarb, chocolate)
    • Cake (chocolate cake, fruit cake, pound cake)
    • Sundaes (with strawberry, chocolate syrup, candies, nuts)
    • Loaves (banana, chocolate chip, pecan, blueberry, cherry)
    • Tarts (apple, blackberry, peach, guava, Nutella)
    • Cookies (ginger, chocolate chip, macadamia)

    Professional Vanilla Ice Cream Tips

    Pro Tip #1 – Completely Freeze Your Ice Cream Bucket

    There is nothing more frustrating than churning your ice cream only to realize the bucket is not cold enough to freeze it properly. Freeze the bowl overnight — at least 12 hours. This guarantees a successful result every time.
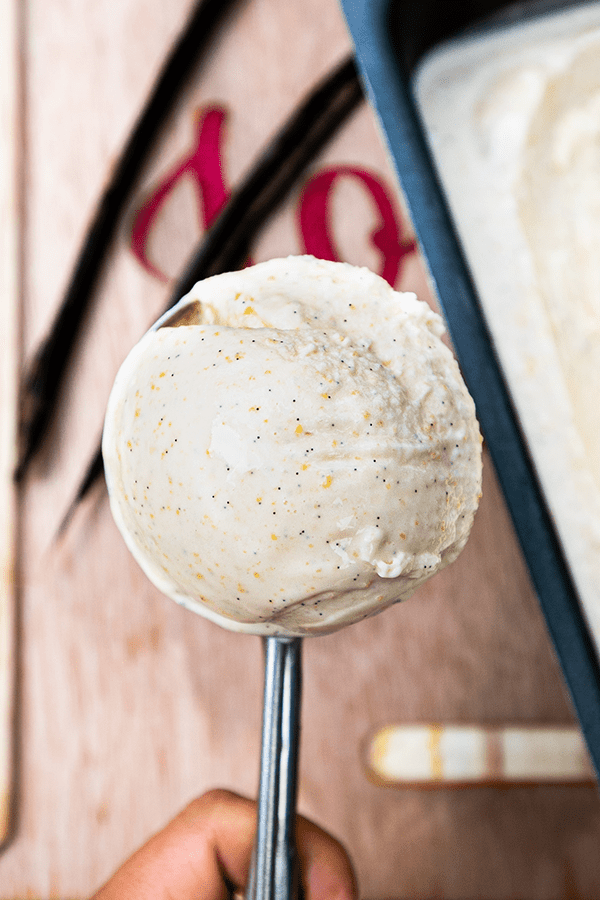
    Pro Tip #2 – Cook the Vanilla Ice Cream Mixture

    We have egg yolks in the recipe and that requires cooking. This step kills any bacteria in the egg. The target temperature is 165°F. Do not let it come to a boil — boiling will scramble the eggs and ruin the custard.

    Pro Tip #3 – A Good Coat on the Back of the Spoon Is Your Signal

    To know if your custard is cooked thoroughly, dip a spoon into the liquid. If it gives a thick, uniform coat that does not run, it is ready. Remove from heat immediately and let it cool to room temperature before chilling.

    Vanilla custard coating the back of a spoon over a bowl, with vanilla pods

    Pro Tip #4 – Cover the Mixture with Plastic Wrap

    When you finish cooking the custard, cool it before placing it in the ice cream bucket. Press a piece of plastic film directly onto the surface of the mixture while it cools. This prevents a skin from forming on top.

    Store your finished ice cream in a dedicated ice cream container for best texture preservation.

    Loaf pan of vanilla bean ice cream with one scoop on top

    Frequently Asked Questions

    Do I need an ice cream machine for this recipe?

    Yes, this recipe is designed for an ice cream machine. The machine churns air into the custard as it freezes, creating the smooth, creamy texture you expect from gourmet ice cream. No-churn methods lack the same texture and flavour depth.

    Can I use vanilla extract instead of a vanilla bean?

    Yes. Substitute the vanilla bean with 1 tablespoon of pure vanilla extract or vanilla bean paste. The paste is the best alternative because it still contains real vanilla seeds and delivers a very similar flavour.

    Why does my ice cream turn icy instead of creamy?

    The most common reasons are: the ice cream bucket was not frozen long enough (freeze at least 12 hours), the custard was not chilled thoroughly before churning, or too much milk and not enough cream was used. Always follow the ratios in this recipe.

    How long does homemade vanilla ice cream last?

    Stored in an airtight container in the freezer, it keeps well for up to 2 weeks. After that, ice crystals start to form and the texture degrades. Press plastic wrap directly on the surface of the ice cream before sealing to minimize crystal formation.

    Why do I need to cook the custard to 165 degrees?

    Raw egg yolks can carry bacteria. Cooking the custard to 165°F eliminates that risk while also thickening the base, which is what gives this ice cream its silky, gourmet texture.

    Can I make this without egg yolks?

    You can, but the result will be less rich and less creamy. Egg yolks are the secret to that gourmet French-style ice cream texture. If you want an egg-free version, increase the heavy cream slightly and add a tablespoon of cornstarch as a thickener.

    Close-up of a scoop of vanilla bean ice cream flecked with vanilla seeds

    Vanilla Bean Ice Cream

    Fresh vanilla bean ice cream is extremely delicious and tastes nothing like your average store-bought artificial flavoured ice cream. With its smooth and velvet-like texture, you can make this with 20 minutes hands-off time! Print Recipe Pin RecipePrep Time:10 minsCook Time:20 minsCourse: DessertKeyword: ice cream, vanilla, vanilla beanServings: 6 people

    Equipment

    • ice cream machine

    Ingredients

    • 4 large egg yolks
    • ¾ cup granulated sugar
    • 1 vanilla bean
    • 1½ cups whole milk
    • 1½ cups heavy cream
    • ½ tsp sea salt

    Instructions

    • In a large non-stick saucepan, heat the pan over medium low heat. Add egg yolks and sugar, and whisk until a light yellow color.
    • In another sauce pan, combine the vanilla bean, whole milk, heavy cream and salt. Combine well. When you see the sides of the sauce pan start to simmer, turn off the heat immediately.
    • Slowly add the milk to egg and sugar mixture, stirring constantly.
    • When the temperature reaches 165°F, remove from heat. Do not let it come to boil.
    • Pour the custard base into a container to reach room temperature. Then add a plastic film on top of the mixture and put it in the fridge for 2 hours or overnight.
    • When the custard base is ready, pour it into your ice cream maker and process according to your ice cream maker's instructions.
  • Salted Caramel Pecan Ice Cream

    Salted Caramel Pecan Ice Cream

    This is not basic ice cream. Salted caramel pecan ice cream is layered with rich, buttery homemade caramel, toasted pecan nuts with a deep roasted flavour, and a silky custard base that tastes absolutely nothing like anything you can buy at a grocery store. It is fall in a scoop — and it consistently steals the show after Thanksgiving dinner.

    This post may contain affiliate links. If you purchase through these links, I may earn a small commission at no extra cost to you. Thank you for supporting Love & Harvest!

    Tub of salted caramel pecan ice cream with a serving spoon

    If you have an ice cream machine, I have the best recipe for you. Nowadays, ice cream parlours charge a lot for real gourmet ice cream, but it is genuinely easy to make at home. Fun fact: did you know Dairy Queen soft serve is 70% air? This recipe is the opposite of that — dense, flavourful, and made with real ingredients you can actually read on the label.

    Try our Vanilla Bean Ice Cream for a classic base, or go bold with our Easy Chocolate Fudge Ice Cream.

    Scoop of salted caramel pecan ice cream on a blue plate

    Why Try This Salted Caramel Pecan Ice Cream

    The taste is unbelievably delicious and packed with textures. The pecan is lightly toasted so you get a darker, richer flavour. Here are a few more reasons to make it:

    • Cheaper — Making gourmet ice cream at home costs a fraction of an ice cream parlour. You are in full control of the ingredients and the quality.
    • It is fun — Watching your ice cream churn is genuinely satisfying. Swirling the caramel into the ice cream with the toasted pecans looks like a masterpiece coming together.
    • Delicious recipe — There are a few more steps compared to simpler recipes, but the result is complex, textured, and tastes like real effort went into it.
    • The perfect fall ice cream — Salted caramel pecan screams fall. This is the dessert to serve after Thanksgiving dinner.

    Ice cream base churning in an ice cream machine

    Why Use an Ice Cream Machine?

    The ice cream machine freezes your base slowly, making small ice crystals that give you a smoother, tastier texture. Many store-bought ice creams are packed with preservatives and air. Making your own means you control exactly what goes in.

    Ingredients

    Key Ingredients

    Heavy Cream

    • Why it matters: Full-fat heavy cream is essential for the rich, luscious texture of this ice cream. For a dairy-free version, swap with coconut cream — it works remarkably well. You can also pick up a Cuisinart Ice Cream Maker if you do not yet have one.

    Pecan Halves

    • Why they matter: The pecan is the textural hero of this recipe. Toast them in a dry pan until fragrant and slightly darkened — the caramelized, roasted flavour is irreplaceable. Buy the best quality pecan halves you can find. Fresh, plump pecans make a noticeable difference.

    Sea Salt Flakes

    • Why they matter: The salt in salted caramel is not just flavour — it is the contrast that makes every bite more interesting. Use quality Maldon sea salt flakes for the best result. The flaky texture dissolves differently than table salt and delivers a cleaner, brighter hit of salt in the caramel.

    Egg Yolks

    • Why they matter: Four egg yolks transform the ice cream sauce into a proper custard. This is what gives the base its ultra-smooth, silky texture. Save the egg whites for meringue or breakfast.

    Wooden bowl of toasted pecans and mixed nuts

    Professional Tips

    Pro Tip #1 – Use an Ice Cream Machine

    This recipe will not work in a high-speed blender. The churning process is what creates the smooth texture. If you love frozen treats, the Cuisinart Ice Cream Maker is a great investment that pays for itself quickly.

    Pro Tip #2 – Get Everything Ready Before You Start

    This recipe has three components — caramel sauce, ice cream custard, and toasted pecans. Read the full recipe first and prepare everything in order so you are not scrambling between steps.

    Pro Tip #3 – Freeze in a Clear Container

    Store the finished ice cream in a clear container with a lid so you can easily identify it in the freezer. A dedicated ice cream container also helps maintain the right texture by limiting air exposure.

    Container of salted caramel pecan ice cream with a scoop taken out

    Frequently Asked Questions

    Do I need an ice cream machine for this recipe?

    Yes. The churning process is essential for the smooth, gourmet texture of this ice cream. A blender-based no-churn version will not produce the same result. See our guide to the best ice cream makers if you need a recommendation.

    Can I make this ice cream dairy-free?

    Yes. Swap the heavy cream with full-fat coconut cream and the whole milk with your preferred nut milk — cashew or oat milk work best. The texture will be slightly different but still very good.

    How do I know when the caramel is ready?

    The sugar will melt and turn a deep amber colour. Once all the sugar is dissolved and the liquid is amber, add the butter immediately. The caramel is done when the butter is fully incorporated and the sauce is smooth and glossy.

    Why is my caramel grainy?

    Grainy caramel usually means the sugar crystallized during cooking. Avoid stirring the sugar once it starts melting — just swirl the pan gently instead. Also make sure no sugar crystals on the sides of the pan fall back into the caramel.

    How long does this ice cream last in the freezer?

    Up to 2 weeks when stored in an airtight container. Press plastic wrap directly onto the surface of the ice cream before sealing to prevent ice crystal formation.

    Can I skip the pecan extract?

    Yes. The real toasted pecans carry most of the flavour. The extract adds extra depth but the ice cream is still excellent without it. Pure vanilla extract alone works perfectly.

    Close-up of salted caramel pecan ice cream with caramel swirls

    Salted Caramel Pecan Ice Cream

    Delicious gooey full flavoured pecan ice cream! Rich nutty-flavoured ice cream swirled together with some salted caramel and roasted pecan nuts. Print Recipe Pin RecipePrep Time:30 minsCook Time:25 minsCourse: DessertKeyword: pecan ice cream, salted caramel

    Equipment

    • ice cream machine

    Ingredients

    Salted Caramel

    • ¾ cup cane sugar
    • 5 tbsp butter room temperature
    • ½ cup heavy cream
    • 1 tsp vanilla
    • 1½ tsp sea salt

    Ice Cream Sauce

    • 1½ cup heavy cream
    • 1½ cup whole milk
    • ½ cup sugar
    • ½ tsp sea salt
    • 1 tsp vanilla
    • 1 tsp pecan extract
    • 4 egg yolks

    Pecan

    • ¼ cup chopped pecan

    Instructions

    Caramel Sauce

    • In a medium sauce pan, add the sugar to the pan on medium high heat. Move the sugar around the sauce pan and eventually the sugar will start to melt. Using a metal whisk, move the liquid around for 3 minutes until the sugar is dissolved.
    • Cut the butter into small pieces and add it to the sugary liquid. Whisk the butter and sugar liquid together until fully incorporated. Then add the cream and vanilla. Whisk until the mixture comes together.
    • Divide the caramel into two equal heat-proof bowls. Divide the salt and place it on top of the caramel. Set to the side to cool.

    Ice Cream Sauce

    • In a large sauce pan, heat the heavy cream, milk and sugar on medium heat. Once the liquid starts to boil, whisk in the salt, vanilla, and pecan extract. Take off the heat.
    • In a separate bowl, separate the egg yolk and egg white.
    • While whisking the hot milk liquid, slowly add the egg yolk and vigorously whisk the egg yolk into the warm liquid. Keep whisking until the egg yolk is completely incorporated into the liquid. Put the pan back on the heat on low heat and simmer for 3 minutes.
    • Add one of the bowls of caramel into the liquid and keep whisking it. Simmer for another 3 minutes.
    • Take the liquid off the heat, and scrape it to a heat proof bowl. Let the liquid cool completely to room temperature and place it in the fridge for 5 hours or overnight.

    Pecan

    • In a sauce pan on medium high heat, toast the pecans until brown and fragrant. Set aside to cool.

    Salted Caramel Pecan Ice Cream

    • Plug in the ice cream machine and insert the freeze bowl into the machine.
    • Have all three ready: caramel sauce, ice cream sauce, and toasted pecans.
    • Turn on the machine and first add the ice cream liquid into the freezer bowl. Then add the toasted pecans. The machine will churn the liquid into ice cream in 25-30 minutes.
    • Meanwhile, take your ice cream vessel out. Put ⅓ of the caramel at the bottom of the vessel.
    • Once the ice cream is done, scoop ⅓ of the ice cream into the vessel along with the caramel. Alternate between the caramel and ice cream until finished. Place the ice cream into the freezer for 3 hours before serving.