Category: fish recipes

  • Ricotta Cheese Salmon Roll

    Ricotta Cheese Salmon Roll

    When we’re not craving our usual panko-crusted baked salmon, this Ricotta Cheese Salmon Roll takes the spotlight. It’s soft, juicy, and packed with fresh flavors—perfect for when you want something elegant but easy. Rolled with creamy ricotta, wilted spinach, and a splash of lemon juice, this dish feels like a quiet celebration on a plate.

    This post may contain affiliate links. If you purchase through these links, I may earn a small commission at no extra cost to you. Thank you for supporting Love & Harvest!

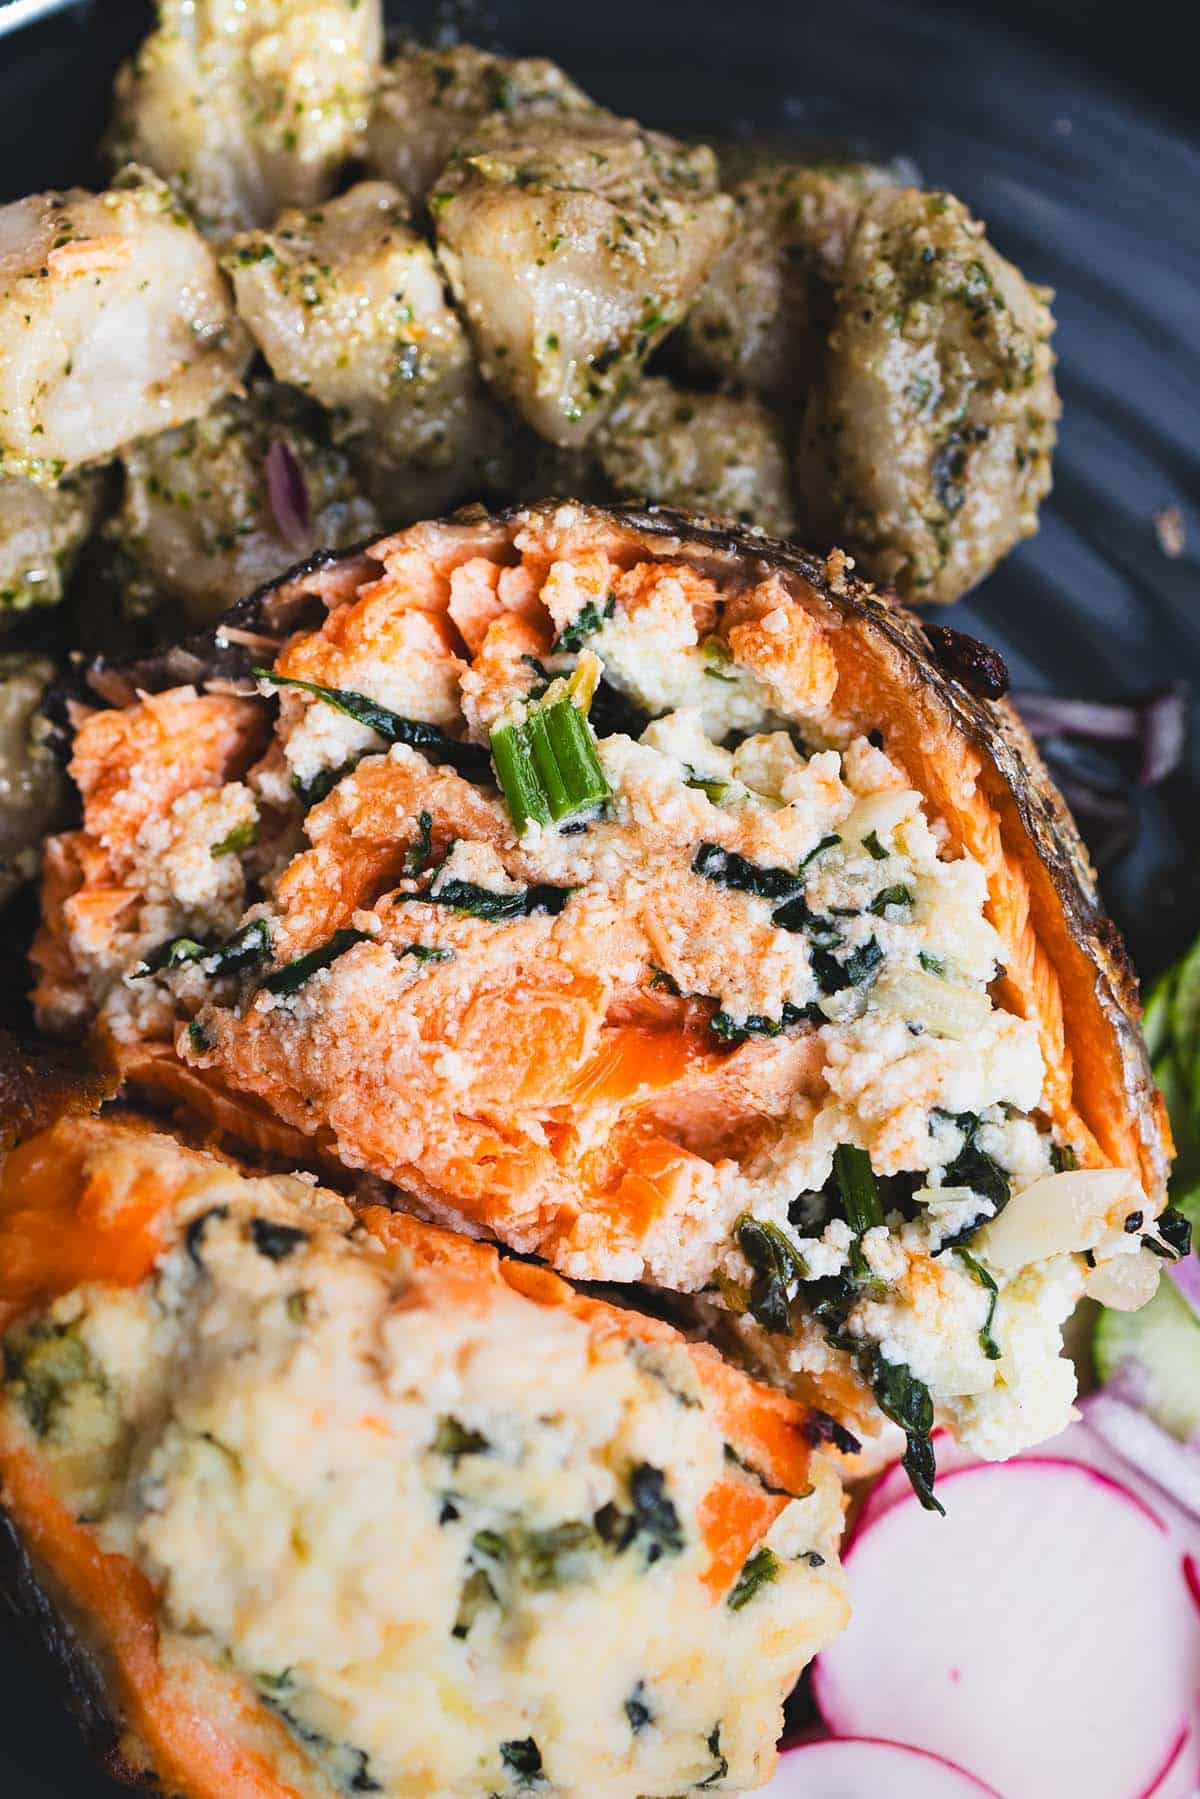
    Ricotta salmon roll cut open to show the spinach and cheese filling

    Flavour

    This salmon roll is tender and fragrant. As it bakes, the ricotta melts into the fish, keeping it moist and buttery, while the spinach and lemon cut through with a light, green brightness. The aroma? It’ll fill your kitchen with something that smells halfway between comfort food and a fine dining entrée.

    It’s that perfect balance—creamy, citrusy, savoury, and soft—all in one satisfying bite.

    Easy Salmon Meal

    What we love most: it’s not complicated.

    All you do is lay out a salmon fillet, spread a layer of seasoned ricotta, top with sautéed spinach, and finish with a little lemon juice. Roll it up, secure with toothpicks or twine, and bake. That’s it.

    You don’t need breadcrumbs, crusts, or a million steps—just clean ingredients and a hot oven.

    This is a go-to on busy nights or when we want to impress without working too hard. Even better: it feels light, so you don’t end dinner feeling weighed down.

    Baked salmon roll with crisp skin and a ricotta and spinach filling

    Favourite Summer Meal

    We especially love this recipe during the warmer months. It’s fresh, light, and doesn’t require standing over the stove for too long. Paired with a crisp white wine or sparkling water with lemon, this salmon roll becomes a breezy summer dinner that feels special without the extra effort.

    It’s one of those meals that works just as well for a quiet dinner on the patio as it does for hosting friends—and it always disappears fast.

    Slices of ricotta salmon roll served with a side on a black plate

    Main Ingredients

    Ingredients

    Salmon Fillet

    • Skin on and wide enough to roll — this is your canvas. Fresh, wild-caught salmon gives the best flavor and the most omega-3s. The fillet needs to be thin enough to roll without breaking; ask your fishmonger to butterfly it if needed.

    Ricotta Cheese

    • Preferably full-fat for creaminess — it’s what keeps the salmon moist as it bakes and creates that lush, creamy filling. Whole milk ricotta is the gold standard here; low-fat versions can make the filling watery.

    Fresh Spinach

    • Sautéed or wilted slightly before adding. Raw spinach contains too much water — wilting it first prevents the filling from becoming soggy. Season with a tiny pinch of nutmeg for an Italian-inspired touch.

    Lemon Juice

    • For brightness and balance. The acidity cuts through the richness of the ricotta and salmon, lifting the whole dish. Zest a little lemon into the ricotta filling for even more citrus impact.

    Fresh Herbs (Optional)

    • Dill or flat-leaf parsley work beautifully. Dill has a natural affinity with salmon and amplifies the Nordic-meets-Italian vibe of this dish. Add to the ricotta filling or scatter on top before serving. You’ll also want a silicone spatula for spreading the ricotta evenly across the fillet.

    Why We Love This Recipe

    • It’s juicy, flavorful, and wholesome

    • You only need a few fresh ingredients

    • It has no gluten-containing ingredients, and it’s versatile

    • It’s one of those meals that looks fancy but is actually simple

    • It gives our salmon rotation a nice little upgrade—especially when we’re not in the mood for crunchier crusts like panko. Speaking of which, if you’re in a crunchier mood, our crispy panko-crusted baked salmon or our delicate homemade sashimi are both worth exploring.

    Ricotta salmon roll sliced open on a dark plate with radishes

    Frequently Asked Questions

    What cut of salmon is best for rolling?

    A wide, thin salmon fillet works best — ideally at least 6 inches wide so it can be rolled without cracking. Ask your fishmonger for a side fillet and have them skin and butterfly it. Atlantic or sockeye salmon both work well, though sockeye has a more vibrant color and slightly firmer texture.

    Can I make this in the air fryer?

    Yes! We actually love making this in our air fryer oven. Cook at 375°F (190°C) for about 18–22 minutes, checking at 18 minutes. The outside gets a lovely light golden color while the inside stays juicy. Just make sure the roll is secured well with toothpicks before placing in the air fryer basket.

    How do I keep the salmon roll from falling apart?

    Two tips: first, pat the salmon very dry before adding the filling — moisture is the enemy of a tight roll. Second, secure the roll with wooden toothpicks or kitchen twine at 1-inch intervals before baking. Remove all toothpicks before serving.

    Can I prepare this recipe ahead of time?

    You can assemble the roll up to 4 hours ahead and refrigerate it covered. Just bring it to room temperature for 10 minutes before baking for even cooking. Don’t add the lemon juice until just before baking to avoid breaking down the fish texture.

    What sides pair well with ricotta salmon roll?

    We love it with roasted baby potatoes, a simple arugula salad with lemon vinaigrette, or steamed asparagus. For a lighter option, a cucumber and dill salad keeps everything fresh and bright. A glass of chilled white wine — Pinot Grigio or Sauvignon Blanc — is the perfect accompaniment.

    Fresh seafood stuffed salmon with herbs and vegetables, served with roasted baby potatoes and a side of radishes.

    Ricotta Cheese Salmon Roll

    This salmon roll is tender and fragrant. As it bakes, the ricotta melts into the fish, keeping it moist and buttery, while the spinach and lemon cut through with a light, green brightness. The aroma? It’ll fill your kitchen with something that smells halfway between comfort food and a fine dining entrée.
    It’s that perfect balance—creamy, citrusy, savoury, and soft—all in one satisfying bite.
    Prep Time 20 minutes
    Cook Time 35 minutes
    Total Time 55 minutes
    Course: Main Course
    Cuisine: Greek, Mediterranean
    Calories: 310

    Ingredients
      

    • 1 large skin on salmon fillet (about 1 to 1.5 lbs) – wide and even thickness skinless fillet is a good option too
    • 1 cup ricotta cheese (preferably full-fat)
    • 1 cup fresh spinach, wilted or lightly sautéed
    • 1 tbsp lemon juice
    • 1 garlic clove, finely minced (optional)
    • salt and pepper to taste

    Method
     

    1. Preheat oven to 375°F (190°C).
    2. Lay the salmon fillet flat on a cutting board. If it's thick, you can butterfly it slightly or pound it gently with a meat mallet to even out the thickness for easier rolling.
    3. In a small bowl, combine the ricotta, wilted spinach, lemon juice, optional zest, garlic, salt, and pepper.
    4. Spoon and gently spread the ricotta mixture evenly over the salmon, leaving about ½ inch around the edges.
    5. Starting from one of the shorter sides, carefully roll the salmon into a log. Use toothpicks or kitchen twine to hold it together. I used twine to hold everything together.
    6. Lightly brush the outside of the roll with olive oil. Sprinkle with a little more salt and pepper.
    7. Place the salmon roll seam-side down in a baking dish lined with parchment paper. Bake for 20–25 minutes, or until salmon is cooked through and flakes easily with a fork.
    8. Let it rest for 5 minutes before removing toothpicks or twine. Slice into 1-inch rounds and serve warm.

    Notes

    • Serve with roasted vegetables, a fresh salad, or garlic mashed potatoes. We like to eat it with a light salad and pesto gnocchi.
    • Drizzle with a little extra lemon juice or a light herb sauce if you want to dress it up.
  • West Coast Jambalaya – No Pork

    West Coast Jambalaya – No Pork

    A hearty, soul-warming jambalaya inspired by a rainy day in Tofino, British Columbia — made without pork or sausage but packed with all the smoky, spicy depth you expect. One pot, big flavour, ready in 45 minutes.

    This post may contain affiliate links. If you purchase through these links, I may earn a small commission at no extra cost to you. Thank you for supporting Love & Harvest!

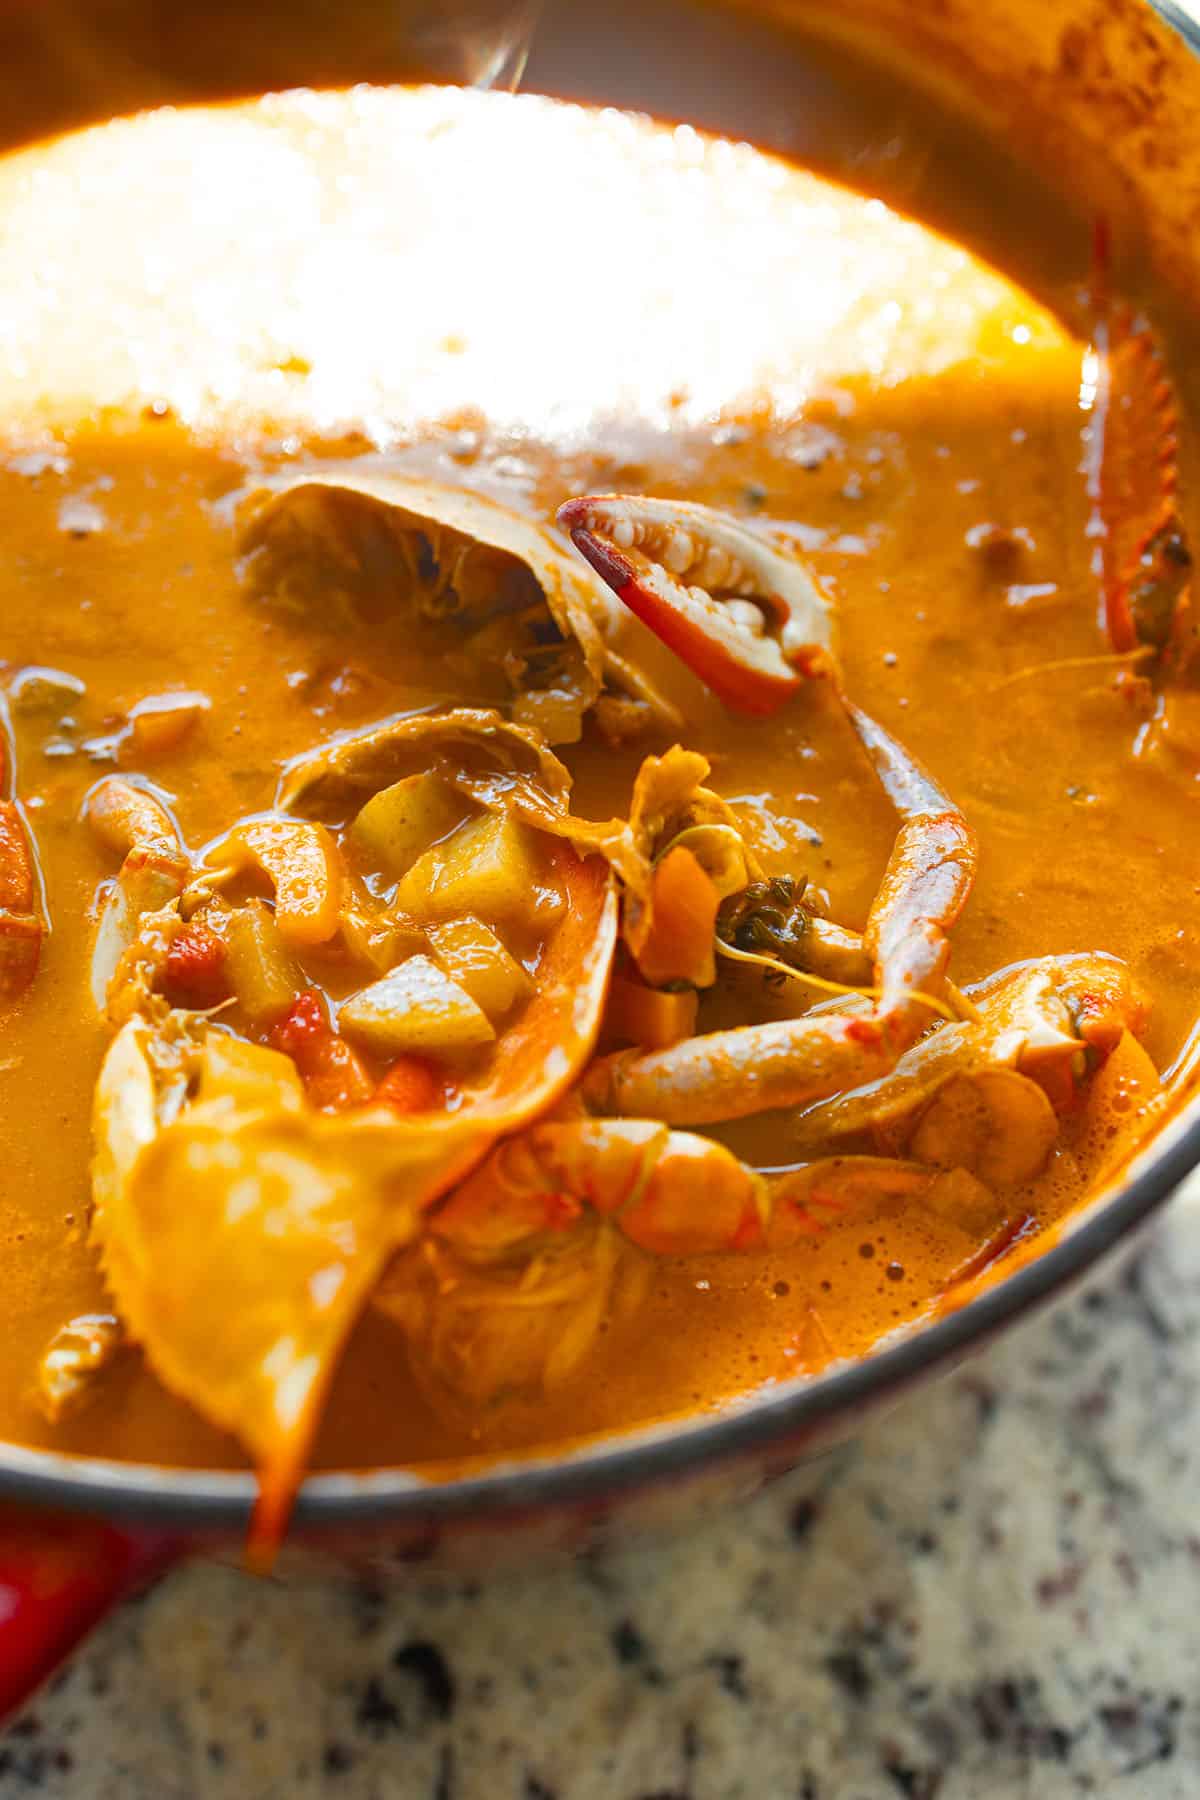
    Fresh seafood crab dish with vibrant vegetables in a rich, flavorful sauce.

    West Coast Best Coast

    It was a cold and rainy day in Tofino, British Columbia, where the Pacific Rim’s rugged coastline meets the endless stretch of ocean. I had just finished a morning of surfing, shivering and soaked, when I stumbled upon a small food stand with steam rising into the misty air. Their special of the day? Jambalaya.

    As I wrapped my hands around the steaming bowl, the first bite hit me like a warm hug. It was savoury, spicy, and jam-packed with flavour. Each spoonful was a revelation — the perfect blend of tender chicken, shrimp, and spices nestled in a bed of rice, all swimming in a deeply seasoned broth.

    Replicate Time

    I went back to that food stand three more times during my trip, determined to savour every detail and unlock its secrets. Back home, I worked tirelessly to recreate that magical experience. This recipe is my replica of their soulful jambalaya. It’s rich and hearty, perfect for those who can’t eat pork. Instead of using chorizo sausages, I’ve added all the spices that give chorizo its distinctive flavour directly into the soup.

    Crab pieces in an orange, tomato-based jambalaya sauce

    Why You Should Try This Recipe

    If you love hearty, one-pot meals that explode with flavour, this easy jambalaya is for you. It’s a crowd-pleaser, perfect for feeding a hungry family or impressing friends at a casual dinner. The mix of smoked paprika, fresh herbs, and a kick of cayenne brings the Louisiana bayou straight to your kitchen. Best of all, it’s ready in about 45 minutes.

    Ingredients

    Smoked Paprika

    • The backbone of the jambalaya spice blend — adds a deep, woody smokiness that mimics the complexity of pork sausage without any meat. Use a good-quality Carbon Steel Wok to toast it briefly and amplify the flavour.

    The Holy Trinity (Onion, Celery, Bell Pepper)

    • The Creole foundation of flavour. These three aromatics build the savoury base that every jambalaya depends on. Chop them uniform so they cook evenly and melt into the broth.

    Crab & Shrimp

    • West Coast proteins that replace pork completely. Crab adds sweet briny depth while shrimp cooks quickly and stays tender. Add shrimp in the final 5 minutes to avoid overcooking.

    Long-Grain Rice

    • Absorbs all the spiced broth as it cooks, making every grain flavour-packed. Do not stir once added — let it steam undisturbed for the best texture.

    Savory crab stew with rich, flavorful broth and tender crab meat. Perfect comfort food from Love & Harvest.

    Flavours of Jambalaya

    Jambalaya is all about balance. The smoky, spicy flavours of the sausage spices set the tone, while tender chicken and shrimp add heartiness. Aromatics like onion, celery, and bell peppers — known as the “Holy Trinity” of Creole cooking — form the flavourful base. Tomato and chicken broth bring richness, while spices like paprika, thyme, and cayenne create layers of complexity. The rice absorbs all these incredible flavours, tying the dish together.

    For a hearty Instant Pot chili with similar bold spices, or our Beer Batter Fish and Chips for another West Coast seafood favourite. You might also love this One Pot Lemon Garlic Chicken for an easy weeknight alternative.

    Grab a good Lodge Dutch Oven 5qt for the best one-pot results, and use a Lodge 12″ Cast Iron Skillet to sear your proteins first for deeper flavour.

    Frequently Asked Questions

    Can I make this jambalaya without seafood?

    Yes! You can substitute chicken thighs for the crab and shrimp. Cut into 1-inch pieces and brown them first before adding your vegetables. The cooking time stays the same.

    What makes this recipe “West Coast” style?

    Traditional Louisiana jambalaya uses pork sausage like andouille as its core protein. This version leans into Pacific Northwest seafood — crab and shrimp — and replaces sausage with a custom spice blend that delivers all the smoky depth without any pork.

    How do I prevent the rice from getting mushy?

    Add the rice after your broth comes to a simmer, reduce the heat to low, and resist stirring. Let it absorb the liquid undisturbed for about 20 minutes. The rice will steam perfectly and stay separate rather than turning starchy.

    Can I freeze leftover jambalaya?

    Yes. Let it cool completely, then freeze in airtight containers for up to 3 months. Reheat on the stovetop with a splash of broth or water to restore the consistency. The seafood may soften slightly after freezing.

    What is Cajun spice and can I make my own?

    Cajun spice is a blend of smoked paprika, garlic powder, onion powder, cayenne, oregano, and thyme. You can absolutely mix your own — combine 2 tsp smoked paprika, 1 tsp garlic powder, 1 tsp onion powder, ½ tsp cayenne, ½ tsp dried thyme, and ½ tsp dried oregano.

    Is this recipe gluten-free?

    Not as written: it uses ½ cup flour. Replace the flour with a 1:1 gluten-free flour blend, and make sure your stock and any sauces you add are labelled gluten-free.

    Crab pieces in an orange, tomato-based jambalaya sauce

    Jambalaya

    Delicous cramy Jambalaya packed with flavours without using pork sausages. Rest
    Prep Time 15 minutes
    Cook Time 1 hour 27 minutes
    Total Time 1 hour 42 minutes
    Servings: 6 people
    Course: Main Course
    Cuisine: American
    Calories: 480

    Ingredients
      

    • 6 tbsp butter
    • 3 small crabs chopped into 4 large pieces
    • 1 large white onion
    • 2 carrots, chopped
    • 2 celery stalk, chopped
    • Jambalaya Spice see "Jambalaya Spice" below
    • 3 clove garlic
    • ½ cup flour
    • 1 cup red whine
    • 1 L stock / water / vegetable stock
    • 5 small potatoes, chopped
    • 1 cup rice
    • 2 fish fillet, cubed into 2"
    • 5 large shrimps head removed and deveined, shells peeled
    • 1 bell pepper, chopped
    • 1 cup heavy cream
    • sea salt
    • black pepper
    Spice
    • 1 tbsp cajan spice
    • dash of ground cinnamon
    • 1 tsp ground Mexican oregano
    • 1 tsp ground cumin
    • 2 tsp ground smoked paprika
    • 5 bay leaf
    • 2 tsp ground bell chile

    Method
     

    1. Heat butter in a large, deep skillet or pot over medium heat. Add the crab pieces and cook until golden on all sides. Remove and set aside.
    2. Add the onion, carrot, and celery to the skillet. Sauté until softened, about 5 minutes. Stir in the jambalaya spice and garlic and cook for another minute.
    3. Add the flour into the skillet and move it around until it clumps and turn brown or it starts to become aromatic. Quickly add the wine and using a whisk, break up the flour clumps. Add the chicken stock.
    4. Return the crabs to the skillet, and add the potatoes and rice. Bring the mixture to a boil, then reduce the heat to low. Cover and simmer for 20-25 minutes, stirring occasionally, until the rice is tender and the liquid is absorbed.
    5. Finally add the shrimp, fish fillet pieces, bell pepper, and heavy cream. Gently mixing them into the rice. Cover and cook for another 15 minutes, or until the shrimp are pink and cooked through. Salt and pepper to your preference.
  • Beer Batter Fish and Chips

    Beer Batter Fish and Chips

    Our beer batter fish and chips is so crispy and golden you will wonder why you have never tried it before — restaurant-quality crunch with tender, flaky fish inside, all made right in your own kitchen with ingredients you likely already have on hand.

    This post may contain affiliate links. If you purchase through these links, I may earn a small commission at no extra cost to you. Thank you for supporting Love & Harvest!

    Golden crispy beer batter fish and chips on a plate.

    Why Beer Batter Makes the Best Fish and Chips

    Beer batter fish and chips takes this traditional dish to the next level, providing a crispy, golden crust that encases tender, flaky fish. The beer in the batter serves multiple purposes:

    1. Crispiness: The carbonation in the beer creates tiny bubbles in the batter, resulting in a light, airy, and exceptionally crispy coating.
    2. Flavour: Beer imparts a subtle malty flavour that enhances the overall taste without overpowering the fish.
    3. Moisture: The beer helps keep the fish moist and tender during frying, ensuring a perfect bite every time.

    Beer Batter vs. Regular Batter

    Traditional fish and chips are typically coated in a simple flour and water batter or seasoned flour. While delicious, they often lack the same level of crunch and depth of flavour that beer batter provides.

    • Effervescence: The bubbles in the beer expand during frying, creating a light and crispy crust.
    • Complexity: The beer adds subtle complexity to the batter, enhancing flavour without being overwhelming.

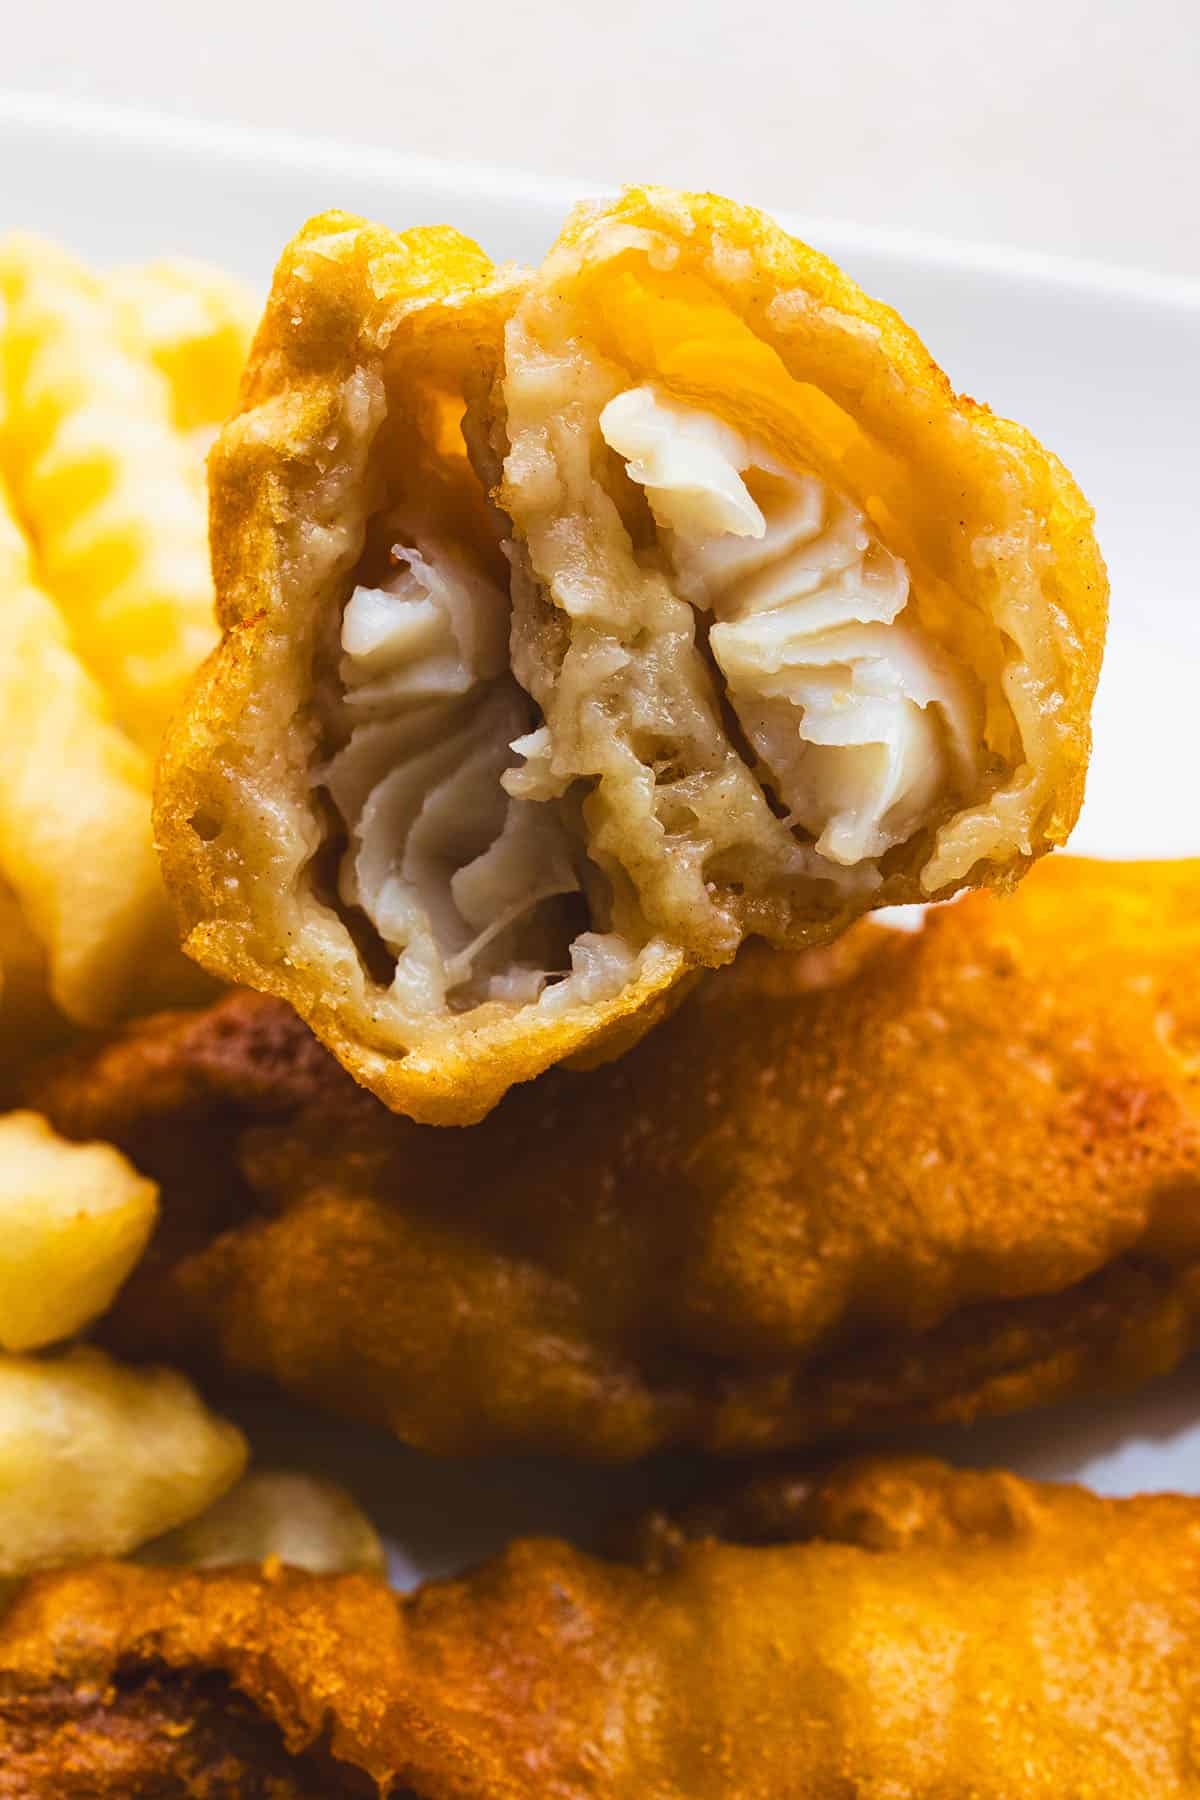
    Golden fried fish fillet with flaky white fish inside and crispy breading.

    Key Ingredients

    Ingredients

    The Fish

    Traditionally halibut was the go-to fish for fish and chips. With the rise in halibut prices, many other options have become popular. We always use tilapia based on availability, but the following all work beautifully:

    • Why it matters: A firm, flaky white fish holds up to frying without falling apart. Avoid thin or delicate fillets that will overcook before the batter turns golden.
    • Best choices: halibut, cod, haddock, tilapia, pollock, or catfish.

    Beer

    A light lager or pale ale works best for fish and chips batter. Let it sit open for a few minutes before using to slightly reduce the carbonation so it does not bubble over when mixed.

    • Why it matters: The carbonation is what creates that signature light, airy, crispy crust that makes this recipe special.

    Rice Flour Blend

    Using a combination of all-purpose flour and rice flour gives the batter an extra-crispy texture that stays crunchy longer.

    • Why it matters: Rice flour has less gluten than wheat flour, which means the batter fries up crispier and lighter without toughening.

    Dutch Oven

    For stovetop deep frying, a Lodge cast iron Dutch oven is ideal. Cast iron holds heat evenly and maintains the oil temperature far better than a regular saucepan.

    • Why it matters: Consistent oil temperature at 375°F (190°C) is the secret to a non-greasy, perfectly golden crust.

    Fresh white fish fillets on a wire rack ready for beer batter frying.

    How to Make Beer Batter Fish and Chips

    Open a can of beer and let it sit for a few minutes to slightly reduce the carbonation. Meanwhile, cut the fish into long strips and season with salt and pepper. Set aside.

    Combine all the dry ingredients in a bowl and stir well to ensure they are thoroughly mixed. Gradually whisk in the beer until the batter is thick and smooth. Set aside.

    Heat oil in a Dutch oven to 375°F (190°C). Use a deep frying thermometer to monitor the temperature throughout cooking. Dip each fillet into the beer batter, making sure it is well coated. Carefully lower the battered fish into the hot oil and fry until golden brown and crispy, about 4–6 minutes per fillet. Remove and drain on paper towels.

    Serve the fish and chips hot, sprinkled with a little extra salt. Accompany with lemon wedges, tartar sauce, or malt vinegar, and French fries.

    Crispy fried fish fillets with crinkle-cut fries on a white plate.

    Tips for the Crispiest Beer Batter Fish

    • Cold batter: Keep the batter cold until the moment of frying. Cold batter hitting hot oil creates the crispiest coating.
    • Don’t crowd the pan: Fry 2–3 pieces at a time. Crowding drops the oil temperature and leads to greasy, soggy fish.
    • Pat the fish dry: Before dipping in batter, pat the fish fillets dry with paper towels. Excess moisture prevents the batter from adhering properly.
    • Monitor oil temperature: Use a thermometer and maintain 375°F throughout cooking. Too low = greasy; too high = burnt outside, raw inside.

    Love seafood dinners? Try our Crispy Panko Crusted Baked Salmon for a lighter weeknight option, or our Easy Camping Shrimp Pasta for something quick and flavourful. For a beautiful salmon dish, the Ricotta Cheese Salmon Roll is always a crowd-pleaser.

    Crispy beer batter fish and chips served with dipping sauce.

    Frequently Asked Questions

    What is the best beer for beer batter fish?

    A light lager or pale ale gives the best results — something crisp and not too bitter. Avoid dark stouts or heavily hopped IPAs as they can make the batter too heavy and bitter. If you prefer not to use alcohol, sparkling water or club soda works as a non-alcoholic substitute and still provides the carbonation needed for a crispy crust.

    Why is my batter not sticking to the fish?

    The most common reason is excess moisture on the fish. Always pat the fillets completely dry with paper towels before dipping in batter. Also make sure the batter is thick enough — it should coat the back of a spoon. If the batter is too thin, add a tablespoon of flour and stir.

    What oil is best for frying fish?

    Use a neutral high-smoke-point oil such as canola, vegetable, or sunflower oil. Avoid olive oil or butter as they burn at high frying temperatures. You need at least 2–3 inches of oil in the pot so the fish can float freely while frying.

    Can I make this in an air fryer?

    Beer batter does not work well in an air fryer because the batter is too wet and liquid — it drips off before it can set. For an air fryer version, use a dry breadcrumb coating instead. For the authentic crispy beer batter crust, deep frying in a Dutch oven is the only way to achieve the right result.

    What type of fish works best if halibut is not available?

    Cod and haddock are the most traditional substitutes and give the best texture. Tilapia is widely available and mild in flavour, making it very family-friendly. Pollock is a budget-friendly option with great texture. Avoid very thin fillets or fatty fish like salmon for this recipe as they behave differently in hot oil.

    How do I keep the fish crispy while frying in batches?

    Place fried pieces on a wire rack set over a baking sheet in a 225°F (110°C) oven while you finish frying the remaining batches. Never stack hot fried fish on paper towels alone — the steam traps moisture underneath and makes the bottom soggy. A wire rack lets air circulate all around each piece.

    Golden fried fish fillet with flaky white fish inside and crispy breading. Perfect for seafood lovers and date night dinners.

    Beer Batter Fish and Chips

    Restaurant quality fish and chip batter that guarantees a crispy, golden crust that encases tender, flaky fish using beer in the batter.
    Prep Time 10 minutes
    Cook Time 30 minutes
    Total Time 40 minutes
    Servings: 5 people
    Course: Main Course
    Cuisine: American
    Calories: 580

    Ingredients
      

    • 1½ pounds white fish fillets (such as cod, haddock, or pollock)
    • 1 cup all-purpose flour + extra for coating the fish
    • 1 tsp ground paprika
    • 1 tsp baking powder
    • 1 tsp salt
    • 1 cup beer open and sit on counter for 20 minutes
    • 1 tsp salt
    • vegetable oil
    • 3 pounds frozen fresh fries

    Method
     

    1. Heat vegetable oil in a deep fryer or large pot to 325°F (165°C).
    2. Fry the potatoes in batches for about 3-4 minutes until they are pale and soft but not browned. Remove and drain on paper towels.
    3. Increase the oil temperature to 375°F (190°C). Fry the potatoes again in batches for 2-3 minutes until golden and crispy. Remove and drain on paper towels, then season with salt.
    Preparing the Fish
    1. Pat the fish fillets dry with paper towels and season both sides with salt and pepper.
    2. In a large bowl, mix together the flour, paprika, baking powder, and salt.
    3. Gradually pour the beer into the flour mixture, whisking until smooth.
    4. Dip each fish fillet into some flour until well coated, then submerge the fillet into the batter, allowing any excess to drip off.
    5. Carefully lower the fish into the hot oil and fry for about 4-5 minutes, or until the batter is golden brown and the fish is cooked through. Fry in batches if necessary to avoid overcrowding the fryer.
    6. Remove the fish from the oil and drain on paper towels.
    7. To Serve: the hot, crispy fish with the freshly fried chips. Optionally, serve with lemon wedges, tartar sauce, and malt vinegar.
  • Homemade Sashimi

    Homemade Sashimi

    Making sashimi at home is one of the most rewarding things you can do in the kitchen — and it is far more achievable than most people think. This guide walks you through how to safely source, freeze, and slice salmon so you can enjoy restaurant-quality sashimi without leaving your house.

    This post may contain affiliate links. If you purchase through these links, I may earn a small commission at no extra cost to you. Thank you for supporting Love & Harvest!

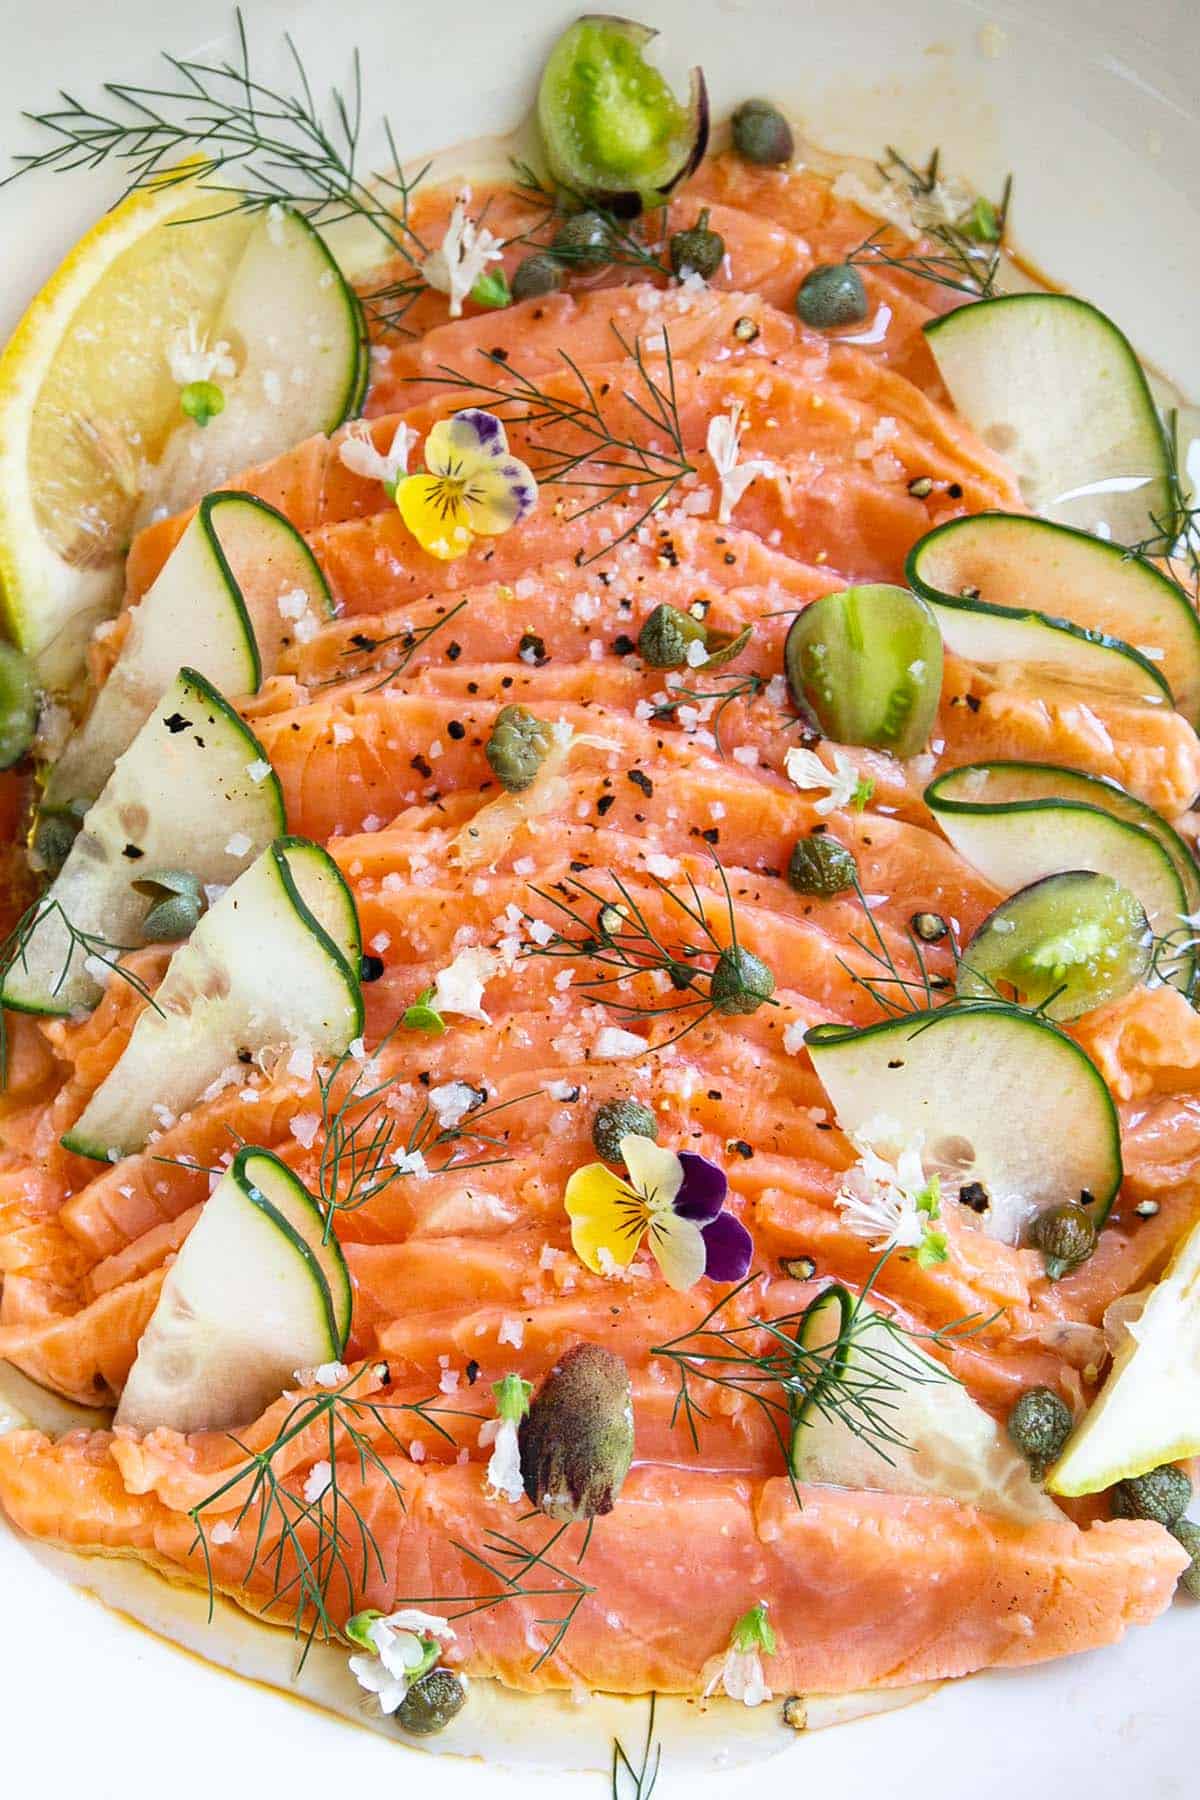
    Close-up of thinly sliced salmon sashimi with cucumber, capers, dill and edible flowers

    How I Started Making Sashimi at Home

    Allow me to share a little secret: crafting homemade sashimi has been quite the adventure for me. Living in Mexico, where authentic sashimi experiences are scarce and restaurants often overcharge for mediocre quality, I seized the opportunity and started experimenting. What followed was years of research, countless batches of salmon, and a method I use every time.

    In this guide I will share exactly how I safely freeze salmon fillets to achieve sashimi-grade quality, the shortcut I discovered for sourcing great fish, my personal experience using Costco salmon, and a simple plating recipe to pull it all together.

    This post shares how I prepare salmon at home. Raw fish always carries some risk; follow the freezing guideline below, and skip raw fish if you are pregnant, immunocompromised, very young or elderly.

    Homemade salmon sashimi fanned out on a white plate with cucumber, lemon, capers and dill

    What Fish Should I Use?

    Contrary to popular belief, you do not need to break the bank to source sashimi-grade fish. With the right knowledge and a keen eye, you can find excellent options at your local fish market or even in the frozen section of your grocery store. Check the labeling and ensure the fish has been frozen at the appropriate temperature to kill any potential parasites.

    Salmon sashimi plated with lemon wedges, cucumber slices, capers and edible flowers

    Wild Salmon vs. Farmed Salmon for Sashimi

    The choice between wild-caught and farmed salmon depends on your personal preferences and priorities. Both can work beautifully for sashimi when handled correctly.

    1. Flavor Preference: Wild-caught salmon tends to have a richer, more intense flavor. Farmed salmon is milder and consistently fatty — often preferred for sashimi.
    2. Nutritional Considerations: Wild salmon generally contains higher omega-3 levels. Both are excellent, nutritious options.
    3. Sustainability: Some prefer wild-caught for environmental reasons, though responsible farmed options exist.
    4. Availability and Price: Farmed salmon is more readily available year-round and typically more affordable.

    Overhead close-up of salmon sashimi slices sprinkled with sea salt, pepper and dill

    How to Safely Freeze Salmon for Sashimi

    To eliminate potential parasites in fresh salmon, the FDA recommends freezing at -4°F (-20°C) or below for at least 7 days. This is the step I never skip.

    Step-by-Step Freezing Guide

    1. Select Fresh Salmon: Begin with high-quality, fresh salmon fillets. Start with fish that is fresh and shows no signs of spoilage.

    2. Inspect and Clean: Check for discoloration or odor. Pat dry with paper towels.

    3. Portion the Salmon: Cut into even portions for uniform freezing.

    4. Wrap Tightly: Wrap each portion in plastic wrap or seal in airtight freezer bags, removing as much air as possible.

    5. Label and Date: Mark each portion with the date and fish type.

    6. Freeze Cold Enough, Long Enough: The FDA standard is -4°F (-20°C) or colder for at least 7 days. Many home freezers sit around 0°F (-18°C), which is not cold enough, so set yours to its coldest setting and leave space between portions for airflow.

    7. Check the Temperature: Use a freezer thermometer to confirm it holds -4°F (-20°C) or colder for the full 7 days.

    8. Thaw Safely: Thaw overnight in the refrigerator, or in a sealed bag under cold running water. Never at room temperature.

    Freezing kills parasites, not bacteria. Pregnant people, young children, older adults and anyone with a weakened immune system should skip raw fish.

    White plate of salmon sashimi with lemon and cucumber on a grey table

    Other Ways to Source Sashimi-Grade Salmon

    From frozen specialty stores: In Mexico I discovered WildFork, a store that sources fresh seafood and freezes it immediately at extremely low temperatures. Ask the store whether it was frozen to the FDA parasite standard; if they can’t confirm, freeze it yourself as above.

    From fresh fish stores: Check the store’s description for high-quality, fresh salmon sourcing. Inspect fillets carefully — no discoloration, no odor, firm to the touch. To prepare our sashimi we also use a sashimi knife set for clean, precise slicing.

    Salmon sashimi slices with dill, cucumber and lemon in a white bowl

    I Have Used Costco Salmon for Sashimi

    I anticipate mixed opinions on this, but I have personally used Costco salmon to make sashimi — many times. Despite what social media says, Costco salmon has worked well for me, always after freezing it myself as described above.

    What About the Cautionary Labels at Costco?

    Take those labels seriously: Costco does not sell this salmon as sashimi-grade, so if you want to eat it raw, freeze it first as shown above. Always check the packaging date on the day of purchase, look for firmness, and verify there are no signs of water leakage, discoloration, or odor.

    While I acknowledge inherent risks, I have prepared gravlax and sashimi from Costco salmon many times, always freezing it first. For presentation, I serve on a bamboo sushi mat with soy sauce and wasabi paste.

    How to Make Sashimi

    Once your salmon is properly thawed, making sashimi is all about technique and a sharp knife.

    1. Thaw the Salmon: Remove from the freezer and thaw in the refrigerator overnight, or in a sealed bag under cold running water for faster results. Fully thaw before slicing.
    2. Prepare the Salmon: Pat fillets dry with paper towels to remove excess moisture. Dry fish slices cleanly and looks better on the plate.
    3. Slice the Salmon: Using a sharp knife, slice thinly and evenly against the grain — approximately 1/4 to 1/2 inch thick. Take your time for uniform, beautiful slices.
    4. Serve and Garnish: Arrange on a platter with thinly sliced cucumber, pickled ginger, and wasabi. Sesame seeds or microgreens add a nice touch.
    5. Serve Immediately: Sashimi is best fresh. Serve right after slicing. A bed of ice helps keep it chilled during presentation.
    6. Enjoy Responsibly: Handle raw fish with care. Proper hygiene throughout the process is non-negotiable.

    Ingredients

    Salmon Fillet

    The star of the dish. Choose a fresh, high-quality salmon — wild or farmed — that has been properly frozen to sashimi-grade standards.

    • Why it matters: The quality of your salmon determines everything. Do not compromise on freshness.

    Soy Sauce

    A classic dipping sauce for sashimi. Look for a good-quality Japanese soy sauce — it should have a clean, rounded umami flavor rather than just saltiness.

    • Why it matters: A quality soy sauce enhances the delicate salmon flavor without overpowering it.

    Wasabi Paste

    Traditional accompaniment. Use real wasabi paste rather than horseradish-based imitations when possible.

    • Why it matters: Wasabi does more than add heat — it provides a sharp, clean flavor contrast that elevates the entire experience.

    Pickled Ginger

    Served between pieces to cleanse the palate. The acidity refreshes your taste buds between bites so each slice of salmon tastes as good as the first.

    • Why it matters: It is not just garnish — it is a functional part of the sashimi ritual.

    Frequently Asked Questions

    Is it safe to eat store-bought frozen salmon as sashimi?

    If the salmon has been frozen at -4°F (-20°C) or below for at least 7 days, it meets the FDA parasite guideline; freezing does not remove bacteria. Always verify the source and freezing practices of your specific store.

    Can I use tuna or other fish for sashimi?

    Yes — tuna (bluefin, yellowfin, bigeye), yellowtail, halibut, and sea bass are all popular choices. The same freezing and freshness standards apply regardless of the fish species.

    What is the difference between sashimi and sushi?

    Sashimi is simply raw fish served on its own, typically with soy sauce, wasabi, and ginger. Sushi refers to vinegared rice combined with other ingredients — it may or may not include raw fish.

    How thin should I slice sashimi?

    For salmon, aim for slices between 1/4 and 1/2 inch (6–12 mm) thick, cut against the grain. Thinner slices work better for leaner fish. A sharp knife and a steady hand make all the difference.

    Does Costco salmon require additional freezing before eating raw?

    Yes. Costco’s fresh Atlantic salmon is not sold as sashimi-grade, so freeze it at -4°F (-20°C) or colder for 7 days before eating it raw. I do this every time.

    Can I make sashimi without a special knife?

    Any sharp, long-bladed knife can work in a pinch, but a dedicated sashimi knife produces far cleaner cuts. A clean cut protects the fish’s delicate muscle fibers and results in better texture.

    If you love Japanese-inspired recipes, also check out our homemade sushi roe guide and our Cha Gio fried spring rolls for more fresh, vibrant dishes from the kitchen.

    Homemade Sashimi

    Restaurant-quality salmon sashimi made at home — properly sourced, frozen to the FDA guideline, then sliced thin and served with soy sauce, wasabi, and pickled ginger.
    Prep Time 15 minutes
    Total Time 15 minutes
    Servings: 2 servings
    Course: Appetizer
    Cuisine: Japanese
    Calories: 210

    Ingredients
      

    • 300 g sashimi-grade salmon fillet previously frozen at -4°F (-20°C) for at least 7 days to eliminate parasites, then thawed overnight in fridge
    • 3 tbsp Japanese soy sauce for dipping
    • 1 tsp wasabi paste real wasabi or horseradish-based, to taste
    • 2 tbsp pickled ginger for palate cleansing between pieces
    • ½ cucumber thinly sliced, for garnish and serving
    • 1 tsp sesame seeds optional garnish
    • microgreens optional garnish

    Method
     

    1. Thaw the frozen salmon overnight in the refrigerator. Never thaw at room temperature.
    2. Pat the thawed salmon fillet dry with paper towels to remove excess moisture — dry fish slices cleanly and looks better on the plate.
    3. Using a sharp knife, slice the salmon thinly and evenly against the grain — approximately 1/4 to 1/2 inch (6–12 mm) thick. Take your time for uniform, beautiful slices.
    4. Arrange slices on a serving platter with thinly sliced cucumber. Add pickled ginger on the side.
    5. Serve immediately with soy sauce and wasabi for dipping. A bed of ice helps keep the sashimi chilled during presentation.

    Notes

    SAFETY NOTE: Always freeze salmon at -4°F (-20°C) or below for at least 7 days before eating raw to eliminate potential parasites (FDA recommendation). Most home freezers sit near 0°F (-18°C), which is not cold enough; check with a freezer thermometer. Thaw overnight in the refrigerator, or in a sealed bag under cold running water. Never at room temperature. Sashimi is best eaten immediately after slicing. A sharp, long-bladed sashimi knife produces the cleanest cuts and best texture.
  • How to Make Sushi Roe

    How to Make Sushi Roe

    The day our eldest son asked to go fishing for his birthday, we said yes without hesitation — and we came home with fresh trout loaded with roe sacs. What followed was an afternoon of discovery: rinsing, separating, brining, and tasting. The result was vibrant, jewel-like fish roe that he piled on top of his sushi and popped inside his mouth with pure joy. This guide shows you exactly how to replicate that experience at home.

    This post may contain affiliate links. If you purchase through these links, I may earn a small commission at no extra cost to you. Thank you for supporting Love & Harvest!

    Sushi rolls topped with bright orange homemade salmon roe

    What Is Sushi Roe?

    Sushi roe refers to the tiny, flavorful eggs of various fish species used as a topping or garnish in sushi. These glistening orbs add both visual appeal and a burst of flavor that elevates any sushi creation.

    What Does Sushi Roe Taste Like?

    The flavor varies by fish type. Here are the most common varieties:

    1. Tobiko (Flying Fish Roe): Small, crunchy, vibrant colors. Mild and sweet with a hint of salt.
    2. Ikura (Salmon Roe): Larger, richer pop. Savory with subtle sweetness.
    3. Masago (Capelin Roe): Smaller, milder than tobiko. Slightly sweet, valued for texture.
    4. Trout Roe: Larger than most. Mild, buttery, slightly briny. Smooth texture with a satisfying pop.

    Close-up of glossy orange fish roe still in its membrane

    What’s in Fish Roe

    1. Omega-3 Fatty Acids: Fish roe has the omega-3 fats EPA and DHA.
    2. Protein: Fish roe is mostly protein and fat.
    3. Vitamins and Minerals: Contains B12, vitamin D, iodine, selenium, and phosphorus.
    4. Astaxanthin: The pigment that gives salmon roe its orange colour.

    Sushi pieces topped with orange roe on a dark plate

    Fish Roe vs. Caviar: What Is the Difference?

    Fish roe is a broad term covering the eggs of any fish species. Caviar specifically refers to the processed, salted eggs of sturgeon — particularly beluga, osetra, and sevruga. True caviar is rarer, more expensive, and more regulated than other types of roe. Trout, salmon, and flying fish roe are more accessible and just as delicious for everyday sushi use.

    Ingredients

    Key Ingredients

    Fresh Trout with Roe Sacs

    The key is sourcing the freshest fish possible. Ask your fishmonger specifically for trout with intact roe sacs, or catch your own. The roe must be fresh — not frozen and thawed — for the best flavor and texture.

    • Why it matters: Fresh roe has clean flavor and firm eggs that hold their shape during brining. Older or improperly handled roe will be mushy and off-tasting.

    Sea Salt Brine

    A simple brine of 1/4 cup sea salt per quart of water is all you need to preserve and season the roe. The salt draws out excess moisture, firms up the eggs, and adds the characteristic savory depth that makes sushi roe so addictive.

    • Why it matters: The brine concentration and soak time directly control the saltiness of the final product — start with 30 minutes and adjust to your taste.

    Gunkan-style sushi topped with large orange roe

    Equipment You Will Need

    • Cookie sheet cooling rack — acts as a sieve to separate eggs from the membrane
    • Colander or fine mesh strainer
    • Bowl for collecting the eggs
    • Cheesecloth (optional, for removing excess moisture)

    Once you have your homemade roe ready, use it on homemade sashimi or alongside traditional kimchi for a Japanese-inspired spread at home.

    A child in a sun hat holding up a freshly caught trout by a lake

    Frequently Asked Questions

    How long does homemade fish roe last in the refrigerator?

    Freshly made fish roe is best consumed within 3–4 days when stored in a clean, airtight container in the refrigerator. The brine helps preserve it but it is still a fresh product — do not push it past a week.

    Can I use salmon roe instead of trout?

    Absolutely. Salmon roe (ikura) is one of the most popular types for home preparation. The process is identical — harvest, rinse, separate from membrane over a rack, brine, strain, and serve. Salmon roe will be larger with a richer, more pronounced pop.

    How salty should the brine be?

    The standard ratio is 1/4 cup of sea salt per quart of water. For a less salty result, soak for only 20–30 minutes and taste frequently. For a more preserved, saltier roe closer to commercial ikura, extend the brine to 2–4 hours.

    Can I freeze homemade fish roe?

    Yes, but the texture will change after thawing — the eggs become slightly softer. Freeze in small portions in airtight containers for up to 1 month. Thaw slowly in the refrigerator overnight.

    Why use a cooling rack to separate the eggs?

    The cooling rack acts as a natural sieve. When you place the intact roe sac on the rack and gently work it, the individual eggs drop through the openings while the membrane stays on top — a clean, efficient way to separate them without crushing the delicate eggs.

    What can I do with homemade sushi roe besides sushi?

    Fish roe is excellent on crackers with cream cheese, as a garnish for deviled eggs, stirred into pasta dishes, or served on a simple bed of steamed rice with soy sauce. Once you have a batch ready, the possibilities are wide open.

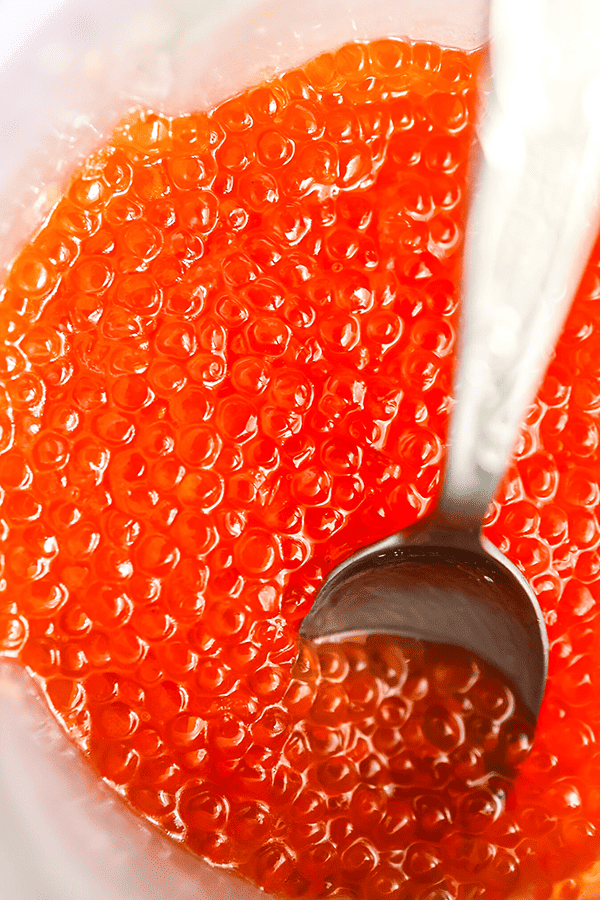
    Bowl of cured orange fish roe with a spoon

    How to Make Sushi Roe

    An effortlessly and simple recipe using trout eggs, resulting in a truly satisfying culinary experience bursting with flavour and colour.
    Prep Time 30 minutes
    Brining 30 minutes
    Total Time 1 hour
    Course: Condiment
    Cuisine: Japanese
    Calories: 60

    Ingredients
      

    • 2 fresh trout with roe sacks
    • ¼ cup sea salt
    • 1 quart water
    • liquid smoke optional
    • smoking gun optional

    Equipment

    • cookie sheet cooling rack
    • Colander or fine mesh strainer
    • bowl
    • cheesecloth

    Method
     

    1. Obtain fresh fish with roe. Common fish with edible roe include trout, salmon, or any other fish known for its roe.Carefully remove the roe sacs from the fish. You can do this by gently cutting along the belly and extracting the roe.
    2. Place the roe sacs in a bowl of cold water. Gently rinse the roe to remove any blood or membrane.
    3. Position the cookie sheet cooling rack over a bowl or tray. The purpose of the rack is to allow the eggs to fall through while keeping the membrane on top.Using a knife or your fingers, carefully cut or gently pull apart the membrane that encases the roe sac. Be gentle to avoid damaging the eggs.
    4. Place the roe sac, along with its membrane, onto the cooling rack. The eggs will start to fall through the spaces in the rack, separating from the membrane.
    5. Let the roe sac sit on the cooling rack for a few minutes, allowing gravity to help the eggs drop through the openings. You may gently tap or shake the membrane to encourage the process.
    6. As the eggs fall through the rack, collect them in the bowl or tray placed underneath. The cooling rack acts as a sieve, separating the eggs from the membrane.
    7. Prepare a brine solution by dissolving salt in water. A common ratio is¼ cup of salt per quart of water. Immerse the cleaned roe in the brine solution. The salt helps preserve the roe and adds flavour. Allow the roe to soak in the brine for at least 30 minutes to several hours, depending on your preference for saltiness.
    8. After brining, strain the roe to remove excess liquid. You can use a colander or a fine mesh strainer.Optionally, if you want a more refined texture, place the strained roe on a layer of cheesecloth and gently wrap it to remove excess moisture.
    9. Storage: Place the processed roe in a clean, airtight container. Store the roe in the refrigerator. Freshly made fish roe is best when consumed within a few days
      Serve: Once processed, the fish roe can be served as a topping for sushi, salads, or other dishes.
  • Chinese Fish Noodle Soup with Mexican Verduloga

    Chinese Fish Noodle Soup with Mexican Verduloga

    My mom’s traditional Cantonese fish noodle soup gets a surprising upgrade with Mexican verdolaga — a purslane green that adds a fresh, slightly tangy note to the umami-rich milky broth. It is an unlikely fusion, but once you taste the combination, it makes complete sense. Two culinary traditions meeting in a single bowl.

    This post may contain affiliate links. If you purchase through these links, I may earn a small commission at no extra cost to you. Thank you for supporting Love & Harvest!

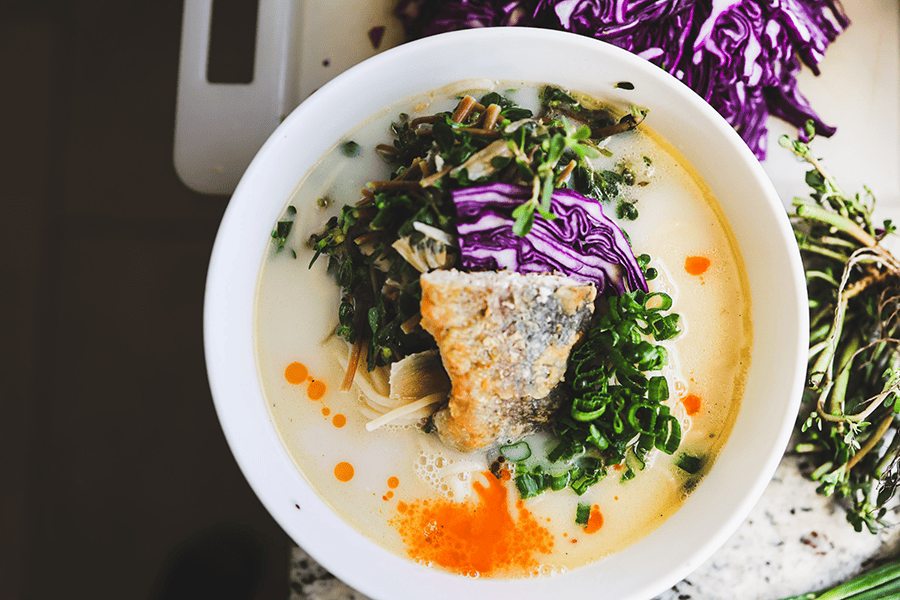
    fish noodle soup with verdolaga

    How Does It Taste?

    The fish soup broth is rich, fragrant, and milky white — achieved by frying the fish and bones in a hot wok before adding boiling water. The umami notes from the Tianjin preserved vegetable meld seamlessly with verdolaga’s fresh, slightly tangy flavor, creating a harmonious balance. It is unlike anything you have had before: comforting like congee but brighter, and deeply savory without being heavy.

    milky white cantonese fish broth

    Why Try This Fish Noodle Soup Recipe

    This fusion showcases the versatility of two distinct culinary traditions and embodies the beauty of cultural exchange through food. My mom grew up making this soup in Hong Kong; I grew up finding verdolaga in every Mexican market. Putting them together felt natural. Whether you are an adventurous food enthusiast or simply looking for something new, this is a culinary journey worth taking.

    Ingredients for This Fusion Fish Noodle Soup

    Ingredients

    Verdolaga (Purslane)

    • Why it matters: Verdolagas bring a slightly sour, refreshing quality that cuts through the rich fish broth — similar to the role watercress plays in traditional Cantonese fish soup (my mom used to use watercress; verdolaga is the natural Mexican substitute). It is also one of the most omega-3-rich leafy greens you can find.

    Fresh Fish

    • Why it matters: Fresh, firm-fleshed fish is essential for a milky white broth. I use trout caught locally in Metepec, Puebla, but bass, sea bass, mackerel, or snapper all work well. On a budget? Fish heads work perfectly — back in Hong Kong, when food was scarce, my parents’ family made this soup with fish heads only, and it was outstanding.

    Tianjin Preserved Vegetable

    • Why it matters: This is the secret weapon of Cantonese fish soup. Tianjin preserved vegetable (salted napa cabbage) adds a savory, slightly funky depth that brings the broth alive. Find it at any Chinese grocery store — loose, pre-packed, or in a brown claypot. Amazon carries a similar preserved vegetable (B07MTZ8W5M) if you cannot find it locally.

    Large Stock Pot

    • Why it matters: This recipe makes enough broth for 4 generous servings. A large stock pot (B07MRQ3HN5) gives you the room to simmer bones and skim foam without crowding.

    trout fishing metepec puebla

    Professional Tips

    1. FRY THE FISH FIRST WITH GINGER

    My mother, along with many skilled Cantonese cooks, swears by this rule: fry the fish and bones in a hot wok with oil and fresh ginger before adding water. This removes the fishy undertones and transforms them into a richer umami profile. The ginger further neutralizes any fishiness. Skipping this step gives you a thinner, fishier broth — do not skip it.

    2. ADD BOILING WATER (NOT COLD) TO THE WOK

    Adding boiling water to a still-hot wok is how you get the iconic milky white color. The thermal shock emulsifies the fish fats into the water, creating that creamy, opaque broth. Cold water simply will not achieve the same effect — the fat separates rather than emulsifies.

    3. TIANJIN PRESERVED VEGETABLE IS ESSENTIAL

    Do not substitute this if you can avoid it. The salted, slightly fermented cabbage adds a depth that plain salt cannot replicate. A little goes a long way — start with 2 teaspoons and adjust. Related: pair this soup with our steam preserved vegetables (zha choy and pork) recipe for a full Cantonese-inspired spread.

    Frequently Asked Questions

    Can I use frozen fish for this recipe?

    Yes, though fresh fish gives a cleaner flavor. If using frozen, thaw completely and pat very dry before frying — excess moisture will cause splattering and prevent the fish from browning properly.

    What can I substitute for verdolaga?

    Watercress is the most traditional substitute (it is what my mom originally used). Baby spinach or arugula also work in a pinch. If you want to stay Mexican, quelites (wild greens) are a good match flavor-wise.

    What noodles should I use?

    Thin dried wheat noodles or rice noodles are both excellent. Avoid fresh egg noodles from the package — they tend to break apart in the broth. Cook noodles separately, rinse with cold water, and add to bowls just before serving to prevent them from absorbing all the broth.

    How do I get the milky white broth color?

    Two keys: fry the fish and bones first in hot oil, then add boiling (not cold) water directly to the hot wok. The combination of high heat, fat, and rapidly introduced water creates the emulsification that makes the broth milky. Simmering on low for 30+ minutes maintains the color.

    Can I make the fish stock ahead of time?

    Yes. The stock keeps in the refrigerator for up to 3 days, or you can freeze it for up to 2 months. Reheat on the stovetop and add fresh verdolaga when ready to serve — do not re-cook the greens in pre-made stock until just before serving.

    Chinese Fish Noodle Soup with Mexican Verdolaga

    This exotic marriage of flavours introduces you to the combination of Chinese fish noodle soup and Mexican verdolaga. A fish noodle soup that surprises and delights the palate.
    Print Recipe
    Prep Time:15 minutes
    Cook Time:30 minutes
    Cuisine: fusion
    Keyword: chinese, fish noodle soup, mexican, noodle soup, verdolaga

    Ingredients

    Fried Fish

    • 4 pieces trout fillet or any white-fleshed fish
    • 1 tsp salt
    • ½ tsp white pepper
    • ½ cup canola oil
    • 1 egg
    • ¼ cup flour or cornstarch

    Fish Stock

    • 1 tbsp canola oil
    • 1 lb fish bones and trimmings (heads, tails, and bones from white-fleshed fish like trout, snapper, or cod)
    • 2 slices of ginger
    • 1 litre hot water
    • 2 tsp Tianjin preserved vegetable
    • salt to your taste
    • dashi (optional)

    Chinese Fish Noodle Soup with Mexican Verdolaga

    • 3 cups verdolaga, chopped, rinsed and cleaned
    • 1 package dried wheat noodles for 4 people
    • 4 purple cabbage leaves, thinly sliced
    • green onions
    • chili oil

    Instructions

    Fish Stock

    • Rinse the fish bones and trimmings under cold water to remove any impurities. Cut the fish bones into smaller pieces to expose more flavor.
    • In a large wok or frying pan that can hold 1 litre of water, heat the oil on high temperature. Carefully place the fish bones and ginger into the wok until ginger is fragrant and the fish bones are browned on both sides.
    • While the wok is still hot, add BOILING water to the wok (this is how you get the milky color and texture for the stock). Add in the Tianjin preserved vegetable.
    • Bring the stock to a boil, then reduce the heat to low and let it simmer gently. Skim off any foam or impurities that rise to the surface. Simmer for 30–40 minutes. Salt the stock to your taste and add dashi if using.

    Fried Fish

    • Meanwhile the stock simmers, rinse the fish fillet and pat dry with a paper towel. Season with salt and white pepper. Set aside.
    • In a frying pan, add the canola oil on high heat until it reaches 350℉. To test: insert a clean dry chopstick into the oil. If the tip starts bubbling, the oil is ready.
    • In a separate flat bowl, beat the egg well.
    • Coat the fish fillet in beaten egg, then dip it into flour. Fry each side for approximately 5 minutes or until both sides are golden brown. Set aside on a paper towel to cool.

    Putting It All Together

    • WASH VERDOLAGA: Place the leaves in a colander or large bowl and rinse thoroughly under cold running water. Snap off the bottom roots if still attached. Gently rub the leaves with your fingers to remove any dirt. Soak in a bowl of cold water, swish to dislodge remaining dirt, then lift out gently and set aside.
    • Place a colander over a clean pot and strain the fish stock. Discard the bones and debris. Bring the strained soup to a boil.
    • Cook the dried wheat noodles according to package instructions. Rinse with cold water, strain, and set aside.
    • Once the soup is boiling, roughly chop the verdolaga and toss it into the fish stock. Boil until tender, approximately 5 minutes.
    • Divide the noodles into 4 bowls. Divide the verdolaga and pour the hot soup into each bowl. Top with a fried fish fillet, sliced purple cabbage, green onions, and a drizzle of chili oil. Serve immediately.
  • Crispy Panko Crusted Baked Salmon

    Crispy Panko Crusted Baked Salmon

    Panko crusted salmon with dill, mayonnaise, and lemons — this is the best baked salmon you will ever taste, and it requires only a handful of simple ingredients that probably already live in your kitchen.

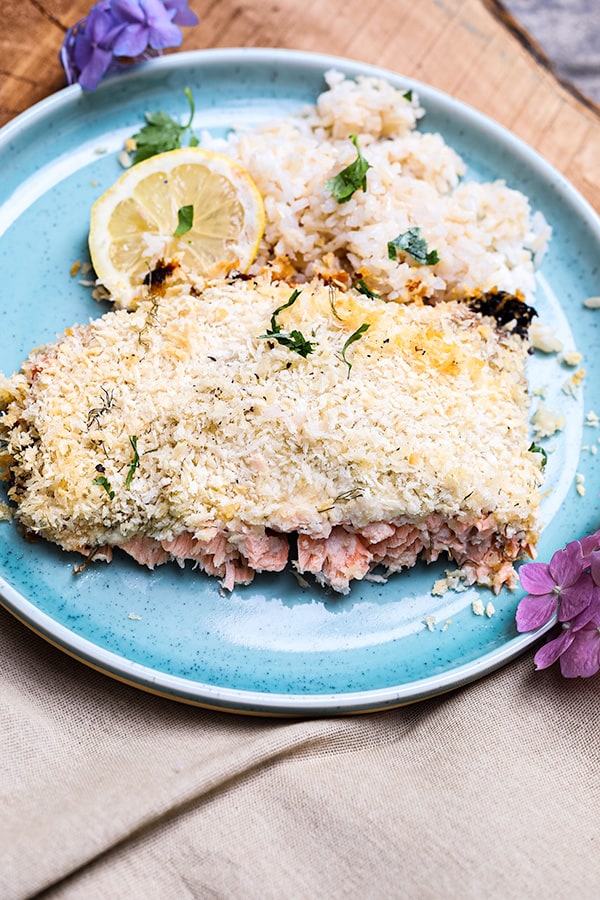
    Crispy panko crusted baked salmon on a blue plate with hydrangea flowers

    This post may contain affiliate links. If you purchase through these links, I may earn a small commission at no extra cost to you. Thank you for supporting Love & Harvest!

    Hard to imagine that the best tasting baked salmon you’ll ever have only requires a few ingredients. Mediterranean inspired, you’ll absolutely love this salmon because it is fresh tasting, and no ingredient overpowers the natural great taste of salmon!

    I’ve been using this recipe for a very long time. I’ve done teriyaki chicken, salmon with a butter creamy mushroom sauce, and even a fish and chip version with salmon! They were all amazing, but our family still comes back to this Panko Crusted Baked Salmon because it tastes great and it’s so simple.

    Panko crusted salmon fillet topped with lemon slices and dill on parchment

    There’s something special about dill and salmon. These two ingredients pair so well together. My kids rarely like the taste of dill on its own, but they absolutely adore this recipe!

    You have to try this recipe! Easy ingredients to find and even easier cooking once it’s baked in the oven. You can quickly make a gourmet salmon within a few minutes!

    It’s crunchy, savoury, and citrusy. Great for the summer since salmon is more widely available and the citrus flavour really brings out summer vibes. Serve it alongside our fresh beet pasta for a vibrant dinner spread.

    Panko baked salmon served with rice and a lemon slice on a blue plate

    What is Panko?

    Panko is a Japanese type of breadcrumb made only with dried white bread and no crust. It is not fried, but baked with an electric current. They are super crunchy and a staple in Japanese deep frying cuisine. They use it a lot as the final ingredient to roll food into before it goes into the deep fryer.

    Whenever I can, I always choose panko over breadcrumbs. They have a cracker-like crispiness that breadcrumbs can’t mimic, and the taste is similar to fried food.

    A hand sprinkling panko breadcrumbs over a mayonnaise-coated salmon fillet

    Why You Will Love This Recipe

    • Delicious! It’s smooth, silky, and flakey on the inside with hints of lemon and dill flavour, and the outside is super crunchy and moist from the panko and mayonnaise.
    • Summer dish: summer flavours are here! Fresh lemon with salmon is my favourite smell and taste of summer!
    • Easy to make: whip the sauce together, marinate it on top of the fish, and put it in the oven. It’s really that simple!
    • Minimal clean-up: that’s right, you’re not stuck with piles of dishes or spoons to wash!

    Golden panko crusted salmon with lemon slices on a parchment-lined tray

    Ingredients

    Salmon Fillet

    I tend to buy my fresh salmon from Costco. The type I normally buy is salmon with the skin on. When the fish bakes in the oven, the skin at the bottom of the pan gets crispy and chewy — it’s one of the best parts.

    Dill

    Both fresh and dried dill work for this recipe. For dried dill use only 2 tsp. For fresh, use 1/4 cup. Dried dill is stronger in taste than fresh. Fresh dill gives you a brighter, more vibrant flavour, while dried dill delivers a more concentrated herby punch.

    A hand holding fresh dill over a bowl of mayonnaise

    Panko Breadcrumbs

    Panko breadcrumbs are the secret to the incredible crunch in this recipe. They create a light, airy crust that regular breadcrumbs cannot replicate. Make sure to drizzle a little oil over the panko before baking for the best golden colour.

    Lemon

    You will need both lemon juice and lemon zest for this recipe. Lemon juice adds the acidity while zest carries the bright citrus essential oils. A microplane zester makes this quick and easy.

    Mayonnaise

    The mayonnaise acts as the binding layer between the fish and the panko crust. It keeps the salmon moist during baking and creates that beautiful golden top. If you want to reduce calories, swap mayonnaise for plain Greek yogurt — it still comes out unbelievably crunchy.

    Pro Tips for the Perfect Panko Salmon

    Pro Tip 1: Run a Finger Along the Spine of the Salmon

    Sometimes not all fish mongers are perfect at filleting fish. Running a finger along the spine of the fillet can help detect if there’s a bone stuck in the flesh. Trust me, you’ll feel it if you run across one.

    Pro Tip 2: Salt the Fish First

    Before you gather the marinade and slather it on the salmon, marinate the fillet with some salt first. This way the fish will absorb some of the salt and penetrate flavours into the flesh before the mayonnaise sauce.

    Pro Tip 3: Trade Mayo for Natural Yogurt

    You can lower the calories of this dish by trading mayonnaise with yogurt. It will still come out tasty and unbelievably crunchy.

    Stirring a creamy dill and yogurt mixture in a white bowl

    Pro Tip 4: Steam Veggies Alongside the Salmon

    Before you put the salmon in the oven, boil some vegetables for 5 minutes. Drain them and toss them on the side of the baking sheet with the salmon. Once the juice and sauce start to melt in the oven, the vegetables will soak up the sauce while they get crunchy in the oven. Use a quality rimmed baking sheet pan so none of those juices spill.

    What Goes Well With This Panko Crusted Baked Salmon

    • Baked potatoes: I love baked potato with this baked salmon. I especially love adding butter and extra sauce on top of the baked potato.
    • Pesto salad: complete this Mediterranean dish with some pesto pasta salad. Best summer dish combo! Try our homemade pesto gnocchi as a side.
    • White rice: sometimes plain white rice is the best way to taste the salmon. We love serving it with plain rice so we can later drizzle the burnt mayonnaise sauce on the rice.
    • Salad: a green salad on the side.

    Baked panko salmon cut open to show the pink center

    Frequently Asked Questions

    What temperature should I bake panko salmon at?

    Bake at 375°F (190°C) with the rack in the middle of the oven. This temperature gives you a golden panko crust while keeping the salmon moist and flakey inside. Check at the 25-minute mark — the fish should flake easily with a fork when done.

    Can I make this recipe ahead of time?

    You can mix the mayonnaise sauce and store it in the fridge up to one day ahead. Spread it on the salmon and add the panko just before baking for the crispiest result.

    Can I use frozen salmon for this recipe?

    Yes! Thaw the salmon completely in the refrigerator overnight before using. Pat it very dry with paper towels before adding the marinade — excess moisture will prevent the panko from crisping up.

    How do I know when the salmon is cooked through?

    The salmon is done when it flakes easily with a fork and the internal temperature reads 145°F (63°C). The flesh should be opaque throughout and the panko crust should be golden brown.

    Can I use breadcrumbs instead of panko?

    You can, but the result won’t be as crunchy. Panko creates a lighter, crispier crust because the crumbs are coarser and drier than regular breadcrumbs. If panko is unavailable, lightly toasted regular breadcrumbs are the best substitute.

    Can I make this dairy-free?

    This recipe is naturally dairy-free since it uses mayonnaise rather than butter or cream. Simply ensure your mayonnaise brand is dairy-free and you’re good to go.

    Close-up of panko crusted baked salmon with lemon and parsley

    Crispy Panko Crusted Baked Salmon

    Panko crusted salmon with dill, mayonnaise, and lemons. The best baked salmon you will ever taste with a few simple ingredients. Print Recipe Pin RecipePrep Time:15 minsCook Time:25 minsCourse: Main CourseCuisine: AmericanKeyword: baked salmon, pankoServings: 6 people

    Ingredients

    • ½ kg fresh salmon fillet optional: with skin
    • 1 tsp sea salt
    • ½ cup mayonnaise
    • 1 lemon on juice
    • 1 lemon zest
    • 1 tsp sea salt
    • 2 tsp dried dill or ¼ cup fresh ¾ chopped dill
    • black pepper
    • ½-¾ cup panko
    • oil
    • ½ lemon sliced
    • parsley chopped

    Instructions

    • Wash the salmon fillet and pat dry with paper towels.
    • Run your finger along the spine of the fillet to check if there are any bones stuck in the fillet. If you feel a small bone with your fingers, use a tweezer to pull it out.
    • Sprinkle salt both sides of the fish and let it sit for 10 minutes.
    • Meanwhile combine mayonnaise, lemon juice, lemon zest, salt, dill, and pepper in a bowl. Mix well.
    • Preheat oven to 375°F with the rack in the middle.
    • Take a baking sheet out and lay a parchment paper on top that fits the fish fillet.
    • Lay the salmon on top with the skin down.
    • Generously spread the mayonnaise mixture on top of the fillet. Cover all areas.
    • Sprinkle the panko over the mayonnaise. Give a quick drizzle of oil on top.
    • Bake the fish for 25-30 minutes in the oven. Serve with lemon slices and parsley on top.
  • Easy Salmon Pot Pie with Thyme Crust

    Easy Salmon Pot Pie with Thyme Crust

    Cozy fall evenings call for something extraordinary — and this easy salmon pot pie delivers every time. Picture golden, flakey thyme crust shattering to reveal a creamy, steaming filling of tender salmon, winter vegetables, and melted gouda cheese. It smells incredible while it bakes, and it tastes even better.

    This post may contain affiliate links. If you purchase through these links, I may earn a small commission at no extra cost to you. Thank you for supporting Love & Harvest!

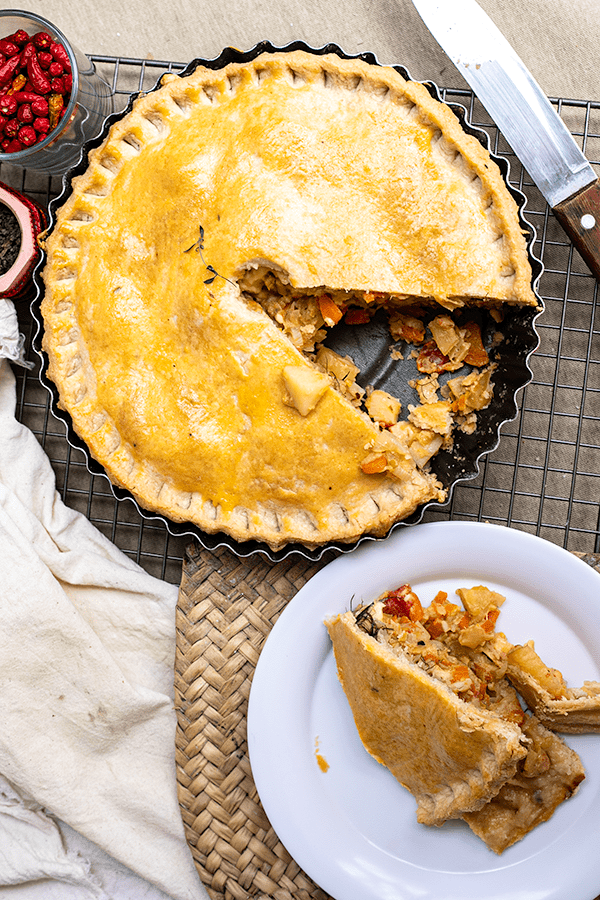
    Salmon pot pie with a golden thyme crust and a slice served on a plate

    This post is all about salmon pot pie — a favourite fall dish stuffed with salmon, winter vegetables, and cheese, then wrapped and baked in a flakey pie crust made with thyme.

    Salmon pot pie cut open to show the salmon and vegetable filling

    Fall is here and comfort food is calling. This salmon pot pie is the answer — salmon and vegetable stuffing, manchego cheese, and a thyme pie crust. Sounds amazing right? The crust alone is worth making. Besides its delicious flavour, it is also a super easy recipe that can be made ahead of time. I make all my pie crusts with a food processor for minimal clean-up.

    Slice of salmon pot pie on a white plate next to the pie

    Salmon Pot Pie Flavour

    Salmon is first marinated with soy sauce and sesame oil. This adds incredible depth of umami flavour to the salmon before it even hits the pan.

    The seasonal fall vegetables are potato, leek, garlic, onion, tomato, and carrot — readily available and perfect for the colder season. Once you combine this with the thyme pie crust, uufff! You have got yourself a marvellous pot pie.

    A hand holding a plate with a slice of salmon pot pie

    Why You Will Love This Recipe

    • Easy: Pie dough is made with a food processor and the salmon stuffing is made on the stovetop. Then combined and baked.
    • Incredible flavour: Salmon steamed with milk, cheese, and vegetables wrapped in a flakey thyme crust — the hardest part is waiting while the aroma fills your house.
    • Filling: Great for cold winter days when you want something substantial.
    • Make-ahead friendly: Pot pies can be made ahead or frozen. Great for busy nights.
    • Economical ingredients: Besides the salmon, everything else is budget-friendly produce you can find anywhere.

    Salmon pot pie filling, rolled crust and grated cheese ready to assemble

    Key Ingredients

    Ingredients

    Salmon

    Fresh or frozen salmon both work here, cut into cubes.

    • Why it matters: Salmon is marinated in soy sauce and sesame oil before cooking, which locks in umami flavour even through the baking process. The cubes absorb the creamy milk-and-cheese filling beautifully.

    Thyme Pie Crust

    Fresh thyme leaves are pulsed directly into the dough using a Lodge Cast Iron Skillet-friendly pastry method — lard, cold water, and apple cider vinegar for maximum flake. For a full deep-dive, see our guide on How to Make a Flakey Pie Crust.

    • Why it matters: Cold fat hits hot oven air and creates steam pockets — that is what makes the crust flakey. Thyme adds an herbal note that pairs perfectly with seafood.

    Gouda Cheese

    Two cups of grated gouda melt into the filling and sit on top before the lid crust goes on.

    • Why it matters: Gouda melts smoothly and has a mild nuttiness that complements the soy-marinated salmon without overpowering it. Use a deep Pyrex pie dish to hold all that cheesy goodness.

    Dill

    Fresh or dried dill sprinkled between the cheese and top crust.

    • Why it matters: Dill and salmon are a classic pairing. While the pot pie bakes, the dill perfumes the steam inside, infusing every bite. If you love this combo, try our Crispy Panko Crusted Baked Salmon next.

    Pot of cubed salmon and vegetable filling for pot pie

    Frozen or Fresh Salmon?

    Fresh salmon is always best for unbeatable flavour, but frozen works well here too. Since we marinate the salmon with soy sauce — a strong flavouring agent — both options produce excellent results. The salmon cubes steam in a glorious pot of cheese, milk, and vegetables and come out flakey and soaked in flavour.

    Food processor bowl of flour topped with fresh thyme sprigs

    Seasonal Vegetables

    Winter vegetables that are economical and easy to find: potato, leek, garlic, onion, tomato, and carrot. Nothing exotic — just your typical corner grocery store staples.

    Thyme Pie Crust

    From the base flakey pie crust recipe, we simply add fresh thyme to the dough. Thyme is a great herb to accompany seafood, especially salmon. Use a rolling pin to roll the dough evenly, and a pastry brush for the egg wash. Not to mention it looks absolutely gorgeous!

    Rolled thyme pie crust draped over a fluted pie pan

    We Love Dill with Our Salmon

    This comes with no surprise — we love adding fresh dill to salmon. Fresh or dried dill works. If you love salmon and dill together, do not miss our Crispy Panko Crusted Baked Salmon — another baked salmon recipe with dill, lemon, mayonnaise. And for something different with salmon, try our Ricotta Cheese Salmon Roll.

    Salmon and vegetable filling topped with cheese and dill inside the pie crust

    Fool-Proof Professional Tips

    Pro Tip #1 — Cool Everything Before Assembling

    Do not put hot salmon stuffing onto cold dough — it melts the butter and ruins the flakey structure. Let everything cool to room temperature first. We also need to freeze the assembled pie before baking, and you should never put hot food in the freezer.

    A hand spreading soft cheese over the salmon pot pie filling

    Pro Tip #2 — Freeze the Pie 20 Minutes Before Baking

    Pie crusts love to be cold. When cold dough hits hot oven air, it creates airy, flakey layers. Give the assembled pie at least 20 minutes in the freezer before it goes into a 400°F oven.

    Whole salmon pot pie with a golden top crust and a thyme sprig

    Pro Tip #3 — Crimp the Pie Crust Edge

    Crimping the edges not only looks beautiful but helps the pastry and filling stay in place while cooking. Use the index finger of one hand to push the inner edge out while pinching the outer edge in with the thumb and index finger of the other hand. Repeat around the entire edge for a classic scalloped finish.

    Hands crimping the edge of a pie crust
    Fingers pinching a scalloped edge around a pot pie crust

    Pro Tip #4 — Let It Cool Before Cutting

    The hardest part is waiting. Do not cut into a freshly baked pie — it is still cooking inside. Cutting too early dries the pie out by releasing all the steam. Rest it at least 10–15 minutes.

    Pro Tip #5 — Cut Holes in the Top Crust for Ventilation

    Always cut a hole in the centre of the crust for steam to escape. You can also poke a few holes around the crust with a fork before baking.

    Knife cutting a steam vent in the center of the top pie crust

    Frequently Asked Questions

    Can I use canned salmon instead of fresh or frozen?

    Yes. Drain the canned salmon well and break it into chunks before adding it to the filling. The texture will be slightly different but still delicious, and the soy-sesame marinade will compensate for the milder flavour.

    Can I make this pot pie ahead of time?

    Absolutely. Assemble the entire pot pie, wrap it tightly, and freeze it unbaked for up to one month. When ready to bake, go straight from freezer to oven — add 10–15 minutes to the bake time. Alternatively, fully bake it, cool it, and refrigerate for up to 3 days.

    Can I use butter instead of lard in the pie crust?

    Yes. Substitute an equal amount of cold unsalted butter. The crust will be just as flakey — lard produces a slightly more tender texture, but butter adds a richer flavour. Make sure both are very cold when you pulse them.

    What can I substitute for gouda cheese?

    Manchego, gruyere, or sharp cheddar all work well. Avoid fresh cheeses like mozzarella as they release too much liquid into the filling.

    Why does my pie crust shrink when baking?

    The dough was not rested long enough. Always refrigerate the dough disk for at least 30 minutes (or overnight) before rolling. Also, do not stretch the dough when placing it in the pan — let it fall into place naturally.

    What size pie dish should I use?

    A standard 9-inch deep-dish pie pan works best. A Pyrex deep dish pie plate is ideal because you can see the bottom crust browning through the glass.

    Salmon pot pie with a golden thyme crust and a slice served on a plate

    Easy Salmon Pot Pie with Thyme Flakey Crust

    Easy salmon pot pie that is the perfect comfort food for fall. Dig into this steamy pot pie filled with salmon, winter vegetables, and cheese all wrapped and topped with a delicious flakey thyme crust!
    Prep Time 45 minutes
    Cook Time 30 minutes
    Total Time 1 hour 15 minutes
    Servings: 6 people
    Course: Main Course
    Calories: 560

    Ingredients
      

    salmon marinate
    • 200 g fresh or frozen salmon cubed
    • 1 tbsp soy sauce
    • 1 tsp sesame oil
    pot pie filling
    • 2 tbsp butter
    • ½ large leek
    • 2 garlic cloved diced
    • ½ white onion chopped
    • 3 carrots chopped
    • 3 medium sized potato cubed
    • 2 small tomato chopped
    • 1 tsp chicken boulenise powder
    • 1½ cup whole milk
    • 1 cup cream
    • 1 tsp sea salt
    • black pepper
    • 2 cups gouda cheese grated
    • 2 tbsp fresh dill or 1 tsp dried dill
    • 1 tbsp butter, cold sliced thinly
    thyme pie crust
    • 3 fresh springs of thyme
    • 1 tsp sea salt
    • 3.5 cups all-purpose flour
    • 1.5 cups lard
    • ¾ cup cold water
    • 2 tsp apple cider vinegar
    • 1 egg

    Method
     

    Salmon Marinate
    1. Combine the salmon, soy sauce and sesame oil together. Mix well and let it marinate for 10 minutes.
    Pot Pie Filling
    1. On medium heat in a large pot or pan, melt butter and sauté the chopped leeks, garlic, and white onions. 3 minutes.
    2. Add the carrot and potatoes. cook for 5 minutes.
    3. Toss the tomatoe in along with the chicken bouillon powder, milk, cream, salt, and pepper. Turn the heat to low and cook for 10 minutes with a lid. Turn off the heat with the lid off and let the mixture cool to room temperature.
    4. Meanwhile, put the thyme leafs, flour, and salt in the food processor. Pulse the flour mixture so it is well combined. Open the lid and ddd small chunk of lard into the food processor. Close the lid.
    5. Combine the cold water and vinegar together.
    6. Add half the cold water mixture in the food processor and pulse it 7 times. Slowly drizzle the rest of the water in to the food processor while you do quick pulses. Keep pulsing the mixture when the cold water runs out. When the dough starts to form and pull away. Take the lid off and divide the dough into two parts. Flatten the dough into a flat disk and put it in the fridge for at least 30 minutes or overnight.
    Putting everything together
    1. On a floured surface, pie dough, and sprinkle it with a little flour. Roll out any creases and roll it out just big enough to cover your pan.
    2. Add the salmon filling into the pie. Place thinly sliced cold butter on top of the filling. Then top it off with grated cheese and dill. Place the other rolled out pie dough over the top of the pan, folding up the corners. Cut a hole in the middle for venting.
    3. Place the pie in the freezer for 20 minutes.
    4. Preheat oven to 400°F
    5. Before you put the pie in the oven, brush the top of the pie with egg wash.
    6. Bake at 400°F for 20 minutes, then lower heat to 350°F, and bake 10 more minutes.
    7. Let it cool for at least 10-15 minutes before cutting into the pie.
  • Steamed Soy Sauce Fish with Preserved Lemon

    Steamed Soy Sauce Fish with Preserved Lemon

    There are fish recipes, and then there is this fish recipe. Cantonese steamed soy sauce fish with preserved lemon is the dish my family in Hong Kong has made for generations — fall-off-the-bone tender, swimming in a golden ginger broth, with the preserved lemon cutting every trace of fishiness so cleanly your kids will ask for seconds before you sit down.

    This post may contain affiliate links. If you purchase through these links, I may earn a small commission at no extra cost to you. Thank you for supporting Love & Harvest!

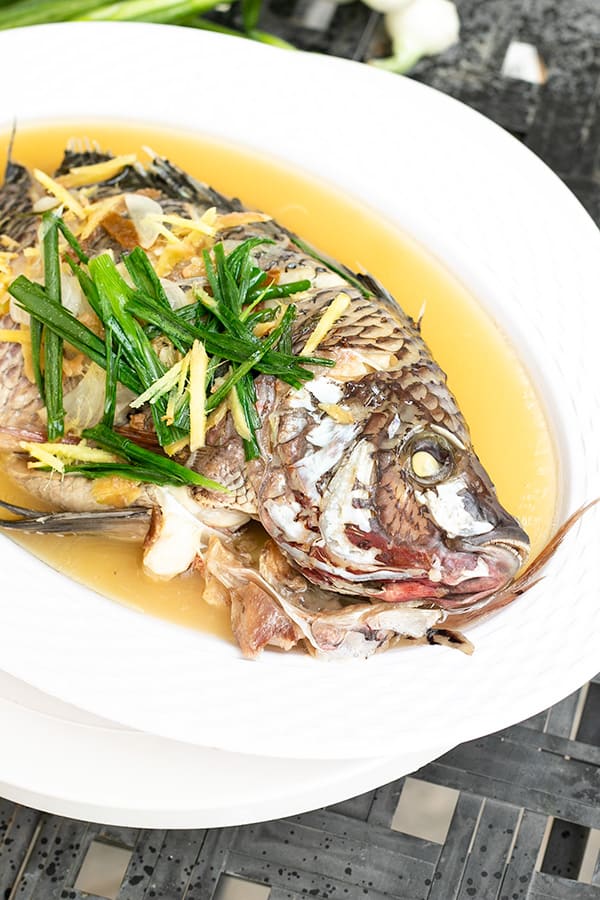
    Steamed Soy Sauce Fish

    What Makes This Cantonese Steamed Soy Sauce Fish Special

    This steamed soy sauce fish is simple, quick, and lets the fish be the star. What sets it apart from every other steamed fish recipe is the preserved lemon.

    A widely popular seafood dish among Chinese families and restaurants, fresh fish is steamed with ginger and preserved lemon, then finished with a sizzle of hot oil before serving. The preserved lemon helps cut out that strong fishy taste so you get the clean, fresh fish flavour without the pungent smell — making it one of the most kid-friendly fish recipes you will ever make.

    steamed fish

    Why You Will Love This Recipe

    • Moist, soft, and fluffy texture — steaming guarantees a soft and flakey texture with tons of moisture and flavour.
    • Straightforward recipe — a relatively easy recipe with just a few things to keep in mind. Step-by-step photos guide you to a no-fail result.
    • No strong fishy taste — the preserved lemon cuts the oily fish taste and softens the strong fish smell. Suitable for children.
    • Addictingly delicious — steaming creates a beautiful thick lemon soup that is incredible on rice.

    steamed whole fish

    Hong Kong Cantonese Fish: A Cultural Staple

    Fish in Chinese culture represents abundance and increased prosperity. It is an essential dish for New Year, birthdays, and anniversaries. Hong Kong is a coastal city rich in seafood resources — back when it was a large fishing port and world exporter, fish became an easy everyday staple. This recipe comes from my family, who still use it today.

    We love this steamed soy sauce fish so much in our family. Kids are rarely excited about fish unless it is a fish stick — but this recipe is so good my kids constantly ask for it. They get genuinely excited when they know I am making Cantonese steamed soy sauce fish with preserved lemon.

    Ingredients Deep-Dive

    Tilapia Fish

    The best fish to use for this recipe is tilapia or halibut (if you are willing to splurge). Tilapia steams perfectly — it is firm enough to hold its shape yet soft enough to fall off the bone. Your fishmonger will descale and gut it for you. Always make sure the belly is cleaned well under the fins.

    • Why it matters: The right fish gives you that silky, fall-off-the-bone texture that defines this dish. Too thin a fish overcooks quickly; too thick and the center stays raw.

    Preserved Lemon

    This is the secret weapon. Preserved lemon provides salt, umami, and a citrus sharpness that no fresh lemon can replicate. Rub it inside the cavity and along the cuts — it penetrates the flesh as it steams and eliminates that pungent fishy smell entirely. You can make your own preserved salty lemons at home with just lemons and salt.

    • Why it matters: Without preserved lemon, you have steamed fish. With it, you have a Cantonese classic your family will request every week.

    Pick up a jar of preserved lemon if you do not have any on hand yet.

    Ginger

    Thinly slice fresh ginger — as thin as you can manage. Half goes inside the cavity of the fish, half rests on top during steaming. Ginger adds warmth and its own aromatic quality that pairs perfectly with soy sauce and lemon.

    • Why it matters: Ginger neutralises fishy odours during cooking while adding a gentle heat and fragrance that makes every bite interesting.

    Soy Sauce

    Added at the very end — never cooked into the fish. This preserves the fresh, bright soy taste. Cooked soy sauce takes on a bitter, heavier flavour that would overpower the delicate fish.

    • Why it matters: Timing the soy sauce correctly is what separates home cooks from Cantonese masters. Get a quality soy sauce — the flavour difference is real.

    Essential Steps for Restaurant-Quality Steamed Fish

    cantonese steamed fish

    1. Wash the Fish Inside and Outside

    Descale the fish — your fishmonger will do this for you. Once home, open the belly. You will see a grey residue: this is what causes strong fishy smell and taste. Use your fingers and fingernails to rub it all off. Then find the second pocket along the back of the spine, cut it open with a knife, and clean that out too.

    chinese steamed fish recipe

    2. Rub Preserved Lemon Inside and Outside

    Take 1 tbsp of preserved lemon to the chopping board. Chop it finely and rub with your finger to release the brine. Rub the lemon and salt inside the cavity and outside the fish, working it into all the cuts.

    steamed fish in light soy sauce

    3. Add Ginger to the Cavity

    Scrape the skin off a 1-inch piece of ginger with a knife. Slice it as thinly as possible. Place half inside the cavity; the other half rests on top of the fish while steaming. A quality fish sauce can be added as an optional finishing touch alongside the soy sauce.

    4. Steam the Fish

    Place the fish in a heat-proof bowl or deep dish that will catch the golden juice as it steams. Use a bamboo steamer or your Instant Pot — whichever fits the fish comfortably.

    calories in steamed fish with soy sauce

    Instant Pot Steaming Instructions

    1. Add about 2 cups of water to the pot and place the steaming basket inside. Place the fish in a bowl that fits inside the Instant Pot with enough room for steam to rise around it.

    2. Set the mode to “Steam” for 20 minutes. Place the fish in the bowl with ginger on top. Close the lid and turn the valve OFF.

    3. Once the timer goes off, release the valve.

    steamed fish fillet soy sauce ginger

    5. Quick Oil Fry Finish

    Take the fish out and place thinly sliced scallion (green parts only) on top. Heat 1/4 cup of canola oil in a pan until it just starts to smoke. Bring the fish to the sink or outside. Pour the hot oil directly over the scallion — the oil will sizzle loudly and smoke. Add 2 tsp of soy sauce and a dash of white pepper. Serve immediately.

    Professional Tips for No-Fail Steamed Soy Sauce Fish

    Tip 1: Add Soy Sauce at the Very End

    Cooked soy sauce develops a heavier, more bitter taste. Adding it fresh at the end keeps the soy sauce tasting bright and original — that is what gives this dish its clean, restaurant-quality finish.

    Tip 2: Serve Immediately

    Steamed soy sauce fish should always be eaten hot or warm. The gelatin-rich broth at the bottom turns solid at room temperature and loses its appeal. Eat it warm over a bowl of rice.

    Tip 3: Tilapia Is the Best Choice

    Tilapia is ideal for this recipe. Halibut works beautifully if you want to splurge. My economical mom sometimes uses a fish head for the same recipe — equally delicious.

    Related Cantonese Recipes

    If you love this steamed fish, you will also enjoy steamed preserved vegetables with pork — another family favourite that uses the same steaming technique. For a completely different take on fresh seafood flavours, try our homemade sashimi.

    Frequently Asked Questions

    What fish is best for Cantonese steamed fish?

    Tilapia is the most economical and forgiving choice — firm enough to hold up in the steamer yet soft enough to become fall-off-the-bone tender. Halibut is the premium option. Avoid very thin fish fillets as they overcook too quickly.

    Can I use fresh lemon instead of preserved lemon?

    You can, but you will lose the umami depth that preserved lemon brings. Preserved lemon adds salt and fermented flavour that fresh lemon simply cannot replicate. It is worth making a batch of your own preserved salty lemons — they last months in the fridge.

    How long do I steam the fish?

    Steam on high for 20 minutes for a whole tilapia around 1 kg. The fish is ready when the flesh flakes easily away from the bone with a fork. Do not overcook — even a few extra minutes will dry it out.

    Can I make this without an Instant Pot?

    Absolutely. A traditional bamboo steamer over a wok works beautifully and is what most Cantonese families use. Any steamer setup that fits the fish and allows steam to circulate around it will give you the same result.

    Why do I pour hot oil over the fish at the end?

    The hot oil sizzle is the signature Cantonese finishing technique. It cooks the raw scallion instantly, creating a fragrant aromatic oil that infuses into the fish. It also gives the skin a slightly crisp texture on the surface while the flesh stays tender.

    How do I store and reheat leftovers?

    Store leftovers covered in the refrigerator for up to 2 days. Reheat gently in the microwave or in the steamer for 3–4 minutes. The broth will re-liquefy as it warms. Avoid the oven — it will dry out the fish.

    Whole steamed fish with ginger and green onions in soy sauce broth

    Steamed Soy Sauce Fish with Preserved Lemon

    This Cantonese Steamed Fish with Preserved lemon is the best fall-off-the-bone fish recipe! It’s flakey soft and oh.em.gee. tasty. Print Recipe Pin RecipePrep Time:10 minsCook Time:20 minsCourse: Main CourseCuisine: ChineseKeyword: fish, preserved salty lemon, seafood, steamed fishServings: 4 people

    Equipment

    • steamer

    Ingredients

    • 1 kg tilapia fish descaled, gutted, and cleaned
    • 1 inch ginger thinly sliced
    • 1 tbsp preserved lemon
    • ¼ cup canola oil
    • 1 inch scallion thinly sliced (green parts only)
    • 2 tsp soy sauce
    • dash of grounded white pepper

    Instructions

    Clean the fish

    • Rinse the fish with cold tap water. Touch around the fish and descale any scales still stuck on the fish.
    • Open the belly. You will see a grey residue — this is what causes the strong fishy smell and taste. Rub it all off with your fingers and fingernails.
    • Find the second pocket along the back of the spine. Use a knife to cut it open. Clean it out and you will be able to touch the spine of the fish.
    • Take 1 tbsp of preserved lemon to the chopping board. Chop finely and rub with your finger. Rub inside the cavity and outside the fish along all the cuts.
    • Scrape the skin off a 1-inch piece of ginger. Slice as thinly as possible. Place half inside the cavity; the other half rests on top of the fish while steaming.

    Steaming the fish

    • Place the fish in a heat-proof bowl or deep plate that will catch the golden juice while steaming.Use the steamer you are comfortable with that also fits the fish. Steam on high for 20 minutes.

    Instant Pot Steaming Instructions

    • Add about 2 cups of water to the pot and place the steaming basket inside. Place the fish bowl inside the Instant Pot with enough room for steam to rise.Set the mode to “Steam” for 20 minutes. Place the fish with ginger on top. Close the lid and turn the valve OFF.Once the timer goes off, release the valve.

    Final Steps

    • Take the fish out and place thinly sliced scallion (green parts only) on top.Heat 1/4 cup of canola oil in a pan until it just starts to smoke. Place the fish near the sink or outside. Pour the hot oil directly over the scallion — it will sizzle loudly.
    • Add 2 tsp of soy sauce on top of the fish and a dash of white pepper. Serve immediately.