Category: easy meals

  • Easy Chinese Scallion Pancakes

    Easy Chinese Scallion Pancakes

    These easy Chinese scallion pancakes take about 30 minutes, from gathering everything to cooking, need just a handful of pantry ingredients, and make an easy breakfast any day of the week. My kids beg for them every morning — and after trying them, someone in your family will too!

    Thin scallion pancake on a plate next to a bowl of fillings

    This post may contain affiliate links. If you purchase through these links, I may earn a small commission at no extra cost to you. Thank you for supporting Love & Harvest!

    This post is a recipe for easy Chinese scallion pancakes. An easy recipe made with flour, eggs, water, green onion and salt.

    Why You’ll Love This Recipe

    • Quick and Easy: The recipe takes about 30 minutes from start to finish, making it perfect for busy mornings or a quick snack.
    • Simple Ingredients: With just six pantry ingredients, there’s no special shopping trip required.
    • Just 2 Tablespoons of Oil in the Batter: Made with eggs, green onion, flour and just 2 tablespoons of oil in the batter.
    • Kid-Friendly: Children love the mild savoury flavour and the fun of rolling them up with a sauce inside.
    • Culturally Rich: Every bite carries generations of Shandong Province culinary tradition.

    Two folded scallion pancakes on a white plate

    My Story

    In the mornings of my youth, my father would rise early and craft scallion pancakes for our breakfast. The scent of sizzling dough and fresh scallions was an uncommon delight, for my father seldom ventured into the kitchen. Each aromatic whiff was a herald of something special, a rare treat that painted our mornings with joy.

    My father’s roots trace back to Shandong Province in China, where this recipe was born and lovingly passed down. It carries the essence of his childhood, the warmth of his mother’s kitchen, and now it lives on in our own family’s tradition.

    As a parent, I understand the challenge of waking early to prepare breakfast every day. Yet, not a moment spent in this ritual is one I would ever regret. I urge every parent to discover that one recipe their children adore — one that will nestle in their hearts and become a cherished memory.

    Folded scallion pancakes stacked on a plate

    The Recipe That Connects Generations

    Food has a unique way of bringing us closer to our heritage. Every time I make these scallion pancakes, I feel a deep connection to my dad and my grandmother. It is more than just a recipe; it is a piece of our family history. In sharing it here, I hope it brings you and your loved ones as much joy as it has brought us.

    Ingredients

    Ingredients

    Green Onion

    • Why it matters: Fresh green onion is the soul of this recipe. Use both the white and green parts, chopped finely. The white parts add a gentle sharpness; the green parts provide colour and a lighter onion flavour that mellows beautifully in the pan.

    Eggs

    • Why it matters: Three large eggs bind the batter, create structure, and give these pancakes their fluffy, tender texture. They are also what makes this recipe so quick — no yeast, no resting time, just eggs and a whisk.

    Flour

    • Why it matters: Cake flour or all-purpose flour both work well. Cake flour produces a slightly softer, more delicate pancake. Whatever you use, add it gradually while whisking to avoid lumps. A kitchen scale helps you measure consistently every time.

    Water

    • Why it matters: Regular drinkable water thins the batter to the right consistency. The ratio of water to egg determines whether the pancake is crispy or soft — a thinner batter spreads wider and crisps faster.

    Fillings

    • Why it matters: Our children love rolling the pancakes around ketchup. Worcestershire sauce, Maggi sauce, or soy sauce all work beautifully. The filling adds a burst of flavour and makes the pancakes even more interactive for kids.

    How to Make Chinese ShanDong Scallion Pancakes

    Preparation

    Wash the green onions well and remove any yellow or unusable stems. Thinly slice them on a chopping board and set aside. In a large bowl, combine the chopped green onions, eggs, and water. Whisk vigorously until the mixture is foamy and slightly thicker. Slowly add the flour while continuing to whisk. Once fully combined with no lumps, add a pinch of salt and whisk a few more rounds. The batter should be pourable and not too thick.

    Cooking

    Preheat a non-stick frying pan over medium-high heat. Drizzle a bit of oil and swirl to coat evenly. Ladle about ½ cup of batter into the pan, swirling to spread it evenly to the edges. Once the edges begin to brown and curl, flip the pancake and cook for 1–2 minutes on the other side until golden. Repeat until all batter is used. I like to use a silicone spatula and tongs for easy flipping. Running two pans simultaneously speeds things up considerably if you are feeding a family.

    A hand lifting a folded scallion pancake from the plate

    Frequently Asked Questions

    Can I use a cast iron skillet instead of a non-stick pan?

    Yes. A well-seasoned cast iron skillet actually produces a slightly crispier bottom. Make sure it is properly preheated before adding oil and batter, and use a little more oil than you would with a non-stick pan to prevent sticking.

    Why is my batter too thick or too thin?

    The batter should be about the consistency of thin crepe batter — pourable and spreadable when you swirl the pan. If it is too thick, add water a tablespoon at a time. If it is too thin, add a spoonful of flour and whisk again. The right consistency gives you a pancake that spreads on its own to the edge of the pan.

    Can I make the batter ahead of time?

    Yes. The batter keeps well in the refrigerator for up to 24 hours in a covered container. Give it a good stir before using, as the flour tends to settle. Do not make it more than a day ahead as the green onions can become slightly slimy.

    Are these scallion pancakes the same as the flaky Chinese ones?

    No. Traditional flaky scallion pancakes (cong you bing) are made with unleavened dough and require rolling and laminating with oil. This Shandong version is made from a quick egg-and-flour batter — much simpler, faster, and just as delicious. Think of it more as a savoury crepe than a bread-based flatbread.

    What dipping sauces pair best with these pancakes?

    Soy sauce mixed with a little rice vinegar and sesame oil is classic. Hoisin sauce is popular with kids. Worcestershire sauce or Maggi seasoning gives a deep umami kick. For a sweeter version, ketchup or sweet chili sauce works wonderfully, especially for children.

    Can I freeze leftover scallion pancakes?

    Yes. Let them cool completely, stack with parchment paper between each one, and freeze in a zip-lock bag for up to 1 month. Reheat in a dry pan over medium heat for 2–3 minutes per side, or in a toaster oven at 375°F (190°C) for 5 minutes. They crisp up beautifully from frozen.

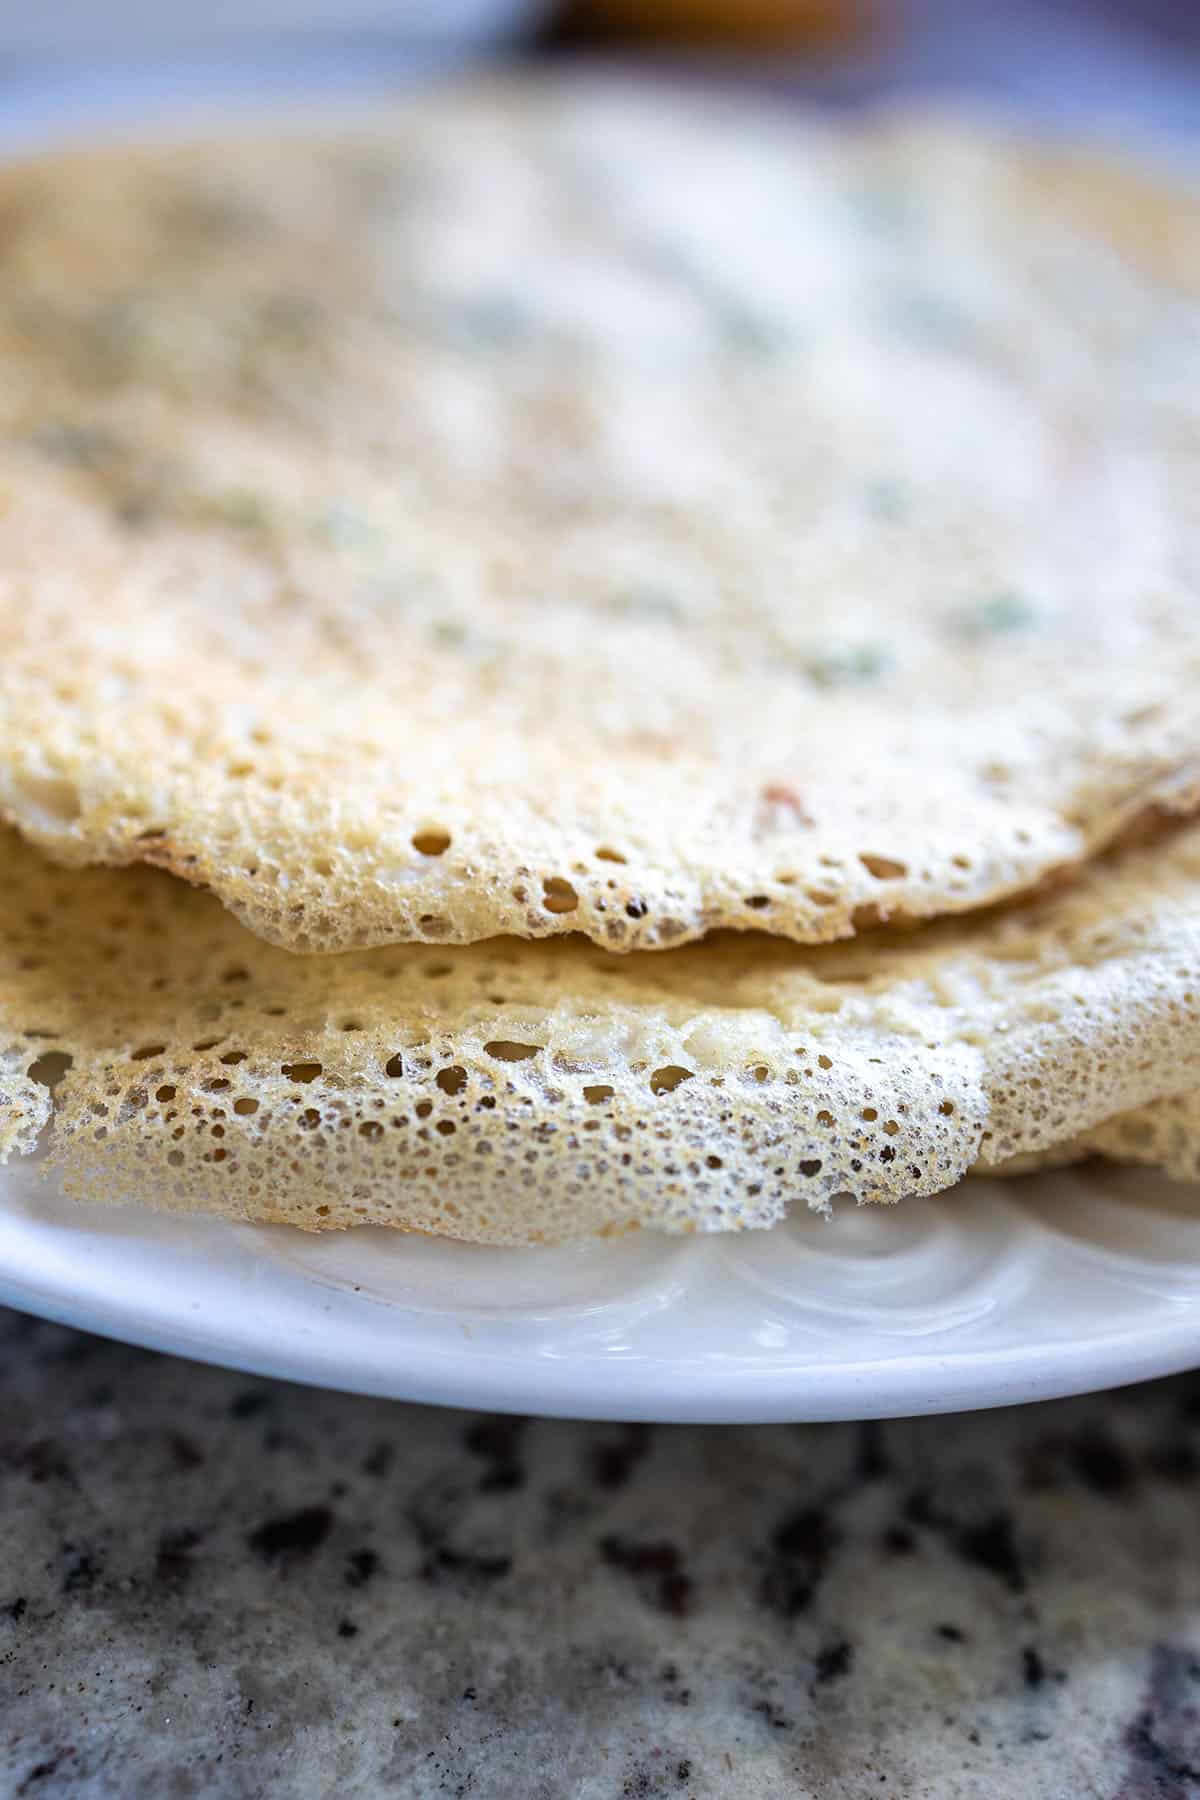
    Stack of thin, golden scallion pancakes on a white plate

    Easy Chinese Scallion Pancakes

    The recipe takes about 30 minutes from start to finish, making it convenient for busy mornings or a quick snack. This family recipe originated from Shandong Province in China. The combination of crispy texture and savory scallions is likely to be a hit with anyone who tries them.
    Prep Time 10 minutes
    Cook Time 20 minutes
    Total Time 30 minutes
    Servings: 15 pancakes
    Course: Breakfast
    Cuisine: Chinese
    Calories: 90

    Ingredients
      

    • 1 cup chopped green onion
    • 3 large eggs
    • 2 tbsp vegetable oil
    • 7 cups water
    • 3 cups all-purpose flour
    • 1 tsp salt

    Equipment

    • whisk
    • 2-1 non-stick frying pan
    • ladle

    Method
     

    1. In a large bowl, combine the green onions, eggs, vegetable oil and water. While you're whisking the liquid mixture together, slowly add the flour little by little. Make sure there is no small balls of flour in the mixture. Add the salt, give it a few good whisks, and set it aside.
    2. Heat a teaspoon of oil in a non-stick skillet over medium heat. Use two skillet if you think you can manage two cooking at the same time. Spoon a ladle-sized amount (1/2 cup) of pancake mixture onto the hot pan, making sure to include some of the green onions in each scoop. 
    3. Swiftly rotate the pan to spread the mixture evenly along the edges. Once the edges begin to brown or curl up, flip the pancake and cook for 1-2 minutes on the other side. Repeat this process until all the mixture is used up.
    4. To serve: squeeze a line of your favourite condiments (ketchup, soy sauce, etc). Roll it up and serve immediately.

    If you enjoyed these pancakes, try our Easy Homemade Soy Milk as the perfect morning pairing. For another quick breakfast, our Mixed Berry Smoothie with Pomegranate and Nopal is a family favourite. And if you love exploring Asian-inspired recipes, our Steam Preserved Vegetables with Zha Choy and Pork is a wonderful next step.

  • Crispy Pickle Brine Chicken Wings

    Crispy Pickle Brine Chicken Wings

    Do you have leftover pickle brine and wonder if there’s more to its fate than the drain? Hold off — because these crispy pickle brine chicken wings are the perfect blend of tangy, juicy, and crunchy and they will change the way you think about brining forever.

    Platter of crispy pickle brine chicken wings around a bowl of dipping sauce

    This post may contain affiliate links. If you purchase through these links, I may earn a small commission at no extra cost to you. Thank you for supporting Love & Harvest!

    In this post, you’ll find the recipe for making crispy, juicy, flavourful chicken wings using leftover pickle juice to brine the wings.

    This little-known secret can transform your homemade chicken wings into a culinary delight that rivals your favourite restaurant.

    Discover the Secret to Juicy Chicken Wings: Pickle Brine Magic!

    Many restaurants use pickle brine to soak their chicken parts overnight — it’s the secret behind wings that stay juicy every single time they hit the fryer. Pickle brine is tangy, sweet, and packed with flavours that enhance the taste of the chicken, lock in moisture during frying, and penetrate deep into the meat.

    Learn how we make our juicy wings, and you’ll never think twice about throwing away that precious liquid again. We also provide our recipe for our BEST Bread and Butter Pickled Cucumbers — so delicious and crunchy that we’ve turned many pickle-haters into pickle lovers.

    Bowl of bread and butter pickles in their brine with chopsticks

    Why Pickle Brine?

    The acidity of the brine tenderises the meat, allowing the flavours to penetrate deep into the chicken. When you fry the brined chicken, the brine locks in moisture, resulting in wings that are incredibly juicy on the inside and perfectly crispy on the outside. No other marinade achieves this dual effect with such simplicity.

    What Makes Them So Special?

    1. Pickle Brine Magic: These wings are marinated in pickle brine, infusing them with a unique tangy flavour and ensuring they stay incredibly moist and tender.
    2. Perfectly Crispy: After marinating, the wings are fried to perfection, achieving a golden, crispy exterior that contrasts beautifully with the succulent interior.
    3. Unmatched Flavor: The combination of tangy pickle brine with savoury spices in the breading creates a flavour explosion that will leave you craving more.

    Bowl of crispy fried chicken wings on paper

    Ingredients

    Ingredients

    Pickle Brine

    • Why it matters: The star of this recipe. Use brine from your homemade bread and butter pickles for the best flavour. The salt, vinegar, sugar, and spices in the brine work together to tenderise the meat while infusing it with tangy depth. Refrigerate the wings in brine for at least 4 hours, ideally overnight.

    Chicken Wings

    • Why it matters: Fresh or thawed wings work equally well. Pat them completely dry after brining — this is the single most important step for achieving a truly crispy crust. Moisture is the enemy of crunch.

    Cornstarch Coating

    • Why it matters: A mixture of cornstarch, salt, pepper, garlic powder, and paprika creates a light, shatteringly crispy crust. Cornstarch absorbs surface moisture and fries up crispier than flour alone. Coat the wings immediately before frying for the best texture.

    Frying Oil

    • Why it matters: Use a neutral high-smoke-point oil — vegetable, canola, or peanut. Heat to 350°F (175°C) and use a deep-fry thermometer to maintain the temperature. Oil that is too cool produces greasy wings; oil that is too hot burns the outside before the inside cooks through.

    How to Make Them

    1. Marinate: Place the chicken wings in a bowl or glass jar and cover with pickle brine. Refrigerate for at least 4 hours, preferably overnight.
    2. Dry and Coat: Remove the wings from the brine and pat them completely dry with paper towels. Coat in a mixture of cornstarch, salt, pepper, and your favourite spices.
    3. Fry: Fry in hot oil at 350°F (175°C) until golden brown and crispy, about 8–10 minutes. Drain on paper towels.
    4. Enjoy: Serve hot with your favourite dipping sauces.

    Flour-coated chicken wings resting on a wire rack before frying

    Frequently Asked Questions

    How long should I brine the chicken wings in pickle juice?

    A minimum of 4 hours produces noticeable results, but overnight (8–12 hours) is the sweet spot. Beyond 24 hours the texture can become slightly mushy as the acid breaks down the meat fibres too aggressively. Plan ahead and brine the night before you want to cook them.

    Can I use store-bought pickle brine instead of homemade?

    Yes, absolutely. Any pickle brine works — dill, bread and butter, or spicy. Each variety will impart a slightly different flavour profile. Bread and butter brine gives a sweeter, more complex result. Dill brine produces a sharper, more classic wing flavour similar to what fast-food chicken chains use.

    Should I bake or air-fry instead of deep-frying?

    Yes. For air-frying: pat the wings dry, coat lightly in oil and cornstarch, then air-fry at 400°F (200°C) for 20–25 minutes, flipping halfway. For baking: place on a wire rack over a sheet pan and bake at 425°F (220°C) for 40–45 minutes, flipping once. Deep-frying gives the crispiest result, but both alternatives are delicious and lower in fat.

    Why do I need to dry the wings after brining?

    Surface moisture creates steam when the wing hits the hot oil, which prevents the crust from crisping properly. Pat each wing firmly with paper towels until the surface feels dry to the touch. Some cooks leave the wings uncovered in the refrigerator for 1 hour after drying to achieve an even drier surface before frying.

    What dipping sauces pair best with pickle brine wings?

    Ranch dressing is the classic pairing — the creamy tang complements the pickle flavour beautifully. Blue cheese dip, honey mustard, and sriracha mayo are all excellent alternatives. For a Vietnamese-inspired twist, a nuoc cham dipping sauce adds a bright citrusy contrast.

    Can I use the same brine again after marinating the chicken?

    No. Once raw chicken has marinated in the brine, discard it. Do not reuse it for more chicken or for anything else. Cross-contamination is a serious food safety risk. Always use fresh brine for a second batch.

    Crispy chicken drumette resting on a bowl of bread and butter pickles

    Crispy Pickle Brine Chicken Wings

    Our crispy pickle brine chicken wings are the perfect blend of tangy, juicy, and crunchy. This little-known secret can transform your homemade chicken wings into a culinary delight that rivals your favorite restaurant.
    Prep Time 5 minutes
    Cook Time 10 minutes
    Resting Time 8 hours
    Total Time 8 hours 15 minutes
    Servings: 6 people
    Course: Appetizer
    Cuisine: American
    Calories: 340

    Ingredients
      

    Chicken Wings Marinate
    • 2 cups pickle brine (from a jar of pickles)
    • 1kg chicken wings separated into drumettes and flats
    For the coating
    • 1 cup cornstarch
    • 2 tsp garlic powder
    • 1 tsp onion powder
    • 1 tsp salt
    • 2 cups vegetable oil
    Lime Dipping Sauce
    • 1 tbsp fish sauce
    • ¼ cup warm water
    • 1 tbsp sugar
    • 3 tbsp lime juice freshly squeezed
    • 1 lime slice thinly sliced

    Method
     

    Marinate
    1. Combine all the ingredients together, and put it in a large non-reactive bowl. Cover the top and let it marinate overnight in the fridge.
    Fying
    1. Give the chicken wings good stir in the juice, and strain the liquid out. Let it sit out and dry on a drying rack.
    2. Meanwhile, combine all the dry ingredients together. Whisk well.
    3. Get a large frying pot (like a dutch oven), add the oil, and heat the oil to 375℉.
    4. Dredge each chicken wing in the dry mixture, ensuring an even coating. Shake off any excess.
    5. Carefully add the coated wings to the hot oil in batches, avoiding overcrowding.
    6. Fry the wings for about 8-10 minutes, turning occasionally, until they are golden brown and crispy.
    7. Use a slotted spoon or tongs to remove the wings from the oil and place them on a paper towel-lined plate to drain any excess oil.
    Dipping Sauce
    1. Combine all the ingredients together. Make sure the sugar is completely dissolved. Add the slice of lime as garnish
    Platting
    1. Arrange the crispy pickle brined chicken wings on a serving platter. Also place a small bowl with the dipping sauce.

    These wings are even better when you make your own brine — check out our BEST Bread and Butter Pickled Cucumbers for the full recipe. If you love crispy fried chicken, our Beer Batter Fish and Chips uses the same deep-fry method with equally spectacular results. And for another brine-forward recipe, try our Mexican Pickled Red Onion — a 10-minute condiment that elevates everything.

  • Best Garlic Mashed Potatoes

    Best Garlic Mashed Potatoes

    Some recipes just stay with you. I’ve been making this garlic mashed potatoes since high school, and it has never once left leftovers on the table — not at family dinners, not at parties, not at potlucks. It’s creamy, fluffy, and loaded with savory garlic flavor, and it comes together in under 40 minutes. The secret is in five simple tips that most people skip: the right potato, the right timing on the garlic, room-temperature butter, proper mashing technique, and a touch of patience. Once you nail this, every roast, chicken, or grilled salmon on your table gets an instant upgrade.

    This post may contain affiliate links. If you purchase through these links, I may earn a small commission at no extra cost to you. Thank you for supporting Love & Harvest!

    Best garlic mashed potatoes creamy and fluffy

    Why Make This Best Garlic Mashed Potatoes Recipe

    Garlic mashed potatoes are one of the most versatile side dishes in any kitchen. They pair beautifully with roast beef, grilled chicken, salmon, ribs — essentially anything that benefits from a rich, savory accompaniment.

    Bowl of creamy garlic mashed potatoes with a serving spoon

    We Have Loved This Recipe for Years and You Will Too

    This is the dish I reach for when there’s nothing in the fridge. It’s customizable, fast, and everyone who tries it asks for the recipe. Whether you’re cooking for a weeknight dinner or a dinner party, garlic mashed potatoes are a guaranteed hit.

    Creamy mashed potatoes with garlic butter close-up

    Ingredients

    Key Ingredients

    Russet Potatoes

    Russet potatoes are the gold standard for mashed potatoes. They have a low moisture content and high starch level that results in a light, fluffy mash rather than a dense or gluey one. Yukon Gold is a good second option for a slightly creamier, butterier result.

    • Why it matters: Waxy potatoes (like red or fingerling) hold too much water and produce a dense, gummy mash. Russets are the correct choice for this texture.

    Garlic

    Fresh garlic sauteed in butter is the backbone of this recipe. The key is timing — garlic must be added to heated butter and cooked for only 1–2 minutes until fragrant. A good stainless steel garlic press makes mincing fast and consistent.

    • Why it matters: Burned garlic turns bitter and unpleasant. Under-cooked garlic stays sharp and raw-tasting. Exactly 1–2 minutes in warm butter is the sweet spot.

    Butter

    Use unsalted butter at room temperature. Cold butter does not incorporate smoothly into the mash and can cause a lumpy, streaky texture. Room-temperature butter blends in effortlessly and creates a silkier finish.

    • Why it matters: Temperature of your fat directly determines the smoothness of your final mash. This is one of the most common mistakes home cooks make.

    Heavy Cream or Whole Milk

    Heavy cream delivers the richest, most luxurious mash. Whole milk produces a lighter result. Both must be warmed before adding — cold dairy seizes the starch in the potato and creates a gummy texture. A potato ricer gives you a smoother result than a standard masher.

    • Why it matters: Cold cream = lumps. Warm cream = velvet. This single step separates average mashed potatoes from extraordinary ones.

    Professional Tips

    Pro Tip 1: Use Russet Potatoes

    Russet potatoes have a buttery texture and less moisture than waxy varieties, which means a creamier, lighter mash. For more on choosing the right potato, see Bon Appetit’s guide to the best potatoes for mashing.

    Pro Tip 2: Do Not Overcook the Potatoes

    Overcooked potatoes become waterlogged and mushy, which ruins the texture. Check frequently and remove from heat the moment a fork slides in with minimal resistance. Do not wait for the potato to fall apart.

    Pro Tip 3: Use Room Temperature Ingredients

    Cold butter and cold cream cause the mash to seize and turn lumpy. Pull your butter out of the fridge 30 minutes before cooking and warm your cream in a small saucepan before adding it to the potatoes.

    Pro Tip 4: Add Garlic at the Right Time

    Add garlic to butter only after the butter is heated. Saute for 1–2 minutes until fragrant, then immediately incorporate into the mash. Do not let the garlic sit in the pan unattended — it burns in seconds.

    Pro Tip 5: Mash the Potatoes Properly

    Use a potato ricer for the smoothest result, or a hand masher for a slightly chunkier texture. Never use an electric mixer or food processor — over-processing breaks down the starch structure and creates a sticky, gluey paste.

    This mashed potato recipe pairs perfectly with lemongrass chicken drumsticks or a crispy pan-seared salmon. For another classic comfort dish, try our 30-minute Thai basil chicken — it is equally fast and deeply satisfying.

    Frequently Asked Questions

    What potatoes are best for mashed potatoes?

    Russet potatoes are the top choice for their low moisture content and fluffy texture when mashed. Yukon Gold is a close second for a creamier, buttery result. Avoid waxy potatoes like red potatoes or fingerlings — they produce a dense, gummy mash.

    Can I make garlic mashed potatoes ahead of time?

    Yes. Make them up to 2 days ahead and store covered in the refrigerator. Reheat gently on the stovetop with a splash of warm cream or milk to restore the creamy consistency. Do not reheat in a microwave without adding moisture — they will dry out.

    Why are my mashed potatoes gummy or glue-like?

    The most common cause is over-mashing or using a food processor. This activates too much starch in the potato and creates a sticky paste. Use a ricer or hand masher and stop as soon as the potatoes are smooth.

    Can I use garlic powder instead of fresh garlic?

    You can in a pinch, but fresh sauteed garlic produces a noticeably richer, more aromatic flavor. Garlic powder tends to taste flat in comparison. Use 1/2 teaspoon of garlic powder as a substitute if needed.

    How do I keep mashed potatoes warm for a dinner party?

    Transfer the finished mashed potatoes to a heatproof bowl set over a pot of barely simmering water (double-boiler method). Cover with a lid or foil and they will hold for up to 2 hours with occasional stirring.

    Can I freeze mashed potatoes?

    Yes. Spread them in a single layer on a baking sheet to flash freeze, then transfer to airtight bags. They keep for up to 1 month. Reheat from frozen in a covered saucepan with added butter and cream, stirring frequently.

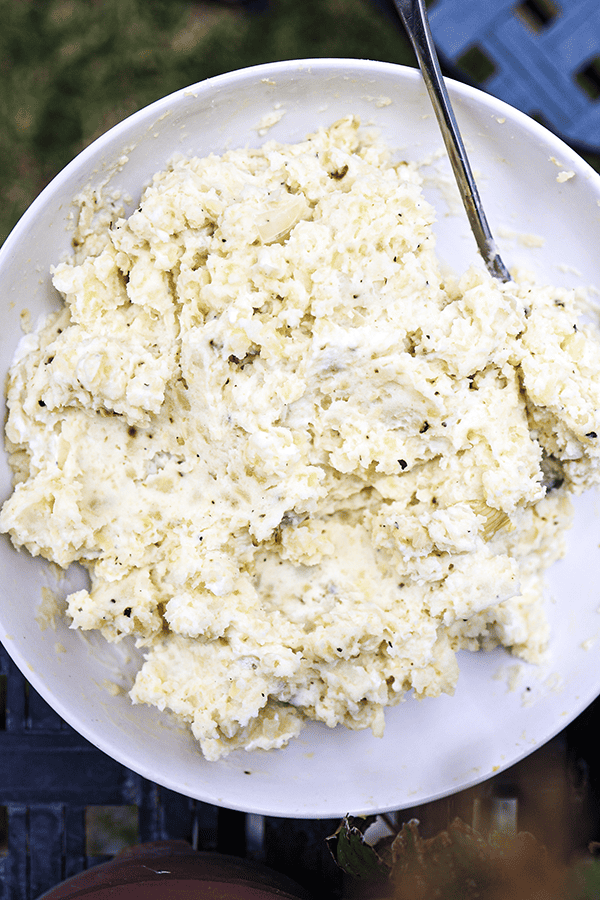
    Garlic mashed potatoes in a white bowl on a striped cloth with flowers

    Best Garlic Mashed Potatoes

    The best garlic mashed potato dish that is creamy, fluffy, and bursting with savoury garlic flavour.
    Prep Time 15 minutes
    Cook Time 20 minutes
    Servings: 6 people
    Course: Side Dish
    Cuisine: American
    Calories: 260

    Ingredients
      

    • 1½ kg russets potato cut into large chunks
    • 1 litre water
    • 5 tbsp butter room temperature
    • 5 garlic clove grated
    • 1 white onion finely diced
    • 2 tsp dried basil
    • ½ cup sour cream
    • salt
    • black pepper

    Method
     

    1. Run the potatoes in the water and give it a good scrub. Cut the potatoes into large wedges. (For a large potato I usually cut it into 5 wedges). Give it another good rinse to wash away all the starch. Place them into a large pot and make sure it is covered by water (roughly about 1L of water). Place lid on top, and heat the pot on the stove on high.
    2. Once the pot is boiling, move the lid slightly open so the water doesn't boil over. Boil the potatoes on medium-high for 20 minutes. You know the potatoes are done if you can easily poke thru the potato wedges with a fork.
    3. Meanwhile, in a frying pan heat it in high heat. Place 5 tbsp of butter inside. Sauce the onion until soft and slightly translucent. Add the garlic and sauté it until it's aromatic. Stir in the dried basil. Turn the heat off and set it aside.
    4. Discard the water, and let the potatoes cool until it is warm or when your hands can touch it without burning.
    5. Peel the skin of the potato with your hands and place them in a large mixing bowl. Place another 2 tbsp of butter inside the warm peeled potatoes. Using a hand potato masher or a potato rice, mash the potatoes until smooth and no large chunks are visible.
    6. Fold in the butter garlic. You don't want to deflate the fluffiness.
    7. Stir in the sour cream until well combined. Add salt and pepper to your liking.
  • Chicharron Salad “Ensalada de Chicharrón Placero”

    Chicharron Salad “Ensalada de Chicharrón Placero”

    Ensalada de Chicharron Placero is one of those Mexican dishes that stops you mid-bite — the contrast of crunchy pork rind, creamy avocado, fresh tomato, and bright lime is completely addictive. This is my version, made with the flavors and ingredients of Central Mexico where I live.

    This post may contain affiliate links. If you purchase through these links, I may earn a small commission at no extra cost to you. Thank you for supporting Love & Harvest!

    Jump to Recipe

    Bowl of chicharrón salad with tomato, onion and green pepper next to a nasturtium flower

    This post is a recipe for chicharron salad, also known as pork rind salad. In Spanish it is called “Ensalada de Chicharron Placero.” It has pork rind, avocado, tomatoes, and lime juice.

    What is Chicharron Salad?

    Chicharron Salad is a flavorful dish that brings together the crispy, savory goodness of fried pork rind with fresh vegetables and a bright lime dressing. This dish is a celebration of textures — crunchy chicharron against creamy avocado and juicy tomatoes, unified by a simple olive oil and lime vinaigrette.

    The version I make here is common in Central Mexico and includes diced tomatoes, sliced red onions, cubed avocados, chopped cilantro, jalapeños for heat, and a dressing made with lime juice and extra virgin olive oil.

    The Superhero Ingredient: Pork Rind (Chicharron)

    In Mexican cuisine, every bite tells a story, and chicharron is one of the most iconic chapters. Pork skin frying in a pot of golden lard is culinary alchemy — transforming a humble ingredient into crispy, golden nuggets of pure satisfaction. The sizzle and pop of pork skin meeting hot lard is a melody that resonates through the bustling markets of Mexico City and Puebla, enticing everyone nearby with its irresistible aroma.

    A hand holding up a large sheet of crispy pork rind (chicharrón)

    Ingredients

    Pork Rind (Chicharron)

    Crispy, deep-fried pork skin is the star and this is where the dish begins and ends. If you cannot find fresh-fried chicharron locally, the bagged variety works well. This Tito’s Choice Chicharrones is the most similar to what we use here in Mexico, though a lighter chicharron chip style also works.

    • Why it matters: The crunch is the entire point of this salad. Use it immediately after tossing with the dressing — it softens fast, and you want that satisfying snap in every bite.

    Avocados

    Ripe, cubed avocado adds creaminess that counters the crunch and heat of the chicharron. It also makes the salad filling enough to serve as a light meal.

    • Why it matters: The fat in avocado coats each ingredient lightly, helping the lime dressing cling to everything and creating a more cohesive dish.

    Cilantro

    There is no salad in Mexico without cilantro. It is aromatic, fresh, and gives the dish a depth that flat-leaf parsley cannot replicate. Use it generously — do not be shy.

    • Why it matters: Cilantro lifts the entire flavor profile, cutting through the richness of avocado and pork rind with bright, herbal freshness.

    Purple Onion

    Purple onion is preferred over white or yellow for this salad because it is visually striking and noticeably sweeter — a better balance for a fresh salad than the sharper bite of white onion.

    • Why it matters: The sweetness of purple onion plays off the acidity of the lime without overpowering the other ingredients.

    Extra Virgin Olive Oil

    A drizzle of extra virgin olive oil creates a simple vinaigrette with the lime juice. It coats the salad, adds a glossy finish, and ties all the flavors together.

    • Why it matters: Oil prevents the lime from making the avocado brown as quickly and gives the salad a more polished, restaurant-quality look and feel.

    Lime

    The vinaigrette is simply lime juice and olive oil — minimal, clean, and explosive. The acidity cuts through the richness of both avocado and pork rind, keeping every bite bright and refreshing.

    • Why it matters: Without acid, this salad would feel heavy. Lime is what makes it feel light despite the richness of its main ingredients.

    Tomatoes

    Fresh diced tomatoes add color, juiciness, and a gentle acidity that balances the savory and fatty components. In Mexico, tomato is a non-negotiable base for most fresh salads.

    • Why it matters: Tomatoes add water content and freshness that prevents the salad from feeling dry or monotone in texture.

    Jalapeño or Serrano Pepper

    Optional but highly recommended. Serrano is hotter than jalapeño — choose based on your heat tolerance. Finely dice it so the heat distributes evenly throughout the salad rather than hitting you in one concentrated bite.

    • Why it matters: A touch of heat creates contrast that makes every other flavor in the salad more vivid and interesting.

    Make It into a Taco

    One of the most popular ways to eat this salad in Central Mexico is as a taco filling. Load it into a soft tortilla and add red or green salsa on top. Try our green nopales tortilla recipe — it pairs beautifully with this salad.

    Green nopales tortilla recipe: a stack of green corn tortillas

    Frequently Asked Questions

    When should I add the chicharron to the salad?

    Add the chicharron right before serving — within 5 minutes of plating. Pork rind absorbs moisture rapidly and goes from perfectly crunchy to soggy in about 10 minutes once it contacts the lime dressing. If making the salad ahead, keep the chicharron separate and combine just before eating.

    Can I make the dressing ahead of time?

    Yes. Mix the olive oil and lime juice up to 2 days in advance and store in a small jar in the refrigerator. Shake well before using. The dressing actually improves slightly as it sits, as the lime mellows and the flavors integrate.

    What type of chicharron is best for this salad?

    Thick-cut, fresh-fried chicharron from a Mexican market is the ideal. The puffed, airy kind has the best crunch and texture for salad. Thin, chip-style pork rinds can also work but soften faster. Avoid overly seasoned flavored varieties as they can compete with the fresh ingredients.

    Is Ensalada de Chicharron Placero spicy?

    The heat is completely adjustable. Without jalapeño or serrano it is mild. With jalapeño it has a gentle, lingering warmth. With serrano it has a proper kick. Deseed the chili for a milder version that keeps the flavor without the heat.

    What can I serve this salad with?

    It works beautifully as an appetizer, a side dish alongside grilled meats, or as a taco filling. It also pairs well with tostadas, garnachas, and as a topping for nachos. In Central Mexico it is often served at room temperature as a botana (snack) with cold drinks.

    How do I keep the avocado from browning?

    The lime juice in the dressing helps significantly. Toss the avocado in lime juice immediately after cutting and keep it in contact with the dressing. If making ahead, cut the avocado last and add it right before serving. Do not store assembled salad overnight — avocado browns regardless.

    Love authentic Mexican flavors? Also try our vegetarian mango soy ceviche, our Mexican fava bean salad, and our easy hummus for more vibrant, fresh dishes.

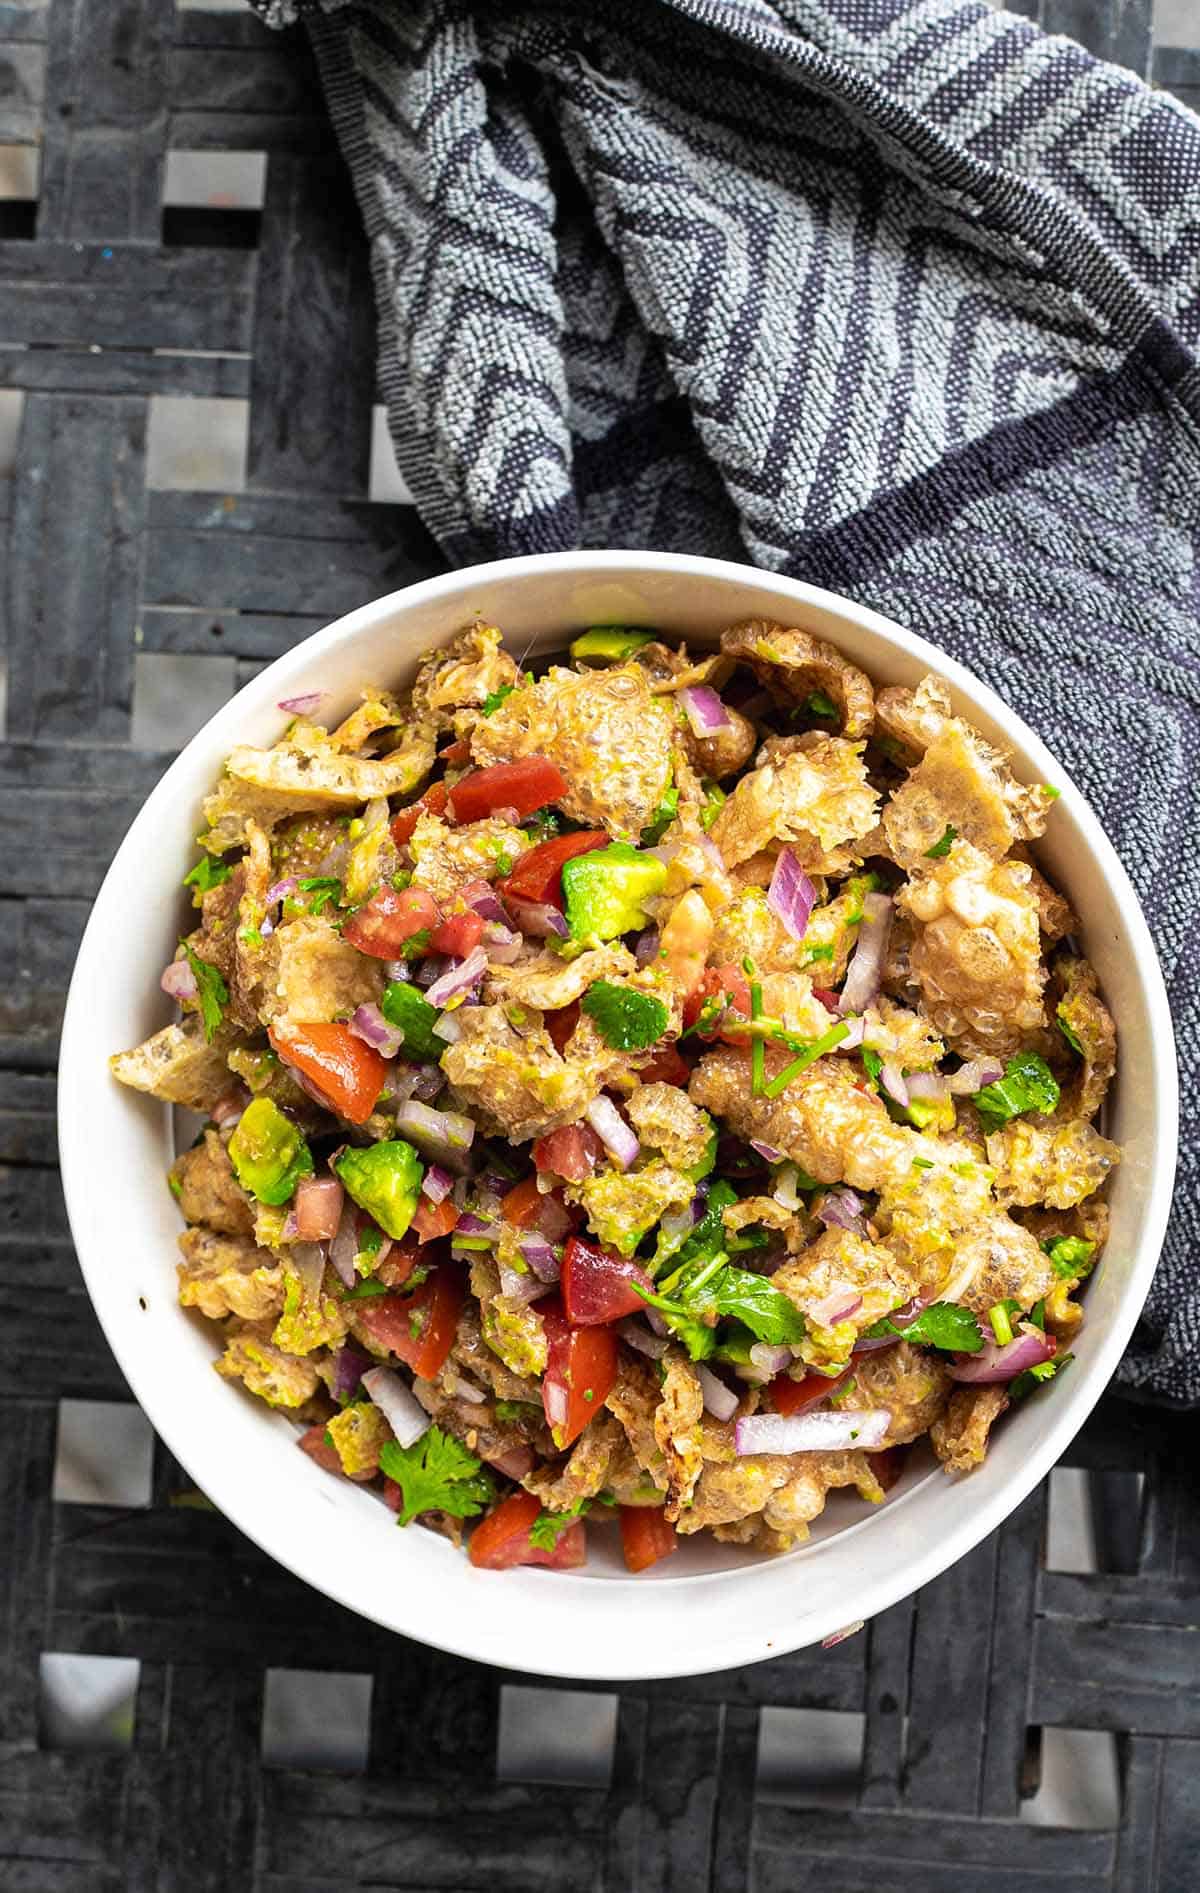
    Overhead view of chicharrón salad in a white bowl on a dark cloth

    Chicharron Salad “Ensalada de Chicharrón Placero”

    This homemade dish is a well-known favorite in Mexico. It is savory, tangy, and crunchy all at the same time! Every household puts its unique spin on it, and today, I'll share my version infused with the flavors and ingredients inspired by Central Mexico.
    Prep Time 30 minutes
    Total Time 30 minutes
    Servings: 4
    Course: Appetizer
    Cuisine: Mexican
    Calories: 310

    Ingredients
      

    • 220 g crispy chicharrón, broken into bite-sized pieces or 5 cups of chicharron chips
    • 1 cup diced fresh tomatoes
    • 2 avocados cubed
    • ½ cup thinly sliced red onions
    • ¼ cup chopped fresh cilantro
    • 1-2 jalapeños, finely diced (adjust to taste)
    • 2 tbsp extra virgin olive oil
    • 2 limes juiced
    • salt and pepper

    Method
     

    Dressing
    1. In a small bowl, whisk together the extra virgin olive oil and lime juice. This zesty dressing will infuse a refreshing citrusy note into our salad.
    Salad
    1. In a large mixing bowl, combine the chicharrón pieces with the diced tomatoes, avocados, sliced red onions, chopped cilantro, and jalapeños. Drizzle the lime and olive oil dressing over the mixture and toss gently to coat all ingredients evenly.
    2. Add salt and pepper to taste, ensuring a harmonious balance that enhances the natural flavors of each element.

    Notes

    Serving Suggestions:
    • Enjoy the Chicharrón Salad as a standalone appetizer or side dish.
    • Serve it alongside tacos, tostadas, or even as a topping for nachos for an added layer of crunch and flavor.
  • Mexican Fava Bean Salad

    Mexican Fava Bean Salad

    This Mexican fava bean salad is one of those dishes that surprises people — hearty enough to stand on its own as a meal, yet light and bright enough to serve alongside anything on the table. Fava beans, grilled cactus paddles, fresh tomatoes, cilantro, and jalapeños come together in a zesty lime dressing. It tastes like Mexico in a bowl.

    This post may contain affiliate links. If you purchase through these links, I may earn a small commission at no extra cost to you. Thank you for supporting Love & Harvest!

    Jump to Recipe

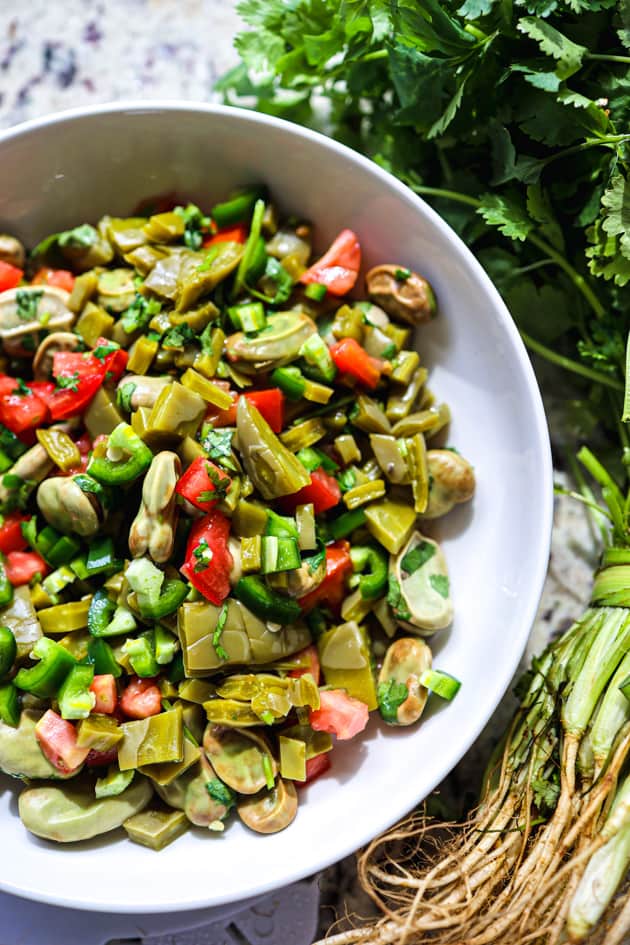
    Mexican fava bean salad with nopales, tomato and green onion in a white bowl

    What Makes This Salad Special?

    This salad stands out for its unique blend of flavors and textures. The fava beans give the salad its creamy, hearty base, the nopales add a slightly acidic green note that balances everything out, and the lime dressing pulls it all together with brightness and heat. Whether you use fresh or canned fava beans, this is a reliable, versatile, and deeply satisfying dish.

    Why Try This Salad?

    • Hearty and filling: about 8 g protein and 7 g fiber per serving, per the recipe card.
    • Offers a burst of authentic Mexican flavors that will surprise your palate.
    • An easy addition to any meal plan, dressed with just lime juice, olive oil and oregano.
    • Accessible year-round thanks to canned fava beans.

    Spoonful of fava bean and nopal salad lifted from the bowl

    Ingredients

    Key Ingredients

    Fava Beans

    You can use fresh or dried fava beans — both work beautifully. Canned fava beans are the most convenient option and require only a rinse before use.

    • Why they matter: Fava beans are the protein backbone of the salad. Their creamy, slightly earthy flavor pairs perfectly with the bright acidity of lime and the freshness of cactus.

    Cactus Paddles (Nopales)

    Nopales are a staple of Mexican cooking — slightly acidic, green, and succulent. Look for them fresh at Mexican grocery stores, or use jarred nopales as a convenient alternative.

    • Why they matter: Their mild acidity and firm texture balance the creaminess of the fava beans and keep the salad from feeling heavy.

    Tomatoes

    Use fresh, ripe tomatoes. Remove the seeds and use only the flesh to prevent the salad from becoming watery.

    • Why they matter: They add juiciness and a touch of sweetness that rounds out the acidity of the lime dressing.

    Cilantro

    Fresh cilantro is non-negotiable here. Its robust, herbal taste is one of the defining flavors of the Mexican profile in this dish.

    • Why it matters: Cilantro brings a refreshing herbaceousness that lightens every bite and adds that unmistakable Mexican identity.

    Jalapenos

    One to two jalapeños, roughly chopped, adds just the right level of heat without overpowering the other flavors. Remove the seeds for a milder kick.

    • Why they matter: Heat activates the other flavors in the salad and makes every bite more dynamic.

    Lime

    Generous lime juice forms the base of the dressing. Do not be shy — this salad needs real citrus brightness.

    • Why it matters: Lime acid brightens every ingredient, makes the beans taste fresher, and ties the dressing together.

    Mexican Oregano

    Mexican oregano has an earthy, slightly citrusy flavor that is distinct from Mediterranean oregano. It is worth seeking out for this recipe.

    • Why it matters: It adds depth and authenticity to the dressing — the flavor note that makes this taste unmistakably Mexican.

    Mexican fava bean salad with tomato and cilantro beside fresh green onions

    How to Cook Fresh Fava Beans

    Cooking fresh fava beans only takes 5–7 minutes depending on pod size. Remove the beans from their shells and boil them in salted water for 5–7 minutes. Meanwhile, prepare a bowl of ice water. Once the beans turn a vibrant moss green, transfer them to the ice bath immediately. Once cool, use your fingers to peel off the pale outer skin — the bright green inner bean is what you want.

    How to Cook Dried Fava Beans

    Dried fava beans require soaking and simmering before use.

    1. Place beans in a large bowl and cover with water. Soak overnight or for at least 8 hours.
    2. Drain, rinse, and place in a pot. Cover with fresh water at least 2 inches above the beans.
    3. Bring to a boil, then reduce to a simmer. Cook for 1 to 1.5 hours until tender, adding water as needed.

    For another hearty Mexican salad, try the original pico de gallo or the warm lentil and sweet potato salad.

    Fava bean and nopal salad on a white plate next to roast chicken and rice

    Frequently Asked Questions

    Can I use canned fava beans instead of fresh?

    Yes — canned fava beans are the easiest option. Simply drain, rinse thoroughly under cold water, and they are ready to use. The texture is slightly softer than fresh but the flavor is excellent, especially once dressed.

    What can I substitute for nopales?

    If you cannot find cactus paddles, you can substitute with blanched green beans, sliced zucchini, or cucumber for a similar crunchy, fresh element. The flavor profile will shift slightly but the salad will still be delicious.

    How long does fava bean salad keep?

    Store undressed salad in the refrigerator for up to 3 days. If already dressed, it is best consumed within 24 hours as the acid in the lime juice will continue to soften the vegetables.

    Is this salad served warm or cold?

    It is typically served at room temperature or slightly chilled. If using freshly cooked beans or nopales, allow them to cool before dressing and combining.

    Can I make the dressing ahead of time?

    Absolutely. Whisk all dressing ingredients together and store in a sealed jar in the refrigerator for up to 5 days. Give it a good shake before using.

    Mexican fava bean salad with tomato and cilantro beside fresh green onions

    Mexican Fava Bean Salad

     Try the amazing flavours of Mexico with our delicious fava bean salad! This dish features fresh cactus paddles, juicy tomatoes, and zesty onions. 
    Prep Time 30 minutes
    Cook Time 10 minutes
    Total Time 40 minutes
    Course: Salad
    Cuisine: Mexican
    Calories: 195

    Ingredients
      

    • 1 can (15pz) fava beans, drained and rinsed 2.5 cups of shelled and peeled fresh fava beans
    • 1 cup diced fresh tomatoes
    • 1 cup diced fresh cactus paddles "nopales"
    • ½ cup red onion, finely chopped
    • ¼ cup cilantro, finely chopped
    • 1-2 jalapeños, roughly chopped
    Salad Dressing
    • 2 limes, juiced
    • 1 tsp dried oregano
    • ¼ cup olive oil
    • 1 tsp sugar
    • 1 tsp salt to taste
    • black pepper to taste

    Method
     

    1. FRESH FAVA BEANS: bring a large pot of water to a boil. Remove the bean from the shell, and boil them for 5-7 minutes. 
       Once the pods have turned into a moss colour green, remove them and quickly place them in the ice bath. Now use your fingers to peel off the tough outer skin of each bean. The vibrant green inner bean is what you want to keep.
    2. CANNED FAVA BEANS: Remove the beans from the can and strain out the liquid. Give them a good rinse in water. Strain.
    3. DRESSING: Put all the ingredients together and give it a good stir with a whisk.
    4. PUTTING IT TOGETHER: Add all the fava beans tomato, cactus paddles, red onion, cilantro, and jalapeños together in a large bowl. Give it a good toss, and top it off with the dressing and give it another good toss. Serve immediately.
  • Simple Rack of Lamb with Mango Mint Sauce

    Simple Rack of Lamb with Mango Mint Sauce

    Rack of lamb looks intimidating, but this recipe proves it is actually one of the most impressive — and effortless — dinners you can put on the table. A simple rosemary-garlic marinade, 25 minutes in the oven, and a blender-quick mango mint sauce turn a restaurant-level cut into a weeknight celebration.

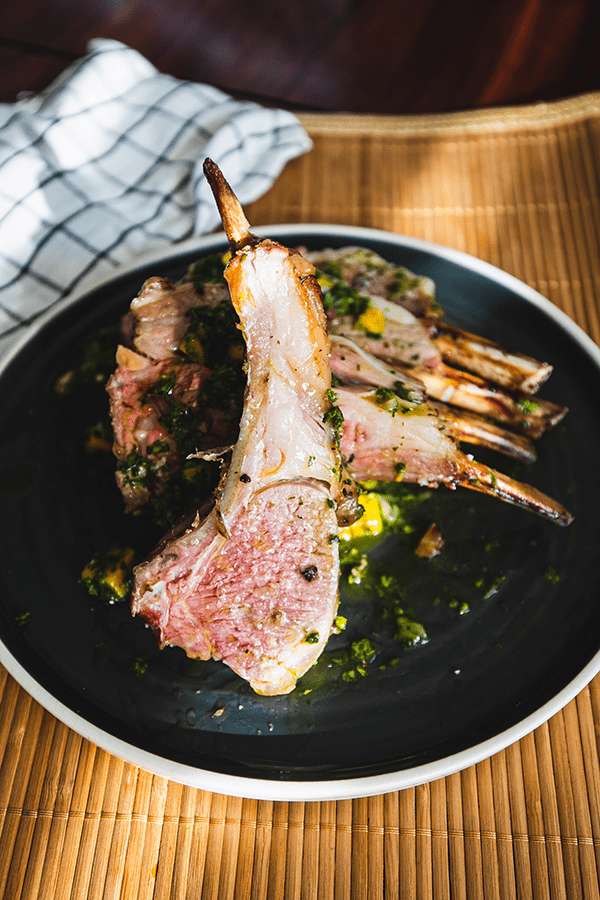
    Roasted rack of lamb with foil-wrapped bones on a white plate

    Lamb chops are a personal favourite, and this roasted version is no exception. The tenderness of the meat, combined with the bold flavours, creates an unforgettable dining experience. Every time the lamb is sliced, a burst of juicy goodness pours out, making each bite irresistible.

    When the lamb and garlic hit the high heat of the oven, a heavenly aroma fills the kitchen — reminiscent of a five-star restaurant. It’s the perfect dish to serve to guests, impressing them with both the presentation and the flavours.

    Besides the marinade, the secret to a tender and juicy rack of lamb is temperature. High heat ensures the lamb is cooked to a perfect medium-rare finish.

    Roasted rack of lamb with mango mint sauce

    To complement the rich flavours of the lamb, the mango and mint sauce provides a refreshing balance. The sweetness of the mango paired with the freshness of the mint creates a symphony of flavours that brings out the best in the dish.

    This post may contain affiliate links. If you purchase through these links, I may earn a small commission at no extra cost to you. Thank you for supporting Love & Harvest!

    Ingredients for Rack of Lamb

    Rack of Lamb

    • Why it matters: Choose a French-cut rack (bones exposed and cleaned) so the presentation is clean and the meat cooks evenly. Look for a rosy-pink colour with good marbling — the fat bastes the meat as it roasts.

    Rosemary and Garlic

    • Why it matters: These two aromatics are classic companions for lamb. Rosemary’s pine-like fragrance penetrates the meat overnight, while grated garlic caramelises into a golden crust in the oven. Together they define the flavour of the dish.

    Fresh Mango

    • Why it matters: Ripe mango adds tropical sweetness that cuts through the richness of the lamb. It balances the sauce without any added sugar and makes the colour stunning.

    Fresh Mint

    • Why it matters: Mint is the traditional partner to lamb across Middle Eastern and British cuisines. Here it keeps the sauce bright and refreshing instead of heavy.

    Mango mint sauce ingredients - mint, parsley, garlic

    Mint, parsley and garlic — key ingredients for the mango mint sauce.

    The Mango Mint Sauce

    The mango mint sauce is the perfect accompaniment to the rack of lamb. The refreshing taste of mint, the brightness of lemon juice, and the sweetness of mango chunks blend together to create a sauce that is both delicious and satisfying. With the addition of garlic and parsley, the sauce is elevated to a new level of flavour, adding a pleasant depth to the dish.

    Mango mint sauce ingredients close up

    Easy Rack of Lamb Marinade

    When it comes to marinating a lamb rack, simplicity is key. With just a handful of ingredients, you can elevate the flavour of the meat to a whole new level. The combination of garlic, rosemary, olive oil, salt, and pepper work together to create a mouthwatering taste that is sure to impress.

    Try marinating your lamb rack overnight and see for yourself! As the flavours meld together, the meat becomes tender and juicy, making for an absolutely delicious meal that is perfect for any occasion.

    Rack of lamb marinating with rosemary and garlic
    Marinated rack of lamb ready to roast

    How to Shop for Rack of Lamb

    At the butcher shop, inquire about a rack of lamb. Before making the purchase, check that the meat is fresh — it makes all the difference in taste.

    Look for a pink or rosy-red colour, which indicates freshness. Dark red or brown meat has been out too long. Also look for good marbling — fat surrounding the meat — which creates a tender and juicy experience when cooked. Consider asking for the “French” cut, where the ribs are cleaned and exposed. This cut is perfect for showcasing the succulent meat and makes it easier to carve and serve.

    Shopping for fresh rack of lamb at the butcher
    Frenched rack of lamb ready to prepare

    Side Dishes to Serve with Rack of Lamb

    1. Roasted Root Vegetables: Cut up carrots, parsnips, and sweet potatoes, toss with olive oil and seasonings, and roast alongside the lamb.
    2. Grilled Asparagus: Brush fresh asparagus spears with olive oil and grill or roast until tender and slightly charred.
    3. Couscous Salad: Mix cooked couscous with chopped fresh herbs, diced vegetables, and a simple vinaigrette.
    4. Creamy Polenta: Cook polenta according to package directions, then stir in butter and grated Parmesan for a rich and creamy side dish.
    5. Sauteed Mushrooms: Saute sliced mushrooms in butter with garlic and fresh thyme until golden brown.
    6. Roasted Brussels Sprouts: Halve the sprouts, toss with olive oil and seasonings, and roast until tender and slightly crispy.

    Rack of lamb plated with sides

    Professional Tips

    Pro Tip #1 — Use a Meat Thermometer

    A meat thermometer is the best way to determine doneness, especially for an expensive cut like rack of lamb. Insert the probe into the thickest part of the meat: 125°F for rare, 135°F for medium-rare. No guesswork, no overcooked lamb.

    Using a meat thermometer on rack of lamb

    Pro Tip #2 — Make Ahead for Easy Entertaining

    My favourite part of this recipe is that you can marinate the rack of lamb 1 to 2 days before roasting — and the longer you marinate it, the tastier it becomes! Take it out of the refrigerator 1 hour before roasting so it comes to room temperature. This ensures even cooking throughout.

    Marinated rack of lamb resting before roasting

    Pro Tip #3 — Let the Roast Rest Before Carving

    When the rack of lamb comes out of the oven, the internal temperature continues to rise due to residual heat. Resting the meat allows the juices to redistribute throughout, keeping the lamb moist and tender. Cover loosely with foil and rest for at least 15 to 20 minutes — this is the time to prepare your sides and sauce. For a general rule, allow 10 minutes of rest per pound.

    Love this lamb recipe? Try these other dinner favourites on Love & Harvest:

    You’ll also want a good roasting rack and a sturdy roasting pan to get that perfect elevated roast every time.

    Frequently Asked Questions

    What temperature should rack of lamb be cooked to?

    For medium-rare, which is the recommended doneness for rack of lamb, the internal temperature should read 135°F (57°C). Use a meat thermometer inserted into the thickest part of the meat to check. For rare, pull it at 125°F (52°C).

    How long should I marinate the rack of lamb?

    A minimum of 2 hours works well, but overnight is ideal. The longer the lamb sits in the rosemary-garlic marinade, the more deeply the flavours penetrate the meat. You can safely marinate it up to 2 days in the refrigerator.

    Can I make the mango mint sauce ahead of time?

    Yes. Blend the mint, parsley, garlic, and lemon juice up to a day ahead and store covered in the refrigerator. Stir in the fresh mango chunks just before serving to keep the texture vibrant and the colour bright.

    Do I need to score the meat before marinating?

    It is not necessary, but lightly scoring the fat cap with a sharp knife helps the marinade penetrate deeper and allows the fat to render more evenly during roasting. Make shallow cuts — do not cut through to the meat.

    What does “French cut” mean for rack of lamb?

    French cut (or “frenched”) means the rib bones have been trimmed and cleaned of meat and fat, exposing the bones for an elegant presentation. Most butchers offer this service — just ask when you buy.

    Can I cook rack of lamb on a cast iron skillet instead of a roasting pan?

    Absolutely. A preheated Lodge 12-inch cast iron skillet works beautifully. Sear the lamb fat-side down for 2 to 3 minutes before transferring to the oven — this creates an extra-crispy crust that a roasting pan alone will not achieve.

    Rack of lamb topped with mango mint sauce

    Simple Rack of Lamb with Mango Mint Sauce

    Delicious and juicy rack of lamb made with only a few ingredients! This is an easy recipe for entertaining that requires only 25 minutes of cooking time, served with a refreshing mango and mint sauce. Print Recipe Pin RecipePrep Time:2 hours Cook Time:25 minutes Course: Main CourseKeyword: mango mint sauce, rack of lambServings: 6 people

    Ingredients

    Rack of Lamb Marinate

    • 1.7 kg rack of lamb French cut
    • 3 tbsp olive oil
    • 1 spring of rosemary chopped finely
    • 4 garlic cloves grated
    • 2 tsp salt
    • pepper

    Mango Mint Sauce

    • 1 cup mint
    • ¼ cup parsley
    • ½ lemon juice
    • 2 garlic cloves
    • 1 mango
    • 1 tsp sea salt
    • pepper

    Instructions

    Marinating Rack of Lamb

    • Take the lamb out and give it a good rinse under running tap water. Pat dry with paper towel.
    • Meanwhile, combine the olive oil, rosemary, garlic, salt and pepper in a bowl. Mix well.
    • Rub the marinade all over the rack of lamb. Give it a good rub and massage. The more time you rub, the better the flavour penetrates into the meat. Wrap the rack of lamb with plastic and let it sit in the fridge for at least two hours. For best flavour, leave it in the fridge overnight.

    Cooking the Rack of Lamb

    • Take the rack out 1 hour before putting it in the oven. Have the plastic wrap still intact while it rests to room temperature.
    • Preheat oven to 375°F. Place a rack at the bottom third of the oven.
    • Once the lamb has rested for 1 hour on the countertop, take out a roasting pan with a rack. Unwrap the plastic around the lamb, and place the rack with the exposed bones up and the meatiest part of the lamb sitting on the roasting pan.
    • Bake the rack of lamb for 25 minutes. To know if the lamb is ready, insert a thermometer into the center or thickest part of the meat. The temperature should read 125°F for rare or 135°F for medium-rare.
    • While the lamb is roasting, make the mango mint sauce. Using a food processor, add the mint, parsley, lemon juice, and garlic. Pulse about 15 times. If you like it smoother, process continuously for 15 seconds. Scrape the sauce out and stir in the mango chunks, salt, and pepper. Set aside.
    • Take the lamb out and let it rest for 15 to 30 minutes before carving. Serve the mango mint sauce on top or on the side.
    • Optional: place small aluminum foil strips on the exposed bones to protect them from burning in the high heat. This is purely for aesthetics.
  • Vegetarian Mango Soy Ceviche

    Vegetarian Mango Soy Ceviche

    This Vegetarian Mango Soy Ceviche is proof that plant-based food can be just as vibrant and satisfying as anything from the sea. Juicy mango, tangy lime, jalapeño heat, and tender soy protein come together in a refreshing dish that is perfect for warm summer days — and ready in under 40 minutes.

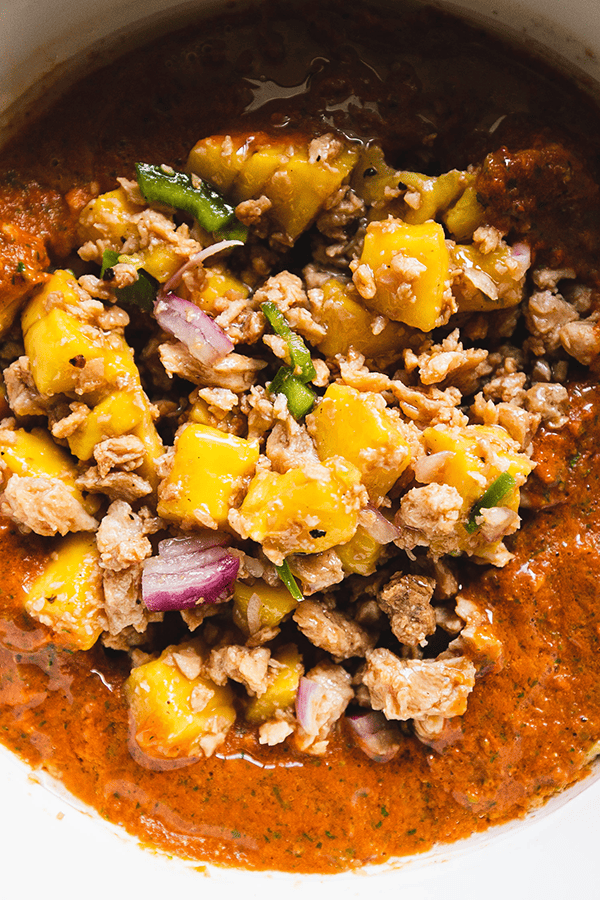
    Vegetarian Mango Soy Ceviche plated with red salsa

    This post may contain affiliate links. If you purchase through these links, I may earn a small commission at no extra cost to you. Thank you for supporting Love & Harvest!

    What Is Ceviche?

    Ceviche is a vibrant and refreshing dish that hails from the coastal regions of Latin America. Traditionally it is made by marinating raw fish or shellfish in citrus juice — the acid “cooks” the seafood, denaturing the proteins and giving it a firm texture. The result is a zesty and flavourful dish enjoyed as an appetizer or a light meal.

    Here in Mexico, ceviche is a celebration of fresh ingredients and bold flavours. It features an array of complementary components such as onions, tomatoes, herbs like cilantro, and a touch of heat from jalapeños. The beauty of ceviche lies in its versatility — vegetarian versions like this Mango Soy Ceviche use vegetables and fruits as the base, marinated in citrusy goodness to create a refreshing and tangy medley of flavours.

    Vegetarian Mango Soy Ceviche ingredients laid out

    My Vegetarian Journey in Mexico

    In my culinary journey through Mexico, I noticed the abundance of fresh vegetables and fruits in the markets, and also that vegetarian dishes did not always take the spotlight in traditional Mexican cuisine. As someone passionate about vegetarian food, I was inspired to create a dish that proves vegetarian cuisine is anything but mundane.

    With each bite of the Mango Soy Vegetarian Ceviche, I am transported to the bustling streets of Mexico, where the lively atmosphere and rich culinary heritage come alive. The succulent mangoes bring a burst of sweetness, the tangy lime juice adds a refreshing kick, and the dried soy protein creates a satisfying hearty texture that makes this dish a complete meal.

    Ingredients for Vegetarian Mango Soy Ceviche

    Dried Soy Protein

    • Why it matters: Dried soy protein (also called textured vegetable protein or TVP) is the meat substitute that gives this ceviche its hearty, chewy texture. Once boiled and cooled, it absorbs the lime, Maggie sauce, and spices beautifully, mimicking the texture of seafood without any fish. Look for it in health food stores or order it online.

    Ripe Mango

    • Why it matters: The mango delivers natural sweetness and tropical flavour that balances the acidity of the lime and the savoury depth of the sauces. Choose a mango that yields slightly to pressure — too firm and it won’t have enough flavour, too soft and it turns mushy in the dish.

    Fresh Lime Juice

    • Why it matters: Lime is the soul of any ceviche. The citric acid brightens every ingredient and ties the flavours together. Use freshly squeezed lime juice — two small limes — for the best results.

    Maggie Sauce

    • Why it matters: Maggie sauce adds a savoury, umami depth that makes this vegetarian ceviche taste complex and restaurant-worthy. It is a beloved Mexican condiment found in almost every kitchen in Mexico. A little goes a long way.

    Jalapeño

    • Why it matters: The jalapeño brings the heat that makes ceviche addictive. Finely chop it for even distribution. Remove the seeds for a milder version or keep them for full heat.

    Plated mango soy ceviche with red salsa base

    Why Try This Mango Soy Vegetarian Ceviche?

    1. Bursting with vibrant flavours: The combination of ripe mangoes, zesty lime juice, and the umami richness of Maggie sauce creates a harmonious balance that dances on your palate.
    2. Refreshing and light: The citrusy marinade paired with juicy mangoes provides a delightful burst of freshness, making it perfect for warm weather indulgence.
    3. Vegetarian delight: This ceviche showcases the beauty and versatility of vegetarian cuisine — you can enjoy the essence of a traditional ceviche while staying fully plant-based.
    4. Texture experience: The soy protein, juicy mango, and crisp jalapeño add layers of texture to every bite.
    5. Easy and quick: With straightforward instructions, you can have this on the table in under 40 minutes.
    6. Sustainable choice: Overfishing and unsustainable fishing practices have depleted marine resources worldwide. Choosing plant-based alternatives like this ceviche lets you enjoy a delicious meal with a lighter impact on the planet.

    Vegetarian ceviche close-up showing texture

    Vegetarian Ceviche Flavour Profile

    The flavour of Mango Soy Vegetarian Ceviche can be described as a tantalizing combination of sweet, tangy, savoury, and refreshing notes in perfect harmony. The ripe mangoes bring natural sweetness, the lime juice provides a bright citrusy kick that balances that sweetness, and the Maggie sauce and vegan fish sauce layer in a complex, savoury depth that makes this dish genuinely surprising for first-time tasters.

    Love fresh and vibrant Mexican-inspired dishes? Try these others from Love & Harvest:

    Frequently Asked Questions

    What is dried soy protein and where do I find it?

    Dried soy protein (also called TVP — textured vegetable protein) is a high-protein meat substitute made from defatted soy flour. It comes in small granules or chunks, is shelf-stable, and doubles in size when rehydrated. Find it at health food stores, Latin markets, or order a bag of dried soy protein on Amazon.

    Can I make this ceviche ahead of time?

    Yes. The red salsa and the soy protein can be prepared up to a day in advance and stored separately in the refrigerator. Combine everything and add the fresh mango just before serving to keep the texture and colour at their best.

    How do I make this dish spicier or milder?

    For more heat, keep the jalapeño seeds and add a second jalapeño. For a milder version, remove all seeds and membrane from the jalapeño before chopping, or substitute a milder pepper like poblano.

    Can I use fresh soy protein instead of dried?

    The recipe calls for dried soy protein specifically because its texture after rehydration mimics seafood. Fresh tofu can be substituted — press it dry, cube it, and use it directly without boiling. The flavour absorption will be different but still delicious.

    What can I serve this ceviche with?

    Serve with tostadas, corn tortilla chips, or slices of avocado. The red salsa base is also wonderful on its own as a dip. A squeeze of extra lime over the top just before serving brings out all the flavours.

    Is this ceviche gluten-free?

    The base ingredients are naturally gluten-free, but check your brand of dried soy protein and Maggie sauce — some brands add wheat-based ingredients. Substitute coconut aminos for the Maggie sauce if you need a certified gluten-free alternative.

    Vegetarian Mango Soy Ceviche

    Vegetarian Mango Soy Ceviche

    A delightful twist on the traditional seafood-based ceviche. Our Mango Soy Ceviche is bursting with vibrant colours and flavours, which offer a refreshing and tangy taste, perfect for warm summer days. Print Recipe Pin RecipePrep Time:20 minutes Cook Time:15 minutes Course: AppetizerCuisine: MexicanKeyword: ceviche, soy, vegetarianServings: 6 people

    Equipment

    • high speed blender
    • colander

    Ingredients

    • 2 cups dried soy protein
    • 1 ripe mango cubed
    • 1 jalapeno finely chopped
    • 1 tbsp red onion finely chopped
    • 2 small lime juiced
    • 1 tsp Maggie sauce
    • 2 tsp vegan fish sauce
    • 1 tsp salt
    • 1 tbsp olive oil garnish

    Red Salsa

    • 1-2 tsp olive oil
    • 4 small roman tomatoes
    • 3 branches of cilantro
    • 1 tsp apple cider vinegar
    • pinch of salt

    Instructions

    Red Sauce

    • In a saucepan, turn the heat to medium-high. Slice the tomatoes into quarter-inch slices. Add the oil to the pan and sear the sides of all the tomatoes until slightly browned. Remove from heat.
    • In a high-speed blender, add the grilled tomatoes, cilantro, vinegar, and salt. Blend until smooth. Set aside.

    Mango Soy Ceviche

    • Add the dried soy proteins to a colander. Rinse under the faucet to remove any dust particles. Set aside.
    • Bring 1 litre of water to a boil, then add the rinsed soy protein. Cook on medium heat for about 10 to 15 minutes. Watch the pot carefully as it can foam up. Drain through a colander and let the cooked soy protein cool to room temperature.
    • In a large bowl, combine the cubed mango, jalapeño, red onion, lime juice, Maggie sauce, vegan fish sauce, and salt. Add the cooled soy proteins and mix well.
    • On the serving dish, spread the red salsa as the base. Place the mango soy ceviche on top in the centre. Drizzle the olive oil evenly over the top. Serve cold.
  • Delicious Meatless Spicy Peanut Noodle

    Delicious Meatless Spicy Peanut Noodle

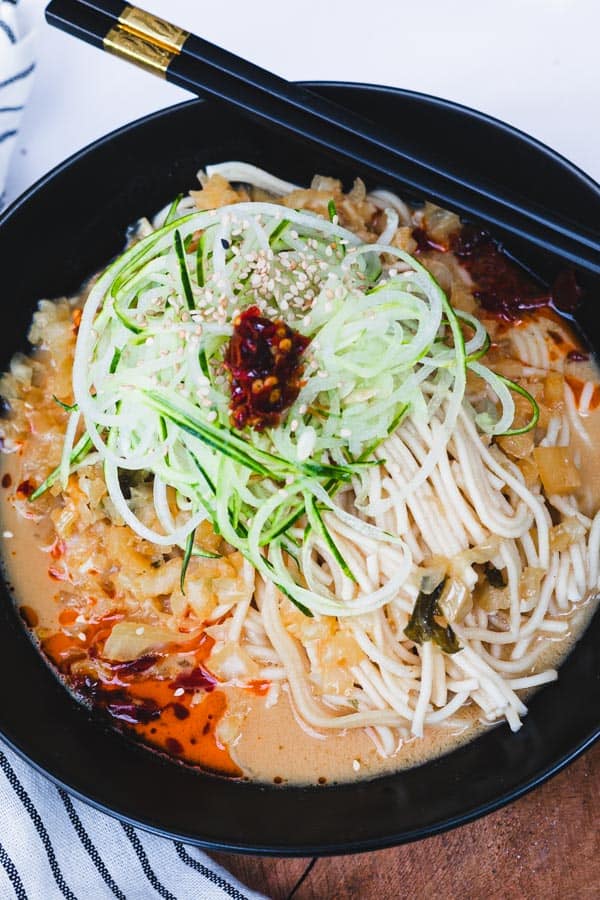
    This vegetarian peanut noodle is so easy to make and RIDICULOUSLY delicious. The perfect umami slurp that’s meatless.

    veggie peanut butter noodles

    This post may contain affiliate links. If you purchase through these links, I may earn a small commission at no extra cost to you. Thank you for supporting Love & Harvest!

    My summer is never complete without making this vegetarian spicy peanut noodle with cooling cucumber. Imagine a nutty and tangy peanut noodle pasta served with a refreshing cucumber and sesame oil salad on top. This dish is the epiphany of what life is all about!

    Back a few years ago when I was teaching cooking classes in Mexico, this vegetarian Spicy Peanut Noodle with cooling cucumber recipe was one of my students’ favourite recipes. Till this day I have past students of mine messaging me and telling me this recipe had stuck with them for a long time and they are now feeding their children with the exact same recipe.

    It’s a humble experience knowing I’ve gifted them something that is now being passed down as a family meal. And now I want everyone to have the same experience as all my students once had.

    This recipe is easy and very good for a fast-paced family who are always on the go. It’s also a kid-friendly meal, minus the spice. My kids love this a lot and occasionally request it. If you know a child who loves peanut butter sandwiches and you can’t get them to eat anything else, this is what they need in their life. You will not struggle with time using this recipe!

    peanut noodles

    How Does It Taste?

    It is spicy, tangy, nutty, and thick. You can serve it hot or cold — the options are yours. In the summer I make it with less sauce so it just lightly coats the noodle. I bring it to picnic trips and road trips. Then I top it off with some cold cucumber sesame oil salad.

    In the winter I like it more hot and with more of the sauce to warm around the noodle, almost like a noodle soup. Sometimes I ladle a hot cup of chicken stock into the sauce so it thins out and turns it into a noodle soup. The recipe is super versatile.

    What Noodles Should I Use?

    Original Chinese noodles will do. DragonMall Wu Mu Noodles are a good option. They cook very easily and coat the peanut sauce well. They remind me a lot of how Shandong noodles are made and taste.

    If you don’t have access to these noodles you can make your own! I have my 3 minute homemade ramen noodle recipe here if you’re interested in going the extra mile. Regular spaghetti noodles also work if neither option is available — not the authentic style, but we do what we have to do. You could also try pairing this sauce with a simple noodle base like this spinach pasta for a creative variation.

    peanut noodle recipe

    Why You Will Love This Meatless Recipe

    • Easy Meal – it takes only 30 minutes to make this meal! You make your sauce all in the blender, toss it with some hot noodles, and lay the cucumber sesame oil salad on top.
    • Vegetarian and Vegan – Looking for a meatless meal that’s still delicious and cooling for summer and into fall? This recipe is perfect for something cooling to eat in the summer.
    • Have it hot or cold – yes, you can make it cold for summer days or hot for colder weather. There is no season preference.
    • It’s super tasty – in the sauce there’s soy sauce, garlic, peanut butter, and black vinegar. It has a super umami taste and a slurp of this bad boy is unreal.
    • The best slurp experience – who doesn’t love noodles? You’re going to get the best slurp experience with these noodles because they’re packed with flavour and spiciness you’ll truly enjoy. Then we add the cucumber salad to cool your tongue.

    vegan spicy peanut noodles

    How to Make the Spicy Peanut Noodle Sauce

    The sauce is made purposefully easy because we want to make it hassle free. Here are the simple steps:

    • In your blender add: soy sauce, peanut butter, garlic, ginger, sesame oil, peppers, vinegar, dark soy sauce, and chicken stock.
    • Cook the noodles as instructed. You do not need to rinse the noodles in water. The starch from the cooked noodles will help make the sauce thicker and coat it better.
    • Toss the sauce and noodle together.

    vegan thai peanut noodles

    How to Make the Cucumber Salad

    Easy and delicious cucumber salad. I use it to garnish the top of the noodles. Once you make it make sure to serve it immediately.

    • Wash the cucumbers, and slice off the ends. Using a vegetable peeler, start to slice it lengthwise to get these thin beautiful slices. Put them in a strainer to let the excess water run off.
    • Give them a good pat with a paper towel and soak up any excess water.
    • Toss the cucumber ribbons with sesame oil, salt, and sesame seeds.
    • Garnish on top of the noodles and try to build and fluff it up as high as possible on the noodle.

    To thinly cut the cucumber I am using the Vegetable Spiralizer to cut my cucumber perfectly.

    vegan peanut noodle bowl

    Ingredients

    Your Favourite Chili Oil

    If you have a favourite Asian chilli oil and don’t have much opportunity to use it, this is the time! This meatless peanut noodle goes well with any Asian chilli oil. Slather it in the soup or just add a small spoon on top. Whatever portion is perfect here.

    Peanut Butter

    I like to use smooth peanut butter. Chunky peanut butter is fine too. We are adding everything to the blender so the texture of peanut butter doesn’t matter here. For a sesame-forward variation, try tahini as a substitute — it gives the sauce a slightly nuttier depth.

    Salted Mustard

    This is a must for this dish. Do not skip it. Lots of the unknown umami flavour is from here. Pickled mustard is a bit strange in flavour on its own, but when added to other things like soup, it adds lots of dimensions of flavour!

    cold thai peanut noodles

    Soy Sauce

    To give this sauce the umami flavour, we are adding soy sauce. Uncooked soy sauce has a strong and special umami flavour that’s going to lift this sauce into its glorious taste.

    Ginger

    A small finger-tip size ginger helps round out the flavour of the sauce. We are using fresh ginger, not the dry powder form.

    Garlic

    Adding a couple cloves of garlic makes this sauce very tasty. If two is too much for your taste, just add one.

    Sesame Oil

    The toasty taste of sesame oil tells you right away this is an Asian dish! You have the option to add it in the blender or when you toss the noodle and sauce together.

    Vegetable Stock / Chicken Stock

    I give these two options because we all have different dietary restrictions. I love the taste of vegetable stock whether it is store-bought or homemade — I’d much prefer homemade if you ask me. When it is winter and I need to add more protein or bone-brothy goodness for the kids, I will add my homemade chicken stock. Store-bought chicken stock or chicken powder also works.

    Chinese Black Vinegar

    This is a common ingredient in Chinese cooking. We are adding a little bit of vinegar to get that tangy flavour. Black vinegar is a good option here.

    Cabbage

    To thicken and add texture to the sauce, we are adding some pre-boiled chopped cabbage. A pure liquid sauce to coat the noodles is not enough. To add some elegance and texture, we are adding cabbage and salted mustard.

    thai peanut noodles recipe

    Love noodle dishes? Try our homemade pesto gnocchi for another satisfying pasta night.

    Frequently Asked Questions

    Can I make this peanut noodle gluten-free?

    Yes! Swap regular soy sauce for tamari or a certified gluten-free soy sauce, and use rice noodles instead of wheat noodles. The flavour profile stays the same.

    Can I add protein to this meatless noodle?

    Absolutely. Tofu, edamame, or a soft-boiled egg all work beautifully. For non-vegetarians, shredded rotisserie chicken or sauteed shrimp are great additions.

    How long does the peanut sauce keep?

    Store leftover peanut sauce in a sealed jar in the refrigerator for up to 5 days. It will thicken as it chills — thin it back out with a splash of warm water or vegetable stock before using.

    Can I make this dish ahead of time?

    Make the peanut sauce and cucumber salad up to one day ahead and store them separately. Cook the noodles fresh when ready to serve for the best texture.

    What is Chinese black vinegar and can I substitute it?

    Chinese black vinegar (Chinkiang vinegar) has a deep, malty-sweet tang. The closest substitute is a mix of balsamic vinegar and a splash of rice vinegar. Regular rice vinegar on its own also works but the flavour will be lighter.

    Is this recipe suitable for kids?

    Yes, with adjustments. Simply omit or reduce the chilli oil and peppers for the kids’ portion. The base peanut sauce is kid-friendly and many children love the nutty noodle flavour.

    Spicy peanut noodles topped with cucumber ribbons and chili oil

    Meatless Spicy Peanut Noodle

    This Meatless Spicy Peanut Noodle recipe is a delicious bowl of slurp! Spicy, nutty, and tangy. A favourite among kids and adults. Print Recipe Pin RecipePrep Time:25 minsCook Time:15 minsCourse: Main CourseCuisine: ChineseKeyword: Spicy Meatless Peanut NoodleServings: 5 people

    Ingredients

    Peanut Sauce

    • 3 tbsp smooth peanut butter or tahini
    • ½ cup soy sauce
    • 2 cups vegetable stock
    • 2 garlic clove
    • ¼ inch fresh ginger
    • 1 tbsp chinese black vinegar
    • 500g Dried Asian noodles
    • 2 tbsp minced pickled mustard do not blend with the sauce
    • 1 tsp sesame oil
    • 1 tsp chilli oil

    Cucumber Salad

    • 2 medium size cucumber
    • 1 tsp sesame oil
    • 1 tsp sesame seed
    • ½ tsp sea salt add only when you're ready to serve

    Cabbage Side

    • ¼ small cabbage
    • 1 tsp salt
    • ½ litre water

    Instructions

    To Make Peanut Sauce

    • In a blender add the peanut sauce, soy sauce, vegetable stock, garlic, ginger, and black vinegar. Blend until smooth.

    To Make Cucumber Salad

    • Using the vegetable spiralizer, attach the cucumber and spiralize the cucumber into ribbons. Toss it with some sesame oil. Salt: do not add the salt until you're ready to serve. Salt will quickly turn the cucumber into mush.

    To Make the Cabbage Side

    • Take the food processor and add roughly cut cabbage into the machine. Pulse it a few times and turn it completely "on" to finely chop the cabbage. Add the chopped cabbage to boiling water with salt for 5 minutes. Strain the water and set it aside.

    Assemble the Noodle Soup

    • Meanwhile, cook the asian noodles you like. See package for instructions. Set the noodle aside in the bowl.
    • In a pot, add the peanut sauce and bring it to a boil. Add the minced pickled mustard, and cabbage. Cook for about 5 minutes. Test the soup for saltiness. If you think it's too salty, add some water to dilute it. Alternatively you can add non-salted vegetable broth as well.
    • Ladle the hot soup on to the noodles and add the cucumber salad on top.
    • Garnish with some salt on top of the cucumber salad (if desired), sesame seeds, sesame oil, and chili oil. Serve immediately.
  • Frozen Yogurt Bark

    Frozen Yogurt Bark

    These yummy frozen yogurt bark treats are so tasty you’ll want seconds and thirds — and they come together in less time than it takes a baby to nap.

    frozen yogurt bark chocolate

    This post may contain affiliate links. If you purchase through these links, I may earn a small commission at no extra cost to you. Thank you for supporting Love & Harvest!

    These gorgeous frozen yogurt barks are so easy to make you’ll only need a few minutes from your busy schedule to prepare them.

    I managed to make this in between my baby’s nap, and also had some time to pour myself a cup of hot fresh coffee. Impressive right?

    Besides their good looks, they are effortless. Once you make them they can be stored easily in your freezer for up to 6 months — but I guarantee you’ll need only a few days before they get cleared out! This recipe is made with assorted fruits and assorted goodies. It’s a great way to pack in all your summer fruits together.

    We also like saving these barks for winter, when fruits are not readily available.

    frozen yogurt bark with berries and coconut

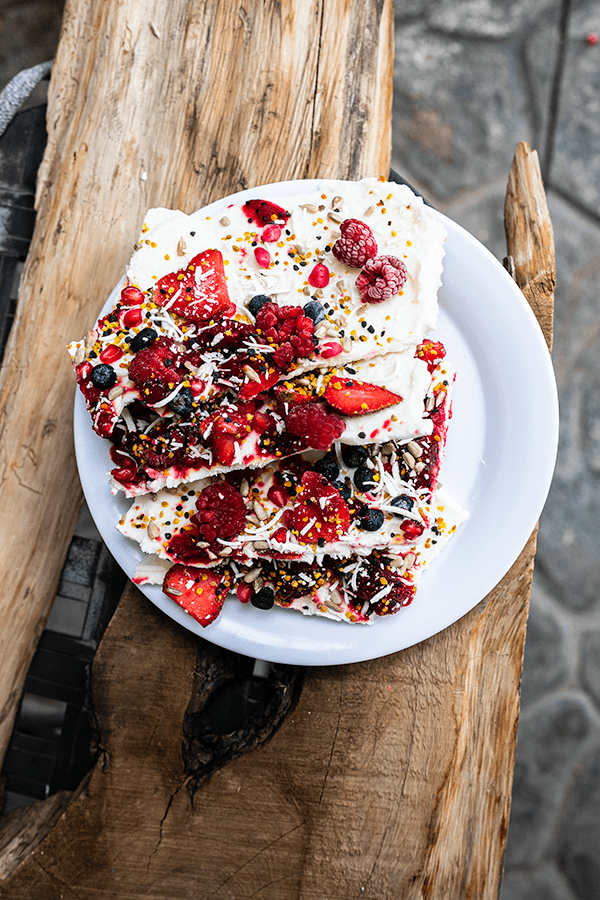
    Frozen yogurt barks are gorgeous! They are made with greek yogurt, sunflower seeds, bee pollens, and coconut strips. We are using fresh summer fruits like red cactus pears, blueberries, pomegranate seeds, strawberries, and raspberries.

    Gorgeous and easy — what more can you ask for, right? If you enjoy frozen treats, you might also love our matcha avocado popsicles or our easy blueberry ice cream for another refreshing option.

    frozen yogurt bark pioneer woman

    Why You Will Love These Frozen Yogurt Barks

    • Easy summer dessert treat: hot summers can feel dreadful, but enjoying these barks on a hot summer day can easily cool you off!

    frozen yogurt bark with fruit toppings

    Why Use Greek Yogurt?

    Greek yogurt is the best yogurt to use compared to others because it is higher in protein (nearly twice the amount). Greek yogurt has a thicker, creamier texture because the liquid whey is strained out.

    It’s also lower in lactose.

    Can I Sweeten My Frozen Yogurt Barks?

    Absolutely! I would recommend using natural maple syrup to sweeten them. After you spread the greek yogurt along the parchment paper, drizzle maple syrup everywhere evenly. You can also add vanilla extract for extra taste!

    Summer Fruits

    In my recipe I made it with the fruits available to me here in Mexico.

    Red cactus pear may be hard or even impossible to find in your area, but locally sourced fruits available in your area can be a great option!

    frozen yogurt bark with cactus pear

    What Else Can You Do With These Barks?

    In the winter time, fruits are not always available. What we also do is save these frozen yogurt barks to make smoothies. We add a few chunks in a blender, toss in some soy milk and banana and we have ourselves a delicious smoothie.

    I love making this smoothie in the morning when we are late. It’s quick and easy for the kids to drink up before they go to school!

    Ingredients

    Greek Yogurt

    One of the best yogurts you can use for this recipe. Chobani whole milk Greek yogurt is a great choice. Other options include all-natural yogurt. The key is using a thick yogurt so your bark sets firmly in the freezer.

    Sunflower Seeds

    Natural sunflower seeds add a great crunch to the barks. If you like, toast the sunflower seeds to give them more flavour.

    Bee Pollen

    I like to add bee pollen because they look like sprinkles once laid on top of the barks — all kids love sprinkles on top of everything! Skip the bee pollen for anyone with pollen or bee allergies.

    Coconut Strips

    I love the coconut strips taste in the bark.

    Pieces of frozen yogurt bark with berries and coconut strips on a white plate

    For my frozen yogurt barks, I use fresh fruits available to me here in Mexico. Some of the fresh summer fruits I am using for this recipe are:

    Red Cactus Pears

    Prickly cactus pear are also known as “tuna” here in Mexico. They range from green (less sweet but more flavour) to red (more sweet but less flavour). They are usually eaten raw with tons of seeds inside which you can bite through and are safe to swallow. The red cactus pear has a beautiful colour.

    Blueberries

    We have to eat the colours of the rainbow which is why we are adding some blue to the frozen yogurt barks. Blueberries add a lovely acidity to the barks.

    Strawberries

    I love the taste of frozen strawberries and that is why they are showing up on these barks! I usually cut one strawberry into 4 to 6 pieces so it is easier to bite into.

    Raspberries

    I love the fuzzy texture of raspberries, and it’s a no-brainer to add raspberries to the barks.

    How to Prepare the Barks

    Cut Up All Your Fruits

    Once you know what fruits you’re using, cut them all up in small cubes. The smaller the better so in one bite you can get a variety of all the ingredients without missing anything. Cutting them small also helps in sprinkling them onto the yogurt evenly.

    Put Everything in Small Cups

    Once you’re ready to sprinkle all your ingredients on to the bark, it’s good to have everything on the side and ready. It will be difficult to have your hands dirty and need to open a bag of sunflower seeds mid-process. Having everything ready makes the process easier and cleaner.

    Frozen yogurt bark with fresh summer fruit and coconut strips

    Parchment Paper

    Line your baking sheet with parchment paper. This will help the bark come off easily once it is frozen. It is much easier to spread the yogurt on top of parchment paper. To make this even easier, use a Greek yogurt strainer to get the thickest, creamiest yogurt for your base.

    Spatula

    Using a spatula helps spread the yogurt easier on the parchment paper. If you have an offset spatula, it will make the process much easier.

    frozen yogurt bark recipe

    Frequently Asked Questions

    How long do frozen yogurt barks last in the freezer?

    Stored in an airtight container in the freezer, they keep well for up to 6 months. Separate layers with parchment paper to prevent them from sticking together.

    Why is my frozen yogurt bark too soft?

    This usually happens if the yogurt layer is too thick or the freezer was not cold enough. Spread the yogurt to about 1/4 inch thickness for the best results. Freeze for at least 2 hours, or overnight for a firmer bark.

    Can I use regular yogurt instead of Greek yogurt?

    You can, but regular yogurt contains more water and will result in a less firm, icier bark. Greek yogurt is recommended because it is thicker, creamier, and higher in protein.

    What fruits work best for frozen yogurt bark?

    Any fruit that freezes well works great — berries, kiwi, mango, peaches, and pomegranate seeds are all excellent choices. Avoid high-water fruits like watermelon as they can make the bark watery.

    Can I add chocolate to frozen yogurt bark?

    Absolutely! Drizzle melted dark chocolate over the top of the fruit before freezing, or sprinkle chocolate chips or cacao nibs for added flavour and crunch.

    Frozen yogurt bark topped with strawberries, blueberries and seeds

    Frozen Yogurt Bark

    These yummy frozen yogurt barks are so tasty you’ll want seconds and thirds. Great summer treats for both kids and adults! Print Recipe Pin RecipePrep Time:10 minsCourse: DessertKeyword: dessert, frozen yogurt barkServings: 6 people

    Equipment

    • large baking sheet
    • spatula
    • parchment paper

    Ingredients

    • 3-4 cups natural greek yogurt
    • ¼ cup natural maple syrup optional
    • 1 red prickly cactus pear
    • ½ cup blueberries
    • ¼ cup pomegranate seeds
    • 5-6 strawberries sliced thinly
    • 10-12 raspberries
    • 2 tsp bee pollen
    • ¼ cup coconut strips
    • 2 tbsp sunflower seeds

    Instructions

    • Take out your large cookie baking sheet and spread parchment paper that covers the whole bottom. Use the spatula and spread the greek yogurt along the edge of the parchment paper.
    • Optional: drizzle maple syrup and vanilla. Use the spatula to spread the syrup and vanilla evenly.
    • Always place the largest fruit cubes on first.
    • Gently and evenly put in your first fruit layer. I normally put it in these sequences: strawberry, raspberry, blueberry, and pomegranate seed.
    • Next I add my other ingredients, which are: coconut strips, sunflower seeds and bee pollens.
    • Freeze until firm, roughly about 2 hours. Break into pieces and store in a covered container in the freezer.
  • Halloween Monster Apple Snacks

    Halloween Monster Apple Snacks

    The cutest monster apple snacks for Halloween! Watch your kids light up when they open their lunchbox and see these boo-licious apple snacks. Great as a lunch box idea that is adorably appetizing — and the best part is the kids can help build them too.

    apple monster halloween

    This post may contain affiliate links. If you purchase through these links, I may earn a small commission at no extra cost to you. Thank you for supporting Love & Harvest!

    These super cute Halloween Monster Apple Snacks are Boo-liciously tasty. The perfect Halloween snacks for your kids!

    These cute monsters are made with green apple slices, peanut butter, chocolate chips, strawberries, peanuts, and some leftover cake fondants.

    Making these Halloween monster apple snacks is easy and even the kids can join in on the fun! Making Halloween snacks can be fun, educational, and creative for children!

    Can you imagine the surprise and delight when they open their lunchbox to find these cute monsters waiting for them? I know as parents we always want to surprise our kids with something that is not materialistic, and this is the best intangible surprise you can give your little ones!

    Make these for them, and I’m sure they will feel your effort and love for them! For more fun Halloween food ideas, check out our Halloween Frankenstein guacamole — another crowd-pleaser for kids.

    Let’s get started on how to assemble these cute Halloween Monster Apple Snacks!

    Why You Will Love These Halloween Monster Apple Snacks

    • Creative: let the kids be involved with this process! There’s nothing more creative than letting the kids build their own food! The best part is that all parts of this project are edible — nothing goes to waste.
    • Fun snack for kids: building education through play is the best tactic for getting your kids to learn! They get to recognize forms and shapes!
    • Put a smile on your kid: building these apple snacks with your kids is a great way of bonding. Even if you don’t have the time to work on them with the kids, making these monsters yourself and putting them in their lunchboxes will make them feel loved and treasured. They will feel your effort and amor for them!

    Ingredients

    Apples

    We will need green apples for this project. I use Granny Smith green apples. They taste excellent and all kids love this variety of apples! The tartness of Granny Smith balances perfectly with the sweet peanut butter and chocolate chips.

    Peanut Butter

    Besides the fact that peanut butter is delicious, it serves as the glue for this snack project and helps hold everything together. Use smooth peanut butter for the easiest spreading. A natural smooth peanut butter is the best choice here.

    Peanuts

    There’s something delightfully cute about these crooked teeth made out of peanuts. They stick really well with the peanut butter, and it’s so satisfying sticking these teeth in the monster’s mouths!

    Strawberries

    Monsters can’t be monsters without a funny tongue to showcase! We are thinly slicing the strawberries as the tongue for the monsters. So cute! Make sure to cut each strawberry thinly enough so it fits snugly in the apple mouth slot.

    Chocolate Chips

    I don’t know any kid who doesn’t love chocolate chips, and they are the perfect size for the eyes! I promise you, these eyes are the first to go once the kids see them. Use semi-sweet or dark chocolate chips for the best look.

    Fondants or Dried Fruits

    The fondants go around the rim of the eye. They help enhance the eye and make it pop out more. If you don’t have fondant, you can easily replace it with sliced dried fruits, sliced marshmallow, flat circular candies, or even Cheerios cereal.

    halloween monster apple bites

    To keep these vegan, use dairy-free chocolate chips and a gelatin-free fondant (check the labels), or use sliced dried fruit for the eye rims. Skip the marshmallow and Cheerios options if you need them vegan.

    Frequently Asked Questions

    How do I stop the apples from turning brown?

    Dip or brush lime juice (or lemon juice) onto the flesh of the apple immediately after cutting. The citric acid prevents oxidation and keeps the apple looking fresh and green. Assemble the monsters close to serving time for the best results.

    Can I make these ahead of time?

    You can prep the components the night before — cut the apples and brush with lime juice, portion out the peanut butter, and slice the strawberries. Store everything separately in the fridge and assemble the morning of for the freshest look.

    What can I use instead of peanut butter for nut-free schools?

    Sunflower seed butter (sunbutter) is the best nut-free substitute and has a very similar texture and taste. You can also use tahini, cream cheese, or a soy nut butter.

    How many apple snacks does this recipe make?

    With 4-5 apples, cutting each into quarters, you get about 16-20 apple monster pieces. Plan for about 4 monsters per child as a snack serving.

    Can I use red apples instead of green?

    Yes! Green Granny Smith apples are ideal because their tart flavour balances the sweet peanut butter, but red apples like Fuji or Gala work just as well. The monsters will look just as adorable.

    Are these suitable for toddlers?

    Skip the peanuts as whole peanuts are a choking hazard for young children. You can use finely chopped peanuts or leave the teeth out altogether.

    Halloween monster apple snacks

    Halloween Monster Apple Snacks

    Print Recipe Pin RecipePrep Time:15 minsServings: 4 people

    Ingredients

    • 4-5 Granny Smith's Green Apples
    • 3 tbsp peanut butter smooth
    • 3 strawberries medium or small sizes thinly sliced
    • 15-20 peanuts
    • 1 inch fondant ball or sliced dried fruits or 20 pcs cheerios cereal
    • 20 chocolate chips

    Instructions

    • Wash and dry the apples. Cut the apples in quarters (cut 4 pieces per apple). Also cut out the stem and the core of the apple.
    • Take a slice of the apple, and using a paring knife, cut a hole in the center of the skin of the apple (this is where the mouth will be). Adjust the size of the mouth according to the slice of the strawberries. Each mouth will be a different size depending on the size of the strawberry.
    • Add peanut butter all over the cut hole. Grab a piece of sliced strawberry and firmly press it to the mouth. Add the peanuts to the top of the mouth and firmly press the peanuts into the mouth as well.You can add as many or as few peanuts as you like. Be creative!
    • Lastly, take a small piece of fondant and press it down to a flat circular shape (or whatever food you choose that is flat and circular). Tap some peanut butter to the back and front of the circular object. First glue the fondant to the apple slices and then press the chocolate chips on top.You can add one eye or up to three eyes per monster.

    Notes

    • To keep the apples from going brown, dip or brush lime juice to the flesh of the apples.
  • Easy Salmon Pot Pie with Thyme Crust

    Easy Salmon Pot Pie with Thyme Crust

    Cozy fall evenings call for something extraordinary — and this easy salmon pot pie delivers every time. Picture golden, flakey thyme crust shattering to reveal a creamy, steaming filling of tender salmon, winter vegetables, and melted gouda cheese. It smells incredible while it bakes, and it tastes even better.

    This post may contain affiliate links. If you purchase through these links, I may earn a small commission at no extra cost to you. Thank you for supporting Love & Harvest!

    Salmon pot pie with a golden thyme crust and a slice served on a plate

    This post is all about salmon pot pie — a favourite fall dish stuffed with salmon, winter vegetables, and cheese, then wrapped and baked in a flakey pie crust made with thyme.

    Salmon pot pie cut open to show the salmon and vegetable filling

    Fall is here and comfort food is calling. This salmon pot pie is the answer — salmon and vegetable stuffing, manchego cheese, and a thyme pie crust. Sounds amazing right? The crust alone is worth making. Besides its delicious flavour, it is also a super easy recipe that can be made ahead of time. I make all my pie crusts with a food processor for minimal clean-up.

    Slice of salmon pot pie on a white plate next to the pie

    Salmon Pot Pie Flavour

    Salmon is first marinated with soy sauce and sesame oil. This adds incredible depth of umami flavour to the salmon before it even hits the pan.

    The seasonal fall vegetables are potato, leek, garlic, onion, tomato, and carrot — readily available and perfect for the colder season. Once you combine this with the thyme pie crust, uufff! You have got yourself a marvellous pot pie.

    A hand holding a plate with a slice of salmon pot pie

    Why You Will Love This Recipe

    • Easy: Pie dough is made with a food processor and the salmon stuffing is made on the stovetop. Then combined and baked.
    • Incredible flavour: Salmon steamed with milk, cheese, and vegetables wrapped in a flakey thyme crust — the hardest part is waiting while the aroma fills your house.
    • Filling: Great for cold winter days when you want something substantial.
    • Make-ahead friendly: Pot pies can be made ahead or frozen. Great for busy nights.
    • Economical ingredients: Besides the salmon, everything else is budget-friendly produce you can find anywhere.

    Salmon pot pie filling, rolled crust and grated cheese ready to assemble

    Key Ingredients

    Ingredients

    Salmon

    Fresh or frozen salmon both work here, cut into cubes.

    • Why it matters: Salmon is marinated in soy sauce and sesame oil before cooking, which locks in umami flavour even through the baking process. The cubes absorb the creamy milk-and-cheese filling beautifully.

    Thyme Pie Crust

    Fresh thyme leaves are pulsed directly into the dough using a Lodge Cast Iron Skillet-friendly pastry method — lard, cold water, and apple cider vinegar for maximum flake. For a full deep-dive, see our guide on How to Make a Flakey Pie Crust.

    • Why it matters: Cold fat hits hot oven air and creates steam pockets — that is what makes the crust flakey. Thyme adds an herbal note that pairs perfectly with seafood.

    Gouda Cheese

    Two cups of grated gouda melt into the filling and sit on top before the lid crust goes on.

    • Why it matters: Gouda melts smoothly and has a mild nuttiness that complements the soy-marinated salmon without overpowering it. Use a deep Pyrex pie dish to hold all that cheesy goodness.

    Dill

    Fresh or dried dill sprinkled between the cheese and top crust.

    • Why it matters: Dill and salmon are a classic pairing. While the pot pie bakes, the dill perfumes the steam inside, infusing every bite. If you love this combo, try our Crispy Panko Crusted Baked Salmon next.

    Pot of cubed salmon and vegetable filling for pot pie

    Frozen or Fresh Salmon?

    Fresh salmon is always best for unbeatable flavour, but frozen works well here too. Since we marinate the salmon with soy sauce — a strong flavouring agent — both options produce excellent results. The salmon cubes steam in a glorious pot of cheese, milk, and vegetables and come out flakey and soaked in flavour.

    Food processor bowl of flour topped with fresh thyme sprigs

    Seasonal Vegetables

    Winter vegetables that are economical and easy to find: potato, leek, garlic, onion, tomato, and carrot. Nothing exotic — just your typical corner grocery store staples.

    Thyme Pie Crust

    From the base flakey pie crust recipe, we simply add fresh thyme to the dough. Thyme is a great herb to accompany seafood, especially salmon. Use a rolling pin to roll the dough evenly, and a pastry brush for the egg wash. Not to mention it looks absolutely gorgeous!

    Rolled thyme pie crust draped over a fluted pie pan

    We Love Dill with Our Salmon

    This comes with no surprise — we love adding fresh dill to salmon. Fresh or dried dill works. If you love salmon and dill together, do not miss our Crispy Panko Crusted Baked Salmon — another baked salmon recipe with dill, lemon, mayonnaise. And for something different with salmon, try our Ricotta Cheese Salmon Roll.

    Salmon and vegetable filling topped with cheese and dill inside the pie crust

    Fool-Proof Professional Tips

    Pro Tip #1 — Cool Everything Before Assembling

    Do not put hot salmon stuffing onto cold dough — it melts the butter and ruins the flakey structure. Let everything cool to room temperature first. We also need to freeze the assembled pie before baking, and you should never put hot food in the freezer.

    A hand spreading soft cheese over the salmon pot pie filling

    Pro Tip #2 — Freeze the Pie 20 Minutes Before Baking

    Pie crusts love to be cold. When cold dough hits hot oven air, it creates airy, flakey layers. Give the assembled pie at least 20 minutes in the freezer before it goes into a 400°F oven.

    Whole salmon pot pie with a golden top crust and a thyme sprig

    Pro Tip #3 — Crimp the Pie Crust Edge

    Crimping the edges not only looks beautiful but helps the pastry and filling stay in place while cooking. Use the index finger of one hand to push the inner edge out while pinching the outer edge in with the thumb and index finger of the other hand. Repeat around the entire edge for a classic scalloped finish.

    Hands crimping the edge of a pie crust
    Fingers pinching a scalloped edge around a pot pie crust

    Pro Tip #4 — Let It Cool Before Cutting

    The hardest part is waiting. Do not cut into a freshly baked pie — it is still cooking inside. Cutting too early dries the pie out by releasing all the steam. Rest it at least 10–15 minutes.

    Pro Tip #5 — Cut Holes in the Top Crust for Ventilation

    Always cut a hole in the centre of the crust for steam to escape. You can also poke a few holes around the crust with a fork before baking.

    Knife cutting a steam vent in the center of the top pie crust

    Frequently Asked Questions

    Can I use canned salmon instead of fresh or frozen?

    Yes. Drain the canned salmon well and break it into chunks before adding it to the filling. The texture will be slightly different but still delicious, and the soy-sesame marinade will compensate for the milder flavour.

    Can I make this pot pie ahead of time?

    Absolutely. Assemble the entire pot pie, wrap it tightly, and freeze it unbaked for up to one month. When ready to bake, go straight from freezer to oven — add 10–15 minutes to the bake time. Alternatively, fully bake it, cool it, and refrigerate for up to 3 days.

    Can I use butter instead of lard in the pie crust?

    Yes. Substitute an equal amount of cold unsalted butter. The crust will be just as flakey — lard produces a slightly more tender texture, but butter adds a richer flavour. Make sure both are very cold when you pulse them.

    What can I substitute for gouda cheese?

    Manchego, gruyere, or sharp cheddar all work well. Avoid fresh cheeses like mozzarella as they release too much liquid into the filling.

    Why does my pie crust shrink when baking?

    The dough was not rested long enough. Always refrigerate the dough disk for at least 30 minutes (or overnight) before rolling. Also, do not stretch the dough when placing it in the pan — let it fall into place naturally.

    What size pie dish should I use?

    A standard 9-inch deep-dish pie pan works best. A Pyrex deep dish pie plate is ideal because you can see the bottom crust browning through the glass.

    Salmon pot pie with a golden thyme crust and a slice served on a plate

    Easy Salmon Pot Pie with Thyme Flakey Crust

    Easy salmon pot pie that is the perfect comfort food for fall. Dig into this steamy pot pie filled with salmon, winter vegetables, and cheese all wrapped and topped with a delicious flakey thyme crust!
    Prep Time 45 minutes
    Cook Time 30 minutes
    Total Time 1 hour 15 minutes
    Servings: 6 people
    Course: Main Course
    Calories: 560

    Ingredients
      

    salmon marinate
    • 200 g fresh or frozen salmon cubed
    • 1 tbsp soy sauce
    • 1 tsp sesame oil
    pot pie filling
    • 2 tbsp butter
    • ½ large leek
    • 2 garlic cloved diced
    • ½ white onion chopped
    • 3 carrots chopped
    • 3 medium sized potato cubed
    • 2 small tomato chopped
    • 1 tsp chicken boulenise powder
    • 1½ cup whole milk
    • 1 cup cream
    • 1 tsp sea salt
    • black pepper
    • 2 cups gouda cheese grated
    • 2 tbsp fresh dill or 1 tsp dried dill
    • 1 tbsp butter, cold sliced thinly
    thyme pie crust
    • 3 fresh springs of thyme
    • 1 tsp sea salt
    • 3.5 cups all-purpose flour
    • 1.5 cups lard
    • ¾ cup cold water
    • 2 tsp apple cider vinegar
    • 1 egg

    Method
     

    Salmon Marinate
    1. Combine the salmon, soy sauce and sesame oil together. Mix well and let it marinate for 10 minutes.
    Pot Pie Filling
    1. On medium heat in a large pot or pan, melt butter and sauté the chopped leeks, garlic, and white onions. 3 minutes.
    2. Add the carrot and potatoes. cook for 5 minutes.
    3. Toss the tomatoe in along with the chicken bouillon powder, milk, cream, salt, and pepper. Turn the heat to low and cook for 10 minutes with a lid. Turn off the heat with the lid off and let the mixture cool to room temperature.
    4. Meanwhile, put the thyme leafs, flour, and salt in the food processor. Pulse the flour mixture so it is well combined. Open the lid and ddd small chunk of lard into the food processor. Close the lid.
    5. Combine the cold water and vinegar together.
    6. Add half the cold water mixture in the food processor and pulse it 7 times. Slowly drizzle the rest of the water in to the food processor while you do quick pulses. Keep pulsing the mixture when the cold water runs out. When the dough starts to form and pull away. Take the lid off and divide the dough into two parts. Flatten the dough into a flat disk and put it in the fridge for at least 30 minutes or overnight.
    Putting everything together
    1. On a floured surface, pie dough, and sprinkle it with a little flour. Roll out any creases and roll it out just big enough to cover your pan.
    2. Add the salmon filling into the pie. Place thinly sliced cold butter on top of the filling. Then top it off with grated cheese and dill. Place the other rolled out pie dough over the top of the pan, folding up the corners. Cut a hole in the middle for venting.
    3. Place the pie in the freezer for 20 minutes.
    4. Preheat oven to 400°F
    5. Before you put the pie in the oven, brush the top of the pie with egg wash.
    6. Bake at 400°F for 20 minutes, then lower heat to 350°F, and bake 10 more minutes.
    7. Let it cool for at least 10-15 minutes before cutting into the pie.
  • Halloween Frankenstein Guacamole

    Halloween Frankenstein Guacamole

    This Frankenstein guacamole is the most adorable dip you can make, and it will be hard to be the first to dig into his sweet face!

    Guacamole decorated as Frankenstein with nori hair and a tomato mouth

    This post is all about Halloween Frankenstein Guacamole. The food design of this adorable Frankenstein is made with sushi seaweed papers, sunflower seeds, and tomatoes.

    This post may contain affiliate links. If you purchase through these links, I may earn a small commission at no extra cost to you. Thank you for supporting Love & Harvest!

    This delicious guacamole recipe is so refreshing and delicious that we gave him life and turned him Mexican! At least until people start dipping his presence away!

    A cute recipe for food styling to bring to kids’ Halloween parties. It is an easy no-brainer side dish you can whip up in minutes. Halloween is a big week — kids are hammering you about costumes and parties. Don’t overthink the food. Make this easy peasy guacamole for Halloween today!

    The best part is that you can make this any size you want. All you need is to scale the design to fit the serving dish you are bringing.

    Key Ingredients

    Ingredients

    Avocado

    The star of the show — ripe, creamy avocados are the green canvas for Frankie’s face.

    • Why it matters: A ripe avocado should give slightly when pressed. Under-ripe avocados are grainy and hard to mash smoothly. Over-ripe avocados taste off. The lime juice you add prevents browning and adds essential citrus brightness. Traditionally in Mexico, we mash avocados in a mortar and pestle for authentic texture — chunky or smooth, your choice.

    Sushi Nori (Seaweed Paper)

    Nori sheets cut into Frankenstein hair and eyes.

    • Why it matters: Nori is what gives Frankie his iconic flat-top hairstyle and dark eyes. It cuts cleanly with scissors and holds its shape on the guacamole surface for serving time. It does not stay crisp for hours — serve within 30 minutes of decorating for best presentation.

    Lime

    Freshly squeezed lime juice mixed into the guacamole.

    • Why it matters: Lime does two critical jobs: adds citrus acidity that brightens all the flavours, and prevents oxidation (browning). If the guacamole will sit before serving, squeeze in an extra half lime and press plastic wrap directly onto the surface of the dip to exclude air.

    How to Make the Guacamole

    It only requires a few easy ingredients available in any grocery store: avocado, tomato, red onion, cilantro, and lime.

    First, pit the avocado and mash the flesh with a fork in a large bowl. Juice the lime into the avocado and mix well. Chop the tomato, red onion, and cilantro into small pieces. Add to the bowl. Salt to taste. It is that simple and so very delicious!

    How to Cut the Frankie Design

    Use sushi seaweed paper (nori) for the hair and eyes. Measure the length of your serving container, then use a cutting board and scissors to cut the fringe hair design. Be creative — play with the distance between the eyes and create your own version of Frankie. I use a sunflower seed as his nose, but it can be anything!

    Frankie Is Just the Beginning

    A Halloween Frankenstein Guacamole is just the start! How about a three-eye monster guacamole? A silhouette of a haunted house? The options are endless. For more Halloween fun, check out our Halloween Spooky Breakfast Bowl and Homemade Halloween Sugar Cookies.

    Why You Will Love This Halloween Frankenstein Guacamole

    • Easy recipe — just a few ingredients, no cooking required. Fresh and excellent tasting.
    • Fun design — Frankenstein is just the beginning! Design your own monsters at your own skill level.
    • Fun potluck dish — easy to make and bring, and completely captivating at Halloween parties.
    • Halloween food the kids will actually eat — avocado, lime and a few fun toppings.

    Frequently Asked Questions

    How do I keep guacamole from turning brown?

    Two methods work best: add extra lime juice (the acid slows oxidation), and press plastic wrap directly onto the surface of the guacamole, eliminating all air contact. An avocado pit in the bowl is a common tip but less effective than the plastic wrap method. Make the guacamole no more than 2 hours before serving for best color and freshness.

    How do I know if my avocados are ripe enough?

    Gently press the avocado near the stem end — it should give slightly under firm pressure but not feel mushy. The skin should be dark green to black. If the stem pops out easily and the flesh underneath is green (not brown), it is perfectly ripe.

    Can I add spice to this guacamole?

    Absolutely — and we encourage it! Add finely minced jalapeño or serrano pepper for a good kick. Serrano is hotter than jalapeño. Start with half a pepper, taste, and adjust from there. A pinch of cayenne also works if you want even heat distribution.

    Can I make this guacamole ahead for a party?

    Make it up to 2 hours ahead. Press plastic wrap directly onto the surface (no air gaps) and refrigerate. Decorate with the nori Frankenstein design right before serving — nori softens quickly once it contacts moisture.

    What can I serve with this guacamole besides tortilla chips?

    Sliced bell peppers, cucumber rounds, jicama sticks, and mini tostadas all work beautifully. For a Halloween theme, use black sesame crackers or triangle-cut tortilla chips arranged to look like bat wings around Frankie’s face.

    How large a batch should I make for a Halloween party?

    Plan on 1 medium avocado per 2 guests as a rough guideline. For a party of 20, use 10 avocados and scale all other ingredients proportionally. Use a large serving platter and scale up the Frankenstein design to match.

    Authentic Guacamole

    A simple yet delicious guacamole recipe that takes a matter of minutes to whip up!
    Prep Time 15 minutes
    Total Time 15 minutes
    Servings: 4 people
    Course: Appetizer
    Cuisine: Mexican
    Calories: 195

    Ingredients
      

    • 4-5 medium sized avocado
    • 1 – 1½ lime juice
    • 1 medium tomato diced
    • 1 branch cilantro chopped
    • ¼ red onion chopped
    • sea salt

    Method
     

    1. In a large mixing bowl, cut the avocado in half. Pit the centre seed out and scoop the green flesh into the bowl with a spoon.
    2. Use a fork and press the avocado. The more you mash the avocado the smoother the texture will be.
    3. Drizzle the lime on to the avocado and mix well. 1 lime is perfect but if you like to more acidic, you can half half a lime more.
      (Half half a lime more if you know it will not be eaten immediately to help it not turn brown).
    4. Add the chopped cilantro, tomato ,and red onion. Mix well. salt to taste

    Notes

    • Spicy: you’re more than welcome to add jalapeno or serrano peppers to give it a good kick.