Category: dressing recipes

  • Easy Mexican Salsa Verde

    Easy Mexican Salsa Verde

    If you have ever tasted a truly fresh salsa verde made with raw tomatillos, you already know nothing from a jar comes close. This easy Mexican salsa verde recipe comes together in under 10 minutes with zero cooking required — just drop everything in a blender, pulse, and you have a bright, tangy green sauce that makes tacos, eggs, and grilled meats come alive.

    This post may contain affiliate links. If you purchase through these links, I may earn a small commission at no extra cost to you. Thank you for supporting Love & Harvest!

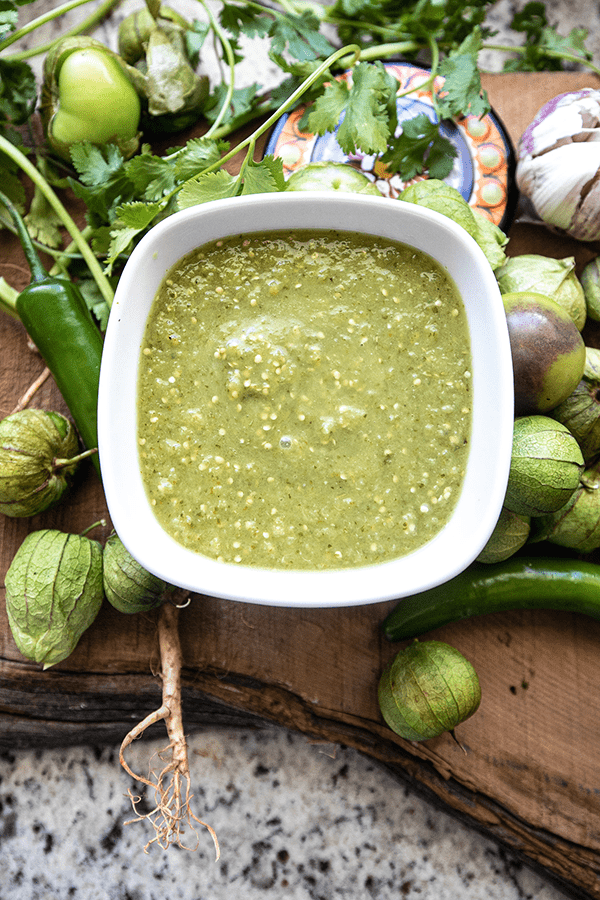
    Bowl of tomatillo salsa verde with a spoon surrounded by fresh tomatillos

    Mexican cuisine is known for its vibrant flavours and rich history. One of the most popular condiments used in Mexican cuisine is salsa verde. 

    In this blog post, we’ll dive into the history and ingredients of salsa verde, as well as some delicious ways to use it in your cooking.

    What You Need to Know about Salsa Verde

    Salsa verde, which translates to “green sauce,” has been a staple of Mexican cuisine for centuries. The sauce is made from a combination of tomatillos, chilies, garlic, cilantro, and vinegar, giving it a tangy, slightly spicy flavor.

    When dining in Mexico, you will find that all restaurants offer both red and green salsa. However, each establishment prepares their own version of these salsas, resulting in a unique flavor profile for each one. Some may be rawer, thicker, spicier, or even tangier than others.

    Although there are numerous versions of salsa verde, with each person believing their recipe is the best, the real standout ingredient is the tomatillo. Tomatillos are small, green fruits that originate from Mexico, and they are responsible for giving the sauce its distinctive vibrant green hue.

    Fresh tomatillos, garlic, green chiles and cilantro on a wooden board

    How It Is Made

    Making salsa verde is easy and can be done in just a few minutes. Some people like to roast or boil the tomatillos, but I love it raw! I will be sharing the easy raw salsa verde version.

    Start by removing the husks from the tomatillos and rinsing them under cold water. Next, add the tomatillos, garlic, cilantro, and chili peppers in a blender. Blend on high for 30 seconds until smooth, and ta-da, you’re done! Salt the salsa and vinegar to your liking.

    I use a Vitamix, but any high-speed blender works. I use it to make everything from sauces to soup!

    Green and purple tomatillos, some still in their husks, in a steel bowl

    What You Can Use Salsa Verde For

    One of the great things about salsa verde is its versatility. It can be used as a dip for chips, a topping for tacos, or a marinade for meat. Here are a few of our favourite ways to use salsa verde in the kitchen:

    1. Tacos: Salsa verde is a perfect topping for tacos, adding a tangy, slightly spicy flavour to your favourite protein. Try it on steak, chicken, or even fish tacos for a burst of flavour.
    2. Enchiladas: Instead of using traditional red enchilada sauce, try using salsa verde. It pairs perfectly with shredded chicken and cheese and gives the dish a bright flavour.
    3. Grilled meats: Use salsa verde as a marinade for grilled meats like chicken or pork. The acid in the tomatillos will help tenderize the meat while adding a delicious flavour.
    4. Eggs: Salsa verde is a great addition to breakfast dishes like scrambled eggs or omelets. It pairs well with cheese and adds a bit of zing to your morning meal.

    Love Mexican salsas? Try our fresh and easy Pico de Gallo or the smoky, addictive Salsa Macha from Veracruz.

    Salsa verde on a platter of grilled steak, sausages, chicken and stuffed peppers

    What’s in Salsa Verde

    In addition to its delicious flavour, salsa verde is made with simple, fresh ingredients. Tomatillos give it its bright, tangy flavour.

    So the next time you’re looking to add a bit of flavour to your meal, consider reaching for a jar of salsa verde.

    Why You Should Make Salsa Verde

    In conclusion, salsa verde is a staple condiment in Mexican cuisine that’s easy to make and adds a burst of flavour to any dish. With just a few simple ingredients, you can make a batch of salsa verde to keep on hand for all your cooking needs.

    Whether you’re using it as a dip for chips, a topping for tacos, or a marinade for meat, salsa verde is sure to add a delicious zing to your meal. Give it a try and taste the flavour of Mexico in your own kitchen.

    Bowl of bright salsa verde beside grilled steak and roasted peppers

    Ingredients

    Key Ingredients

    Tomatillos

    • Why they matter: The backbone of every authentic salsa verde. Raw tomatillos deliver a bright, tangy, slightly citrusy flavour that no substitution can replicate. Look for firm ones with their papery husks still intact. You can find canned tomatillos as a convenient alternative when fresh are unavailable.

    Jalapeños

    • Why they matter: Fresh jalapeños bring clean, grassy heat. Remove the seeds and ribs for mild heat, leave them in for full fire. For a smokier profile, you can substitute a serrano or use a roasted Hatch green chile.

    Cilantro

    • Why they matter: Fresh cilantro is non-negotiable. Two full bunches give you that herbaceous depth that makes this salsa taste unmistakably Mexican. Do not use dried cilantro — it will not work.

    Professional Tips for Salsa Verde

    Pro Tip #1 – Raw Tomatillos Taste Best

    There are many versions of salsa verde out there. Some people roast or toast the tomatillos before throwing them in the blender. And there are some that will boil the tomatillos until it turns a slight yellow. For me, I like it raw! Raw gives out a vibrant green colour and I find the taste to be more to my liking. If you have plans to cook it, don’t overcook the tomatillos or it will give out a slight bitterness to it.

    A hand holding a single fresh tomatillo with its husk

    Pro Tip #2 – Acid Is Your Friend

    This recipe calls for white vinegar, but you can substitute for any acid! Some other substitutes that will work are apple cider vinegar or fresh lime juice.

    Pro Tip #3 – Storage

    This fresh salsa can be stored for days! Because we add vinegar to the salsa, it can be kept fresh for a long time. This salsa verde can last for around 5 to 7 days when stored properly in the refrigerator.

    Frequently Asked Questions

    What is salsa verde made of?

    Authentic Mexican salsa verde is made from raw tomatillos, fresh jalapeños, garlic, cilantro, white vinegar, and salt. No cooking required for this version.

    Can I make salsa verde without a blender?

    Yes. A food processor or even a molcajete (traditional stone mortar) works well. The molcajete gives a slightly chunkier, more rustic texture that many people prefer.

    How long does homemade salsa verde last?

    Stored in an airtight container in the refrigerator, it stays fresh for 5 to 7 days. The vinegar acts as a natural preservative. You can also freeze it for up to 3 months.

    Is salsa verde spicy?

    It depends on your jalapeños. Remove the seeds and membranes for a mild, tangy salsa. Leave them in for a spicier kick. You can also substitute with serrano peppers for more heat.

    What is the difference between salsa verde and salsa roja?

    Salsa verde uses tomatillos and green chiles for a bright, tangy flavour. Salsa roja uses ripe red tomatoes and dried red chiles for a deeper, earthier taste. Both are staples on every Mexican table.

    Can I use canned tomatillos instead of fresh?

    Yes, canned tomatillos work well when fresh ones are hard to find. Drain them first before blending. The flavour will be slightly milder than fresh, but still delicious.

    Salsa verde in a white bowl surrounded by tomatillos and green chiles

    Authentic Mexican Salsa Verde

    Say hello to your new favourite condiment! This easy Mexican salsa verde recipe is fresh and flavourful – it will brighten up any food! Print Recipe Pin RecipePrep Time:10 minutes Course: condimentCuisine: MexicanKeyword: no-cook, salsa verdeServings: 8 people

    Equipment

    • blender

    Ingredients

    • 1 kg tomatillos husked and rinsed
    • 2 cilantro bunches
    • 1 garlic clove
    • 2-3 jalapeños seeded (leave the seeds if you want it spicier)
    • 1 tsp white vinegar
    • salt

    Instructions

    • In a blender or food processor, combine the tomatillos, cilantro, garlic, jalapeño pepper, vinegar, and salt.
    • Pulse until smooth.
    • Taste and adjust seasoning as needed. Serve immediately or store in the refrigerator for up to a week.
  • Best Homemade Fried Chicken with Ranch Sauce

    Best Homemade Fried Chicken with Ranch Sauce

    This post may contain affiliate links. If you purchase through these links, I may earn a small commission at no extra cost to you. Thank you for supporting Love & Harvest!

    There’s a moment when you bite into a piece of perfectly fried chicken — that ear-splitting crunch, the steam that hits your face, and then the juice that runs — where you realize not all fried chicken is created equal. This recipe was gifted to me by a stranger on a Facebook group who had spent years in restaurant kitchens. He asked nothing in return. I’m passing it on to you the same way.

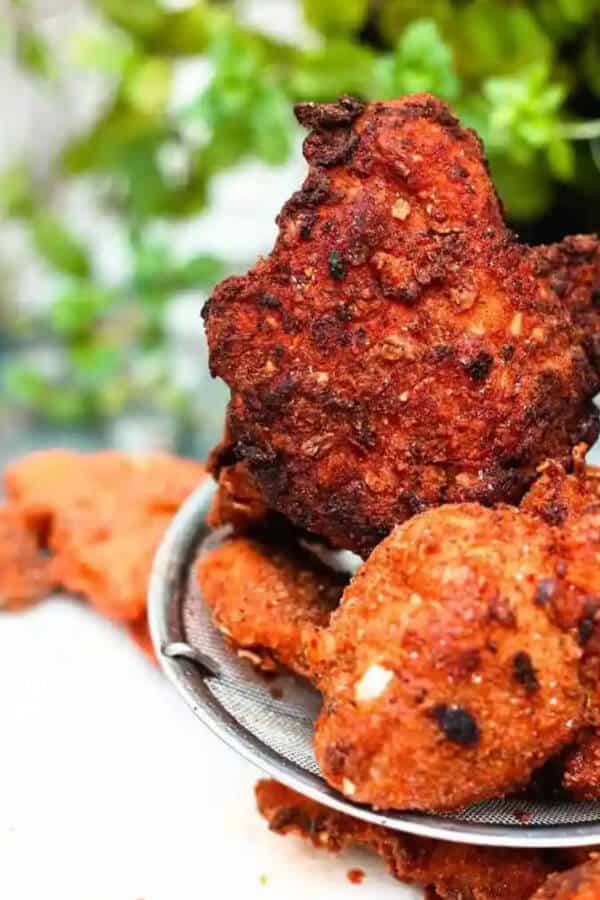
    Pile of crispy homemade fried chicken on a plate outdoors

    Why This Is the Best Homemade Fried Chicken

    Fried chicken is a social affair. It’s gathering food — the kind that fills a table with noise and happiness. What makes this recipe stand out is a two-part process: a citrus brine overnight and a double-fry method that locks in moisture while building a shattering crust. The result is chicken that’s deeply flavoured all the way to the bone, never dry, never greasy.

    Thank you, Ethan Chavoya, wherever you are.

    Golden fried chicken drumsticks and thighs with a crunchy crust

    Ingredients Deep-Dive

    Ingredients

    The Citrus Brine

    The brine is the heart of this recipe. Lemon juice breaks down the muscle fibres, salt draws moisture in rather than out (counterintuitively), and ginger adds a subtle warmth that doesn’t read as “ginger” in the finished chicken — it just tastes more alive. Sugar balances acidity and encourages browning during frying. Give the chicken a full 12 hours in the brine. Overnight is not optional here — it’s what separates good from unforgettable.

    The Dredge Liquid: Hot Sauce + Buttermilk

    The secret is a sour-base hot sauce mixed into the buttermilk. It tenderises further and leaves a faint tang in the finished crust. In Mexico, Valentina works perfectly. Elsewhere, Frank’s Red Hot Buffalo Sauce is the benchmark. Can’t find buttermilk? Mix 1 cup whole milk with 1 tbsp white vinegar, wait 5 minutes — done.

    The Breading Blend

    The combination of flour, breadcrumbs, and cornmeal creates three different textures in the crust: the flour gives it body, the breadcrumbs add a coarse chew, and the cornmeal produces those irresistible sharp ridges that stay crispy long after the chicken comes out of the oil. The spice blend — paprika, cayenne, garlic and onion powder, poultry seasoning — seasons the crust, not just the meat.

    The Oil and Temperature

    Use a neutral oil with a high smoke point: canola is ideal. The first fry at 275°F sets the crust and partially cooks the meat without burning. A second fry finishes the job and produces the deep amber colour. A deep-fry thermometer is your best tool here — guessing oil temperature is how you get pale, greasy chicken. For air frying, see the section below.

    The Ranch Sauce

    Sour cream base instead of mayonnaise keeps it tangy and light. Fresh chives and parsley are non-negotiable — dried herbs flatten the flavour. A touch of dried dill and white vinegar ties everything together. This ranch keeps for a week in the fridge and will be raided for carrots, celery, and anything else within reach.

    How to Make the Best Fried Chicken (Step-by-Step with Photos)

    Step 1 — Brine the Chicken

    In a large bowl, combine the chicken pieces with all the dry brine ingredients. Add the lemon juice and zest. Toss until everything is evenly coated. Transfer to a sealed bag or covered bowl and refrigerate for 12 hours minimum.

    Step photos: chicken pieces tossed with the brine ingredients in a bowl
    Step photos: chicken pieces lightly coated in buttermilk brine

    Step 2 — Air Dry and Dredge

    The next day, place the chicken on a wire rack over a baking sheet and return to the fridge — uncovered — for 2 hours. This surface drying is critical; wet chicken in hot oil spatters dangerously and produces a soggy crust. While it dries, whisk together the buttermilk, eggs, and hot sauce in one bowl. Combine all the breading ingredients in a second bowl.

    One piece at a time: dip in the wet mixture, then press firmly into the breading on all sides. Place back on the rack. Let the coated pieces rest in the fridge for 1 hour so the breading fully adheres.

    Step photos: hands dredging buttermilk chicken in seasoned flour on all sides

    Step 3 — First Fry (275°F)

    Heat the oil in a large wok or heavy pot to 275°F. Fry 3 pieces at a time — never crowd the pan. Lower each piece in slowly, holding the end for 3 seconds before releasing. Fry for 12–15 minutes until cooked through, then transfer to a paper-towel-lined rack. Repeat with remaining pieces.

    Step photo: tossing a floured chicken piece to shake off excess breading

    Step 4 — Second Fry (375°F) for Extra Crunch

    Raise the oil to 375°F. Fry each piece a second time for 3–5 minutes until deeply golden. The second fry is what produces the signature crunch. Transfer to fresh paper towels. Do not cover — steam will soften the crust.

    Breaded chicken pieces resting on a wire rack before frying
    Tray of flour-coated chicken pieces on a rack next to the dredging bowls

    Air Fryer Method

    Preheat to 400°F for 5 minutes. Cook drumsticks and thighs for 10 minutes, flip, then cook for another 10 minutes. Check doneness with a knife poke at the thickest point — juice should run clear. Internal temperature must reach 165°F. An air-fried version won’t match the deep-fried crunch, but it’s a solid weeknight alternative.

    What to Serve with Fried Chicken

    This chicken pairs beautifully with bright, acidic sides that cut through the richness. Try it alongside our Beet and Avocado Sashimi Appetizer for a party spread, or keep it classic with coleslaw and cornbread. The ranch sauce doubles as a vegetable dip — our kids have it with carrots and celery weekly.

    For a complete feast, the Easy Fall-Off-the-Bone Ribs make an incredible companion for big gatherings. Both can be prepped ahead and served together.

    Frequently Asked Questions

    Can I use chicken wings instead of drumsticks and thighs?

    Yes. Wings work well and make a great appetizer-sized serving. Note that wings cook significantly faster than thighs — reduce the first fry time to around 8 minutes and check doneness before the second fry.

    What if I can’t find buttermilk?

    Make it yourself in 5 minutes: combine 1 cup of whole milk with 1 tablespoon of white vinegar, stir, and let stand for 5 minutes. You’ll see the milk thicken slightly — that’s your buttermilk ready to use.

    How far ahead can I prep this recipe?

    The brine step can be done 24 hours in advance. The fully dredged, uncooked chicken can sit on the rack in the fridge for up to 2 hours before frying. The first fry can be done several hours ahead; just do the second fry right before serving for maximum crunch.

    Can I bake this instead of frying?

    You can, though the crust won’t achieve the same crunch. Bake on a wire rack at 425°F for 35–40 minutes, flipping halfway. Spray lightly with oil before baking to help the breading brown.

    How do I keep the chicken warm for a party?

    After the second fry, place on a wire rack set over a baking sheet in a 200°F oven. This keeps the chicken warm for up to 45 minutes without softening the crust. Do not cover or wrap — trapped steam is the enemy of crispy.

    Is there a Lodge cast iron skillet option?

    Absolutely. A Lodge 12″ cast iron skillet is excellent for shallow-frying this chicken with less oil. Use about 2 inches of oil and maintain temperature carefully — cast iron holds heat well but responds slowly to adjustments.

    best fried chicken love and harvest

    BEST Homemade Fried Chicken with Ranch Sauce

    Incredibley crispy golden brown fried chicken with super juicy flesh inside. The BEST homemade fried chicken you'll taste all made with fresh herbs and spices. A gorgeous bright and fresh brine that will tenderize your chicken for that super moist and juicy texture. All matched with an amazing ranch sauce that will get your guests dipping and crunching away. There is no better way of serving chicken than this. Print Recipe Pin RecipePrep Time:15 minsCook Time:30 minsCourse: Main CourseCuisine: AmericanKeyword: chicken, fried chickenServings: 5 people

    Ingredients

    Chicken Brine

    • 2 kg chicken legs and chicken wings mix
    • 1 TBSP salt
    • 1 TSP pepper
    • 1 spring fresh rosemary chopped
    • ½ TSP fresh thyme chopped
    • 1 TSP fresh ginger grated
    • 1 lemon juice
    • 1 lemon zest
    • 2 TSP sugar
    • 1 TSP chili flakes

    Dredge Liquid

    • 2 eggs
    • 1 cup buttermilk
    • 2 TBSP hot sauce

    Fried Chicken Breading

    • 2 cups flour
    • ½ cup bread crumbs
    • 3 TBSP cornmeal
    • 2 TBSP salt
    • 2 TSP pepper
    • 1 TBSP paprika
    • 2 TSP garlic powder salt
    • 2 TSP onion powder
    • 1 TSP poultry seasoning
    • 1 TSP cayenne powder

    Deep Fry

    • 4 cups canola oil

    Ranch Sauce

    • 1 ½ cups sour cream
    • 5 tsp white vinegar / lemon juice
    • 2 TBSP fresh chives chopped
    • ½ TSP fresh parsley chopped
    • 1 TSP dried dill
    • 1 TSP garlic powder
    • 1 TSP onion powder
    • 2 TSP salt
    • ½ TSP pepper

    Instructions

    Chicken Brine

    • In a large bowl, clean and rinse the chicken. Pat try. Cut the legs into two pieces separating the drumstick and thigh. Add the salt, pepper, rosemary, thyme, ginger, lemon juice, lemon zest, sugar, and chili flakes with the chicken. Toss and rub the chicken with the marinate. Put everything in a plastic bag and marinate overnight (12 hours).

    To Prepare Fried Chicken

    • Next day, take out a baking rack with a fitted baking sheet underneath. Take the bag of chicken out the fridge and give it a light toss to flick out access liquid. Put all the chicken pieces in the rack to air dry in the fridge.
    • Prepare the dredge liquid by combining the egg, buttermilk and hot sauce together with a whisk in a large bowl.
    • In a separate bowl (preferably a smaller bowl with tall wall – like a small pot) put the breading ingredients together. Combine well the flour, bread crumbs, cornmeal, salt, pepper, paprika, garlic salt powder, onion powder, poultry seasoning, and cayenne powder together.
    • Take the chicken out the fridge. Dip each chicken pieces separately in the liquid first. make sure all surface is covered with the liquid, and quickly drop the chicken piece in the breading bowl. Rub and put pressure to make sure all surface area is covered with the breading flour. if you see a gap, add some flour and rub it in. Give it a few taps for access flour, and place it back on the drying rack. Repeat until all the chicken pieces are dredge and breaded. Let them rest in the fridge for 1 hour before deep frying.

    To Make Fried Chicken

    • Heat your vessel to deep fry. I have a wok and I enjoy deep frying everything there. Add 4 cups of fresh canola oil. Preheat oil to 275F.
    • Depending how big the deep fryer you have, add enough chicken pieces where it has room to swim around and not be over crowded. I recommend 3 pieces at the same time.
    • Carefully dip half the chicken in the oil and hold on to the end for 3 seconds, and let it all go in the deep fryer. This is the reason we need the chicken as dry as possible. If there's liquid on the chicken, the oil will explode and burn your hand. Repeat until you have three pieces in the deep fryer. Fry for 12-15 minutes.
    • In a drying rack, add some paper towels. When the chicken is done cooking, take them out and place them on top of the paper towel. Make sure you're not over crowding the chickens. For them to maintain crispy, it needs air circulation to completely dry and not have any moisture. Serve

    Ranch Sauce

    • Whisk together the sour cream, white vinegar / lemon juice, fresh chives, and fresh parsley. Add the spices. Pour into a jar and chill in the refrigerator until ready to serve. This dressing will keep nicely in the refrigerator for up to a week. Enjoy!
  • Spicy Fermented Jalapeno Hot Sauce 🔥🔥🔥

    Spicy Fermented Jalapeno Hot Sauce 🔥🔥🔥

    If you have ever wanted to make your own hot sauce from scratch, this fermented jalapeño hot sauce is the place to start. It is tangy, sharp, and spicy — far better than anything you will find at the store — and the entire process is mostly hands-off. Your pantry will smell incredible while it works its magic over three months.

    This post may contain affiliate links. If you purchase through these links, I may earn a small commission at no extra cost to you. Thank you for supporting Love & Harvest!

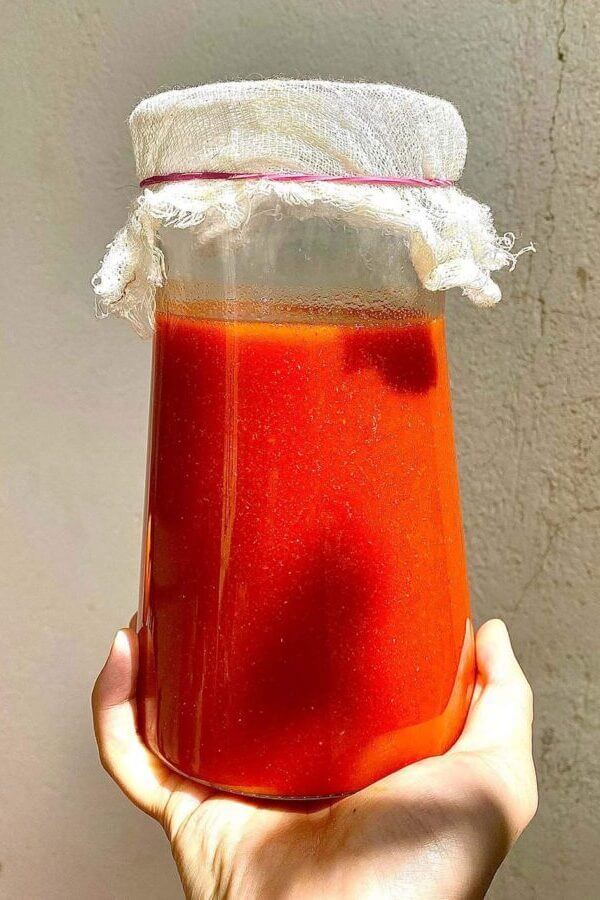
    fermented jalapeno hot sauce

    This fermented jalapeño hot sauce is the base for many other recipes on this site. My BEST Juicy Fried Chicken uses it as a brine — it tenderizes the chicken while layering in incredible flavor. Once you have a jar in your fridge, you will find yourself reaching for it constantly.

    Essentially hot sauces like Tabasco use tabasco peppers fermented in vinegar for three years. We are doing something similar but accelerating the process with a rice koji ball, which adds depth of flavor and shortens the wait.

    What Does This Fermented Jalapeño Hot Sauce Taste Like?

    The flavor is tangy, sharp, and spicy with a complexity that vinegar-only sauces simply cannot match. The texture is naturally thick without any cornstarch or xanthan gum, and the color is a deep, vibrant red. After three months of fermentation, the heat mellows into something everyone at the table can enjoy.

    How to Pick Your Chili Peppers

    Red jalapeños are milder and sweeter than many other Mexican chilies, making this hot sauce accessible even to those who do not normally eat spicy food. Green jalapeños produce a grassier flavor profile while red ones lean sweeter and fruitier. The chart below shows a range of options from mild to very hot — experiment and find your preference.

    Chart of chilies from hottest to mildest: Moruga scorpion, ghost, habanero, bird's eye, cayenne, manzano, serrano, jalapeño

    What Is Fermentation?

    Fermentation is a process where microorganisms — bacteria, yeast, or fungi — convert sugars and starches into alcohol or acids. In vegetables and fruits, those sugars convert to lactic acid, which acts as a natural preservative and creates complex, slightly sour flavors. Historically, fermentation was used to preserve foods long before refrigeration.

    Many everyday foods are fermented: kimchi, miso, beer, bread, cheese, and much more. Lacto-fermentation specifically transforms raw spicy flavor through time, adding sour pungency and eventually fruity organic compounds. It also takes the harsh edge off aggressive heat.

    Why Ferment the Hot Sauce?

    We use a rice koji ball to quicken fermentation and add more flavor depth. The three stages are: one month (first fermentation), then two more months with vinegar, then blending and straining to finish. It takes time for hot sauce to bloom into a full palette of flavors — the slow process is what gives it that unmistakable umami depth.

    fermented jalapeno hot sauce vinegar stages

    Why You Will Love This Recipe

    • Tangy, sharp, and spicy — a flavor profile no store-bought sauce can replicate.
    • Mostly hands-off — a few minutes of prep, then time does the work for you.
    • Versatile marinade and condiment — works on everything from fried chicken to eggs to tacos.

    Ingredients

    Jalapeño Chilies

    • Why they work: Red jalapeños are less aggressive than other Mexican chilies. After fermentation the heat mellows further, making this accessible to most palates. Their natural sugars ferment into fruity acid notes that give the sauce its signature tang.

    You can find fresh red jalapeños at any Mexican or Latin grocery store. If you cannot find them fresh, look for them canned: wide-mouth mason jars are ideal for storing and fermenting your batch.

    Koji Rice Ball

    • Why it matters: Koji (Aspergillus oryzae) is the same culture used to make miso, sake, and amazake. It produces enzymes that break down proteins and starches, creating umami depth and speeding up the fermentation timeline compared to a plain salt brine.

    A recommended koji ball is the Hang Tai Marine Shanghai Yeast Ball. It smells sweet and yeasty with hints of chestnut and citrus. Find it online or at any Asian supermarket.

    Distilled White Vinegar

    • Why it works: Added after the first month, vinegar lowers the pH and stabilizes the sauce for longer shelf life. It also contributes the sharp tang that makes this hot sauce so addictive on everything.

    Coarse Sea Salt

    • Why it matters: Salt draws moisture from the peppers, creates the brine that enables lacto-fermentation, and inhibits harmful bacteria while letting the good lactobacillus cultures thrive. Do not substitute table salt — the iodine can interfere with fermentation.

    A good set of wide-mouth mason jars and fermentation weights will keep your peppers submerged and your ferment safe.

    jalapeno hot sauce recipe finished

    Frequently Asked Questions

    How long does the fermented jalapeño hot sauce last?

    Once bottled and refrigerated after the final blend and strain, this hot sauce keeps for up to 6 months in the fridge. The acidity from fermentation and the vinegar keeps it shelf stable once refrigerated.

    Can I use green jalapeños instead of red?

    Yes. Green jalapeños produce a grassier, more vegetal flavor profile. Red jalapeños ferment into a sweeter, fruitier sauce. Both work — the choice comes down to the flavor you prefer.

    Do I have to use a koji rice ball?

    The koji ball is optional but highly recommended. Without it the fermentation is slower and the umami depth is less pronounced. If you cannot find one, a plain salt brine fermentation for an additional two to four weeks will compensate somewhat.

    Why does my hot sauce smell so strong while fermenting?

    Active lacto-fermentation produces CO2 and aromatic compounds — that is the fermentation doing its job. A pungent, slightly sour, savory smell is completely normal. If you see pink or fuzzy mold (not white surface kahm yeast, which is harmless), discard and start over.

    Can I use fermentation lids instead of cheesecloth?

    Absolutely. Fermentation lids with airlocks make the process even more hands-off by automatically venting CO2 without letting oxygen in. This reduces the chance of surface mold and is a great upgrade if you ferment often.

    Is this hot sauce good for people who cannot eat very spicy food?

    Yes. Red jalapeños are mild to moderate on the Scoville scale, and fermentation mellows the heat further. Most people who find Tabasco too aggressive report this sauce to be very manageable and far more flavorful.

    fermented jalapeno hot sauce

    Spicy Jalapeño Hot Sauce

    Tangy fermented hot sauce that is great on everything. Fermented with rice goji ball giving it a subtler and often more interesting taste than other hot sauce. Texture that is naturally thicker without the use of cornstarch or xanthan gum. This 3 month long fermented hot sauce also takes some of the edge off harsh, aggressive spiciness, which can be a good thing.
    Prep Time 20 minutes
    Total Time 90 days 20 minutes
    Course: Condiment
    Calories: 10

    Ingredients
      

    • 1 kg fresh red jalapeños
    • 5.5 TBSP course sea salt
    • 1 TBSP dried rice koji ball (link) or half a dried rice koji ball
    • 8 cups distilled white vinegar

    Equipment

    • 3.5L fermenting jar / glass jar
    • cheesecloth
    • nylon mesh

    Method
     

    1. Wash and cut the stems from the jalapeños. I suggest for this process to wear gloves to protect your fingers from the chili.
    2. Roughly chop the peppers. Put them in a large bowl and those them with 3.5 TBSP course sea salt.
    3. In small amounts, put the peppers to a food processor and pulse until they are finely chopped but not in liquid pureed form (roughly about 10 pulses). Transfer all the chopped peppers to your fermenting vessel and fold in the rice goji. If you're using the fermented rice ball, just cut half the ball, and using your hands, crush it with your fingers, and sprinkle the crumbs at the top of the chopped peppers. Fold it in.
    4. Place a square cheesecloth on top and sprinkle the remaining 2 TBSP sea salt at the top evenly at the top of the cheesecloth. Cover the vessel with nylon mesh or a double layer of cheesecloth and secure with elastic band.
    5. Place the vessel away from sun, in a dark and cool place. Ferment for one month.
    After One Month
    1. Remove mesh and lift away and discard cheesecloth. The peppers should be a bright red at this time. Pour the vinegar over the mash. Replace the mesh, and secure it again with an elastic band. Place the hot sauce in a cool place and ferment for two months.
    After Two Months
    1. In small batches, transfer the hot sauce to a high speed blender and blend on high until smooth, 2 minutes. In a large bowl, put a strainer on top, and strain the liquid through. Discard the solids.
    2. Ladle the hot sauce into two clean 1 quart canning jars. Wipe the rims and thread clean, place the lids and rings on the jars, and tighten the rings then refrigerate. It will last in the fridge up to 6 months in the fridge.

    Notes

    This hot sauce goes well with everything.

    If you enjoyed this recipe, try these next: Salsa Macha from Veracruz, Easy Mexican Salsa Verde, or Bread and Butter Pickled Cucumbers — all recipes that use fermentation or preservation to build deep, complex flavor.