Category: cake recipes

  • Mexican Corn Cake with Cream Cheese

    Mexican Corn Cake with Cream Cheese

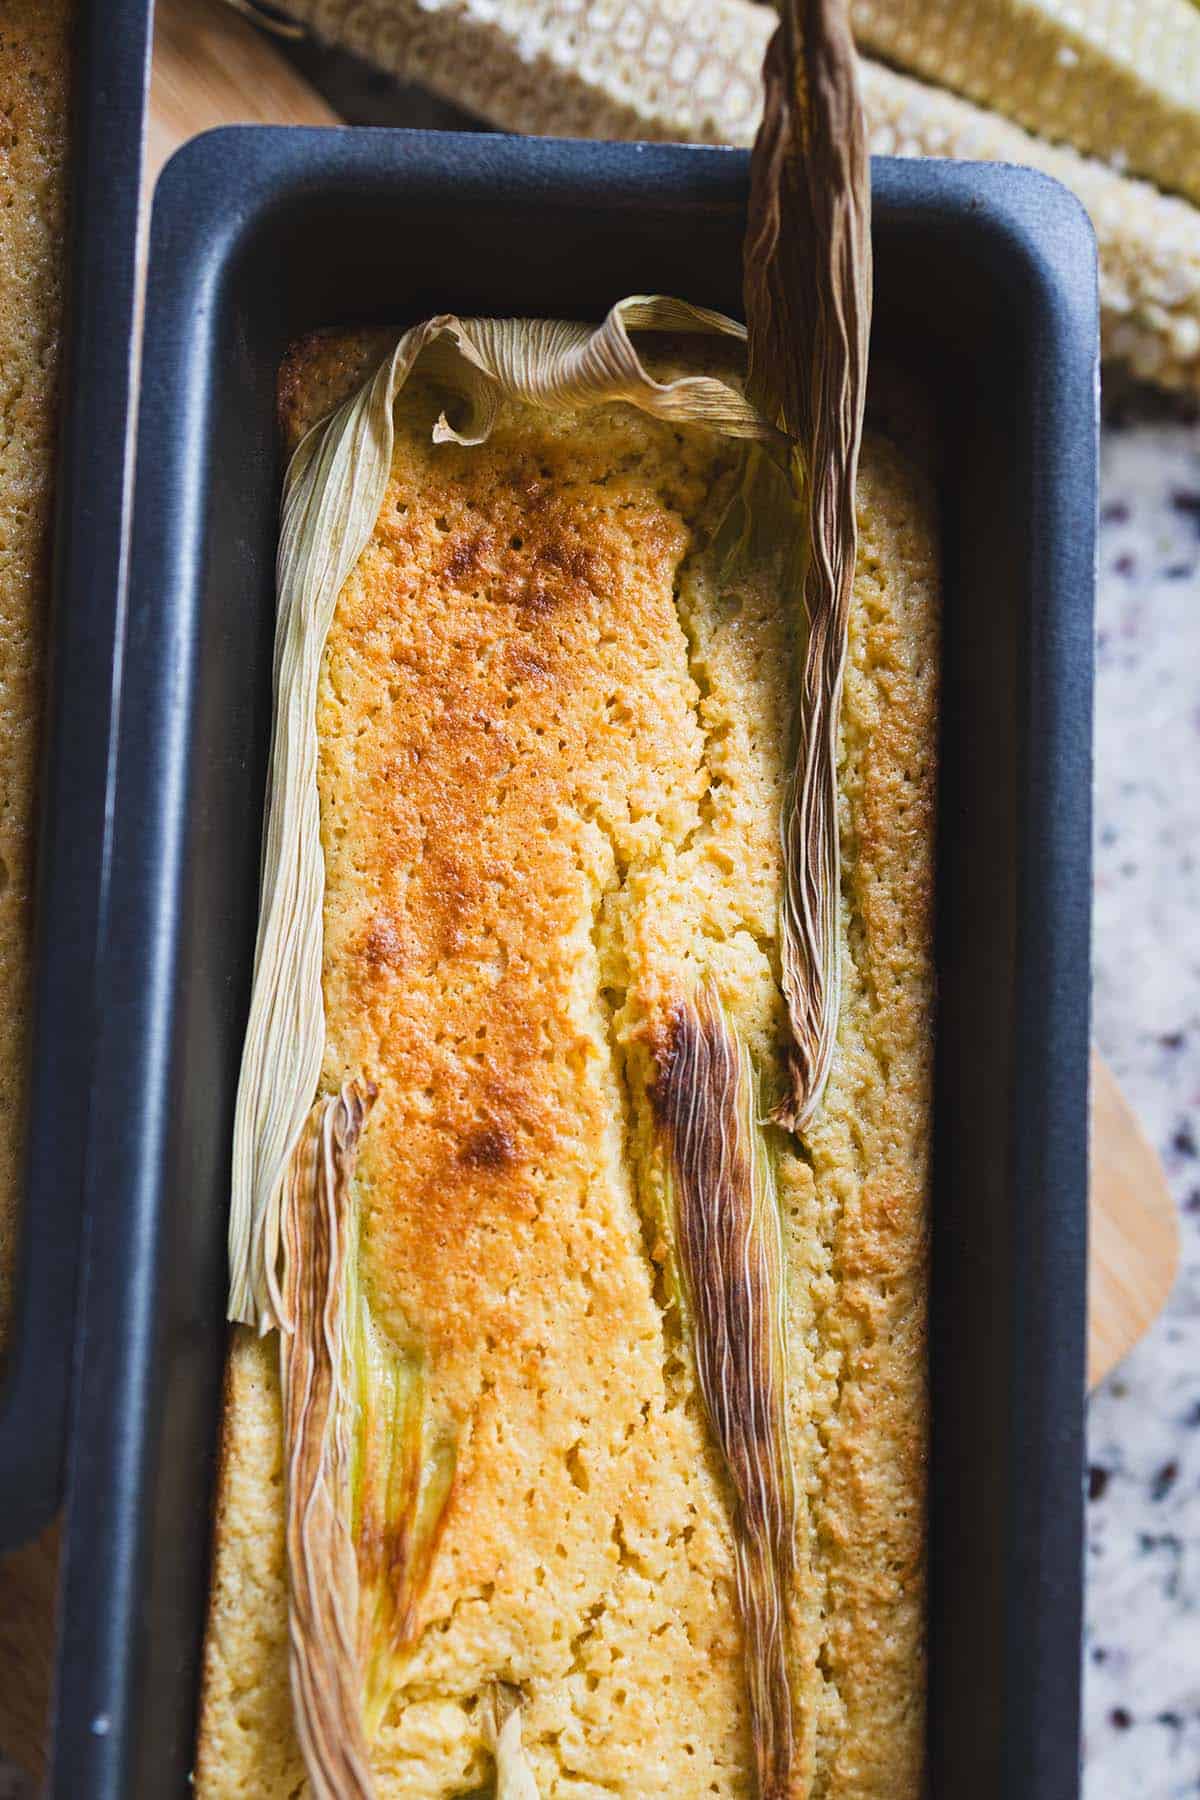
    If you’ve ever tasted Pastel de Elote, you know it’s more than just a cake—it’s a story baked into every slice. Sweet, moist, and rich with the flavor of fresh corn, this 8-ingredient Mexican Corn Cake with Cream Cheese is one of those recipes that will transport you straight to a Mexican kitchen. Whether you serve it warm at a Sunday gathering or packed for a picnic, it never fails to impress.

    This post may contain affiliate links. If you purchase through these links, I may earn a small commission at no extra cost to you. Thank you for supporting Love & Harvest!

    Mexican corn cake sliced on a wooden board

    This easy corn cake recipe uses just 8 ingredients. Also known as pastel de elote, it’s made with fresh corn, eggs, condensed milk, vanilla extract, cream cheese, flour, baking powder, and a splash of milk. No mixer needed — just a blender.

    For a little twist, I added cream cheese to my version. It’s not traditional — the original recipe does not include it — but it gives the cake a richer flavour and smoother texture. Consider it my “jazzed up” pastel de elote.

    Mexican corn cake batter being poured into a pan

    Pastel de Elote: Mexico’s Beloved Corn Cake

    Pastel de Elote is more than a dessert — it’s a piece of Mexican culinary history. This cake beautifully blends indigenous corn traditions with Spanish colonial influence, resulting in something truly unique: semi-sweet, moist, and unlike any other cake you’ve tried.

    Fun Facts About Corn in Mexico

    In Mexico, there are more ways to prepare corn than kernels on a cob. That’s no surprise considering the country is the birthplace of maize, believed to have been domesticated in Mesoamerica thousands of years ago.

    • In Mayan mythology, people were said to be created from corn.

    • The region of Oaxaca still has one of the world’s highest diversities of native corn species.

    • Corn is the base of much of the Mexican diet — including desserts like Pastel de Elote.

    This corn cake is also an example of the historic merging of Spanish colonial and indigenous cuisines. Corn was plentiful, and villagers often gifted it to monks and nuns, who had access to sugar and eggs. It’s even suspected that a nun may have invented Pastel de Elote, using ingredients readily available at the time.

    Overhead view of Mexican corn cake

    Why We Love This Corn Cake Recipe

    There’s something magical about how Pastel de Elote balances sweet and savoury. It’s semi-sweet, never overpowering, with a moist, slightly sticky texture that feels like comfort in every bite.

    Depending on how it’s prepared, the cake can range from:

    • Moist and dense (especially when using canned corn), to

    • Light and fluffy (when made with fresh kernels).

    The colour can also vary depending on the type of corn used, making every cake a little bit unique.

    Mexican corn cake with cream cheese layer

    Ingredients for Mexican Corn Cake

    Ingredients

    Fresh Corn Kernels

    • The star of the dish — fresh corn brings natural sweetness and that unmistakable corn flavour. For a lighter, fluffier cake use fresh kernels from the cob; for a denser, moister result, canned (well-drained) corn works beautifully.

    Cream Cheese

    • The secret twist that makes this version extra special. Sliced cream cheese is layered in the middle of the batter before baking, creating a rich, luscious pocket that melts into the cake. Use a block-style cream cheese, not whipped. A 9-inch springform pan makes unmolding a breeze.

    Sweetened Condensed Milk

    • Adds a creamy richness and balanced sweetness that defines the classic pastel de elote flavour. Half a can (about 7 oz) is all you need — don’t substitute with regular milk or sugar.

    Eggs

    • Give the cake structure and help create a tender crumb. Use room-temperature eggs for a smoother batter that blends evenly.

    Vanilla Extract

    • Enhances the corn’s natural sweetness with a warm, aromatic note. Don’t skip it — it rounds out the flavour perfectly.

    All-Purpose Flour & Baking Powder

    • Flour provides body while baking powder gives the cake its gentle rise and soft, fluffy texture. Make sure your baking powder is fresh for the best results. A digital kitchen scale ensures your measurements are spot-on every time.

    Ingredients for Mexican corn cake laid out

    How to Make Mexican Corn Cake

    This recipe couldn’t be simpler — you just need a blender and a baking pan. Blend everything, pour half the batter, layer the cream cheese, pour the rest, and bake. The hardest part is waiting for it to cool! If you’re planning a full Mexican dessert spread, pair this with our Instant Pot Mexican Menudo for a complete feast, or try our Mexican Slow Cooker Pulled Pork for a savory main. And if you love easy blender cakes, our Dairy-Free Chocolate Cake is another crowd-pleaser.

    To make sure your cake bakes evenly, use a good blender to get a silky-smooth batter, and always grease your pan generously.

    Frequently Asked Questions

    Can I use canned corn instead of fresh?

    Yes, absolutely! Canned corn works well in this recipe — just make sure to drain it thoroughly. Fresh corn from the cob will give you a lighter, slightly sweeter result, while canned corn makes the cake a bit denser and moister. Both versions are delicious.

    Do I have to include the cream cheese?

    The cream cheese is optional but highly recommended! It’s not part of the traditional pastel de elote recipe, but it adds a rich, creamy layer inside the cake that makes it feel extra special. If you prefer the classic version, simply omit it.

    How do I know when the cake is done?

    Bake at 350°F (175°C) for 50–60 minutes. Insert a toothpick near the edge of the cake (not the center) — it should come out mostly clean. The center, where the cream cheese sits, will stay softer and that’s perfectly normal. The top should be golden brown.

    How should I store Mexican Corn Cake?

    Store leftovers in an airtight container in the refrigerator for up to 4 days. The cake tastes wonderful served slightly warm — just microwave individual slices for 20–30 seconds. You can also freeze slices (wrapped individually) for up to 2 months.

    Can I make this cake gluten-free?

    Yes! Substitute the all-purpose flour with a 1:1 gluten-free flour blend. Since corn is naturally gluten-free, this swap works very well in this recipe and the texture stays moist and tender.

    Slice of Mexican corn cake with cream cheese on a corn husk and a white plate

    Mexican Corn Cake with Cream Cheese

    This easy corn cake recipe only uses 8 ingredients. Corn cake, also known as pastel de elote, is made with ingredients such as fresh corn, eggs, flour, vanilla extract, cream cheese, baking powder, and a bit more.
    Prep Time 7 minutes
    Cook Time 40 minutes
    Total Time 1 hour 7 minutes
    Servings: 8 people
    Course: Dessert
    Cuisine: Mexican
    Calories: 230

    Ingredients
      

    • 2 cups fresh corn kernels  from about 3–4 cobs, or use canned/drained
    • 3 large eggs room temperature
    • ½ can sweetened condensed milk 7 oz / 200 g
    • 2 tsp vanilla extract
    • ½ cup all-purpose flour
    • 1½ tsp baking powder
    • ¼ cup whole milk
    • 100 g cream cheese  cut into thin slices for layering

    Equipment

    • highspeed blender

    Method
     

    1. Heat oven to 350°F (175°C). Grease and flour a 9×9 inch pan or loaf pan.
    2. In a blender, add corn kernels, eggs, condensed milk, vanilla, flour, baking powder, and milk.
      Blend until smooth and creamy (some small corn bits are fine for texture).
    3. Pour half the batter into the prepared pan. Arrange the cream cheese slices evenly on top of this first layer. Pour the remaining batter on top, covering the cream cheese completely.
    4. Bake for 50–60 minutes, or until golden brown and a toothpick inserted near the edge comes out mostly clean.
      (Note: The center where the cream cheese sits will remain softer.)
    5. Let the cake cool for at least 20 minutes before slicing, so the cream cheese filling sets slightly.
      Serve warm or at room temperature, with optional extra condensed milk drizzled on top.
  • Easy Picnic Tiramisu Recipe

    Easy Picnic Tiramisu Recipe

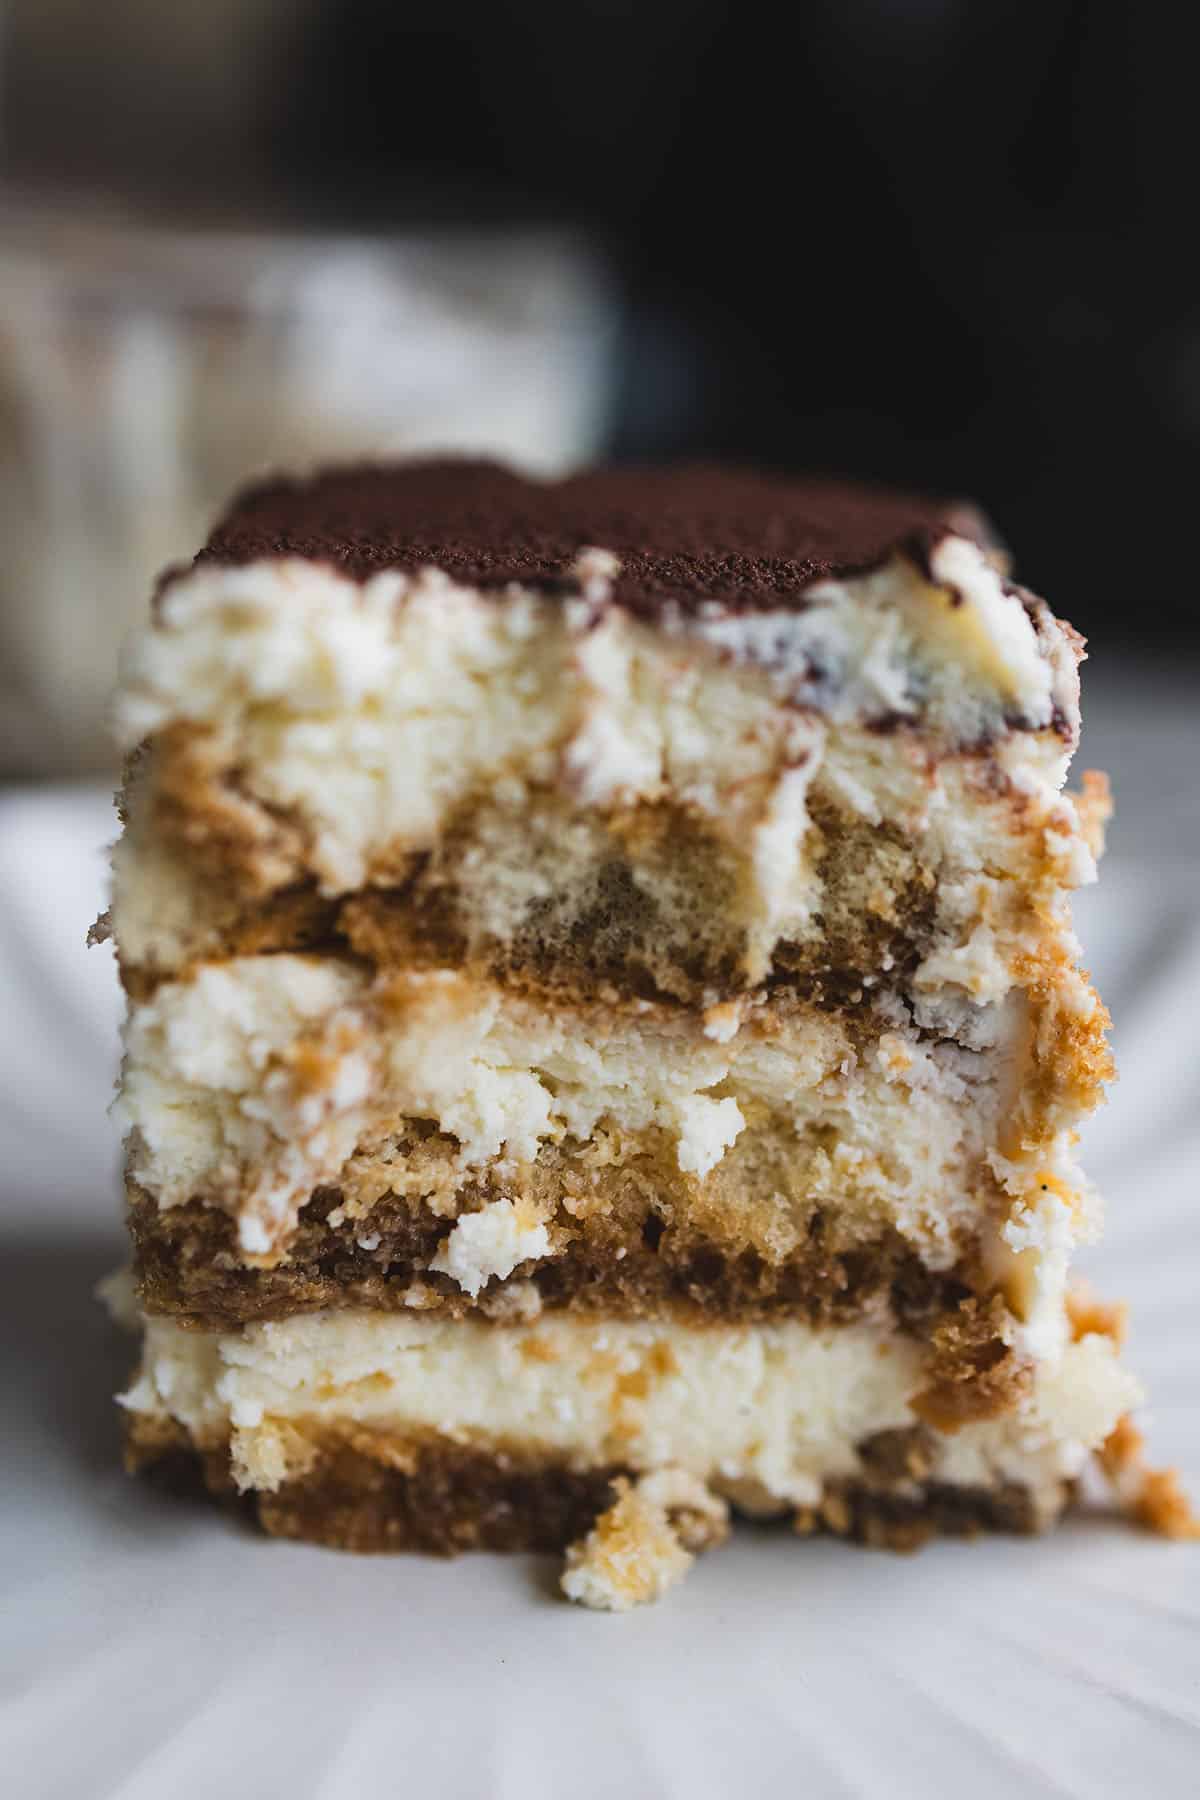
    A no-bake dessert that travels well, looks great, and tastes even better than restaurant tiramisu. This Easy Picnic Tiramisu is made right inside a Tupperware container — layer, chill, and go. The longer it sits, the better it gets, making it the ultimate make-ahead treat for picnics, barbecues, or any gathering where you want to impress without the stress.

    This post may contain affiliate links. If you purchase through these links, I may earn a small commission at no extra cost to you. Thank you for supporting Love & Harvest!

    Delicious homemade tiramisu dessert with cocoa powder topping.

    Why We Love This Recipe

    When it comes to picnics, we’re always hunting for that perfect dessert: easy to prepare, travels well, and still tastes (and looks!) delicious after a warm day in the sun. This tiramisu cake checks every single box. It’s no-bake, fuss-free, and made right inside a container with a lid — just layer, chill, and go. The longer it sits, the better it gets, which makes it picnic-perfect.

    Every time we bring this to a gathering, our close friends literally cheer when they hear we’ve packed our “famous picnic tiramisu.” Not a crumb is ever left behind.

    Flavour

    Think: creamy clouds of mascarpone, bold espresso-soaked layers, a whisper of vanilla, and a bitter cocoa finish. It’s soft, rich, comforting, and light all at once. Every bite melts on the tongue. This isn’t just a picnic dessert — it’s a little bit of luxury under the sky.

    Rich layered tiramisu dessert with coffee, mascarpone, and cocoa powder, perfect for special occasions.

    Effortless but Maximum Flavour

    No baking. No fancy tools. You don’t even need a stand mixer. We literally assemble everything in a simple tub or Tupperware — layer ladyfingers dipped in coffee, spread a fluffy mascarpone cream, repeat, and top with cocoa powder. The secret? Let it chill for at least a few hours. The result: a silky, creamy, coffee-kissed dessert that tastes like it took hours to make.

    Key Ingredients

    Ingredients

    Ladyfinger Cookies (Savoiardi)

    • The classic base of tiramisu. Savoiardi are light, dry sponge biscuits that soak up espresso without falling apart — which is exactly what you want. Dip them quickly (1–2 seconds per side), never soak them or they’ll turn mushy. Store-bought Italian ladyfingers work perfectly. A kitchen torch and a 9-inch springform pan are great for fancier presentations if you’re serving at home.

    Mascarpone Cheese

    • The soul of tiramisu. Mascarpone is a rich Italian cream cheese with a velvety, buttery texture that creates the signature creamy layer. Make sure it’s at room temperature before mixing — cold mascarpone can turn grainy when combined with cream. Don’t substitute with regular cream cheese; the flavour and texture are different.

    Espresso or Strong Coffee

    • The flavour backbone of the dish. Use freshly brewed espresso or very strong coffee, cooled to room temperature before dipping. Instant espresso powder dissolved in hot water also works well. Adding a splash of Kahlua, rum, or amaretto to the coffee is optional but adds wonderful depth for an adult crowd.

    Heavy Cream

    • Whipped to stiff peaks and folded into the mascarpone, heavy cream lightens the filling and gives it that cloud-like texture. Use cold cream straight from the fridge for the best whipping results. The ratio of cream to mascarpone is what makes this version light yet rich.

    Cocoa Powder

    • The classic finishing touch. A generous dusting of unsweetened cocoa powder on top adds a slight bitterness that perfectly balances the sweet, rich cream layers underneath. Dust right before serving (not before chilling) for the cleanest, most vibrant cocoa finish.

    Tiramisu and Picnic: A Match Made in Heaven

    You might think tiramisu is too delicate for outdoor fun — but this version is built for it. We make it ahead, and the chill time actually works in its favor. By the time everyone’s had their sandwiches and drinks, your tiramisu has turned into the creamiest, most irresistible treat. It holds up beautifully — even on warm summer evenings — and still scoops out neatly. We’ve served this on hiking trails, beaches, park benches, and patios, and it never disappoints.

    Why You Need to Try It

    My niece once told me, “Your tiramisu doesn’t even taste like the ones at restaurants — it tastes better.” I’ll never forget that. It’s one of those recipes that surprises people with how simple it is and delights them with how luxurious it tastes. Whether it’s a family picnic or a last-minute get-together, this is the dessert that brings smiles all around. Once you try it, you’ll always want to bring it along.

    Decadent tiramisu cake with layers of coffee-soaked sponge and mascarpone cheese. Perfect for dessert lovers and special occasions.

    Crumbled tiramisu dessert with cocoa powder on top, close-up shot.

    If you love no-bake desserts, our Cherry Clafoutis Pie is a crowd-pleasing French classic, and our Mexican Corn Cake with Cream Cheese is another easy, show-stopping treat. For a full Italian-inspired picnic spread, pair this tiramisu with our Homemade Pesto Gnocchi.

    Frequently Asked Questions

    Can I make this tiramisu without alcohol?

    Absolutely. The coffee liqueur (Kahlua, rum, or amaretto) is completely optional. Simply skip it and use just cooled espresso or strong coffee for dipping the ladyfingers. The tiramisu will still be deeply flavourful and delicious — and completely family-friendly.

    How long does picnic tiramisu need to chill?

    At a minimum, 4 hours in the refrigerator. Overnight is even better — the layers meld together, the ladyfingers soften to perfection, and the mascarpone cream sets beautifully. If you’re making it for a picnic, assemble the night before and transport it straight from the fridge in your cooler bag.

    How do I transport tiramisu to a picnic?

    That’s the beauty of this recipe — it’s made right in a lidded Tupperware container! Once chilled, simply seal the lid and pack it in a cooler with ice packs. It holds up well for several hours as long as it stays cold. Dust the cocoa powder on at the picnic just before serving for the freshest look.

    Can I make tiramisu without raw eggs?

    This recipe is already egg-free — no raw egg yolks in the mascarpone cream. The filling is made with whipped heavy cream folded into mascarpone and sweetened with powdered sugar, so it’s safe for everyone, including pregnant women, children, and anyone who prefers to avoid raw eggs.

    How long does homemade tiramisu keep?

    Tiramisu keeps well in the refrigerator for up to 3 days. The flavour actually improves on day 2 as the layers continue to meld. Keep it covered and chilled at all times. We don’t recommend freezing tiramisu as the cream layer can become grainy and watery when thawed.

    Slice of layered picnic tiramisu dusted with cocoa powder

    Easy Tiramisu

    A dessert that delivers maximum flavour with minimal effort, all packed into a container that’s ready to travel. It’s the perfect sweet treat kissed with a touch of luxury, even in the heart of the wilderness.
    Prep Time 20 minutes
    Total Time 4 hours 20 minutes
    Servings: 6 people
    Course: Dessert
    Cuisine: Italian
    Calories: 420

    Ingredients
      

    Cream Layer
    • 1 cup heavy cream
    • 250 g mascarpone cheese (room temperature)
    • ⅓ cup granulated sugar
    • 1 tsp vanilla extract
    For the Coffee Dip
    • 1 cup strong brewed espresso or coffee (cooled)
    • 2-3 tbsp sugar optional, to sweeten the coffee
    • 2-3 tbsp coffee liqueur (e.g., Kahlua, rum, Marsala wine, or amaretto) optional
    Assembly
    • 200-250 g ladyfinger biscuits (savoiardi)
    • Unsweetened cocoa powder (for dusting)

    Equipment

    • 1 round glass container (about 8–9 inches wide and 3–4 inches deep) with a tight-fitting lid

    Method
     

    1. Whip the cold heavy cream until stiff peaks form. Set aside.
    2. In another bowl, mix mascarpone, sugar, and vanilla until smooth. Gently fold in the whipped cream until light and fluffy. Chill briefly.
    3. Mix the cooled espresso with sugar and optional liqueur in a shallow bowl. Stir to dissolve. Taste and adjust sweetness.
    Assembly
    1. Quickly dip each ladyfinger into the coffee mixture (1–2 seconds per side).
    2. Place dipped ladyfingers side by side at the base of your round glass container, trimming or breaking as needed to fit the circular shape.
    3. Spread half the mascarpone cream evenly over the first layer of ladyfingers using a spoon or spatula.
    4. Repeat with a second layer of dipped ladyfingers.
    5. Finish with the remaining cream, smoothing the top.
    Chill, Cover, and Dust
    1. Place the lid securely on the container and refrigerate for at least 4 hours (overnight for best results). The dessert will set beautifully and be easy to transport.
    2. Before serving, open the lid and dust generously with cocoa powder. Add chocolate shavings if desired. Scoop to serve, or bring the whole container to a picnic—no mess, just flavour.
  • Dairy-free Chocolate Cake

    Dairy-free Chocolate Cake

    Moist, fudgy, and completely dairy-free and egg-free. This chocolate cake is so good you’ll forget it’s vegan.

    This post may contain affiliate links. If you purchase through these links, I may earn a small commission at no extra cost to you. Thank you for supporting Love & Harvest!

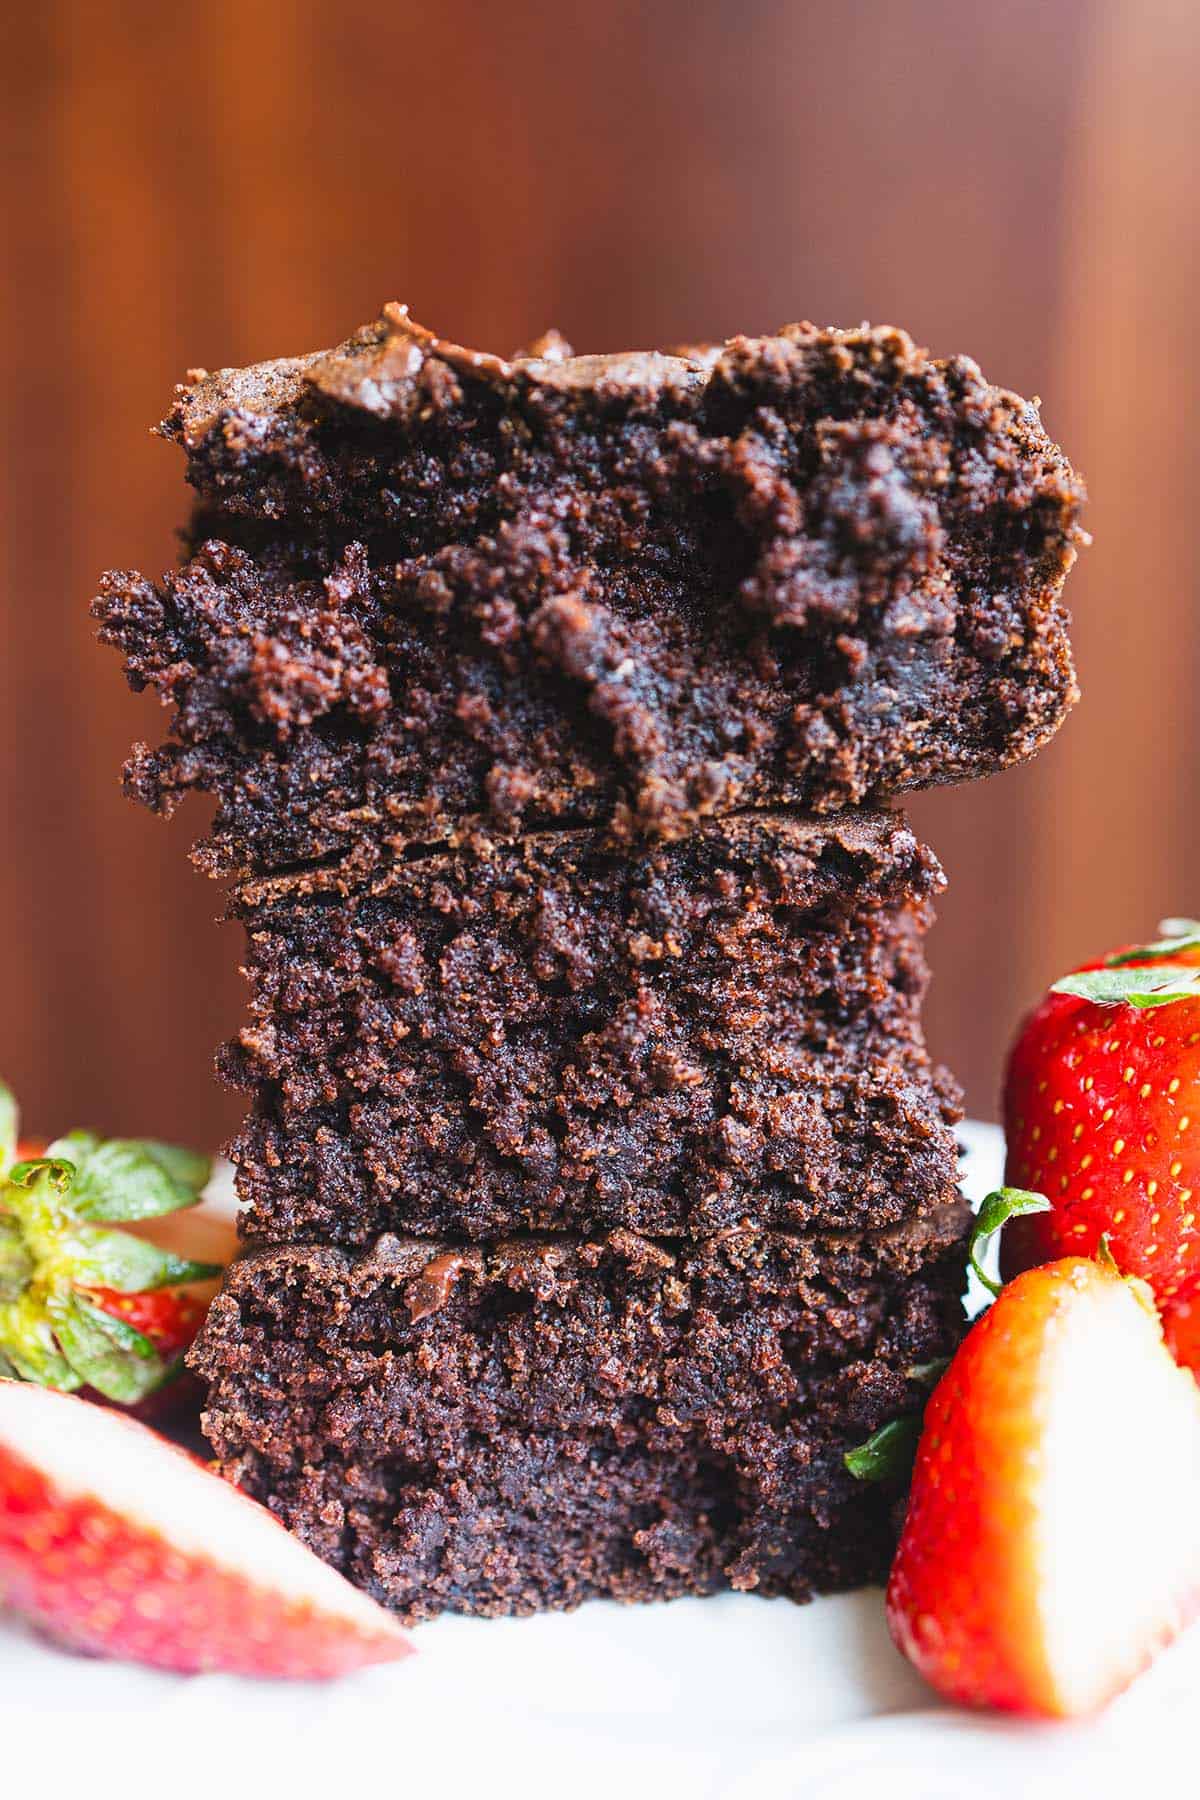
    Tall slices of dairy-free chocolate cake with fresh strawberries

    The Ultimate Dairy-Free Chocolate Cake: A Vegan Delight

    Whether you have food allergies or love experimenting with dairy-free baking, this recipe is one you’ll keep coming back to.

    Why You Will Love This Dairy-free Chocolate Cake

    • Super Moist Texture: This cake stays moist and tender, just like any classic chocolate cake.
    • No Fancy Ingredients: Uses simple pantry staples that are easy to find.
    • Allergy-Friendly: Perfect for anyone avoiding dairy, eggs, or animal products.
    • Kid-Approved: Tested and loved by even the pickiest eaters.
    • Versatile: Great for birthdays, celebrations, or an everyday treat.

    Delicious chocolate cake being eaten by a child with a fork.

    What is a Chia Egg?

    A chia egg is a fantastic plant-based substitute for traditional eggs in baking. Made from just chia seeds and water, it works as a binder to hold the cake together while keeping it moist and fluffy. It’s perfect for recipes like this one, where eggs need to be replaced without compromising texture.

    How to Make a Chia Egg

    1. Measure: Add one tablespoon of ground chia seeds to a small bowl.
    2. Add Water: Pour three tablespoons of water over the seeds.
    3. Stir: Mix well and let it sit for 5–10 minutes until it forms a gel-like consistency. Replace one chia egg for one regular egg in your baking recipes.

    Ingredients

    Cocoa Powder

    • Use unsweetened Dutch-process cocoa for the deepest chocolate flavour and darkest colour. It reacts differently than natural cocoa — deeper, smoother, less acidic. Sift it to prevent lumps. A 9-inch round cake pan gives you the ideal lift and texture for this batter.

    Chia Seeds (as egg replacer)

    • Ground chia seeds mixed with water create a gel that binds the cake exactly the way an egg would. They’re virtually tasteless in this recipe. Buy ground chia or grind whole seeds in a spice grinder for best results.

    Plant-Based Milk (Oat or Almond)

    • The recipe uses 1 cup of almond milk or oat milk. Oat milk gives a slightly richer, more neutral flavour; almond milk is lighter. Either works perfectly. Look for unsweetened versions to keep control over the sweetness level.

    Stack of dairy-free chocolate cake squares with strawberries

    Love baking without dairy? Try our Lightly Sweet Black Forest Cake for another allergy-friendly showstopper, or explore the Pumpkin Chocolate Chip Cake with Biscoff Frosting for autumn celebrations. For a simpler chocolate fix, our Pumpkin Chocolate Streusel Loaf is another family favourite.

    Use a springform pan if you want clean, professional-looking layers, or a standard 9-inch round cake pan for everyday baking.

    Frequently Asked Questions

    Can I use regular milk instead of plant-based milk?

    Yes — if dairy isn’t a concern for your household, any milk works in a 1:1 swap. The texture will be virtually identical. For a vegan or dairy-free version, stick with oat milk, almond milk, or coconut milk.

    Can I make this cake ahead of time?

    Absolutely. Bake the layers up to 2 days ahead and wrap tightly in plastic wrap at room temperature. Frost the day you plan to serve for the freshest presentation. Frosted cake keeps well in the refrigerator for up to 5 days.

    What dairy-free frosting works best?

    A simple chocolate ganache made with full-fat coconut milk and dairy-free chocolate chips is unbeatable. Whipped coconut cream with cocoa powder is also excellent. For a quick option, many store-bought frostings (like Pillsbury chocolate) are accidentally vegan — check the label.

    Can I substitute the chia egg with a flax egg?

    Yes. A flax egg (1 tbsp ground flaxseed + 3 tbsp water, rested 5 minutes) works identically. Flax gives a slightly earthier, nuttier flavour note but it’s undetectable in a chocolate cake with this much cocoa.

    Is this cake suitable for nut allergies too?

    The rest of the recipe is nut-free. Just use oat milk or rice milk instead of almond milk, and double-check that your cocoa powder and chocolate are processed in nut-free facilities if this is a concern.

    Tall slices of dairy-free chocolate cake with fresh strawberries

    Dairy-free Moist Chocolate Cake

    Decadent dark chocolate cake that’s completely dairy-free and egg-free. No dairy and no eggs. Oven and air fryer recipe.
    Prep Time 10 minutes
    Cook Time 35 minutes
    Total Time 45 minutes
    Servings: 6 people
    Course: Dessert
    Calories: 390

    Ingredients
      

    • 1¾ cups all-purpose flour
    • 1½ cups sugar
    • ¾ cup dutch-process cocoa
    • 1 tsp instant coffee powder
    • 1½ tsp baking soda
    • 1½ tsp baking powder
    • 1 tsp salt
    • ½ cup canola oil
    • 1 cup almond milk or oat milk
    • 1¾ cups hot water
    • ¼ cup prepared chia eggs see blog on how to make it
    • 2 tsp vanilla extract

    Equipment

    • air fryer optional

    Method
     

    1. oven baking: preheat oven to 350℉. Grease a 9inch square pan. Set aside.
    2. air fryer baking: preheat oven to 340℉. Grease a 9inch square pan. Set aside.
    3. In a large bowl, whisk together the flour, sugar, cocoa powder, instant coffee, baking soda, baking powder, and salt.
    4. In another bowl (or measuring jug), combine the oil, almond or oat milk, hot water, prepared chia eggs, and vanilla extract. Pour the wet mixture into the dry ingredients and whisk until smooth.
    5. Scrape the batter into the square pan and bake for 30-35 minutes, or until an inserted toothpick comes out clean. Remove from the oven and let it cool completely.
  • Pumpkin Chocolate Chip Cake with Biscoff Frosting

    Pumpkin Chocolate Chip Cake with Biscoff Frosting

    This Pumpkin Chocolate Chip Cake with Biscoff Frosting is the perfect dessert to celebrate the festive spirit of Christmas — a warm, moist cake bursting with earthy pumpkin sweetness, pockets of melted chocolate, and topped with the most irresistible buttery Biscoff cream cheese frosting you will ever taste.

    This post may contain affiliate links. If you purchase through these links, I may earn a small commission at no extra cost to you. Thank you for supporting Love & Harvest!

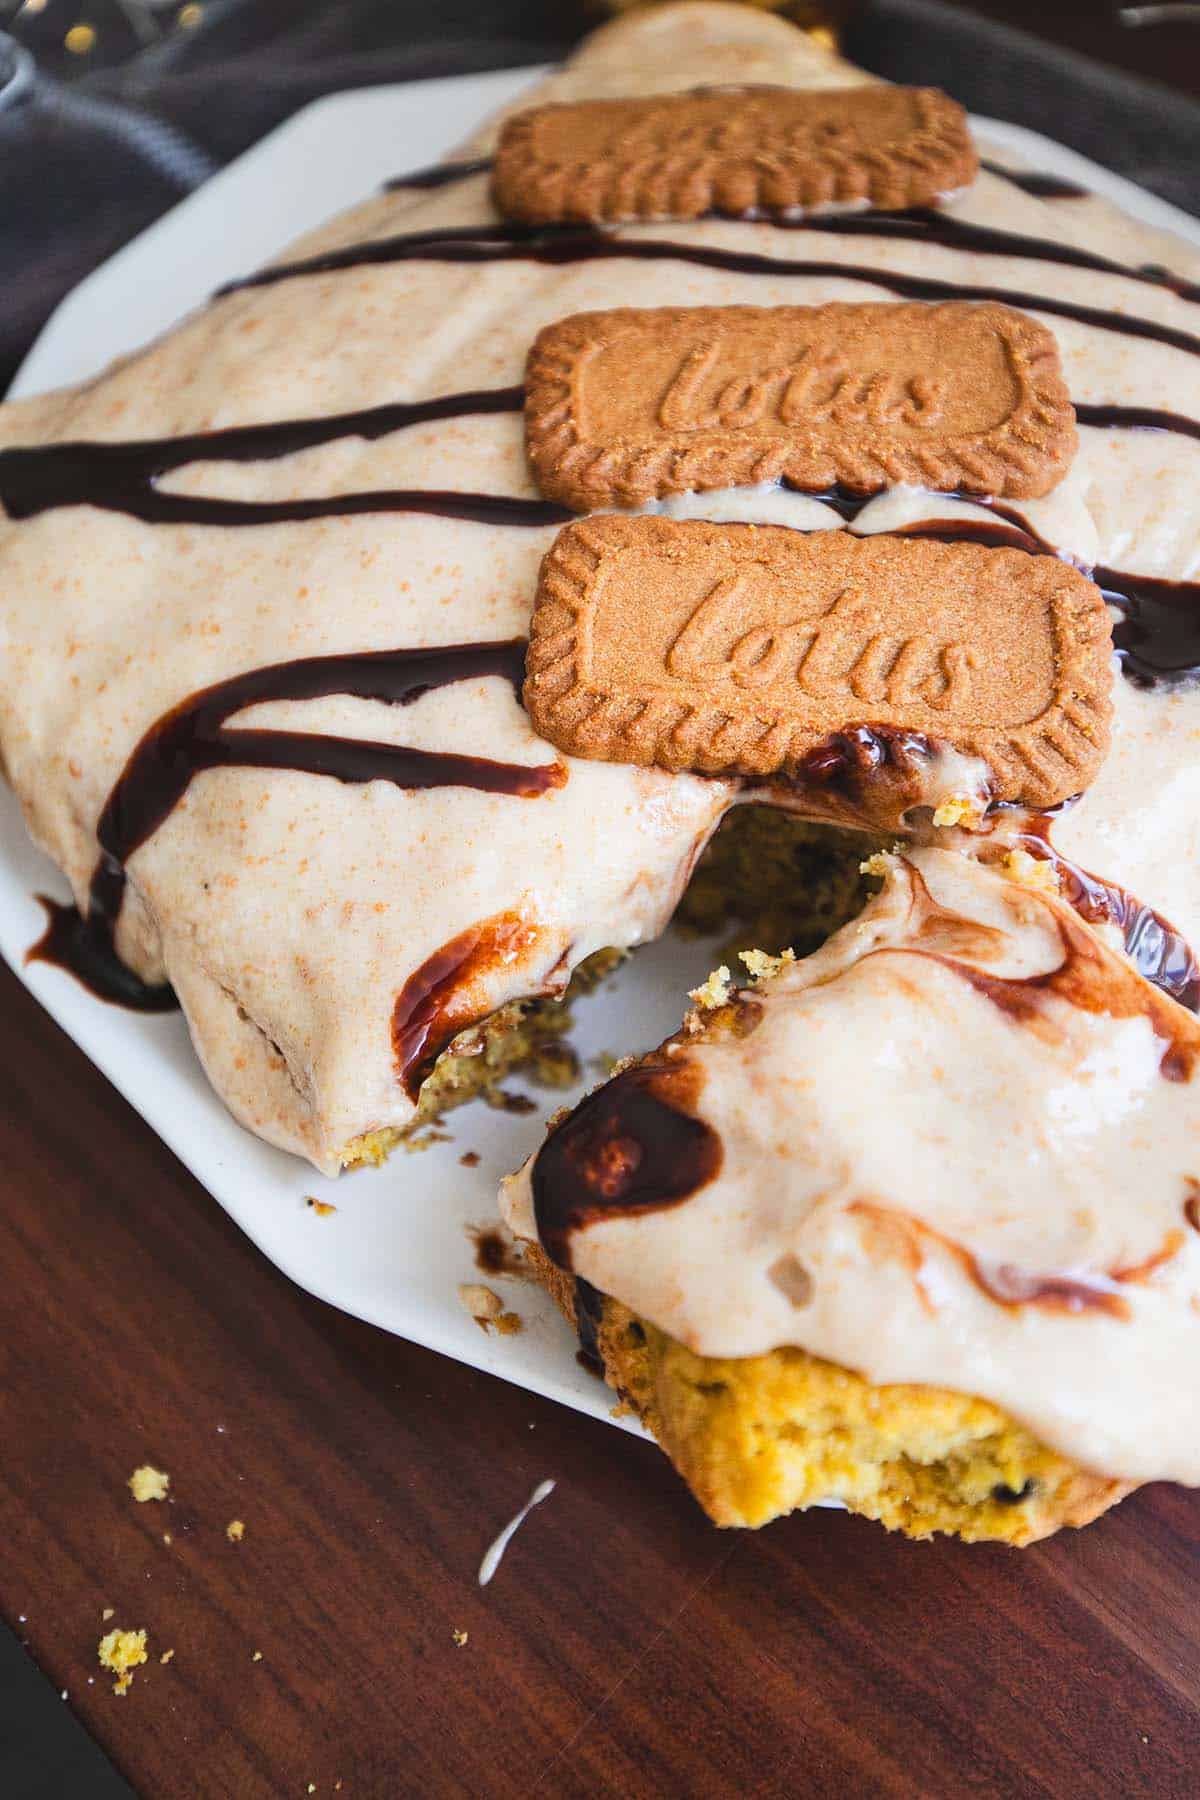
    Delicious dessert with cookies and chocolate drizzle, perfect for Christmas celebrations.

    Why You Should Make This Pumpkin Chocolate Biscoff Cake

    We love recipes that combine the best of fall and winter flavours, making this the ideal dessert for Thanksgiving, Christmas, or any cozy family gathering. The pumpkin keeps the cake moist, while the chocolate chips add a burst of decadence in every bite. And then there’s the frosting: sweet, slightly spiced, and utterly irresistible. Whether you’re hosting a holiday dinner or looking for a treat to enjoy by the fireplace, this cake delivers both flavour and festivity.

    In our family, this cake has become a tradition. The kids love the surprise of chocolate chips in every slice, and the adults rave about the Biscoff frosting’s unique flavour. It is easy to make, special enough to steal the show, and feels like a cozy hug on a crisp winter day.

    Rich homemade pumpkin cake with Biscoff cream cheese frosting and cookie topping.

    Key Ingredients

    Ingredients

    Pumpkin Puree

    Pumpkin puree is the heart of this cake. It gives the dessert its signature fall flavour, a subtle earthy sweetness that pairs perfectly with warm spices like cinnamon and nutmeg.

    • Why it matters: Keeps the cake incredibly moist and naturally sweetens the batter so you can use less added sugar.
    • Fresh vs. canned: I love steaming a fresh pumpkin for the best flavour, but Libby’s canned pumpkin puree works beautifully and saves time on busy holiday schedules.

    Chocolate Chips

    Semi-sweet chocolate chips add a burst of indulgence to the cake. The slight bitterness of the chocolate balances the sweetness of the pumpkin and frosting perfectly.

    • Why it matters: Creates pockets of gooey, melted chocolate in every bite — the surprise everyone loves.

    Biscoff Spread

    Biscoff spread (also known as cookie butter) is the secret ingredient that takes this frosting to the next level. Its warm, spiced, caramel-like flavour makes the frosting uniquely rich and irresistible, elevating this cake from delicious to unforgettable.

    • Why it matters: Adds depth, warmth, and a caramelised cookie flavour that no other ingredient can replicate.

    Cream Cheese

    Cream cheese is the unsung hero that adds tangy richness to the frosting. Paired with the Biscoff spread, it creates a silky, balanced frosting that is not overly sweet.

    • Why it matters: Balances the sweetness of the cookie butter and gives the frosting a luscious, spreadable texture.

    Warm pumpkin chocolate chip cake with Biscoff frosting on a white plate.

    How to Make This Pumpkin Chocolate Chip Cake

    Step 1: Prepare the Cake

    1. Preheat your oven to 350°F (175°C) and grease a 9×13-inch baking pan.
    2. If using fresh pumpkin: break into small pieces and steam with the skin for 15 minutes on high. Poke the skin with a fork — if it inserts with ease, it is ready. Spoon out the flesh, discard the skin, and let cool completely. Puree in a food processor. Add the eggs, vanilla, salt, coconut oil, and sugar. Process until smooth with no lumps. Move the mixture to a large mixing bowl.
    3. Add the flour, baking powder, baking soda, cinnamon, clove, nutmeg, and ginger into the mixture. Mix until just combined. Fold in the chocolate chips.
    4. Transfer to the prepared pan and bake for 30 minutes, or until the center springs back with no batter on your finger.
    5. Remove the cake and let cool for at least 30 minutes before adding the frosting.

    Step 2: Make the Biscoff Frosting

    1. In a large mixing bowl with a hand mixer or stand mixer, combine the cream cheese, heavy cream, powdered sugar, vanilla extract, and crushed Biscoff cookies until smooth and fluffy. Set aside until the cake has fully cooled.
    2. Starting from the center of the cooled cake, use a spatula to scoop the frosting down and slowly spread toward the edges. Allow gravity to pull the frosting down the sides. Generously drizzle with chocolate syrup and place whole Biscoff cookies on top as garnish.

    Step 3: Assemble and Serve

    1. Spread the frosting evenly over the cooled cake and place Biscoff cookies on top.
    2. Slice, serve, and enjoy the warm smiles from your loved ones!

    Pumpkin chocolate chip cake with Biscoff frosting slice showing moist texture.

    Tips for the Best Pumpkin Chocolate Biscoff Cake

    • Don’t overmix: Stir the batter only until combined for a tender, moist crumb.
    • Cool completely: Frost only when the cake is fully cooled to prevent the frosting from melting.
    • Make ahead: The cake keeps well covered in the fridge for up to 4 days — the flavours deepen overnight.
    • Room temperature cream cheese: Softened cream cheese blends into a lump-free frosting much more easily.

    Looking for more festive bakes? Try our Pumpkin Chocolate Streusel Loaf or the classic Best Spiced Pumpkin Pie with Flakey Crust — both perfect for the holiday season. And if you love chocolate desserts, our Dairy-Free Chocolate Cake is another crowd-pleaser.

    Frequently Asked Questions

    Can I make this cake ahead of time?

    Yes! Bake the cake up to 2 days in advance and store unfrosted at room temperature wrapped tightly in plastic wrap. Make the frosting fresh and apply on the day of serving for the best presentation. Frosted cake keeps well in the fridge for up to 4 days.

    Can I use store-bought Biscoff cookies instead of Biscoff spread?

    The frosting uses both Biscoff spread (cookie butter) for flavour and crushed Biscoff cookies for texture. You can find Biscoff cookies and spread on Amazon if they are not available locally. In a pinch, speculoos cookies make a good substitute.

    Can I substitute the pumpkin puree?

    You can use butternut squash puree as a close substitute — it has a similar texture and mild sweetness. Sweet potato puree also works well and gives the cake a slightly richer flavour. Avoid watery squash varieties as they can make the batter too loose.

    Why is my cake dense instead of fluffy?

    Overmixing is the most common culprit — once the flour is added, fold gently until just combined. Also check that your baking powder and baking soda are fresh (they lose potency after 6 months). And make sure the pumpkin puree is well-drained if using homemade.

    Can I make cupcakes instead of a sheet cake?

    Absolutely! Pour the batter into lined muffin tins (fill each about two-thirds full) and bake at 350°F for 18–22 minutes. This recipe makes about 18–20 cupcakes. Apply the Biscoff frosting once fully cooled and top each one with half a Biscoff cookie.

    How do I store leftovers?

    Store the frosted cake covered in the refrigerator for up to 4 days. Bring individual slices to room temperature for 15 minutes before serving for the best texture and flavour. You can also freeze individual slices (unfrosted) for up to 2 months.

    Pumpkin chocolate chip cake with Biscoff frosting, cookies and chocolate drizzle

    Pumpkin Chocolate Cake with Biscoff Frosting

    Prep Time 10 minutes
    Cook Time 30 minutes
    Cooling Time 30 minutes
    Total Time 1 hour 10 minutes
    Servings: 8 people
    Course: Dessert
    Cuisine: American
    Calories: 440

    Ingredients
      

    Cake
    • 1 cup pumpkin puree
    • 2 large eggs
    • 1 tsp vanilla extract
    • pinch sea salt
    • ½ cup melted coconut oil or butter
    • ½ cup sugar or maple syrup
    • 2 cups all-purpose flour
    • 2 tsp baking powder
    • 1 tsp baking soda
    • 2 tsp ground cinnamon
    • ½ tsp ground clove
    • ½ tsp ground nutmeg
    • 1 tsp ground ginger
    • ½ cup chocolate chips
    Biscoff Frosting
    • 8 oz cream cheese, room temperature
    • 2 tbsp heavy cream
    • 1 cup powder sugar
    • 4 crushed biscoff cookies or 3 tbsp Biscoff Cookie Butter
    • 1 tsp vanilla extract
    • Hershey's Chocolate Syrup (garnish)
    • 3-4 Biscoff Cookies (garnish)

    Method
     

    Pumpkin Chocolate Cake
    1. Preheat the oven to 350° F. Grease a (9×9 inch) bread pan.
    2. Fresh Pumpkin: Break the pumpkin into small pieces and steam with the skin for 15 minutes on high. The test: poke the skin with a fork, if it can be inserted with ease, it is ready. Spoon out the flesh and discard the outer skin. Set aside to completely cool. Puree steamed pumpkin flesh in a food processor. Add the eggs, vanilla, salt, coconut oil, and sugar. Process until the liquid is smooth with no lumps. Move the mixture to a large mixing bowl.
    3. Canned pumpkin: Puree canned pumpkin flesh in a food processor. Add the eggs, vanilla, salt, coconut oil, and sugar. Process until the liquid is smooth with no lumps. Move the mixture to a large mixing bowl.
    4. Add the flour, baking powder, baking soda, cinnamon, clove, nutmeg, and ginger into the mixture, mix until just combined. Fold in the chocolate chips
    5. Transfer to the oven and bake for 30 minutes, or until the center is just set. I usually touch the centre of the cake, if it springs back with no batter glued to my fingers, it is ready.
    6. Remove the bread and let cool for at least 30 minutes before you place the frosting.
    Biscoff Frosting
    1. In a large mixing bowl with a handheld mixer, or a standup mixer, combine all the ingredients together: cream cheese, cream, powder sugar, vanilla extract, crushed Biscoff cookies. Set aside and wait for the cake to cool.
    2. Starting from the center, use a spatula and scoop the frosting down and slowly move to the side of the cake. Allow gravity to pull some of the frosting down. Generously drizzle the Hershey's Chocolate Syrup, and lastly place the Biscoff Cookies on top as garnish.
  • Pumpkin Chocolate Streusel Loaf

    Pumpkin Chocolate Streusel Loaf

    With molten chocolate oozing from the center and a crunchy oatmeal pecan streusel topping, this Pumpkin Chocolate Streusel Loaf is the perfect balance of indulgence and wholesomeness — a cozy fall bake that fills the whole house with the most incredible spiced aroma.

    This post may contain affiliate links. If you purchase through these links, I may earn a small commission at no extra cost to you. Thank you for supporting Love & Harvest!

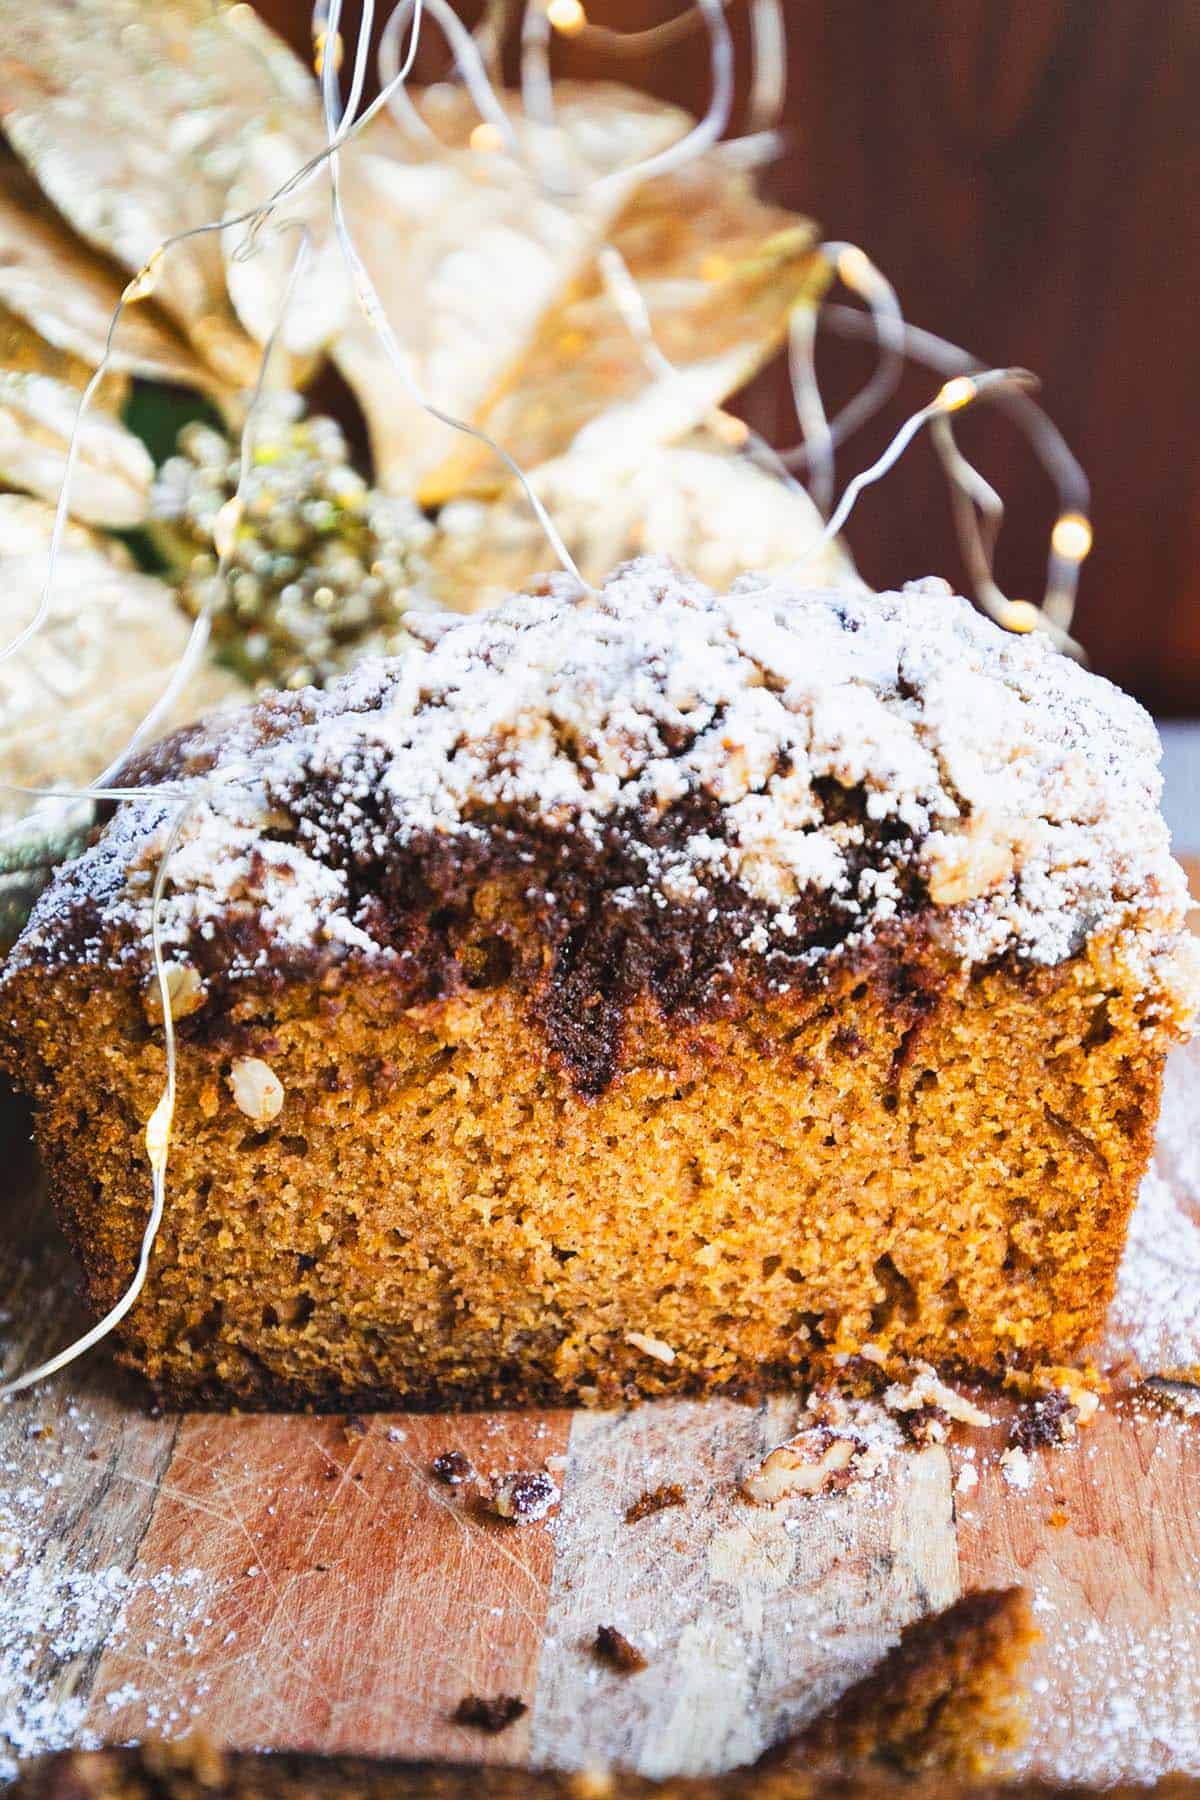
    Moist pumpkin bread with chocolate chips and powdered sugar topping for a cozy fall treat.

    Why We Love This Pumpkin Chocolate Streusel Loaf

    When autumn rolls in with its crisp air and cozy vibes, it brings a bounty of pumpkins. For our family, the season is not complete without baking this loaf. It is not overly sweet, so you can enjoy a slice (or two) without guilt — packed with essential fall flavours: cinnamon, nutmeg, and pumpkin.

    This loaf is more than just food — it is a tradition. We pack it into the kids’ lunches for a mid-day treat or bring it along to share with friends during holiday visits. It is easy to make, always a hit, and feels like a little gift of homemade happiness. The kids love whisking the dry ingredients while sneaking chocolate chips, and everyone enjoys sprinkling the streusel topping over the batter — it feels like adding a crown to something already special.

    Pumpkin chocolate streusel loaf dusted with powdered sugar on a cutting board

    Key Ingredients

    Ingredients

    Pumpkin Puree

    Pumpkin puree is the soul of this loaf, giving it its signature earthy sweetness and incredible moisture.

    • Why it matters: Keeps every slice springy and moist for days without drying out.
    • Fresh vs. canned: Fresh steamed pumpkin delivers the best flavour, but a quality canned puree works beautifully when you are short on time.

    Molten Chocolate Center

    Melted butter and chocolate chips are combined and tucked into the center of the batter before baking, creating a rich gooey core that surprises you with every slice.

    • Why it matters: The chocolate center is what makes this loaf memorable — that molten surprise in every bite is what guests rave about.

    Oatmeal Streusel Topping

    A mixture of butter, brown sugar, chopped pecans, oats, flour, and cinnamon creates the perfect crunchy contrast to the soft, bouncy loaf below.

    • Why it matters: Adds texture, crunch, and a caramelised sweetness that elevates this from a simple bread to a proper show-stopper.

    Black Coffee and Molasses

    A small amount of black coffee and molasses deepens the flavour of the pumpkin and spices, adding complexity without any coffee taste.

    • Why it matters: These two ingredients are the secret to a deeply flavoured, rich loaf that tastes bakery-quality.

    Pumpkin chocolate streusel loaf with gold holiday decorations behind it

    How to Make This Pumpkin Chocolate Streusel Loaf

    1. Preheat and Prep: Preheat your oven to 350°F (175°C) and grease a 9×5-inch loaf pan. You can also line it with parchment paper for easy removal.
    2. Prepare the Chocolate: In a microwave, melt the butter and chocolate chips using 30-second intervals. Once soft and gooey, whisk together with a pinch of salt until fully combined. Set aside in the fridge while you prepare the rest of the recipe.
    3. Prepare the Streusel Topping: In a small bowl, mix together the butter, brown sugar, chopped pecan, oatmeal, flour, and cinnamon. Stir until the mixture is crumbly, then set aside.
    4. Mix the Wet Ingredients: In a large bowl, whisk together the pumpkin puree, oil, brown sugar, eggs, molasses, vanilla extract, and black coffee until smooth.
    5. Combine the Dry Ingredients: In another bowl, whisk the flour, baking soda, salt, cinnamon, clove, ginger, and nutmeg. Gradually add to the wet ingredients, stirring just until combined. Do not overmix — it can affect the loaf’s bouncy texture.
    6. Assemble and Bake: Pour the batter into the prepared loaf pan and smooth the top. Using a spoon, create a well in the centre and add the chocolate filling. Evenly sprinkle the streusel mixture over the top. Bake for 50–60 minutes, or until a toothpick inserted into the centre comes out clean (except for the melted chocolate!).
    7. Cool and Serve: Let the loaf cool in the pan for 10 minutes before transferring to a wire rack to cool completely. Slice and enjoy warm or at room temperature.

    Sliced pumpkin chocolate streusel loaf showing its moist crumb

    Baking Tips

    • Do not overmix: Once the flour is added, fold gently until just combined for a tender, bouncy crumb.
    • Check doneness carefully: The chocolate center will look wet on the toothpick — insert the toothpick near the edge of the loaf rather than dead center.
    • Make ahead: This loaf actually tastes better the next day as the spices deepen. Store wrapped at room temperature for up to 3 days.
    • Silicone spatula tip: Use a silicone spatula to fold in the dry ingredients without overworking the batter.

    Love pumpkin bakes? Try our Pumpkin Chocolate Chip Cake with Biscoff Frosting for a show-stopping holiday cake, or the Best Spiced Pumpkin Pie with Flakey Crust for the ultimate Thanksgiving dessert. For a beautiful autumn tart, our Apple Tart with Cardamom Crust is a seasonal favourite.

    Frequently Asked Questions

    Can I make this loaf without the chocolate center?

    Yes, absolutely. Simply skip the chocolate filling step and sprinkle the streusel directly over the batter. The loaf will still be wonderfully moist and flavourful from the pumpkin, spices, and streusel topping — it just won’t have the molten surprise inside.

    Can I substitute the pecans in the streusel?

    Walnuts work just as well as pecans in the streusel topping. If you need a nut-free version, simply omit them and increase the oats slightly to keep the same crumbly texture. Sunflower seeds can also add a nice crunch.

    How do I know when the loaf is done?

    Insert a toothpick near the edge of the loaf (not the chocolate center). It should come out clean. The loaf will also spring back gently when pressed on top. The internal temperature should reach about 200°F (93°C). Baking time can vary by oven — check at 50 minutes.

    Can I freeze this loaf?

    Yes! Let the loaf cool completely, then wrap tightly in plastic wrap and place in a freezer bag. It keeps well for up to 2 months. Thaw overnight at room temperature. The streusel topping may soften slightly after freezing, but the flavour remains excellent.

    Can I use regular coffee instead of black coffee?

    Yes — a small amount of strong black coffee (or espresso) works best. The coffee does not make the loaf taste like coffee; it simply deepens the chocolate and spice flavours. If you prefer to avoid coffee entirely, you can substitute with an equal amount of milk or water.

    Why does my loaf sink in the middle?

    A sunken center is usually caused by underbaking or opening the oven door too early. Make sure your oven is fully preheated, do not open the door during the first 40 minutes of baking, and always test with a toothpick before removing. Overmixing can also cause sinking by developing too much gluten.

    Pumpkin chocolate streusel loaf dusted with powdered sugar on a cutting board

    Pumpkin Chocolate Streusel Loaf

    The molten chocolate inside surprises you with every bite, while the oatmeal streusel topping provides the perfect crunchy contrast. Plus, it’s kid-approved, crowd-friendly, and made with simple ingredients.
    Prep Time 15 minutes
    Cook Time 50 minutes
    Total Time 1 hour 5 minutes
    Servings: 6 people
    Course: Dessert
    Calories: 480

    Ingredients
      

    MELTED CHOCOLATE
    • 3 oz semi-sweet chocolate chips
    • 2 tbsp butter
    • pinch salt
    LOAF
    • 1 cup pumpkin puree
    • ½ cup canola oil
    • 2 large eggs room temperature
    • 1 tbsp molasse
    • 2s tsp vanilla extract
    • ¼ cup black coffee
    • 1½ cup all-purpose flour
    • ¾ cup brown sugar
    • 1 tsp baking soda
    • 1 tsp ground cinnamon
    • ½ tsp ground clove
    • ½ tsp ground ginger
    • ¼ tsp ground nutmeg
    • pinch salt
    STREUSEL
    • 4 tbsp butter room temperature
    • ¾ cup brown sugar
    • ½ cup chopped pecan
    • ½ cup oatmeal
    • ⅓ cup all-purpose flour
    • 1 tsp cinnamon

    Method
     

    MELTED CHOCOLATE:
    1. In a microwave, melt the butter and chocolate chips using 30 seconds intervals. Once it is soft and gooey, whisk together until it is combined completely. Set aside in the fridge while you prepare the rest of the recipe.
    STREUSEL
    1. Preheat your oven to 350°F (175°C) and grease a 9×5-inch loaf pan. You can also line it with parchment paper for easy removal.
    2. In a small bowl, mix together the rolled oats, brown sugar, melted butter, flour, and cinnamon. Stir until the mixture is crumbly, then set it aside.
    LOAF
    1. In a large bowl, whisk together the pumpkin puree, oil, brown sugar, eggs, molasse, vanilla extract, and black coffee until smooth.
    2. In another bowl, whisk the flour, brown sugar, baking soda, salt, cinnamon, clove, ginger, and nutmeg. Gradually add this to the wet ingredients, stirring just until combined. Be careful not to overmix, as this can affect the loaf’s bouncy texture.
    3. Pour the batter into the prepared loaf pan and smooth the top. Using a spoon, create a dwell in the centre, and add the chocolate filling on top. Evenly sprinkle the streusel mixture over the batter. Bake for 50–60 minutes, or until a toothpick inserted into the center comes out clean (except for the melted chocolate!).
    4. Let the loaf cool in the pan for 10 minutes before transferring it to a wire rack to cool completely. Slice and enjoy warm or at room temperature.
  • Best Spiced Pumpkin Pie with Flakey Crust

    Best Spiced Pumpkin Pie with Flakey Crust

    The best homemade pumpkin pie! Smooth, silky pumpkin filling perfectly balanced with cinnamon, clove, nutmeg, and ginger — all nestled in a buttery, shattering-crisp flakey crust. This is the pie that converts people who think they don’t like pumpkin pie, and the one guests always ask for the recipe.

    This post may contain affiliate links. If you purchase through these links, I may earn a small commission at no extra cost to you. Thank you for supporting Love & Harvest!

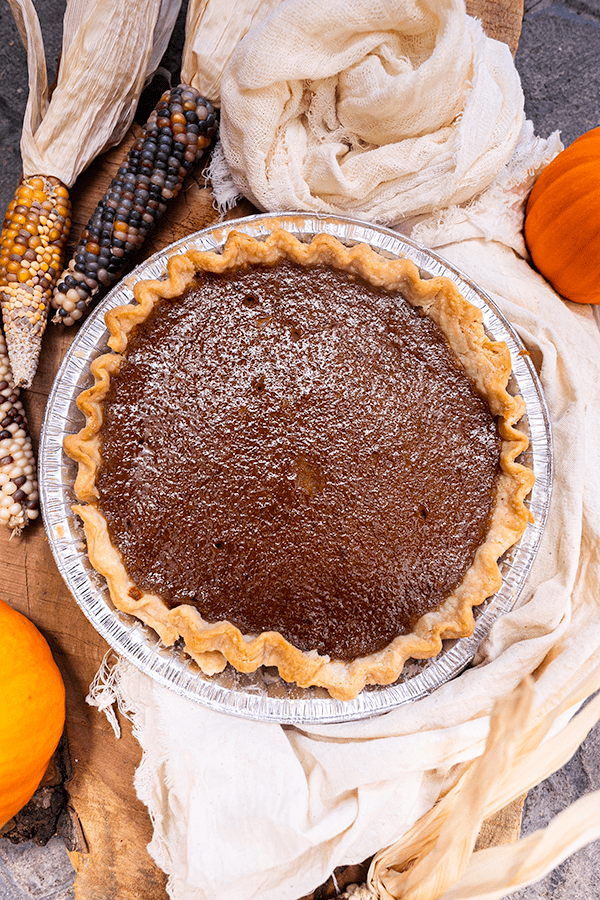
    Spiced pumpkin pie with a fluted flaky crust and dried corn on a linen cloth

    Why This Pumpkin Pie Stands Out

    If you love pumpkin flavour (and not the artificial kind), this is the pie for you. Blended through the food processor for a super silky, almost custard-like texture, with warm fall spices that complement rather than overpower the pumpkin. It is not strong in spice flavour — it is a well-balanced pie where you can still taste the pumpkin beautifully.

    I once worked at a famous pie shop in West Vancouver and this flakey crust is the exact recipe they used. I have since made this pie for countless house parties, sold it here in Mexico, and watched people who claim not to like pumpkin pie come back for seconds. It speaks for itself.

    Thanksgiving is never complete without a slice of this pie — and once you make it yourself, you will never go back to store-bought. Take a look at How to Make Super Flakey Pie Crust to master the crust before you begin.

    Fresh Pumpkin vs. Canned Pumpkin

    If you have the time, fresh pumpkin delivers unbeatable flavour. But canned pumpkin works perfectly in this recipe and the result is still incredible. No matter which you choose, you will have a silky filling and a very flakey crust.

    Side view of a pumpkin pie slice showing the smooth filling and flaky crust

    Key Ingredients

    Ingredients

    Pumpkin

    Whether canned or fresh, pumpkin is the star. Libby’s 100% pure pumpkin is a reliable canned option that many bakers swear by. If you have access to a favourite brand you trust, use it.

    • Why it matters: The pumpkin puree creates the silky custard-like filling. Its natural moisture content and starch structure are essential to the final texture — too watery and the filling won’t set.

    Pumpkin Spice: Cinnamon, Clove, Nutmeg, and Ginger

    These four spices together create the classic fall flavour profile. The balance is key — not too heavy on any single spice.

    • Why it matters: Freshly ground spices give a more vivid, aromatic result. A quality spice grater set makes a noticeable difference, especially for nutmeg.

    Eggs

    Two eggs are what give the filling its smooth, silky, custard-like texture as it bakes.

    • Why it matters: Eggs provide the structure that allows the filling to set firm enough to slice cleanly while staying creamy and soft inside.

    Condensed Milk

    Condensed milk provides the perfect amount of sweetness and contributes to the smooth, rich texture — no extra sugar needed.

    • Why it matters: The milk proteins and sugar in condensed milk help the custard filling set beautifully and add a subtle caramelised richness that cannot be replicated with regular milk and sugar alone.

    Pumpkin Variety Guide

    Not every pumpkin tastes the same. Some are strictly for carving, others for cooking and baking. All pumpkins are edible, but some are more fibrous or sweeter than others. Some recommendations:

    • Sugar pumpkin
    • Cherokee Bush
    • Cinderella
    • Muscade de Provence
    • Calabaza grande (Mexico)

    In Mexico we use the calabaza grande — medium-sized with a hard green exterior and sweet, flavourful flesh inside. This is my personal favourite for pumpkin pie and the variety I use when making it to sell locally.

    A child standing beside a pile of green-striped pumpkins at a market

    Fool-Proof Professional Tips

    Pro Tip 1: Bake at 425°F

    Flakey doughs love high temperatures. When the cold fat in the dough hits the heat of the oven, the moisture in the fat evaporates, creating pockets of steam. This steam pushes up the dough, creating lightness and flakiness. If your pie crusts are not crisp enough, your oven is likely not hot enough.

    Pro Tip 2: Use a High-Speed Blender or Food Processor

    To get the silky smooth texture, blend everything together in a food processor or high-speed blender. The machine aerates the eggs and creates a custard-like consistency that is impossible to achieve by hand. A quality immersion blender also works well for smaller batches.

    Pro Tip 3: Let the Pie Cool Completely

    Allow the pie to cool completely before cutting — at least 2 hours at room temperature, then refrigerate. When the pie comes out of the oven it is still slowly cooking. Cut into it too soon and the moisture escapes, the filling dries out, or worse — it spills out unset. Best served cold with a generous dollop of whipped cream.

    Love pumpkin season baking? Try our Pumpkin Chocolate Chip Cake with Biscoff Frosting for a showstopping holiday cake, or the Pumpkin Chocolate Streusel Loaf for a cozy weekend bake. For a beautiful autumn tart, our Apple Tart with Cardamom Crust and Caramel Drizzle is always a seasonal favourite.

    Frequently Asked Questions

    Can I make this pie a day ahead?

    Yes — in fact this pie is better the next day. Bake the pie and let it cool completely, then cover loosely and refrigerate overnight. The filling firms up further and the flavours deepen. Remove from the fridge 30 minutes before serving. This makes it ideal for Thanksgiving where oven space is precious on the day itself.

    How do I prevent the crust edges from burning?

    If the crust edges are browning too quickly during baking, cover them loosely with strips of aluminium foil or use a pie shield ring. Remove the foil or shield for the last 10–15 minutes of baking so the edges can achieve a deep golden colour. You can also lower the oven temperature by 25°F after the first 15 minutes if your oven runs hot.

    Why did my pumpkin pie crack on top?

    Cracking usually means the pie was overbaked or cooled too quickly. The filling is done when the edges are set but the center still has a slight jiggle (it will firm up as it cools). Remove it from the oven at that stage and let it cool slowly at room temperature before refrigerating. Avoid putting a hot pie directly into the fridge.

    Can I use sweet potato instead of pumpkin?

    Yes! Sweet potato makes an excellent substitute and gives a slightly sweeter, richer flavour. The texture is very similar to pumpkin pie filling. Use the same quantity of sweet potato puree and keep all other ingredients the same. This is a popular variation in the American South and is equally delicious.

    How do I know when the pumpkin pie is done?

    The pie is done when the edges are set and puffed slightly and the center still has a gentle wobble — like Jell-O, not a liquid slosh. It will continue to set as it cools. If the top is cracking or the center looks dry, it has been overbaked. Internal temperature should reach about 175°F (79°C) in the center.

    Can I freeze this pumpkin pie?

    Yes. Let the pie cool completely, then wrap tightly in plastic wrap and aluminium foil and freeze for up to 1 month. Thaw overnight in the refrigerator before serving. The texture remains excellent after freezing. The crust may soften very slightly but a few minutes uncovered at room temperature will help it crisp back up.

    Spiced pumpkin pie with a fluted flaky crust and dried corn on a linen cloth

    Best Spiced Pumpkin Pie with Flakey Crust

    Prep Time 15 minutes
    Cook Time 35 minutes
    Total Time 50 minutes
    Servings: 8 people
    Course: Dessert
    Cuisine: American
    Calories: 320

    Ingredients
      

    • 2 cups pumpkin puree homemade or canned
    • 1 (14oz) condensed milk
    • 2 large eggs room temperature
    • 1 tsp ground cinnamon
    • ½ tsp ground ginger
    • ¼ tsp ground clove
    • ½ tsp ground nutmeg
    • ½ tsp salt
    • 1 unbaked pie crust

    Method
     

    1. Preheat the oven to 425°F (220°C)
    2. In a food processor, add the pumpkin puree, condensed milk, eggs, cinnamon, ginger, clove, nutmeg, and salt until smooth. Pour into the unbaked pie crust.
    3. Bake in the preheated oven for 15 minutes.
    4. Dial the temperature down to 350°F and continue to bake for 35-40 minutes. Watch the edge of the crust. When it is golden brown or until a knife inserted into the centre of the pie comes out clean.
    5. Allow the pie to cool completely before serving. About 2 hours.

    Notes

     
    Top with a generous dollop of whipped cream. I like pumpkin pie to be well chilled, so I make pies a day ahead of time and keep them in the refrigerator overnight with a film on top. However, it’s perfectly acceptable to serve room temperature pie too – just be sure to pop the leftovers in the fridge. 
  • Lightly Sweet Black Forest Cake

    Lightly Sweet Black Forest Cake

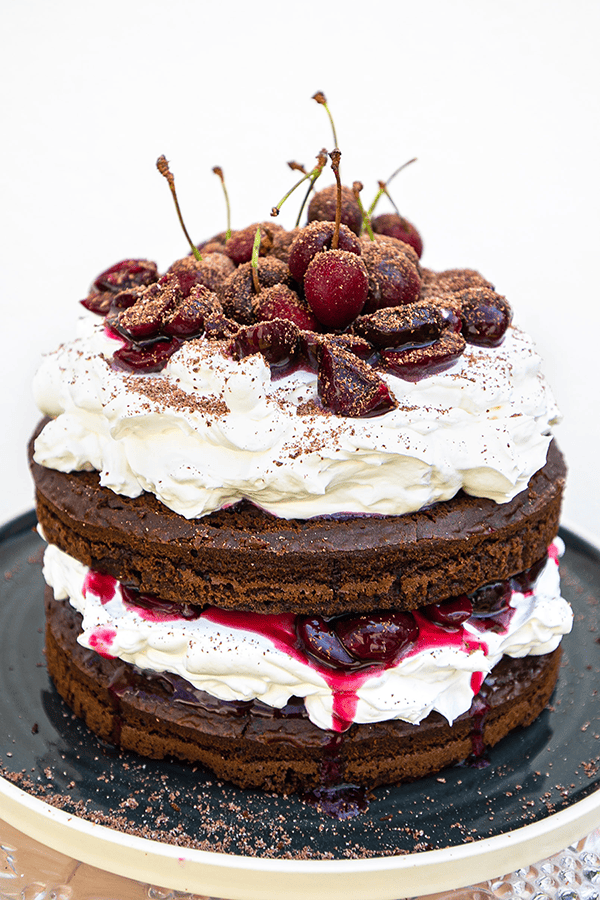
    This Black Forest cake is an accidental miracle that became the most delicious mistake I ever made. Rich, velvety chocolate layers soaked with cherry syrup and stacked with cloud-like whipped cream. There’s no granulated sugar in the base batter, but it isn’t sugar-free. The chocolate chips, cherry syrup and whipped cream bring the sweetness.

    Lightly Sweet Black Forest Cake whole on a cake stand

    This post may contain affiliate links. If you purchase through these links, I may earn a small commission at no extra cost to you. Thank you for supporting Love & Harvest!

    Planning dinner too? My free PDF has seven easy family dinners for the weeknight table. Send me the free dinners

    A Note on “Lightly Sweet”

    Let’s set the record straight. It isn’t sugar-free. There’s no granulated sugar in the base batter, but the chocolate chips, the cherry syrup and a little powdered sugar in the whipped cream all bring some sweetness. This combination strikes the perfect balance, infusing the cake with just the right amount of sweetness and cocoa goodness.

    A version made with gluten-free flour is right below. Keep reading!

    The Flavour

    With each forkful, you savour the delightful dance of flavours. The deep, velvety chocolate cake embraces the tangy burst of cherry syrup, while a hint of almond infuses every layer with warmth and complexity. The ethereal whipped cream crowns the creation, adding a cloud-like lightness to the ensemble. Born out of serendipity, this cake is a symbol of the beauty of imperfection, and a reminder that some of the best recipes come from happy accidents.

    Layered Black Forest cake with whipped cream and dark cherries

    Ingredients for Lightly Sweet Black Forest Cake

    Unsweetened Cocoa Powder

    • Cocoa powder is where all the chocolate flavour comes from. Use a good-quality natural unsweetened cocoa powder for the deepest, richest flavour. The espresso powder in the dry ingredients intensifies the cocoa even further. It’s a classic baker’s trick.

    Semi-Sweet Chocolate Chips

    • The chocolate chips are melted into the wet batter, adding richness, moisture and a good part of the cake’s sweetness, since semi-sweet chips do contain sugar. They contribute a mild sweetness that makes the cake feel indulgent. You can swap these for an extra half cup of cocoa powder and 1/4 cup of powdered sugar or honey, like in the gluten-free version below.

    Natural Yogurt and Cream

    • Yogurt and cream are what keep this cake so moist. The yogurt adds a subtle tang and keeps the crumb tender. The cream adds richness. Together they eliminate the need for butter while producing a denser, moister cake than a traditional recipe.

    Cherry Syrup and Fresh Cherries

    • The cherry syrup soaks into each cake layer, adding moisture and a tart-sweet flavour that defines the Black Forest experience. If, like me, you cannot find cherry syrup at your local grocery store, you can make your own using my homemade Cherry Syrup Recipe. It takes under 15 minutes.

    Heavy Whipping Cream

    • The whipped cream is what makes this cake feel light and celebratory. The addition of cornstarch stabilises it so it holds its shape even in warm weather. Chill your cream in the freezer for 10 to 15 minutes before whipping. It will whip up faster and hold peaks better.

    Two-layer lightly sweet Black Forest cake topped with whipped cream and fresh cherries

    Made with Gluten-Free Flour

    If you’re baking for someone with celiac disease, check that every ingredient is labeled gluten-free.

    If you want to make it with gluten-free flour, start from my base recipe and make the following adjustments:

    1. Remove the chocolate chips from the recipe and double up on the cocoa powder instead.
    2. Add 1/4 cup of powdered sugar or 1/4 cup of honey.
    3. Remove the all-purpose flour and replace it with your favourite gluten-free flour blend.
    4. Add 1 tsp of almond extract for that classic Black Forest flavour.
    5. Add one extra egg (3 eggs total) to compensate for the different binding properties of gluten-free flour.

    Black forest cake assembly showing layers

    How to Make This Black Forest Cake

    The links below are Amazon affiliate links. If you buy through them, I may earn a small commission at no extra cost to you.

    Recommended tools

    A hand mixer works too, and any comparable offset spatula does the job.

    1. Preheat the oven to 350°F and grease a round 9-inch springform pan. Line the bottom with parchment paper and set aside.
    2. Combine all dry ingredients in a bowl. In a pot over low heat, melt the chocolate chips with water, whisking constantly so it doesn’t stick. Scrape into a stand mixer bowl or large heat-proof bowl.
    3. Using a hand mixer or stand mixer, slowly add the vegetable oil on low speed. Add the yogurt and cream on medium until combined. Add eggs one at a time, then the vanilla extract.
    4. Gradually add half the dry mixture to the wet mixture. Mix until incorporated. Add the remaining dry ingredients and whisk for about one minute until uniform.
    5. Pour the batter into the pan and bake for 30 to 35 minutes. The cake is done when a toothpick inserted in the centre comes out clean, or the centre springs back firmly when lightly touched.
    6. Let the cake cool completely in the pan. Wrap with plastic wrap to retain moisture. Refrigerate until assembly.
    7. Assemble the cake: Whip the heavy cream, confectioners’ sugar, and cornstarch on high speed until medium peaks form, about 3 to 4 minutes. Do not overmix or the cream will break.
    8. Level the cake top with a serrated knife. Carefully slice the cake in half horizontally to create two even layers.
    9. Place the first layer on your serving plate. Drizzle 2 tbsp cherry syrup and spread evenly. Scatter 2 tbsp cherries. Apply a generous layer of whipped cream and smooth with an offset spatula.
    10. Place the second layer on top. Add remaining cherry syrup and cherries. Apply the rest of the whipped cream. Garnish with fresh cherries and grated chocolate.

    Black Forest cake topped with whipped cream and cherries in syrup

    Cherry Syrup Recipe

    If, like me, you cannot find cherry syrup in your local grocery store, you can easily make it at home. Follow my homemade Cherry Syrup Recipe. It takes under 15 minutes and uses just three ingredients.

    Cherry syrup recipe: homemade cherry syrup in a jar

    My Tips

    Bake the Cake a Day Ahead

    To save time, bake the cake the day before assembly. Wrap the cooled layers tightly in plastic wrap and refrigerate overnight. Cold cake layers are actually easier to slice cleanly and hold up better under the whipped cream.

    Add Cornstarch to the Whipped Cream

    Humidity and heat can cause whipped cream to melt and turn runny. Mix 1 teaspoon of cornstarch per cup of heavy cream before whipping. I also like to chill my heavy cream in the freezer for 10 to 15 minutes first. The texture should look like runny ice cream with a few ice crystals. This helps it whip up faster and hold its peaks longer.

    Make It Your Own

    The recipe is a classic Black Forest Cake, but don’t let that stop you from making it your own. At the top of my cake, I like to grate Mexican Abuelita Chocolate. It has hints of cinnamon and clove that give the cake a beautiful complexity. Other ideas: add chocolate syrup, raisins, figs, or anything that represents you and sounds delicious.

    Black Forest cake with a slice cut out, topped with cherries and chocolate

    Looking for more indulgent desserts on Love & Harvest? Try these:

    Frequently Asked Questions

    Can I use a regular cake pan instead of a springform pan?

    Yes. A standard 9-inch round cake pan works fine. Line the bottom with parchment paper and grease the sides well. To remove the cake, run a thin knife around the edges and invert onto a wire rack. The 9-inch springform pan makes removal easier and protects the cake edges, but it is not required.

    Why does the centre of the cake sink slightly?

    Usually it’s underbaking or opening the oven door too early. Bake for 30 to 35 minutes, until a toothpick in the center comes out clean, and keep the oven door closed for most of the bake.

    How do I know when the cake is done baking?

    Insert a toothpick into the centre of the cake. If it comes out clean, the cake is done. You can also lightly press the centre with your finger. It should spring back firmly. If it feels wet or leaves an indent, give it another 5 minutes and test again.

    Can I make the whipped cream ahead of time?

    Whipped cream is best made fresh. If you need to prep ahead, whip the cream, store it in the refrigerator for up to 2 hours, and give it a brief re-whip by hand before using. The cornstarch stabiliser in this recipe helps it hold much longer than plain whipped cream.

    How long does the assembled cake keep in the refrigerator?

    The assembled cake keeps well covered in the refrigerator for up to 3 days. The cherry syrup actually continues to soak into the cake layers as it sits, making the cake even more moist and flavourful on day two.

    Can I use less powdered sugar in the whipped cream?

    Yes. Start with half and taste. The cornstarch still helps the cream hold its shape.

    Need dinner ideas for this week? Get my free PDF with seven easy family dinners. Get the free dinners

  • Super Moist Cherry Loaf

    Super Moist Cherry Loaf

    There is one loaf you absolutely must bake before summer ends — a super moist cherry loaf bursting with juicy cherries, warm almond extract, and a golden crumb that somehow stays tender for days. This is the loaf that makes you wish summer never ended.

    This post may contain affiliate links. If you purchase through these links, I may earn a small commission at no extra cost to you. Thank you for supporting Love & Harvest!

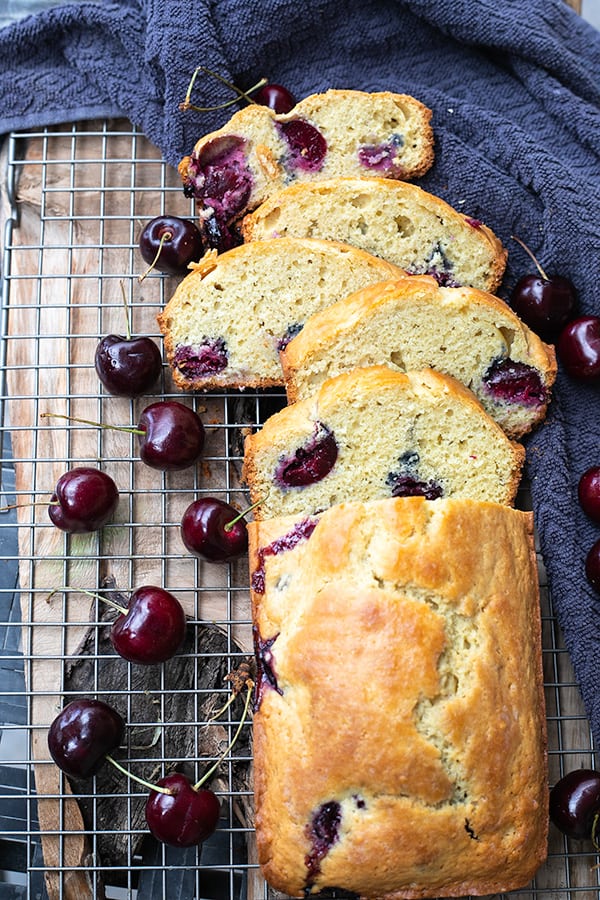
    Slices of super moist cherry loaf with fresh cherries on a wire rack

    This post is all about the best cherry loaf — a moist, crumbly recipe loaded with juicy cherries and a hint of almond. Perfect with your morning coffee or afternoon tea.

    It’s that time of the year when cherries take over the market stands — deep red, plump, and impossibly sweet. Before you let them go to waste, bake them into this simple loaf that celebrates the very best of late summer.

    The recipe comes together in one bowl, requires no stand mixer, and is forgiving enough for beginner bakers. Kids love helping fold in the cherries. And the smell while it bakes? Pure summer.

    Why You Will Love This Recipe

    • Perfect late-summer recipe — use up your cherry harvest before the season ends
    • Works with sweet or sour cherries — both varieties bake beautifully in this loaf
    • One-bowl, no mixer needed — simple enough for kids to help, done in under an hour
    • Butter-free swap — replace butter with apple sauce 1:1
    • Best morning loaf with coffee — pairs perfectly with a hot cup or a pat of butter on top

    Golden cherry loaf baked in a white loaf pan

    Ingredients

    Cherries

    Sweet cherries are best for this recipe. The sweetness really pulls through with the almond extract. Look for cherries that are fully ripe — the skin is soft and plump and easy to split in half. Fresh summer cherries are ideal, but if you can only find frozen, thaw and pat them dry before folding in.

    • Why they matter: Cherries are the star — they provide pockets of juicy fruit in every slice and keep the loaf moist even after a day or two.

    Almond Extract

    Almond and cherry are the best partners in the baking world. You can use coloured or clear almond extract — either works. Half a teaspoon is enough to perfume the entire loaf without overpowering it.

    • Why it matters: Almond extract amplifies the cherry flavour in a way vanilla simply cannot. Do not skip it.

    Eggs

    Two large eggs at room temperature give the loaf structure and lift. Cold eggs can cause the butter to seize, so take them out 20 minutes before you start.

    • Why they matter: Eggs bind the batter and are the key to that moist, tender crumb.

    Sugar

    Half a cup of natural cane sugar is just right. If you want to cut sweetness, a quarter cup works fine — the cherries carry plenty of natural sweetness on their own.

    • Why it matters: Sugar tenderises the crumb and helps the top brown to a golden finish.

    Loaf Pan

    A standard 9×5 loaf pan is all you need. Prep it with baking spray so the loaf releases cleanly after cooling.

    • Why it matters: A well-prepared pan means no sticking and a clean, even crust all the way around.

    Cherry loaf cooling on a wire rack surrounded by fresh cherries

    How to Make It with Apple Sauce Instead of Butter

    Replace butter with apple sauce. It is tried and tested, and it’s a delicious substitute. The loaf comes out even more spongy and is just as flavourful — maybe even better. Use a 1:1 swap.

    Cherry loaf batter studded with cherries in a white loaf pan

    What Goes Well with This Cherry Loaf?

    • A hot black coffee
    • Butter, lightly toasted
    • Nutella spread
    • Peach jam or blackberry jam
    • Iced peach tea

    Baking Time Tips

    Bake at 350°F for 55–60 minutes. For the last 5 minutes, watch closely. Once the top is slightly golden and the loaf has pulled away from the sides, take it out. The centre should still be slightly moist — that is what keeps it juicy. Let it cool in the pan for 5 minutes, then transfer to a rack.

    Slice of cherry loaf showing whole cherries in the crumb

    More Cherry and Baking Recipes

    If you loved this loaf, try these next: Cherry Syrup Recipe for topping pancakes and ice cream, and Cherry Clafoutis Pie for a French-inspired dessert using the same summer cherries. For a chocolate twist, the Dairy-Free Chocolate Cake is a crowd pleaser any time of year.

    Frequently Asked Questions

    Can I use frozen cherries instead of fresh?

    Yes. Thaw the cherries completely and pat them dry with paper towels before folding them into the batter. Excess moisture from frozen cherries can make the loaf gummy.

    How do I keep the cherries from sinking to the bottom?

    Toss the pitted and halved cherries in a tablespoon of flour before folding them into the batter. The light coating helps them stay suspended throughout the loaf.

    Can I replace the butter entirely?

    Yes — apple sauce is a great 1:1 substitute. The loaf comes out slightly more spongy but equally moist and delicious with fewer calories.

    How should I store this cherry loaf?

    Wrap tightly in plastic wrap or store in an airtight container at room temperature for up to 3 days. For longer storage, slice and freeze individual pieces — they thaw in 15 minutes.

    What type of cherries work best?

    Sweet cherries like Bing or Rainier are ideal because their sweetness pairs beautifully with almond extract. Sour cherries also work — just add an extra tablespoon of sugar to balance them.

    Can I add other mix-ins to this loaf?

    Absolutely. Chocolate chips, slivered almonds, or lemon zest all work well. Keep the total add-ins to about one cup so the batter is not overloaded.

    Moist Cherry Loaf

    Delicious cherry loaf that is moist and filled with perfectly cooked juicy cherries. Print RecipePrep Time:10 minsCook Time:50 minsCourse: DessertCuisine: AmericanKeyword: cherry loaf

    Ingredients

    • ¼ cup butter soft
    • ½ tsp almond extract
    • ½ cup sugar
    • 2 large eggs room temperature
    • 2 cup all-purpose flour
    • ¾ tsp baking powder
    • ½ tsp baking soda
    • ½ tsp salt
    • ½ cup milk
    • 1 cup sweet cherries pitted sliced in halves

    Instructions

    • Preheat the oven to 350 degrees F. Prepare a bread pan with baking spray.
    • In a mixing bowl, whisk together the apple sauce, sugar and almond extract until well blended. Add and whisk the eggs one at a time.
    • Sift together the flour, baking powder, baking soda and salt and add to the sugar mixture alternating with the milk. Gently fold in the cherries.
    • Pour the batter into the bread pan and bake for 55-60 minutes or until the bread has pulled away from the sides of the pan and the top is golden brown. Let cool in the pan for 5 minutes then transfer to a cooling rack. Serve warm or at room temperature.
  • Carlota de Limon – Mexican No-bake Lime Dessert

    Carlota de Limon – Mexican No-bake Lime Dessert

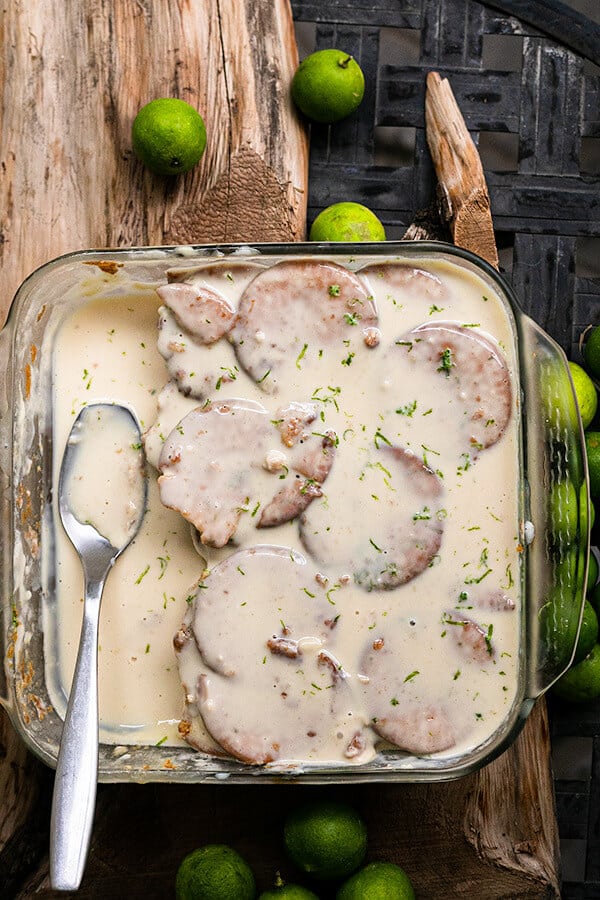
    This simple four-ingredient no-bake cake, known as Carlota de Limón, is one of the most beloved desserts in Mexican households — and once you taste it, you will understand why. Layers of crunchy Maria cookies soaked in condensed milk, evaporated milk, and fresh lime juice come together in the refrigerator into a zesty, creamy, irresistibly refreshing icebox cake. My mother-in-law has made this for years, and now our whole family asks for it every time.

    This post may contain affiliate links. If you purchase through these links, I may earn a small commission at no extra cost to you. Thank you for supporting Love & Harvest!

    no bake cake

    Why You Will Love This Recipe

    • Super easy recipe — no baking and no special equipment needed. Only 4 ingredients and a refrigerator.
    • Authentic Mexican flavour — a classic Mexican housewife recipe. Follow the recommended brands and you will taste the real thing.
    • No special grocery store trip — this cake uses pantry staples you likely already have at home.

    A Perfect No-Bake Dessert for Every Occasion

    Kid-Friendly

    There is no hot stove, no electrical equipment, and no complex techniques involved. Just stacking cookies and whisking ingredients. Even a young child can assemble this dessert — try it once and your kids will beg to help every time.

    Picnic-Friendly

    Carlota de Limón stays together firmly and travels well. Made in a glass baking dish, you do not need to worry about it falling apart in the car. The perfect portable dessert for any outdoor event.

    Camping-Friendly

    This is the ideal camping dessert. Bring all 4 ingredients to the campsite, assemble it there, let it sit for at least 2 hours in a cooler, and you will have an impressive cake that nobody will believe you made from scratch at a campsite.

    Potluck-Friendly

    Looking for a crowd-pleasing dessert that requires minimal effort? This is it. At the end of the party, you will be bringing home an empty container.

    no bake desserts

    Ingredients Deep-Dive

    Maria Cookies

    Just as popular as the name suggests, Maria cookies are a beloved everyday cookie across Mexico — a plain, slightly crispy biscuit with gentle hints of vanilla and ginger. Some people in Mexico recommend them when you have an upset stomach, which speaks to how mild and comforting they are. They absorb the milk mixture beautifully, becoming soft like cake on the outside while the center stays slightly crunchy.

    • Why it matters: Maria cookies are the structural base of this dessert. Their absorbency is precisely calibrated for this type of no-bake cake — they soften without falling apart. You can find them at any Latin grocery store or on Amazon.

    Condensed Milk

    This is where the sweetness of the cake comes from. Condensed milk is thick, very sweet, and acts as a natural thickener that helps bind the layers together. The most authentic brand to use in Mexico is La Lechera.

    • Why it matters: The right amount of condensed milk gives the cake its signature rich sweetness. Too much and it becomes cloyingly sweet; too little and the texture turns watery.

    Evaporated Milk

    Evaporated milk adds richness and creaminess without additional sugar. It gives the liquid mixture that fresh milk taste and a lighter, pourable consistency that soaks into the cookies evenly.

    • Why it matters: The combination of condensed milk (sweet and thick) and evaporated milk (fresh and creamy) is what creates the balanced flavour of this dessert. Using only one or the other throws off the texture.

    Fresh Lime

    Lime is where all the flavour lives. Fresh lime juice is essential — a bottled product simply does not deliver the same brightness. The acidity of fresh lime also slightly thickens the milk mixture as it sits, helping the cake set. Add lime zest on top before serving for an extra burst of citrus aroma.

    • Why it matters: This is called Carlota de Limón for a reason. The lime is the star ingredient. A lime juicer makes squeezing multiple limes effortless.

    Professional Tips for No-Fail Carlota de Limón

    Pro Tip 1: Use Fresh Lime Always

    Fresh lime juice and zest make an extraordinary difference in this dessert. All the flavour comes from lime — this is not the place to use bottled juice.

    Pro Tip 2: The Cookies Will Float at First

    When you begin assembling the cake, the cookies will float in the milk mixture. This is normal. As they soak and absorb the liquid, they will settle. Halfway through the sitting phase, gently press the cookies down with a spoon and they will stay in place.

    Pro Tip 3: Refrigerate for At Least 2 Hours

    Do not cut into this cake too early. The cookies need at least 2 hours (preferably 4 or overnight) to fully absorb the milk mixture and transform into a cohesive cake. Cutting it before this time will result in a runny, unset dessert. Patience is the only technique this recipe requires.

    More Mexican Dessert Recipes

    If you love this Carlota de Limón, you will also enjoy our easy Mexican salsa verde for a savoury contrast, or explore more refreshing desserts like our fresh mango sorbet.

    Frequently Asked Questions

    What are Maria cookies and where can I find them?

    Maria cookies (galletas Marias) are a classic Mexican plain biscuit with mild vanilla and ginger flavour. They are available at any Latin or Mexican grocery store, and also online. The Gamesa brand is the most authentic. Graham crackers can work as a substitute but will give a slightly different flavour.

    Can I add cream cheese to this recipe?

    Yes — many Mexican families add cream cheese for a richer, thicker texture. Blend 4 oz of cream cheese into the milk mixture before assembling. It makes the cake denser and more indulgent.

    How long does Carlota de Limón keep in the fridge?

    Covered with plastic wrap, this cake keeps well for up to 3 days in the refrigerator. The texture actually improves after the first few hours as the cookies continue to soften.

    Can I use lemon instead of lime?

    You can, but the result will be different. Mexican limes (Key limes) have a more floral, intense flavour than standard lemons. Lime is the traditional and most recommended choice. If using lemons, you may want to add slightly more juice to achieve the same brightness.

    Why is my Carlota too runny?

    Either it was not refrigerated long enough, or the ratio of condensed to evaporated milk was off. Give it at least 4 hours in the fridge, or ideally overnight. If it is still runny, there may be too much liquid — try reducing the evaporated milk by 1/4 cup next time.

    Can I make this the night before a party?

    Absolutely — and it is actually better when made ahead. The overnight rest in the fridge gives the cookies maximum time to absorb and the cake to fully set. Simply cover and refrigerate, then slice and serve directly from the dish.

    A hand holding a plate with a slice of carlota de limón

    Mexican Lime Icebox Cake “Carlota de Limón”

    Mexican Lime Icebox Cake is an explosion of flavour and texture! You get the big tasty hit of condensed milk and lime. Around the end of the cake, you get a soft cake-like texture, while the inside remains crumbly and crunchy like the cookie. 
    Prep Time 10 minutes
    Total Time 2 hours 10 minutes
    Servings: 8 people
    Course: Dessert
    Cuisine: Mexican
    Calories: 360

    Ingredients
      

    • 2-3 package of Marias Cookies
    • ¾ cup lime juice 6 Mexican Limes
    • 375 g condensed milk 1 can
    • 360 g evaporated milk 1 can
    • lime zest

    Equipment

    • 8 x 8 glass baking dish

    Method
     

    1. Juice the lime and filter it through a strainer.
    2. Add the lime juice to the blender along with the condensed milk and evaporated milk. Give it a good blend for 10 seconds. Alternatively, you can add everything to a large jug and whisk vigerously for 30 seconds.
    3. In a 8×8 glass baking dish, place your first layer of Marias cookies. Pour a small layer of the milk mixture until the cookies are slightly coated. Add another layer of cookie. If you need, use a spoon or a fork to press the cookies down. It might float up a bit.
      Repeat until you've stacked to the top with ¼" of space. By now you should have used up all the milk mixture. Break the cookies up if you like to fill in the gaps between the cookies.
    4. Top layer should be the milk mixture. Use a spoon the smooth out the surface. Tap the dish on the table to get rid of any bubbles that maybe be trapped between the layers. Zest the lime on top of the cake.
    5. Cover the top of the dish with foil or plastic, and let it refrigerate for 2 hours.
      Usually, I prefer to leave my cake overnight so it settles better and more solid.
      Halfway through, you can take it out and gently push the cookies down with a spoon if the cookies are still floating. Giving it one hour in the fridge, the cookies are denser so a quick push to the bottom of the pan will make it settle better.
    6. Serve with lime slices to garnish.

    Notes

    This Carlota de Limón will keep in the fridge for up to a week but preferably consume in 2 days or the cookies become too soft and soggy. 
  • BEST cinnamon rolls recipe with Rompope Frosting

    BEST cinnamon rolls recipe with Rompope Frosting

    Every Christmas, these cinnamon rolls become the gravitational centre of the house. Before they are even out of the oven, the whole family is already hovering in the kitchen. The rolls are soft, pull-apart fluffy, layered with Muscovado sugar and Christmas spices — and then slathered with a Rompope and white chocolate frosting that stops people mid-bite and makes them ask, “Wait, what IS that frosting?” Every. Single. Year.

    This post may contain affiliate links. If you purchase through these links, I may earn a small commission at no extra cost to you. Thank you for supporting Love & Harvest!

    If you’re baking for kids or anyone avoiding alcohol, use the non-alcoholic frosting below. These are the kind of rolls that make you feel like everything is right with the world on a cold winter morning.

    Why This Frosting Changes Everything

    Instead of the standard cream cheese frosting, this recipe uses Rompope — a Mexican creamy liquor made with egg yolks, vanilla, milk, sugar, and alcohol. Imagine eggnog from the liquor store. The Rompope is melted on the stovetop with white chocolate and vanilla, then whisked with powdered sugar into a glossy, pourable frosting. It smells amazing, and it’s unlike any cinnamon roll frosting you’ve had before.

    Heads up, this one has alcohol! The frosting is only warmed to melt the chocolate. It isn’t cooked, so it keeps the rompope’s alcohol. Serve these to adults, or use the non-alcoholic version below.

    Non-Alcoholic Frosting

    I haven’t tested this version as many times as the original yet, so start with these amounts and adjust.

    • 1/4 cup heavy cream (instead of the Rompope)
    • 2 oz white chocolate chips
    • 2 tsp alcohol-free vanilla flavouring
    • 1/4 to 1/2 tsp alcohol-free rum flavouring (brands vary a lot in strength, so start small and taste)
    • a pinch of ground cinnamon
    • 1 1/2 cups powdered sugar

    Warm the cream, white chocolate and vanilla on the lowest heat. When the chocolate is almost melted, take it off the heat and whisk until smooth. Whisk in the rum flavouring, cinnamon and powdered sugar. Too thick? Add more cream, 1 teaspoon at a time. Too thin? Add a little more powdered sugar. Check your labels! Regular vanilla and rum extracts are made with alcohol, so look for ones that say alcohol-free.

    These pair beautifully with our Best Triple Chocolate Fudgy Brownies for a complete holiday dessert spread, or serve alongside our Birthday Rainbow Sugar Cookies for a festive table.

    Ingredients

    Muscovado (Mascabado) Sugar

    • Why Muscovado over brown sugar: Muscovado is less refined and retains a high percentage of natural molasses — giving it a deeply rich, complex caramel and toffee flavour that regular brown sugar simply cannot match. Brown sugar is white sugar with molasses added back; Muscovado never had it removed in the first place. In a recipe where sugar is the star, this difference is unmistakable. It also retains moisture, resulting in softer, denser rolls.

    KitchenAid Stand Mixer

    Rompope

    • Why Rompope and not eggnog: Rompope is Mexico’s answer to eggnog — spiced, creamy, and made right here in Puebla since colonial times by the nuns of the Santa Clara Convent. It has a more concentrated, aromatic flavour than commercial eggnog. Outside Mexico, you can find it in Latin specialty stores or online. If unavailable, substitute with store-bought eggnog — the result is still delicious.

    Instant Yeast

    • Why instant yeast, not active dry: Instant yeast does not need to be proofed in warm liquid first — it goes directly into the flour. This makes the process faster and more reliable for home bakers. The dough needs at least 1 hour to double in size; in a cooler kitchen, allow up to 2 hours. A trick: place the covered bowl in the oven with just the oven light on for a warm, draft-free environment.

    Dough Scraper

    White Chocolate

    • Why white chocolate in the frosting: White chocolate adds a creamy, sweet richness that thickens and stabilises the Rompope frosting as it cools. It also amplifies the vanilla notes in the Rompope. Use good-quality white chocolate chips or a chopped white chocolate bar — not white baking chips, which contain less cocoa butter and will not melt as smoothly.

    Tested and Compared

    We tried grocery store cinnamon rolls — dry, with an over-sweet artificial frosting. We tried Cinnabon® rolls: perfect texture, but the frosting was too sweet for us. This recipe gives you light, pull-apart rolls with controlled sweetness and a frosting that is genuinely interesting. The Muscovado filling gives a depth of flavour no regular brown sugar roll can match.

    Love & Harvest is not affiliated with or endorsed by Cinnabon; Cinnabon® is a trademark of its owner.

    A Note on Sugar

    I kept the sweetness where we like it: sweet, but not overwhelming. If you want more filling sweetness, add an extra 1/4 cup Muscovado to the filling as noted in the recipe. At the end of the day, all sugars are nutritionally similar — the difference here is purely in flavour and baking performance. For a balanced diet, save these for celebrations and enjoy every single bite.

    Where to Find Rompope

    In Mexico, the most popular brands are Santa Clara and Holandesa — both available in most grocery stores. The Santa Clara brand has a particularly rich history: it was originally created by the Clarisa Nuns of the Santa Clara Convent right here in Puebla during colonial times. Outside Mexico, check Latin specialty stores, liquor stores, or online retailers. If all else fails, substitute with store-bought eggnog from the holiday section of your grocery store.

    Frequently Asked Questions

    Can I make these cinnamon rolls the night before?

    Yes. After cutting and placing the rolls in the baking dish, cover tightly with plastic wrap and refrigerate overnight instead of letting them do the second rise at room temperature. The next morning, remove from the refrigerator and let them come to room temperature and finish rising for 45–60 minutes before baking. This cold fermentation actually deepens the flavour.

    Why did my dough not rise?

    The most common cause is yeast that has been killed by liquid that was too hot. The warm milk should feel comfortable on your wrist — around 110°F (43°C). Anything hotter will kill the yeast. Also check that your instant yeast is still within its expiry date. If your kitchen is cold (below 70°F), the dough may need up to 2 hours to double in size.

    Can I substitute Rompope with something else?

    Yes. Store-bought eggnog is the closest substitute and works beautifully. Most grocery store eggnog has no alcohol, but check the label. For a frosting without alcohol, use the Non-Alcoholic Frosting above: heavy cream with alcohol-free vanilla and rum flavouring. Regular extracts contain alcohol.

    How do I get perfectly even rolls?

    Use a sharp knife or unflavoured dental floss to cut the rolls. Dental floss gives the cleanest cut — slide it under the log, cross the ends on top, and pull through without compressing the spiral. This keeps the layers intact and gives you bakery-quality rounds every time.

    Can I freeze these cinnamon rolls?

    Yes — both before and after baking. To freeze unbaked rolls, place the cut rounds on a baking sheet, freeze until solid, then transfer to a freezer bag. Bake from frozen at 350°F for 35–40 minutes. To freeze baked rolls, wrap individually without frosting and freeze for up to 2 months. Thaw, warm in the oven, and add frosting fresh.

    Why do my rolls come out dry?

    The most common cause is over-baking. The rolls are done when the tops are just lightly golden — not deep brown. They will continue to cook slightly from residual heat after leaving the oven. The internal temperature should be around 190°F. If the outside looks golden, pull them out — erring on the side of slightly under-baked produces softer, gooier rolls.

    Cinnamon Rolls with Rompope Frosting

    Soft, light cinnamon rolls with a Muscovado sugar filling, slathered with a Rompope and white chocolate frosting. The frosting isn’t cooked, so it contains alcohol; a non-alcoholic option is in the notes. A must for the holidays!
    Prep Time 15 minutes
    Cook Time 25 minutes
    Total Time 1 hour 55 minutes
    Servings: 12 rolls
    Course: Dessert
    Cuisine: American, Mexican
    Calories: 420

    Ingredients
      

    • 4 cups all purpose flour
    • 2 TSP instant yeast
    • 2 TBSP brown sugar
    • ¼ TSP sea salt
    • ¾ cup whole milk slightly warm
    • 3 large eggs room temperature
    • 1 TSP vanilla extract
    • ½ cup butter melted
    Sugar Filling
    • ½ cup mascabado sugar add 1/4 cup if you want more sugar taste
    • 2 TBSP ground cinnamon
    • 1 TSP ground clove
    • ½ cup butter soft
    Rompope Frosting
    • ¼ cup Rompope liquor
    • 2 ounce white chocolate chips
    • 2 TSP vanilla extract
    • 1 ½ cups powdered sugar
    • 1 cup toasted pecans

    Method
     

    Cinnamon Dough
    1. In a stand mixer attach the hook attachment. Add the flour, yeast, brown sugar, and salt. Give it a good stir. While the hook is running in slow, slowly add the milk, eggs, vanilla and butter. Mix for 5 minutes. Cover with film and let it sit for 1 hour or more at a warm area in the house. Let it double or triple in size. If your house is on the colder side, you might need to let it rest for 2 hours. Alternatively you can put the resting dough in the oven with the lights on.
    Sugar Filling
    1. Add the sugar and spice together. Line a 9×13 inch baking dish with parchment paper.
    2. Dust your work surface with some flower and roll the dough out. Punch out the air and roll out a rectangle about 10×16 inches. Spread the soft butter evenly over the dough. Spring the sugar filling evenly and make sure the edges are also sprinkled. Starting at the edge closest to you, roll tightly away from you, and form a long log. At the end, pinch the edges to incorporate into the log. Give it a couple gentle roll so it mends together well. Using a sharp knife, cut 12 -15 rolls and place it in the baking dish. Put a towel on top and let it rest for another 30 minutes.
    3. Preheat oven to 350F. Take out the towel and bake for 25-30 minutes, until you see the top is slightly golden brown (not too much!).
    4. Meanwhile make the frosting by using a pot in the lowest heat setting, whisk together the Rompope, white chocolate, and vanilla. When you see the chocolate has almost fully melted, take it off the heat and whisk wildly until it is all melted. Add in the powder sugar.
    5. Spread the frosting on the warm rolls and garnish with pecan nuts

    Notes

    Heads up, this one has alcohol! The frosting is only warmed to melt the chocolate. It isn’t cooked, so it keeps the rompope’s alcohol. Serve these to adults, or use the non-alcoholic frosting.
    Non-Alcoholic Frosting: I haven’t tested this version as many times as the original yet, so start with these amounts and adjust. Swap the 1/4 cup Rompope for 1/4 cup heavy cream and the 2 tsp vanilla extract for 2 tsp alcohol-free vanilla flavouring, then add 1/4 to 1/2 tsp alcohol-free rum flavouring (brands vary a lot in strength, so start small and taste) and a pinch of ground cinnamon. Keep the 2 oz white chocolate and 1 1/2 cups powdered sugar. Same method. Too thick? Add more cream, 1 teaspoon at a time. Regular vanilla and rum extracts contain alcohol, so check your labels.