Category: brunch ideas

  • Chicken Shawarma Wrap with Caesar Salad

    Chicken Shawarma Wrap with Caesar Salad

    Picture this: warm, pillowy naan bread wrapped around juicy yogurt-marinated chicken, crisp romaine Caesar salad, and a shower of freshly grated Parmesan — all held together by one gloriously messy squeeze. This Chicken Shawarma Wrap with Caesar Salad is the meal I make on repeat for road trips, school lunches, and dinner parties alike. It takes 30 minutes to assemble once the chicken has marinated overnight, and it never fails to impress.

    This post may contain affiliate links. If you purchase through these links, I may earn a small commission at no extra cost to you. Thank you for supporting Love & Harvest!

    Chicken shawarma wrap with Caesar salad on naan bread

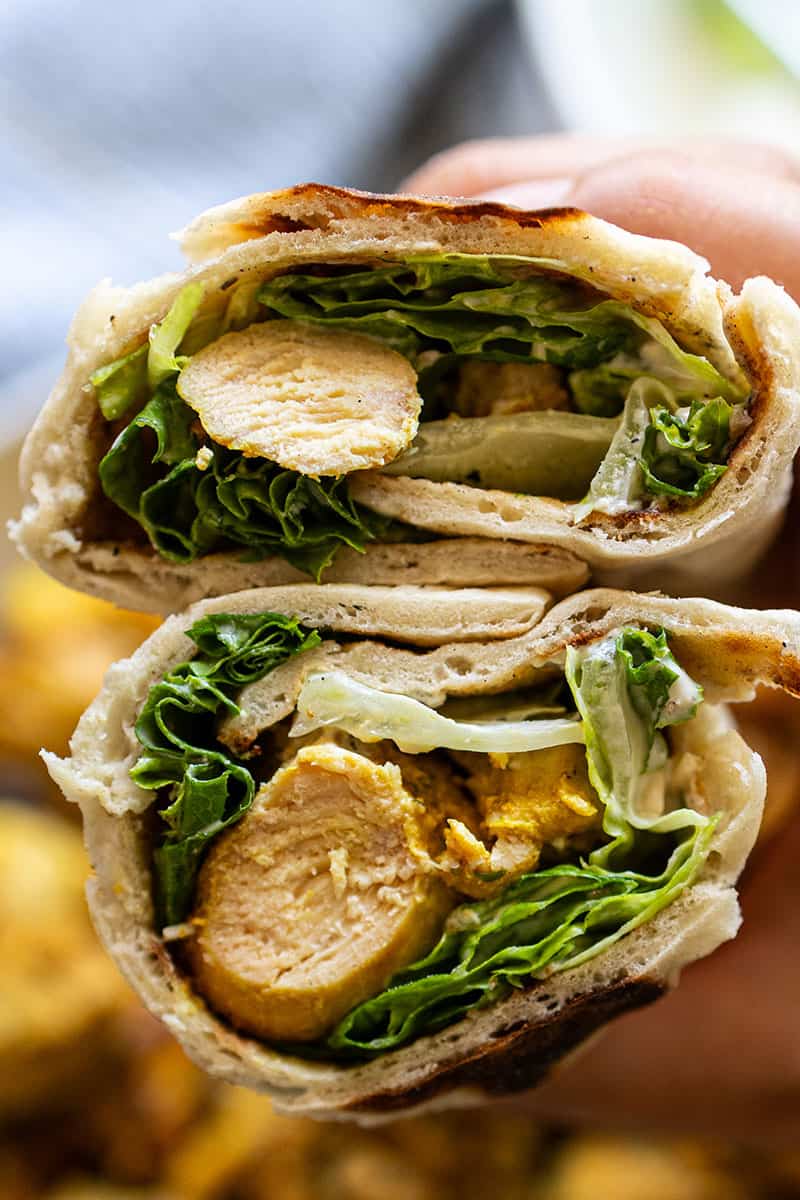
    Succulent chicken marinated overnight in yogurt, dill, turmeric, and lime juice — wrapped up with crisp Caesar salad inside warm, fluffy naan. One squeeze and the juices spill from every corner.

    Why You Should Try This Chicken Shawarma Recipe

    1. It is totally different: Combining two classic recipes into one — shawarma and Caesar salad — is the most original twist on a weeknight wrap.
    2. Bursting with flavor: The overnight marinade of yogurt, dill, turmeric, and lime juice ensures every bite is bold and aromatic.
    3. Perfectly juicy chicken: Marinating overnight guarantees plump, tender chicken pieces that don’t dry out on the grill.
    4. Crisp Caesar salad: Crunchy romaine, tangy dressing, and salty Parmesan add a fresh, savory contrast inside the wrap.

    Chicken shawarma ingredients laid out

    My Favorite On-the-Go Meal

    I’m not exaggerating when I say this is my favorite go-to meal when I need something quick and delicious. With the chicken marinating overnight, all I have to do is grill it and toss the Caesar salad. It takes 30 minutes and works for picnics, road trips, school lunches, and camping, basically anywhere you need a satisfying meal that travels well.

    Chicken shawarma wrap ready to eat

    What Makes This Recipe Different

    1. Naan bread: Soft, fluffy homemade naan instead of standard pita adds a chewy, slightly sweet element that makes every bite better.
    2. Caesar salad inside: Most shawarma wraps use plain lettuce and tomato. We go full Caesar — romaine, tangy dressing, Parmesan — for a restaurant-quality finish.
    3. Easy to make: A few simple ingredients, overnight marinating, and 30 minutes of assembly. That’s it.

    Ingredients

    Key Ingredients

    Natural Yogurt

    Yogurt tenderizes the chicken by breaking down proteins with its acidity, resulting in a juicy texture. It also acts as a carrier for the spices, ensuring they penetrate deeply into the meat. During grilling, yogurt keeps the chicken moist and prevents it from drying out.

    • Why it matters: Without yogurt in the marinade, the chicken loses its characteristic tenderness and the flavors stay surface-level.

    Dill

    Dill adds a fresh, slightly tangy flavor that lifts the entire marinade. It complements the warm spices and contributes to the Mediterranean character of this dish. You can use a quality dried dill if fresh is not available.

    • Why it matters: Dill is what distinguishes this shawarma from generic chicken marinades. Don’t skip it.

    Turmeric

    Turmeric gives the chicken its golden color and adds a warm, earthy flavor to the marinade. A good organic turmeric powder makes a real difference in both color and taste.

    • Why it matters: That vibrant yellow color is the visual hallmark of shawarma — and it signals depth of flavor.

    Lemon Juice

    The acidity in lemon juice tenderizes the chicken further, adds brightness, and balances the warm spices in the marinade. Use freshly squeezed for the cleanest flavor.

    • Why it matters: Lemon juice prevents the marinade from becoming heavy or one-dimensional. It is the flavor activator.

    Garlic

    Garlic amplifies every other flavor in the marinade. It brings out the chicken and makes all the herbs and spices taste more pronounced. Crush it fresh for maximum potency.

    Caesar Salad Dressing

    You can use any quality store-bought Caesar dressing. The secret upgrade: stir in a squeeze of fresh lemon juice and some freshly grated Parmesan. It takes a standard dressing to another level.

    • Why it matters: The Caesar dressing is the bridge between the hot, spiced chicken and the cool, crisp lettuce. It holds the whole wrap together.

    Grilled chicken shawarma plated
    Assembling the chicken shawarma wrap

    This wrap pairs beautifully with our fluffy naan bread recipe — they were made for each other. For a lighter side, try our homemade Caesar salad dressing or the Thai chicken salad for an Asian-inspired variation on the same flavor profile.

    Frequently Asked Questions

    Can I use chicken breast instead of thighs?

    Yes, but chicken thighs are strongly recommended. They stay juicier on the grill and hold up better in the wrap. If using breast, reduce grill time by 2–3 minutes per side and watch closely to avoid drying out.

    How long should I marinate the chicken?

    Overnight is ideal — 8 to 12 hours in the refrigerator. The minimum is 4 hours. Anything less and the flavors won’t fully penetrate the meat.

    Can I make this ahead of time?

    Yes. Grill the chicken and store it separately from the Caesar salad and naan. Assemble the wraps just before serving to keep the naan from getting soggy.

    What can I substitute for naan bread?

    Pita, flatbread, or large flour tortillas all work. Naan gives the best result because of its softness and chew, but the recipe is flexible.

    Is this recipe kid-friendly?

    Very much so. Kids love the mild flavors and the handheld format. You can reduce the turmeric slightly for younger kids and pack extra Caesar dressing on the side for dipping.

    Can I cook the chicken in a pan instead of grilling?

    Absolutely. A cast iron skillet on medium-high heat gives you a great sear. Cook 4–5 minutes per side depending on thickness. A Lodge 12-inch cast iron skillet is perfect for this.

    Two halves of a chicken shawarma wrap with Caesar salad filling

    Chicken Shawarma Wrap

    Incredibly juicy, tender chunks of chicken marinated overnight with yogurt, dill, lemon juice, and turmeric, all wrapped up with Caesar salad. It's an easy meal perfect for dinner or for taking on road trips.
    Prep Time 20 minutes
    Cook Time 15 minutes
    Total Time 35 minutes
    Servings: 6 people
    Course: Main Course
    Cuisine: Indian
    Calories: 420

    Ingredients
      

    Chicken Shawarma
    • ½ kg chicken meat (can be chicken breast, chicken leg, or assorted) 1.1 pounds of chicken meat
    • 1 cup natural yogurt no sugar
    • 3 garlic cloves grated
    • 2 tsp dried dill
    • 1 tsp cumin powder
    • 1 tsp turmeric powder
    • 1 tbsp paprika
    • 1 tsp lemon juice
    • 2 tsp sea salt
    • ½ tsp black pepper
    • 6-8 large naan bread or tortilla wraps
    Caesar Salad
    • 4 cups chopped romaine lettuce
    • ¼ cup grated Parmesan cheese
    • ¼ cup Caesar salad dressing
    • 1 tbsp lemon juice
    • salt and pepper to taste

    Method
     

    1. With a clean chopping board, slice the chicken into medium size cubes. They need to be large enough to be on skewers. About 1 inch cubes.
    2. In a large bowl, combine the yogurt, grated garlic, dill, cumin, turmeric, paprika, lemon juice, salt, and pepper. Add the sliced chicken thighs and toss until well coated. Cover and refrigerate for at least 2 hours, preferably overnight.
    3. Preheat a grill or grill pan over medium-high heat. Remove the chicken from the marinade and thread onto skewers. Grill for 5-6 minutes on each side, or until the chicken is cooked through and slightly charred. Remove from the grill and place it on a plate.
    4. In a large mixing bowl, combine the chopped romaine lettuce, grated Parmesan cheese, Caesar salad dressing, lemon juice, salt, and pepper. Toss until the lettuce is evenly coated with the dressing.
    5. To assemble the wraps, warm the pita bread or tortilla wraps according to package instructions. Place a generous amount of Caesar salad on each wrap, then top with the grilled chicken shawarma slices.
    6. Roll up the wraps tightly, folding in the sides as you go. Cut in half diagonally and serve immediately.
  • Super Moist Cherry Loaf

    Super Moist Cherry Loaf

    There is one loaf you absolutely must bake before summer ends — a super moist cherry loaf bursting with juicy cherries, warm almond extract, and a golden crumb that somehow stays tender for days. This is the loaf that makes you wish summer never ended.

    This post may contain affiliate links. If you purchase through these links, I may earn a small commission at no extra cost to you. Thank you for supporting Love & Harvest!

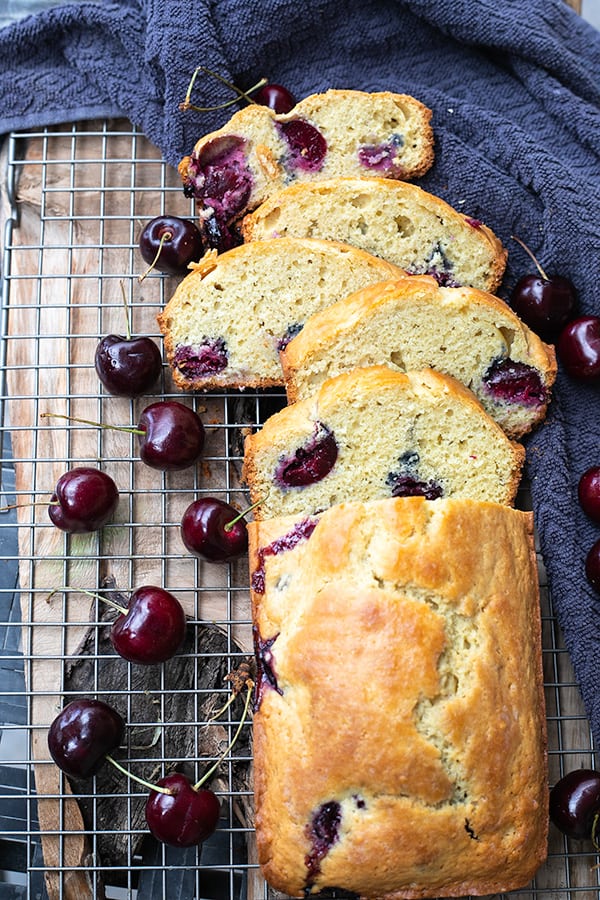
    Slices of super moist cherry loaf with fresh cherries on a wire rack

    This post is all about the best cherry loaf — a moist, crumbly recipe loaded with juicy cherries and a hint of almond. Perfect with your morning coffee or afternoon tea.

    It’s that time of the year when cherries take over the market stands — deep red, plump, and impossibly sweet. Before you let them go to waste, bake them into this simple loaf that celebrates the very best of late summer.

    The recipe comes together in one bowl, requires no stand mixer, and is forgiving enough for beginner bakers. Kids love helping fold in the cherries. And the smell while it bakes? Pure summer.

    Why You Will Love This Recipe

    • Perfect late-summer recipe — use up your cherry harvest before the season ends
    • Works with sweet or sour cherries — both varieties bake beautifully in this loaf
    • One-bowl, no mixer needed — simple enough for kids to help, done in under an hour
    • Butter-free swap — replace butter with apple sauce 1:1
    • Best morning loaf with coffee — pairs perfectly with a hot cup or a pat of butter on top

    Golden cherry loaf baked in a white loaf pan

    Ingredients

    Cherries

    Sweet cherries are best for this recipe. The sweetness really pulls through with the almond extract. Look for cherries that are fully ripe — the skin is soft and plump and easy to split in half. Fresh summer cherries are ideal, but if you can only find frozen, thaw and pat them dry before folding in.

    • Why they matter: Cherries are the star — they provide pockets of juicy fruit in every slice and keep the loaf moist even after a day or two.

    Almond Extract

    Almond and cherry are the best partners in the baking world. You can use coloured or clear almond extract — either works. Half a teaspoon is enough to perfume the entire loaf without overpowering it.

    • Why it matters: Almond extract amplifies the cherry flavour in a way vanilla simply cannot. Do not skip it.

    Eggs

    Two large eggs at room temperature give the loaf structure and lift. Cold eggs can cause the butter to seize, so take them out 20 minutes before you start.

    • Why they matter: Eggs bind the batter and are the key to that moist, tender crumb.

    Sugar

    Half a cup of natural cane sugar is just right. If you want to cut sweetness, a quarter cup works fine — the cherries carry plenty of natural sweetness on their own.

    • Why it matters: Sugar tenderises the crumb and helps the top brown to a golden finish.

    Loaf Pan

    A standard 9×5 loaf pan is all you need. Prep it with baking spray so the loaf releases cleanly after cooling.

    • Why it matters: A well-prepared pan means no sticking and a clean, even crust all the way around.

    Cherry loaf cooling on a wire rack surrounded by fresh cherries

    How to Make It with Apple Sauce Instead of Butter

    Replace butter with apple sauce. It is tried and tested, and it’s a delicious substitute. The loaf comes out even more spongy and is just as flavourful — maybe even better. Use a 1:1 swap.

    Cherry loaf batter studded with cherries in a white loaf pan

    What Goes Well with This Cherry Loaf?

    • A hot black coffee
    • Butter, lightly toasted
    • Nutella spread
    • Peach jam or blackberry jam
    • Iced peach tea

    Baking Time Tips

    Bake at 350°F for 55–60 minutes. For the last 5 minutes, watch closely. Once the top is slightly golden and the loaf has pulled away from the sides, take it out. The centre should still be slightly moist — that is what keeps it juicy. Let it cool in the pan for 5 minutes, then transfer to a rack.

    Slice of cherry loaf showing whole cherries in the crumb

    More Cherry and Baking Recipes

    If you loved this loaf, try these next: Cherry Syrup Recipe for topping pancakes and ice cream, and Cherry Clafoutis Pie for a French-inspired dessert using the same summer cherries. For a chocolate twist, the Dairy-Free Chocolate Cake is a crowd pleaser any time of year.

    Frequently Asked Questions

    Can I use frozen cherries instead of fresh?

    Yes. Thaw the cherries completely and pat them dry with paper towels before folding them into the batter. Excess moisture from frozen cherries can make the loaf gummy.

    How do I keep the cherries from sinking to the bottom?

    Toss the pitted and halved cherries in a tablespoon of flour before folding them into the batter. The light coating helps them stay suspended throughout the loaf.

    Can I replace the butter entirely?

    Yes — apple sauce is a great 1:1 substitute. The loaf comes out slightly more spongy but equally moist and delicious with fewer calories.

    How should I store this cherry loaf?

    Wrap tightly in plastic wrap or store in an airtight container at room temperature for up to 3 days. For longer storage, slice and freeze individual pieces — they thaw in 15 minutes.

    What type of cherries work best?

    Sweet cherries like Bing or Rainier are ideal because their sweetness pairs beautifully with almond extract. Sour cherries also work — just add an extra tablespoon of sugar to balance them.

    Can I add other mix-ins to this loaf?

    Absolutely. Chocolate chips, slivered almonds, or lemon zest all work well. Keep the total add-ins to about one cup so the batter is not overloaded.

    Moist Cherry Loaf

    Delicious cherry loaf that is moist and filled with perfectly cooked juicy cherries. Print RecipePrep Time:10 minsCook Time:50 minsCourse: DessertCuisine: AmericanKeyword: cherry loaf

    Ingredients

    • ¼ cup butter soft
    • ½ tsp almond extract
    • ½ cup sugar
    • 2 large eggs room temperature
    • 2 cup all-purpose flour
    • ¾ tsp baking powder
    • ½ tsp baking soda
    • ½ tsp salt
    • ½ cup milk
    • 1 cup sweet cherries pitted sliced in halves

    Instructions

    • Preheat the oven to 350 degrees F. Prepare a bread pan with baking spray.
    • In a mixing bowl, whisk together the apple sauce, sugar and almond extract until well blended. Add and whisk the eggs one at a time.
    • Sift together the flour, baking powder, baking soda and salt and add to the sugar mixture alternating with the milk. Gently fold in the cherries.
    • Pour the batter into the bread pan and bake for 55-60 minutes or until the bread has pulled away from the sides of the pan and the top is golden brown. Let cool in the pan for 5 minutes then transfer to a cooling rack. Serve warm or at room temperature.
  • Super Tasty Mexican Slow Cooker Pulled Pork

    Super Tasty Mexican Slow Cooker Pulled Pork

    This Mexican Slow Cooker Pulled Pork is the definition of a set-it-and-forget-it meal that still manages to blow everyone away. Smoky guajillo and ancho peppers, red wine, apple, and cumin slow-cook together with a pork shoulder for 5 hours until the meat falls apart and drinks up every drop of that incredible sauce. It is one of our most-made dinner recipes — at least twice a month on the rotation.

    This post may contain affiliate links. If you purchase through these links, I may earn a small commission at no extra cost to you. Thank you for supporting Love & Harvest!

    slow cooker pulled pork

    This post is all about slow cooker Mexican pulled pork.

    Ingredients for This Mexican Slow Cooker Pulled Pork Recipe

    Ingredients

    Pork Shoulder

    The cut we are looking for in this recipe is the pork shoulder. The shoulder has enough meat and fat mixed in together — it is not the tough part of the pork and using the slow cook method, the meal always comes out juicy, tender, and incredibly delicious.

    • Why it matters: Fat content in the shoulder bastes the meat from the inside as it slow-cooks, creating that signature pull-apart texture you cannot get from leaner cuts like loin.

    Guajillo Peppers

    The Guajillo dried peppers are not spicy when the seeds are removed. They give the sauce a nice thick texture and a distinct citrus-smoke flavour.

    • Why it matters: Guajillos are the backbone of many Mexican red sauces. Their fruity, slightly tannic flavour is what makes this sauce taste authentically Mexican rather than generic chili pork.

    Ancho Peppers

    Ancho peppers give the sauce its deep red color. They are not spicy and don’t have a sharp taste — they are dried poblanos with a mild, chocolatey undertone.

    • Why it matters: Anchors are responsible for the sauce’s gorgeous color and the earthy depth that rounds out the guajillo’s brightness. Together they are a classic Mexican pairing.

    Cumin

    Always a great partner with pork. Use powder form, not seeds — it marinates into the meat more evenly and the flavour is more evenly distributed throughout the roast.

    • Why it matters: Cumin is the warm spice foundation of the rub. Without it the pork tastes flat. Don’t be shy with it — this recipe leans into the cumin intentionally.

    Red Wine

    A great way to tenderize the pork — it penetrates into the meat and adds a fall-and-winter depth of flavour. A Malbec or any full-bodied red wine works perfectly here.

    • Why it matters: The alcohol in the wine breaks down muscle fibers during the long cook, resulting in a more tender final product. It also adds complexity to the sauce that water or stock alone cannot achieve.

    Apple

    Three apples, peeled and shredded. Adding apples is a great way to include fibre and natural sweetness that offsets the wine’s acidity and tartness.

    • Why it matters: The natural sugars in the apple caramelize during cooking and help balance the smokiness of the peppers. The apple also adds another layer of tenderization — the malic acid breaks down protein similarly to how a citrus marinade works.

    Slow Cooker

    I use an Crock-Pot Slow Cooker or the slow cook setting on my Instant Pot 7-in-1. Both work perfectly. The slow cook method is what makes this recipe so hands-off — 90% of the time you’re just waiting for the cooker to do its magic.

    • Why it matters: Slow cooking at low temperature for a long time breaks down the tough collagen in the pork shoulder into gelatin, which gives the sauce its body and the meat its silky, fall-apart texture.

    How to Serve Pulled Pork

    There are many ways to serve this slow cooker pulled pork:

    • Bread — any bread works. Make a pulled pork burger, a torta, or sliders with small buns.
    • Burrito — wrap in a large flour tortilla.
    • Taco — serve on top of a corn tortilla for a pulled pork taco.
    • Mash potato — serve with mashed potato and veggies, drizzled with the sauce.
    • Poutine — deep fry fries, add pulled pork, black beans, cheese, and sour cream.
    • Appetizer — bake thin baguette slices and serve the pulled pork with pickled onions.

    For more Mexican-inspired recipes, try our Green Pozole (Pozole Verde) or our Easy Mexican Salsa Verde — both pair beautifully with this pulled pork.

    easy slow cooker pulled pork

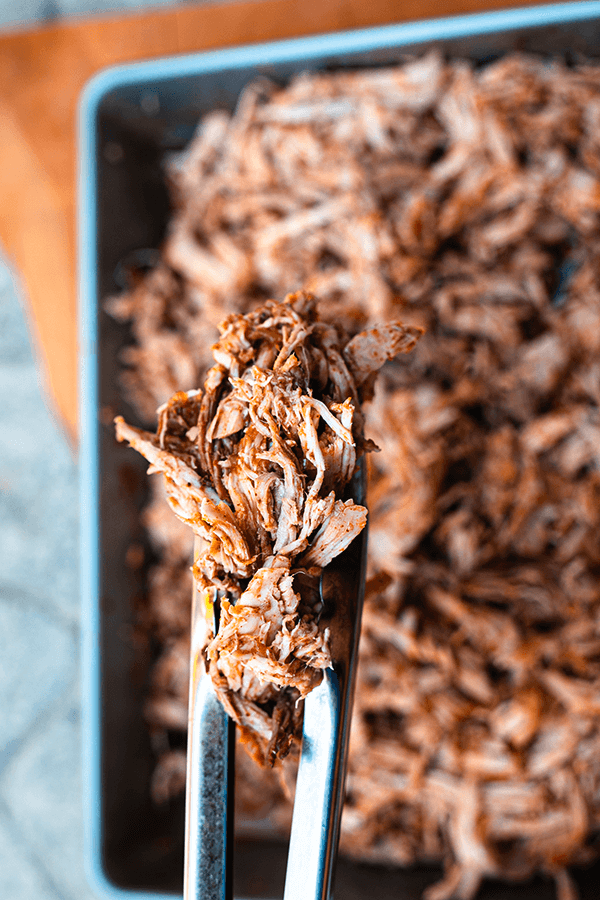
    Mexican pulled pork being shredded with forks in a dark sauce

    Mexican Slow Cooker Pulled Pork

    Easy tender and delicious pork with a Mexican sauce soaked and slow-cooked in an Instant Pot. I love serving this with tortilla, rice, or over mashed potatoes.
    Print Recipe
    Pin Recipe
    Prep Time:10 minsCook Time:5 hrsServings: 6 people

    Equipment

    • Instant Pot or Slow Cooker

    Ingredients

    Pork Marinate

    • 1 kg pork shoulder whole
    • 3 tsp sea salt
    • 1 tbsp paprika
    • 1 tbsp cumin powder
    • 1 tsp black pepper
    • 3 tbsp canola oil

    Mexican Peppers

    • 2 guajillo peppers
    • 3 ancho peppers

    Liquid

    • 1 cup red wine
    • 3 apples peeled and shredded
    • 1 white onion shredded
    • 1 cup orange juice
    • 2 tbsp vinegar
    • 3 bay leaf
    • salt to taste

    Instructions

    • Rinse and pat dry the pork shoulder with a paper towel.
    • Mix the spices and salt together for the pork marinade. Rub the spice all over the meat. Let it sit for 15–30 minutes.
    • Soak the Mexican peppers in hot boiling water. Place a plate or something heavy on top to keep the peppers fully submerged for 10 minutes.
    • Break the top off the peppers and scrape the inside clean. Add all the peppers to a blender with 1/2 cup of water. Blend until smooth.
    • Heat a pan with oil on medium-high heat. Place the pork shoulder in the pan and brown all sides.
    • Set your slow cooker or Instant Pot to the slow cook setting on high for 5 hours. Place the browned pork shoulder inside and add all the liquids and Mexican pepper puree on top.
    • Close the lid and open the valve (if using Instant Pot).
    • After 5 hours, open the lid and use two forks to shred the meat apart. This allows the sides to soak up all the juices. Add salt to taste.

    Frequently Asked Questions

    Can I make this pulled pork without a slow cooker?

    Yes. You can braise it in a Dutch oven in the oven at 300°F (150°C) for 4–5 hours with the lid on. The result is essentially the same — low heat for a long time is what does the work, regardless of the vessel. A Lodge Dutch Oven works beautifully for this.

    What cut of pork is best for pulled pork?

    Pork shoulder (also called pork butt or Boston butt) is the best cut for pulled pork. It has the right fat-to-meat ratio so the meat stays moist during the long cook. Avoid pork loin — it is too lean and will dry out.

    How spicy is this Mexican pulled pork?

    Not spicy at all, as long as you remove the seeds from the guajillo and ancho peppers before blending. Both peppers are mild when deseeded. The sauce is smoky, earthy, and slightly sweet from the apple and orange juice — not hot.

    Can I use an Instant Pot instead of a Crock-Pot?

    Yes. Use the slow cook function on your Instant Pot, set to high for 5 hours with the lid closed and the valve open. Alternatively, use the pressure cook function for 60–75 minutes on high pressure followed by a natural release — the texture will be slightly different but equally tender.

    How do I store and reheat leftover pulled pork?

    Store pulled pork in an airtight container with its juices in the refrigerator for up to 4 days, or freeze for up to 3 months. Reheat gently in a pan on low heat with a splash of water or orange juice to revive the sauce. Avoid microwaving on high as it can dry the meat out.

    What do I do if the sauce is too thin after cooking?

    Remove the pork from the slow cooker after shredding and pour the remaining liquid into a saucepan. Simmer on medium-high heat for 10–15 minutes until the sauce reduces and thickens. Pour it back over the shredded pork before serving.

  • Blender Oatmeal Pancakes

    Blender Oatmeal Pancakes

    These blender oatmeal pancakes have become our family’s most-requested breakfast — and they have replaced buttermilk pancakes in our household for good. Made from just bananas, oats, eggs, and baking powder, everything goes straight into the blender and onto the griddle. The cleanup is one blender. The result is a soft, fluffy, naturally sweet pancake that keeps you full until lunch. My IHOP-loving husband is the proof of concept.

    This post may contain affiliate links. If you purchase through these links, I may earn a small commission at no extra cost to you. Thank you for supporting Love & Harvest!

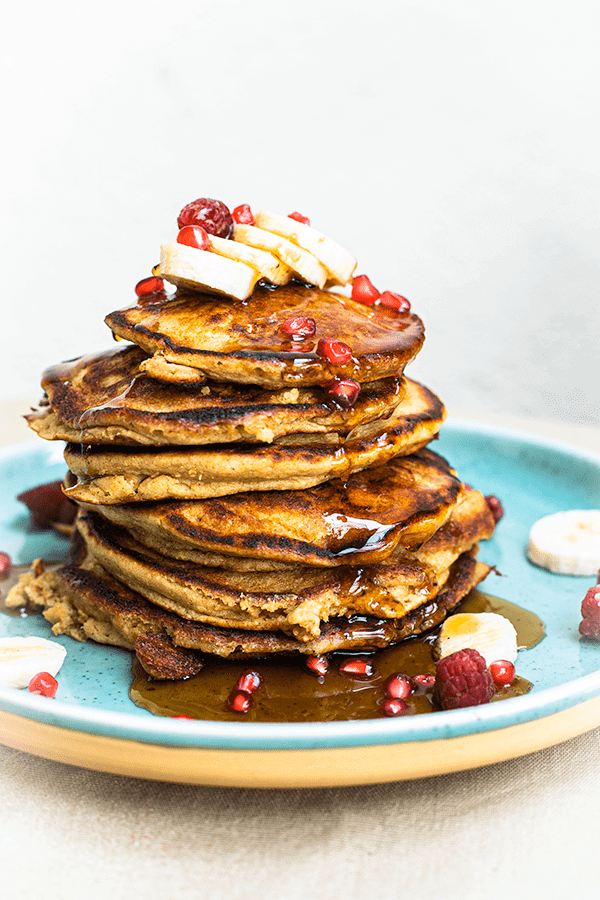
    Stack of oat banana pancakes with syrup, banana slices and pomegranate

    This post features a blender oatmeal pancake recipe using banana, oatmeal, vanilla, and eggs, all blended together.

    Why Make This Recipe?

    Pancakes for breakfast is probably one of the most popular breakfasts around the world. But can you make a version that’s easy and comes together in a blender? Yes. These oatmeal pancakes do. They are packed with whole grains from the oatmeal and natural sweetness from the bananas. Just 2 tablespoons of maple syrup in the whole batch. No flour. No special skills required.

    Mornings can be hectic. This recipe respects that — all the ingredients go into a blender, and cleanup is just the blender. That is it. It has been tested and approved by my IHOP-pancake-loving husband, who is not going back to buttermilk pancakes.

    Tall stack of pancakes topped with banana and pomegranate seeds

    Can These Pancakes Be Gluten-Free?

    I make these with regular oatmeal at home — not certified gluten-free oats — so as written they are not a gluten-free recipe. If you need them gluten-free, use certified gluten-free oats (and know that cross-contact can still happen in some kitchens and facilities). The only added sweetener is 2 tablespoons of maple syrup. They come out soft, fluffy, and full of flavour — perfect with maple syrup or any topping you love.

    Ingredients Deep-Dive

    Ingredients

    Oatmeal

    Either old-fashioned oats or quick-cooked oats both work. The oatmeal is the base of these pancakes — it replaces flour entirely.

    • Why it matters: Oats give these pancakes their hearty texture, no flour needed. I use regular rolled or quick oats. If you need a gluten-free version, choose certified gluten-free rolled oats or oat flour — oats are naturally gluten-free but can pick up wheat in processing, and cross-contact is still possible.

    Bananas

    Use overripe bananas — the riper, the better. The spots on the peel are your best friends here. Riper bananas are sweeter and blend more smoothly.

    • Why it matters: Bananas serve as both the natural sweetener and the binding agent in this recipe. They replace both sugar and part of the fat you would find in a traditional pancake recipe. Overripe bananas have higher natural sugar content and a more intense banana flavour.

    Eggs

    Eggs help the pancake rise and give it a fluffy texture. They are also the primary structural ingredient that binds the oats and banana together.

    • Why it matters: Without eggs, the batter would be too loose to hold together on the griddle. The protein in eggs sets when heated, creating the structure that gives these pancakes their lift.

    Baking Powder

    Baking powder creates the bubbles and air pockets inside the pancake that give it that light and fluffy texture. It is essential in all pancake recipes.

    • Why it matters: Without baking powder, these pancakes will come out flat and dense. The reaction between baking powder and the moisture in the batter produces CO2 bubbles that make the pancakes puff up on the griddle.

    Stack of pancakes with a forkful cut out to show the fluffy inside

    Pro Tips for Perfect Oatmeal Pancakes

    Pro Tip 1 — Use a Griddle

    A cast iron griddle has a larger surface area than regular pans, letting you cook more pancakes at once. It also creates an even surface of heat so every pancake cooks consistently.

    Pro Tip 2 — Cook the Pancakes with Butter

    Always add a thin layer of butter on the griddle before adding the batter. This prevents sticking and adds flavour. Butter tastes better than regular cooking oil for pancakes.

    Pro Tip 3 — When to Flip the Pancakes

    Flip when you see little air pockets forming in the middle of the pancake and the edges stop looking wet — they will have a soft, matte texture. This is the signal that the bottom is set and the pancake is ready to flip without breaking.

    Pancake stack in a pool of syrup with banana slices on a blue plate

    Looking for more breakfast ideas? Try our Mixed Berry Smoothie with Pomegranate and Nopal or our Celery Juice to pair alongside these pancakes for a complete morning meal.

    Tall stack of pancakes topped with banana and pomegranate seeds

    Blender Oatmeal Pancakes

    Delicious pancakes made with oatmeal and banana. All made with just a blender. Gluten-free when made with certified gluten-free oats.
    Prep Time 7 minutes
    Cook Time 15 minutes
    Total Time 22 minutes
    Servings: 4 people
    Course: Breakfast
    Cuisine: American
    Calories: 295

    Ingredients
      

    • 2 cups royal oats or quick oats
    • 1 cup water
    • 1 medium riped banana
    • 2 eggs
    • 2 tbsp melted butter
    • 2 tbsp maple syrup
    • 1 tbsp baking powder
    • ½ tsp baking soda
    • ½ tsp salt
    • ½ tsp ground cinnamon
    • 2 tsp vanilla extract

    Equipment

    • high speed blender

    Method
     

    1. Preheat your griddle on the stovetop and set it on medium low heat.
    2. In the blender put all the ingredients together and blend on high for 30 seconds. Batter should be smooth with no lump.
    3. lightly brush the surface of your griddle with butter.
    4. With your ⅓ measuring cup, scoop the batter with the mesuring cup, and slowly drop the batter on the griddle. Leave enough space between pancakes so they are not touching each other.
    5. Cook until small bubbles start to form in the middle of the pancake the sides have turned into a matte texture. Flip the pancake and cook for another 1-2 minutes.
    6. Serve right away with a small slice of butter on top and maple syrup.

    Frequently Asked Questions

    Do these oatmeal pancakes taste like banana?

    Yes, mildly. The banana flavour is present but not overwhelming. The more overripe your bananas are, the stronger the banana flavour. If you want to reduce it, use one banana instead of two and add a tablespoon of nut butter for binding. The oat flavour balances out the banana very well.

    Can I make this recipe without a blender?

    Yes, but the texture will be coarser. Mash the bananas very well with a fork, then mix in the eggs, and finally stir in the oats and baking powder. For a smoother texture without a blender, use certified gluten-free oat flour instead of whole rolled oats — it blends into the batter without the blender step.

    Are these pancakes suitable for toddlers?

    Yes. They have no refined flour, and the only sweetener is the banana plus 2 tablespoons of maple syrup in the whole batch. They do contain butter and eggs. They are soft, easy to chew, and naturally sweet from the banana. Cut them into small pieces or serve as finger food for younger toddlers. They are also an easy way to serve oats and eggs at a toddler breakfast.

    How do I store leftover oatmeal pancakes?

    Let the pancakes cool completely, then store in an airtight container in the refrigerator for up to 3 days. For longer storage, freeze with parchment paper between each pancake and reheat directly from frozen in a toaster or non-stick pan. They reheat very well and taste just as good the next day.

    Can I add protein powder to this recipe?

    Yes. Add one scoop of plant-based protein powder to the blender along with the other ingredients. The batter may thicken slightly — if it does, add a tablespoon of water to reach the right consistency. A vanilla or unflavored protein powder works best so it does not compete with the banana.

    Why are my pancakes coming out flat?

    The most common reason is old baking powder. Baking powder loses its potency over time — test yours by dropping a teaspoon into hot water. If it bubbles vigorously, it is still good. If not, replace it. Also make sure you are not overmixing the batter after adding the baking powder — stir just until combined to keep the air pockets intact.