Category: breakfast ideas

  • Easy Chinese Scallion Pancakes

    Easy Chinese Scallion Pancakes

    These easy Chinese scallion pancakes take about 30 minutes, from gathering everything to cooking, need just a handful of pantry ingredients, and make an easy breakfast any day of the week. My kids beg for them every morning — and after trying them, someone in your family will too!

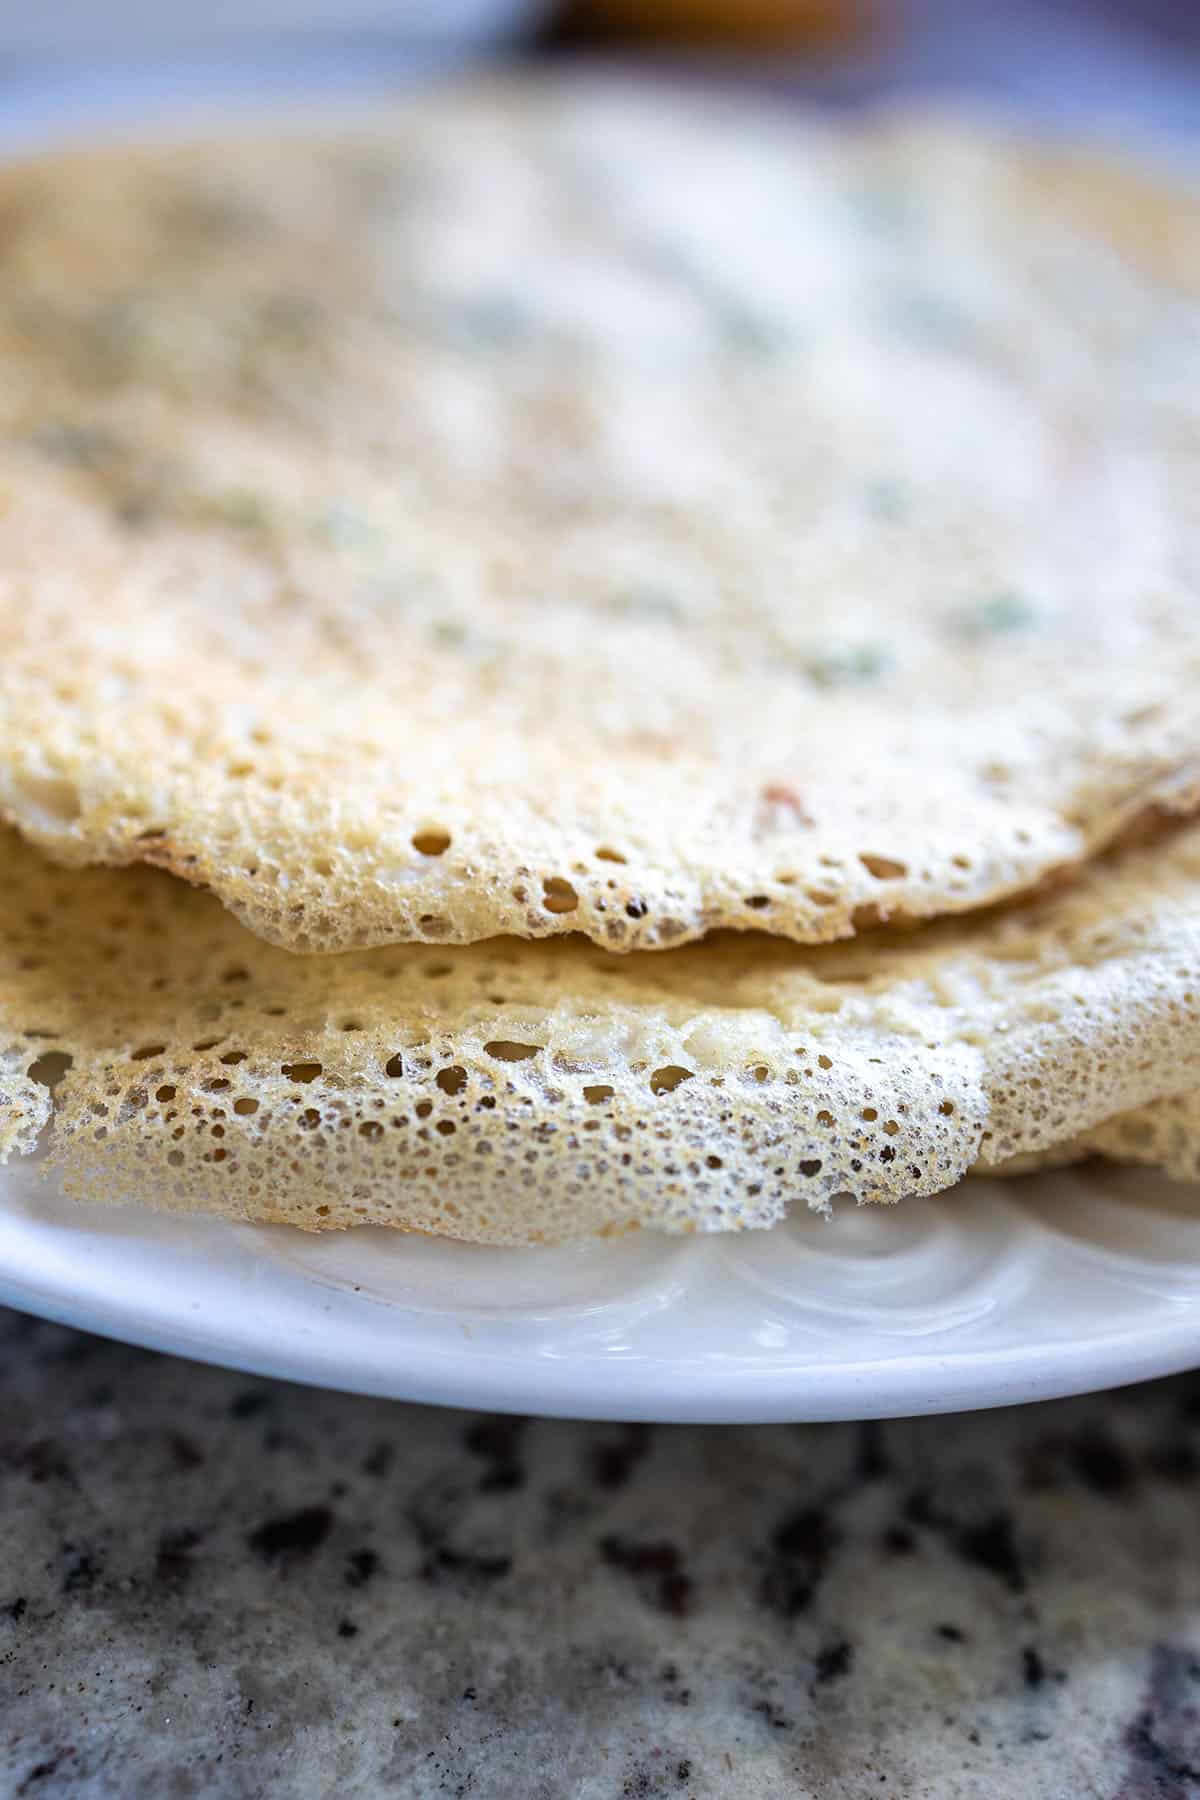
    Thin scallion pancake on a plate next to a bowl of fillings

    This post may contain affiliate links. If you purchase through these links, I may earn a small commission at no extra cost to you. Thank you for supporting Love & Harvest!

    This post is a recipe for easy Chinese scallion pancakes. An easy recipe made with flour, eggs, water, green onion and salt.

    Why You’ll Love This Recipe

    • Quick and Easy: The recipe takes about 30 minutes from start to finish, making it perfect for busy mornings or a quick snack.
    • Simple Ingredients: With just six pantry ingredients, there’s no special shopping trip required.
    • Just 2 Tablespoons of Oil in the Batter: Made with eggs, green onion, flour and just 2 tablespoons of oil in the batter.
    • Kid-Friendly: Children love the mild savoury flavour and the fun of rolling them up with a sauce inside.
    • Culturally Rich: Every bite carries generations of Shandong Province culinary tradition.

    Two folded scallion pancakes on a white plate

    My Story

    In the mornings of my youth, my father would rise early and craft scallion pancakes for our breakfast. The scent of sizzling dough and fresh scallions was an uncommon delight, for my father seldom ventured into the kitchen. Each aromatic whiff was a herald of something special, a rare treat that painted our mornings with joy.

    My father’s roots trace back to Shandong Province in China, where this recipe was born and lovingly passed down. It carries the essence of his childhood, the warmth of his mother’s kitchen, and now it lives on in our own family’s tradition.

    As a parent, I understand the challenge of waking early to prepare breakfast every day. Yet, not a moment spent in this ritual is one I would ever regret. I urge every parent to discover that one recipe their children adore — one that will nestle in their hearts and become a cherished memory.

    Folded scallion pancakes stacked on a plate

    The Recipe That Connects Generations

    Food has a unique way of bringing us closer to our heritage. Every time I make these scallion pancakes, I feel a deep connection to my dad and my grandmother. It is more than just a recipe; it is a piece of our family history. In sharing it here, I hope it brings you and your loved ones as much joy as it has brought us.

    Ingredients

    Ingredients

    Green Onion

    • Why it matters: Fresh green onion is the soul of this recipe. Use both the white and green parts, chopped finely. The white parts add a gentle sharpness; the green parts provide colour and a lighter onion flavour that mellows beautifully in the pan.

    Eggs

    • Why it matters: Three large eggs bind the batter, create structure, and give these pancakes their fluffy, tender texture. They are also what makes this recipe so quick — no yeast, no resting time, just eggs and a whisk.

    Flour

    • Why it matters: Cake flour or all-purpose flour both work well. Cake flour produces a slightly softer, more delicate pancake. Whatever you use, add it gradually while whisking to avoid lumps. A kitchen scale helps you measure consistently every time.

    Water

    • Why it matters: Regular drinkable water thins the batter to the right consistency. The ratio of water to egg determines whether the pancake is crispy or soft — a thinner batter spreads wider and crisps faster.

    Fillings

    • Why it matters: Our children love rolling the pancakes around ketchup. Worcestershire sauce, Maggi sauce, or soy sauce all work beautifully. The filling adds a burst of flavour and makes the pancakes even more interactive for kids.

    How to Make Chinese ShanDong Scallion Pancakes

    Preparation

    Wash the green onions well and remove any yellow or unusable stems. Thinly slice them on a chopping board and set aside. In a large bowl, combine the chopped green onions, eggs, and water. Whisk vigorously until the mixture is foamy and slightly thicker. Slowly add the flour while continuing to whisk. Once fully combined with no lumps, add a pinch of salt and whisk a few more rounds. The batter should be pourable and not too thick.

    Cooking

    Preheat a non-stick frying pan over medium-high heat. Drizzle a bit of oil and swirl to coat evenly. Ladle about ½ cup of batter into the pan, swirling to spread it evenly to the edges. Once the edges begin to brown and curl, flip the pancake and cook for 1–2 minutes on the other side until golden. Repeat until all batter is used. I like to use a silicone spatula and tongs for easy flipping. Running two pans simultaneously speeds things up considerably if you are feeding a family.

    A hand lifting a folded scallion pancake from the plate

    Frequently Asked Questions

    Can I use a cast iron skillet instead of a non-stick pan?

    Yes. A well-seasoned cast iron skillet actually produces a slightly crispier bottom. Make sure it is properly preheated before adding oil and batter, and use a little more oil than you would with a non-stick pan to prevent sticking.

    Why is my batter too thick or too thin?

    The batter should be about the consistency of thin crepe batter — pourable and spreadable when you swirl the pan. If it is too thick, add water a tablespoon at a time. If it is too thin, add a spoonful of flour and whisk again. The right consistency gives you a pancake that spreads on its own to the edge of the pan.

    Can I make the batter ahead of time?

    Yes. The batter keeps well in the refrigerator for up to 24 hours in a covered container. Give it a good stir before using, as the flour tends to settle. Do not make it more than a day ahead as the green onions can become slightly slimy.

    Are these scallion pancakes the same as the flaky Chinese ones?

    No. Traditional flaky scallion pancakes (cong you bing) are made with unleavened dough and require rolling and laminating with oil. This Shandong version is made from a quick egg-and-flour batter — much simpler, faster, and just as delicious. Think of it more as a savoury crepe than a bread-based flatbread.

    What dipping sauces pair best with these pancakes?

    Soy sauce mixed with a little rice vinegar and sesame oil is classic. Hoisin sauce is popular with kids. Worcestershire sauce or Maggi seasoning gives a deep umami kick. For a sweeter version, ketchup or sweet chili sauce works wonderfully, especially for children.

    Can I freeze leftover scallion pancakes?

    Yes. Let them cool completely, stack with parchment paper between each one, and freeze in a zip-lock bag for up to 1 month. Reheat in a dry pan over medium heat for 2–3 minutes per side, or in a toaster oven at 375°F (190°C) for 5 minutes. They crisp up beautifully from frozen.

    Stack of thin, golden scallion pancakes on a white plate

    Easy Chinese Scallion Pancakes

    The recipe takes about 30 minutes from start to finish, making it convenient for busy mornings or a quick snack. This family recipe originated from Shandong Province in China. The combination of crispy texture and savory scallions is likely to be a hit with anyone who tries them.
    Prep Time 10 minutes
    Cook Time 20 minutes
    Total Time 30 minutes
    Servings: 15 pancakes
    Course: Breakfast
    Cuisine: Chinese
    Calories: 90

    Ingredients
      

    • 1 cup chopped green onion
    • 3 large eggs
    • 2 tbsp vegetable oil
    • 7 cups water
    • 3 cups all-purpose flour
    • 1 tsp salt

    Equipment

    • whisk
    • 2-1 non-stick frying pan
    • ladle

    Method
     

    1. In a large bowl, combine the green onions, eggs, vegetable oil and water. While you're whisking the liquid mixture together, slowly add the flour little by little. Make sure there is no small balls of flour in the mixture. Add the salt, give it a few good whisks, and set it aside.
    2. Heat a teaspoon of oil in a non-stick skillet over medium heat. Use two skillet if you think you can manage two cooking at the same time. Spoon a ladle-sized amount (1/2 cup) of pancake mixture onto the hot pan, making sure to include some of the green onions in each scoop. 
    3. Swiftly rotate the pan to spread the mixture evenly along the edges. Once the edges begin to brown or curl up, flip the pancake and cook for 1-2 minutes on the other side. Repeat this process until all the mixture is used up.
    4. To serve: squeeze a line of your favourite condiments (ketchup, soy sauce, etc). Roll it up and serve immediately.

    If you enjoyed these pancakes, try our Easy Homemade Soy Milk as the perfect morning pairing. For another quick breakfast, our Mixed Berry Smoothie with Pomegranate and Nopal is a family favourite. And if you love exploring Asian-inspired recipes, our Steam Preserved Vegetables with Zha Choy and Pork is a wonderful next step.
  • Sourdough English Muffins

    Sourdough English Muffins

    There is something deeply satisfying about pulling a batch of homemade sourdough English muffins off a cast iron skillet — golden, nook-filled discs that toast up perfectly every single time. This recipe uses your active sourdough starter to deliver a subtle tang and incredible texture you simply cannot get from a store-bought bag.

    This post may contain affiliate links. If you purchase through these links, I may earn a small commission at no extra cost to you. Thank you for supporting Love & Harvest!

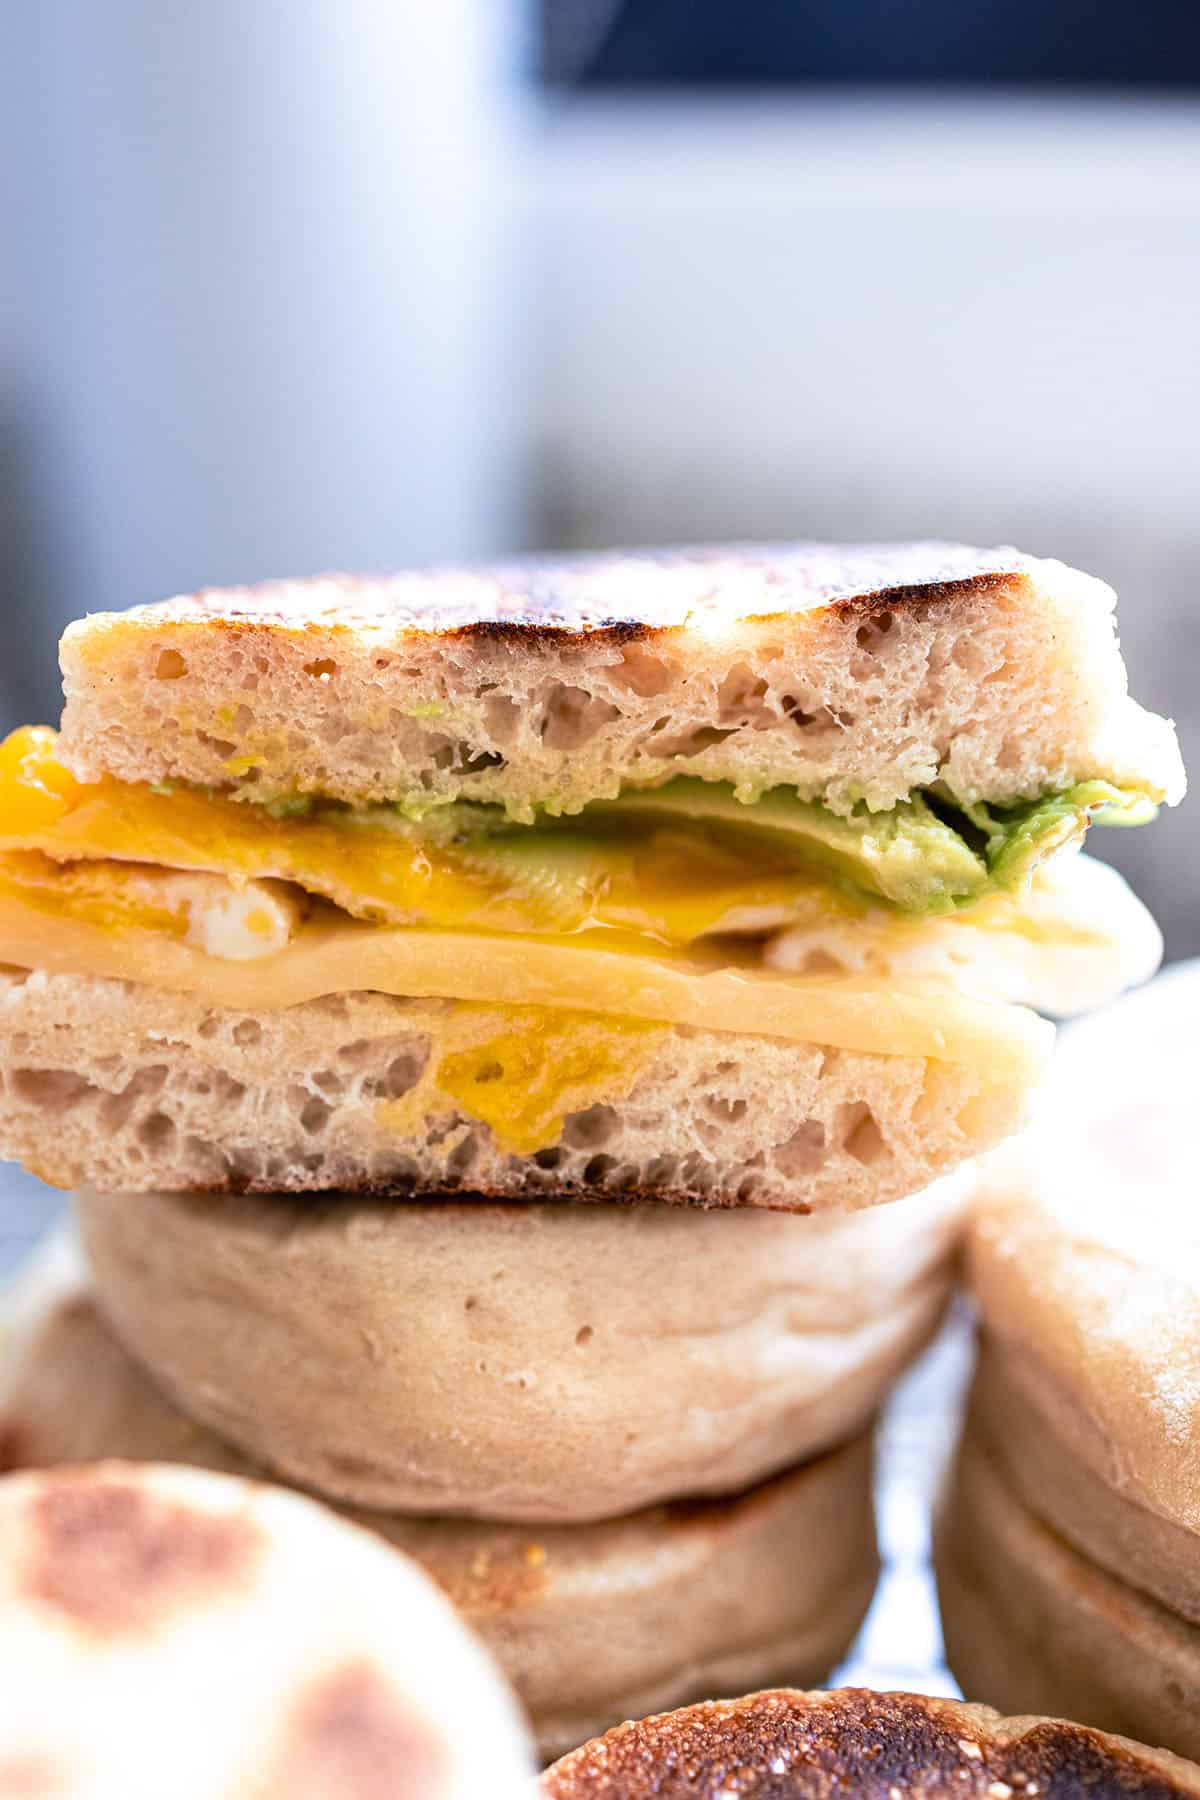
    Sourdough English muffin sandwiches with egg, cheese and avocado

    Why Try This Recipe?

    Beyond the convenience of store-bought options, crafting these delectable delights at home adds artisanal flair to your mornings. Here is why this recipe is worth your time.

    • Flavorful Complexity: Sourdough fermentation imparts a unique, subtle tang that transforms each bite into something special.
    • Control Over Ingredients: Choose organic flour, local honey, and wholesome components — no mystery additives.
    • No Preservatives or Additives: Unlike commercially available muffins, homemade versions are clean and natural.

    And above all, sharing these muffins with people who can taste your dedication and love of food is the real reward.

    Golden sourdough English muffins cooling on a wire rack

    What You’ll Need

    Ingredients

    Sourdough Starter

    If you already have an active sourdough starter, you are all set. If not, or if you are not sure what one is, check out the full guide here: How to Make Sourdough Starter.

    • Why it matters: The starter is the leavening agent and the source of that signature tangy flavor — no commercial yeast needed.

    Flour

    Standard all-purpose flour works perfectly here. For a cleaner, more flavorful result, weigh your flour with a kitchen scale rather than scooping by volume.

    • Why it matters: Measuring by weight ensures consistent dough hydration and a reliable rise every time.

    Milk

    Full fat whole milk gives the muffins a fluffier, richer texture. Low-fat alternatives work but will produce a slightly less tender crumb.

    • Why it matters: The fat in whole milk tenderizes the dough and contributes to a soft, pillowy interior.

    Honey

    Honey serves a dual purpose — it adds a balanced sweetness and feeds the beneficial bacteria in the sourdough starter, helping the dough rise optimally.

    • Why it matters: Unlike refined sugar, honey also adds moisture and depth of flavor to the finished muffin.

    Cornmeal

    Cornmeal dusted on the pan and the baking sheet creates a classic, slightly crunchy coating on the outside of every muffin — the hallmark of a proper English muffin.

    • Why it matters: It prevents sticking and delivers that iconic texture contrast between the crisp exterior and pillowy interior.

    Equipment

    Electric Stand Mixer

    A KitchenAid stand mixer with a dough hook makes kneading effortless and consistent. These machines last for decades — well worth the investment.

    Cast Iron Skillet

    Cast iron distributes heat evenly and retains it well, which is critical for getting that golden crust without scorching. I love my Lodge 5-quart Dutch oven and cast iron skillets for all bread work — pre-seasoned, affordable, and virtually indestructible.

    English muffin breakfast sandwich stacked on top of whole muffins

    This is a flexible recipe — mix the dough in the morning and cook your muffins by evening, or ferment overnight for an even deeper flavor. Either way, you end up with a batch of beautifully nook-filled muffins ready for toasting. Pair them with the full sourdough bread guide or try them alongside rosemary beer bread for a full bread-baking weekend.

    Stack of sourdough English muffins topped with an egg, cheese and avocado sandwich

    Frequently Asked Questions

    Can I make sourdough English muffins without a stand mixer?

    Yes. You can knead the dough by hand for about 8–10 minutes until it becomes smooth and elastic. It takes more effort but works perfectly well.

    How long does the dough need to ferment?

    After adding all the flour, the dough needs 4–6 hours at room temperature until it doubles in size. For a more developed flavor, you can refrigerate the dough after the first fermentation and cook the muffins the next morning.

    What if my sourdough starter is not active enough?

    Feed your starter 8–12 hours before you begin the recipe. It should be bubbly, have roughly doubled in size, and pass the float test — a small spoonful dropped in water should float.

    Can I freeze sourdough English muffins?

    Absolutely. Let them cool completely, then freeze in a zip-lock bag for up to 3 months. Thaw at room temperature or toast directly from frozen.

    Why do English muffins have nooks and crannies?

    The nooks come from the open crumb structure created by fermentation and the way the muffins are cooked on a griddle rather than baked in an oven. Never slice them with a knife — always use a fork to split them so you preserve those pockets.

    Can I use discard sourdough starter instead of active starter?

    For best results use an active, fed starter. Discard will work but the rise will be slower and the muffins may be denser. Allow extra fermentation time if using discard.

    Golden sourdough English muffins cooling on a wire rack

    Sourdough English Muffins

    Easy sourdough English muffins cooked on a griddle! Ferment the dough in the morning and enjoy fresh English muffins in the evening. They are crunchy on the outside and super soft and moist on the inside.
    Prep Time 8 hours
    Cook Time 15 minutes
    Total Time 8 hours 15 minutes
    Servings: 12
    Course: Breakfast
    Calories: 195

    Ingredients
      

    • 1 cup active sourdough starter
    • ¾ cup warm water
    • 1 cup warm whole milk
    • 5 cups flour split 2 cups first then 3 cups
    • ¼ cup honey
    • 1 tbsp extra virgin olive oil
    • 1 tsp sea salt
    • cornmeal

    Equipment

    • electric stand mixer
    • round steel pastry cutter
    • Rolling Pin
    • cast iron skillet

    Method
     

    1. Ensure your sourdough starter is active and bubbly. If it has been in the refrigerator, take it out a day before and feed it with equal parts flour and water until it becomes vigorous.
    2. In the electric stand mixer with the dough hook attached, combine the active sourdough starter, warm water, and warm milk until it is well combined. Wait 5 minutes.
    3. Now add TWO CUPS of all-purpose flour, and mix until a sticky dough comes together. Cover and leave for 30 minutes. Mix the ingredients until they come together into a sticky dough.
    4. Now add in the remaining 3 cups of all-purpose flour and honey. Knead the dough for about 5 minutes and a smooth elastic dough forms. Drizzle the olive oil on top and cover the top with plastic. Rest for 4-6 hours until it double in size.
    5. Once the dough has risen, gently deflate it and turn it out onto a floured surface. Roll the dough to about 1/2 inch thickness. Using a round cutter or a glass, cut out individual muffins. Place them on a baking sheet dusted with cornmeal to prevent sticking.
    6. Cover the muffins with a kitchen towel and let them rise for another 1-2 hours. They should puff up but not necessarily double in size.
    7. Preheat a large skillet over medium-low heat. Sprinkle some cornmeal on the hot surface. Carefully transfer the muffins onto the skillet and cook for 6-8 minutes on each side or until they are golden brown and cooked through.
    8. Once cooked, transfer the English muffins to a wire rack to cool. They can be split with a fork or a serrated knife.

    Notes

    COOKING THE NEXT MORNING:
    You can absolutely prepare the dough in the evening and refrigerate it overnight for baking the next morning. This overnight method allows for a longer, slower fermentation, enhancing the flavor and texture of the sourdough English muffins. The adjusted timeline is after the first fermentation, deflate the dough and put it in a container (with space for it to rise), and place it in the fridge. In the morning, take the dough out of the refrigerator. It should have risen overnight. Gently deflate it and roll it out to about 1/2 inch thickness on a floured surface. Cut out individual muffins and place them on a cornmeal-dusted baking sheet. Cover the muffins with a kitchen towel and let it rise at room temperature for 1-2 hours or until they puff up but not necessarily double in size. Now follow the same cooking instructions. 
  • Hairy Amaranth (Huauzontle) Breakfast Graveyard

    Hairy Amaranth (Huauzontle) Breakfast Graveyard

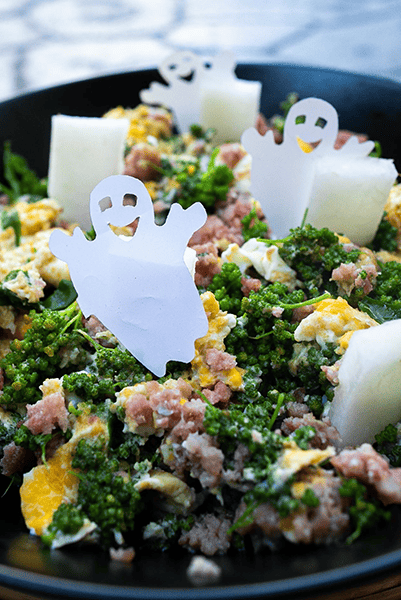
    Before the Halloween candy starts, this graveyard breakfast hash gets eggs, ham and huauzontle into the kids first. Built around huauzontle (hairy amaranth) — a Mexican green with mild, earthy flavor similar to spinach — this spooky dish has become our family’s annual Halloween morning tradition.

    This post may contain affiliate links. If you purchase through these links, I may earn a small commission at no extra cost to you. Thank you for supporting Love & Harvest!

    hairy amaranth huauzontle breakfast graveyard halloween

    A Spooky Graveyard Breakfast for Halloween

    Made with huauzontle florets, eggs, ham, and jicama carved into tiny gravestones, this dish is hauntingly delicious. Our family runs on a good breakfast before embarking on any adventure, and Halloween is no exception. Some other Halloween recipes we adore: the Spooky Breakfast Bowl and our Cute Halloween Screamers.

    Ingredients for This Graveyard Breakfast Hash

    Ingredients

    Huauzontle (Hairy Amaranth)

    • Why it matters: Huauzontle is a Mexican green vegetable from the quinoa family. It is harvested for its flower clusters, which have a mild, earthy flavor similar to spinach or broccoli. The florets hold up well to quick cooking — two minutes in boiling water is all they need before going into the pan. If you cannot find huauzontle at a Mexican market, spinach or broccoli florets are easy substitutes that give you a similar look.

    Eggs

    • Why they matter: Eggs provide the protein backbone of this hash. We give one egg per child and two per adult. Free-range eggs with orange yolks are worth seeking out for the colour they bring to the plate.

    Ham and Sausage

    • Why they matter: Smoked ham and Argentina chorizo (a pale, herb-seasoned sausage without the red pepper coloring of Mexican chorizo) add savory depth. The smoky notes from the ham complement the earthy huauzontle. Substitute with any sausage you prefer — Italian, breakfast links, or even turkey sausage all work. You can order uncured applewood smoked ham (B0923SPBN8) if you prefer an uncured ham.

    Jicama (Mexican Potato)

    • Why it matters: Jicama is the raw, crunchy element that gets carved into mini gravestones — its firm white flesh holds a clean shape perfectly. Fresh starchy taste, mild and slightly sweet. Mexicans typically eat jicama with Tajin and lime. For this recipe, we use it raw as a decorative and textural element. Fresh jicama (B00B6QUFK2) is widely available at Latin markets; always peel before eating.

    hairy amaranth huauzontle plant

    How to Cook Huauzontle

    Take the huauzontle stems and pluck the small florets from the branch tips. Place a handful of florets into a bowl of water and rinse thoroughly. Strain and set aside.

    Bring a large pot of water to a boil. Add the florets and cook for 2 minutes — no longer, or they will turn mushy. Drain immediately and set aside. Your huauzontle is now ready to fold into the hash.

    jicama graveyard tombstones carved

    Frequently Asked Questions

    Where can I find huauzontle?

    In Mexico, huauzontle is widely available at traditional markets (tianguis) from late summer through fall. In the US, look for it at Latin specialty grocery stores. If you cannot find it, broccoli florets or baby spinach are the most reliable substitutes for both texture and nutrition.

    Can I make this dish for kids under age 3?

    Yes, but with one important caveat: the ghost decorations and jicama tombstones are choking hazards for very young children. Always remove all plastic decorations and small carved pieces before the children eat. Never leave the dish unattended with toddlers.

    How long does it take to carve the jicama tombstones?

    About 10 minutes once you get the hang of it. Use a sharp paring knife. Start by cutting ¼-inch slices, then rough-cut a tombstone arch shape from each slice. The jicama does not need to be perfect — slightly irregular shapes actually look more spooky and graveyard-authentic.

    Can I meal-prep this breakfast?

    The huauzontle can be blanched the night before and refrigerated. The jicama tombstones can be carved and stored in water in the fridge overnight. The actual cooking of the hash takes only 10–12 minutes, so morning assembly is quick even with the prep already done.

    What other vegetables can I add to this hash?

    Bell peppers (especially orange or black for Halloween color!) and sautéed mushrooms add volume and nutrition without overpowering the huauzontle. A handful of baby spinach stirred in at the end adds extra iron and wilts beautifully into the eggs.

    hairy amaranth huauzontle breakfast graveyard

    Hairy Amaranth (Huauzontle) Breakfast Graveyard

    Delicious graveyard hash with eggs, ham and sausage. It is made with the Mexican plant “Huauzontle”, jicama, eggs, and sausages. A fun Halloween breakfast dish in the morning!
    Print Recipe
    Pin Recipe
    Prep Time:10 minutes
    Cook Time:7 minutes
    Course: Breakfast
    Cuisine: Mexican
    Keyword: halloween breakfast
    Servings: 4 people

    Ingredients

    • ½ cup huauzontle florets
    • 1 jicama
    • 4 ham slices, thinly cut
    • 1 Argentina sausage or any sausage of your choice
    • 4–5 large eggs
    • salt and pepper
    • ghost decorations (for display only — remove before eating)

    Instructions

    • Prepare huauzontle: take the stems of the huauzontle plant and pick out the florets. Quickly soak in water and drain. Bring a pot of water to a boil and blanch for 2 minutes. Drain and set aside.
    • Prepare jicama tombstones: cut off the ends of the jicama and peel completely with a vegetable peeler. Slice ¼ inch thick. Using a paring knife, carve out mini tombstone shapes from each slice. You will need around 5–7 pieces.
    • In a frying pan, heat 1 tsp of oil over medium-high. Lightly sauté the ham until slightly brown, then add sliced sausage. Cook for 5 minutes.
    • Add the eggs. Scramble until half-cooked, then add the huauzontle florets. Keep stirring and breaking up the eggs. Season with salt and pepper.
    • Place everything in a shallow bowl. Arrange the jicama tombstones evenly around the dish, then add the ghost decorations spaced throughout. Serve immediately. Important: if you have children age 3 or under, remove all plastic ghost decorations and jicama tombstones before the children eat. Small plastics and carved pieces can be a choking hazard.
  • Oatmeal Chai Breakfast Cookies

    Oatmeal Chai Breakfast Cookies

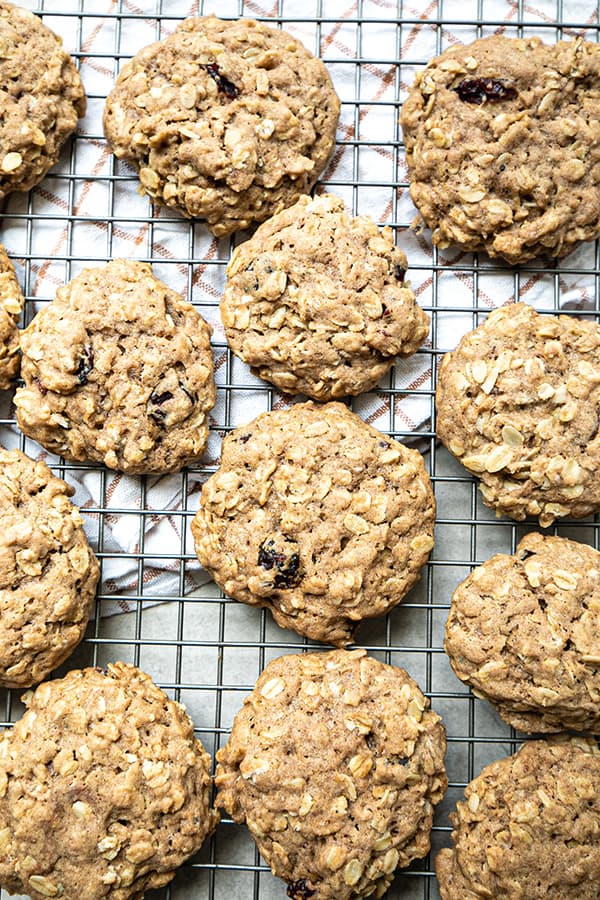
    What if a breakfast cookie could taste like a warm chai latte, come packed with chewy rolled oats, and be ready in 30 minutes? These Oatmeal Chai Breakfast Cookies do exactly that — chewy rolled oats, warming spices, and sweet-tart dried cranberries in every bite. They are the fall treat your family will ask for twice a month.

    This post may contain affiliate links. If you purchase through these links, I may earn a small commission at no extra cost to you. Thank you for supporting Love & Harvest!

    oatmeal chai cookies on a cooling rack

    The Chai-Spiced Magic

    Chai spices have long been associated with autumn, with their rich, warming flavours that seem tailor-made for this season. Cinnamon, cardamom, ginger, and cloves come together in a harmonious blend that captures the essence of fall. When these spices are incorporated into the oatmeal chai cookie recipe, the result is pure magic.

    oatmeal chai cookies spice mix

    Ingredients

    Key Ingredients

    Rolled Oats

    Rolled oats lend a delightful chewiness and a hearty texture to these cookies.

    • Why they matter: Oats provide structure, fiber, and that signature chewy bite that makes these cookies satisfying as a breakfast or snack.

    We love using Bob’s Red Mill Oat Flour for a gluten-free variation, or classic rolled oats for full texture.

    Chai Spice Blend

    Cinnamon, cardamom, ginger, and cloves are the star of the show. They provide the unmistakable chai flavour that makes these cookies perfect for autumn.

    • Why they matter: Chai spices are warming and create the aroma that fills your kitchen and your heart.

    Grab a quality pre-made Chai Spice Blend if you want to skip making your own.

    Coconut Sugar or Brown Sugar

    Adds depth of flavour and helps keep the cookies moist and tender.

    • Why it matters: It contributes a subtle caramel-molasses note that plays beautifully with the spices.

    Try Coconut Sugar for a more natural sweetener option.

    Dried Cranberries

    The chewy and slightly tart dried cranberries complement the spiced chai flavors beautifully and add a pop of colour.

    • Why they matter: They balance the warm sweetness of the spices with a fruity brightness that keeps every bite interesting.

    Alternative Ways to Enjoy Your Oatmeal Chai Breakfast Cookies

    We love these oatmeal chai cookies not just because they taste great, but because they are very versatile! Here are some ways we eat them.

    1. Crumble on top of porridge

    oatmeal chai cookie crumbled on porridge

    Add a crumbled cookie with some bee pollen, brown sugar, and blueberries on top of a matcha porridge for a cozy morning bowl.

    2. Great side snack to pack for school

    Sometimes I run out of ideas on what to bring for the kids’ lunchbox. I avoid processed food and anything with plastic wrap. These cookies are my favourite thing to pack for the kids. They keep them full and happy. There is a reason why I make them at least twice a month!

    oatmeal chai cookies packed for school

    3. Decorate them for any event

    These cookies are a lot of fun to decorate. Chai flavour is great for fall, and they are even better for Halloween decoration. Because the texture is bumpy, we love making funny scary faces on them!

    4. Add mix-ins

    Toss in mix-ins like chopped nuts, seeds, or dried fruits. They add texture and flavour.

    oatmeal chai cookies batch

    Frequently Asked Questions

    Can I make these oatmeal chai cookies gluten-free?

    Yes. Swap the all-purpose flour for a 1:1 gluten-free flour blend and use certified gluten-free rolled oats. The texture will be slightly more crumbly but still delicious.

    How do I store oatmeal chai breakfast cookies?

    Store in an airtight container at room temperature for up to 5 days. They also freeze well for up to 3 months — just thaw at room temperature for 20 minutes.

    Can I substitute the dried cranberries?

    Absolutely. Dried blueberries, raisins, chopped dried apricots, or even chocolate chips all work wonderfully. Use whatever dried fruit you love or have on hand.

    Do I need a stand mixer?

    No. A hand mixer or even a wooden spoon works fine. A KitchenAid Stand Mixer makes the process faster and easier, especially when creaming the butter and sugar, but it is not required.

    Why are my cookies spreading too much?

    Butter that is too soft or too warm is the most common culprit. Make sure your butter is at room temperature — soft but not melted. You can also chill the shaped dough balls for 15 minutes before baking to reduce spreading.

    Can I make the chai spice mix ahead of time?

    Yes, and we recommend it. Mix a double or triple batch and store it in a sealed jar. It keeps well for 6 months and works great in lattes, oatmeal, and pancakes too.

    oatmeal chai breakfast cookies

    Oatmeal Chai Breakfast Cookies

    These delightful treats are not only a delicious taste of fall but also a perfect way to bring the family together during this cozy time of year. Cinnamon, cardamom, ginger, and cloves come together in a harmonious blend of oatmeal and cranberries that captures the essence of fall.
    Print Recipe
    Pin Recipe
    Prep Time:15 minutes
    Cook Time:15 minutes
    Course: Cookie
    Keyword: chai, cookies, halloween breakfast, oatmeal

    Ingredients

    Chai Spice

    • 3 tbsp ground cinnamon
    • 1 tbsp ground cardamom
    • 1 tbsp ground ginger
    • ½ tbsp ground allspice
    • ½ tbsp ground clove
    • ½ tbsp ground nutmeg

    Oatmeal Chai Cookies

    • ½ cup butter room temperature
    • ½ cup brown sugar
    • ½ cup granulated sugar
    • 1 large egg room temperature
    • ½ tsp vanilla extract
    • ½ tsp baking soda
    • ½ tsp salt
    • 3 tsp chai spice (see 'Chai Spice' Recipe above)
    • ¾ cup all-purpose flour
    • 1½ cups rolled oats
    • 1 cup dried berries (ex: cranberry, blueberries, strawberries, etc)

    Instructions

    Chai Spice

    • In a bowl, combine all the ingredients together. Whisk it very well. Store it in a tight plastic container and label the container.

    Oatmeal Chai Cookies

    • Preheat your oven to 350°F (175°C) and line two baking sheets with parchment paper.
    • In a large mixing bowl or in a stand mixer, place the butter inside. Cream until the colour is more light, and texture is fluffy.
    • Add the brown sugar and granulated sugar. Combine at medium-high speed for 1 minute. Add the egg and vanilla, and mix well.
    • In another bowl, add all your dry ingredients together: baking soda, salt, chai spice, flour, and oats.
    • Combine the dry ingredients with your wet by adding the dry into the wet ingredients. Start the speed slowly so the flour does not come out of the bowl. Once everything looks moist, speed it up to medium speed, and mix for 1-2 minutes. Fold in the berries.
    • Drop rounded tablespoons of cookie dough onto the prepared baking sheets, spacing them about 2 inches apart.
    • Bake in the preheated oven for 10-12 minutes, or until the edges of the cookies are golden brown and the centers are set.
    • Allow the cookies to cool on the baking sheets for a few minutes before transferring them to wire racks to cool completely.

    Love these chai cookies? Try our Homemade Vanilla Extract to make the most flavourful batch possible, or check out our Birthday Rainbow Sugar Cookies for another festive bake the whole family will love.

  • Halloween Spooky Breakfast Bowl

    Halloween Spooky Breakfast Bowl

    Halloween is the best time to showcase your creativity with food! Let your food art do all the talking and have some fun!

    halloween breakfast ideas

    This post is about a spooky Halloween breakfast bowl — made with purple yam, banana, chocolate, yogurt, kiwi, and bee pollen. Fun, colorful, and ready in under 15 minutes.

    I cast thy away, boring breakfast food!

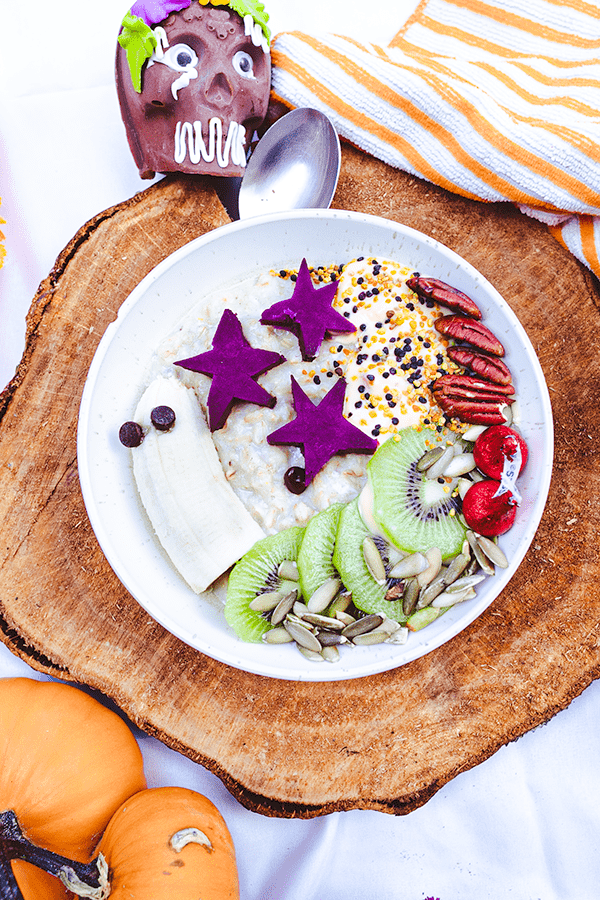
    And I bring you this fun and adorable Halloween theme oatmeal bowl! This bowl is so yummy your kids will gobble it up in minutes. There is nothing more exciting than waking up to a bowl of Halloween ghosts floating on milk and oatmeal. Kids love fun food art. They love making it and eating it. Halloween is the best time to let them lead!

    Looking for more Halloween ideas? Check out our Floating Halloween Screamer Dessert for a stunning party showpiece, and our Halloween Frankenstein Guacamole for a fun savory option.

    Creative Food Is Good for Kids

    Allowing your kids to be creative is great for their minds and leadership. Here are some benefits of cooking with your kids:

    • Develops an adventurous eater: Kids who cook tend to have a more varied palate. If you want your kids to be open-minded world leaders, start them young in the kitchen.
    • Life skill: We all learn to cook for ourselves one day. Starting them young helps them adapt well to adulthood.

    Key Ingredients

    Ingredients

    Purple Yam

    Steamed, cooled, and cut into star shapes using a cookie cutter or knife.

    • Why it matters: Purple yam provides the hauntingly beautiful deep purple color for the bowl. Its naturally sweet, floral flavour pairs wonderfully with oatmeal. Steam it in a bamboo steamer or a regular steamer pot for 10 minutes.

    Banana Ghost

    Half a banana with chocolate chip eyes makes the iconic floating ghost.

    • Why it matters: The banana ghost is the centrepiece of the whole bowl — it floats on top of the milk-soaked oatmeal. Place it just before serving to prevent browning. Use chocolate chips or food coloring for expressive ghost faces.

    Oatmeal Base

    About 1.5 cups of cooked oatmeal with a pinch of cinnamon and a teaspoon of sugar.

    • Why it matters: Oatmeal is the blank canvas for all the Halloween decoration. For a creamier texture, stir in one egg right before turning off the heat — it cooks through from the residual heat and makes the oatmeal incredibly smooth and protein-rich. Adding half a cup of milk (not stirred in — let it float) creates the spooky foggy effect.

    Toppings and Decoration

    Yogurt, kiwi, bee pollen, pecan nuts, Hersey Kisses, and sunflower seeds.

    • Why it matters: Each topping adds colour and texture. The yogurt creates a contrasting white zone for the pecan nuts. The kiwi adds bright green. The bee pollen dusted on yogurt adds golden colour. It is edible art.

    Prepping the Bowl

    1. Steam the purple yam for 10 minutes. Let it cool and peel the skin off. Using a star cookie cutter or a knife, cut 3 star shapes. They don’t need 5 points — be creative.

    2. Cook your oatmeal as you like it. Add a pinch of cinnamon and 1 tsp sugar. For smoother consistency: just before turning off the heat, stir in one egg and let it cook through from the residual heat.

    3. Slice the kiwi.

    4. Cut half the banana and peel the skin off.

    Arranging the Breakfast Bowl

    1. In a shallow bowl, add about 1.5 cups of oatmeal. Then add half a cup of milk. Do not stir — let it float on top of the oatmeal for the spooky fog effect.

    2. Place the banana on one side of the bowl.

    3. Place yogurt on the other side, opposite the banana.

    4. Arrange the pecan nuts on top of the yogurt and along the side of the bowl.

    5. Sprinkle bee pollen on top of the yogurt.

    6. Place the kiwi at the bottom of the bowl and add some sunflower seeds on top.

    7. Finally add chocolate chips for eyes on the banana, and some Hershey Kisses on the side of the bowl.

    halloween breakfast bowl recipe

    Frequently Asked Questions

    Can I make this Halloween breakfast bowl the night before?

    Partially, yes. Cook the oatmeal, steam the purple yam, and slice the kiwi the night before — store everything separately in the fridge. In the morning, reheat the oatmeal, assemble the bowl, and add the banana ghost right before serving to prevent browning.

    What can I substitute for bee pollen?

    Honey drizzled over the yogurt gives a similar golden colour and sweetness. Granola or hemp seeds also work and add a nice crunch.

    My kids don’t like purple yam — what else can I use for the purple colour?

    Blueberries or acai powder stirred into a small amount of yogurt creates a deep purple-blue colour. You can also use butterfly pea flower tea as a natural food dye — it turns vivid blue-purple and is flavourless.

    What other Halloween breakfast bowls can I make?

    This same base concept works with different characters — try a mummy bowl (white yogurt lines over dark oatmeal), a jack-o-lantern bowl (orange butternut squash puree), or a witch bowl (green matcha oatmeal). See our Halloween Monster Apple Snacks for another quick spooky idea.

    What’s in this breakfast bowl?

    Oatmeal cooked with milk, an egg and a teaspoon of sugar, purple yam stars, a banana ghost, yogurt, kiwi, pecans, sunflower seeds and a sprinkle of bee pollen. The full ingredient list is on the recipe card. The chocolate chips and Hershey Kisses are the treat part, and on Halloween, that is perfectly fine.

    How do I keep the banana from sinking into the oatmeal?

    Add the banana slice last, right after pouring the milk. The milk creates a surface film on the oatmeal that helps the banana float briefly. Serve immediately for the full floating ghost effect.

  • The best savoury Easy Rosemary Beer Bread

    The best savoury Easy Rosemary Beer Bread

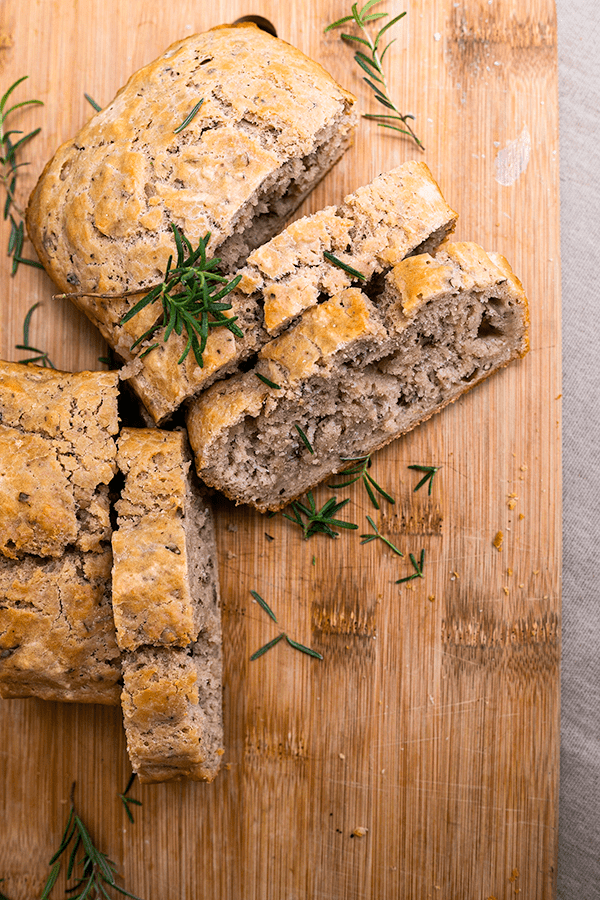
    This Easy Rosemary Beer Bread is the one recipe people always ask me about after they try it. No yeast, no kneading, no overnight fermentation — just one loaf pan and about an hour. The combination of rosemary, beer, and toasted walnuts gives it a depth of flavour that most people do not expect from such a fast bread. Slather it with fresh butter and a pinch of sea salt and you will understand why my aunt requests this every single time she visits.

    This post may contain affiliate links. If you purchase through these links, I may earn a small commission at no extra cost to you. Thank you for supporting Love & Harvest!

    easy rosemary bread no yeast

    This post is all about no-knead bread with rosemary and beer — the best savoury bread that is super easy to make.

    My Story

    A few years ago when I was visiting an aunt from Texas, she showed me her large rosemary bush at the front of her house. She was very proud it grew so large on its own. She asked me to make something with it because she had so much. This artisan bread always brings me back to that day. She loves this bread so much that every time she visits me in Mexico she asks if I have time to make it — and now I just always show up with a loaf without her ever needing to ask.

    Easy Rosemary Beer Bread

    Ingredients Deep-Dive

    Ingredients

    Flour

    The recipe calls for all-purpose white flour. You can substitute whole wheat, but do not go 100% whole wheat — it will make the bread dense and heavy. A 50/50 blend of all-purpose and whole wheat gives you a slightly nuttier loaf without sacrificing the texture.

    • Why it matters: All-purpose flour has the right protein content to give the bread structure without making it tough. Since there is no kneading here, the flour does all the structural work on its own.

    Beer

    One 12oz can or bottle of beer. Any beer works — lager, ale, stout. Each will give a slightly different flavour. A light lager gives a mild, slightly hoppy note. A dark stout gives a richer, almost caramel-like depth.

    • Why it matters: The carbonation in beer acts as a natural leavening agent, working alongside the baking powder to give the bread lift. The sugars in the beer also contribute to the golden crust. Without the beer, you do not have this recipe.

    Rosemary

    Fresh chopped rosemary is preferred — 1 tablespoon. If using dried, reduce to 1 teaspoon. The recipe also works with dried dried rosemary if you do not have fresh on hand.

    • Why it matters: Rosemary’s piney, woodsy aroma is the signature of this bread. It pairs perfectly with the malt from the beer and the butter on top. Fresh rosemary is more fragrant, but dried is perfectly fine in this recipe.

    Walnuts

    A quarter cup of chopped walnuts adds texture and a pleasant bitterness that rounds out the sweetness from the sugar.

    • Why it matters: The walnuts give this bread a rustic, artisan quality. They create little pockets of crunch that contrast beautifully with the dense, tender crumb. Do not skip them.

    Baking Powder

    Three teaspoons. This is the primary leavening agent — no yeast required.

    • Why it matters: Baking powder reacts with liquid and heat to produce CO2 bubbles that make the bread rise. Because we are not using yeast, the oven does all the heavy lifting. This is why the recipe does not need fermentation time — the chemistry is instant.

    Loaf Pan

    A nonstick bread loaf pan is all you need. I love mine from this nonstick loaf pan set — it comes in two identical pans, which is great for making double batches. The consistent size ensures even baking every time.

    • Why it matters: This recipe is so hydrated that it needs to be contained in a loaf pan to hold its shape during baking. Unlike yeasted breads that can be shaped and hold themselves, this batter is more like a thick cake batter than a classic dough.

    rosemary bread recipes

    Stand Mixer and Baking Tips

    For this recipe you will need a stand mixer with a dough hook. It makes the dough come together much faster. I personally use the KitchenAid 7 Quart Stand Mixer — it doubles as an assistant for pies, cookies, cakes, pasta, and more.

    Oven Temperature

    The oven needs to reach 350°F. Most breads require 400–450°F, but because we are using baking powder instead of yeast, the bread does not need that intense pull of heat. Lower and slower is the right approach here — it is closer to cake baking than bread baking.

    Cut the Bread Only After It Is Completely Cooled

    This is the hardest part. When the bread comes out of the oven, it is still cooking on the inside as it cools. Cutting into it too soon causes the inside to be undercooked and gummy, and releases all the moisture into the open air. Wait until it is fully cool — your patience will be rewarded.

    rustic rosemary bread

    If you love baking bread, try our Sourdough Bread, our Easy Homemade Focaccia, or our Fluffy Naan Bread.

    A hand holding two halves of rosemary beer bread showing the crumb

    Easy No-Knead Rosemary Beer Artisan Bread

    Print Recipe
    Pin Recipe
    Prep Time:10 minsCook Time:50 minsTotal Time:60 mins

    Ingredients

    • 3 cups all purpose flour sifted
    • 3 tsp baking powder
    • 1 tsp salt
    • ¼ cup sugar
    • ¼ cup chopped walnut
    • 1 tbsp fresh chopped rosemary or 1 tsp dried rosemary
    • 1 12oz beer
    • ⅓ cup melted butter for top of bread before baking

    Instructions

    • Preheat oven to 350°F and place the rack at the middle of the oven.
    • Grease a large loaf pan with spray or butter. Set aside.
    • Using a stand mixer with the dough hook attachment, place all the dry ingredients together. Mix for 1 minute.
    • With the machine running on medium-low, slowly pour the can of beer into the batter.
    • Place the batter into the greased pan and drizzle the melted butter on top. Run a knife along the edges so the butter touches all the sides.
    • Place the pan on the middle rack and bake for 50 minutes until the top is slightly golden brown.
    • Allow the bread to cool completely before cutting.

    Frequently Asked Questions

    Can I make this rosemary bread without beer?

    Technically yes, but the result will be quite different. The beer contributes both leavening (from carbonation) and flavour (malt and hops). If you want to substitute, use sparkling water or club soda for the leavening effect, though the bread will be more neutral in flavour. Ginger ale can work as a semi-sweet alternative.

    Does the bread taste like beer?

    Not strongly. The beer flavour mellows significantly during baking — what remains is a subtle, slightly malty background note that pairs beautifully with the rosemary. If you use a very dark beer like a stout, you will taste it more. If you use a light lager, it is barely detectable.

    Can I substitute the all-purpose flour for whole wheat?

    Partially, yes. A 50/50 blend of all-purpose and whole wheat flour works well and adds a nuttier flavour. Going 100% whole wheat will make the bread very dense. If you want a lighter whole grain option, spelt flour at a 1:1 substitution produces a better texture than whole wheat.

    Why does my bread come out gummy in the middle?

    Almost always this is because the bread was cut before it was fully cooled. The interior continues to cook and set as the loaf cools on the counter. Cutting it hot releases the steam and moisture prematurely, leaving the crumb gummy. Wait at least 45 minutes after taking it out of the oven before slicing.

    Can I add other herbs or mix-ins?

    Yes. Thyme, sage, or a combination of herbs all work well. You can also add grated Parmesan or sharp cheddar into the batter for a cheesy herb bread. Sun-dried tomatoes and olives are another great combination. Keep add-ins to about 1/3 cup total to not overwhelm the structure.

    How do I store this rosemary beer bread?

    Wrap the cooled loaf in a clean kitchen towel or beeswax wrap and store at room temperature for up to 2 days. For longer storage, slice the loaf, freeze the slices in a zip-lock bag, and toast directly from frozen. Avoid storing in plastic wrap at room temperature — it traps moisture and makes the crust go soft.

  • Blender Oatmeal Pancakes

    Blender Oatmeal Pancakes

    These blender oatmeal pancakes have become our family’s most-requested breakfast — and they have replaced buttermilk pancakes in our household for good. Made from just bananas, oats, eggs, and baking powder, everything goes straight into the blender and onto the griddle. The cleanup is one blender. The result is a soft, fluffy, naturally sweet pancake that keeps you full until lunch. My IHOP-loving husband is the proof of concept.

    This post may contain affiliate links. If you purchase through these links, I may earn a small commission at no extra cost to you. Thank you for supporting Love & Harvest!

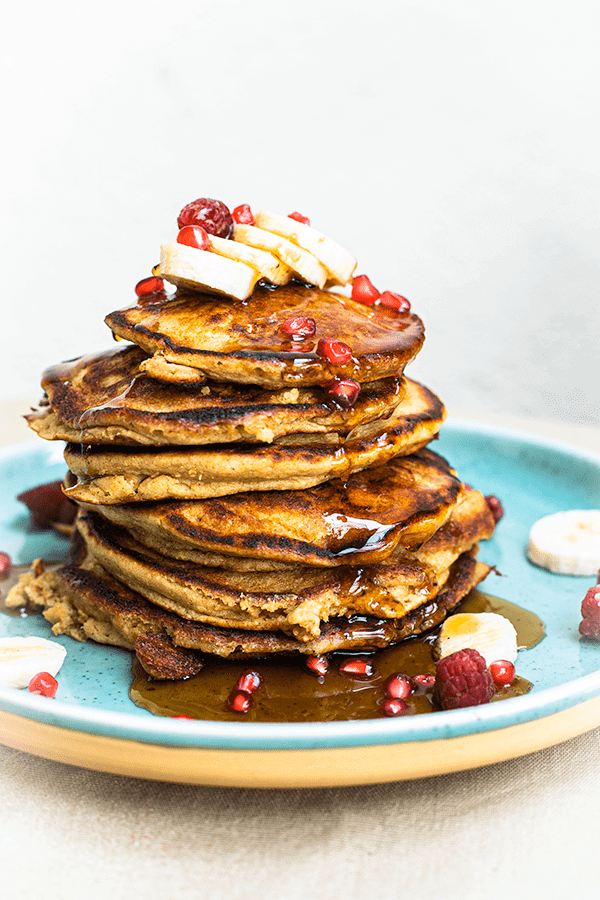
    Stack of oat banana pancakes with syrup, banana slices and pomegranate

    This post features a blender oatmeal pancake recipe using banana, oatmeal, vanilla, and eggs, all blended together.

    Why Make This Recipe?

    Pancakes for breakfast is probably one of the most popular breakfasts around the world. But can you make a version that’s easy and comes together in a blender? Yes. These oatmeal pancakes do. They are packed with whole grains from the oatmeal and natural sweetness from the bananas. Just 2 tablespoons of maple syrup in the whole batch. No flour. No special skills required.

    Mornings can be hectic. This recipe respects that — all the ingredients go into a blender, and cleanup is just the blender. That is it. It has been tested and approved by my IHOP-pancake-loving husband, who is not going back to buttermilk pancakes.

    Tall stack of pancakes topped with banana and pomegranate seeds

    Can These Pancakes Be Gluten-Free?

    I make these with regular oatmeal at home — not certified gluten-free oats — so as written they are not a gluten-free recipe. If you need them gluten-free, use certified gluten-free oats (and know that cross-contact can still happen in some kitchens and facilities). The only added sweetener is 2 tablespoons of maple syrup. They come out soft, fluffy, and full of flavour — perfect with maple syrup or any topping you love.

    Ingredients Deep-Dive

    Ingredients

    Oatmeal

    Either old-fashioned oats or quick-cooked oats both work. The oatmeal is the base of these pancakes — it replaces flour entirely.

    • Why it matters: Oats give these pancakes their hearty texture, no flour needed. I use regular rolled or quick oats. If you need a gluten-free version, choose certified gluten-free rolled oats or oat flour — oats are naturally gluten-free but can pick up wheat in processing, and cross-contact is still possible.

    Bananas

    Use overripe bananas — the riper, the better. The spots on the peel are your best friends here. Riper bananas are sweeter and blend more smoothly.

    • Why it matters: Bananas serve as both the natural sweetener and the binding agent in this recipe. They replace both sugar and part of the fat you would find in a traditional pancake recipe. Overripe bananas have higher natural sugar content and a more intense banana flavour.

    Eggs

    Eggs help the pancake rise and give it a fluffy texture. They are also the primary structural ingredient that binds the oats and banana together.

    • Why it matters: Without eggs, the batter would be too loose to hold together on the griddle. The protein in eggs sets when heated, creating the structure that gives these pancakes their lift.

    Baking Powder

    Baking powder creates the bubbles and air pockets inside the pancake that give it that light and fluffy texture. It is essential in all pancake recipes.

    • Why it matters: Without baking powder, these pancakes will come out flat and dense. The reaction between baking powder and the moisture in the batter produces CO2 bubbles that make the pancakes puff up on the griddle.

    Stack of pancakes with a forkful cut out to show the fluffy inside

    Pro Tips for Perfect Oatmeal Pancakes

    Pro Tip 1 — Use a Griddle

    A cast iron griddle has a larger surface area than regular pans, letting you cook more pancakes at once. It also creates an even surface of heat so every pancake cooks consistently.

    Pro Tip 2 — Cook the Pancakes with Butter

    Always add a thin layer of butter on the griddle before adding the batter. This prevents sticking and adds flavour. Butter tastes better than regular cooking oil for pancakes.

    Pro Tip 3 — When to Flip the Pancakes

    Flip when you see little air pockets forming in the middle of the pancake and the edges stop looking wet — they will have a soft, matte texture. This is the signal that the bottom is set and the pancake is ready to flip without breaking.

    Pancake stack in a pool of syrup with banana slices on a blue plate

    Looking for more breakfast ideas? Try our Mixed Berry Smoothie with Pomegranate and Nopal or our Celery Juice to pair alongside these pancakes for a complete morning meal.

    Tall stack of pancakes topped with banana and pomegranate seeds

    Blender Oatmeal Pancakes

    Delicious pancakes made with oatmeal and banana. All made with just a blender. Gluten-free when made with certified gluten-free oats.
    Prep Time 7 minutes
    Cook Time 15 minutes
    Total Time 22 minutes
    Servings: 4 people
    Course: Breakfast
    Cuisine: American
    Calories: 295

    Ingredients
      

    • 2 cups royal oats or quick oats
    • 1 cup water
    • 1 medium riped banana
    • 2 eggs
    • 2 tbsp melted butter
    • 2 tbsp maple syrup
    • 1 tbsp baking powder
    • ½ tsp baking soda
    • ½ tsp salt
    • ½ tsp ground cinnamon
    • 2 tsp vanilla extract

    Equipment

    • high speed blender

    Method
     

    1. Preheat your griddle on the stovetop and set it on medium low heat.
    2. In the blender put all the ingredients together and blend on high for 30 seconds. Batter should be smooth with no lump.
    3. lightly brush the surface of your griddle with butter.
    4. With your ⅓ measuring cup, scoop the batter with the mesuring cup, and slowly drop the batter on the griddle. Leave enough space between pancakes so they are not touching each other.
    5. Cook until small bubbles start to form in the middle of the pancake the sides have turned into a matte texture. Flip the pancake and cook for another 1-2 minutes.
    6. Serve right away with a small slice of butter on top and maple syrup.

    Frequently Asked Questions

    Do these oatmeal pancakes taste like banana?

    Yes, mildly. The banana flavour is present but not overwhelming. The more overripe your bananas are, the stronger the banana flavour. If you want to reduce it, use one banana instead of two and add a tablespoon of nut butter for binding. The oat flavour balances out the banana very well.

    Can I make this recipe without a blender?

    Yes, but the texture will be coarser. Mash the bananas very well with a fork, then mix in the eggs, and finally stir in the oats and baking powder. For a smoother texture without a blender, use certified gluten-free oat flour instead of whole rolled oats — it blends into the batter without the blender step.
    Are these pancakes suitable for toddlers?

    Yes. They have no refined flour, and the only sweetener is the banana plus 2 tablespoons of maple syrup in the whole batch. They do contain butter and eggs. They are soft, easy to chew, and naturally sweet from the banana. Cut them into small pieces or serve as finger food for younger toddlers. They are also an easy way to serve oats and eggs at a toddler breakfast.

    How do I store leftover oatmeal pancakes?

    Let the pancakes cool completely, then store in an airtight container in the refrigerator for up to 3 days. For longer storage, freeze with parchment paper between each pancake and reheat directly from frozen in a toaster or non-stick pan. They reheat very well and taste just as good the next day.

    Can I add protein powder to this recipe?

    Yes. Add one scoop of plant-based protein powder to the blender along with the other ingredients. The batter may thicken slightly — if it does, add a tablespoon of water to reach the right consistency. A vanilla or unflavored protein powder works best so it does not compete with the banana.

    Why are my pancakes coming out flat?

    The most common reason is old baking powder. Baking powder loses its potency over time — test yours by dropping a teaspoon into hot water. If it bubbles vigorously, it is still good. If not, replace it. Also make sure you are not overmixing the batter after adding the baking powder — stir just until combined to keep the air pockets intact.

  • Mango and Coconut Smoothie Bowl

    Mango and Coconut Smoothie Bowl

    This smoothie bowl mango and coconut is the kind of breakfast that makes you feel like you are eating at a beach resort — and it takes only 5 minutes to make. Thick, creamy, naturally sweet, and loaded with tropical flavor, it is as delicious as it is beautiful.

    This post may contain affiliate links. If you purchase through these links, I may earn a small commission at no extra cost to you. Thank you for supporting Love & Harvest!

    smoothie bowl mango

    Why Coconut and Mango Work So Well

    Coconut water and coconut cream make this bowl creamy and refreshing, and the mango and pineapple keep it sweet and tropical. For more drinks, try the Homemade Soy Milk or the Mixed Berry Smoothie with Pomegranate and Nopal.

    mango smoothie bowl without banana

    Ingredients Deep-Dive

    Fresh Mango

    • Why it matters: Ripe manila mango provides natural sweetness and a buttery base. The riper the mango, the sweeter and more aromatic the bowl.

    Coconut Cream and Fresh Coconut Water

    • Why it matters: Coconut cream thickens the smoothie. Fresh coconut water keeps the bowl light and refreshing.

    Frozen Pineapple

    • Why it matters: Frozen pineapple chills the bowl to a thick, almost ice-cream-like consistency without needing ice (which would dilute the flavor). Pineapple also adds a bright, tangy sweetness.

    Toppings That Make the Bowl

    Presentation is everything with smoothie bowls — and the toppings are not just visual. Here I use fresh strawberries, semi-sweet chocolate chips, and dried coconut shreds. Each spoonful has freshness, sweetness, and crunch. Other great toppings: guava, blueberries, passion fruit, lychee, sunflower seeds, or crushed walnuts. The options are endless — just keep them fresh and colorful. To serve in a coconut shell for a stunning presentation, check out these natural coconut shell bowls. For blending, a Vitamix high-speed blender gives the smoothest, thickest result.

    How to Split a Fresh Coconut

    If you want to serve the bowl inside a real coconut half, here is how. Using a large heavy cleaver, tap all around the equator of the coconut with the back of the blade to loosen the membrane from the shell. Place a large bowl underneath to catch the water that starts to escape. Then, with the sharp edge, strike firmly along the latitude of the coconut until you establish a clear crack. Insert the blade into the crack and twist to split it open. The water will drain out fully. Once split, clean the inside and fill with your smoothie.

    How to Sweeten Your Smoothie Bowl

    Always try natural fruit sweeteners first. Banana adds sweetness and helps thicken the consistency. Pitted Medjool dates blend in beautifully. If you need extra sweetness beyond the fruit, use a drizzle of raw honey, maple syrup, or agave nectar.

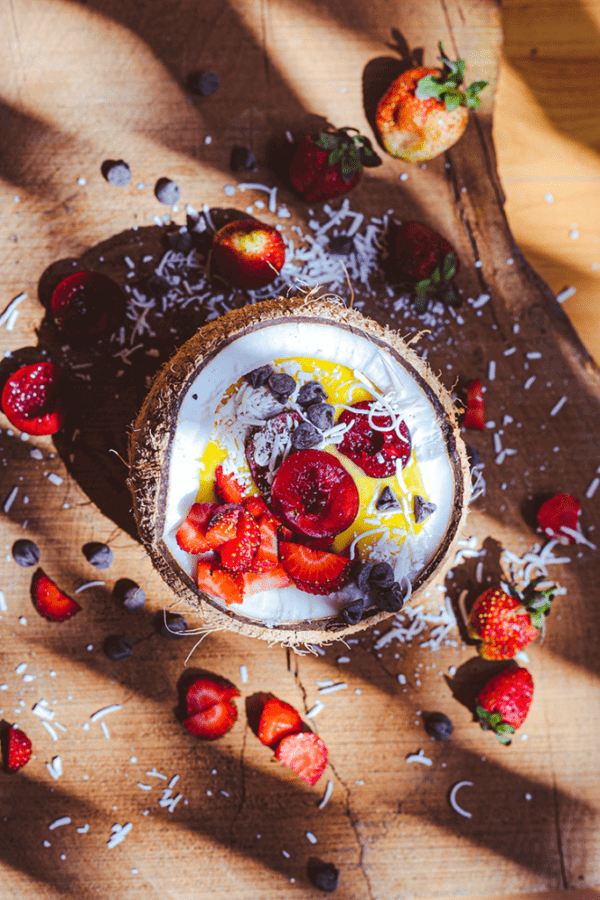
    Mango and coconut smoothie bowl with toppings

    Frequently Asked Questions

    Can I make this smoothie bowl without fresh coconut?

    Absolutely. If a fresh coconut is not available, use full-fat canned coconut cream and a splash of store-bought coconut water. The flavor will be nearly identical. Serve in any regular bowl — or pick up a set of coconut shell bowls for the same aesthetic.

    How do I make the smoothie bowl thick enough to eat with a spoon?

    The key is using frozen fruit. Frozen pineapple and a small amount of coconut cream create the thick, scoopable texture that makes a smoothie bowl different from a drinkable smoothie. Use as little liquid as possible during blending — add coconut water only a splash at a time until the blender moves. More liquid means a thinner bowl.

    Is this smoothie bowl good after a workout?

    It’s cold, sweet and refreshing after a workout. Pair it with eggs or yogurt if you want more protein.

    What is the difference between a smoothie bowl and a regular smoothie?

    A smoothie is drinkable and typically contains more liquid. A smoothie bowl is blended thicker so it holds toppings and is eaten with a spoon. The toppings add texture, crunch, and extra nutrients that you cannot get in a drinkable smoothie. The experience is much more satisfying as a meal.

    Can I use a regular blender for this recipe?

    A standard blender will work, but you may need to add more liquid to get it moving — which makes the bowl thinner. A high-speed blender like the Vitamix can handle frozen fruit with minimal liquid, giving you that signature thick texture. If you only have a regular blender, blend in smaller batches and be patient.

    Can I make this the night before?

    The blended base can be made and frozen overnight, then thawed for 5 to 10 minutes in the morning before eating. However, for the best texture and the freshest toppings, making it the morning of is recommended. Toppings should always be added right before serving.

    A hand holding a coconut shell filled with a mango coconut smoothie bowl and fruit

    Mango and Coconut Smoothie Bowl

    Prep Time 5 minutes
    Total Time 5 minutes
    Course: Breakfast
    Calories: 420

    Ingredients
      

    • 1 fresh and large coconut water split in half
    • 1 ripe manila mango
    • ½ cup frozen pineapples cubed
    • ½ cup coconut cream
    Garnish
    • 3 fresh strawberries cubed
    • 3 tbsp semi sweet chocolate chips
    • 3 tbsp dried shredded coconut non sweet

    Equipment

    • high speed blender

    Method
     

    1. Split the coconut in half and clean the inside. If a coconut shell is not obtainable, a regular medium size bowl will do.
    2. In a high speed blender, add the mango pineapple and coconut cream. Blend until smooth and thick.
    3. Use a spoon and scoop out the thick smoothie on to the bowl and garnish the top bowl with cubed strawberries, semi sweet chocolate and finally shredded dry coconut. Serve immediately.