Category: bread recipes

  • Mexican Corn Cake with Cream Cheese

    Mexican Corn Cake with Cream Cheese

    If you’ve ever tasted Pastel de Elote, you know it’s more than just a cake—it’s a story baked into every slice. Sweet, moist, and rich with the flavor of fresh corn, this 8-ingredient Mexican Corn Cake with Cream Cheese is one of those recipes that will transport you straight to a Mexican kitchen. Whether you serve it warm at a Sunday gathering or packed for a picnic, it never fails to impress.

    This post may contain affiliate links. If you purchase through these links, I may earn a small commission at no extra cost to you. Thank you for supporting Love & Harvest!

    Mexican corn cake sliced on a wooden board

    This easy corn cake recipe uses just 8 ingredients. Also known as pastel de elote, it’s made with fresh corn, eggs, condensed milk, vanilla extract, cream cheese, flour, baking powder, and a splash of milk. No mixer needed — just a blender.

    For a little twist, I added cream cheese to my version. It’s not traditional — the original recipe does not include it — but it gives the cake a richer flavour and smoother texture. Consider it my “jazzed up” pastel de elote.

    Mexican corn cake batter being poured into a pan

    Pastel de Elote: Mexico’s Beloved Corn Cake

    Pastel de Elote is more than a dessert — it’s a piece of Mexican culinary history. This cake beautifully blends indigenous corn traditions with Spanish colonial influence, resulting in something truly unique: semi-sweet, moist, and unlike any other cake you’ve tried.

    Fun Facts About Corn in Mexico

    In Mexico, there are more ways to prepare corn than kernels on a cob. That’s no surprise considering the country is the birthplace of maize, believed to have been domesticated in Mesoamerica thousands of years ago.

    • In Mayan mythology, people were said to be created from corn.

    • The region of Oaxaca still has one of the world’s highest diversities of native corn species.

    • Corn is the base of much of the Mexican diet — including desserts like Pastel de Elote.

    This corn cake is also an example of the historic merging of Spanish colonial and indigenous cuisines. Corn was plentiful, and villagers often gifted it to monks and nuns, who had access to sugar and eggs. It’s even suspected that a nun may have invented Pastel de Elote, using ingredients readily available at the time.

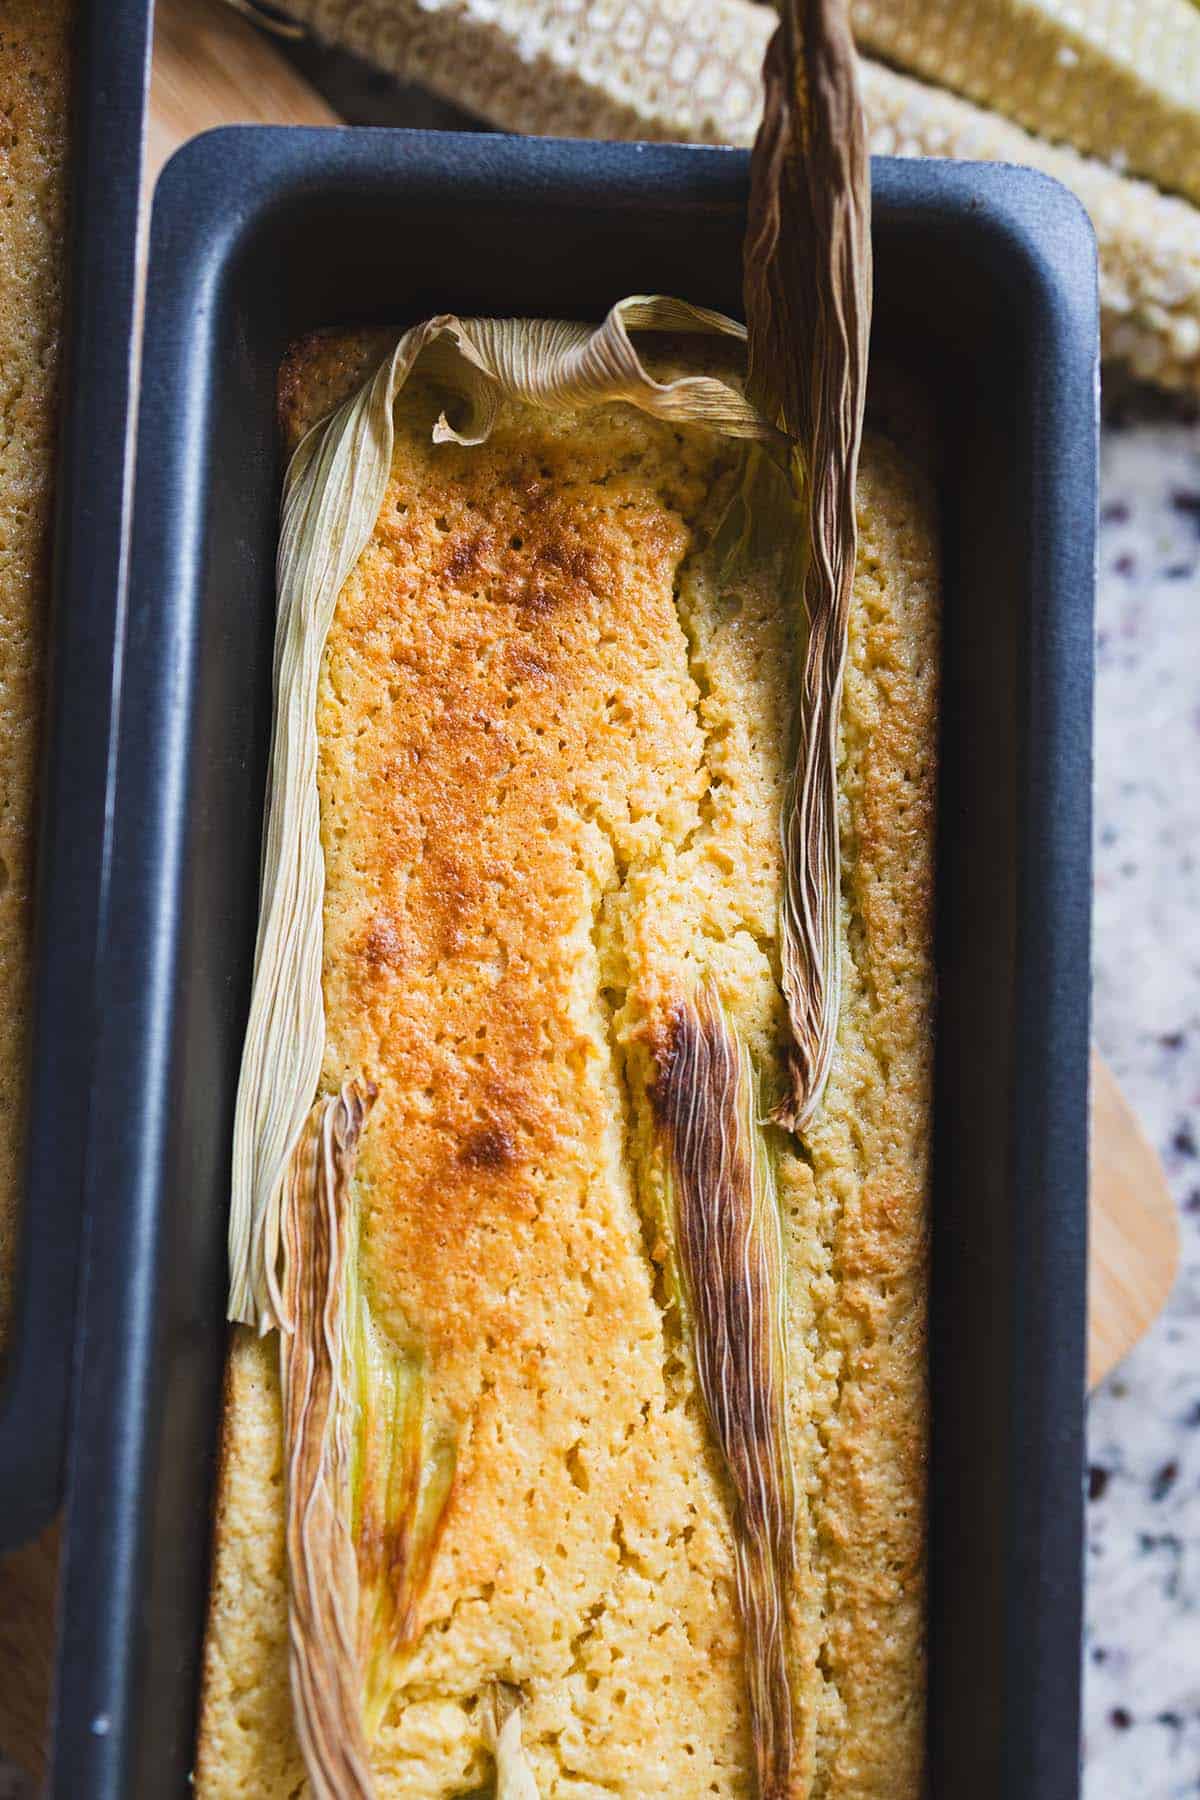
    Overhead view of Mexican corn cake

    Why We Love This Corn Cake Recipe

    There’s something magical about how Pastel de Elote balances sweet and savoury. It’s semi-sweet, never overpowering, with a moist, slightly sticky texture that feels like comfort in every bite.

    Depending on how it’s prepared, the cake can range from:

    • Moist and dense (especially when using canned corn), to

    • Light and fluffy (when made with fresh kernels).

    The colour can also vary depending on the type of corn used, making every cake a little bit unique.

    Mexican corn cake with cream cheese layer

    Ingredients for Mexican Corn Cake

    Ingredients

    Fresh Corn Kernels

    • The star of the dish — fresh corn brings natural sweetness and that unmistakable corn flavour. For a lighter, fluffier cake use fresh kernels from the cob; for a denser, moister result, canned (well-drained) corn works beautifully.

    Cream Cheese

    • The secret twist that makes this version extra special. Sliced cream cheese is layered in the middle of the batter before baking, creating a rich, luscious pocket that melts into the cake. Use a block-style cream cheese, not whipped. A 9-inch springform pan makes unmolding a breeze.

    Sweetened Condensed Milk

    • Adds a creamy richness and balanced sweetness that defines the classic pastel de elote flavour. Half a can (about 7 oz) is all you need — don’t substitute with regular milk or sugar.

    Eggs

    • Give the cake structure and help create a tender crumb. Use room-temperature eggs for a smoother batter that blends evenly.

    Vanilla Extract

    • Enhances the corn’s natural sweetness with a warm, aromatic note. Don’t skip it — it rounds out the flavour perfectly.

    All-Purpose Flour & Baking Powder

    • Flour provides body while baking powder gives the cake its gentle rise and soft, fluffy texture. Make sure your baking powder is fresh for the best results. A digital kitchen scale ensures your measurements are spot-on every time.

    Ingredients for Mexican corn cake laid out

    How to Make Mexican Corn Cake

    This recipe couldn’t be simpler — you just need a blender and a baking pan. Blend everything, pour half the batter, layer the cream cheese, pour the rest, and bake. The hardest part is waiting for it to cool! If you’re planning a full Mexican dessert spread, pair this with our Instant Pot Mexican Menudo for a complete feast, or try our Mexican Slow Cooker Pulled Pork for a savory main. And if you love easy blender cakes, our Dairy-Free Chocolate Cake is another crowd-pleaser.

    To make sure your cake bakes evenly, use a good blender to get a silky-smooth batter, and always grease your pan generously.

    Frequently Asked Questions

    Can I use canned corn instead of fresh?

    Yes, absolutely! Canned corn works well in this recipe — just make sure to drain it thoroughly. Fresh corn from the cob will give you a lighter, slightly sweeter result, while canned corn makes the cake a bit denser and moister. Both versions are delicious.

    Do I have to include the cream cheese?

    The cream cheese is optional but highly recommended! It’s not part of the traditional pastel de elote recipe, but it adds a rich, creamy layer inside the cake that makes it feel extra special. If you prefer the classic version, simply omit it.

    How do I know when the cake is done?

    Bake at 350°F (175°C) for 50–60 minutes. Insert a toothpick near the edge of the cake (not the center) — it should come out mostly clean. The center, where the cream cheese sits, will stay softer and that’s perfectly normal. The top should be golden brown.

    How should I store Mexican Corn Cake?

    Store leftovers in an airtight container in the refrigerator for up to 4 days. The cake tastes wonderful served slightly warm — just microwave individual slices for 20–30 seconds. You can also freeze slices (wrapped individually) for up to 2 months.

    Can I make this cake gluten-free?

    Yes! Substitute the all-purpose flour with a 1:1 gluten-free flour blend. Since corn is naturally gluten-free, this swap works very well in this recipe and the texture stays moist and tender.

    Slice of Mexican corn cake with cream cheese on a corn husk and a white plate

    Mexican Corn Cake with Cream Cheese

    This easy corn cake recipe only uses 8 ingredients. Corn cake, also known as pastel de elote, is made with ingredients such as fresh corn, eggs, flour, vanilla extract, cream cheese, baking powder, and a bit more.
    Prep Time 7 minutes
    Cook Time 40 minutes
    Total Time 1 hour 7 minutes
    Servings: 8 people
    Course: Dessert
    Cuisine: Mexican
    Calories: 230

    Ingredients
      

    • 2 cups fresh corn kernels  from about 3–4 cobs, or use canned/drained
    • 3 large eggs room temperature
    • ½ can sweetened condensed milk 7 oz / 200 g
    • 2 tsp vanilla extract
    • ½ cup all-purpose flour
    • 1½ tsp baking powder
    • ¼ cup whole milk
    • 100 g cream cheese  cut into thin slices for layering

    Equipment

    • highspeed blender

    Method
     

    1. Heat oven to 350°F (175°C). Grease and flour a 9×9 inch pan or loaf pan.
    2. In a blender, add corn kernels, eggs, condensed milk, vanilla, flour, baking powder, and milk.
      Blend until smooth and creamy (some small corn bits are fine for texture).
    3. Pour half the batter into the prepared pan. Arrange the cream cheese slices evenly on top of this first layer. Pour the remaining batter on top, covering the cream cheese completely.
    4. Bake for 50–60 minutes, or until golden brown and a toothpick inserted near the edge comes out mostly clean.
      (Note: The center where the cream cheese sits will remain softer.)
    5. Let the cake cool for at least 20 minutes before slicing, so the cream cheese filling sets slightly.
      Serve warm or at room temperature, with optional extra condensed milk drizzled on top.
  • Easy Chinese Scallion Pancakes

    Easy Chinese Scallion Pancakes

    These easy Chinese scallion pancakes take about 30 minutes, from gathering everything to cooking, need just a handful of pantry ingredients, and make an easy breakfast any day of the week. My kids beg for them every morning — and after trying them, someone in your family will too!

    Thin scallion pancake on a plate next to a bowl of fillings

    This post may contain affiliate links. If you purchase through these links, I may earn a small commission at no extra cost to you. Thank you for supporting Love & Harvest!

    This post is a recipe for easy Chinese scallion pancakes. An easy recipe made with flour, eggs, water, green onion and salt.

    Why You’ll Love This Recipe

    • Quick and Easy: The recipe takes about 30 minutes from start to finish, making it perfect for busy mornings or a quick snack.
    • Simple Ingredients: With just six pantry ingredients, there’s no special shopping trip required.
    • Just 2 Tablespoons of Oil in the Batter: Made with eggs, green onion, flour and just 2 tablespoons of oil in the batter.
    • Kid-Friendly: Children love the mild savoury flavour and the fun of rolling them up with a sauce inside.
    • Culturally Rich: Every bite carries generations of Shandong Province culinary tradition.

    Two folded scallion pancakes on a white plate

    My Story

    In the mornings of my youth, my father would rise early and craft scallion pancakes for our breakfast. The scent of sizzling dough and fresh scallions was an uncommon delight, for my father seldom ventured into the kitchen. Each aromatic whiff was a herald of something special, a rare treat that painted our mornings with joy.

    My father’s roots trace back to Shandong Province in China, where this recipe was born and lovingly passed down. It carries the essence of his childhood, the warmth of his mother’s kitchen, and now it lives on in our own family’s tradition.

    As a parent, I understand the challenge of waking early to prepare breakfast every day. Yet, not a moment spent in this ritual is one I would ever regret. I urge every parent to discover that one recipe their children adore — one that will nestle in their hearts and become a cherished memory.

    Folded scallion pancakes stacked on a plate

    The Recipe That Connects Generations

    Food has a unique way of bringing us closer to our heritage. Every time I make these scallion pancakes, I feel a deep connection to my dad and my grandmother. It is more than just a recipe; it is a piece of our family history. In sharing it here, I hope it brings you and your loved ones as much joy as it has brought us.

    Ingredients

    Ingredients

    Green Onion

    • Why it matters: Fresh green onion is the soul of this recipe. Use both the white and green parts, chopped finely. The white parts add a gentle sharpness; the green parts provide colour and a lighter onion flavour that mellows beautifully in the pan.

    Eggs

    • Why it matters: Three large eggs bind the batter, create structure, and give these pancakes their fluffy, tender texture. They are also what makes this recipe so quick — no yeast, no resting time, just eggs and a whisk.

    Flour

    • Why it matters: Cake flour or all-purpose flour both work well. Cake flour produces a slightly softer, more delicate pancake. Whatever you use, add it gradually while whisking to avoid lumps. A kitchen scale helps you measure consistently every time.

    Water

    • Why it matters: Regular drinkable water thins the batter to the right consistency. The ratio of water to egg determines whether the pancake is crispy or soft — a thinner batter spreads wider and crisps faster.

    Fillings

    • Why it matters: Our children love rolling the pancakes around ketchup. Worcestershire sauce, Maggi sauce, or soy sauce all work beautifully. The filling adds a burst of flavour and makes the pancakes even more interactive for kids.

    How to Make Chinese ShanDong Scallion Pancakes

    Preparation

    Wash the green onions well and remove any yellow or unusable stems. Thinly slice them on a chopping board and set aside. In a large bowl, combine the chopped green onions, eggs, and water. Whisk vigorously until the mixture is foamy and slightly thicker. Slowly add the flour while continuing to whisk. Once fully combined with no lumps, add a pinch of salt and whisk a few more rounds. The batter should be pourable and not too thick.

    Cooking

    Preheat a non-stick frying pan over medium-high heat. Drizzle a bit of oil and swirl to coat evenly. Ladle about ½ cup of batter into the pan, swirling to spread it evenly to the edges. Once the edges begin to brown and curl, flip the pancake and cook for 1–2 minutes on the other side until golden. Repeat until all batter is used. I like to use a silicone spatula and tongs for easy flipping. Running two pans simultaneously speeds things up considerably if you are feeding a family.

    A hand lifting a folded scallion pancake from the plate

    Frequently Asked Questions

    Can I use a cast iron skillet instead of a non-stick pan?

    Yes. A well-seasoned cast iron skillet actually produces a slightly crispier bottom. Make sure it is properly preheated before adding oil and batter, and use a little more oil than you would with a non-stick pan to prevent sticking.

    Why is my batter too thick or too thin?

    The batter should be about the consistency of thin crepe batter — pourable and spreadable when you swirl the pan. If it is too thick, add water a tablespoon at a time. If it is too thin, add a spoonful of flour and whisk again. The right consistency gives you a pancake that spreads on its own to the edge of the pan.

    Can I make the batter ahead of time?

    Yes. The batter keeps well in the refrigerator for up to 24 hours in a covered container. Give it a good stir before using, as the flour tends to settle. Do not make it more than a day ahead as the green onions can become slightly slimy.

    Are these scallion pancakes the same as the flaky Chinese ones?

    No. Traditional flaky scallion pancakes (cong you bing) are made with unleavened dough and require rolling and laminating with oil. This Shandong version is made from a quick egg-and-flour batter — much simpler, faster, and just as delicious. Think of it more as a savoury crepe than a bread-based flatbread.

    What dipping sauces pair best with these pancakes?

    Soy sauce mixed with a little rice vinegar and sesame oil is classic. Hoisin sauce is popular with kids. Worcestershire sauce or Maggi seasoning gives a deep umami kick. For a sweeter version, ketchup or sweet chili sauce works wonderfully, especially for children.

    Can I freeze leftover scallion pancakes?

    Yes. Let them cool completely, stack with parchment paper between each one, and freeze in a zip-lock bag for up to 1 month. Reheat in a dry pan over medium heat for 2–3 minutes per side, or in a toaster oven at 375°F (190°C) for 5 minutes. They crisp up beautifully from frozen.

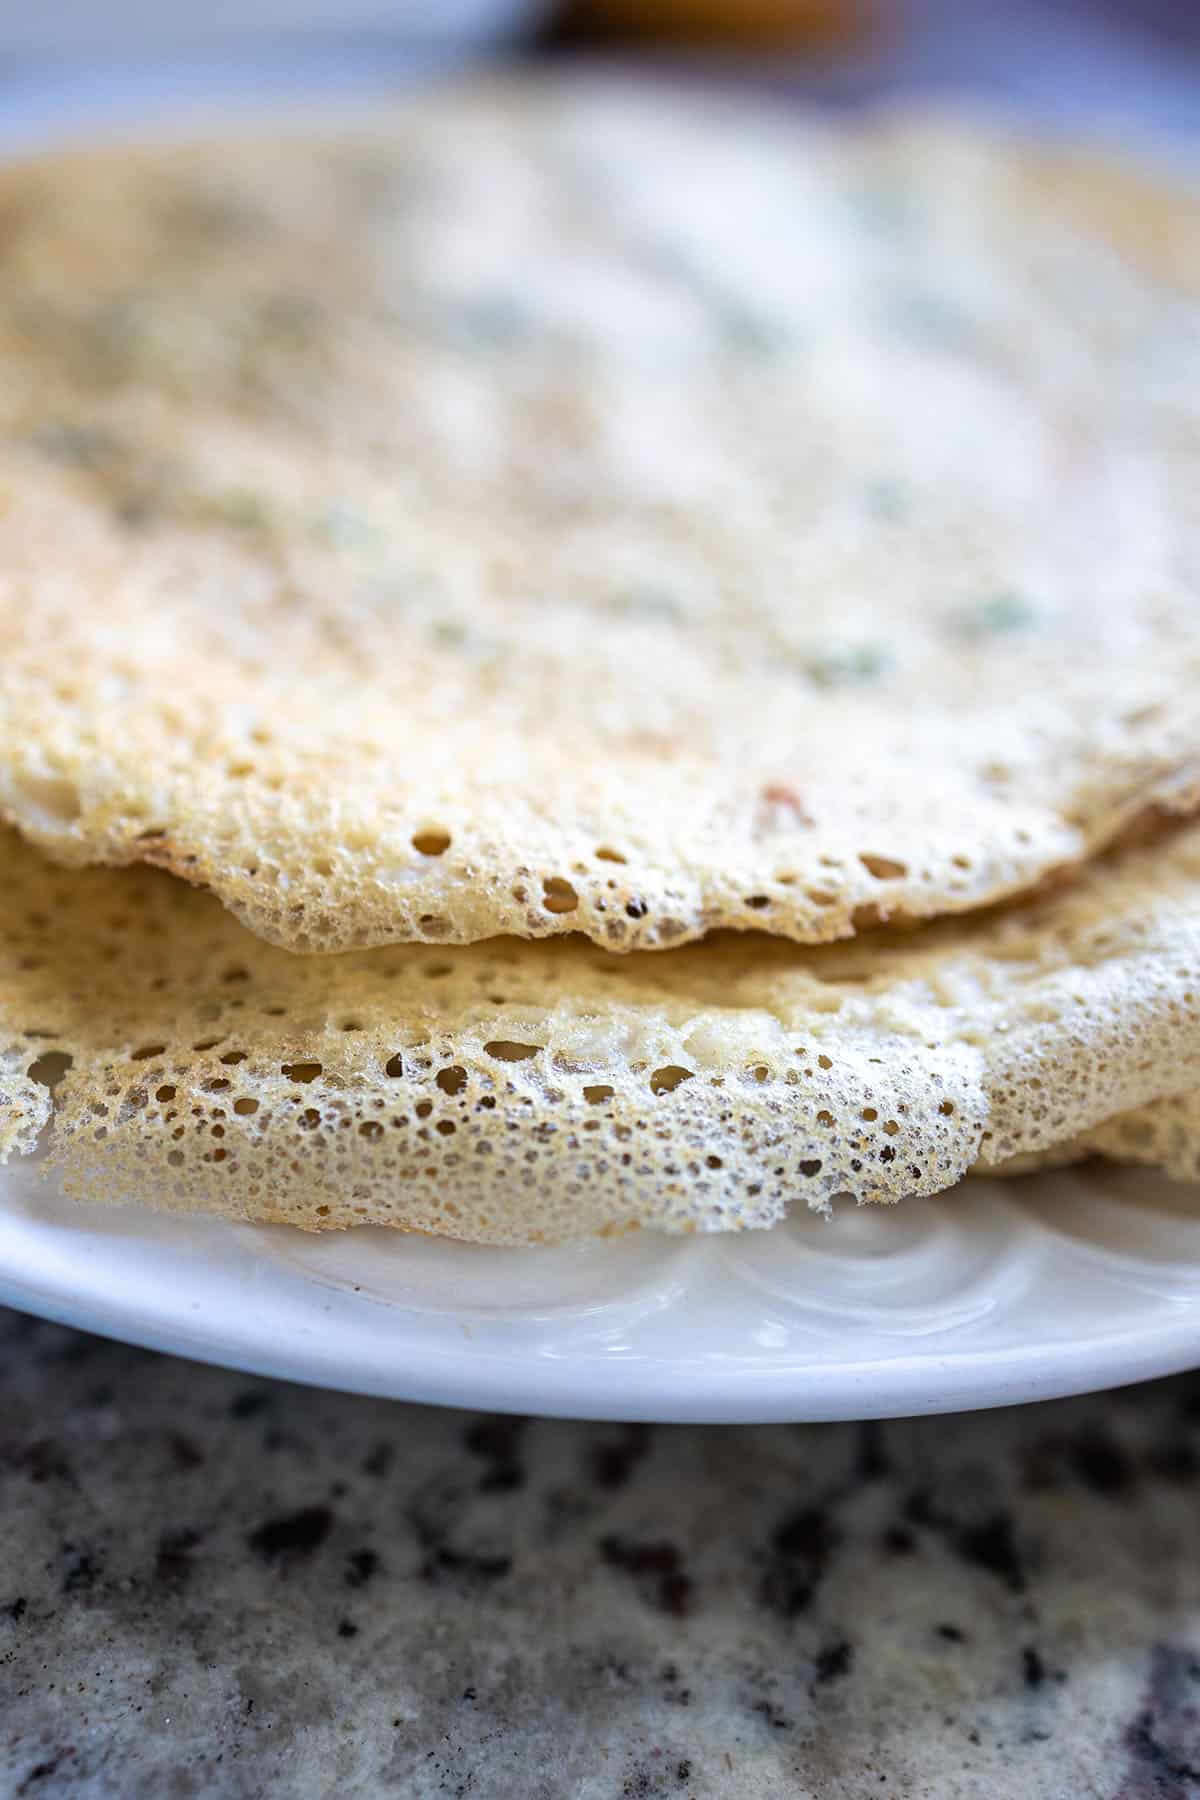
    Stack of thin, golden scallion pancakes on a white plate

    Easy Chinese Scallion Pancakes

    The recipe takes about 30 minutes from start to finish, making it convenient for busy mornings or a quick snack. This family recipe originated from Shandong Province in China. The combination of crispy texture and savory scallions is likely to be a hit with anyone who tries them.
    Prep Time 10 minutes
    Cook Time 20 minutes
    Total Time 30 minutes
    Servings: 15 pancakes
    Course: Breakfast
    Cuisine: Chinese
    Calories: 90

    Ingredients
      

    • 1 cup chopped green onion
    • 3 large eggs
    • 2 tbsp vegetable oil
    • 7 cups water
    • 3 cups all-purpose flour
    • 1 tsp salt

    Equipment

    • whisk
    • 2-1 non-stick frying pan
    • ladle

    Method
     

    1. In a large bowl, combine the green onions, eggs, vegetable oil and water. While you're whisking the liquid mixture together, slowly add the flour little by little. Make sure there is no small balls of flour in the mixture. Add the salt, give it a few good whisks, and set it aside.
    2. Heat a teaspoon of oil in a non-stick skillet over medium heat. Use two skillet if you think you can manage two cooking at the same time. Spoon a ladle-sized amount (1/2 cup) of pancake mixture onto the hot pan, making sure to include some of the green onions in each scoop. 
    3. Swiftly rotate the pan to spread the mixture evenly along the edges. Once the edges begin to brown or curl up, flip the pancake and cook for 1-2 minutes on the other side. Repeat this process until all the mixture is used up.
    4. To serve: squeeze a line of your favourite condiments (ketchup, soy sauce, etc). Roll it up and serve immediately.

    If you enjoyed these pancakes, try our Easy Homemade Soy Milk as the perfect morning pairing. For another quick breakfast, our Mixed Berry Smoothie with Pomegranate and Nopal is a family favourite. And if you love exploring Asian-inspired recipes, our Steam Preserved Vegetables with Zha Choy and Pork is a wonderful next step.

  • Fluffy Naan Bread

    Fluffy Naan Bread

    I still remember the first time I pulled a piece of freshly made naan off a cast iron pan — that slightly charred, impossibly soft bread that fills the kitchen with the most intoxicating yeasty aroma. This recipe has become a weekly staple in our home, and once you taste it warm with a brush of garlic butter, you’ll understand why. It’s also the exact naan we use for our chicken shawarma wraps — and that combination is nothing short of legendary.

    This post may contain affiliate links. If you purchase through these links, I may earn a small commission at no extra cost to you. Thank you for supporting Love & Harvest!

    Fluffy homemade naan bread fresh off the pan

    Fluffy, chewy naan bread made with instant yeast, honey, yogurt, and whole milk — topped with garlic butter. Soft on the inside, lightly charred on the outside. Ready in under 2 hours.

    Culinary Versatility

    One of the most remarkable aspects of naan bread is how many ways you can use it. While it shines as a side dish alongside curries and tandoori meats, it is also one of the best canvases for creativity in the kitchen.

    Some of our favorite ways to use naan:

    • Naan pizza — Top with tomato sauce, cheese, and your favorite protein. Bake until bubbly.
    • Naan chips — Slice into strips, brush with olive oil, season with herbs, bake until crispy.
    • Curry scoop — Use naan as a spoon to pick up rich, saucy curries. Better than rice on some days.
    • Chicken shawarma wraps — Fill with grilled shawarma chicken, romaine, and Caesar dressing. Our favorite meal, once a week, without fail.

    Chicken shawarma wrap recipe: a naan wrap with chicken and lettuce cut in half

    Ingredients

    Key Ingredients

    Instant Yeast

    Instant yeast does not require proofing or activation before adding it to the dough. This saves time and simplifies the process significantly compared to active dry yeast. You get consistent, reliable rise every time.

    • Why it matters: Instant yeast is forgiving and fast — ideal for breads where you want a predictable, fluffy result without babysitting a starter.

    Honey

    A small amount of honey balances the slight tanginess of the yogurt and milk, giving the naan a subtle sweetness. If you don’t have honey on hand, 1 teaspoon of regular sugar works perfectly as a substitute.

    • Why it matters: Without something to balance the savory, the bread tastes flat. Honey also feeds the yeast for a better rise.

    Whole Milk

    Whole milk is what gives naan its characteristic chewy, soft texture. The fat content in whole milk cannot be replicated by low-fat or skim milk — the texture will suffer. Do not substitute here.

    • Why it matters: Fat = tenderness. Low-fat milk produces a tougher, drier crumb. This is a non-negotiable ingredient for authentic naan.

    Plain Yogurt

    Yogurt is the other key ingredient for softness. Its protein content keeps the bread tender as it cooks on the griddle. It also adds a very subtle tang that gives naan its distinct flavor.

    • Why it matters: Without yogurt, naan becomes dense and hard. Yogurt is what separates this bread from a simple flatbread.

    All-Purpose Flour

    All-purpose flour provides the right gluten structure for naan — strong enough to hold shape, but tender enough to stay soft. Whole wheat flour can be substituted if you prefer a slightly heartier, nuttier bread.

    • Why it matters: Flour protein level directly determines the chew. All-purpose strikes the ideal balance for naan’s pillowy texture.

    Stack of fluffy homemade naan with charred spots

    Torn piece of naan showing its soft, airy inside

    This naan pairs perfectly with our chicken shawarma wrap. It’s also a great companion to homemade hummus for a simple, crowd-pleasing appetizer. For a full bread-baking session, try our sourdough bread recipe next.

    Frequently Asked Questions

    Can I make naan bread without a cast iron pan?

    Yes. Any heavy-bottomed pan or griddle on high heat will work. Cast iron gives the best char and heat retention, but a stainless steel or nonstick pan can produce good results. A Lodge cast iron skillet is our recommendation for consistent results.

    Can I freeze naan bread?

    Yes. Let the naan cool completely, then stack with parchment between each piece, place in a zip-lock bag, and freeze for up to 2 months. Reheat in a dry pan for 30–60 seconds per side.

    Why is my naan turning out dense instead of fluffy?

    The most common causes are: yeast that is too old or dead, dough that was not allowed to rise long enough, or flour that was overmeasured. Make sure your yeast is fresh, your kitchen is warm (68–75°F), and you measure flour by spooning it into the cup rather than scooping.

    Can I make garlic butter naan?

    Absolutely — it’s our favorite version. Melt 2 tablespoons of butter with 2 cloves of minced garlic and a pinch of fresh parsley. Brush liberally over the naan immediately after it comes off the pan.

    How long does the dough need to rest?

    The dough should rest for 60–90 minutes or until it has roughly doubled in size. A warm environment speeds this up. Do not rush the rise — it is what creates the fluffy, bubbly interior.

    Can I use active dry yeast instead of instant yeast?

    Yes. Proof the active dry yeast first by dissolving it in warm milk with a pinch of sugar for 10 minutes until foamy, then proceed with the recipe. The rest time may be slightly longer.

    Fluffy Naan Bread

    An amazing naan recipe that is soft and moist. It is made with a griddle on the stovetop with butter garlic. Its slightly charred exterior and soft, chewy interior create a delightful contrast that leaves taste buds craving for more!
    Prep Time 1 hour 30 minutes
    Cook Time 20 minutes
    Total Time 1 hour 50 minutes
    Servings: 20 naam breads
    Course: Bread
    Cuisine: Indian
    Calories: 160

    Ingredients
      

    Naam Bread
    • ¼ cup warm water
    • 1 tbsp honey
    • ¾ tsp instant yeast
    • ¾ cup warm whole milk
    • 1 cup plain yogurt
    • 4 cups all-purpose flour
    • 1½ tsp baking powder
    • 1 tsp baking soda
    • ¼ tsp sea salt
    Butter Garlic
    • 8 tbsp butter melted
    • 2-4 garlic clove grated
    • ¾ cup chopped mix fresh herbs (cilantro, oregano, thyme, rosemary, chive, parsley, dill)
    • ¼ tsp sea salt

    Equipment

    • stand mixer

    Method
     

    1. In a large heat proof bowl, mix together the warm water, honey, and instant yeast. Let it sit for 5-10 minutes until the liquid is slightly frothy on the surface.
    2. In the stand mixer with the dough hook attachment, combine warm whole milk, plain yogurt, flour, baking powder, baking soda, and salt. While the machine is mixing on medium speed, add the bowl of instant yeast liquid. knead together for 3 minutes.
    3. Once the dough comes together (it will look sticky), cover with a plastic wrap and let it sit for 1 hour or until it double in size.
    4. Meanwhile, make the garlic butter. Melt the butter in the microwave for about 20-30 seconds. Stir in the mix of fresh herbs and salt. Set it on the side.
    5. Preheat the griddle over medium-high heat. Deflate the dough and knead it briefly. Pinch off a golf ball-sized piece of dough and roll it out into a thin round using a rolling pin. Lightly spread garlic butter over the dough. Carefully place the dough on the griddle, buttered side down. Spread more garlic butter over the top while the first side cooks, about 2 minutes. Flip and cook for another 2 minutes. Repeat with the remaining dough.
  • Sourdough English Muffins

    Sourdough English Muffins

    There is something deeply satisfying about pulling a batch of homemade sourdough English muffins off a cast iron skillet — golden, nook-filled discs that toast up perfectly every single time. This recipe uses your active sourdough starter to deliver a subtle tang and incredible texture you simply cannot get from a store-bought bag.

    This post may contain affiliate links. If you purchase through these links, I may earn a small commission at no extra cost to you. Thank you for supporting Love & Harvest!

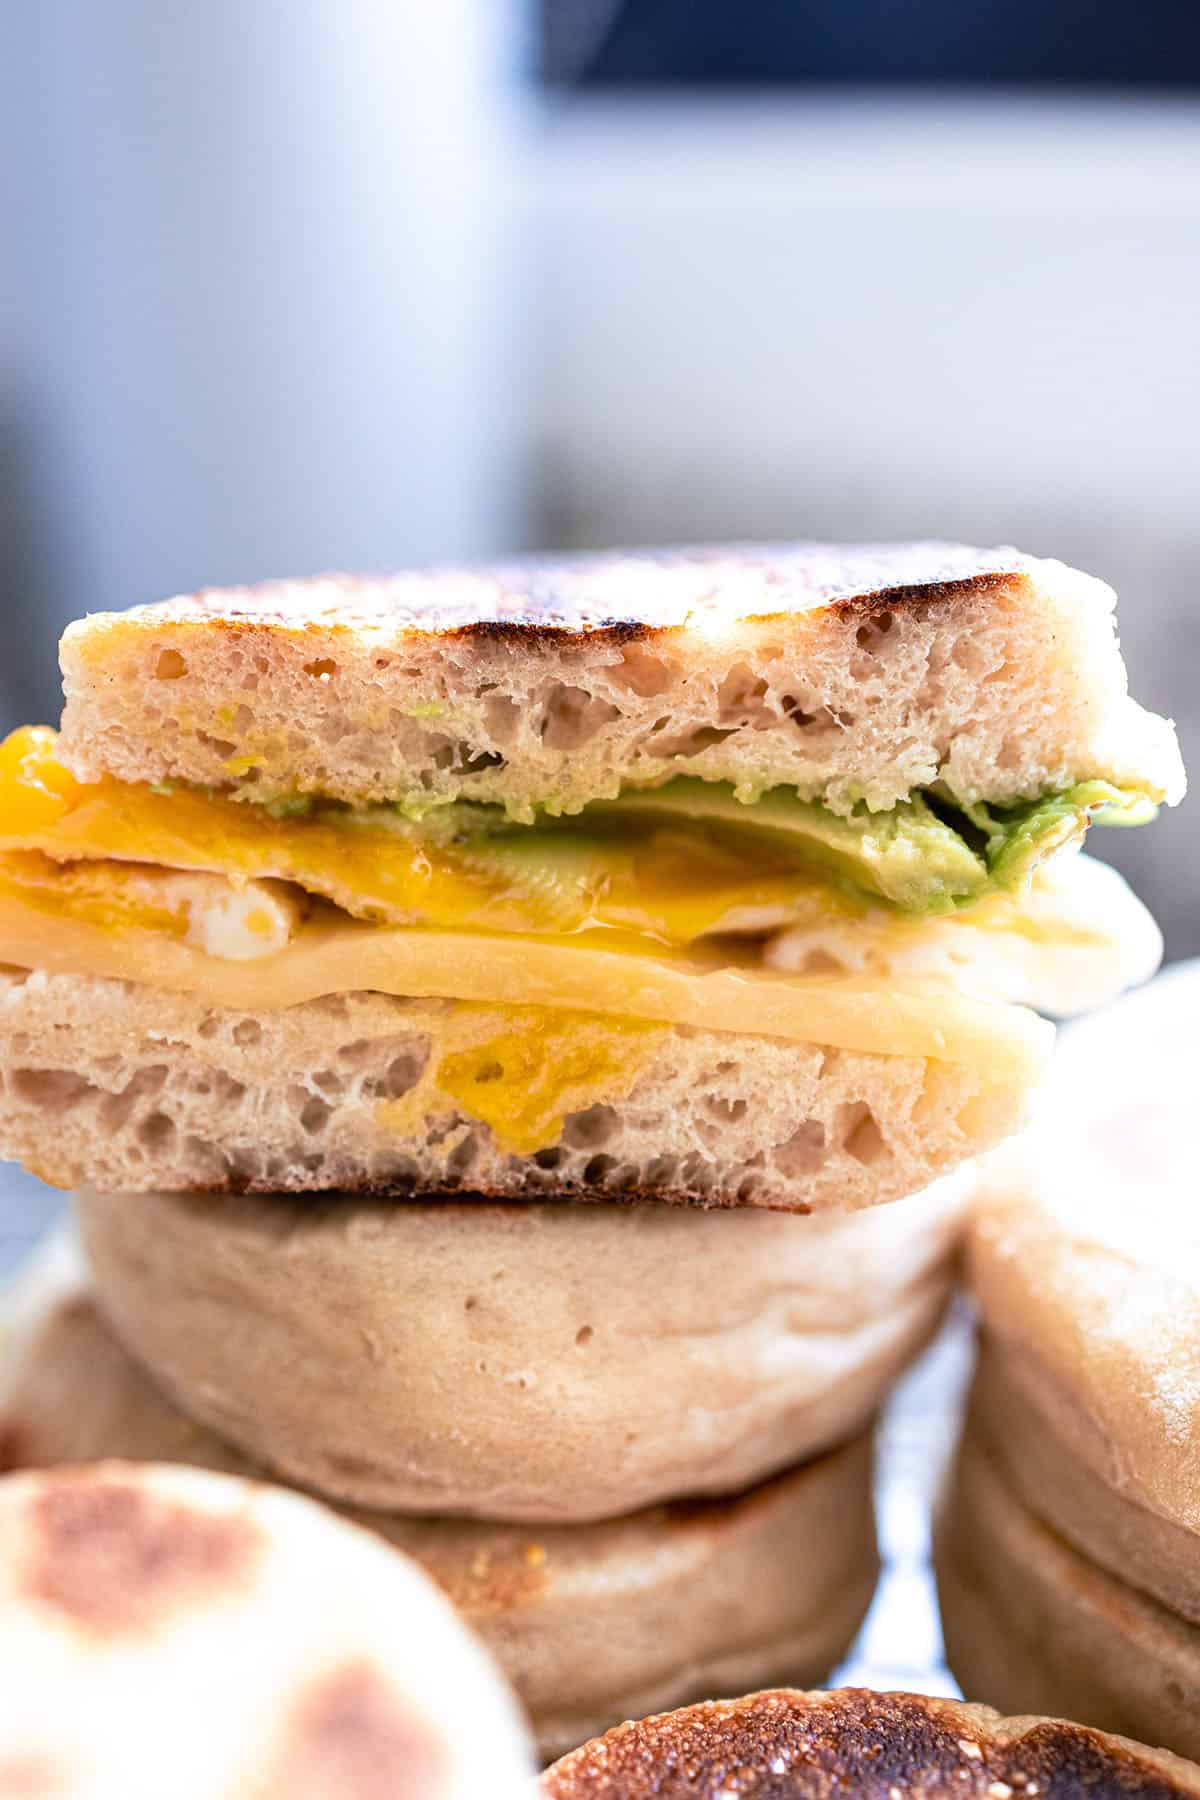
    Sourdough English muffin sandwiches with egg, cheese and avocado

    Why Try This Recipe?

    Beyond the convenience of store-bought options, crafting these delectable delights at home adds artisanal flair to your mornings. Here is why this recipe is worth your time.

    • Flavorful Complexity: Sourdough fermentation imparts a unique, subtle tang that transforms each bite into something special.
    • Control Over Ingredients: Choose organic flour, local honey, and wholesome components — no mystery additives.
    • No Preservatives or Additives: Unlike commercially available muffins, homemade versions are clean and natural.

    And above all, sharing these muffins with people who can taste your dedication and love of food is the real reward.

    Golden sourdough English muffins cooling on a wire rack

    What You’ll Need

    Ingredients

    Sourdough Starter

    If you already have an active sourdough starter, you are all set. If not, or if you are not sure what one is, check out the full guide here: How to Make Sourdough Starter.

    • Why it matters: The starter is the leavening agent and the source of that signature tangy flavor — no commercial yeast needed.

    Flour

    Standard all-purpose flour works perfectly here. For a cleaner, more flavorful result, weigh your flour with a kitchen scale rather than scooping by volume.

    • Why it matters: Measuring by weight ensures consistent dough hydration and a reliable rise every time.

    Milk

    Full fat whole milk gives the muffins a fluffier, richer texture. Low-fat alternatives work but will produce a slightly less tender crumb.

    • Why it matters: The fat in whole milk tenderizes the dough and contributes to a soft, pillowy interior.

    Honey

    Honey serves a dual purpose — it adds a balanced sweetness and feeds the beneficial bacteria in the sourdough starter, helping the dough rise optimally.

    • Why it matters: Unlike refined sugar, honey also adds moisture and depth of flavor to the finished muffin.

    Cornmeal

    Cornmeal dusted on the pan and the baking sheet creates a classic, slightly crunchy coating on the outside of every muffin — the hallmark of a proper English muffin.

    • Why it matters: It prevents sticking and delivers that iconic texture contrast between the crisp exterior and pillowy interior.

    Equipment

    Electric Stand Mixer

    A KitchenAid stand mixer with a dough hook makes kneading effortless and consistent. These machines last for decades — well worth the investment.

    Cast Iron Skillet

    Cast iron distributes heat evenly and retains it well, which is critical for getting that golden crust without scorching. I love my Lodge 5-quart Dutch oven and cast iron skillets for all bread work — pre-seasoned, affordable, and virtually indestructible.

    English muffin breakfast sandwich stacked on top of whole muffins

    This is a flexible recipe — mix the dough in the morning and cook your muffins by evening, or ferment overnight for an even deeper flavor. Either way, you end up with a batch of beautifully nook-filled muffins ready for toasting. Pair them with the full sourdough bread guide or try them alongside rosemary beer bread for a full bread-baking weekend.

    Stack of sourdough English muffins topped with an egg, cheese and avocado sandwich

    Frequently Asked Questions

    Can I make sourdough English muffins without a stand mixer?

    Yes. You can knead the dough by hand for about 8–10 minutes until it becomes smooth and elastic. It takes more effort but works perfectly well.

    How long does the dough need to ferment?

    After adding all the flour, the dough needs 4–6 hours at room temperature until it doubles in size. For a more developed flavor, you can refrigerate the dough after the first fermentation and cook the muffins the next morning.

    What if my sourdough starter is not active enough?

    Feed your starter 8–12 hours before you begin the recipe. It should be bubbly, have roughly doubled in size, and pass the float test — a small spoonful dropped in water should float.

    Can I freeze sourdough English muffins?

    Absolutely. Let them cool completely, then freeze in a zip-lock bag for up to 3 months. Thaw at room temperature or toast directly from frozen.

    Why do English muffins have nooks and crannies?

    The nooks come from the open crumb structure created by fermentation and the way the muffins are cooked on a griddle rather than baked in an oven. Never slice them with a knife — always use a fork to split them so you preserve those pockets.

    Can I use discard sourdough starter instead of active starter?

    For best results use an active, fed starter. Discard will work but the rise will be slower and the muffins may be denser. Allow extra fermentation time if using discard.

    Golden sourdough English muffins cooling on a wire rack

    Sourdough English Muffins

    Easy sourdough English muffins cooked on a griddle! Ferment the dough in the morning and enjoy fresh English muffins in the evening. They are crunchy on the outside and super soft and moist on the inside.
    Prep Time 8 hours
    Cook Time 15 minutes
    Total Time 8 hours 15 minutes
    Servings: 12
    Course: Breakfast
    Calories: 195

    Ingredients
      

    • 1 cup active sourdough starter
    • ¾ cup warm water
    • 1 cup warm whole milk
    • 5 cups flour split 2 cups first then 3 cups
    • ¼ cup honey
    • 1 tbsp extra virgin olive oil
    • 1 tsp sea salt
    • cornmeal

    Equipment

    • electric stand mixer
    • round steel pastry cutter
    • Rolling Pin
    • cast iron skillet

    Method
     

    1. Ensure your sourdough starter is active and bubbly. If it has been in the refrigerator, take it out a day before and feed it with equal parts flour and water until it becomes vigorous.
    2. In the electric stand mixer with the dough hook attached, combine the active sourdough starter, warm water, and warm milk until it is well combined. Wait 5 minutes.
    3. Now add TWO CUPS of all-purpose flour, and mix until a sticky dough comes together. Cover and leave for 30 minutes. Mix the ingredients until they come together into a sticky dough.
    4. Now add in the remaining 3 cups of all-purpose flour and honey. Knead the dough for about 5 minutes and a smooth elastic dough forms. Drizzle the olive oil on top and cover the top with plastic. Rest for 4-6 hours until it double in size.
    5. Once the dough has risen, gently deflate it and turn it out onto a floured surface. Roll the dough to about 1/2 inch thickness. Using a round cutter or a glass, cut out individual muffins. Place them on a baking sheet dusted with cornmeal to prevent sticking.
    6. Cover the muffins with a kitchen towel and let them rise for another 1-2 hours. They should puff up but not necessarily double in size.
    7. Preheat a large skillet over medium-low heat. Sprinkle some cornmeal on the hot surface. Carefully transfer the muffins onto the skillet and cook for 6-8 minutes on each side or until they are golden brown and cooked through.
    8. Once cooked, transfer the English muffins to a wire rack to cool. They can be split with a fork or a serrated knife.

    Notes

    COOKING THE NEXT MORNING:
    You can absolutely prepare the dough in the evening and refrigerate it overnight for baking the next morning. This overnight method allows for a longer, slower fermentation, enhancing the flavor and texture of the sourdough English muffins. The adjusted timeline is after the first fermentation, deflate the dough and put it in a container (with space for it to rise), and place it in the fridge. In the morning, take the dough out of the refrigerator. It should have risen overnight. Gently deflate it and roll it out to about 1/2 inch thickness on a floured surface. Cut out individual muffins and place them on a cornmeal-dusted baking sheet. Cover the muffins with a kitchen towel and let it rise at room temperature for 1-2 hours or until they puff up but not necessarily double in size. Now follow the same cooking instructions. 
  • How to Make Sourdough Bread

    How to Make Sourdough Bread

    Once you bake your first real sourdough loaf — crackling crust, open crumb, deep tang — you will never look at store-bought bread the same way. This guide breaks down the entire process simply and clearly: how to build a starter from scratch, how to shape and ferment the dough, and how to bake a loaf that rivals what you would find in a serious bakery. Our family makes sourdough at least once a week, and this is the exact recipe we use.

    This post may contain affiliate links. If you purchase through these links, I may earn a small commission at no extra cost to you. Thank you for supporting Love & Harvest!

    Sourdough loaf broken in half next to a linen bread bag

    Why Sourdough?

    Sourdough bread is all about flavor and that chewy, tangy crumb.

    Two round loaves of whole grain sourdough bread on a cloth

    Step 1: Build Your Sourdough Starter

    Your starter is the heart of this recipe. If you want a deeper guide, see the full post: How to Make Sourdough Starter. Here is the quick version.

    How to Make Sourdough Starter

    Ingredients: Whole wheat or all-purpose flour, filtered or dechlorinated water

    Day 1: Mix 1/2 cup flour with 1/2 cup water. Cover loosely and leave at room temperature for 24 hours.

    Day 2: Discard half. Add 1/2 cup flour and 1/2 cup water. Mix. Cover and rest 24 hours.

    Days 3–7: Repeat daily — discard half, add 1/2 cup flour, 1/2 cup water. Watch for bubbles and rising.

    Day 7 (or when active): The starter should be bubbly, smell tangy, and have roughly doubled in size. It is ready to bake with.

    A lively starter is what makes sourdough rise without commercial yeast. It is also endlessly useful — cinnamon rolls, pizza dough, croissants, and much more all benefit from a well-maintained starter.

    A hand holding two halves of sourdough bread showing the crumb

    Ingredients

    Key Ingredients

    Flour

    All-purpose or bread flour both work. For the best flavor, we recommend organic flour. Use a digital kitchen scale to weigh your flour — precision is one of the biggest contributors to consistent results in sourdough baking.

    • Why it matters: Exact flour weight ensures correct hydration, which directly affects the crumb structure and crust.

    Active Sourdough Starter

    Your starter must be fed and active before you begin. Feed it 8–12 hours before mixing the dough. It should be bubbly and at or near its peak rise.

    • Why it matters: An under-active starter results in a dense, gummy loaf that will not rise properly. Timing the starter correctly is the single most important variable in this recipe.

    Sea Salt

    Salt is added after the autolyse rest, not at the start. It controls fermentation rate, strengthens gluten, and adds essential mineral complexity to the crumb.

    • Why it matters: Adding salt too early inhibits the starter. Timing it after the initial rest gives the dough structure without slowing the initial hydration phase.

    Two crusty round sourdough loaves on parchment paper

    6 Steps to Make Sourdough Bread

    1. Mix the Dough

    Combine active sourdough starter and lukewarm water in a large bowl. Gradually add flour, stirring to form a shaggy dough. Rest 30 minutes. This autolyse step improves gluten development before any kneading.

    2. Add Salt and Knead

    Sprinkle salt over the rested dough and knead for about 5 minutes until smoother. No need to overwork it — just incorporate the salt fully.

    3. Bulk Fermentation

    Cover with a damp cloth and rest at room temperature for 4–6 hours. Perform a series of gentle stretch-and-fold sets every 30 minutes during the first 2 hours. This builds strength and structure without aggressive kneading.

    4. Shape and Refrigerate Overnight

    Turn the dough onto a lightly floured surface. Stretch all sides outward and fold them to the center to build tension, then shape into a smooth round ball. Place in a bowl lined with a floured cloth, seam-side up. A banneton proofing basket is ideal here for maintaining shape and developing the classic spiral pattern. Refrigerate for 12–24 hours — the cold slow fermentation deepens flavor significantly.

    5. Bake in a Dutch Oven

    Preheat your oven to 450°F (230°C) with a Lodge 5-quart Dutch oven inside. Once preheated, carefully transfer the cold dough to the hot Dutch oven. Score the top with a bread lame. Cover and bake 20 minutes. Remove the lid and bake another 20 minutes until the crust is deep golden brown.

    6. Cool Before Slicing

    This step is non-negotiable. Let the bread cool on a wire rack for at least 1 hour before slicing. Cutting too early releases steam and collapses the crumb structure — patience here protects all the work you put in.

    Half a loaf of sourdough bread resting in a clay pot

    Other Sourdough Variations to Try

    • Honey Cranberry sourdough bread
    • Chocolate Coffee sourdough bread
    • 4 Seeds — sunflower, flaxseed, sesame, and pumpkin seed
    • Rye flour sourdough bread
    • Purple yam sourdough bread

    Once you have sourdough mastered, try branching out to homemade focaccia bread or sourdough English muffins — both use the same starter and build naturally from these same skills.

    Tray of sourdough cinnamon rolls topped with rainbow sprinkles
    Table of assorted sourdough breads, buns and cookies
    Dark sourdough loaf cut open to show the crumb

    Frequently Asked Questions

    Why does sourdough take so long to make?

    The long fermentation time — 4–6 hours bulk fermentation plus 12–24 hours of cold proofing — is what creates the flavor and texture that make sourdough worth the effort. The wild yeast and bacteria need time to do their work. You can compress the timeline, but the flavor and texture will be less developed.

    What flour is best for sourdough bread?

    Bread flour or high-quality unbleached all-purpose flour produce excellent results. Bread flour has a higher protein content which supports stronger gluten development. For extra nutrition and complexity, you can replace up to 20% of the flour with whole wheat or rye flour.

    Why is my sourdough not rising?

    The most common causes are: starter that is not active enough (feed it and wait for peak activity), dough that is too cold (ferment in a warmer spot — 75–78°F is ideal), or insufficient gluten development (perform more stretch-and-fold sets during bulk fermentation).

    Do I need a Dutch oven to bake sourdough?

    A Dutch oven is strongly recommended. It traps steam in the first phase of baking, which allows the loaf to expand fully before the crust sets. Without it you can use a baking stone with a steam pan underneath, but results will be less consistent.

    How do I know when sourdough bread is done baking?

    A well-baked sourdough loaf has a deep golden-brown crust, sounds hollow when tapped on the bottom, and reads 200–210°F (93–99°C) internally. Visual cues and the tap test are usually sufficient once you have made it a few times.

    Can I freeze sourdough bread?

    Yes. Let it cool completely, slice it, and freeze in a tightly sealed bag for up to 3 months. Toast directly from frozen or thaw at room temperature. Pre-slicing before freezing makes it much more convenient to use.

    A hand holding two halves of sourdough bread showing the crumb

    How to Make Sourdough Bread

    We have assembled an easy-to-follow guide on how to make a glorious loaf of tasty sourdough bread at the comfort of your own home. 
    Prep Time 12 hours
    Cook Time 40 minutes
    Total Time 12 hours 40 minutes
    Course: Bread
    Calories: 170

    Ingredients
      

    • 475 g all-purpose flour or bread flour
    • 300 g filtered water
    • 30 g active sourdough starter
    • 1 tsp sea salt

    Equipment

    • kitchen scale
    • large non-reactive bowl
    • large kitchen clothe
    • parchment paper
    • sharp blade

    Method
     

    NIGHT BEFORE
    1. 9PM: Take your sourdough starter from the fridge right before you sleep, and place it on your counter overnight.
    DOUGH DAY
    1. 10 AM: Open your sourdough starter and put half of it into a clean jar. Add ¼ cup of water, stir the mixture until well combined. Slowly incorporate ½ cup of flour, stirring until everything is well combined, and no traces of flour remain in the mixture. Cover with a lid and let it sit until it has doubled in size.
      *I like to place an elastic band where the starter is initially. When it has doubled in size, I will know because it has surpassed the elastic band on the jar.*
      *also remember to feed the other half of the sourdough starter with the same measurements. Once it has doubled in size, place the lid back on, and place it back in the fridge for next time use*
    2. 12PM: While you wait for the sourdough start to doubled in size, in a large bowl mix together the flour and water together. Roughly combine the dough until a shaggy dough develops. Cover it with a kitchen towel or plastic wrap and wait for 30 minutes.
    3. 12:30PM: Remove the towel or plastic wrap and add in the 30g sourdough starter that has doubled in size. Mix well until it is well combined. Leave it for 1 hour and cover.
    4. 1:30PM: Stretch and fold the dough, cover and let it rest at room temperature for 1 hour.
    5. 2:30 PM: Stretch and fold the dough, cover and let it rest at room temperature for 30 minutes.
    6. 3:30 PM: Stretch and fold the dough, cover and let it rest at room temperature for 30 minutes.
    7. 4:00 PM: Perform a fourth set of stretches and folds. In the bowl where you plan to proof your bread, cover it with a large kitchen towel and dust it with flour. Stretch the dough and pinch a portion to form a stretched-out ball. Place the dough with the pinched part facing up. Allow the ends of the bowl to cover the dough and let it rest in the fridge overnight.
    BAKING DAY
    1. 6AM: Take the dough out of the fridge, place your dutch oven with the lid on top into the oven and preheat at 450°F (232°C) for 30 minutes.
    2. Open the kitchen towel and gently place a parchment paper on top of the dough. Carefully flip the bowl over, and remove the bowl and kitchen towel. Using a sharp blade, make a deep score (also known as a cut) in the middle of the bread.
    3. Using oven gloves, carefully remove the Dutch oven and lift the lid. Holding onto the ends of the parchment paper, gently place the bread inside the Dutch oven and replace the lid. Bake the bread for 35 minutes.
    4. Uncover the pot and bake for another 25 minutes.
    5. Place the bread on a cooling rack. Slice when the bread is completely cooled.
  • How to Make Sourdough Starter

    How to Make Sourdough Starter

    You only need two ingredients and seven days to build a living, bubbling sourdough starter from scratch — and once you have it, you have a leavening agent that can last for decades. This guide walks you through every day of the process, explains why each step matters, and gives you the troubleshooting knowledge to revive your starter no matter what life throws at it.

    This post may contain affiliate links. If you purchase through these links, I may earn a small commission at no extra cost to you. Thank you for supporting Love & Harvest!

    how to make sourdough starter

    What Is a Sourdough Starter?

    A sourdough starter is a mixture of flour and water that captures and cultivates wild yeast and lactic acid bacteria from your environment. This naturally fermented mixture serves as the leavening agent in sourdough bread, giving it the distinct tangy flavor, open crumb, and chewy crust that commercial yeast simply cannot replicate. The starter is kept alive by regular feedings of fresh flour and water, allowing the microbial community to thrive indefinitely.

    Why Make Your Own Sourdough Starter?

    There are real, practical reasons to build your own starter rather than buying commercial yeast:

    • No commercial yeast needed ever again — once established, your starter replaces packaged yeast for all bread, pancakes, waffles, and more.
    • Better flavor and texture — the lactic acid bacteria produce organic acids that create sourdough’s signature tang and help preserve the bread naturally.
    • Endless versatility — use the same starter (or its discard) for sourdough English muffins, focaccia, pizza crust, pancakes, and waffles.
    • Self-sufficient and zero-waste — discard can be turned into crackers, crepes, and flatbreads instead of being thrown away.

    active sourdough starter bubbles

    Ingredients for a Sourdough Starter

    Ingredients

    Flour

    • Why it matters: Whole-wheat or rye flour on Day 1 gives the starter a head start — the bran contains more wild yeast and bacteria than white flour. Once active, you can switch to all-purpose for daily maintenance. For the best results, use a kitchen scale (ASIN B079D9B82W) to weigh rather than measure by volume — precision matters more than it does in regular baking.

    Water

    • Why it matters: Chlorine and chloramine in tap water can inhibit or kill the wild yeast you are trying to culture. Use filtered water, or let tap water sit uncovered overnight to let the chlorine dissipate. Room-temperature water (around 70–75°F / 21–24°C) works best — cold water slows fermentation and hot water above 100°F can kill beneficial bacteria.

    sourdough starter day by day progress

    What Other Baked Goods Can You Make with a Sourdough Starter?

    Once your starter is active, you can use it — or its discard — in a wide range of recipes. Here are some favorites:

    • Sourdough Bread — the classic. Use our guide at how-to-make-sourdough-bread.
    • Sourdough English Muffins — perfect nooks and crannies. See our sourdough English muffins recipe.
    • Focaccia — crispy outside, airy inside. Try our easy homemade focaccia bread.
    • Pancakes and waffles — tangy, fluffy, and easy to make with discard.
    • Pizza crust, crackers, biscuits, cinnamon rolls — once you have a starter, the list is almost endless.

    How to Make Your Own Sourdough Starter

    With just two ingredients and patience, you can have an active starter within 5–7 days.

    How to Maintain a Sourdough Starter

    Once established, keeping your starter healthy is straightforward. Here is the routine:

    Equipment:

    Feeding ratios: A common starting ratio is 1:1:1 (starter : flour : water by weight). As your starter matures and you want to control its rise timing, you can move to 1:2:2 or 1:5:5 for a slower rise.

    Frequency: At room temperature, feed every 12–24 hours. If you bake infrequently, store in the refrigerator and feed once a week.

    Signs of a Healthy Starter

    • Bubbles throughout the jar, not just on top.
    • Doubles in size within 4–8 hours of feeding.
    • Pleasant, slightly tangy or yeasty aroma (like beer or yogurt).
    • Passes the float test: a small spoonful dropped in water floats when ready to bake.

    sourdough starter ready to bake

    Frequently Asked Questions

    What if I do not bake frequently?

    Store your starter in the refrigerator. Feed it once before refrigerating, then pull it out and feed it at least once a week to keep it alive. When you are ready to bake, take it out 24 hours in advance, let it come to room temperature, and feed it at least once before using it in your recipe.

    There is a grey or dark liquid on top of my starter — is it ruined?

    No. That liquid is called “hooch,” a byproduct of fermentation that forms when the starter is hungry. Simply pour it off (or stir it back in for a more sour flavor) and feed the starter as normal. However, if your starter turns pink or orange, that signals contamination — discard it and start fresh.

    What should my starter smell like?

    A healthy starter smells pleasantly tangy, like yogurt or mild vinegar. A very sharp acetone smell means it needs more frequent feeding. If it smells rotten or putrid (not just sour), check for contamination — pink or fuzzy growth is a sign to start over.

    My starter is not bubbling — is it still alive?

    Check whether it rises (not just bubbles) in the hours after feeding. Activity varies with room temperature — colder rooms slow everything down. Try moving it somewhere warmer (top of the refrigerator, inside the oven with just the light on). If you have not fed it in weeks, it will take 2–3 days of daily feedings to bounce back.

    Can I freeze my sourdough starter?

    Yes. Freeze a portion as a backup by spreading a thin layer on parchment paper, letting it dry completely, then storing the flakes in a sealed bag. To revive, rehydrate the flakes in water, add flour, and feed daily until active again — usually 3–5 days.

    Why is my starter not rising after 7 days?

    The most common culprits are: chlorinated tap water, a room that is too cold (below 65°F / 18°C), too-infrequent feedings, or using flour that lacks enough wild yeast. Try switching to whole-wheat flour for the next few feedings, use filtered water, and move to a warmer spot. If you live in a region where wild yeast is sparse, a small amount of commercial dried sourdough starter can jumpstart the culture.

    sourdough starter in jar

    How to Make Sourdough Starter

    We have assembled an easy-to-follow guide on how to make a glorious loaf of tasty sourdough bread at the comfort of your own home.
    Print Recipe
    Pin Recipe
    Prep Time:5 minutes
    7 days

    Equipment

    • glass jar

    Ingredients

    • ½ cup whole-wheat flour
    • non-chlorinated water
    • all-purpose flour for maintaining the starter

    Instructions

    • Day 1: combine ½ cup of whole-wheat flour and ¼ cup water in the jar. Stir thoroughly and cover with a towel and rubber band. Let it sit for 24 hours at room temperature. Keep it in an area that is somewhat warm. Very cool rooms tend to slow the action of a starter.
    • Day 2: The first feeding after 24 hours. Add ½ cup of all-purpose flour and ¼ cup of water. Give it a good stir, and wait for 24 hours.
    • Day 3: After 24 hours, check for bubbles. Bubbles are a sign something is going right. Discard half of the starter, add ½ cup of all-purpose flour and ¼ cup of water, and stir thoroughly. Let it sit for 24 hours.
    • Day 4: Again discard half of the starter, and feed with ½ cup of all-purpose flour and ¼ cup of water, stirring thoroughly. Let it sit for 24 hours.
    • Day 5 onward: Continue this routine until the starter is consistently bubbling and doubling in size within 8 hours of each feeding. At this point, you can store the starter in the refrigerator and feed it about once a week. When you plan to use the starter, pull it out of the refrigerator 24 hours in advance to feed it and allow it to warm up and grow.

    Notes

    If you have repeatedly attempted sourdough starters with dismal results, it could be that the wild yeast strains in your area are not well suited to sourdough. You can easily overcome this by purchasing a dried commercial starter. Cared for properly, your starter should last for many years. If you have other ferments or cultures in your kitchen, keep your starter at least several feet away from them to prevent cross-contamination.

  • Super Moist Cherry Loaf

    Super Moist Cherry Loaf

    There is one loaf you absolutely must bake before summer ends — a super moist cherry loaf bursting with juicy cherries, warm almond extract, and a golden crumb that somehow stays tender for days. This is the loaf that makes you wish summer never ended.

    This post may contain affiliate links. If you purchase through these links, I may earn a small commission at no extra cost to you. Thank you for supporting Love & Harvest!

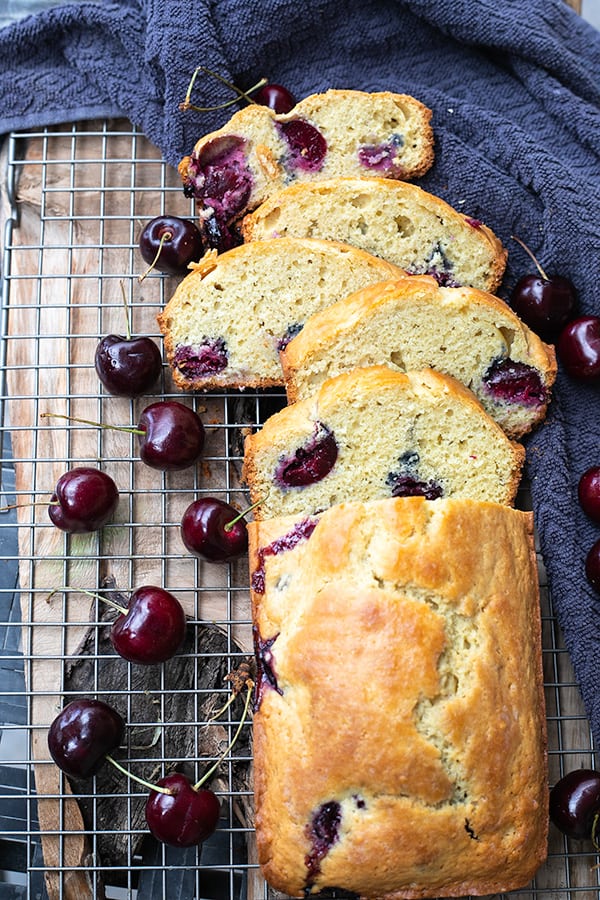
    Slices of super moist cherry loaf with fresh cherries on a wire rack

    This post is all about the best cherry loaf — a moist, crumbly recipe loaded with juicy cherries and a hint of almond. Perfect with your morning coffee or afternoon tea.

    It’s that time of the year when cherries take over the market stands — deep red, plump, and impossibly sweet. Before you let them go to waste, bake them into this simple loaf that celebrates the very best of late summer.

    The recipe comes together in one bowl, requires no stand mixer, and is forgiving enough for beginner bakers. Kids love helping fold in the cherries. And the smell while it bakes? Pure summer.

    Why You Will Love This Recipe

    • Perfect late-summer recipe — use up your cherry harvest before the season ends
    • Works with sweet or sour cherries — both varieties bake beautifully in this loaf
    • One-bowl, no mixer needed — simple enough for kids to help, done in under an hour
    • Butter-free swap — replace butter with apple sauce 1:1
    • Best morning loaf with coffee — pairs perfectly with a hot cup or a pat of butter on top

    Golden cherry loaf baked in a white loaf pan

    Ingredients

    Cherries

    Sweet cherries are best for this recipe. The sweetness really pulls through with the almond extract. Look for cherries that are fully ripe — the skin is soft and plump and easy to split in half. Fresh summer cherries are ideal, but if you can only find frozen, thaw and pat them dry before folding in.

    • Why they matter: Cherries are the star — they provide pockets of juicy fruit in every slice and keep the loaf moist even after a day or two.

    Almond Extract

    Almond and cherry are the best partners in the baking world. You can use coloured or clear almond extract — either works. Half a teaspoon is enough to perfume the entire loaf without overpowering it.

    • Why it matters: Almond extract amplifies the cherry flavour in a way vanilla simply cannot. Do not skip it.

    Eggs

    Two large eggs at room temperature give the loaf structure and lift. Cold eggs can cause the butter to seize, so take them out 20 minutes before you start.

    • Why they matter: Eggs bind the batter and are the key to that moist, tender crumb.

    Sugar

    Half a cup of natural cane sugar is just right. If you want to cut sweetness, a quarter cup works fine — the cherries carry plenty of natural sweetness on their own.

    • Why it matters: Sugar tenderises the crumb and helps the top brown to a golden finish.

    Loaf Pan

    A standard 9×5 loaf pan is all you need. Prep it with baking spray so the loaf releases cleanly after cooling.

    • Why it matters: A well-prepared pan means no sticking and a clean, even crust all the way around.

    Cherry loaf cooling on a wire rack surrounded by fresh cherries

    How to Make It with Apple Sauce Instead of Butter

    Replace butter with apple sauce. It is tried and tested, and it’s a delicious substitute. The loaf comes out even more spongy and is just as flavourful — maybe even better. Use a 1:1 swap.

    Cherry loaf batter studded with cherries in a white loaf pan

    What Goes Well with This Cherry Loaf?

    • A hot black coffee
    • Butter, lightly toasted
    • Nutella spread
    • Peach jam or blackberry jam
    • Iced peach tea

    Baking Time Tips

    Bake at 350°F for 55–60 minutes. For the last 5 minutes, watch closely. Once the top is slightly golden and the loaf has pulled away from the sides, take it out. The centre should still be slightly moist — that is what keeps it juicy. Let it cool in the pan for 5 minutes, then transfer to a rack.

    Slice of cherry loaf showing whole cherries in the crumb

    More Cherry and Baking Recipes

    If you loved this loaf, try these next: Cherry Syrup Recipe for topping pancakes and ice cream, and Cherry Clafoutis Pie for a French-inspired dessert using the same summer cherries. For a chocolate twist, the Dairy-Free Chocolate Cake is a crowd pleaser any time of year.

    Frequently Asked Questions

    Can I use frozen cherries instead of fresh?

    Yes. Thaw the cherries completely and pat them dry with paper towels before folding them into the batter. Excess moisture from frozen cherries can make the loaf gummy.

    How do I keep the cherries from sinking to the bottom?

    Toss the pitted and halved cherries in a tablespoon of flour before folding them into the batter. The light coating helps them stay suspended throughout the loaf.

    Can I replace the butter entirely?

    Yes — apple sauce is a great 1:1 substitute. The loaf comes out slightly more spongy but equally moist and delicious with fewer calories.

    How should I store this cherry loaf?

    Wrap tightly in plastic wrap or store in an airtight container at room temperature for up to 3 days. For longer storage, slice and freeze individual pieces — they thaw in 15 minutes.

    What type of cherries work best?

    Sweet cherries like Bing or Rainier are ideal because their sweetness pairs beautifully with almond extract. Sour cherries also work — just add an extra tablespoon of sugar to balance them.

    Can I add other mix-ins to this loaf?

    Absolutely. Chocolate chips, slivered almonds, or lemon zest all work well. Keep the total add-ins to about one cup so the batter is not overloaded.

    Moist Cherry Loaf

    Delicious cherry loaf that is moist and filled with perfectly cooked juicy cherries. Print RecipePrep Time:10 minsCook Time:50 minsCourse: DessertCuisine: AmericanKeyword: cherry loaf

    Ingredients

    • ¼ cup butter soft
    • ½ tsp almond extract
    • ½ cup sugar
    • 2 large eggs room temperature
    • 2 cup all-purpose flour
    • ¾ tsp baking powder
    • ½ tsp baking soda
    • ½ tsp salt
    • ½ cup milk
    • 1 cup sweet cherries pitted sliced in halves

    Instructions

    • Preheat the oven to 350 degrees F. Prepare a bread pan with baking spray.
    • In a mixing bowl, whisk together the apple sauce, sugar and almond extract until well blended. Add and whisk the eggs one at a time.
    • Sift together the flour, baking powder, baking soda and salt and add to the sugar mixture alternating with the milk. Gently fold in the cherries.
    • Pour the batter into the bread pan and bake for 55-60 minutes or until the bread has pulled away from the sides of the pan and the top is golden brown. Let cool in the pan for 5 minutes then transfer to a cooling rack. Serve warm or at room temperature.
  • The best savoury Easy Rosemary Beer Bread

    The best savoury Easy Rosemary Beer Bread

    This Easy Rosemary Beer Bread is the one recipe people always ask me about after they try it. No yeast, no kneading, no overnight fermentation — just one loaf pan and about an hour. The combination of rosemary, beer, and toasted walnuts gives it a depth of flavour that most people do not expect from such a fast bread. Slather it with fresh butter and a pinch of sea salt and you will understand why my aunt requests this every single time she visits.

    This post may contain affiliate links. If you purchase through these links, I may earn a small commission at no extra cost to you. Thank you for supporting Love & Harvest!

    easy rosemary bread no yeast

    This post is all about no-knead bread with rosemary and beer — the best savoury bread that is super easy to make.

    My Story

    A few years ago when I was visiting an aunt from Texas, she showed me her large rosemary bush at the front of her house. She was very proud it grew so large on its own. She asked me to make something with it because she had so much. This artisan bread always brings me back to that day. She loves this bread so much that every time she visits me in Mexico she asks if I have time to make it — and now I just always show up with a loaf without her ever needing to ask.

    Easy Rosemary Beer Bread

    Ingredients Deep-Dive

    Ingredients

    Flour

    The recipe calls for all-purpose white flour. You can substitute whole wheat, but do not go 100% whole wheat — it will make the bread dense and heavy. A 50/50 blend of all-purpose and whole wheat gives you a slightly nuttier loaf without sacrificing the texture.

    • Why it matters: All-purpose flour has the right protein content to give the bread structure without making it tough. Since there is no kneading here, the flour does all the structural work on its own.

    Beer

    One 12oz can or bottle of beer. Any beer works — lager, ale, stout. Each will give a slightly different flavour. A light lager gives a mild, slightly hoppy note. A dark stout gives a richer, almost caramel-like depth.

    • Why it matters: The carbonation in beer acts as a natural leavening agent, working alongside the baking powder to give the bread lift. The sugars in the beer also contribute to the golden crust. Without the beer, you do not have this recipe.

    Rosemary

    Fresh chopped rosemary is preferred — 1 tablespoon. If using dried, reduce to 1 teaspoon. The recipe also works with dried dried rosemary if you do not have fresh on hand.

    • Why it matters: Rosemary’s piney, woodsy aroma is the signature of this bread. It pairs perfectly with the malt from the beer and the butter on top. Fresh rosemary is more fragrant, but dried is perfectly fine in this recipe.

    Walnuts

    A quarter cup of chopped walnuts adds texture and a pleasant bitterness that rounds out the sweetness from the sugar.

    • Why it matters: The walnuts give this bread a rustic, artisan quality. They create little pockets of crunch that contrast beautifully with the dense, tender crumb. Do not skip them.

    Baking Powder

    Three teaspoons. This is the primary leavening agent — no yeast required.

    • Why it matters: Baking powder reacts with liquid and heat to produce CO2 bubbles that make the bread rise. Because we are not using yeast, the oven does all the heavy lifting. This is why the recipe does not need fermentation time — the chemistry is instant.

    Loaf Pan

    A nonstick bread loaf pan is all you need. I love mine from this nonstick loaf pan set — it comes in two identical pans, which is great for making double batches. The consistent size ensures even baking every time.

    • Why it matters: This recipe is so hydrated that it needs to be contained in a loaf pan to hold its shape during baking. Unlike yeasted breads that can be shaped and hold themselves, this batter is more like a thick cake batter than a classic dough.

    rosemary bread recipes

    Stand Mixer and Baking Tips

    For this recipe you will need a stand mixer with a dough hook. It makes the dough come together much faster. I personally use the KitchenAid 7 Quart Stand Mixer — it doubles as an assistant for pies, cookies, cakes, pasta, and more.

    Oven Temperature

    The oven needs to reach 350°F. Most breads require 400–450°F, but because we are using baking powder instead of yeast, the bread does not need that intense pull of heat. Lower and slower is the right approach here — it is closer to cake baking than bread baking.

    Cut the Bread Only After It Is Completely Cooled

    This is the hardest part. When the bread comes out of the oven, it is still cooking on the inside as it cools. Cutting into it too soon causes the inside to be undercooked and gummy, and releases all the moisture into the open air. Wait until it is fully cool — your patience will be rewarded.

    rustic rosemary bread

    If you love baking bread, try our Sourdough Bread, our Easy Homemade Focaccia, or our Fluffy Naan Bread.

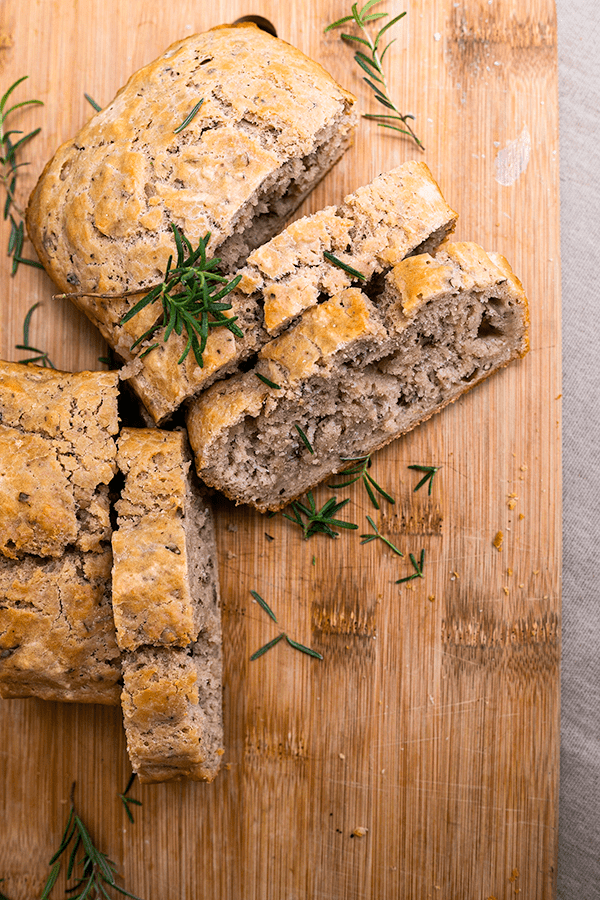
    A hand holding two halves of rosemary beer bread showing the crumb

    Easy No-Knead Rosemary Beer Artisan Bread

    Print Recipe
    Pin Recipe
    Prep Time:10 minsCook Time:50 minsTotal Time:60 mins

    Ingredients

    • 3 cups all purpose flour sifted
    • 3 tsp baking powder
    • 1 tsp salt
    • ¼ cup sugar
    • ¼ cup chopped walnut
    • 1 tbsp fresh chopped rosemary or 1 tsp dried rosemary
    • 1 12oz beer
    • ⅓ cup melted butter for top of bread before baking

    Instructions

    • Preheat oven to 350°F and place the rack at the middle of the oven.
    • Grease a large loaf pan with spray or butter. Set aside.
    • Using a stand mixer with the dough hook attachment, place all the dry ingredients together. Mix for 1 minute.
    • With the machine running on medium-low, slowly pour the can of beer into the batter.
    • Place the batter into the greased pan and drizzle the melted butter on top. Run a knife along the edges so the butter touches all the sides.
    • Place the pan on the middle rack and bake for 50 minutes until the top is slightly golden brown.
    • Allow the bread to cool completely before cutting.

    Frequently Asked Questions

    Can I make this rosemary bread without beer?

    Technically yes, but the result will be quite different. The beer contributes both leavening (from carbonation) and flavour (malt and hops). If you want to substitute, use sparkling water or club soda for the leavening effect, though the bread will be more neutral in flavour. Ginger ale can work as a semi-sweet alternative.

    Does the bread taste like beer?

    Not strongly. The beer flavour mellows significantly during baking — what remains is a subtle, slightly malty background note that pairs beautifully with the rosemary. If you use a very dark beer like a stout, you will taste it more. If you use a light lager, it is barely detectable.

    Can I substitute the all-purpose flour for whole wheat?

    Partially, yes. A 50/50 blend of all-purpose and whole wheat flour works well and adds a nuttier flavour. Going 100% whole wheat will make the bread very dense. If you want a lighter whole grain option, spelt flour at a 1:1 substitution produces a better texture than whole wheat.

    Why does my bread come out gummy in the middle?

    Almost always this is because the bread was cut before it was fully cooled. The interior continues to cook and set as the loaf cools on the counter. Cutting it hot releases the steam and moisture prematurely, leaving the crumb gummy. Wait at least 45 minutes after taking it out of the oven before slicing.

    Can I add other herbs or mix-ins?

    Yes. Thyme, sage, or a combination of herbs all work well. You can also add grated Parmesan or sharp cheddar into the batter for a cheesy herb bread. Sun-dried tomatoes and olives are another great combination. Keep add-ins to about 1/3 cup total to not overwhelm the structure.

    How do I store this rosemary beer bread?

    Wrap the cooled loaf in a clean kitchen towel or beeswax wrap and store at room temperature for up to 2 days. For longer storage, slice the loaf, freeze the slices in a zip-lock bag, and toast directly from frozen. Avoid storing in plastic wrap at room temperature — it traps moisture and makes the crust go soft.

  • Crusty Artisan Purple Yam Bread Recipe

    Crusty Artisan Purple Yam Bread Recipe

    There is something almost magical about pulling a purple loaf out of the oven — the color alone stops people in their tracks. This no-knead artisan purple yam bread is strikingly beautiful, but the flavor is what keeps you coming back: a subtle floral sweetness from the yam, a shattering crispy crust, and a cloud-soft interior. And the whole thing comes together with five ingredients and zero elbow grease.

    This post may contain affiliate links. If you purchase through these links, I may earn a small commission at no extra cost to you. Thank you for supporting Love & Harvest!

    fresh baked purple yam bread

    In its most essential form, bread is just flour, water, salt, and yeast. But why go basic when you can jazz it up? This purple yam bread recipe is a perfect beginner project. The results are so impressive you will want to make it again and again.

    A Note to First-Time Bakers

    Have you been browsing Pinterest dreaming about no-knead artisan loaves? That day is today. This recipe is so easy that no one will believe it is your first time. The technique requires almost no active work — just some stretch-and-fold, an overnight fridge rest, and a hot Dutch oven. When you break this loaf open, the colors and textures will genuinely delight you.

    Why You Will Love This Recipe

    • No-knead, easy technique — simple stretch and fold, then the fridge does the rest overnight.
    • Only 5 ingredients — you likely have most of them in your pantry right now.
    • Gorgeous to look at — the natural purple color makes this the most impressive bread at any table.
    • Unique flavor — the yam adds a subtle floral taste you have to experience to understand.
    • Soft and chewy texture — crispy crust, moist interior — the dream loaf.

    purple yam bread sliced

    Ingredients

    All-Purpose Flour

    • Why it works: All-purpose flour is accessible and forgiving — proof that you do not need specialty ingredients for outstanding results. If you have bread flour, use it; the higher protein content produces a chewier, slightly more structured crumb. King Arthur’s organic bread flour is a good option. The quality difference is noticeable.

    Purple Yam (Ube)

    • Why it works: Purple yam is a starchy root vegetable with a subtle floral, vanilla-like flavor. It adds moisture that clings to the gluten network, so the crumb stays soft long after baking. It also provides the stunning violet color — no food coloring needed. Find it fresh at Asian grocery stores or as purple yam powder (ube) online for convenience.

    Steam the yam for 15–20 minutes, let it cool on a plate to release extra moisture, then peel and mash smooth with a fork before adding to the dough.

    Instant Yeast

    • Why it works: Instant yeast activates without pre-dissolving and works reliably even in slightly cooler water. It is what gives the dough its lift and those beautiful air bubbles in the crumb. Anthony’s instant dry yeast packets come in 42 individual pouches — perfect for keeping freshness across multiple bakes.

    Sea Salt

    • Why it matters: Salt controls fermentation speed, strengthens gluten, and is the single biggest contributor to flavor in a lean dough. Use sea salt, not table salt — iodized table salt can slightly inhibit yeast activity. Celtic Sea Salt’s gourmet kosher grain is a great choice for both inside the dough and as a finishing sprinkle.

    Lukewarm Water

    • Why temperature matters: Warmer water (around 80–90°F / 27–32°C) activates yeast faster and speeds the initial rise. Too hot and you kill the yeast; too cold and the dough takes much longer to develop. Slightly warmer than your wrist is the right feel.

    purple yam bread dough fermented

    Professional Tips for a No-Fail Loaf

    Pro Tip 1 — Read the Full Recipe Before You Begin

    This bread is a two-day affair. Prepare the dough before bed, let it ferment in the fridge overnight, then bake the next morning. It requires very little active time but rewards readers who plan ahead.

    Pro Tip 2 — Use a Stand Mixer

    The stand mixer does all the mixing work so you truly do not need to knead. Use the dough hook at medium-low for 20 minutes. A KitchenAid stand mixer is a long-term kitchen investment that pays for itself across hundreds of bakes.

    Pro Tip 3 — Measure by Weight, Not Volume

    Bread baking is precise. Cup measurements vary widely depending on how loosely or tightly you pack the flour. A kitchen scale eliminates guesswork and guarantees consistent results every time. All measurements in this recipe are given in grams — follow them.

    Pro Tip 4 — Use a Dutch Oven

    A home oven cannot inject steam the way a professional bread oven can. A Dutch oven solves this by trapping the moisture released from the dough during the first 20 minutes of baking, which is what creates that shattering crust. The Lodge 5 qt cast iron Dutch oven is the one I recommend — it holds heat evenly and lasts a lifetime.

    Pro Tip 5 — Bake at Full Temperature

    Preheat to 475°F (245°C) with the Dutch oven inside. Bake covered for 20 minutes, then uncover for 30 minutes. The high heat is non-negotiable for a proper crust. Do not lower the temperature.

    Pro Tip 6 — Master the Stretch and Fold

    After the 3-hour bulk rise, gently deflate the dough and fold it: pull the two sides out and fold to center (like folding a letter), then pull the top and bottom and fold to center. Flip seam-side down and rotate the ball on the counter under your palms to build surface tension. Repeat three times total. This is what creates structure and the open crumb.

    purple yam artisan bread baked

    Frequently Asked Questions

    Can I use purple yam powder instead of fresh yam?

    Yes. Use about 2–3 tablespoons of ube powder mixed into the water before adding to the dough. The flavor will be slightly more intense and the color equally vivid.

    What if I do not have a Dutch oven?

    You can bake in a deep oven-safe pot with a lid, or place a metal bowl over the loaf for the first 20 minutes to trap steam. The crust will not be quite as dramatic but the bread will still be delicious.

    How do I know when the dough has proofed enough?

    After the 3-hour bulk rise at room temperature, the dough should have tripled in size and look bubbly. After the overnight fridge proof, it should have grown noticeably and feel cold and slightly domed in the container.

    Can I add seeds or grains to this loaf?

    Absolutely. Sprinkle seeds (sesame, poppy, sunflower) into the proofing basket before adding the dough. They will adhere to the crust during baking and add texture and flavor.

    Why did my bread come out flat?

    The most common causes are dead yeast (check the expiry date and water temperature), insufficient proofing time, or over-handling the dough during shaping (which pops the gas bubbles). Weigh your ingredients and follow the timing carefully.

    Can I make this with sourdough starter instead of instant yeast?

    Yes — this recipe adapts well to a sourdough approach. Check the how to make sourdough bread and how to make sourdough starter guides for reference. You will need to extend the fermentation time and adjust hydration slightly.

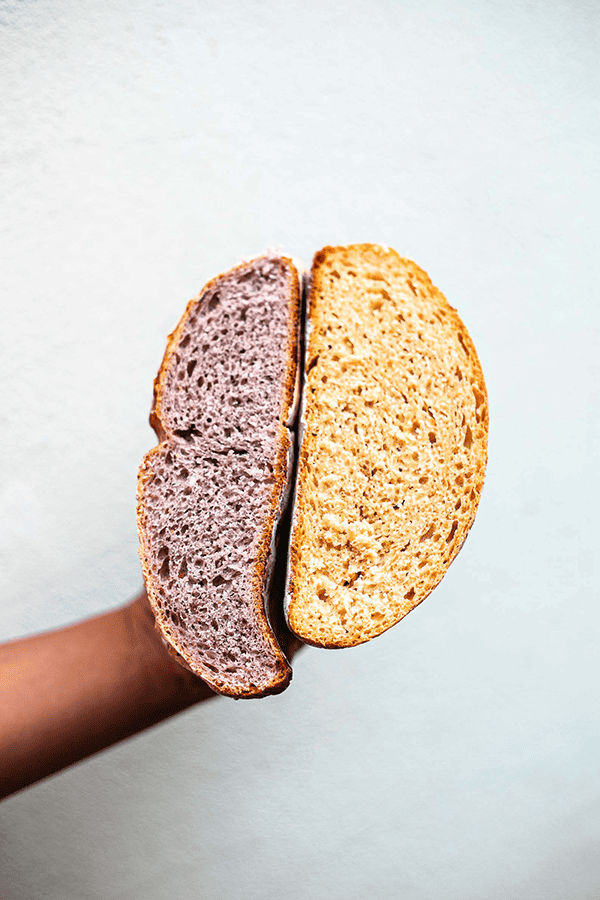
    Purple yam bread loaf cut in half to show the purple crumb

    Rustic Purple Bread

    Easy and beautiful loaf of bread made with purple yam. Crunchy and chewy on the outside and super moist on the inside. An fairly easy bread to make to impress anyone at the dinner table, and the best bread to wipe and clean off any sauces on the plates.
    Prep Time 30 minutes
    Cook Time 50 minutes
    Total Time 13 hours 20 minutes
    Course: Bread
    Calories: 175

    Ingredients
      

    • 400 g all purpose flour (3 cups of all purpose flour)
    • 310 g Luke warm water (307ml of Luke warm water)
    • 160 g steamed and cooked purple yam (3/4 cup of cooked purple yam)
    • 10 g sea salt (1 1/2 tsp sea salt)
    • 2 g instant yeast (1/2 tsp instant yeast)

    Equipment

    • stand mixer

    Method
     

    1. Wash and peel the purple yam. Put it in your steamer and steam for about 20 minutes until soft. Test it by poking it with a fork. If it goes in without effort it is done. If it requires force, then give it another 5-10 minutes.
    2. In a stand mixer, attach the dough hook. Add the flour and water together and combine until a light crumble appears. Put a towel or plastic wrap over the top and let it rest for 30 minutes. This allow the flour to fully hydrate.
    3. Meanwhile, put the fork in another bowl and mash it. Make sure all the big clumps are broken into smaller pieces. Don't worry if its not smooth, once it is in the stand mixer, it will break and smooth everything together. I sometimes like small chunks showing and are in the dough, so when it is baked, you can also see the purple yam pieces in the bread.
    4. Remove the towel or plastic wrap from the bowl, and add the mashed purple yam, sea salt, and instant yeast. Adjust speed to medium low for 20 minutes. The dough afterwards will look sticky and very elastic like. Let it sit for 3 hours until it has tripled in size.
    5. Dust the clean counter top with some flour, and carefully remove the dough on to the table. Gently deflate the dough, and give the dough the fold and stretch method. You're going to take the sides of the dough (imagine the dough is a face and you're going to pull the two ears of the face) stretch it out, and fold it where the nose is (the centre of the dough). Don't over stretch where you see the dough is tearing. Now you're going to take the top and bottom (top of the head and the chin of the face) and fold it again to the centre of the dough (the nose). Do this 3 times. Now flip it outside down (now the face is slapped onto the counter top) seaside down, and roll the dough around. You need to put some pressure at the bottom of the dough and pull the dough at the centre. You're going to feel some pressure and stretching of the dough (its honestly the best feeling when I do this part), and you're going to do this a few times until the dough becomes a beautiful ball. Do this 3 times.
    6. Now you need to find a vessel to put the dough in the fridge. If you have a bread proofing basket – use it. If not, just a regular bowl but find one that fits the dough but also some space for it to grow slightly. Add a piece of parchment paper and pat it down to the shape of the bowl. Gently flour the bowl and place the dough seaside down (wrinkly face down). Put plastic wrap at the top of the bowl and let it sit in the fridge overnight: at least 12 hours.
    7. When you're ready to bake, preheat oven to 475F/245C with the rack at the lower third. Insert the dutch oven with the lid on while it preheats. When the oven reaches the desire temperature, let the dutch oven sit there for an additional 20 minutes.
    8. Gently lift the dough out of the bowl by lifting on the sides of the parchment paper, and place it on the counter top. Place another new parchment paper beside the dough, and gently flip the dough on to the new parchment paper. The seaside should be facing up now.
      The goal here is to preserve and not disturb the air gas that can been developing in the fridge for 12 hours. the Less movement we can create when we place the dough into the oven, the better gas bubbles you'll get when you bake the bread. When the dough has been sitting in the fridge, all the gas built up is at the bottom of the dough which is the seaside is located. When we flip the bread upside down, the gas is invertiley at the top, so when we bake it at a high temperature, it will expand and get the beautiful air bubbles in the bread.
    9. Carefully take the dutch oven out, and carefully by lifting the parchment paper place the dough inside the oven with the lid on top. Bake for 20 minutes.
    10. After the first 20 minutes finished, lift the lid off and bake for an additional 30 minutes.
    11. Lift the bread out and let it cool completely on a drying rack. You need complete air circulation around the bread, including the bottom. Let the bread cool off completely before indulging.

    Notes

    You can easily add seeds and grains to the top of the bread easily by placing the desire seed and grain to the proofing basket before you add the dough inside.

    Love baking with fermentation? Try the Easy Homemade Focaccia Bread or the Savoury Rosemary Beer Bread next.

  • Easy Homemade Focaccia Bread

    Easy Homemade Focaccia Bread

    There is something deeply satisfying about making your own focaccia. The moment you poke those dimples in the dough, drizzle on the olive oil, and pull that golden, crackling sheet from the oven — it is an experience that no store-bought bread can replicate. This easy focaccia recipe is soft, airy, gloriously fluffy, and requires almost no skill. If you have a stand mixer and a little patience, you can make this tonight.

    This post may contain affiliate links. If you purchase through these links, I may earn a small commission at no extra cost to you. Thank you for supporting Love & Harvest!

    easy homemade focaccia bread golden crust

    Bread making has been part of human civilization for thousands of years. There is a reason it feels so deeply satisfying to bake your own loaf — it connects you to something ancestral and primal. I find real solace in baking bread for my family. The aroma fills the house, the kids want to help poke the dough, and the act of breaking into a fresh loaf together is a small ritual worth protecting.

    Why You Will Love This Focaccia

    • Easiest bread recipe — soft, easy to cut, with a crunchy salt-and-rosemary top that delivers incredible texture and flavor.
    • Flexible schedule — prepare the dough in the morning and bake at night, or let it ferment overnight and bake fresh the next day.
    • Fully customizable toppings — the sea salt blend is my favorite, but you can go savory with olives and sun-dried tomatoes, or keep it simple with just olive oil and herbs.
    • Kids love making it — poking the dimples in the dough before it bakes is genuinely fun for children of any age.

    focaccia bread dimples olive oil

    Topping Options

    The standard sea salt blend (salt, black pepper, rosemary, chili flakes) is my go-to and the base recipe below. But focaccia is one of the most creative-friendly breads you can make. Other options that work beautifully:

    • Olives, sun-dried tomatoes, rosemary, and olive oil
    • Capers, red onions, and olive oil
    • Oregano, thyme, cherry tomatoes, and olive oil
    • Fresh rosemary and flaky sea salt only (classic and elegant)

    focaccia bread topping options

    Ingredients

    Flour (All-Purpose and Whole Wheat Blend)

    • Why the blend works: All-purpose flour creates the open, airy structure while whole wheat adds fiber, density, and a nutty flavor complexity that plain white focaccia lacks. The higher protein in whole wheat also contributes to a slightly chewier, more satisfying bite. The ratio (815g white to 160g whole wheat) keeps the bread accessible without making it heavy.

    A kitchen scale is essential for this recipe — weighing your flour removes all the variability from cup measurements and ensures a consistent dough every time.

    Olive Oil

    • Why only olive oil: Focaccia is an Italian bread built on olive oil — both inside the dough and generously drizzled on top before baking. Olive oil contributes a distinctive fruity, slightly peppery flavor that is irreplaceable. Do not substitute canola, sunflower, or any neutral oil. The olive oil on top also creates the crispy, golden crust that defines great focaccia.

    Sea Salt

    • Why quality matters: The salt inside the dough controls fermentation and develops gluten. The salt on top — preferably a flaky, crunchy sea salt — creates the addictive textural contrast that makes you tear off just one more piece. The Celtic Sea Salt ground variety is excellent inside the dough; use a flaky finishing salt on top if you have one.

    Instant Yeast

    • Why instant yeast: Instant yeast activates immediately when it contacts the water and flour — no pre-dissolving required. It works reliably across a wide temperature range and gives you a predictable, consistent rise. The small amount (7g) in this recipe is intentional — less yeast means a slower, longer fermentation that builds far more complex flavor.

    focaccia bread sandwich made at home

    Professional Tips for a No-Fail Focaccia

    Pro Tip 1 — Patience Is Everything

    This recipe rewards patience above all else. There is almost no active work — the stand mixer kneads, the yeast rises, time does the fermentation. The more time you give the dough (especially the overnight fridge fermentation), the more complex and flavorful the final bread will be.

    Pro Tip 2 — Use a Stand Mixer

    The dough hook does all the kneading. This is what makes the recipe truly hands-off. Use the hook attachment only — not the paddle, not the whisk. Mix on medium speed: first 10 minutes with water and yeast, then 5 minutes after adding salt, then 5 more minutes after adding olive oil. A KitchenAid 7 Qt Pro Line stand mixer is a good option.

    Pro Tip 3 — Fermentation Container

    For the full-day counter fermentation, leave the dough in the stand mixer bowl covered with plastic wrap. For overnight fridge fermentation, transfer to a large clear container with a lid so you can monitor the rise without disturbing the dough. A 6 qt clear storage container works perfectly.

    Frequently Asked Questions

    Can I make this focaccia without a stand mixer?

    Yes, but be prepared for a workout. The dough is quite wet and sticky — that high hydration is what makes the bread so airy. If mixing by hand, work the dough for at least 15–20 minutes until smooth and elastic. Wet hands help prevent sticking.

    How do I know the focaccia is fully baked?

    The top should be deep golden brown and the edges should be pulling away from the pan slightly. The bottom (lift a corner with a spatula) should also be golden, not pale. The internal temperature should reach 200–210°F (93–99°C).

    Why does my focaccia come out dense instead of airy?

    The most common causes are: not giving the dough enough time to rise, using water that is too hot (kills the yeast), not measuring ingredients precisely (use a scale), or pressing the dough too hard when dimpling (be gentle — you want to preserve the gas bubbles).

    Can I freeze focaccia?

    Yes. Cool completely, slice, wrap individual pieces in parchment, then freeze in a zip-lock bag for up to 2 months. Reheat directly from frozen in a 375°F oven for 8–10 minutes.

    What is the best way to serve focaccia?

    Tear it and dip it into extra virgin olive oil mixed with balsamic vinegar. Use it as sandwich bread for picnics. Serve alongside soups and stews for dipping. It is also excellent with fresh mozzarella and roasted tomatoes.

    Can I make this recipe with sourdough starter?

    Absolutely. Replace the instant yeast with 150g active sourdough starter, reduce water slightly, and extend the bulk fermentation to 6–8 hours at room temperature or 12–16 hours in the fridge. See the sourdough bread guide for reference on starter ratios and timing.

    Golden homemade focaccia bread with herbs on a baking tray

    Easy Focaccia Bread

    Easy homemade focaccia bread that is soft, airy, and delicious with every bite. Great to use as a dipping bread with your favourite sauce or to make your favourite sandwich. It’s perfectly soft and fluffy and satisfyingly chewy. It’s sprinkled with lots of flaky sea salt herbs, and spice. Drizzled with extra olive oil, and soaks perfectly into all of those little classic holes that you have poked in the bread.
    Prep Time 15 minutes
    Cook Time 25 minutes
    Total Time 5 hours 40 minutes
    Course: Bread
    Cuisine: Italian
    Calories: 210

    Ingredients
      

    • 815 g white flour
    • 160 g whole wheat flour
    • 830 g warm water
    • 5 g sugar
    • 7 g instant dry yeast
    • 20 g sea salt blend (see below)
    • 20 g olive oil
    Sea Salt Blend (1 serving)
    • 1 tbsp sea salt
    • 1 tsp black pepper
    • 1 tbsp dried rosemary
    • 1 tbsp dried chili flakes
    Sea Salt Blend (small jar)
    • ¼ cup sea salt
    • 1 tbsp black pepper
    • 3 tbsp dried rosemary
    • 3 tbsp dried chili flakes

    Equipment

    • stand mixer
    • large 13 x 18" baking sheet

    Method
     

    1. in a stand mixer, add the flour and whole wheat flour together.
    2. Using a dough hook attachment, slowly add the warm water, yeast, and sugar together with the flour. Mix on medium speed for 10 minutes. Occasionally use a scraper and scrape down the sides so all the flour is well incorporated in the dough.
    3. Add the salt and mix for another 5 minutes.
    4. Add the olive oil and mix for another 5 minutes.
    5. In a large container, put the dough inside and drizzle some oil on top and on the side. Close the lid or wrap the top with plastic.
    To bake at night on the same day
    1. Start your process at 10am. Leave the dough on the counter top and let it rise for 3 hours. After punch the gas out of the dough and fold the dough. Let it rise again for another 2 hours.
    2. After the last rise, spray the baking sheet with oil, and fold the dough inside. stretch the dough until it is even and has stretch to all sides of the baking sheet. Wrap it in plastic and let it ferment on it's last rise for 2 hours.
    To bake in the morning for the next day
    1. Start your process anytime at night: In a 3-4qt container, generously spray with oil along with a drizzle of olive oil. Toss the dough and cover with a greased lid.
    2. Place in the fridge for 8-12 hours
    3. Spray oil in the large baking tray and fold the dough into the baking sheet. Stretch the dough until its even at the top and stretch the dough to all sides of the baking sheet. Wrap it in plastic and let it ferment on it's last rise for 3 hours.
    Baking
    1. Once the dough has finished the last rise. Preheat oven 500-550F.
    2. Once ready to go in the oven, drizzle generously with 20g of olive oil at the top and sprinkle the sea salt blend. Poke some holes using your fingers on the top of the bread evenly.
    3. Bake for 20-25 minutes.

    If you love baking your own bread, try the Crusty Artisan Purple Yam Bread or the Savoury Rosemary Beer Bread — two more recipes where simple ingredients and a little patience produce extraordinary results.