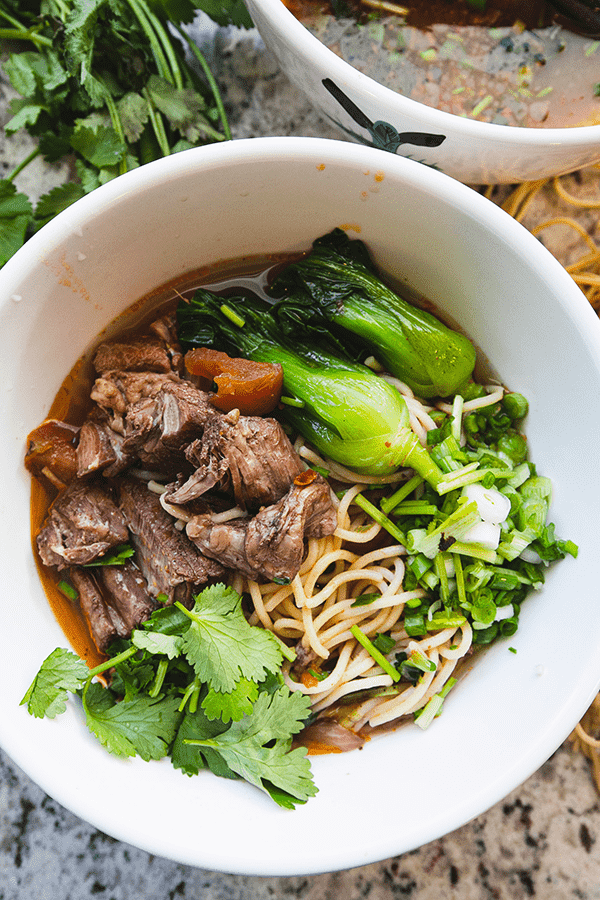
Category: beef recipes

  • Hearty Shepherd’s Pie

    Hearty Shepherd’s Pie

    This hearty shepherd’s pie is ground beef simmered with carrots, green beans, bell pepper, oregano and a handful of raisins, topped with nutmeg mashed potatoes and baked at 375°F (190°C) until golden. It makes about 6 servings. Plan about 1 hour 45 minutes. These times are estimates and vary with your stove, oven and dish. Cook the beef to 160°F (71°C).

    This post contains affiliate links. As an Amazon Associate I earn from qualifying purchases.

    Fall may be all about pumpkin spice and sweet treats (hello, spiced pumpkin pie), but when autumn hits, my mind is completely consumed by one thing: potatoes. Should I mash it? Roast it? Fill it? Smash it? Boil it? I constantly think about it!

    This is one of those recipes our whole family loves. If your kids have been going to Bible classes, be ready to stand corrected, because in our house this dish is never called shepherd’s pie. Get ready to be gently lectured on why it obviously has to be called David’s Pie!

    Besides the usual filling of ground beef, carrots and green beans, we add raisins. That’s right! They give a subtle sweetness against the savoury sauce. Once the dish goes into the oven, the kids come running down the stairs because they know EXACTLY what’s inside. So here’s my trick: write a list of chores before dinner. They are so eager to eat that they will do almost anything.

    One honest note on the name. Shepherd’s pie is traditionally made with lamb, and the ground beef version is often called cottage pie. We make ours with beef, so if you’re looking for another cozy ground beef dinner, try my ground beef chili too.

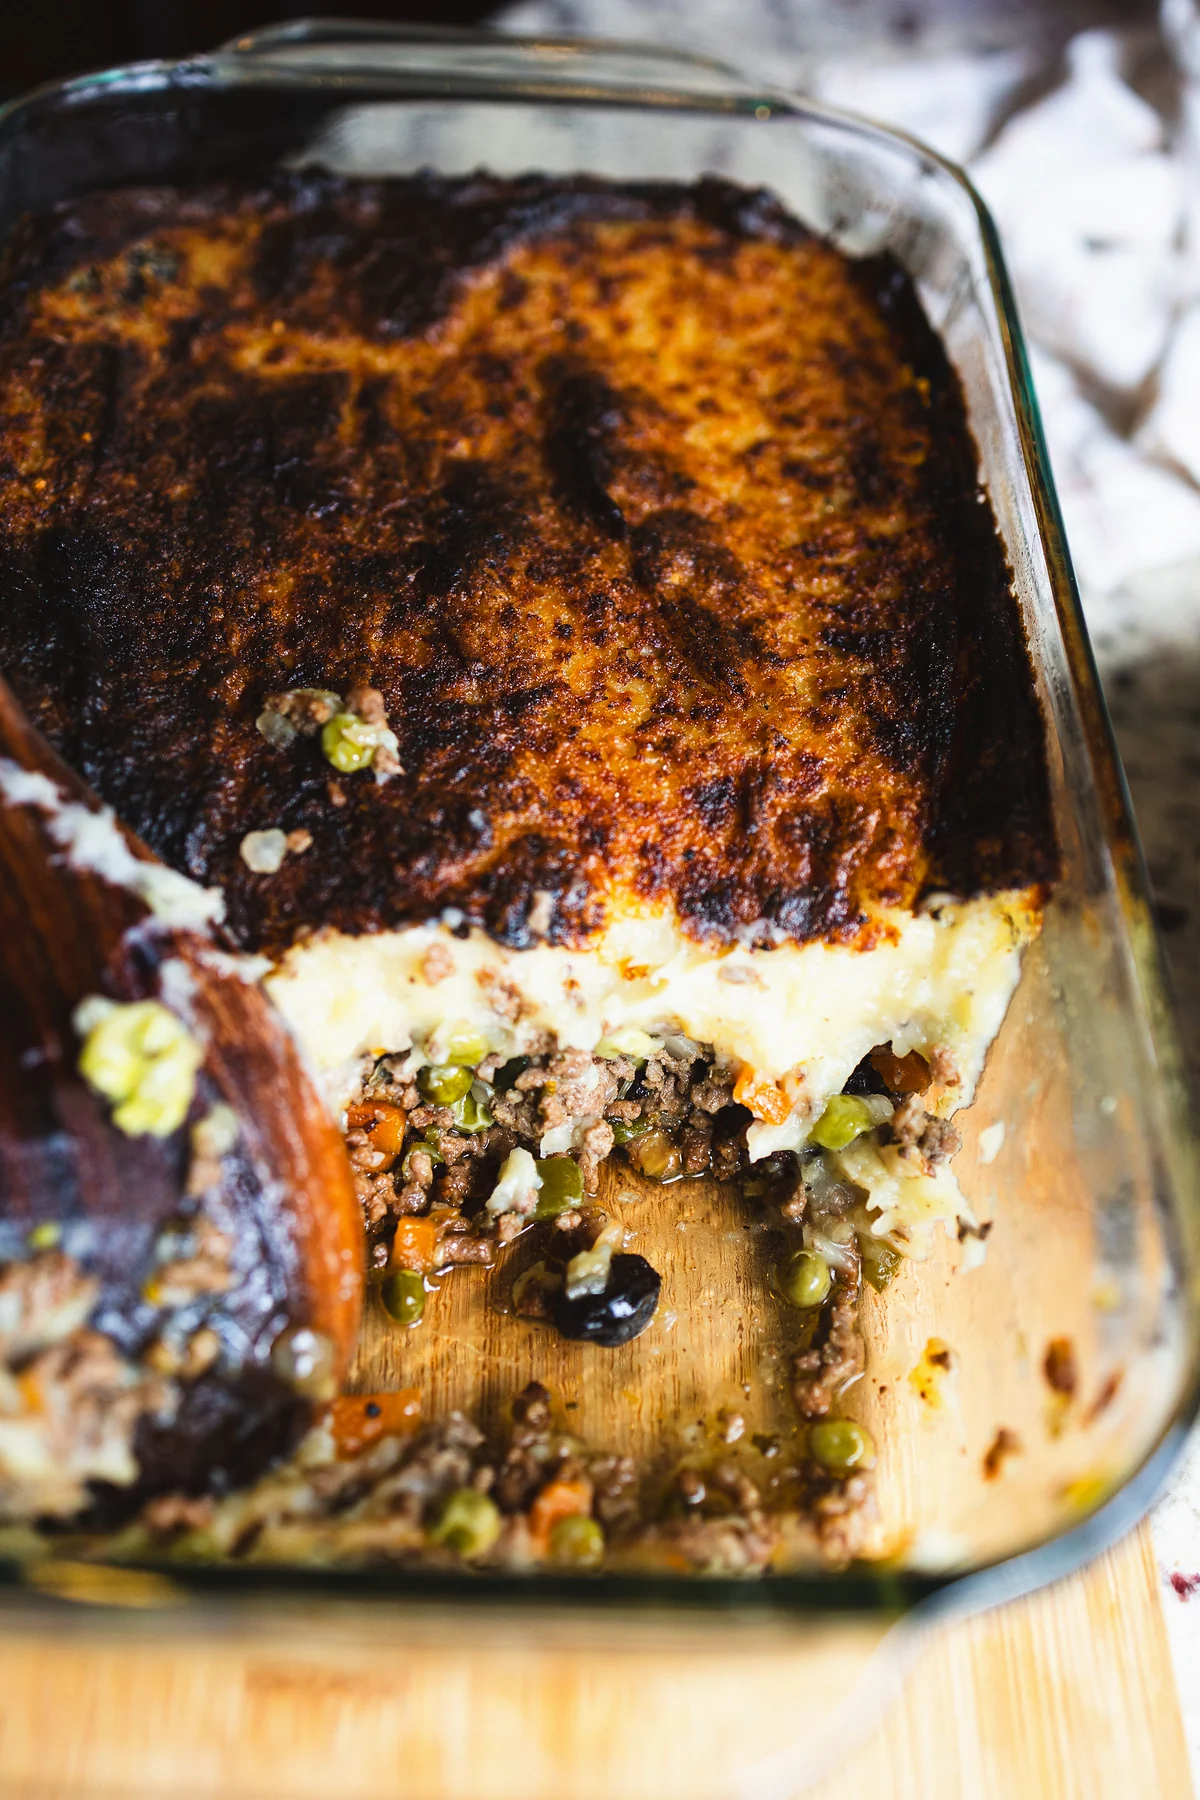
    Glass baking dish of shepherd's pie with a dark golden mashed potato top, a corner scooped out to show the ground beef and vegetable filling.

    Want a week of dinners planned for you? Get my free dinners

    Ingredients

    Here’s what goes into it. Exact amounts are in the recipe card below.

    • Mashed potatoes: 2 lb (about 900 g) russet potatoes, water and salt for boiling, butter, sour cream, freshly grated nutmeg, a pinch of dried thyme, salt and pepper.
    • Beef filling: 1.5 lb (about 680 g) lean ground beef, garlic, white onion, carrots, green beans (fresh or frozen), green bell pepper, oregano, beef flavour powder, raisins, salt and pepper.
    • To deglaze: 1 cup red wine. For an alcohol-free version, use 1 cup beef broth instead. Some alcohol stays in the dish after simmering and baking, so use the beef broth if you’re serving kids or anyone avoiding alcohol.
    • Topping: a few thin slices of butter and a little extra grated nutmeg.

    Equipment you’ll need

    These are Amazon affiliate links. As an Amazon Associate I earn from qualifying purchases.

    How to make hearty shepherd’s pie

    Step 1: Boil the potatoes. Peel and quarter 2 lb of russet potatoes and put them in a large pot. Cover them with cold water and salt the water generously. Bring to a boil and cook about 15 to 20 minutes, until fork-tender. Drain them well in a colander, pouring away from you so the steam doesn’t catch your face.

    Step 2: Mash the potatoes. Put the potatoes back in the pot and mash them with 2 tablespoons butter, 1/4 cup sour cream, 1 teaspoon grated nutmeg, a pinch of dried thyme, salt and pepper until smooth and creamy. Set aside.

    Step 3: Brown the beef. Heat a large skillet over medium-high heat and add 1.5 lb lean ground beef. Wash your hands, and anything that touched the raw beef, with hot soapy water. Cook the beef, breaking it up, about 8 to 10 minutes, until browned with no pink left. Check it with an instant-read thermometer: it needs 160°F (71°C). Carefully spoon off any extra fat into a heatproof container. Let the fat cool, then put it in the trash. Never pour it down the drain.

    Step 4: Make the filling. Add 3 minced garlic cloves, 1/2 diced white onion, 2 chopped carrots, 1 cup green beans and 1/2 diced green bell pepper. Sauté about 5 to 7 minutes, until the vegetables soften. Stir in 2 teaspoons dried oregano and 1 teaspoon beef flavour powder (beef bouillon powder, any brand). Pour in 1 cup red wine (or 1 cup beef broth) and scrape up the browned bits from the bottom of the pan. Toss in 1/4 cup raisins. Simmer about 10 minutes, until the liquid reduces into a rich, glossy sauce. Season with salt and pepper to taste.

    Step 5: Assemble and bake. Preheat your oven to 375°F (190°C). Spread the beef filling in an even layer in a glass oven-safe square dish (8-inch square, 2 quart). Set it on a baking sheet to catch any drips. Spoon or pipe the mashed potatoes generously over the top. Scatter a few thin slices of butter over the potatoes and grate a little extra nutmeg right over the surface. Bake about 25 to 30 minutes, until the filling is bubbling at the edges and the potato top is golden and crisp. The centre should reach 165°F (74°C).

    Close-up of baked shepherd's pie showing a dark golden potato crust, a creamy mashed potato layer and the ground beef filling with carrots and green vegetables.

    Step 6: Rest and serve. Set the hot dish on a dry trivet or wire rack and let it rest about 10 minutes, so the filling settles before you scoop it.

    A serving of shepherd's pie in a white scalloped bowl, with browned potato topping next to the ground beef and vegetable filling.

    Tips for a better shepherd’s pie

    • Use a thermometer for the beef. Colour alone can fool you. Ground beef is safe at 160°F (71°C), the USDA safe minimum, so check it before the vegetables go in.
    • Drain the potatoes well. Wet potatoes usually give you a runny mash that sinks into the filling. Let them steam in the colander for a minute before mashing.
    • Let the sauce reduce. If the filling is still soupy when it goes into the dish, the bottom layer can turn watery. Simmer until the liquid reduces into a rich, glossy sauce.
    • Don’t skip the butter slices on top. They help the potato top brown in the oven.
    • Love mashed potatoes? My garlic mashed potatoes are another way to get your fix this fall.

    How to store and reheat leftover shepherd’s pie

    Shepherd's pie in a glass baking dish with a slice removed, showing the potato layer over the beef filling.

    Refrigerate leftovers within 2 hours of baking (1 hour if the room is above 90°F / 32°C), in shallow airtight containers. Eat them within 3 to 4 days. Reheat until steaming hot and 165°F (74°C) in the centre. A covered dish in the oven can work well, since it keeps the potato top from drying out.

    Shepherd’s pie FAQ

    Is shepherd’s pie made with beef or lamb?

    Traditionally, shepherd’s pie is made with lamb, and the ground beef version is often called cottage pie. This recipe uses lean ground beef, the way we make it at home. If you use ground lamb instead, cook it to 160°F (71°C) too.

    Why put raisins in shepherd’s pie?

    They add a surprising, subtle sweetness that plays off the savoury sauce.

    Can I make it without wine?

    Yes. Use 1 cup beef broth instead of the red wine and deglaze the pan the same way. Some alcohol stays in the dish after simmering and baking, so use the beef broth if you’re serving kids or anyone avoiding alcohol. If you use broth, taste before adding salt, since the broth and beef flavour powder can be salty.

    How long do you bake shepherd’s pie at 375°F?

    About 25 to 30 minutes here, because the filling and potatoes are already cooked when they go into the oven. Bake until the filling bubbles at the edges, the top is golden and the centre reaches 165°F (74°C).

    What temperature should shepherd’s pie be cooked to?

    Cook the ground beef to 160°F (71°C) in the skillet. The baked pie should reach 165°F (74°C) in the centre, and leftovers should be reheated to 165°F (74°C) too.

    Can you make shepherd’s pie ahead of time?

    You can make it ahead. Let the filling cool in a shallow layer first, then assemble it, cover it and refrigerate it within 2 hours of mashing the potatoes. Bake it the next day. A cold pie usually needs extra time in the oven, so go by the thermometer: 165°F (74°C) in the centre. If you use a glass dish, follow its maker’s instructions on going from the fridge into a hot oven.

    More recipes you’ll love

    Make it your own, and write that chore list before it comes out of the oven!

    Need more dinner ideas? Grab my free dinners

    Shepherd's pie in a glass baking dish with a golden potato top and a scoop removed to show the beef filling.

    Hearty Shepherd’s Pie

    Lean ground beef simmered with carrots, green beans, bell pepper, oregano and raisins, topped with nutmeg mashed potatoes and baked at 375°F until golden. Cook the beef to 160°F.
    Prep Time 25 minutes
    Cook Time 1 hour 10 minutes
    Rest 10 minutes
    Total Time 1 hour 45 minutes
    Servings: 6 servings
    Course: Main Course

    Ingredients
      

    Mashed potatoes
    • 2 lb russet potatoes about 900 g; peeled and quartered
    • water and salt for boiling
    • 2 tbsp butter plus a few thin slices for the topping
    • ¼ cup sour cream
    • 1 tsp freshly grated nutmeg plus extra for the topping
    • 1 pinch dried thyme
    • salt and pepper to taste
    Beef filling
    • 1.5 lb lean ground beef about 680 g
    • 3 cloves garlic minced
    • ½ white onion diced
    • 2 carrots chopped
    • 1 cup green beans fresh or frozen, chopped
    • ½ green bell pepper diced
    • 2 tsp dried oregano
    • 1 tsp beef flavour powder beef bouillon powder, any brand
    • 1 cup red wine or 1 cup beef broth for an alcohol-free version
    • ¼ cup raisins
    • salt and pepper to taste

    Equipment

    • Large pot and colander for the potatoes
    • potato masher
    • Fine grater for the nutmeg
    • Large skillet for the filling
    • Heatproof container for the drained fat
    • Instant-read thermometer for 160°F / 71°C and 165°F / 74°C
    • glass oven-safe square dish (8-inch square, 2 quart)
    • Baking sheet to catch any drips
    • Piping bag optional, for the potato topping
    • Trivet or wire rack for resting the hot dish

    Method
     

    1. Peel and quarter the russet potatoes and put them in a large pot. Cover with cold water and salt the water generously. Bring to a boil and cook about 15 to 20 minutes, until fork-tender. Drain well in a colander, pouring away from you so the steam doesn’t catch your face.
    2. Return the potatoes to the pot and mash with the 2 tablespoons butter, sour cream, 1 teaspoon grated nutmeg, dried thyme, salt and pepper until smooth and creamy. Set aside.
    3. Heat a large skillet over medium-high heat and add the ground beef. Wash your hands, and anything that touched the raw beef, with hot soapy water. Cook the beef, breaking it up, about 8 to 10 minutes, until browned with no pink left. Check it with an instant-read thermometer: it needs 160°F (71°C). Carefully spoon off any extra fat into a heatproof container. Let the fat cool, then put it in the trash. Never pour it down the drain.
    4. Add the garlic, onion, carrots, green beans and bell pepper. Sauté about 5 to 7 minutes, until the vegetables soften. Stir in the oregano and beef flavour powder. Pour in the red wine (or beef broth) and scrape up the browned bits from the bottom of the pan. Toss in the raisins. Simmer about 10 minutes, until the liquid reduces into a rich, glossy sauce. Season with salt and pepper to taste.
    5. Preheat your oven to 375°F (190°C). Spread the beef filling in an even layer in a glass oven-safe square dish (8-inch square, 2 quart). Set it on a baking sheet to catch any drips. Spoon or pipe the mashed potatoes generously over the top. Scatter a few thin slices of butter over the potatoes and grate a little extra nutmeg over the surface. Bake about 25 to 30 minutes, until the filling is bubbling at the edges and the potato top is golden and crisp. The centre should reach 165°F (74°C).
      Close-up of baked shepherd's pie showing a dark golden potato crust, a creamy mashed potato layer and the ground beef filling with carrots and green vegetables.
    6. Set the hot dish on a dry trivet or wire rack and let it rest about 10 minutes, so the filling settles before you scoop it.
    Notes

    Cook the ground beef to 160°F (71°C). Wash your hands, and anything that touched the raw beef, with hot soapy water. Let the drained fat cool, then put it in the trash. Never pour it down the drain.
    For an alcohol-free version, use 1 cup beef broth instead of the red wine. Some alcohol stays in the dish after simmering and baking, so use the beef broth if you’re serving kids or anyone avoiding alcohol. If you use broth, taste before adding salt, since the broth and beef flavour powder can be salty.
    Shepherd’s pie is traditionally made with lamb, and the ground beef version is often called cottage pie. This recipe uses ground beef.
    Servings, prep, cooking, baking and resting times are estimates and vary with your stove, oven and dish.
    Refrigerate leftovers within 2 hours of baking (1 hour if the room is above 90°F / 32°C), in shallow airtight containers. Eat within 3 to 4 days, and reheat until steaming hot and 165°F (74°C) in the centre.
    Make ahead: let the filling cool in a shallow layer first, then assemble, cover and refrigerate within 2 hours of mashing the potatoes. Bake the next day. A cold pie usually needs extra time in the oven, so bake until 165°F (74°C) in the centre. If you use a glass dish, follow its maker’s instructions on going from the fridge into a hot oven.
  • Ground Beef Chili with Chorizo (Stovetop)

    Ground Beef Chili with Chorizo (Stovetop)

    This stovetop ground beef chili is thick and beefy, with Mexican chorizo, kidney beans and finely diced vegetables simmered uncovered until rich. Brown the meat to 160°F, simmer 35–50 minutes, then finish with sour cream and cheddar — in a bowl, over buttered pasta or on hot dogs.

    Jump to Recipe

    This post may contain affiliate links. As an Amazon Associate I earn from qualifying purchases.

    When the weather starts getting cooler and winter is just around the corner, there is nothing quite like a big pot of homemade chili simmering on the stove. This ground beef chili is thick, packed with flavour, and full of beef, chorizo and vegetables cooked right into the pot. To make it extra creamy, we love adding a generous spoonful of sour cream when serving!

    In our family, colder months usually mean more beef on the table. This beefy chili is one of our favourite ways to enjoy that — and everyone can eat it their own way. We have it straight from a bowl, spoon it over buttered pasta, or pile it onto hot dogs with extra cheddar cheese. The hot dog version is especially popular with the kids!

    I make this recipe at least twice a month, and somehow we keep finding new ways to serve it. Prefer a pressure-cooker version? Try my Instant Pot easy chili — this one stays on the stovetop for a thicker, longer simmer.

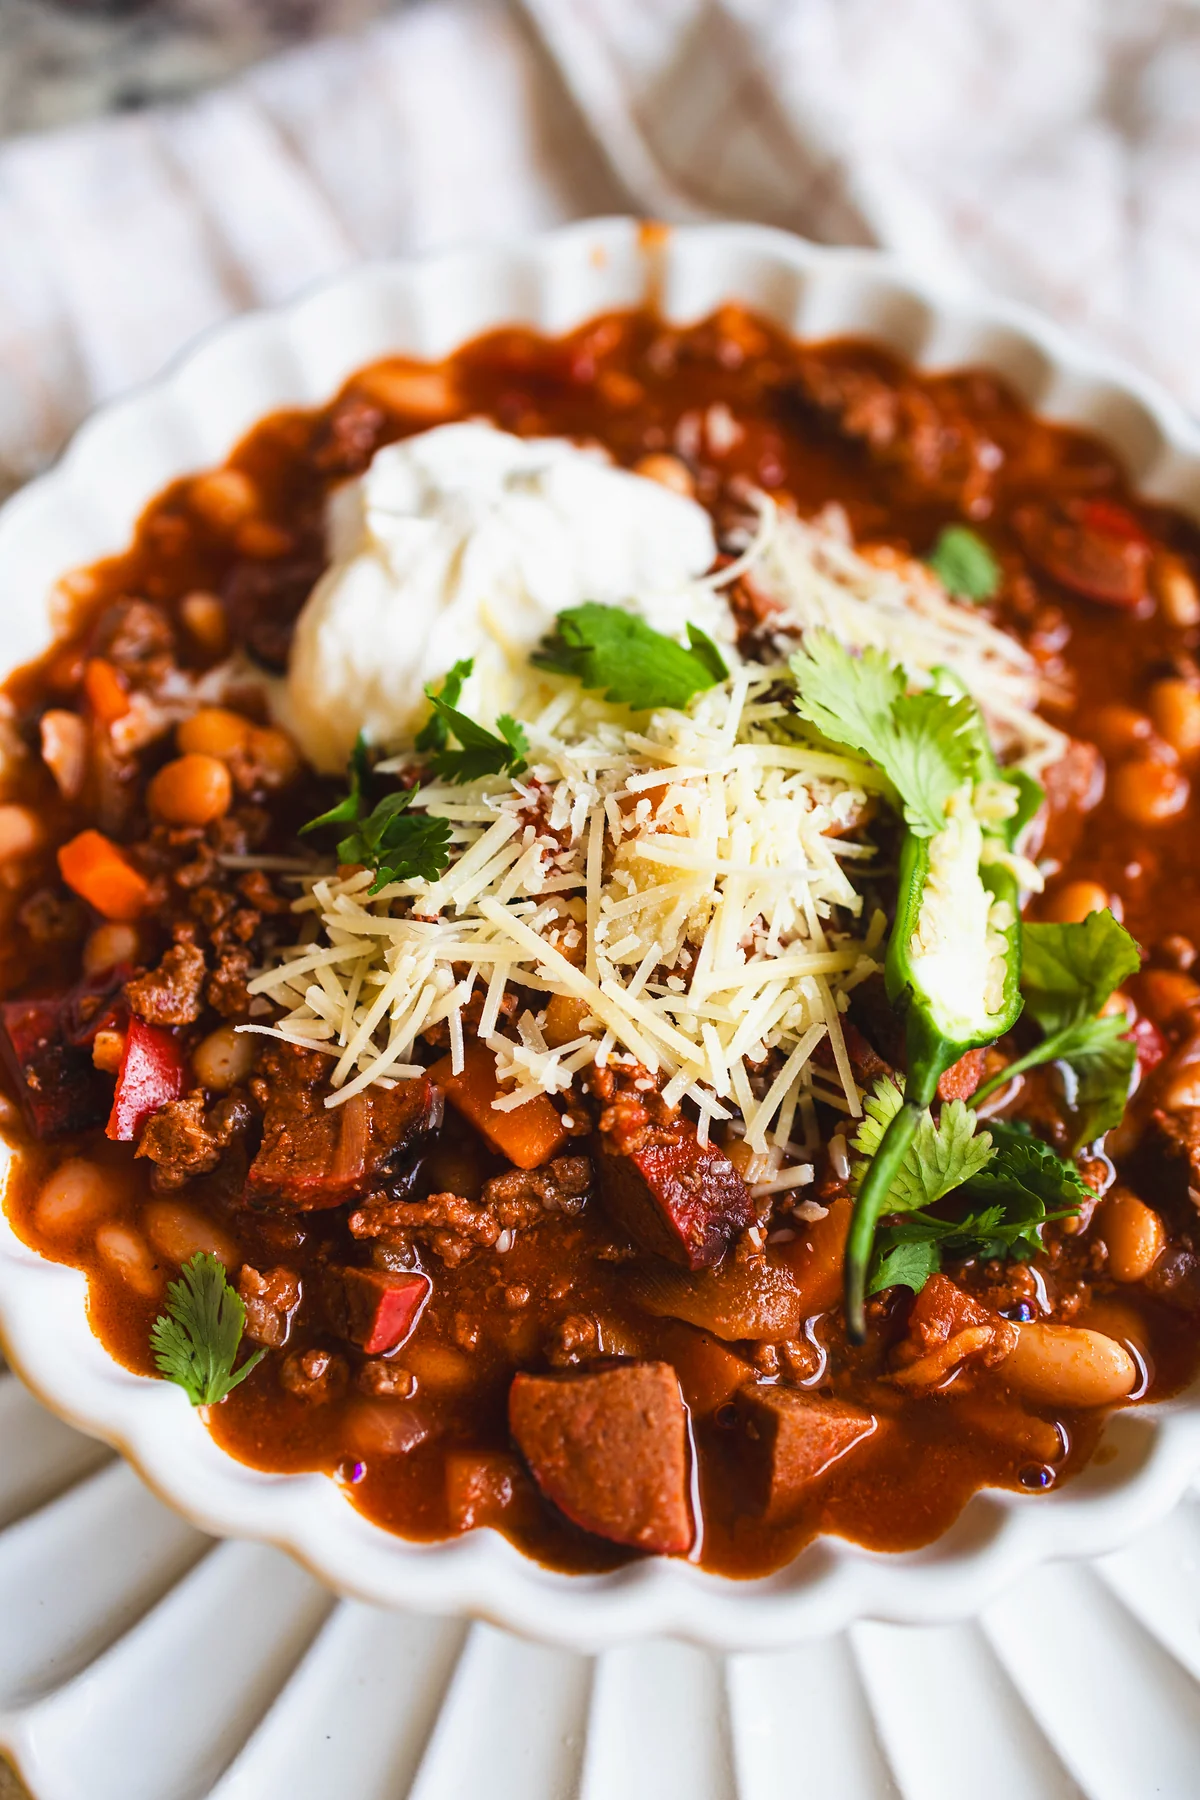
    Bowl of thick ground beef chili with beans, carrots and chorizo, topped with sour cream and shredded cheese.

    Want a week of dinners planned for you? Get my free dinners

    Why we love this ground beef chili

    The combination of ground beef and Mexican chorizo gives the chili a rich, savoury taste, while the spices add just enough warmth without making it overwhelming. This is not a thin, watery chili — it is a substantial, beefy meal that feels especially satisfying when the weather gets chilly.

    One of my favourite things about this recipe is how many vegetables go into the pot. Finely diced onion, red pepper, carrots and celery soften into the sauce, so they become part of every spoonful. As a parent, I appreciate finding ways to make vegetables a natural part of our family dinners without turning every meal into a negotiation.

    I also love that everyone can customize their bowl with sour cream, cheddar, or their favourite way of serving it. That little bit of choice makes dinner more fun for the kids.

    Ingredients you will need

    Everyday ingredients build a deeply savoury pot: ground beef for the base, Mexican chorizo for seasoning and richness, then vegetables, beans, tomatoes and spices.

    • Ground beef: 1 kg (about 2.2 lb).
    • Mexican chorizo: 250 g (about 9 oz), casings removed if needed.
    • Vegetables: 1 large onion, 1 red bell pepper, 2 carrots and 2 celery stalks, all diced (carrots and celery finely), plus 3 cloves garlic, minced.
    • Tomato paste, chopped tomatoes, maple syrup, kidney beans and beef broth to round out the pot.
    • Seasoning: chili powder, cumin, smoked paprika, bay leaves, oregano, black pepper and salt to taste.
    • For serving: sour cream, shredded cheddar, and optional buttered pasta or hot dogs and buns.

    A little note about the spice: we like enough seasoning for a lovely warmth without making it overwhelming for the kids. Chili powders and chorizo vary in heat, so start moderate and adjust.

    Recommended tools

    Equipment

    • Large heavy-bottomed pot or Dutch oven
    • Wooden spoon
    • Instant-read meat thermometer (for 160°F / 71°C on ground meat)
    • Measuring cups and spoons

    How to make stovetop ground beef chili

    Step 1: Brown the chorizo. Heat a large, heavy-bottomed pot over medium heat. Add the chorizo and cook until browned, breaking it into small pieces with a wooden spoon. The chorizo releases flavourful fat that helps build the base of the chili.

    Step 2: Cook the ground beef. Add the ground beef. Break it apart and cook until browned and no longer pink. Check with an instant-read thermometer that the meat reaches 160°F (71°C) — the USDA safe minimum for ground meats. If there is excessive fat, carefully spoon some out, leaving enough behind to flavour the vegetables.

    Step 3: Add the vegetables. If the pot looks dry after browning the meats, add up to 2 tablespoons olive oil. Stir in the diced onion, red bell pepper, carrots and celery. Cook about 5–8 minutes, stirring occasionally, until they begin to soften. Add the minced garlic and cook another minute. This is one of my favourite parts — the carrots add a subtle sweetness, while the onion, pepper and celery build layers of flavour.

    Step 4: Add the tomato paste and spices. Stir in the tomato paste, chili powder, cumin, smoked paprika, oregano and black pepper. Cook 1–2 minutes, stirring so the spices coat the meat and vegetables.

    Step 5: Add the tomatoes, beans and broth. Pour in the chopped tomatoes, maple syrup and beef broth, then add the drained kidney beans and bay leaves. Stir and bring to a gentle simmer.

    Step 6: Let the chili simmer. Reduce the heat to low and simmer uncovered for about 35–50 minutes, stirring occasionally, until thick. If it becomes thicker than you like, add a small splash of broth or water. Taste and adjust salt and spices. Remove the bay leaves before serving.

    Close-up of ground beef chili showing beans, diced carrots, red pepper and chorizo under sour cream and shredded cheese.

    Step 7: Serve with your favourite toppings. Ladle into bowls with a generous spoonful of sour cream and shredded cheddar. For a little extra comfort, spoon it over buttered pasta or onto a hot dog with plenty of cheese.

    Overhead view of a bowl of ground beef chili with sour cream and shredded cheese on a granite counter.

    Ways to serve this chili

    Although we usually think of chili as dinner, a big pot makes family meals more flexible. Some days we enjoy it just as it is, with sour cream melting into the warm sauce. Other times we spoon it over pasta tossed with butter. And then there is the hot dog version — chili spooned over a hot dog and finished with extra cheddar — which is especially handy when everyone wants something familiar.

    The chili also works well for meal prep. Make a big batch, refrigerate leftovers promptly, and reheat individual portions for quick lunches or dinners during the week.

    How to store homemade ground beef chili

    White bowl of ground beef chili topped with sour cream and shredded cheese on a striped kitchen towel.

    Divide the chili into shallow containers about 2 inches (5 cm) deep or less so it cools quickly — don’t leave a full pot sitting out on the stove. Refrigerate within 2 hours of cooking (1 hour if the room is above 90°F / 32°C). Enjoy refrigerated leftovers within 3–4 days, or freeze in meal-sized portions for 2–3 months for best quality. Thaw overnight in the fridge, or reheat from frozen until steaming hot.

    Reheat on the stovetop over medium-low heat, stirring occasionally, until it reaches 165°F (74°C). You can also reheat individual portions in the microwave: cover, stir halfway, let stand about 1 minute, and check that several spots reach 165°F (74°C). Add sour cream and cheddar after reheating rather than freezing them in the chili.

    Tips

    • 160°F for ground meat (beef and chorizo). Don’t rely on colour alone — use an instant-read thermometer on the crumbled meat (USDA safe minimum for ground meats). Brown the meats through before adding tomatoes and broth so you can probe the crumbles, not the liquid.
    • Uncovered simmer is what thickens this chili; keep an eye on the bottom of the pot so it does not stick.
    • Spice level: start moderate; chili powder and chorizo heat levels vary.
    • Prefer Instant Pot? See my Instant Pot easy chili recipe for a pressure-cooker version.

    Other recipes you may like

    It is easy to make, full of flavour, and the kind of family dinner you will find yourself returning to again and again.

    Need more weeknight ideas? Grab my free dinners

    Overhead view of ground beef chili with chorizo and beans topped with sour cream, shredded cheese and cilantro.

    Ground Beef Chili with Chorizo

    Thick stovetop chili with ground beef, Mexican chorizo, kidney beans and finely diced vegetables. Brown the meat to 160°F, simmer uncovered until thick, then finish with sour cream and cheddar.
    Prep Time 20 minutes
    Cook Time 1 hour 10 minutes
    Total Time 1 hour 30 minutes
    Servings: 8 servings
    Course: Main Course
    Cuisine: Mexican

    Ingredients
      

    For the chili
    • 1 kg ground beef about 2.2 lb
    • 250 g Mexican chorizo sausage casings removed if needed; about 9 oz
    • 1 large onion diced
    • 3 cloves garlic minced
    • 1 red bell pepper diced
    • 2 carrots finely diced
    • 2 stalks celery finely diced
    • 2 tbsp tomato paste
    • 1 can chopped tomatoes (about 14.5 oz / 400 g), undrained
    • 1 tbsp maple syrup
    • 2 cans (about 400 g each) kidney beans drained and rinsed
    • 1 cup beef broth plus more if needed
    • 2 tbsp olive oil if needed
    For the seasoning
    • 2 tbsp chili powder adjusted to taste
    • 3 tsp ground cumin
    • 2 tsp smoked paprika
    • 3 bay leaves
    • 1 tsp dried oregano
    • ½ tsp ground black pepper
    • salt to taste
    For serving
    • sour cream
    • shredded cheddar cheese
    • buttered cooked pasta optional
    • hot dogs and buns optional

    Equipment

    • Large heavy-bottomed pot or Dutch oven
    • Wooden spoon
    • Instant-read meat thermometer for 160°F / 71°C on ground meat
    • Measuring cups and spoons

    Method
     

    1. Heat a large, heavy-bottomed pot over medium heat. Add the chorizo and cook until browned, breaking it into small pieces with a wooden spoon. The chorizo releases flavourful fat that builds the base of the chili.
    2. Add the ground beef. Break it apart and cook until browned and no longer pink. Check with an instant-read thermometer that the meat reaches 160°F (71°C) (USDA safe minimum for ground meats). If there is excessive fat, spoon some out, leaving enough to flavour the vegetables.
    3. If the pot looks dry after browning the meats, add up to 2 tablespoons olive oil. Stir in the diced onion, red bell pepper, carrots and celery. Cook 5–8 minutes, stirring occasionally, until the vegetables begin to soften. Add the minced garlic and cook 1 minute more.
    4. Stir in the tomato paste, chili powder, cumin, smoked paprika, oregano and black pepper. Cook 1–2 minutes, stirring so the spices coat the meat and vegetables.
    5. Pour in the chopped tomatoes, maple syrup and beef broth, then add the drained kidney beans and bay leaves. Stir and bring to a gentle simmer.
    6. Reduce heat to low and simmer uncovered 35–50 minutes, stirring occasionally, until thick. Add a splash of broth or water if it gets thicker than you like. Taste and adjust salt and spices. Remove bay leaves before serving.
      Close-up of ground beef chili showing beans, diced carrots, red pepper and chorizo under sour cream and shredded cheese.
    7. Ladle into bowls and finish with sour cream and shredded cheddar. Or spoon over buttered pasta, or pile onto hot dogs with extra cheese.
      Overhead view of a bowl of ground beef chili with sour cream and shredded cheese on a granite counter.

    Notes

    Chili powders and chorizo vary in heat — start moderate and adjust. This recipe uses a mild US/Canadian chili powder blend (typically ground mild chile peppers with cumin, garlic and oregano) — not pure cayenne. UK/AU readers: if your “chilli powder” is a hot pure ground chilli, do not use a full 2 tablespoons one-for-one — start with far less, taste, and build (untested substitution; adjust carefully). Mexican chorizo here typically means fresh/raw (uncured) pork chorizo that crumbles when browned — not cured Spanish-style slicing chorizo; remove casings if needed. Confirm brand/heat with your package. Refrigerate leftovers within 2 hours of cooking (1 hour if the room is above 90°F / 32°C); use within 3–4 days, or freeze 2–3 months for best quality. Reheat to 165°F (74°C). In the microwave, cover, stir halfway, let stand about 1 minute, then check several spots reach 165°F (74°C).
  • Homemade Beef Jerky

    Homemade Beef Jerky

    Homemade beef jerky is thin strips of beef marinated in soy sauce, Worcestershire sauce, liquid smoke and spices, heated to 160°F for safety, then dried at 135°F in an air fryer, oven or dehydrator until firm but still bendy. Plan on an overnight marinade and about 8 hours of drying.

    Jump to Recipe

    This post may contain affiliate links. As an Amazon Associate I earn from qualifying purchases.

    There is something so satisfying about having a homemade snack ready whenever hunger strikes. In our house, this homemade beef jerky has become a family favourite. It’s savoury, a little smoky, and so good that my son loves it enough to learn the recipe himself!

    We started making jerky because we were looking for snacks to take on our trips. Store-bought beef jerky is expensive, but it was always what we ended up buying at the convenience store instead of chips, packaged cookies or instant ramen. So we started making our own!

    Now it’s our snack for trips and for that rush between school and afternoon classes, when there’s no time to sit down and eat. The kids grab it, and honestly, so do the grown-ups.

    Living in Mexico, I find that convenience stores are filled with packaged snacks and sweets. There is nothing wrong with a treat, but a jar of homemade jerky is a snack we’d rather pack than chips.

    Let me show you how we make it!

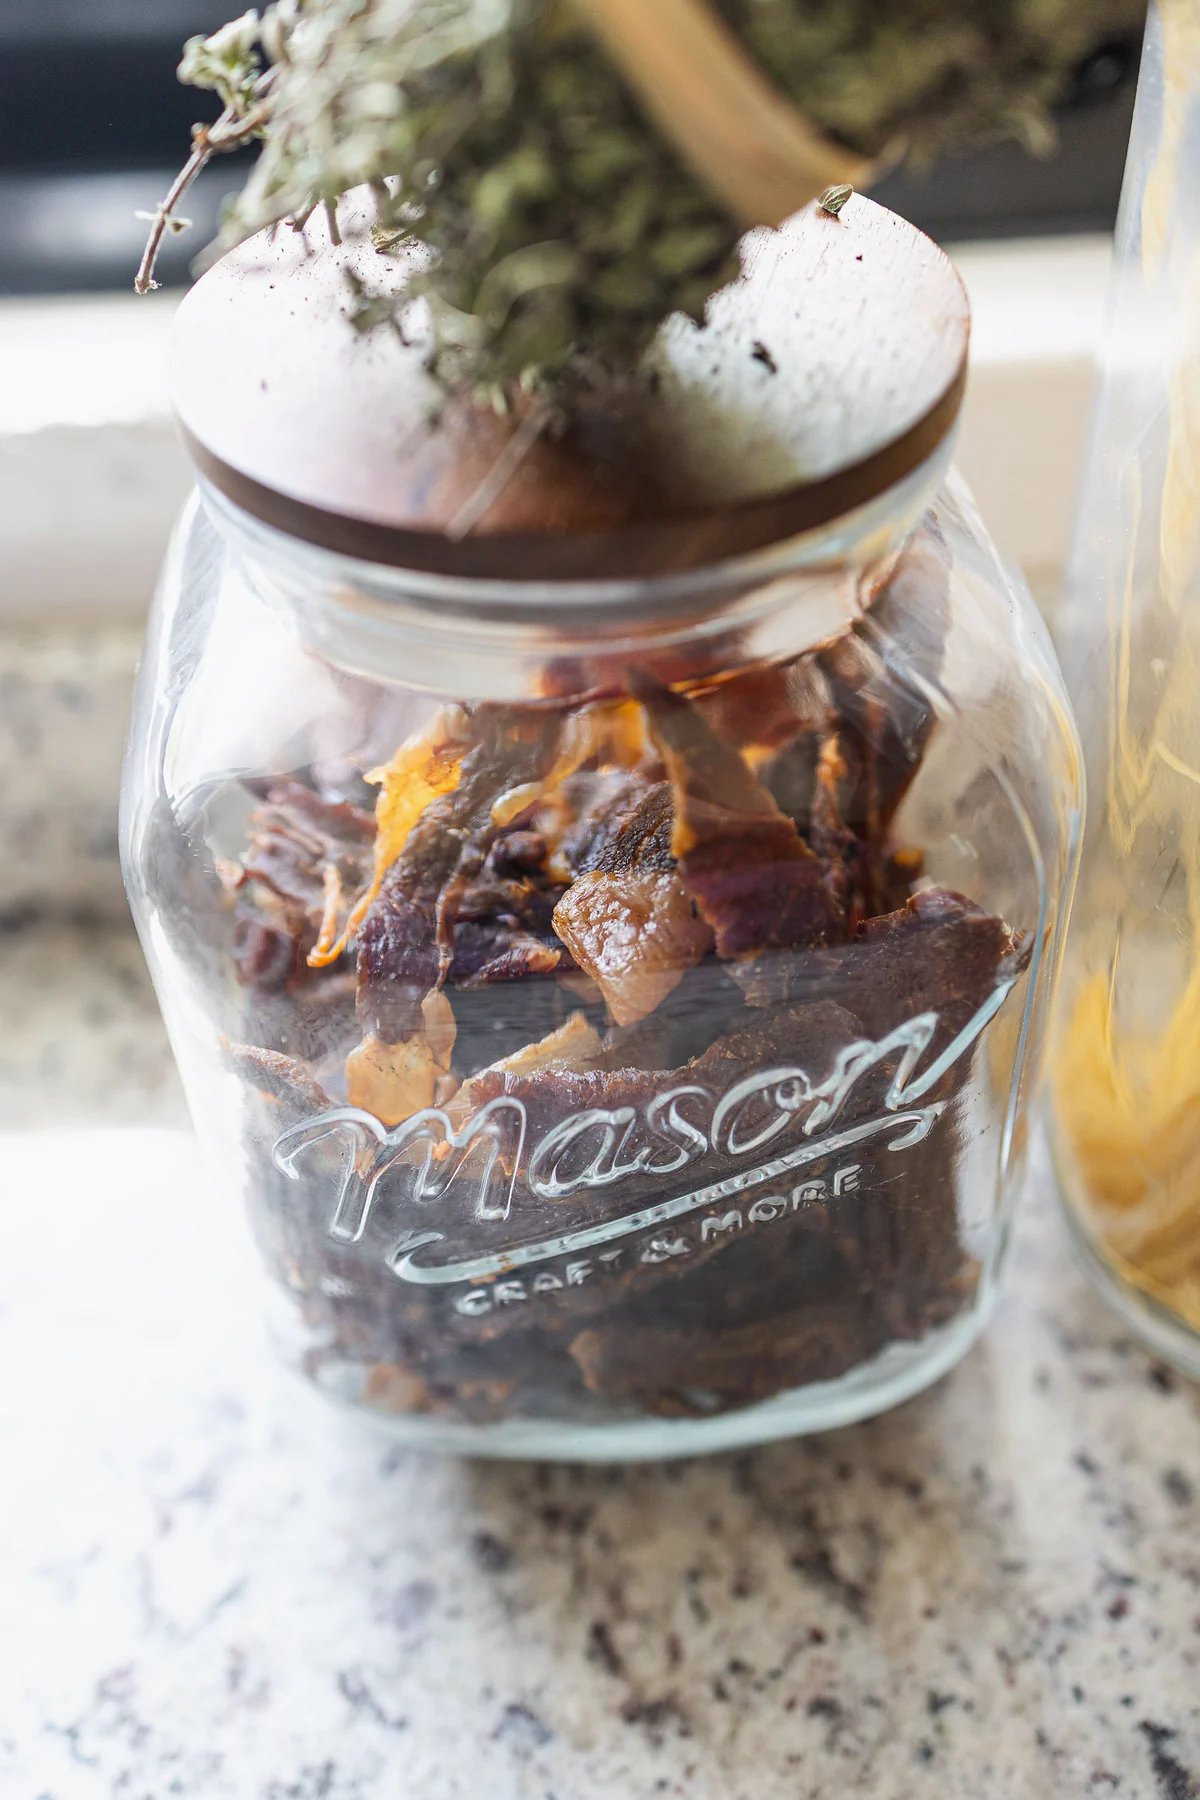
    Homemade beef jerky in a glass Mason jar with a wooden lid on a granite kitchen counter.

    Want a week of dinners planned for you? Get my free dinners

    Why we love this beef jerky recipe

    The first reason is simple: it tastes amazing! Soy sauce, Worcestershire sauce, liquid smoke, garlic, onion and paprika make a savoury, smoky jerky that is hard to stop eating.

    My son is one of its biggest fans. He loves these beef jerky sticks so much that he learned the recipe just so he would know how to make them. As a mom, I love seeing my kids get excited about food we make at home!

    I also love how convenient it is. We keep a jar on the kitchen counter for those moments when the kids or my husband walk by looking for something to eat. Instead of cookies or candy being the easiest thing to grab, there’s homemade jerky. Keep the main batch airtight in the fridge, though (more on storage below).

    Of course, jerky is still a salty snack, so we enjoy it as one snack among many. But having another option our whole family genuinely enjoys? That is a win in my book.

    Ingredients you’ll need

    You only need five things to think about: beef, soy sauce, Worcestershire sauce, liquid smoke and seasonings.

    • Beef round steak: a lean cut, which matters because fat goes rancid. Top round or eye of round both work well. I buy my sliced beef from Wild Fork. It comes frozen and cut thin, which makes prep so much easier. If your beef isn’t sliced, freeze it for 1 to 2 hours until firm, then slice it about 1/4 inch (5 mm) thick. Slice against the grain for a more tender chew, or with the grain if you like it chewier.
    • Soy sauce: regular soy sauce. Low-sodium soy sauce works too if you want it a little less salty.
    • Worcestershire sauce and liquid smoke: these two give it the smoky, “store-bought jerky” flavour.
    • Brown sugar: balances the salt.
    • Meat tenderizer: use unseasoned meat tenderizer. Most brands already contain salt, so don’t add extra.
    • Garlic powder, onion powder, sweet paprika, black pepper, salt.

    Substitutions: no liquid smoke? Use smoked paprika instead of regular paprika for a gentler smoky note. Gluten-free: use tamari and a gluten-free Worcestershire sauce.

    Recommended tools for homemade jerky

    Equipment

    • Air fryer with a dehydrate function (that’s what I use), or an oven that can hold 135°F, or a food dehydrator with an adjustable thermostat
    • Instant-read meat thermometer
    • Large bowl or zip-top bag for marinating
    • Sheet pan with a wire rack (for the 160°F pre-heat step)
    • Long, sharp slicing knife and cutting board (if slicing your own beef)
    • Clean airtight jars or zip-top bags

    How to make homemade beef jerky

    Step 1: Make the marinade. In a large bowl, stir together the soy sauce, Worcestershire sauce, liquid smoke, brown sugar, salt, black pepper, meat tenderizer, garlic powder, onion powder and paprika until well combined.

    Step 2: Marinate the beef. Add the thin beef strips and toss so every piece is coated. Cover and refrigerate overnight, at least 6 and up to 24 hours. Always marinate in the fridge, never on the counter, and throw out the marinade afterwards.

    Step 3: Drain. Take the beef out of the marinade and let the excess drip off. Pat the strips lightly with paper towels so they dry faster.

    Step 4: Heat to 160°F first. This is the food safety step. The USDA recommends heating beef to 160°F (71°C) before dehydrating, because drying alone may never get the meat hot enough to kill bacteria. Lay the strips in a single layer on a wire rack set over a sheet pan and roast at 325°F (163°C) until an instant-read thermometer in the thickest strip reads 160°F. Thin strips usually take 10 to 15 minutes, but go by the thermometer, not the clock. You can also steam them.

    Strips of homemade beef jerky on a wire cooling rack over a granite counter.

    Step 5: Dry at 135°F for about 8 hours. Once the strips have reached 160°F, arrange them in a single layer with space between pieces so air can move. I use my air fryer’s dehydrate function at 135°F (57°C) for about 8 hours. No air fryer? Use the oven at 135°F for about 8 hours, with the strips on a wire rack over a sheet pan. Check with an oven thermometer that your oven really holds 135°F, because many ovens don’t go that low; if yours doesn’t, use an air fryer or a dehydrator instead. A food dehydrator set to 135°F works the same way. The USDA says to keep the drying temperature steady between 130 and 140°F. Thinner strips can be ready sooner, so start checking around 6 hours.

    Step 6: Check the texture. Done jerky is dry and firm but still bends and cracks without snapping in half. No wet or soft spots in the middle. Let it cool completely before storing.

    Homemade beef jerky strips sticking out of a glass Mason jar.

    And that’s it! TA-DA, you got yourself a batch of homemade beef jerky for the next snack attack.

    Tips and common mistakes

    • Don’t skip the 160°F step. Marinating doesn’t make raw meat safe, and 135°F drying is too low to do the job alone.
    • Keep the slices even. Thick and thin strips on the same tray dry at different speeds. Pull the thin ones early.
    • Trim visible fat. Fat doesn’t dry and makes jerky go off sooner.
    • Give it room. Overlapping strips stay wet where they touch.
    • Use a thermometer, not a guess. Thin strips heat fast, so check early.

    Amazing snacks for the family

    Close-up of homemade beef jerky through the glass of a Mason jar.

    One of my favourite things about this recipe is how easily it fits into our everyday routine. Some days the kids are home looking for something to eat between activities. Other days we are rushing from one place to another, and I know we will need something in the car.

    That’s when these beef jerky sticks really shine. I pack a few sticks and a bottle of water, and it’s a simple snack for the kids while we’re out. Having something ready in my bag saves me from stopping at a convenience store every time someone gets hungry.

    My son especially loves this snack, and it’s an easy one to pack alongside fruit or crackers. Since jerky is dried and salty, I make sure the kids drink plenty of water with it, especially when they’re active or outside.

    I’m not saying we never buy packaged snacks. Real life is busy. But I love knowing I have another option ready at home or packed for the road.

    How to store homemade beef jerky

    A jar of homemade beef jerky topped with a bundle of thyme on a sunny windowsill.

    In our house it’s gone in two weeks, so the jar on the counter never sits around for long! Honestly, I would have guessed a good airtight jar keeps it about a month, but the National Center for Home Food Preservation says properly dried jerky keeps two weeks at room temperature in a sealed container, so two weeks is our counter limit. Keep the rest airtight in the fridge; the USDA says home-dried jerky can be stored 1 to 2 months. For longer, freeze it in small portions; Cornell Cooperative Extension says up to 1 year in the freezer for best quality. If you ever see moisture or mould in the jar, or it smells off, throw it out.

    • Before storing: let it cool completely and blot off any oil, then pack it in a clean, dry, airtight jar or bag.
    • On the go: pack a portion in a clean, sealed container and keep it cool. Don’t leave jerky in a hot car.

    FAQ

    Do you have to cook beef jerky before dehydrating it? Yes, for safety. The USDA recommends steaming or roasting the strips to 160°F before drying, because a dehydrator or low oven may not heat the meat enough to kill bacteria like E. coli and Salmonella.

    What is the best cut of beef for jerky? Lean cuts like round steak (top or bottom round) or eye of round work best because there is less fat to go rancid. We use thinly sliced round steak.

    How long does homemade beef jerky last? Up to 2 weeks at room temperature in a sealed container (National Center for Home Food Preservation). In the fridge, it keeps 1 to 2 months (the USDA says home-dried jerky can be stored 1 to 2 months). Freeze it for longer storage.

    How do I know when beef jerky is done? It should be dry and firm but still bend and crack without breaking in two, with no moist spots inside.

    Can I make beef jerky in an air fryer? Yes. If your air fryer has a dehydrate function, heat the strips to 160°F first, then dehydrate at 135°F for about 8 hours. That’s how we make ours.

    Can I make beef jerky in the oven? Yes, if your oven can hold a steady 135°F. Heat the strips to 160°F first, then dry them on a wire rack at 135°F for about 8 hours. Check the temperature with an oven thermometer.

    How long should I marinate beef jerky? At least 6 hours and up to 24 hours, always in the fridge.

    More recipes you’ll love

    If there is one thing I have learned as a busy mom, it’s that the snacks we keep within easy reach make everyday life a little easier. This jerky is something we can make ahead, keep ready for hungry family members, and pack when we know we’ll be out for hours.

    So make a batch, store it safely, and see how fast your family goes through it. Just be warned: once everyone finds out where you keep the jerky, that jar may need refilling sooner than you think!

    Happy snacking!

    Get my free dinners

    Homemade beef jerky in a glass jar.

    Homemade Beef Jerky

    Thin strips of beef round marinated in soy sauce, Worcestershire, liquid smoke and spices, heated to 160°F for safety, then dried at 135°F in the air fryer or oven until firm but bendable.
    Prep Time 20 minutes
    Cook Time 8 hours 15 minutes
    Marinate 12 hours
    Total Time 20 hours 35 minutes
    Servings: 10 servings (about 1 oz each)
    Course: Snack
    Cuisine: American

    Ingredients
      

    For the beef
    • 1.2 kg beef round steak top round or eye of round, sliced about 1/4 inch (5 mm) thick (about 2.6 lb)
    For the marinade
    • ¼ cup soy sauce regular or low-sodium
    • 2 tbsp Worcestershire sauce
    • 1 ½ tbsp liquid smoke
    • 2 tbsp brown sugar
    • 2 tsp salt
    • 1 tsp ground black pepper
    • 1 tsp meat tenderizer unseasoned
    • 1 tsp garlic powder
    • 1 tsp onion powder
    • 1 tsp sweet paprika

    Equipment

    • Air fryer with a dehydrate function or an oven that holds 135°F, or a food dehydrator
    • Instant-read meat thermometer
    • Slicing knife if slicing your own beef
    • Wire rack and sheet pan
    • Airtight jars or zip-top bags

    Method
     

    1. In a large bowl, stir together the soy sauce, Worcestershire sauce, liquid smoke, brown sugar, salt, pepper, meat tenderizer, garlic powder, onion powder and paprika.
    2. Add the beef strips and toss to coat every piece. Cover and refrigerate overnight (6 to 24 hours). Discard the marinade afterwards.
    3. Drain the strips and pat them lightly dry with paper towels.
    4. Lay the strips in a single layer on a wire rack over a sheet pan and roast at 325°F (163°C) until the thickest strip reads 160°F (71°C) on an instant-read thermometer, usually 10 to 15 minutes. Go by the thermometer, not the clock.
      Strips of homemade beef jerky on a wire cooling rack over a granite counter.
    5. Arrange the strips in a single layer with space between pieces. Dry at 135°F (57°C) for about 8 hours using the air fryer’s dehydrate function, an oven that holds 135°F, or a dehydrator, until dry and firm but still bendable. Start checking around 6 hours.
    6. Cool completely. Store in an airtight container in the fridge, or freeze for longer storage.
      Homemade beef jerky strips sticking out of a glass Mason jar.

    Notes

    I use my air fryer’s dehydrate function at 135°F. No air fryer? Use the oven at 135°F for about 8 hours, but check with an oven thermometer that it really holds 135°F. A food dehydrator at 135°F works too (USDA: keep drying between 130 and 140°F). The USDA recommends heating beef to 160°F before drying. Thin, even slices dry evenly; pull thinner strips early. Storage: up to 2 weeks at room temperature in a sealed container (NCHFP). Keep the rest airtight in the fridge; the USDA says home-dried jerky can be stored 1 to 2 months. Freeze it for longer storage.
    Yield: about 300 g (10 to 11 oz) of jerky from 1.2 kg raw beef.
  • Instant Pot Easy Chili Recipe

    Instant Pot Easy Chili Recipe

    There’s something timeless about a big pot of chili — rich, hearty, and packed with flavour. Thanks to the Instant Pot, making this classic dish has never been easier. No more juggling multiple pots and pans or waiting hours for everything to simmer down just right. One pot, 30 minutes of pressure cooking, and you’ve got a bowl of deeply spiced, stick-to-your-ribs chili that works at home and at the campsite.

    Looking for a thick stovetop version with Mexican chorizo? Try my ground beef chili with chorizo (simmered uncovered on the stove).

    This post may contain affiliate links. If you purchase through these links, I may earn a small commission at no extra cost to you. Thank you for supporting Love & Harvest!

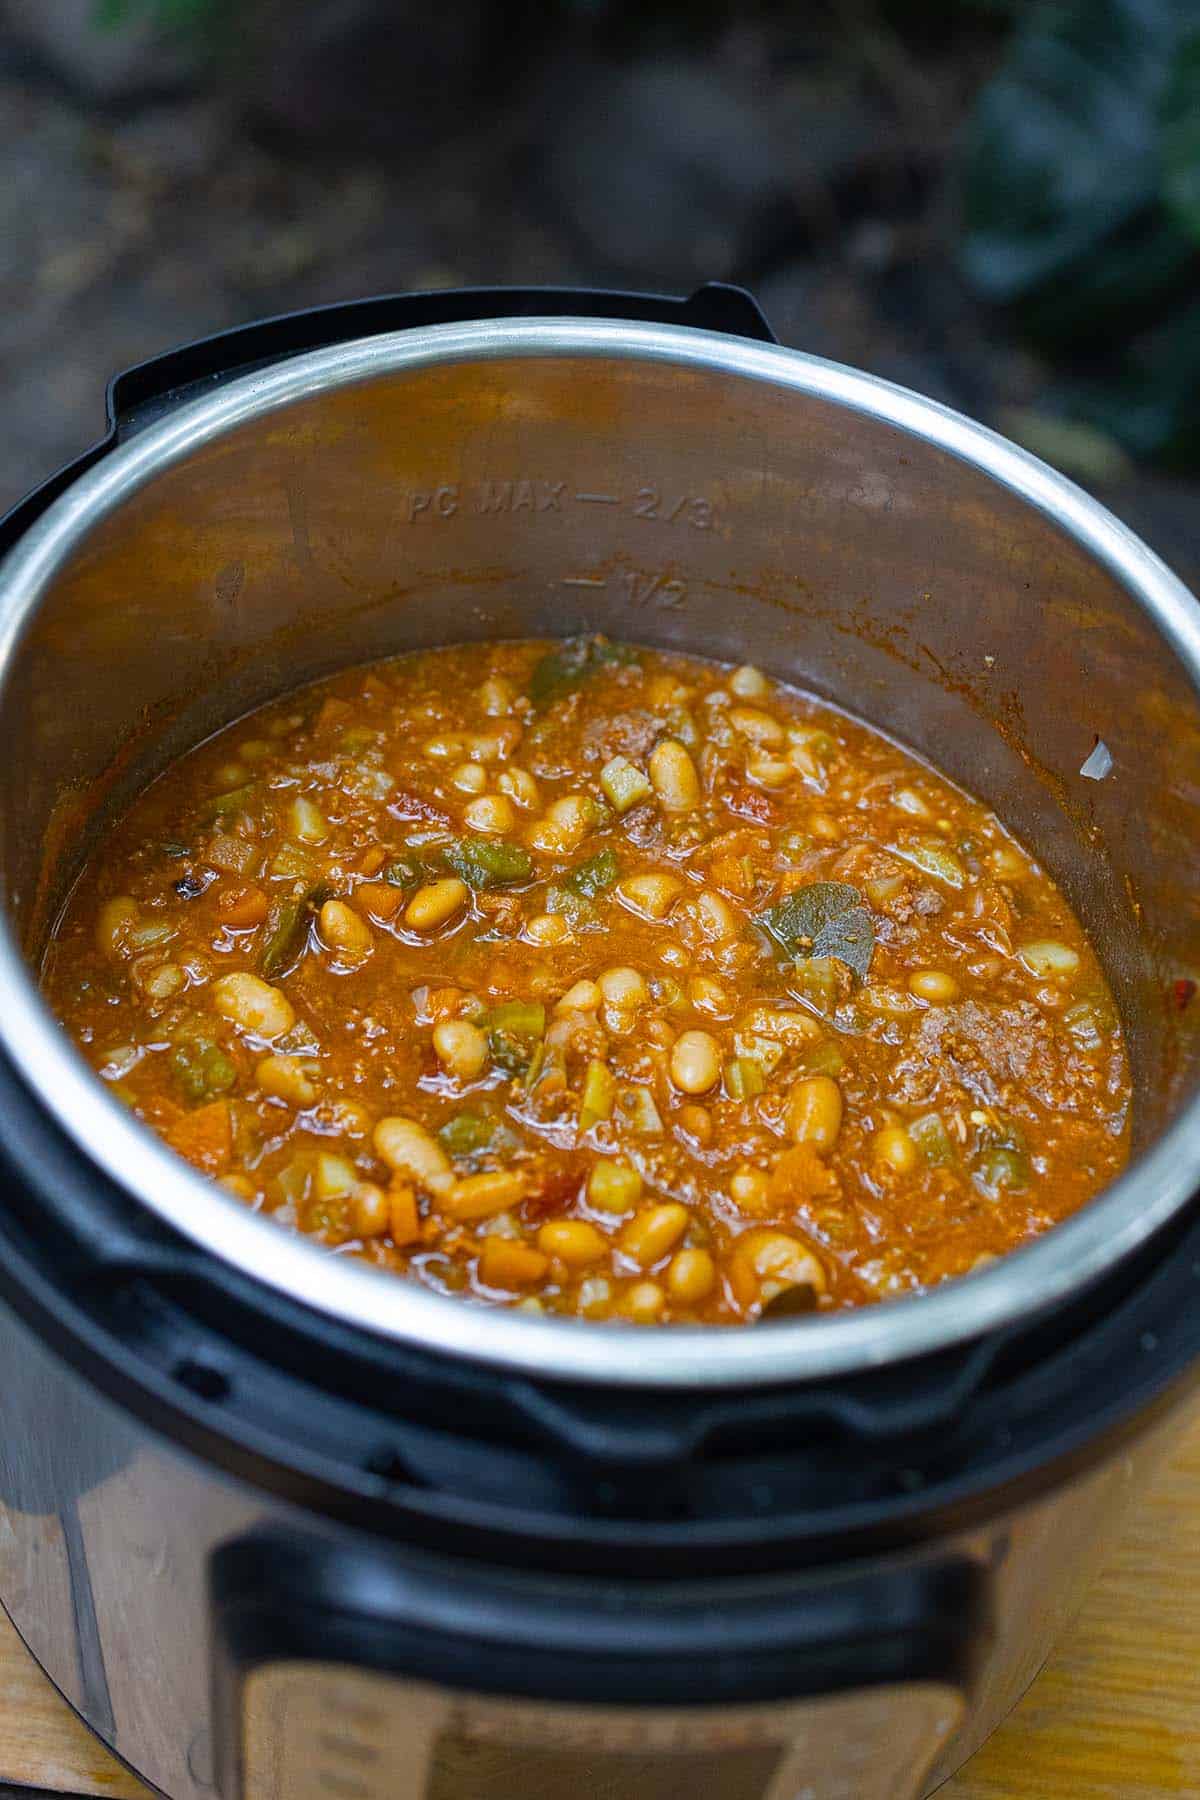
    Pot of bean chili with a wooden spoon next to grilled meat on a large green leaf

    This post shows you how to make a quick and flavourful chili using an Instant Pot. It’s a favourite in our home — and so easy, we even bring our Instant Pot camping! The recipe includes ground beef, chorizo, beans, tomato paste, and more hearty ingredients for a rich, satisfying meal with minimal effort.

    This Easy Instant Pot Chili has become a must-have on all our camping trips. We bring the Instant Pot right along with us (yes, even when camping!), because nothing beats the comfort of a hearty bowl of chili after a long day outdoors. Whether we’re spooning it over grilled potatoes, tossing it with pasta, or squishing it between fresh bread, it’s always dense, hearty, and absolutely delicious.

    Why We Love This Easy Instant Pot Chili

    One word: simplicity. This recipe is straightforward, no-fuss, and makes cleanup a breeze — everything cooks in one pot! Plus, it’s versatile enough to enjoy in different ways: ladled over baked potatoes, stirred into pasta, or served sandwich-style for a rustic campfire meal. Better yet, it’s a recipe we keep coming back to because it’s reliable, hearty, and so satisfying that it keeps us full well into the night — essential when camping days are packed with hiking, swimming, and exploring.

    Bean chili cooked in the Instant Pot inner pot

    Key Ingredients

    Ingredients

    Ground Beef

    • Rich, hearty, and satisfying — the backbone of a great chili. Look for 80/20 blend for best flavour.

    Chorizo

    • Adds a smoky, slightly spicy kick that sets this chili apart. Mexican-style fresh chorizo works best here.

    Smoked Paprika & Cumin

    • These two spices are what make this chili sing. Get your smoked paprika fresh for maximum impact — it makes a huge difference over regular paprika.

    Kidney Beans & Diced Tomatoes

    • Essential for bulk, protein, and fibre. The canned tomatoes add acidity that balances the rich meat perfectly.

    Tomato Paste

    • Deepens the flavour and ties everything together with a concentrated, slightly sweet tomato richness.

    For the best results, use a quality Instant Pot 6qt Duo — it’s what we use in this recipe and it makes the process completely hands-free. A wooden spoon set is also handy for breaking up the meat during the sauté step.

    Instant Pot chili with beans in a steel pot beside grilled chicken on a large green leaf

    Chili and Camping

    Camping is full of activities — and let’s be honest, who wants to spend hours cooking after a full day of adventures? This Instant Pot Chili solves that problem beautifully. It’s quick to prep, cooks hands-free, and one big pot feeds a crowd. Even better, it tastes even better the next day, which means leftovers are a bonus you’ll actually look forward to. Plus, when you cook it in the Instant Pot, you don’t have to babysit the pot over the fire — you can set it, forget it, and get back to enjoying the outdoors.

    If you love camping recipes, check out our Easy Camping Shrimp Pasta and Lemongrass Chicken Drumsticks — both are campfire favourites in our family.

    A man and three children eating at an outdoor picnic table while camping

    Frequently Asked Questions

    Can I make this chili without an Instant Pot?

    Yes! If you don’t have an Instant Pot, you can make this chili on the stovetop in a large Dutch oven. Simply follow the same sauté steps, then add all the remaining ingredients and simmer covered on low heat for 45–60 minutes, stirring occasionally until the flavours meld and the chili thickens to your liking.

    Can I freeze Instant Pot chili?

    Absolutely. This chili freezes beautifully. Let it cool completely, then portion it into freezer-safe containers or bags. It keeps well for up to 3 months. Thaw overnight in the fridge and reheat on the stovetop or in the microwave. The flavour actually deepens after freezing!

    What can I serve with Instant Pot chili?

    The options are endless. Serve it over steamed rice, baked potatoes, or corn chips for nachos. It’s also fantastic stuffed into tacos or burritos. For camping, we love serving it with crusty bread or spooned over grilled potatoes cooked in the embers.

    How do I thicken chili that’s too watery?

    If your chili is thinner than you’d like after pressure cooking, simply switch the Instant Pot back to Sauté mode and let it simmer uncovered for 5–10 minutes, stirring occasionally, until it reaches your desired consistency. You can also mash a handful of the beans against the side of the pot to add body.

    Can I make this chili spicier?

    Definitely. Add a chopped jalapeño with the onion during the sauté step, or stir in a teaspoon of cayenne pepper with the spices. Chipotle peppers in adobo are another great option — try one or two chipotle peppers in adobo sauce for a deep, smoky heat.

    Pot of bean chili with a wooden spoon next to grilled meat on a large green leaf

    Instant Pot Easy Chili Recipe

    Easy Instant Pot Recipe that you can bring it to go camping. Packed with ground beef, chorizo, bean, and so much more! A classic but a goodie.
    Prep Time 10 minutes
    Cook Time 30 minutes
    Total Time 40 minutes
    Servings: 6 servings
    Course: Main Course
    Cuisine: American
    Calories: 380

    Ingredients
      

    • 1 tbsp olive oil
    • ½ kg ground beef
    • 3 garlic cloves minced
    • 1 white onion minced
    • 3 chorizo sausages roughly chopped
    • 1 tsp dried oregano
    • 2 tbsp tomato paste
    • 1 can (540ml) kidney beans
    • 1 can diced tomatoes
    • 1 water or chicken stock
    • 1 tbsp Old Bay Seasoning
    • 1 tsp smoked paprika
    • 1 tsp ground cumin
    • salt and pepper

    Equipment

    • Instant Pot

    Method
     

    1. Sauté the base Turn the Instant Pot to Sauté mode. Add olive oil, then sauté ground beef with the garlic and onions for 2–3 minutes until fragrant.
    2. Add chorizo. Cook for 5–7 minutes until browned, breaking it up with a spoon. Drain excess fat if needed. Then add oregano and fry the tomato paste until fragrant.
    3. Add remaining ingredients Stir in the beans, diced tomatoes, broth, and all spices. Mix well.
    4. Pressure cook Cancel Sauté mode. Secure the lid and set the valve to Sealing. Cook on Manual / Pressure Cook for 15 minutes.
    5. Natural release Let the pressure release naturally for 10 minutes, then do a quick release for any remaining pressure.
    6. Stir and serve Open the lid, stir well, and taste. Adjust seasoning if needed. Let it sit on Keep Warm for 10–15 minutes to thicken.

  • Instant Pot Menudo (My Mother-in-Law’s Recipe from Saltillo)

    Instant Pot Menudo (My Mother-in-Law’s Recipe from Saltillo)

    This is my mother-in-law’s menudo from Saltillo, made in the Instant Pot: beef tripe and beef shank in a guajillo and ancho chile broth, ready in about 1 hour 40 minutes instead of a whole morning.

    Rich beef soup with vegetables and herbs, served in a white bowl on colorful Mexican tablecloth.

    Want more dinners like this? My free PDF has seven easy family dinners for the weeknight table. Send me the free dinners

    Why I make menudo in the Instant Pot

    The traditional way takes hours of slow simmering. I use the Instant Pot because, honestly, that’s the only way menudo happens on a weeknight in my house. Not the traditional method, but hey, we do what we have to do.

    Bowl of Instant Pot menudo with chopped onion, oregano and lime on the side

    My mother-in-law’s menudo from Saltillo

    This menudo recipe comes straight from my mother-in-law, who has been making it for years for our family gatherings.

    Saltillo is in the northern part of Mexico, about 30 minutes from Monterrey.

    Every time we make it, we make a big batch to share with friends and neighbours.

    Rocky mountains under a clear blue sky near Saltillo, in northern Mexico

    What you need

    • Beef tripe: the honeycomb tripe is the best part for menudo. It stays tender with a little chew, and soaks up the broth.
    • Beef shank: a cut from the leg, with marrow in the bone. Under pressure it turns soft and gives the broth its body.
    • Beef feet (optional): add them if you want a thicker broth.
    • Guajillo and ancho chiles: guajillos are dried mirasol chiles, bright red with mild to medium heat. Anchos are dried poblanos, darker, a little sweet and smoky. Together they make the broth red.
    • Mexican oregano: it isn’t the same as Mediterranean oregano. It’s more citrusy, and it goes in the broth and on top.
    • Cumin and garlic: in the chile paste.

    Savory beef stew with tender meat and flavorful broth, served with fresh lime and cheese toppings.

    How to make Instant Pot menudo

    The links below are Amazon affiliate links. As an Amazon Associate I earn from qualifying purchases, at no extra cost to you.

    Recommended tools

    Any medium pot and any full-size blender that can handle warm liquids work.

    1. Prep the chiles: boil the sliced tomatoes with the guajillo and ancho chiles in hot water for 20 minutes, then blend with the garlic, oregano, cumin and a little of the soaking water until smooth.
    2. Cook the meat: add the chile paste, beef shank, beef feet (if using), and the bay leaves to the Instant Pot. Cover with enough water to cover the meat, season with salt to taste, and cook on high pressure for 45 minutes.
    3. Add the tripe: let the pressure release naturally, then open the lid. Stir in the tripe and let it simmer on the soup setting for another 20 minutes.
    4. Serve: with lime juice, diced onion, diced serrano and a pinch of dried oregano, and warm corn tortillas on the side.

    Trust me, don’t skip the lime and raw onion on top.

    Menudo topped with chopped onion and oregano, with limes and dried corn behind

    How we serve it

    In my family, menudo is what we look forward to on Mexican Independence Day and on cold winter mornings.

    It’s also a New Year’s Day tradition, a comforting, traditional bowl many families enjoy the morning after a celebration.

    Love bold Mexican soups? Try our Green Pozole (Pozole Verde) for another classic, or the Easy Mexican Salsa Verde as the perfect fresh topping. Our Mexican Fire Roast Chicken is another family-favourite recipe from the same culinary tradition.

    Savory beef stew with herbs, chopped vegetables, and rich broth in a white bowl.

    Savory beef stew with herbs, chopped vegetables, and rich broth in a white bowl.

    Instant Pot Menudo

    My mother-in-law’s menudo from Saltillo, made in the Instant Pot. Tripe and beef shank in a guajillo and ancho chile broth.
    Prep Time 20 minutes
    Cook Time 1 hour
    Total Time 1 hour 40 minutes
    Servings: 6 people
    Course: Soup
    Cuisine: Mexican
    Calories: 320

    Ingredients
      

    • 1 kg beef tripe cut into bite-sized pieces
    • 1 kg beef shank
    • 2 beef feet (optional, for a thicker broth)
    • 1 litre water or beef broth
    • 6 guajillo peppers
    • 4 ancho peppers
    • 4 garlic cloves
    • 7 bay leaf
    • salt to taste
    • 1 tbsp dried oregano
    • 1 tbsp cumin powder
    • 5 medium tomatoes
    • white onion, diced garnish
    • 2 serrano peppers, diced garnish
    • dried oregano garnish
    • 6 limes garnish

    Equipment

    • Instant Pot

    Method
     

    1. Prep the Chiles:
      In a medium pot, combine the sliced tomatoes, guajillo chiles, and ancho chiles. Boil them in hot water for 20 minutes until softened. Transfer the softened ingredients to a blender, add the garlic, oregano, cumin, and 1 cup of the soaking water. Blend until smooth and set aside.
    2. Cook the Meat:
      In the Instant Pot, add the blended chile paste, the beef shank, the beef feet (if using), and the bay leaves. Pour in enough water to fully cover the meat and season with salt to taste. Seal the lid and cook on high pressure for 45 minutes.
      (The beef tripe goes in later, not now.)
    3. Add the Tripe:
      Let the pressure release naturally, then open the lid. Add the beef tripe to the pot. Switch to the soup setting and simmer for another 20 minutes.
    4. Serve:
      Ladle the menudo into bowls and garnish with a squeeze of fresh lime juice, diced onion, diced serrano, and a sprinkle of dried oregano. Serve with warm corn tortillas on the side.

    Cooking this one this week? Get my free PDF with seven easy family dinners, so the rest of the week is planned too. Get the free dinners

  • Classic Simple Cheeseburgers

    Classic Simple Cheeseburgers

    If you’ve ever stood at a grill wondering why your homemade burger never quite matches the one at that legendary local joint, the answer isn’t a secret sauce or special equipment — it’s technique. These Classic Simple Cheeseburgers use a smash-and-sear method on a flat-top, a blend of chuck roast and flank steak for the perfect fat ratio, homemade special sauce, and bread-and-butter pickles that will absolutely ruin you for store-bought. Simple done right is the best kind of cooking there is.

    This post may contain affiliate links. If you purchase through these links, I may earn a small commission at no extra cost to you. Thank you for supporting Love & Harvest!

    Double cheeseburger with grilled onions and pickles on a toasted bun

    This recipe uses a mix of boneless chuck roast and flank steak for the patties — the perfect mixture of fat and flavour. Accompanied by homemade special sauce and homemade bread and butter pickles.

    Why This Recipe Works

    Most homemade burgers fail for one of three reasons: wrong beef, wrong heat, or wrong technique. This recipe fixes all three. The smash method maximizes the Maillard reaction (that deep, caramelized crust), the beef blend delivers just the right fat content, and the special sauce brings tangy complexity without overpowering the meat. It’s the kind of burger that makes you wonder why you ever ordered delivery.

    Tall double cheeseburger stacked with lettuce, tomato and pickles

    Ingredients Deep Dive

    Ingredients

    Chuck Roast & Flank Steak (Beef Blend)

    • Why it matters: Chuck brings rich beefy flavour and enough fat to stay juicy. Flank adds a firmer texture and a slightly more intense meaty note. Together they hit around 20–25% fat — the sweet spot. Too lean and you get a dry hockey puck; too fatty and the patty shrinks to nothing on the griddle.

    Special Sauce

    • Why it matters: Mayo, mustard, ketchup, lemon juice, lemon zest, pickled jalapeños, and hot sauce. Each element plays a role — mayo brings creaminess, mustard cuts through the fat, ketchup adds sweetness, the citrus brightens everything, and the jalapeños deliver a quiet heat that keeps things interesting without being obvious.

    Bread and Butter Pickles

    • Why it matters: Sweet-tangy pickles create contrast against the rich beef and creamy sauce. The crunch is structural — it gives every bite a textural surprise. Try our homemade bread and butter pickles — they are genuinely in a different league from store-bought.

    Cast Iron Flat-Top or Skillet

    • Why it matters: You need a flat, very hot surface to smash properly. A good Lodge 12″ Cast Iron Skillet holds heat better than almost anything else and develops a natural non-stick surface over time. It’s the single best investment for burger cooking at home.

    Burger Press

    • Why it matters: While a spatula works, a burger press gives you consistent thin patties with even surface contact every time. This means a more uniform crust and better cheese melt.

    A hand holding a juicy cheeseburger cut to show the patty

    The Smash Method

    Roll the meat into a ball and season the outside heavily with salt and pepper. Place it on a screaming-hot flat-top and smash it hard with a spatula or burger press. Then: leave it alone. The proteins grip the griddle surface, and moving it prematurely tears the crust. Let the fat render and caramelize for 1½–2 minutes per side. After flipping, add the onions to the griddle to soften alongside the patty, and lay the cheese on top until just melted.

    Smash burger patties with melted cheese and onions on a bun

    The Special Sauce

    Mayo + mustard + ketchup + pickles + lemon zest + lemon juice + pickled jalapeños + hot sauce. See the full recipe card below for exact ratios. Spread it generously on both sides of the bun. Don’t be shy — the sauce is doing real work here.

    Bread and Butter Pickles

    Try our BEST bread-and-butter pickles — once you taste homemade, there’s no going back. They’re sweet, tangy, snappy, and take the burger to a completely different level.

    Bread and butter pickles recipe: pickle slices in brine in a white bowl

    Gluten-Free Option

    Swap the bun for crisp iceberg lettuce leaves. This is more than just a substitution — it’s legitimately great. The cool crunch of the lettuce complements the hot, juicy patty in a way the bun never quite does. Many burger chains offer this now. Once you try it, you’ll understand why.

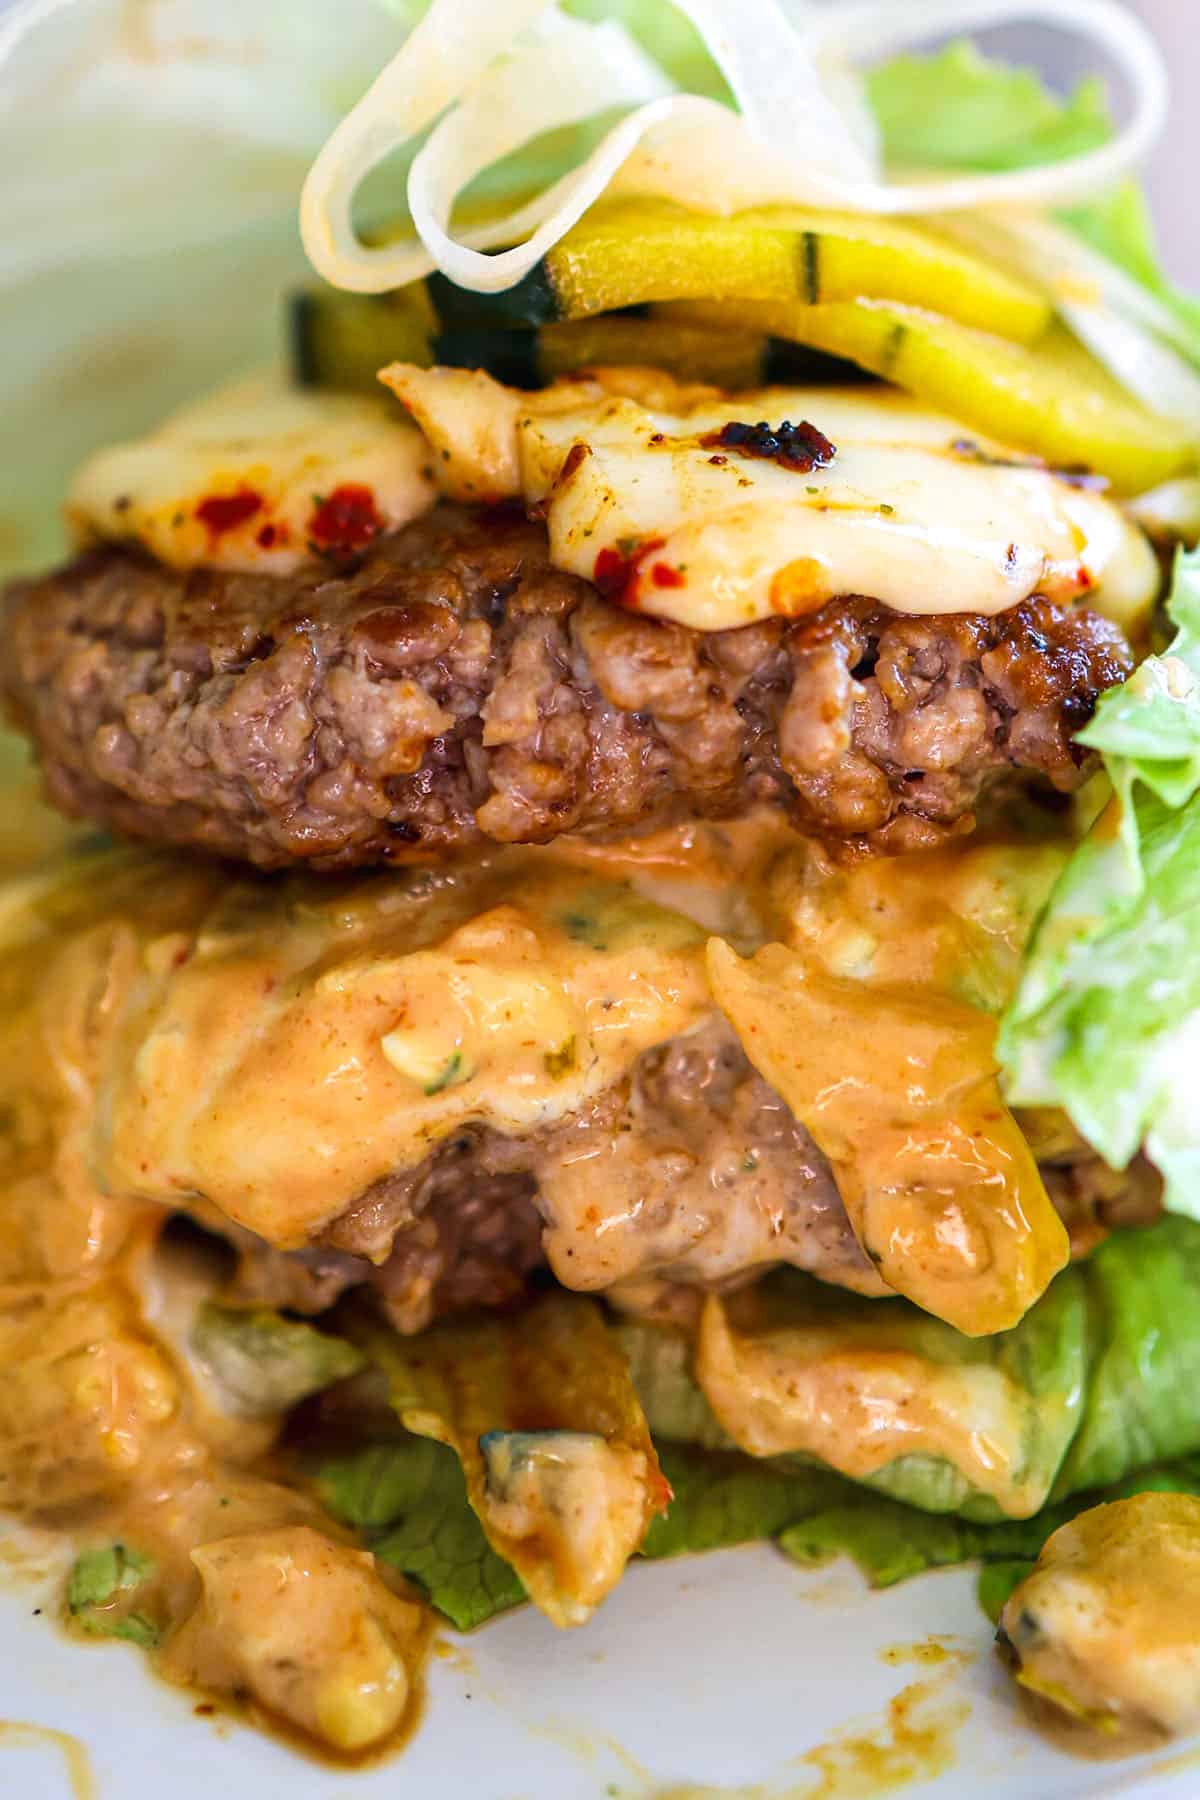
    Lettuce-wrapped cheeseburger with special sauce and onions

    Want to use a reliable instant-read meat thermometer to check doneness? 160°F for well-done, 145°F for medium. No guessing required.

    Bunless double cheeseburger in lettuce with pickles and sauce

    Classic cheeseburger with melted cheese, onions and special sauce

    More Recipes You’ll Love

    Frequently Asked Questions

    Can I use ground beef from the store instead of grinding my own?

    Yes. Look for 80/20 ground chuck — it has the right fat percentage for a juicy smash burger. Avoid extra-lean ground beef; it will dry out on the high heat required for the smash method.

    Do I need a flat-top grill or will a skillet work?

    A heavy cast-iron skillet works very well. The key is getting it very hot before the patty goes down. Avoid non-stick pans — they can’t handle the heat required and the coating may degrade at high temperatures.

    Why do you smash the burger? Doesn’t that squeeze out the juices?

    This is one of the most common burger myths. Smashing immediately after placing the ball on the griddle maximizes the surface area in contact with the hot metal — creating a much larger Maillard crust. The juices are locked in by that sear, not lost. The key is to smash once, immediately, and not press repeatedly.

    What cheese works best?

    American cheese melts the most smoothly and is the traditional choice. Oaxaca string cheese (as used in this recipe) pulls beautifully and adds a mild, creamy flavour. Cheddar is excellent for sharper flavour. Avoid hard aged cheeses — they don’t melt properly on a hot patty.

    Can I make the special sauce ahead of time?

    Yes — and it actually improves after a few hours in the fridge as the flavours meld. It keeps covered in the refrigerator for up to 5 days. Make a double batch; you’ll find yourself putting it on everything.

    How do I prevent the burger from falling apart?

    Don’t overwork the meat when forming the ball — handle it as little as possible. Season the outside, not mixed in. And use beef with enough fat content. Lean beef needs binders to hold together; the right fat percentage does the binding naturally.

    A hand holding a juicy cheeseburger cut to show the patty

    Classic Cheeseburgers

    There's something undeniably satisfying about a classic cheeseburger. It's the kind of meal that feels like home, yet offers endless opportunities for customization. I want to celebrate the beauty of simplicity—a cheeseburger that’s built on the basics but elevated by attention to detail and the right ingredients.
    Prep Time 15 minutes
    Cook Time 25 minutes
    Total Time 40 minutes
    Servings: 5 cheeseburgers
    Course: Main Course
    Cuisine: American
    Calories: 680

    Ingredients
      

    Special Sauce
    • ¾ cup mayonnaise
    • ½ cup yellow mustard
    • 2½ tbsp ketchup
    • ¼ cup bread and butter pickles drained and cut into small dices
    • 2 tbsp picled jalapeños drained and cut into small dices
    • 1½ tsp grated lemon zest
    • 1 tbsp fresh lemon juice
    • 1 tbsp Valentina Mexican hot sauce
    • 1½ tsp Red Hot Buffalo Hot Sauce
    • salt and pepper
    Cheeseburgers
    • 1½ pound boneless chuck roast
    • 8 oz flank steak
    • 3 tbsp unsalted butter room temperature
    • 5 hamburger buns split
    • ½ cup shaved white onion
    • 10 slices American Cheese
    • ½ cup homemade bread and butter pickles see notes above

    Equipment

    • meat grinder

    Method
     

    Special Sauce
    1. Combine all the ingredients for the sauce in a large container and stir to blend well. Cover and refrigerate. (this can be stored in the fridge for up to 5 days).
    Cheeseburgers
    1. Place the meat in the fridge. Make sure it is cold so when you grind the meat it passes through more successful – warmer meat tends to get the meat grinder all clogged up. Grind the chuck and flank steak through the large die of the meat grinder into a bowl.
    2. Mix gently to combine. Grind half the mixture through the small die. Mix the two halves together. Set aside.
    3. Heat a griddle on the stove on high heat.
    4. Roll the meat into a ball weighing roughly ½ pound each. Generously salt and pepper the balls around it.
    5. Place the the meat ball on the hot griddle, and using a spatula smash the meatball flat on the griddle. Now leave it alone and do not touch it. Let it cook for 1½-2 minutes. Flip the burger and add the cheese on top. Casually saute the onions on the griddle as well until soft.
      Depending on the fat content of the meat you buy, you might not need to add any extra fat. But if it feels a bit dry, you can add some beef fat or butter.
    6. Lightly toast the buns and smear some of the special sauce on both sides. Place 5 pickles on the bottom half of each bun. Add the burgers and top them with iceberg lettuce before placing the top half of the bun on.

  • Succulent Sunday Pot Roast

    Succulent Sunday Pot Roast

    The most succulent pot roast you can make on a Sunday — hassle-free, inexpensive, and packed with deep beefy flavour. Slow-roasted at 300°F with a garlic red-wine braise, then finished with a rich drippings gravy that will go on everything at your table.

    This post may contain affiliate links. If you purchase through these links, I may earn a small commission at no extra cost to you. Thank you for supporting Love & Harvest!

    succulent Sunday pot roast on a platter

    Using the most affordable cut, pot roast can still deliver super juicy, fork-tender results — as long as you know how to cook it.

    Economically, being smart about money is essential. This beefy pot roast is the perfect Sunday dinner for your family because, for the price per pound, it is a bargain. Top sirloin roast costs far more, yet with the right technique we get a similar depth of flavour at a fraction of the cost.

    raw beef roast ready to marinate

    Fancy Recession Dinner

    When fall arrives, a few recipes always make me giddy — and this succulent pot roast is one of them. There is a reason why pot roast shows up as the Sunday dinner to make for families across every food publication. This inexpensive cut has a strong beefy taste and follows a beautiful “set it and forget it” method of cooking.

    My family absolutely adores this recipe. I make it for rare and special moments: the night before the kids go back to school in September, for someone’s birthday, for any celebratory occasion that deserves a slow-cooked love letter at the dinner table.

    Pot Roast Gravy

    An easy gravy made from the drippings of the pot roast. Every drop of juice from the roast is packed with concentrated beefy flavour, and we are using every bit of it. It is thick, glossy, and delicious, and I guarantee you will put it on everything.

    pot roast gravy in pan

    Why Make This Recipe

    • “Set it and forget it” recipe: A simple and effortless recipe that requires very little of your time. Just marinate the beef, let it sit, and cook it in the oven.
    • Tastes amazing: Get a great beefy taste for a fraction of the cost of premium cuts.
    • Inexpensive cut: Compared to other cuts of beef, pot roast is the most affordable. Great for both your wallet and your table.
    • Amazing Gravy: The beefy juice this roast produces is incredible, and we are not letting a drop go to waste.

    pot roast before oven

    Which Cut of Beef Do I Use?

    I prefer the round eye roast cut. It is affordable and delicious when cooked the right way. The round eye has a strong beefy flavour and is inexpensive because it tends to be chewier compared to other cuts — slow roasting at low heat solves that completely.

    Ingredients

    Key Ingredients

    Beef Chuck or Round Eye Roast

    The beef chunk roast or round eye cut is known to be inexpensive mainly because the meat is tougher. Do not let the price fool you — it has one of the best flavours when slow-roasted.

    • Why it matters: Tough cuts have more collagen and connective tissue. When cooked low and slow, that collagen breaks down into gelatin, giving you incredibly moist, fork-tender meat and a rich, silky braising liquid for the gravy.

    For this recipe, we use 1.5 kg — perfect for a family of 5-6 with leftovers. Leftover pot roast makes incredible sandwich fillings, beef stew, or a topping for mac and cheese.

    Nopales (Cactus Paddle)

    Because I live in Mexico, nopales are a regular green I can always find. Green beans are an excellent substitute.

    • Why they matter: Roasting the greens alongside the beef adds colour contrast, fibre, and a subtle earthy flavour that complements the rich meat. Other substitutes: cauliflower, broccoli, or cabbage.

    Carrots

    I love adding carrots to my pot roast because they give it that subtle sweetness that is missing in a fully savoury meal.

    • Why they matter: Carrots caramelize slightly during the long braise, adding a natural sweetness that balances the deep savoury beef flavours.

    Montreal Steak Seasoning

    To marinate the beef, I use a good Dutch oven and the Costco-brand Montreal Steak Seasoning. It is one of my favourite beef seasonings. I use it for roasts, burger patties, and even mac and cheese.

    • Why it matters: Montreal seasoning is a bold blend of coarse pepper, garlic, coriander, and dill that creates a flavourful crust when seared. That crust seals in juices and adds complexity to the gravy.

    pot roast ingredients

    No-Fail Professional Tips

    Pro Tip 1 — Marinate at Least 2 Hours or Overnight

    Because we are using a larger cut, it needs to be marinated for a longer period. A longer marinate guarantees the flavour will penetrate into the meat. I like to marinate the meat at night and use it the next day. Rubbing the marinade only requires 5-10 minutes of your time.

    Pro Tip 2 — Low Oven Temperature: 300 degrees F

    Keeping a steady low temperature is essential for a perfect pot roast. I always have an oven thermometer on hand to track the actual temperature inside. Slow and low heat is your friend here — it breaks down the tough connective tissue without drying out the meat.

    pot roast in cast iron skillet

    Pro Tip 3 — Use a Cast Iron Skillet or Dutch Oven

    I use a Lodge 5qt Dutch Oven for this recipe. Cast iron gives even heat distribution to brown the pot roast properly, and it goes straight from stovetop to oven. Make sure your vessel is oven-proof safe.

    Pro Tip 4 — Let It Rest 30 Minutes Before Serving

    I learned this from a Gordon Ramsay Holiday special. For any meat roasted in the oven, let it rest outside for at least 30 minutes before cutting. When you cut immediately, the moisture escapes as steam, leaving a drier slice. Let it rest and every cut will be succulent and juicy.

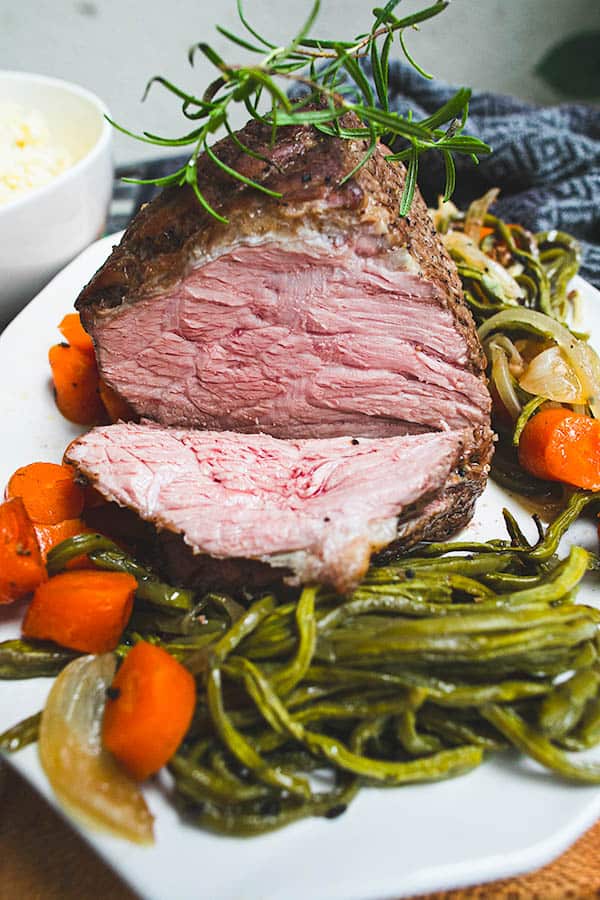
    sliced pot roast with vegetables

    Frequently Asked Questions

    How long do I cook pot roast in the oven?

    3 hours total at 300°F. The first 2 hours are covered with tin foil or a lid to trap steam. The last hour is uncovered, which helps develop a deeper colour on the meat. The roast is done when it reaches an internal temperature of 202°F and shreds easily with a fork.

    Can I make this without red wine?

    Yes. You can substitute the red wine with beef broth, grape juice, or pomegranate juice. The red wine adds depth and slight acidity that helps tenderize the meat, but broth works beautifully as a substitute.

    What if I do not have a cast iron skillet?

    Any heavy, oven-proof pan or Dutch oven will work. The most important thing is that the vessel can go from stovetop (for searing) to oven (for slow roasting) without issues. Avoid non-stick pans for high-heat searing.

    How do I prevent the pot roast from drying out?

    Three things prevent a dry pot roast: (1) marinating overnight to season deep into the meat, (2) cooking covered for the first 2 hours to keep moisture in, and (3) letting the meat rest for 30 minutes after cooking before slicing.

    What can I do with leftover pot roast?

    Leftover pot roast is a gift. Use it for beef sandwiches, beef tacos, beef stew, or as a topping for baked potatoes or mac and cheese. The cold leftover meat re-heats beautifully with a spoonful of the leftover gravy.

    Can I make the gravy ahead of time?

    The gravy uses the pot roast drippings, so it must be made after the roast is done. However, you can make extra gravy and refrigerate it for up to 3 days. It reheats perfectly over low heat with a splash of water or broth to loosen it.

    succulent Sunday pot roast

    Succulent Sunday Pot Roast

    The most succulent pot roast beef you can make that is hassle free and tastes amazing! We also have the best tasting gravy to go along with this pot roast!
    Print Recipe
    Pin Recipe
    Prep Time:30 mins
    Cook Time:3 hrs
    Course: Main Course
    Cuisine: American
    Keyword: pot roast
    Servings: 6 people

    Equipment

    • 1 cast iron skillet
    • tin foil
    • 1 dutch oven optional

    Ingredients

    Pot Roast Marinade

    • 1.5 kg beef chunk roast or any beef roast you choose
    • 3 tbsp canola oil
    • 2 tbsp Montreal Steak Seasoning
    • 2 tsp sea salt
    • black pepper optional

    Skillet Greens

    • 2 tbsp butter
    • 1 medium white onion sliced
    • 5 nopales or cactus paddle ½kg green beans as substitute
    • 3 large carrots roughly chopped
    • 2 cloves garlic crushed
    • 2 cups red wine

    Pot Roast Gravy

    • 1 tbsp butter
    • 2 cloves garlic grated
    • 2 tbsp flour
    • juice of pot roast
    • 1 tsp sea salt

    Instructions

    Pot Roast Marinade

    • Wash your pot roast with cold tap water. Pat dry with paper towel.
    • Combine the oil, seasoning, salt, and pepper (optional) in a bowl. Using your hands, rub vigorously the seasoning all around the pot roast. Wrap the roast up with plastic and let it sit in the fridge for 2 hours or preferably, overnight.

    Pot Roast

    • Preheat oven to 300°F.
    • Using your cast iron skillet, heat it on high. Alternatively, you can use a Dutch Oven. Add the butter until fully melted and sear the roast until brown, 3-4 minutes each side. Take the pot roast out and set it aside.
    • On medium-high heat, saute the onion for 2 minutes. Add the sliced nopales (or green beans) with the carrots for 5 minutes. Lastly add the crushed garlic and cook for 1 minute.
    • Place the pot roast on top of the vegetables and add the red wine. Add enough tin foil to cover the top of the skillet. If you are using a Dutch Oven, just put the lid on top.
    • Put the pot roast in the oven for 2 hours covered.
    • For the remaining last 1 hour, remove the tin foil or lid. To know it is done, the meat needs to reach an internal temperature of 202°F and/or shreds easily with a fork.
    • After 3 hours, let the pot roast sit on the counter for 30 minutes. Meanwhile, take the juice out of the pan with the garlic cloves. Using a fork, mash the garlic clove in its juice and set it aside.

    Pot Roast Gravy

    • In a pan, heat on medium-high and melt the butter. Add in the minced garlic and saute for 2 minutes. Add the flour and continuously move it around with a whisk. Do not walk away. Move the flour until it is fragrant and has a slight brown colour. Quickly pour the pot roast juice into the pan and whisk vigorously until the flour is well blended with no lumps. Salt the gravy. Cook on the stovetop for 10 minutes on medium-low heat.

    Assemble the Pot Roast

    • On a large plate, carefully place the pot roast in the center. Mix the vegetables well with tongs (add a little more salt if desired), and place the vegetables around the roast beef. Serve the gravy on top or on the side. Serve warm.

    If you love this hearty Sunday dinner, try our Instant Pot Taiwanese Beef Noodle Soup for another beef recipe that delivers serious depth of flavour. Or warm up with our Easy Instant Pot Chili on a cold weeknight.

  • Instant Pot Taiwanese Beef Noodle Soup

    Instant Pot Taiwanese Beef Noodle Soup

    Spicy, soulful, and packed with beef that melts right off the bone — this Instant Pot Taiwanese Beef Noodle Soup is the most comforting bowl you can make at home. Chewy wheat noodles, aromatic Asian spices, tender braised beef chunks, and a deeply savory broth come together in under 2 hours with almost no effort.

    This post may contain affiliate links. If you purchase through these links, I may earn a small commission at no extra cost to you. Thank you for supporting Love & Harvest!

    Taiwanese beef noodle soup in bowl

    An easy and effortless recipe that guarantees a meat-melting experience. Literally a throw-in-everything recipe that only requires an Instant Pot. The perfect Taiwanese beef noodle soup that is soul-comforting and ridiculously delicious!

    beef noodle soup with bok choy

    What Is Taiwanese Beef Noodle Soup?

    A rich soup filled with beef flavour and assorted Asian spices, served over fresh chewy wheat noodles. It is topped with bok choy, tender chunks of beef, cilantro, green onions, and spicy Sichuan oil.

    This Taiwanese beef noodle soup has flavours of spicy, savoury, fresh, beefy, and salty. It is the best comfort food when it is cold outside and an utterly slurp-worthy experience.

    beef shank for Taiwanese soup

    Ingredients

    Key Ingredients

    Beef Shank or Chuck Cut

    The kind of meat I like to use is the shank or the chuck cut. In Mexico, it is called “pierna” or “agujas.” It is packed with flavour and can tolerate long stewing time without drying out.

    • Why it matters: Beef shank is full of collagen and connective tissue. Under pressure cooking, that collagen converts to silky gelatin that enriches the broth and gives the beef a luxuriously tender, fall-apart texture.

    Doubanjiang (Chili Bean Paste)

    Doubanjiang is the backbone of the broth — a fermented broad bean and chili paste from Sichuan cuisine that adds depth, umami, and a pleasant heat that builds with each sip.

    • Why it matters: It is the single most important flavour component in this soup. Without it, you have a good beef broth. With it, you have something truly extraordinary. Find Doubanjiang Chili Paste at any Asian grocery or online.

    Chinese Spice Package

    The spice package is made up of star anise, cinnamon stick, fennel seeds, bay leaves, cumin seeds, coriander seeds, Sichuan peppercorns, and dried chili peppers. These spices give the broth its distinctive aromatic complexity.

    • Why they matter: This spice combination is what makes Taiwanese beef noodle soup taste unmistakably different from any other beef soup in the world. The Sichuan peppercorns add a subtle numbing tingle, while star anise and fennel give it a slightly sweet, anise-forward warmth.

    Light Soy Sauce

    Provides the salty, umami backbone of the broth alongside the doubanjiang.

    • Why it matters: Light soy sauce is thinner and saltier than dark soy sauce. It seasons without darkening the broth excessively, keeping the colour a beautiful amber-red rather than jet black.

    The Instant Pot

    The Instant Pot Duo 7-in-1 is the best-selling pressure cooker on Amazon and the machine I rely on for this recipe. It cuts the cooking time from 3-4 hours on the stovetop down to 100 minutes, without sacrificing any depth of flavour.

    • Why it matters: The sealed pressure environment raises the boiling point of the liquid, allowing the beef and spices to develop in ways that standard simmering cannot achieve in the same timeframe. My husband also appreciates that the sealed vent means no strong cooking smells throughout the house while it cooks.

    Instant Pot with beef noodle soup ingredients

    Fresh Noodles or Packaged Noodles?

    Both are completely fine. If you have Chinese wheat noodles you prefer, use those. Here in Mexico, my options are limited to spaghetti pasta, so I make fresh noodles with my Philips Pasta and Noodle Maker.

    For a chewier and bouncier bite, make your noodles with bread flour. The high protein content creates stronger, chewier noodles that stand up to the rich broth without going soggy.

    Check out my 3-minute Homemade Ramen Noodles post to learn how to make them at home!

    fresh wheat noodles

    Professional Tips

    Pro Tip 1 — Marinate Your Meat

    By simply adding salt and pepper to your beef chunks, you can elevate the final flavour significantly. Toss the meat in a bowl with salt and pepper. Leave it in the fridge for 30 minutes while you prep everything else for the recipe.

    Pro Tip 2 — Strain Fat for a Cleaner Broth

    For a cleaner-tasting soup, skim the top layer of fat off the broth with a spoon before serving. That fat will make the soup richer and tastier, but removing it produces a lighter result. Your call.

    Pro Tip 3 — Serve Immediately

    Nothing is more disappointing than letting noodle soup sit while the noodles soak up all the broth. Pour the hot soup over the noodles only when it is time to eat. Noodles left sitting in broth for too long lose their texture. Serve only when people are seated and ready.

    Taiwanese beef noodle soup served in bowls

    Frequently Asked Questions

    Can I make Taiwanese beef noodle soup without an Instant Pot?

    Yes. Follow all the same steps but use a heavy-bottomed pot on the stove. Cook the soup on low/simmer for 3-4 hours until the beef is tender and shreds easily with a fork. The flavour may be even deeper with the longer simmer time.

    What is doubanjiang and where do I find it?

    Doubanjiang is a fermented broad bean and chili paste from Sichuan, China. It is the defining flavour of this soup. You can find it at any Asian grocery store in the condiments or fermented foods section, or order it online here. Do not substitute it — there is no real equivalent.

    What noodles work best for this soup?

    Fresh or dried Chinese wheat noodles are ideal. Look for thick, chewy wheat noodles at an Asian grocery store. In a pinch, dried udon noodles or even thick spaghetti work. Avoid rice noodles — they are too delicate for this broth.

    How do I store and reheat the leftovers?

    Store the broth and beef separately from the noodles. The broth and beef keep in the refrigerator for up to 3 days or freeze for 3 months. Reheat the broth on the stovetop, cook fresh noodles, and assemble each bowl fresh. Never store noodles in the broth — they will absorb all the liquid and become mushy.

    Can I make this less spicy?

    Yes. Reduce or eliminate the dried chili peppers from the spice package and use less doubanjiang. The soup will still be deeply flavourful but with less heat. Start with 1 tablespoon of doubanjiang and taste before adding more.

    Instant Pot Taiwanese beef noodle soup

    Instant Pot Taiwanese Beef Noodle Soup

    Easy and delicious Taiwanese Beef Noodle Soup using an Instant Pot! Spicy and savoury soup with beef chunks that melts in your mouth!
    Print Recipe
    Pin Recipe
    Prep Time:15 minutes
    Cook Time:1 hour 40 minutes
    Course: Main Course
    Cuisine: Taiwanese
    Keyword: Beef Noodle Soup
    Servings: 6 people

    Equipment

    • Instant Pot

    Ingredients

    Meat

    • 1 kg beef shank cut into 2 inch chunks
    • 2 tsp vegetable oil
    • 1 tsp salt
    • pepper

    Beef Noodle Soup

    • 1 white onion thinly sliced
    • 6 cloves garlic crushed, back of the knife
    • 2 inch ginger roughly sliced
    • ¼ cup red wine or shaoxing wine
    • 2 tbsp doubanjiang
    • 1 tomato diced
    • 2 tbsp tomato paste
    • 2 tsp sugar
    • ½ cup light soy sauce
    • 8 cups water
    • 1 Chinese Spice Package make your own with below recipe
    • 35 oz fresh wheat noodles

    Chinese Spice Package

    • 4 star anise
    • 1 cinnamon stick
    • 1 tsp fennel seeds
    • 6 bay leaves
    • 1 tbsp cumin seeds
    • 1 tsp coriander seeds
    • 2 tbsp sichuan peppercorns
    • 2 tsp dried chili peppers

    Garnish

    • cilantro
    • green onion
    • bok choy
    • doubanjiang optional
    • chili oil optional

    Instructions

    • To marinate the meat, add everything together, give it a good toss, and set aside for 15-30 minutes.
    • Use the “Saute” option on the Instant Pot and add 2 tsp of oil. Add the onion, garlic, and ginger. Saute for 3 minutes.
    • Add the marinated beef chunks and cook each side until lightly browned.
    • Deglaze the pot by adding shaoxing wine or red wine. Once the liquid starts to boil, cancel the “Saute” option. Select “Meat/Stew” and set the timer to 100 minutes (1 hour and 40 minutes).
    • Add everything: doubanjiang, tomato, tomato paste, sugar, light soy sauce, water, and the Chinese spice package.
    • Close the lid and turn the vent knob to the sealed (not venting) position.

    Cooking WITHOUT an Instant Pot

    • Follow the instructions above, but use a regular heavy pot on the stove. Cook the soup on low/simmer for 3-4 hours until the beef is tender and shreds easily.

    Setting Up the Bowl

    • Cook your noodles as instructed on the package. If you are interested in making fresh wheat noodles, try my 3 minute easy ramen noodles made at home.
    • Blanch bok choy until tender, about 2 minutes in boiling water.
    • Put your freshly cooked noodles in a large bowl and add your bok choy on top. Pour the hot beef soup over the noodles and add 3-4 beef chunks to each bowl. Serve with chopped cilantro and green onions.

    If you love bold Asian flavours, try our Succulent Sunday Pot Roast for a Western take on slow-braised beef, or warm up with our Green Pozole for a Mexican soul-warming soup experience.